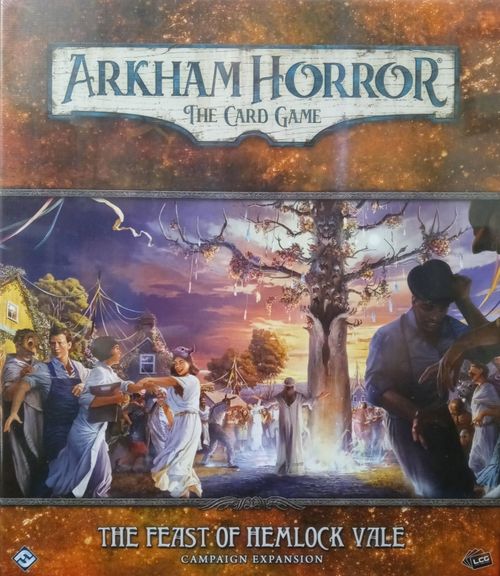
Arkham Horror: The Card Game – The Feast of Hemlock Vale: Campaign Expansion
Arkham Horror: The Card Game – The Feast of Hemlock Vale: Campaign Expansion Rulebook
Table of Contents
Table of Contents
- Additional Rules and Clarifications
- New Keywords
- Campaign Setup
- Playing Preludes in The Feast of Hemlock Vale
- Prelude: Welcome to Hemlock Vale!
- Scenario: Written in Rock
- Scenario: Hemlock House
- Scenario: The Silent Heath
- Scenario: The Lost Sister
- Scenario: The Thing in the Depths
- Prelude: The First Evening
- Scenario: The Twisted Hollow
- Prelude: Dawn of the Second Day
- Prelude: The Second Evening
- Scenario: The Longest Night
- Prelude: Dawn of the Final Day
- Prelude: The Final Evening
- Scenario: Fate of the Vale
- Epilogue
- Transcription Notes
Additional Rules and Clarifications
The Codex
The Feast of Hemlock Vale campaign features a new gameplay concept: The Codex. During this campaign, some card effects may direct players to read a specific codex entry. While playing, keep the Campaign Guide on hand for easy reference.
Certain locations, characters, or enemies in The Feast of Hemlock Vale have codex entries, marked with the codex symbol and a key (for example, Codex 2 or Codex Θ). To read a character or location's codex entry, you must pay all costs on that ability first, then turn to the current scenario or prelude's Codex in this Campaign Guide and resolve all text.
- Each codex entry cannot be resolved more than once per scenario or prelude unless otherwise stated.
- When resolving a codex entry, the player who triggered that entry resolves all effects (resolving a test, dealing damage, paying resources, etc.). If it is unclear who triggered the codex entry, the lead investigator resolves the entry.
- If a codex entry instructs players to put a named set-aside resident into play, put that character into play with their story asset side faceup unless otherwise stated.
- A resident whose name is crossed out in your Campaign Log cannot enter play during preludes or scenarios. If a resident's name is crossed out, so are all entries in that resident's Notes.
- While resolving a codex entry for a specific character, you may only read a single section for which you meet the requirements. If you do not meet the requirements for the first section of a codex entry, skip to the following section. Only refer to that character's Notes and Relationship Level in your Campaign Log unless otherwise stated. (e.g. "In River Hawthorne's Notes, record River is a dreamboat" directs players to change the "Notes" section in River's Campaign Log entry.)
- After resolving a codex entry and making any changes in your Campaign Log, resume play.
Expansion Icon
The cards in The Feast of Hemlock Vale campaign expansion can be identified by this symbol before each card's collector number: the expansion icon.
New Keywords
Alert
Some enemies in this campaign have the alert keyword. Each time an investigator fails a skill test while attempting to evade an enemy with the alert keyword, after applying all results for that skill test, that enemy performs an attack against the evading investigator. An enemy does not exhaust after performing an alert attack. This attack occurs whether the enemy is engaged with the evading investigator or not.
Elusive
Some enemies in this campaign have the elusive keyword. Elusive enemies represent enemies who want to avoid the investigators for their own survival or to accomplish their own goals.
If a ready enemy with the elusive keyword attacks or is attacked, after that attack resolves, that enemy immediately disengages from all investigators, moves to a connecting location (with no investigators, if able), and exhausts. This effect occurs whether the enemy was engaged with the attacking investigator or not.
Patrol
Some enemies in this campaign have the patrol keyword. During the enemy phase (in framework step 3.2), each ready, unengaged enemy with the patrol keyword moves to a connecting location along the shortest path toward the designated location (as described in parentheses next to the word patrol).
- If there are multiple locations that qualify as the designated location, the lead investigator may choose which location the enemy moves toward.
- If an enemy with patrol would be compelled to move to a location via a path that is blocked by a card ability, the enemy does not move.
Three Days, Three Nights
The Feast of Hemlock Vale campaign gives players just three days in-game to play out its story. This campaign also contains playable preludes in which investigators may interact with the residents of Hemlock Vale, learn the secrets of Hemlock Isle, and make preparations for the next scenario.
Preludes are non-confrontational segments that are set up with locations and a scenario reference, act, and agenda. The end of each prelude provides several choices on which scenario to play next. Depending on the day and time, some scenarios may provide new story options or challenges. Players will not have time to play every scenario or befriend each resident on a single playthrough of this campaign.
- Players may earn experience when playing preludes and interludes. Record this experience under "Unspent Experience," but do not spend it until instructed to by the campaign guide.
- To keep track of the current day/time, you may refer to and update the "Day/Time" section in the Campaign Log.
Day and Night
During setup during this campaign, players may be instructed to put the Time Marker card into play. To do so, find the Time Marker card in the The First Day, The Second Day, or The Final Day encounter sets that corresponds to the current day and place it next to the agenda deck. This is the current day and time.
Some cards have different effects depending on whether the scenario takes place during the Day (sun icon) or Night (moon icon). Text following a (Day) or (Night) keyword is only active if the scenario or prelude being played is during the Day or Night, respectively. Any other ability not preceded by these keywords is active regardless of the time period.
Setup instructions may have specific instructions depending on the current day and time. (e.g. "If it is Day 2, put River Hawthorne into play at the Cranberry Bog" only applies when playing that scenario as a Day 2 scenario and not a Night 2 scenario).
Residents and Relationship Levels
At times, story text may instruct investigators to increase their Relationship Level with a particular resident. If instructed to do so, check the Campaign Log and find the specified resident's entry.
- When referring to a resident's Relationship Level, the number of checked boxes in their entry is that resident's Relationship Level.
- To increase a resident's Relationship Level, check the leftmost unchecked box in that resident's entry.
- To decrease a resident's Relationship Level, erase the rightmost checked box in that resident's entry.
- Unless otherwise stated, you should increase or decrease a resident's Relationship Level by 1 box at a time.
- If instructed to set a resident's Relationship Level to 0, erase all checked boxes in that resident's entry.
- A resident whose name is crossed out in your Campaign Log cannot enter play during preludes or scenarios.
Location Adjacency in this Campaign
Most scenarios in this campaign are arranged in a set grid pattern. During these scenarios, each location is connected to each location adjacent to it, in addition to any connection icons.
- Adjacent locations share a side (left, right, above, or below). Locations that share only a corner are not considered adjacent.
- When instructed to put a location into play, place it in an adjacent empty space above, below, or to the left or right of your location.
- You cannot put a location into play where an existing location already is. When choosing where to put a new location, you must choose a spot unoccupied by a location, if able. If you cannot, no new locations are put into play.
- Note that during preludes and scenarios that utilize The Vale encounter set, locations are only connected via their icons.
Campaign Setup
To set up The Feast of Hemlock Vale campaign, perform the following steps in order.
- Choose investigator(s).
- Each player assembles their investigator deck.
- Choose difficulty level.
- Assemble the campaign chaos bag. (Note that the starting chaos bag does not include an Ꞩ2 token.)
- Easy (I want to dance!): +1, +1, 0, 0, 0, –1, –1, –1, –2, –2, –3, skull, skull, elder sign.
- Standard (I want to feast!): +1, 0, 0, –1, –1, –1, –2, –2, –3, –3, –4, skull, skull, elder sign.
- Hard (I want to be transfigured!): 0, 0, 0, –1, –1, –2, –2, –3, –3, –5, –5, –7, skull, skull, elder sign.
- Expert (I want the Abyss!): 0, –1, –1, –2, –2, –3, –3, –4, –5, –5, –6, –6, –8, skull, skull, elder sign.
You are now ready to begin at the Prologue.
Playing Preludes in The Feast of Hemlock Vale
- Preludes in this campaign require investigators to set up a map, act and agenda deck and play much like they would a traditional scenario of Arkham Horror: The Card Game.
- Hemlock Vale is generally a safe place. During these preludes, there is no encounter deck. This means that the investigators cannot use abilities that interact with the encounter deck in any way. (For example, effects such as those that search the encounter deck, draw cards from the encounter deck, or look at cards in the encounter deck cannot be resolved.)
- Understanding the residents' wants and needs, as well as where they go during the day, is key to building trust with each of them. Your relationship with each resident influences the story and will earn you rewards and experience in later preludes.
- Hemlock Vale is a good place to stock up on supplies. At the end of a prelude, each investigator keeps the following:
- Cards in hand, up to their opening hand size. (Note that investigators do not take a traditional mulligan for (Day) scenarios.)
- Resources in play, up to their starting resources.
- A single asset in their play area that does not normally start in play.
- All clues they control.
- For more information on Preludes and Relationship Levels, refer to the Additional Rules and Clarifications on page 2 of this Campaign Guide.
Prelude: Welcome to Hemlock Vale!
Intro 1: June 1926. Narrative omitted. The investigators must decide (choose one):
- "We're here on a survey from Miskatonic University." Proceed to Intro 2.
- "We're here for the Feast." Skip to Intro 3.
Intro 2: Narrative omitted.
- Add 1 tablet token to the chaos bag for the remainder of the campaign.
- Proceed to Intro 4.
Intro 3: Narrative omitted.
- Add 1 elder thing token to the chaos bag for the remainder of the campaign.
- Skip to Intro 4.
Intro 4: Narrative omitted. Proceed to Setup (page 6).
Prelude Setup
- Gather all cards from the following encounter sets: The First Day, Day of Rest, Residents, and The Vale. These sets are indicated by the following icons: (encounter set icons).
- Put the Day One Time Marker card into play.
- Put each location from The Vale encounter set into play on its (Day) side according to the location map above.
- Note that during this prelude, locations are only connected via their location connection icons.
- Each investigator begins play at The Crossroads.
- Set each card from the Residents encounter set aside, out of play.
- Place doom on the agenda equal to the number of investigators.
- Keep the Campaign Guide on hand as you play. Codex entries for this prelude are on the next three pages (7, 8, and 9).
- You are now ready to begin.
Prelude Codex: Welcome to Hemlock Vale!
Read the following entries on pages 7–9 only when directed while playing the Welcome to Hemlock Vale prelude.
Codex 1: Mother Rachel. Narrative omitted.
- You may play a Charm or Spell asset from your hand, ignoring its cost.
Codex 2: Leah Atwood. Narrative omitted.
- You may play a Tool card from your hand, ignoring its cost.
- Increase Leah Atwood's Relationship Level.
Codex 3: Simeon Atwood. Narrative omitted.
- Search the top 9 cards of your deck for a Tactic or Trick card and add it to your hand (shuffle your deck).
- Increase Simeon Atwood's Relationship Level.
Codex 4: William Hemlock. Narrative omitted.
- Search the top 9 cards of your deck for a Tome or Talent card and add it to your hand (shuffle your deck).
- Increase William Hemlock's Relationship Level.
Codex 5: River Hawthorne. Narrative omitted.
- Gain 3 resources.
- Increase River Hawthorne's Relationship Level.
Codex 6: Gideon Mizrah. Narrative omitted.
- Draw 3 cards.
- Increase Gideon Mizrah's Relationship Level.
Codex 7: Judith Park. Narrative omitted.
- You may play a Weapon card from your hand, ignoring its cost.
- Increase Judith Park's Relationship Level.
Codex 8: Theo Peters. Narrative omitted.
- You may immediately move to any location.
- Increase Theo Peters's Relationship Level.
Codex 9: Boarding House. Narrative omitted.
- You may either draw 1 card or gain 1 resource.
- Search the set-aside Residents encounter set for River Hawthorne and put them into play at the Boarding House, asset side faceup.
Codex 10: The Crossroads. Narrative omitted.
- You may either draw 1 card or gain 1 resource.
- Search the set-aside Residents encounter set for Theo Peters and put him into play at The Crossroads, asset side faceup.
Codex 11: Hemlock Chapel. Narrative omitted.
- You may either draw 1 card or gain 1 resource.
- Search the set-aside Residents encounter set for Mother Rachel and put her into play at Hemlock Chapel, asset side faceup.
Codex 12: The Old Mill. Narrative omitted.
- You may either draw 1 card or gain 1 resource.
- Search the set-aside Residents encounter set for Leah Atwood and put her into play at The Old Mill, asset side faceup.
Codex 13: The Atwood House. Narrative omitted.
- You may either draw 1 card or gain 1 resource.
- Search the set-aside Residents encounter set for Simeon Atwood and put him into play at The Atwood House, asset side faceup.
Codex 14: Tad's General Store. Narrative omitted.
- You may spend 1 resource to search your deck for an Item card and play it, ignoring its cost. Any investigator who has not resolved this effect may trigger this codex again.
- Search the set-aside Residents encounter set for Judith Park and put her into play at Tad's General Store, asset side faceup.
Codex 15: Vale Schoolhouse. Narrative omitted.
- You may either draw 1 card or gain 1 resource.
- Search the set-aside Residents encounter set for William Hemlock and put him into play at Vale Schoolhouse, asset side faceup.
Codex 16: The Commons. Narrative omitted.
- Search the top 9 cards of your deck for an Ally card and add it to your hand (shuffle your deck).
- Search the set-aside Residents encounter set for Gideon Mizrah and put him into play at The Commons, asset side faceup.
Prelude Resolution 1: Welcome to Hemlock Vale!
Do not read until the end of the prelude.
Resolution 1: Narrative omitted.
- Make preparations for your first survey.
- Choose 1 asset in your play area to keep for the next scenario. It must be one that does not normally start in play. Discard each other asset and attachment in your play area, except for those that start each game in play.
- Discard down to your opening hand size. Shuffle your discard pile into your deck. (Your current hand is your opening hand for the next scenario; you will not draw a new opening hand or take a mulligan.)
- Discard down to your starting resources.
- Exploring the Isle is allegedly dangerous. Add 1 Ꞩ2 token to the chaos bag for the remainder of the campaign.
- When setting up the next scenario, skip steps 1–8 of "Setting Up the Game" on page 27 of the Rules Reference.
- The investigators must choose where to survey today! You will have the opportunity to survey multiple areas over the course of the campaign.
- To the north, the abandoned North Point Mine lies empty and overrun with strange wildlife. To brave the dangers of Written in Rock, turn to page 10.
- To the south, the old Hemlock House is said to be host to a strange infestation. To investigate Hemlock House, turn to page 14.
- The devastated Pearl Ridge up northwest is covered in a persistent layer of white ash. To explore The Silent Heath, turn to page 19.
- Northeast is Akwan: a dwindling settlement of Abenaki and mariners on the desolate coastline. To save The Lost Sister, turn to page 23.
- Dr. Marquez believes Eastwick Bog to the southeast may be the origin of the sample that drew you here. To discover The Thing in the Depths, turn to page 27.
Scenario: Written in Rock
Narrative omitted. The path to North Point Mine and the mine's opening description are fiction and are not transcribed.
Scenario Setup
Proceed to Setup.
- Gather all cards from the following encounter sets: Written in Rock, Horrors in the Rock, Refractions, Chilling Cold, and Ghouls. These sets are indicated by the following icons: (encounter set icons).
- In addition, check the Campaign Log for the current day and gather its corresponding encounter set for The First Day, The Second Day, or The Final Day. These sets are indicated by the following icons: (encounter set icons).
- Check your Campaign Log for the current day and time. Put the Time Marker card into play on its corresponding (Day) or (Night) side.
- Gather the 6 Cave locations and randomly remove 2 of them from the game. Place the rest as shown in the Location Placement diagram on page 11 (see Location Adjacency on page 3).
- Gather each location from the Written in Rock encounter set. Put the Control Station location into play as shown. Set the remaining 15 Rail locations aside, out of play.
- Place 1 resource on each location, as a scrap. (Hint: The scraps collected during Act 1 will help investigators during Act 2.)
- Investigators begin play at the leftmost location.
- If it is (Day), gather each story asset from the Residents encounter set. This set is indicated by the following icon: (encounter set icon).
- If it is Day 1, place River Hawthorne at the location in column 3.
- If it is Day 1 or Day 2, set Simeon Atwood aside, out of play.
- If it is Day 3, set Leah Atwood aside, out of play.
- Remove the rest of the Residents encounter set from the game.
- If it is (Day), remove the Subterranean Beast enemy from the game.
- Put the scenario reference card into play on its Act 1 side.
- Set both copies of the Crystal Parasite enemy and each other card from the Written in Rock encounter set aside, out of play.
- Shuffle the remaining encounter cards to build the encounter deck.
Rules: The Rail Line and Adjacency in Act 2
- Each Rail location has 1 or more rail icons printed on it. These rail icons represent the track the Mine Cart moves along.
- When a rail icon on one location faces a rail icon on an adjacent location, the rail icons are aligned.
- Adjacent locations with aligned rail icons are connected to each other and form a rail line. Adjacent locations without aligned rail icons are not connected to each other.
- When moving the Mine Cart, it can only move along a rail line to a connecting location.
- When the Mine Cart enters a location, the investigators may turn it 90 degrees in either direction to face the same direction as a rail icon on that location.
- The Mine Cart can only move in the direction its rail icon is facing. If the location it moves into does not form a complete rail line (they are not aligned), the Mine Cart moves off the rail line.
- The Mine Cart. Each investigator's mini-card is placed overlapping the Mine Cart.
- An investigator in the Mine Cart is also at its location. Investigators cannot move independently of the Mine Cart. When the Mine Cart moves, each investigator moves with it.
- The Mine Cart story asset has a rail icon on its right side that indicates the direction it is facing. The Mine Cart's rail icon must always face the same direction as one of its location's rail icons.
- Diagram example (Act 2 Location Placement): In this example, the Mine Cart is facing the adjacent location next to the Control Station. When it moves via its forced effect, it will move into that location if the rail icons are aligned. If the icons are not aligned, the Mine Cart moves off the tracks and each investigator is defeated!
- Sliding and Swapping Locations. Sliding and swapping locations allow the investigators to create a path to the Rail Exit by aligning the rail line.
- To slide a location, choose a location with an empty space adjacent to it. Move that location (and all cards at that location) into that empty space.
Scenario Interlude: The Cave-In
The guide prints no explicit trigger for this interlude in the text of this scenario; it is transcribed as printed. Its Act 2 setup steps are referenced by the Standalone Mode instructions below.
- The Cave-In 1: Narrative omitted. Check your Campaign Log.
- If it is (Day), proceed to The Cave-In 2.
- Otherwise, skip to The Cave-In 3.
- The Cave-In 2: Narrative omitted. Skip to The Cave-In 4.
- The Cave-In 3: Narrative omitted. Proceed to The Cave-In 4.
- The Cave-In 4: Narrative omitted. Then perform the following setup:
- Gather all 15 set-aside Rail locations.
- Place the Rail Exit and the 7 depicted Rail Tunnel locations as shown in the Location Placement diagram.
- Shuffle the remaining Rail locations and place 1 in each space marked with a "?" on the Location Placement diagram.
- Place 1 resource on the scenario reference card, as a switch.
- Place the set-aside Mine Cart asset at the Control Station and choose which direction it is facing (see Sliding and Swapping Locations and The Mine Cart on page 11).
- Place each investigator mini-card in the Mine Cart.
- If either Simeon Atwood or Leah Atwood are set aside, place them at the topmost location in column 2.
- Place the set-aside Prismatic Shard asset at the bottom location in column 4.
- If it is (Night), place the set-aside Subterranean Beast enemy at the Control Station, exhausted.
- Shuffle the remaining set-aside Written in Rock encounter cards and the encounter discard pile into the encounter deck.
Codex: Written in Rock
Read the following entries only when directed while playing the Written in Rock scenario.
Codex 2: Leah Atwood. Narrative omitted.
- If Leah Atwood is not under the control of an investigator: Choose an investigator to take control of Leah Atwood. An investigator may trigger this codex again.
- Otherwise: Place 1 resource on the scenario reference card, as a switch.
Codex 3: Simeon Atwood. Narrative omitted.
- If Simeon Atwood is not under the control of an investigator: Choose an investigator to take control of Simeon Atwood. An investigator may trigger this codex again.
- Otherwise: Place 2 resources on the scenario reference card, as switches.
Codex Θ: Dr. Rosa Marquez. Narrative omitted.
- If it is Act 1: Place 1 resource on the scenario reference card, as a scrap. An investigator may trigger this codex again during a different act.
- If it is Act 2: Swap 2 adjacent locations.
Codex 5: River Hawthorne. Narrative omitted.
- Take control of River Hawthorne. If investigators end the scenario with both River Hawthorne and at least 2 clues under their control, remember that "you helped River."
Standalone Mode (Written in Rock)
If you are playing in Standalone Mode and do not wish to refer to any other setup or resolutions, you may use the information below when setting up and playing this scenario:
- Shuffle each Time Marker and draw 1 at random. The Time Marker indicates the current day.
- Flip a coin to determine whether it is (Day) or (Night) when choosing the current time.
- Assemble the chaos bag using the following tokens: +1, 0, 0, –1, –1, –2, –2, –3, –3, –5, skull, skull, tablet, elder thing, elder sign, Ꞩ2 token.
- If it is Day/Night 2, add 1 tablet token and 1 elder thing token to the chaos bag.
- If it is Day 3, add 2 tablet tokens and 2 elder thing tokens to the chaos bag.
- Place 2 resources on the scenario reference card, as switches.
- Remove Agenda 1, Act 1, and the Rail Exit location from the game. Begin with Act 2 and Agenda 2 in play, following the setup instructions in Scenario Interlude: The Cave-In.
- For the remainder of this scenario, Agenda 2 gains "Forced – When the round ends: Flip each revealed empty Rail location to its unrevealed side. (Discard all tokens.)"
- This scenario is unwinnable in Standalone Mode. Your goal is to continue playing for as long as you can. Once each investigator has been defeated, the amount of doom on the agenda will determine how well you performed.
Resolutions: Written in Rock
Do not read until the end of the scenario.
If no resolution was reached (each investigator was defeated): Narrative omitted. Check your Campaign Log.
- If it is Night 1 or Night 2, cross out Simeon Atwood's name and skip to Resolution 6.
- If it is Day 1 or Day 2, skip to Resolution 3.
- If it is Day 3, skip to Resolution 4.
Resolution 1: Narrative omitted.
- Update your Campaign Log.
- In Simeon Atwood's Notes, record Simeon survived.
- Increase Simeon Atwood's Relationship Level by 2. Each investigator earns 2 bonus experience.
- Skip to Resolution 6.
Resolution 2: Narrative omitted.
- Update your Campaign Log.
- In Leah Atwood's Notes, record Leah saw something in the mine.
- Increase Leah Atwood's Relationship Level. Each investigator earns 2 bonus experience.
- Skip to Resolution 6.
Resolution 3: Narrative omitted.
- Update your Campaign Log.
- In Simeon Atwood's Notes, record Simeon disappeared.
- Cross out Simeon Atwood's name.
- Skip to Resolution 6.
Resolution 4: Narrative omitted.
- Update your Campaign Log.
- In Leah Atwood's Notes, record Leah and Simeon were reunited.
- Cross out Leah Atwood's name.
- Skip to Resolution 6.
Resolution 5: Narrative omitted.
- In your Campaign Log, record the investigators survived the horrors in the rock.
- Proceed to Resolution 6.
Resolution 6: Narrative omitted. The Miskatonic Survey journal entry read at this resolution is not transcribed.
- If the Prismatic Shard story asset was under the control of an investigator when the scenario ended, choose an investigator to add it to their deck. It does not count toward their deck size.
- Update your Campaign Log.
- If "you helped River," increase River Hawthorne's Relationship Level. Each investigator earns 1 bonus experience.
- If an investigator controls River Hawthorne and the above is not true: Decrease River Hawthorne's Relationship Level.
- Each investigator earns experience equal to the Victory X value of each card in the victory display. Each investigator may now spend the experience recorded under "Unspent Experience" in your Campaign Log.
- In the "Areas Surveyed" section of your Campaign Log, check off North Point Mine.
- Check your Campaign Log.
- If it is Day 1, turn to Prelude: The First Evening (page 31).
- If it is Night 1, turn to Prelude: Dawn of the Second Day (page 39).
- If it is Day 2, turn to Prelude: The Second Evening (page 43).
- If it is Night 2, turn to Prelude: Dawn of the Final Day (page 51).
- If it is Day 3, turn to Prelude: The Final Evening (page 55).
Scenario: Hemlock House
Narrative omitted for the scenario's opening. The Intro paragraphs below are chosen by day and time.
- Check your Campaign Log.
- If it is Night 1 or Night 2, skip to Intro 4.
- Otherwise:
- If it is Day 1, proceed to Intro 1.
- If it is Day 2, skip to Intro 2.
- If it is Day 3, skip to Intro 3.
Intro 1: Narrative omitted. Proceed to Setup.
Intro 2: Narrative omitted. Proceed to Setup.
Intro 3: Narrative omitted. Proceed to Setup.
Intro 4: Narrative omitted. Proceed to Setup.
Scenario Setup
- Gather all cards from the following encounter sets: Hemlock House, Agents of the Colour, Blight, Fire!, Transfiguration, Locked Doors, and Rats. These sets are indicated by the following icons: (encounter set icons).
- In addition, check the Campaign Log for the current day and gather its corresponding encounter set for The First Day, The Second Day, or The Final Day. These sets are indicated by the following icons: (encounter set icons).
- Check your Campaign Log for the current day and time. Put the Time Marker card into play on its corresponding (Day) or (Night) side.
- Set Act 2a: Against the House aside, out of play.
- If it is Day/Night 1 or Day 3, remove Agenda 2a: The House Stirs (v.II) from the game.
- Otherwise, remove Agenda 2a: The House Stirs (v.I) from the game.
- Gather all 13 locations. Set the Shapeless Cellar location and one random copy of the Bedroom location aside, out of play. Put each remaining location into play, Dormant side faceup, according to the following rules and Location Placement diagram.
- Place the Parlor, Foyer, and Dining Room in a row exactly as shown. This is the 1st Floor.
- Shuffle each remaining location and place six of these locations into play in two rows above the 1st Floor.
- Put the set-aside Bedroom location into play in the middle column on the 4th Floor.
- Remove each remaining location from the game.
- If it is Day/Night 1 or Day/Night 2, each investigator begins play at the Foyer.
- If it is Day 3, each investigator begins play at the Bedroom on the 4th floor.
- If it is (Day), gather each story asset from the Residents encounter set. This set is indicated by the following icon: (encounter set icon).
- If it is Day 1, put Gideon Mizrah into play at the Parlor location. Put the Little Sylvie story asset into play at a Bedroom location on the lowest floor.
Location Placement (Hemlock House)
The printed Location Placement diagram ("Location Placement for Hemlock House") shows the floors, columns, and the Dormant side of each location card. The location card text reproduced in the diagram is printed on the cards themselves and is not restated here. The following placement rules apply:
- Each location is connected to each location adjacent to it, in addition to any connection icons (see Location Adjacency in this Campaign on page 3).
- "X is 1 more than this location's floor number." The Cellar's floor number is considered to be 0 for the purposes of card effects.
Rules: Enemy-Locations
This scenario introduces a new card type: enemy-location. An enemy-location is both an enemy and a location, and that enemy is considered to be at that location. Investigators may fight, evade, and investigate enemy-locations.
- Enemy-locations cannot be moved by card effects.
- When instructed to flip a location to its enemy-location side or vice versa, keep all investigators, enemies, attachments, and tokens on that location.
- Locations with a seal on them are considered "sealed" and cannot be flipped to their enemy-location side by a predation test.
- An unsealed location is a location with no seals on it.
- When an enemy-location is defeated, add it to the victory display, leaving behind an empty space. Then, simultaneously slide each location that was above it in its column down one floor to fill that empty space. Place each investigator, story asset, and enemy that was at the defeated enemy-location at the newly-moved location.
- If there are no locations above the empty space in its column, choose a location adjacent to the empty space and place each investigator, story asset, and enemy in the chosen location.
- If the entire middle column is removed, slide the entire left column one step to the right, so that the two remaining columns are adjacent. (They remain the left and right columns, respectively; there is no middle column.)
The terms "predation," "predation test," "predation bag," "seal," and "Dormant" are used as printed in this Campaign Guide and on the scenario's cards; this Campaign Guide does not restate their definitions in the text of this scenario.
Codex: Hemlock House
Read the following entries on pages 17–18 only when directed while playing the Hemlock House scenario.
Codex 4: William Hemlock. Narrative omitted in each section below.
- If it is Day 1 and an investigator controls the Little Sylvie story asset: Take control of William Hemlock. Remember that you "found Little Sylvie." Increase William Hemlock's Relationship Level. Each investigator earns 1 bonus experience.
- Otherwise, if it is Day 1: Each investigator gains 1 clue (from the token pool). For the rest of the scenario, the Little Sylvie story asset gains "Action: Take control of Little Sylvie." The investigator who controls Little Sylvie may trigger this codex again.
- If it is Day 2 and both William Hemlock and Judith Park are at the same location: Proceed to Codex Σ: The Argument (page 18).
- Otherwise, if it is Day 2: Take control of William Hemlock. You may trigger this codex again if both William Hemlock and Judith Park are at the same location.
Codex 6: Gideon Mizrah. Narrative omitted.
- If "you are helping Gideon": Increase Gideon Mizrah's Relationship Level. Each investigator earns 1 bonus experience.
- Otherwise: You may cancel the next predation that would take place. Remember "you are helping Gideon." An investigator may trigger this codex again.
Codex 7: Judith Park. Narrative omitted in each section below.
- If it is Day 2 and both William Hemlock and Judith Park are at the same location: Proceed to Codex Σ: The Argument (page 18).
- Otherwise, if it is Day 2: Take control of Judith Park. You may trigger this codex again if both William Hemlock and Judith Park are at the same location.
- If it is Day 3: Take control of Judith Park. Remember that "Judith is remodeling."
Codex 8: Theo Peters. Narrative omitted.
- Take control of Theo Peters.
Codex Σ: The Argument. Narrative omitted. The investigator resolving this codex must decide (choose one):
- "Judith is right. There's nothing here to salvage." Proceed to The Argument 2.
- "It is William's home. We should respect his wishes." Skip to The Argument 3.
The Argument 2: Narrative omitted.
- Remove William Hemlock from the game. Each investigator may draw 1 card. Increase Judith Park's Relationship Level. Each investigator earns 1 bonus experience.
The Argument 3: Narrative omitted.
- Remove Judith Park from the game. Each investigator may draw 1 card. Increase William Hemlock's Relationship Level. Each investigator earns 1 bonus experience.
Codex Θ: Dr. Rosa Marquez. Narrative omitted.
- Draw 3 cards. Choose an enemy-location in play and deal it 1 damage.
Standalone Mode (Hemlock House)
If you are playing in Standalone Mode and do not wish to refer to any other setup or resolutions, you may use the information below when setting up and playing this scenario:
- Shuffle each Time Marker and draw 1 at random. The Time Marker indicates the current day.
- Flip a coin to determine whether it is (Day) or (Night) when choosing the current time.
- Assemble the chaos bag using the following tokens: +1, 0, 0, –1, –1, –2, –2, –3, –3, –5, skull, skull, tablet, elder thing, elder sign, Ꞩ2 token.
- If it is Day/Night 2, add 1 tablet token and 1 elder thing token to the chaos bag.
- If it is Day/Night 3, add 2 tablet tokens and 2 elder thing tokens to the chaos bag.
Resolutions: Hemlock House
Do not read until the end of the scenario.
If no resolution was reached (each investigator resigned or was defeated): Narrative omitted. Skip to Resolution 2.
Resolution 1: Narrative omitted. Proceed to Resolution 2.
Resolution 2: Narrative omitted. The Miskatonic Survey journal entry read at this resolution is not transcribed.
- Remove 1 elder thing token from the predation bag. Return any remaining elder thing tokens in the predation bag to the chaos bag for the remainder of the campaign.
- If the investigators "found Little Sylvie," an investigator may add the Little Sylvie story asset to their deck. It does not count toward that investigator's deck size.
- Check the victory display and the number of seals in play when the scenario ended:
- If there are 8 or more seals in play, each investigator earns 1 bonus experience. If there are 10 or more seals in play, each investigator earns 1 additional experience.
- If there are 8 or more enemy-locations in the victory display, each investigator earns 1 bonus experience. If there are 10 or more enemy locations in the victory display, each investigator earns 1 additional experience.
- If there are 8 or more enemy-locations in the victory display, Judith Park is under the control of an investigator, and "Judith is remodeling," increase Judith Park's Relationship Level. Each investigator earns 1 bonus experience.
- Each investigator earns experience equal to the Victory X value of each card in the victory display. Each investigator may now spend the experience recorded under "Unspent Experience" in the Campaign Log.
- In the "Areas Surveyed" section of your Campaign Log, check off Hemlock Harbor.
- Check your Campaign Log.
- If it is Day 1, turn to Prelude: The First Evening (page 31).
- If it is Night 1, turn to Prelude: Dawn of the Second Day (page 39).
- If it is Day 2, turn to Prelude: The Second Evening (page 43).
- If it is Night 2, turn to Prelude: Dawn of the Final Day (page 51).
- If it is Day 3, turn to Prelude: The Final Evening (page 55).
Scenario: The Silent Heath
- Check your Campaign Log.
- If it is Night 1 or Night 2, skip to Intro 4.
- Otherwise:
- If it is Day 1, proceed to Intro 1.
- If it is Day 2, skip to Intro 2.
- If it is Day 3, skip to Intro 3.
Intro 1: Narrative omitted. Skip to Intro 5.
Intro 2: Narrative omitted. Skip to Intro 5.
Intro 3: Narrative omitted. Skip to Intro 5.
Intro 4: Narrative omitted. Proceed to Setup.
Intro 5: Narrative omitted. Proceed to Setup.
Scenario Setup
- Gather all cards from the following encounter sets: The Silent Heath, Agents of the Colour, Blight, Horrors in the Rock, Refractions, Transfiguration, and Striking Fear. These sets are indicated by the following icons: (encounter set icons).
- In addition, check the Campaign Log for the current day and gather its corresponding encounter set for The First Day, The Second Day, or The Final Day. These sets are indicated by the following icons: (encounter set icons).
- Check your Campaign Log for the current day and time. Put the Time Marker card into play on its corresponding (Day) or (Night) side.
- If it is Day 1 or Night 1, remove Agenda 2a: Desolation (v.II) from the game.
- Otherwise, remove Agenda 2a: Desolation (v.I) from the game.
- Put the following locations into play: Crystal Grove, Pearl Estate Ruins, and Ashen Slope. Use the diagram on this page for reference (see Location Adjacency in this Campaign on page 3).
- Each investigator begins play at the Pearl Estate Ruins.
- Set each of the following aside, out of play: the Brood Queen enemy, both copies of the Crystal Parasite enemy, and the single-sided Salt Chamber, Larval Tunnel, and Crystal Nursery locations.
- Shuffle the 3 Crystal Remains story asset cards facedown (so you do not know which is which) and set them aside, out of play.
- Choose 3 locations at random from the Horrors in the Rock encounter set and set them aside without looking at their revealed sides. Remove the remaining Horrors in the Rock locations from the game.
- If it is (Day), gather each story asset from the Residents encounter set. This set is indicated by the following icon: (encounter set icon).
- If it is Day 1, place Leah Atwood at the Pearl Estate Ruins location.
- If it is Day 2, place Dr. Rosa Marquez at the Crystal Grove location.
- If it is Day 3, place Mother Rachel at the Ashen Slope location.
Placing New Locations
- When placing new locations, place them adjacent to your location. Note that the starting locations are still connected via their location connection icons (see Location Adjacency in this Campaign on page 3).
The printed diagram "Placing New Locations in 'The Silent Heath'" shows the three starting locations and their adjacency. The location card text and flavor text in the diagram are printed on the cards and are not restated.
Codex: The Silent Heath
Read the following entries only when directed while playing The Silent Heath scenario.
Codex 1: Mother Rachel. Narrative omitted.
- Increase Mother Rachel's Relationship Level. Each investigator earns 1 bonus experience.
Codex 2: Leah Atwood. Narrative omitted.
- In Leah Atwood's Notes, record Leah searched the Pearl Ruins.
- Each investigator gains 1 clue (from the token pool).
Codex Θ: Dr. Rosa Marquez.
- If it is Act 1: Narrative omitted. Draw 3 cards. An investigator may trigger this codex again during a different act.
- If it is Act 2: Narrative omitted. Choose a location in play. Reveal all cards beneath the chosen location. Discard each treachery revealed and put the rest back in any order.
Codex Ψ: Larval Tunnel. Narrative omitted.
- Gather 1 of the set-aside Crystal Remains cards along with the top 2 cards of the encounter deck. Shuffle them together and place the 3 cards facedown in a stack beneath Larval Tunnel.
Codex Ω: Salt Chamber. Narrative omitted.
- Gather 1 of the set-aside Crystal Remains cards along with the top 2 cards of the encounter deck. Shuffle them together and place the 3 cards facedown in a stack beneath Salt Chamber.
Codex Φ: Crystal Nursery. Narrative omitted.
- Gather 1 of the set-aside Crystal Remains cards along with the top 2 cards of the encounter deck. Shuffle them together and place the 3 cards facedown in a stack beneath Crystal Nursery.
Codex Σ: Brood Queen. Narrative omitted.
- Spawn the Brood Queen at the location nearest to the most investigators (at a Cave location, if able). Remove each Insect enemy from the victory display and spawn it at the Brood Queen's location.
Standalone Mode (The Silent Heath)
If you are playing in Standalone Mode and do not wish to refer to any other setup or resolutions, you may use the information below when setting up and playing this scenario:
- Shuffle each Time Marker and draw 1 at random. The Time Marker indicates the current day.
- Flip a coin to determine whether it is (Day) or (Night) when choosing the current time.
- Assemble the chaos bag using the following tokens: +1, 0, 0, –1, –1, –2, –2, –3, –3, –5, skull, skull, tablet, elder thing, elder sign, Ꞩ2 token.
- If it is Day/Night 2, add 1 tablet token and 1 elder thing token to the chaos bag.
- If it is Day/Night 3, add 2 tablet tokens and 2 elder thing tokens to the chaos bag.
Resolutions: The Silent Heath
Do not read until the end of the scenario.
If no resolution was reached (each investigator resigned or was defeated): Narrative omitted.
- If there are exactly 3 Crystal Remains in the victory display, proceed to Resolution 1.
- If there are exactly 1 or 2 Crystal Remains in the victory display, skip to Resolution 2.
- Otherwise, skip to Resolution 4.
Resolution 1: Narrative omitted.
- In your Campaign Log, record the investigators laid the Pearl Family to rest.
- Skip to Resolution 3.
Resolution 2: Narrative omitted.
- In your Campaign Log, record the remains were partially recovered.
- Proceed to Resolution 3.
Resolution 3: Narrative omitted. The diary excerpts read at this resolution are not transcribed.
- In your Campaign Log, record Madame Pearl's diary was recovered.
- Proceed to Resolution 4.
Resolution 4: Narrative omitted. The Miskatonic Survey journal entry read at this resolution is not transcribed.
- Each investigator earns experience equal to the Victory X value of each card in the victory display. Each investigator may now spend the experience recorded under "Unspent Experience" in your Campaign Log.
- In the "Areas Surveyed" section of your Campaign Log, check off Pearl Ridge.
- Check your Campaign Log.
- If it is Day 1, turn to Prelude: The First Evening (page 31).
- If it is Night 1, turn to Prelude: Dawn of the Second Day (page 39).
- If it is Day 2, turn to Prelude: The Second Evening (page 43).
- If it is Night 2, turn to Prelude: Dawn of the Final Day (page 51).
- If it is Day 3, turn to Prelude: The Final Evening (page 55).
Scenario: The Lost Sister
Intro 1: Narrative omitted.
- Check your Campaign Log.
- If it is Night 1 or Night 2, skip to Intro 5.
- Otherwise:
- If it is Day 1, proceed to Intro 2.
- If it is Day 2, skip to Intro 3.
- If it is Day 3, skip to Intro 4.
Intro 2: Narrative omitted. Proceed to Setup.
Intro 3: Narrative omitted. Proceed to Setup.
Intro 4: Narrative omitted. Proceed to Setup.
Intro 5: Narrative omitted. Proceed to Setup.
Scenario Setup
- Gather all cards from the following encounter sets: The Lost Sister, Blight, Horrors in the Rock, Mutations, and Myconids. These sets are indicated by the following icons: (encounter set icons).
- In addition, check the Campaign Log for the current day and gather its corresponding encounter set for The First Day, The Second Day, or The Final Day. These sets are indicated by the following icons: (encounter set icons).
- Check your Campaign Log for the current day and time. Put the Time Marker card into play on its corresponding (Day) or (Night) side.
- Put the Akwan location into play.
- Each investigator begins play at Akwan.
- Construct the "Caverns deck" as follows:
- Gather each location from the The Lost Sister and Horrors in the Rock encounter sets.
- Set the Fungal Cave location aside, out of play.
- Remove 2 random Cave locations from the Horrors in the Rock encounter set from the game.
- Shuffle each remaining location together to form the Caverns deck. Place this deck near the scenario reference card.
- Put the top three cards of the Caverns deck into play, unrevealed, below and to the left and right of Akwan (see Location Adjacency in this Campaign on page 3).
- If it is (Day), gather each story asset from the Residents encounter set. This set is indicated by the following icon: (encounter set icon).
- Put Helen Peters into play under the control of an investigator. She does not take up an ally slot during this scenario.
- If it is Day 1 or Day 2, put Theo Peters into play under the control of an investigator.
- If it is Day 2 or Day 3, put Gideon Mizrah into play under the control of an investigator.
- If it is Day 3, put William Hemlock into play at Akwan.
Rules: Dark Locations
Day and Night effects function differently during The Lost Sister scenario. During this scenario, cards at a Dark location (including the location itself) only use (Night) effects. Cards at all other locations (including the location itself) only use (Day) effects. This rule is in effect regardless of whether this scenario is played during the (Day) or (Night).
- During the evening, the moonlight is as bright as the sun. Unlike in other scenarios in this campaign, the Time Marker card has no mechanical effect during The Lost Sister scenario.
Rules: Double-Sided Enemies
The Lost Sister encounter set features 3 double-sided enemies. These enemies have a (Day) side and a (Night) side and are considered to be the same enemy. If these enemies are at a Dark location, flip them to their (Night) side. Conversely, if these enemies are at a location without the Dark trait, flip them to their (Day) side.
- Flipping from one side to another is an immediate effect that cannot be interrupted. When a double-sided enemy flips, it keeps all tokens and attachments. (Note that some enemies have Forced– effects that activate after they flip to one side or the other.)
Codex: The Lost Sister
Read the following entries only when directed while playing The Lost Sister scenario.
Codex 4: William Hemlock. Narrative omitted.
- Increase William Hemlock's Relationship Level. Each investigator earns 1 bonus experience.
Codex 6: Gideon Mizrah. Narrative omitted.
- Remember "Gideon is searching for an heirloom." (Hint: If investigators control at least 2 clues at the end of this scenario, you can help Gideon find what he's looking for!)
Codex Σ: The Lobstrosity.
- If Theo reconciled with Helen: Narrative omitted. Move 1 damage from Theo Peters to the Limulus Hybrid enemy.
- Otherwise: Narrative omitted. Remove Theo Peters from the game.
Codex 8: Theo Peters.
- If "Theo is arguing with Helen" and both Theo Peters and Helen Peters are at the same location: Narrative omitted. Choose an investigator at Theo Peters' location to test [head-silhouette skill icon] (4). If this test is successful, continue reading. Otherwise, an investigator may trigger this codex again.
- Narrative omitted. In Theo Peters' Notes, record Theo reconciled with Helen. Increase Theo Peters' Relationship Level. Each investigator earns 1 bonus experience.
- Otherwise: Narrative omitted. Remember "Theo is arguing with Helen." An investigator may trigger this codex again if both Theo Peters and Helen Peters are at the same location.
Codex Θ: Dr. Rosa Marquez. Narrative omitted.
- Look at the top card of the Caverns deck. You may either put that location into play adjacent to the nearest Cave location or place it on the bottom of the Caverns deck.
Standalone Mode (The Lost Sister)
If you are playing in Standalone Mode and do not wish to refer to any other setup or resolutions, you may use the information below when setting up and playing this scenario:
- Shuffle each Time Marker and draw 1 at random. The Time Marker indicates the current day.
- Flip a coin to determine whether it is (Day) or (Night) when choosing the current time.
- Assemble the chaos bag using the following tokens: +1, 0, 0, –1, –1, –2, –2, –3, –3, –5, skull, skull, tablet, elder thing, elder sign, Ꞩ2 token.
- If it is Day/Night 2, add 1 tablet token and 1 elder thing token to the chaos bag.
- If it is Day/Night 3, add 2 tablet tokens and 2 elder thing tokens to the chaos bag.
Resolutions: The Lost Sister
Do not read until the end of the scenario.
If no resolution was reached (each investigator resigned or was defeated): Narrative omitted.
- Each investigator earns 1 bonus experience for coming face to face with the horrors of the coastal caves.
- Skip to Resolution 4.
Resolution 1: Narrative omitted.
- Check your Campaign Log.
- If "Theo reconciled with Helen" is recorded in Theo Peters' Notes, proceed to Resolution 2.
- Otherwise, skip to Resolution 3.
Resolution 2: Narrative omitted.
- Each investigator earns 2 bonus experience for helping Helen save her sister.
- In your Campaign Log, record The Peters family was reunited.
- Skip to Resolution 4.
Resolution 3: Narrative omitted.
- Each investigator earns 2 bonus experience for helping Helen save her sister.
- In your Campaign Log, record Elizabeth Peters was saved.
- Proceed to Resolution 4.
Resolution 4: Narrative omitted. The Miskatonic Survey journal entry read at this resolution is not transcribed.
- Update your Campaign Log. If "Gideon is searching for an heirloom" and the investigators possess 2 clues: Increase Gideon Mizrah's Relationship Level. Each investigator earns 1 bonus experience. In Gideon Mizrah's Notes, record Gideon found his treasure.
- Each investigator earns experience equal to the Victory X value of each card in the victory display. Each investigator may now spend the experience recorded under "Unspent Experience" in your Campaign Log.
- In the "Areas Surveyed" section of your Campaign Log, check off Akwan Shoreline.
- Check your Campaign Log.
- If it is Day 1, turn to Prelude: The First Evening (page 31).
- If it is Night 1, turn to Prelude: Dawn of the Second Day (page 39).
- If it is Day 2, turn to Prelude: The Second Evening (page 43).
- If it is Night 2, turn to Prelude: Dawn of the Final Day (page 51).
- If it is Day 3, turn to Prelude: The Final Evening (page 55).
Scenario: The Thing in the Depths
- Check your Campaign Log.
- If it is Night 1 or Night 2, skip to Intro 8.
- Otherwise:
- If it is Day 1, proceed to Intro 1.
- If it is Day 2, skip to Intro 4.
- If it is Day 3, skip to Intro 7.
Intro 1: Narrative omitted.
- Check your Campaign Log.
- If Judith Park's Relationship Level is 1 or higher, proceed to Intro 2.
- Otherwise, skip to Intro 3.
Intro 2: Narrative omitted.
- Increase Judith Park's Relationship Level. Each investigator earns 1 bonus experience.
- Proceed to Setup.
Intro 3: Narrative omitted.
- In Judith Park's Notes, record Judith shared a grudge.
- Proceed to Setup.
Intro 4: Narrative omitted. The investigators must decide (choose one):
- "We can push!" Proceed to Intro 5.
- "We'll rev the engine." Skip to Intro 6.
Intro 5: Narrative omitted.
- Each investigator begins the next scenario with 2 fewer resources.
- Proceed to Setup.
Intro 6: Narrative omitted.
- Each investigator begins the next scenario with 1 fewer action.
- Proceed to Setup.
Intro 7: Narrative omitted. Proceed to Setup.
Intro 8: Narrative omitted. Proceed to Setup.
Scenario Setup
- Gather all cards from the following encounter sets: The Thing in the Depths, Blight, The Forest, and Mutations. These sets are indicated by the following icons: (encounter set icons).
- In addition, check the Campaign Log for the current day and gather its corresponding encounter set for The First Day, The Second Day, or The Final Day. These sets are indicated by the following icons: (encounter set icons).
- Check your Campaign Log for the current day and time. Put the Time Marker card into play on its corresponding (Day) or (Night) side.
- If it is Day 2 or Night 2, place 1 doom on the agenda.
- If it is Day 3, place 2 doom on the agenda.
- Gather the 10 double-sided locations and shuffle them. Remove one of these locations from the game at random. Put the remaining 9 locations into play in a 3x3 grid with their Bog side facing up, as shown in the Location Placement diagram (see Location Adjacency in this Campaign on page 3).
- Each investigator begins play at the "Starting Location."
- If it is (Day), gather each story asset from the Residents encounter set. This set is indicated by the following icon: (encounter set icon).
- If it is Day 1, place Judith Park at the North Shore location. Put Dr. Rosa Marquez into play under the control of an investigator. She does not take up an ally slot during this scenario.
- If it is Day 2 or Day 3, place River Hawthorne at the North Shore location.
- Remove each other card in the Residents encounter set from the game.
- Set the following cards aside, out of play: the Thing in the Depths enemy, the Chelydran Hybrid enemy, and all five copies of the Grasping Tendril enemy.
- Shuffle the remaining encounter cards to build the encounter deck.
- You are now ready to begin.
Location Placement (The Thing in the Depths)
The printed Location Placement diagram ("Location Placement for 'The Thing in the Depths'") shows the 3x3 grid. North Shore is in the top right, the Starting Location is in the bottom left, and Cranberry Bog is in the bottom right. The other positions are marked with "?" in the diagram. The location card text printed in the diagram is on the cards themselves and is not restated here.
Rules: Sinking Locations
During this scenario, damage tokens are placed on locations, as sinkholes, to represent the sinking of the bog. When a location has three or more sinkholes on it, it will flip via the agenda's forced effect.
- When instructed to flip a location, discard all damage tokens on that location (not on investigators or enemies). Then, flip it, keeping all investigators, enemies, attached treacheries, and clues on that location. Discard all player card attachments from that location.
Codex: The Thing in the Depths
Read the following entries only when directed while playing The Thing in the Depths scenario.
Codex 5: River Hawthorne. Narrative omitted in each section below.
- If you do not control River Hawthorne: Remember that "River 'asked' for help." Take control of River Hawthorne. You may trigger this codex again at the Cranberry Bog location (see the Location Placement diagram on page 28).
- If you control River Hawthorne and are at the Cranberry Bog location (see the Location Placement diagram on page 28): Increase River Hawthorne's Relationship Level. Each investigator earns 1 bonus experience. Remove River Hawthorne from the game.
Codex 7: Judith Park. Narrative omitted in each section below.
- If Judith shared a grudge: Choose a non-Elite enemy in play. Defeat that enemy. Take control of Judith Park.
- Otherwise: Take control of Judith Park.
Codex Θ: Dr. Rosa Marquez. Narrative omitted.
- Choose any location in play. If it is a Bog location, remove all sinkholes from it. If it is a Sunken location, flip it, keeping all tokens and attachments.
Standalone Mode (The Thing in the Depths)
If you are playing in Standalone Mode and do not wish to refer to any other setup or resolutions, you may use the information below when setting up and playing this scenario:
- Shuffle each Time Marker and draw 1 at random. The Time Marker indicates the current day.
- Flip a coin to determine whether it is (Day) or (Night) when choosing the current time.
- Assemble the chaos bag using the following tokens: +1, 0, 0, –1, –1, –2, –2, –3, –3, –5, skull, skull, tablet, elder thing, elder sign, Ꞩ2 token.
- If it is Day/Night 2, add 1 tablet token and 1 elder thing token to the chaos bag.
- If it is Day/Night 3, add 2 tablet tokens and 2 elder thing tokens to the chaos bag.
Resolutions: The Thing in the Depths
Do not read until the end of the scenario. The guide prints no explicit condition for choosing Resolutions 1 through 4 in this text; each is transcribed as printed, and the Resolution 5 instructions apply after any of them.
If no resolution was reached (each investigator was defeated): Narrative omitted.
- Each investigator earns 1 bonus experience as they gain insight into the unique ecosystem of Hemlock Isle.
- Skip to Resolution 5.
Resolution 1: Narrative omitted.
- In your campaign log, record the Chelydran Hybrid perished.
- Each investigator earns 1 bonus experience as they study a part of Eastwick Bog's unique flora and fauna.
- Skip to Resolution 5.
Resolution 2: Narrative omitted.
- In your Campaign Log, record the Chelydran Hybrid lived.
- Each investigator earns 3 bonus experience, as they witness a part of Eastwick Bog's unique flora and fauna.
- Skip to Resolution 5.
Resolution 3: Narrative omitted.
- In your campaign log, record the Chelydran Hybrid was devoured.
- Each investigator suffers 1 mental trauma.
- Each investigator earns 1 bonus experience, as they gain insight into the unique ecosystem of Hemlock Isle.
- Skip to Resolution 5.
Resolution 4: Narrative omitted.
- In your campaign log, record The Thing in the Depths was defeated.
- Proceed to Resolution 5.
Resolution 5: Narrative omitted. The Miskatonic Survey journal entry read at this resolution is not transcribed.
- Update your Campaign Log.
- If "River 'asked' for help" and an investigator controlled River Hawthorne when they were defeated or the scenario ended: Decrease River Hawthorne's Relationship Level.
- In Judith Park's Notes, if Judith shared a grudge and the Thing in the Depths enemy is in the victory display: Increase Judith Park's Relationship Level. Each investigator earns 1 bonus experience.
- Each investigator earns experience equal to the Victory X value of each card in the victory display. Each investigator may now spend the experience recorded under "Unspent Experience" in your Campaign Log.
- In the "Areas Surveyed" section of your Campaign Log, check off Eastwick Bog.
- Check your Campaign Log.
- If it is Day 1, turn to Prelude: The First Evening (page 31).
- If it is Night 1, turn to Prelude: Dawn of the Second Day (page 39).
- If it is Day 2, turn to Prelude: The Second Evening (page 43).
- If it is Night 2, turn to Prelude: Dawn of the Final Day (page 51).
- If it is Day 3, turn to Prelude: The Final Evening (page 55).
Prelude: The First Evening
Narrative omitted. The opening of this prelude (the community dinner in the Commons and Mother Rachel's address) is fiction and is not transcribed.
- Each investigator must decide individually, one at a time:
- Keep eating. In your Campaign Log, record [investigator's name] finished their meal.
- Don't eat any more.
- You may choose where to sit for the community meal. One at a time, each investigator may choose a different codex entry from the following. (If there is only one investigator, you may choose two to resolve instead.) After you have read the appropriate number of sections, proceed to Resolution 1 (page 33).
- Dr. Marquez, Mother Rachel, and William sit at the head of the room at a large open table. To sit with them, Codex Θ (page 31).
- Judith's face is pinched in frustration as she talks to River. To join them at the outer edge of the commons, Codex Δ (page 32).
- Leah is watching the room as Gideon talks to her. To join them in the center of the commons, Codex Σ (page 32).
- Theo leans against the doorpost looking outside. To join him at the entrance to the commons, Codex Ω (page 32).
- Some children in animal masks eat honeyed cake in the corner. To sit with the Vale's youth, Codex Γ (page 33).
- To sit alone, Codex Π (page 33). (If there is only one investigator, this option cannot be the first choice.)
Codex: The First Evening
Read the following entries on pages 31–33 only when directed during The First Evening prelude.
Codex Θ: The Hemlock Legacy.
- The Hemlock Legacy 1: Narrative omitted. You must decide what to say (choose one):
- "Who are the Atwoods?" Proceed to The Hemlock Legacy 2.
- "Who are the Children of the Stars?" Skip to The Hemlock Legacy 3.
- "Who are the Hemlocks?" Skip to The Hemlock Legacy 4.
- The Hemlock Legacy 2: Narrative omitted.
- Increase Mother Rachel's Relationship Level. Each investigator earns 1 bonus experience.
- The Hemlock Legacy 3: Narrative omitted.
- Increase Mother Rachel's Relationship Level. Each investigator earns 1 bonus experience.
- The Hemlock Legacy 4: Narrative omitted.
- Increase William Hemlock's Relationship Level. Each investigator earns 1 bonus experience.
- In William Hemlock's Notes, record William shared his legacy.
Codex Δ: Best "Friends."
- Best "Friends" 1: Narrative omitted. You must decide (choose one):
- "River, jazz is delightful." Proceed to Best "Friends" 2.
- "Jazz is hell, Judith." Skip to Best "Friends" 3.
- Best "Friends" 2: Narrative omitted.
- Increase River Hawthorne's Relationship Level. Each investigator earns 1 bonus experience.
- In River Hawthorne's Notes, record River shared their ambitions.
- Best "Friends" 3: Narrative omitted.
- Increase Judith Park's Relationship Level. Each investigator earns 1 bonus experience.
Codex Σ: Old Blood.
- Old Blood 1: Narrative omitted. You must decide (choose one):
- "I heard you were a sailor, Gideon." Proceed to Old Blood 2.
- "Leah, tell me about your work." Skip to Old Blood 3.
- Old Blood 2: Narrative omitted.
- Increase Gideon Mizrah's Relationship Level. Each investigator earns 1 bonus experience.
- In Gideon Mizrah's Notes, record Gideon told the story of Captain Hemlock.
- Old Blood 3: Narrative omitted.
- Increase Leah Atwood's Relationship Level. Each investigator earns 1 bonus experience.
- If Leah searched the Pearl Ruins is in Leah Atwood's Notes, proceed to Old Blood 4. Otherwise, stop reading.
- Old Blood 4: Narrative omitted.
- In Leah Atwood's Notes, record Leah shared her frustrations.
Codex Ω: Family Matters. Narrative omitted in each section below.
- If The Peters Family was reunited:
- Increase Theo Peters' Relationship Level. Each investigator earns 1 bonus experience.
- In your Campaign Log, record Helen Peters joined the survey. Any one investigator may choose to add the Helen Peters story asset to their deck. It does not count toward their deck size. This card can be found in the Residents encounter set, indicated by the following encounter set icon: (encounter set icon).
- Otherwise:
- Increase Theo Peters' Relationship Level. Each investigator earns 1 bonus experience.
Codex Γ: The Rabbit.
- If Simeon Atwood's name is crossed out: Narrative omitted. Each investigator earns 1 bonus experience.
- Otherwise: Narrative omitted.
- Increase Simeon Atwood's Relationship Level. Each investigator earns 1 bonus experience.
- In Simeon Atwood's Notes, record Simeon hatched a plan.
Codex Π: Friendly Strangers. Narrative omitted.
- Search the Heirlooms encounter set for the Worry Rock story asset and add it to your deck. It does not count toward your deck size. This set is indicated by the following encounter set icon: (encounter set icon).
Prelude Resolution 1: The First Evening
Do not read until the end of the prelude.
Resolution 1: Narrative omitted.
- Each investigator earns the bonus experience awarded during this prelude. Record each bonus experience earned under "Unspent Experience" in your Campaign Log, but do not spend any of it until the end of the next scenario.
- The investigators must decide (choose one):
- Search for Bertie Musgrave with Dr. Marquez. Proceed to The Twisted Hollow on page 34.
- Gather more information on Hemlock Isle's unique ecosystem at night. Check the "Areas Surveyed" section of your Campaign Log and choose a scenario that has not yet been checked off. If you do, add 1 tablet token and 1 elder thing token to the chaos bag for the remainder of the campaign.
Scenario: The Twisted Hollow
Intro 1: Narrative omitted. The investigators must decide (choose one):
- Tell the truth. Proceed to Intro 2.
- Lie to her. Skip to Intro 3.
Intro 2: Narrative omitted.
- In your Campaign Log, record Mother Rachel showed the way.
- Add 1 cultist token to the chaos bag for the remainder of the campaign.
- Proceed to Setup.
Intro 3: Narrative omitted.
- In your Campaign Log, record the investigators lost the path.
- Add 1 elder thing token to the chaos bag for the remainder of the campaign.
- Proceed to Setup.
Scenario Setup
- Gather all cards from the following encounter sets: The First Day, The Twisted Hollow, The Forest, and Myconids. These sets are indicated by the following icons: (encounter set icons).
- Put the Night One Time Marker card into play.
- Check your Campaign Log.
- If Mother Rachel showed the way: Find the Vale Lantern story asset with the Boon trait and put it into play under the control of an investigator, Lit side faceup. Remove the other Vale Lantern from the game. If there is only 1 investigator, the Vale Lantern does not take up a hand slot during this scenario.
- If the investigators lost the path: Find the Vale Lantern story asset without the Boon trait and put it into play under the control of an investigator, Lit side faceup. Remove the other Vale Lantern from the game. If there is only 1 investigator, the Vale Lantern does not take up a hand slot during this scenario.
- Set the Twisted Hollow and Glimmering Meadow locations aside, out of play (both are the revealed side of a Western Woods location). Then, based on the number of investigators in the game, randomly remove the following from the gathered Western Woods locations:
- If there are 1 or 2 investigators, remove 2 locations from the game.
- If there are 3 or 4 investigators, remove 1 location from the game.
- Check your Campaign Log.
- If Mother Rachel showed the way: Put the Glimmering Meadow location into play. Each investigator begins play at Glimmering Meadow.
- If the investigators lost the path: Put a random Western Woods location that has not been set aside into play, ignoring any forced effects. Each investigator begins play at that location.
- If it is not already in play, shuffle the set-aside Glimmering Meadow location along with each remaining Western Woods location to form the "Woods deck." Draw the top 4 cards of the Woods deck and put them into play above, below, and to the right and left of the starting location.
Rules: Darkness Level
Throughout this scenario, the number of resources under "Darkness Level" on the scenario reference card indicate the current stage of night. As time ticks down, resources are added to the current darkness level, and play continues until the investigators reach a certain darkness level, or are defeated. The darker the forest, the deadlier its snares. The current darkness level has no game effect on its own; however, some encounter card effects may change or become stronger depending on the current darkness level.
Rules: Location Adjacency in The Twisted Hollow
During this scenario, locations will be arranged in a set pattern, with new locations from the Woods deck emerging adjacent to existing locations, unrevealed side faceup. During this scenario, adjacent locations are connected to one another.
- If a location ever has no shared edges with another location, slide it vertically or horizontally until it is adjacent to the nearest location.
The printed Location Placement diagram shows the Western Woods locations in their placement grid. Its note reads: "If playing with exactly 1 or 2 investigators, you will have 1 fewer location in the Woods deck. When placing locations, leave this spot empty."
The Twisted Hollow location card, as printed in this diagram, reads: "Objective – At the end of the round, if each surviving investigator is at The Twisted Hollow, investigators may spend 2 clues, as a group, to advance to act 2b." Its flavor quotation is not transcribed.
Rules: Pursuit
Some cards in this scenario reference an area called the "pursuit area." The pursuit area is an out-of-play area next to the act and agenda deck which enemies can enter and leave via card effects. Generally speaking, enemies in play will move to the pursuit area as the night progresses.
- Although the pursuit area is out of play, whenever an enemy moves to or from the pursuit area, it keeps all tokens and attachments.
- Enemies in the pursuit area are considered to be "in pursuit." Enemies that are in pursuit are considered to be out of play, and cannot be affected by player cards or investigator actions. However, enemies that are in pursuit can re-enter play by a variety of card abilities.
- (While enemies are in pursuit, ignore all forced effects on those enemies. Doom on enemies in pursuit is out of play and does not count toward the doom threshold.)
Codex: The Twisted Hollow
Read the following entries only when directed while playing The Twisted Hollow scenario.
Codex 7: Judith Park. Narrative omitted.
- Deal 2 damage to Judith Park.
- In Judith Park's Notes, record Judith saved your ass.
- Proceed to Codex Σ: The Bear 3 (on this page).
Codex 8: Theo Peters. Narrative omitted.
- Deal 2 horror to Theo Peters.
- In Theo Peters' Notes, record Theo distracted the Bear.
- Proceed to Codex Σ: The Bear 3 (on this page).
Codex Ω: Bertie Musgrave. Narrative omitted.
- Either (choose one): Each investigator gains 1 clue (from the token pool), or ready the Vale Lantern asset.
Codex Θ: Dr. Rosa Marquez. Narrative omitted.
- Choose any location in play. You may reveal that location, ignoring its Forced effect.
Codex Σ: The Bear. Choose the bravest investigator to read the following:
- The Bear 1: Narrative omitted.
- Check the set-aside cards.
- If either Judith Park or Theo Peters are set aside, choose one of them to put into play under your control and immediately resolve their codex entry (on this page).
- Otherwise, proceed to The Bear 2.
- The Bear 2: Narrative omitted. You must either (choose one), then continue reading:
- Suffer 1 physical trauma and take 1 direct damage.
- Suffer 1 mental trauma and take 1 direct horror.
- Narrative omitted for the shot that follows. In Mother Rachel's Notes, record Mother Rachel intervened.
- Proceed to The Bear 3.
- The Bear 3: Narrative omitted.
- Move each unengaged enemy to the pursuit area.
- Spawn the Ursine Hybrid enemy at your location, exhausted, and deal 1 damage to it.
- If it is not under the control of an investigator, choose an investigator to take control of Vale Lantern.
- Set aside each empty Dark location to remake the Woods deck. To do this, perform the following:
- Shuffle the set-aside Twisted Hollow location with 3 random Western Woods locations together to form the bottom 4 locations of the Woods deck, Western Woods side faceup.
- Then, place all of the other Western Woods locations on top in a random order. All of the cards in the Woods deck should be showing only the Western Woods side, so that the investigators do not know which is which.
Standalone Mode (The Twisted Hollow)
If you are playing in Standalone Mode and do not wish to refer to any other setup or resolutions, you may use the information below when setting up and playing this scenario:
- Assemble the chaos bag using the following tokens: +1, 0, 0, –1, –1, –2, –2, –3, –3, –5, skull, skull, tablet, elder thing, elder thing, elder sign, Ꞩ2 token.
- During setup:
- The investigators lost the path.
- When setting up the Woods deck, remove only the Glimmering Meadow location. Do not remove any other locations regardless of player count.
- Begin the game at act 2, with the Ursine Hybrid enemy (back of Act 1a) in pursuit.
- Ignore the Objective text on Act 2a. There is no escape.
- This scenario is unwinnable in Standalone Mode. Your goal is to gather as many clues as possible. Once each investigator has been defeated, the current darkness level and your clue total will determine how well you performed.
Resolutions: The Twisted Hollow
Do not read until the end of the scenario. The guide prints no explicit condition for choosing between Resolution 1 and Resolution 2 in this text; each is transcribed as printed.
If no resolution was reached (each investigator resigned or was defeated): Narrative omitted.
- In your Campaign Log, record Bertie was lost in the woods.
- Skip to Resolution 3.
Resolution 1: Narrative omitted.
- In your Campaign Log, record Bertie was rescued.
- Skip to Resolution 3.
Resolution 2: Narrative omitted.
- In your Campaign Log, record Bertie was lost in the woods.
- Proceed to Resolution 3.
Resolution 3: Narrative omitted. The Miskatonic Survey journal entry read at this resolution is not transcribed.
- Each investigator earns 1 bonus experience as they gain insight into Hemlock Isle's unique ecosystem.
- Each investigator earns 1 additional experience if an investigator resigned with Bertie Musgrave under their control.
- Each investigator earns experience equal to the Victory X value of each card in the victory display. Each investigator may now spend the experience recorded under "Unspent Experience" in your Campaign Log.
- Update your Campaign Log.
- If Ursine Hybrid is in the victory display, record the bear was wounded.
- In the "Areas Surveyed" section of your Campaign Log, check off Western Woods.
- Proceed to Prelude: Dawn of the Second Day (page 39).
Prelude: Dawn of the Second Day
Narrative omitted. The waking scene that opens this prelude is fiction and is not transcribed.
- The fatigue from the long night catches up to you. Draw tokens from the chaos bag at random until you have 2 non-symbol tokens. Replace these tokens with a chaos token of a value 1 lower for the remainder of the campaign. (If you cannot replace a token, repeat this process until a total of 2 chaos tokens have been replaced.)
- Check your Campaign Log. Each investigator who finished their meal must read The Hemlock Curse. Each other investigator must read Gnawing Hunger.
The Hemlock Curse: Narrative omitted.
- Search the Day of Rain encounter set for The Hemlock Curse weakness and add it to your deck. It does not count toward your deck size. This set is indicated by the following icon: (encounter set icon).
- Proceed to Prelude Setup.
Gnawing Hunger: Narrative omitted.
- Suffer 1 physical trauma.
- Proceed to Prelude Setup.
Prelude Setup
- Gather all cards from the following encounter sets: The Second Day, Day of Rain, Residents, and The Vale. These sets are indicated by the following icons: (encounter set icons).
- Put the Day Two Time Marker card into play.
- Put each location from The Vale encounter set into play on its (Day) side according to the map on page 6.
- Each investigator begins at the Boarding House.
- Gather the Residents encounter set and check the Campaign Log.
- Remove each resident whose name is crossed off from the game.
- Put Judith Park into play at The Crossroads, asset side faceup.
- Set each remaining card from the Residents encounter set aside, out of play.
- Place doom on the agenda equal to the number of investigators.
- You are now ready to begin.
Prelude Codex: Dawn of the Second Day
Read the following entries on pages 39–42 only when directed while playing the Dawn of the Second Day prelude.
Codex 1: Mother Rachel.
- Check Mother Rachel's Notes.
- If Mother Rachel intervened, proceed to Mother Rachel 2.
- Otherwise, skip to Mother Rachel 3.
- Mother Rachel 2: Narrative omitted.
- Increase Mother Rachel's Relationship Level. Each investigator earns 1 bonus experience.
- Search the Heirlooms encounter set for the Corn Husk Doll story asset and add it to your deck. It does not count toward your deck size. This set is indicated by the following encounter set icon: (encounter set icon).
- Mother Rachel 3: Narrative omitted.
- Increase Mother Rachel's Relationship Level. Each investigator earns 1 bonus experience.
- Draw 1 card. You may play a Charm or Spell asset from your hand, ignoring its cost.
Codex 3: Simeon Atwood.
- If Simeon hatched a plan: Narrative omitted. In Simeon Atwood's Notes, record The plan is underway. (Hint: Tomorrow, you need to hide 1 [fedora-and-mask icon] fireworks around Hemlock Vale.)
- Otherwise: Narrative omitted.
- Draw 1 card. Search the top 9 cards of your deck for a Tactic or Trick card and add it to your hand (shuffle your deck).
Codex 4: William Hemlock. Narrative omitted.
- In William Hemlock's Notes, record William took heart.
- Increase William Hemlock's Relationship Level. Decrease River Hawthorne's Relationship Level. Each investigator earns 1 bonus experience.
- Search the top 9 cards of your deck for a Tome or Talent card and add it to your hand (shuffle your deck).
Codex 5: River Hawthorne. Narrative omitted.
- In River Hawthorne's Notes, record The scheme is in motion.
- Increase River Hawthorne's Relationship Level by 2. Decrease William Hemlock's Relationship Level. Each investigator earns 2 bonus experience.
- Gain 4 resources.
Codex 6: Gideon Mizrah.
- Gideon 1: Narrative omitted. Check Gideon Mizrah's Notes.
- If Gideon told the story of Captain Hemlock, proceed to Gideon 2.
- Otherwise, skip to Gideon 3.
- Gideon 2: Narrative omitted.
- In Gideon Mizrah's Notes, record Gideon told the tale of the Annabelle Lee.
- Draw 3 cards. Increase Gideon Mizrah's Relationship Level. Each investigator earns 1 bonus experience.
- Gideon 3: Narrative omitted.
- Draw 3 cards. Increase Gideon Mizrah's Relationship Level. Each investigator earns 1 bonus experience.
Codex 7: Judith Park.
- Judith 1: Narrative omitted. Check Judith Park's Notes.
- If Judith saved your ass, proceed to Judith 2.
- Otherwise, draw 1 card. You may play a Weapon card from your hand, ignoring its cost.
- Judith 2: Narrative omitted. You must decide (choose one):
- "I can handle myself." Proceed to Judith 3.
- "Thanks for saving us." Skip to Judith 4.
- Judith 3: Narrative omitted.
- Increase Judith Park's Relationship Level. Each investigator earns 1 bonus experience.
- Judith 4: Narrative omitted.
- Decrease Judith Park's Relationship Level. Each investigator earns 1 bonus experience.
Codex 8: Theo Peters.
- If Theo distracted the bear: Narrative omitted.
- You may immediately move to any location.
- Increase Theo Peters' Relationship Level. Each investigator earns 1 bonus experience.
- Otherwise: Narrative omitted.
- You may immediately move to any location.
Codex 9: Boarding House. Narrative omitted. Choose one of the options below to resolve. Investigators at Boarding House may spend any number of actions, as a group, to choose that many additional options. An investigator may trigger this codex again.
- "Leah was supposed to prepare the Feast in the Crossroads. If she's there, I know she'd appreciate your help." An investigator at the Boarding House may immediately move to The Crossroads.
- "Simeon's probably hiding in the field." Search the set-aside Residents encounter set for Simeon Atwood and put him into play at The Old Mill, asset side faceup.
- "Gideon is probably at The Commons like always." Search the set-aside Residents encounter set for Gideon Mizrah and put him into play at The Commons, asset side faceup.
Codex 10: The Crossroads. Narrative omitted.
- Draw 1 card. Remember that you are "running an errand."
Codex 11: Hemlock Chapel. Narrative omitted.
- Search the set-aside Residents encounter set for Mother Rachel and put her into play at Hemlock Chapel, asset side faceup.
Codex 12: The Old Mill. Narrative omitted.
- Draw 3 cards.
Codex 13: The Atwood House. Narrative omitted. You must decide (choose one):
- "William has a point." (You may only choose this option if William Hemlock's Relationship Level is 2 or higher.) Search the set-aside Residents encounter set for William Hemlock and put him into play at The Atwood House, asset side faceup.
- "River has a point." (You may only choose this option if River Hawthorne's Relationship Level is 2 or higher.) Search the set-aside Residents encounter set for River Hawthorne and put them into play at The Atwood House, asset side faceup.
- Let them fight it out. Continue reading. Decrease both William Hemlock and River Hawthorne's Relationship Levels.
Codex 14: Tad's General Store.
- If you are "running an errand": Narrative omitted. Increase Leah Atwood's Relationship Level. Each investigator earns 1 bonus experience.
- Otherwise: Narrative omitted. You may spend 3 resources to search your deck for an Item asset and play it, ignoring its cost. An investigator may trigger this codex again if they are "running an errand."
Codex 15: Vale Schoolhouse. Narrative omitted.
- Search the set-aside Residents encounter set for Theo Peters and put him into play at Vale Schoolhouse, asset side faceup.
Codex 16: The Commons. Narrative omitted.
- An investigator may search their deck, discard pile, or hand for an Item story asset and permanently remove it from their deck. If they do, check the Campaign Log and choose a resident with a Relationship Level of 2 or lower. Increase the chosen resident's Relationship Level. Each investigator earns 1 bonus experience.
Codex 17: The Curse. Narrative omitted.
- If The Hemlock Curse weakness is not already in your deck, search the set-aside Day of Rain encounter set for the Hemlock Curse weakness and add it to your deck. It does not count toward your deck size. Otherwise, during setup for the next scenario, search your deck and discard pile for the Hemlock Curse weakness and add it to your opening hand.
- You (and only you) earn 2 bonus experience.
Prelude Resolution: Dawn of the Second Day
Do not read until the end of the prelude.
Resolution 1: Narrative omitted.
- Skip to Resolution 3.
Resolution 2: Narrative omitted.
- Proceed to Resolution 3.
Resolution 3: Narrative omitted.
- Do not record the Victory X value of each card in the victory display. Each investigator earns the bonus experience awarded during this prelude. Record each bonus experience earned under "Unspent Experience" in your Campaign Log, but do not spend any of it until the end of the next scenario.
- Make preparations for your next survey.
- Choose 1 asset in your play area to keep for the next scenario. It must be one that does not normally start in play. Discard each other asset and attachment in your play area, except for those that start each game in play.
- Discard down to your opening hand size. Shuffle your discard pile into your deck. (Your current hand is your opening hand for the next scenario; you will not draw a new opening hand or take a mulligan.)
- Discard down to your starting resources.
- When setting up the next scenario, skip steps 1–8 of "Setting Up the Game" on page 27 of the Rules Reference.
- Check the "Areas Surveyed" section of your Campaign Log and choose a scenario that has not yet been checked off.
- To brave the decaying North Point Mine in Written in Rock, turn to page 10.
- To investigate the long-abandoned Hemlock House, turn to page 14.
- To explore the eerily quiet Pearl Ridge in The Silent Heath, turn to page 19.
- To explore the Akwan Shoreline up north in The Lost Sister, turn to page 23.
- To survey Eastwick Bog and risk an encounter with The Thing in the Depths, turn to page 27.
Prelude: The Second Evening
The Second Evening 1: Narrative omitted. Check your Campaign Log.
- If "Simeon survived" is recorded in Simeon Atwood's Notes, proceed to The Second Evening 2.
- Otherwise, skip to The Second Evening 3.
The Second Evening 2: Narrative omitted.
- Skip to The Second Evening 4.
The Second Evening 3: Narrative omitted.
- Update your Campaign Log.
- In Leah Atwood's Notes, record Leah is searching for Simeon.
- Cross out Simeon Atwood's name.
- Proceed to The Second Evening 4.
The Second Evening 4: Narrative omitted.
- You may choose whom you would like to dance with. One at a time, each investigator may choose a different codex entry from the following (if there is only one investigator, you may choose two to resolve instead). If a resident's name is crossed out, you cannot choose their codex. After you have read the appropriate number of sections, proceed to Resolution 1 (page 45).
- Mother Rachel watches the room: Codex 1 (page 43).
- Next to the dinner spread, Leah looks utterly exhausted: Codex 2 (page 43).
- Simeon makes bird noises to a gaggle of children: Codex 3 (page 43).
- William sits in a corner, penning the first lines of what is sure to be an overwrought poem about his family legacy: Codex 4 (page 43).
- River is tearing it up on the dance floor: Codex 5 (page 44).
- Gideon sits on a stool near the dancing: Codex 6 (page 44).
- Standing by the entrance, Judith watches the door: Codex 7 (page 44).
- Theo bobs his head in rhythm in the crowd: Codex 8 (page 44).
- Dance by yourself: Codex 9 (page 44).
- A woman in hunting clothes stands at the edge of the room: Codex Ω (page 44).
- Dr. Marquez eyes you from across the room: Codex Θ (page 44).
Codex: The Second Evening
Read the following entries on pages 43–44 only when directed during The Second Evening prelude.
Codex 1: Mother Rachel. Narrative omitted.
- In Mother Rachel's Notes, record Mother Rachel shared her doubts.
Codex 2: Leah Atwood.
- If Leah is searching for Simeon: Narrative omitted.
- Otherwise: Narrative omitted.
- In Leah Atwood's Notes, record Leah shared a dance.
Codex 3: Simeon Atwood.
- If Simeon Atwood is at Relationship Level 3 or higher: Narrative omitted. In Simeon Atwood's Notes, record Simeon shared a dance.
- Otherwise: Narrative omitted.
Codex 4: William Hemlock.
- If William Hemlock is at Relationship Level 3 or higher: Narrative omitted. In William Hemlock's Notes, record William shared a dance.
- Otherwise: Narrative omitted.
Codex 5: River Hawthorne.
- If River Hawthorne is at Relationship Level 3 or higher: Narrative omitted. In River Hawthorne's Notes, record River shared a dance.
- Otherwise: Narrative omitted.
Codex 6: Gideon Mizrah.
- If Gideon Mizrah is at Relationship Level 3 or higher: Narrative omitted. In Gideon Mizrah's Notes, record Gideon shared a dance.
- Otherwise: Narrative omitted.
Codex 7: Judith Park.
- If Judith Park is at Relationship Level 3 or higher: Narrative omitted. In Judith Park's Notes, record Judith shared a dance.
- Otherwise: Narrative omitted.
Codex 8: Theo Peters.
- If Theo Peters is at Relationship Level 3 or higher: Narrative omitted. In Theo Peters' Notes, record Theo shared a dance.
- Otherwise: Narrative omitted.
Codex 9: Dancing Alone. Narrative omitted.
- Each investigator earns 1 bonus experience.
Codex Ω: Helen Peters. Check your Campaign Log.
- If Helen joined the survey: Narrative omitted. In your Campaign Log, record Helen shared a dance.
- If the Peters family was reunited: Narrative omitted. In your Campaign Log, record Helen Peters joined the survey. Any one investigator may choose to add the Helen Peters story asset to their deck. It does not count toward their deck size. This card can be found in the Residents encounter set, indicated by the following encounter set icon: (encounter set icon).
- Otherwise: Narrative omitted. In Theo Peters' Notes, record Theo rejected his family.
Codex Θ: Dr. Rosa Marquez. Narrative omitted.
- Each investigator begins the next scenario with 2 additional resources.
Prelude Resolution: The Second Evening
Do not read until the end of the prelude.
Resolution 1: Narrative omitted. Check your Campaign Log.
- If Madame Pearl's diary was recovered, proceed to Resolution 2.
- Otherwise, skip to Resolution 3.
Resolution 2: Narrative omitted.
- Any one investigator may choose to add The Pearl Diary story asset to their deck. It does not count toward their deck size. This card can be found in the Heirlooms encounter set, indicated by the following encounter set icon: (encounter set icon).
- Proceed to Resolution 3.
Resolution 3: Narrative omitted.
- Check your Campaign Log.
- If Bertie was rescued, proceed to Resolution 4.
- Otherwise, skip to Resolution 5.
Resolution 4: Narrative omitted.
- Skip to Resolution 6.
Resolution 5: Narrative omitted.
- In your Campaign Log, record Bertie had an epiphany.
- Proceed to Resolution 6.
Resolution 6: Narrative omitted.
- Each investigator earns the bonus experience awarded during this prelude. Record each bonus experience earned under "Unspent Experience" in your Campaign Log, but do not spend any of it until the end of the next scenario.
- The investigators must decide (choose one).
- Follow Dr. Marquez's lead out to the Atwood Farm. What is the Vale hiding? Proceed to The Longest Night on page 46.
- Gather more information on Hemlock Isle's unique ecosystem at night. Check the "Areas Surveyed" section of your Campaign Log and choose a scenario that has not yet been checked off. If you do, add 1 tablet token, 1 skull token, and 1 elder thing token to the chaos bag for the remainder of the campaign.
Scenario: The Longest Night
Intro 1: Narrative omitted. The investigators must decide (choose one):
- Confront Mother Rachel. Proceed to Intro 2.
- Keep hidden. Skip to Intro 3.
Intro 2: Narrative omitted.
- Add 1 tablet token to the chaos bag for the remainder of the campaign.
- Skip to Intro 4.
Intro 3: Narrative omitted.
- Add 1 skull token to the chaos bag for the remainder of the campaign.
- Proceed to Intro 4.
Intro 4: Narrative omitted.
- Check your Campaign Log for each resident who shared a dance.
- If 2 or more residents shared a dance, proceed to Intro 5.
- If exactly 1 resident shared a dance, skip to Intro 6.
- Otherwise, skip to Intro 7.
Intro 5: Narrative omitted.
- Add 1 cultist token to the chaos bag for the remainder of the campaign.
- Skip to Intro 8.
Intro 6: Narrative omitted.
- Add 1 cultist token and 1 elder thing token to the chaos bag for the remainder of the campaign.
- Skip to Intro 8.
Intro 7: Narrative omitted.
- In your Campaign Log, record The investigators faced the longest night alone.
- Add 1 elder thing token to the chaos bag for the remainder of the campaign.
- Proceed to Intro 8.
Intro 8: Narrative omitted. Proceed to Setup.
Scenario Setup
- Gather all cards from the following encounter sets: The Second Day, The Longest Night, Blight, Transfiguration, Fire!, Chilling Cold, The Midnight Masks, and Striking Fear. These sets are indicated by the following icons: (encounter set icons).
- When gathering The Midnight Masks encounter set, only gather the treachery cards. Do not gather the locations, acts, agendas, or enemies from this set.
- Put the Night Two Time Marker card into play.
- Randomly remove 1 Outer Fields location from the game.
- Put each remaining location into play as shown in the Location Placement diagram on page 48 (see Location Adjacency in this Campaign on page 3).
- Put The Captives story asset into play at The Farmhouse.
- Each investigator begins play at a location of their choice.
- To build the Enemy deck, gather the 15 red-backed enemy cards in The Longest Night encounter set (see The Enemy Deck).
- Put the Ursine Hybrid enemy into play at the west Outer Fields location.
- Shuffle the remaining enemy cards to build the Enemy deck. Place it next to the agenda deck.
- Check the Campaign Log. If the bear was wounded is recorded, deal 2 damage to the Ursine Hybrid enemy and exhaust it.
- Prepare your defenses! Regardless of their starting position, investigators choose, as a group, to place a total of 1 decoy, 1 trap, and 1 [fedora-and-mask icon] barriers, divided as they want among any number of locations. (See Barriers, Decoys, and Traps on page 47.)
- Put the "Barriers, Decoys, and Traps" Token Reference Card next to the scenario reference card.
- Check your Campaign Log.
- If the investigators faced the longest night alone, each investigator gains 3 clues (from the token pool).
Location Placement (The Longest Night)
The printed Location Placement diagram ("Location Placement for 'The Longest Night'") on page 48 shows the locations in a cross shape, labelled North, South, East, and West, with The Farmhouse at the center. The location card text reproduced in the diagram is printed on the cards and is not restated here. The printed text of The Farmhouse card reads: "Sanctum. The Farmhouse cannot have player card attachments, traps, or decoys."
Rules: Barriers, Decoys, and Traps
Some card abilities allow the investigators to put up barriers around the farm. Barriers block the movement of enemies.
- To put up a barrier, place 1 resource token (from the token pool) between your location and a connecting location, as a barrier. If a card effect instructs you to place a barrier "at" your location, choose an adjacent location and place the barrier between your location and the chosen location. This barrier is considered to be "at" both locations for the purposes of card effects.
- There is no limit to the number of barriers between locations.
- When an enemy would move via a keyword (i.e. hunter or patrol) and one or more barriers are between its location and the location it is moving to, remove one of those barriers, then cancel the effects of the move instead.
- Enemies that ignore barriers do not resolve any of the above effects (including removing the barrier).
Some card abilities set up decoys around the farm to stall enemies.
- To set up a decoy, place 1 horror token (from the token pool) on your location, as a decoy. Limit 1 decoy per location.
- When an enemy enters a location with a decoy, remove the decoy, deal 1 damage to that enemy, disengage it from all investigators, and exhaust it. That enemy cannot ready for the remainder of the round.
- Enemies that ignore decoys do not resolve any of the above effects (including removing the decoy).
Some card abilities lay traps around the farm for enemies to fall into.
- To lay a trap, place 1 damage token (from the token pool) on your location, as a trap. Limit 1 trap per location.
- When an enemy enters a location with a trap, remove the trap and deal 2 damage to that enemy.
- Enemies that ignore traps do not resolve any of the above effects (including removing the trap).
Rules: The Enemy Deck
During the setup of this scenario, a second deck with a different encounter back is constructed: the Enemy deck. This deck is a separate deck made up of only enemies, and represents the relentless horde of frenzied beasts coming for the captives. During the mythos phase, the agenda's forced effect prompts each investigator to draw the top card of the Enemy deck.
- The Enemy deck has its own discard pile and is immune to player card effects. Non-weakness enemies in this scenario are discarded to the Enemy discard pile. If the Enemy deck is empty, shuffle the Enemy discard pile back into the Enemy deck.
Codex: The Longest Night
Read the following entries only when directed while playing The Longest Night scenario.
Codex 2: Leah Atwood. Narrative omitted.
- In Leah Atwood's Notes, record Leah stood by you.
- Deal 3 damage to the nearest enemy.
Codex 3: Simeon Atwood. Narrative omitted.
- In Simeon Atwood's Notes, record Simeon stood by you.
- Place 1 decoy at any location.
Codex 4: William Hemlock. Narrative omitted.
- In William Hemlock's Notes, record William stood by you.
- Each investigator gains 1 clue (from the token pool).
Codex 5: River Hawthorne. Narrative omitted.
- In River Hawthorne's Notes, record River stood by you.
- Choose a non-Elite enemy. Move that enemy to any location.
Codex 6: Gideon Mizrah. Narrative omitted.
- In Gideon Mizrah's Notes, record Gideon stood by you.
- The next time an investigator would draw a card from the Enemy deck, discard that card instead.
Codex 7: Judith Park. Narrative omitted.
- In Judith Park's Notes, record Judith stood by you.
- Place 1 trap at any location.
Codex 8: Theo Peters. Narrative omitted.
- In Theo Peters' Notes, record Theo stood by you.
- You may move 1 barrier, decoy, or trap from your location to any location. Disengage from each enemy engaged with you and move to that location.
Codex Θ: Dr. Rosa Marquez. Narrative omitted.
- Place 2 barriers at your location.
Codex Ω: Ajax. Narrative omitted.
- Take control of the Ajax story asset. He does not take up an ally slot for the remainder of this scenario.
Standalone Mode (The Longest Night)
If you are playing in Standalone Mode and do not wish to refer to any other setup or resolutions, you may use the information below when setting up and playing this scenario:
- Assemble the chaos bag using the following tokens: +1, 0, 0, –1, –1, –2, –2, –3, –3, –5, skull, skull, skull, cultist, tablet, tablet, elder thing, elder thing, elder sign, Ꞩ2 token.
- The investigators faced the longest night alone.
- The bear was wounded is not recorded.
Resolutions: The Longest Night
Do not read until the end of the scenario.
Investigator Defeat (read before any other resolution, if at least 1 investigator was defeated): Narrative omitted.
- Each defeated investigator is devoured (they are killed). If there are no surviving investigators to continue the campaign, the investigators lose the campaign.
- If another resolution was reached, the remaining investigators proceed to that resolution.
- If no resolution was reached (each surviving investigator resigned): Skip to Resolution 3.
Resolution 1: Narrative omitted.
- If the amount of damage on The Captives story asset is:
- 0, each investigator earns 5 bonus experience.
- 1 or 2, each investigator earns 4 bonus experience.
- 3 or 4, each investigator earns 3 bonus experience.
- In your Campaign Log, record the captives were saved.
- Skip to Resolution 4.
Resolution 2: Narrative omitted.
- If the amount of damage on The Captives story asset is:
- 5 or 6, each investigator earns 3 bonus experience.
- 7 or 8, each investigator earns 2 bonus experience.
- 9, each investigator earns 1 bonus experience.
- In your Campaign Log, record many captives were lost.
- Skip to Resolution 4.
Resolution 3: Narrative omitted.
- The guilt from failing to help those in need haunts you forever. Each investigator must search the collection for a random basic Madness weakness and add it to their deck.
- In your Campaign Log, record all the captives were lost.
- Proceed to Resolution 4.
Resolution 4: Narrative omitted.
- If the Ajax story asset was under the control of an investigator at the end of this scenario, choose an investigator to add it to their deck for the remainder of the campaign. It does not count toward their deck size.
- Choose an investigator to add the Dr. Rosa Marquez story asset to their deck for the remainder of the campaign. It does not count toward their deck size.
- Each investigator earns experience equal to the Victory X value of each card in the victory display. Each investigator may now spend the experience recorded under "Unspent Experience" in your Campaign Log.
- Update your Campaign Log.
- Record Dr. Marquez has a plan.
- In the "Areas Surveyed" section of your Campaign Log, check off Southern Fields.
- Proceed to Prelude: Dawn of the Final Day (page 51).
The printed guide gives no explicit condition for choosing between Resolutions 1, 2, and 3 in this text; each is transcribed as printed.
Prelude: Dawn of the Final Day
- Check your Campaign Log.
- If Dr. Marquez has a plan, proceed to Intro 1.
- Otherwise, skip to Intro 2.
Intro 1: Narrative omitted. Skip to Intro 3.
Intro 2: Narrative omitted. Proceed to Intro 3.
Intro 3: Narrative omitted.
- More survey assistance has arrived. Any player whose investigator was killed in The Longest Night scenario may select a new investigator and upgrade their new deck to half the earned experience of their previous investigator (rounded up).
- The fatigue from the long night catches up to you. Draw tokens from the chaos bag at random until you have 2 non-symbol tokens. Replace these tokens with a chaos token of a value 1 lower for the remainder of the campaign. (If you are unable to replace a token, repeat this process until a total of 2 chaos tokens have been replaced.)
- Proceed to Prelude Setup.
Prelude Setup
- Gather all cards from the following encounter sets: The Final Day, Day of the Feast, Agents of the Colour, Residents, and The Vale. These sets are indicated by the following icons: (encounter set icons).
- Put the Day Three Time Marker card into play.
- Build the act and agenda deck using All is Full of Love and Dawn of the Final Day. Remove each other act and agenda from the game.
- Put each location except for The Crossroads and The Old Mill into play on its (Day) side according to the map on page 6.
- Use The Crossroads and The Old Mill locations from the Day of the Feast encounter set, (Morning) side faceup. Remove the other The Crossroads and The Old Mill locations from the game.
- Each investigator begins play at The Boarding House.
- Gather the Residents encounter set and check the Campaign Log.
- Remove each resident whose name is crossed off from the game.
- Put Mother Rachel and Judith Park into play at The Crossroads, asset side faceup.
- Set each remaining card from the Residents encounter set aside, out of play.
- Set the Agents of the Colour encounter set aside, out of play.
- Place doom on the agenda equal to the number of investigators.
- You are now ready to begin.
Prelude Codex: Dawn of the Final Day
Read the following entries on pages 51–54 only when directed while playing the Dawn of the Final Day prelude.
Codex 1: Mother Rachel.
- Mother Rachel 1: Narrative omitted. Check the "Areas Surveyed" section of your Campaign Log.
- If the box next to Southern Fields is checked, proceed to Mother Rachel 2.
- Otherwise, you cannot reach the matron. Continue playing.
- Mother Rachel 2: Narrative omitted. You must decide (choose one):
- "Thank you for your prayers." Proceed to Mother Rachel 3.
- "I see you for what you really are." Skip to Mother Rachel 4.
- Mother Rachel 3: Narrative omitted.
- In your Campaign Log, record The investigators learned their place.
- Increase Mother Rachel's Relationship Level. Each investigator earns 1 bonus experience.
- Mother Rachel 4: Narrative omitted.
- Decrease Mother Rachel's Relationship Level. Each investigator earns 1 bonus experience.
Codex 2: Leah Atwood.
- If Simeon Atwood's name is crossed out: Narrative omitted. Increase Leah Atwood's Relationship Level. Each investigator earns 1 bonus experience.
- If Simeon Atwood's name is not crossed out: Narrative omitted. Increase Leah Atwood's Relationship Level by 2. Each investigator earns 2 bonus experience.
Codex 4: William Hemlock.
- William 1: Narrative omitted. Check your Campaign Log.
- If William stood by you, proceed to William 2.
- Otherwise, skip to William 3.
- William 2: Narrative omitted.
- If William took heart, in William Hemlock's Notes, record William is resolved.
- Increase William Hemlock's Relationship Level. Each investigator earns 1 bonus experience.
- William 3: Narrative omitted.
- Increase William Hemlock's Relationship Level. Each investigator earns 1 bonus experience.
Codex 5: River Hawthorne.
- If River stood by you and the scheme is in motion: Narrative omitted. In River Hawthorne's Notes, record River is reclaiming their legacy. Increase River Hawthorne's Relationship Level. Each investigator earns 1 bonus experience.
- Otherwise: Narrative omitted. Gain 3 resources.
Codex 6: Gideon Mizrah.
- If Gideon stood by you: Narrative omitted. Increase Gideon Mizrah's Relationship Level. Each investigator earns 1 bonus experience.
- Otherwise: Narrative omitted. Draw 3 cards.
Codex 7: Judith Park.
- Judith 1: Narrative omitted.
- Search the set-aside Agents of the Colour encounter set for 1 copy of the Miasmatic Shadow enemy and spawn it at The Crossroads.
- Check your Campaign Log.
- If Judith stood by you, and/or The Thing in the Depths was defeated, and/or Judith Park is at Relationship Level 4 or higher, proceed to Judith 2.
- Otherwise, skip to Judith 3.
- Judith 2: Narrative omitted.
- Take control of Judith Park.
- In Judith Park's Notes, record You backed Judith up.
- Increase Judith Park's Relationship Level. Each investigator earns 1 bonus experience.
- Judith 3: Narrative omitted.
- Discard 1 card at random from your hand.
- Increase Judith Park's Relationship Level. Each investigator earns 1 bonus experience.
Codex 8: Theo Peters.
- If Theo stood by you: Narrative omitted. In Theo Peters' Notes, record Theo is having second thoughts. Increase Theo Peters' Relationship Level. Each investigator earns 1 bonus experience.
- Otherwise: Narrative omitted. Remember that "you are delivering a package."
Codex 9: Boarding House. Narrative omitted. Choose one of the options below to resolve. Investigators at Boarding House may spend any number of actions, as a group, to choose that many additional options. An investigator may trigger this codex again.
- "I think William had something to do at the Old Mill." Search the set-aside Residents encounter set for William Hemlock and put him into play at The Old Mill, asset side faceup.
- "Theo was supposed to manage Tad's Store today." Search the set-aside Residents encounter set for Theo Peters and put him into play at Tad's General Store, asset side faceup.
- "I think I saw River vamping with some of their friends here in the study." Search the set-aside Residents encounter set for River Hawthorne and put them into play at Boarding House, asset side faceup.
Codex 10: The Crossroads.
- If Simeon Atwood's Notes say "The plan is underway": Narrative omitted. Test [head icon] or [fist icon] (3) to hide the fireworks. If you succeed, mark 1 tally next to "The plan is underway." (Hint: You need to hide 1 [fedora-and-mask icon] fireworks to help Simeon.) If you fail, an investigator may trigger this codex again.
- Otherwise: Narrative omitted. You may either draw 1 card or gain 1 resource.
Codex 11: Hemlock Chapel.
- If Simeon Atwood's Notes say "The plan is underway": Narrative omitted. If Gideon Mizrah is not already in play, search the set-aside Residents encounter set for Gideon Mizrah and put him into play at Hemlock Chapel, asset side faceup. Test [boot icon] (2) to hide the fireworks. If you succeed, mark 1 tally next to "The plan is underway." (Hint: You need to hide 1 [fedora-and-mask icon] fireworks to help Simeon.) If you fail, an investigator may trigger this codex again.
- Otherwise: Narrative omitted. Search the set-aside Residents encounter set for Gideon Mizrah and put him into play at Hemlock Chapel, asset side faceup.
Codex 13: The Atwood House. Narrative omitted.
- Search the set-aside Residents encounter set for Leah Atwood and put her into play at The Atwood House, asset side faceup.
Codex 14: Tad's General Store.
- If Simeon Atwood's Notes say "The plan is underway": Narrative omitted. Test [book icon] or [boot icon] (3) to hide the fireworks. If you succeed, mark 1 tally next to "The plan is underway." (Hint: You need to hide 1 [fedora-and-mask icon] fireworks to help Simeon.) If you fail, an investigator may trigger this codex again.
- Otherwise: Narrative omitted. You may spend 5 resources to search your deck for an Item card and play it, ignoring its cost. Any other investigator may trigger this codex again.
Codex 15: Vale Schoolhouse.
- If Simeon Atwood's Notes say "The plan is underway": Narrative omitted. Test [fist icon] or [boot icon] (3) to hide the fireworks. If you succeed, mark 1 tally next to "The plan is underway." (Hint: You need to hide 1 [fedora-and-mask icon] fireworks to help Simeon.) If you fail, an investigator may trigger this codex again.
- Otherwise: Narrative omitted. You may either draw 1 card or gain 1 resource.
Codex 16: The Commons.
- If "you are delivering a package": Narrative omitted. Increase Theo Peters' Relationship Level. Each investigator earns 1 bonus experience.
- Regardless: Narrative omitted. An investigator may remove 1 earned Item story asset from their deck, discard pile, or hand. If they do, choose a resident with a Relationship Level of 2 or lower. Increase that resident's Relationship Level. Each investigator earns 1 bonus experience.
Prelude Resolution: Dawn of the Final Day
Do not read until the end of the prelude.
If no resolution was reached (each investigator was defeated): Narrative omitted.
- Place 1 doom on the lead investigator's investigator card.
- Skip to Resolution 2.
Resolution 1: Narrative omitted.
- In your Campaign Log, record Dr. Marquez has a hunch.
- Proceed to Resolution 2.
Resolution 2: Narrative omitted.
- Update your Campaign Log. In Simeon Atwood's Notes, if there are at least 1 [fedora-and-mask icon] tallies next to "The plan is underway": In your Campaign Log (not in Simeon Atwood's Notes), record The Vale is full of fireworks.
- Each investigator earns the bonus experience awarded during this prelude. Record each bonus experience earned under "Unspent Experience" in your Campaign Log, but do not spend any of it until the end of the next scenario.
- Make preparations for your final survey.
- Choose 1 asset in your play area to keep for the next scenario. It must be one that does not normally start in play. Discard each other asset and attachment in your play area, except for those that start each game in play.
- Discard down to your opening hand size. Shuffle your discard pile into your deck. (Your current hand is your opening hand for the next scenario; you will not draw a new opening hand or take a mulligan.)
- Discard down to your starting resources.
- When setting up the next scenario, skip steps 1–8 of "Setting Up the Game" on page 27 of the Rules Reference.
- Check the "Areas Surveyed" section of your Campaign Log and choose a scenario that has not yet been checked off.
- To brave the decaying North Point Mine in Written in Rock, turn to page 10.
- To investigate the long-abandoned Hemlock House, turn to page 14.
- To explore the eerily quiet Pearl Ridge in The Silent Heath, turn to page 19.
- To explore the Akwan Shoreline up north in The Lost Sister, turn to page 23.
- To survey Eastwick Bog and risk an encounter with The Thing in the Depths, turn to page 27.
Prelude: The Final Evening
Intro 1: Narrative omitted.
- Check your Campaign Log.
- If Dr. Marquez has a plan, proceed to Intro 2.
- Otherwise, skip to Intro 5.
Intro 2: Narrative omitted. Check your Campaign Log. The investigators must decide (choose one):
- "You have done nothing wrong." Proceed to Intro 3. (You may only choose this if Mother Rachel's Relationship Level is 3 or higher.)
- "You have done nothing wrong." (You are lying.) Skip to Intro 4. (You may only choose this if Mother Rachel's Relationship Level is 3 or higher.)
- "You have sentenced this village to death." Skip to Intro 5.
Intro 3: Narrative omitted.
- Add 1 cultist token to the chaos bag for the remainder of the campaign.
- Search each investigator's deck for the Dr. Rosa Marquez story asset and remove it from the game.
- In your Campaign Log, record the investigators believed.
- Proceed to Setup.
Intro 4: Narrative omitted.
- Add 1 cultist token and 1 elder thing token to the chaos bag for the remainder of the campaign.
- In your Campaign Log, record the investigators lied to Mother Rachel.
- Proceed to Setup.
Intro 5: Narrative omitted.
- Add 1 tablet token and 1 elder thing token to the chaos bag for the remainder of the campaign.
- In your Campaign Log, record the investigators interrupted the Feast.
- Proceed to Setup.
Prelude Setup
- Gather all cards from the following encounter sets: The Final Day, Day of the Feast, Residents, and The Vale. These sets are indicated by the following icons: (encounter set icons).
- Put the Day Three Time Marker card into play.
- Build the act and agenda deck using Around the Table. It is both the current act and current agenda. Set aside the Lambs to the Slaughter special agenda. Remove each other act and agenda from the game.
- Put each location except for The Crossroads and The Old Mill into play on its (Day) side according to the map on page 6.
- Use The Crossroads and The Old Mill locations from the Day of the Feast encounter set, (Evening) side faceup. Remove the other The Crossroads and The Old Mill locations from the game.
- Put 1 copy of the Frenzied Reveler enemy into play at The Commons. If there are 3 or 4 investigators in the game, put the other copy of Frenzied Reveler into play at Hemlock Chapel.
- Check your Campaign Log.
- If North Point Mine is not checked off under "Areas Surveyed," cross out Leah Atwood's name.
- If the investigators interrupted the feast, each investigator begins play at The Boarding House. Otherwise, each investigator begins play at The Crossroads.
- Gather the Residents encounter set and check the Campaign Log.
- Remove each resident whose name is crossed off from the game.
- Put Mother Rachel into play at The Crossroads, asset side faceup.
- If Bertie had an epiphany, put Bertie Musgrave into play at The Crossroads, enemy side faceup.
- If the investigators interrupted the Feast, search each investigator's deck and all out-of-play areas for Dr. Marquez and put her into play under the control of an investigator. She does not take up an ally slot for the remainder of this prelude.
- Put Leah Atwood into play at Hemlock Chapel, asset side faceup. If her Relationship Level is 2 or lower, flip her to her enemy side instead.
Prelude Codex: The Final Evening
Read the following entries on pages 56–59 only when directed while playing The Final Evening prelude.
Codex 1: Mother Rachel.
- If the investigators believed: Narrative omitted.
- Flip each Resident card except Mother Rachel to its enemy side.
- Gather each set-aside Resident card and put each into play, one at a time, at an empty location, enemy side faceup.
- Remove all doom from the current agenda and swap it with the set-aside Lambs to the Slaughter agenda.
- If the investigators lied to Mother Rachel: Narrative omitted. Flip Mother Rachel to her enemy side and deal 2 damage to her.
- Otherwise: Narrative omitted. Flip Mother Rachel to her enemy side.
Codex 2: Leah Atwood.
- If Leah saw something in the mines:
- Leah 1: Narrative omitted. You must decide (choose one):
- "What did you see in North Point Mine?" Proceed to Leah 2.
- Say nothing. Skip to Leah 3.
- Leah 1: Narrative omitted. You must decide (choose one):
- Leah 2: Narrative omitted. Set Leah Atwood's Relationship Level to 0.
- Leah 3: Narrative omitted.
- Increase Leah Atwood's Relationship Level. Each investigator earns 1 bonus experience.
- Take control of Leah Atwood.
- Otherwise: Narrative omitted. Increase Leah Atwood's Relationship Level. Each investigator earns 1 bonus experience.
Codex 3: Simeon Atwood.
- If "The Vale is full of fireworks": Narrative omitted. Increase Simeon Atwood's Relationship Level by 2. Each investigator earns 2 bonus experience. Take control of Simeon Atwood.
- Otherwise: Narrative omitted. Increase Simeon Atwood's Relationship Level. Each investigator earns 1 bonus experience.
Codex 4: William Hemlock. Narrative omitted.
- Increase William Hemlock's Relationship Level. Each investigator earns 2 bonus experience.
- Take control of William Hemlock.
- Set River Hawthorne's Relationship Level to 0.
- Search the set-aside Residents encounter set for River Hawthorne and put them into play at The Atwood House on their enemy side.
Codex 5: River Hawthorne. Narrative omitted.
- Increase River Hawthorne's Relationship Level. Each investigator earns 2 bonus experience.
- Take control of River Hawthorne.
- Set William Hemlock's Relationship Level to 0.
- Search the set-aside Residents encounter set for William Hemlock and put him into play at The Atwood House on his enemy side.
Codex 6: Gideon Mizrah.
- If Gideon told the story of the Annabelle Lee and Gideon found his treasure: Narrative omitted.
- In your Campaign Log, record Gideon finished the tale of the Annabelle Lee.
- Increase Gideon Mizrah's Relationship Level. Each investigator earns 2 bonus experience.
- Take control of Gideon Mizrah.
- Otherwise: Narrative omitted. Increase Gideon Mizrah's Relationship Level. Each investigator earns 1 bonus experience.
Codex 7: Judith Park.
- If "You backed Judith up": Narrative omitted.
- You may play a Weapon card from your hand, ignoring its cost.
- Increase Judith Park's Relationship Level. Each investigator earns 2 bonus experience.
- Take control of Judith Park.
- Otherwise: Narrative omitted. Increase Judith Park's Relationship Level. Each investigator earns 1 bonus experience.
Codex 8: Theo Peters.
- If Theo is having second thoughts and Theo reconciled with Helen: Narrative omitted. Increase Theo Peters' Relationship Level. Each investigator earns 2 bonus experience. Take control of Theo Peters.
- If only Theo is having second thoughts is recorded: Narrative omitted. Increase Theo Peters' Relationship Level. Each investigator earns 1 bonus experience. Take control of Theo Peters.
- Otherwise: Narrative omitted. Take control of Theo Peters.
Codex 9: Boarding House. Narrative omitted.
- Either draw 3 cards or gain 3 resources.
Codex 10: The Crossroads. Narrative omitted.
- Choose any enemy in play. Disengage the chosen enemy from all investigators, move it to The Crossroads, and exhaust it.
Codex 11: Hemlock Chapel. Narrative omitted.
- Either draw 1 card or gain 1 resource.
Codex 12: The Old Mill. Narrative omitted.
- Choose a Resident enemy at this location or a connecting location and test any skill (2). If you succeed, automatically evade the chosen enemy.
Codex 13: The Atwood House.
- If "The Hemlocks are hashing it out": Narrative omitted.
- In your Campaign Log, record The Hemlocks made a truce.
- Increase both William Hemlock's and River Hawthorne's Relationship Levels. Each investigator earns 2 bonus experience.
- Search the set-aside Residents encounter set for either William Hemlock or River Hawthorne and put 1 of them into play under your control.
- Otherwise: Narrative omitted. You must decide (choose one):
- "Side with River." (You may only choose this option if "River is reclaiming their legacy" is recorded in River Hawthorne's Notes.) Search the set-aside Residents encounter set for River Hawthorne and put them into play at The Atwood House on their asset side.
- "Side with William." (You may only choose this option if "William is resolved" is recorded in William Hemlock's Notes.) Search the set-aside Residents encounter set for William Hemlock and put him into play at The Atwood House on his asset side.
- "Let them fight it out." If either "William is resolved" or "River is reclaiming their legacy" is recorded in William Hemlock or River Hawthorne's Notes, remember "the Hemlocks are hashing it out." You may trigger this codex again.
Codex 14: Tad's General Store. Narrative omitted.
- Gain 3 resources.
Codex 15: Vale Schoolhouse. Narrative omitted.
- Choose a Resident enemy at this location and test any skill (2). If you succeed, automatically evade the chosen enemy.
Codex 16: The Commons. Narrative omitted.
- You may immediately move to any other location. If you do, you may take an additional action this turn.
Codex Ω: Bertie Musgrave. Narrative omitted.
- Choose and discard 3 cards from your hand.
- In your Campaign Log, record Bertie perished.
Codex Θ: Dr. Rosa Marquez. Narrative omitted.
- Choose an investigator at any location to draw 5 cards.
Prelude Resolution: The Final Evening
Do not read until the end of the prelude.
If no resolution was reached (each investigator resigned or was defeated): Narrative omitted. Check your Campaign Log.
- If the investigators believed, skip to Resolution 2.
- Otherwise, skip to Resolution 4.
Resolution 1: Narrative omitted.
- Skip to Resolution 4.
Resolution 2: Narrative omitted.
- Proceed to Resolution 3.
Resolution 3: Narrative omitted.
- Each investigator is devoured by the Colour Out of Space.
- Or at least, this version of each investigator is devoured. You may replay this prelude to try for a different outcome. If you do, cross out "The investigators believed" in your campaign guide and restart this prelude (starting at Intro 1 on page 55). Otherwise, the investigators lose the campaign.
Resolution 4: Narrative omitted.
- Each investigator earns experience equal to the Victory X value of each card in the victory display, along with any bonus experience awarded during this prelude. Each investigator may now spend the experience recorded under "Unspent Experience" in your Campaign Log.
- Proceed to Fate of the Vale (page 61).
Scenario: Fate of the Vale
Narrative omitted. The opening description of the iridescent cavern and the closing fragment of text are fiction and are not transcribed. Proceed to Setup.
Scenario Setup
- Gather all cards from the following encounter sets: The Final Day, Fate of the Vale, Day of the Feast, Agents of the Colour, Fire!, Horrors in the Rock, Refractions, Residents, Transfiguration, and The Vale. These sets are indicated by the following icons: (encounter set icons).
- Put the Night Three Time Marker card into play.
- Replace each player's investigator card with a Shattered Self investigator card (see Shattered Self below). Remove each other Shattered Self card from the game.
- Gather each location from the Fate of the Vale encounter set along with each copy of the double-sided Cosmic Emissary enemy.
- Shuffle the 4 Mirror Nest locations so you do not know which is which and put them into play, unrevealed, along with the Cosmic Emissary enemy according to the diagram on page 63. Each Cosmic Emissary enemy begins play with its Colour side faceup.
- Note that each Mirror Nest location is connected to the location clockwise and counter-clockwise from it.
- Each investigator begins play at a different Mirror Nest location of their choice.
- Set the following cards aside, out of play: The Abyss story card, each location from The Vale and Horrors in the Rock encounter sets, the Day of the Feast, Residents, and Fire! encounter sets, each copy of Act 3a—Fate of the Vale (v.I–IV), and both Crystal Parasite enemies.
- Remove the scenario reference card from The Vale encounter set from the game.
- After drawing opening hands, create The Abyss (see The Abyss below).
- Shuffle each remaining encounter card along with the top 5 cards of each investigator's deck together.
- Split the shuffled deck in half and set one half aside. Shuffle each "true" investigator card into one half, and place this half on top of the other half. This is The Abyss.
- Place the double-sided The Abyss card on top of The Abyss, story card side faceup.
Rules: The Abyss
The double-sided The Abyss card always covers the top of The Abyss, and is never shuffled in. If 1 or more cards are placed on top of The Abyss, they are placed just beneath The Abyss card, on top of all other cards in The Abyss. If 1 or more cards are shuffled into The Abyss, remove The Abyss card, shuffle the cards into The Abyss, then place The Abyss card back on top.
- Whenever an investigator would draw 1 or more cards from the encounter deck (e.g. during the mythos phase, or via a card effect), they instead reveal cards from the bottom of The Abyss until a card with an encounter card back is revealed, and draw that card. Each other revealed card is shuffled and placed back on top of The Abyss (beneath The Abyss card).
- Whenever a card is drawn from The Abyss, refer to the double-sided The Abyss story card to determine how to resolve it.
- Player card and weakness effects that look at, search, add cards to, or discard cards from the encounter deck cannot interact with The Abyss and all fail.
- When an encounter card would be discarded in this scenario, it is always placed on top of The Abyss.
The printed The Abyss story card reads, in part:
- Forced – When you draw a card from The Abyss, if that card is:
- a treachery or an enemy: Draw it.
- a Resident card: Flip it to its enemy side. It gains "Revelation – This enemy attacks you (without engaging you). Discard this enemy."
- a player card: Add it to its owner's hand.
- a location: Put it into play adjacent to the nearest Mirror Nest (that is not already connected to a Cave location, if able). For the remainder of this scenario, the two locations are connected to one another.
- any investigator's "true" investigator card: Its owner heals all damage and horror and takes control of it. Then, they flip their Shattered Self investigator card to its Old Memory side and put it into play under their control.
The story card's flavor quotation is not transcribed. The Mirror Nest and Cosmic Emissary card text shown in the diagrams is printed on the cards and is not restated here, except as noted below.
Rules: The Cosmic Emissary
The Cosmic Emissary is made of multiple Cosmic Emissary enemies.
- Each Cosmic Emissary enemy enters play "in formation" as shown in the diagram below.
- Each Cosmic Emissary enemy must always stay in formation unless otherwise instructed. If the Cosmic Emissary ever breaks formation, each enemy will move independently from one another.
- Each Cosmic Emissary enemy can be fought and evaded separately. (Unless they have a health value, no damage can be dealt to these enemies.)
- While in formation, each Cosmic Emissary enemy is considered to be at the Mirror Nest its card is physically bordering.
The printed diagram "The Cosmic Emissary" labels each enemy in formation as "When Cosmic Emissary is placed according to this diagram, it is considered to be 'in formation.'"
Rules: Shattered Self
During setup for this scenario, each investigator is instructed to replace their investigator card with a Shattered Self investigator card included in the Fate of the Vale encounter set.
- Each investigator's deck remains the same. For a portion of this scenario, investigators must use the Shattered Self investigator card, and cannot use any of their investigator's abilities.
- Each investigator should still use their investigator mini-card so they can tell who is who.
- Any effects on your investigator card that direct you to begin play with a specific asset are resolved prior to swapping your investigator card for a Shattered Self investigator card.
- Any trauma that would normally be placed on your investigator is transferred to your Shattered Self investigator card.
- Any cards that were attached or placed underneath your investigator card are attached to or placed underneath your Shattered Self card.
- Any card effects that refer to your "true" investigator card refer to your original investigator card and not your Shattered Self card.
- Your Shattered Self card has the same card title as your "true" investigator card (e.g: If you are playing Kōhaku Narukami, treat the Shattered Self card as if its title were "Kōhaku Narukami.")
- If your Shattered Self is defeated during this scenario, you are driven insane.
Scenario Interlude: Fate of the Vale
The guide's text for each path below does not print the trigger that sends the investigators to it, and the requirements shown in the Standalone Mode section are referenced here. Each path is transcribed as printed.
Fate of the Vale 1: Narrative omitted.
- If the Dr. Marquez story asset is not in play, search each investigator's deck and all out-of-play areas for Dr. Marquez and put her into play under the control of an investigator. She does not take up an ally slot for the remainder of this scenario.
- Flip The Abyss story card to its location side.
- Flip each Cosmic Emissary enemy to its Shattered side (breaking their formation). Place the Cosmic Emissary (The Abyss) enemy at The Abyss location. Place each other Cosmic Emissary enemy the Mirror Nest location it was physically bordering.
- Put Act 3a—Fate of the Vale (v.I) into play. Remove each other act from the game.
- Resume playing.
Fate of the Vale 2: Narrative omitted.
- Remove each Mirror Nest and Cave location from the game.
- Put each set-aside Hemlock Vale location into play on its (Night) side according to the diagram on page 6.
- Move each investigator to The Crossroads.
- Check your Campaign Log.
- If the Peters family was reunited, search all in- and out-of-play areas for Helen Peters and Theo Peters and put each into play under the control of any investigator(s), asset side faceup.
- If The Hemlocks made a truce, search all in- and out-of-play areas for River Hawthorne and William Hemlock and put each into play under the control of any investigator(s), asset side faceup.
- Put Act 3a—Fate of the Vale (v.II) into play. Remove each other act from the game.
- Search the Day of the Feast encounter set for 2 copies of Frenzied Reveler, shuffle them with each set-aside Resident card, and place them, enemy side faceup, beneath each location except The Crossroads, distributed as evenly as possible.
- Flip each Cosmic Emissary enemy to its Shattered side (breaking their formation). Place Cosmic Emissary (The Abyss) at The Crossroads. Shuffle the remaining Cosmic Emissary enemies and place one of each at The Boarding House, The Commons, and The Atwood House.
- Resume playing.
Fate of the Vale 3: Narrative omitted.
- Put Act 3a—Fate of the Vale (v.III) into play. Remove each other act from the game.
- Skip to Fate of the Vale 5.
Fate of the Vale 4: Narrative omitted.
- Put Act 3a—Fate of the Vale (v.IV) into play. Remove each other act from the game.
- Proceed to Fate of the Vale 5.
Fate of the Vale 5: Narrative omitted.
- Remove each Mirror Nest and Cave location from the game.
- Put each set-aside Hemlock Vale location into play on its (Night) side according to the diagram on page 6.
- Move each investigator to The Crossroads.
- Check your Campaign Log.
- If Bertie perished, remove the set-aside Bertie Musgrave story asset from the game. Otherwise, put him into play at The Boarding House, asset side faceup.
- Search the Day of the Feast encounter set for 2 copies of Frenzied Reveler, shuffle them with each set-aside Resident card, and place them, enemy side faceup, at each empty location except The Crossroads, distributed as evenly as possible. (If there are no empty locations remaining, immediately stop.)
- Remove each remaining Resident card from the game.
- Flip each Cosmic Emissary enemy to its Shattered side (breaking their formation). Place Cosmic Emissary (The Abyss) at The Crossroads. Shuffle the remaining Cosmic Emissary enemies and place one of each at The Boarding House, The Commons, and The Atwood House.
- Resume playing.
Codex: Fate of the Vale
Read the following entries on pages 65–66 only when directed while playing the Fate of the Vale scenario.
Codex 2: Leah Atwood.
- If it is Act 2: Narrative omitted. Search all out-of-play areas for an Item asset and draw it. An investigator may trigger this codex again during a different act.
- If it is Act 3: Narrative omitted. Each investigator may either draw 2 cards or heal 1 horror.
Codex 3: Simeon Atwood.
- If it is Act 2: Narrative omitted. Automatically evade each Cosmic Emissary enemy in play. An investigator may trigger this codex again during a different act.
- If it is Act 3a: Fate of the Vale (v.III): Narrative omitted. Choose a location and place 3 resources on it, as kindling.
- Otherwise: Narrative omitted. Each investigator may either draw 1 card or gain 2 resources.
Codex 4: William Hemlock.
- If it is Act 2: Narrative omitted. Each investigator gains 1 clue (from the token pool). An investigator may trigger this codex again during a different act.
- If it is Act 3a: Fate of the Vale (v.II): Narrative omitted. Draw a Resident card underneath any location and put it into play at that location, exhausted, enemy side faceup.
- Otherwise: Narrative omitted. Each investigator may draw up to 2 cards.
Codex 5: River Hawthorne.
- If it is Act 2: Narrative omitted. You may play an Item card from your hand, ignoring all costs. An investigator may trigger this codex again during a different act.
- If it is Act 3a: Fate of the Vale (v.II): Narrative omitted. Draw a Resident card underneath any location and put it into play at that location, exhausted, enemy side faceup.
- Otherwise: Narrative omitted. Gain 4 resources.
Codex 6: Gideon Mizrah.
- If it is Act 2: Narrative omitted. Each investigator may take an additional action during their next turn. An investigator may trigger this codex again during a different act.
- If it is Act 3a: Fate of the Vale (v.I): Narrative omitted. Automatically evade the Cosmic Emissary enemy at your location.
- Otherwise: Narrative omitted. Remove 1 doom from the current agenda.
Codex 7: Judith Park.
- If it is Act 2: Narrative omitted. Choose an enemy at any location and automatically evade it. An investigator may trigger this codex again during a different act.
- If it is Act 3: Narrative omitted. Search your deck, hand, and discard pile for a Weapon card and play it, ignoring all costs.
Codex 8: Theo Peters.
- If it is Act 2: Narrative omitted. You may search The Abyss for a location, put it into play, and immediately move to it. An investigator may trigger this codex again during a different act.
- Otherwise: Narrative omitted. Disengage from each enemy and move to any location.
Codex Θ: Dr. Rosa Marquez.
- If it is Act 1: Narrative omitted. Reveal the bottom 6 cards of The Abyss. You may draw any of them. Place the rest back on top of The Abyss in any order. An investigator may trigger this codex again during a different act.
- If it is Act 3a: Fate of the Vale (v.I): Narrative omitted. Each investigator gains 1 clue (from the token pool).
- Otherwise: Narrative omitted. Each investigator gains 1 clue (from the token pool). An investigator may trigger this codex again during a different act.
Codex Ω: Bertie Musgrave. Narrative omitted.
- Take control of Bertie Musgrave. If it is Act 3a: Fate of the Vale (v.IV), remember that "Bertie is fleeing."
Standalone Mode (Fate of the Vale)
If you are playing in Standalone Mode and do not wish to refer to any other setup or resolutions, you may use the information below when setting up and playing this scenario:
- Assemble the chaos bag using the following tokens: +1, 0, 0, –1, –1, –2, –2, –3, –3, –5, skull, skull, skull, cultist, tablet, tablet, elder thing, elder thing, elder thing, elder sign, Ꞩ2 token.
- Each resident's Relationship Level is 0.
- When prompted to choose a path in Scenario Interlude: Fate of the Vale, investigators may choose any option, ignoring its requirements.
Resolutions: Fate of the Vale
Do not read until the end of the scenario. The guide prints no explicit condition for choosing among Resolutions 1 through 5 in this text; each is transcribed as printed.
If no resolution was reached (each investigator resigned or was defeated): Narrative omitted.
- In your Campaign Log, record the investigators became the true Feast of Hemlock Vale.
- The investigators are devoured (each investigator is killed).
- The investigators lose the campaign.
Resolution 1: Narrative omitted.
- Update your Campaign Log.
- Cross out the name of each resident that was not under control of an investigator at the end of the game.
- In your Campaign Log, record Dr. Marquez sacrificed herself for the Vale.
- If Dr. Rosa Marquez is part of an investigator's deck, remove her from that investigator's deck.
- Each investigator suffers 1 physical trauma and 1 mental trauma as they grieve the loss of Dr. Marquez and recover from the degenerative effects of the Colour.
- Each investigator earns experience equal to the Victory X value of each card in the victory display. Each investigator earns 5 bonus experience, as they have defeated the Cosmic Emissary and the Colour Out of Space.
- The investigators win the campaign!
- Proceed to Epilogue (page 68).
Resolution 2: Narrative omitted.
- In your Campaign Log, record the investigators sacrificed themselves for the Vale.
- The investigators are devoured (each investigator is killed).
- The investigators win the campaign, but are annihilated.
- Proceed to Epilogue (page 68).
Resolution 3: Narrative omitted.
- Update your Campaign Log.
- Cross out the name of each resident that was in the victory display at the end of the game.
- Record the Vale was saved.
- Each investigator suffers 2 physical trauma and 2 mental trauma as they grapple with the profound loss of life and the terror that still lives beneath Hemlock Isle.
- Each investigator earns experience equal to the Victory X value of each card in the victory display. Each investigator earns 3 bonus experience, as they have saved the people of Hemlock Isle from a terrible fate.
- The investigators win the campaign!
- Proceed to Epilogue (page 68).
Resolution 4: Narrative omitted.
- Update your Campaign Log.
- Cross out the name of each resident that was not under control of an investigator at the end of the game.
- In your Campaign Log, record the Vale burned.
- Each investigator suffers 2 physical trauma and 2 mental trauma as they grapple with the profound loss of life and the terror that still lives beneath Hemlock Isle.
- Each investigator earns experience equal to the Victory X value of each card in the victory display. Each investigator earns 3 bonus experience for eradicating the Colour Out of Space…right?
- The investigators win the campaign?
- Proceed to Epilogue (page 68).
Resolution 5: Narrative omitted.
- Update your Campaign Log.
- Cross out the name of each resident that was not under control of an investigator at the end of the game.
- In your Campaign Log, record the investigators barely survived the Feast of Hemlock Vale.
- Each investigator suffers 3 physical trauma and 3 mental trauma as they are haunted by the brilliant, maddening effects of the Colour Out of Space.
- Each investigator earns experience equal to the Victory X value of each card in the victory display. Each investigator earns 2 bonus experience for surviving the Feast.
- The investigators win the campaign…but nobody else did.
- Proceed to Epilogue (page 68).
Epilogue
Check your Campaign Log. If there are any surviving investigators remaining, you may read any codex entry in the epilogue for which you meet the requirements.
- If Dr. Marquez sacrificed herself for the Vale, proceed to Epilogue 1.
- If the investigators sacrificed themselves for the Vale, skip to Epilogue 2.
- Otherwise, skip to Epilogue 3.
Epilogue 1: Narrative omitted. The letter to Dr. Henry Armitage, written after the survey and describing the loss of Dr. Marquez, is not transcribed.
Epilogue 2: Narrative omitted. The letter to Dr. Henry Armitage, written after the survey and describing the sacrifice of the investigators' contacts, is not transcribed.
Epilogue 3: Narrative omitted. The letter to Dr. Henry Armitage, signed by Dr. Rosa Marquez, is not transcribed.
Codex: Epilogue
The following codex entries are read only if you meet their requirements. Their text is narrative and is not transcribed.
Codex 2 & 3: The Atwoods. Narrative omitted.
- If neither Leah Atwood's nor Simeon Atwood's names are crossed out: Narrative omitted.
Codex 4 & 5: The Hemlocks. Narrative omitted.
- In your Campaign Log, if The Hemlocks made a truce and neither William Hemlock's nor River Hawthorne's names are crossed out: Narrative omitted.
Codex 7: Judith Park. Narrative omitted.
- If Judith Park is at Relationship Level 5 or higher and her name is not crossed out: Narrative omitted.
Codex 8: Theo Peters. Narrative omitted.
- If Theo Peters is at Relationship Level 5 or higher and his name is not crossed out: Narrative omitted.
Transcription Notes
- Icons. The PDF text layer drops icon glyphs, so icons were identified from the page images. Token icons are written by name: skull, cultist, tablet (the cracked-stone icon), elder thing, elder sign, and Ꞩ2 (the printed glyph). The action arrow is written as "Action:". Skill-test icons are written as bracketed descriptions of the printed symbol (for example, [head-silhouette skill icon]). One fedora-and-mask icon is printed in the Hint, barrier, and tally lines and is written as [fedora-and-mask icon] wherever it appears; its meaning is not restated.
- Typos. Printed misspellings were corrected where they would mislead a reader: "procceed" to "proceed" (Dawn of the Final Day, Judith 1 and William 1), "River Hathorne" to "River Hawthorne" (The Final Evening, Codex 13), and "Location Adacency" to "Location Adjacency" (The Silent Heath, Placing New Locations). "Campaign guide" in Resolution 3 of The Final Evening is kept as printed; it appears to mean the Campaign Log.
- Triggers not printed. Where the guide's text gives the outcomes of a scenario or interlude but not the condition that selects among them, each is transcribed as printed and marked in place. This applies to the Cave-In interlude (Written in Rock), Resolutions 1–4 (The Thing in the Depths), Resolutions 1–2 (The Twisted Hollow), Resolutions 1–3 (The Longest Night), the Fate of the Vale interlude paths and Resolutions 1–5. The Fate of the Vale path requirements are referenced by the Standalone Mode text but are not printed in this guide.
- Terms defined on cards. Terms such as "predation," "seal," "Dormant," and the location card text in the Location Placement diagrams are used as printed; their definitions are on the scenario cards, not in this guide.
- Not transcribed. The credits, the Achievement List, the Design Notes, the printed Campaign Log pages, and the Quick Reference index are not rules and are omitted. Narrative passages (introductions, story text, resolution fiction, letters, and codex flavour prose) are marked Narrative omitted at their location; every condition, choice, setup step, resolution, codex effect, and campaign-log instruction is transcribed.