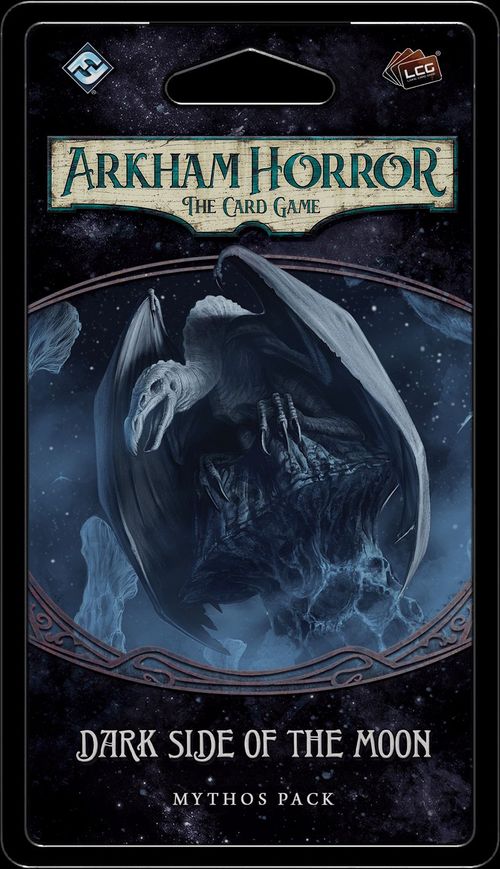
Arkham Horror: The Card Game – Dark Side of the Moon: Mythos Pack
Arkham Horror: The Card Game – Dark Side of the Moon: Mythos Pack Rulebook
Table of Contents
Table of Contents
Scenario III–A: Dark Side of the Moon
Check Campaign Log.
- If at least one investigator was captured, proceed to Intro 1.
- If no investigators were captured, skip to Intro 2.
Intro 1
Over the next few days, you learn more about your captors, but nothing about the black galley's destination. It seems the Corsairs who hunted you down and captured you were only agents—or perhaps slaves—of a much greater evil: a race of greyish-white toad-like creatures with no eyes and slippery skin concealed beneath a loose disguise of silken clothing. You notice the creatures tend to stay below deck, and none of them deign to interact with you at all. Despite their disguises, the mere sight of one makes you retch. If they are indeed the masters of the Corsairs, this cannot bode well for you. You are kept apart from Virgil, and suspect he is on a different ship entirely.
More days pass. You have no way of telling how long it's been since your capture. You have been kept well fed—that is, if being forced to eat bitter porridge from a dirty clay bowl counts as "well fed." What concerns you most is the ship itself. Though you are sure it's still moving, you no longer feel it rock back and forth as the waves push it from side to side, nor do you hear the sounds of the ocean or of gulls cawing over the coast. In fact, you hear very little at all now: only the occasional commands of one of the beasts from below deck, and the shouting of Corsairs in reply. No churning sea. No wind in the sails. Nothing at all.
Panic seizes your mind. What if you are destined for some strange port from which there can be no return? Could they have have sailed off the face of the planet itself? You have to do something. Escape, somehow. You try desperately to come up with a plan of action, but in vain. Corsairs relentlessly patrol the brig, and even if you managed to slip your bonds and sneak past them, where would you go?
Just as you begin to lose hope, a familiar face descends from the top deck. It is the ship captain you hired in Dylath-Leen: a chubby, middle-aged fellow with a bushy beard and long hair pulled into a bun atop his head. He peeks around, realizes he is alone with you, and runs to your side. "I am so sorry, my friends," he stammers quietly. "I had no idea who I was dealing with. I was tricked, I swear. I did not know that they were…I did not know…" he trails off, red-faced with guilt. You aren't entirely sure what he means, but obviously he had something to do with your capture. Regardless, he is your only chance at escape. You tell him all will be forgiven if he helps you. He ponders for a moment, looks around, then finally nods and slices through your bonds with a curved knife.
Freedom has never tasted so sweet. You stretch your aching muscles and search nearby for your belongings, but there is little time to waste. Keeping a lookout, your rescuer whispers, "There may be a rowboat you can use on the top deck, but we'll have to be quiet as mice. If they spot—" his voice suddenly catches in his throat, along with a sharp, jagged blade. He makes a dreadful gurgle as blood wells in his mouth, and he collapses. Behind him, a Corsair flashes a sadistic grin at his next victims: you.
Check Campaign Log.
- If at least one investigator was not captured, proceed to Intro 2.
- Otherwise, skip to Setup.
Intro 2
You have little choice if you are to save the Corsairs' captives: You must sail to the Moon and rescue them yourself, or they will surely become slaves of the beasts who call it home. "They are evil creatures who serve an even greater evil," Randolph explains as you prepare to set sail. "There are port cities like Dylath-Leen that have dealt with them before, but few know their true identity, for they wear disguises to mask their hideous nature."
Perhaps your captain, who shuttled you to and from the various regions of the Dreamlands, dealt with them in the past. Or perhaps not. For the sake of your own sanity, it may be better not to dwell on suspicions of betrayal.
"How does one even sail to the Moon?" you ask, befuddled. By now, you are no stranger to the oddities of the Dreamlands, having spent weeks exploring its cities, wilds, and places stranger still. Even knowing the laws of physics and astronomy should not apply here, you struggle to imagine how one might sail a ship into space.
"It will be a long journey," Randolph answers. "Far across the sea lie the Basalt Pillars of the West. Between these pillars, the ocean plunges off the edge of the world. If we sail off of the precipice between them, we can cross the void of space itself."
You shouldn't be surprised that the world of Earth's Dreamlands is flat; after all, everything else here is a fiction, too. Still, you are incredulous. "I have sailed this route before," Randolph says, sensing your skepticism. "But I fear this time it might be a one-way trip, especially without a crew. We may need to find an altogether different way to unknown Kadath. Are you prepared?"
You look to the horizon, where the cerulean sea meets the sky. Somewhere out there, your aid is needed. What's more, the proof you seek may lie across the sea—over the edge of the very world itself. You prepare to embark.
Proceed to Setup.
Setup
- Gather all cards from the following encounter sets: Dark Side of the Moon, Corsairs, Dreamer's Curse, and Ancient Evils. These sets are indicated by the following icons: [four encounter-set icons, shown in the printed order of the set names above; icons not reproduced]
- Put City of the Moon-Beasts, Temple of the Moon Lizard, Moon-Forest, and The Dark Crater into play.
- Set each other location aside, out of play.
- Check Campaign Log.
- If at least 1 investigator was captured, put the set-aside Moon-Beast Galley into play, revealed side faceup. This location has no unrevealed side—instead, it has a story card on its reverse side. (For the best experience, do not read the text on its reverse side until you are instructed to do so.)
- Each investigator who was captured begins play in the Moon-Beast Galley. For each investigator who begins the game in the Moon-Beast Galley, place 2 additional clues on it (from the token bank).
- Each other investigator begins play in the Moon-Forest.
- Check Campaign Log.
- If Randolph was captured, search each investigator's deck for Randolph Carter (Expert Dreamer) and set him aside, out of play.
- Set the following cards aside, out of play: the Moon Lizard enemy, the Virgil Gray (Truly Inspired) story asset, The Captain story asset, and the False Awakening weakness.
- Place 1 doom on each investigator card. This doom represents that investigator's current alarm level (see Alarm Level, below). It does not count as doom and does not count toward the current agenda's doom threshold.
- Shuffle the remainder of the encounter cards to build the encounter deck.
Alarm Level
The setup of this scenario instructs the players to place 1 doom on each investigator card, marking their current "alarm level." As the investigators attempt to escape from the grasp of the moon-beasts, their respective alarm levels may increase or decrease based on their actions and decisions. A higher alarm level means you are closer to being discovered, which will significantly hinder your attempts to escape.
If an effect raises an investigator's alarm level by any amount, place that much doom on that investigator's card to represent this. Likewise, if an effect reduces an investigator's alarm level by any amount, remove that much doom from that investigator's card.
Even though it is marked using doom tokens, an investigator's alarm level is not doom, and does not count toward the agenda's doom threshold.
An investigator's alarm level has no effect on its own, but it may alter or strengthen other encounter card effects.
Standalone Mode
If you are playing in Standalone Mode and do not wish to refer to any other setups or resolutions, you may use the information below when setting up and playing this scenario:
- Assemble the chaos bag using the following tokens: +1, 0, 0, –1, –1, –2, –2, –3, –4, Skull, Skull, Skull, Cultist, Tablet, Tablet, [icon], Elder Sign. (Transcriber note: the seventh icon token after –4, shown as a stylised "S" with a 2, is not named in the printed text and is left as an icon placeholder; the Skull, Cultist, Tablet and Elder Sign names are assigned by appearance.)
- The investigators may decide (choose one):
- Each of the investigators was captured, and Randolph was captured. Choose this for a more difficult experience.
- None of the investigators were captured, and Randolph eluded capture. Choose this for an easier experience.
Do Not Read: Until the End of the Scenario
Do not read this section until the end of the scenario.
If no resolution was reached (each investigator was defeated)
Despite your best efforts, your pursuers are too many for you to escape unnoticed. You are cornered and taken captive. Virgil tries his best to resist, but Randolph gives in, knowing that his resistance is futile. You are brought into a large domed temple on the dark side of the Moon and forced to kneel before one of the moon-beasts. It is dressed in grey robes and heavy wrappings, but you see its true visage beneath: its slippery, clammy flesh and its drooling, bulbous lips. "Wonderful," it praises its henchmen. "Our master will be pleased." Behind you, Corsairs prevent your escape, while a row of winged things on either side of you squawk rhythmically and flap their wings. A preparation, you suspect, for an unpleasant journey.
The moon-beast orders its slaves to haul you onto the winged creatures. "Bring these wretches to the sacrificial pits," it decrees. "They must be judged for their heresy. The moon lizard shall feed well tonight."
"What? No, this isn't right." Randolph grits his teeth.
There is a bright flash of light, and you awaken. You are sitting atop a comfortless and unfamiliar bed. A wave of relief washes over you at first. Have you finally awoken from this endless dream? Then the still, cold void embraces you, and you realize where you truly are. Instead of four walls and a ceiling, you are surrounded by a bright, starry cosmos. Galaxies and nebulae in the distance seem to stare back at you with unfeeling cruelty. Your bed floats along the thinnest of silver threads. Virgil's cat sits up at your feet. "You're not awake," the black cat says. "Not yet."
Another flash of light. The moon-beast orders its slaves to haul you onto the winged creatures. "Bring these wretches to the High Priest in the Cold Wastes," it decrees. "They must be judged for their heresy."
"Worry not, my friends," Randolph whispers to you. "Did you hear that? The Cold Wastes is the region wherein unknown Kadath lies. With any luck, they will bring us right to our destination—" Randolph is cut off as the moon-beast grabs him and pulls him to his feet.
"No, not you. I know of you. You will be a gift. Fodder for the moon lizard. Come." It drags Randolph away before your very eyes. His screams echo off the walls of the temple and fade as he is hauled underground. Then, borne aloft on dreadful, membranous wings, your mounts carry you into the void of space.
- In your Campaign Log, record the investigators were carried to the Cold Wastes.
- In your Campaign Log, record Randolph Carter did not survive the voyage. If an investigator's deck contains Randolph Carter (Expert Dreamer) (The Dream-Eaters card #59), remove him from that deck for the remainder of the campaign.
- The lead investigator has earned the False Awakening weakness (The Dream-Eaters #233) (does not count toward deck size). Add this card to the lead investigator's deck.
- Each investigator earns experience equal to the Victory X value of each card in the victory display.
- If you are playing The Dream-Quest as a four-part campaign, proceed to Scenario 4–A: Where the Gods Dwell.
- If you are playing The Dream-Quest and The Web of Dreams as an interconnected eight-part campaign…
- …and you have not yet played Scenario 3–B: Point of No Return, proceed to that scenario.
- …and you have already played Scenario 3–B: Point of No Return, proceed instead to Interlude III: The Great Ones.
Resolution 1
As the white galley glides silently back toward the Earth, its captain sings a soft, melodic shanty, which the ship's oarsmen repeat. You seem to know the language well, despite having never heard it before. You ask after your course, but the bearded man does not reply other than to continue his harmonious song. You plead with him to aid you in your search for unknown Kadath, believing it to be of the utmost importance. "You should not seek to disturb the gods," the man warns, his song interrupted. "They are far greater than you or I. Do you not see the folly in your ambition?" You beseech him once more, telling him you must bring back proof of the Dreamlands, and cannot return home without the aid of the gods. "Would that be so dire a fate? Look around you."
You do as the captain requests, and are met with a scene of such serene beauty that it leaves you breathless. The seas below glitter in the moonlight like an ocean of diamonds. Along the horizon, you see crystalline coastlines, blissful countrysides, lush mountain vistas, and emerald-green gardens. The air is crisp and cool as you descend below the clouds. Your heart swells with the sweet fragrance of flowers from the nearby coast. Never in all your years in "reality" have you experienced a beauty so real.
Maybe staying wouldn't be so bad. You've already spent weeks—no, months—in this land. There have been hardships, yes, but could you really return to your mundane reality after everything you've seen and experienced in this wondrous land?
Then, far to the north, you see it. Looming just over the horizon, or perhaps beyond the dreams of Earth itself. A white peak, atop which sits an azure beacon of refracted moonlight. The bearded man follows your gaze. "So be it," he sighs. He changes course, following now behind a celestial bird whose plumage matches the vibrant sky. "We sail to the abode of the gods themselves."
- In your Campaign Log, record the investigators traveled to the Cold Wastes.
- In your Campaign Log, record Randolph survived the voyage.
- Each investigator earns experience equal to the Victory X value of each card in the victory display.
- Record 3 tally marks next to "Evidence of Kadath" in your Campaign Log.
- If you are playing The Dream-Quest as a four-part campaign, proceed to Scenario 4–A: Where the Gods Dwell.
- If you are playing The Dream-Quest and The Web of Dreams as an interconnected eight-part campaign…
- …and you have not yet played Scenario 3–B: Point of No Return, proceed to that scenario.
- …and you have already played Scenario 3–B: Point of No Return, proceed instead to Interlude III: The Great Ones.