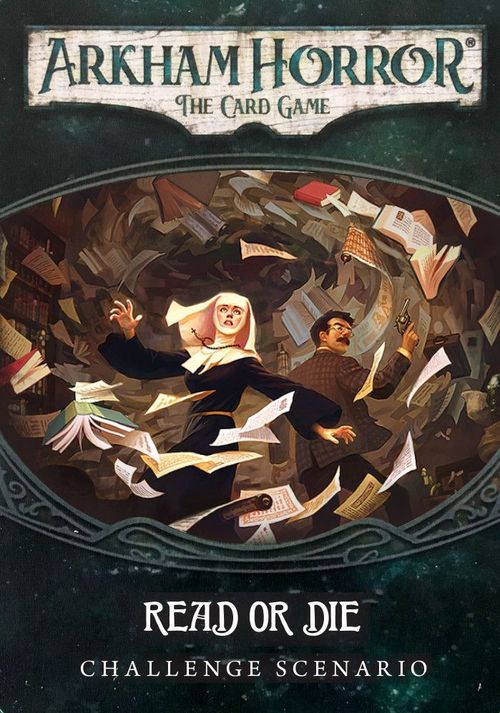
Arkham Horror: The Card Game – Read or Die: Challenge Scenario
Arkham Horror: The Card Game – Read or Die: Challenge Scenario Rulebook
Table of Contents
Table of Contents
- Parallel Investigators
- Challenge Scenarios
- Standalone Mode
- Side-story (Campaign Mode)
- Expansion Symbol
- Investigator Setup
- Scenario Setup
- DO NOT READ
- Challenge Cards
- Parallel Investigator: Daisy Walker (The Librarian, front)
- Parallel Investigator: Daisy Walker (The Librarian, back)
- Daisy's Tote Bag (Advanced)
- The Necronomicon, John Dee Translation (Advanced)
- Read or Die (Easy / Standard)
- Read or Die (Hard / Expert)
- Act 1a: Speed Reading
- Act 1b: Page-turner
- Agenda 1a: Mortal Inquiry
- Agenda 1b: Reading Can Be Deadly
- Namer of the Dead
Parallel Investigators
Parallel investigators are alternate, print-and-play versions of investigators from existing Arkham Horror: The Card Game products. These investigators, along with their advanced signature cards, are fully playable in any scenario or campaign.
- When building a Daisy Walker deck, you may choose whether to use the original version or the parallel version of both her front side and her back side. Each version has its own advantages and disadvantages. You can also mix and match the two versions. This means that you can use both original sides, both parallel sides, the original front side and parallel back side, or the parallel front side and original back side.
- Regardless of which version of Daisy you use, you may also optionally upgrade Daisy's signature cards to her new advanced signature cards (replacing the original versions). These versions are indicated by the Advanced keyword on Daisy's Tote Bag and the "Advanced Weakness" subtitle bar on The Necronomicon. These are included only as a set—if you choose to upgrade Daisy's Tote Bag, you must also upgrade The Necronomicon. Doing so costs no experience, and may be done at any point during a campaign. However, once this upgrade is made, it cannot be undone unless you are instructed otherwise.
Challenge Scenarios
Challenge scenarios are special print-and-play scenarios that utilize existing products in the Arkham Horror: The Card Game collection, along with additional print-and-play cards, to create new content. These scenarios are designed with certain prerequisites in mind, in order to craft a challenging puzzle-like experience.
The Read or Die challenge scenario centers around the investigator Daisy Walker, and therefore has the following prerequisites:
- Daisy Walker must be chosen as one of the investigators when playing this scenario.
- Daisy Walker's deck must include at least 4 Tome assets. Tome weaknesses do not count toward this total.
Standalone Mode
When played as a standalone scenario, follow the steps for Standalone Mode in the Rules Reference. Refer to the section below for additional setup instructions. When played as a standalone scenario, Read or Die has four difficulty modes. Construct the chaos bag with the following tokens:
- Easy: +1, +1, 0, 0, 0, –1, –1, –1, –2, –2, [Skull], [Skull], [Cultist], [Tablet], [Elder Thing], [Elder Sign], [Auto-fail].
- Standard: +1, 0, 0, –1, –1, –1, –2, –2, –3, –4, [Skull], [Skull], [Cultist], [Tablet], [Elder Thing], [Elder Sign], [Auto-fail].
- Hard: 0, 0, –1, –1, –2, –2, –3, –4, –5, –6, [Skull], [Skull], [Cultist], [Tablet], [Elder Thing], [Elder Sign], [Auto-fail].
- Expert: 0, –1, –2, –3, –4, –5, –6, –7, –8, [Skull], [Skull], [Cultist], [Tablet], [Elder Thing], [Elder Sign], [Auto-fail].
Editor's note: the printed Expert line lists "–5 –6" without a separating comma and gives 9 numeric tokens (16 tokens in total), while the other three difficulty lines give 10 numeric tokens (17 in total). The Expert list is transcribed as printed.
Side-story (Campaign Mode)
A side-story is a scenario that may be played between any two scenarios of an Arkham Horror: The Card Game campaign. Playing a side-story costs each investigator in the campaign a certain amount of experience. Weaknesses, trauma, experience, and rewards granted by playing a side-story stay with the investigators for the remainder of the campaign. Each side-story may only be played once per campaign.
When this scenario is played as a side-story during a campaign, play it as if you are setting up the next scenario in the campaign, with the same chaos bag, weaknesses, trauma, and story assets previously earned.
Investigators can only play Read or Die as a side-story if Daisy Walker is in the campaign. Playing the Read or Die side-story costs Daisy Walker 3 experience, and each other investigator only 1 experience.
Expansion Symbol
The cards in the "parallel investigator" series can be identified by this symbol before each card's collector number.
Investigator Setup
- Remove each non-weakness Tome asset from Daisy Walker's deck. Set each of these assets aside, out of play.
Scenario Setup
- Gather all cards from the following encounter sets: Read or Die, Extracurricular Activity, Sorcery, The Beyond, Bishop's Thralls, Whippoorwills, Ancient Evils, Locked Doors, Agents of Yog-Sothoth, and Armitage's Fate. Each of these sets except for Read or Die can be found in The Dunwich Legacy Deluxe Expansion. These sets are indicated by the following icons.
- Remove the original scenario reference card from the Extracurricular Activity encounter set from the game. Use the new scenario reference card provided in the downloadable Read or Die encounter set.
- Remove the original act and agenda deck from the Extracurricular Activity encounter set from the game. Build the act and agenda decks using only the new act and agenda cards provided in the downloadable Read or Die encounter set.
- Remove the Faculty Offices (The Hour is Late) location, the Alchemy Labs location, the Alchemical Concoction story asset, The Experiment enemy, and the Professor Warren Rice story asset from the game. These cards are not used in this challenge scenario.
- Put each of the remaining locations into play: Miskatonic Quad, Orne Library, Humanities Building, Student Union, Science Building, Administration Building, Dormitories, and Faculty Offices (The Night is Still Young).
- Daisy Walker begins play at the Orne Library.
- Each other investigator begins play at the Miskatonic Quad.
- Since Dormitories and Faculty Offices start the game in play and Alchemy Labs is removed from the game, ignore any Forced abilities that would put these locations into play.
- Shuffle each of the set-aside Tome assets previously removed from Daisy Walker's deck and place 1 of them facedown beneath each location except for the Miskatonic Quad, starting with the locations farthest from the Orne Library. Place each remaining set-aside Tome asset facedown beneath the Orne Library.
- For example, if Daisy Walker previously set 12 Tome assets aside, 1 would be placed facedown beneath each location except for Miskatonic Quad, and the remaining 6 would be placed beneath Orne Library.
- Put the "Jazz" Mulligan story asset into play at the Science Building.
DO NOT READ
Until the end of the scenario.
If no resolution was reached because each investigator was defeated: Proceed to Resolution 2.
Resolution 1: When you wake, the floor of the library is a mess of scattered paper and torn books. The Necronomicon lies in front of you, its metal clasp sealing it shut once more. Hopefully, whatever presence had been unleashed is safely stored within. But you can't risk the grimoire staying here—it is far too dangerous to be left alone. You stuff the tome into your tote bag, knowing only you can keep it safe...or keep others safe from it.
- Daisy Walker earns experience equal to either the combined Victory X value of each card in the victory display, or equal to the number of Tome assets she had in play at the end of the game, whichever is higher.
- Each other investigator only earns experience equal to the combined Victory X value of each card in the victory display.
- Daisy Walker may either upgrade Daisy's Tote Bag to its advanced version, or downgrade the advanced version of The Necronomicon (John Dee Translation) to its original version.
Resolution 2: You stuff the tome back into your tote bag. You can only hope that the entity that was unleashed won't cause further harm...
- Daisy Walker earns experience equal to either the combined Victory X value of each card in the victory display, or equal to the number of Tome assets she had in play at the end of the game, whichever is higher.
- Each other investigator only earns experience equal to the combined Victory X value of each card in the victory display.
- Daisy Walker must either upgrade The Necronomicon (John Dee Translation) to its advanced version, or downgrade the advanced version of Daisy's Tote Bag to its original version.
Challenge Cards
The following cards are provided in the downloadable Read or Die print-and-play encounter set. Their printed rules text is reproduced below under each card name. Flavour text is omitted except where a card's text refers to it. Card layout details that are not rules text (collector numbers, illustrator credits, and the threshold numbers printed on the act and agenda cards) are not reproduced here and appear on the card scans.
Parallel Investigator: Daisy Walker (The Librarian, front)
Miskatonic.
- You get +1 [Intellect icon] and +1 sanity for each Tome asset you control.
- [Fast icon] [Action icon]: One at a time, resolve an ability on each Tome asset you control, ignoring their cost. (Limit once per game.)
- Elder Sign effect: +1. You may return a Tome asset from your discard pile to your hand.
Parallel Investigator: Daisy Walker (The Librarian, back)
Deck Size: 30.
Deckbuilding Options: Tome cards level 0-5, Seeker cards [Seeker icon] level 0-3, Neutral cards level 0-5, up to five other level 0 Guardian and/or Mystic cards [Guardian icon] and/or [Mystic icon].
Deckbuilding Requirements (do not count toward deck size): Daisy's Tote Bag, The Necronomicon (John Dee Translation), 1 random basic weakness.
Daisy's Tote Bag (Advanced)
Asset. Item. Daisy Walker deck only. Advanced.
- You have 2 additional hand slots, which can only be used to hold Tome assets.
- [Reaction icon] When you play a Tome asset during your turn, exhaust Daisy's Tote Bag: That asset gains fast.
The Necronomicon, John Dee Translation (Advanced)
Weakness. Item. Tome. Advanced.
- Revelation – Put this card into play in your threat area, with 3 horror on it. It cannot leave play while it has 1 or more horror on it. While it is in play, treat each Elder Sign you reveal on a chaos token as [Cultist], [Tablet], and [Elder Thing] (resolve all three).
- [Action icon]: Move 1 horror from this card to Daisy Walker. Then, if this card has no horror on it, discard it.
Read or Die (Easy / Standard)
- [Skull]: –X. X is the number of Tome assets Daisy Walker controls.
- [Cultist]: Reveal another token. If you fail, discard the top 2 cards of your deck.
- [Tablet]: –2. If this is an attack or evasion attempt against Namer of the Dead and you do not succeed by at least 2, it attacks you.
- [Elder Thing]: –3. If you fail, Daisy Walker takes 1 horror.
Read or Die (Hard / Expert)
- [Skull]: –X. X is 1 more than the number of Tome assets Daisy Walker controls.
- [Cultist]: Reveal another token. If you fail, discard the top 3 cards of your deck.
- [Tablet]: –3. If this is an attack or evasion attempt against Namer of the Dead and you do not succeed by at least 3, it attacks you.
- [Elder Thing]: –5. If you fail, Daisy Walker takes 1 horror.
Act 1a: Speed Reading
The way to seal this being away must be recorded in one of the many tomes around campus…
- Ignore all Objectives on locations.
- [Action icon] If you are Daisy Walker, investigators at your location spend 1 [Clue icon] clues: Shuffle 1 facedown player card beneath this location into your deck.
- Objective – Find a way to banish the Namer of the Dead before it is too late.
Act 1b: Page-turner
You stand in the restricted section of the Orne Library, surrounded by volumes of ancient, heretical texts. The incantations you have found may prove to be enough to dispel the entity—or perhaps bind it back within the Necronomicon from whence it came. Your voice rises to a crescendo as you repeat the words. Shadows crawl across the room. The walls and ceiling bend. Pages flutter in the tempestuous gale. Every fiber of your hair is whisked into the air. All is swept away in the ensuing chaos, like a wet paintbrush kissing the canvas of reality.
- (→R1)
Agenda 1a: Mortal Inquiry
Whatever entity has been unleashed from within the Necronomicon is spreading across the campus like a deadly shadow. You must put a stop to it before it grows too powerful to be contained.
- Dr. Henry Armitage does not take up an ally slot and gains: "You have 2 additional hand slots, which can only be used to hold Tome assets."
- "Jazz" Mulligan gains: "[Action icon]: Move to a Miskatonic location up to 3 connections away."
Agenda 1b: Reading Can Be Deadly
A tremendous whirlwind and a thunderous voice erupts from the Necronomicon, sending a tornado of pages into the sky. A sinister shadow looms over the entire campus, then escapes through the ensuing tempest. When it is done, the grimoire clatters to the floor, devoid of energy. Whatever presence it held before is now gone. It feels somehow empty in your hands.
- (→R2)
Namer of the Dead
Monster. Geist. Elite. Hunter. Presence Within the Grimoire. Enemy. Stats: 2, 3, 2.
- Prey – Daisy Walker only.
- Forced – When Namer of the Dead would be defeated: Instead, fully heal it, exhaust it, and move it to Orne Library.
- [Action icon] If you are Daisy Walker and you control at least 4 non-weakness Tome assets: Parley. Test [skill icon] (18). This test gets –2 difficulty for each Tome asset you control. If you succeed, advance the act.