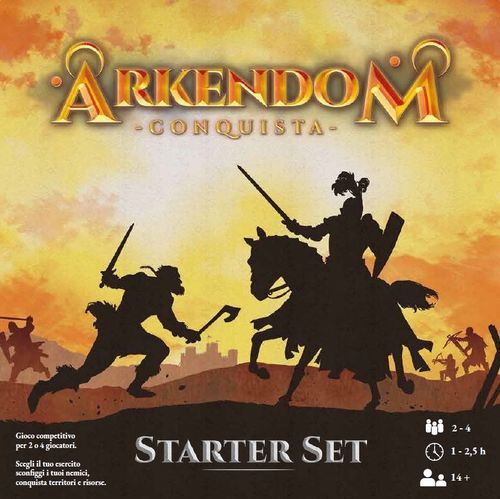
Arkendom Conquista Starter Set
Arkendom Conquista Starter Set Rulebook
Table of Contents
Table of Contents
- Components
- Setup
- 1) Choose the game mode and size; take the starting resource tokens
- 2) Select the army
- 3) Place the game board
- 4) Place the terrain tiles
- 5) Draw the Battle Objectives
- 6) Deploy the army and place reference tiles for the Characters used
- Focus Box 1: Unit deck size
- Focus Box 2: Characters and Crown tokens
- Focus Box 3: Commander-in-Chief
- 7) Place the Basic Action tiles and assemble the Action deck
- Focus Box 4: Action cards and the starter set
- 8) Take the Army, Act and Influence tokens
- 9) Draw the Army Objectives
- 10) Decide the initial player order
- Focus Box 5: Alternative game setups
- Measuring Distance and Units
- The Game and Victory Conditions
- The Round
- The Activation Turn and Activations
- The Combat System
- Wounds, Health Status and Morale
- Add-on Cards
- Action Cards
- Objectives
- Influence
- Terrains
- Special Rules
- Tokens
Components
- 1 game board
- 1 rulebook
- 1 tutorial booklet
- 4 Melee Enlargement tokens
- 2 Army tokens
- 2 Crown tokens
- 18 Medal tokens
- 14 Morale tokens
- 27 Uncommon Unit tokens
- 18 Rare Unit tokens
- 4 Influence tokens
- 10 Time tokens
- 10 Throw tokens
- 24 Act tokens
- 12 Army Objective cards
- 3 Battle Objective cards
- 10 Action cards (5 for each army)
- 12 Add-on cards
- 20 unit cards (10 for each army)
- 2 Basic Action tiles
- 4 character tiles
- 27 green Wound tokens
- 11 yellow Wound tokens
- 11 orange Wound tokens
- 11 red Wound tokens
- 68 Money tokens
- 10 Gold Nugget tokens
- 5 Defense dice, 6 Offense dice, 1 yellow die
- 4 Power dice, 4 blue dice
Setup
Before playing, perform the following steps in order. For alternatives to the standard setup procedure, see Focus Box 5 on page 29.
1) Choose the game mode and size; take the starting resource tokens
This game has several types of resources, each represented by its own dedicated tokens.
- Three are Starting Resources: Money (Silver Coins), Crowns and Medals.
- Two more are earned and spent during the Deployment Phase (see setup step 6): Uncommon Unit points and Rare Unit points.
- One is earned during setup step 8 and can then be spent during the game to obtain special effects: Influence.
- The other resources are only gained during play: Gold Nuggets and Gems.
Each Money token can have a value from 1 to 100 Silver Coins; every other token is worth a single unit of its own resource.
Game modes are as follows:
a. One player against one player: two armies face each other, each player controls one army.
b. Two-player team against two-player team: two armies face each other, each team controls a single army.
c. Pair of players against pair of players: two armies face two other armies, each player controls one army. In this case, the two players of a pair and their two armies form an Alliance, and they are called Allies.
Players must choose the game mode and size. Depending on the choice, the amount of Starting Resources each player has will differ, according to the tables below.
If the chosen mode is 1 versus 1 or team versus team, refer to Table 2. If the chosen mode is pair versus pair, refer to Table 3.
The contents of the base box allow games according to the modes in Table 2, on the 150- or 200-Silver-Coin scale as starting Money.
Each duration estimate given in the tables includes both setup and playing time.
Starting Resources for each player or team (one versus one, or team versus team)
| Game Size | Silver Coins | Crowns | Medals | Estimated Duration (hours) |
|---|---|---|---|---|
| Minimum | 150 | 0 | 6 | 1–2 |
| Small | 200 | 1 | 4 | 1.5–2.5 |
| Medium | 300 | 1 | 7 | 3–4 |
| Large | 400 | 1 | 11 | 4–5 |
Table 2
Starting Resources for each player (pair versus pair)
| Game Size | Silver Coins | Crowns | Medals | Estimated Duration (hours) |
|---|---|---|---|---|
| Medium | 150 | 0 | 6 | 3–4 |
| Large | 200 | 1 | 4 | 4–5 |
Table 3
After choosing the mode and size of the game, each player or team (for the two members of each team, the Resources are shared) takes the Money tokens needed to reach the correct amount of Silver Coins, and also takes the correct number of Crown tokens and Medal tokens. All these tokens form that player's or team's Resource Pool.
Note that the mode and size of the game also determine the number of Objective cards available to the players. This aspect of the game is defined during setup steps 5 and 9.
Figure 1 (on page 12) shows the board and its Zones.
2) Select the army
Each army is represented by its own unit cards, Add-on cards and Action cards. Each player or team chooses an army, takes the cards corresponding to that army and sets them aside. In the case of 2 teams, the two players of each team will divide, during setup and during play, the unit cards and the add-on cards of their army.
3) Place the game board
The game board is a rectangular grid of square spaces: 12 spaces wide by 7 spaces long (84 spaces in total). The grid is divided into three main Zones: two outer Deployment Zones and one inner Battle Zone. Each Zone is in turn divided into smaller Areas. In particular:
- each of the two Deployment Zones is made up of 3 Deployment Areas; each Area consists of a 4x2 grid of spaces, for a total of 24 spaces (12 wide by 2 long).
- the Battle Zone has 4 Battle Areas; each Area consists of a 3x3 grid of spaces, for a total of 36 spaces (12 wide by 3 long).
See Figure 1 for a diagram of the board and its Zones. The heavier outlines in the figure mark the division of the Zones into their Areas.
When the board has been placed on the table, one of the two Deployment Zones is given to one player, one team or one pair of players, while the other goes to the opponents: each will sit at the side of the table of their assigned Zone.
4) Place the terrain tiles
In this step, the terrains used during the game are placed. Terrains are special spaces with specific rules. Some terrains offer cover to troops, others can generate resources or are needed to claim some Objectives, and so on. See pages 66–68 for their description.
This box contains 20 terrains: 4 Forests, 3 Hills, 1 Fortification, 1 Gem Mine, 1 Gold Mine, 2 Hidden Springs, 4 Open Terrains, 2 Rocky Terrains, 2 Villages. Some terrains can only be placed on Deployment Areas (2x4 grids of spaces), others only on Battle Areas (3x3 grids of spaces).
Each Area of the game board can hold no more than one Terrain tile. Each Terrain tile has printed on it a description of which spaces of an Area are selectable to hold it (see the green marks): one of the selectable spaces may be chosen to hold the Terrain tile.
Figure 2 shows an example of a Terrain for a Deployment Area (2x4 space Area), and Figure 3 shows one for a Battle Area (3x3 space Area).
Furthermore, each terrain may or may not be a Base Terrain.
The Base Terrains are: Forest, Rocky Terrain and Open Terrain.
Figure 2 and Figure 3 are diagrams and are not reproduced.
Terrain selection and distribution proceed as follows:
-
Rolling 1d10, one player calls even while the opposing player calls odd. The winner of the roll begins first to select Terrains.
-
The first player or team (by agreement between the two members) must choose a Base Terrain tile from those placeable in the Deployment Areas (2x4 spaces), taking the chosen Terrain tile. In the same way, an opposing player or the opposing team then does so. The contenders then alternate once more, choosing again a Base Terrain tile from those placeable in the Deployment Areas. The contenders then alternate for a third time, choosing any Terrain tile remaining among those placeable in the Deployment Areas. At the end of this procedure, each player, team or pair of players will have selected three Terrain tiles: two Base Terrains and one Terrain of their choice, all placeable only in Deployment Areas.
-
The first player or team now chooses a Base Terrain tile from those placeable in the Battle Areas (3x3 spaces), taking the chosen Terrain tile. In the same way, an opposing player or the opposing team then does so. The contenders then alternate once more, choosing any Terrain tile remaining among those placeable in the Battle Areas. At the end of this procedure, each player, team or pair of players will have selected two Terrain tiles: one Base and one of their choice, all placeable only in Battle Areas.
-
All the Terrain tiles chosen for the Deployment Areas are taken and shuffled (6 in total). They are then randomly redistributed to the players, so that each player, team or pair of players receives 3.
-
All the Terrain tiles chosen for the Battle Areas are taken and shuffled (4 in total). They are then randomly redistributed among the players, so that each player, team or pair of players receives 2.
The Terrain tiles must then be placed on the game board. Rolling 1d10, one player calls even while an opposing player calls odd. The winner of the roll begins first to place a Terrain tile. The two players, the two teams or the two pairs of players alternate until all the Terrain tiles have been placed, each in a different Area.
Remember:
- No more than one Terrain tile may be in the same Area.
- When placing a Terrain tile intended for an empty Deployment Area, you may choose any such Area, even if the chosen Area belongs to the opponent's Deployment Zone.
Open Terrain tiles are included among the terrains: they are equivalent to no terrain. Open Terrains serve to occupy Areas when Terrain tiles are placed, so that no particular type of terrain is placed in those Areas. This can be useful for players who wish to keep all the spaces of certain particular Areas of the game field clear. After the terrains have been arranged on the board, the placed Open Terrain tiles may be removed.
5) Draw the Battle Objectives
The Battle Objective deck is unique and shared among all players. It is used to generate those known objectives that each individual player, team, or each player of a pair may try to achieve during the game. Battle Objectives serve to represent, in narrative terms, the important reasons why the armies are fighting one another. See Figure 4 for an example of a Battle Objective card.
The Battle Objective deck is shuffled and then, from its top, a certain number of cards is drawn, depending on the mode and size chosen for the game (see Tables 4 and 5 below).
The drawn cards become the Battle Objectives used in the current game, and are placed face up in a free space on the table, so that everyone can see them.
The completion of some Battle Objectives may be related to the Terrain tiles present on the game board: each time a Battle Objective card is drawn, but some of the requirements it contains cannot be satisfied with the current layout of the board, that card is discarded and another must be drawn to replace it.
Battle Objectives to draw (one versus one or team versus team)
| Game Size | Battle Objectives to draw |
|---|---|
| Minimum | 1 |
| Small | 1 |
| Medium | 1 |
| Large | 2 |
Table 4
Battle Objectives to draw (pair versus pair)
| Game Size | Battle Objectives to draw |
|---|---|
| Medium | 2 |
| Large | 2 |
Table 5
Remember that the tables indicate, for each mode and size, the TOTAL number of Battle Objective cards to use in the game and to draw from the deck, which is unique for all players.
Figure 4 is a diagram and is not reproduced.
6) Deploy the army and place reference tiles for the Characters used
This setup step is called the Deployment Phase: during this phase, the players take turns making several Deployment Turns, thereby placing their armies on the game board. Right at the start of this step, each single player, each team, or each member of the pairs takes the unit cards of their own army (those with the unit symbol) and does the following:
- Chooses 2 cards from their own unit deck. The chosen cards are set aside and become Reserve cards for that player or team. They are placed face up, outside the game board, so that they are clearly visible to all.
- Shuffles their own unit deck (made up of the remaining unit cards), then draws 3 cards from its top.
Focus Box 1 (Unit deck size) is given after this step.
Roll 1d10: one player calls even while an opposing player calls odd. The winner of the roll begins first to make a Deployment Turn. The players alternate, so that the same player and/or the same team cannot take two consecutive turns.
Remember:
- After finishing a Deployment Turn, one player cannot take another until every other player has taken one.
- One team or pair of players cannot take two Deployment Turns consecutively. The two teams or the two pairs must therefore alternate.
As a consequence, in team-versus-team mode, two players of the same team must alternate in deciding how to carry out the Deployment Turns of their shared army.
A Deployment Turn is carried out as follows: a player draws a card from the top of the unit deck of the army being used. Then they choose a card from the hand of drawn unit cards or from the Reserve cards, and deploy the chosen card face up in a space of their own Deployment Zone. The chosen space must be free of other units, but it may have a Terrain on it, provided that the unit to be deployed can normally enter that Terrain.
Note: correct placement of a unit card within a space of the board requires that the sides of the card are parallel, two by two, to the corresponding sides of the space. In practice, the orientation of the unit card within the occupied space must be clearly shown: crooked or fanciful placements are not allowed. This applies both in this step and for the entire duration of the game.
During a Deployment Turn, it is also possible to choose a unit card from your hand and then discard it: this can be done as a cost to pay in order to draw a new card from the top of the unit deck of the army being used. A player taking their Deployment Turn can do this at any time during that Turn, but no more than once per Turn. Discarded units are stacked face up, forming the discard pile of each player or team.
After deploying a unit, the Resource Pool must be modified by an amount equal to the amount indicated on that unit, as shown in the examples of Figures 5 and 6. Obviously, you cannot spend Resources that you do not already own in your Resource Pool. For example, to deploy a unit card with a negative value of Uncommon Unit points ( ) or Rare Unit points ( ), you must already have those Resources in your Resource Pool. Since the Resource Pool does not initially include Uncommon Unit tokens or Rare Unit tokens, you cannot spend them until you obtain them. To gain Uncommon Unit tokens or Rare Unit tokens, you must first place on the game board those cards which, by virtue of having been deployed, provide exactly those types of tokens as a reward, to be put into your Resource Pool.
Figure 5 (Deploying Swordsmen): when the Swordsmen unit card is deployed, the Resource Pool of the player who deployed it is modified as follows:
- the total of Silver Coins is reduced by 15.
- 2 Uncommon Unit tokens and 2 Rare Unit tokens are added to the Pool.
Add-on cards are small two-sided cards, recognisable by the Add-on symbol printed on them. They come in three types: Equipment, Companion or Character. Each card specifies the type of unit to which it can be attached (Infantry, Cavalry, Archers, etc.). The same unit cannot have two or more Add-on cards of the same type. It can therefore have attached to it: 1 Equipment, 1 Companion and 1 Character (one for each type). If desired, the plastic bases supplied in the box can be used to place Add-on cards vertically on the board, above their units.
In the Deployment Phase, each player or team may choose to spend the Crown tokens ( ) or the Medal tokens ( ) they own: these resources, together with the Silver Coins, serve to deploy Add-on cards of the Character type.
Characters, which are the most important type of Add-on card, are identified by an additional symbol. All the Resources needed to deploy a Character are shown on its dedicated reference tile (see for example Figure 7 on page 22). In particular, an Add-on Character card that requires spending a Crown token represents one of the most powerful or influential heroes available and, when deployed, automatically counts as the Commander-in-Chief of its army. At any moment in the Deployment Phase, a Crown token may also be converted by its owner into 5 Medal tokens. This is irreversible, since Medal tokens can NEVER be converted into Crown tokens.
Figure 6 (Deploying Barbarian Scouts): when the Barbarian Scouts unit card is deployed, the Resource Pool of the player who deployed it is modified as follows:
- 21 Silver Coins are removed from the Pool.
- 1 Uncommon Unit token is removed from the Pool.
Obviously, in order to deploy the Barbarian Scouts unit, you must have obtained at least one Uncommon Unit token, by first deploying another card that provides it as a reward.
Note that a Rare Unit token may be spent in the Deployment Phase also as if it were an Uncommon Unit token, at a 1-to-1 conversion rate. Uncommon Unit tokens, however, can only be spent as such.
After deploying a unit, in the same Deployment Turn it is also possible to deploy an Add-on card on any unit already deployed. That unit is called the parent unit (unità madre) of the Add-on card.
When an Add-on card is deployed on the game board, you must pay the cost printed on it, modifying your Resource Pool accordingly.
In summary, during its own Deployment Turn a player may deploy:
- one unit card (no more); OR
- one unit card and then one Add-on card (no more; the Add-on card may be placed on any unit card of their own already deployed that does not yet have an Add-on card of that type); OR
- one or more Add-on cards, but no more than one of them of the Character type (each may be placed on any unit card of their own already deployed that does not yet have an Add-on card of that type).
Note also that an Add-on card and the unit it is on must be assigned to the same member of the team. That is, it is not possible to divide control of an Add-on card from the control of the unit it sits on, which is its parent unit. Finally, all the reference tiles corresponding to the deployed Add-on Character cards are taken and placed outside the game board, near the Deployment Zones of the respective armies. These tiles serve as a reminder of all the characteristics of the Characters used, and as support cards to keep the tokens that may concern those Characters. For example, see the Regent's Character tile in Figure 7.
Figure 7 is a reference tile diagram and is not reproduced.
The players alternate their Deployment Turns as follows:
- Throughout the entire Deployment Phase, each player or team MUST spend at least half of the Silver Coins they had at the start.
- At least 10 Silver Coins must be spent in each Deployment Turn.
- If in a Deployment Turn a player does not want (or cannot) deploy units or Add-on cards, then they MUST pay 10 Silver Coins to end that Turn and pass.
- If a player cannot (or does not want to) pay the price in Coins to pass, they may still pass, but that player or their team MUST then continue to do nothing in all the following Deployment Turns, passing automatically until the end of the Deployment Phase.
Deployment Turns continue one after the other until all participants have no more cards to deploy or Resources left, or until all declare that they wish to end the Deployment Phase.
When the Deployment Phase is over, each player or team keeps the remaining unspent Silver Coins, and converts all unspent Uncommon Unit and Rare Unit tokens into Silver Coins to keep: each Uncommon Unit token is converted into 2 Silver Coins, while each Rare Unit token is converted into 3 Silver Coins. Unspent Medal or Crown tokens are NOT converted and are lost.
In the case of two teams facing each other, the two players of each team must now divide as equally as possible both the control of the deployed units and the control of the deployed Characters: during the game, each team member may use only the cards under their control. Note that this equal division is based on the number of deployed units, not on their value. This also applies to Characters.
Focus Box 1: Unit deck size
The two unit decks included in the base set are each made up of 10 cards. They guarantee both useful variability for learning the rules and a good length in terms of challenges and game situations. Thanks to future expansions dedicated to individual armies, the standard size for each army's unit deck will be 30 cards.
Focus Box 2: Characters and Crown tokens
Note that the starter set in this box does not include Characters that require Crown tokens to be deployed. These Characters will be introduced with the future expansions dedicated to individual armies. The box nevertheless provides all the material needed to learn the fundamental aspects of the game, allowing games in one-versus-one or team-versus-team mode, for 150 or 200 Silver Coins (see Table 2 on page 11). On the 200 Silver Coin scale, the Crown token provided as a starting Resource can be converted into 5 Medal tokens, as per the general rules.
Focus Box 3: Commander-in-Chief
Each player or team must choose one of their deployed Characters to be the Commander-in-Chief of their army: to represent the choice made, take a Crown token from the box and place it on the reference tile of the chosen Character. In this case, the Crown token serves only as an indicator for the Commander-in-Chief: it is not a Resource, it does not come from the Resource Pool, and it cannot be used otherwise. When choosing the Commander-in-Chief, a Character deployed by paying a Crown token takes precedence over the other deployed Characters.
Furthermore, if a player or team has chosen not to deploy any Character Add-on card, then during the game that player or team will have no Commander-in-Chief. The figure of the Commander-in-Chief may be necessary for some game effects. In particular, the Commander-in-Chief grants 1 Influence token, which is placed on its Character tile. See setup step 8, and how Influence works on page 65.
7) Place the Basic Action tiles and assemble the Action deck
Action cards are recognisable by this symbol printed on them, and are divided into two different groups: those with the Base trait and those without it.
Basic Action cards represent generic actions that an army can perform during battle. They are not intended to go into the Action deck. Each army has its own Basic Action cards, which do not come as separate cards: they are instead depicted in groups, on dedicated cardboard tiles unique to each specific army. Each player or team places them face up, outside the game board, near the Deployment Zone of their own army. See Figure 8 for an example of a Basic Action tile of the Barbarian Tribes.
Figure 8 is a tile diagram and is not reproduced.
Other Action cards represent powers, abilities and opportunities provided by the Characters deployed on the game board, and form the Action deck. If an army is deployed without any Character, it will have no Action deck.
Each player or team must build its own Action deck: how this is done depends strictly on the Characters the player decided to deploy for their army. In general, each Character can have one or more of the following Special Rules: Orders, Abilities or Throws; each of these rules, where present, is followed by a number in parentheses. The number indicates how many of the Action cards of that type contribute to forming the Action deck (see also pages 61–63). It follows that different Action decks may be composed of a different number of cards.
Non-Base Action cards also have Character symbols printed in their upper right corner, which are the same as those shown large on the Add-on Character cards. In general, the Character symbols printed on a non-Base Action card also indicate all the Characters that, if deployed, allow that specific card to be included in the Action deck.
As a general rule, an Action deck may not contain more than two cards with the same name. For this limitation, what counts is the actual name of the card; its statistics, description, illustration or symbols do not count.
After each player or team has composed its Action deck, the deck is shuffled and set aside. See Figures 9, 10 and 11 for examples of non-Base Action cards for Orders, Abilities and Throws.
Figures 9, 10 and 11 are card diagrams and are not reproduced.
Focus Box 4: Action cards and the starter set
The set included in this box contains 5 Action cards for each army (10 in total).
- For the Barbarian Tribes, there are 2 Abilities (usable if the Character Ambitious Youth is deployed) and 3 Throws (usable if the Shapeshifter is deployed).
- For the United Principalities, there are 2 Orders (usable if the Regent is deployed) and 3 Throws (usable if the Luminous One is deployed).
For the cards in this box, this means that if an army is deployed with both of its Characters, its Action deck will be automatically composed of all 5 available cards.
With future expansions, the number of Action cards will be expanded, so that, depending on the Character deployed, the combinations of Action cards usable to compose one's Action deck will be diversified.
8) Take the Army, Act and Influence tokens
Each player or team takes the token bearing the symbol of the army being used. Then it checks the number of its deployed units and takes an equal number of Act tokens.
Each single player, team member or pair member takes an Influence token and places it on the Character tile of their own Commander-in-Chief, if they have one.
If a player controls a deployed Character that has the Special Rule Bonus Influence, that player is entitled to additional Influence tokens (see page 73). For example, in the starter set of this box, if the Regent has been deployed, its controller is entitled to one additional Influence token, thanks to the Special Rule Bonus Influence (+1). This additional token is placed on the Regent's Character tile.
Figure 12 shows the United Principalities symbol and Figure 13 the Barbarian Tribes symbol. Figure 14 shows an Act token, which has two different faces, and Figure 15 an Influence token. These diagrams are not reproduced.
9) Draw the Army Objectives
Note: the full game includes the use of Army Objectives. The players may also agree not to use them, in order to simplify and speed up the game. If you choose not to use them, ignore this setup step and move on to the next.
Army Objectives represent particular opportunities that arise during battle, which armies glimpse during clashes and try to exploit to their advantage.
The game uses two Army Objective decks: each is a copy of the other. The two decks are marked on their backs as deck No. 1 and deck No. 2. They are used to generate secret Objectives for the army of each single player, each team, or for each alliance of two armies in the case of pairs of players. Deck No. 1 is assigned to one player, team or pair of players, while deck No. 2 goes to the other player, team or pair of players. See Figure 16 for an example of an Army Objective.
Figure 16 is a card diagram and is not reproduced.
Once the Army Objective decks have been shuffled, each player, team or pair draws from its own deck a certain number of cards. Then each player, team or pair must choose which cards to keep among those drawn: the number of cards to draw and the number to keep depend on the mode and size chosen for the game (see Tables 6 and 7 below). Cards not chosen are discarded, together with all the other cards that were not drawn.
One versus one or team versus team
| Game Size | Army Objective cards to draw | Army Objective cards to keep |
|---|---|---|
| Minimum | 4 | 1 |
| Small | 4 | 2 |
| Medium | 5 | 3 |
| Large | 6 | 4 |
Table 6
Pair versus pair
| Game Size | Army Objective cards to draw | Army Objective cards to keep |
|---|---|---|
| Medium | 6 | 2 |
| Large | 6 | 4 |
Table 7
The kept cards are secret, to be revealed possibly during the game. In pair-versus-pair mode, the two players of each pair must choose how to divide the cards they decided to keep: each player of the pair may choose to reveal or possibly claim, with their own army, only the cards they have kept for themselves.
10) Decide the initial player order
Roll 1d10: one player calls even while an opposing player calls odd. The winner of the roll places the common six-sided die included in the box on top of their Army token, with the number 1 facing up. This indicates that the selected army will start first in the first Round of the game.
In the case of a pair game (4 armies, therefore 4 Army tokens), the pair that won the roll freely chooses on which of their two allied armies' tokens to place the six-sided die. The Army tokens must be placed next to each other, with the first token at the front and the remaining ones in a horizontal row to its right, in a free part of the table, clearly visible to all. The order of priority runs from the army whose token bears the die, and then towards the right.
Figure 17 shows an example of a one-versus-one or team-versus-team game in which the army of the United Principalities will start first. Figure 18 shows the layout of the 4 tokens in pair-versus-pair mode, where the two armies of each alliance must alternate in the row. Each pair chooses the initial distribution of its armies in its own positions. Figures 17 and 18 are not reproduced.
With the Army tokens and the six-sided die now placed, the setup of the game is complete.
Focus Box 5: Alternative game setups
Terrain variant: the chooser keeps. In the standard procedure, opponents choose the terrains by alternating: the chosen ones are then shuffled and randomly redistributed before being placed on the game board. With this variant, immediately after the terrains are chosen they are not shuffled, but are kept by the player or team that chose them. Each player or team will deploy those Terrain tiles it chose, according to the usual alternation.
Terrain variant: agreed terrains. In this variant, the players agree on which Terrain tiles will be used in the game. The agreed tiles are equally and randomly divided, then deployed according to the usual alternation. The number of Terrains to deploy does not change, either for the Deployment Areas or for the Battle Areas.
Terrain variant: agreed scenario. In this variant, the players choose which Terrain tiles to use and place them according to an agreed layout. The number and type of Terrains used may be chosen freely. The Battle Objectives may also be chosen freely.
Objectives variant: direct battle. In this variant, no Objectives of any kind are used. This choice can be useful to simplify the game further, for example when learning. The use of Battle Objectives is nevertheless recommended.
Armies variant: pre-set armies. In this variant, no unit deck is composed, nothing is drawn from it, and no cards are paid for at deployment. The players agree on the mode and size of the game in advance. Each player or team may compose its own army independently before the game. The usual restrictions remain in force, which require including the units that generate Uncommon Unit and Rare Unit tokens before those Resources can be spent to compose the army. The players will then have ready-made armies to deploy in alternation, according to the usual rules of Deployment Turns. This variant allows full choice over what to include in one's army, but requires planning. The standard rules instead allow games to be set up on the fly on any occasion, and add the further tactical and strategic dimension of army composition and deployment through the unit decks.
Measuring Distance and Units
Measuring distances by counting spaces
If used for movement, each unit has a number of Movement Points equal to the value of its Movement Attribute. The symbol of this Attribute is the green arrow, and for each unit the appropriate value of Movement Points is written within the symbol itself.
If a ranged attack is made, it is carried out according to its Range Points, which are equal to the value of the corresponding Range Attribute. The symbol of this Attribute is the purple arrow, and the appropriate value of Range Points is written within the symbol itself.
When a distance must be measured for movement or range, each included space that is an odd diagonal (the 1st diagonal, the 3rd diagonal, and so on), horizontal (odd or even) or vertical (odd or even), counts as one space; while each even diagonal space counts as two spaces. This means that moving a unit from its occupied space to an immediately adjacent space always costs 1 Movement Point, just as reaching an adjacent space with a ranged attack always requires only 1 Range Point. For longer movements or ranges, this rule on even diagonal spaces, which count double, comes into play. If, for example, a unit wants to move through a path that includes two diagonal spaces, it must have at least 3 Movement Points to spend on those two specific spaces: 1 point for the first diagonal space included in the path, and 2 points for the second.
As further examples of distances and their costs in Movement Points or Range Points, refer to page 48, Figures 24, 25 and 26. (These figures are not reproduced.)
Spaces and units
A space may be occupied by only a single unit. Two or more units may occupy the same space only if they are engaged in a Close Combat (CR), that is, a melee (mischia). This implies that at least one enemy unit must be present in the same space. A unit may enter a space that is already occupied only through a Charge Activation (see page 35), and only if an enemy unit is present in that space. Two friendly units that are not engaged in melee with enemies can never be in the same space.
The Game and Victory Conditions
The goal of the game is to obtain more Victory Points than your opponents. A game lasts 6 Rounds and, once the sixth Round is over, the player, team or pair of players with the most Victory Points wins. To obtain Victory Points, you must satisfy the conditions written on the Objective cards and/or accumulate resources in your Resource Pool.
When a player removes an enemy unit and any Add-on cards attached to it, that player gains in their Resource Pool a number (in absolute value) of Silver Coins equal to the sum of the coins shown on all the cards removed at that moment. If an Add-on card is removed from the game before its unit (for example in a different Round), the opponent who removed it immediately gains the related Silver Coins. If it was removed by its own owner, the opponent may gain its value only if they manage to remove from the game the unit on which it was placed. Other circumstances allow players to gain various resources during the game: additional Coins, Gold Nuggets or Gems.
At the end of the game, each Gold Nugget owned is converted into 1d10 Silver Coins (roll a ten-sided die), and each Gem owned is converted into 2d10 Silver Coins (roll two ten-sided dice). Finally, each player, team or pair gains +1 Victory Point for every 20 Silver Coins owned.
The Round
A Round is made up of 6 successive Phases: the Acquisition Phase, the Revelation Phase, the Activation Phase, the Morale Phase, the Update Phase and the Claim Phase.
The Acquisition Phase
This is the first phase of the Round. During this phase, each single player, each team, or each player of the two pairs does the following:
- Draws from the top of their own Action deck a number of Action cards equal to the number of Characters still in play in the army being used, plus one additional card if one of those Characters required the spending of a Crown token to be deployed. This is done as long as cards remain in the deck. In the case of teams, the two members divide the cards drawn as they wish for the army used in common, considering which of them can be used by the Characters managed by each player.
- Gains Throw tokens as described in the rules for Throws (page 62).
The Revelation Phase
This is the second phase of the Round and is dedicated to those game mechanisms that require revealing secret elements in advance. For the components of this box, the only elements of this kind are the Army Objective cards: if you have chosen not to use them, this phase is to be ignored. In each of these phases, each single player, each team, or each player of the pairs chooses whether to reveal one (and no more than one) of the Army Objective cards they own. This is done by placing the card face up on the table so that it is clearly visible, and is carried out by the players in the order of priority valid for the current Round. To complete and claim any Army Objective, the corresponding card must have already been revealed beforehand. See page 64 for further details on Objectives.
The Activation Phase
This is the third phase of the Round and is the main phase of the whole game. The Activation Phase consists of a series of Activation Turns. The player who is first in priority for the current Round selects one of their units and carries out an Activation Turn with it. Once that is done, an opposing player carries out an Activation Turn with one of their own units, and so on, alternating between the armies, until all the players have taken a Turn. In team mode, at the start of this phase the two members of each team freely decide which of the two begins to use, first, the army they have in common, with the cards assigned to and controlled by that member. The sequence is then repeated with the same order of players, until all the units in play have an Act token on them.
Act tokens are used to keep track of the units that have carried out their Activation Turn. A unit with at least one Act token on it is called Not Ready, while it is called Ready if it has no Act token. If all the units of a player or team become Not Ready, that player or team must continue to pass its Activation Turns. The other players continue to take their turns until all units become Not Ready. As soon as this happens, the Activation Phase ends. See the next chapter for a detailed explanation of the Activation Turn and of Activations.
The Morale Phase
This is the fourth phase of the Round. First, every unit in play that must undergo a Morale Test must be identified. Each player or team, from first to last place according to the order of priority for that Round, identifies those units among the ones they own on the game board, and carries out the Test once for each of them. See pages 53 to 57 for further details on Wounds, health status and Morale Tests.
The Update Phase
This is the fifth phase of the Round. During this phase, the following changes are made in succession:
- From each unit on the game board, 1 Act token is removed.
- From each Action card still in play (Orders, Throws, etc.), 1 Time token is removed. If, as a result of this removal, any of these Action cards no longer has any Time tokens, that card is immediately discarded and all its effects end at that precise moment.
- Each player returns all unused (non-Base) Action cards to their Action deck: those cards are moved from the player's hand to the bottom of the Action deck, in any order desired. Some circumstances and/or specific rules may allow a player to keep some of the unused cards.
- The order of priority must be updated with the Army tokens and the six-sided die. The die is moved onto the Army token to the right of the one on which the die was placed during this Round, and the number shown on the six-sided die is updated to the number of the next Round. The army whose token the die is moved to will begin first in the next Round. The second army will be the one whose token is to the right of the token now bearing the die, and so on, until the end of the row of tokens, then resuming from the first token in the row (the leftmost one). Figure 19 shows a generic diagram for 4 armies, with the order of priority updated for the 2nd Round.
Figure 19 is a diagram and is not reproduced.
The Claim Phase
This is the sixth and last phase of the Round. During this phase, each player or team may claim the completion of Battle Objectives, if the necessary conditions are met. They may also claim their Army Objectives, provided that the corresponding Objective cards have been revealed previously and all the conditions are met. See page 64 for further details on Objectives. Afterwards, during this phase, every specific resource generated during the current Round by Terrains or other game effects is claimed and taken by the legitimate player or team.
Once the Claim Phase is concluded, the next Round begins.
The Activation Turn and Activations
When each player takes an Activation Turn, that player must select on the game board a Ready unit available to them. In that Activation Turn, the player uses only that unit, together with all the Add-on cards on it. The player must choose and declare which Activation the selected unit will carry out.
After the selected unit has carried out the chosen Activation, it becomes Not Ready and an Act token is placed on it. The Act token has two different faces: one with the Resist symbol, and one with a chain symbol. If the unit carried out a Reposition Activation, place on it an Act token with the Resist face up (see Reposition on page 35, and the Resist Special Rule on page 75). Otherwise, use the other side for any other Activation carried out.
During each of your Activation Turns:
- You may play only one Action (Base or non-Base).
- Choose a Ready unit you control and have it carry out an Activation. Together with the selected unit, you may also use all the Add-on cards placed on it.
- If you have no Ready unit on the game board, you must pass your Activation Turn. Before passing, you may still play the single Action allowed for that Turn, if the game conditions and the Action to be used permit it.
- After using the chosen unit and its linked Add-on cards, place an Act token on it, and that unit becomes Not Ready. The face of the token pointing up must be the one with the chain symbol. Only if a Reposition Activation was carried out is the face with the Resist symbol turned up.
- After the unit becomes Not Ready, the current Activation Turn ends.
Activations
During an Activation Turn, the selected unit carries out one (and only one) of the following 6 Activations: (1) Move, (2) Shoot, (3) Move & Shoot, (4) Reposition, (5) Fight, (6) Charge.
(1) Move. A unit card may be chosen to carry out a Move Activation only if it is not engaged in close combat (melee). This Activation allows the selected unit to move in any direction, spending its Movement Points along a path decided by the controlling player. Remember that when used to carry out this Activation, a unit card has a number of Movement Points equal to the value of its Movement Attribute. At the end of the movement, the unit card may orient its front (its side with the white border) in any direction.
During a Move Activation, a unit may not pass through an occupied space, unless that space is occupied by just one friendly unit with the Special Rule Open Formation (see page 72). In any case, a unit may not end its Move Activation inside an already occupied space. Rotating an unengaged unit card in place, without leaving its space, counts as a particular kind of movement: to do this, a unit must carry out a Reposition Activation or a Move & Shoot Activation.
(2) Shoot. Some units and/or some of their Add-on cards may carry out ranged attacks. With this Activation, an unengaged unit card (not in melee) and its Add-on cards carry out all the ranged attacks available to them.
(3) Move & Shoot. A unit that can carry out ranged attacks, alone and/or thanks to its Add-on cards, may choose to move and shoot in the same Activation. The unit may decide to shoot after moving, or to move after shooting. These two combined Activations are exactly the sum of the Move Activation and the Shoot Activation, except for the following: if a unit is chosen to carry out this combination in a single Activation Turn, then every ranged attack made by that unit and/or by one of its Add-on cards suffers a -1 modifier to the value of its Aim Attribute (one die less) for the entire Activation Phase. Turning in place within a space, even just a simple rotation (for example to change its field of view), before shooting requires a Move & Shoot Activation.
(4) Reposition. When carrying out this Activation, the selected unengaged unit can do nothing other than rotate (if desired) within its occupied space, and all its Add-on cards cannot be used. Character cards may still be chosen as sources for Action cards. A unit that carries out this Activation gains the Special Rule Resist until the Update Phase of the current Round (that is, until its Act token is removed and, going from Not Ready, the unit becomes Ready again). To remember this, the Act token placed on the unit at the end of its Activation Turn must be placed so that its Resist face (the symbol) is visible. See page 75 for the Special Rule Resist.
(5) Fight. If a unit begins its Activation Turn already engaged in close combat, it must use that Turn to carry out a Fight Activation against one of its enemies. This is also done as a free, additional and mandatory Activation after a successful Charge.
(6) Charge. This is the only Activation that allows the selected unit to enter a space already occupied by an enemy. If this Activation is chosen for the selected unit, the player moves that unit into a target space containing an enemy. To succeed, the Charge Activation must meet certain requirements; see Focus Box 6 below for a detailed explanation.
Focus Box 6: Charge Activation and requirements for success
a. The selected unit card must not be engaged in any close combat (melee) and must be free to leave its space.
b. Another space, and an enemy unit within it, must be identified, and both must be declared as targets.
c. The target space must be of a type that, if empty, could normally be accessed without restriction by that selected unit card through a simple Move Activation. This also means that the chosen unit must have enough Movement Points to reach the target space.
d. The destination space must lie within the field of view (arc of sight) of the selected charging unit. The arc of sight is evaluated from the front of the unit card (the side with the white border), as shown in Figure 20. The arc of sight of a unit card is made up of the 3 spaces of the first row that lie directly in front of the white border of the card, then the 5 spaces of the second row, and so on, for as many rows of spaces as are available on the game board. The same procedure is used to define the rear arc, starting from the black border of the unit card. The left and right arcs are built in a similar way, taking the red borders of the card as reference; but for each side arc, only one space is taken in front of the red border, 3 spaces are taken behind the first space, and so on.
If the charging unit comes from outside the enemy's field of view, that is, from a side or rear space from the perspective of the attacked enemy unit, the front edge of the attacking unit card is aligned and placed in contact with the appropriate side or rear edge of the attacked unit card.
e. The Charge must be made, using Movement Points, along the shortest path available. Among all the trajectories available to the selected unit to reach its target space, the one requiring the least expenditure of Movement Points must be used, up to a maximum distance equal to that obtained by spending all of its Movement Points. All trajectories requiring the same quantity of Movement Points are considered equivalent. Remember that when used to carry out a Charge Activation, a unit has a number of Movement Points equal to the numerical value written in the symbol of its Movement Attribute.
f. The path must be free of obstacles. Only after the shortest path has been defined must it be verified that this trajectory is free of obstacles. If another friendly unit, a different enemy unit or an inaccessible space blocks that shortest path, the chosen space cannot be a legitimate target: another space must be chosen as the target for the Charge Activation, or a different Activation must be chosen. Note that to satisfy this requirement, the situation inside the final target space is never considered. What counts is the absence of obstacles in the spaces that must be crossed to reach the final target space. This means that any other friendly or enemy units inside the target space that are already involved in close combat (melee) do not count as obstacles for reaching a specific enemy target that is already in that same target space. If a friendly unit has the Special Rule Open Formation (see page 72), it does not count as an obstacle for other friendly units carrying out a Charge Activation.
If the Charge Activation is carried out successfully, the charging unit is placed inside the target space and immediately carries out an additional and free Fight Activation against the enemy target unit inside that same space. Note that, although free, the additional Fight Activation is mandatory and must be carried out. For the duration of this free Activation, the charging unit and its Add-on Character and/or Companion cards, where applicable, have a +1 modifier to the values of their Melee Attribute (one extra die).
If the charging unit starts from a starting space that lies within the field of view of the attacked enemy unit, the two cards are placed facing one another in the same space (it is the charging unit that is moved and aligned, so that their white borders are in contact).
Once two or more units are engaged in close combat (melee), they cannot be moved, and they are locked in position within the same space until all the enemy units (of the same player, the same team or the same pair of players) are destroyed and the melee ends.
After the completion of the free Fight Activation following a successful charge, the selected unit gains its Act token and becomes Not Ready.
When a unit card is charged on its flank (one of its two red borders) by an enemy, it must undergo an Immediate Morale Test (see page 56), and the charging enemy gains a further +1 to the value of its Melee Attribute (one extra die). This modifier affects the charging enemy unit and its Add-on Character and/or Companion cards, where applicable and where they have a value for the corresponding Attribute; and it lasts until the end of the next free Fight Activation.
Every time a unit card is charged on its rear (its black border), that unit must undergo an Immediate Morale Test (see page 56) with a -1 modifier to the value of its Discipline Attribute (the highest one it can use). The charging enemy unit and its Add-on Character and/or Companion cards, where applicable, gain another +1 to the value of their Melee Attribute (one extra die). This modifier lasts until the end of the next free Fight Activation.
Note on card borders: some unit cards have no coloured borders; instead, their side borders and their rear border are white, like their front. If a unit card has all its borders white, this means that:
- When it carries out a Charge, Shoot or Move & Shoot Activation, its field of view is 360°.
- When it is charged on its side or rear, it suffers no penalty, does not have to undergo any Immediate Morale Test, and the unit that charged it does not gain the extra Melee die for charges on the flank or rear.
- If it benefits from the Special Rule Spears (Armi ad Asta, page 69), it fully exploits the effects of that rule on all its sides.
Figure 20 shows the field of view of a unit card and is not reproduced.
The Combat System
Close combat (CR): the attack pool
When attacking in Close Combat (CR) with a Fight Activation, the result is obtained by rolling a single pool (handful) of dice, called the Attack Roll, or simply the Attack. To correctly assemble all the dice that make up the pool, proceed as follows:
- For each point of the attacking unit card's Threat Attribute, take one blue ten-sided die (a d10, which may be called an Attack die).
- For each point of the attacking unit card's Melee Attribute, take one of the Offense dice (dO), which are the white six-sided dice. Remember that the unit gains +1 Melee (one extra die) for the duration of each Activation Turn in which it is charging.
- For each point of the attacking unit card's Strength Attribute, take one of the Power dice (dP), which are the red six-sided dice.
- For each point of the Armour Attribute of the attacked enemy unit card, take one of the Defense dice (dD), which are the black six-sided dice.
Once the pool of dice is ready, all the dice are rolled simultaneously by the attacking player; then the results are checked. See below for the description of each type of die and the meaning of its symbols.
The dice
Attack die (d10, blue). Attribute: Threat. A Wound is marked if the result of the rolled die is HIGHER than the Melee Protection Attribute printed on the attacked enemy unit card. If a natural result of 1 is obtained, no Wound is marked, while if a natural result of 10 is obtained (the "0" face of the die), a Wound is automatically marked. If, after applying any modifiers, none of the Attack dice rolled allows a Wound to be marked, the entire pool of dice is wasted and no Wounds are marked.
Offense die (dO, six-sided, white). Attribute: Melee. This die has special symbols, whose meanings are given below.
- +1: this symbol modifies by +1 the individual result of EACH Attack die (dado attacco) in the rolled pool. A +1 symbol can never modify a natural result of 1 or 10 obtained with an Attack die. Alternatively, each +1 symbol can be converted into an Advantage result. An Advantage result obtained in this way, or from any other source (that is, not directly from rolling a dO), is defined as "generated" (see below for further details).
- Advantage (Vantaggio): Advantage symbols may be spent to activate a special power among those that cards may have. An Advantage result obtained directly from a face of an Offense die is defined as "natural". Normally, at least two Advantages of any type (generated or natural) must be spent to activate a single power once. Alternatively, two natural Advantage symbols may be spent to increase by +1 the individual result of EACH Attack die, in which case they are effectively converted into a single generated +1 symbol.
- +2: this symbol modifies by +2 the individual result of EACH Attack die in the rolled pool, just as is done with the +1 symbol. Alternatively, it may be consumed so that a natural 10 result of a rolled Attack die scores two Wounds instead of one: the act of spending a +2 symbol to obtain this effect is defined as causing a Critical Hit (Colpo Critico). Note that the sum of two +1 symbols (natural or generated) obtained cannot be consumed to obtain a Critical Hit: only natural +2 symbols, obtained directly from rolling the Offense dice, are useful for the Critical Hit option. In addition, a +2 symbol cannot numerically modify a natural result of 1 or 10 obtained with an Attack die.
- Blank face: a blank face has no effect.
Power die (dP, six-sided, red). Attribute: Strength. This die has special symbols, whose meanings are given below.
- Penetration (Penetrazione): each Penetration result cancels one Barrier result, and both are removed. This is resolved automatically before a Barrier result can produce any effect.
- Wound marked (Ferita segnata): each Wound symbol obtained increases the number of Wounds marked by one. Wounds marked by obtaining this symbol directly with the Power dice are the last to be cancelled by Barrier results or other effects. This order of cancellation may be necessary for some game effects, but is normally not relevant. Remember that if, in the rolled pool, none of the results obtained with the Attack dice allows at least one Wound to be marked (after numerical modifiers but before Barriers), then no Wound can be marked and this symbol has no effect.
- Blank face: a blank face has no effect.
Defense die (dD, six-sided, black). Attribute: Armour. This die has special symbols, whose meanings are given below.
- Barrier (Barriera): each Barrier reduces the final number of Wounds marked by 1. This reduction is applied last, after the total number of Wounds marked has been calculated through all the other symbols and results. Only once the number of Wounds marked by rolling the pool has been defined are the remaining Barrier symbols consumed to reduce that number.
- Disadvantage (Svantaggio): each Disadvantage symbol obtained cancels one Advantage obtained, and both are removed. This is resolved automatically, before any other effect or decision about the use of Advantages. Only if there are no natural or generated Advantage symbols left, or no more Advantage symbols to cancel, does each remaining Disadvantage symbol then modify by -1 each individual result of the rolled Attack dice. A Disadvantage can never modify a natural result of 10 (or 1) obtained with an Attack die.
- Blank face: a blank face has no effect.
Resolving Wounds in close combat
All the Wounds marked that remain and are not eliminated become Wounds suffered by the attacked target. Once the number of Wounds suffered has been calculated, an appropriate number of Wound tokens is placed on the attacked card (see pages 53–55 for Wounds, Wound tokens and Health Status).
When a unit card has enough Wound tokens on it, it counts as destroyed. If a unit card counts as destroyed, this indicates that the combatants that make it up are dead, captured and/or have fled the battle never to return. In game terms, the destroyed unit card is removed from the game board together with all its Add-on cards and the tokens placed on it. All effects that target only that destroyed unit also cease to exist.
When the last enemy unit card involved in a melee (close combat) within a space is destroyed, all the unit cards of the winning player or team must adjust their position so that no more than one unit card remains in a given space. This means that one of the winning unit cards must be chosen to remain in the original space where the clash took place, while any remaining ones are distributed as desired to other free and immediately adjacent spaces. Only if there are no more free adjacent spaces may a unit card be placed inside an adjacent space occupied by another enemy unit card (thus counting as engaged in a new melee), or by unit cards of the two players or teams involved in a different melee.
Note that for the entire duration of any melee, and when making the position adjustment required after the end of any combat, each unit card must keep the original orientation of its sides. This means that at the end of a close combat, each unit card must have its front side (white border) aligned in the same direction it faced when it was aligned with its enemy during the combat.
Focus Box 7: Example of Close Combat (CR)
In this example, the Swordsmen unit card is engaged in Close Combat (CR) with the enemy unit card Clan Members, and is about to carry out a Fight Activation against that enemy. As can be seen in the image (Figure 21), the following values are printed on the Swordsmen unit card, in the area on the left reserved for the Close Combat (CR) Attributes: Threat = 2; Melee = 3; Strength = 1.
Looking instead at the Clan Members card (Figure 22), the following values can be seen printed in the area on the right reserved for the Defense (DIF) Attributes: Melee Protection = 5; Armour = 2.
The Fight pool of the Swordsmen against the Clan Members is therefore composed of these dice:
- two Attack dice: 2d10 blue (Threat attribute of the Swordsmen; 2)
- three Offense dice: 3dO white (Melee attribute of the Swordsmen; 3)
- one Power die: 1dP red (Strength attribute of the Swordsmen; 1)
- two Defense dice: 2dD black (Armour attribute of the Clan Members; 2)
Once the pool of dice is formed, the attacking player immediately rolls all the dice that make up that pool. In this example, suppose the following results are obtained:
- a 4 and a 10 from the 2d10 blue (Attack dice).
- a +2 symbol and two blank faces from the 3dO white (Offense dice).
- a Penetration symbol from the 1dP red (Power die).
- a Barrier symbol and a Disadvantage symbol from the 2dD black (Defense dice).
The overall result is calculated as follows. The Barrier symbol is cancelled by the Penetration symbol obtained from the rolled 1dP. Since no Advantage symbols are available to cancel the Disadvantage symbol obtained, that symbol will be spent later to modify each of the two results obtained with the 2d10 by -1. The two numbers from the 2d10 should eventually be modified by -1. The natural 4 obtained will in fact become an (modified) result of 3. Since the other number obtained is not in the range from 2 to 9, but is a natural 10, it will not be modified, because a natural 10 (as well as a natural 1) can never be modified.
The attacking player may now choose to use the +2 symbol obtained in one of the two following ways:
a. The player may use it as a +2 numerical modifier to the results. If this choice is made, in the end the 3 will become a 5; while the natural 10 remains unchanged (if it had been a number in the range 2–9, it would have been modified by +2).
b. The player may consume it to cause a Critical Hit. Since among the rolled Attack dice there is a natural 10, a Critical Hit can be caused by consuming a +2 symbol, thus scoring another Wound. If this choice is made, the other result will not be affected and will remain equal to 3.
In this example, the attacking player chooses to cause a Critical Hit, and the total number of Wounds marked against the Clan Members becomes 2. This number of Wounds marked is not reduced, since there are no more Barrier symbols: the two Wounds marked both become Wounds suffered by the Clan Members. This is represented by placing two Wound tokens on the attacked unit (see pages 53–55 for Wounds suffered and Wound tokens).
Figure 21 and Figure 22 are card diagrams and are not reproduced.
In a later Activation Phase, the player who controls the Clan Members unit card uses it to carry out, in turn, a Fight Activation against the Swordsmen unit card, which is already engaged in Close Combat (CR) in the same space.
The following Attribute values are printed on the two unit cards:
- Clan Members: Threat = 1; Melee = 3; Strength = 2.
- Swordsmen: Melee Protection = 6; Armour = 2.
The new Attack pool is composed of these dice:
- one Attack die: 1d10 blue (Threat attribute of the Clan Members; 1)
- three Offense dice: 3dO white (Melee attribute of the Clan Members; 3)
- two Power dice: 2dP red (Strength attribute of the Clan Members; 2)
- two Defense dice: 2dD black (Armour attribute of the Swordsmen; 2)
In this example, the new pool of dice is rolled and the following results are obtained:
- a 7 from the 1d10 blue (Attack die).
- one +1 symbol and two Advantage symbols from the 3dO white (Offense dice).
- one Penetration symbol and one Wound symbol from the 2dP red (Power dice).
- two Barrier symbols from the 2dD black (Defense dice).
The overall result is calculated as follows:
-
One Advantage symbol is removed by the Special Rule Sword Parry (Parata di Spada) of the Swordsmen (see page 74). This is an example of an automatic effect, which activates immediately and influences the natural results obtained (that is, those obtained directly from the rolled dice).
-
One of the two Barrier symbols obtained is cancelled by the Penetration symbol of the 2dP rolled.
-
The +1 symbol may be used in two different ways: a. The attacking player may use it as a +1 numerical modifier for the result obtained with the Attack die. If this choice is made, the 7 becomes an 8 (but in this example doing so against the Swordsmen is useless, since a 7 is already enough to mark a Wound). b. The attacking player may convert it into another Advantage symbol.
-
In this case, the choice is made to obtain the additional Advantage symbol. The gained symbol and the one already available can both be spent to activate once the power written on the Clan Members unit card. Activating it yields a Penetration symbol, which can then be spent to cancel the remaining Barrier symbol.
-
Since there are no more automatic and/or negative numerical modifiers that can be applied, and since the result obtained by rolling the Attack die (a 7) is greater than the Melee Protection value (6) of the Swordsmen, a Wound is marked.
-
Another Wound (for a total of 2) is marked thanks to the Wound symbol obtained with the 2dP.
There are no more Barrier symbols, so the number of Wounds marked is not reduced, and is entirely converted into an equal number of Wounds suffered by the Swordsmen (see pages 53–55 for Wounds suffered and Wound tokens).
Ranged attacks (DST): dice pool and results
If a unit or an Add-on card can make a ranged attack, this is described in a dedicated area of the card, which gives the values of the attributes to use for its ranged (DST) attack. For example, see Figure 23 for the case of the Crossbowmen unit card.
If a unit is not engaged in melee, it may attack at range with a Shoot Activation, together with its Add-on cards that have ranged attacks, targeting an enemy unit that is not engaged.
To be chosen as a target, an enemy unit card must lie within the field of view of the attacking unit that is carrying out the Shoot Activation. Moreover, that same target unit must be, in terms of measured distance, within a maximum number of spaces equal to the value reachable with the Range Attribute of the ranged attack used. When measuring the distance, you start counting from any desired space that is adjacent to the attacking unit's space and within its field of view; you then continue counting up to the space containing the target. Distances on the game board are measured, as always, in the same way as for movement; this means that each even diagonal space included in the measured distance counts as double. If all these conditions are not satisfied, a Shoot Activation cannot be carried out against the desired target. See the examples given below.
Figures 23 to 26 are diagrams and are not reproduced. Figure 23 shows the Crossbowmen unit card. Figures 24 to 26 show distance examples.
Obviously, the distance values shown in the figures may change depending on the length and shape of the chosen path. As can be seen in Figure 26, the three numbers shown are different, although they refer to the same final space. In these cases, for ranged attacks, the correct distance is always the one evaluated along the shortest path (in Figure 26, 4 is the correct value).
The procedure for resolving each ranged attack made with a Shoot Activation is almost the same as that required for close combat with a Fight Activation. The only differences are that, for the attribute that indicates the number of white dice to use, the term Aim (Mira) is used in place of Melee for convenience and ease of reference; and that the Ranged Protection (Protezione dal Tiro) is used in place of Melee Protection for the defence of the target.
In fact, Aim is the specific attribute for ranged attacks, and is the number of Offense dice to use when a specific ranged attack is carried out. The target's Ranged Protection Attribute is used in place of Melee Protection when checking the results of the Attack dice. Each ranged attack (DST) has its own values of Threat and Strength: these values must be used only to compose the pool of dice associated with that type of attack.
If a ranged attack also allows enemy Characters to be targeted, this must be expressly written in the description of that attack itself.
Units in a space
While they are not engaged in melee (close combat), unit cards each occupy one space. When a melee is in progress, two or more units may be present in the same space. Indeed, the spaces of the game board do not indicate only the physical space occupied by a single unit; rather, they represent a relatively large area of the territory in which the battle takes place. A single space may also include a Terrain tile, which in turn identifies a piece of territory with special characteristics.
The unit occupying a space therefore represents, figuratively, the troops tasked with guarding that territory. It is natural that, in the case of a melee, several units may be found in the same territory (the same space) to contest victory.
As a general rule and limitation, no more than 6 unit cards may enter the same space and/or take part in the same melee. This represents the maximum limit of physical space and manoeuvrability that each territory (space) can provide to units. Reaching 6 units involved in the same melee is a very rare event: normally, even in important melees of large battles, no more than 4 or 5 units are involved in a single close combat. Moreover, for most of a game, many melees involve only two units. In this regard, it is worth noting that unit cards have been designed to maximise readability, especially in the most common situation of close combat between two units.
The images (Figures 27 and 28) show examples of convenient placements, in the same space, of two unit cards engaged in melee. In Figure 27, the Clan Members have frontally charged the Swordsmen. In Figure 28, the Clan Members have charged the Swordsmen on their right flank. In all the placements shown, the Attribute values of both cards are clearly visible and readable.
Figures 27 and 28 are diagrams and are not reproduced.
Focus Box 8: Advantages and special powers
Generally, to activate a special power once, at least two Advantage symbols must be spent. The same special power may be activated more than once, by spending the correct number of Advantages several times.
The most common special powers allow symbols to be added to those obtained with an attack roll, or allow further dice to be added to the rolled pool. For example, the Crossbowmen unit card (Figure 23) has the following special power: "[Crossbow icon] (Crossbow, DST): [dice icon]". Activating it adds a Penetration symbol to those obtained with the rolled dice. The text "DST" indicates a power that can be activated only during a ranged attack, while "CR" indicates one that can be activated only in close combat/melee.
As another example, a special power of the type "[icon] (Two weapons, CR): 1 extra die" indicates that, by activating it in close combat, you can roll one extra d10 (Attack die), whose result will go into the group of those already obtained by rolling the dice.
The special power icons are not reproduced in the text layer of the source; they are described here in words.
Focus Box 9: Melee Enlargement tokens
The largest melees, which involve more than two units in the same space, can still be handled easily. Experienced players, or enthusiasts of games in which many cards interact and overlap, have no problems managing several unit cards, their tokens and their Add-on cards, even when this material physically takes up more room than the single space. A solution often used is to temporarily make use of the free adjacent spaces, until the melee is resolved and the cards are correctly repositioned.
Those who prefer to manage the most demanding melees in a more visually orderly way can do so by using the Melee Enlargement tokens provided in this box (Figure 29). There are two pairs of Melee Enlargement tokens in total, each pair of a different colour and shape. Each pair serves a different space (and melee).
In the case of a large melee, a Melee Enlargement token can be placed on the space where it takes place. The unit cards involved in that melee are then removed from the game board and placed outside it, in a convenient and free place (for example, in a free part of the game table). When a Melee Enlargement token is placed on a space, its arrow must be oriented so as to provide a reference for how the cards will later be repositioned at the end of the melee. For example, the front side of the first card that was charged (engaged in melee), that is, the one that first occupied the space, may be taken as reference.
The unit cards involved in the melee and placed outside the board have the other token of the pair placed nearby, with its arrow as a reference, for example for that same first unit. In this way, at the end of the melee, it will be easy to reposition the unit cards on the game board, correctly respecting the proper orientation of each one's front side. The two pairs of tokens included in the box therefore allow up to two melees to be managed outside the board.
Figures 28 and 29 are diagrams and are not reproduced.
Wounds, Health Status and Morale
Health status bars
Unit cards and Character Add-on cards are removed from the game if they suffer enough Wounds. Each of these cards has its own health status bar, which is itself made up of a sequence of coloured circles representing HIT POINTS (Punti Ferita, PF). In fact, it is not possible to attack directly, or to mark Wounds against, cards that have no health status bar. Companion Add-on cards never have their own health status bar, and therefore cannot be removed by direct attacks.
The total number of circles in the bar indicates the maximum number of Wounds a card can suffer without being removed. For example, if a unit card has a health bar made up of a total of 4 coloured circles, it can sustain up to a maximum of 4 Wounds suffered without being removed. If the same card suffers a fifth Wound, it is removed from the game board.
When a card suffers a Wound, place an appropriate number of Wound tokens of the correct colour on it. The Wound tokens included in this box come in 4 different colours (green, yellow, orange and red). For green there are tokens indicating different numbers of Wounds suffered (from 1 to 4 Wounds suffered per token, depending on the face); for the other colours, each token indicates only one Wound suffered.
- Green: the green circles usually represent the first part of the health bar, and green tokens are usually the first to be placed on a card when it begins to suffer Wounds. For example, if a card's health bar has 2 green circles, the first or second Wound it could suffer must be represented by placing the correct number of green tokens on the card (one or two tokens showing the number 1, or just one token showing the number 2). As long as a card has no Wound tokens on it, or has only green Wound tokens, that card has a green health status. Only green circles can be more than one.
- Yellow: a single yellow circle indicates the part of the bar that is usually second, to be "filled" with a yellow token, once no more green tokens can be placed. As long as a card has a yellow Wound token on it and not orange or red ones, that card has a yellow health status.
- Orange: a single orange circle constitutes the part of the bar that is usually third, and its "filling" is handled with an orange token. As long as a card has an orange Wound token on it and not a red one, that card has an orange health status.
- Red: a single red circle always constitutes the last part of the bar, the one to be "filled" with the red token. As long as a card has a red Wound token on it, that card has a red health status.
Table 8 is a colour key showing the green, yellow, orange and red Wound tokens; it is a graphic and is not reproduced.
Note that some cards may not have green circles in their health bar, in which case the yellow circle is the first element of their bar. A card may therefore have a health status of different colours, and this can affect that card with modifiers and/or conditions, as described below.
Effects of health status
- Green: no particular additional effect applies.
- Yellow: if, during a Round, the card has suffered at least one Wound (in any way) while engaged in melee (CR) and its health status becomes yellow, it must take a Standard Morale Test in the Morale Phase of that Round. In that case, a Morale token is placed on it. If a card's health status becomes yellow while it is not engaged, no Morale token is placed, because it is not required to take the Morale Test.
- Orange: the card and its ranged attacks receive the following modifiers (where applicable): -1 Melee, -1 Aim. If the card has suffered at least one Wound (in any way) during a Round, and its health status becomes orange, it must take a Standard Morale Test in the Morale Phase of that Round. Immediately after one or more Wounds are suffered by a unit, if as a consequence its bar changes from green or yellow to orange, place a Morale token on the unit.
- Red: the card and its ranged attacks receive the following modifiers (where applicable): -1 Melee, -1 Aim and -1 Discipline. If the card has suffered at least one Wound (in any way) during a Round, and its health status becomes red, it must take a Standard Morale Test in the Morale Phase of that Round. Immediately after Wounds are suffered by a unit, if as a consequence its bar changes from green, yellow or orange to red, place a Morale token on the unit.
Focus Box 10: Wounds suffered and health status
Take as an example a health status bar like the one in Figure 30. Starting from the top, the bar is made up of 2 green circles, 1 yellow circle, 1 orange circle and 1 red circle. This means that as long as a card with that type of bar has not suffered Wounds, or has suffered up to 2 Wounds, its health status is green. The green Wound tokens are used to track those up to 2 Wounds suffered.
As soon as that card suffers the third Wound, a yellow Wound token is placed on the card and its health status becomes yellow. The previous green tokens on the card may be moved if desired, since the yellow one is sufficient to track the correct health status.
If the card suffers a fourth Wound, an orange token is placed on it and its health status becomes orange. The previous green and/or yellow tokens on the card may be removed entirely if desired, since the orange one is sufficient to track the correct health status.
If that card suffers a fifth Wound, a red token is placed on it and its health status becomes red. The previous green, yellow and/or orange tokens may be removed entirely if desired, since the red one is sufficient to track the health status.
Finally, if another Wound (the sixth) is suffered by the card, the card is removed from the game. Each time a player removes an enemy card from the game, they gain a number of Silver Coins equal to the amount (in absolute value) printed on that card. That player places the Silver Coins gained into their Resource Pool.
Remember that using a single token (yellow, orange or red) to track the current health status of a unit is only a way of managing tokens more simply and keeping the game board cleaner: it does not mean that the previous Wound tokens have disappeared. If an effect allows that unit to recover some health or to remove some Wound tokens, the tokens are removed in reverse order, starting from the last one placed on the card.
Figure 30 is a diagram of a health bar and is not reproduced.
Morale Tests
When a unit is forced to undergo a Morale Test, it rolls 1d10 and adds the value of its Discipline Attribute to the result. If the final result is equal to or higher than 10, the test is passed and the unit suffers no negative consequence. Otherwise, if the final result is lower than 10, the unit suffers one Wound for each point needed to reach the minimum of 10.
For example, if a Morale Test rolls a 3 on the d10, and the unit card taking the test has a Discipline Attribute value of 5, the final result is 3 + 5 = 8. This means the unit suffers 2 Wounds, because the test failed by 2 points (10 − 8 = 2). Suffering Wounds when a Morale Test is failed represents a situation in which members of a unit abandon it, for example when some soldiers flee the battlefield because of panic or a general loss of morale.
As explained later (page 60), if a unit has a Character or Companion Add-on card and must undergo a Morale Test, only one Test is carried out, but using the highest value of the Discipline Attribute available among those of the unit and its Add-on cards. If the test is not passed, only the unit suffers Wounds. Characters never suffer Wounds due to a failed Morale Test. Remember, however, that if a unit card is removed from the game, all the Add-on cards of that unit must be removed with it.
Morale Tests are normally carried out during the Morale Phase, and in each single Morale Phase a unit may not undergo more than one Morale Test. At the start of that Phase, any unit on the game board with a Morale token on it carries out a Morale Test, after which the Morale token is removed from that card. This type of test, carried out in the Morale Phase, is defined as a Standard Morale Test.
The most common conditions that can force a unit to take a Morale token, and therefore to take a Standard Morale Test in the Morale Phase, consist of having a health bar that is Yellow, Orange or Red (see the section on health status above for details).
Some game effects can instead force a unit card to take an Immediate Morale Test during the Activation Phase. In this case, the Morale Test is carried out immediately by that unit card. Note that each unit card may also be forced by different effects to take more than one Immediate Morale Test during the same Phase (or Activation Turn).
A unit card is forced to take an Immediate Morale Test every time it is successfully charged on its flank or rear.
- In the case of a charge on the rear, the charged unit card must take the test with a -1 modifier to the value of its Discipline Attribute used. This modifier adds to the one a unit card receives for having a red health status. This means that if a unit card with red health status is charged on its rear, it must take an Immediate Morale Test with an overall modifier of -2 to its Discipline Attribute.
Note that failing an Immediate Morale Test does not automatically cause the same number of Wounds as failing a Standard Morale Test. For the consequences of a failed Immediate Morale Test caused by a charge on the flank or rear, see the Mass Bonus rules below (page 58).
Focus Box 11: Cards as causes of Wounds and Morale Tests
For some game mechanics (for example Objectives), it may be relevant to identify which of the units or Add-on cards involved is the cause of a specific Immediate or Standard Morale Test.
No more than one unit may be identified as the cause of each single Immediate Morale Test. Conversely, more than one unit may be identified simultaneously as the cause of the same Standard Morale Test. In particular, when a unit must take a Standard Morale Test, every enemy unit (or Add-on card) that caused one or more Wounds suffered by that same unit taking the Test during that Round is considered the cause of that Test.
When a unit is the cause of a Morale Test of any kind, it is also the cause of any Wound suffered as a result of failing that Test. If an Add-on Character or Companion card can be identified as the sole cause of any Wound suffered, or of any type of Morale Test, then the parent unit also becomes the cause of that Wound or Test, and vice versa.
If an Action card causes one or more Wounds suffered, or causes any type of Morale Test, then both the Add-on card identified as the source of that Action and its parent unit become the cause of those Wounds or that Test. Likewise, if an Action card causes one or more Wounds suffered, or causes any type of Morale Test, then both the unit card identified as the source of that Action and its Add-on cards become the cause of those Wounds or that Test. This could happen in the future with some new, particular Action cards that identify a unit card as their source.
Unit size and Mass Bonus
Within this game, the same type of unit card can come in up to 5 variants, differentiated by the number of combatants of the same kind that it represents. The 5 variants, in order from the smallest to the largest size, are: Individual (Ind.), Detachment (Dist.), Regiment (Reg.), Brigade (Brig.) and Horde (Orda). This information is shown in the upper left corner of each unit card. Immediately below the abbreviation indicating the unit's size, a numerical bonus is shown in parentheses: this is the Mass Bonus (see Figure 31).
Figure 31 is a card diagram and is not reproduced.
The size of a unit may affect its Threat Attribute and its Mass Bonus, in the sense that larger sizes often correspond to greater values. Size also determines which Terrains a unit can access (see pages 66–68), and influences some Special Rules, such as the Area rule (see pages 69–70).
Fighting alone is more stressful than fighting shoulder to shoulder with many comrades. Moreover, a charge by many individuals against the flank or rear of an enemy formation is more effective at causing chaos than attacking when one is few in number.
When a unit fails an Immediate Morale Test for being charged on the flank or rear, it can suffer at most a number of Wounds equal to the Mass Bonus of the charging unit that caused that Test. For example, if a unit charged on its flank fails the Immediate Morale Test by 4 points, and the enemy unit that charged it has a Mass Bonus of 2, the number of Wounds suffered is limited to 2. The Mass Bonus sometimes also affects some Special Rules, such as the Spears (Armi ad Asta) Special Rule (see pages 69–70).
Add-on Cards
Small cards that are placed directly on deployed unit cards and serve as upgrades for those units are called Add-on cards. They are cardboard tiles measuring 63 x 41 mm, recognisable by this symbol printed on them. Each specifies the type of unit on which that card can be placed (Infantry, Cavalry, Archers, etc.). If desired, the plastic bases supplied in the box can be used to place Add-on cards vertically on the game board, above their units.
Each Add-on card is permanently linked to the unit on which it has been placed, and can leave it only if it is removed from the game. The unit on which an Add-on card is placed is called the parent unit (unità madre) of that card. The most common types of Add-on cards are Equipment, Character and Companion.
- Equipment cards provide advantages that may be constant, or that may be temporarily activated during the course of the game.
- Characters are special and powerful Add-on cards, recognisable by an additional dedicated symbol. They have their own profile of Attributes and their own health status bar, which always consists only of green circles. Nevertheless, they cannot be targeted directly by ranged attacks, and can be attacked in melee only by enemy Characters.
- Companions may or may not have their own profile of Attributes, or may give various advantages to their units. Companions never have a health status bar.
In terms of field of view, a Character or Companion of a unit has the same front, side and rear as that same unit. Some effects and/or modifiers of Attributes that apply to their unit can also be applied to Characters and Companions. When this is the case, it is expressly stated in the description of the modifier and/or effect.
The other properties of Characters and/or Companions are listed below:
- IMPORTANT: while a unit card has a Character on it, that unit gains +1 green circle in its health status bar. As a result, while a Character is within a unit, that unit can sustain one more Wound before being removed (or before its health status changes colour from the initial green, while the unit is still in play). If the Character in question required spending a Crown token to be deployed, it provides its parent unit with +2 green circles instead of +1.
- IMPORTANT: as long as a player or team has in play a Character that required spending a Crown token to be deployed, that player or team may draw 1 extra Action card during each Acquisition Phase.
- Each Character or Companion fights with its parent unit. When the unit carries out a Fight Activation, the Character and/or Companion may attack an enemy target engaged in melee with the parent unit. The target may be the same one chosen for the parent unit, or a different one. This is true for any type of Add-on card with usable combat statistics printed on it. Remember that Characters are the only type of card that can be used to attack enemy Characters when a unit carries out a Fight Activation with its parent unit.
- If a Character or Companion can carry out ranged attacks, this may be done when the parent unit is selected to carry out a Shoot or a Move & Shoot Activation. As in the case of melee, the target may be the same one chosen for the parent unit or another one, provided that the target lies within the range of the attack carried out and within the field of view of the parent unit. If the Activation carried out is Move & Shoot, the Character and/or Companion may shoot before or after the movement of the parent unit, suffering the usual -1 modifier to Aim (one die less). Remember that enemy Characters cannot be targeted by ranged attacks.
- The non-Base Action cards that make up the Action deck are linked to those Characters that are deployed on the battlefield during the Deployment Phase. See the setup procedures for further details.
- Characters also serve as sources through which non-Base Action cards may be played. As regards this limitation, the playable Action cards are those that have at least one Character Symbol corresponding to one of the symbols possessed by the Characters still present on the game board. A Character card bearing the appropriate Character Symbol may be chosen as the source from which the effects of the Action card played develop. See the chapter dedicated to Action cards for further details.
Action Cards
To play a non-Base Action card, there must be at least one Character on the game board with the same Character Symbol required by the Action card you want to play. If a Character has the Character Symbol required by the Action card, it may be selected as the source that triggers that card's effects. In general, the selected Character may be anywhere on the game board, and does not necessarily have to be within the unit that, in that specific Activation Turn, has been chosen to carry out its Activation.
There are three main types of Action cards: Orders, Abilities and Throws. As a further general restriction, a Character cannot be a source for a type of Action if it has not contributed to composing the Action deck with that type of Action. If, for example, a Character has not contributed to composing the Action deck with Ability cards, it cannot be an admitted source for playing Ability Action cards.
- Order Action cards in general produce long-range effects. They can usually affect any controlled unit card of your army on the game board, regardless of its distance from any chosen source.
- Ability Action cards usually affect a Character of your army (the one chosen as the source for the Action), and allow a particular special attack to be carried out, or bonuses to Attribute values to be gained. Basic Action cards of the Ability type usually represent unique abilities of a given army.
- Throw Action cards represent supernatural powers such as magical forces or divine manifestations. In the Acquisition Phase, players may obtain Throw tokens from some of the deployed cards. In particular, if an in-play Character Add-on card has one or more book symbols indicated on its reference tile, that is the number of Throw tokens generated by that Character each Round in the Acquisition Phase. Place each Throw token obtained on the reference tile of the appropriate Character. Each Throw token is not a shared resource, but is available only to the Character that generated it. A Throw Action card may require spending Throw tokens to be played, and the tokens needed are subtracted from the amount available to the Character chosen as the source for that card. A Throw card usually needs zero, one or two Throw tokens to be played, depending on the power of the card. The number of Throw tokens required is shown as an equal number of book symbols printed on the card under the heading "Cost". No book symbol is printed on the card if it does not need Throw tokens to be played (see Figure 11 on page 24).
Some Action cards (mainly Throws) have a defined range of action, indicated by the appropriate Range value (icon). When playing one of these cards, choose a source as usual. Then calculate the distance between the source and the target, just as in the case of ranged attacks; but for Action cards there is no field of view or front border to consider. Moreover, the target of an Action card with a Range value may usually also be in the same melee in which the chosen source is engaged. To summarise, for any Action card with a Range value: you do not need to evaluate the front or field of view of the source, and the source may also be engaged with the target of that Action.
Note that, normally, enemy Add-on cards cannot be targeted directly by the effects of any Action card, unless this is clearly indicated on the specific Action card being played.
Duration of Action cards
If an Action card has a duration longer than that of an instant effect, it bears an hourglass symbol followed by a number. This means that when the card is played, an equal quantity of Time tokens is placed on it. That card remains in play and has effect as long as it has Time tokens on it. During point 2 of each Update Phase (page 33), remove one Time token from each Action card in play. When no Time tokens remain on an Action card, remove it immediately from the game board and place it in the discard pile. If discarded, a non-Base Action card may not be reused in the same game, unless some rules allow it to be recovered. A Basic Action card, instead, may always be reused in each subsequent Round, but each single player, team or pair member may not use more than one Basic Action card in each Round.
As soon as a player uses a Basic Action card, they place an Act token with the chain symbol on the image of that card on the Basic Action tile (see page 23). This allows the player to remember which Basic Action card was used, and also to remember that they can no longer use Basic Action cards in the current Round. The Act token is then removed as usual during the Update Phase.
Remember
- You may not play more than one Action card (of any type) in each of your Activation Turns.
- You may not play (as a player or team) more than one Basic Action card in a single Round. (In this regard, see also the Influence rules on page 65.)
Action cards with the descriptor trait Reaction may, if desired and if specific conditions occur, be played immediately as described on those cards. When this happens, they do not count toward the number of Action cards you may play in your Activation Turn (normally limited to 1). In general, they may also be played during another player's Activation Turn.
Focus Box 12: Throw-type actions and targets
After a Throw Action card has been played and its source has been defined, the targets appropriate for that card's effects may differ, depending on whether the parent unit of the source Character is engaged in melee or not. Specifically:
- If the parent unit is engaged in melee, only enemies directly engaged (in the same space) may be legitimate targets for any hostile effects of the Throw Action card; and only friendly units (or friendly Add-on cards) in the same space may be legitimate targets for any beneficial effects of the Throw Action card. This can be summarised in the phrase: If you are engaged, you can target with a Throw only those who are engaged with you.
- If the parent unit is not engaged in melee (that is, it has no enemies in its space), only enemies that are not engaged (that is, with no enemies in their space) may be legitimate targets for any hostile ranged effects of the Throw Action card; and only friendly units (or friendly Add-on cards) that are not engaged (that is, with no enemies in their space) may be legitimate targets for any beneficial ranged effects of the Throw Action card. This can be summarised in the phrase: If you are not engaged, you can target with a Throw only those who are not engaged.
- If the Throw Action card has the descriptor trait Ing. (short for Ingaggiato, engaged) printed on it, this indicates that the Action may take effect even if the chosen target (friendly or enemy) is engaged in any melee (that is, a melee that may take place even in a space different from the one occupied by the parent unit of the chosen source). This is true regardless of whether the parent unit of the chosen source is engaged in melee or not. This can be summarised in the phrase: With a Throw that has the trait "Ing.", you need not worry about your engagement status or that of your target.
Objectives
Objectives are an important way of gaining Victory Points. There are two types of Objectives: Battle Objectives and Army Objectives. Army Objective cards are personal to each player or team and are kept secret, while Battle Objective cards are shared and known to all players from the start. Army Objective cards may be revealed and claimed only by the player or team that owns them, while Battle Objective cards may be claimed by any player or team.
The requirements needed to claim an Objective are printed on each specific Objective card. The number of Victory Points obtained by claiming an Objective is printed on the Objective card itself, next to the trophy symbol dedicated to that purpose. After an Objective has been claimed, the corresponding card is normally discarded. If a card represents a Battle Objective that can be claimed by more than one player or team, it remains on the table until all players or all teams have failed to claim that Objective once; and one same player or team may not claim it more than once. Follow the instructions described on each Objective card for any exceptions to these general rules.
The requirements needed to claim some Objectives can be satisfied only through the interaction of cards and Terrains. In such cases, the suitable Terrains are indicated on each specific Objective card.
Some Objective cards may have the word Influence printed on them. See the description of the Influence resource for further details (page 65).
Objectives and Roles
Different units and/or different Characters are specialised in various combinations of roles and, as a consequence, may perform some tasks better. Objective cards are usually linked to certain Roles.
When a player or team claims an Objective, that player or team may generally choose up to one of the unit cards and/or up to one of the Character cards it controls that in some way contributed to satisfying the necessary requirements. To be chosen, each card must still be in play on the board at the moment the claim is made.
- If the chosen unit has at least one of the Roles indicated on the Objective card being claimed, 1 additional Victory Point is gained.
- If the chosen Character has at least one of the Roles indicated on the Objective card being claimed, 1 additional Victory Point is gained.
Read the instructions printed on each specific Objective card to check whether it satisfies all these general rules, and/or whether it adds other conditions for obtaining additional Victory Points, perhaps precisely through Roles.
Influence
Influence is represented by Influence tokens, and is a unique type of resource that may be spent during the game in the three different ways described below. At the end of the game, unused Influence tokens are lost.
Additional Basic Action
Once per Round, an Influence token may be spent to play one additional Basic Action card, beyond the normal limit of one per Round. This means that an army, as long as it has Influence tokens available to spend, may play up to two different Basic Action cards each Round. This use of Influence does not allow more than one Action card to be played during the same Activation Turn.
Additional Victory Point
When an Objective card that bears the word Influence on it is claimed, 1 Influence token may be spent by the player or team claiming it to gain 1 additional Victory Point. This may be done for any Objective claimed in any situation. No more than 1 Influence token may be spent in this way each time an Objective is claimed.
Conversion into Silver Coins
During the Claim Phase of each Round, each player or team may convert a maximum of 1 Influence token into 5 Silver Coins.
Influence tokens may be used as soon as the conditions allow, with no further restrictions. However, their retention before being spent is tied to the cards deployed that allowed them to be obtained during the setup phase. For example, the Commander-in-Chief's initial Influence token is kept on its Character tile; and if a Character has the Special Rule Bonus Influence (+X), it guarantees X initial Influence tokens, to be kept on its Character tile.
All of this means that if a deployed card (generally a Character) is removed from the game, all the Influence tokens it provided that have not yet been spent are immediately lost and eliminated together with that card.
Terrains
Forest
The Forest is a BASE TERRAIN, and grants the effects of the Special Rules Ambush (Imboscata) and Refuge (Rifugio) to the units inside it (see pages 72 and 76). Only units that are Detachments and/or that have the Special Rule Scouts (Esploratori) may access it. Since this Terrain has the Wooded trait, any unit with the Special Rule Cross: Forests (Attraversare: Foreste) may enter it freely, regardless of its size.
Hill
The Hill has the Special Rule Height (Altura). Thanks to this rule, this Terrain grants an unengaged unit inside it (and its possible Character or Companion) a +1 modifier to the value of its Range Attribute for each ranged attack made. Any enemy (unit or Add-on card) that carries out a Charge Activation against a unit that controls this Terrain suffers a -1 modifier to the value of its Melee Attribute (one die less) for the duration of the current Round. If the charging enemy is a unit with the Cavalry or Chariot trait, this modifier goes from -1 to -2 (two dice less).
A unit gains control of a Terrain as soon as it is alone and not engaged on it. It continues to control it (even while engaged in melee) until it leaves that Terrain. No more than one unit may control the same Terrain at the same time. There are no access restrictions for this Terrain, so any unit may enter it according to the standard rules for access to spaces.
Fortification
The Fortification grants the Special Rule Strong (Forte, see page 72) to the unit that controls it. Note that a unit gains control of a Terrain as soon as it is alone and not engaged within that Terrain. It therefore keeps control (even while engaged in melee) until another unengaged unit manages to be alone on that Terrain. No more than one unit may control the same Terrain at the same time. There are no access restrictions for this Terrain, so any unit may enter it according to the standard rules for access to spaces.
Since this Terrain also has the Special Rule Garrison (Presidio), in the last Claim Phase of the game (the sixth Round), the player whose unit controls it may spend up to one Influence token to gain +1 Victory Point.
Gem Mine
This Terrain has the Special Rules Danger (2) and Resources (icon).
Thanks to the Resources rule, during the Claim Phase of each Round, the player who has an unengaged unit on this Terrain gains +2 Gems.
Because of the Danger (2) rule, 2 Power dice must be rolled:
- for each Penetration symbol obtained, reduce the total number of Gems gained by 1;
- for each Wound marked symbol obtained, reduce the total number of Gems gained by 1, and the unit on this Terrain suffers a Wound.
The player who would receive the Gems may choose not to roll the Power dice if they give up entirely the two Gems generated, which are then discarded.
There are no access restrictions for this Terrain, so any unit may enter it according to the standard rules for access to spaces.
Hidden Spring
The Hidden Spring grants the effects of the Special Rule Refuge (Rifugio) to the units inside it (see page 76). Only units that have the Special Rule Scouts (Esploratori) may access it. Since this Terrain has the Watery trait, any unit with the Special Rule Cross: Waters (Attraversare: Acque) may enter it freely, whether or not it has the Scouts Special Rule.
This Terrain is also a Water Source (Fonte d'Acqua).
Open Terrain
The Open Terrain is a BASE TERRAIN. It is equivalent to no terrain, and serves to occupy Areas when the terrains are placed, so that no particular type of terrain is placed in those Areas. This can be useful for players who wish to keep all the spaces of certain particular Areas of the game board clear. Once the placement of terrains on the game board is complete, any Open Terrain tiles placed may be removed.
Gold Mine
This Terrain has the Special Rules Danger (1) and Resources (icon).
Thanks to the Resources rule, during the Claim Phase of each Round, the player who has an unengaged unit on this Terrain gains +2 Gold Nuggets.
Because of the Danger (1) rule, 1 Power die must be rolled:
- if 1 Penetration symbol is obtained, reduce the total number of Gold Nuggets gained by 1;
- if 1 Wound marked symbol is obtained, reduce the total number of Gold Nuggets gained by 1, and the unit on this Terrain suffers a Wound.
The player who would receive the Gold Nuggets may choose not to roll the Power die if they give up entirely the two Gold Nuggets generated, which are then discarded.
There are no access restrictions for this Terrain, so any unit may enter it according to the standard rules for access to spaces.
Rocky Terrain
The Rocky Terrain is a BASE TERRAIN, and grants the effects of the Special Rule Refuge (Rifugio) to the units inside it (see page 76). Only units that are Detachments and/or that have the Special Rule Scouts (Esploratori) may access it. Since this Terrain has the Rocky trait, any unit with the Special Rule Cross: Mountains (Attraversare: Montagne) may enter it freely, regardless of its size.
Village
This Terrain has the Special Rule Resources (5 icon). Thanks to this rule, during the Claim Phase of each Round, the player who has an unengaged unit on this Terrain gains +5 Silver Coins.
There are no access restrictions for this Terrain, so any unit may enter it according to the standard rules for access to spaces.
Special Rules
Rule names are given as printed in the rulebook. Where a value is shown only as a symbol in the printed book and the text layer does not carry it, the text says so.
Ability (X)
If a card deployed in the Deployment Phase has this Special Rule, it contributes to building the Action deck with a number of Ability-type Action cards equal to X. A Character that has this Special Rule allows including in the Action deck those Ability-type Action cards that have its Character Symbol printed on them. A Character that does not have this Special Rule cannot be chosen as a source for Ability-type Action cards.
Area (Ad Area)
When a Brigade or a Horde is targeted, any ranged attack possessed by a card with this Special Rule increases by 1 the number of Wounds marked obtained with the dice pool. This extra Wound is marked only if the results of the dice pool already allow at least one Wound to be marked by themselves.
In addition, for Wounds obtained through the Wound marked symbols (icon) of the Power dice (red dice), this Special Rule always makes them count in the total number of Wounds marked, regardless of the size, traits or roles of the target chosen for the ranged attack, and independently of the results of the Attack dice rolled (d10s).
Light's Halo (Alone di Luce)
The parent unit of the Character gains +1 to the value of the attribute shown by the shield symbol. (The shield symbol is an icon that is not legible in the text layer of the source; see the printed card for the exact attribute.)
Height (Altura)
This is a Special Rule of the Hill Terrain, described under Hill above.
Spears (Armi ad Asta)
Foot troops equipped with spears have advantages due to the effectiveness of their long weapons used frontally. A card with this Special Rule constantly keeps the +1 modifier to its Melee Attribute value (one extra die) that is normally granted to cards only when charging. This modifier is granted on condition that the Fight Activations are directed against enemies engaged on the front (white border). This means that if a unit card with this Special Rule carries out a Fight Activation in the direction of its flank or rear, this modifier must not be applied.
Moreover, every time a unit card with this Special Rule becomes the target of a free Fight Activation aimed at its front, carried out by an enemy Cavalry or Chariot unit that is charging, that charging Cavalry or Chariot unit automatically receives, after the end of that free Fight Activation, a certain number of Wounds suffered. This number may be at most equal to the Mass Bonus of the charged unit that has this Special Rule, but it may not exceed the Mass Bonus of the charging Cavalry or Chariot unit. Since these are Wounds suffered, they cannot be reduced. For example, if a unit with this Special Rule has a Mass Bonus of +3, it can automatically cause up to 3 Wounds suffered to an enemy Cavalry or Chariot unit that charges it frontally. If the charging Cavalry or Chariot unit has a Mass Bonus of +2, the Wounds suffered are only 2.
Cross (Attraversare)
A unit with this Special Rule may enter some particular Terrains freely.
- If it has the rule Cross: Waters (Attraversare: Acque), it may enter any Terrain with the Watery trait.
- If it has the rule Cross: Forests (Attraversare: Foreste), it may enter any Terrain with the Wooded trait.
- If it has the rule Cross: Mountains (Attraversare: Montagne), it may enter any Terrain with the Rocky trait.
Vanguard (Avanguardia)
During the Deployment Phase, each unit card with this Special Rule may also be deployed in one of those spaces of the Battle Zone that are adjacent (the nearest ones) to the Deployment Zone of its army. The chosen space must not contain a Terrain that the unit cannot normally enter.
Berserk
If one or more enemies are within the movement range and within the field of view of a unit with this Special Rule, then when that unit is Ready and is used in an Activation Turn, a Charge Activation must be carried out by that unit against one of those enemies of its choice.
Charge (+X)
This Special Rule adds +X to the value of the Movement Attribute of the unit card that carries out a Charge Activation.
Dynamic (Dinamici)
During a Move & Shoot Activation, each of the ranged attacks of cards with this Special Rule, if carried out, does not obtain the -1 modifier to its Aim Attribute (one die less) that is normally given by that Activation. Any ranged attack with this Special Rule may be resolved with a 360-degree field of view, regardless of the field of view of the card that carries it out.
Disengage (Disimpegno)
Once per Round, a unit with this Special Rule may attempt a Disengage Test. After attempting the test, place a Time token on the unit card to remember it: it will be removed in step 1 of the Update Phase.
This test may be made in two different cases:
- Case 1: if that unit, while not engaged, is then engaged in melee during an enemy's Activation Turn by a successful Charge Activation. The unit that makes the test may be Ready or Not Ready, indifferently. In this case, the test is an immediate and optional response to having been successfully charged during an enemy's Activation Turn.
- Case 2: if the unit is already engaged in melee and, at the start of an Activation Turn, that unit is Ready and is chosen to be used. In this case, the test is made as an optional choice at the start of its own Activation.
In both cases, the test can be made only if that unit is engaged with at least one enemy in the same space. This means that in case 1, the enemy must first complete the successful Charge movement, thereby engaging the unit.
Before any attack can be made and/or any damage can be caused in melee in the current Activation Turn, the unit may take the Disengage Test by rolling 1d10 (a ten-sided die) and adding to the result its Discipline Attribute value, or the value of its possible Character or Companion. If a total of at least 10 is obtained, the test is passed.
- In case 1, if the unit passes the test, it may immediately move away into a free adjacent space, and the previously engaged enemy may not follow it (it cannot be placed in the same space). This is a free movement that never counts as an Activation. The destination space must be free and must be opposite the direction from which the charging enemy arrived. After being moved to the new space, the unit may be positioned by its controller with its front (white) border aligned freely in any of the four directions.
- In case 2, the engaged unit may attempt the test right at the start of its Activation Turn. If the test is passed, the unit carries out a Move Activation instead of the mandatory Fight Activation, thereby escaping the melee.
In both cases, if the test is not passed and/or if there are no freely accessible spaces, no change of position is made and everything proceeds as usual.
Note that when charged and/or engaged by at least one enemy with the Tracker role (Tracciare), a unit can never carry out a Disengage Test; it is therefore treated as if it did not have this Special Rule.
Tax Collector (Esattore delle Tasse)
If, in the Claim Phase, a Character with this Special Rule is inside a Village or a Fortification, its controller gains +5 Silver Coins.
Scouts (Esploratori)
A unit card with this Special Rule may enter any Terrain tile, without any other requirement or test depending on the type of Terrain.
Open Formation (Formazione Aperta)
A non-engaged unit with this Special Rule never counts as an obstacle if other friendly units pass through its space without stopping in it, during a Charge, Move or Move & Shoot Activation.
Strong (Forte)
This is a Special Rule possessed by the Fortification Terrain. As long as a unit controls a Terrain with this Special Rule, that unit and its possible Character are automatically considered to be under the effects of the Special Rule Resist. A unit gains control of a Terrain as soon as it is alone and not engaged within it. It continues to control it (even while engaged in melee) until it leaves that Terrain.
Ambush (Imboscata)
This is a Special Rule of some Terrains. Any unit that is a Detachment or has the Special Rule Scouts gains +1 Threat (one extra die), +1 Melee (one extra die) and +1 Strength (one extra die) during each Activation Turn in which it has successfully carried out a Charge Activation starting from inside that Terrain. All these bonuses are in addition to the +1 Melee (one extra die) of the Charge Activation.
If a unit card that is a Detachment or has the Special Rule Scouts is inside that Terrain, and carries out ranged attacks against an enemy target, it gets a +1 modifier to the values of its Aim Attribute (one extra die) for its ranged attacks.
Note that this Special Rule has effect only if the target of the Charge Activation or of the ranged attack is in a space adjacent to the Terrain (that is, up to a maximum of the 8 possible spaces surrounding the Terrain). If the unit that gets these modifiers has a Character with the Role Tracker (Tracciare), that Character also gets them. No other Character or Companion can get them.
Imprecise (Impreciso)
When making ranged attacks (DST) against an enemy of Individual or Detachment size, or with the Trait War Machine or Chariot, a unit or Add-on card with this Special Rule has a -1 modifier to the value of its Aim Attribute (one die less) for each ranged attack made. This modifier is not applied against targets that have the Role Large Individual, regardless of their size or traits.
Channel (Incanalare)
Once per Round, a Character with this Special Rule may spend a Throw token to recover a Throw Action card from the discard pile. The recovered card must be one for which that Character could normally be selected as a source, and it is placed in the hand of Action cards of its controller. Immediately after doing this, place a Time token on the reference tile of that Character: this is to remember that the Character has used this option in the current Round. The Time token is removed during step 1 of the Update Phase.
Each player may use this option only when that same player takes an Activation Turn, in place of using an Action card of any type. This means that a player cannot use both an Action card and this option in the same Activation Turn. It also means that during each Activation Turn this option cannot be used more than once, even if a player has more than one Character with this Special Rule on the board, and not even by spending Influence.
Bonus Influence (+X)
Any card with this Special Rule that is deployed on the game board provides its possessor with a number of additional Influence tokens equal to X (see page 65).
Throws (X)
If a card deployed in the Deployment Phase has this Special Rule, it contributes to building the Action deck with a number of Throw-type Action cards equal to X. A Character that has this Special Rule allows including in the Action deck those Throw-type Action cards that have its Character Symbol printed on them. A Character that does not have this Special Rule cannot be chosen as a source for Throw-type Action cards.
Lances on Horseback (Lance a Cavallo)
A unit, Character or Companion with this Special Rule gains +1 Melee (one extra die) and +1 Strength (one extra die) during any Activation Turn in which it has successfully carried out a Charge Activation. These modifiers are in addition to the +1 Melee (one extra die) obtained from the charge.
Book of Magic (X)
This is a Special Rule of Mage Characters. If a player controls, on the game board, a Mage Character with this Special Rule, then at the end of each Activation Phase the player may choose up to X Throw-type Action cards with the Magic trait that are still in their hand of Action cards. The chosen cards are not discarded; they are kept face up in a free part of the table, usable in subsequent Rounds. Each Mage with this Special Rule allows keeping in this way only those Magics for which that Mage can be a suitable source. If more than one Mage is controlled by the same player or team, the total number of cards that can be kept is added up, based on the X values the Mages have. All Throw-type Action cards with the Magic trait set aside by a player or team in this way are defined as kept in the Book of Magic of that player or team.
Hide (Nascondersi)
In the Deployment Phase, a unit with this Special Rule may also be deployed in any space of the Battle Zone in which one of the following Terrains is present: Forest, Rocky Terrain or Hidden Spring.
Scent of Prey (Odore della Preda)
The parent unit of the Character with this Special Rule has 4 white borders.
Orders (X)
If a card deployed in the Deployment Phase has this Special Rule, it contributes to building the Action deck with a number of Order-type Action cards equal to X. A Character that has this Special Rule allows including in the deck those Order-type Action cards that have its Character Symbol printed on them. A Character that does not have this Special Rule cannot be chosen as a source for Order-type Action cards.
Sword Parry (Parata di Spada)
Every time an enemy attacks in close combat a card with this Special Rule, one natural Advantage result must be removed from those possibly obtained with the roll of the Attack pool. This must be done immediately, as soon as the pool has been rolled and the natural results have been obtained.
Danger (Y)
This is a Special Rule of some Terrains that already have the Resources (X) Special Rule. Whenever one of those Terrains generates resources, Y Power dice must be rolled:
- for each Penetration symbol obtained, reduce the total number of resources generated by 1;
- for each Wound marked symbol obtained, reduce the total number of resources generated by 1, and the unit on that Terrain suffers a Wound.
The player to whom the resources generated by the Terrain would go may choose not to roll the Power dice if they give up those resources entirely, in which case they are discarded.
Powerful (X)
When attacking an enemy that has the Special Rule Resistance (Y), a card with this Special Rule reduces that Resistance value by X, to a minimum of zero.
Garrison (Presidio)
This is a Special Rule of the Fortification Terrain. In the last Claim Phase of the game (the sixth Round), the player whose unit controls this Terrain may spend up to one Influence token to gain +1 Victory Point. A unit gains control of a Terrain as soon as it is alone and not engaged within it. It continues to control it (even while engaged in melee) until it leaves that Terrain.
Resistance (Y)
A unit card or Character with this Special Rule reduces by Y the Wounds marked of each enemy attack (that is, of each dice pool roll) directed against it, to a minimum of 1 Wound marked per attack. This happens after evaluating any remaining Barrier results, which cancel Wounds marked.
Resist (Resistere)
Each unit or Add-on card that attacks in melee a target subject to this Special Rule gets a -1 modifier to its Melee Attribute value (one die less).
As long as a card has this Special Rule, it also counts as being under the effect of the Special Rule Refuge (Rifugio), which is otherwise granted only by some Terrains. That is, a -1 modifier applies to the value of the Aim Attribute (one die less) of any incoming enemy ranged attack.
Armour Reduction (X)
When preparing the dice pool for any attack subject to this Special Rule, reduce the Armour Attribute value of the target by an amount equal to X, to a minimum of zero.
Refuge (Rifugio)
This is a Special Rule of some Terrains. Every ranged attack directed against a target located inside a Terrain with this Special Rule suffers a -1 modifier to the value of its Aim Attribute (one die less).
Resources (X)
This is a Special Rule of some Terrains. During the Claim Phase of each Round, the player who has an unengaged unit on a Terrain with this Special Rule gains X resources, where X consists of the type and number of the appropriate Resource tokens gained.
Expendable (Sacrificabili)
Any unit with this Special Rule reduces by 10 the total amount of Silver Coins given to the enemy when it is removed from the game board, together with its possible Add-on cards, to a minimum of 0 Silver Coins.
Static (Statico)
Any ranged attack (DST) of a card with this Special Rule may be used only when carrying out a Shoot Activation.
Trample (X) (Travolgere)
Each time a unit with this Special Rule carries out the free Fight Activation following a successful Charge, that unit adds +X Wounds marked to the result obtained with the dice pool of its attack (its Attack Roll).
Swift (Veloce)
The diagonal movement of units with this Special Rule always costs only one Movement Point per space.
Tokens
- Army tokens (Segnalini Esercito): each army has its own dedicated Army token. Army tokens are used to keep track of the order of priority among the players during the various Rounds of the game.
- Act tokens (Segnalini Atto): if a unit has an Act token on it, that unit is considered Not Ready. This usually means that the unit has already carried out its Activation Turn during the current Round. During step 1 of each Update Phase, 1 Act token is removed from each unit on the game board. Act tokens are also used to keep track of the use of Basic Actions. Each Act token has 2 different faces. For details, see pages 25, 32 and 34.
- Wound tokens (Segnalini Ferita): see Wounds, Wound tokens and Health Status (the printed reference reads "pages 56–68"; the section itself appears on pages 53–55).
- Crown tokens (Segnalini Corona): if a game is played in which each army has at least 200 Silver Coins as Starting Resources, that army also has one Crown token as an additional Starting Resource. Each of the most powerful Characters of this game also requires the spending of 1 Crown token to be deployed. During the Deployment Phase, 1 Crown token may be irreversibly converted by its owner into 5 Medal tokens. The Crown token is also used as the indicator for the Commander-in-Chief of each army.
- Money tokens (Segnalini Denaro): Money tokens keep track of the Silver Coins owned. Silver Coins are the main Starting Resource to be spent to deploy one's army, and may also be gained during the game. When a player manages to remove an enemy unit from the game, that player gains a number of Money tokens suited to represent the Silver Coin cost of the removed unit, plus the cost of all its possible Add-on cards. If an Add-on card is removed from the game before its unit (for example in different Rounds), the opponent who removed it immediately gains the related Silver Coins. If it was removed by its owner, the opponent may gain its value only if they manage to remove from the game the unit on which it was placed. Other circumstances may allow players to gain Silver Coins during the game. At the end of the game, every 20 Silver Coins owned earns 1 Victory Point.