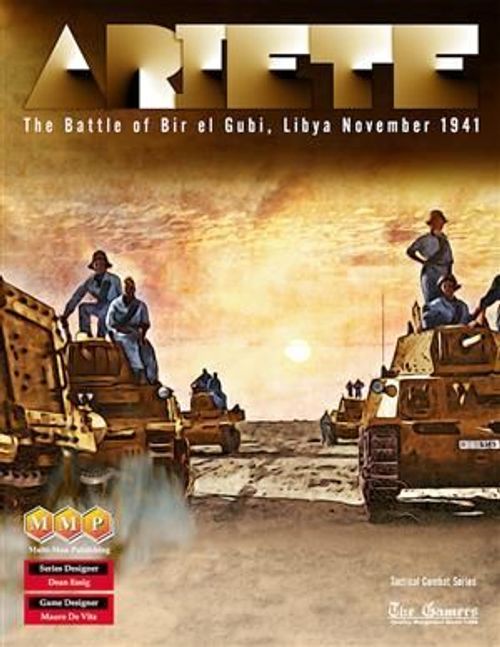
Ariete: The Battle of Bir el Gubi, Libya November 1941
Ariete: The Battle of Bir el Gubi, Libya November 1941 Rulebook
Table of Contents
Table of Contents
- Part One: Ariete Game-Specific Rules
- Game Scale
- 1.0 General Special Rules
- 2.0 Italian Special Rules
- 3.0 British Special Rules
- 4.0 Scenarios
- 4.1 Attack of the 2nd Royal Gloucestershire Hussars
- 4.1a Short Version: A Chance Encounter
- 4.2 Attack of the 4th County of London Yeomanry
- 4.2a Short Version: "The Nearest Thing to a Cavalry Charge"
- 4.3 The Battle of Bir el Gubi
- 4.3a Short Version: The Attack on the 8 Bersaglieri
- 4.4 The "Ram" Strikes - Counterattack of the 132nd Tank Regiment
- 4.5 The Battle of Bir el Gubi (Open Deployment)
- Ariete Order of Battle and Counter Manifest
- The Battle for Bir el Gubi
- Designer's Notes
- Terrain Effects Chart
- Visibility Table
- Part Two: TCS Series Rules v4.02
Part One: Ariete Game-Specific Rules
Game Scale
The Ariete game map uses a scale of 150 meters per hex. To maintain standard TCS movement rates, the game uses a time scale of 30 minutes per turn. The Prep Ratings for both sides have been modified to account for this change in turn length.
1.0 General Special Rules
1.1 Terrain, LOS and Visibility
1.1a Desert. Desert hexes are Open Terrain for all purposes.
Design note: The terrain includes numerous rocky outcroppings and small depressions that are too small to be represented on a TCS scale map. This is not Billiard Table terrain.
1.1b Spotting. LOS is limited to a maximum of 10 hexes, subject to Visibility (see 1.1e).
Design note: The pervasive effects of swirling dust, heat haze, and "sub-hex" terrain features on the battlefield limits LOS significantly in a desert environment.
1.1c Contours. The Ariete battlefield is relatively flat, with each contour line representing 5m rather than the usual 20m. No extra movement points are paid to cross any contour line in Ariete. A contour line only blocks LOS [TCS 8.1a] between two hexes if both hexes are at the same elevation, on the lower elevation side of that contour line. Due to the long, gradual slope of the battlefield, a contour line never blocks LOS between two hexes at different elevations.
1.1d Dust clouds. Any hex containing a Vehicle unit in either Mode, or a unit with Integrated Carriers in Move Mode that was last declared as using Vehicle movement points [TCS 24.2c], blocks LOS through the hex or along any of its hexsides. LOS may be traced into and out of such hexes normally.
Design note: Tanks and moving vehicles raised a significant quantity of sand and dust, rendering it difficult to see beyond the first line of moving units.
1.1e Visibility. At the end of the Command Phase of each turn (i.e., NOT just every hour), roll two dice and consult the Visibility Table (on game map) to determine the maximum Visibility for that game turn.
Design note: Visibility in the desert could be quite uncertain, with fluctuations in dust and heat haze being prime variables.
1.1f Exiting the map. When authorized by scenario special rules, scenario victory conditions, or if a map edge is designated as a Rally Point (see 1.7g), units may exit the map area in play at a cost of 1 MP from any hex along the designated map edge.
1.2 Lack of Radios
Because of a general lack of voice communication equipment on both sides, coordination between and within formations was difficult.
1.2a Combining fires. Units in different hexes may not combine to fire PFAs. Units that are not on the same Op Sheet (even if stacked together) and units that belong to different Vehicle formations [1.7f] (even if stacked together and on the same Op Sheet) may not combine to fire SFAs, PFAs, or in response to an Overwatch Trigger in either Action Phase.
Design note: Due to this restriction the Cross Fire Modifier [TCS 11.4] cannot be used for P-Fires.
1.2b Tank Element Grouping. During his Action Phase the phasing player must complete all Vehicle Impulses [TCS 20.2] or SFAs for all units of a friendly tank "element", i.e., an Italian tank company or British armoured (NOT armoured car) squadron (see 1.7f), as a group before performing a Vehicle Impulse or SFA with a unit of any other element or formation. Before he performs a Vehicle Impulse, SFA, or response to an Overwatch Trigger with a unit from a tank element, the phasing player must first designate any one unit of that element as its "command tank" for the current Action Phase, then must immediately determine whether the other units of that element are "in command": all units that are within 2 hexes of their "command tank" at that moment are deemed to be "in command", as are any units that are adjacent to a unit that is "in command" (which could create a chain of adjacent "in command" units, only one of which must be within 2 hexes of its "command tank").
All units deemed to be "in command" will remain "in command" for the remainder of the friendly Action Phase, regardless of any later movement or change of location relative to their "command tank". Any unit not "in command" is deemed to be "out of command" for the remainder of the Action Phase. Only a unit that is "in command" may perform a Vehicle Impulse fire (PFA, CS Smoke [3.2a], Assault, Overrun), SFA, or response to an Overwatch Trigger during the friendly Action Phase; any unit that is "out of command" may only move and/or change Mode during the friendly Action Phase.
"Out of command" restrictions do not apply during an enemy Action Phase, allowing an otherwise eligible tank unit to respond to an Overwatch Trigger regardless of its proximity to the rest of its element. British regimental HQ tank units, although part of their formation, are not an "element"; they may freely move and fire, individually or as part of a stack, at any time during the British Action Phase.
Design note: Tank formations must stay grouped for effective command and control.
1.2c Restrictions on Artillery Missions. In order to fire an Artillery Mission, an artillery battery or battalion must be on an implemented Op Sheet. Only a unit on the same Op Sheet as the firing artillery unit may observe for its Artillery Mission. An artillery battery (or all batteries of an artillery battalion), whether on-map or off-map, counts as a single element for Op Sheet size but does not qualify for the Staff Modifier. All on-map batteries of a battalion must be within one hex of a single common hex to fire a Battalion Mission.
1.3 Limited AT weapons
Due to the general ineffectiveness of AT weapons in use in 1941, all AT Rolls receive an additional -2 modifier, cumulative with any other AT Roll modifiers.
1.4 Minefields
Neither side may deploy minefields in this game.
1.5 Vehicles
1.5a Vehicles as Carriers. Vehicles may not act as Carriers.
1.5b Vehicle morale. The Vehicle Morale rules [TCS 17.8] are NOT used in Ariete.
1.5c Vehicle SYR. Any stack of Vehicles that suffers 2 or more step losses from an attack (a single P-Fire, A-Fire or a set of simultaneous die rolls on the Artillery Point Fire Table or AT Roll Table), must conduct an Obligatory SYR [TCS 17.4].
1.6 Off-Map Artillery
Artillery units designated in a scenario may fire from off-map.
1.7 Command and Control
1.7a Italian Command Prep Rating. The 8th Bersaglieri Regiment has a Command Prep Rating of 3. The 132nd Tank Regiment has a Command Prep Rating of 2.
1.7b British Command Prep Rating. The British Command Prep Rating is 2 for all formations
1.7c Italian Commander's Intent. The Italians must defend Bir el Gubi and defeat the British armor.
1.7d British Commander's Intent. The British must defeat the Italian armor.
1.7e Initial Op Sheets. If not otherwise indicated in the scenario, players may draw up Op Sheets of any type before the beginning of the game.
1.7f Vehicle Op Sheets. In the desert war the role of armored formations was to maneuver against enemy formations; the taking and holding of geographic objectives was secondary to finding the enemy and engaging him in battle.
A Vehicle Attack Op Sheet may list one or more enemy formations, even if not currently on the map, as its "target" rather than designating a geographical objective. Units on an implemented Vehicle Attack Op Sheet which lists an enemy formation as its target may freely maneuver against it in order to destroy units of that formation. Any (or all) of the battalions of the 132nd Tank Regiment, as well as any (or all) of the regiments of the 22nd Armoured Brigade, may be listed as the target of a Vehicle Attack Op Sheet. Incidental targets in close proximity to a target formation may also be engaged, but the focus of the Vehicle Attack Op Sheet should be the destruction of the target formation, not clearing other units from a geographical area 'en route'.
When calculating Op Sheet size [TCS 6.9b], each Italian tank battalion and British armoured regiment is a Vehicle formation and each Italian tank company and British armoured squadron is an element of its parent formation.
1.7g Off-map Rally Points. Both players may designate a friendly map edge as the Rally Point for Op Sheet failure: for the Italian player, the friendly map edge is the northwest edge (hexes 1.27-1.53); for the British player, the friendly map edge is the south edge (hexes 1.00-40.00) [Exception: If playing the Optional Tank Reinforcements variant (see 4.0a), the friendly map edge for 3CLY (only) is the northeast edge (hexes 40.27-40.43)]. Units executing Failure Instructions may exit the map through the designated map edge at a cost of 1 MP. Any unit re-entering the map on a new implemented Op Sheet after exiting must do so through their designated friendly map edge.
Design note: Both players can use off-map Rally Points to regroup out of contact and strike from their friendly map edge with a new attack.
1.8 Set Up Notes
1.8a Order of Set Up. Both players draw up all Op Sheets BEFORE set up. After initial Op Sheets are completed, the Italian player sets up first.
1.8b Set Up Codes. "Formation/Element (-#)" used in scenario 4.4 only means that the formation/element sets up with # less steps of type indicated. Step losses at set-up may be distributed among the units in the formation/element as desired.
1.8c Battalion Morale. Unless specified with a "BM=#" code (used in scenario 4.4 only), Battalion Morale for all units always starts at zero.
1.8d Artillery Ammunition. Each scenario lists artillery ammunition available at start. Track ammo separately by formation as given in the scenario set-up.
2.0 Italian Special Rules
Some of the Italian special rules are optional (and are so indicated); these may be used to explore "what-ifs" or to balance the game for players of different abilities.
2.1 EP Rounds
Italian 75mm On-Map Artillery Batteries may roll once per gun on the Artillery Point Fire Table [TCS 18.9b] when using direct fire (SFAs, Overwatch, or in Assault or Overrun Combat) as IGs [TCS 24.5b], with a maximum range of 8 hexes. This is an exception to the requirement under TCS 24.5b that the IG be at least 100mm. For each On-Map Artillery Battery using direct fire in this fashion, expend one Battery Fire of ammunition [TCS 24.6c].
Design note: Effetto Pronto (EP) were HEAT rounds. A few hundred of them were distributed to Ariete's 75mm artillery groups (battalions) just before the battle. They were a new type of round for the 75mm, developed to make it a stop gap AT gun. Ariete was the first unit to receive them and the only one to receive them during Operation Crusader.
2.2 Weapons Units
2.2a 102mm AT Gun. The Italian 102mm AT Gun depicted in Ariete is a naval gun permanently mounted (i.e., not just transported) on a heavy truck chassis; for Spotting purposes, therefore, it is a treated as a vehicle target both in Fire Mode and Move Mode, but in all other regards it is a Weapons unit [TCS3.1b] with an Integrated Carrier [TCS 24.2], not a Vehicle.
2.2b 47mm AT Gun. Italian 47mm AT gun units have 2 steps each; when firing, both steps must fire at the same target [TCS 9.1g].
2.2c MG and Mortar Units. The Weapons units of III-8th Bersaglieri deployed in an infantry role at Bir el Gubi. Treat the MG and 81mm Mortar units as Infantry units for the purpose of making AT Rolls [TCS 16.1a], including during Assault and Overrun combat.
2.3 Op Sheets
Units from the three battalions (III, V, XII) of the 8th Bersaglieri Regiment (and all artillery and AT units that enter or set up with them), may never be on the same Op Sheet, nor may the Op Sheets containing different battalions of the 8th Bersaglieri Regiment overlap with their graphic in any way. Other Italian units, including the Motorcycle Company, the three tank battalions (and their component companies), the I-Milmart Artillery Group, and the I-24 Artillery Group, may be assigned to any Op Sheet(s).
2.4 Battalion Morale
Unlike weapons battalions in other TCS games, III Heavy Weapons Battalion, 8th Bersaglieri Regiment, is subject to Battalion Morale rules [TCS 17.1] and has its own Battalion Morale Box.
2.5 Tank Breakdown
OPTIONAL When used in any scenario, the Italian player rolls a die for each tank company just before it sets up or enters the map. Halve the result, rounding fractions down, and remove that many steps (minimum 0, maximum 3) from the company to represent breakdowns en route to the battlefield. Step losses due to breakdown may be distributed among the units within the company as desired. Step losses due to breakdown do NOT count for Victory Points [4.0c].
Design note: The M13/40 tank was underpowered and had reliability issues.
2.6 Supply Problems
OPTIONAL. Reduce Italian artillery ammunition to one-half the designated amount, rounded down.
3.0 British Special Rules
Some of the British special rules are optional (and are so indicated); these may be used to explore "what-ifs" or to balance the game for players of different abilities.
3.1 2pdr Tank Gun
Because the British 2pdr guns lacked HE rounds, halve the Fire Strength of any British P-Firer Vehicles (all were armed with 2pdr guns) when making Area Fires.
3.2 CS Tanks
British Cruiser tanks in 1941 were armed with the 2pdr gun with no Smoke or HE capability; thus a section of two Close Support (CS) tanks, armed with 76mm howitzers able to fire Smoke (with a very limited HE load), was part of each armoured squadron's headquarters troop establishment.
3.2a Smoke. A CS tank unit may fire Smoke in lieu of any one Vehicle Impulse during its Action Phase. To fire Smoke a CS tank unit must be in Fire Mode. When firing Smoke, a CS tank unit (whether composed of 1 step or 2 steps) fires at a single hex, rolling once on the Mortar and Infantry Gun Smoke Table. Although it is not marked with a Fired marker, a CS tank which has fired Smoke may not fire again in that phase. A CS tank unit may not fire Smoke in response to an Overwatch Trigger.
3.2b A-Fires. CS tank units are High Trajectory A-firers, but a CS tank unit may only use A-fire twice per game, each roll on the Fire Table, including in Assault combat or Overrun, counting as the use of one A-fire. Use the game markers to indicate whether a unit has fired once or twice.
3.3 2pdr Portee AT guns
At the start of the British Action Phase, 2pdr AT gun units can be declared to be either mounted ("en portee") on their trucks, in which case they are B-1 Vehicle targets, whether in Fire Mode or Move Mode, or dismounted as standard AT guns [TCS 24.4] with Integrated Carriers [TCS 24.2], in which case they are B-0 targets in Fire Mode or when using Foot MA in Move Mode, or B-1 targets when using Vehicle MA in Move Mode. For each 2pdr unit the declaration remains in effect until changed in a future British Action Phase.
Design note: The British Army, having found that towing the 2pdr AT gun cross-country in the desert caused significant damage to the gun, transported it on the back of a truck ("en portee"), as illustrated in the counter art. While it could be fired from the truck, standard practice was to unload the gun and fire it from the ground. The Italian Army used the same approach with their 47mm AT guns and 75mm artillery.
3.4 Op Sheets
Units from different British armoured regiments (2RGH, 3CLY, 4CLY) may not be on the same Op Sheet, nor may the Op Sheets containing different armoured regiments overlap with their graphic in any way. Other British units, including B Sqn, 11 Hussars; AT Trp, 102 Anti-Tank Regt RHA; C Bty, 4 Field Regt RHA; and A Coy, 1KRRC, may be assigned to any Op Sheet(s).
British armoured regiments are treated as battalions for the Op Sheet Staff Modifier [TCS 6.9c].
3.5 Tank Breakdown
OPTIONAL. When used in any scenario, the British player rolls a die for each armoured squadron just before it sets up or enters the map. Halve the result, rounding fractions down, and remove that many steps (minimum 0, maximum 3) from the squadron to represent breakdowns en route to the battlefield. Step losses due to breakdown may be distributed among the units within the squadron as desired (Mk VI Cruiser or Mk VI CS steps at the player's option). Step losses due to breakdown do NOT count for Victory Points [4.0c].
Design note: The British Mk VI Cruiser and CS tanks, new to the desert environment, were very prone to mechanical breakdown.
3.6 Maintenance
OPTIONAL. Assume the British did a better job with maintenance and repair of the new Mk VI Cruiser and Mk VI CS tanks before the battle. When rolling the die for variable tank breakdown as per 3.5 above, subtract 1 from the die roll before halving.
3.7 1st Bn KRRC
OPTIONAL The British player may add one motor infantry company (A Coy-1KRRC) to represent the possible use of 1st Battalion, Kings Royal Rifle Corps in this battle. It sets up or enters the map with AT Trp-102 Anti-Tank Regt RHA. Note that the three infantry section units of its Scout Platoon have 2 steps each.
4.0 Scenarios
The scenarios for Ariete divide the battle geographically into east and west sections (4.1 and 4.2, respectively), as well as temporally into the initial attack phase (4.1a, 4.2a, 4.3a) and the Italian counterattack (4.4). There is a scenario for the entire battle (4.3), as well as an open deployment scenario (4.5) to explore establishing different operational objectives before the battle.
4.0a Variants. Most scenarios allow a number of variants. These variants are listed in italics. They are optional and allow players to explore some significant "what-ifs".
Better-Prepared Italian Defense: The entire 8th Bersaglieri begins already deployed and Dug In. Historically the units arrived piecemeal and III-8th Bersaglieri was caught in transit by 2RGH and scattered. For play balance the use of Italian optional rule 2.5 Tank Breakdown is highly recommended. May be used with 4.1-4.3 (including their short versions, 4.1a, 4.2a, and 4.3a).
British Arrive Early: The British get off to a better start and the first turn is 1100 rather than 1130. This affects reinforcements and catches the Italians less prepared. May be used only with 4.1-4.3, and 4.2a (not recommended for 4.1a or 4.3a as it would produce a complete "no contest" on the east flank). Do not use in combination with the Better Prepared Italian Defense variant.
Optional Tank Reinforcements: This variant assumes that Italian 2 Co VII-132nd Tk Bn, which in the historical battle moved further to the east and was destroyed by A and C Squadrons, 3CLY, remained with IX-132nd Tk Bn, and that 3CLY came up on the right flank of 2RGH, as was the original intent. For play balance the use of British optional rule 3.5 Tank Breakdown is highly recommended. May be used only with 4.1, 4.3, and 4.4.
4.0b Automatic Victory. Most scenarios use the Automatic Victory conditions below.
British Automatic Victory: If, at any point during the game, the Italian player has declared Mission Failure for all tank formations/elements on implemented Op Sheets, the game ends immediately and the British player automatically wins a Major Victory.
Italian Automatic Victory: If, at any point during the game, the British player has declared Mission Failure for all tank formations/elements on implemented Op Sheets, the game ends immediately and the Italian player automatically wins a Major Victory.
4.0c Victory Points. If no Automatic Victory has occurred by the end of the last turn, or if the scenario does not use the Automatic Victory conditions, victory is instead determined by Victory Points (VPs). The players accrue VPs according to the rates below. Scenarios may also award additional VPs as indicated.
- 2 VPs each Italian tank step eliminated (British player)
- 1 VP each British tank or armoured car step eliminated (Italian player)
- 2 VPs each enemy Inf platoon or arty unit eliminated (both players)
- 1 VP each enemy AT gun step eliminated (both players)
- 1 VP each enemy Inf section, MG, or Mtr unit eliminated (both players)
To determine victory, total British VPs and subtract Italian VPs, then modify by any VPs for the use of variants. Compare the net result against the Victory Determination for each scenario.
4.1 Attack of the 2nd Royal Gloucestershire Hussars
This scenario depicts the day's action on the east flank of the British attack, from the scattering of III-8 Bersaglieri through the tank battles north of Bir el Gubi.
- First Turn: 1130 (Brits early: 1100)
- Last Turn: 1630 (11/12 turns)
- Map Area: East of the boundary defined by hexes 1.40 - 28.26 - 28.00 (inclusive)
- Initiative: British player has Initiative for first 2 turns.
Note: Any variants can be used with this version of the scenario.
Italian Information:
Set-up: w/i 1 of 35.21 (all units in Move Mode, Vehicle movement last declared [TCS 24.2c]):
- III-8 Bers. (3 x 81mm Mtr, 6 x MG)
- 1 Co II-8 Bers. (4 x 47mm AT)
- I-3 Celere Art Grp (3 x 75mm Art)
Better-Prepared Italian Defense Variant: w/i 4 of 35.21 (all units in Fire Mode)
British Arrive Early Variant: on Track hexes w/i 2 of 29.18 (all units in Move Mode, Vehicle movement last declared [TCS 24.2c])
Reinforcements:
Enter 1200 through hex 1.47 (Trigh el Abd):
- One platoon, 1 Co IX-132 Tk Bn (1 x M13/40 [5 steps]; this platoon is exempt from 1.2b until it begins an Italian Action Phase within 2 hexes of another platoon of 1 Co IX-132 Tk Bn)
Enter 1330 through hex 1.47 (Trigh el Abd):
- Two platoons, 1 Co IX-132 Tk Bn (2 x M13/40 [4 steps])
- 2 Co IX-132 Tk Bn (3 x M13/40)
- 3 Co IX-132 Tk Bn (3 x M13/40)
Optional Tank Reinforcements Variant: Add to 1330 reinforcements:
- 2 Co VII-132 Tk Bn (3 x M13/40)
Artillery:
- I-3 Celere Art Grp
Ammunition:
- I-3 Celere Art Grp (75mm): 25 HE
Orders:
- III-8 Bersaglieri (plus 1 Co II-8 Bersaglieri and I-3 Celere Art Grp) begin the scenario Unassigned, with 10 weighted turns accrued toward implementation of a Hasty Defense Op Sheet (to defend w/i 4 of 35.21), having just completed Preliminary Instructions (Move Op Sheet, to move to w/i 1 of 35.21). The Italian player may designate exiting the west edge of the map area (hexes 28.16-28.26) as the "Rally Point" for Op Sheet Failure. The Italian player may declare Mission Failure for the Hasty Defense Op Sheet in any Action Phase after a British tank unit has been Spotted by a unit assigned to the Op Sheet.
- IX-132 Tk Bn: Attack (any British tank formation).
Better-Prepared Italian Defense Variant: III-8 Bersaglieri (plus 1 Co II-8 Bersaglieri and I-3 Celere Art Grp): Prepared Defense
British Arrive Early Variant: III-8 Bersaglieri (plus 1 Co II-8 Bersaglieri and I-3 Celere Art Grp): Unassigned, 8 weighted turns accrued toward implementation of a Hasty Defense Op Sheet (to defend w/i 4 of 35.21), currently executing Preliminary Instructions (Move Op Sheet, moving to w/i 1 of 35.21). The Italian player may declare Mission Failure for the Move Op Sheet and/or Hasty Defense Op Sheet in any Action Phase after a British tank unit has been Spotted by a unit assigned to the Op Sheet.
Optional Tank Reinforcements Variant:
- 2 Co VII-132 Tk Bn: Attack (any British tank formation).
British Information:
Set-up: w/i 5 of 40.00:
- Two troops B Sqn 11th Hussars (2 x Humber AC)
Enter at start through south edge of map area (hexes 28.00-40.00):
- Regt HQ 2RGH (2 x Mk VI)
- H Sqn 2RGH (4 x Mk VI, 1 x Mk VI CS)
Reinforcements:
Enter 1200 (British Arrive Early Variant: 1130) through south edge of map area (hexes 28.00-40.00):
- F Sqn 2RGH (4 x Mk VI, 1 x Mk VI CS)
Enter 1230 (British Arrive Early Variant: 1200) through south edge of map area (hexes 28.00-40.00):
- G Sqn 2RGH (4 x Mk VI, 1 x Mk VI CS)
Optional Tank Reinforcements Variant: Enter 1500 w/i 2 of hex 40.36 (Trigh el Abd):
- 3CLY (2 x Mk VI HQ, 12 x Mk VI, 3 x Mk VI CS)
Artillery:
- 1-C Bty 4th Field Regt RHA (off-map)
Ammunition:
- 25pdr: 15 HE
Orders:
- Attack the 132nd Tank Regiment.
Victory Determination:
British and Italian Automatic Victory conditions [4.0b] are used in this scenario. If no Automatic Victory has occurred by the end of the 1630 turn, determine victory by Victory Points [4.0c]:
| Net VPs | Result |
|---|---|
| 30 or more | British Major Victory |
| 25 to 29 | British Minor Victory |
| 20 to 24 | Draw |
| 15 to 19 | Italian Minor Victory |
| 14 or less | Italian Major Victory |
- Better-Prepared Italian Defense Variant: 5 VPs for British
- Optional Tank Reinforcements Variant: 10 VPs for Italians
- British Arrive Early Variant: 5 VPs for Italians
4.1a Short Version: A Chance Encounter
This version depicts III-8 Bersaglieri being overrun by 2nd Royal Gloucestershire Hussars. Historically, this occurred just as the Italian units began detrucking in their new defensive positions east of Bir el Gubi, but the British tanks had business with the 132nd Tank Regiment further north and moved on, leaving III-8 Bersaglieri to reorganize and be in position to inflict additional losses on 2RGH when the British withdrew through the area later in the day.
- First Turn: 1130
- Last Turn: 1330 (5 turns)
- Map Area: East of hex column 28.xx (inclusive), south of hex row xx.26 (inclusive)
- Initiative: British player has Initiative for first 2 turns.
Note: Only the Better-Prepared Italian Defense Variant is recommended with this version.
Italian and British information: per Scenario 4.1, including Better-Prepared Italian Defense Variant.
Exceptions:
- No Italian Reinforcements enter play.
- British Orders: Exit north edge of map area (to find and attack the 132nd Tank Regiment).
Victory Determination:
The Automatic Victory conditions are not used in this version of the scenario. Determine victory by Victory Points instead:
| Net VPs | Result |
|---|---|
| 55 or more | British Major victory |
| 50 to 54 | British Minor victory |
| 45 to 49 | Draw |
| 40 to 44 | Italian Minor victory |
| 39 or less | Italian Major victory |
Additional VPs:
- 1 British VP for each tank step exited via the northern edge of the map area (hex row xx.26)
- Better-Prepared Italian Defense Variant: 5 VPs for British
4.2 Attack of the 4th County of London Yeomanry
This scenario depicts the day's action on the west flank of the British attack, from the initial attacks of the 4th County of London Yeomanry through the counterattack of the VIII-132nd Tank Battalion.
- First Turn: 1130 (Brits Early: 1100)
- Last Turn: 1630 (11/12 turns)
- Map Area: West of hex column 25.xx (inclusive)
- Initiative: British player has Initiative for first 2 turns.
Note: The Optional Tank Reinforcements Variant is not used with this scenario.
Italian Information:
Set-up: w/i 4 of 9.15: (British Arrive Early Variant: all units in Move Mode, Vehicle movement last declared [TCS 24.2c])
- XII-8 Bers. (6 x Inf, 4 x 47mm AT)
- I-132 Art Grp (3 x 75mm Art)
w/i 4 of 20.13:
- V-8 Bers. (3 x Inf, 4 x 47mm AT)
- II-132 Art Grp (3 x 75mm Art)
w/i 2 of 17.19 (Bir el Gubi):
- 2 Co II-8 Bers. (4 x 47mm AT)
- MC Co 8 Bers. (3 x Inf)
w/i 1 of 11.22:
- 1 Bty I-Milmart (3 x 102mm AT)
w/i 1 of 5.22:
- 3 Co VII-132 Tk Bn (3 x M13/40)
Reinforcements: Enter 1400 through hexes 1.27-1.39
- 1 Co VII-132 Tk Bn (3 x M13/40)
- VIII-132-Tk Bn (9 x M13/40)
- 6 Bty I-Milmart (2 x 102mm AT)
- I-24 Art Grp (105mm Art, off-map)
Artillery:
- I-132 Art Grp
- II-132 Art Grp
- I-24 Art Grp (off-map)
Ammunition:
- I-132 Art Grp (75mm): 25 HE
- II-132 Art Grp (75mm): 20 HE
- 105mm: 25 HE, 10 Smoke
Orders:
- V-8 Bers. and II-132 Art Grp: Prepared Defense.
- I-24 Art Grp begins the scenario Unassigned and can accrue weighted turns beginning 1130 for the purpose of being added to any implemented Op Sheet [TCS 6.13c], I-24 Art Grp may not begin rolling to be added to an implemented Op Sheet until 1400.
- All other units: Hasty Defense; 3 Co VII-132 Tank in Reserve.
Better-Prepared Italian Defense Variant:
- V-8 Bers. (plus II-132 Art Grp): Prepared Defense.
- XII-8 Bers. (plus I-132 Art Grp): Prepared Defense.
- I-24 Art Grp: Unassigned, can accrue weighted turns beginning 1130 for the purpose of being added to any implemented Op Sheet [TCS 6.13c], I-24 Art Grp may not begin rolling to be added to an implemented Op Sheet until 1400.
- All other units: Hasty Defense; 3 Co VII-132 Tk Bn in Reserve.
British Arrive Early Variant:
- V-8 Bers. (plus II-132 Art Grp): Prepared Defense.
- XII-8 Bers. (plus I-132 Art Grp): Unassigned. 14 weighted turns accrued toward implementation of Hasty Defense Op Sheet (to defend the area w/i 4 of 9.15). The Italian player may declare Mission Failure for the Hasty Defense Op Sheet in any Action Phase after a British tank unit has been Spotted by a unit assigned to the Op Sheet.
- I-24 Art Grp: Unassigned, can accrue weighted turns beginning 1130 for the purpose of being added to any implemented Op Sheet [TCS 6.13c], I-24 Art Grp may not begin rolling to be added to an implemented Op Sheet until 1400.
- All other units: Hasty Defense; 3 Co VII-132 Tk Bn in Reserve.
British Information:
Set-up: w/i 3 of 2.00 and/or 14.00:
- Four troops, B Sqn 11th Hussars (4 x Humber AC)
- AT Trp-102nd Anti-Tank Regiment RHA (4 x 2pdr AT)
- 2-C Bty 4th Field Regiment RHA (1 x 25pdr)
Enter at start through south edge of map area (hexes 1.00-20.00):
- Regt HQ 4CLY (2 x Mk VI)
- A Sqn 4CLY (4 x Mk VI, 1 x Mk VI CS)
Reinforcements:
Enter 1200 (British Arrive Early Variant: 1130) through south edge of map area (hexes 1.00-20.00):
- B Sqn 4CLY (4 x Mk VI, 1 x Mk VI CS)
Enter 1230 (British Arrive Early Variant: 1200) through south edge of map area (hexes 1.00-20.00):
- C Sqn 4CLY (4 x Mk VI, 1 x Mk VI CS)
Artillery:
- 2-C Bty 4th Field Regt RHA
Ammunition:
- 25pdr: 15 HE
Orders:
- Attack the 132nd Tank Regiment.
Victory Determination:
British and Italian Automatic Victory conditions [4.0b] are used in this scenario. If no Automatic Victory has occurred by the end of the 1630 turn, determine victory by Victory Points [4.0c]:
| Net VPs | Result |
|---|---|
| 20 or more | British Major Victory |
| 15 to 19 | British Minor Victory |
| 10 to 14 | Draw |
| 5 to 9 | Italian Minor Victory |
| 4 or less | Italian Major Victory |
- Better-Prepared Italian Defense Variant: 5 VPs for British
- British Arrive Early Variant: 5 VPs for Italians
4.2a Short Version: "The Nearest Thing to a Cavalry Charge"
This scenario covers only the initial attack of the 4th County of London Yeomanry on XII-8th Bersaglieri, which was deployed (but not yet dug-in) west of Bir el Gubi. Observers described it as "the nearest thing to a cavalry charge" that they had seen in the war.
- First Turn: 1130 (Brits early: 1100)
- Last Turn: 1330 (5/6 turns)
- Map Area: West of hex column 25.xx (inclusive), south of hex row xx.26 (inclusive)
- Initiative: British player has Initiative for first 2 turns
Note: The Optional Tank Reinforcements Variant is not used with this scenario.
Italian and British information: Per Scenario 4.2, including variants.
Exceptions:
- No Italian Reinforcements enter play.
- British Orders: Exit north edge of map area (to find and attack the 132nd Tank Regiment).
Victory Determination:
The Automatic Victory conditions are not used in this version of the scenario. Determine victory by Victory Points instead:
| Net VPs | Result |
|---|---|
| 10 or more | British Major Victory |
| 5 to 9 | British Minor Victory |
| 0 to 4 | Draw |
| -1 to -5 | Italian Minor Victory |
| -6 or less | Italian Major Victory |
Additional VPs:
- 1 British VP for each tank step exited via the northern edge of the map area (hex row xx.26)
- Better-Prepared Italian Defense Variant: 5 VPs for British
- British Arrive Early Variant: 5 VPs for Italians
4.3 The Battle of Bir el Gubi
This scenario covers the full attack of the 4th County of London Yeomanry and the 2nd Royal Gloucestershire Hussars on the 132nd Armored Division Ariete around Bir el Gubi. It's the big one!
- First Turn: 1130 (Brits early: 1100)
- Last Turn: 1630 (11/12 turns)
- Map Area: All
- Initiative: British player has Initiative for the first 2 turns.
Note: Any variants may be used.
Italian and British Information: per Scenarios 4.1 and 4.2, including variants.
Exceptions:
- Add to British Scenario 4.2 Set-up, w/i 3 of 2.00 and/or 14.00: 1-C Bty 4th Field Regiment RHA (1 x 25pdr)
- Combine British Ammunition allotments for Scenarios 4.1 and 4.2: 25pdr: 30 HE
British Special Movement restrictions:
- 4CLY must remain west of column 20.xx (inclusive) until they move north of hex row xx.26.
- 2RGH must remain east of column 21.xx (inclusive) until they move north of hex row xx.26.
- When the British player draws up his Op Sheets he may freely set the boundary between his armoured regiments for the map area north from hex row xx.27 (inclusive).
Victory Determination:
British and Italian Automatic Victory conditions [4.0b] are used in this scenario. If no Automatic Victory has occurred by the end of the 1630 turn, determine victory by Victory Points [4.0c]:
| Net VPs | Result |
|---|---|
| 50 or more | British Major victory |
| 40 to 49 | British Minor victory |
| 30 to 39 | Draw |
| 20 to 29 | Italian Minor victory |
| 19 or less | Italian Major victory |
- Better-Prepared Italian Defense Variant: 10 VPs for British
- Optional Tank Reinforcements Variant: 10 VPs for Italians
- British Arrive Early Variant: 10 VPs for Italians
4.3a Short Version: The Attack on the 8 Bersaglieri
This version covers the initial stage of the battle as two regiments of the British 22nd Armoured Brigade, the 4th County of London Yeomanry and the 2nd Royal Gloucestershire Hussars, attack the 8 Bersaglieri (plus attached units) around Bir el Gubi.
- First Turn: 1130
- Last Turn: 1330 (5 turns)
- Map Area: South of hex row xx.26 (inclusive)
- Initiative: British player has Initiative for the first 2 turns
Note: Only the Better-Prepared Italian Defense Variant is recommended with this version.
Italian and British information: Per Scenarios 4.1 and 4.2, including Better-Prepared Italian Defense Variant.
Exceptions:
- No Italian Reinforcements enter play.
- Add to British Scenario 4.2 Set-up, w/i 3 of 2.00 and/or 14.00: 1-C Bty 4th Field Regiment RHA (1x 25pdr)
- Combine British Ammunition allotments for Scenarios 4.1 and 4.2: 25pdr: 30 HE
- British Orders: Exit north edge of map area (to find and attack the 132nd Tank Regiment).
British Special Movement restrictions:
- 4CLY must remain west of column 20.xx (inclusive).
- 2RGH must remain east of column 21.xx (inclusive).
Victory Determination:
The Automatic Victory conditions are not used in this version of the scenario. Determine victory by Victory Points instead:
| Net VPs | Result |
|---|---|
| 65 or more | British Major victory |
| 55 to 64 | British Minor victory |
| 45 to 54 | Draw |
| 35 to 44 | Italian Minor victory |
| 34 or less | Italian Major victory |
Additional VPs:
- 1 British VP for each tank step exited via the northern edge of the map area (hex row xx.26).
- Better-Prepared Italian Defense Variant: 10 VPs for British
4.4 The "Ram" Strikes - Counterattack of the 132nd Tank Regiment
This scenario examines the second phase of the battle, as the 132nd Tank Regiment arrives in force to deal with the British armoured regiments.
- First Turn: 1400
- Last Turn: 1630 (6 turns)
- Map Area: All
- Initiative: British player has Initiative for the first turn.
Note: Only the Optional Tank Reinforcements Variant may be used with this scenario.
Italian Information:
Set-up: w/i 4 of 9.15:
- XII-8 Bers. (6 x Inf [-6 steps], 4 x 47mm AT [-2 steps])
- I-132 Art Grp (3 x 75mm Art)
w/i 4 of 20.13:
- V-8 Bers. 6 x Inf, 4 x 47mm AT)
- II-132 Art Grp (3 x 75mm Art)
w/i 4 of 35.21:
- III-8 Bers. (1 x 81mm Mtr, 2 x MG; BM=3, place the eliminated 81mm Mtr (x2), MG (x4), 47mm AT (x2) and 75mm Art battery (x1) on the III-8 Bersaglieri Battalion Morale Display)
- 1 Co II-8 Bers.2 x 47mm AT [-2 steps])
- I-3 Celere Art Grp (2 x 75mm Art)
w/i 2 of 17.19 (Bir el Gubi):
- 2 Co II-8 Bers. (4 x 47mm AT)
- MC Co 8 Bers. (3 x Inf)
w/i 4 of 5.22:
- 3 Co VII-132 Tk Bn (3 x M13/40 [-5 steps])
w/i 1 of 11.22:
- 1 Bty I-Milmart (3 x 102mm AT)
w/i 1 of 8.48:
- 3 Co IX-132 Tk Bn (3 x M13/40, must set up in Move Mode).
w/i 1 of 8.45:
- 2 Co IX-132 Tk Bn (3 x M13/40, must set up in Move Mode).
w/i 1 of 8.42:
- Two 4-step platoons, 1 Co IX-132 Tk Bn (2 x M13/40, must set up in Move Mode).
- One 5-step platoon, 1 Co IX-132 Tk Bn (1 x M13/40, may set up in either Mode).
Optional Tank Reinforcements variant: w/i 8 of 1.47: 2 Co VII-132 Tk Bn (3 x M13/40, must set up in Move Mode).
Enter at start through hexes 1.27-1.39:
- 1 Co VII-132 Tk Bn (3 x M13/40)
- VIII-132 Tk Bn (9 x M13/40)
- 6 Bty I-Milmart (2 x 102mm AT)
- I-24 Art Grp (105mm Art, off-map)
Artillery:
- I-132 Art Grp
- II-132 Art Grp
- I-3 Celere Art Grp
- I-24 Art Grp (off-map)
Ammunition:
- I-132 Art Grp (75mm): 10 HE
- II-132 Art Grp (75mm): 10 HE
- I-3 Celere Art Grp (75mm): 10 HE
- 105mm: 25 HE, 10 Smoke
Orders:
- V-8 Bersaglieri (plus II-132 Art Grp): Prepared Defense
- IX-132 Tk Bn: Attack (any British tank formation)
- 1 Co VII-132 Tk Bn, VIII-132 Tk Bn, 6 Bty I-Milmart: Attack (any British tank formation)
- I-24 Art Grp begins the scenario Unassigned and has accrued 15 weighted turns for the purpose of being added to any implemented Op Sheet [TCS 6.13c].
- All other units: Hasty Defense
Optional Tank Reinforcements variant:
- 2 Co VII-132 Tk Bn: Attack (any British tank formation).
British Information:
Set-up: w/i 12 of 2.00 and/or 14.00:
- B Sqn 11th Hus (4 x Humber AC)
- AT Trp 102 AT Regt RHA (4 x 2pdr AT)
- C Bty 4th Field Regt RHA (2 x 25pdr)
w/i 4 of 1.17:
- 4th County of London Yeomanry (2 x Mk VI HQ, 12 x Mk VI, 3 x Mk VI CS) [-6 steps]
w/i 4 of 18.44:
- 2nd Royal Gloucestershire Hussars (2 x Mk VI HQ, 12 x Mk VI, 3 x Mk VI CS) [-3 steps]
- Two troops, B Sqn 11th Hussars (2 x Humber AC)
Reinforcements:
Optional Tank Reinforcements variant: Enter 1500 w/i 2 of hex 40.36 (Trigh el Abd):
- 3rd County of London Yeomanry (2 x Mk VI HQ, 12 x Mk VI, 3 x Mk VI CS)
Artillery:
- C-Bty 4th Field Regt RHA
Ammunition:
- 25pdr: 10 HE
Orders:
- Attack. British tank formations must choose an Italian tank formation as the target of their Attack Op Sheet.
Victory Determination:
British and Italian Automatic Victory conditions [4.0b] are used in this scenario. If no Automatic Victory has occurred by the end of the 1630 turn, determine victory by Victory Points [4.0c]:
| Net VPs | Result |
|---|---|
| 40 or more | British Major victory |
| 30 to 39 | British Minor victory |
| 20 to 29 | Draw |
| 10 to 19 | Italian Minor victory |
| 9 or less | Italian Major victory |
Losses already inflicted at the start of this scenario to not count for VPs.
Optional Tank Reinforcements Variant: 10 VPs for Italians
4.5 The Battle of Bir el Gubi (Open Deployment)
This scenario covers the attack of the 22nd Armoured Brigade on the 132nd Armored Division Ariete around Bir el Gubi, with an early start to allow the players more freedom to develop their plans and set-ups.
- First Turn: 0800
- Last Turn: 1630 (18 turns)
- Map Area: All
- Initiative: British
Note: Do not use any variants with this scenario.
Italian Information:
Set-up: w/i 4 of 20.13:
- V-8 Bers. (6 x Inf, 4 x 47mm AT)
- II-132 Art Grp (3 x 75mm Art)
w/i 1 of 15.22:
- 3 Co VII-132 Tk Bn (3 x M13/40)
Reinforcements:
Enter 0830 through hex 1.32:
- 2 Co II-8 Bers. (4 x 47mm AT)
- MC Co-8 Bersaglieri (3 x Inf)
- 1 Bty I-Milmart (3 x 102mm AT)
Enter 0930 through hex 1.32:
- XII-8 Bers. (6 x Inf, 4 x 47mm AT)
- I-132 Art Grp (3 x 75mm Art)
Enter 1030 through hex 1.32:
- III-8 Bers. (3 x 81mm Mtr, 6 x MG)
- 1 Co II-8 Bers (4 x 47mm AT)
- I-3 Celere Art Grp (3 x 75mm Art)
132 Tank Regiment (less 3 Co VII-132 Tk Bn), 6 Bty I-Milmart, and I-24 Art Grp begin the scenario off-map with no prepared Op Sheets; the Italian player may create Attack Op Sheets for these units or assign them to existing Op Sheets [TCS 6.13c, 6.13d] (use of Preliminary Instructions is NOT permitted) in any Command Phase after a British tank unit (NOT an armoured car, AT gun, or On-map Artillery unit) has been Spotted. A unit may enter play through hexes 1.27-1.53 on the turn its Op Sheet is implemented:
- 1 Co VII-132 Tk Bn (3 x M13/40)
- 2 Co VII-132 Tk Bn (3 x M13/40)
- 1 Co VIII-132 Tk Bn (3 x M13/40)
- 2 Co VIII-132 Tk Bn (3 x M13/40)
- 3 Co VIII-132 Tk Bn (3 x M13/40)
- 1 Co IX-132 Tk Bn (3 x M13/40)
- 2 Co IX-132 Tk Bn (3 x M13/40)
- 3 Co IX-132 Tk Bn (3 x M13/40)
- 6 Bty I-Milmart (2 x 102mm AT)
- I-24 Art Grp (105mm Art, off-map)
Artillery:
- I-132 Art Grp
- II-132 Art Grp
- I-3 Celere Art Grp
- I-24 Art Grp (off-map)
Ammunition:
- I-132 Art Grp (75mm): 25 HE
- II-132 Art Grp (75mm): 25 HE
- I-3 Celere Art Grp (75mm): 25 HE
- 105mm: 25 HE, 10 Smoke
Orders:
- V-8 Bersaglieri (plus II-132 Art Grp): Prepared Defense
- 3 Co VII-132 Tk Bn: Hasty Defense, in Reserve
British Information:
Set-up: Enter at start through south edge of map area (hex row xx.00):
- B Sqn 11th Hussars (6 x Humber AC)
- AT Troop 102nd Anti-Tank Regiment RHA (4 x 2pdr AT)
- C Battery 4th Field Regiment RHA (2 x 25pdr)
Reinforcements: The 2nd Royal Gloucestershire Hussars, 3rd County of London Yeomanry, and 4th County of London Yeomanry begin the scenario off-map with no prepared Op Sheets; the British player may create Attack Op Sheets for these units (use of Preliminary Instructions is NOT permitted) in any Command Phase after an Italian unit has been Spotted. A unit may enter play through the south edge of map area (hex row xx.00) on the second turn after its Op Sheet is implemented:
- Regt HQ 2nd Royal Gloucestershire Hussars (2 x Mk VI HQ)
- F Sqn 2RGH (4 x Mk VI, 1 x Mk VI CS)
- G Sqn 2RGH (4 x Mk VI, 1 x Mk VI CS)
- H Sqn 2RGH (4 x Mk VI, 1 x Mk VI CS)
- Regt HQ 3rd County of London Yeomanry (2 x Mk VI HQ)
- A Sqn 3CLY (4 x Mk VI, 1 x Mk VI CS)
- B Sqn 3CLY (4 x Mk VI, 1 x Mk VI CS)
- C Sqn 3CLY (4 x Mk VI, 1 x Mk VI CS)
- Regt HQ 4th County of London Yeomanry (2 x Mk VI HQ)
- A Sqn 4CLY (4 x Mk VI, 1 x Mk VI CS)
- B Sqn 4CLY (4 x Mk VI, 1 x Mk VI CS)
- C Sqn 4CLY (4 x Mk VI, 1 x Mk VI CS)
Artillery:
- C Bty 4th Field Regt RHA
Ammunition:
- 25pdr 30 HE
Orders:
- Attack
Victory Determination:
British and Italian Automatic Victory conditions [4.0b] are used in this scenario. If no Automatic Victory has occurred by the end of the 1630 turn, determine victory by Victory Points [4.0c]:
| Net VPs | Result |
|---|---|
| 50 or more | British Major victory |
| 40 to 49 | British Minor victory |
| 30 to 39 | Draw |
| 20 to 29 | Italian Minor victory |
| 19 or less | Italian Major victory |
Ariete Order of Battle and Counter Manifest
132nd Armored Division Ariete
8th Bersaglieri Regiment
- Motorcycle Company 3 x Inf (MC) (4-4-2 AA6(24))
- II-8 Bers. (Anti-Tank Battalion)
- 1 Co 4 x 47mm AT (2-4-0 PB3(12)) [2]
- 2 Co 4 x 47mm AT (2-4-0 PB3(12)) [2]
- III-8 Bers. (Heavy Weapons Battalion)
- 1 Co 3 x 81mm Mtr (6-24-4 AA4(12))
- 2 Co 6 x MG (2-8-4 AA5(12))
- V-8 Bers.
- 1 Co 3 x Inf (4-6-3 AA6(12))
- 2 Co 3 x Inf (4-6-3 AA6(12))
- 3 Co 4 x 47mm AT (2-4-0 PB3(12)) [2]
- XII-8 Bers.
- 1 Co 3 x Inf (4-6-3 AA6(12))
- 2 Co 3 x Inf (4-6-3 AA6(12))
- 3 Co 4 x 47mm AT (2-4-0 PB3(12)) [2]
132nd Tank Regiment
- VII-132 Tank Battalion
- 1 Co 3 x M13/40 (2-4-2 PP9) [4,4,3]
- 2 Co 3 x M13/40 (2-4-2 PP9) [4,4,3]
- 3 Co 3 x M13/40 (2-4-2 PP9) [4]
- VIII-132 Tank Battalion
- 1 Co 3 x M13/40 (2-4-2 PP9) [4,4,3]
- 2 Co 3 x M13/40 (2-4-2 PP9) [4,4,3]
- 3 Co 3 x M13/40 (2-4-2 PP9) [4]
- IX-132 Tank Battalion
- 1 Co 3 x M13/40 (2-4-2 PP9) [5,4,4]
- 2 Co 3 x M13/40 (2-4-2 PP9) [5]
- 3 Co 3 x M13/40 (2-4-2 PP9) [4]
132nd Divisional Artillery
- I-132 Artillery Group 3 x 75mm (4-14-0 AB(12)) [4] (Bn 11/5, 3 x Bty 8/4)
- II-132 Artillery Group 3 x 75/mm (4-14-0 AB(12)) [4] (Bn 11/5, 3 x Bty 8/4)
- I-3 Celere Artillery Group 3 x 75mm (4-14-0 AB(12)) [4] (Bn 11/5, 3 x Bty 8/4)
- I-24 Artillery Group (off-map 105mm Bn 16/7, 3 x Bty 12/5)
- 1 Bty, I-Milmart Artillery Group 3 x 102mm AT (6-7-0 PB(18))
- 6 Bty I-Milmart Artillery Group 2 x 102mm AT (6-7-0 PB(18))
British Forces
11th Hussars (Prince Albert's Own) (11H)
- B Squadron 6 x Humber Armoured Car (1-6-1 AB(30)) [3]
2nd Regiment, Royal Gloucestershire Hussars (2RGH)
- Regt HQ 2 x Mk VI (2-4-2 PP18) [2]
- F Squadron 4 x Mk VI (2-4-2 PP18) [3], 1 x Mk VI CS (4-14-2 AP18) [2]
- G Squadron 4 x Mk VI (2-4-2 PP18) [3], 1 x Mk VI CS (4-14-2 AP18) [2]
- H Squadron 4 x Mk VI (2-4-2 PP18) [3], 1 x Mk VI CS (4-14-2 AP18) [2]
3rd Regiment, County of London Yeomanry (3CLY)
- Regt HQ 2 x Mk VI (2-4-2 PP18 [2]
- A Squadron 4 x Mk VI (2-4-2 PP18) [3], 1 x Mk VI CS (4-14-2 AP18) [2]
- B Squadron 4 x Mk VI (2-4-2 PP18) [3,3,2,2], 1 x Mk VI CS (4-14-2 AP18) [1]
- C Squadron 4 x Mk VI (2-4-2 PP18) [3], 1 x Mk VI CS (4-14-2 AP18) [2]
4th Regt, County of London Yeomanry (4CLY)
- Regt HQ 2 x Mk VI (2-4-2 PP18) [2]
- A Squadron 4 x Mk VI (2-4-2 PP18) [3], 1 x Mk VI CS (4-14-2 AP18) [2]
- B Squadron 4 x Mk VI (2-4-2 PP18) [3], 1 x Mk VI CS (4-14-2 AP18) [2]
- C Squadron 4 x Mk VI (2-4-2 PP18) [3], 1 x Mk VI CS (4-14-2 AP18) [1]
1st Battalion, King's Royal Rifle Corps (1KRRC)
- A Company 3 x Inf (4-6-2 AA6(18)), Scout Platoon 3 x Inf Sec (3-6-2 AA6[12])
22nd Armoured Brigade
- AT Troop 102nd Anti-Tank Regiment RHA 4 x 2pdr AT (2-4-1 PB3(18))
- C Battery 4th Field Regiment RHA 2 x 25pdr (4-14-0 AB(18)) [4] (2 x Bty 8/4)
Note #1: Unit steps are given in [brackets] at the end of each element's line entry (Exceptions: Infantry platoons and sections, Weapons sections).
Note #2: A and B Target Type units with Movement Allowances in Square Brackets [...] indicate Tracked movement and Movement Allowances in parentheses (...) indicate Wheeled movement.
The Battle for Bir el Gubi
On 19 November 1941, during Operation Crusader, a battle was fought in the Libyan desert around the crossroads at Bir el Gubi (spelled "Bir el Gobi" in Italian sources) between the Italian 132nd Armoured Division Ariete, the best (and best known) Italian armored division of WWII, and the British 22nd Armoured Brigade. What follows is a description of the main combat units on each side and the battle they fought near Bir el Gubi.
The Italians
In the early '30s, when most armies in the world were still far from the concept, Italy had begun to develop a doctrine of motorized warfare (Guerra di Rapido Corso). Although the country lacked the means to properly sustain this innovative doctrine, it began to create the organizations needed to implement it, and the nucleus of Centotrentaduesima Divisione Corazzata "Ariete", the 132nd Armoured Division Ariete, was established in January 1937, when the Italian army formed two armored brigades, Ariete (Ram) and Centauro (Centaur). Ariete was enlarged to division size in February 1939 and included the 32nd Tank Regiment, with four tank battalions (for a total, on paper, of 156 tanks); the 8th Bersaglieri (light infantry) Regiment, with three motorized infantry battalions; the 132nd Artillery Regiment, with two battalion-sized artillery "groups"; two light anti-aircraft batteries; and an engineer company.
After the destruction of the Italian Tenth Army in December 1940, Ariete was sent to North Africa, the lead elements arriving in Tripoli on 24 January 1941. By 7 February the bulk of the division had arrived, 6000 men strong, with 40 M13/40 medium tanks, 117 L3/35 light tanks (including 24 flame-throwing tanks), 24 75mm field guns, 36 47mm anti-tank guns, 760 trucks and cars, and 703 motorcycles. For the March-April 1941 German-Italian counter-offensive, the new Axis field commander, Lt.-General Erwin Rommel, paired Ariete with the German 5th Light Division. After its involvement in the fighting for El Agheila and Mersa Brega (24 March-2 April), Ariete was subdivided into several columns for the advance on Derna. On 7-8 April, the 8th Bersaglieri Regiment, after a long march, seized El Mechili, capturing over 2000 prisoners from the 3rd Indian Motorised Brigade and the HQ of the British 2nd Armoured Division. Through 14 April Ariete continued to fight at Derna, Tobruk, Bardia, and Sollum, then, at the end of April, was withdrawn from the front line and designated as mobile reserve. Part of the division was involved in bitter fighting near Sollum in the middle of May and again during Operation Battleaxe in the middle of June, after which the division retired to Berta, where it spent the summer of 1941 resting, training, and rebuilding its strength. On 15 June the 132nd Tank Regiment (which was to become known as the best Italian armored regiment of the war), consisting of three tank battalions (VII, VIII and IX) equipped with M13/40 medium tanks, was formed and incorporated into Ariete. The tank component of the division was now centered around the M13/40, which, although not a stellar machine, was a "real" tank compared to the L3/35, a vehicle more in the class of the British Universal Carrier.
At the beginning of November Ariete, now reinforced by additional artillery, was deployed around Bir el Gubi, about 60 km south of Tobruk, facing east. On 18 November, as Operation Crusader commenced, Rommel ordered Ariete to redeploy facing south, which was to cause some problems for the 8th Bersaglieri Regiment, which was only partially redeployed when the Crusaders of the British 22nd Armoured Brigade attacked.
The British
The 22nd Armoured Brigade, activated on 3 September 1939 under Brigadier J. Scott-Cockburn, was composed of three Territorial Army (Reserve) mechanised cavalry (armoured) regiments: the 3rd and 4th Regiments of the County of London Yeomanry ("The Sharpshooters") and the 2nd Regiment of the Royal Gloucestershire Hussars. On 31 July 1941 the brigade was mobilized for overseas service and on 1 August it was inspected by the King and Queen at Warminster. The 22nd Brigade was re-equipped with Mk.VI Cruiser (Crusader) tanks, the first armoured brigade to be fully equipped with this new tank, and, in mid-August, embarked at the Clyde, Avonmouth and Liverpool, starting the trip to the Middle East. The Mediterranean route being closed by the Italian navy, the ships had to take the long route, around Africa, through the Indian Ocean, to Port Said on the Red Sea; the last lap was by train to El Amirya, near Alexandria.
After five more weeks of training, the great news was received: the 22nd Armoured Brigade was to go into action as part of the 7th Armoured Division, the famous "Desert Rats", commanded by Major-General Gott. The 7th Armoured Division was part of Lt.-General Norrie's XXX Corps, under the newly named Eighth Army of Lt.-General Sir Alan Cunningham. Operation Crusader was starting.
The Battle
Operation Crusader was intended to destroy the German and Italian armored formations and recapture Cyrenaica. The relief of Tobruk would follow. The armored elements of the British XXX Corps were to move round the south flank and either destroy the enemy armor or prevent it from interfering with the British XIII Corps operating to the north. Within this plan, the task of the 7th Armoured Division was to advance to the airfields at El Adem and Sidi Rezegh. The 22nd Armoured Brigade was on the division's left (southern) flank.
Greene & Massignani, in Rommel's North African Campaign, wrote: "Rommel was ignoring the growing body of intelligence that suggested a British counterattack, and was determined to finish off Tobruk - it had become an obsession." In fact, Italian intelligence was aware of an imminent attack toward Tobruk and tried to warn the Germans, but with little success. In the first days of November, Ariete moved to Bir el Gubi; it was part of General Gambara's RECAM Corps, along with the Motorised Division Trieste and the Recam Group.
At dawn on 18 November 1941, the 22nd Armoured Brigade advanced with the 4th County of London Yeomanry (4CLY) on the left, the 3rd County of London Yeomanry (3CLY) on the right, and the 2nd Royal Gloucestershire Hussars (2RGH) in the center. Humber armored cars of the 11th Hussars were patrolling up to 20 miles in front of the brigade, which began crossing the Libyan border at 0900 hrs and by the end of the day had reached an area 20 miles southeast of Bir el Gubi. During the 80-mile march there were many breakdowns of Crusader tanks due to mechanical failures.
On the evening of 18 November, men from the 132nd Tank Regiment saw dozens of enemy fighters and bombers flying overhead. The following morning the news arrived that an enemy attack was to be expected shortly. On the morning of 19 November the 22nd Armoured Brigade resumed its advance, although 4CLY was short of fuel. First contact with elements of Ariete was made around noon by 2RGH.
The Italian official history, Le Operazioni in Africa Settentrionale - Vol.II, written by General Mario Montanari, reports:
At Bir el Gobi the Ariete was busy redeploying. It had to establish a defensive line about 10 kilometers south of Bir el Gobi, formed by a semicircle of strongpoints, held by the Bersaglieri and reinforced by 47/32 AT, 20mm pieces and 75/27 guns. On 19 November the fieldworks were still incomplete when at 7.30 AM General Mannerini, deputy commander of the RECAM Corps, arrived at the Ariete HQ to attend a meeting with General Balotta. Considering that the British were already very near, it was decided to contract the defensive line. This way V-8th Bersaglieri Battalion and II-132nd 75/27 Artillery Group remained where they were, on the trail to el-Cuasc; III-8th Bersaglieri Battalion and the 3rd Celere's 75/27 Artillery Group were sent east of Bir el Gobi; XII-8th Bersaglieri Battalion and I-132nd 75/27 Artillery Group were sent west of Bir el Gobi. North of the Bersaglieri positions were the Milmart and the 105/28 Artillery Battalion from the 24th Artillery Regiment, and further north was waiting the slightly understrength 132nd Tank Regiment, with its 100 M13/40s . . .
Around 11.00 AM there was the first clash with 22nd Armoured Brigade, advancing screened by 11th Hussars Regiment: one M13 company and one 75/27 section had a brief fight at Bir el Dleua a few kilometres southwest of Bir el Gobi. After sustaining some losses, the Italian unit retired on Bir el Gobi.
After a short time the 22nd Armoured arrived before Bir el Gobi. General Scott-Cockburn deployed his eight 25pdr and ordered the attack. The 2nd RGH on the right charged the V-8th Bersaglieri Battalion position; 4th CLY on the left attacked the XII-8th Bersaglieri Battalion. V Bersaglieri had been in place for a few days and was well entrenched, while XII Bersaglieri had not had time to prepare its new position and was virtually in the open. III Bersaglieri was literally arriving on the field of battle with its trucks . . .
All the 47/32s and 75/27s started to fire against the three charging British regiments. In a few minutes everything was submerged in a dense dust cloud. The artillery fire was deadly and accurate and soon 3rd and 4th CLY changed course and tried to attack the Bersaglieri positions from the flanks. XII Bersaglieri succeeded in repulsing the attack of 4th CLY, but III Bersaglieri, attacked by 3rd CLY and 2nd RGH started to crack. 3rd CLY was able to penetrate III Bersaglieri positions. 8th Bersaglieri HQ, now isolated, had to fight to reach XII Bersaglieri positions . . .
At this moment, 3.00 PM, Scott-Cockburn still had good hopes of winning the battle, but, suddenly, the Ariete counter-attacked. Two kilometres north of Bir el Gobi the 132nd Tank Regiment launched its 100 M13/40s toward 2nd RGH. In the meantime Milmart's seven 102/35s started firing their devastating anti-ship rounds. VII and VIII Tank Battalions clashed with 3rd CLY and 2nd RGH and after one hour of fighting Ariete's last reserve, IX Tank Battalion, was launched against the flank and rear of the tired British. That was a little bit too much. 22nd Armoured's remaining Crusaders used their advantage in speed over the M13s to retire in disorder . . .
The surviving War Diaries of 3CLY and 2RGH do not fully support some of the details in the official Italian account. The 3CLY War Diary reports that "A" and "C" Squadrons of that regiment, assigned to cover the right flank of 2RGH, saw brief action against a single Italian tank company (2 Company VII-132nd, with about 11 tanks) some distance to the east of Bir el Gubi, outside the Ariete map area; late in the afternoon seven tanks from "B" Squadron, 3CLY, on the regiment's left, approached Bir el Gubi in search of 2RGH, with whom they were not in communication - all seven tanks were promptly destroyed by Italian anti-tank guns, apparently the sum of 3CLY's losses that day. The 2RGH War Diary reports that "F" and "H" Squadrons of that regiment overran an Italian unit still mounted in their trucks east of Bir el Gubi (as reported in the Italian official history, that unit would be the III-8th Bersaglieri), then proceeded about three miles north of Bir el Gubi, where they encountered a large number of Italian tanks (i.e., the counterattack by the 132nd Tank Regiment), engaged in a three-hour battle with them, and retreated through the Bersaglieri position, where they received fire from Italian anti-tank guns; 2RGH reported that they began the day with 46 tanks and had lost 30 by the end. Losses for 4CLY, who were very heavily engaged with the XII-8th Bersaglieri, would account for the remaining 20 British tank losses (of 57) reported in the Italian official history (the 4CLY War Diary did not survive), remembering that Ariete held the field at the end of the day and could count the wrecks. The game covers the fighting that resulted in the 50 tanks lost by 2RGH and 4CLY and about 38 of the reported 49 Italian tank losses (excluding 2 CompanyVII-132nd).
The Sharpshooters' regimental history concludes the chapter on this battle saying:
". . . the wisdom of putting in this attack on a heavily fortified position with dug-in gun emplacements and anti-tank artillery may be doubted in retrospect . . . It would be possible, but pointless at this distance of time, to examine mistakes made and lessons learned. Fruitless also to try to apportion responsibility for losses suffered. Sooner or later all fighting regiments must be blooded and the process is never painless."
General Norrie, XXX Corps commander, wrote about the battle: ". . . it had been an encounter battle . . . carried out too enthusiastically against prepared positions . . . not seen or recognized until after the attack had been launched . . ."
In any event, the 22nd Armoured Brigade was repulsed, suffering substantial losses, and left Ariete in possession of the field. The Italians felt that their improved combat performance was due to elite units being sent to Africa, the lessons of 1940 having been learned, and the impact of the Germans in the theater. The weapons were generally the same but they were better used and some effort had been made to improve leadership.
Designer's Notes
The first version of Ariete is dated 1994 and originated during research work done for Tunisia, DAK, Crusader, and Gazala. Ideally, Ariete is a zoomed-in view of the battles in the Bir el Gobi area during Operation Crusader, from OCS DAK through SCS Crusader. It was my wish to show that, after the disaster of the Italian 10th Army during Wavell's offensive (late 1940-early1941), the Italian forces in North Africa were able to face British and CW forces, stand their ground, and win.
The choice of Ariete division, the oldest armored unit in the Regio Esercito, still alive today as the only armored brigade in the modern Italian Army (equipped with latest generation Ariete MBT), was natural, considering it fought well during all the North African campaigns, from early 1941 to 3rd Alamein.
The battle of Bir el Gobi was chosen because it introduces into the TCS series a number of never-seen-before situations: it was a desert battle; it was between Italian and British forces (i.e. no Germans); it was between tank-heavy forces.
I hope you will enjoy this game!
Terrain Effects Chart
| Desert | Track | Contour | Building | |
|---|---|---|---|---|
| Combat | Open | ot | ot | Partly Protective |
| Foot | 1 | 1 | ot | 1 |
| Tracked | 1 | 1 | ot | 1 |
| Wheeled | 2 | 1 | ot | 2 |
ot = Other Terrain
Visibility Table
| Dice Roll | 0800 - 1030 | 1100 - 1300 | 1330 - 1500 | 1530 - 1630 |
|---|---|---|---|---|
| 2 | 4 | 3 | 2 | 1* |
| 3 | 6 | 4 | 3 | 2 |
| 4 | 8 | 6 | 4 | 3 |
| 5 | 10 | 8 | 6 | 4 |
| 6-8 | 10 | 10 | 8 | 6 |
| 9 |
* = Visibility 1: Movement Point entry cost of each hex is doubled (x2).
Roll for Visibility at the end of the Command Phase each turn [1.1e].
Part Two: TCS Series Rules v4.02
Introduction
The Tactical Combat Series (TCS) contains realistic, playable games of specific tactical actions during and after World War II. The system's emphasis is on command and combined arms effects. Version 4.02 introduces a number of minor changes from Version 4.0 in order to clean up a few little details to smooth out the 4.0 experience. Nothing of substance has been modified. The TCS Version 4.02 rules presented here are backwards compatible and can be used with all previous TCS games. Check the Multi-Man Publishing web site for updates to game rules as well as newer morale charts to use with Version 4.02 rules.
1.0 General Game Concepts
1.1 The Map
The map included in this game depicts the area in which the battle was fought.
1.1a Hex Numbering System. Every hex on the game map is identified by a hex number (e.g. 29.17). The digits before the decimal point (29.xx) indicate the vertical hex column, reading along the map from left to right. The digits after the decimal point (xx.17) identify the exact hex in the column, reading from bottom to top. To reduce map clutter, hex numbers are printed only on every fifth row of hexes (xx.05, xx.10, xx.15). To find hex 29.17, for example, follow the xx.15 row until you find the 29.xx column, then count up two hexes to 29.17. If the game uses more than one map, any reference to a hex number will include the appropriate map letter (e.g. B29.17).
1.1b Map Edge Hexes. Only hexes with at least one-half showing are playable.
1.1c Off-Map Movement and Fires. Unless specifically allowed in a given game, units cannot conduct any sort of off-map movement. Destroy units forced off the map. Artillery Barrage or Smoke markers which scatter off the game map have no effect.
1.2 The Rules
Every TCS game contains separate series and game rulebooks. The series rulebook contains the rules generally applicable to all the games in the series. The game rulebook gives the details needed for a specific game, including any special rules, scenarios, and set up information.
1.2a Organization. Section and case numbers outline the rules. Each major grouping of the rules is a section; a paragraph within a rules section is a case. The number 4.2 would, for example, refer to section 4, case 2. A specific case can contain a number of related statements. Statements within a case are numbered as in 4.2a, 4.2b, etc.
1.2b Repetition. Once stated, a rule is repeated only if needed for clarification.
1.3 Scale
Each turn is 20 minutes (one hour at night) and each hex 125 yards with a 20 meter contour interval unless otherwise given in the game rulebook. Some games have a 10 meter contour interval; others use a 125m/hex scale. The personnel units are generally platoons. Weapons units (AT Guns, Infantry Guns) usually represent one gun. Mortar and MG units generally represent 2-3 weapons in a section. Artillery counters can represent either one gun or a battery of 2-6 guns, and vehicle units (tanks and other armored vehicles) can represent either single vehicles or sections/platoons of 2-6 vehicles; the number of vehicles is indicated on the counter. Carrier counters (trucks, half-tracks) represent sufficient vehicles, usually 2-3, to carry a full Infantry platoon or tow two larger guns or cannons. Many Carriers are not represented as counters but are integrated into the Weapons units they transport.
1.4 Standard Rounding Rule
Round .00 to .49 down; round .50 to .99 up. When rounding must occur, do so only after making all modifications (before final application). In no case should you round a number before another manipulation.
1.5 Fog of War
To increase realism, a player should not be aware of the enemy's Op Sheets, Battalion Morale values, Task Organizations, artillery availability or ammunition, Rally Points, nor any future plans that might be converted into Op Sheets. Examining enemy stacks is allowed.
1.6 Dice Rolls
Most dice rolls in the TCS are sequential (in the 11..66 format). Roll two dice, one red and one white. Read the red die as the tens digit and the white die as the ones. For instance, a roll of "3" on the red die and "4" on the white one would be "34".
2.0 Sequence of Play
The sequence of play for one game turn follows below: it can also be found in the accompanying tables. To determine Initiative for the Aircraft & Artillery Phase and the Action Phase, each player rolls one die. The player with the higher roll has the Initiative and chooses to be first or second for the phase in question. Re-roll any ties.
Sequence of Play
Command Phase
Both players do the following:
- Review Implemented Op Sheets for completion [6.11].
- Accrue Weighted Turns [6.9d].
- Make any implementation checks [6.9f].
- Make any Reserve or Alternate Die Roll Check attempts [6.14d].
- Add units to existing Op Sheets [6.13].
- Create new Op Sheets [6.8].
On full hour turns (turns ending in -00), add the following:
- Roll to reduce Battalion and Vehicle Morale if applicable [17.1d, 17.8d, 26.1d].
- Roll for Weather if necessary [7.0a].
Aircraft & Artillery Phase
Roll to determine which player fires first [2.0]. The player who wins the roll chooses to be first or second for the duration of the Aircraft & Artillery Phase.
Each player conducts the following six subphases separately, in Initiative order:
- Determine and execute Aircraft Sorties, rolling on the game-specific table if necessary [25.0]; execute any Overwatch Fires generated by AA fire or SYRs [18.10].
- Execute any Pre-Plotted Barrages as per special rules in certain TCS games.
- Remove own Continuous Fire Missions and place new Artillery Missions [18.0]. Illum works instantly and can be used to observe other Missions during mission adjustment [subphase 4].
- Adjust missions by rolling on the Artillery Adjustment Table [18.7].
- Execute all new Missions; non-phasing player executes any Overwatch Fires generated by on-board Artillery Missions or SYRs [18.10].
- Remove all Barrage markers that are not Continuous Fires.
Action Phases
Roll to determine who conducts his phase first [2.0]. Each player has his own separate Action Phase. Conduct them one right after the other, following the sequence described below.
- Remove all Fired markers from the phasing player's units.
- Remove Mortar and Infantry Gun Smoke and Illum markers placed by the player during the previous turn.
- Place Reinforcements on the appropriate map edge [27.2].
- The phasing player may conduct Mode Change [4.1], Movement [20.0], Suppressive Fire Actions [13.0], Point Fire Actions [14.0], Assaults [22.0], Overruns [23.0], Vehicle Impulses [20.2], Minefield Breaches [21.3], and Minefield Crossings [21.2]. In either Action Phase both players can conduct appropriate Overwatch Fires [15.0].
- The phasing player may remove Suppressed and reduce Paralyzed markers if desired. The non-phasing player may conduct Overwatch Fires at stacks recovering from being Suppressed or Paralyzed [17.7]. Resolve any overstacking [5.0].
Clean Up Phase [26.2c, 19.2]
Both players work together to do the following (ORDER is important):
- Remove all Artillery Illum markers.
- Remove all Level 1 Smoke markers.
- Flip all Level 2 Smoke markers to Level 1 Smoke markers.
3.0 Units
The game's playing pieces-the counters-represent combat units, vehicles, and informational markers. The word "unit" denotes any counter that represents troops or vehicles-as distinct from informational markers. Each unit belongs to one of the following categories: Infantry, Weapons, Vehicle, or Carrier.
3.1 Unit Types
3.1a Infantry Units. The Infantry unit category includes not only Infantry platoons, but also engineers, military police, and other troop units. Infantry units are Area targets and Low-Trajectory Area Firers (A-firers). They add their steps to their Fire strength at range zero (in the same hex) and one-half their steps at range one. They have Morale and make Morale Checks. Only Infantry units can breach minefields or make AT Rolls. All infantry units are 5-step platoons unless otherwise indicated in the game rules.
3.1b Weapons Units. These units represent heavier weapons systems that require a crew of three or more. Mortar and MG units have two steps; AT Guns, AA Guns, and Infantry Guns generally have one step. On-map Artillery may have 1-6 steps. Weapons units have Morale and make Morale Checks. Weapons units cannot conduct minefield breaches or make AT Rolls.
3.1c Vehicle Units. A Vehicle unit or step represents an individual combat vehicle, such as a tank, assault gun, tank destroyer, armored car, or self-propelled artillery, not specifically designed to carry passengers. Vehicle units are generally Point targets armed with Point Fire weapons and are affected by Vehicle Morale. Vehicle units are capable of Overrun combat and can use Vehicle Impulses. They can carry other units using special rules.
3.1d Carrier Units. Carrier units represent trucks, half-tracks, and other vehicles whose purpose is the transportation of men and equipment. They function like Vehicles, except that they use the Carrier rules to transport other units and tow weapons. They cannot use Vehicle Impulses. Like Vehicle units, Carrier units are capable of Overrun combat. Carrier units have two steps, have no Morale rating on their counter and are not subject to Vehicle Morale or Battalion Morale, although Carrier units lost in combat do count towards Battalion Morale.
3.1e Coding. Counters are coded for firing class and type. See the TCS Unit Explanation table. For pre-4.0TCS games, a box around the range number indicates an A-firer; a circle around the range number indicates an A-firer capable of indirect fire (Mortar); a white range number blocked in red or black indicates a P-firer's nominal range. You may, of course, also consult the rulebook that came with the game.
3.2 Target and Firer Types
There are two classifications for each unit's firer and target characteristics.
3.2a The two firer types are Area-firer (A-firer) and Point-firer (P-firer). The target types are Area targets, Point targets, and a combination of the two called Both-type targets (B-targets).
3.2b Area Fire weapons spray an area with directed, but not necessarily aimed, fire. A-firers can attack Area targets or B-targets but cannot attack Point targets. In addition, Infantry units cannot attack B-1 targets (i.e. B-targets with a strength of one representing lightly armored vehicles) with Area Fires. A-firers are divided into two categories: Low-Trajectory and High-Trajectory [11.2].
3.2c Point Fire weapons fire penetrating rounds at a specific target (such as a vehicle or large weapon) and require a direct hit to damage the target. P-firers can also conduct Area Fires using their printed Fire strength (AT Guns use 1/2 their Point Fire strength). P-firers can attack B-targets either with Area Fire or Point Fire as desired by the owning player (that is, they can spray it with MG and/or HE fire or fire armor piercing rounds). Note that in this case the firing player must select the fire resolution method (Area or Point) before resolving the fire.
3.2d Area targets are formations of men spread throughout the hex. They are more difficult to spot than Vehicles and can suffer negative combat modifiers for being packed too densely.
3.2e Point targets are armored vehicles whose defense strength corresponds to their armor rating (the higher the better).
Design Note: A P-1 target is a fairly light tank which cannot be penetrated by heavy MG fire. A P-6 target is a late WWII heavy tank such as the Tiger II.
3.2f B-targets can be attacked by both Area Fire and Point Fire. B-1 targets cannot be affected by Area Fire from Infantry units.
Design Note: B-0 targets are unarmored vehicles (jeeps, trucks, etc.) or guns (Infantry Guns, On-Map Arty, AT). B-1 targets are lightly armored vehicles such as half-tracks and armored cars that can be penetrated by heavy MGs, mortars, and other support weapons, but are safe from small-arms fire.
3.2g For pre-4.0 TCS games, the abbreviations on the unit's back are: "A" for Area, "P" for Point, and "B" for Both. A "-" in the firer type's place indicates a unit without a weapon or with a special classification.
3.3 Multiple-Step Counters
Some TCS games use single counters to represent multiple guns or vehicles. Indicate the loss of individual vehicles or guns with Step Loss markers.
3.4 Counters
- Fire Strength: White = Area-firer, yellow = Point-firer.
- Range: Black = Low-trajectory firer, white = High-trajectory firer.
- Defense Strength: White = Area target (morale value), yellow = Point target, black = B-target.
- Movement: White = Foot, black = Wheeled, yellow = Track.
- ID Band: color shows battalion, gray = not attached to particular battalion [17.1c].
4.0 Modes
Units in the game can be in one of two Modes: Fire Mode or Move Mode. Mode determines a unit's capabilities. The side of a counter facing up shows that unit's Mode.
4.1 Mode Change
A player can change unit Modes during his Action Phase. A unit may also be allowed or required to change Mode, at no Movement Point (MP) cost, when it conducts a Save Yourself Retreat (SYR), suffers a Suppressed or Paralyzed Morale result, or during Assault combat.
4.1a Infantry and Weapons units (including units with Integrated Carriers [24.2]) using Foot Movement can change from Move Mode to Fire Mode at no Movement Point (MP) cost. They must spend one-half of their Movement Allowance [round normally immediately, see 1.4] to change from Fire Mode to Move Mode. Tow-only units have an assumed MA of two MPs for this purpose. Units with Integrated Carriers using Vehicle Movement [24.2] must spend one-half of their MA to change Mode (both Fire and Move).
4.1b Vehicle and Carrier units must spend one-third of their MA [or one Movement Impulse for Vehicles, see 20.2] to change from Move Mode to Fire Mode. Changing from Fire Mode to Move Mode does not cost any MPs.
4.1c Suppressed, Paralyzed, and Fired-marked units can only change Mode to conduct a Save Yourself Retreat (SYR) [17.4].
4.2 Mode Effects
Units in Fire Mode can fire Suppressive Fire Actions (SFAs), Point Fire Actions (PFAs), or Overwatch (OW) and breach Minefields. Units in Move Mode can move, initiate Assault and Overrun combats, mount or dismount Carriers, and breach Minefields. In Assault and Overrun combat, Mode has no effect on a unit's ability to fire. EXCEPTION: Weapons units in Move Mode may not fire in Assault or Overrun combat.
A unit must be in Fire Mode to observe for Artillery Missions. A unit can observe for Mortar fires in either Move Mode or Fire Mode.
5.0 Stacking
Stacking is the placing of more than one unit in a single hex. Enforce stacking limits at the end of each Action Phase, at the end of each Vehicle Impulse, and during the execution of Assault and Overrun combats (where both sides count stacking independently of the other). The owning player destroys the excess steps in any overstacked hexes.
5.1 Stacking Limits
The stacking limit for each hex is 30 Infantry/Weapons steps plus six Vehicle/Carrier steps. Units mounted inside a Carrier or being towed do not count towards the stacking limit.
5.2 Handling Rules
5.2a Stacking and unstacking cost no Movement Points. Stacks are declared when units start moving together.
5.2b Friendly and enemy units can occupy a hex together only during Assault combat and Overrun combat. Units can never end a phase stacked with an enemy unit. Destroy units forced to enter an enemy-occupied hex for reasons other than Assault or Overrun combat.
5.2c Both sides can examine the contents of any enemy stack at any time.
6.0 Command
The command rules impose realistic limits on the players' ability to rapidly change missions. Create Op Sheets to define your objectives. The units on an Op Sheet must execute the mission on that sheet until they accomplish the mission, they are reassigned, or the player cancels the Op Sheet.
6.1 Playing Without Command
You can easily play without the formal command system. Skip all the rules in section 6. Players can choose between realism and simplicity to suit their tastes. The game design works with or without the Command Rules, although the Command Rules are one of the main driving elements of TCS games.
6.2 Unit Actions Unaffected by Command
Op Sheets show the functions of higher level formations, such as battalions, brigades, and regiments. Much of what unit counters do while part of a higher plan need not be controlled by Op Sheets. These actions include, but are not limited to, fire combats, exact unit movements, Assault and Overrun combats, Minefield operations, and artillery fires. Play proceeds along Op Sheet frameworks, but Op Sheets do not control precise unit actions, unlike games featuring plotted movement.
6.3 Unassigned Units
Units not listed on an implemented Op Sheet's Task Organization have no orders and are Unassigned. Only when a new Op Sheet which contains them implements do such units become Assigned. Units executing Preliminary Instructions [6.14a] are Unassigned and subject to 6.3a and 6.3b, but are exempt from some of the restrictions in 6.3c. Units executing implemented Move Op Sheets [6.6d] and units moving on implemented Defensive Op Sheets [6.6e] are Assigned but are treated as Unassigned units executing Preliminary Instructions.
6.3a Unassigned units are never Dug In (unless allowed by game rules), cannot initiate Assault or Overrun combat, and cannot fire as part of SFAs or PFAs. They may fire Overwatch Fires normally. Unassigned On-Map Artillery may fire SFAs and Artillery Missions normally.
6.3b Infantry and Weapons units suffer a +2 Morale modifier when Unassigned. Vehicle formations suffer no additional morale penalties when Unassigned.
6.3c Unassigned units that begin their Action Phase more than five hexes from their Rally Point may not voluntarily end any movement or Voluntary SYR closer to enemy units that they can spot at any point during their move or retreat, nor may they end movement further from their Rally Point. Unassigned units that begin their Action Phase within five hexes of their Rally Point can move/SYR closer to a spotted enemy unit and/or end movement further from their Rally Point as long as they remain within the five-hex envelope. [Exception: Units executing Preliminary Instructions [6.14a], units executing implemented Move Op Sheets [6.6d], and units moving on implemented Defensive Op Sheets [6.6e] are subject to the restrictions on movement/SYR closer to a spotted enemy unit but are permitted to end movement further away from their Rally Point.]
6.4 Higher Commander's Intent
The higher commander's intent is a battlefield vision that your commander wants you to create, and is stated in the game rules. You can freely use your units to make his intent come true. Your success on the game map will be judged by your success in achieving that intent as it is reflected in the Victory Conditions.
6.5 Op Sheets
Each Op Sheet contains all the instructions for its Task Organization. An Op Sheet can be implemented or non-implemented. An implemented Op Sheet has passed its Command Prep [6.9] and its units must now follow its instructions. Non-implemented Op Sheets are still in their Command Prep and cannot control their units.
6.5a The Graphic. The graphic is a reduced version of the game map on which players draw up their operations. Other than the use of alternates, reserves, and the addition of new units to the Task Organization, make no changes to the graphic after creating it. We recommend the use of standard US Army (NATO) symbols. A list of useful symbols is on page 4 of the TCS charts. Players can use custom-designed symbols as long as both players agree to their meaning. The graphic alone should provide much of the information needed for another person to understand the Op Sheet.
6.5b Written Notes. The written notes give the information needed to cement together the graphic's logic and order. Written notes should be as short as possible. They should explain the execution details for the graphic so that another person can fully understand the Op Sheet.
6.5c Failure Instructions. Every Op Sheet must give instructions about what to do if it fails. The determination of failure is up to the owning player (or as a result of failing Vehicle Morale, see 17.8). These instructions must include Rally Points [6.12] to which the units must withdraw to await further orders. Failure Instructions can only entail a rapid movement to the Rally Point, avoiding enemy contact. Any part of a Task Organization that executes Failure Instructions becomes Unassigned. Failure Instructions become valid once the Op Sheet implements or units on the Op Sheet begin executing Preliminary Instructions.
Example Op Sheet (figure: "A Complex Fire and Movement Attack Op Sheet with Fish Motif"): Time 1020; Objective: OBJ Tuna; Type: Attack; Size: 1 (one infantry Bn plus parts of one Tank Bn less staff modifier); Task Organization: Support: A Co, B Co, Bn Wpns; Assault: 1, 2 Tank Plt, C Co; Security: 3 Tank Plt; Failure Instructions: Return to LD and await new orders; Rally Point: 14.05. Written Notes: Move in three axes. Group Security: Move along Carp to Shark. Isolate OBJ Tuna. Support: Move along Axis Trout to the support position. Assault: Move along Axis Bass to seize OBJ Tuna.
6.6 Op Sheet Types
Each Op Sheet can entail a number of actions such as movements and attacks. While a sheet can contain any number of sub-mission types, a given set of units on an Op Sheet can only have one particular mission. In other words, a single Op Sheet could never order a company to attack a hill and then defend it. That would take two separate Op Sheets. For example, a player has an implemented Attack Op Sheet and simultaneously draws up a Prepared Defense Op Sheet. The defense accrues time while the attack is underway, but the player does not roll to implement it until the objective is secured.
Multiple sub-missions here refers to having a single Op Sheet which deals with a large number of units, say a regiment, in which one battalion is doing one job, and another is doing something else-no single group of units (such as a battalion) is trying to accomplish two successive tasks on the same Op Sheet.
It is OK to assign one group the task of attacking along a route to and over one hill and onto another-that would be considered one attack. It is also OK to generate a defense in zones which allows the player's units to defend one phase line after another as the situation develops. It is important to avoid being too "tight" in terms of the mission allowances for an Op Sheet-provided you are not setting up a single order to attack an objective and then defend it with the same group of units, you are probably OK. It is possible to have one group of units on an Op Sheet attack an objective and to have
another group on the same Op Sheet with Hasty Defense orders ready to defend the objective when taken. Naturally the units designated to defend cannot participate in the attack.
Categorize each Op Sheet according to the highest ranking operation on it in this order:
- Prepared Defense
- Attack
- Hasty Defense
- Move
6.6a Prepared Defense. Defense of an area that allows the troops to dig in and may include the laying of minefields.
6.6b Attack. Offensive operations towards an objective not currently held-even to occupy terrain not garrisoned by the enemy.
6.6c Hasty Defense. Quick defense without enough time to dig in or lay mines.
6.6d Move. When drawn up, Move Op Sheets may not specify movement through areas containing enemy units. Units on implemented Move Op Sheets are treated as Unassigned units executing Preliminary Instructions [see 6.3].
Example Op Sheet (figure: "A Simpler Attack Op Sheet with Tree Motif"): Time 1020; OBJ Oak; Type: Attack; Size: 1 (one infantry Bn plus part of one Tank Bn less staff modifier); Task Organization: 1-123 Infantry, A-58 Tank Bn; Failure Instructions: Return to LD and await new orders; Rally Point: 12.04. Written Notes: Advance along Axis Elm to seize OBJ Oak. Use alternate route to Maple to provide support with B-1-123 if needed.
6.6e Defensive Op Sheets when drawn may only specify locations that are either (1) currently held or 'behind friendly lines', or (2) within the designated objectives of an Attack Op Sheet. Players will need to use common sense here. Movement from assembly areas to these locations is allowed. Units moving on implemented Defensive Op Sheets are treated as Unassigned units executing Preliminary Instructions [see 6.3].
Design Note: The concept of attacking an objective while a defense order accrues time in your pocket might raise eyebrows. The point here is that only a limited amount of the time spent implementing a Prepared Defense is actually spent digging. The majority of the time is expended doing coordination with other friendly units in the area, securing needed supplies, setting up artillery fires, etc. in order to be ready to defend. The actual digging does not take all that long and need not be finished for the unit to be ready to defend. Indeed, doctrine in most countries is that field position improvement is an ongoing process that never is really finished. The time accrued represents the staff preparing for a mission it knows is coming up-not Snuffy digging a prepared hole that he carries with him in the attack.
Play Note: Be careful where your units are when you start rolling for a Prepared Defense-a lucky die roll might cause you to dig in at a location you don't want! Units are Dug In the instant the roll is successful.
6.7 Task Organization
List the units making up an Op Sheet in its Task Organization. The Task Organization must provide a complete unit listing for that Op Sheet. Units not so listed cannot operate as part of that Op Sheet. The player can assign his units, even those off map, to any Op Sheet he devises.
6.7a List all units that are to conduct an Op Sheet's operation on that sheet's Task Organization. Players can divide their units as they see fit. If a Task Organization contains the "304 PG Rgt", then that Op Sheet contains all the 304th Panzergrenadier Regiment's elements-including those off map. Never leave any doubt about which units are in a Task Organization.
6.7b Off-Map Artillery is not assigned to Op Sheets unless specified in the game-specific rules.
6.7c Limitation on Op Sheet Assignments. Never list a unit on more than two Op Sheets-one implemented and one unimplemented or two unimplemented. A unit also cannot be on two unimplemented Op Sheets of the same type (Hasty Defense and Prepared Defense are not the same type). Being listed on an Op Sheet that has been declared a success [6.11a] or failure [6.11b] does not count towards this limit.
6.8 Op Sheet Creation
Players can create Op Sheets both before the game and during any Command Phase. When drawn, Op Sheets are unimplemented [except for those drawn before the game, see 27.1f]. When the player successfully rolls on the Command Prep Table, the Op Sheet is implemented. A player can draw up any number of Op Sheets in a turn. Complete all Op Sheet parts when first creating it. A player can assign any of his units to any Op Sheet [subject to 6.7]. Forces placed on a new Op Sheet while under an old implemented one remain under the old sheet's control until the new one implements.
6.9 Command Prep
Each Op Sheet begins its Command Prep when the player creates it. The Command Prep ends when the player implements the Op Sheet using the Command Prep Table.
Example Op Sheet (figure: "An Elastic Defense Op Sheet"): Time 1020; Type: Hasty Defense; Size: 0 (one infantry Bn less staff modifier); Task Organization: 1-123 Infantry; Written Notes: Defend in first Battle position... on order fall back to second BP. A Co: BP 1...BP 6; B Co: BP 2...BP 4; C Co: BP 3...BP 5. Delay in BP until withdrawal is ordered. Failure Instructions: Withdraw off map as shown; Rally Point: 11.05.
6.9a The game rules give each side a Command Prep Rating. This rating reflects the ability of each side's command systems to conduct operations quickly, or-more specifically-to change plans rapidly.
6.9b Op Sheet Size. Op Sheet Size modifies the player's Command Prep Rating for use on the Command Prep Table. The size equals the number of Elements in the Task Organization. An Element is any number of units of any type from a single formation that is subject to either Battalion or Vehicle Morale. Units not part of a formation subject to Battalion or Vehicle Morale, such as regimental AT guns, Weapons companies, Weapons battalions, and scout platoons, do not count. Three companies, each from a different formation, would have a size of three, while three companies from the same battalion would have a size of one, which becomes a zero with the staff modifier [6.9c]. An infantry battalion, two tank platoons from a single company, and an AT gun from a regimental weapons section would have a size of two. After 6.9c, this becomes a size of one.
6.9c Staff Modifier. Any Op Sheet including at least one whole battalion (all parts not eliminated) subtracts one from the Op Sheet size.
For example, a full infantry battalion would normally get a size of 1, but since it has a staff attached the size is zero.
6.9d Weighted Turns. Each turn, an unimplemented Op Sheet accrues weighted turns representing the value of the time spent preparing. Before checking any Op Sheets for implementation in each Command Phase, add a number of marks to each sheet's tally. The number of marks made each turn depends on the condition of the units in each Op Sheet's Task Organization. Use the worst condition applicable:
- All units are Unassigned: 3
- Any unit Assigned or executing Preliminary Instructions or a Night turn [26.0]: 2
- Any unit fired or fired upon in any way during the previous turn: 1
Firing involves any Area Fire, Point Fire, or AT Roll. Observing for artillery or mortars does not count as firing.
6.9e Vehicle Op Sheets. An Attack, Hasty Defense or Move Op Sheet consisting only of Vehicles (not Carriers!) accrues weighted turns at triple the normal rate. For example, an Op Sheet with a battalion of tanks that is Unassigned and out of combat accrues nine weighted turns per turn.
Design Note: Vehicle Op Sheets implement much more quickly because of the higher operational tempo of armor units. Communication via radio or other signals was much faster, and armor units were accustomed to operating at a much faster pace than infantry. Players will find themselves tempted to maneuver with their armor independently of their slow infantry comrades-and narratives of WWII combat are replete with just such stories! However, digging in vehicles still takes a lot of time.
6.9f Command Prep Table. During each Command Phase, the player can attempt to implement any of his unimplemented Op Sheets. The player is never forced to try to implement an Op Sheet.
Use the Command Prep Table to implement Op Sheets. Add the total weighted turns accrued so far and follow the row for the Op Sheet's type across to the furthest right column that does not exceed that number. Add your Command Prep Rating to the Op Sheet's Size [6.9b & 6.9c]. Find the row containing the modified Command Prep Rating and cross index it with the column found earlier to locate the table's value. Roll two dice (11...66). If the dice roll is greater than or equal to the table's value, implement the Op Sheet. Otherwise, the attempt fails, and you can try again next turn. Roll separately for each Op Sheet.
Example: A player has an unimplemented Attack Op Sheet with a full regiment on it awaiting implementation. So far, it has accrued 27 weighted turns. It has a size of two (three battalions less the staff modifier). The player has a Command Prep Rating of three.
Cross indexing the modified Command Prep Rating (5) with the 27 weighted turns (along the Attack-type line, using the 22 line since 27 is less than 28) gives a required roll of 52 or more. The player rolls two dice and gets a 43. The order does not implement and the player curses his bad luck and threatens to sack the regimental commander.
The next turn, he tries again. This time he has accrued 30 weighted turns (three more for this last turn) that changes the needed roll to a 45. The player grits his teeth and rolls the dice getting a 61, implementing the Op Sheet. Elated at this turn of events, the player chortles his approval thereby warning the sly mug across the table to watch out. Our hero realizes this and kicks himself for his lack of a poker face and promises himself to do better next time.
6.10 Implementation
Upon a successful roll on the Command Prep Table, the Op Sheet implements. The player must follow each implemented Op Sheet until he removes that sheet by whatever means: mission completion, failure, or unit reassignment.
6.10a Units listed on a newly implemented Op Sheet are immediately removed from any previously implemented Op Sheet that they may already be on.
6.10b Players are free to use their units as they see fit in following Op Sheet instructions, but they must follow those instructions. They are free to vary their operational tempo for any reason, provided they do not violate Op Sheet instructions.
6.11 Mission Completion
At some point the player may find that an Op Sheet has served its purpose: Either it has succeeded or failed.
6.11a Mission Success. During the Command Phase, a player can declare an Op Sheet to have succeeded. Once a mission succeeds, indicate this on the Op Sheet in question. All units on the Op Sheet become Unassigned [6.3]. However, they still retain their Failure Instructions and Rally Point until they are listed on a new implemented Op Sheet or begin executing Preliminary Instructions. Scratch such units from the successful Op Sheet and discard that Op Sheet when the units that were previously listed on it are now executing Preliminary Instructions or are listed on another implemented Op Sheet.
6.11b Mission Failure. Every Op Sheet requires instructions about what to do if it fails. The decision to call off a mission rests solely with the player, with the exception of Vehicle Morale failure [17.8]. The player can declare Mission Failure in any friendly Action Phase. Units on a failed Op Sheet are now Unassigned and must execute their Failure Instructions and move towards their Rally Point [6.12].
6.11c Units executing Failure Instructions must move towards their Rally Point and avoid enemy contact [6.3]. It is possible they might not be able to move at all due to the presence of enemy units, but be pinned in the middle of enemy territory as Unassigned units-and that's bad.
6.11d It is possible for only a portion of a Task Organization to fail. An example would be a battalion defense where one company gets hammered, while the others are OK. Cross out the failed units from the Op Sheet and allow them to follow the Failure Instructions independently.
6.12 Rally Points
Rally Points are locations where Unassigned units gather to reorganize. There are no markers for Rally Points-their location and composition are noted on Op Sheets.
6.12a When drawing up Op Sheets, all units on the Op Sheet must be assigned a Rally Point as part of the Failure Instructions. This Rally Point becomes valid once Preliminary Instructions are initiated or the Op Sheet implements. There may be multiple Rally Points on one Op Sheet, but only one Rally Point per battalion.
6.12b Units on an Op Sheet that has succeeded [6.11a] retain their Rally Point until they have been assigned a new Rally Point through a newly implemented Op Sheet or they begin executing Preliminary Instructions on a new Op Sheet not yet implemented.
6.12c Rally Points are designed to be safe locations away from enemy units. Rally Points should not be assigned so as to cause units to advance toward the enemy while unassigned. Remember that failure instructions should be very simple, so don't try to get too cute with complicated Rally Point assignments.
6.13 Special Handling Issues
6.13a If a new Op Sheet implements or begins executing Preliminary Instructions and this new Op Sheet lists units that are currently listed on another implemented Op Sheet, delete the reassigned units from the older Op Sheet. In addition, a player may voluntarily declare a unit or units on an implemented Op Sheet to have succeeded or failed. Such units become Unassigned and, if they failed, they must execute their Failure Instructions.
6.13b A player can scratch units off an unimplemented Op Sheet during any Command Phase. Do not adjust the Op Sheet's Size modifier.
6.13c To add units to an existing implemented Op Sheet, draw their part on the graphic and add the written notes. Add them to the Task Organization. Those units (only) must go through the implementation process using the staff modifier and mission type from the gaining sheet, if any, and the size of the adding force only. Roll against the column with the most difficult mission type if multiple missions exist on the same Op Sheet. These units cannot function with the Op Sheet they are being added to until they make their implementation roll or begin implementing Preliminary Instructions.
Note: Only Vehicle units may be added to an existing Vehicle Op Sheet [6.9e].
6.13d Adding units to an unimplemented Op Sheet causes a reduction in accumulated weighted turns in proportion to the size of the units being added. Add these new units to the Op Sheet, drawing in their part on the graphic and adding written notes. Calculate the new Op Sheet Size and multiply the currently accumulated weighted turns by the ratio of the old size divided by the new size without the staff modifier (rounding normally). For instance, an unimplemented Op Sheet has a size of one (two battalions minus the staff modifier) and 27 weighted turns accumulated. The owning player decides to add another battalion (size one). The new Op Sheet has a size of two. The ratio of old size divided by the new size is 2/3 (two battalions divided by three battalions). Thus the number of weighted turns is multiplied by 2/3, yielding 18. The new Op Sheet Size is two (three battalions less the staff modifier.)
6.13e Reinforcements. Handle these according to 6.13c, 6.13d, or write up a new Op Sheet for them. It is also perfectly acceptable to write up Op Sheets for reinforcements ahead of their arrival. Op Sheets for reinforcements written before the game begins are automatically implemented. Reinforcements may not enter the map until they are on an implemented Op Sheet or executing Preliminary Instructions.
6.14 Special Instructions
The following are different in some respects from the foregoing and supersede the earlier rules where conflict exists.
Example Op Sheet (figure: "A Night Attack Op Sheet with Bird Motif"): Time 1800; OBJ Hawk; Type: Attack; Size: 1 (two infantry Bns less staff modifier); Task Organization: 1-123 Infantry, 2-130 Infantry, 3x 75mm AT; Failure Instructions: Withdraw to PDs to await further orders; Rally Point: 12.04. Written Notes: 2-130 with 1x75mm AT makes supporting attack. Leave Point of Departure 2. At Chicken, send B Co and the AT Gun to Crow. Continue on DA Turkey, deploy on PLD Ostrich, and attack to capture OBJ Blue Jay. This attack is to draw the enemy's attention from the main effort on OBJ Hawk. 1-123 with 2x 75mm AT makes the main effort. Leave Point of Departure 1 two hours after 2-130 moves out of PD 2. At Sparrow, send B Co and the AT Guns to Robin. Continue on DA Buzzard, deploy on PLD Eagle, and attack to capture OBJ Hawk.
6.14a Preliminary Instructions. Players may use Preliminary Instructions to get units to an assembly area before their Op Sheet actually implements. When drawing up a new Op Sheet, the player can list any Preliminary Instructions he wants. Units executing Preliminary Instructions are Unassigned, but use the Failure Instructions of the new Op Sheet and may move away from their Rally Point.
When a player rolls for implementation of the Op Sheet on the Command Prep Table, he declares whether A) he is attempting to implement the whole Op Sheet or B) only the Preliminary Instructions. Units on the Op Sheet may execute their Preliminary Instructions in either case if the die roll succeeds when checked against the Move column.
Example: Player A (Command Prep 3) has a battalion of Shermans just itching to attack. They are out of position, so the player writes down an assembly area for the attack and Preliminary Instructions to get there. The next turn the unit (size 0, 1 battalion minus staff modifier) accumulates 9 weighted turns (daylight, no contact, Vehicle formation). The player attempts to implement the Op Sheet and rolls a 46. This is not enough to implement the Attack Op Sheet (Prep 3 + 0 size = 3 row, with 9 weighted turns he needed a 55 to implement). However, to implement Preliminary Instructions the die roll needed was 44 (cross reference it as 8 weighted turns on the Move row). Preliminary Instructions have now been implemented and the Shermans can roll off to their assembly area even though the Op Sheet has not yet implemented.
6.14b Reserves. Reserves give Op Sheets some flexibility. Reserves are designated when drawing up the Op Sheet. Up to one half of all units on an Op Sheet may be designated as reserves when the Op Sheet is written. Consider an Op Sheet's reserves to have Attack orders for implementation purposes. Uncommitted reserves are considered to be executing Preliminary Instructions.
To commit a reserve, the player must first identify the units being committed as a group and draw their intended use on the Op Sheet's graphic. This cannot be changed later. Any number of units desired can be used, even a single platoon. Then roll to try to pass a Die Roll Check [6.14d]. The new group must continue to make Die Roll Checks each turn until successful. They are treated as Unassigned until this Die Roll Check succeeds. Units in reserve may not be Dug In unless allowed by the game rules.
Units in reserve can be assigned Move, Attack, or Hasty Defense orders that must be within the framework of their Op Sheet. Thus a player could assign them to defend an objective taken in a recent attack, guard a flank, or initiate a flanking attack themselves. Each group committed can be assigned only one type of operation. Thus to initiate a counterattack and then hold the ground taken would require two different reserve groups.
Reserves are always relative to an Op Sheet (i.e., a mission) and are not just hanging around waiting for something to happen. If during the Command Phase more than half the units on an Op Sheet are uncommitted in reserve, the owning player must commit enough units to bring the ratio back to 50% or lower. Once units are committed, they do not count as being in reserve, even if their Die Roll Check has not yet succeeded.
6.14c Alternates. A player can list alternate routes and/or objectives on an Op Sheet. The player can switch to these in the same way that he commits reserves. Draw alternates on the graphic when creating the Op Sheet. Once units on an Op Sheet switch to their alternates, they cannot switch back. Each unit can have one alternate route or objective.
6.14d Die Roll Checks. To commit a reserve or switch to alternates, make a Die Roll Check during each Command Phase until successful. Roll one die: if the roll is greater than or equal to the Command Prep Rating of the checking side, the Die Roll Check succeeds. Otherwise, it has no effect and a new roll must be made in the next Command Phase. A player with a Command Prep Rating of 7 or more cannot pass a Die Roll Check and is therefore unable to use alternates or reserves.
6.15 Line Entry Command (optional)
Line Entry Command is a shorthand version of the command system. It does require a fair degree of honesty to use, since there is no graphic to follow.
6.15a For each Op Sheet in this system, allocate one line on a piece of paper. Enter the units involved on the left followed by the Op Sheet size and type. Jot down the mission of the units (e.g. "Attack to capture village A").
6.15b Each Command Phase, jot down the weighted turns and make any implementation rolls normally. Place a check mark to the right of any line that implements.
6.15c You must come up with an idea of how you want to execute the mission when it is first written down and follow that plan when it implements-regardless of changing circumstances.
6.16 Digging In
Units listed on a newly implemented Prepared Defense mission become Dug In. No other units are ever Dug In unless allowed by the game rules.
6.16a Units must be in Fire Mode at the moment their Prepared Defense Op Sheet implements to become Dug In. Units that are in Move Mode when their current Prepared Defense Op Sheet implements lose the opportunity to become Dug In.
6.16b Players must keep track of which units are Dug In using Dug In markers to indicate each unit's status.
6.16c A unit loses its Dug In status if it enters Move Mode at any time.
6.16d Any unit that becomes Unassigned, Assigned to a mission other than Prepared Defense, or begins implementing Preliminary Instructions automatically loses its Dug In status.
6.16e It is not necessary to use Dug In markers to mark every Dug In unit on the map-they are intended to help in areas where players might get confused.
7.0 Visibility and Spotting
Visibility is the maximum range to which a Line of Sight (LOS) can be traced. Visibility is given as a number for each turn on the Turn Record Track; the Visibility number for a turn is the maximum range in hexes that a unit can trace a LOS during that turn; any LOS longer than the Visibility number of the current turn is automatically blocked. If no Visibility number is given, Visibility for that turn is unlimited.
7.0a Weather can further reduce Visibility in accordance with the game rules. When used, determine the Weather during the Command Phase of every full hour turn by rolling on the Weather Table. The Weather result affects the entire hour after the roll.
7.0b Night, Twilight, Dawn, and Dusk turns also reduce Visibility [26.0].
7.1 Spotting Ranges
The ranges at which certain types of fire can occur are limited by Spotting Ranges. Regardless of the appropriate Spotting Range, firing range might be still further limited by LOS [8.0], Visibility, and weapon ranges.
7.1a The Spotting Range Table gives the Spotting Ranges based on the target type, target posture, firer posture, and the terrain of the target hex. Ranges that shift left off the table are 0; those shifting right off the table are unlimited.
7.1b PFAs [12.0] and Overwatch Fires [15.0] are not allowed at targets beyond the Spotting Range. SFAs may be performed against unspotted targets.
7.1c For the Spotting Table, Mortars use the range from the observer, not the range from the Mortar unit itself.
7.1d An SFA [11.0] is unspotted if the target hex does not contain at least one spotted unit. Unspotted SFAs that include any Low-Trajectory firers use the bold Target Terrain/Posture modifiers, and, if applicable, the Stacking modifiers with an asterisk.
7.1e To find the Spotting Range, find the column for target type. Shift columns as indicated on the Spotting Range Table (positive shifts to the right, negative shifts to the left), according to the terrain in the target's hex (Protective, etc.), the target's posture (Move Mode, Dug In, etc.), firer preparation (Dug In), and other factors (Smoke, etc). For determining Spotting Range, use the unit in the target hex that produces the LONGEST Spotting Range even if that unit is not the intended target or the Overwatch Trigger.
Example: Company A, consisting of three platoons, is looking to cross Open terrain covered by a lone enemy MG section, which is Dug In in a woods hex. All units are Area targets and the base Spotting Range is 3. Units from Company A enter Move Mode (+1 shift on the Spotting Range Table) and are visible at a greater distance from the Dug In MG section because of prepared fields of fire (+1 shift for Dug In). Thus the advancing units can be spotted by the MG section at a range of six hexes (3 +2 columns on Spotting Range Table).
The Infantry units will have a much harder time spotting the MG section, which has -1 shift for Partly Protective terrain and -1 shift for being Dug In. This yields a Spotting Range of one unless the MG section fires (giving a +4 shift to the Spotting Range Table). Trying to advance against this small MG unit across Open terrain may be a more difficult task than was previously thought. It might be time to try to suppress this MG section first or block the Line of Sight (LOS) with Smoke [8.1b] to reduce potential Overwatch Fires.
Design Note: Probably the most important feature of the modern battlefield is the fact that to any one observer on it, there is little or nothing to see. This has been termed the "Empty Battlefield". Even "open" terrain is filled with minor obstructions to observation (trees, bushes, high grass, walls, small buildings, depressions, gullies, drainage ditches, and so on) making what appears to be an easy task to the game player (seeing what's coming at him) impossible. Rather than to attempt to control what a player knows, these rules inhibit his ability to use that knowledge. When you see that infantry running up the "barren" hill at you, remember there is a lot of firing going on which is beyond your control and of too little effect to worry about-the potshots of individual riflemen who are engaging fleeting targets of opportunity.
8.0 Line of Sight
Line of Sight (LOS) determines the ability of units to see each other.
8.1 General Rules
8.1a LOS is traced from the center dot of one hex to the center dot of another hex. A LOS can either be unblocked or blocked. A LOS can be blocked by terrain features, such as woods and buildings, or higher ground as determined by elevation. Units do not block LOS.
8.1b LOS can freely pass into or out of Smoke hexes, but never through them. Barrage markers do not block LOS. [Exception: Continuous Fire Attack Zones; 18.6b].
8.1c Units can always fire into or out of-but not through-hexes which contain blocking terrain features.
8.1d A LOS is never blocked into an adjacent hex, including Overwatch Fire.
8.1e The map has been printed with contour lines and a color coding of contour bands to assist in determining the elevation of any hex. The elevation of a particular contour line is given along the line in meters. The contour interval is 20 meters unless indicated otherwise in the game rules. Note that a contour line is NOT a blocking terrain feature in the same sense that a woods or building symbol is, so crossing a higher elevation contour line does not, in itself, block LOS, although contour lines, by their effect on the elevation of hexes [through the procedure in 8.2], indirectly affect LOS.
8.1f A coastline (the line where the land touches the sea) is a contour line with an elevation of zero meters. Sea hexes are at an elevation of zero meters.
8.1g Any hex along a LOS (excluding the firing/spotting/observing hex and the target hex) that may block the LOS is called a Point of Contention (PoC); the base elevation of a PoC hex (including its hexsides) is determined using the procedure in 8.2 below.
8.1h Terrain features may add to the base elevation of a PoC. You can find the height of terrain features in the Terrain Effects Chart (TEC) for each game. For natural features (such as woods) and individual buildings, the printed map symbols block LOS only if the actual LOS crosses or touches the symbol. For village/town/city hexes, the whole hex (including hexsides) blocks LOS even if there are gaps in the actual printed building symbols in the hex.
If not stated otherwise in the game rules, trees (in forest, woods, hedgerow, orchard, and other symbols) and buildings (alone or in towns and villages) add 20 meters to the elevation of the PoC.
8.1i Ignore "Spot Elevations" and "Benchmarks" when evaluating elevations; they are for location reference only.
8.2 Standard Elevation Determination
The judgment of the elevation of a point falls into one of three categories.
8.2a Hilltops. A Hilltop is an area encircled by one last high contour line (possibly with the help of the map edge) and does not contain any contour lines higher than that top line. Elevations on a Hilltop are equal to the contour line encircling the feature. Hilltops are, in effect, flat.
8.2b Points Located Between or on Contour lines. Draw a line that passes through the center dot of the hex being evaluated, beginning at the next lower contour line and ending at the next higher contour line. The length of this line must be the shortest distance between the two contour lines. Divide the line into four equal quarters, starting from the lower contour line. Determine which of the quarter marks (0/4, 1/4, 2/4, 3/4, 4/4) the center dot is closest to. Add this proportion of the contour interval (20m) to the lower of the two contour lines used (for 20m contours you will add 0, 5, 10, 15, or 20). For example, a center dot which falls closest to the 1/4 mark above the 30 meter contour line would have an elevation of 35 meters. Accuracy beyond 5m is not required, so in games with 10m contours round to the nearest 1/2 contour (5m). The case where a contour line goes right through the center dot of the hex is the easiest-read the value of that contour line and that is the elevation of that hex.
8.2c Bottoms. A Bottom is the inverse of a Hilltop. It is an area encircled by one last low contour line (possibly with the help of the map edge) and does not contain any contour lines lower than that final line. Elevations in a Bottom are equal to the contour line encircling the feature. Bottoms are, in effect, flat.
8.3 LOS Determination
Use the procedure below to see whether a LOS is blocked by terrain.
8.3a Whenever a player declares an attack, check any PoCs along the LOS that may block the LOS.
8.3b To check LOS, follow the following procedure:
Step 1: Trace the LOS as a straight line between the center dot of the firing (spotting/observing) hex and the center dot of the target hex.
Step 2: Determine the elevation of the firing (spotting/observing) hex and the target hex, using only the base elevation at the hex center dot, as determined by the procedure above [8.2].
Step 3: Determine the elevation of each PoC. The elevation of a PoC is equal to the base elevation of the hex plus the height of the highest terrain feature that the LOS crosses within the PoC.
Step 4: Check the LOS on the LOS grid located at the back of these rules. Set the lower hex at its elevation along the left side and the higher hex at its elevation in the column corresponding to its distance in hexes from the lower hex. Find the column of the PoC according to its distance in hexes from the lower hex and its elevation. Draw a straight line between the high and low points on the LOS grid. If the elevation of the PoC is higher than the line connecting the two points on the LOS grid, the LOS is blocked.
Note: Players may find that a rubber band or string is a good tool for checking LOS, while a clear ruler works well on the Line of Sight Grid.
8.4 Optional Simplified Elevation Determination
The standard elevation LOS rules are a relatively realistic way of determining elevation and LOS. However, if players prefer using a simpler "pancake" topography, then replace 8.2 with the following.
8.4a If a contour line touches a hex center dot, the hex is at the same elevation as the contour line. If no contour line touches the center dot, the hex is at the elevation of the next lower contour line from the center dot.
8.4b Bottoms. A Bottom is the area encircled by one last low contour line (possibly with the help of the map edge) and does not contain any contour lines lower than that final line. Elevations in a Bottom are defined as one contour interval lower than the contour line encircling the feature.
8.5 Optional "Contour-Heads" LOS Determination
Players who are comfortable reading contour maps may enhance their TCS gaming experience by using the following modifications to the LOS rules. 8.5a may be used by itself or in conjunction with 8.5b and 8.5c as desired.
8.5a Points Located Between or on Contour lines [modifies 8.2b]. Rather than using the center point to determine the elevation of a PoC, choose one specific point in the hex along the LOS as the actual PoC and draw a line through this point rather than the hex center dot to determine, by interpolation, the elevation of the PoC. The elevation of the PoC will be determined by the elevation of the highest point along the LOS in the PoC hex, plus terrain features, instead of the elevation of the center dot.
8.5b Hilltops [modifies 8.2a]. Hilltops are no longer considered to be flat. Unless depicted by a map symbol, the actual location of the "Hilltop" is defined, by map reading convention, as the center of the area enclosed within the last surrounding contour line. To determine the elevation of a Hilltop, use any Benchmark or Spot Elevation on the Hilltop; if there is no Benchmark or Spot Elevation, add 10m to the last contour line (one-half of the contour interval, usually 10m, is the technique taught in the US Army for estimating hilltop elevations). To determine the elevation of any point between the actual Hilltop and the highest contour line enclosing the Hilltop, use 8.2b.
8.5c Bottoms [modifies 8.2c]. Assign the lowest point in a Bottom an elevation of one-half the contour interval below the surrounding contour. Modify this as appropriate with your keen contour-map reading skills (i.e. perhaps only 1/4 a contour if it does not seem very low), using features such as streams to define the "lowest point".
Design Note: Determining LOS is always a tricky element in tactical combat games, and there is a trade off between ease of play and "accuracy". There are as many methods of checking LOS as there are games! It should of course be remembered that no contour map can adequately portray the actual terrain and that sighting the enemy is always difficult. Players should establish their method for determining elevation and stick to it, whether it be interpolation [8.2b] as taught in map reading in the military, or the pancake method [8.4] that is easier but can lead to some odd rounding. Players interested in real-life map reading are referred to US FM 21-26 Map Reading and Land Navigation which is also generally available via internet search.
Elevation Determination Example
(The examples refer to a printed illustration of a contour map, not reproduced here.)
Standard Method [8.2b]:
- Hex 4.04: The center dot is closest to the 1/4 mark between the 60m and 80m contour lines. Therefore, 1/4th of the contour interval is added to the lower contour elevation (60m). The elevation of the center dot and hex is 65m.
- Hex 3.05: The center dot touches the 60m contour line. Therefore, the elevation of the center dot and hex is 60m.
- Hex 3.06: The center dot is closest to the 4/4 mark between the 60m and 80m contour lines. Therefore, 4/4ths (all) of the contour interval is added to the lower contour elevation (60m). The elevation of the center dot and hex is 80m.
LOS Determination Examples
Standard Method [8.2]:
- A-G: Unit A is between two contour lines [8.2b] and is determined to be at an elevation of 35 meters. The center dot for hex 4.05 is on a Hilltop [8.2a] which is surrounded by an 80m contour line, so G is at 80 meters. PoC 2.04 has an elevation of 50m, and PoC 3.05 has an elevation of 60m. These points are then plotted on the LOS Grid and a line is drawn between A and G. It can be seen that the LOS is clear because no PoC is higher than the line connecting A and G. See LOS Grid example.
- B-C: Both the center dots for B and C are in a Bottom [8.2c] which is surrounded by the 40m contour line, so B and C are at 40m. The LOS touches the corner of hex 2.09 which is a village hex. A village hex has a height of 20m and includes its hexsides, so the total height of this PoC is 60m. Therefore, the LOS is blocked.
- B-H: B is at 40 meters. H is at 80m. PoC 3.11 has an elevation of 70m. If plotted on the LOS Grid it would be seen that this PoC blocks the LOS.
- C-D: Both C and D are at 40 meters. The LOS passes though a hex containing woods (2.07). The LOS is clear because the LOS does not touch the woods depiction.
- D-G: D is at 40m and G is at 80 m. PoC 4.06 has an elevation of 60m. PoC 3.07 has a base elevation of 40m. The LOS crosses the woods depiction in the hex so the 20m height of the woods is added to the 40m base elevation. Therefore, the total height of PoC 3.07 is 60m. These points are then plotted on the LOS Grid, and a line is drawn between D and G. It can now be seen that the LOS is clear. See LOS Grid example.
- E-I: E is at 65m and I is at 65m. Either hex 3.12 or 3.13 can be used for a PoC. Hex 3.12 has an elevation of 80m. Since a PoC includes its hexsides, the LOS is blocked.
- F-G: F is at 50m. G is at 80m. PoC 4.04 has a base elevation of 65m. The LOS touches the building, so the height of the building is added to the base elevation of the PoC. In this example we will assume that the game specific rules give buildings a height of 5m. Therefore, the total height of the PoC is 70m. When these points are plotted on the LOS Grid, we can see that the LOS is blocked, because the PoC is higher than the line connecting F and G. If the building was not present, the LOS would be clear. See LOS Grid example.
- G-H: Both G and H are at 80m with no PoC between them higher than 80m. The LOS is clear.
Optional "Contour-Head" Method [8.5]: These examples are similar to the Standard method, but with some notable variations depending on which portions of 8.5 players choose to use:
- Using 8.5c, B, C and D could be considered to be at 35m as they are near the edge of a Bottom. If there was a unit in hex 1.08, it could be considered to be at 30m.
- Using 8.5b G would be at 85m because it is approximately half way between the 80m contour line and the center of the Hilltop, and H would be at 90m based on its position between the 80m contour line and the 96m benchmark.
Some LOS differences, depending on the portions of 8.5 used, are as follows:
- A-G: Whether using only 8.5a, or using 8.5b in combination with 8.5a, this LOS is blocked by PoC X in hex 2.04 which has an elevation of 55m.
- D-G: If using only 8.5a, this is blocked by PoC Y in hex 4.06 which has an elevation of 75m; if using 8.5b and 8.5c in combination with 8.5a, however, the LOS is clear.
- G-H: If using only 8.5a, the LOS is clear; if using 8.5b in combination with 8.5a, however, the LOS is blocked by PoC Z in hex 4.09 which has an elevation of 96m.
Optional Simplified Method [8.4]:
- A-G: A is at is at 20m, because the next lower line from the center dot is the 20m contour line. G is at 80m, because the next lower contour line (there is only one) from the center dot is the 80m contour line. PoC 2.04 is at 40m and PoC 3.05 is at 60m. When plotted on the LOS Grid, it can be seen that the LOS is clear because no PoC is higher than the line drawn between A and G.
- B-C: Both the center dots for B and C are in a Bottom which is surrounded by the 40m contour line, so B and C are one contour interval (20m) lower than the surrounding contour line. They are both, therefore, at 20m. The LOS touches the corner of hex 2.09 which is a village hex. A village hex has a height of 20m and includes its hexsides, so the total height of this PoC is 40m. Therefore, the LOS is blocked.
- B-H: B is at 20 meters. H is at 80m. PoC 3.11 has an elevation of 60m. PoC 2.10 has an elevation of 40m. When plotted on the LOS Grid, it can be seen that the LOS is clear.
- C-D: Both C and D are at 20 meters. The LOS passes though a hex containing woods (2.07). The LOS is clear because the LOS does not touch the woods depiction.
- D-G: D is at 20m and G is at 80 m. PoC 4.06 has an elevation of 60m. PoC 3.07 has a base elevation of 20m. The LOS crosses the woods depiction in the hex so the 20m height of the woods is added to the 20m base elevation. Therefore the total height of PoC 3.07 is 40m. Neither PoC is high enough to block the LOS.
- E-I: E and I are both at 60m. Either hex 3.12 or 3.13 can be used for a PoC. Hex 3.12 has an elevation of 80m. A PoC includes its hexsides, so the LOS is blocked.
- F-G: F is at 40m. G is at 80m. PoC 4.04 has a base elevation of 60m. The LOS touches the building, so the height of the building is added to the base elevation of the PoC. In this example we will assume that the game specific rules give buildings a height of 5m. Therefore, the total height of the PoC is 65m. When these points are plotted on the LOS Grid, we can see that the LOS is blocked. If the building was not present, the LOS would be clear.
- G-H: Both G and H are at 80m with no PoC between them higher than 80m. The LOS is clear.
9.0 Fire Combat
Fire combat occurs in two forms: Area and Point. A-firers can only conduct Area Fires. P-firers may conduct either Point Fires or Area Fires. All fire combat is resolved using the Fire Table, but each type of fire uses a somewhat different procedure.
Fire combats can occur during the Action Phases as Suppressive Fire Actions (SFAs), Point Fire Actions (PFAs), Overwatch Fires, Assault, and Overrun combats.
9.1 Rules and Restrictions
9.1a A unit can fire an unlimited number of times in response to Overwatch Triggers. In addition, a unit may perform up to three PFAs or one SFA per turn, if otherwise eligible. Exception: Mortar units can only fire once per Action Phase.
9.1b All direct fires require an unblocked LOS from the firer to the target. Mortars require an unblocked LOS from an observer to the target.
9.1c Only units in Fire Mode can conduct SFAs, PFAs, or Overwatch Fires.
9.1d Paralyzed units may fire only in Assault combat.
9.1e Mounted Infantry units may fire only in Assault or Overrun combat. Mounted or towed Weapons units may never fire.
9.1f AT guns conduct Area Fires at 1/2 Fire strength.
9.1g No unit can split its fire across multiple target hexes.
9.2 Target Type Restrictions
A unit's target type (Point, Area, or Both) determines how an enemy unit can engage it in fire combat.
9.2a A-firers engage Area targets and B-targets using the Area Fire modifiers on the Fire Table. Infantry units cannot affect B-1 targets with A-fires.
9.2b P-firers engage Area targets using the Area Fire modifiers and Point targets using the Point Fire modifiers. They may choose either type of fire against B-targets.
9.3 Terrain Effects on Fire Combat
The Target Terrain/Posture Table gives terrain effects for four types of terrain: Billiard Table, Open, Partly Protective, and Protective. Each game's Terrain Effects Chart classifies its terrain.
9.3a The applicable terrain effects are those of the target's hex and the hexsides of the target hex that the fire passes through. Use the most protective terrain of the target hex or hexside fired through when resolving a fire combat-therefore, a hex with some Open terrain and a small amount of forest (Partly Protective) is considered Partly Protective.
9.3b Terrain has no effect on attacks by Minefields [21.0].
9.3c For resolution of SFAs against unspotted targets [7.1d], use the bold column of the Target Terrain/Posture modifiers if any firer is Low Trajectory.
10.0 Losses
Losses for all units are taken in steps. Different unit types have different numbers of steps available. Mark step losses by placing a Step Loss marker under the unit.
10.0a Infantry platoons usually have 5 steps. Mortar units, Infantry sections, MG sections, and Carrier units have 2 steps. Vehicle units and On-Map artillery units have 1-6 steps per counter. All other units have 1 step unless otherwise indicated.
10.0b Step losses do not affect the printed Fire strength of Infantry or MG units, but do reduce the Fire strength of Infantry at close range [11.3d] and also affect Morale Checks [17.2]. Mortar and Carrier units have their Fire strength halved if they have lost one step.
Design Note: The lack of effect due to hits on, say, an infantry platoon, can seem odd at first. The reason? Let's take the infantry platoon as an example. Small arms represent only one point of its firepower; the rest of its Fire strength comes from MGs. As it takes losses, unless one of the MGs is destroyed (unlikely), the platoon will scramble to ensure that the MGs remain manned and firing right up to the end. So, while that one point of firepower keeps dropping due to losses, the bulk of the platoon's firepower remains the same until the last step (the last six guys available to feed the "pigs") is destroyed and no one is left to man the guns. Disagree if you like, but I believe that both history and the inner workings of infantry units bear this out. A much more important method of reducing enemy fire effectiveness is suppression by fire, both in real life and here.
10.0c Whenever a Fire Table result calls for one or more step losses, adjust the markers under the target units and remove any units that have reached their step loss limit. Place destroyed units in their Battalion Morale boxes and track Vehicle Morale, if applicable.
10.0d Step losses belong to the unit that incurred them. Never transfer, absorb, or consolidate them with other units unless allowed by the game rules.
10.0e Ignore losses in excess of the number of steps in a stack.
10.0f In Area Fires, step losses can come from any unit in the hex that is not mounted in a Carrier-but the first loss must come from the largest (in steps) non-mounted unit in the hex. The defender chooses if there are two or more "largest" units. When assaulting, the largest unit in the assaulting stack must be selected. Losses after the first step can come from any unit in the hex. The defending player selects which units take half the losses (round up), then the attacker assigns the remaining losses.
10.0g When a unit (Carrier or Vehicle) carrying another unit or units loses one or more steps, eliminate the same proportion of the carried steps, using 10.0f to assign losses. Thus, if a 2-step truck which is carrying a 5-step Infantry platoon loses one step, the Infantry platoon loses three steps (50% rounded up).
Example: Player A makes a large Area Fire attack against a stack of Player B's units. The Fire Table result turns out to be eight steps. After Player B gets done screaming at Player A and kicking furniture around the room, they must inflict the eight steps. There are two full-strength Infantry platoons and an AT gun in the target hex. First, Player B takes the very first step loss from one of the Infantry platoons. This leaves seven steps to distribute. They divide the seven by two and round normally to get four. Player B inflicts four step losses between the two Infantry platoons. Player A then gets to inflict the remaining three step losses. He takes great care to kill off the AT Gun and then to hit the Infantry platoon hard which has the worst Morale of the two-thereby setting up the target hex for a big failure when it comes time to do the Morale Check required by the Fire Table result. Player B swears under his breath and starts planning a large artillery barrage for the next turn.
10.0h To assign losses for Point Fires, players, beginning with the firer, alternate selecting a step to eliminate from among the eligible target steps.
11.0 Area Fires
Resolve fires against Area targets using the Area Fire modifiers given for the Fire Table. Handle the attack as one strike against the hex, with all A-targets and vulnerable B-targets being attacked together.
Procedure: Identify the target hex and the firers. Total the applied Fire strength and find the column heading containing that amount. Add any applicable Area Fire column shifts together and apply the net result (positive shifts to the right, negative shifts to the left), then roll two dice (11...66) on the Fire Table and apply the result. Make a Morale Check if any result other than 'no effect' is achieved. Any attacks shifted to the right of the 101+ column are rolled on the 101+ column. Attacks adjusted to the left of the zero column have no effect.
11.1 Rules and Restrictions
11.1a Area Fires may not be made at targets beyond the firer's maximum range. Area Fires do not affect Point targets.
11.1b B-1 targets take losses from Area Fires only if none of the firing units is an Infantry unit.
11.1c Combat results on the Fire Table appear as step losses. If units are completely destroyed as a result of the Area Fire, be sure to assign them for Battalion Morale purposes [17.1].
11.1d A-firers and P-firers can combine to make Area Fires.
11.1e P-firers can conduct Area Fires at a range of up to twice their nominal range.
11.1f Multi-step Vehicle, gun, and On-Map Artillery units have an Area Fire strength equal to the number of steps in the unit multiplied by its Fire rating. Thus, a 5-step Tiger unit (P-5 firer) has an Area Fire strength of 25.
Example: Player A announces an SFA on a hex containing a 5-step Infantry platoon in Move Mode, a full-strength half-track unit (B-1) with a mounted Infantry platoon, and another half-track unit with only one step remaining that is towing an AT Gun. The hex is Open terrain. The attacking Fire strength is 11. The attacking units include two Infantry platoons at range 4 and a Mortar.
A Fire strength of 11 uses the 11-13 column, but is shifted +2 (to the right) for Move Mode in Open terrain and -1 (to the left) for range 4. The mounted platoon does not count for stacking, nor do the half-track units since they cannot be harmed by this attack [11.1b], but the AT Gun does count because it is being towed and is vulnerable, so there are six steps in the hex for determining a stacking modifier, yielding no shift. The total shift is +1 to the right and the fire is resolved on the 14-16 column. The firing player rolls two dice and gets a 65 (ouch!) which results in three step losses. Because an Infantry platoon was involved in the fire, the B-1 targets (AND their passengers) are immune to losses. The towed AT Gun, however, is vulnerable to loss. The defending player assigns one step loss to the dismounted platoon since it is the unit with the most steps. The remaining two step losses are split between the firing player and the defending player. The defending player applies his to the Infantry platoon again, while the firing player elects to destroy the AT gun. The defending player then makes his Morale Check using the weakened platoon's Morale since it is the unit with the worst Morale in the hex (and now even worse with -2 steps).
11.2 Low-Trajectory vs. High-Trajectory Fires
Some Area Fire modifiers are based on whether the incoming fire is Low-Trajectory or High-Trajectory. Area targets can hide from low grazing-type fire but are more vulnerable to high trajectory HE-type fires.
11.2a High-Trajectory firers are all Mortars, Infantry Guns, On-Map Artillery, and Vehicle units with an Area Fire rating that are indicated in the game rules as being High-Trajectory firers (also Artillery and Sorties). High-Trajectory firers cannot help to create a Cross Fire.
11.2b Low-Trajectory firers are all other firers, including Infantry, MG, AA Guns, and P-firers. Low-Trajectory firers can create Cross Fires [11.4].
Design Note: While one can quibble about whether Shermans carrying 105mm guns are Low-Trajectory firers or High-Trajectory firers, the distinction demonstrates that Area targets hugging the ground (i.e. in Fire Mode) are difficult to kill with Low-Trajectory ballistic weapons. Some Infantry Guns fire at fairly low trajectories, but their large HE effect makes up for this.
11.3 Area Fire Modifiers
The modifiers used to resolve Area Fires are found with the Fire Table.
11.3a Terrain. Find the row with the terrain in the defender's hex and cross-index it with the posture of the defending units. If a hex or applicable hexside contains more than one terrain type, apply the one that most favors the defender. [Exception: for some Movement-based Overwatch Triggers, the terrain of the hexside crossed may be used; see 15.2c].
If an SFA is unspotted [7.1d] and any firing unit is Low Trajectory, use the numbers in bold font in the right-hand columns of the Target Terrain/Posture modifiers.
11.3b Target Posture. If units in more than one target posture occupy the hex, apply the one that least favors the defender. Ignore all Point targets, mounted units, as well as all B-1 targets if the Area Fire cannot affect them [11.1b]. Billiard Table modifiers apply differently to Vehicles/Carriers.
11.3c Range. Find the range modifier for each firing unit on the Area Fire Range Modifier Table and apply the one that most favors the defender.
The row for Low-Trajectory covers all Low-Trajectory firers except Infantry.
Design Note: Using the worst range modifier inhibits giant consolidated and coordinated shots (quite rare in real life, but all too common in wargames). TCS highlights and rewards the kind of close-in, sporadic fighting that did occur-not the typical wargame "everyone within two clicks fire up that platoon in hex 12.34" shot.
11.3d Infantry. Infantry units receive a bonus to their Fire strength (not column shifts!) if they are close to their target. This represents small arms and grenades. At range zero (in the same hex), add the number of Infantry steps remaining to the total Fire strength. At range one, add one-half of all Infantry steps, rounding normally.
11.3e Stacking. To find the stacking modifier, count the steps in the hex, excluding all Point targets, units being carried inside a Carrier, and any B-1 targets that cannot be affected by the attack. Include towed units, units being carried by Vehicles, and eligible B-1 targets when counting steps.
11.3f Other Modifiers. Apply additional modifiers from this table as appropriate. Night, Twilight, Smoke, Illum, and Artillery Attack Zones do not affect Artillery resolution on the Fire Table. Suppressed and Paralyzed targets do not receive a favorable shift at range zero. A target hex containing a Vehicle step with a P-defense rating of 2 or higher receives a -2 shift if any firer is a Low-Trajectory Firer. The +2 road moving modifier is used in Movement-based Overwatch if the triggering stack is utilizing road movement. It also applies to stacks moving into a hex in or adjacent to an Artillery Attack Zone [18.8c].
11.4 The Cross Fire Modifier
Low-Trajectory firers (Point or Area) can create a Cross Fire if they can direct fire into a single hex from widely separated angles. Cross Fires gain positive modifiers both on the Fire Table and the Morale Table.
Procedure: Twelve lines (30 degrees apart) radiate from the center dot of the hex occupied by the target unit: one through the center of each hexside (directly down each hex row) and one through each hex corner (alternately along a hexside and diagonally across a hex).
Pick any two Low-Trajectory firing units. Count the number of 30 degree lines on and between those units, using the smaller of the two possible angles (in other words, if the two units are sitting right next to each other, you don't go the long way 'round for nearly 360 degrees). If the total is five or more (that is, forming an angle of 120 degrees or more), apply the Cross Fire modifier.
Illustration (not reproduced): In each image the center hex is the target hex. The four arrows represent two separate attacks. The attacks with five points qualify for the Cross Fire modifier. The attacks with only four points do not qualify for the Cross Fire modifier. The circled numbers count the number of 30 degree increments between the two firers in each attack. For an attack to qualify for the Cross Fire modifier it must include at least five of the 30 degree increments between two of the firers using the smaller of the two possible angles.
Design Note: The Cross Fire rule reflects the difficulty of finding defensive terrain that works facing in many directions. It is also designed to highlight the importance of flanking the enemy.
12.0 Point Fires
Point Fires represent the fire of precision weapons against relatively large individual targets such as Vehicles or AT Guns where a kill results from a direct hit.
Resolve Point Fires on the Fire Table using the Point Fire modifiers.
Procedure: a) Select eligible firing unit(s). b) Select targets. The firing player determines which Point targets or B-targets he is engaging in the target hex subject to normal rules of PFAs (14.0) and Overwatch Fires (15.0). c) Count the number of steps firing (not their Fire strength) and find the appropriate column on the Fire Table. d) Apply column shifts from the Fire Table for Point Fires. e) Roll on the Fire Table and apply the result.
12.1 Point Fire Modifiers
12.1a Terrain/Target Posture Chart. Find the row with the terrain type in the defender's hex and cross-index it with the posture of the defending units. If a hex or applicable hexside contains more than one terrain type, apply the type that favors the defender most [exception: 15.2]. If units in more than one target posture occupy the hex, apply the posture that favors the defender least. Only units actually being fired upon are used to determine this modifier.
Example: A hex contains Dug In AT Guns and tanks in Move Mode. The firer selects the AT Guns only as the targets, so the target posture is Dug In.
12.1b Range. Find the Range Modifier for each firing unit on the Point Fire Range Modifier Table and apply the one that favors the defender most. The range printed on the front of a P-firer counter is its "Nominal" range. The Point Fire weapon range categories are "Close" (less than or equal to one-half the printed range, rounded up), "Nominal" (beyond Close, up to the printed range), and "Long" (beyond Nominal, up to twice the printed range). So, for a unit with a printed range of 7, Close is 0-4, Nominal 5-7, and Long 8-14.
12.1c Differential. Find the attacking unit with the lowest Point Fire strength and then subtract the best P-defense strength of the defending units.
12.1d Other Modifiers. Apply modifiers from the Other Modifiers Table as appropriate to Point Fires. This includes the Crossfire Modifier.
12.2 Rules and Restrictions
12.2a Unlike Area Fires, specific units in a target hex may be selected. This is important because only the actual targets affect target posture and defense strength. Thus a firing player could decide to fire at three armored cars while ignoring a Panther tank in the same hex.
12.2b A given target can be engaged by as many or as few firers as the player wants, given the PFA and Overwatch rules.
12.2c The firing player can selectively target Point Fires against towed units; such fires never affect the towing unit regardless of the result.
12.2d B-targets with a Morale Value on their counter have a Defense value of 0.
12.2e When rolling on the Fire Table, any number result indicates the number of targets destroyed. Apply losses as per 10.0h.
12.2f Point Fires never cause Morale Checks.
12.2g Point Fire Column shifts use all columns on the Fire Table, not just those columns that have a value for the number of P-firers.
Example: A Panther (P-5) fires on two Shermans (P-3 defense) in Fire Mode in Open terrain (+0) at range 8. This is Long range (+0) for the Panther (whose Nominal range is 7). The following modifiers apply: Terrain: +0; Range: +0; Differential: +2.
The fire begins at the 4 column (1 P-firer) and is shifted to the right 2 columns for the differential (5-3), landing on the 6 column. The German player rolls a 65, yielding a 1-step loss. Had he rolled a 66, both Shermans would have been eliminated. The American player mutters about his bad luck, removes one Sherman, and places a marker in the Vehicle Morale Box for the Sherman's formation [17.8].
The remaining Sherman uses the Panther's fire as an Overwatch Trigger with which to return fire. The Panther is also in Fire Mode in Open terrain. The Sherman's attack is 3 (a short barreled 75mm gun) and the Panther's defense is 4. The range for the Sherman is also Long.
The modifiers for Target Terrain/Posture and Range are both +0. The differential is -1 (modifier -2). The fire again starts on the 4 column and shifts left 2 columns because of the -1 fire differential. The player rolls two dice for a 62 which fails to kill the Panther (he needed a 63). In retrospect, the player controlling the Sherman feels he should have conducted a Vehicle SYR [15.2h] with the Sherman instead of firing, since the Panther still has two more Point Fire Actions [14.0].
13.0 Suppressive Fire Actions
The Suppressive Fire Action (SFA) allows units from one or more hexes to attack a target hex with a single Area Fire. Conducting an SFA is the only way for units in multiple hexes to engage in a common Area Fire attack in one fire combat. To conduct an SFA, fulfill the various requirements below and announce the firers and the target hex. Mark any units firing an SFA with Fired markers.
Design Note: SFAs represent an entire turn of fire trying to suppress and keep units in a hex pinned down. Players should be forewarned of the implications of firing SFAs. While the fire of an SFA is coordinated between different units, the trade-off is that after firing the SFA, all units are marked as Fired. This greatly restricts their ability to fire Overwatch until their next Action Phase. If you choose to fire many SFAs and fail to leave someone to cover the units firing SFAs, don't come crying to me if you have no one left to fire Overwatch when the enemy bolts across an open field to assault your units.
13.1 Rules and Restrictions
13.1a Units can conduct SFAs only in the friendly Action Phase.
13.1b To fire an SFA, units must have been continually in Fire Mode since the beginning of the current phase and cannot be marked with a Fired marker or have fired a PFA or made an AT Roll attack [16.0].
13.1c Unassigned units may not fire SFAs [6.3e].
13.1d Each SFA provides one Overwatch Trigger which the non-phasing player can use to fire at any one hex containing units which participated in the SFA.
13.1e Units in different stacks may combine their fires to do an SFA.
13.1f Paralyzed units may not participate in SFAs [17.5].
13.1g SFAs do not require a Trigger.
13.1h A hex can be the target of only one SFA per Action Phase. SFAs consisting only of AT Rolls are not so limited.
13.1i After each SFA is executed, including any SYRs caused by the SFA, mark all the units that fired with Fired markers.
Example: Player A wishes to conduct an SFA against a hex occupied by an Infantry platoon (5 steps), a MG section (2 steps), and an AT Gun, all in Fire Mode in Partly Protective terrain and marked with a Fired marker. The firer can bring to bear two Infantry platoons with an Area Fire strength of 4 each (one at range 3, the other at range 4); two MG sections with a Fire strength of 2 each, at range 4; two AT Guns with a Fire strength of 2 each, at range 3; and a Mortar with a Fire strength of 4, at range 16 (within range).
The Infantry units are not at range 0 or 1 so they only use their Area Fire strength without adding anything for their steps remaining. The AT Guns are halved for making an Area Fire. The total attack strength is therefore 18.
Fire Mode Area targets receive a -2 shift for Partly Protective terrain. The worst range modifier is for the Infantry platoon at range 4 so the whole attack suffers another -1 shift. Because of the Fired marker, the target hex is spotted at range 8 (base 3, -1 shift for Partly Protective terrain, +4 (Fired marker) so no unspotted target modifiers apply. Eight steps stacked in the target hex yields a +1 shift. The net shift is -2, so the final column for the attack is 11-13.
After the SFA is executed, all firing units are marked with a Fired marker. The non-phasing player can use a Fire-based Overwatch Trigger against any one hex that contains units participating in the SFA as long as the units firing Overwatch can spot the hex.
14.0 Point Fire Actions
Point firers do not spend an entire turn trying to keep a hex suppressed. Rather, they try to kill their target (which they can see perfectly well) as quickly as possible.
14.1 Rules and Restrictions
14.1a Point Fire Actions can only be made against spotted B-targets or Point targets.
14.1b A Point Fire Action involves a unit or units from one or more hexes conducting one Point Fire against at least one B-target or Point target in a single hex.
14.1c A unit may participate in up to three PFAs in a single Action Phase. Units which conduct one or more PFAs in an Action Phase may not move [Exception: see 20.2 Vehicle Impulses] or fire an SFA; they may conduct Overwatch Fires [15.0].
14.1d Unlike SFAs, units which conduct a PFA are not marked with a Fired marker.
14.1e Once a PFA has been completed, the non-phasing player has a Fire-based Overwatch Trigger on one of the firing hexes.
14.1f Vehicle units may fire one PFA during each of their three Vehicle Impulses [20.2].
14.1g P-firers must begin the Action Phase (or Impulse) in Fire Mode in order to conduct a PFA. Thus units cannot change to Fire Mode (which is movement) and fire a PFA in the same Action Phase or Impulse.
14.1h There is no limit to the number of PFAs that can be fired at a hex.
14.1i Units that are Unassigned [6.3a], Paralyzed [17.5], or marked as Fired may not conduct PFAs.
15.0 Overwatch
Overwatch (OW) is the TCS version of what is commonly called "Opportunity Fire" in other games. Overwatch Fire is a provoked action taken by units with an unblocked LOS to an Overwatch Trigger. An Overwatch Trigger is an event that draws enemy fire-such as movement into a hex or firing. A unit can fire any number of Overwatch Fires in a phase as long as it meets the conditions for firing.
Overwatch Fires are voluntary and need not be planned in any way.
Important: Only one stack can respond to an Overwatch Trigger. Once a Trigger is spotted, conduct the Overwatch Fire exactly as any other fire in the game, and resolve it fully before continuing play. The firing player chooses whether to respond to the Trigger and which stack to fire.
15.1 Overwatch Cycles
There are four primary Overwatch Cycles. In the examples below, it is Player A's Action Phase.
15.1a Movement-based Overwatch Cycle. This cycle occurs in an Action Phase the instant a unit moves into a hex (note: this cycle can also occur in the Aircraft & Artillery Phase or in either Action Phase in response to an SYR [17.4f & 18.10]).
- Movement-based Overwatch Trigger (Player A).
- Overwatch Fire (Player B).
- Overwatch Return Fire (Player A).
15.1b Fire-based Overwatch Cycle. This cycle occurs in an Action Phase when a player has executed a PFA or SFA (note: this cycle can also occur in the Aircraft & Artillery Phase in response to AA fire or an On-Map Artillery Mission [18.10]).
- SFA/PFA/AA/On-Map Artillery Mission is executed (Player A).
- Overwatch Fire (Player B) against one firing hex.
15.1c Recovery Overwatch Cycle. This cycle occurs when a player has declared a unit in a stack to be recovering from Suppression or Paralysis.
- Recovery conducted (Player A).
- Overwatch Fire (Player B).
15.1d Final Overwatch Cycle. This cycle occurs when an Assault or Overrun is declared.
- Attack announced (Player A).
- Overwatch Fire (Player B, target hex only may respond to this Trigger).
15.2 Overwatch Triggers
Overwatch Fires occur in response to Overwatch Triggers. If there is no Trigger or the Trigger cannot be spotted, there can be no Overwatch Fires.
15.2a Events Generating Overwatch Triggers. Four events can trigger Overwatch Fires: (1) Movement (including SYRs), (2) Fires, (3) Recovery from Suppression or Paralysis; and (4) Assaults or Overruns. Overwatch Triggers occur when an enemy unit or stack A) enters a hex; B) executes an SFA, PFA, AA fire, On-Map Artillery Mission, or Movement-based Overwatch; C) declares a Recovery; or D) declares an Overrun or Assault. AT Rolls do not generate Overwatch Triggers.
15.2b LOS and Triggers. The Overwatching unit or observer (in the case of Mortars) must have an unblocked LOS to the Trigger and must be within Spotting Range. A Movement-based Trigger is located at the center of the hex which the unit just entered. All other Triggers are located at the center of the hex the triggering unit or stack occupies.
15.2c Movement-based Triggers. A Movement-based Trigger occurs the instant an enemy unit enters a hex, whether due to movement or because of an SYR. Attack such units with Artillery Barrages or Minefields only after any Overwatch Fires. Units may not change to Fire Mode until after any Overwatch Fire has been conducted (and any Artillery Barrages or Minefield attacks executed). Once all attacks have been resolved, the moving units can switch to Fire Mode or continue to move. A moving unit which triggers Overwatch Fires can never use those fires as a Trigger for its own Overwatch Fires.
A stack can respond to a non-adjacent Movement-based Overwatch Trigger in Protective or Partly Protective terrain only if it can trace an unobstructed LOS to the hex that the unit is leaving in addition to the one it is entering. The hex the unit leaves does not have to be within the Spotting Range of the responding stack; only a valid LOS is required.
If a stack responds to a Movement-based Overwatch Trigger and can trace a LOS to both the hex that the moving unit or stack is leaving and the hex it is entering, the firing player may, at his discretion, use the terrain of the center of the hexside crossed rather than the terrain of the hex entered to determine Spotting Range, terrain modifiers on the Fire Table, and the modifiers to any resulting Morale Checks.
Mode change, mounting/dismounting, and entering the target hex of Assault or Overrun combat do not generate Movement-based Overwatch Triggers. Exiting Overrun combat does generate a Movement-based Overwatch Trigger.
15.2d Fire-based Triggers. A Fire-based Trigger occurs whenever an SFA or PFA is conducted, an On-Map Artillery Mission or AA fire is executed during the Aircraft & Artillery Phase, or a stack conducts Overwatch Fire against a Movement-based Overwatch Trigger. Fires that occur within Assault and Overrun combats do not generate Overwatch Triggers.
15.2e Recovery Triggers. A Recovery-based Trigger occurs immediately after a unit or stack recovers from being Suppressed or Paralyzed. Non-mortar units marked as Fired may fire at these Triggers normally.
15.2f Final Overwatch Triggers. These Triggers occur immediately when the phasing player announces an Assault or Overrun. Only eligible units in the hex targeted by the Assault or Overrun can fire OW in response to this Trigger. The Trigger location is the center of the hex occupied by the assaulting or overrunning units, although the non-phasing player may, at his discretion, use the terrain of the hexside being crossed by the assaulting or overrunning units rather than the terrain of the trigger hex to determine terrain modifiers for the Fire Table as well as any Morale Checks. The range of Final Overwatch Fire is one hex.
15.2g Targets and Overwatch Triggers. Each unit in the hex responding to an Overwatch Trigger uses either Area Fire or Point Fire. All A-firers combine in one Area Fire and all P-firers combine into one Point Fire. Point Fires may be made at any spotted units in the hex, even if these units did not provide the Trigger themselves.
15.2h Vehicle SYR. Vehicle units which respond to an Overwatch Trigger provided by a Point Fire action may conduct an SYR rather than fire at the Trigger. Units mounted on retreating Vehicles stay with the unit (holding on for dear life). Vehicle units that retreat do not affect the ability of other units in the same hex to use Overwatch Fire. Vehicles in Move Mode may conduct Vehicle SYRs even though normally only units in Fire Mode may respond to Overwatch Triggers.
15.3 Rules and Restrictions
15.3a No unit marked as Suppressed or Paralyzed may fire any type of Overwatch, including Final Overwatch.
15.3b Units marked as Fired are prohibited from firing in response to Movement-based or Fire-based triggers at any range greater than one. They are not prevented from firing at Recovery and Final Overwatch Triggers by being marked Fired.
15.3c MG units are not restricted by 15.3b and may respond to any Overwatch Trigger if otherwise able, even when marked with a Fired marker.
Design Note: This ability of MG units to fire Overwatch even after conducting an SFA represents the MG units' better supply and capabilities vs. light MGs incorporated into the fire strength of Infantry platoons.
15.3d Units in Move Mode can observe for Overwatch Fire from Mortars.
15.3e Overwatch Area Fires affect ALL eligible units in the target hex, not just the ones who offered the Trigger. Remember that Point Fires can only affect spotted P-targets or B-targets that the firing player has designated as targets.
15.3f Units can make AT Rolls in response to Overwatch Triggers, in addition to any other fires.
15.3g A player cannot fire an Artillery Mission in response to an Overwatch Trigger.
15.3h A unit can fire Overwatch even if the fire cannot affect the triggering unit. Thus, if Vehicle units move through a hex containing friendly A-targets, the opposing player may fire Area Fire Overwatch in response to that Trigger hoping to affect the A-targets in the hex even though the Vehicles that triggered the fire will be unaffected.
15.3i Vehicle Impulse Triggers. Vehicles conducting a Vehicle Impulse [20.2] trigger Overwatch Fire normally. However, any given stack belonging to the non-phasing player may fire at a moving Vehicle stack only once per Impulse. Different stacks can respond to each Trigger during an Impulse move, but units in any given enemy stack can only fire at it once for that Impulse.
15.3j SYRs. Units conducting an SYR offer Movement-based Triggers as if they had moved normally. An SYR is treated as a single Impulse for Vehicle units conducting an SYR.
15.3k Unlike with SFAs, units which conduct Overwatch Fire are NOT marked with a Fired marker.
16.0 AT Rolls
AT Rolls represent assaults by small infantry groups against P-targets and B-targets. Naturally, this combat method depends on the cover and concealment afforded by terrain.
Units can only use AT Roll attacks to destroy Point targets and B-targets at a range of one hex or less.
Important: Each step of the firing unit(s) can make one AT Roll against one Vehicle, Carrier, or B-target step. No target step, however, may be attacked more than once in any given AT Roll attack. Therefore, the maximum number of AT Rolls permitted in any AT Roll attack will always be the lesser of (a) the number of infantry steps attacking, or (b) the number of Vehicle, Carrier or B-target steps being attacked (Example: a 5-step infantry platoon uses AT Rolls to attack a stack that includes a 3-step tank platoon and a 1-step AT Gun; the infantry platoon may make a maximum of four AT Rolls). Units may conduct Area Fires in addition to making AT Rolls against the same target hex in any order desired.
Procedure: Cross index the target hex's terrain with the attack range (In-hex, One Hex Range) on the AT Roll Table to determine the base dice roll needed for a kill. Roll two dice for each designated target step in the target hex-up to the maximum number of attacks permitted, as identified above. Modify each roll according to the AT Roll Table modifiers.
16.1 Rules and Restrictions
16.1a Only Infantry units in Fire Mode can make AT Rolls [Exceptions: See 22.0 Assault combat and 23.0 Overrun combat]. Suppressed units can make AT Rolls. Mounted units cannot make AT Rolls. Paralyzed units may only make AT rolls in Assault combat. No unit is ever required to make an AT Roll attack.
16.1b An AT Roll attack can be part of an SFA, Overwatch Fire, Assault, or Overrun. Regardless, the unit conducting the AT Roll can also fire normally at the same time.
16.1c When a unit makes an AT Roll attack against a hex, roll separately for each Point target or B-target step attacked. A given Infantry unit can only attack one hex with AT Rolls per fire, regardless of the number of steps involved.
16.1d AT Roll attacks have a maximum range of one.
16.1e An original (i.e., non-modified) dice roll of 3 or less in an AT Roll attack destroys the step making the attack. These losses to the attacking unit do not cause Morale Checks. Only the one step of the unit actually making the attack is affected by this rule.
16.1f AT Rolls may be resolved before or after Area Fires and Point Fires as desired by the firing player. Thus, in an Assault combat the firing player could execute Area Fire first, hoping to eliminate defending infantry and then execute his AT Rolls afterwards.
16.1g If an SFA consists only of AT Rolls, the firing units are not marked with a Fired marker but they are still treated in all other ways as if they had conducted an SFA (i.e., they may not move or conduct any more SFAs for the rest of that Action Phase, although they may conduct Overwatch Fires normally).
16.1h AT Rolls by themselves do not generate Overwatch Triggers.
Example: Player A decides to conduct an SFA composed only of AT Rolls with a platoon of two steps against an adjacent stack of five tanks. The target is covered with Smoke from an earlier Mortar fire. The terrain of the attack is that of the target hex (Protective). The base roll for One Hex Range attack in Protective terrain is 8. Of the AT Roll Table modifiers, only the +1 for a target in Smoke applies, so the attack will be successful if the player rolls a 7 or more. He rolls once for each of the two tanks that the unit can attack (because only two steps are attacking), getting a 9 and 4. The final result is that one of the tanks is destroyed, possibly requiring the non-phasing player to make a Vehicle Morale Check [17.8]. Because the SFA was composed only of AT Rolls, there is no Overwatch Trigger and the attacking stack is not marked as Fired. It may not conduct any more SFAs or move for the rest of its Action Phase, although it may conduct Overwatch Fires normally.
17.0 Morale
Morale effects represent the troops' covert or overt actions to refuse to continue dangerous operations.
17.0a All Infantry and Weapons units are subject to Morale Checks and their results. Vehicles and Carriers never make Morale Checks of their own, although they may be affected by the Morale Checks of the Infantry and Weapons units with which they are stacked, and Vehicle formations may be required to make Vehicle Morale Checks [17.8]. When a Morale Check is required, the entire stack checks Morale as a whole and the result affects the entire stack. Vehicles and Carriers ignore Suppressed or Paralyzed results, but must follow any SYR or Surrender results.
17.0b Infantry and Weapons units check Morale whenever their hex is subject to an Area Fire attack that results in a Morale Check or Step Loss.
17.0c Mark unit Morale conditions with Suppressed or Paralyzed markers. All units under a Morale marker have the same Morale condition. Units stacked in the same hex may have a variety of morale conditions.
17.1 Battalion Morale
Battalion Morale measures the cumulative punishment that a battalion has received. Unless specified otherwise, all Battalion Morale values begin at zero; Battalion Morale can increase without limit but it can never drop below zero.
17.1a Place destroyed units in their battalion's box on the Battalion Morale Display. Each Infantry platoon and every three other units (MGs, Mortars, AT guns, Carriers, etc.) in a box add one to that battalion's Morale. Non-infantry units only have an effect each time the third one is killed. Ignore non-combat losses (for example, paradrops, amphibious landings, etc.) for purposes of Battalion Morale.
17.1b Battalion Morale affects all units of the battalion when they make Morale Checks, but the Battalion Morale value of a battalion only affects the units in that battalion.
17.1c Some formations, especially Weapons Battalions, have no Battalion Morale Box and thus are not subject to Battalion Morale. However, whenever an Infantry, Weapon or Carrier unit that is not associated with a formation subject to Battalion Morale is eliminated, place the unit in the Battalion Morale Box belonging to the unit closest to it that is subject to Battalion Morale. If more than one battalion has units equidistant, the opposing player decides which battalion the eliminated unit is applied to. This means that every non-Vehicle unit eliminated will count towards the Battalion Morale of some friendly battalion.
17.1d Battalion Morale Reduction. During the Command Phase of every full hour turn (i.e., 0800, 1100, 2200, etc.), both players simultaneously recover Battalion Morale. Roll one die separately for each battalion with a Battalion Morale value of one or greater. If the die roll is equal to or less than the battalion's current Battalion Morale, reduce that Battalion Morale value by 1 (simply remove one eliminated platoon or three other units from the Battalion Morale Display). On any other result, there is no effect. See 26.1d for Night effects.
17.1e If any unit of a battalion or similar formation is on an implemented Attack Op Sheet with an attack mission (i.e., not in reserve or defending as part of the Attack Op Sheet), that battalion or formation may not roll to reduce Battalion Morale.
17.1f Old Battalion and Company Morale. For pre-v4.0 TCS games, ignore all starting Company and Battalion Morale values given in scenarios.
17.2 Conducting Morale Checks
A unit's Morale value equals: Printed Morale + Step losses + Battalion Morale + Morale Table Modifiers. Find the column on top of the Morale Table that contains the resulting number. Roll two dice (11..66). Read down the column to the row containing the dice roll. Read to the table's right to determine the result. Apply the result.
Example: After taking a step loss due to an Area Fire, a player has to make a Morale Check for his stack. The unit which took the step loss is an Infantry platoon with a Morale of 4 and it has now lost a total of three steps. It has a Battalion Morale of 1. The only modifier which applies is the +1 for being at Night. This gives a total of 9 (4 Morale + 3 Steps Lost + 1 Battalion Morale +1 Night).
Find 9 along the top of the Morale Table and roll two dice (11..66). The player rolls a 46 which gives an SYR result. The defending player must now execute a Save Yourself Retreat with the stack, hoping it survives any Overwatch Fires it may receive in the process.
17.2a Determining Which Unit Checks Morale for the Stack. The selection of which unit performs a stack's Morale Check is important. The chosen unit must have the "worst morale" in the hex. To determine the "worst morale unit," select the one that has the greatest total of printed unit Morale, step losses, and Battalion Morale. Eliminated units are eligible, in which case their step losses are equal to the full-strength stacking value of their counter.
17.3 Suppression
Suppression is the most common fire combat effect on a unit. Suppression hampers a unit's ability to fire and move.
17.3a Suppressed units may not:
- change Mode voluntarily
- breach Minefields
- voluntarily mount or dismount
- fire Overwatch of any kind
- conduct a Voluntary SYR
- observe for Mortars, Artillery, or Sorties
17.3b Suppressed units may:
- fire SFAs and PFAs
- fire during Assault or Overrun
- conduct AT Rolls
17.3c Units in Move Mode that become Suppressed automatically change to Fire Mode unless mounted in a Carrier. Units mounted on Vehicles dismount, switch to Fire Mode and are Suppressed.
17.3d Additional Suppressed results have no further effect [Exception: See 22.0c Assault combat].
17.4 Save Yourself Retreats
A Save Yourself Retreat (SYR) is the result of troops deciding that it is better to be elsewhere. An SYR can be Voluntary or Obligatory; all rules governing SYRs apply to both Voluntary SYRs and Obligatory SYRs unless specified otherwise.
A Voluntary SYR can begin in one of three ways: (1) in lieu of performing normal movement during the owning player's Action Phase (all eligible units); (2) in lieu of Final Overwatch Fire prior to Assault combat (all eligible units [22.0]); or (3) Vehicle SYR as a response to a Point-Fire-based Overwatch Trigger (selected Vehicles only [15.2h]).
When a player chooses to conduct an SYR in lieu of performing normal movement, every unit in the hex that is not Suppressed or Paralyzed must participate in the SYR and is subject to the SYR procedure below; all Suppressed and Paralyzed units remain behind and are not affected by the SYR procedure.
When a player chooses to conduct an SYR in lieu of Final Overwatch Fire, every unit in the hex that is not Suppressed or Paralyzed must participate in the SYR and is subject to the SYR procedure below; all Suppressed and Paralyzed units remain behind and are not affected by the SYR procedure.
When a player chooses to conduct a Vehicle SYR in lieu of Overwatch Fire as a response to a Point-Fire-based Overwatch Trigger, he may select any Vehicle units not marked with a Fired marker to participate in this SYR; all non-selected units remain behind and are not affected by the SYR procedure below.
An Obligatory SYR only occurs as the result of a Morale Check and always affects the entire stack.
Use the following procedure to conduct an SYR (Note: steps 1-3, as designated, apply to only certain types of SYR; steps 4-6 apply to all types of SYR):
- Remove half the remaining steps (rounding up) from each Paralyzed unit that conducts an SYR from Assault combat (only applies to Obligatory SYRs during Assault combat).
- Remove any Paralyzed or Suppressed markers (only applies to Obligatory SYRs).
- Eliminate any non-Suppressed/non-Paralyzed AT guns, Infantry Guns, AA guns, Mortars, and On-Map Artillery not in Move Mode with Integrated Carriers or mounted/being towed (does not apply to Vehicle SYRs).
- Place all affected units in Move Mode (applies to all SYRs).
- Owning player conducts an SYR according to the rules below (applies to all SYRs).
- Upon stopping, Vehicle and Carrier units (including units using Integrated Carriers), as well as any units mounted on them, remain in Move Mode. All other units enter Fire Mode and are automatically Suppressed (applies to all SYRs).
17.4a All units in a hex that conduct an SYR must move together as one stack.
17.4b The owning player retreats the stack to the hex opposite the enemy action (if any) that caused it. If that first hex is blocked by terrain or enemy units, you can substitute another one as close to it as possible. If a unit is unable to retreat as required, destroy it.
17.4c Units performing SYRs conduct movement in terms of hexes, not movement points. A stack consisting only of Vehicles and/or Carriers (including carried/towed units) executing an SYR must retreat six hexes. All other stacks must retreat three hexes. SYRs may only move through hexes that are traversable in regular movement and not occupied by enemy units. If a unit is unable to retreat as required, destroy it.
17.4d Units must make all SYRs locally to the rear and towards Protective or Partly Protective terrain. No "doubling back" is allowed, and the retreat must be in a reasonably straight line. If the retreat carries units into a Protective or Partly Protective hex, even if it is the first hex entered, the owning player may at his discretion end the retreat at that point.
17.4e Retreating units must end their retreat no closer to any spotted enemy units than it began. Thus if the closest spotted enemy unit was two hexes away at the start of the retreat, the retreating unit(s) cannot end their retreat adjacent to any spotted enemy unit.
17.4f Units conducting an SYR generate Movement-based Overwatch Triggers.
17.4g Artillery Barrage markers attack units conducting SYRs that enter or move adjacent to their Attack Zones.
17.4h Units crossing a Minefield hex during an SYR are always attacked, even if there is a breach.
17.4i Units conducting an SYR ignore any further Morale results obtained during an SYR except Surrender. Other units they may happen to be stacked with during an SYR ARE affected by all Morale results.
17.4j Multiple SYRs. Regular Overwatch Fires may generate Return Overwatch Fires that create additional SYRs against other stacks. In such cases, interrupt the current SYR and execute the new one. Players may want to mark the previous SYR with a Step Loss marker to remember how many hexes are left in the retreat. Theoretically there is no limit to the "chain reaction" of nested SYR results.
17.4k Units eliminated because of step losses incurred as a result of being Paralyzed and conducting an SYR (step 1 above) count toward Battalion Morale.
17.4l If, during the Aircraft & Artillery Phase, a stack receives an SYR morale result as a consequence of an Artillery Mission fire attack, the owning player may, at his option, convert the SYR into a Paralyzed result.
17.5 Paralysis
Paralysis is a more severe Morale effect than Suppression.
17.5a Paralyzed units suffer all the restrictions of Suppressed units [17.3a] and in addition may not:
- fire as part of an SFA or PFA
- fire and make AT Rolls in Overrun combat
17.5b Paralyzed units may:
- fire and make AT Rolls in Assault Combat
17.5c Units in Move Mode that become Paralyzed automatically change to Fire Mode unless mounted in a Carrier. Units mounted on Vehicles dismount and are Paralyzed
17.5d Except in Assault combat, additional Suppressed or Paralyzed results on a stack that is already Paralyzed have no effect. Paralyzed units which receive an SYR result from a Morale Check while not mounted on a Carrier lose their Paralyzed marker and conduct the SYR. For Morale effects in Assault combat, see 22.0c.
17.5e Paralyzed units may conduct Recovery to become Suppressed instead of Paralyzed [17.7].
17.5f As noted above, Paralyzed units cannot conduct Voluntary SYRs or choose to SYR prior to Assault combat. They may only conduct an Obligatory SYR as a result of a Morale Check or when mounted on Carriers that conduct an SYR.
17.6 Surrender
The Surrender result on the Morale Table represents the complete collapse of resistance. Remove from play any stack that surrenders. Remove all units in such a hex, even if not normally subject to Morale results. In other words, tanks in a hex that surrenders are also destroyed! Units lost by surrendering count towards Battalion Morale and Vehicle Morale.
17.7 Recovery
At the end of each friendly Action Phase, a player may, at his option, have Suppressed and Paralyzed units recover. Paralyzed units become Suppressed, and Suppressed units lose their Suppressed marker. This offers the opponent an Overwatch Trigger [15.1c].
17.7a Apply the following procedure on a stack-by-stack basis:
- Phasing player removes Suppressed markers and changes Paralyzed markers to Suppressed. Use this new status in any ensuing combats.
- The Non-phasing player may now fire at each Recovery Overwatch Trigger. The recovering units must be spotted [7.1]. Remember that units marked with a Fired marker ARE allowed to fire at Recovery Triggers (exception: Mortars). This may result in the recovering units becoming Paralyzed or Suppressed again. Such is life.
17.7b Units in an Artillery Attack Zone may not recover from being Suppressed or Paralyzed.
17.7c No unit is forced to recover from being Suppressed or Paralyzed. It may remain in its current Morale state indefinitely, if desired.
17.7d A stack may only recover once per Action Phase.
Design Note: The Recovery rule represents units being pinned down under fire (hence units marked as Fired may respond to these Triggers). Players will need to think twice about having their troops recover when close to enemy positions.
17.8 Vehicle Morale
Vehicle units do not have unit Morale values, but Vehicle formations (such as tank battalions) have Vehicle Morale values and may suffer adverse Morale results when their tanks start brewing up. The Vehicle Morale value for each formation begins at zero; the Vehicle Morale value can increase without limit but it can never drop below zero.
17.8a Each time a Vehicle formation suffers a step loss, place a marker on the first open box or circle of the formation's Vehicle Morale Track. Each time a marker is placed on a square box, add the number in the box (usually 1, sometimes 2 or 3 for small formations) to the formation's Vehicle Morale. When all boxes on a track are filled, the player must record the formation's current Vehicle Morale, then remove all the markers from the track. Check recent game errata on the MMP web site for new Morale charts for pre-v4.0 TCS games.
17.8b For each point of Vehicle Morale a formation gains, test the formation's Morale by rolling one die. If the die roll is less than or equal to the current Vehicle Morale value, the formation fails its Vehicle Morale Check.
17.8c All units in a formation that fails a Vehicle Morale Check are immediately dropped from any implemented Op Sheets, fail their current mission, become Unassigned and must execute Failure Instructions [6.11b].
17.8d Vehicle formations recover Morale in the same fashion as Infantry battalions [17.1d]. Roll a single die each full hour: if the roll is less than or equal to the formation's current Vehicle Morale, reduce the Vehicle Morale by 1. Units on an Attack Op Sheet with an attack mission may not roll to reduce Vehicle Morale.
17.8e Double the amount of Vehicle Morale added when a square box is filled if the formation has already lost at least half of its steps when the new loss is applied.
17.8f Losses from Vehicles not assigned to a Vehicle Morale box (such as HQ or recon tanks) are ignored.
Example: A fresh Soviet formation of nine T-34s has a Vehicle Morale Track as shown above. A stack of its Vehicles is fired upon and loses three steps. The owning player places markers in the first and second boxes. Placing a marker in the second box adds one to the formation's Vehicle Morale, so the player must check Morale. He rolls a 3 and passes. He then places a marker in the third box, another square, which adds another point to Vehicle Morale (now 2). After recording the formation's current Vehicle Morale, the owning player removes all the markers from the track (since it is filled) and checks the formation's Morale again. This time he rolls a 2: the formation fails and is marked as such on its Op Sheet. All units in the formation are now Unassigned and must execute their Failure Instructions.
Design Note: Because Vehicle formations are of vastly different sizes (anywhere from 3 to 30 vehicles), the Vehicle Morale Tracks pro-rate losses according to formation size.
18.0 Artillery
Artillery Missions are fired during the Aircraft & Artillery Phase. During the appropriate sub phase, players place all their Artillery Missions and then roll for each Mission on the Artillery Adjustment Table. After all Artillery Missions have been adjusted, the players execute all attacks, resolving each hex completely before moving to the next hex. Each hex is attacked by one combined Area Fire strength and each Barrage marker attacks each Point target on the Artillery Point Fire Table.
Artillery Missions never need to be plotted in advance, unless required by a specific game. Ignore Called Fire Delays listed in older TCS games.
18.1 General Artillery Rules
18.1a Unless specified otherwise, Artillery can hit targets anywhere on any map.
18.1b A battery can execute one HE, Continuous Fire, Fast Fire or Smoke Mission in a single turn, plus one Illum Mission. The number of guns in a battery has no effect on the battery's abilities or ammunition consumption [Exception: See 24.6 On-Map Artillery].
18.1c Artillery fires cannot be cancelled after being announced and placed.
18.2 Ammunition
Each scenario gives the ammunition available in the form of "Battery Fires", which is defined as the quantity of ammunition needed to fire one Mission. Battery Fires are given as HE (High Explosive), Smoke, or Illum (Illumination) types.
Early TCS games (2-01 through 2-05) allotted ammunition differently: divide their HE and Smoke ammunition allotments by 4, but leave their Illum allotments the same.
18.2a Players must keep a running record of their remaining ammunition by type and caliber. Delete used ammunition the moment it is fired. A player can never use more total Battery Fires than he has available-either batteries or ammunition.
18.2b Each Mission can consist of only one ammunition type.
18.2c A Battery Barrage marker costs one Battery Fire of ammunition, whether firing a normal HE Mission or a Continuous Fire Mission. A Battalion Barrage marker (and hence, Mission) requires three Battery Fires of ammunition. Fast Fire Missions cost triple the amount of ammunition for the type of Mission being fired.
18.3 Mission Execution
1. Place New Missions. Each player (in Initiative order) first removes his own Continuous Fire Missions from the previous turn and then places the Barrage or Illum markers of all the Artillery Missions that he wishes to fire, in the target hex(es) of his choice, no more than one Barrage marker per hex. At this point the player must declare each Mission type. Illum missions are not adjusted - they are automatically successful and Artillery Illum markers just placed are now functioning and can be used for adjusting other Missions.
2. Adjustment. In Initiative order, each player rolls for his Missions on the Artillery Adjustment Table in any order desired. Barrage markers without a LOS from a valid observer are automatically a No Shoot.
3. Fire For Effect. Replace successful Smoke Missions with Level 2 Smoke markers. Then conduct all attacks against occupied hexes. Attack every hex in or adjacent to an Attack Zone that contains Area targets and B-targets with the combined total of all Barrage markers (of both players!) that affect the hex, using the Fire Table. Any Point targets in the Attack Zone of a Barrage marker are attacked on the Artillery Point Fire Table. In initiative order, make any Morale Checks or Vehicle Morale Checks only after all attacks have been executed but before Barrage Markers are removed. Each player conducts the attacks against opposing stacks, regardless of whose Artillery is affecting the hex.
4. Remove Barrage Markers. Remove all Barrage markers that are not Continuous Fire Missions from the map.
18.4 Observing
All Missions except Illum Missions require an observer with an unblocked LOS to the target hex. Identify the observing unit for the Mission when it is announced.
18.4a Unless restricted by the game rules, any unit from any organization can observe for any Artillery Mission.
18.4b The observer must be in Fire Mode and have an unblocked LOS to the target hex. The observer cannot be Suppressed or Paralyzed. Any hex within Visibility and LOS of the observer unit may be targeted regardless of the presence or absence of enemy units in or near the target hex.
18.4c Illumination Missions do not need observers and thus can be fired at any hex on the map.
18.5 Mission Types
18.5a HE Missions. This is the most common type of Artillery Mission, dumping several sheaves in rapid succession on a target hex. An HE Mission doubles the printed Fire strength of the Barrage marker. The Attack Zone of a Battery HE Mission is the hex in which the Barrage marker is located. Hexes adjacent to an Attack Zone are attacked at half the strength of the Attack Zone. Barrage markers for HE Missions are removed at the end of the Aircraft & Artillery Phase.
18.5b Battalion Fire Missions. A Battalion Fire Mission is an HE Mission where all batteries from the same artillery battalion fire together (and expend ammo). Being part of a Battalion Fire Mission uses up a battery's Mission for that turn. The Attack Zone of a Battalion Fire Mission is the target hex and the surrounding six hexes. In older TCS games with generic Barrage markers, when you are determining the Fire strength of the Artillery Attack Zone for a battalion with mixed caliber tubes, use the smallest caliber in the battalion. More recent games have the combined battalion Fire strength printed on each Battalion Fire marker.
18.5c Smoke Missions. An artillery battery (not a battalion) can use Smoke ammunition to fire a Smoke Mission; no special requirements exist, simply use Smoke ammo in place of HE and fire the Mission normally. Roll on the Artillery Adjustment Table; a Smoke Mission is successful on any result other than a No Shoot. A Smoke Mission can scatter if the Artillery Adjustment Table calls for that result. For characteristics of Smoke see 19.0.
18.5d Illum Missions. An artillery battery can use Illum Missions to light the battlefield at night. An Illum Mission does not count as a battery's Mission for the turn. To fire an Illum Mission, simply place the Illum marker directly into the desired target hex during Subphase (3): Place New Missions.
18.6 Mission modifiers
HE Missions, both battery and battalion, may be modified as below.
18.6a Fast Fire Missions. Only guns of 122mm caliber or smaller can fire a Fast Fire Mission. Declare the Mission (when the marker is placed) to be a Fast Fire Mission. Expend triple the Battery Fires you normally would for the size of Mission desired. Execute the Mission as an HE Mission except that the Fire strength of the Barrage marker is doubled and there is a modifier on the Artillery Point Fire Table. Yes, this means that Fast Fire HE Missions have quadruple (4x) the printed Fire strength of the Barrage marker.
18.6b Continuous Fire Missions. A Continuous Fire Mission spreads the fire out over time rather than trying to plaster the target in one swoop. The Barrage marker remains on the map for the duration of the turn and is removed during the next Aircraft & Artillery Phase. A Continuous Fire Mission consumes one Battery Fire per battery and attacks with the Fire strength printed on the Barrage marker. A Continuous Fire Mission may be combined with a Fast Fire Mission and a Battalion Fire Mission, combining the characteristics of each; a Battalion-sized, Fast Fire, Continuous Fire Mission, therefore, would consume nine Battery Fires of HE ammo and would attack at double the Fire strength printed on the Barrage marker.
Continuous Fire Attack Zones (but not adjacent hexes) block LOS like Smoke.
18.6c Rocket Mission. Rocket Artillery must always scatter from its target hex and does not use the Adjustment Table. Rocket Artillery is always a simple HE Mission; it cannot execute Continuous or Fast Fire Missions. Rocket Artillery attacks only affect the hexes in the Attack Zone-adjacent hexes not in the actual Attack Zone are not affected by Rocket Artillery.
To determine scatter, roll two dice, a red one for direction and a white one for distance. Scatter the Barrage marker the number of hexes equal to the distance roll in the direction indicated by the Scatter Direction diagram on the map. Rocket Artillery never lands directly on its target hex.
Because Rocket Artillery can only be fired as an HE Mission, the doubled Fire strength is printed directly on the Barrage Marker. For the first games in the series, the Rocket Artillery Attack Zones and Area Fire strength are given below. In later games, game-specific rules and/or Barrage markers indicate the Area Fire strength and Attack Zone for Rocket Artillery.
- Bloody 110: The Nebelwerfer fires have an Attack Zone with a radius of 5 hexes and an Area Fire strength of 20 (doubled to 40 for HE).
- Objective: Schmidt: None
- Omaha: The LCT(R) fires have an Attack Zone with a radius of 8 hexes and an Area Fire strength of 30 (doubled to 60 for HE).
18.7 Adjustment
Adjustment determines whether a Mission scatters from its intended target hex and whether it uses its "Good Shoot" attack values or its "Bad Shoot" attack values. Adjustment is performed on the Artillery Adjustment Table.
After both players have placed all their Barrage markers, each player (in Initiative order) rolls on the Artillery Adjustment Table and places remaining Barrage markers on their Good Shoot or Bad Shoot sides. Scatters are executed at this time too. Attacks are executed only after all barrages have been adjusted.
Rocket Artillery always gives a Good Shoot and always scatters. Do not use the Adjustment Table for Rocket fires [18.6c].
18.7a Artillery Adjustment Table. Find the base Adjustment Value for the firing Artillery. Games published with Version 4.0 rules will usually list this in the scenario information. Otherwise look up the nationality on the Artillery Adjustment Table. Roll two dice (11...66) and cross index the dice roll with the adjusted row of the firing unit.
18.7b No Shoot. Remove the marker from the map and return the ammunition to the player's pool; nothing happened.
18.7c Scatter. Roll on the Artillery Scatter Table to see where the Mission lands. On a roll of 1-3 the attack scatters 1 hex (roll a die to determine direction). On a roll of 4-5 the attack scatters 2 hexes (again roll a die to determine direction). On a 6, the opposing player places the Mission in any hex desired within 3 hexes (it does not have to scatter in a straight line). All Missions which scatter are executed as Bad Shoots.
18.7d Bad Shoot. Flip the Barrage marker to the Bad Shoot side and use its Bad Shoot value when executing attacks.
18.7e Good Shoot. Leave the Barrage marker with the Good Shoot side up and use its Good Shoot value when executing attacks.
18.8 Artillery Barrage Markers and Fire Resolution
After all fires have been adjusted, players execute their own Smoke Missions and then execute attacks on enemy hexes in Initiative order. Some early TCS games do not come with game-specific Artillery Barrage markers-for those games, use the generic Artillery Barrage markers included with the game, each side taking a different color.
18.8a Immediately after completing Subphase (4) Adjustment, and before any Artillery attacks are executed, players with A-targets or non-vehicle B-targets in Fire Mode currently in or adjacent to an Artillery Attack Zone may, in initiative order, voluntarily "self-suppress" any of these units by placing a Suppressed marker on all eligible units in the hex..
18.8b After all Missions have been resolved, both players remove all Barrage markers that are not Continuous Fire Missions.
18.8c While on the map, Barrage markers automatically attack any unit or stack each time it moves into a hex in or adjacent to their Attack Zone. Such attacks only affect the moving units-units already in the hex have no effect on the Area Fire (i.e., do not add their stacking value) and are not affected by it. Apply any road-movement modifiers if applicable.
18.9 Indirect Fire vs. Point Targets
Artillery rolls on the Artillery Point Fire Table to attack Point targets.
18.9a Only hexes inside the Attack Zone use this table. Point targets adjacent to an Attack Zone are not affected by it.
18.9b Roll two dice for each Point target step (NOT B-type targets!) in each hex for each Barrage marker attacking it. If the modified roll is greater than or equal to the number indicated on the Artillery Point Fire Table, destroy the target. Make this same attack roll (once per target step per hex) whenever a moving Point target enters a Barrage marker's Attack Zone.
18.9c A "miss" dice roll on the Artillery Point Fire Table has no effect.
18.9d Immediately after Subphase (4) Adjustment, players with Point target Vehicle units currently in the Attack Zone of a Barrage marker may, in initiative order, change any of these Vehicles to Move Mode.
18.10 Overwatch during Artillery & Aircraft Phase
Overwatch Triggers are generated normally during the Aircraft & Artillery Phase.
18.10a Movement-based Overwatch Triggers can occur during the Aircraft & Artillery Phase from units conducting SYRs. Conduct these Overwatch Fires normally according to 15.1a, including Overwatch Return Fire.
18.10b When On-Map Artillery fires an Artillery Mission, this fire offers a Fire-based Overwatch Trigger [15.1b] at one hex containing an On-Map Artillery unit that participated in the Mission. Conduct this Fire-based Overwatch after the Artillery Mission has been executed. If an On-Map Artillery battery is firing a Continuous Fire Mission, and, because of this Overwatch Fire, fewer than two non-Suppressed/non-Paralyzed steps remain, remove the Continuous Fire Barrage marker.
18.10c When an AA gun fires against a Sortie [25.1e], this fire offers a single Fire-based Overwatch Trigger [15.1b] at the hex containing the AA gun that fired. Conduct this Fire-based Overwatch immediately, before the Sortie is executed, although the AA modifier is applied even if the AA gun is eliminated or suffers a morale result [25.2].
19.0 Smoke
Smoke blocks LOS and gives a modifier on some tables.
19.1 Smoke Effects
19.1a A Smoke marker creates an infinitely high LOS obstacle that affects the entire hex and all its hexsides. Any number of Smoke markers can be in one hex at one time, but multiple Smoke markers in the same hex give no additional effect. Units can always see into or out of a hex containing Smoke for any purpose, including observing and Overwatch Trigger spotting. However, units can never see through such a hex.
19.1b Smoke markers may not be placed in an all-water hex. Smoke markers which scatter into an all-water hex are treated as No Shoot.
19.1c Smoke adds +1MP to the cost to enter a hex.
19.2 Smoke Reduction
In each Clean Up Phase, first remove all Level 1 Smoke Barrage markers, then flip all Level 2 Smoke Barrage markers to Level 1 Smoke Barrage markers. At the beginning of his Action Phase, each player removes any Mortar and Infantry Gun Smoke markers that he placed during the previous turn.
19.3 Smoke Markers
Artillery Missions place Smoke markers only when Smoke Missions are fired.
19.3a Each Smoke Mission generates one Level 2 Smoke Barrage marker in the Attack Zone hex.
19.3b Treat all hexes adjacent to a Smoke Barrage marker as also containing a regular Smoke marker.
19.3c A Smoke marker placed by a Mortar or Infantry Gun fills only the hex that the marker itself occupies.
20.0 Movement
Players can move all, some, or none of their units during the friendly Action Phase. If a moving unit triggers Overwatch Fire [15.0], the players immediately follow the Overwatch Cycle [15.1a] for that Trigger; the unit can continue moving only after the cycle ends.
20.0a Only units in Move Mode can move. Units that move cannot fire an SFA later in the same phase. Units that have conducted any type of SYR in the current Action Phase may not use normal movement later in the same phase.
20.0b Units can move individually or in stacks. Stacks for movement are formed when units begin moving. A unit or stack must complete its movement before another unit or stack moves (Exception: Vehicle Impulses [20.2]). Units may not voluntarily split off from a stack during movement, though sometimes a stack may be broken up due to combat and Morale Checks.
20.0c Each unit moves along a contiguous path of hexes (in any direction or set of directions), using its movement allowance to pay the movement point cost of each hex and hexside, according to the game-specific Terrain Effects Chart. A unit cannot expend more movement points than its movement allowance. EXCEPTION: If otherwise able to move, a unit can always spend its entire movement allowance to move one hex in its Action Phase, into non-prohibited terrain, regardless of the Movement Point cost.
20.0d Units cannot save unused movement points from turn to turn or transfer them from unit to unit. The only time that the movement of one friendly unit assists another is when Carriers and Vehicles act as transports [24.1].
20.0e Players can move units as they see fit as long as they do not violate either the letter or the spirit of the units' Op Sheet or Failure Instructions.
20.0f Units marked TO (tow-only) in place of a movement allowance cannot move under their own power and must be towed. If they are required to move by themselves (e.g., an SYR), destroy them instead. These units have an assumed movement allowance of 2 to be used solely for Mode Change and proportioning movement with respect to Carriers.
20.0g Units cannot enter the same hex as enemy units, except in Assault or Overrun combat. Destroy units forced to violate this rule.
20.0h Units can conduct an Assault or Overrun as a stack only if the stack has existed since the beginning of the current Action Phase (not Vehicle Impulse).
20.1 Terrain Effects on Movement
Terrain determines the movement point cost of various hexes and hexside features, as given on the Terrain Effects on Movement Chart. Each game has its own Terrain Effects on Movement Chart. Use the Basic Terrain Effects when playing earlier TCS games without a game-specific chart. The movement point cost of a hex is the entry cost of the hex plus the cost of any hexside feature crossed to enter it.
20.1a Certain map features may not be listed on the Terrain Effects on Movement Chart. These have no effect on movement.
20.1b Elevation Changes. Units which cross a solid contour line-including any solid contour line that runs through the center dot of the hex that the units are entering but excluding any solid contour lines that runs through the center dot of the hex being exited-must pay an additional +1MP for each solid contour line crossed. Using road movement [20.1e] negates this cost. Some TCS games also have broken contour lines (usually representing 10m contour intervals rather than the standard 20m intervals); these are used to determine elevation for LOS purposes [8.2] but do not add to movement costs.
20.1c Multiple Contour Lines. Vehicle, Carrier and B-target Weapons units may not enter a hex containing more than one solid contour line or cross more than one solid contour line when moving to an adjacent hex, except when using road movement [20.1e]. Count any solid contour line running through the center dot of the hex being entered but do not count any solid contour line running through the center dot of the hex being exited.
20.1d Bottlenecks. Bottlenecks are features such as bridges that channel movement within a hex or hexside. Bridges and Minefield Breaches are ALWAYS Bottlenecks; each game specifies any additional Bottleneck features applicable to that game. Units entering a hex or crossing a hexside with a Bottleneck feature generate an extra Movement-based Overwatch Trigger, in addition to the normal Movement-based Overwatch Trigger that the movement itself generates, so that potentially the opponent could fire at this stack twice, even with the same units if desired. Resolve such 'double' Overwatch Fires in sequence; resolving the first Overwatch Fire completely before conducting the next one.
20.1e Units using Roads and Road-like features (trails, etc.) ignore the movement point costs of the other terrain features and contours in the hex or along the hexside. This only applies to units that are following the road's path from hex to hex. Moving along a road makes a unit vulnerable to negative modifiers in relation to Spotting [7.1] and Overwatch Fires [15.2]. To avoid these penalties associated with moving on the road, units can move paying the full non-road entry costs of hexes and hexsides and move off-road.
[Exception: Vehicle, Carrier and B-target Weapons units may not enter a hex using "off-road" movement if they have to cross more than one solid contour line or enter prohibited terrain, see 20.1c and 20.1f].
20.1f Certain hexes and hexsides are prohibited. No unit can enter a prohibited hex or cross a prohibited hexside unless using a road or road-like feature. Destroy any unit forced to do so.
20.1g If more than one terrain type (each with different MP costs) exists within a hex, apply only the most costly. Add the cost of any hexside features that a unit must cross to enter the hex to the cost of the most expensive terrain in the hex to determine the hex's total movement point cost.
20.1h Slow Go Terrain and Blocks. Slow Go Terrain and Blocks are no longer used.
20.1i Woods and Forest Features. Forest and woods map symbols sometimes occupy only a part of a hex. A hex is considered to be forest (or woods) for movement and combat if any part of the hex is covered by the symbol. The actual location of the symbol determines its LOS effects [8.1h].
20.2 Vehicle Impulses
While, as a general rule, each unit or stack must complete its movement before proceeding to the next unit/stack, Vehicle units have increased flexibility since they operate at a much higher tempo than do foot units.
20.2a Stacks consisting solely of Vehicles and units mounted on them may split their actions into three Impulses per turn, which can be executed in any order desired. That is, a player may execute one Impulse for a stack, then move some other units and come back to the stack to execute the remaining two Impulses later in the Action Phase. Vehicle units which fire as part of an SFA, however, may not conduct Vehicle Impulses.
20.2b A Vehicle Impulse may consist of movement, changing to Fire Mode, or conducting a PFA. Units conducting a movement Impulse may move with one-third their normal movement allowance. Any remaining fractional movement points may be used in the last Impulse. A Vehicle using Impulses could, for example, move in its first Impulse, change to Fire Mode in its second Impulse, and then fire a PFA to complete its three Impulses in an Action Phase.
20.2c A stack may execute two consecutive movement Impulses at once, using the total of their MPs for both Impulses, rounded normally. Once the MP expenditure exceeds the MPs for one Impulse, a new Impulse is considered to have begun for Overwatch purposes [15.3i].
20.2d Changing to Move Mode does not cost any MPs and may be done in any movement Impulse. Changing to Fire Mode requires an entire Impulse.
20.2e Vehicles using Impulse movement may not move in the same stack with any units not using Impulse movement. Exception: Carried units do not count against this restriction. Dismounted Infantry and Vehicles moving together must begin the Action Phase stacked together and cannot use Vehicle Impulses.
20.2f If Vehicles using Impulse movement move into a hex containing other Vehicles, these Vehicles may form a new stack and move together in another Impulse if desired. In a newly combined Vehicle stack, the number of Impulses expended thus far is that of the Vehicle in the stack which has expended the most Impulses.
21.0 Minefields
Minefields can be used to inhibit enemy movement into an area or to channel the enemy into a kill zone.
21.0a Once emplaced, Minefields attack both sides in the same manner. There are no "friendly" Minefields.
21.0b Units using Foot Movement to enter a Minefield are attacked with an Area Fire strength of 18, modified for stacking only. Roll two dice for each step using Vehicle Movement to enter a Minefield hex, destroying the step on a result of 8+.
21.0c Minefields only attack units when they enter the Minefield hex, not when they exit it, nor if they simply remain in the hex.
21.0d Do not use the Dummy Minefields found in earlier TCS games.
21.1 Laying Mines
Lay mines before the game begins (if given in the scenario set-up) or whenever a Prepared Defense Op Sheet implements. When laying mines before play begins, the side that sets up first cannot place them in any hex in which enemy units can set up. When a Prepared Defense Op Sheet implements, the player can place one Minefield for every two Infantry platoons on the Op Sheet (round down). Place Minefields the instant the Op Sheet implements, anywhere within four hexes of the two platoons that generated the Minefield. The hex must also be at least five hexes away from the nearest enemy unit.
21.2 Crossing Minefields
Units pay two additional movement points to enter a Minefield hex. After they undergo any Overwatch Fire triggered by their movement and/or any Artillery attack, the Minefield attacks them as described above [21.0b], after which they may freely exit the hex.
Enemy units occupying Minefield hexes may be assaulted normally, although the assaulting units must undergo an attack by the Minefield when they enter the hex.
21.3 Breaching
Breaches allow units to enter Minefield hexes without being attacked by them. Dismounted Infantry units (only) may attempt to breach a Minefield if they begin their Action Phase in or adjacent to a Minefield hex and the Minefield hex is not occupied by enemy units. Units which attempt to breach a Minefield may not move, change Mode or participate in an SFA or AT Roll.
21.3a Only non-Paralyzed, non-Suppressed, Dismounted Infantry units can breach Minefields. Such a unit must begin the phase in or adjacent to the Minefield hex. It may be in either Move Mode or Fire Mode. If a unit in Fire Mode attempts a breach, it may not conduct an SFA or move during its Action Phase.
21.3b To breach a Minefield, the owning player must declare the breach attempt and move the unit, in its current Mode, into the Minefield hex (if it is not already there). Note that this is a Movement-based Overwatch Trigger, even though the breaching unit may be in either Move Mode or Fire Mode. Resolve any Overwatch Fires and Artillery attacks normally.
21.3c If the breaching unit is still in the Minefield hex, attack the breaching unit on the 9 column of the Fire Table, applying only the stacking modifier. If the unit still occupies the Minefield hex and is not Suppressed or Paralyzed, it has successfully created a Breach. Place a Minefield Breach marker in the hex.
21.3d Units must pay the two additional movement points [21.2] to enter a Minefield hex even if it is breached. Units may enter a breached Minefield from any direction without being attacked by it. However, units may not use the Breach when conducting an SYR (the Minefield attacks them normally). Minefield Breaches are Bottlenecks [20.1d].
22.0 Assault Combat
Assault combats can occur at any time during a player's Action Phase. Resolve each of these combats in its entirety before moving on. These combats affect only the units within the target hex. Every Assault combat must end with one side or the other alone in the target hex.
Assault combats do not require any additional MPs other than the normal cost of entering the target hex. Only one stack may conduct an Assault at a time.
Procedure:
-
The attacker announces the intended Assault and the target hex. The assaulting stack must be in Move Mode and adjacent to the target hex.
-
The defending units have one Final Overwatch Trigger at the assaulting stack before it enters the target hex. Any unit in the target hex that is not Suppressed or Paralyzed and is capable of firing Overwatch (including units marked Fired) may participate in this Final Overwatch Fire. At his option, the defending player may conduct a Voluntary SYR in lieu of firing Overwatch. All eligible units must participate in this SYR; Suppressed and Paralyzed units are left behind.
-
If the attackers did not receive a Suppressed, Paralyzed or SYR result in step 2, move the assaulting stack into the target hex and remove any Suppressed marker from the defending units in the hex. Do not remove a Paralyzed marker.
Design Note: This represents lifting suppressive fires to allow the assaulting units to cross the last 80m to their objective.
-
If the target hex is in or adjacent to an Artillery Attack Zone, execute an attack on the assaulting units. Ignore the defending units in the target hex. Use the terrain modifier of the target hex.
-
If the target hex contains a Minefield it now attacks the assaulting stack. Minefield Breaches cannot be used by assaulting stacks. Use the terrain of the target hex for any Morale Table modifiers.
If during steps 2, 4 or 5 the attacker receives a Suppressed, Paralyzed or SYR result, or is eliminated, the Assault ends and the attackers remain in, or are returned to, their starting hex in their current Mode. If an SYR occurs during step 4 or 5, it starts from the hex being assaulted. If all defending units retreated in step 2, skip to step 7.
-
Determine fire order: If NONE of the units of one side are Suppressed or Paralyzed and if ANY unit of the other side is Suppressed or Paralyzed, the side with no Suppressed or Paralyzed units fires first. Otherwise, the fires are conducted simultaneously. Infantry units may also make AT Rolls. P-firers may participate using either Point Fire or Area Fire, but not both. Conduct any Morale Checks or Vehicle Morale Checks caused by a fire immediately after that fire has been resolved. If the fires were conducted simultaneously, conduct any Morale Checks or Vehicle Morale Checks after all the fires have been resolved, with the assaulting player checking morale first-if his units are eliminated or execute an SYR, the defending stack does not need to conduct a Morale Check, although he may still have to conduct a Vehicle Morale Check.
-
Mounted units (either side) may dismount and any units in Move Mode (either side) may change to Fire Mode, if desired. The assaulting player decides first.
Conduct further rounds of Assault combat, repeating steps 6 and 7 above as many times as necessary until one side or the other is eliminated or conducts an SYR, leaving only one side in the target hex.
22.0a Only units in Move Mode that have enough MPs left to enter the target hex may attack in Assault combat.
22.0b Infantry, Carrier, and Vehicle units may fire in Assault combat whether in Move Mode or Fire Mode. Weapons units must be in Fire Mode to fire. Mortar units (regardless of Mode) cannot fire in Assault combat.
22.0c Units which become Suppressed during a round of Assault combat and which receive another Suppressed result when checking Morale in a later round of that Assault combat must either execute an SYR or lose one step from the largest unit as per 10.0f, at the owning player's discretion. Paralyzed units which receive a Suppressed result during a round of Assault combat must conduct an SYR [losing half their steps, rounded up; see 17.4]. If Paralyzed units receive another Paralyzed result they immediately Surrender [17.6].
22.0d The phasing player can Assault a hex as many times as he has the units to do so. He can make these Assaults in any order with respect to other actions and fires.
22.0e Area Fires in Assault combat affect only enemy units. Calculate the stacking modifier for each side separately.
22.0f Ignore any negative shifts on the Fire Table that apply to both sides equally (such as Night, both sides Suppressed, Smoke, etc.).
22.0g Terrain. If both sides have negative terrain modifiers, cancel enough shifts for both sides to bring the smaller negative modifier to 0. For instance, in a Protective terrain hex the assaulting stack is in Fire Mode (-3 shift) and the defender is Dug-In (-5 shift). The smaller negative modifier is the -3 for Fire Mode, so cancel three negative shifts for both sides. There is now no shift due to terrain for fires against the assaulting stack (originally -3, now 0) and a -2 shift for fires against the defender (originally -5, now -2).
22.0h In Assault combat units can conduct AT Rolls, Point Fires, and Area Fires in any order desired. All Area Fires must be consolidated into one fire.
22.0i After resolving an Assault combat, the attacking units may conduct no further actions (movement, PFAs, SFAs). They may observe for Mortars and may fire Overwatch if eligible.
22.0j Unassigned units may not initiate Assaults [6.3a].
22.0k Vehicle units from a formation which fails its Vehicle Morale Check during Assault combat must immediately conduct an SYR. If other friendly units still remain in the hex, the Assault combat continues normally (after conducting any Overwatch Fire against the retreating unit or units).
23.0 Overrun Combat
Overrun combat is a special vehicular version of Assault combat. Effectively, the vehicles drive through the hex with guns blazing and exit the hex immediately. These combats end after one round-instead of the multiple rounds involved in an Assault combat.
Conduct Overrun combats as Assault combat [22.0] with the restrictions and changes listed below.
23.0a Only Carriers (including any passengers) and Vehicles in Move Mode with enough MPs to both enter and exit the target hex may conduct an Overrun. Mounted Infantry units may fire in Overruns.
23.0b Hexes which cost the overrunning stack more than 3 MPs to enter cannot be overrun. Vehicles and Carriers may use road movement to conduct an Overrun. Units using Integrated Carriers with Wheeled or Tracked movement may conduct Overruns if desired.
23.0c In Overrun combat, use the terrain of the target hex for combat purposes. Terrain modifiers are used normally on the Fire Table, unlike in regular Assault combat.
23.0d Any number of Overruns can be conducted against a single target hex in one phase.
23.0e Paralyzed units may NOT fire in Overrun combat.
23.0f Defending units may NOT voluntarily conduct an SYR during step 2 of the Overrun in lieu of firing Final Overwatch.
23.0g Defending units do NOT remove any Suppressed markers.
23.0h After resolving an Overrun combat, the phasing player may continue to move the units which made the Overrun (if they are still able to do so) with any MPs they have remaining.
23.0i Exiting an Overrun hex generates a Movement-based Overwatch Trigger.
23.0j Units using Vehicle Movement Impulses may conduct Overruns by executing consecutive movement Impulses if they do not have enough MPs in a single Impulse [20.2c].
23.0k If a stack has enough MPs left, it may leave one Overrun combat and immediately conduct another Overrun in the next hex. Such an Overrun does not offer a Movement-based Overwatch Trigger.
23.0l Unassigned units may not initiate Overruns [6.3a].
24.0 Special Units
24.1 Carriers
Carriers are units designed to transport other units. Trucks, wagons, and half-tracks are the usual Carriers. Each Carrier unit represents the number of vehicles required to make up a platoon-sized portage capacity. Carrier units have two steps when at full strength. Carriers usually have a white box around their unit type to designate their status as Carriers.
Consider a unit mounted (or towed) if the Carrier's counter is on top of it. While a passenger, a unit expends MPs in proportion to the Carrier's MA. For example, if a Carrier with a MA of 18 MPs expends a third (6 MPs), the transported unit with a movement allowance of 6 MPs expends that fraction also (2 MPs).
For simplicity, "mounting" refers to all the operations of mounting, dismounting, hitching, or unhitching.
24.1a All full-strength Carriers can carry up to five steps or tow up to two towable units (AT guns, On-Map Artillery, Tow-Only Mortars, and Infantry Guns). Only Area target units may be carried. Carriers which have lost one step may carry three steps or tow one towable unit. Units with Integrated Carriers may not be transported by other Carriers. A Carrier unit cannot carry Area target steps and tow a gun simultaneously.
24.1b Mounting costs the Carrier 3 MPs and the mounting unit 1 MP. Tow-only units have an assumed MA of two MPs for this purpose. Units must be in Move Mode to mount and remain so while mounted. Suppressed or Paralyzed units cannot voluntarily mount or dismount.
24.1c Mounted Infantry can fire in Assault combat and Overrun. No other mounted units may fire.
24.1d If a Carrier unit is destroyed, automatically destroy any units it was carrying or towing. If it suffers a step loss but still survived, the owner must eliminate the corresponding number of carried steps [10.0g]. These losses do not trigger a morale check.
24.1e Vehicles as Carriers. Players can use tanks and other vehicles as makeshift Carriers. Each Vehicle step with a P-defense strength of three or more can carry two Area target steps. Each Vehicle step with a P-defense of two may carry one Area target step. A Vehicle with a defense strength of one may not act as a carrier. Vehicles may not tow guns. Vehicles in a stack may add their capacity together to carry multi-step units.
Units carried by Vehicles are treated normally for combat, (i.e., 10.0f and 11.3e do not apply). Carried units must remain in Move Mode [24.1b]. For losses, see 10.0g.
24.2 Integrated Carriers
In more recent TCS games many units have Integrated Carriers (i.e., the transport is organic to the counter).
24.2a When in Move Mode, treat units with Integrated Carriers for all purposes as being carried by a notional 1-step Carrier of the appropriate target type (2-step Carrier if an Area Target with 3+ steps). Notional Carrier steps are treated as in 24.1d. if destroyed in combat. Notional steps are counted for stacking in the same manner as regular Carriers.
24.2b Units with two movement types can choose between Foot Movement and Vehicle Movement. The Foot MA is given on the counter in white and the Vehicle MA next to it (black for Wheeled, yellow for Tracked). When such units are in Fire Mode or in Move Mode using their Foot MA, they are considered to be the target type shown on their counter (i.e., either Area targets or B-0 targets); when they are in Move Mode using their Vehicle MA they are considered to be B-0 targets (jeeps, trucks, wagons, etc) if they have Wheeled MA or B-1 targets (half-tracks, Bren Carriers, etc) if they have Tracked MA.
24.2c When units with Foot and Vehicle MAs enter Move Mode, they must declare which type of movement they are using. Only one type of movement can be used per phase. This type remains valid for all game purposes until the units enter Fire Mode or declare a different type of movement during a succeeding Action Phase.
24.2d Units with Integrated Carriers expend 1/2 their movement allowance to change Mode [4.1a].
24.2e Non-MG Weapons Units with Integrated Carriers may only conduct an SYR if they are in Move Mode and are using Vehicle Movement.
24.3 Mortars
All Mortar units have two steps and are subject to Morale effects. They may make indirect fire attacks using other units to observe for them.
24.3a Mortars do not require an unblocked LOS to the target from their own hex. They must, however, have an appropriate observer from the same next-higher-echelon as the Mortar itself-the same company (in the case of company mortars), same battalion (in the case of battalion mortar platoons or heavy weapons companies), or the same regiment (in the case of regimental heavy weapons companies or battalions). Suppressed and Paralyzed units cannot observe for Mortars. Mode has no effect on a unit's ability to observe for Mortars.
24.3b Mortars can fire only once per Action Phase and once during the Aircraft & Artillery Phase in response to an Overwatch Trigger. Mortars without Fired markers can fire Overwatch Fires if the observer can spot the Trigger. Mortars may not fire at range zero (i.e., in Assault or Overrun combat).
24.3c In lieu of an SFA, a 3"/80mm or larger Mortar can fire one Mortar Smoke or Illum marker. For Illum, choose any hex within range of the Mortar (neither LOS nor an observer is required), place an Illum marker and mark the Mortar as Fired. Smoke requires an appropriate observer and must be within range of the Mortar. Identify the target hex, mark the Mortar as Fired, and roll on the Mortar and Infantry Gun Smoke Table; if successful place a Smoke marker in the target hex. A Mortar firing Smoke or Illum generates a Fire-based Overwatch Trigger. A Mortar cannot fire Smoke or Illum in response to an Overwatch Trigger.
24.3d Mortars can move by themselves or be carried by Carriers. Large Mortars (marked as Tow Only) cannot move by themselves and must be towed.
24.3e Negative modifiers from the Fire Table for Artillery Attack Zone and Smoke apply both to the observer (if not the Mortar unit itself) as well as to any firing Mortar unit(s).
24.4 Anti-Tank (AT) Guns
AT Guns are B-0 targets and P-firers with a Morale of 3. When firing Area Fires, they use one-half their Point Fire rating, rounding up. Always add all AT Gun fire first, then round.
24.5 Infantry Guns
Infantry Guns are B-0 targets and High-Trajectory A-firers with a Morale of 3.
24.5a In lieu of an SFA, an Infantry Gun (IG) of 100mm or larger can fire one Smoke or Illum marker (use Mortar Smoke and Illum markers to indicate IG Smoke and Illum). For Illum, choose any hex within range of the IG (LOS is not required), place an Illum marker and mark the IG as Fired. Smoke requires an appropriate LOS and must be within range of the IG. Identify the target hex, mark the IG as Fired, and roll on the Mortar and Infantry Gun Smoke Table; if successful place a Smoke marker in the target hex. An IG firing Smoke or Illum generates a Fire-based Overwatch Trigger. An IG cannot fire Smoke or Illum in response to an Overwatch Trigger.
24.5b An Infantry Gun of 100mm or larger may attack Point targets on the Artillery Point Fire Table [18.9b] in addition to making an Area Fire attack on the same hex. For each Infantry Gun of 100mm or larger firing at a hex containing Point targets, the firing player selects one Point target to be attacked and rolls once on the Artillery Point Fire Table. For multi-step On-Map Artillery units firing as IGs [24.6b], select all guns' Point targets before any of them fire. IGs may not attack Point targets at any range greater than 14 hexes, and suffer a -1 modifier on the Artillery Point Fire Table when attacking Point targets at range 8-14 hexes
24.6 On-Map Artillery
Most games will restrict artillery to being off-map, but sometimes the situation will require these units to be on the map. On-Map Artillery functions like its off-map cousin in all ways except the following:
24.6a On-Map Artillery units are B-0 targets and High-Trajectory A-firers with a Morale of 6. Depending on the game, an On-Map Artillery Battery may be represented by several single-step gun counters (i.e., one gun per counter) or by one or more multi-step gun counters.
24.6b When firing direct, On-Map Artillery units are treated as Infantry Guns and may conduct SFAs and Overwatch Fires normally. A single-step On-Map Artillery unit is handled exactly like an Infantry Gun [24.5], except that it cannot fire Smoke or Illum [24.6d]. For a multi-step gun counter, all steps in the counter must fire together with an Area Fire strength equal to the number of steps remaining multiplied by the Fire strength printed on the counter. If no ratings are provided on the counters (as in older TCS games), use the following Area Fire strengths:
- Less than 100mm: 4 [Range 14]
- 100-130mm: 6 [Range 24]
- 131mm+: 8 [Range 40]
24.6c If any gun of a battery fires direct during a phase, expend a total of one Battery Fire of ammunition no matter how many (or few) guns of the battery fire or how much (or little) they fire.
24.6d On-Map Artillery units can only fire Smoke or Illum as part of an Artillery Mission.
24.6e To fire a regular Artillery Mission, an On-Map Artillery Battery must have a minimum of two guns/steps remaining in play, and these guns/steps must be in Fire Mode, may not be marked with a Fired marker, and may not be Suppressed or Paralyzed. It need not be assigned to an Op Sheet to fire Artillery Missions.
24.6f After an On-Map Artillery Battery has fired an Artillery Mission, even a No-Shoot, mark the Battery counter (or each unit in the Battery) with a Fired marker. On-Map guns firing Artillery Missions, even No-Shoots, generate Fire-based Overwatch Triggers normally, even though Artillery fires do not occur during the normal Action Phases. Execute these Overwatch Fires after the Artillery attack has been executed. If Overwatch Fires bring the total number of non-Suppressed/non-Paralyzed steps below two, remove any Continuous Fire Barrage markers associated with the artillery battery immediately (18.10b).
24.7 AA Guns
AA Guns are marked as AA on the counter. While the majority of AA Guns are A-firers, some are P-firers, such as the German 88mm Flak. AA Guns are always Low-Trajectory firers [11.2b]. AA Guns may also affect Aircraft Sorties [25.0]. Like AT guns and Infantry Guns, AA Guns are B-0 targets with a Morale of 3.
25.0 Aircraft
When aircraft are available, they are given as Sorties. A Sortie is the attack of one aircraft against one target unit or hex. In earlier TCS games using "runs" treat each run for an aircraft as a separate Sortie.
25.1 Sorties
Conduct Sorties in the first subphase of the Aircraft & Artillery Phase. Each player (in initiative order) places all Sortie attacks at once and then executes each Sortie separately, in any order desired.
25.1a On any turn in which Sorties are available, the owning player uses them in the Aircraft & Artillery Phase. He picks each target hex. There is no limit to the number of Sorties which can be placed in a hex.
25.1b Sorties use their Area Fire rating to make an Area Fire on a hex. Sortie attacks are considered spotted High-Trajectory fire and use modifiers for Terrain, Target and Stacking on the Fire Table. The Sortie's Point ability is a die roll to kill Point targets or B-targets. These abilities cannot be combined in one Sortie. The player must announce which ability the Sortie is to use before he resolves the attack and forfeits the other ability when he does so.
25.1c The Point Kill roll requires a roll of two dice. Pick one target and modify the roll according to the Sortie Point Fire Modifications Chart. If the modified roll is greater than or equal to the kill number, destroy the target. Any other roll has no effect.
25.1d Vehicles destroyed by Sortie attacks add to Vehicle Morale, if applicable.
25.1e AA Guns. The non-phasing player may commit an unfired AA Gun to defend target hexes from Sorties. Such an AA Gun must be in Fire Mode and not marked as Fired, Suppressed or Paralyzed. Declare that the AA gun is firing against the Sortie and mark it with a Fired marker. AA firing offers a single Fire-based Overwatch Trigger. Only one AA Gun may be committed to any one Sortie. AA Guns must be able to trace LOS to the hex they are defending and may fire up to their printed range (if A-firer) or their long range (if P-firer). Unassigned AA guns may conduct AA fire normally.
25.2 Aircraft Sortie Resolution
Resolve Sorties as follows:
- Place all the side's available Sorties for the turn.
- For each Sortie, follow the remaining steps after placement:
- Identify the Sortie to be resolved and its type.
- Non-phasing player identifies any AA Gun firing. Immediately place a Fired marker on this AA Gun and resolve any Fire-based Overwatch against it. Apply the modifier on the Sortie Success Table even if the AA Gun is eliminated or suffers a morale result.
- Identify an observer if desired: any friendly unit within six hexes and LOS of the target hex, in Fire Mode, and neither Suppressed nor Paralyzed can be the observer. Observers are not mandatory but they prevent a negative modifier on the Sortie Success Table.
- Roll one die on the Sortie Success Table and apply any modifiers. If the roll is equal to or greater than the value indicated on the table, execute the attack. Otherwise, the Sortie is expended, but no attack is made.
- Execute the attack, if any. If more than one Sortie is directed against a hex, each must be resolved independently.
Note: "Full woods hex" means that the target hex is completely filled with woods or forest (not orchard) and does not have any road or trail in it. Targets in such hexes are extremely difficult to spot from the air.
26.0 Night
The difficulty of military operations at night is impossible to describe adequately. Dawn, Dusk, and Twilight are the turns just before Night begins and just after Night ends. Dawn, Dusk, and Twilight turns do not qualify as either Night or Daytime; during these turns the following rules modifications are in effect:
- Maximum Visibility is limited as shown on the Turn Record Track
- Night rules and modifiers do not apply
- Sorties cannot be used
- Illum cannot be used
26.1 Night Effects
26.1a Weighted turns accrue at a maximum base rate of two per turn (six for Vehicle Op Sheets).
26.1b Night Missions must be tightly controlled by their Op Sheets. Players must use much more precise routes and other control measures.
26.1c Visibility at night is two hexes if not otherwise indicated in the game rules.
26.1d Each night turn represents a full hour. Battalion Morale recovery attempts occur only on even Night turns (2000, 2200, 2400, etc.).
26.1e Morale Checks at night suffer additional modifiers. Illum-lighted areas do not negate these.
26.1f Area Fires, Point Fires, and AT Rolls are modified at night.
26.1g Sorties cannot be used at night.
26.2 Illumination (Illum)
Illum rounds provide battlefield illumination.
26.2a Each Illum Battery Fire and each Illum Mortar or Infantry Gun shot generates one Illum marker.
26.2b Each Artillery Illum marker generates a lighted area with a five hex radius around its location. This lighted area acts as a spot of daylight and reduces the night effects on the Fire Table, but not on the Morale Table. Mortar and Infantry Gun Illum markers have a radius of three hexes. During Dawn, Dusk, and Twilight turns, Illum markers cannot be used.
26.2c Remove all Artillery Illum markers on the map during each Clean Up Phase. Each player removes his own Mortar and Infantry Gun Illum markers from the previous turn at the very beginning of his Action Phase.
26.2d Units in an illuminated hex can spot, observe or fire at illuminated hexes at any range (subject to other rules), but can only spot, observe or fire at non-illuminated hexes if they are adjacent to them.
27.0 Scenario Set-Up
Each game's specific rules include instructions for setting up the game. Unless otherwise noted, the following conventions are used:
27.1 Set-Up notes
27.1a "w/i X" means set up the unit at or within X hexes of the listed hex.
27.1b Units can set up in any Mode and can be mounted or dismounted.
27.1c Units can never start the game overstacked unless specifically allowed in the game rules.
27.1d Unless noted otherwise, units start at full strength.
27.1e Where given, spread losses as equally as possible within the listed organization. If losses are by type, eliminate the losses from that type.
27.1f Historical orders are for informational purposes only. The player is free to create his Op Sheets before the game begins. All Op Sheets created before the game start play implemented. Unless the scenario requires otherwise, these can be of any type. Players cannot begin the game with unimplemented Op Sheets-these must be drawn up no earlier than turn one.
27.2 Reinforcements
27.2a At the beginning of a player's Action Phase, place reinforcements next to the map adjacent to their entry area. Reinforcements enter the map by paying MPs to enter the first hex at the map's edge and continuing from there. If there are enemy units, Artillery Attack Zones or Minefields on or adjacent to the assigned entry area hexes, then reinforcements may shift their entry area to anywhere along the map edge within 10 hexes of that assigned entry area.
27.2b Reinforcements may not enter the map unless they are on an Implemented Op Sheet or executing Preliminary Instructions.
27.2c Unless otherwise noted, all reinforcing units enter with their full movement allowances. They are not "lined up" behind each other off the map.
27.2d Op Sheets drawn up for reinforcements before the game are automatically implemented.
27.2e Reinforcements may be assigned to an implemented Op Sheet at the beginning of each game or be assigned to an Op Sheet and accumulate weighted turns normally during the course of the game.
27.2f Unless otherwise noted, reinforcements do not have to enter the map on their assigned turn of entry. They may enter on a later turn. Units of a reinforcement group do not all have to enter on the same turn.
27.3 Playing Solitaire
You can easily enjoy this game series solitaire. While such playings will lack the tension of not knowing the enemy's plan, this can be made up for by rigidly following the orders you give as intended at the time you wrote them.
Playing solitaire is best using the Command system. You do not have to "forget" what the enemy is doing, etc. Play each side (orders and all) the best way you can. Or write up multiple Op Sheets for each side at the beginning and choose one set randomly. During game play, do not write Op Sheets that directly counter the other side's intentions not yet shown by movements on the map. If you do, you will only destroy your own fun. Remember, the Command system was not designed as a limited intelligence tool, but as a limitation on responsiveness.
Play out the Op Sheets you've made up as you intended when you wrote them. Make no modifications to them because of changing circumstances. Assign any Op Sheets you want and force yourself to live with the consequences. The result will be a game that tells you its battle's story, and you can enjoy the fun. Playing solitaire with a scenario's optional historical orders can yield insights into how the actual commanders fought the battle.
Version 4.01/4.02 Developer's Notes
Version 4.0 has become the standard for TCS now and, as such, a history lesson going back to version 3.1 and 3.0 is not necessary. Compared to the momentous changes moving from 3.1 to 4.0, the modifications here are minor, and involve mainly tweaks and the addition of some response to Artillery (vehicles changing to Move Mode, Area Targets being able to self-suppress).
Tactics 101
When faced with the initial complexity of the Tactical Combat Series, new players naturally have questions about how to approach this system. Though the rule set is long, it plays smoothly once players get a feel for the rhythm of a turn. But how should one play the TCS? I'll offer my thoughts here as a long-time TCS player in the hope that new players (and perhaps even experienced ones!) will pick up a trick or two that will be useful for their play.
Like many wargames, the key to winning most scenarios in TCS games is to eliminate the opposing units while keeping your own alive. This is done using direct fire weapons, Artillery, aircraft Sorties, and Assault combat. When you're the active player you can initiate direct fires (SFAs and PFAs) in your Action Phase, and you can respond to enemy activity (Overwatch) during either Action Phase. To eliminate the enemy, you need to spot them and then create local fire superiority, where you can bring more firepower to bear than your opponent and thus create a favorable exchange rate.
At the core, then, is a triad of combat activities that Bob Leonhard summed up, in his book Fighting by Minutes, as Move, Strike, and Protect. The purpose of all three activities is to create local superiority by using your strengths against your enemy's weaknesses (termed dislocation in literature on Maneuver Warfare and its offshoots). Sometimes these three activities can be combined, but generally any action you take in the TCS will have only one of these three activities at its core. And by emphasizing one activity, the other activities generally cannot be undertaken, or at least not at maximum efficiency. Let's look now at several key actions you can take in the TCS through this lens of Move, Strike and Protect.
Op Sheets: The true core of the TCS is the Op Sheet system that Dean Essig developed. This provides a wonderful mechanism that allows you the opportunity to position your units favorably without your opponent being able to respond quickly. In my experience, most TCS players do not use Op Sheets to their full advantage. The tradition in most typical wargames is to move your units into contact and then start rolling dice. Don't do this! Discipline yourself to have all your units on two Op Sheets at all times, one of which is gaining Weighted Turns for a future operation. Do not be content to sit passively in place on the defense and wait for your opponent. Consider how you could bring about local superiority by moving your formations quickly and decisively to strike before your opponent can react. Learn to "dance like a butterfly" to the greatest extent possible, recognizing that a Prep Rating of 7 may slow you down. The basic idea is that if you do not have your units on two Op Sheets and you are not actively trying to outmaneuver or outfox your opponent (e.g., through feints), you are not playing to your best ability.
Fire superiority: Once you have positioned your forces favorably and are in contact with your opponent, you need to destroy the opposing forces through a careful balance of (tactical) Movement, Striking at your opponent's forces and Protection of your own forces. Let's look briefly at some of the tools that the TCS provides to do this.
SFAs: The Suppressive Fire Action is a foundational tool of the TCS which has two main purposes: (1) Striking enemy units through direct Area Fires, and (2) allowing your units to Move tactically by suppressing enemy stacks (to prevent them from firing Overwatch). Against Dug-in troops, an SFA is not a very effective Striking tool, and you will need a lot of time to suppress enemy stacks and attrit them, particularly if they have high morale. This is different from many other tactical games, so do not rely solely on SFAs to get the job done. The effectiveness of SFAs is greatly enhanced by crossfires, so you should always seek to create a crossfire situation, which is, of course, a tactic of choice for attacking forces because it largely neutralizes the Dug-in modifiers. Vehicles are great for creating crossfires, because they are mobile and immune to Area Fires. However, performing an SFA results in marking all your firing units as Fired, which means they are much easier to spot (i.e., are more vulnerable, reducing Protection), and they cannot fire Overwatch except at range 1, which can greatly enhance your opponent's mobility. Make sure you leave units unfired if you need to interdict enemy movements or discourage enemy fires.
PFAs: Point Fire Actions are used to Strike and destroy enemy vehicles, carriers and guns. Tanks are great at this, because they can mass quickly to create local fire superiority, and take out enemy Point targets quickly. One problem, however, is spotting: if enemy guns are Dug-in in Protective terrain, your Point firers may not be able to fire since PFAs can only be used against spotted enemy units.
Artillery: Artillery is definitely the Queen of the Battlefield in TCS, which accurately reflects the situation in most WWII battles. Artillery firepower can be massed quickly (one observer can usually call in multiple Battery fires) and this massing of firepower to Strike does not compromise Protection. Usually when you group units, they become more vulnerable because of stacking and bunching, making them particularly susceptible to Artillery (which is an area effect weapon). But massing Artillery firepower does not add to the stacking or the density of your units, so you can spread out your defending units to give them better Protection while still Striking hard with your Artillery. Artillery is also quite useful in suppressing enemy units to allow you greater tactical Movement free of Overwatch. One great effect of Artillery is that it forces your opponent to disperse in order to protect his units, which, in turn, makes it is harder for them to concentrate firepower and Strike.
Overwatch: One key tool to degrade enemy firepower and maneuver is Overwatch. Whenever your forces are in contact, make sure that you provide Protection through proper Overwatch capability for your maneuvering and firing units. MGs are great for this purpose because their have a favorable range modifier and can both conduct SFAs AND fire Overwatch without limit during a turn. Set up MG stacks to support assaults or protect your flanks against enemy Area targets. Always have an unsuppressed stack to fire OW to protect your moving and firing units, or at least make the enemy pay if they fire at you. Stacks of tanks can be good for this purpose, as long as they do not make themselves vulnerable to enemy Artillery.
Assault Combat: Veteran TCS players use Assaults sparingly, because they are quite risky and are generally only useful against very weak stacks that have been Suppressed. While Assaults speed up the process of eliminating enemy stacks (particularly in good defensive terrain), the attacking units are also vulnerable to heavy losses. Assaults work best against Suppressed, weak stacks with low fire strength and relatively bad morale. When these conditions are met, feel free to Assault, but assaulting in other situations is usually asking for grief. When you do Assault, be sure to (1) Suppress the enemy stack(s) first via SFA or Artillery fires; (2) neutralize supporting enemy stacks via SFA, Artillery, or Smoke; and (3) go in with troops with good morale. Tanks can help but you may well lose a few to AT Rolls, so be careful. If the enemy stack does not contain P-firers or enemy Infantry, then it is extremely vulnerable to vehicles and an Assault with vehicles (or even an Overrun) makes great sense.
Spotting: Learn the distances at which the enemy can spot your units (and vice versa) since this is a key aspect to maneuver. You cannot fire Overwatch at a stack you have not spotted. In addition, unspotted units are much harder to damage with SFAs (by a factor of nearly 50%). This makes high-morale Infantry Dug-in in Protective terrain extremely difficult to dislodge-you usually have to move adjacent and spend many turns firing. Being this close to the enemy, of course, limits the usefulness of your Artillery.
Mortars: Mortars are small, flexible artillery platforms and can do a lot of things (Smoke, Illum, SFAs, Overwatch). Generally it is best to keep your battalion mortar units stacked and hidden away in a town or forest hex to prevent them being targeted. Stacking three 81mm mortars allows you to use them all for Overwatch, and an OW fire with fire strength 12 against a moving Area Target can do some damage (and does not open you to return OW, very important).
Smoke: Smoke can create local fire superiority by blocking fires from enemy units. Use it liberally, both to isolate the battlefield and to protect your own units from fires (or observation for Artillery). Mortar smoke is less useful but can be handy, particularly when enemy units are unspotted and well-protected (so that Area Fires are not effective). Try to end each game with no Smoke ammo left, which means you were using it aggressively and liberally.
Digging in: Dug-in modifiers are excellent Protection for your troops, shielding them from damage and giving them better observation and morale. But digging in has a price: no mobility. Do NOT be afraid to give up the Protection of Dug-in modifiers to gain advantages through other means. One of the key psychological disadvantages of units being Dug-in is that players are generally loathe to move them. Use this to your advantage-screen or ignore Dug-in troops and hit the enemy elsewhere. He then has the choice of leaving his Dug-in position to meet the new threat, or sitting tight and letting you have local fire superiority elsewhere. You can even try to be clever and feint at another point, hoping to convince your opponent to respond with his Dug-in troops, thus removing their defensive benefits. The basic point is to not let yourself become entrapped by being Dug-in: be ready to Move and Strike . . . and you have another Prep Defense Op Sheet gaining Weighted Turns anyway, right?
Fire Table: One key thing to know about the Fire Table is that it is not linear. That is, it takes about 4x the Fire Strength to double enemy losses. For column shifts, 3 shifts will double (or halve) losses, and 5 shifts will increase (or cut) losses by a factor of 4. This means that, to inflict losses most efficiently, players should spread their fires out and not go for the "death ray" killer SFA on one hex. By the same token, it also means that well-protected troops (unspotted and Dug-in in Protective terrain) are shielded from nearly 90% of incoming damage.
Putting it all Together: As you can see, the interplay between unit types and capabilities (tanks, infantry, weapons units, artillery) and the benefits to be gained tactically (terrain, smoke, unit posture, dug-in status, stacking vehicles with infantry, etc.) make for very rich and complicated interactions. This is an accurate representation of combined arms, using the unique strengths of each unit type to better Move, Strike and Protect. Be ruthless in applying mismatches against your opponent. Are his units concentrated to provide better firepower (Striking)? Hammer him by Striking with your Artillery. Does he have masses of tanks (Striking)? Dig your infantry into Protective terrain, use Smoke to shield yourself from fires, and keep your AT guns from firing until the last minute so they remain immune to Point Fires because they are unspotted. Protect your weapons units from enemy tanks by stacking them with Infantry and/or AT guns. Never leave your troops sitting around if you can be doing something more useful. Always keep working on new Op Sheets because that habit will make you more focused and will train you to look for, or create, new opportunities at all times. During each turn, consider the advantages of concentrating your Striking forces, but also the disadvantages of decreased Protection. Try to avoid stacking more than seven steps in a hex without very good reason, as this is generally the best balance between Striking and Protection.
A key habit to learn when you are playing the TCS is to think several game hours ahead and try to shape the battlefield dispositions to your advantage, gaining local fire superiority where you can and preventing the enemy from doing the same to you. You will find that the TCS system provides wonderful incentives for clever and solid play that are not found in other systems, and will be instructive in the nature of combined-arms fighting with WWII-type armies. Your work will be rewarded with a rich gaming experience where each battle provides a unique narrative that, in nearly every case, has a good ring of historical authenticity. As long as you are constantly striving to learn and are not content to simply send your forces straight towards the enemy and start rolling dice, you will become a genuine, and perhaps even feared, TCS player.
Resources for learning the TCS: Multiman-Publishing TCS page: http://www.gamersarchive.net/tcs.htm. You'll find errata, articles on Op Sheets, Tactical Problems, and conversion information to bring all TCS games to 4.02 standards.
Line of Sight Grid
(Chart: a grid with Elevation in meters, 0 to 300 in steps of 20, on the vertical axis and Distance in hexes, 2 to 32, on the horizontal axis, used with 8.3b. Not reproducible in text.)