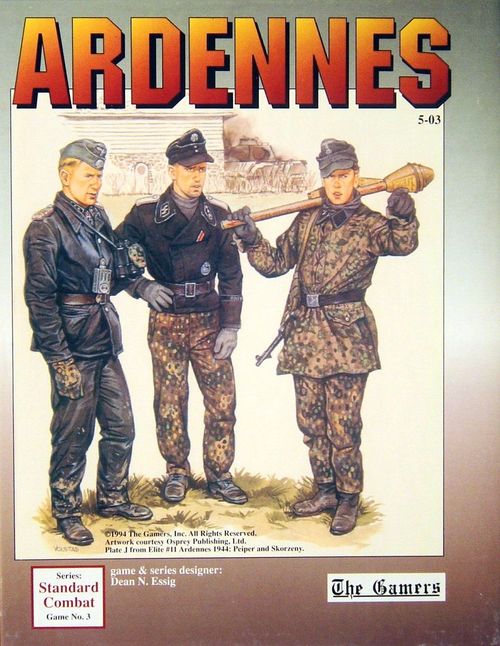
Ardennes
Ardennes Rulebook
Table of Contents
Table of Contents
- Unit Terms & Abbreviations
- Standard Combat Series Core Rules
- 1.0 Sequence of Play
- 2.0 Zones of Control (ZOCs)
- 3.0 Movement
- 4.0 Stacking
- 5.0 Reinforcements
- 6.0 Overrun Combat
- 7.0 Combat
- 8.0 Step Losses
- 9.0 Retreats
- 10.0 Advance After Combat
- 11.0 Exploitation
- 12.0 Supply
- 13.0 Hex Control
- Ardennes: General Special Rules
- 2.0 German Special Rules
- 3.0 Allied Special Rules
- 4.0 Victory
- 5.0 Scenarios
- Charts and Tables
- Designer's Notes
- German Player's Notes
- US Player's Notes
Unit Terms & Abbreviations
- Abn — Airborne
- AG — Assault Gun
- Arm — Armored
- Arty — Artillery
- Bde — Brigade
- Bn — Battalion
- CCA, CCB or CCR — Combat Command A, B, Reserve
- Div — Division
- Divarty — Divisional Artillery
- F.Begleit — Führer Begleit
- F.Gren — Führer Grenadier
- FJ — Fallschirmjäger (Parachute)
- Füs — Füsilier
- Grp — Group
- Inf — Infantry
- KG — Kampfgruppe (Battle Group)
- Mech — Mechanized
- PG — Panzer Grenadier (Armored Infantry)
- PJ — Panzerjäger (Tank Hunter)
- Pz — Panzer (Armored)
- Rgt — Regiment
- Rlbn — Rollbahn (literally route of advance)
- TD — Tank Destroyer
- Tk — Tank
- VG — Volksgrenadier (People's Infantry)
- Werfer — Rocket Artillery
Standard Combat Series Core Rules
The Standard Combat Series games enable both experienced and beginning players to enjoy simple to play and quick to learn games. Every Gamers' Brand game contains separate Series and Game rulebooks. The Series rulebook contains the rules generally applicable to all the games in the series. The Game rulebook gives the details needed for a specific game, including any special rules, scenarios, and set up information. If the Game rules contradict the Series rules, the Game rules take precedence.
The Hex Numbering System
The numbering system identifies individual hexes on the map. If the game uses more than one map, letters identify the map in question. A hex number pertaining to a given map will begin with that map's letter, as in A10.10. The digits before the decimal point indicate the hex row, reading along the map's horizontal dimension from left to right. The digits after the decimal identify the exact hex along the given hexrow, reading along the vertical dimension from bottom to top. Not all hexes have printed numbers, but the numbering applies to all of them.
Only hexes with at least 1/2 the hex showing are playable. Destroy units forced off the map. Unless specifically allowed in a given game, units cannot conduct any sort of off-map movement.
Set Up Notes
Aside from any special notes in the Game rules concerning setup, the following are always true:
- "w/i #" means to set up a given unit within the stated number of hexes (#) of the hex listed, inclusive.
- Units can never start over-stacked, but may be stacked up to the limit.
- Units generally start at full strength and in supply.
- When the notation "inclusive" follows set up boundaries, it means that units may set up anywhere within the given zone including on the boundary lines.
- The second moving player always sets up first.
Cumulative Effects and Rounding
In all cases where a unit is subject to multiple modifiers, the effects are cumulative. A unit halved for terrain and halved for supply in a combat is quartered overall. Retain fractions created by this process until after applying all modifiers, then use the Standard Rounding Rule: round fractions as per .01 to .49 down, .50 to .99 up.
Fog of War
Except when calculating the odds for an attack he has committed to make, a player cannot examine the units comprising an enemy stack. He can observe the stack's top unit only. He may look under any marker(s) that may be covering this top unit. A player cannot cancel an attack after announcing it.
1.0 Sequence of Play
A "game-turn" is a sequence of steps, the order of which is "the sequence of play." Each turn consists of two "player turns." Each player-turn consists of a set sequence. Both players play through their player-turn to finish a game-turn. At the end of the game-turn, advance the Turn Marker and begin the process again. Players must follow the Sequence of Play strictly in the order given. Ardennes's own Turn Sequence is given below, under "1.2 Turn Sequence."
First Player Turn
- Movement — Place any phasing-side reinforcements into the entry hexes called for by the Order of Arrival. The phasing player can move his units. Phasing units can conduct overrun combat.
- Combat — Phasing units adjacent to enemy units can attack.
- Exploitation — Exploitation-capable phasing units can move. They may also overrun.
- Supply — The phasing player ensures that each of his units are in supply. If not, mark them Out of Supply.
Second Player Turn — Repeat the above switching roles with your opponent.
2.0 Zones of Control (ZOCs)
Zones of Control (ZOCs) represent a unit's ability to inhibit enemy movement around it. The ZOCs of enemy units are called Enemy Zones of Control (EZOCs). Friendly ZOCs have no effect on friendly units.
- 2.0a Only units with a printed Attack Strength (not Barrage, Supply Range or Defense only) of 1 or more have ZOCs.
- 2.0b A unit's ZOC consists of hexes adjacent to it that it could move into during regular movement.
2.1 ZOC Effects
- 2.1a Pay +2 MPs to enter a hex containing an EZOC. Given the MPs, units can move directly from EZOC to EZOC and can move into and exit any number of EZOCs.
- 2.1b Units that begin a phase in an EZOC cannot overrun in that phase. Units that begin the Exploitation Phase in an EZOC cannot move.
- 2.1c A unit can attack only units in its ZOC.
- 2.1d Remove one step from a stack that retreats into an EZOC. Retreating stacks lose one step total, not one step per unit. Do this for each EZOC hex retreated into.
- 2.1e EZOCs do not inhibit Advance After Combat (10.0).
- 2.1f EZOCs block supply lines (12.1a).
- 2.1g Multiple EZOCs give no additional effect. Friendly ZOCs have no effect on EZOCs. A hex can have friendly ZOCs and EZOCs simultaneously.
- 2.1h Friendly units negate EZOCs in their hexes for Supply purposes ONLY.
Movement is prohibited across river hexsides except at bridges — the ZOC extends only across the bridge.
3.0 Movement
During his Movement Phase, the player can move as many or as few of his units as he wants, each as far as it wants within its Movement Allowance and any other applicable restrictions. The phasing player moves units individually or as stacks, keeping track of remaining Movement Allowance by expending Movement Points. Units must follow a contiguous path through the hex grid. The movement of one unit (or stack) must be completed before starting to move another.
3.1 How to Move Units
- 3.1a The player can move all, some or none of his units.
- 3.1b Each unit has a Movement Allowance (MA). A unit cannot expend more Movement Points in a single phase than its Movement Allowance (EXCEPTION: see 3.1e).
- 3.1c Calculate movement using Movement Points (MPs). Each hex or hexside feature costs a special amount of MPs per the Terrain Effects Chart. The player must keep a running total of the number of MPs each unit expends while it moves.
- 3.1d Movement Allowances are independent and one unit's expenditures do not affect other units. A unit cannot save unused MPs or transfer them to another unit.
- 3.1e A player can always move a unit (with an MA greater than 0) one hex — regardless of the MP cost involved. Such movement cannot be through or into prohibitive terrain nor can it be used to perform an overrun. Movement Allowance modifications (such as from supply) and EZOCs have no effect on a unit's ability to use this rule, although units that begin the Exploitation Phase in an EZOC still cannot move.
3.2 Terrain Effects on Movement
- 3.2a Each hex and hexside feature costs Movement Points per the Terrain Effects Chart. A unit must pay the total MPs required to enter a hex before entering that hex, with the exception of units moving using rule 3.1e.
- 3.2b Units may use roads (or road-like features such as railroads, trails, tracks or bridges) only when following a continuous path along the road to enter a given hex. Such units pay the road movement cost and ignore the MP costs of the hex entered or hexside crossed.
- 3.2c A hexside feature crossed that is not negated by a road adds its cost to that of the hex.
- 3.2d Units cannot enter or cross prohibitive terrain (unless negated by roads).
3.3 Restrictions on Movement
- 3.3a Units cannot enter enemy occupied hexes.
- 3.3b Only friendly units move during a friendly phase. Combat results can force enemy units to retreat.
- 3.3c The map edge is a "hard boundary." Destroy units that cross it and count them for victory purposes.
4.0 Stacking
A stack occurs when a hex contains more than one unit. Each game has its own stacking limit.
- 4.0a Enforce stacking at each phase's end, at the instant of overrun and at the end of an Advance After Combat. In the overrun case, count both overrunning units and any units which just happen to be in the hex. Reinforcements can overstack initially, but these stacks must break up by that phase's end. When stacking is enforced, kill off any excess stacking found in any hex (owning player's choice of units). In the case of a stacking check at the moment of overrun, simply put the moving units back into their starting hex and redo their move (do not kill anything). Units which are overstacked after retreating due to a combat result (overrun or regular combat) do not have to kill off excess stacking until the end of the next friendly Movement Phase.
- 4.0b Game markers (Out of Supply, etc.) never affect stacking.
- 4.0c Order of Stacking. The player can arrange his stacks any way he likes with the following restriction: the top unit in every stack must have an Attack Strength (not Barrage, Supply Range or Defense only) of one or more (if such a unit exists in the stack).
5.0 Reinforcements
Reinforcements are units that enter after play begins. Place them into their entry hexes at the beginning of their entry turn's Movement Phase, into the hex containing the entry area designation (if several hexes are given, they may be split up), and start their movement there. Reinforcements always enter supplied. A player cannot delay the entry of reinforcements.
- 5.0a Reinforcements can overstack on placement provided they split up during that phase.
- 5.0b Reinforcement placement does not cost MPs. Reinforcements can use their full MA in their first phase.
- 5.0c EZOCs have no effect on reinforcement placement. Do not place reinforcements into hexes containing enemy units. If enemy units block a reinforcement's entry hexes, the reinforcements arrive in any hex at or within 10 hexes along the map edge. Blocking includes surrounding map-edge entry hexes in such a way that will result in overstacking losses to the reinforcements. If entry occurs on the map (that is, not on an edge) and the hex is blocked, the units enter anywhere at or within 5 hexes of the intended hex.
6.0 Overrun Combat
Overrun Combat is combined movement and combat. At a 2 MP cost, units can conduct an "overrun attack" during the Movement or Exploitation Phases. To overrun as a stack, units must begin movement stacked. Units that begin the phase in an EZOC cannot overrun. Units that overrun can stack (adjacent to the target hex) with units that are not overrunning and that hex's stacking total must be within the stacking limit. Adverse combat results only affect the units actually engaged in the overrun.
Procedure: The player moves a unit or stack adjacent to the target hex, paying this adjacent hex's terrain cost and any EZOC cost. The units then expend 2 MPs for the overrun. The player calculates the odds, rolls the dice, and applies the results from the Combat Results Table as in any combat. If all defending units vacate the target hex, the overrunning units must enter it.
- 6.0a Resolve overruns like any combat (see rule 7.0) but resolve them during the Movement Phase immediately after announcing them. Overruns are not resolved in the defender's hex — at all times the attacking and defending stacks are in adjacent hexes — just like any combat (7.0).
- 6.0b More than one stack can never overrun a single target at once.
- 6.0c Units can overrun only those target hexes that would cost them 2 or less MPs to enter in regular movement. For this rule, use the target hex's terrain cost only, ignore EZOCs.
6.1 Restrictions on Overruns
- 6.1a Only units allowed to move in the Exploitation Phase can overrun during that Phase.
- 6.1b An attacking stack can overrun only once in a phase. A given target hex can be overrun only once in a phase — units in that hex can be overrun again should they retreat to another — yet to be overrun — hex. Units can overrun during the Movement Phase and attack normally during the Combat Phase. Properly managed, a unit can attack up to three times in a turn.
- 6.1c Supply status has no effect on a unit's ability to overrun, although being out of supply may reduce a unit's Movement Allowance and Attack Strength.
- 6.1d Units cannot use roads (and road-like features) to execute overruns. Units can use a road to get to the hex adjacent to the overrun target, but cannot use the road to lessen the cost of the target hex to allow overrun.
- 6.1e Units (overrunning and stationary combined) cannot overstack in the overrun attack hex (see 4.0a).
- 6.1f All game-specific modifiers (air points, combined arms modifiers, etc.) apply to overruns like any other combat.
6.2 Overrun Results
- 6.2a Overrun attackers can Advance After Combat, but regardless of the result the overrun ends the regular movement for them. The attacking units must enter (or traverse) the defender's hex if it becomes vacant during an overrun.
- 6.2b Apply any retreat results the attacker gets in an overrun.
7.0 Combat
Combat is the act of attacking one hex. A unit can conduct combat against any enemy occupied hex in its ZOC. Other than overruns, combat occurs only in the Combat Phase. A player is never forced to attack. Units must defend if attacked. Units within a stack cannot be attacked singly — stacks always defend together. Units from more than one hex can engage in the attack on a single hex, but only one hex can be the defender. Execute attacks in any desired order. Attacks are announced and resolved one at a time — there is no need to announce all attacks in advance. To announce an attack, the phasing player reveals all the units involved in the attack, and then the defender reveals the defending units.
Procedure: After announcing the attack, the combat's odds are determined (see below) and the correct odds column on the game's Combat Results Table is found. The phasing player rolls two dice. Players read the result and apply it as listed below.
7.1 Combat Results
The Combat Results Table (CRT or Combat Table) gives results that affect the attacker (A), the defender (D), or both:
- # — Number of steps lost
- r# — Number of hexes to be retreated
A result of A1r1 would mean the attacker must lose one step and retreat one hex. The attacking forces must lose a total of one step (strongest unit) and all attacking units must retreat one hex. Execute the result immediately upon determining it. After executing it, move on to other combats. The defender always executes his result first.
7.2 Restrictions on Combat
- 7.2a No unit must attack.
- 7.2b No unit can ever divide its strength between more than one combat. Any number of units can attack in a single attack, and attacks can be made from any direction or set of directions. While no individual unit in a stack can divide its attack, stacks always can. In other words, units stacked together could attack different hexes, but no single unit can contribute to more than one attack.
- 7.2c Attack all units in a hex as a single Defense Strength. The defender cannot withhold units in a hex from a combat.
- 7.2d Units can attack or be attacked only once in a Combat Phase. Units that retreat to another yet to be attacked hex will not participate in that combat; only the original units in the hex defend, yet any and all adverse combat results apply to the entire stack. Units can make only one overrun attack in a phase. Units which overrun are eligible to attack in the regular Combat Phase as well.
- 7.2e Units with a printed Attack Strength of zero can participate in an attack with other non-zero units. While they add nothing in the way of Attack Strength, such units can help absorb step losses and Advance After Combat. Units without an actual printed Attack Strength (such as Barrage, Supply Range or Defense only) cannot participate in an attack.
7.3 Terrain Effects on Combat
Combat into or across certain terrain types, as listed on the Terrain Effects Chart, is prohibited. Furthermore, units cannot attack into terrain they might not otherwise be able to move into from their current hex. Generally, terrain modifies attacking and defending combat strengths as a multiplier. Terrain affects only those units that are subject to a condition. Usually, only the terrain of the defender's hex and the hexsides between the attackers and the defender affect combat.
7.4 Odds Determination
To determine the combat odds, compare the total modified Attack Strength with the total modified Defense Strength. Divide both numbers by the smaller number of the two. Apply the rounding rule to the results of the divisions and express the two numbers as a ratio attacker to defender. Odds columns are limited to those printed on the table. Resolve attacks at odds greater than the table's right-most column on that column. When called for, column shifts for such attacks also start from the right-most column (there are no imaginary columns to the right of the right-most column). Attacks found to be at odds less than the left most column incur the following: the attacker loses one step and the defender is unaffected — do not roll on the table (this rule also applies to attacks which are shifted off the Combat Results Table's left side).
8.0 Step Losses
Steps allow a unit to take damage in increments. The unit's side displayed shows a unit's current strength. Most units have a full and a reduced strength side. Full strength units that take a step loss are flipped over and become reduced strength. Reduced strength units which take a step loss are destroyed and removed from play.
- 8.0a When a result calls for a step loss, the first step lost must be from the side's strongest unit. The "strongest unit" being that with the highest printed Attack Strength (for the attacker) or highest printed Defense Strength (for the defender).
- 8.0b All units in a particular combat must absorb one step loss before any single unit of them absorbs two.
- 8.0c Given 8.0a and 8.0b, the owning player is free to distribute step losses among any units he wants, provided they were actually involved in the combat. Step losses beyond the absorption capacity of a side are ignored.
- 8.0d Some units have only one step. These units have printing on only one side. A single step loss eliminates any such unit.
9.0 Retreats
- 9.0a Retreats are given as the number of hexes the affected units must retreat. Unless using the "no retreat option" (9.2, below), all of a side's units in a combat must retreat that number of hexes.
- 9.0b Units can only retreat into or through hexes that the units could move through during movement. Units which cannot retreat or continue their retreat for this reason must lose one step per retreat hex the stack cannot do. The owning player selects the unit or units that take these losses. Note: that is one step from the stack, not per unit, for each hex not retreated.
- 9.0c Retreat is always given in hexes, not Movement Points. Except where prohibitive terrain prevents retreat, terrain has no effect on the retreat's length.
- 9.0d Any hex containing an EZOC (friendly units do not negate this) which a retreating unit enters during its retreat costs the retreating unit one step. This loss is in addition to the combat result itself. A stack must lose one step, total, per EZOC hex entered. The owning player chooses the unit to lose this step.
- 9.0e Retreating units can stay together as a stack or retreat using separate paths.
9.1 Retreat's Path
- 9.1a The owning player retreats his own units.
- 9.1b Each retreat path hex must be farther away from the unit's original hex than the last (e.g., the second hex retreated is two hexes away from the combat hex).
- 9.1c If possible, the unit must retreat toward a supply source.
- 9.1d If possible, the unit may avoid hexes containing an EZOC. When determining a retreat path, a unit may avoid EZOCs even if doing so violates rule 9.1c.
9.2 No Retreat Option
When the Combat Results Table calls for one or more retreat hexes, the owning player can opt to convert any retreat amount into step losses, on a one step per one hex basis. Therefore, if the defender suffers an "r3" result, he may opt for any of the following: retreat 3, no step loss; retreat 2, one step loss; retreat 1, two step losses; or no retreat, three step losses. The owning player can choose any combination of retreat hexes and step losses to fulfill his retreat result, provided the total equals the table's retreat result. Again, step losses affect single units, retreat hexes affect the entire force involved in the combat.
10.0 Advance After Combat
Any time an attack causes the defender's hex to become vacant, attacking units can occupy the hex. The attacking player chooses which units, if any, he wants to advance with. If the defender retreats further than one hex, only exploit capable units can advance as many hexes as the defender's retreat result. Note that even if the defender expends step losses to cover part of his retreat result, the Advance After Combat is equal to the original result. The defender's original hex must be the first advance hex. After entering that hex, advancing units can go anywhere (they can split up or stay together) — except for hexes containing enemy units or prohibitive terrain. While advancing after combat, units ignore EZOCs. Any unit involved in the combat can Advance After Combat (involved meaning it contributed at least a zero Attack Strength to the combat). Only exploitation capable units, however, can advance more than one hex. The stacking limit must be followed at the end of any advance.
- 10.0a If the combat destroys the defender leaving an unfulfilled retreat result, the attacker can advance the retreat result's number of hexes.
- 10.0b Calculate advances, as retreats, by number of hexes, not Movement Points.
- 10.0c The defender cannot Advance After Combat.
- 10.0d Attacking units must advance into (or through) the defender's hex if it becomes vacant during an overrun attack.
11.0 Exploitation
The Exploitation Phase allows friendly units that are specified as exploitation capable to move up to their full Movement Allowance. They may also conduct overrun attacks during this phase.
- 11.0a Generally, only units with a yellow box around their unit values are exploit capable. The Game rules can define conditions that allow other units access to the Exploitation Phase.
- 11.0b A unit that is in an EZOC at the Exploitation Phase's beginning cannot move or overrun in the Exploitation Phase.
- 11.0c Units which are not exploit capable (or not otherwise allowed access to the Exploitation Phase) cannot apply 3.1e to move.
12.0 Supply
SCS games simulate supply in an abstract "trace" manner. Individual games vary in the exact manner of handling supply.
Procedure: During the Supply Phase, the phasing player checks each of his units to determine if a supply line trace exists. If a trace is not possible, he marks the unit with an Out of Supply marker. If, in a later Supply Phase, a supply line trace exists for such units, the owning player removes the Out of Supply marker.
12.1 Tracing Supply Lines
- 12.1a A Supply Line Trace is a path free of enemy units and EZOCs between each unit and the side's supply source. Generally, supply line traces may be any contiguous hex length. The Game rules list the "Supply Source" for each side. Impassable terrain hexes/hexsides, enemy units, and non-negated EZOCs block supply line traces. If the path used is not blocked, a supply trace is possible. If the path is blocked (and no other unblocked path is available — the player may check any potential path), mark the unit Out of Supply. The owning player checks each unit or stack for a supply line trace independently.
- 12.1b After a successful trace, units are "in supply" until the next Supply Phase — regardless of changing circumstances. Conversely, Out of Supply units must wait until (at least) the next Supply Phase to qualify as being in supply.
12.2 Out of Supply Effects
The Game rules specify the Out of Supply effects. A unit is subject to the Out of Supply effects from the moment it receives a marker until it is removed or the unit is destroyed. (See "1.14 Effects of Being Out of Supply" below for the effects used in Ardennes.)
13.0 Hex Control
Control of a hex is often important for determining victory or other game functions. A player can gain control of a hex by having one of his units occupy or pass through the hex. A ZOC is not sufficient to gain control of a hex. Hex control can change back and forth during the course of a game. In some games the term "hold", "capture" or "take" may be used instead of "control".
Ardennes: General Special Rules
1.1 Scale
Each turn is one day, each hex one mile, units range in size from battalion through brigade.
1.2 Turn Sequence
Note the position of the Supply Phase in the below sequences, it is different from the SCS basic outline.
German Turn
- Weather Determination
- US Air Point Determination
- German Movement Phase
- US Barrage Phase
- German Barrage Phase
- German Combat Phase
- German Supply Phase
- German Exploitation Phase
- Clean Up
US Turn
- US Movement Phase
- Bridge Blowing & Repair
- US Barrage Phase
- US Combat Phase
- US Supply Phase
- US Exploitation Phase
- Clean Up
There is no German Barrage Phase in the US player turn — that isn't a typo.
1.3 Stacking
A maximum of 6 steps can stack in any hex.
1.4 Step Losses
Flip a unit to its back-side when it takes its first step loss (unless the unit has but one step, in which case destroy it). Place a step loss marker under the unit to mark the next step lost, etc. When the number of hits equals the step size listed on the back of the counter, the unit is dead. Until the unit dies, after the first flip, the unit's combat strength is unaffected by additional step losses.
EXCEPTION: Artillery units have their mode shown by the side of the counter facing up. For these units (which are all single step anyway), step loss is not shown by flipping their counter.
1.5 Special Movement Effects
- 1.5a Units can never move as stacks, all units must move individually, and a unit must finish its movement for the phase before a player can move other units. Whenever a unit moving along a road enters a hex containing one or more other friendly units, moving ones must pay +1 MP. Apply this cost to Supply Trace counts as well. Do not count Greif Teams or 0-stacking point Supply Dumps for this purpose.
- 1.5b Map Traffic Jams. The roads in these hexes are negated for turns 1 and 2. NEVER apply both 1.5a and 1.5b — apply only that which most hinders movement. Greif Teams can always use the road movement costs — regardless of Map Traffic Jams. Apply this rule to Supply Trace counts as well.
1.6 Mechanized Units
The wintry Ardennes forest is terrible terrain for armored warfare. Mechanized units are penalized during combat in Forest or City hexes. They also have their own Terrain Effects on Movement costs.
Mechanized units get an additional shift of one to the left when attacking in Forest or City hexes (apply this shift only if half or more of the attacking combat strength is mech).
Mechanized Units consist of the following: Armor or Panzer; Assault Gun; Tank Destroyer or Panzerjäger; Mechanized Infantry; Armored Recon; All Artillery (Armored or otherwise) (for movement purposes only); Engineers; Supply Units.
1.7 Special Overrun Effects
As an exception to the standard SCS rules, units can overrun hexes regardless of the actual MP cost of the target hex. (The standard rules state that the hex must cost 2 MPs or less in regular movement.) Because of this exception, the following are true:
- 1.7a The Overrun MP cost is 2 MPs (standard) OR the cost of the target hex in regular off-road movement (whichever is more). Ignore EZOC costs in this determination. Ignore 1.5a as it applies to the target hex.
- 1.7b Furthermore, a hex can be overrun up to twice in a given phase (overruns are not restricted to one attack per phase as in the series rules).
1.8 Reserves
The proper reserve usage is the only way the player can access the Exploitation Phase. The counter-mix limits the number of Reserve Markers available to the players. (These are recycled each player-turn, so no hoarding is possible.)
- 1.8a Place Reserve Markers on any friendly unit or stack at any time during the owning player's regular Movement Phase. Only units which have not moved in the current game turn, which are not Disorganized, and are not adjacent to any enemy unit can be marked. Greif Teams and Supply Units can never be placed into reserve.
- 1.8b Units, while in Reserve, cannot move, or conduct any sort of Barrage or combat. Should a Barrage attack DG them, remove the Reserve marker.
- 1.8c Remove any remaining Reserve markers (and all DG markers) from your units during your Clean Up Phase.
1.9 Exploit Capable Units
Only units placed into Reserve during the Movement Phase can move and overrun during the Exploitation Phase. Release reserves at the beginning of the player's Exploitation Phase. There are no units which are automatically eligible for the Exploitation Phase. This fact also applies to advance after combat — no unit in this game can advance after combat further than the defender's hex itself — regardless of the defender's retreat result.
1.10 Artillery and Barrage Attacks
Artillery units can conduct barrage attacks against units at or within their range. All artillery units (except American 8-inch guns and German Werfer (Rocket Artillery) units) have a 3-hex range. Eight-inch guns and Werfers have a 4-hex range. Count range starting with the hex adjacent to the artillery unit to the target. Artillery can barrage targets from range one to their maximum range, inclusive. No Line of Sight or spotter is required (although Barrages without spotters get a backwards shift on the Barrage Table). Resolve Barrage attacks in any of the Barrage Phases assigned to the player. An artillery unit can fire in every one of the owning player's Barrage Phases. When available, airstrikes can be incorporated into these segments as if they were other artillery units.
1.10a Modes. All artillery units have two modes — one assisting movement and one assisting fire. Show the current mode of each artillery unit by the side which faces up. In each player's Movement Phase, the player can flip any number of artillery units from one mode to the other, provided those units have not yet moved. Mode change does not affect the unit's ability to move in that phase (given its new MA). Mode cannot be changed at any other time. Mode has no effect on the artillery unit's ability to fire or move — except the values allowed for each.
1.10b Restrictions on Artillery.
- A) Artillery cannot make more than one barrage attack per friendly Barrage Phase. Artillery units cannot split their fires.
- B) Any number of artillery and airstrikes can engage in a single Barrage Attack and resolve these attacks on the Barrage Table.
- C) Artillery belonging to a division can only fire a Barrage Attack against a hex if at least one unit from its division (or itself) is adjacent to that hex. Non-divisional artillery has no such requirement.
- D) The target hex's terrain affects the Barrage attack according to the Terrain Effects on Movement and Combat Chart.
- E) In ground combat, each Artillery unit in a hex has a defense-only combat strength of 1.
- F) Out of Supply artillery fires at 1/2 Barrage strength.
- G) Disorganized and Reserve units cannot make Barrage attacks.
- H) Artillery in a Mode with a zero Movement Allowance which is forced to retreat as a combat result of combat is destroyed instead.
1.11 Disorganized Status
Units can become Disorganized (DG'd) as the result of Barrage attacks. At the time of the result, indicate the DG'd status of the stack by placing a DG marker atop it. Remove any Reserve Marker from the stack. All units in a hex which get a DG marker are DG'd except Supply Units and Hidden Greif Teams which are never affected by DG results.
- 1.11a DG'd units suffer the following effects: they cannot Attack or Barrage; they Defend and Move x1/2; and have no ZOC.
- 1.11b Remove all DG markers from your units in your player-turn's Clean-Up Phase.
1.12 Weather
The Weather Marker's current position on the Weather Track gives the weather for that turn. The Weather Track has several categories ranging from Soup to Crystal Clear. The Weather changes as the Weather Marker moves from endpoint to endpoint along this track.
- 1.12a Each scenario gives the initial Weather Marker position. At the beginning of each German Player Turn, the German player rolls two dice to determine any change to the Weather Track according to the Weather Change Table. Move the Weather Marker the number of boxes and direction given by the result (the marker can never move further than the left-most or right-most boxes and any excess change is lost).
- 1.12b The only effect of the Weather Marker's position is the column on the US Airpower Table the US player uses to determine the number of Air Points he has available during the turn in the following US Air Point Determination Phase.
1.13 General Supply Rules
Both sides have their own special supply rules. Rule 1.14 applies to both.
1.14 Effects of Being Out of Supply
- Attack strength is x1/4
- Defense strength, and Barrage strength are x1/2
- Mechanized unit movement is x1/4
- Other units' movements are x1/2
- These units cannot be placed into reserve.
2.0 German Special Rules
2.1 Operation Greif and the 150th Panzer Bde
The units of Operation Greif (the Greif Teams A through D) and the three Kampfgruppen of the 150th Panzer Bde represent the German effort to insert commando teams into American rear areas to increase both chaos and hold critical terrain features. The two sets of units are very different in their capabilities and have separate rules as follows.
2.1a 150th Panzer Bde. The 150th Panzer Bde was somewhat equipped with American equipment and good English speakers. Its only advantage is that its units do not pay the EZOC movement cost when entering Allied ZOCs.
2.1b The Greif Teams. The Greif Teams were much better off than the 150th Panzer Bde, but only had a handful were successful — these are the only ones represented. Greif Teams have a Hidden ("Hide") and Open modes shown by the counter's side facing up. They have the following effects:
-
A) Hidden OR Open Greif Teams never pay the EZOC movement point cost or affect other units (or are affected) by the Traffic Jam rules (1.5).
-
B) While Hidden, the units remain on the map, have no defensive ability, do not count for stacking, and allow US units to traverse their hexes with no ill effects (except for possible traffic redirection, or extra MP costs). Unlike Open teams, Hidden ones can move freely using their Movement Allowance and completely ignore all units (even Allied) they choose to move through. Hidden Greif Teams are completely unaffected by attacks or barrages into their hexes. US units can even advance after combat into their hexes with no ill-effect to either side. (Open Greif Teams are not so lucky — they are affected by these results like any other unit.)
-
C) Hidden Greif Teams (only) can "redirect traffic". Only when the US player moves a unit into a Greif Team's hex, the German Player announces if he wishes to 'redirect traffic.' If so, the US player checks for detection. He rolls one die on the Greif Team Discovery Table. If the team is destroyed, remove the Greif Team from play and no redirection happens. If the roll on the table fails, the desired redirection occurs automatically. Do not roll on the table if the German player chooses not to redirect traffic.
To redirect traffic: the German player decides which road to send the US unit down. Regardless of where the US player wanted the unit to go (even if he wanted it to stop in the Greif Team's hex), the US unit must move down that road 5 MPs and cannot turn around, stop, leave the road, or change direction until it hits a village, city, crossroads, the map edge, or has expended 5 movement points (the 5 MPs are completely independent of the units movement allowance; consider them a 'bonus'). Once any of these events occur, it must stop its movement for the phase in the hex it is in. A US unit can never be redirected more than once in a single phase — even if it enters another Greif Team's hex while expending its 5 MPs of redirection.
-
D) Whenever the German player wishes, a Greif Team can become "Open". This change can be done at any time and in any phase (including the enemy's). (It is possible to become Open right as the US player points at a bridge in an attempt to blow it or announces an attack — but such an announcement must occur BEFORE the dice roll [in bridge blowing] or odds determination [in combats].) Flip the Greif Team to its Open side and place the team in either the hex it is in or in any of the six hexes adjacent to it. While "Open", the Greif Team becomes the same as any other German unit on the map with one step, and a defense strength. Open Greif Teams can never become Hidden again. Greif Teams cannot become open in a hex containing Allied units.
2.2 Operation Stösser
The von der Heydte Parachute Kampfgruppe represents the war's last German airborne operation. The German player can use it either as another ground unit or in an air drop on turn one. If the player chooses to use it as a ground unit, it behaves as any other German unit. If he uses it as an air drop, apply the following.
- 2.2a As the first thing during the first turn's German Movement Phase, the German player selects the drop hex for the von der Heydte KG by placing the von der Heydte Drop Marker in it.
- 2.2b When the German player finishes all movement in that first Movement Phase, he must drop the Parachute Kampfgruppe. Go to the marked hex. The German player identifies the "1" hex direction of choice and numbers the hexes around the marked hex clock-wise from that hex. Roll one die to determine the direction of the scatter. Roll another die. The second die determines the distance the unit scatters. If the result is off map, on top of a US unit, or if the distance scattered is 5 or 6, destroy the von der Heydte unit. Otherwise, place it in the determined hex.
- 2.2c Once on the game map, the Kampfgruppe is a regular German unit except that it is free from supply concerns. On the turn of the drop, the Kampfgruppe cannot move.
2.3 Engineers and Bridge Building
The German engineer units have an "Engineer" side and a "Bridge" side. The engineer side allows the unit to move. The bridge side represents emplaced bridges and in all river hexsides adjacent to the unit.
- 2.3a To switch between an engineer unit's modes, the unit must not move at all during the regular Movement Phase. At the end of the phase, flip the unit over.
- 2.3b Bridge units (when on their Bridge side) count for unit stacking, and give an additional +1 hexside cost.
- 2.3c German built bridges cannot be blown by US engineers. The German player cannot repair bridges like the US player — he must use engineer units to "emplace" bridges.
- 2.3d Engineers with emplaced bridges are destroyed if US units enter their hex (emplaced bridges cannot retreat). These bridges cannot be captured and used by the Allies — they are instantly destroyed instead when an enemy unit enters their hex. Note that while engineers have a defense strength of one, emplaced bridges do not.
2.4 Supply Units and Movement of Supply
The German player has a number of Supply units. Each Supply unit has its own movement ability, has no defense strength, and has three steps (for stacking purposes only, these steps can never be used to absorb combat losses or be attacked using the CRT or Barrage Table — if enemy units enter the Supply Unit's hex, destroy the Supply Unit). Supply units cannot enter Reserve status, retreat or advance as a result of combat. Supply Units can never move adjacent to enemy units. Should they find themselves adjacent to the enemy because of enemy movement, there is no ill-effect, nor do they have to retreat. Supply units never become DG'd.
2.5 German Supply
German supply is handled in two ways: The Eastern Zone and Supply Units.
- 2.5a The Eastern Zone. Any German units which can trace a 5 hex or less path free of unnegated EZOCs, and enemy units to anywhere into the Eastern Zone (defined below) is automatically in supply. Ignore terrain and MP costs for Eastern Zone supply — count only hexes. The Eastern Zone consists of all hexes east of the Our River or any hex east of Bxx.10 which is north of B48.10 (inclusive)
- 2.5b Supply Units. All supply units can supply any unit for which they can trace a 10 MP or less path free of unnegated EZOCs, and enemy units. Count these MPs using Mech MP terrain costs (as well as the special rate for Secondary Roads for Supply Purposes) — Stacked hexes and Map Traffic Jams (see 1.5) do affect this count. These counts are always made from the Supply to the Unit. The Supply Trace need only get to a hex adjacent to the unit being supplied — regardless of terrain, the supply can get from that hex to the unit.
- 2.5c Supply Phase Supply. All units which can trace appropriately to either a Supply Unit or the Eastern Zone are in supply — those which cannot are out of supply.
- 2.5d Captured Supply. Captured American dumps can be used exactly like regular German Supply units except that they cannot move. The German player can blow any captured dump during any German phase. To blow a captured dump, simply pick it off the map and place it in the dead pile — no die roll or unit is needed.
3.0 Allied Special Rules
3.1 Bridge Blowing, Engineers, and Bridge Repair
The US Player can make up to three bridge blowing or repair attempts per US Bridge Blowing Phase. Only one of these attempts can be made against a single bridge per phase. Use the Bridge Blowing or Bridge Repair Tables as appropriate. There are no engineer units on the Allied side, the player merely points at the bridge he wishes to attempt to blow (or repair) and makes a roll on the table. Bridges cannot be blown if the bridge hexside is one of a hex containing German combat unit or open Greif Team, if the bridge in question is a German-built one, or if the Germans were the last to cross it. An attempt to blow a bridge which is thwarted by a Greif Team which flips to Open at that moment counts as used.
The US player (only) can attempt to repair a blown bridge by using the Bridge Repair Table. The same conditions apply to bridge repair as to bridge blowing.
3.2 Airpower
Just after Weather Determination, the US Player rolls two dice according to the Weather to determine the number of Air Points he will have available for the coming game turn. These points can be used in either the German Player turn (to assist defenses or in the US Barrage Phase) or in the US Player turn (to assist attacks or to conduct barrages). Unused Air Points are lost and cannot be saved from turn to turn.
- 3.2a Air Points can be used to generate column shifts (in the direction appropriate to the US player) to assist Allied ground units in combat as attackers or defenders OR to make independent Barrage attacks (like artillery, but with no range limitations).
- 3.2b Each Air Point expended in attack or defense in a combat generates one column shift to benefit the US forces in the combat. Any number of shifts can be applied to a single combat.
- 3.2c Each Air Point generates a barrage attack of 5 points and any number can be used in a single barrage. Air Points can be used in conjunction with artillery barrage strengths.
3.3 US Supply Dumps
The US Supply Dumps can supply US units, but also exist for the German player to capture and use. The US player cannot destroy these dumps (the Germans can). These dumps have no combat strength or step size (they do not count for stacking). They cannot move, nor interfere with unit movement. Should the German player enter a hex containing a US Supply Dump, flip the dump over, if it is real convert it into a German Supply Dump. A former US dump (under new German management) can be destroyed in the same way as any other German dump. The US player can never capture German dumps, even if they were once American — they are destroyed instead.
When needed, the US player can use these dumps for US supply needs (following the same rules for German Supply Units). Dumps (German or Allied) can never spot for Barrage purposes.
- 3.3a Dummy and Real Supply Dumps. The US player has a number of real and dummy supply dumps to place on the map. In all ways, real and dummy dumps behave in the same ways, except when the German player enters the dump's hex — real dumps become German Supply Dumps, dummies do not. The US player cannot recapture these dumps, destroy them instead.
- 3.3b Liege. Liege contains one of the largest dumps in Europe. All city hexes of Liege controlled by either side act as inexhaustible supply heads with a range of 5 hexes. They function much like the German Supply Zone. The last player through each city's hex owns that hex for supply purposes.
3.4 US Supply
Allied units are in supply if they can trace to a US Dump (in the same manner as the Germans) or trace a path of 3 hexes (or less) to a road and then continuous road hexes to the west, south, or north map edges which are free of unnegated EZOCs or enemy units (ignore Hidden Greif teams). If they cannot, they are out of supply.
4.0 Victory
To keep the Allied player guessing about the actual purpose of the German offensive, the German player must choose a victory option from the list below. Each has its own problems and benefits and they were set up so as to keep the Allied player in the dark, yet to avoid giving the German player any particularly easy options.
If the German player fulfills the chosen victory conditions, the Germans win. Apply the Minor Victory Conditions below if the German player is unsuccessful in the bid to win big.
4.1 Victory Options
Antwerp — The German player must exit 60 attack strength points and a Supply Unit off the north-west corner of Map A on the west side of the Meuse. Any road hex will do.
Liege — The German player must capture every contiguous city hex of the city of Liege and all those hexes must be occupied by German units at the end of the game.
Paris — The German player must exit 60 attack strength points and a Supply Unit off the edge of Map A via Entry Hex J or hex A12.35 (Givet).
Total the VP values of all cities controlled by the German player at the game's end. A city hex is controlled if the German player was the last to move units through the hex or if he currently occupies the hex. Greif Teams (open or not) can never capture Victory Point cities by themselves — a "real" German unit must enter the hex to capture it. In multi-hex cities, the VPs are only awarded if the German player controls every hex of the city in question.
4.2 Minor Victory Conditions
- Massive German Victory (See above 4.1)
- Major German Victory — 24 or more
- Minor German Victory — 19 to 23
- Minor US Victory — 14 to 18
- Major US Victory — 10 to 13
- Massive US Victory — 9 or less
5.0 Scenarios
5.1 Kampfgruppe Peiper
This scenario follows the exploits of the 6 SS Panzer Army as they attempt (historically unsuccessfully) to smash through the American line to drive on the Meuse. It is a fast play and a good primer for the campaign scenario for both players.
- First Turn: 1
- Last Turn: 6
- Game Length: 6 turns
- Map Bounds: Map B, only that area north of hexrow B43.xx, inclusive.
- Weather at Start: Soup
- Blown Bridges: None
German Set Up: B42.06 (293 Inf Rgt)—18 VG Div; B47.07 (295 Inf Rgt)—18 VG Div; B48.07 (294 Inf Rgt)—18 VG Div; B48.06 (1818 Arty Rgt)—18 VG Div; B49.07 244 AG Bn; B49.06 388 Arty Rgt; B50.07 (18 FJ Rgt)—3 FJ Div; B50.06 (9 FJ Rgt, 3 Arty Rgt)—3 FJ Div; B51.07 (5 FJ Rgt)—3 FJ Div; B51.06 4 Werfer Bde; B50.01 (KG X, KG Y, KG Z)—150 Pz Bde; B51.03 (KG Peiper-A, KG Peiper-B)—1 SS Pz Div; B51.02 (KG Peiper-C)—1 SS Pz Div; B51.01 (1 Pz Arty)—1 SS Pz Div; B52.01 (KG Hansen-A, KG Hansen-B)—1 SS Pz Div; B53.01 (KG Knittel)—1 SS Pz Div; B54.00 (KG Sandig)—1 SS Pz Div; B52.08 (27 Füs Rgt)—12 VG Div; B52.07 (KG 48)—12 VG Div; B53.08 (KG 89)—12 VG Div; B53.07 (12 Arty Rgt)—12 VG Div; B55.09 (991 Inf Rgt)—277 VG Div; B56.09 (990 Inf Rgt)—277 VG Div; B57.10 (989 Inf Rgt)—277 VG Div; B57.09 (277 Arty Rgt, 402 Arty Rgt)—277 VG Div; B57.08 (KG Müller-A, KG Müller-B)—12 SS Pz Div; B57.07 (KG Kulmann-A, KG Kulmann-B, KG Kulmann-C)—12 SS Pz Div; B58.08 (KG Rollbahn-A, KG Bremer)—12 SS Pz Div; B58.07 (KG Krause, 12 Pz Arty Rgt)—12 SS Pz Div; B60.11 (753 Inf Rgt)—326 VG Div; B61.13 (751 Inf Rgt)—326 VG Div; B62.13 (752 Inf Rgt)—326 VG Div; B62.11 (326 Arty Rgt)—326 VG Div; B59.10 9 Werfer Bde; B62.12 17 Werfer Bde.
With or adjacent to any of the above (unit attachments do not affect set up in any way): 2x 6 SS Panzer Army Engineer Grps; KG von der Heydte (see special rules); 1x Greif Team (must start hidden, can even start stacked with US units); 3x Supply Units (cannot be placed West of the Our River at start). No German bridge can begin the game emplaced.
US Set Up: B49.28 5 Füs Belgian Inf Bn; B60.12 (9 Inf Rgt)—2 Inf Div; B58.16 155mm Arty Grp; B57.11 (38 Inf Rgt)—2 Inf Div; B57.16 (23 Inf Rgt)—2 Inf Div; B57.15 155mm Arty Grp, (Divarty Rgt)—2 Inf Div; B57.13 (741 Arm Bn, 644 TD Bn)—2 Inf Div; B61.14 (395 Inf Rgt)—99 Inf Div; B56.12 (Divarty Rgt)—99 Inf Div; B56.10 (393 Inf Rgt)—99 Inf Div; B53.09 (394 Inf Rgt)—99 Inf Div; B49.16 (CCB Bde)—9 Arm Div; B49.09 (18 Arm Cav Bn)—14 Cav Grp; B45.11 105mm Arty Grp.
Supply Dumps: each set of hexes has two real dumps and one dummy. Set 1: Büllingen (B54.13), B49.28, Spa (B55.32). (The US player can only make one bridge blowing attempt per turn in this scenario.)
Dead Pile: None. Reinforcements: None.
Victory: The German player wins if he exits at least 8 SS units off the west map edge by the end of play. Otherwise, the US player wins.
5.2 The Drive on Bastogne
This game replicates the drive by the 5th Panzer Army on Bastogne. While long in terms of the number of turns involved, this scenario plays fast due to the limited number of units.
- First Turn: 1
- Last Turn: 12
- Game Length: 12 turns
- Map Bounds: Map B, only that area south of hexrow B29.xx, inclusive.
- Weather at Start: Soup
- Blown Bridges: None
German Set Up: B15.02 (987 Inf Rgt)—276 VG Div; B15.01 (986, 988 Inf Rgt)—276 VG Div; B16.01 (276 Arty Rgt)—276 VG Div; B16.03 (916 Inf Rgt)—352 VG Div; B17.04 (914 Inf Rgt, 352 Arty Rgt)—352 VG Div; B17.05 (915 Inf Rgt)—352 VG Div, (15 FJ Rgt)—5 FJ Div; B18.05 (13 FJ Rgt)—5 FJ Div; B18.04 (11 AG Bn)—5 FJ Div, 406 Arty Rgt; B18.02 408 Arty Rgt; B19.08 18 Werfer Bde; B19.06 (14 FJ Rgt, 5 Arty Rgt)—5 FJ Div; B21.09 766 Arty Rgt, (KG Kaufmann, KG Kunkel)—26 VG Div; B22.10 (KG 77, KG 78)—26 VG Div; B23.10 (26 Arty Rgt)—26 VG Div, 15 Werfer Bde; B24.11 (KG von Cochmann-A, KG Gutmann-A, KG Gutmann-B)—2 Pz Div; B25.11 (KG von Böhm, KG von Cochmann-B, 38 PJ Bn, 74 Arty Rgt)—2 Pz Div; B24.06 (KG Kunkel, KG von Fallois)—Lehr Pz Div; B27.07 (KG 901, KG 902, 559 AG Bn, 130 Pz Arty Rgt)—Lehr Pz Div; B26.07 243 AG Bn; B29.12 (KG Schmidt, 1560 Arty Rgt)—560 VG Div; B30.12 (KG Schumann)—560 VG Div; B33.11 (KG Stephen, 228 AG Bn)—116 Pz Div; B34.11 (KG Bayer, KG 156 PG)—116 Pz Div; B34.10 (KG 60 PG, 146 Pz Arty Rgt)—116 Pz Div; B33.10 7 Werfer Bde; B34.09 401 Arty Rgt; B36.10 (183 Inf Rgt)—62 VG Div; B36.09 (162 Arty Rgt)—62 VG Div; B37.10 (164 Inf Rgt)—62 VG Div; B38.08 (190 Inf Rgt)—62 VG Div; B41.03 16 Werfer Bde.
With or adjacent to any of the above: 3x 5 Panzer Army Engineer Grps, 1x 7 Army Engineer Grp; 3x Supply Units (cannot be placed West of the Our River at start). No German bridge can begin the game emplaced.
Dead Pile: None. Reinforcements: None.
US Set Up: B31.17 (unit not printed on the copy transcribed here); B24.14 (1-110 Inf Bn)—28 Inf Div; B23.16 (Divarty Rgt)—28 Inf Div; B23.18 (2-110 Inf Bn)—28 Inf Div; B21.12 (3-110 Inf Rgt)—28 Inf Div; B17.06 (2-109 Inf Bn)—28 Inf Div; B15.18 105mm Arty Grp, (707 Arm Bn)—28 Inf Div; B15.04 (3-109 Inf Bn)—28 Inf Div; B14.01 (CCA Bde)—9 Arm Div; B11.07 (1-109 Inf Bn)—28 Inf Div.
Supply Dumps: each hex has a real dump — Bastogne (B15.28), Houffalize (B26.27).
Dead Pile: None.
Reinforcements:
- Game Turn 1 — Hex B29.18: (CCR, Divarty Bde)—9 Arm Div
- Game Turn 3 — Entry Area F: (CCA, CCR, TD Bn, Divarty)—10 Arm Div; Entry Area G: (CCB)—10 Arm Div; Hex B2.35: (501, 502, 506 Abn Rgts, 327 Glider Rgt, Divarty Rgt)—101 Abn Div; 155mm Arty Grp
- Game Turn 6 — Hex B2.35: 602 TD Bn
- Game Turn 7 — Entry Area G: (CCA, CCB, CCR, Divarty)—4 Arm Div; (101, 104, 328 Inf Rgts, 735 Arm Bn, 818 TD Bn, Divarty Rgt)—26 Inf Div; 155mm Arm Arty Grp; Entry Area F: (317, 318, 319 Inf Rgts, 702 Arm Bn, 610 TD Bn, Divarty Rgt)—80 Inf Div
- Game Turn 9 — Entry Area E: (2, 10, 11 Inf Rgts, Divarty Rgt)—5 Inf Div
- Game Turn 11 — Entry Area E: 737 Arm Bn; Entry Area G: (134, 137, 320 Inf Rgts, Divarty Rgt)—35 Inf Div
Victory: The side which holds Bastogne and Wiltz at the end of the game wins. If each player holds one of them, the result is a draw.
5.3 The Battle for the Ardennes
This is the entire game — the campaign game in gamespeak. Enjoy!
- First Turn: 1
- Last Turn: 16
- Game Length: 16 turns
- Map Bounds: Map A & B, all
- Weather at Start: Soup
- Blown Bridges: None
German Set Up: B15.02 (987 Inf Rgt)—276 VG Div; B15.01 (986, 988 Inf Rgt)—276 VG Div; B16.01 (276 Arty Rgt)—276 VG Div; B16.03 (916 Inf Rgt)—352 VG Div; B17.04 (914 Inf Rgt, 352 Arty Rgt)—352 VG Div; B17.05 (915 Inf Rgt)—352 VG Div, (15 FJ Rgt)—5 FJ Div; B18.05 (13 FJ Rgt)—5 FJ Div; B18.04 (11 AG Bn)—5 FJ Div, 406 Arty Rgt; B18.02 408 Arty Rgt; B19.08 18 Werfer Bde; B19.06 (14 FJ Rgt, 5 Arty Rgt)—5 FJ Div; B21.09 766 Arty Rgt, (KG Kaufmann, KG Kunkel)—26 VG Div; B22.10 (KG 77, KG 78)—26 VG Div; B23.10 (26 Arty Rgt)—26 VG Div, 15 Werfer Bde; B24.11 (KG von Cochmann-A, KG Gutmann-A, KG Gutmann-B)—2 Pz Div; B25.11 (KG von Böhm, KG von Cochmann-B, 38 PJ Bn, 74 Arty Rgt)—2 Pz Div; B24.06 (KG Kunkel, KG von Fallois)—Lehr Pz Div; B27.07 (KG 901, KG 902, 559 AG Bn, 130 Pz Arty Rgt)—Lehr Pz Div; B26.07 243 AG Bn; B29.12 (KG Schmidt, 1560 Arty Rgt)—560 VG Div; B30.12 (KG Schumann)—560 VG Div; B33.11 (KG Stephen, 228 AG Bn)—116 Pz Div; B34.11 (KG Bayer, KG 156 PG)—116 Pz Div; B34.10 (KG 60 PG, 146 Pz Arty Rgt)—116 Pz Div; B33.10 7 Werfer Bde; B34.09 401 Arty Rgt; B36.10 (183 Inf Rgt)—62 VG Div; B36.09 (162 Arty Rgt)—62 VG Div; B37.10 (164 Inf Rgt)—62 VG Div; B38.08 (190 Inf Rgt)—62 VG Div; B41.03 16 Werfer Bde; B42.06 (293 Inf Rgt)—18 VG Div; B47.07 (295 Inf Rgt)—18 VG Div; B48.07 (294 Inf Rgt)—18 VG Div; B48.06 (1818 Arty Rgt)—18 VG Div; B49.07 244 AG Bn; B49.06 388 Arty Rgt; B50.07 (18 FJ Rgt)—3 FJ Div; B50.06 (9 FJ Rgt, 3 Arty Rgt)—3 FJ Div; B51.07 (5 FJ Rgt)—3 FJ Div; B51.06 4 Werfer Bde; B50.01 (KG X, KG Y, KG Z)—150 Pz Bde; B51.03 (KG Peiper-A, KG Peiper-B)—1 SS Pz Div; B51.02 (KG Peiper-C)—1 SS Pz Div; B51.01 (1 Pz Arty)—1 SS Pz Div; B52.01 (KG Hansen-A, KG Hansen-B)—1 SS Pz Div; B53.01 (KG Knittel)—1 SS Pz Div; B54.00 (KG Sandig)—1 SS Pz Div; B52.08 (27 Füs Rgt)—12 VG Div; B52.07 (KG 48)—12 VG Div; B53.08 (KG 89)—12 VG Div; B53.07 (12 Arty Rgt)—12 VG Div; B55.09 (991 Inf Rgt)—277 VG Div; B56.09 (990 Inf Rgt)—277 VG Div; B57.10 (989 Inf Rgt)—277 VG Div; B57.09 (277 Arty Rgt, 402 Arty Rgt)—277 VG Div; B57.08 (KG Müller-A, KG Müller-B)—12 SS Pz Div; B57.07 (KG Kulmann-A, KG Kulmann-B, KG Kulmann-C)—12 SS Pz Div; B58.08 (KG Rollbahn-A, KG Bremer)—12 SS Pz Div; B58.07 (KG Krause, 12 Pz Arty Rgt)—12 SS Pz Div; B60.11 (753 Inf Rgt)—326 VG Div; B61.13 (751 Inf Rgt)—326 VG Div; B62.13 (752 Inf Rgt)—326 VG Div; B62.11 (326 Arty Rgt)—326 VG Div; B59.10 9 Werfer Bde; B62.12 17 Werfer Bde.
With or adjacent to any of the above (unit attachments do not affect set up in any way): 3x 5 Panzer Army Engineer Grps; 1x 7 Army Engineer Grp; 2x 6 SS Panzer Army Engineer Grps; KG von der Heydte (see 2.2); 4x Greif Teams (must start hidden, can even start stacked with US units); 6x Supply Units (cannot be placed West of the Our River at start). No German bridge can begin the game emplaced.
Dead Pile: None. Reinforcements: as per Order of Arrival, below.
US Set Up: B49.28 5 Füs Belgian Inf Bn; B60.12 (9 Inf Rgt)—2 Inf Div; B58.16 155mm Arty Grp; B57.11 (38 Inf Rgt)—2 Inf Div; B57.16 (23 Inf Rgt)—2 Inf Div; B57.15 155mm Arty Grp, (Divarty Rgt)—2 Inf Div; B57.13 (741 Arm Bn, 644 TD Bn)—2 Inf Div; B61.14 (395 Inf Rgt)—99 Inf Div; B56.12 (Divarty Rgt)—99 Inf Div; B56.10 (393 Inf Rgt)—99 Inf Div; B53.09 (394 Inf Rgt)—99 Inf Div; B49.16 (CCB Bde)—9 Arm Div; B49.09 (18 Arm Cav Bn)—14 Cav Grp; B45.11 105mm Arty Grp; B42.16 8 inch Arty Grp; B43.11 (Divarty Rgt)—106 Inf Div; B42.09 (422 Inf Rgt)—106 Inf Div; B39.10 (423 Inf Rgt)—106 Inf Div; B37.11 (424 Inf Rgt)—106 Inf Div; B36.16 (811 TD Bn)—9 Arm Div; B36.14 155mm Arty Grp; B35.13 (112 Inf Rgt)—28 Inf Div; B31.17 (CCR, Divarty Bde)—9 Arm Div; B24.14 (1-110 Inf Bn)—28 Inf Div; B23.16 (Divarty Rgt)—28 Inf Div; B23.18 (2-110 Inf Bn)—28 Inf Div; B21.12 (3-110 Inf Rgt)—28 Inf Div; B17.06 (2-109 Inf Bn)—28 Inf Div; B15.18 105mm Arty Grp, (707 Arm Bn)—28 Inf Div; B15.04 (3-109 Inf Bn)—28 Inf Div; B14.01 (CCA Bde)—9 Arm Div; B11.07 (1-109 Inf Bn)—28 Inf Div.
Supply Dumps: each set of hexes has two real dumps and one dummy. Set 1: Büllingen (B54.13), St. Vith (B41.16), Bastogne (B15.28). Set 2: Houffalize (B26.27), B49.28, Vielsalm (B39.26). Set 3: Manhay (A36.02), Spa (B55.32), La Roche (A26.03).
Dead Pile: None. Reinforcements: as per Order of Arrival, below.
Victory: use the main campaign game victory conditions (see 4.0).
Order of Arrival — German Reinforcements
- Game Turn 3 — Entry Area C: (Pz Bn, PG Rgt, 200 AG Bn)—Führer Begleit Bde; (KG Krag, KG Kreutz-A, KG Kreutz-B, KG Deutschland, KG Führer, 2 AG Bn, 2 Pz Arty Rgt)—2 SS Pz Div; (KG Recke, KG Telkamp-A, KG Telkamp-B, 19 PG Rgt, 20 PG Rgt, 9 AG Bn, 9 Pz Arty Rgt)—9 SS Pz Div; (KG Hauptmann)—560 VG Div
- Game Turn 4 — Entry Area D: (Pz Bn, PG Rgt, 911 AG Bn)—Führer Grenadier Bde; Entry Area A: (103 Aufklarungs Bn, 8 PG Rgt, 29 PG Rgt, 3 AG Bn, 103 AG Bn, 3 Arty Rgt)—3 PG Div
- Game Turn 6 — Entry Area B: 506 Tiger Bn
- Game Turn 7 — Entry Area C: (208, 212, 226 Inf Rgts, 179 Arty Rgt)—79 VG Div
- Game Turn 8 — Entry Area C: (9 Aufklarungs Bn, KG Streit-A, KG Streit-B, 10 PG Rgt, 50 AG Bn, 102 Pz Arty Rgt)—9 Pz Div; (115 Aufklarungs Bn, KG Macke-A, KG Macke-B, 104 PG Rgt, 33 AG Bn, 33 Arty Rgt)—15 PG Div; 19 Werfer Bde; 301 Flak Tiger Bn
- Game Turn 10 — Entry Area C: (331, 339, 387 Inf Rgts, 167 Arty Rgt)—167 VG Div
- Game Turn 11 — Entry Area D: (36, 57, 116 Inf Rgts, 9 Arty Rgt)—9 VG Div
Order of Arrival — American Reinforcements
- Game Turn 2 — Entry Area N: (CCA, CCB, CCR, TD Bn, Divarty)—7 Arm Div; (16, 26 Inf Rgts, 745 Arm Bn, 634 TD Bn, Divarty Bde)—1 Inf Div; (CCR)—5 Arm Div; 155mm Arm Arty Grp
- Game Turn 3 — Entry Area F: (CCA, CCR, TD Bn, Divarty)—10 Arm Div; Entry Area G: (CCB)—10 Arm Div; Entry Area L: (504, 505, 508 Abn Rgts, 325 Glider Rgt, Divarty Rgt)—82 Abn Div; 705 TD Bn; Entry Area H: (501, 502, 506 Abn Rgts, 327 Glider Rgt, Divarty Rgt)—101 Abn Div; 155mm Arty Grp; Entry Area M: (117, 119, 120 Inf Rgts, 743 Arm Bn, 823 TD Bn, Divarty Rgt)—30 Inf Div
- Game Turn 4 — Entry Area M: 740 Arm Bn; Entry Area N: (39, 47, 60 Inf Rgts, 746 Arm Bn, Divarty Rgt)—9 Inf Div; 628 TD Bn; 703 TD Bn; 8 inch Arty Grp
- Game Turn 5 — Entry Area N: (18 Inf Rgt)—1 Inf Div; Entry Area M: (3-32, 1-33, 2-33, 3-33 Arm Bns, 36 Mech Inf Rgt)—3 Arm Div
- Game Turn 6 — Entry Area H: 602 TD Bn; Entry Area K: 551 Abn Bn; Entry Area M: (333, 334, 335 Inf Rgts, 771 Arm Bn, 638 TD Bn, Divarty Rgt)—84 Inf Div; 155mm Arty Grp
- Game Turn 7 — Entry Area K: 29 Br Arm Bde; (289, 290, 291 Inf Rgts, 750 Arm Bn, Divarty Rgt)—75 Inf Div; 517 Abn Rgt; 29 Inf Rgt; Entry Area G: (CCA, CCB, CCR, Divarty)—4 Arm Div; (101, 104, 328 Inf Rgts, 735 Arm Bn, 818 TD Bn, Divarty Rgt)—26 Inf Div; 155mm Arm Arty Grp; Entry Area M: 509 Abn Bn; (1-32, 2-32, Divarty Arm Arty Bde)—3 Arm Div; Entry Area F: (317, 318, 319 Inf Rgts, 702 Arm Bn, 610 TD Bn, Divarty Rgt)—80 Inf Div
- Game Turn 8 — Entry Area L: (1-66, 2-66, 3-66, 1-67, 2-67, 3-67 Arm Bns, 41 Mech Inf Rgt, 702 TD Bn, Divarty Arm Arty Bde)—2 Arm Div; (4, 24 Cav Bn)—4 Cav Grp; 759 Arm Bn
- Game Turn 9 — Entry Area L: (CCA, CCB, Divarty)—5 Arm Div; 820 TD Bn; 629 TD Bn; 155mm Arm Arty Grp; Entry Area E: (2, 10, 11 Inf Rgts, Divarty Rgt)—5 Inf Div
- Game Turn 10 — Entry Area J: (CCA, CCB, CCR, Divarty)—11 Arm Div; 105mm Arty Grp; Entry Area K: 33 Br Arm Bde; (71, 158, 160 Br Inf Bdes, Divarty Bde)—53 Br Inf Div
- Game Turn 11 — Entry Area E: 737 Arm Bn; Entry Area G: (134, 137, 320 Inf Rgts, Divarty Rgt)—35 Inf Div; Entry Area L: (329, 330, 331 Inf Rgts, Divarty Rgt)—83 Inf Div
- Game Turn 12 — Entry Area K: 34 Br Arm Bde; (3, 5 Br Abn Bdes, 6 Br Glider Bde, Divarty Bde)—6 Br Abn Div; Entry Area G: (CCA, CCB, CCR, Divarty)—6 Arm Div
5.4 Breakout!
This scenario is a shorter version of the campaign game — one which begins after the Germans have made the breach in the US line. They have failed in the footrace to Bastogne, but are prepared to start the drive further west. Kampfgruppe Peiper has just been cut-off at La Gleize.
- First Turn: 6
- Last Turn: 16
- Game Length: 10 turns
- Map Bounds: Use Map A & B, all
- Weather at Start: Overcast #2
- Blown Bridges: B45.29
German Set Up: B10.01 (987 Inf Rgt)—276 VG Div; B10.02 (988 Inf Rgt)—276 VG Div; B10.04 (986 Inf Rgt)—276 VG Div; B11.02 (276 Arty Rgt)—276 VG Div; B8.08 (914, 916 Inf Rgt)—352 VG Div; B9.08 (352 Arty Rgt)—352 VG Div; B11.07 (915 Inf Rgt, less one step)—352 VG Div, 406 Arty Rgt, German Supply Unit; B13.04 408 Arty Rgt; B17.05 7 Army Engineer Grp (Bridge emplaced); B11.10 (Pz Bn, 911 AG Bn, PG Rgt)—F.Gren Bde; B19.08 18 Werfer Bde; B21.09 5 Pz Army Engineer (Bridge emplaced); B24.11 5 Pz Army Engineer (Bridge emplaced); B23.16 243 AG Bn, 5 Pz Army Engineer (Engineer side), 15 Werfer Bde, German Supply Unit; B15.18 (5 Arty Rgt)—5 FJ Div, German Supply Unit; B11.16 (13 FJ Rgt, less one step)—5 FJ Div; B13.18 (14 FJ Rgt)—5 FJ Div; B13.19 (11 AG Bn, 15 FJ Rgt)—5 FJ Div; B11.26 (KG Kaufmann)—26 VG Div; B14.24 (KG Kunkel)—Lehr Pz Div; B15.24 (559 AG Bn, KG 901 PG)—Lehr Pz Div; B15.23 (KG von Fallois, KG 902 PG)—Lehr Pz Div; B15.22 (130 Arty Rgt)—Lehr Pz Div; B18.23 766 Arty Rgt; B18.24 (KG 77)—26 VG Div; B19.24 (26 Arty Rgt)—26 VG Div; B19.25 (KG Kunkel, KG 78)—26 VG Div; B20.26 (74 Pz Arty Rgt)—2 Pz Div; B20.27 (38 PJ Bn)—2 Pz Div; B20.28 (KG von Cochmann-A)—2 Pz Div; B21.30 (KG Gutmann-A, less one step, KG Gutmann-B)—2 Pz Div; B20.32 (KG von Böhm)—2 Pz Div; B26.28 (KG Stephen, KG 156 PG, less one step)—116 Pz Div; B26.27 US Supply Dump (real, captured), (KG Bayer, KG 60 PG, 146 Pz Arty Rgt)—116 Pz Div; B29.27 (KG Schumann)—560 VG Div; B29.29 (1560 Arty Rgt)—560 VG Div; B30.30 (KG Schmidt)—560 VG Div; B31.30 (KG Hauptmann)—560 VG Div; B33.21 (KG Krag)—2 SS Pz Div; B31.17 (2 AG Bn, KG Deutschland)—2 SS Pz Div; B31.16 (KG Führer, KG Kreutz-A)—2 SS Pz Div; B30.15 (2 Pz Arty Rgt)—2 SS Pz Div; B29.15 (KG Kreutz-B)—2 SS Pz Div; B27.14 German Supply Unit; B35.12 7 Werfer Bde, 401 Arty Rgt; B36.13 (183 Inf Rgt, less one step)—62 VG Div; B39.13 (162 Arty Rgt)—62 VG Div; B39.14 (190 Inf Rgt)—62 VG Div; B40.13 (164 Inf Rgt)—62 VG Div; B43.15 (294 Inf Rgt)—18 VG Div; B44.13 16 Werfer Bde; B44.14 (1818 Arty Rgt)—18 VG Div; B44.15 (295 Inf Rgt)—18 VG Div; B45.16 (293 Inf Rgt)—18 VG Div; B46.16 (Pz Bn, 200 AG Bn, PG Rgt)—F.Begleit Bde; B47.16 388 Arty Rgt; B45.19 (20 PG Rgt)—9 SS Pz Div; B44.20 (9 AG Bn, 9 Pz Arty Rgt)—9 SS Pz Div; B43.21 (19 PG Rgt)—9 SS Pz Div; B45.21 (KG Telkamp-A, KG Telkamp-B)—9 SS Pz Div, German Supply Unit; B40.25 (KG Recke)—9 SS Pz Div; B43.27 (KG Hansen-A)—1 SS Pz Div; B45.27 (1 Pz Arty Rgt)—1 SS Pz Div, German Supply Unit; B45.28 (KG Hansen-B)—1 SS Pz Div, 6 SS Pz Army Engineer (Engineer side); B46.27 (KG Sandig)—1 SS Pz Div; B47.28 (KG Knittel)—1 SS Pz Div; B48.31 (KG Peiper-C)—1 SS Pz Div; B47.32 (KG Peiper-B)—1 SS Pz Div; B47.33 (KG Peiper-A)—1 SS Pz Div; B50.22 (KG X, KG Z)—150 Pz Bde; B50.21 (KG Y)—150 Pz Bde; B52.20 (18 FJ Rgt, less one step)—3 FJ Div; B52.19 (9 FJ Rgt, less one step, 3 Arty Rgt)—3 FJ Div; B53.18 (5 FJ Rgt, less one step)—3 FJ Div; B53.17 (KG Krause, less one step)—12 SS Pz Div; B53.16 (KG Kulmann-A, less one step, KG Kulmann-C, less one step)—12 SS Pz Div; B52.15 (12 Pz Arty Rgt)—12 SS Pz Div; B53.15 (KG Müller-A, KG Müller-B)—12 SS Pz Div; B53.14 (12 Arty Rgt)—12 VG Div; B54.14 (27 Füs Rgt, less one step)—12 VG Div; B54.13 (48, 89 Inf Rgt)—12 VG Div, US Supply Dump (real, captured); B55.14 (3, 103 AG Bn, 29 PG Rgt)—3 PG Div; B55.13 (3 Arty Rgt)—3 PG Div; B56.13 (103 Aufklarungs Bn, 8 PG Rgt)—3 PG Div; B57.12 (277 Arty Rgt, 402 Arty Rgt)—277 VG Div; B57.13 (990 Inf Rgt)—277 VG Div; B58.12 (991 Inf Rgt, less one step)—277 VG Div; B59.12 9 Werfer Bde; B59.13 (989 Inf Rgt)—277 VG Div; B60.13 (751 Inf Rgt)—326 VG Div; B61.14 (753 Inf Rgt)—326 VG Div; B62.12 17 Werfer Bde; B62.13 (326 Arty Rgt)—326 VG Div; B62.14 (752 Inf Rgt)—326 VG Div; A34.34 Greif Team C (Hide); A47.25 Greif Team B (Hide); A50.05 Greif Team D (Hide).
Dead Pile: Team A (Greif), (228 AG Bn)—116 Pz Div, (KG von Cochmann-B)—2 Pz Div, 244 AG Bn, (KG Rollbahn-A, KG Bremer, KG Kulmann-B)—12 SS Pz Div, KG von der Heydte, 4 Werfer Bde, 6 SS Pz Army Engineer (Engineer side).
Reinforcements: as per Order of Arrival.
US Set Up: B8.01 (CCA)—10 Arm Div; B8.03 (CCA)—9 Arm Div; B6.06 (Divarty)—10 Arm Div; B8.06 (1-109 Inf Bn)—28 Inf Div; B8.07 (2-109 Inf Bn)—28 Inf Div; B7.09 (CCR)—10 Arm Div; B5.11 (609 TD Bn)—10 Arm Div; B15.27 (506 Abn Rgt)—101 Abn Div; B14.27 (501 Abn Rgt)—101 Abn Div; B14.28 (327 Glider Rgt)—101 Abn Div; B16.28 (502 Abn Rgt)—101 Abn Div; B15.28 (Divarty)—101 Abn Div, (CCB)—10 Arm Div, 155 Arty Grp, US Supply Dump (real); A26.03 US Supply Dump (real); A31.11 (3-33 Tank Bn)—3 Arm Div; A36.02 99 Inf Bn, US Supply Dump (dummy); B34.31 (3-32 Tank Bn)—3 Arm Div; B35.24 (325 Glider Rgt)—82 Abn Div; B34.20 (32 Cav Bn)—14 Cav Grp; B36.16 (811 TD Bn)—9 Arm Div; B36.14 (112 Inf Rgt, less one step)—28 Inf Div, 155 Arty Grp; B39.15 (424 Inf Rgt, Divarty)—106 Inf Div; B41.16 (CCB)—9 Arm Div; B42.16 (814 TD Bn, Divarty)—7 Arm Div, (Divarty)—9 Arm Div, 8 in Arty Grp, US Supply Dump (dummy); B43.16 (CCB)—7 Arm Div; B43.18 (CCA)—7 Arm Div; B42.20 (CCR)—9 Arm Div, 155 Arm Arty Grp; B39.24 (CCR)—7 Arm Div; B39.26 (508 Abn Rgt)—82 Abn Div, US Supply Dump (dummy); B45.29 (505 Abn Rgt)—82 Abn Div; B45.33 526 Mech Inf Bn, 705 TD Bn; B47.29 (36 Mech Inf Rgt)—3 Arm Div; B48.27 (117 Inf Rgt, 823 TD Bn)—30 Inf Div; B47.35 (Divarty)—82 Abn Div; B47.36 (504 Abn Rgt)—82 Abn Div; B48.33 740 Tank Bn, (119 Inf Rgt)—30 Inf Div; B49.32 (2-33 Tank Bn)—3 Arm Div; B49.30 (1-33 Tank Bn)—3 Arm Div; B49.28 5 Füs Belgian Inf Bn, US Supply Dump (real); B55.32 US Supply Dump (real); B53.24 (Divarty)—30 Inf Div; B52.23 (120 Inf Rgt, 743 Tank Bn)—30 Inf Div; B53.20 (16 Inf Rgt)—1 Inf Div; B54.17 (18 Inf Rgt)—1 Inf Div, 703 TD Bn; B55.17 (Divarty)—1 Inf Div, 8 in Arty Grp; B54.16 (745 Tank Bn, 634 TD Bn)—1 Inf Div; B54.15 (26 Inf Rgt)—1 Inf Div, 628 TD Bn; B55.15 (23 Inf Rgt, less one step, 38 Inf Rgt, less one step)—2 Inf Div; B56.14 (741 Tank Bn, 644 TD Bn, 9 Inf Rgt, less one step)—2 Inf Div; B56.15 (Divarty)—2 Inf Div; B57.15 (393 Inf Rgt, less one step)—99 Inf Div; B57.16 155 Arty Grp; B58.14 (394 Inf Rgt, less one step)—99 Inf Div; B58.15 (Divarty)—99 Inf Div, 155 Arty Grp; B59.14 (60 Inf Rgt, 746 Tank Bn)—9 Inf Div; B59.15 (Divarty)—9 Inf Div; B60.14 (39 Inf Rgt)—9 Inf Div; B61.15 (395 Inf Rgt)—99 Inf Div; B62.15 (47 Inf Rgt)—9 Inf Div; B62.17 (CCR)—5 Arm Div.
Dead Pile: 2x 105mm Arty Grps, (422, 423 Inf Rgt)—106 Inf Div, (18 Cav Bn)—14 Cav Grp, (1-110, 2-110, 3-110, 3-109 Inf Bn, 707 Tank Bn, Divarty)—28 Inf Div.
Reinforcements: as per Order of Arrival.
Victory: use the main campaign game victory conditions (see 4.0). To balance the situation for competitive play, shift the final victory level determined by 4.0 one level in favor of the Germans (to nullify German mistakes made before play began).
5.5 Payback, American-style
This scenario allows the US player a chance to ride roughshod over the Germans who have been dishing it out in the early portion of the battle. If your opponent insists on always playing the Germans, say "Sure, but let's play this one..."
- First Turn: 12
- Last Turn: 16
- Game Length: 5 turns
- Map Bounds: Map A & B, all
- Weather at Start: Clear
- Blown Bridges: B45.27
German Set Up: B12.01 (987 Inf Rgt, less one step)—276 Inf Div; B14.01 (276 Arty Rgt)—276 Inf Div; B12.03 (988 Inf Rgt)—276 Inf Div; B13.04 408 Arty Rgt; B11.07 (915 Inf Rgt, less one step)—352 VG Div, 406 Arty Rgt; B10.07 (916 Inf Rgt, less one step, 352 Arty Rgt)—352 VG Div; B9.08 (914 Inf Rgt, less one step)—352 VG Div; B17.05 7 Army Engineer (bridge emplaced); B21.09 5 Pz Army Engineer (bridge emplaced), (116 Inf Rgt)—9 VG Div; B22.08 (57 Inf Rgt)—9 VG Div; B23.08 (36 Inf Rgt)—9 VG Div; B23.07 (9 Arty Rgt)—9 VG Div; B13.09 (212 Inf Rgt)—79 VG Div, 18 Werfer Bde; B12.10 (226 Inf Rgt)—79 VG Div; B14.10 (179 Arty Rgt)—79 VG Div, German Supply Unit; B13.12 (208 Inf Rgt)—79 VG Div; B11.16 (911 AG Bn, PG Rgt)—F.Gren Bde; B15.18 (11 AG Bn)—5 FJ Div; B12.20 (33 Arty Rgt)—15 PG Div, German Supply Unit; B10.19 (104 Mech Inf)—15 PG Div; B9.21 (33 AG Bn)—15 PG Div; B9.22 (115 Aufklarungs Bn)—15 PG Div; B9.24 (13 FJ Rgt)—5 FJ Div; B11.26 (14 FJ Rgt)—5 FJ Div; B13.25 (15 FJ Rgt, 5 Arty Rgt)—5 FJ Div; B24.15 (339 Inf Rgt)—167 VG Div; B24.14 (331 Inf Rgt)—167 VG Div; B24.13 (167 Arty Rgt)—167 VG Div; B24.11 19 Werfer Bde, 5 Pz Army Engineer (bridge emplaced); B14.25 (559 AG Bn, 901 PG Rgt)—Lehr Pz Div; B16.25 (KG 78, less one step)—26 VG Div, 15 Werfer Bde; B18.23 5 Pz Army Engineer (Engineer side up); B18.27 243 AG Bn, 766 Arty Rgt; B18.30 (KG 77)—26 VG Div; B19.31 (26 Arty Rgt)—26 VG Div; B15.31 (KG Macke-A, KG Macke-B)—15 PG Div; B13.30 (KG Kaufmann)—26 VG Div; A14.02 (KG Kunkel)—26 VG Div, German Supply Unit; A11.09 (KG 902 PG, 130 Pz Arty Rgt)—Lehr Pz Div; A19.06 (10 PG Rgt, 102 Pz Arty Rgt)—9 Pz Div; A18.12 (50 AG Bn)—9 Pz Div; A14.22 (KG Gutmann-A, 38 PJ Bn, 74 Pz Arty Rgt)—2 Pz Div; A15.23 (KG Gutmann-B)—2 Pz Div; A19.18 (KG Kunkel, KG von Fallois)—Lehr Pz Div, German Supply Unit; A20.16 (KG Streit-A, KG Streit-B)—9 Pz Div; A22.17 (9 Aufklarungs Bn)—9 Pz Div; A23.15 (KG Stephen, KG Bayer)—116 Pz Div; A24.14 (KG 156 PG)—116 Pz Div; A24.13 (KG 60 PG, less one step)—116 Pz Div; A23.13 (146 Pz Arty Rgt)—116 Pz Div; A26.03 US Supply Dump (real, captured); A29.09 (Pz Bn)—Führer Begleit Bde; A30.09 (200 AG Bn, PG Rgt)—Führer Begleit Bde; A31.06 (KG Schumann, less one step)—560 VG Div; A31.05 (1560 Arty Rgt)—560 VG Div, 401 Arty Rgt; A32.05 (KG Schmidt, less one step)—560 VG Div; A32.04 (KG Hauptmann, less one step)—560 VG Div; B26.27 US Supply Dump (real, captured), 301 Flak Tiger Bn; B29.27 (KG Kulmann-A, less one step, KG Kulmann-C, less one step)—12 SS Pz Div; B30.26 (KG Müller-A, less one step, KG Krause, less one step)—12 SS Pz Div; B30.25 (12 Pz Arty Rgt)—12 SS Pz Div; A36.02 (KG Krag, KG Deutschland, less one step, 2 Pz Arty Rgt)—2 SS Pz Div; B36.34 7 Werfer Bde; B37.35 (KG Führer, KG Kreutz-A)—2 SS Pz Div; B37.32 (KG Recke)—9 SS Pz Div; B38.31 (9 Pz Arty Rgt)—9 SS Pz Div; B38.32 (KG Telkamp-A, KG Telkamp-B)—9 SS Pz Div; B39.32 (9 AG Bn, 20 PG Rgt)—9 SS Pz Div; B40.31 (19 PG Rgt)—9 SS Pz Div; B39.26 506 Tiger Bn, German Supply Unit; B42.29 (164 Inf Rgt)—62 VG Div; B42.28 (162 Arty Rgt)—62 VG Div; B43.29 (190 Inf Rgt)—62 VG Div; B43.28 (183 Inf Rgt, less one step)—62 VG Div; B41.17 (103 Aufklarungs Bn, 3 AG Bn, 8 PG Rgt)—3 PG Div; B42.16 (103 AG Bn, 29 PG Rgt, less one step, 3 Arty Rgt)—3 PG Div; B45.28 (293 Inf Rgt)—18 VG Div; B45.27 388 Arty Rgt; B46.27 (294 Inf Rgt, 1818 Arty Rgt)—18 VG Div; B48.26 (295 Inf Rgt)—18 VG Div; B48.21 German Supply Unit; B46.18 (KG Hansen-A, less one step, KG Knittel)—1 SS Pz Div; B47.19 (KG Sandig, less one step, 1 Pz Arty Rgt)—1 SS Pz Div; B46.17 6 SS Pz Army Engineer Grp; B47.18 16 Werfer Bde; B50.21 (KG X, KG Z)—150 Pz Bde; B51.21 (18 FJ Rgt)—3 FJ Div; B52.19 (9 FJ Rgt, less one step, 3 Arty Rgt)—3 FJ Div; B53.17 (5 FJ Rgt, less one step)—3 FJ Div; B53.15 (27 Füs Inf Rgt)—12 VG Div; B54.14 (KG 89)—12 VG Div; B54.13 US Supply Dump (real, captured), (12 Arty Rgt)—12 VG Div; B55.14 (KG 48, less one step)—12 VG Div; B56.12 (990 Inf Rgt, less one step)—277 VG Div; B57.13 (991 Inf Rgt, less one step)—277 VG Div; B57.12 402 Arty Rgt, (277 Arty Rgt)—277 VG Div; B59.13 (989 Inf Rgt)—277 VG Div; B59.12 9 Werfer Bde; B60.13 (751 Inf Rgt)—326 VG Div; B61.14 (753 Inf Rgt)—326 VG Div; B62.14 (752 Inf Rgt)—326 VG Div; B62.13 17 Werfer Bde, (326 Arty Rgt)—326 VG Div; A47.25 Greif Team B (Hidden).
With or adjacent to any of the above: 3x 5 Panzer Army Engineer Grps, 1x 7 Army Engineer Grp, 2x 6 SS Panzer Army Engineer Grps (per unit reinforcement/dead-pile notes below); Greif Teams as noted.
Reinforcements: as per Order of Arrival (see 5.3's Order of Arrival tables — Payback begins on the campaign game's Turn 12, so only the reinforcement waves from Turn 12 on are still to arrive).
Dead Pile (German): (KG Y)—150 Pz Bde; (KG Peiper-A, KG Peiper-B, KG Peiper-C, KG Hansen-B)—1 SS Pz Div; (2 AG Bn, KG Kreutz-B)—2 SS Pz Div; (KG Bremer, KG Rollbahn-A, KG Kulmann-B, KG Müller-B)—12 SS Pz Div; Greif Teams A, C, D; (Pz Bn)—Führer Grenadier Bde; (228 AG Bn)—116 Pz Div; (KG von Cochmann-A, KG von Cochmann-B, KG von Böhm)—2 Pz Div; 244 AG Bn; KG von der Heydte; (986 Inf Rgt)—276 VG Div; 4 Werfer Bde; 6 SS Pz Army Engineer Grp.
US Set Up: B11.01 (2 Inf Rgt)—5 Inf Div; B11.02 (10 Inf Rgt)—5 Inf Div; B11.03 (11 Inf Rgt)—5 Inf Div; B10.01 (Divarty)—5 Inf Div; B10.04 (CCA, less one step)—9 Arm Div; B10.05 (Divarty)—10 Arm Div; B11.06 737 Tank Bn, (CCA)—10 Arm Div; B10.06 (CCR, 609 TD Bn)—10 Arm Div; B9.07 (1-109 Inf Bn)—28 Inf Div; B8.08 (702 Tank Bn, 319 Inf Rgt)—80 Inf Div; B9.09 (610 TD Bn, Divarty)—80 Inf Div; B11.10 (317 Inf Rgt)—80 Inf Div; B11.11 (318 Inf Rgt)—80 Inf Div; B10.15 (328 Inf Rgt, 818 TD Bn)—26 Inf Div; B9.16 (735 Tank Bn, Divarty)—26 Inf Div; B10.16 (104 Inf Rgt)—26 Inf Div; B9.19 (101 Inf Rgt)—26 Inf Div; B5.24 (137, 320 Inf Rgt)—35 Inf Div; B5.25 (134 Inf Rgt, Divarty)—35 Inf Div; B6.26 (CCB, Divarty)—4 Arm Div, 155 Arty Grp, 155 Arm Arty Grp; B7.27 (CCA)—4 Arm Div; B9.30 (CCR)—4 Arm Div; B9.32 602 TD Bn; B15.27 (501 Abn Rgt)—101 Abn Div; B16.27 (506 Abn Rgt)—101 Abn Div; B15.28 US Supply Dump (real), (CCB)—10 Arm Div, (Divarty)—101 Abn Div, 155 Arty Grp; B15.29 (502 Abn Rgt)—101 Abn Div; B14.28 (327 Glider Rgt)—101 Abn Div; B42.31 (508 Abn Rgt, less one step)—82 Abn Div; B42.30 (325 Glider Rgt, less one step)—82 Abn Div; B43.30 (504 Abn Rgt)—82 Abn Div; B44.29 (424 Inf Rgt)—106 Inf Div; B45.29 (505 Abn Rgt)—82 Abn Div; B45.30 (Divarty)—106 Inf Div, (Divarty)—82 Abn Div; A50.05 509 Abn Bn; A59.11 33 British Tank Bde; B47.33 526 Mech Inf Bn, 705 TD Bn; B46.31 (119 Inf Rgt)—30 Inf Div; B47.28 740 Tank Bn; B48.27 (117 Inf Rgt, 823 TD Bn)—30 Inf Div; B49.28 5 Füs Belgian Inf Bn, US Supply Dump (real); B55.32 US Supply Dump (real), 820 TD Bn, 629 TD Bn, 155 Arm Arty Grp; B62.33 (CCA, CCR)—5 Arm Div; B62.34 (CCB, Divarty)—5 Arm Div; B52.23 (120 Inf Rgt, less one step, 743 Tank Bn)—30 Inf Div; B53.24 (Divarty)—30 Inf Div; B53.20 (16 Inf Rgt)—1 Inf Div; B54.17 (18 Inf Rgt)—1 Inf Div, 703 TD Bn; B54.16 (745 Tank Bn, 634 TD Bn)—1 Inf Div; B54.15 (26 Inf Rgt)—1 Inf Div, 628 TD Bn; B55.17 (Divarty)—1 Inf Div, 8 in Arty Grp; B55.15 (23 Inf Rgt, less one step, 38 Inf Rgt, less one step)—2 Inf Div; B56.14 (9 Inf Rgt, less one step, 644 TD Bn, 741 Tank Bn)—2 Inf Div; B56.15 (Divarty)—2 Inf Div; B57.15 (393 Inf Rgt, less one step)—99 Inf Div; B57.16 155 Arty Grp; B58.14 (394 Inf Rgt, less one step)—99 Inf Div; B58.15 (Divarty)—99 Inf Div, 155 Arty Grp; B59.14 (395 Inf Rgt, less one step)—99 Inf Div; B60.14 (47 Inf Rgt)—9 Inf Div; B60.15 (Divarty)—9 Inf Div; B61.15 (60 Inf Rgt, 746 Tank Bn)—9 Inf Div; B62.15 (39 Inf Rgt)—9 Inf Div; plus the greater part of III/V/VIII Corps' committed divisions (3, 5, 7, 9, 11 Armored; 4 Cavalry Group; 53 & 6 Airborne British formations, etc.) redeployed to their turn-12 campaign positions per the Order of Arrival.
Reinforcements: as per Order of Arrival.
Dead Pile (US): 1x 155 Arty Grp, 2x 105mm Arty Grp, 3x US Supply Dump (dummy), (2-67 Tank Bn)—2 Arm Div, (1-33, 2-33 Tank Bn)—3 Arm Div, (CCR, Divarty)—9 Arm Div, 99 Inf Bn, (18 Cav Bn)—14 Cav Grp, (1-110, 2-110, 3-110, 2-109, 3-109 Inf Bn, 707 Tank Bn, Divarty)—28 Inf Div, (422, 423 Inf Rgt)—106 Inf Div.
Victory: Use the main campaign game victory conditions (see 4.0). To balance the situation for competitive play, shift the final victory level determined by 4.0 one level in favor of the Germans (to nullify German mistakes made before play began).
(Source note: this scenario's setup listing is printed across a dense multi-column table spanning two pages of the source PDF. The order of battle above has been reassembled and cross-checked from the extracted text; a handful of secondary reinforcement units in the US order of battle are summarized rather than itemized hex-by-hex where the column reconstruction could not be fully verified.)
Charts and Tables
Terrain Effects Chart
| Type | Mech MP Cost | Other MP Cost | Combat Effect (Cumulative) |
|---|---|---|---|
| Open | 2 | 1 | Other terrain, if any |
| Village | 2 | 1 | Left One Col |
| City | 2 | 1 | Left Three Cols, Armor Effect |
| Forest & Village | 3 | 2 | Left Two Cols, Armor Effect |
| Forest | 3 | 2 | Left One Col, Armor Effect |
| Secondary Road | 1/2 (1)** | 1/2 | Other terrain, if any |
** The number in parenthesis is the MP cost for Supply Unit Movement and Supply Trace MP count purposes.
Turn Sequence (quick reference)
German Turn: Weather Determination — US Air Point Determination — German Movement Phase — US Barrage Phase — German Barrage Phase — German Combat Phase — German Supply Phase — German Exploitation Phase — Clean Up.
US Turn: US Movement Phase — Bridge Blowing and Repair — US Barrage Phase — US Combat Phase — US Supply Phase — US Exploitation Phase — Clean Up.
Combat Results Table
11..66 two-dice roll; columns are combat odds from 1:5 to 7:1 or more.
| Roll | 1:5 | 1:4 | 1:3 | 1:2 | 1:1 | 2:1 | 3:1 | 4:1 | 5:1 | 6:1 | 8:1 | 9:1 |
|---|---|---|---|---|---|---|---|---|---|---|---|---|
| A4 | 11-16 | 11-13 | 11-12 | |||||||||
| A3 | 21-24 | 14-21 | 13-15 | 11-12 | 11-12 |
Notes: A—Attacker Result. D—Defender Result. #—Step Loss. r#—Retreat Hexes. NR—No Result. Shift one column to the left if half or more of the attacker's combat strength is mechanized and the defender is in "Armor Effect" terrain.
Greif Team Discovery Table
| Die | Effect |
|---|---|
| 1-4 | None |
| 5-6 | Greif Team Destroyed |
Barrage Table
Rows are the two-dice roll (2-12); columns are total Artillery Points fired at the target hex.
| Roll | 1 | 2 to 3 | 4 to 5 | 6 to 8 | 9 to 12 | 13 to 17 | 18 to 23 | 24 or more |
|---|---|---|---|---|---|---|---|---|
| 2 | - | - | - | - | - | - | - | DG |
| 3 | - | - | - | - | - | - | - | DG |
| 4 | - | - | - | - |
Notes: DG — the target is Disorganized (DG'd). # — steps lost and DG'd.
Shifts: left 1 column if no friendly unit is adjacent to the target hex; left 1 column if the target hex is forest, village, village-forest, or city; right 1 column if three or more steps are in the target hex.
Designer's Notes
My very first design project was a home-brew Kampfgruppe Peiper game using the Panzer Leader system back in 1975. It grew out of a love of the Ardennes subject, repeated readings of Peter Elstob's book, and far too many Panzer Leader counters on-hand. The game you see here grew out of that interest in the subject as well as a deep faith that there simply must be a better way to do this situation than the overdone games presented on the matter of late. The driving goal here was to capture the important issues of the campaign, but to do so with a minimal amount of "fun-killing" rules.
The differing supply methods and artillery phasing between the two sides show their respective strengths and weaknesses. The Germans were hamstrung logistically in this offensive. Fuel was very short and transport for what was available was almost non-existent. German artillery could not afford to barrage as much or as often as could the Americans. On top of all of that, German fire direction control and communications were not as capable as their US enemies.
Originally, we had a Luxembourg option in the victory options. It was dropped as the US response left the southern flank fairly bare and the option was something players always went for — simply because it was so much easier than the others. The others, while obtainable, require outstanding play on the part of the Germans (or criminally poor play on the part of the Americans...) to achieve.
The research for this game was aided dramatically by Anders Frankson of Sweden who let the designer use his draft OoB for an operational game he was working on, as well as the books by Danny Parker and Jean Paul Pallud. Thanks are also due to John Best for the time he spent going over every unit in the game confirming it with respect to at least two other sources, and the in-house playtesting team — especially Mike Haggett and Rod Schmisseur.
German Player's Notes
As the German player, you will rapidly be struck by two facts — time is NOT on your side and your logistical apparatus is not up to the task. Maneuver your troops so they don't fall all over themselves, and keep a consistent objective. German victory is hung on ruthlessly efficient play and masterful placement of units. Failure to think ahead will frequently stifle your own advance as your own troops clog critical road pathways.
By turn 8 or so, you will find the German machine running out of steam. If they haven't won a massive victory already, they probably won't. At that time it is best to grab the VP cities and hold on tight. The second half of the game is the US player's time.
US Player's Notes
Expect to take your lumps in the early game — you have few units and a lot of ground to defend. Work on the road-net. Appropriately placed road blocks (adequately manned and in the correct terrain) will force the Germans to work for it. Your job in the early game is to stall the German effort, to contain it, to keep important roads and cities out of German hands, and to be in the game when the worm turns and it's time to dish it out. Make every bridge destruction count!
When your opponent turns turtle and sticks his head in the sand (goes for the victory on points because he couldn't pull off a massive victory), analyze the VPs in German hands, realize he won't be getting any more, and figure out what you need back to win the game. If you identify a handful of the 'less well defended' locales to retake, and are not bashful about expending units later in the game to retake them, you'll win.