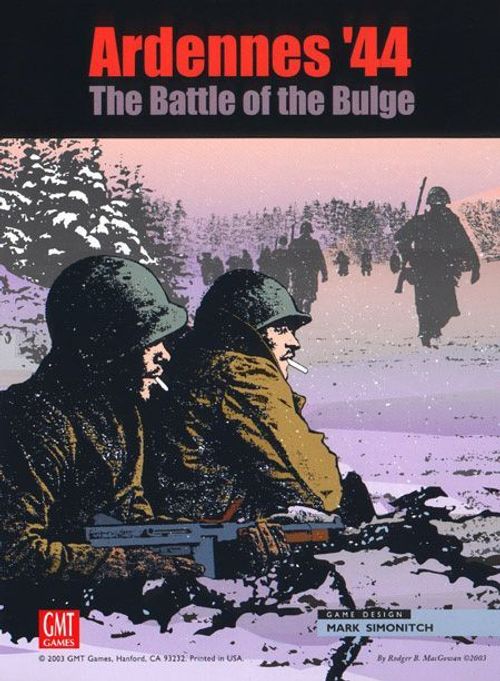
Ardennes '44: The Battle of the Bulge
Ardennes '44: The Battle of the Bulge Rulebook
Table of Contents
Table of Contents
- 1. Introduction
- 2. Game Pieces
- 3. The Map
- 4. Sequence of Play Outline
- 5. The Artillery Supply Phase
- 6. The Fuel Shortage Phase
- 7. Building and Blowing Bridges
- 8. Stacking
- 9. Zones of Control (ZOC)
- 10. ZOC Bonds
- 11. Rules of Movement
- 12. Strategic Movement and Truck Markers
- 13. Reinforcements, Entry Hexes, Off Map Boxes and Blocking Positions
- 14. Rules of Combat
- 15. Combat Modifiers
- 16. Combat Results
- 17. Retreats
- 18. Disruption and Rally
- 19. Advance After Combat
- 20. Disengagement and Removing Engaged Markers
- 21. Tank and Recon Units
- 22. Artillery Units
- 23. Supply and Surrender
- 24. Traffic Markers and Bottleneck Hexes
- 25. Night Turns and Replacements
- 26. Breakdown Units
- 27. Special Units
- 28. Weather
- 29. Turn 1 Special Rules
- 30. How to Win
- Optional Rules
- 31. Night Infiltration
- 32. Fuel Dumps
- 33. Roadblocks
- 34. 18 Factor Limit
- 35. Operation Bodenplatte
- 36. Grief Commando
- Scenarios
- 3rd Edition Changes
- Expanded Sequence of Play
1. Introduction
1.1 Inventory
A complete game of Ardennes '44 includes the following:
- 2 map sheets
- 3 sheets of counters
- 2 (identical) Player Aid Cards
- 2 Reinforcement Cards
- 1 Turn Record Track
- 1 Rules Booklet
- 1 Play Book
- 2 dice
1.2 Game Scale
Each game-turn represents approximately 8 hours of real time. Each map hex represents about 1.6 miles (2.6 kilometers). Units represent battalions, regiments and brigades.
2. Game Pieces
2.1 How to Read the Combat Units
Please review the chart in the lower left corner of this page (see the Player Aid Card). A unit's printed information includes: Unit Size, Arrival Info, Stacking Value, Unit I.D., Unit Type, Attack Strength, Defense Strength, Movement Allowance, Tank Quality (for silhouetted Tank Units), Set-up Info, and Morale Box.
2.2 Attack, Defense and Movement Factors
These numbers indicate how well the unit can attack, defend and move. These numbers will be further explained in the appropriate rule section.
2.3 Unit Sizes
- Sq = Squadron
- I = Company
- II = Battalion
- TF = Task Force
- III = Regiment
- Gp = Group
- X = Brigade
- CC = Combat Command
- XXX = Corps
- (–) = with less elements
- (+) = with added elements
2.4 Unit Types
All ground combat units belong to one of two basic categories: mechanized or non-mechanized (important for movement purposes). The following is a list of the different unit types:
Tank Units (these units have their own column on the TEC, may use the Road Bonus in Advance After Combat and may use Strategic Movement. They may not use Extended Movement. These units may not cross unbridged river hexsides or enter Forest hexes except along roads):
- M4 Sherman
- M5 Stuart
- M10 TD
- M18 TD
- M36 TD
- Sherman Firefly
- Churchill
- Pzkw IV
- Pzkw V (Panther)
- Pzkw VI (Tiger)
- Pzkw VI (King Tiger)
- StuG III
- Hetzer
- Jpz IV
- Jpz V (Hunting Panther)
- Jpz VI (Hunting Tiger)
- Armor (NATO symbol)
- Sturmtiger
- Brummbär
- Recon (Mechanized Cavalry)
- FLAK (Anti-Aircraft)
Artillery Units:
- Artillery
- Nebelwerfer (Rockets)
Mechanized Type Units:
- Mechanized Infantry/Panzergrenadiers (PzG)
- Motorized Infantry
Non-Mechanized Type Units:
- Infantry
- Parachute Infantry
- Glider Infantry
- Combat Engineers
- Fortress Infantry
TANK UNITS: Tank Units come in two types: silhouetted or with a NATO symbol. The NATO symbol represents a mixed force of tanks and infantry. A silhouetted Tank Unit represents a battalion of armored vehicles with little or no infantry support. A summary of silhouetted Tank Unit properties can be found on the player aid card.
ARTILLERY UNITS: Artillery and Nebelwerfer units are collectively called Artillery Units.
2.5 Unit I.D.
The divisional IDs are printed first and in bold for easy recognition—it is the only ID number that is relevant in game play. The second number is the regimental number, and the third (if any) is the battalion ID.
2.6 Arrival Information
Indicates the turn the unit arrives and the Entry Hex it arrives at.
EXAMPLE: 3-AB means the unit arrives on Turn 3 in either Entry Area A or B.
2.7 Set Up Information
A white box indicates an at-start unit. A red box indicates an at-start unit with movement restrictions (29.1). Each Allied unit lists a starting hex number while German units list the Corps they belong to at the start of the game.
2.8 Morale Box
All units are either Elite, Veteran or Green. A red box around the Defense Strength means the unit is Elite, a white box around the Defense Strength means the unit is Green, and no box means Veteran. Morale is used for Fire Fights (16.2), Determined Defense (16.7), Disengagements (20.2), and Surrender Checks (23.7).
2.9 Tank Quality (TQ)
A general rating given to Tank Units. The higher the better. Used to determine Armor Shifts (21.1). TQs in red indicate a Tank Destroyer or Assault Gun (21.2), TQ in a square indicates a FLAK unit (21.2).
2.10 Color Schemes
The colors used to identify the nationality of combat units are:
- Green: U.S. Army
- Tan: British Army
- Dark Gray: German Waffen SS
- Gray: German Wehrmacht
- Blue Gray: German Fallschirmjäger
2.11 Army/Corps Identification Colors
Each combat unit is color coded according to the army or corps it starts in at the beginning of the campaign. German identification colors are used for the "Ourthe River" result on the Fuel Shortage Tables (6.4), Army Boundaries (11.10), and Prime Movers (22.3). Both players use the colors for Artillery Support restrictions (22.6).
GERMAN:
- Red: Dietrich's 6th Panzer Army
- Gray: Manteuffel's 5th Panzer Army
- Blue: Brandenberger's 7th Army
ALLIED:
- Purple: Middleton's VIII Corps
- Burgundy: Gerow's V Corps
- Orange: Patton's 3rd Army (Milikin's III & Eddy's XII Corps)
- Beige: Collin's VII Corps
- Blue: Ridgeway's XVIII Airborne Corps
- Red: Horrock's XXX Corps (British)
BOTH:
- Yellow: Remnants and Army level troops (US)
- White: Breakdown units
2.12 Game Markers
The game also includes a variety of markers that are used to help facilitate play of the game. Their use is explained through the rules, and includes: Truck, Bridge Blown, Prime Mover, Out of Supply, Improved Position (IP), and Fuel Dump markers.
3. The Map
3.1 Setup
Place the maps so the East Map overlays the West Map. Players may sit on any side they wish. Marker holding boxes are provided along the edge of the map for players who wish to keep these markers handy and organized.
3.2 Entry Hexes and Blocking Positions
Entry Hexes are indicated by a star for Allied units or a balkenkreuz for German units. Connected to each Entry Hex on the East Map is a Blocking Position box to hold Allied units that are abstractly blocking German movement down that particular road.
3.3 Rivers That Flow Through Hexes
Ignore rivers that flow through the middle of a town (such as at Malmédy) or in the middle of a Wooded Rough hex. The importance of the river as a movement barrier and defensive terrain has been mitigated by the other terrain.
3.4 The Terrain Effects Chart (TEC)
Please see the Terrain Effects Chart for a complete list of terrain and its effects on Movement and Combat.
4. Sequence of Play Outline
Each game-turn consists of a German Player Turn followed by an Allied Player Turn. The sequence of each game-turn must be strictly followed.
A. GERMAN PLAYER TURN
- The Artillery Supply Phase (5.0)
- The Fuel Shortage Phase—German Turn only (6.0)
- The Bridge Phase (7.1)
- The Movement Phase (11.1)
- The Rally Phase (18.6)
- The Combat Phase (14.1)
- The Traffic Marker Phase (24.3)
- The Supply and Surrender Phase (23.1)
- The Victory Check Phase—Allied Turn only (30.1)
PLAY NOTE: Night Turns follow a different and much shorter sequence (25.1).
B. ALLIED PLAYER TURN
The Allied Player Turn is identical to the German Player Turn (switching the term German for Allied), except the Allied player has a Victory Check Phase and no Fuel Shortage Phase.
C. END TURN
Record the completion of a game-turn by advancing the Game Turn marker one box.
5. The Artillery Supply Phase
5.1 In General
During this phase the phasing player flips over a number of his Artillery Units from their Fired side to their Ready side. If it is the German Turn, the German player should remove all his Prime Mover markers from the map in order to take stock of these important markers and better view his Artillery Units (22.3).
5.2 Artillery Supply Procedure
Artillery supply may not be accumulated—those not used are lost. The number of Artillery Units each side may flip over each friendly Artillery Supply Phase is:
- GERMAN: Three per turn. On Turn 2 (only) the German player may flip over six (5.4).
- ALLIED: All units may flip
5.3 Artillery Supply Restrictions
Artillery Units that are Disrupted/Broken (18.1), Out of Supply (23.4), or using Strategic Movement (Allied only [12.1]), may not be flipped to their Ready side.
NOTE: Artillery Units in an EZOC or Engaged (16.5) may be flipped. There is no need to trace a Line of Supply during this Phase, if not marked Out of Supply they may be flipped (it is assumed they have stocks of ammunition on hand).
5.4 Turn 2 Special Artillery Supply
To reflect the accumulation of supply for the offensive, the German player may flip six Artillery Units to their Ready side on Turn 2.
6. The Fuel Shortage Phase
6.1 Procedure
Starting on Turn 7 (19 AM) the German player checks for fuel shortage. Fuel Shortage is checked using the Fuel Shortage Tables (see below). Roll once for each table. If the result indicates a division (the Führer Begleit and the Führer Grenadier brigades are considered divisions for this rule), then all units in that division are considered out of supply and suffer all the penalties of that status (23.4). The result often gives a choice of two divisions; the German player may choose either one.
DESIGN NOTE: Units marked OOS for Fuel Shortage can have the marker removed in the Supply and Surrender Phase (at the end of the German player's turn) if they can trace a Line of Supply.
Fuel Shortage Table 1
| Die Roll | Result |
|---|---|
| 1 | No Shortage |
| 2 | West of the Ourthe: 5 PzA* |
| 3 | 15 PG or 9 Pz |
| 4 | Füh Bglt and Füh Gr |
| 5 | 2 Pz or Pz Lehr |
| 6 | 116 Pz |
| 7 | Any one Pz Div in 5 PzA* |
Fuel Shortage Table 2
| Die Roll | Result |
|---|---|
| 1 | No Shortage |
| 2 | West of the Ourthe: 6 PzA* |
| 3 | 3 PG |
| 4 | 2SS or 9SS Pz |
| 5 | 1SS or 12SS Pz |
| 6 | 2SS and 9SS Pz |
| 7 | 1SS and 12SS Pz |
DRM: +1 starting on Turn 15 (23 AM). *Allied Player picks division (6.4).
6.2 Fuel Shortage Die Roll Modifier
Starting on Turn 15 (23 AM) the German player must modify his die roll by +1 to account for Allied bombing of the rail net west of the Rhine.
6.3 Fuel Shortage and Reinforcements
If fuel shortage targets a division that is arriving as a reinforcement that turn, it arrives in an unsupplied state (it may use only Tactical Movement). If only one of the formations listed has arrived, the German player must select the one that is on the map. If neither division has arrived the result is treated as a "No Shortage" result.
6.4 Any Division Results
(6.4.1) West of the Ourthe: The Allied player selects the German division belonging to the appropriate army (5 PzA or 6 PzA). Only the units of that division that are west of the Ourthe River Line at that moment are affected.
PLAY NOTE: The Ourthe River Line starts from the south edge at hex 1003, runs straight north to the Ourthe Occidentalle, along that river to the Ourthe, along the Ourthe to the Meuse. Any units on or west of this line are considered west of the line.
(6.4.2) Any One Pz Div: The Allied player can pick any one panzer division in the 5th Pz Army on the East or West Map.
7. Building and Blowing Bridges
7.1 The Bridge Phase
During this phase the phasing player may destroy or rebuild bridges.
7.2 Bridge Demolition
Both players may destroy (or the colloquial "blow") bridges. Bridge demolition occurs in the friendly Bridge Phase or during your opponent's Combat Phase. Only one attempt on each bridge is allowed per player turn. Supply has no effect on blowing bridges. Success or failure is determined using the Bridge Demolition Table. If the result is "Blown" the bridge is destroyed and a Blown Bridge marker is placed. Players must treat a blown bridge as an unbridged river hexside.
Bridge Demolition Table
| Die Roll | Result |
|---|---|
| 1-4 | Blown |
| 5, 6 | No Effect |
DRMs: +1 if during enemy turn; +2 if Disrupted or Engaged. All modifiers are cumulative. Treat results more than 6, as 6.
7.3 Bridge Demolition in a Friendly Bridge Phase
You may only attempt to blow a bridge during your turn if an enemy unit is within one hex of that bridge (see the example below). Bridge demolition requires that you have a friendly, non-Broken Combat Unit within one hex of the bridge hexside. The 1-hex range may be traced through EZOCs, but not through enemy units, enemy Roadblocks (33.0), or into or across an enemy ZOC Bond.
EXAMPLE: It is the Bridge Phase of the Allied player turn. The American player selects the unit shown to blow as many bridges as possible. The bridges marked A may not be blown because they are not within one hex of an Allied unit. The bridges marked B may not be blown because the 1-hex range may not enter or cross an enemy ZOC Bond or a hex containing an enemy unit. All other bridges may be blown by the Allied unit on a die roll of 1–4.
7.4 Bridge Demolition in the Combat Phase
Bridge blowing is allowed during your opponent's Combat Phase whenever an enemy unit is about to attack across the bridge hexside. Successful demolition of a bridge during the Combat Phase will:
- Prevent any Tank Unit that is attacking across the bridge from gaining the Armor Shift (21.3).
- Prevent any Vehicle Type Unit from being used as the Lead Unit in a Fire Fight (16.2).
- Prevent any Vehicle Type Unit from Advancing After Combat across the river hexside (19.2).
- Allow the attacker the opportunity to cancel the attack (14.4).
7.5 Bridge Demolition Modifiers (cumulative)
+1 If the attempt is made during your opponent's Combat Phase. +2 If the friendly unit conducting the demolition is either Disrupted or Engaged.
7.6 Demolition Restriction
- FIRST DAY: No bridge blowing is allowed on Turns 1 and 2 (including the first Night Turn). Exception: the German player must check the Ouren bridge (7.7).
- Broken Units or units using Strategic Movement, Trucks or Prime Movers may not blow bridges.
- When a river flows through the middle of a town hex (example Clervaux and Houffalize), no demolition is possible (3.3).
7.7 The Ouren Bridge (E2020/2119)
DESIGN NOTE: The bridge near Ouren actually represents two weak bridges. These were crucial to the advance of the 116th Panzer Division which, upon reaching the bridges on the second day of the offensive, found the bridges inadequate for tanks and heavy equipment. In this game there is a chance one of the bridges is adequate.
The first time a German unit attempts to move, attack, or advance across the Ouren bridge the Allied player rolls a die. On a die roll of 1-4 the bridge collapses and is considered destroyed (and a Blown Bridge marker is placed). On a die roll of 5 or 6 the bridge remains intact and is considered a normal bridge. This special die roll occurs only once—if the bridge is destroyed and later rebuilt it is considered a normal bridge in all respects; if the bridge remains intact it can be blown like all other bridges starting on Turn 3.
7.8 Rebuilding Bridges
Bridges may be rebuilt by either player at original bridge sites. To build a bridge the following two conditions are necessary:
- Both hexes tangent to the bridge hexside must be clear of enemy units and either be: a) occupied by friendly units, or b) clear of enemy Zones of Control (9.1).
- A Supply Path using roads only (23.3) must be possible from at least one of the hexes tangent to the bridge hexside.
DESIGN NOTE: If there are no enemy units projecting a ZOC on the construction site, then a friendly unit is not physically needed in the hex to repair a bridge.
7.9 Bridge Construction Procedure
Bridge construction is conducted in a two-part process. In the first friendly Bridge Phase that the two conditions above are satisfied, the Blown Bridge marker is flipped to its Under Construction side. In the next friendly Bridge Phase, if the two conditions above are still met, the Blown Bridge marker is removed and the bridge may be used normally that turn. If the conditions are not met in the second Bridge Phase, the Under Construction marker must be flipped back to its Blown side.
8. Stacking
8.1 Stacking Limits
Stacking occurs when multiple units are in one hex. The stacking limit for both sides is 3 Stacking Points plus Free Stacking Units. Markers have no Stacking Point value and may freely stack in a hex without limit.
8.2 Stacking Points
Each Stacking Point represents approximately a battalion, so a 3-battalion regiment would have a Stacking Point value of 3 while a 2-battalion regiment would have a Stacking Point value of 2. Stacking Points are indicated on all non-silhouetted units by the number in the small black box to the right of the unit-type symbol.
FREE STACKING UNITS: All silhouetted units (the Brummbar, Sturmtiger, FLAK, and all Tank Units depicted by a picture) and all Artillery Units have no Stacking Point value and can stack in a hex for free under the following conditions:
- No more than one Artillery Unit per hex.
- No more than two steps of silhouetted units per hex.
NOTE: For ease of identification, all 2-step silhouetted units have a Defense Strength of 3 or 4. All 1-step silhouetted units have a Defense Strength of 2 or 1.
8.3 Stacking Restrictions
The stacking limit can never be voluntarily exceeded except during the course of movement, advance, and after a retreat. The stacking limit must be strictly observed at the completion of movement, Retreat or an Advance After Combat. The owning player must correct all stacking violations at these times by eliminating enough steps from the hex to satisfy the stacking limit.
8.4 Allied Cooperation
British and American units may stack and defend together in the same hex, but may not participate in the same attack (27.3).
9. Zones of Control (ZOC)
9.1 General Rule
The six hexes immediately surrounding a hex occupied by one or more combat units constitute the Zone of Control (ZOC) of those units. All combat units exert a ZOC. Multiple Enemy ZOCs give no additional effect. A hex can have friendly ZOCs and Enemy ZOCs simultaneously.
9.2 ZOCs and Movement
(9.2.1) Stops Movement: Units must stop upon entering an enemy Zone of Control (EZOC). Units that start their movement in an EZOC may move away. It costs all units one additional Movement Point (+1 MP) to exit an EZOC. It costs no additional movement points to enter an EZOC.
(9.2.2) ZOC to ZOC Movement: A unit that starts its move in an EZOC may move directly into another EZOC (and stop) of the same or different enemy unit as long as it does not cross or enter a ZOC Bond (10.2).
9.3 ZOCs and Silhouetted Vehicle Type Units
ZOCs from silhouetted units do not extend into or out of a Wooded Rough or Forest hexes except along a road (any type).
9.4 Other Effects of ZOCs
- EZOCs and Retreats: 17.1, 17.2
- EZOCs and Advances: 19.3
- EZOCs and Supply Paths: 23.3
10. ZOC Bonds
10.1 General Rule
When two friendly non-Artillery Units that are two hexes apart (with one vacant intervening hex), and are in Good Order (18.1), they create a bond between them that no enemy unit may enter or cross. Artillery Units and Disrupted units have ZOCs but may not form ZOC Bonds. Due to the pattern of a hex grid, there are two types of ZOC Bonds—Hex Bonds and Hexside Bonds.
10.2 Effects of ZOC Bonds
- Units may not enter an enemy Hex Bond or cross an enemy Hexside Bond during the Movement Phase.
- Units forced to Retreat into an enemy Hex Bond or across an enemy Hexside Bond are eliminated (17.2).
- Supply can never be traced into an enemy Hex Bond or across an enemy Hexside Bond.
10.3 Negating ZOC Bonds
A Hexside Bond is negated when enemy units are located on each side of the intervening hexside. A Hex Bond is negated when the intervening hex contains an enemy unit. A ZOC Bond is negated as soon as the condition occurs.
10.4 Intersecting ZOC Bonds
If both players have intersecting ZOC Bonds, then neither player may cross the other's ZOC Bond until it is negated.
10.5 ZOC Bonds and Terrain
(10.5.1) A ZOC Bond cannot extend ACROSS two river hexsides or two Wooded Rough hexsides or any combination of those two, with roads and bridges having no effect on that. Lakes also have no effect on ZOC Bonds.
(10.5.2) Pushing Hexside Bonds: When determining if rivers or Wooded Rough terrain breaks a friendly ZOC Bond, push the ZOC Bond to the side of the hexside of your choice but it may not be pushed into a hex containing an enemy unit.
(10.5.3) Silhouetted Units and Hex Bonds: Silhouetted vehicle units in a Wooded Rough hex may only form a ZOC Bond across a Wooded Rough hexside if a road exist through that hexside.
10.6 ZOC Bonds With the Map Edge
A unit can form a ZOC Hexside Bond with a friendly map edge. Allied units can form a ZOC Bond with the South, West and North map edges. German units can form a ZOC Bond with only the East edge.
11. Rules of Movement
11.1 The Movement Procedure
During the Movement Phase the phasing player may move all, some, or none of his combat units. Each unit has a Movement Allowance (MA) that is the maximum number of Movement Points (MPs) it may expend for movement during the Movement Phase and still be able to attack in the Combat Phase. Each hex entered costs a certain number of MPs to enter as determined on the Terrain Effects Chart (TEC). You must complete the movement of one unit (or stack) before starting to move another.
11.2 Extended Movement
Non-Mechanized units may use Extended Movement to increase their Movement Allowance by 2 MPs. Mechanized Type units may not use Extended Movement (Mechanized units have Strategic Movement). Units that use Extended Movement may not end their move adjacent to an enemy unit (even if the hex is not in an EZOC). However, a unit may start adjacent to an enemy unit and use Extended Movement.
11.3 Tactical Movement
Any unit with a MA of 2 or more, may ignore all MP cost (for terrain, EZOCs, etc.) and move up to two hexes, this is called Tactical Movement. Units that use Tactical Movement may attack normally in the following Combat Phase. Units that use Tactical Movement must still stop upon entering an EZOC, may not cross enemy ZOC Bonds and may not enter or cross prohibited terrain (example: Vehicle Type units and non-road Forest hexes).
DELAY MARKERS: Traffic markers (24.1), Roadblocks (33.0) and St-Vith Bottleneck hexes (24.7) are ignored when using Tactical Movement.
11.4 Movement and Rivers
(11.4.1) Rivers: Vehicle Type units (2.4) may not cross an unbridged river hexside—they must use bridges. Infantry Type units may only cross if they start adjacent to the river hexside and use Tactical Movement (move a maximum of two hexes).
(11.4.2) The Meuse: Is treated as a regular river for movement and combat purposes. However, units are eliminated if they Retreat across the Meuse (17.2).
11.5 West Wall and Forest Hexes
Vehicle Type Units may only enter and exit West Wall and Forest hexes if following the path of a road.
11.6 Wooded Rough (Dark Green) Hexsides
Wooded Rough represents a wooded valley with a small river running through the middle of the hex. Crossing a non-road dark green hexside is the same as crossing an unbridged river hexside. Vehicle Type units may not cross, Infantry Type units may only cross if they start adjacent to the Wooded Rough hexside and use Tactical Movement. Infantry Type units may not cross two non-road Wooded Rough hexsides in the same Movement Phase.
11.7 Road Movement
A unit that follows the path of a road when it moves may use the reduced rate of the road. The road rate may be used when moving into or out of an enemy ZOC.
11.8 Forest Roads
Secondary Roads in Forest or Wooded Rough hexes that don't share the hex with a Primary Road are called Forest Roads. Forest Roads are indicated with a dashed line. This type of Secondary road cost 2 MPs for Mechanized units. See 19.1.3 for its affects on Advance After Combat.
11.9 Exiting the Map
(11.9.1) Allied Units: Allied units may exit the map through the south, west or north map edge. An Allied unit that exits the map is placed in the Off Map Box associated with that map edge (southwest, southeast, west, northwest or northeast). Allied units may exit the map via movement, Retreat, or Advance After Combat. During the Movement Phase the cost to exit the map from a map edge hex is always 1 MP. During an Advance After Combat it cost 1 hex from the unit's advance rate.
See 13.4–13.8 for additional details on Off Map Boxes.
(11.9.2) German Units: German units may never enter Off Map Boxes, and may only exit the map to fulfill their victory conditions. No unit from either side may exit the east edge.
(11.9.3) To Antwerp: German units that exit the map through any F or G Entry Hex to fulfill their victory conditions are placed in the Antwerp Box. German units must exit via an Entry Hex (paying the road cost), they may not exit between two Entry Hexes. They may not re-enter the map after exiting. Once a German unit uses an Allied Entry Hex to exit the map, that particular hex is no longer available as an Entry Hex for Allied units.
(11.9.4) Retreat off the Map: An Allied unit that retreats off the map is placed in the appropriate Off Map Box. If the retreat called for the unit to become Disrupted or Broken, then it must be marked as such. That unit may not re-enter the map, or even exit the Off Map Box until it Rallies (18.6).
11.10 Army Boundaries
(11.10.1) Movement Restrictions: German units may not cross the Army Boundary Lines before Turn 5 (18 AM). Army Boundary Line restrictions are removed at the start of Turn 5. The boundary lines do not extend beyond the hexes marked on the map—so German units that move west of the boundary lines may move in any direction.
(11.10.2) Effects on Combat: German units may attack across army boundaries but may not Advance After Combat across them. If a German unit is forced to retreat across an Army Boundary Line it may not Rally (18.6) until it has recrossed the boundary line or until Turn 5. Army Boundaries have no affect on ZOCs or ZOC Bonds.
12. Strategic Movement and Truck Markers
12.1 Strategic Movement in General
Mechanized units (including Allied Artillery Units) may use Strategic Movement to double their MA. Strategic Movement is not available to German non-Mechanized units, German Artillery Units (22.3), Disrupted/Broken units, or units that are out of supply. Non-Mechanized Allied units may use Strategic Movement if they are assigned Trucks (12.4.3). Units using Strategic Movement must move entirely along roads (all types). Reinforcements entering the map may arrive using Strategic Movement.
EXAMPLE: A Cavalry Squadron (MA=7) in Strategic Movement could move 28 hexes along a primary road.
12.2 Restrictions
Units that use Strategic Movement can start stacked with other units but are under the following restrictions:
- May not start their move adjacent to an enemy unit or at any time move adjacent to an enemy unit.
- May not end their move stacked with any unit (exception 12.4.2), nor may other friendly units end their move stacked with them.
- May not blow bridges or build Improved Positions.
- May not end their move adjacent to another unit that bears a Strategic Movement or Truck marker. If the unit is adjacent but on a different road, then it is not considered adjacent for this rule.
12.3 Strategic Movement and Traffic Markers
Units using Strategic Movement may enter and pass through St-Vith Bottleneck hexes (24.7), and hexes containing a Traffic marker (24.1), or a Roadblock (33.0) by paying the additional movement cost.
12.4 Strategic Movement (SM) Markers
(12.4.1) Limit: The number of units that may use Strategic Movement in a single Movement Phase is strictly limited to the number of SM markers available to each side (6 for the German player, 10 for the Allied player).
Allied SM markers are printed on the back of Truck markers, German SM markers are printed on the back of Prime Mover markers.
PLAY NOTE: This means that for every infantry unit trucked, one less Allied Mechanized unit can use Strategic Movement; and for every German Mechanized unit using Strategic Movement, one less German Artillery Unit can be moved (22.3). German SM markers can be used for any Mechanized unit—ignore the army affiliation on the reverse side.
(12.4.2) Procedure: Place a SM marker on every unit (including Reinforcements) that used Strategic Movement. Use the Truck side of the Strategic Movement marker for non-Motorized units. Units that are part of the same regiment or brigade may stack together during Strategic Movement and use only one SM marker. For example, the 106/424(-) and the 106/424/1 would require only one Truck marker if stacked together.
PLAY NOTE: Units that are part of the same regiment or brigade have a colored stripe behind their I.D.
(12.4.3) Truck Markers: Allied non-Mechanized units must be assigned trucks to use Strategic Movement. A non-Mechanized unit moving in trucks is identical to a Mechanized unit using Strategic Movement—trucks are SM markers. An Allied non-Mechanized unit may be assigned trucks if it starts its Movement Phase on a road (any type) and is not adjacent to an enemy unit, or it is currently in an Off Map Box. A unit must expend its entire MA to load up on trucks (i.e., 1st turn place Truck marker—2nd Turn move unit).
Exception: Allied non-Mechanized reinforcements may enter the map in trucks—they do not need to spend their first turn loading.
(12.4.4) Truck Movement Rate: Allied non-Mechanized units trucked receive 12 MPs and move at the rate of Mechanized units. Units in trucks are considered to be using Strategic Movement and must abide by all the rules of Strategic Movement. However, do not double the 12 MPs, the movement rate has already been adjusted for Strategic Movement.
EXAMPLE: A non-Mechanized unit being transported in a truck could move 24 hexes along a primary road.
12.5 Strategic Movement and Combat
Units under an SM or Truck marker may not attack and have their Defense Strength halved (round up). They may not benefit from DCBs, be used as a Lead Unit in a Determined Defense, or form ZOC Bonds. Their TQ and ZOCs are unaffected.
12.6 Removing SM and Truck Markers
The SM/Truck marker is removed at the conclusion of combat if the unit is attacked. They are voluntarily removed at anytime in a friendly Movement Phase as long as the unit has not moved. Once removed the unit may be moved normally. The SM/Truck marker removed is immediately available for use with another unit.
13. Reinforcements, Entry Hexes, Off Map Boxes and Blocking Positions
13.1 Reinforcements
Reinforcements receive their full MA on their turn of entry and enter play during the Movement Phase by paying the terrain cost (the road rate) of the first hex entered. Reinforcements must enter through Entry Hexes, they may not enter through hexes between two Entry Hexes. Reinforcements may enter the map by moving into an enemy ZOC but must stop and move no farther. Reinforcements may use Strategic Movement on the turn of entry. Allied non-Mechanized reinforcements may enter the map in trucks if Truck markers are available. In lieu of entering the map, a reinforcement may be placed in the Off Map Box or a Blocking Position associated with the unit's Entry Hex.
EXAMPLE: The American 4/8/2 infantry battalion scheduled to arrive on Turn 3 may either enter the map at Entry Hex A or B, be placed in the Allied Southeast Off Map Box, or placed in a Blocking Position for Entry Hexes A or B. (Moving to the Blocking Position only makes sense if Entry Hex A or B is German occupied [13.4].)
13.2 US Engineer Reinforcements
(13.2.1) Arrival: American Engineer units do not arrive from off map. Instead, on their turn of arrival the Allied player places them in friendly controlled Town or City hexes (no villages). No more than one in each Town/City hex (one may be placed in each of the two Bastogne hexes for a total of two). They must be placed in a Town or City hex that has a road-bound Supply Path to an Allied Supply Source. They may exceed stacking limits upon placement but they may not be placed adjacent to enemy units or in Town/City hexes containing enemy Roadblocks (33.0).
(13.2.2) Movement Restrictions: American Engineer units may use only Tactical Movement on the turn they arrive.
DESIGN NOTE: During the panic of the first three days the US mobilized the corps and army engineer battalions in the area to fight as infantry.
13.3 Artillery Reinforcements
All Artillery Units arrive on their Fired side.
13.4 German Capture of Entry Hexes
If a German unit occupies an Entry Hex that has a Blocking Position then no Allied reinforcement scheduled to enter through that Entry Hex or any Entry Hex in that "sector" can enter the map until the German threat is "blocked." A Sector is defined as the Off Map Box and all Entry Hexes associated with that Off Map Box. Furthermore, no unit in that sector may move to a different Off Map box.
BLOCKING: German units on an Entry hex present a threat to the Allied player beyond the map. To block this threat, an Allied unit with a Defense Strength of at least 6 (or two or more units with a combined Defense Strength of at least 6) must be moved to the Blocking Position Box associated with that Entry Hex. See 13.1 and 13.5 on how to move to a Blocking Position.
EXAMPLE: It is Turn 4. Say the Germans have a unit in Entry Hex A (and the Allied player has only 4 Defense Factors in that Blocking Position). This means that no US reinforcements can enter the map through either Entry Hexes A, B or C until the Allied player places unit(s) with at least 6 Defense Factors in the Blocking Position for Entry Hex A. It also means units in the Allied Southeast Off Map Box may not move to the Allied Southwest Box. At the start of Movement Phase the Allied player places the 4/22/2 battalion in Blocking Position A, reaching the 6 Defense Strength requirement. Since the threat is now "blocked" the 10Arm/CCA can enter the map normally.
DESIGN NOTE: It is extremely important that the Allied player holds his flanks. If he cannot do it, he will have his reinforcements pulled from him to do it.
13.5 Movement from an Off Map Box
Units that start their move in an Off Map Box may:
- Remain in place.
- Move to any Blocking Position associated with that Off Map Box.
- Enter the map through any Entry Hex associated with that Off Map Box.* The unit may use its full MA (13.1).
- Move to an adjacent Off Map Box.*
13.6 Movement from a Blocking Position
Units that start their move in a Blocking Position may:
- Remain in place or move back to the Off Map Box.
- Enter the map through the Entry Hex connected to that Blocking Position (if the Entry Hex is free of enemy units).* The unit may use its full MA (13.1).
*Only allowed if all captured Entry Hexes in that sector are blocked.
13.7 Properties of Entry Boxes and Blocking Positions
- No stacking limits.
- German units cannot attack into these boxes.
- ZOCs do not extend into or out of.
13.8 Allied Attacks onto the Map
(13.8.1) Allied units in a Blocking Position may attack onto the map during the Allied Combat Phase. The number of Allied units that may attack an Entry Hex from a Blocking Position is limited to what the Allied player could normally stack in two hexes (6 Stacking Points plus 4 steps of Silhouetted units). Air Support and Artillery on its Ready side (22.5) in the Blocking Position or from the sector's Off Map Box can be utilized. All rules of combat apply.
(13.8.2) Restrictions: An attack onto the map is only allowed if all German-occupied Entry Hexes in that sector are blocked (have at least 6 Allied Defense Factors assigned to them). In other words, you can't attack onto the map until your flanks are covered.
(13.8.3) Failed Attacks: If the Allied attack onto the map does not succeed in removing the defender from the hex, the attackers remain in the Blocking Position.
(13.8.4) Successful Attacks: If the attack succeeds in removing the defender from the hex, all participating units may Advance After Combat—the first hex of the advance must be the Entry Hex. Any units that do not or could not advance (due to stacking restrictions) must remain in the Blocking Position.
14. Rules of Combat
14.1 General Rule
Phasing units may attack adjacent enemy units in the Combat Phase. Attacking is voluntary; no unit is forced to attack. No unit may attack or be attacked more than once per Combat Phase (exception: Breakthrough Combat [19.4]). All defending units in a hex must be attacked as one combined defense strength. The attacker may conduct his attacks in any order and need not predesignate them.
14.2 Multi-Hex Combat
- A defending unit or stack can be attacked from up to six different adjacent hexes.
- The attacker may attack only one hex at a time; he may not target two hexes in a single combat.
- No unit may split its Attack Strength to attack a second hex in a separate attack.
- Units in the same hex may attack adjacent defenders in different hexes as long as each attack is conducted separately.
NOTE: Unlike some other game systems, attacking units are not required to attack all adjacent defending units.
14.3 Command and Control Restrictions
(14.3.1) Two Formation Limit: The attacker may have a maximum of two different Formations participate in each attack. All units belonging to the same Division, Brigade, or Cavalry Group count as one Formation. Every Independent unit (those without an ID in bold) counts as one Formation unless attached (see below). Artillery is not restricted by this rule, but is subject to the Army/Corps ID limitations (22.6).
(14.3.2) Attachments: Each Formation may have one unit temporarily attached to it by simply stacking with one of the units of that Formation. The attached unit can be an Independent unit or a unit from another Division/Brigade/Cavalry Group. When "attached" they are considered part of the Formation they are stacked with.
EXAMPLE: Two German Formations are attacking; the 26th VG Division and 2nd Panzer Division. Lehr's Panther battalion is attached to the 2nd Panzer Division and Lehr's Recon battalion is attached to the 26th VG Division.
14.4 Combat Procedure
Follow these steps for each combat:
STEP 1: The defender may roll for bridge demolition before the attack takes place (7.4). If the bridge is blown the attacker may cancel the attack.
STEP 2: Compare the combined attack strength of the participating attacking units against the total defense strength (plus Defensive Combat Bonuses [15.1]) of the involved defending units and express the comparison as a numerical odds ratio (attacker to defender). Round off this odds ratio downward to conform to one of the odds ratio columns found on the CRT. Example, a 15 to 4 would be a 3-1, and 4 to 15 would be a 1-4.
STEP 3: The attacker declares whether he will use Air Support (15.6) and/or Artillery Support (22.7). Each Artillery Unit used is flipped to its Fired side.
STEP 4: The defender declares if he is using Artillery Support; if so he flips the Artillery Unit to its Fired side, rolls a die and consults the Defensive Artillery Table (22.8) to determine its effect.
STEP 5: If this is a German attack during Clear Weather (on or after Turn 15 [23 AM]), then the Allied player rolls on the Jabos Table (15.6).
STEP 6: After taking column shifts into account, the die is rolled and the results are implemented. Players immediately remove any step losses (16.3), perform Determined Defense (16.7), Retreats (17.1), Advance After Combat (19.1), and Breakthrough Combat (19.4).
14.5 Minimum and Maximum Odds
Combat at odds less than 1-3 is an automatic A1 result. Combat at odds greater than 7-1 is resolved on the 7-1 column. Attacker and defender column shifts are applied before the minimum and maximum restriction. Example, 9-1 odds with one shift left would use the 7-1 column.
15. Combat Modifiers
15.1 Defensive Combat Bonuses (DCBs)
Instead of column shifts for terrain the defender receives Defensive Combat Bonuses (DCBs). These are strength point additions to the hex (not per unit). Refer to the Terrain Effects Chart (TEC) for a hex's DCB value.
- The DCB can never exceed the combined defense strength of the defender's stack. Example, a 2-2-3 infantry battalion in a city hex (+4) would receive only 2 DCBs—not 4.
- Due to their lack of infantry support, a stack consisting of only silhouetted units (or silhouetted units and Artillery Units) is restricted to a maximum DCB of 1.
- Units with a Defense Strength in parenthesis do not receive DCBs nor do you add their Defense Strength when determining the number of DCBs for the hex (bullet #1).
- Units using Strategic Movement do not receive DCBs (12.5).
15.2 The Halving Rule
When halving, always halve by individual unit—not stack, and round any fractions up to the next higher whole number.
EXAMPLE: Two units with an attack strength of 5 would have a combined strength of 6 after halving (3 + 3 = 6).
IMPORTANT: An attacking unit may never have its attack strength halved more than once for a given attack.
15.3 Rivers
Combat units attacking across a River hexside (including the Meuse), have their attack strength halved. NOTE: An intact bridge allows a Tank Unit to gain an Armor Shift (21.3) but does not cancel the halving of its Attack Strength.
15.4 Vehicle Units and Combat
Vehicle Units have their Attack Strength halved if attacking across a hexside that they normally could not move across (Wooded Rough, West Wall, Forest hexes, and unbridged river hexsides).
15.5 Wooded Rough and Height Advantage
(15.5.1) Wooded Rough and Combat: Combat units attacking out of a Wooded Rough hex or from one Wooded Rough hex to another, have their Attack Strength halved.
(15.5.2) Height Advantage: Units are not halved attacking into a Wooded Rough hex from a non-Wooded Rough hex (this is called Height Advantage). A Vehicle Unit must attack along a road to get Height Advantage (due to 15.4).
DESIGN NOTE: Always ignore rivers inside Wooded Rough hexes—the Wooded Rough hexside benefit takes account of the river. Think of a unit in a Wooded Rough hex as being in a small valley. If it attacks up and out of the valley it is halved. If it is attacked from above, the attacker is not halved. A Wooded Rough hex is not necessarily a good defensive position in this game.
15.6 Allied Air Support
(15.6.1) When: Starting on Turn 15 (23 AM) the Allied player receives Air Support during AM and PM turns. No Air Support is allowed during a Night Turn.
(15.6.2) Offensive Air Support: During the Allied player turn, the Allied player uses Ground Support markers to indicate which attacks will receive air support. The Allied player determines the number of Air Support markers available that turn by rolling a die any time during his Movement Phase and halving the result (round fractions up). For example, a die roll of 5 would result in three Air Support markers. Each marker provides a favorable shift of one column to the right on the CRT. A maximum of one marker may be used in each combat. Air Support markers may not be accumulated and any not used are forfeited. The markers are removed after the combat is resolved.
(15.6.3) Defensive Air Support: During the German player turn, Allied Air Support is random and is determined by a die roll on the Jabos Table immediately before each attack is conducted (but after artillery commitment). The result on the Jabos Table indicates column shifts to the left. Defensive Air Support is applied to all German attacks and is not tied into the number of Allied Air Support markers.
Jabos Table
| Die Roll | Result |
|---|---|
| 1 | 3 |
| 2 | 2 |
| 3 | 1 |
| 4-6 | 0 |
EXAMPLE: A die roll of 1 would cause the German attack to suffer 3 column shifts left on the CRT.
15.7 West Wall
Only German units may benefit from the +3 DCB for the West Wall (the movement restrictions of 11.5 apply to both players). Vehicle Units attacking into a West Wall hex have their Attack Strength halved.
15.8 Improved Positions
(15.8.1) Combat Effects: Units defending in a hex with an Improved Position (IP) receive a DCB of +2. Units currently using Strategic Movement, and units with their Defense Strength in parenthesis receive no benefit from IPs. The restriction of +1 DCB for silhouetted units (15.1) also applies in Improved Positions.
Important: The +2 DCB is used in lieu of the terrain DCB—it is not cumulative. Building an IP in a Village, Town or City hex has no effect since those hexes already have a DCB value of 2 or more.
(15.8.2) How to Build: Both sides may build IPs in any hex. Any non-engaged, Infantry Type unit in Good Order, that is in supply and not using Strategic Movement may build an IP. Construction is a two-part process—an eligible unit that does not move in its Movement Phase may begin to build an IP. Place an IP Under Construction marker in the hex at that time. It may not attack in the following Combat Phase. If the unit is still there in the next friendly Movement Phase and is not Engaged, it may complete the IP (flip the marker over). The unit may move in the same Movement Phase that it completes the IP.
(15.8.3) Delayed Construction: An IP construction marker that cannot be completed (see above) can remain in the hex and be completed in a later turn (including by a different friendly unit).
(15.8.4) Removing IPs: At the end of each Movement Phase remove any IPs left vacant. During the Combat Phase remove IPs immediately if the occupants are eliminated or forced to retreat.
15.9 Miscellaneous Modifiers
- Units under SM markers have their Defense Strength halved (12.5).
- Tank Units may provide an Armor Shift (21.1).
- Artillery provides shifts on the CRT. Both the attacker and the defender may use artillery (22.6).
- Units marked Out of Supply have their Attack Strength halved (23.4).
16. Combat Results
16.1 Explanation of Combat Results
The words "attacker" and "defender" refer only to the units participating in the combat in question—not to the general strategic situation.
- DS = Defender Shattered: The defender loses 1 step. Surviving defenders must Retreat 4 hexes and become Broken. No Determined Defense is possible (16.7). The attacker receives the Bonus Advance (19.1) and Breakthrough Combat (19.4).
- DR4: The defender must Retreat 4 hexes and become Broken. No Determined Defense is possible (16.7). The attacker receives the Bonus Advance (19.1).
- DR3: The defender must Retreat 3 hexes and become Broken. No Determined Defense is possible (16.7). The attacker receives the Bonus Advance (19.1).
- DR2: The defender Retreats 2 hexes and becomes Disrupted. The attacker receives a Regular Advance.
- ENG: No Retreat or Advance. Place an Engaged marker on the defending stack (16.5).
- A1/ENG: Same as ENG except the attacker loses 1 step.
- FF = Fire Fight: The attacker may either treat this as an ENG result, or immediately roll again on the Fire Fight Table (16.2).
- FF (+1): Same as FF except the attacker must modify his Fire Fight die roll by +1.
- EX: Each side loses 1 step (16.3). Surviving defenders are Engaged. No Retreat or Disruption. If the defender had only 1 step, then the attacker receives a Limited Advance (19.1).
- A1: The attacker loses 1 step.
16.2 The Fire Fight Table
| Die Roll | Result |
|---|---|
| 1 | D1 |
| 2 | DR2 |
| 3 | A1/D1 |
| 4 | A1/DR2 |
| 5 | ENG+ |
| 6 | A1/ENG |
DRMs (cumulative): +1 Lead Unit is Green –1 Lead Unit is Elite. –1 Lead Unit is a Tank Unit with a gray TQ that is ≥ the highest TQ rating in the defending hex.* Applicable only in Terrain where the Armor Shift is allowed (21.3).
*The "≥" is intentionally different than the Armor Shift rules (21.1). Treat results less than 1, as 1; and results more than 6, as 6.
(16.2.1) Purpose: This table is only used when a Fire Fight result occurs on the CRT and the attacker wishes to "push forward." The attacker must first determine the Lead Unit. If the attacker has only one unit involved, then that unit is the "Lead Unit." If the attacker has two or more units participating then the attacker picks one unit as his Lead Unit. The Lead Unit determines any die roll modifiers and will be the unit to suffer a step loss if one is called for. The following units may not be selected as a Lead Unit: Disrupted, Broken, Artillery, and units under SM markers. Only a unit that can legally advance into the defender's hex can be designated as a Lead Unit—if the attacker has no such unit then he may not use the Fire Fight Table.
EXAMPLE: A Tank Unit may not be selected as a Lead Unit when attacking across an unbridged river hexside.
(16.2.2) Results Found Only on the Fire Fight Table:
- D1: The defender loses 1 step. Surviving defenders must Retreat 2 hexes and become Disrupted. The attacker receives the Regular Advance.
- A1/D1: Both sides lose 1 step. Surviving defenders Retreat 2 hexes and becomes Disrupted. The attacker receives the Regular Advance.
- A1/DR2: The attacker loses 1 step. The defender Retreats 2 hexes and becomes Disrupted. The attacker receives the Regular Advance.
- ENG+: No Retreat or Advance. Place an Engaged marker on the defending stack (16.5) and an Attacker's Advantage marker (16.6) on one of the attacker's stacks.
NOTE: If the Fire Fight result allows an Advance After Combat, all units in the original combat may advance—not just the Lead Unit.
16.3 Selecting Step Losses
The owning player always selects which unit suffers the step loss. On an EX result, the owning player must select a Tank Unit for the step loss if he had an Armor Shift in his favor in that combat. The selected Tank Unit must be one that qualified for the shift. When using the Fire Fight or Determined Defense Table, the Lead Unit always takes the step loss if one is called for (16.2, 16.7).
16.4 Indicating Step Losses
Flipping a unit over indicates the unit has suffered a step loss. If it is a one step unit, or the unit is already flipped, then it is placed in the Dead Pile.
REMNANTS: Any unit with a Stacking Point value of 2 on its reduced side (also indicated with a thin stripe) forms a remnant unit when it takes its second step loss. Remove the unit and replace it with a remnant of the same type. The remnant must abide by any retreats or disruptions of the CRT result. All remnants are considered Independent units. If there is no remnant available when a 3-step unit takes a second step loss, then none is created (the player forfeits the step).
16.5 Engaged Markers
Engaged affects the defender only (the attacker does not have to refight an engaged battle in the next turn). Units marked Engaged suffer the following effects:
- may not move in the following Movement Phase.
- may not begin or complete the construction of an Improved Position (15.8).
- suffer a +2 DRM for bridge demolition (7.5).
Engaged markers are removed in the owning player's Combat Phase (20.5).
16.6 Attacker's Advantage Markers
This marker is applied in an ENG+ result—place it on one of the attacking stacks or units pointing to the defender's hex. The marker provides a favorable column shift if the stack/unit attacks the same hex again in the following turn (by itself or with other units).
REMOVAL: The Attacker's Advantage marker is removed in the following cases:
- Always after resolving the second attack (unless another ENG+ is rolled).
- If the target hex is vacant of enemy units at the start of the owning player's Combat Phase.
- If all units originally under the marker exit the hex—it does not matter if other friendly units take their place. One or more units can exit the hex as long as at least one of the original attacking units remain.
- The units in the hex containing the Attacker's Advantage marker suffer a Retreat result (even if the Retreat result is canceled by a successful Determined Defense [16.7]).
16.7 Determined Defense
A determined defense represents a counterattack or a hold-at-all-cost order.
(16.7.1) Procedure: The defender may attempt to cancel a Regular Advance (from the CRT or the Fire Fight Table) by using the Determined Defense Table—a Bonus Advance may not be canceled. A successful result on this table will allow the surviving defenders to ignore the retreat and the associated Disruption and the attacker's advance is canceled. Apply step losses from any D1 or A1/D1 result before using this table. If there are two or more units in the defending stack, then the defender picks one unit as the Lead Unit; this unit determines any die roll modifiers and will be the unit to suffer the step loss if one is called for.
NOTE: A successful Determined Defense does not cancel any step losses suffered—only the Retreat and Disruption portion of the result.
The following units may not be selected as a Lead Unit: Disrupted, Broken, Artillery, and units under SM markers.
(16.7.2) The Determined Defense Table
| Die Roll | Result |
|---|---|
| ≤0 | Yes (EX) |
| 1 | Yes (–1 step) |
| 2 | Delay (–1 step) |
| 3-5 | No |
| ≥6 | No (–1 step) |
DRMs (cumulative): +1 Lead Unit is Green; –1 Lead Unit is Elite; –? The DCB of the defender's hex.
NOTE: The DCB is subtracted not added. Also all restrictions of 15.1 for a total DCB in the hex still applies. Treat results less than 0, as 0; and results more than 6, as 6.
(16.7.3) Explanation of Results:
- Yes (EX): The Determined Defense is successful. Each side loses 1 step (16.3) and the defender is marked with an Engaged marker.
- Yes (–1 step): The Determined Defense is successful. The defender loses 1 step and is marked with an Engaged marker.
- Delay (–1 step): The defender loses 1 step and his surviving units are retreated 2 hexes. The Attacker receives a Limited Advance (19.1).
- No: The Determined Defense fails.
- No (–1 Step): The Determined Defense fails and the defender loses 1 step.
EXAMPLE: The Allied player has an infantry battalion and a tank battalion in Clervaux and has just suffered a DR2 result. Instead of retreating he declares he is making a Determined Defense and selects the tank battalion as his Lead Unit. The Town's DCB provides a –3 modifier. He rolls a 4 which is modified to a 1 which gives a "Yes –1 step" result. The tank battalion is reduced one step and the retreat and disruption are canceled.
(16.7.4) Single Step Defenders: If the defender had only one step, and that step was lost in a successful Determined Defense, then the attacker may advance into the defender's vacated hex (only) and stop (a Limited Advance).
17. Retreats
17.1 Retreat Procedure
The attacker never retreats, only the defender. A stack of retreating units may retreat to different hexes. The owning player may determine the path, but must follow the guidelines below listed in order of priority:
- Defending units must be retreated the full number of hexes indicated without passing through the same hex twice. If possible, the retreat should end a number of hexes away from the battle hex equal to the number of hexes of the retreat result.
- EZOCs: If possible, avoid entering a vacant hex in an EZOC. If not possible, the first hex of a retreat may enter a vacant hex in an EZOC as long as the retreating unit does not cross or enter an enemy ZOC Bond. After that first hex, all other hexes in a retreat must be clear of enemy ZOCs! A friendly unit (one that did not retreat in the current combat phase) negates an EZOC in the hex it occupies for this purposes.
- If possible, a unit must end its retreat in Supply.
- If possible, avoid ending the retreat in violation of the Stacking Limit.
- ROADS: Vehicle Units must use roads as much as possible without violating cases 1-4 above.
CLARIFICATION: "If possible" means you can ignore it if its not possible. For example, retreating the full number of hexes from the battle hex is more important than avoiding enemy ZOCs in the first hex.
17.2 Elimination due to a Retreat
Units are eliminated if they retreat:
- into a hex occupied by an enemy unit,
- across or into an enemy ZOC Bond,
- into a vacant hex in an enemy ZOC other than the first hex of their retreat,
- across a non-bridged Meuse River or Lake hexside, or
- are unable to retreat the full number of hexes required.
Additionally, Vehicle Units are eliminated if they retreat:
- into or out of a Forest, West Wall or Wooded Rough hex unless through a road hexside, or
- across a non-bridged river hexside.
17.3 Unfulfilled Retreats
If the defender does not retreat because it is eliminated, the attacker still receives his full Advance opportunity.
17.4 Overstacking in a Retreat
Overstacking is not allowed after a retreat. A player may avoid an overstacked situation by retreating the stack (or the units in excess of the stacking limit) additional hexes until a hex is reached where stacking restrictions are not violated. Units retreated additional hexes become Broken if not already. If no such hex can be reached, then the steps in excess of the stacking limit are eliminated (owning players choice but the steps must come from those that retreated).
17.5 Combat Against Previously Retreated Units
If a unit or stack is retreated into a friendly occupied hex and that hex undergoes an attack (not Breakthrough Combat) in the same Combat Phase, the retreated units do not add their strength to the combat, and if required to retreat again are eliminated.
17.6 Retreat Off the Map
German units that retreat off any map edge, and Allied Units that retreat off the East Map edge are eliminated. Allied units that retreat off the South, West or North Map edge, are placed in the appropriate Off Map Box. They may reenter the map again after they Rally (18.6).
17.7 Artillery and Retreats
Artillery Units that retreat must flip to their Fired side. This includes German Artillery units under Prime Mover markers. German Artillery units without a Prime Mover marker are eliminated if forced to retreat.
17.8 Retreating Units Bearing Engaged Markers
Remove the Engaged marker from the retreating units and retreat normally. Note this can only happen if the unit was engaged in the Night Turn and attacked in the following AM turn.
18. Disruption and Rally
18.1 Disrupted, Broken and Good Order
Combat Units are always in one of three states: Disrupted, Broken, or Good Order. A unit that is neither Disrupted or Broken is classified as Good Order.
18.2 How Units become Disrupted and Broken
- Any Combat Unit that retreats 2 hexes becomes Disrupted.
- Any Combat Unit that retreats 3-4 hexes becomes Broken.
18.3 Effects of Disruption
A Disrupted unit suffers the following penalties:
- MOVEMENT: May only use Tactical Movement. If the unit starts in an EZOC it must move away if possible. If not possible, it may remain in the hex or move to another hex in an EZOC. A Disrupted unit may not intentionally enter an EZOC if it has other choices. Friendly units in Good Order negate EZOCs in the hex they occupy for this purpose.
- Has a ZOC but cannot be used to form a ZOC Bond.
- COMBAT: If the defending stack contains one or more Disrupted/Broken units the attacker receives one shift right on the CRT.
- Disrupted Artillery Units may not provide support, nor flip to their Ready side.
- RETREAT: A Disrupted unit that suffers another 2 hex retreat becomes Broken. A Disrupted unit that Breaks is eliminated.
- BRIDGES: Suffer a +2 DRM on the Bridge Demolition Table.
- May not use Strategic Movement, Determined Defense, build IPs, receive Replacements (25.2), or perform Breakdown (26.2).
18.4 Abilities of Disrupted Units
Disrupted units retain their ZOC, their full TQ value, and can benefit from DCBs.
18.5 Effects of Broken
A Broken unit is considered Disrupted and all rules that apply to a Disrupted unit also applies to a Broken unit with the following additional penalties:
- A Broken unit that suffers any type of retreat is eliminated.
- Recovery for a Broken unit is a 2-turn process. If it can recover (see 18.5) its status is improved to Disrupted. Removal of the Disrupted marker must wait until the following turn per 18.5.
- BRIDGES: May not be used to blow bridges.
18.6 Rally Phase
During the Rally Phase, all friendly Disrupted or Broken units that are not adjacent to an enemy unit automatically recover one level—Disrupted units have their Disrupted marker removed and Broken units become Disrupted. If the Disrupted or Broken unit is adjacent to an enemy unit then recovery is determined by a die roll:
| Die Roll | Result |
|---|---|
| 1, 2 | Recover 1 level |
| 3-6 | Unit remains Disrupted or Broken |
DRMs: +1 Unit is Green, –1 Unit is Elite. Treat results less than 1, as 1; and results more than 6, as 6.
19. Advance After Combat
19.1 Advance in General
(19.1.1) Who May Advance: The CRT result determines if the attacker may advance after combat. Only the units that participated in the attack may advance. Units not able to contribute Attack Factors due to the Formation Limit (14.3) or Factor Limit rules (34.0) may advance after combat if they were indicated as being involved and are stacked with attacking units. Artillery Units cannot Advance After Combat.
(19.1.2) Types of Advances: There are three types of Advances: Limited, Regular and Bonus.
- LIMITED ADVANCE: This occurs when the defender is eliminated but was not required to retreat (in an EX result or a successful Determined Defense by a 1-step defender)—the attacker may only occupy the defender's vacated hex.
- REGULAR ADVANCE: The attacker may advance one hex in any direction.
- BONUS ADVANCE: The attacker may advance two hexes in any direction. This occurs on a DR3, DR4 and a DS result.
(19.1.3) The Road Bonus: If a Mechanized unit follows the path of a primary and/or a secondary road throughout its advance, it may increase its advance rate by one hex. In this way a Mechanized unit could advance two hexes in a Regular Advance and three hexes in a Bonus Advance. Forest Roads may not be used in a Road Bonus until Frozen Ground Conditions start (28.1). Traffic markers (24.2) and Roadblocks (33.0) have no effect on the Road Bonus.
19.2 Terrain and Advance
- No unit may advance into a hex or across a hexside that is prohibited during normal movement.
- Infantry Type units may only advance into a Forest hex if it's the first hex of the advance or the unit enters the hex via a road. Vehicle Units may never enter such hexes unless following the path of a road.
- Infantry Type units may only advance across a non-road Wooded Rough hexside or an unbridged river hexside if it is the first hex of their advance. Vehicle Units may never cross such hexsides.
EXAMPLE A—A Regular Advance: The defender's vacated hex is indicated with dashed lines. The two German units can advance in any direction. The Mechanized unit may advance two hexes if it follows the path of the road.
EXAMPLE B—A Bonus Advance: Units may advance two hexes in any direction. The Mechanized unit may advance three hexes if following the path of a road. Note that the river may only be crossed, and the non-road Forest hex may only be entered, in the first hex of an advance. The 26/77 Gren VG regiment cannot advance into the hex marked "No" because it may not advance from one EZOC directly into another EZOC of the same enemy unit, except in the first hex of an Advance.
19.3 EZOCs and Advance
(19.3.1) ZOC Bonds: May never be entered or crossed during an Advance After Combat except when entering the defender's vacated hex.
(19.3.2) EZOCs do not stop an advance, but no unit may advance from one EZOC directly into another EZOC of the same enemy unit, except when entering the first hex of its advance.
19.4 Breakthrough Combat
(19.4.1) In General: If the CRT result is DS, then the attacking units may attack again after advancing. This second combat is called Breakthrough Combat. Only one stack of units may participate in this second attack, but you are allowed to form the stack (henceforth called the Breakthrough Group) in the defender's vacated hex. This move into the defender's hex cost 1 hex from their advance. A mechanized Breakthrough Group may use its full advance (including using the Road Bonus) and attack again; a non-mechanized Breakthrough Group, or a mix of both, may advance only one hex and attack again.
(19.4.2) Procedure: The Breakthrough Group may not split up and attack two or more target hexes. Finish advancing units from the originating combat before conducting the Breakthrough Combat. The Breakthrough Combat must be conducted before the attacker conducts the next regular attack. Breakthrough Combat is resolved in the same manner as normal combat using all the same rules. Artillery on its Ready side may be used (offensively and defensively). Units conducting Breakthrough Combat may Advance After Combat again if allowed by the CRT result.
(19.4.3) Eligible Targets: Breakthrough Combat can target any enemy units that the Breakthrough Group moves adjacent to (including those un-Broken units that retreated in the regular combat). The Breakthrough Group may not be used to add Attack Factors to a combat involving other friendly units.
(19.4.4) Multiple Breakthrough Results: There is no limit to the number of times a Breakthrough Group can advance and attack again as long as each attack achieves a DS result.
19.5 Supply and Advance After Combat
Units currently Out of Supply may not use the Road Bonus and may not conduct Breakthrough Combat.
19.6 Stacking and Advance After Combat
Stacking restrictions must be observed at the end of an Advance. Units may not end their advance in a hex containing a friendly unit in Strategic Movement.
20. Disengagement and Removing Engaged Markers
20.1 In General
Units that are marked with an Engaged marker may not move in the Movement Phase—but they have a chance at moving in the Combat Phase using the Disengagement Table. At any time during the friendly Combat Phase the phasing player conducts Disengagements. A unit may Disengage rather than attack—it may not do both. If successful, the unit is retreated one or two hexes by the owning player. All units adjacent to an enemy unit may use the Disengagement Table, not just engaged units (20.4). See 16.5 for the effects of an Engaged marker.
20.2 The Disengagement Table
Disengagement occurs on a unit-by-unit basis. Indicate which unit is attempting to Disengage and roll a die. For a stack of units the owning player must roll for each unit disengaging (announce before rolling which units will attempt to Disengage and which, if any, will remain). Apply any applicable DRMs and then find the result on the Disengagement Table.
| Die Roll | Result |
|---|---|
| 1-3 | Yes |
| 4 | Yes + D |
| 5 | No |
| 6 | No + D |
DRMs: +1 Unit is Green; –1 Unit is Elite; –1 Tank or Recon Unit. All modifiers are cumulative. Treat results less than 1, as 1; and results more than 6, as 6.
20.3 Explanation of Results
- Yes: Disengaging is successful. The unit must retreat one or two hexes abiding by the restrictions of 17.2 and 17.7. If the unit is not Disrupted it may stop in the first hex.
- No: Disengagement fails, the unit must remain in the hex.
- D: The unit is Disrupted (or Broken if already Disrupted). If the result is a Yes +D, then the Disrupted/Broken status is applied at the end of its retreat and the unit is prohibited from stopping in the first hex if that hex is in an EZOC.
20.4 Non-Engaged Units Disengaging
Units that were not Engaged and using the Disengagement Table may not enter an EZOC during their retreat (they were allowed their ZOC to ZOC movement opportunity during the Movement Phase). If the unit has no other option but to retreat into an EZOC, it is eliminated.
NOTE: A unit can move in the Movement Phase and conduct a Disengagement in the Combat Phase.
EXAMPLE: During the Movement Phase Unit A is moved to hex C—the unit must stop because it enters an enemy ZOC. Unit B cannot move in the Movement Phase because it is Engaged. During the Combat Phase both units conduct Disengagement. Unit A is successful and is retreated one hex (it could have retreated two). Unit B is also successful and is retreated two hexes (although it could retreat just one hex).
20.5 Removing Engaged Markers
Remove Engaged markers from your units:
- In the opposing player's turn if forced to Retreat.
- In the owning player's turn during the Combat Phase—all Engaged markers come off at this time. Remove them as you decide whether the unit will Disengage or not. Engaged units that did not Disengage may attack in the Combat Phase.
21. Tank and Recon Units
21.1 The Armor Shift
ATTACKER: The attacker gains a column shift to the right on the CRT when a Tank Unit participates in the battle in the following two cases:
- The defender does not have a Tank Unit, or
- The Tank Unit has a higher TQ rating than all the defender's units.
EXAMPLE: If a Tank Unit with a TQ rating of 4 attacks a Tank Unit with a TQ rating of 3, the attacker would receive a shift.
DEFENDER: The attacker suffers a column shift left on the CRT if he does not have a Tank Unit participating in the battle and the defender has both Infantry Type units and a Tank Unit defending. For this rule, a US Combat Command, the British Guards Armored Brigades and the 150th Pz Brigade satisfies both the infantry and armor requirement.
EXAMPLE: If the attacker attacked a Combat Command with only infantry, the attacker would suffer one shift left.
21.2 Red TQ Numbers
TQ ratings in a red circle must be reduced by one when the unit is attacking. The TQ rating is not reduced when the unit is defending. The German FLAK unit is not a Tank Unit and so cannot gain the Armor Shift—it can only prevent it. Its TQ number is in a red square as a reminder of this.
21.3 Terrain Effects on the Armor Shift
The attacker or defender can never earn the Armor Shift if the defender is in Forest, Wooded Rough, West Wall, or City hex. The attacker may not gain an Armor Shift from a Tank Unit that cannot legally cross the hexside into the defender's hex, whether due to an unbridged river, or a non-road Forest/Wooded Rough hexside. But the Tank Unit's presence is enough to deny the defender his Armor Shift (i.e., if the attacker has a Tank Unit, then the defender will never earn the Armor shift).
NOTE: With the above in mind, its possible to get the Armor Shift attacking across a river hexside at an intact bridge, or out of a Wooded Rough hex if the defender is in a hex where the base terrain is Clear or Light Woods.
21.4 Recon Units Special Ability
Recon Units defending alone in a hex may treat all D1 and DS results against them as a DR4 result.
21.5 Disengaging From Combat Bonus
Tank and Recon Units receive a –1 DRM when attempting Disengagement (20.2).
22. Artillery Units
22.1 Artillery in General
Artillery and Nebelwerfers are collectively called Artillery Units. They cannot move and fire in the same turn unless Shifting Fire Position (22.2). Allied Artillery Units that move more than one hex (or move to an Off Map Box or Blocking Position) must flip to their Fired side. German Artillery Units require a Prime Mover marker to move more than one hex (22.3). Allied Artillery Units on their Fired sides, and German Prime Movers move at the mechanized movement rate. Allied Artillery Units may use Strategic Movement; German Artillery Units may not.
22.2 Shifting Fire Position (1 Hex)
German Nebelwerfer brigades and Allied Artillery Units on their Ready side have an MA of 1. These units can shift one hex and still remain on their Ready side. The one hex move may be made into any hex, regardless of the MP cost, as long as the unit could legally enter the hex under normal rules of movement. Primary roads may not be used to move two hexes.
22.3 German Prime Movers
Germany was short of Prime Movers for their corps level artillery and much of it was left behind after the initial attack. Therefore German Artillery Units are nearly immobile. However, up to five Artillery Units per turn may have their MA increased to 5 if they use a Prime Mover marker (they move as a Vehicle/Mechanized unit but they may not use Strategic Movement—they may use Tactical Movement). There are five Prime Mover markers—two for the 6th Pz Army, two for the 5th Pz Army, and one for the 7th Army. A marker belonging to one army may not be used to move an Artillery Unit belonging to a different army. A Prime Mover may move an Artillery Unit (including Werfer brigades) on its Fired or Ready side (a German Artillery Unit is not flipped if it moves). Leave the Prime Mover marker on the Artillery Unit until the next Artillery Supply Phase to indicate the Artillery Unit cannot fire until then. There is no combat penalty for being under a Prime Mover marker. The German player removes all his Prime Mover markers from the map during the German Artillery Supply Phase (5.1).
22.4 Range
Each Artillery Unit has a range printed in a small box on the upper left side of the counter. This is the maximum distance (measured in hexes) that the Artillery Unit may be from the target hex and still provide artillery support (22.6). Intervening terrain and combat units have no effect. Both the attacker and the defender trace range to the hex under attack. Count the target hex but not the hex of the Artillery Unit.
CLARIFICATION: Artillery Units in a Blocking Position may support an attack onto the map (13.8), but not on-map combat.
22.5 Ready and Fired Sides
All Artillery Units have only one step; the reverse side is used to indicate the Artillery Unit has fired (and/or moved in the case of Allied artillery). The front side is considered the Artillery Unit's "ready" side. Once an Artillery Unit fires (or moves more than one hex if it is Allied), it is flipped to its back side. Artillery Units on their Fired side may flip back to their Ready side only during the Artillery Supply Phase (5.2).
22.6 Artillery Support in General
Only Artillery Units that are in range, in Good Order, on their Ready side and are not Engaged may provide artillery support. Each Artillery Unit may provide support to only one combat, after it is used it is flipped to its "Fired" side.
ARMY/CORPS IDENTIFICATION COLORS: An Artillery Unit may only provide Offensive Support to a combat if there is at least one ground unit participating in the attack that has the same Identification color (2.11) as the Artillery Unit. Ignore army identification colors for Defensive Support.
22.7 Offensive Artillery Support
Each Artillery Unit providing Offensive Support gives the attacker a favorable shift of one column to the right on the CRT. The attacker may use up to two Artillery Units per combat for a maximum of two shifts right.
22.8 Defensive Artillery Support
The defender may use only one Artillery Unit per combat. The defender finds the effect of his defensive artillery by rolling one die and checking the Defensive Artillery Table. The defender's artillery is flipped regardless of the result. If the result is a 1 or 2, the attacker must apply that number of column shifts to the left on the CRT. If the defender is Allied and a TOT (Time on Target) result is achieved, the attacker suffers one step loss and the attack is stopped cold (treat as an A1 result). The attacker chooses the unit to lose the step.
DESIGN NOTE: Time on Target was a practice of coordinating as many artillery batteries as possible to land their shells at one spot, all at one time. The coordination necessary to accomplish this made it infrequent, however, when it did happen it was devastating.
Defensive Artillery Table
| Die Roll | Allied Artillery | German Artillery |
|---|---|---|
| 1 | ToT | 2 |
| 2 | 2 | 2 |
| 3 | 1 | 1 |
| 4 | 1 | 1 |
| 5 | 1 | 0 |
| 6 | 0 | 0 |
(Numbers = CRT Column Shifts left)
22.9 Artillery in Ground Combat
Artillery Units may not attack by themselves—they may only provide Artillery Support. Artillery Units that are attacked use their Defense Strength without DCBs and may not provide Defensive Artillery Support to their own hex; however, an Artillery Unit attacked by an enemy unit may still provide Defensive Artillery Support to a different defending hex. An Artillery Unit may use its Defense Strength in the same Combat Phase it provides Defensive Ground Support.
PLAY TIP: It is often best to attack the hex containing the Artillery Unit first, because an Eng or Disrupted result will prevent the Artillery Unit from providing defensive support to another hex.
22.10 Summary of Other Characteristics
- Artillery Units have ZOCs but cannot form ZOC Bonds (9.1, 10.1).
- Artillery in Retreats (17.7).
- Artillery Units may not Advance After Combat (19.1).
- OOS Artillery Units cannot flip to their Ready side (23.4).
- Artillery cannot be rebuilt (25.2).
23. Supply and Surrender
23.1 The Supply and Surrender Phase
During the Supply and Surrender Phase the phasing player checks supply and surrender for all his units. Players check for supply by tracing a Supply Path from the unit to a Supply Source. If a Supply Path cannot be traced, the unit receives an Out of Supply marker. If the unit was already Out of Supply there is no additional effect. If any unit bearing an Out of Supply marker from a previous phase can now trace a Supply Path, the marker is removed.
NOTE: This rule also applies to German units that suffered fuel shortage at the beginning of the German turn—they are back in supply if they can trace a Supply Path at this time.
23.2 Supply Sources
Supply is available at certain map edge hexes. German map edge Supply Sources are indicated with a German balkenkreuz while Allied ones are indicated with a white star in a green circle (these also indicate Entry Hexes). To block a Supply Source an enemy unit must occupy the hex—merely passing through the hex has no effect on a Supply Source. Allied units in Off Map Boxes are always in Supply.
23.3 Supply Paths
A Supply Path is a path of contiguous hexes from a unit to a Supply Source. A Supply Path can consist of two portions: an Overland Portion and a Road Portion. The Overland Portion (if any) must always come before the Road Portion.
OVERLAND PORTION: The overland portion of the Supply Path may be up to four hexes long. It may traverse all types of terrain (including across rivers) with the following restrictions:
- It may not enter an enemy-occupied hex or cross or enter an enemy ZOC Bond.
- It may not enter a vacant hex in an enemy ZOC other than the first hex of the path. An overland Supply Path may enter that first vacant hex in an EZOC which is useful for units partially surrounded by enemy units. The presence of a friendly unit in a hex will negate the supply blocking effects of EZOCs within that hex.
EXAMPLE: The example above shows two legal overland Supply Paths for unit A. Note how the path can cross unbridged river hexsides and how unit B negates the EZOC in the hex it occupies.
ROAD PORTION: The road portion of the Supply Path may be of any length but must follow a path of contiguous road hexes (any type). At no time may the road portion of the Supply Path:
- Enter an enemy occupied hex.
- Enter an EZOC unless the hex contains a friendly unit.
- Enter a vacant, but enemy controlled Town or City hex (these hexes are considered garrisoned by non-combat troops).
- Enter a hex containing a Roadblock (33.0).
- Cross a river at a blown bridge hexside.
EXAMPLE: The three hexes marked "No" may not be used in the road portion of a Supply Path, either because of uncanceled EZOCs or blown bridges.
23.4 Out of Supply (OOS) Penalties
Any unit bearing an Out of Supply marker suffers the following penalties:
- COMBAT: Its Attack Strength is halved (fractions are rounded up so 1 halved is still 1).
- MOVEMENT: May only use Tactical Movement (11.3).
- ARTILLERY: Artillery Units may not flip to their Ready side. They may still provide artillery support as long as they are on their Ready side.
- RETREAT: Are eliminated if forced to retreat 3 or more hexes.
- ADVANCE: May not use the Road Bonus (19.1).
- REPLACEMENTS: It cannot receive Replacements (25.2).
23.5 Out of Supply Abilities
Units marked OOS retain their ZOC, their ability to form ZOC Bonds, their full defense strength, TQ and Tank effects, and can benefit from DCBs. OOS units can blow bridges and complete an IP (15.8) if it had been started.
23.6 Isolation and Surrender
After supply is checked, the phasing player then determines if any of his units bearing an Out of Supply marker are Isolated (including those units just marked). Any unit that cannot trace a Line of Communication (LOC) is Isolated. A LOC is similar to a Supply Path with the exception that the overland portion may be traced to a friendly unit which in turn can trace four hexes to another friendly unit, and so on, with eventually one unit in the chain being able to trace a normal Supply Path. If the unit is not able to trace a LOC, it is considered Isolated. Each Isolated unit or group of Isolated units must immediately check for Surrender.
DEFINITION OF AN ISOLATED GROUP: An Isolated Group may be of any size, but each unit in the group must be able to trace a 4-hex overland Supply Path to at least one other unit in the Isolated Group.
EXAMPLE: Units A and B form one group. Unit C forms a second group.
23.7 The Surrender Table
If units are part of a group then they will surrender as a group. Roll one die for each Isolated Group, and consult the Surrender Table. The result is the number of Surrender Points the Isolated Group accumulates (or removes in the case of an Air Drop). An Isolated Group surrenders if its Surrender Threshold is reached. Surrendered units are immediately removed from play and cannot be replaced.
PLAY NOTE: Since a Surrender Point marker implies the unit is Out of Supply, the Out of Supply marker is not necessary and may be removed.
| Die Roll | Result |
|---|---|
| 0 | –1 (Air Drop) |
| 1, 2 | 0 |
| 3-6 | 1 |
DRM: –2 for the Allied player during Clear Weather turns (28.2). Treat results less than 0, as 0.
23.8 Surrender Thresholds
Green Threshold: 3 Surrender Points. Normal Threshold: 4 Surrender Points. Elite Threshold: 5 Surrender Points.
Use the Elite Threshold if there are one or more Elite units in the group. Use the Green Threshold if all units in the group are Green. Use the Normal Threshold for all other groups. Keep track of the number of Surrender Points of a group with a Surrender marker next to one of the units in the group.
DESIGN NOTE: Units tended to surrender as a group and good units would inspire others to hold out.
23.9 Splitting and Combining Isolated Groups
If an Isolated Group splits into separate parts due to friendly or enemy action then each of the splinter groups becomes a separate group with its own marker. If two Isolated Groups combine then the combined group uses only the Surrender Points of the larger group. Larger is defined as the group with the greater number of attack factors (use printed values). If the two groups are identical in size, then use the greater of the Surrender Points.
23.10 Breaking Isolation
The Surrender Points are removed from an Isolated Group if during the friendly Supply Phase at least one unit in the group can trace supply.
24. Traffic Markers and Bottleneck Hexes
24.1 Traffic Markers In General
Each player may place available Traffic markers in an attempt to slow the movement of the opposing player's units. Besides traffic, these also represent German commando teams, SNAFUs, psychological disruption and air interdiction (once the weather clears). The Allied player has Traffic markers and the German player has Greif markers (named after Operation Greif). Both markers are identical and are collectively called Traffic markers.
24.2 Effects of Traffic Markers
Traffic markers increase the entry cost (road and off road) of the hex by two MPs for all units. Units using Tactical Movement (11.3) ignore Traffic markers. Traffic markers have no effect on combat, advance, retreat and Supply Paths. German Traffic markers have no effect on German units and Allied Traffic markers have no effect on Allied units.
24.3 The Traffic Marker Phase
(24.3.1) Placement: During this phase the phasing player may place any of his Traffic markers that are in his Traffic Marker Holding Box on the map. Only those markers in the box may be placed—the ones already on the map may not be repositioned.
(24.3.2) Random Removal: After placement he rolls two dice and removes his Traffic markers with the ID of those die rolls (for example, if a 2 and a 4 were rolled, he would remove his Traffic markers numbered 2 and 4). If doubles are rolled, then only one marker is removed. Place the removed Traffic marker(s) back in the Traffic Marker Holding Box for the next turn. Traffic markers are never voluntarily removed once placed on the map—they are removed only as a result of the removal dice roll or by a scheduled removal (24.6).
NOTE: Once German Traffic markers begin to be removed by scheduled removals (24.6) it is possible that the removal dice roll will not remove any markers.
DESIGN NOTE: Letting the opposing player pick where the traffic jams occur seems devious yet is sufficiently realistic—your opponent is apt to place the markers in the road hexes you need to use the most. Removing one or two with a die roll ensures that you never know which will be effective.
24.4 Traffic Marker Placement Restrictions
Traffic markers may not be placed:
- on or adjacent to one another (ignore your opponent's Traffic markers for this restriction),
- the Allied player may not place them in a St-Vith Bottleneck hex, although he may place them adjacent to those hexes.
Beyond those exceptions they can be placed in any hex, in or out of enemy ZOCs, in hexes occupied by enemy units, in German At Start Divisional Set up Areas, behind or in front of enemy lines.
24.5 At Start Situation
All markers start in the Traffic Marker Holding Boxes. The Allied player may place all six during his Traffic Marker Phase of Turn 1 (then roll to see which are removed). The German player does not receive his until Turn 3 (17 AM)—during his Traffic Marker Phase.
24.6 Traffic Marker Scheduled Removals
Starting on Turn 8 (19 PM), one German Traffic marker is removed permanently from play every PM turn. Removal occurs during the German player's Traffic Marker Phase. Markers must be removed in numerical order (i.e., #1 first, #2 second, and so on). Allied Traffic markers have no scheduled removals (once the clear weather starts they begin to represent air interdiction).
24.7 St-Vith Bottleneck Hexes
These three hexes are marked on the map in yellow. They have all the same effects as a Traffic marker (24.2) except units must pay four additional MPs (+4 MPs) instead of +2. The instant the German player gains control of St-Vith the cost of these hexes is reduced to +2 MPs. If the German player loses control of St-Vith the bottleneck hexes again cost +4 MPs. St-Vith Bottleneck hexes have no effect on Allied units or Tactical Movement.
NOTE: Allied Traffic markers may be placed adjacent to St-Vith Bottleneck hexes to create serious traffic problems for the German player. When that happens, it is often best for the German player to just use Tactical Movement to traverse it.
PLAY NOTE: +2 St. Vith markers are provided if players need a reminder of the Bottleneck hexes current value.
25. Night Turns and Replacements
25.1 In General
Between the PM and AM turn is a mini Night Turn. The player sequence in a Night Turn is flip-flopped (Allied first, followed by German) so each player will have two turns in a row to create some chaos for the other player. Night Turns are also when replacements arrive. The following is the Sequence of Play for each Night Turn:
A. Allied Night Replacement Phase B. Allied Night Movement Phase C. Allied Night Combat Phase D. German Night Replacement Phase E. German Night Movement Phase F. German Night Combat Phase
NOTE: There are no other phases to a Night Turn (such as Supply, Bridges, Rally, Traffic, etc.).
25.2 Replacements
(25.2.1) In General: During each Night Turn both players receive Replacements. Replacements are used to restore reduced or eliminated units. The number of Replacements each player receives is printed on the Turn Record Track. If a player receives only one replacement, then it may only be used for an Infantry Type unit (2.4). If a player receives two replacements, one may be used for an Infantry Type unit and the other may be used for either a Tank, Recon, or Flak Unit; or used for another Infantry Type unit. Replacements may not be saved, and those not used are forfeited. Players use their Replacements during their Night Replacement Phase.
(25.2.2) Procedure: Each Replacement can restore a reduced unit to its full strength side or bring a unit out of the dead pile on its reduced side (see 25.2.4 for restrictions). Units adjacent to an enemy unit may receive replacements. If a player uses a replacement to bring a unit from the dead pile, then the unit must arrive under the following restrictions:
- must be placed in a friendly controlled city, town or Entry Hex (no villages) free of enemy Roadblocks which has a road-bound supply path to a friendly Supply Source.
- may not be placed adjacent to an enemy unit.
- must be placed within 5 hexes of another unit with the same Corps/Army Identification color (2.11).
Alternatively, German units may be placed in any Entry Hex labeled K, L or M that is not in an EZOC.
(25.2.3) Large Units: Any unit in the dead pile with a stacking value of 2 on its reduced side may only be replaced if a supplied, non-Engaged, good order Remnant unit of the same type is on the map. Expend the replacement point, remove the Remnant, and place the unit (on its reduced side) where the Remnant was located. The Remnant removed from the map is then returned to the Remnant Display.
EXAMPLE: To bring a 6-6-3 US regiment out of the eliminated pile, the Allied player must have a 1-2-3 infantry-type Remnant on the map.
(25.2.4) Replacement Markers: Indicate each unit that received a replacement with a Replacement marker. During the upcoming AM Turn, that unit may move a maximum of one hex and may not attack. This marker has no effect on the unit's defense strength and is removed at the end of the owning player's Combat Phase of his AM turn. If the unit becomes Disrupted or Broken, remove the REPL marker and apply the effects of the new marker.
(25.2.5) Restrictions: Only units that are in Supply and in Good Order may receive Replacements. Units marked with an Engaged, Strategic Movement, or Night marker may not receive a replacement. The following units may never receive replacements: German Tank Units with a TQ of 5 or higher, German Tank Units with Black Box Attack Strengths, von der Heydte, 150th Panzer Bde, Allied Airborne units, Artillery Units, British units, and any unit that has Surrendered (23.7).
25.3 Night Movement and Combat
(25.3.1) Movement: Movement in the Night Turn is identical to the normal rules, except each side is limited to three stacks of units moving. The units moved may use their full MA. Extended Movement and Tactical Movement are allowed during a Night Turn, Strategic Movement is not. A stack indicated for Night Movement may break up and move in different directions during the Night Turn.
(25.3.2) Combat: Combat in the Night Turn is identical to the normal rules, except only the units that were marked with Night markers may attack. Artillery on their Ready side may be used for Offensive and Defensive Support in a Night Turn without the need for a Night marker.
(25.3.3) Placing the Night Turn Markers: Players must indicate in their PM turn which three stacks will be available for the upcoming Night Turn. To do this, the phasing player places a Night marker on each stack in the Movement Phase of his PM turn.
PLAY NOTE: If a player did not indicate any stacks for the Night Turn during his PM turn, then his Night Turn Movement and Combat Phases are skipped.
(25.3.4) Eligibility: Units must be in Good Order. Units that are Engaged or Out of Supply (including from German Fuel Shortage) may not be designated for the Night Turn.
(25.3.5) Restrictions: Units with a Night marker are under the following restrictions during that PM turn:
- if in an Off Map Box may not leave it.
- may only use 1 MP (no Tactical Movement), and
- may not attack.
(25.3.6) Bridge Blowing at Night: The only bridge blowing allowed in a Night Turn are those that may occur before combat, as described in 7.4.
(25.3.7) Removal: Night markers are removed in the owning player's Night Turn. If a German unit marked with a Night Marker is attacked in the Allied player's PM turn and is forced to Retreat—then the Night marker is removed.
26. Breakdown Units
26.1 In General
Both players may create a breakdown unit by reducing a larger unit. An infantry regiment creates an infantry battalion; a parachute, glider or Fallschirmjäger regiment creates a parachute battalion; a Panzergrenadier regiment creates a Panzergrenadier battalion; and a Combat Command or US Tank battalion creates a Task Force. The breakdown unit is placed in the hex with the unit that removed the step and both units may then move, disengage, or advance normally. Alternatively, a 3-step unit may break down into two breakdown units plus the appropriate Remnant unit.
26.2 Breakdown Restrictions
A unit must perform breakdown before it moves, disengages or advances after combat. Breakdown may only occur during a friendly Movement or Combat Phase—never during the enemy player turn. Disrupted units may not perform breakdown. EZOCs, OOS and Engagement markers have no effect on the ability of a unit to perform breakdown. The number of breakdown units that may be created is strictly limited by the number in the counter mix.
STRATEGY TIP: An Engaged unit may create a breakdown unit and then the reduced unit could attempt to Disengage while the breakdown unit holds the line.
26.3 Properties of Breakdown Units
Breakdown units are normal 1-step units in all respects. The morale ratings of Breakdown units are often lower than the morale rating of the parent unit to reflect the loss of integrity.
26.4 Rebuilding With Breakdown Units
Breakdown units may only reattach to the unit that created it.* The breakdown unit is removed from the map and the parent unit is increased one step. Rebuilding occurs during the Movement Phase at the instant the two units have completed their movement.
*This may require some bookkeeping.
27. Special Units
27.1 Allied Engineer Units
Allied Engineer units are eliminated if Broken or forced to retreat 3 or more hexes in a single combat. Their defense strength has been outlined as a reminder of this rule. Their Morale rating is Green.
DESIGN NOTE: Allied Engineer units were smaller than a regular infantry battalion and were not trained for sustained fighting. They were used as a stop-gap measure to hold bridges and key locations until larger forces could arrive.
27.2 Von der Heydte (Operation Stösser)
DESIGN NOTE: Operation Stösser was a paratroop drop into the American rear in the High Fens area. Their objective was the "Baraque Michel" crossroads. The parachute drop was a complete failure. Von der Heydte ended up with a total of around 300 troops. Too small and too weak to counter the Allies, they abandoned plans to take the crossroads and instead converted his mission to reconnaissance.
The Von der Heydte unit enters play on Turn 3 (17 AM) via an air drop. It may land in or within 8 hexes of hex 2335 (it's historical drop hex) in any Clear or Light Woods hex that does not contain a city, town, village, enemy unit, or EZOC. After placement, the German player rolls for its survival using the Von der Heydte Table. Von der Heydte is a 1-step unit, use the higher strength side if a 1 is rolled on the table, use the reduced side if a 2 or 3 is rolled. The unit may not move on the turn it drops. The unit is considered a normal 1-step unit for all purposes (including supply) once it lands.
PLAY NOTE: The German player is not required to drop it in the 6th Panzer Army sector.
27.3 British Units
(27.3.1) Movement Restrictions: All British units must remain on the West Map and west of the Meuse River at all times. Exception: see 29th Armoured Brigade.
(27.3.2) 29th Armoured Brigade: This unit is released from the British movement restriction rule on Turn 29 (30 AM) or when any German unit crosses the Meuse River.
(27.3.3) Attack Restriction: Due to the difficulty encountered in coordinating inter-Allied operations, British and American units cannot be involved in the same attack. There is no defensive penalty if British and American units are stacked together.
(27.3.4) Antwerp Defense: When German units exit the West Map through an F or G Entry Hex, the Allied player must respond by moving British units to the Antwerp Box. The combined Defense Strength of British units in the Antwerp Box must always exceed the combined Defense Strength of German units by at least 6. The Allied player may pick any British units currently on the map. The units are removed at the end of the German turn that the situation occurs—simply pick them up and place them in the Antwerp Box. British factors removed in excess of the required amount may count towards future German map edge exits. If there are insufficient British units on the map to satisfy this condition, then all British reinforcements must be diverted to Antwerp (as they arrive) until the Allied player again has +6 factors.
27.4 Sturmtigers and Brummbärs
The 1000(+) Sturmtiger and the 217th Brummbär units have their attack strength doubled when attacking a Village, Town or City hex. These units have their Attack Strength enclosed in a black box to remind players of this special ability. These units are not considered Tank Units for rule 21.1.
The Sturmtiger was equipped with a 38cm mortar while the Brummbär had a 15cm howitzer. Both were ideal for urban fighting.
27.5 Kampfgruppe Peiper
The four units of the 1SS indicated as KG Peiper may move and fight in the first Night Turn of the game (even if they moved their full Movement Allowance and attacked in the PM turn). In addition, they may use any German unit they are stacked with at the end of their Dec. 16th Night Movement Phase to assist them in that night combat. The commandeered units are activated for night combat only—not night movement. The commandeered units may advance after combat if the defender retreats.
DESIGN NOTE: Peiper was a very aggressive commander, and on the night of the 16th commandeered units of the 3rd Fallschirmjäger Division to help him in his attack.
NOTE: Potentially, the German player can have the four Kampfgruppe Peiper units plus the three stacks under the Night markers moving and fighting on the Dec. 16th Night Turn.
CLARIFICATION: KG Peiper units that are Engaged on the 16th PM turn may recover during their Night Combat Phase.
27.6 The US 2nd Division
The two regiments of the 2nd Division that start in hexes 1535 and 1636 may not move at all on Turn 1 (16 AM) and only Tactical Movement on Turn 2. These units are marked with a red RRD as a reminder.
DESIGN NOTE: These two regiments had just spent the last three days in a grueling offensive to outflank the Roer River Dams. These units would not have abandoned their ground lightly. Historically they did not pull out until early on the 17th.
27.7 The 653 PzJ (Jpz VI)
The arrival of the 653rd PzJ is not guaranteed. On Turn 4 (17 PM) roll one die—on a die roll of 1 or 2 the unit arrives that turn. On a die roll of 3 or 4 the unit is delayed (roll again next turn). On a 5 or 6 the unit does not arrive at all.
CLARIFICATION: It's possible to keep rolling 3's and 4's and the unit being delayed again and again.
DESIGN NOTE: This unit was intended to fight in the Ardennes, but it was diverted to the Nordwind Operation.
27.8 Dr Sola and Panzer Brigade 150
DESIGN NOTE: Dr. Sola was the code name for Col. Otto Skorzeny, who commanded the 150th Panzer Brigade, a unit that was disguised as an American unit and was partially equipped with captured American tanks and vehicles. It was intended to slip through Allied lines during the confusion caused by the attack of the 6th Panzer Army (Operations Greif and Wãhrung).
(27.8.1) General Rule: The German player may use this unit to infiltrate (27.8.2) and/or provide a combat shift (27.8.3). These abilities may be used if the unit is not detected (determined by a die roll). If not detected the unit is automatically detected at the end of the turn in which one or both of its capabilities is used. Once the unit is detected it loses its special abilities and is treated as a normal unit.
NOTE: The German player does not roll for detection if an Allied unit moves adjacent to the 150th Pz Brigade or if the 150th moves adjacent to an enemy unit with no wish to infiltrate.
(27.8.2) Infiltration Movement: This unit may attempt to ignore enemy ZOCs. Resolve the attempt by rolling a die the instant the brigade attempts to ignore an EZOC. On a die roll of 1-3 the deception is successful and the Allied ZOC in that hex is ignored (ZOC Bonds are never ignored). The brigade may continue to move and attempt to ignore more EZOCs (roll for each attempt). On a 4–6 the unit is recognized as enemy (detected) and the ZOC is treated normally (no further deception attempts are possible).
(27.8.3) Combat Bonus: This unit may attempt to surprise a defender and achieve a favorable shift of one column to the right on the CRT. A surprise attempt is only possible if the brigade has not been detected yet. Resolve the attempt by rolling a die during the Combat Phase before the attack is resolved. On a die roll of 1–3 the surprise is successful. On a 4–6 it is unsuccessful. Whether successful or not, the brigade is "detected" and becomes a normal unit after that one attack.
EXAMPLE: The Skorzeny unit is currently undetected and moves as shown in the diagram. In hex A the German player declares he will attempt to ignore EZOCs and rolls the die. He only rolls once even though there are two enemy units. The die roll is a 2 which is successful. In hex B he again rolls successfully = 3. He then moves Skorzeny one more hex and attempts a surprise attack on unit C. On a die roll of 1-3 it would be successful and provide a column shift. If not successful the attack would be resolved normally.
28. Weather
28.1 Frozen Ground Conditions
The ground condition from Turn 1–10 (16 AM to 20 PM) is considered muddy. This is the normal condition for the game. Starting on Turn 11 (21 AM) a cold front moves in making off road movement easier. Mechanized Units now use the Frozen MP cost on the TEC.
FOREST ROADS: These may now be used with the Road Bonus in Advance After Combat.
28.2 Clear Weather
The weather from Turns 1–14 (16 AM to 22 PM) is considered overcast. On Turn 15 (23 AM) the weather clears and the following rules take effect:
- The Allied player receives Air Support (15.6).
- The Allied player modifies all his Surrender die rolls by –2 (air supply is now possible).
- The German player must modify his Fuel Shortage die rolls by +1 to account for bombing of the rail net west of the Rhine.
29. Turn 1 Special Rules
29.1 Movement Restrictions
(29.1.1) Red Setup Codes: All units with their setup code printed on a red field may not move, conduct Disengagement (20.1), or build Improved Positions on Turn 1. If any of these units are forced to retreat due to combat, they may retreat normally—but they are not released from their movement restriction. These units may attack but may not advance. See the Designer Notes for an explanation of the movement restrictions.
(29.1.2) German Divisional Boundaries: No German unit may enter another division's At Start Area, nor the Rear Zone (those hexes behind the divisional At Start Areas), on Turn 1. Units may freely move and advance into American territory on the first turn. Divisional boundaries are ignored after the first turn.
(29.1.3) Strategic Movement: Neither side may use Strategic Movement on Turn 1.
29.2 Combat Restrictions
(29.2.1) Allied Artillery: The only Allied Artillery Units that may use Defensive Artillery Support on Turn 1 are the V/187 and the V/406 (near Monschau).
(29.2.2) German Artillery: German Artillery Units can only provide Offensive Artillery Support to an attack involving units with the same corps I.D. as the artillery. This restriction is lifted after Turn 1.
29.3 The 212th Volksgrenadier Division
German units crossed the Sauer River below Echternach on the morning of the 16th. On the first turn only, allow one unit from the 212th VG to move into hex 1005 (from hex 1006). It must stop and end its movement in that hex.
29.4 The 106th Division
No units of the 106th Division may enter or attack into the 18th VG Division's set up area if there is one or more German units in that set-up area.
DESIGN NOTE: The Allies had no idea how lightly the 18th VG Division defended this area.
29.5 The Dasburg (E2016/2115) and Gemünd (E1913/2013) Bridges
During the Turn 1 Bridging Phase these two bridges are automatically marked as "under repair".
DESIGN NOTE: The construction of these two bridges was planned weeks before the offensive and each had an engineer battalion and bridging equipment committed to its construction, which allowed these two bridges to be completed quickly (approximately by 4 PM on the 16th).
30. How to Win
"Antwerp! If we reach the Meuse, we should go down on our knees and thank God—let alone trying to reach Antwerp!"
—Field Marshal Gerd von Rundstedt
30.1 The Victory Check Phase
(30.1.1) When: Victory is checked and awarded in the Victory Check Phase which only occurs in the Allied player turn. The game ends immediately if the German player achieves a victory.
(30.1.2) Control: Control of Victory Hexes is important for determining victory. A Victory Hex is considered controlled by the German player if the hex is either occupied by a German unit or a German unit was the last to pass through the hex. In both cases, the Victory Hex must have a road-bound Supply Path to a German Supply Source.
30.2 German Victory
The German player wins the game if during any Victory Check Phase if he accomplishes one or more of the following objectives:
- Has exited a number of units whose combined Attack Factors total at least 24, off the West Map through any F or G Entry Hex. At least one of the Entry Hexes used must be able to trace a road-bound Supply Path (during the Victory Check Phase) back to a German Supply Source.
- Control all 4 Liege hexes.
- Control 4 of the following 6 Victory Hexes on the Meuse river: Givet, Dinant, Namur, Andenne, Huy and Amay.
- Control 6 Victory Hexes on the West Map.
30.3 Allied Victory
- Prevent the German player from achieving a victory, or
- Occupy three or more German At Start Divisional areas for two consecutive Victory Check Phases with at least one Allied combat unit in each Divisional area. The Allied units must be in supply in each Victory Check Phase. This supersedes any German victory.
Optional Rules
The following rules add a bit of complexity to the game and are not essential. They may be used if both players agree.
31. Night Infiltration
Each Night Marker that is not used to indicate a stack for Night Movement may instead be used during the Night Turn to move one stack one hex—this is called Night Infiltration. The one hex movement may be into or across any terrain that is not prohibited to the moving units. The stack using Night Infiltration may not attack in the Combat Phase of the Night Turn.
RESTRICTIONS: Only units that are in Good Order and not under a Replacement, Strategic Movement, or Engaged marker may use Night Infiltration. If the unit is a Veteran or Elite unit, then the one hex move may be into an EZOC, or from one EZOC to another—however, the one hex movement may not cross or enter an enemy ZOC Bond.
The stack using Night Infiltration does not have to be pre-designated with a Night marker. A player simply announces how many Night markers he has available and moves that many stacks during the Movement Phase of his Night Turn. A unit that used its full movement allowance during the previous PM turn is still allowed to use Night Infiltration.
EXAMPLE: At the start of the Night Turn a player has just one stack with a Night marker. The player is allowed to move that stack its full movement allowance, while two other stacks may move one hex. Only the stack with the Night marker may attack in the Combat Phase of the Night Turn.
DESIGNER'S NOTE: This rule helps the Germans a little more than the Allies, but the Germans were better at night battles. The Allied Player can also use it to wiggle free of some impending pockets.
32. Fuel Dumps
32.1 Hidden Fuel Dump
At the start of the game the Allied player randomly places the three Fuel Dump markers on the map—one in each space marked with a Fuel Dump symbol. Only one of the markers contains the real fuel dump—the rest are dummies. The Allied player may examine the markers after he has placed them, but the markers remain secret to the German player. The instant the German player moves a unit adjacent to one of the markers, it is flipped over. If it is a dummy, it is removed.
COMMENTARY: 1st Army had a primary fuel dump located outside of Francorchamps. If captured, this was enough fuel to alleviate the German fuel shortages. Kampfgruppe Peiper came within a few miles of the dump without knowing it.
32.2 Combat and Capture
PROPERTIES: The dump has a Defense Strength of 2 representing the Belgian battalion assigned to its defense. The dump by itself has no stacking value, does not receive DCBs nor may it be selected for Determined Defense. If eliminated, forced to retreat, or suffers a step loss, the German player is considered to have captured the dump and may advance into the hex.
If captured, the German player must hold the dump until the fuel can be removed. The German player can remove the captured dump in his next German Fuel Shortage Phase if a road-bound Supply Path can be traced from the dump to the German East map edge.
EFFECTS: If captured and the fuel can be removed, the German player skips the Fuel Shortage Phases on Turns 7 and 8 (19 AM and PM).
If the Allied player recaptures the dump before the German player removes it, then the dump regains its inherent Defense Strength.
32.3 Destruction
The dump may be destroyed in the same manner as Bridge demolition (1–4 in the Allied Bridge Phase, 1–3 in a German Combat Phase if the German player attacks the dump hex). Demolition in the Allied Bridge Phase may only occur if a German unit is adjacent to the hex. No Allied unit is required for either case. All Fuel Dump markers are automatically removed at the end of Turn 6 (18 PM).
33. Roadblocks
33.1 General Rule
Roadblocks are markers that can control hexes and slow enemy movement. They are like Traffic markers, but are more reliable. Each player has two. They have all the same effects as a Traffic marker with the following additional properties:
- May be repositioned each turn and are not removed by a die roll.
- Units using Strategic Movement may not enter a hex containing an enemy Roadblock.
- Supply Paths and Bridge Demolition paths may not be traced through a hex containing an enemy Roadblock.
- They control the hex they are in (30.1).
- U.S. Engineers (13.2) may not be placed in a town or city hex that contains an enemy Roadblock.
33.2 Placement
Roadblocks are placed or repositioned in the owning player's Traffic Marker Phase before the removal die rolls. The following restrictions apply to placement:
- Must be placed on a road hex within 4 contiguous road hexes of a friendly unit. The placement hex must have a valid road-bound Supply Path to the friendly unit and to a friendly map-edge Supply Source. The road hex may be a vacant Town or City controlled by the opposing player.
- May not be placed on or adjacent to an enemy unit.
- May not be placed on or adjacent to a friendly Traffic marker or another Roadblock marker (friendly or enemy).
33.3 Removal
Friendly Roadblocks must be removed at the end of any enemy Movement Phase or Combat Phase (including Night Turns) in which an enemy unit either ends in the hex or passes through the hex. They are also removed during a friendly Traffic Marker Phase if they no longer have a road-bound Supply Path to a map edge Supply Source. You may voluntarily remove or reposition your Roadblocks every friendly Traffic Marker Phase.
Roadblocks are never eliminated, those that are removed are available to be placed in the next friendly Traffic Marker Phase.
33.4 At Start
The Allied player receives his two Roadblock markers on his first Traffic Marker Phase. The German player does not receive his until Turn 3 (17 AM)—during his Traffic Marker Phase.
34. 18 Factor Limit
The attacker may use a maximum of 18 Attack Factors in each attack. All factors in excess of 18 are ignored. Attacking units that participate but contributed 0 factors due to the limit may still participate in Advance After Combat.
EXAMPLE: Two stacks of German units with a total Attack Strength of 24, attack Allied units with a total Defense Strength of 6. The odds would be 18 to 6 (3-1).
DESIGN NOTE: This rule reflects the difficulties of massing large number of troops against a single objective and also prevents excessive factor counting. It will speed up play.
35. Operation Bodenplatte
At the start of Turn 15 the German player rolls one die and consults the table below. If the result is 4-6 place the Bodenplatte marker on the corresponding space of the Turn Track as a reminder. From that turn onwards, for ALL clear weather turns, the Allied player has a –1 DRM for Offensive Air Support and +1 DRM for Jabos Table die rolls. Treat die rolls less than 1 as 1, and greater than 6 as 6.
| Die Roll | Result |
|---|---|
| 1-3 | No effect |
| 4-5 | Turn 19 (25 AM) onwards |
| 6 | Turn 17 (24 AM) onwards |
DESIGN NOTE: Operation Bodenplatte was designed to cripple Allied air power in support of the Ardennes Offensive but bad weather pushed back the operation until the first available date, January 1st. By the time the weather had improved enough for an effective, mass aerial strike like Operation Bodenplatte, the Ardennes Offensive had been stalled. The planes were instead used to support Operation Nordwind.
36. Grief Commando
Once per game, at any time before Turn 7 (19 AM), the German player may place the Grief Commando marker at any one Bridge hexside. It provides a +2 DRM to the Bridge Demolition attempt at that bridge. Once used, the commando marker is removed.
Scenarios
S1. The Campaign Game
This is the standard game that uses both maps and all the preceding rules.
S1.1 Game Length
22 Turns—16 AM to 26 PM. The game ends at the completion of the Allied 26 PM turn.
S1.2 Reinforcements
Both players should separate their reinforcements from their at-start units. At-start units have their set up code highlighted with a white or red background, all others are reinforcements. Place these units on their arrival turn on the Turn Record Track.
S1.3 Set Up
Allied: The Allied player sets up first. Place your at start units in the hex specified on the counter. A dot after the hexcode indicates the unit starts with an Improved Position.
German: Place your at-start units anywhere within their divisional setup area (indicated by the dashed outlines on the map). Your corps artillery may be placed in any divisional setup area belonging to that corps. Units may be set up adjacent to enemy units (stacking limits must be observed).
- The two units of the 26th Volksgrenadier Division that are marked with a red setup code, may not start in any of the three Wooded Rough hexes.
- The 5FJ/11 StuG Brigade may not set up in either of the two Wooded Rough hexes.
PLAY NOTE: First time players should use the first illustration of the Extended Example of Play to help them set up the game.
S1.4 Markers
Place the Turn Record Track marker in the Turn 1 (16 AM) Box. Place a Blown Bridge marker on the four bridge sites labeled #1-4 (between Echternach and Vianden), and place bridge Under Construction markers on bridges #5 and #6 (7.9). There is also an Ouren bridge marker you can place adjacent to hexside E2020/2119 that can be removed or flipped to intact once the bridge is checked (7.7).
S1.5 Artillery
All Artillery Units start on their Ready sides.
S2. Six Turn Scenario
S2.1 Game Length
6 Turns—16 AM to 18 PM. The game ends at the completion of the Allied 18 PM turn.
S2.2 Set Up
Use the set up for the Campaign Game.
S2.3 Special Rules
Use only the East Map. Remove the 101st and 82nd Airborne units from Reinforcements. They are not used in this scenario.
S2.4 Victory Conditions
The German player wins if he has 10 VPs at the end of the scenario. Award 1 VP for each Victory Hex he controls, and 1 VP for every 4 Attack Factors he has exited off the west edge of the (East) Map. If the German player exits units off the west edge he must be able to trace a road-bound Supply Path back to a German Supply Source from at least one of the exit hexes, otherwise the VPs for exiting units do not count.
S3. Eight Turn Scenario
S3.1 Game Length
8 Turns—16 AM to 19 PM. The game ends at the completion of the Allied 19 PM turn.
S3.2 Set Up
Use the set up for the Campaign Game.
S3.3 Special Rules
Use only the East Map. The 101st and 82nd Airborne units arrive on Turn 6 (18 PM) in Strategic Movement having already expended 4 MPs. They may enter on any west edge road hex. The Allied player must use eight SM markers during Turn 6 to move his eight airborne units.
S3.4 Victory Conditions
Same as the Six Turn Scenario except the German player needs 14 VPs to win.
S4. Patton's Counterattack, December 22
S4.1 Game Length
10 Turns—22 AM to 26 PM. The game ends at the completion of the Allied 26 PM turn.
S4.2 Set Up
Use the Patton's Counterattack Scenario setup pages in the Play Book. The German player sets up first, followed by the Allied player.
S4.3 Special Rules
A. Use both maps.
B. After the Allied player has set up (and before the game starts), he may place his six Traffic markers anywhere on the map and then rolls the dice and removes the appropriate markers per the rules.
C. All German Artillery Units start on their Fired side. The German player starts the game by flipping any three during the German Artillery Supply Phase.
D. Fuel Shortage—The German player must roll on both tables on the first turn.
E. The following bridges are blown: La Roche-en-Andenne (E3921/3820), Ortho (E3718/3618), Trois Ponts (both bridges E2928/3029 and E2929/3029).
F. ISOLATED GROUPS: The only units OOS are the stack containing the three units of KG Peiper and all Allied units inside the Bastogne perimeter. KG Peiper's group is at Surrender Level 3 and the Bastogne group is at Level 1.
G. FIRST PLAYER: Start with the Artillery Supply Phase of the German player turn.
S4.4 Victory Conditions
Same as the Campaign Game except consider the game a draw if the Allied player is not able to trace a road-bound Supply Path back to an Allied Supply Source from the two Bastogne town hexes.
S5. The Extended Game
Players wishing to continue the Campaign Game or the Patton's Counterattack Scenario until the 30th of December can play this Extended Game.
S5.1 Game Length
Additional 8 Turns—27 Night to 30 PM. Follow all the rules for the Campaign Game except the game ends at the completion of the Allied 30 PM.
S5.2 Victory Conditions
Same as the Campaign Game except the Germans also win if they satisfy both conditions below at the end of the game:
- Either controls both Bastogne hexes or prevent the Allied player from tracing a road-bound Supply Path to a Bastogne town hex, and
- Control 4 Victory Hexes on the West Map.
S5.3 Weather
Clear Weather ends on Turn 23 (27 AM) and Allied Air Support (15.6) and the –2 Air Supply modifier no long applies. However, the +1 to the Fuel Shortage Table still applies.
3rd Edition Changes
Besides clarifications and the addition of more examples, the following rule changes were made for this 3rd Edition:
- 6.4.1 West of the Ourthe Line has now been precisely defined and printed on the map.
- 10.5.3 Silhouetted Units in Wooded Rough hexes can now form a ZOC Bond if the bond exits the hex via a road.
- 10.6 ZOC Bonds with the Map Edge: This is now only allowed with friendly map edges.
- 12.5 Strategic Movement and Combat: The penalty for being under an SM marker has been changed.
- 16.1 The D1* CRT result is now called Defender Shattered (DS). This is just a name change—it has the same effect as before.
- 16.2 The –1 DRM on the Determined Defense Table for TQ ratings that was in the 1st Edition returns to this edition.
- 16.7.2 The Determined Defense Table received a new result called "Delay".
- 17.1 A small change to the Retreat Priority list was made.
- 18.5 Broken units may no longer blow bridges.
- 20.1 Disengagements may now happen at any time in the Combat Phase.
- 28.1 Forest Roads may now be used for the Road Bonus once Frozen Ground Conditions occur.
- 29.4 The 106th Division may not move or attack into the 18th Volksgrenadier setup area if there are German units in that area.
-
- Night Infiltration from the 1st Edition returns as an optional rule.
-
- The Optional Factor Limit was increased from 15 to 18.
Two new Optional Rules were added: a "What if" Operation Bodenplatte rule and a Grief Commando unit to help the German player capture a bridge intact.
Changes to the Map
- A few of the "E" Entry Hexes were changed. This was done to insure the US airborne divisions would enter from the direction that they historically did.
- The "G" Entry letter at Liege was changed to an H.
- The road along the Meuse River between Revin and Montherme was added.
- Entry Letter Codes were enlarged.
Changes to the Counters
- All Volkswerfer brigade ranges were returned to the range of 3 as in the 1st Edition. While a range of 2 may reflect their 6-7 km range (each hex is 2.6 km), it made them too hard to use and not reflective of their ability to move quickly into a fire position and move away.
- The U.S. 4th Armored Division was brought up to full strength. Don M. Fox in his book Patton's Vanguard, the United States Army Fourth Armored Division says that Huge Cole was incorrect about the strength of the division when it arrived in the Ardennes.
- The 18/10+ Flak unit became a silhouettes unit.
- The two Guards Armoured brigades had their Strength decreased by 2. They are now 10-8-6s.
- The British 33rd Armoured battalion's TQ was increased from 3 to 4 to reflect the unit was equipped with Sherman Fireflys.
- The 99th Norwegian battalion was changed to an Independent unit.
- A few reminder markers have been added for the Ouren Bridge and the St. Vith hexes.
- Nearly all of the Optional units were removed from the game due to insufficient space on the 3 counter sheets.
Expanded Sequence of Play
A. German Player Turn
1. The Artillery Supply Phase
Flip over the appropriate number of German Artillery Units to their Ready side (see 5.3 for restrictions).
2. The Fuel Shortage Phase (German Turn only)
The German player rolls one die for Fuel Shortage Table #1 and one die for Fuel Shortage Table #2 (6.1). The German player places Out of Supply markers on those units affected by the results.
NOTE: This phase is skipped until Turn 7 (19 AM).
3. The Bridge Phase
The German player may destroy or rebuild bridges (7.0).
NOTE: No bridge blowing on Turns 1 and 2 (16 AM and 16 PM) with the exception of the Ouren bridge (7.7).
4. The Movement Phase
All non-engaged German units may move.
- Disrupted units may only use Tactical Movement (18.3).
- OOS units may only use Tactical Movement (23.4).
- Units may build Improved Positions at this time (15.8).
- Units may Breakdown at this time (26.1).
- (Allied Turn only) Roll for Offensive Air Support (15.6).
- Units may be marked with a Night Turn marker during a PM turn; these units are restricted in their movement (25.3).
5. The Rally Phase
All Disrupted or Broken German units that are not adjacent to an enemy unit recover one level. Roll for those that are adjacent to an enemy unit (18.6).
6. The Combat Phase
- At any time during the Combat Phase the phasing player may remove ENG markers (16.5) from German units. As each ENG marker is removed, decide if that unit (or which units in the stack) will conduct Disengagement (20.0). Resolve Disengagement at that time. Unengaged units may also use the Disengagement Table at this time.
- Conduct all Combats (14.0). Units may breakdown before advancing after combat (26.2).
7. The Traffic Marker Phase
A. Place any Traffic (Greif) markers from the German Traffic Marker Holding Box onto the map (24.0).
B. (Optional) Place or reposition the two German Roadblock markers (33.2).
C. Roll two dice and remove the German Traffic markers with those I.D. numbers (24.3).
8. The Supply and Surrender Phase
A. Check Supply for all German units (23.1).
B. Roll for Surrender of all German units that are Isolated (23.7).
9. The Victory Check Phase (Allied Turn only)
Check to see if the German player has won a Victory, if not continue with another game turn (30.2, 30.3).
B. Allied Player Turn
The Allied Player Turn is identical to the German Player Turn (switching the term German for Allied), except the Allied player has a Victory Check Phase and no Fuel Shortage Phase.
C. End Turn
Record the completion of a game-turn by advancing the Game Turn Marker one box.
Night Turn Sequence of Play
A. Allied Replacement Phase: The Allied player uses his replacements.
B. Allied Night Movement Phase: The 3 Allied stacks marked with Night markers in the PM turn may move.*
C. Allied Night Combat Phase: The 3 Allied stacks marked with Night markers in the PM turn may attack.**
D. German Replacement Phase: The German player uses his replacements.
E. German Night Movement Phase: The 3 German stacks marked with Night markers in the PM turn may move.*
F. German Night Combat Phase: The 3 German stacks marked with Night markers in the PM turn may attack.**
* (Optional) For every Night Marker not placed during PM Turn player may do a Night Infiltration (31.0)
** Artillery on their ready side may provide Artillery Support even if not marked with Night markers.