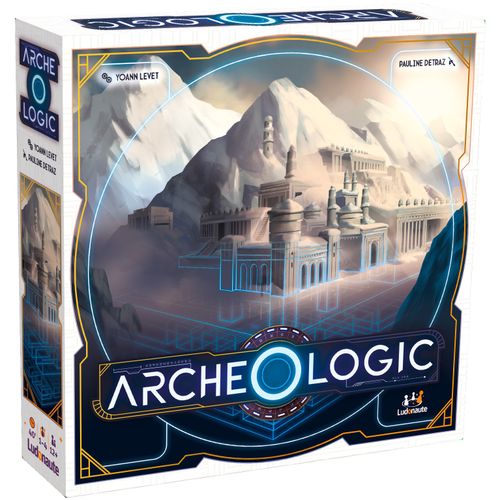
ArcheOlogic
ArcheOlogic Rulebook
Table of Contents
Table of Contents
Game Contents
1 City board — the place to map, with the Viewfinder token showing which axis of the map the Archeoscope aims at, a Time track, and a Coordinates Circle.
28 coded cards — clues left by the Ancients. Each card has a coded card number and, once read through the Archeoscope, deciphers all the answers you want about your quest.
1 Archeoscope — a highly sophisticated piece of equipment that can read the coded cards. It comes in 2 pieces to clip together before the first game.
For each Archaeologist (x4):
- 6 different Building tiles (back with the Archaeologist's color): the buildings of the City mentioned in the Ancients' writing.
- 4 big Buildings, made up of 4 boxes.
- 2 small Buildings, made up of 3 boxes.
- Each Building has a risk-free box, a fire trap box, and a sharp trap box among its boxes.
- 1 Map board (made of 25 zones) — the uncharted map of the City you will fill out.
- 1 Time pawn — the time you spend gathering information. Front: Searching. Back: Checking. It has a player aid printed on the back.
- Note sheets.
- 8 Trap tokens — to help you think.
- 2 screens — because the others don't need to know what you're thinking.
Assembling
Make sure you clear all the small holes of the Archeoscope.
Application
There is a web app to play ArcheOlogic. The gaming experience is slightly different, but you don't need the web app to play. Read the APPLICATION inserts throughout this rulebook and learn more. Scan the QR code printed on the box to find it.
Setup
Take the contents of your Archeologist: 2 screens, 1 Map, 6 Buildings, 1 Time pawn, 8 Trap tokens, and 1 note sheet. You'll need pens that are not provided in the box.
Put your Plan, your note sheet, and the 6 Buildings behind your screens so that the other players cannot see them.
Put the unused Archaeologist contents back in the box.
Take a coded card at random; it will be your quest for this game and it has all the information needed to map the City. Put all the other coded cards back in the box; they will not be used during this game.
Put the City board at the center of the table, on the Multiplayer or Solo side depending on the chosen game mode, and place the Viewfinder on axis 1.
Randomly put the Time pawns, face Searching up, on the first spaces of the track, one pawn per space. Start with the top-left position, on the right of the hourglass. For example, in a 3-player game, put one Time pawn on each of the first three spaces.
Put the Archeoscope close to everyone.
Starting clues
Each starting clue shows where one Trap is in one of the Buildings. Your job is to find which Building that is as the game goes on.
Agree with the other players on how many starting clues you want to use: from 3 clues for harder games, to 5 clues for easier games.
Put the coded card under the Starting clues Wheel. Turn the card to have the icon Clue 1 in the hexagonal sight at the bottom of the Wheel. Read aloud the 3 items (1 coordinate made of 1 Letter and 1 Number, and 1 Trap symbol) that compose the clue to allow every Archaeologist to acknowledge and write them down.
If you want a second clue, turn the card under the Wheel until you see the icon Clue 2 in the hexagonal sight. Then read aloud the 3 items. Repeat the process until you reach the number of clues agreed on.
Example of a starting clue: C, 1, fire trap = there is a fire trap symbol at the intersection of the column C and the row 1.
You can give new Archaeologists one or two more clues to help them and level the playing field.
APPLICATION — You can use the application to find the starting clues relevant to your quest. Just type the number of the coded card after the start of the game.
Principle and Goal of the Game
Each coded card represents a unique layout of the City's Buildings that you will piece back together on your Plan with your 6 Tiles.
Your goal is to be the first player to find the correct layout. Position AND direction of the Buildings will be needed.
You have the Archeoscope to help you. It is a highly sophisticated research device that will never fail you. Ask questions and it will give you valuable information on the position of Buildings and Traps, on the empty zones, etc.
But asking the Archeoscope is a long process and the more complex your question is, the longer it takes. Think, then ask the right questions. Use your deduction skills and logic to be the quickest player to place the Buildings.
About the Buildings' placement
All the Buildings need to be set on the same side, showing the Trap and Risk-free boxes. You cannot put them on the other side to get them in!
The Buildings cannot go over the 5x5 Map.
All 6 Buildings need to be set on the Plan.
There are 4 Sharp trap boxes and 4 Fire trap boxes for all the Buildings combined.
There are 3 empty zones on the Map, with no Building.
Introduction to the App
As you will see throughout the rules, you can play all game modes (solo or multiplayer) with the Application.
To start a new game, go to the Home page and click on Launch a game.
Enter the number of the coded card and click on the chosen mode: normal or expert (see Expert mode).
It also offers you regular new games for more challenge. Its interface is simple and intuitive.
Game Turn
In ArcheOlogic, you do not follow a specific order. Instead, the position of the pawns on the time track determines which player gets to act.
You play when your pawn is last on the track. You need to ask a question, that will make you lose time and thus move your pawn forward.
At the start of the game, the Archaeologist whose pawn is first on the right of the arrow starts the game. Then the Archaeologist whose pawn is on the next position, clockwise, will play, and so forth.
You may play several turns in a row if your pawn is still on the last position after your turn.
IMPORTANT: When moving your Time pawn forward depending on the time your question cost, you never take into account the spaces where other players' pawns are. There can never be 2 pawns on the same space.
Example: Alex is first to act and moves his pawn 4 spaces, then Robin plays and moves her pawn 3 spaces. Finally, Charlie plays and moves her pawn only 2 spaces. Since Charlie's pawn is still in last position, she gets to play another turn right away. After that, it will be Robin's turn to play.
There are 3 steps to each one of your turns, even those played consecutively:
1 — Move the Viewfinder
At the start of each turn, the axis on which you ask your question changes automatically. Move the Viewfinder token one step clockwise on the City board. The Letters refer to the columns on your Map, the Numbers to the rows.
The Archeoscope's sight changes each turn.
2 — Choose a Question and Spend Time
Settle on the question you want to ask the Archeoscope. You can choose to change the Viewfinder's position and you must choose which item to ask about (Building, Trap, Empty zone). Those two choices will establish how much time your question will cost.
You can choose to change the Viewfinder's position for an axis that you prefer:
- Move the Viewfinder clockwise by one more step. Cost: 1 time.
- Move the Viewfinder on the axis you want, wherever you want on the Circle of the coordinates. Cost: 2 times.
You can change the Archeoscope's point of view, but reprogramming the device takes time.
Choose one of the following items to ask about, knowing that their costs vary:
- How many different Buildings are on the selected axis? The answer will be a number between 1 and 5. Cost: 1 time.
- How many Empty zones are there on the selected axis? The answer will be a number between 0 and 3. Cost: 1 time.
- Which boxes of a specific small Building are on the selected axis? The answer will be between 0 and 3 symbols. Cost: 2 times.
- Which Trap boxes are on the selected axis? The answer will be between 0 and 3 symbols. Cost: 2 times.
- Which boxes of a specific big Building are on the selected axis? The answer will be between 0 and 3 symbols. Cost: 3 times.
Some pieces of information require more time than others.
Move your pawn on the Time track by as many spaces as the total cost of your question.
Example: Alex's pawn is in last position, so it is his turn to play. Alex chooses his question: which boxes of a specific big Building are there on axis 1? Alex moves the Viewfinder by one more step and sets it on axis 1, which costs him 1 time. He also chooses to ask about the big Building, costing him three times. In total, Alex's question costs him 4 times and he must move his Time pawn by 4 spaces on the Time track.
3 — Use the Archeoscope to Get Your Answer
Start by taking the Archeoscope and put the blue Selector on the position matching the item you asked about.
Then take the coded card, turn it on the axis side shown on the City board by the Viewfinder token (Letter or Number), and put it behind the Archeoscope, showing the axis in the Sight. Make sure the card has a good fit with the Archeoscope, using the rounded shapes on the sides of both objects for a good fit.
Setting the Archeoscope first is important, before placing the card — you do not want to inadvertently see other pieces of information.
The question you chose is public information that you must say out loud. But the answer you get from using the Archeoscope is strictly personal.
Please note that you can, at any time during the game, check the answer to a previously asked question.
Example: Alex puts the blue Selector on the item matching the choice made previously. Alex takes the coded card of the ongoing game and puts axis 1 in the Sight, making sure the rounded shapes of the Archeoscope and the card are a good fit. The Archeoscope's answer shows that there is a risk-free box and a sharp trap box on the 1 axis. The small dot indicates that no other space of this Building is present on this axis.
Reading the Answer Given by the Archeoscope
For a question about a Building, the Archeoscope shows 3 holes in which you either see an icon of a Risk-free box, a Fire trap, or a Sharp trap for each of the Building's boxes on this axis, or nothing at all. Note that the orientation of the Fire Trap on the Plan should not be taken into account when placing a Building.
For a question about the Traps, the Archeoscope shows 3 holes in which you either see a Fire trap or a Sharp trap for each of the Trap boxes on this axis, or nothing at all. No information shall be provided on the Risk-free boxes.
For a question about the number of different Buildings, the Archeoscope shows 2 holes with, in one of them, a number giving the number of Buildings on this axis.
For a question about the number of Empty zones, the Archeoscope shows 2 holes with, in one of them, a number giving the number of Empty zones on this axis.
Do not forget to write down, as accurately as possible, the valuable information. It is the key to slowly create the City map. You can choose to write down information whichever way you prefer, but we suggest you write the answers either by row, by column, or by question.
Example — Which boxes of a specific big Building are there on the column C?
- 3 empty holes: there is no box of the Building on the column C.
- 1 empty hole + 1 icon Fire trap + 1 icon Risk-free box: the Fire trap box and the central Risk-free box are on the column C, and no other box of the Building is on the column C.
- 2 empty holes + 1 icon Fire trap: the Fire trap box is on the column C, and no other box of the Building is on the column C.
I Think I've Found It!
At the beginning of your turn, if you think you've found the exact layout of the Buildings on the Map, flip your Time pawn on its Checking side and move it forward by 4 spaces (ignoring the spaces occupied by your opponents' pawns). This action counts for your whole turn — you don't move the Viewfinder forward, you don't ask questions.
Set the layout of the Buildings following your deduction behind your screens. Then let the other Archaeologists play until your pawn is again in last position.
You enter the City looking for its treasures. Will you make it out unscathed?
APPLICATION — To confirm your solution, use this rulebook or the web app. Scan the QR code in the center of the coded card then click on Test a solution.
When Playing Without the Web App
When it is your turn to play again, check if the layout matches the solution shown at the end of the rulebook (see Solutions). You will find the number of the quest on the coded card.
If it is, the game ends and you win! Congratulations! You come out of the City with more relics than you can carry. You are definitely one of the world's best archaeologists.
If it is not, too bad! You lost and are out of the game. You made mistakes in mapping the Plan and will not make it out of the City alive.
The other Archaeologists keep playing. If no one gets the answer right, the game is lost! You will need to spend more time training ArcheOlogic.
When Playing With the Web App
APPLICATION — When it is your turn to play again, replicate the layout you made by dragging the Buildings onto the map of your screen, then confirm. Note that to change the orientation of a Building, you just need to click on it.
If you found the right answer, you win and the game ends! Congratulations! You come out of the City with more relics than you can carry. You are definitely one of the world's best archaeologists.
If not, the app will show the Buildings you had right in green, those you had wrong in red. You then immediately play another turn. Flip your pawn on the Searching side. You can either play a normal turn, or give a new solution by spending 4 times. You made mistakes in mapping the Plan and lost time trying out this wrong layout.
You keep on playing with the other Archaeologists until the solution is found.
Solo Mode
Setup
Take your City board Solo mode face up. Put your Time pawn on the 0 of the Time track, Searching side up. Write down the 3 Starting clues. Place the Viewfinder on the axis of your choice.
Game Turn
The game is the same as a multiplayer game, except for one rule: when asking the Archeoscope, for each Trap icon (Fire trap or Sharp trap) that you see, move the Viewfinder by one step clockwise.
End of the Game
If you successfully found the layout of the Buildings, well done! You've earned the apprentice Archaeologist title.
You'll notice that under each Solution are 2 numbers, which measure your level of success. Count the number of spaces your Time token has traveled at the end of the game.
If the value is lower than or equal to the highest number, congratulations, you are a Seasoned Archaeologist. If the value is lower than or equal to the lowest number, the world bows to you — you are one of the few Master Archaeologists.
APPLICATION — You can also play the solo player mode with the app. Scan the QR code in the center of the coded map, write down the starting clues you are given by clicking on Show starting clues. When you think you've found it, click on Test a solution, and compare your score to that of the application.
Expert Mode
APPLICATION — This game can be played on an expert mode to (almost) never play the same game twice and play a more challenging game. The Expert mode offers a new kind of clue, harder to decipher. You need to get on the app to access these clues.
Unlike normal mode, you don't scan the QR code in the center of the coded card. Flash the QR code on the Expert mode page to go to the home page and then, after starting the game and choosing the coded card, choose the Expert mode to access the expert starting clues.
For one card, the expert clues vary from one game to the other. You can play this mode solo or with other players.
Solutions
The Solutions pages give, for each of the 28 coded cards, a full diagram of the correct Building layout on the 5x5 Map — used to check a multiplayer solution, or to verify a solo game. Below each diagram is a scale with two numbers: the highest number is the Time-track value at or below which a solo Archaeologist earns the Seasoned Archaeologist title; the lowest number is the value at or below which they earn the Master Archaeologist title. The layout diagrams themselves are graphical spoiler keys for each quest and are not reproduced here; the score thresholds for every coded card are below.
| Coded card | Seasoned Archaeologist (≤) | Master Archaeologist (≤) |
|---|---|---|
| 3537 | 27 | 18 |
| 3573 | 29 | 19 |
| 3575 | 29 | 19 |
| 3577 | 31 | 20 |
| 3735 | 32 | 20 |
| 3753 | 32 | 20 |
| 3755 | 33 | 21 |
| 3757 | 33 | 21 |
| 5337 | 34 |