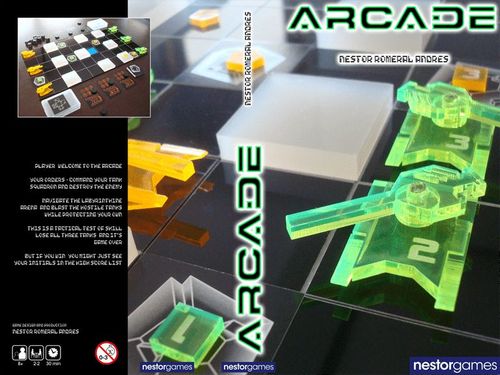
Arcade
Arcade Rulebook
Table of Contents
Table of Contents
Material (Basic Game)
- 3 terrain tiles of 3×5 squares each
- 1 terrain tiles of 1×5 squares each
- 1 square Compass card
- 2 square Energy Pool cards
- At least 27 square Destroyed Floor cards
- 9 walls (square 'ice' blocks)
- 3 green tanks
- 3 orange tanks
- 3 green targeting tokens
- 3 orange targeting tokens
- 3 green tank cards
- 3 orange tank cards
- 8 black discs
- 10 dice
You can add additional terrain tiles, walls and units with the expansions.
Setup
Arrange the terrain tiles into any desired shape, so that they align with an imaginary square grid. Place walls in some of the squares. You can use all the tiles and walls, or just a few. You can also leave 'gaps' on the board. This playfield is called the Zone.
Place each tank onto an empty space of the board. The distribution of the terrain tiles, walls, and tanks must be agreed upon by both players.
(Setup example diagram: a 10 × 5 Zone with orange tanks on the left edge and green tanks on the right edge.)
You can also check the nestorgames site for suggested setup configurations.
Each player takes all cards of her colour and 4 black discs.
Place your cards in front of you in numerical order. Place a disc on the number '6' of every card. This disc indicates the amount of damage that the tank can receive before being destroyed. Tanks start the battle with 6 damage points.
Place the 4th disc directly below card number 1. This is the 'activation disc' and indicates which tank is active.
(Card setup diagram.)
Determine which player goes first by any peaceful means. This player takes all 10 dice.
Core Rules
You'll rarely play with the core rules alone, but the game is easier to learn if we introduce them first, and then the rest.
In the core rules, shots are considered to follow a parabolic path over the Zone. This means that walls don't block the shots.
Players alternate turns during the game doing any of the following with their active tank. All actions are optional.
Moving the Active Tank
You can spend up to 6 movement points for your active tank on your turn. Tanks spend 2 points when moving to an orthogonally adjacent empty space and 3 points when moving to a diagonally adjacent empty space. When moving diagonally, the two spaces orthogonally shared by the starting and ending spaces must be also empty (see example). You can leave points unused. You can also move, then fire, then move with your remaining points.
(Example: The Orange tank moves 1 step forward (2 points) and 1 step diagonal (3 points) for a total of 5 points.)
(Example: Tank '1' (upper-left) cannot move diagonally to the marked square because there is a wall adjacent to both the origin and destination spaces.)
Firing the Cannon of Your Active Tank
Although the tank turrets can rotate, they are merely decorative. The direction that the turret is pointed has no effect on gameplay, but it does feel really cool to point the turret toward its target.
You can only fire the cannon once per turn, but it does not cost any of your movement points to fire. To fire the cannon follow these steps:
-
Determine the target unit.
-
Calculate the distance between your active tank and the target space. To do so, count the number of spaces that separate both horizontally and vertically. Then sum up the highest of the two plus half the lowest rounding down. If your tank is not moving this turn, subtract 2 points from that result (your pilot is aiming carefully). If the number of dice goes below 1 then you automatically hit, dealing 6 points of damage.
(Example: The active green tank is 8 spaces away from the target horizontally, and 4 spaces vertically. The distance is 10 = 8 + 2.)
- Fire the cannon by rolling as many dice as the result of the calculation (with a maximum of 10 dice). If at least one of the dice shows a '1' then you've missed the target. Otherwise the target is hit for as many damage points as the lowest die value. Move the damage disc of the target's card accordingly. If the damage disc goes below 1 the unit is destroyed and removed from the game (optionally, you can keep the unit in place so it acts as an obstacle).
After taking your actions, move your activation disc to the next unit to activate it for the next turn. Tank order is 1, 2, 3, 1, 2, 3...
If your active unit has been destroyed simply move your activation disc to the next unit and pass the turn to your opponent. That is to say that destroyed units actually take a turn doing nothing.
Game End
If, at the end of your turn, all enemy units have been destroyed then you've won the battle.
Advanced Rules
I recommend applying all these rules at once, but you can add them to the games sequentially. Agree on which ones you will be using before the game starts.
Collateral Damage
A miss doesn't just disappear into thin air. It can make a lucky ricochet, or even strike something else nearby.
During the setup phase, place the Compass tile next to the Zone, aligned with its sides. It doesn't matter in which of the four directions it is oriented, but it must stay oriented the same way the entire game. Each player takes all the targeting tokens of her colour.
During the game each time a shot is missed (at least one '1' is rolled), follow this procedure to find out where the rocket strikes:
-
Remove all 1s and 6s that have been rolled.
-
Remove all pairs of dice that add up to 7. This is 4+3 and 5+2.
-
If there are no remaining dice, then the target is hit for 1 point of damage. Yes, your aim was off, but luckily the rocket scored a glancing blow after all! The collateral damage procedure ends.
-
However, if there are dice remaining, the shot has missed the target altogether, and will land elsewhere (which may be outside the Zone). In order to determine where it lands, start from the targeted space, and then do the following for each die value remaining (not for each die; for each value: You should have only one or two values left, and they won't add up to 7; otherwise, you've done something wrong) to determine the offset: In the direction indicated on the Compass tile for that value, count as many spaces away from the target as the number of dice with that value. After you have counted the offset in each direction, this offset location is where the rocket hits. If it hit another unit (even if it is yours!) that unit takes 1 point of damage.
(Example: The orange active tank fires a rocket at the green tank on the bottom-right with 10 dice. It rolls at least one '1' so it misses. Then removes all 1s and 6s. Then all pairs 3+4 and 2+5. After all this, there are two 3s and one 2 remaining. According to the directional tile (above the board) the rocket lands two spaces to the left (because of the two 3s) and one space up (because of the 2) in the space indicated with a circle.)
Floor Destruction
If, during play, a rocket hits an empty space, then place a Destroyed Floor card on it. This space has been destroyed and from now on acts as a gap. It can neither be occupied, nor crossed by a ground unit.
(Example: a 'destroyed floor' tile is placed where the rocket hit.)
Wall Destruction
If the rocket hits a wall, remove the wall.
Note: These rules do not imply that units are tougher than the floor and walls. Floor and walls are merely considered to receive maximum impact.
Blast
Whenever a unit is hit with 6 points of damage or a space or a wall is destroyed, all orthogonally and diagonally adjacent units receive 1 point of damage.
If all the remaining units are destroyed as a result of this blast, the game ends in a tie.
Stun
Whenever a unit is hit with more than 3 points of damage, or receives damage due to an adjacent blast, it is stunned; turn its card 90 degrees. Instead of taking a normal action on its next turn, a stunned unit just recovers; rotate its card 90° back to normal.
Triangulation
Experienced pilots use triangulation to shoot targets with greater accuracy.
After each unit takes its first shot, place its targeting token on the space where the rocket hit.
On that unit's subsequent shots, instead of measuring the distance from the firing unit to the target, you can choose to measure from the targeting token to the target, but adding 2 dice to the roll. Move the targeting token to the new impact space after firing. Targeting tokens don't block the movement of units or rockets. There can be several aiming tokens on the same space, and can also be on a space occupied by a unit.
(Example: Orange tank 1 uses its aiming token to shoot Green tank 3, so it will roll 2 additional dice. The aiming token is at a distance of [2 + ½] = 2, so the green player rolls 2 (distance) + 2 (additional dice for using the aiming token) = 4 dice instead of 10. It's much easier to hit a target close to what you just hit!)
Energy Bolts
All units fire energy bolts instead of rockets. Energy bolts travel in a straight line, so shots no longer avoid obstacles by following a parabolic curve over the arena.
After calculating the 'landing space' (targeted space plus any offset for missing), you need to determine what the energy bolt strikes. In order to do this, use the following procedure:
Trace an imaginary straight line from the centre of the space where the firing unit is to the centre of the shot's landing space. The first object in that line from your unit is what the energy bolt strikes. This can be a unit – it receives 1 damage point – or a wall (apply wall destruction, if you are using that rule).
If no object is hit before the shot reaches the target then the target is hit (receiving the corresponding damage).
Notice that, according to the 'collateral damage' rules, the landing space can lie outside the board. The imaginary line is harder to trace in this case, but do your best and agree with your opponent.
(Example: Orange tank 1 shoots accurately at Green tank 3, but a wall is in the shot's trajectory, so it hits the wall instead (red circle).)
Target Anything
Your target does not have to be a unit. You can shoot an empty space or a wall.
Repair
If you wish to use this rule, place one or two Energy Pools (blue tiles) on the board during the setup phase.
A unit can repair itself by drawing energy from an Energy Pool. It does so by staying on an orthogonally or diagonally adjacent space for its entire turn (when it is the active unit) and doing nothing else. This repairs up to 2 points of damage. Multiple units can use the same Energy Pool in a single round.
Energy pools can't be destroyed.
Collision
Tanks can ram other tanks. The ramming tank must expend enough movement to get into the occupied space, but stops moving one space short, adjacent to the target. Both units receive 1 point of damage for every full 2 movement points the ramming tank spent to reach the target space. The target unit is not moved by the impact.
(Example: Green moves one space orthogonally, then one space diagonally to the space Orange occupies. Green does not actually move into Orange's space, instead remaining diagonally adjacent. Both tanks take 2 damage.)
Missions
You can agree on alternate victory conditions. Feel free to create your own, but here are some suggestions:
-
Setup: Place an Energy Pool in the centre of the Zone. Victory: You can win by having a single unit repair there 3 turns in a row (It's OK if no damage is being repaired).
-
Victory: Reach the opposite end of the Zone (your opponent's first rank) to win.
-
Setup: Place 9 walls in the Zone. Victory: Destroy 5 of them to win (keep destroyed walls in front of you to keep track).
You can agree either to use only one victory condition, or to select several, any of which can be achieved for victory.