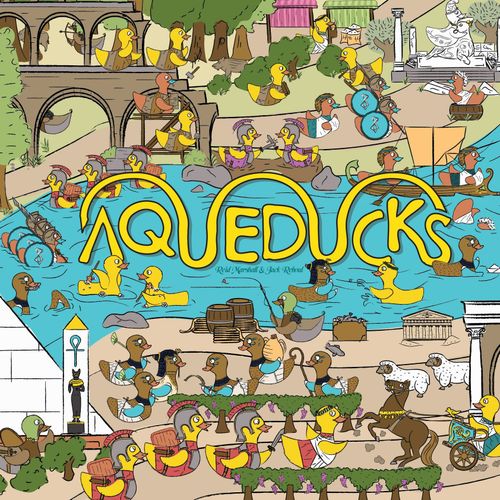
Aqueducks
Aqueducks Rulebook
Table of Contents
Table of Contents
1. Introducktion
1.1. Victory
In Aqueducks, victory is attained by having the most Favour (heart) at the end of the game. Favour is accumulated over the four eras of Aqueducks by donating duckats (coin) to aid the Roman Eggpublic. Through strategic drafting and placement of buildings in your city, players can amass duckats and resources to make critical contributions to the Pondifex at the right moment.
1.2. Components
- 194 building cards
- 42 protection cards
- 6 player boards
- 1 Pondifex board
- 60 colourful cubes
- 6 favour (heart) trackers
- 95 duckats (coins)
- 1 turn tracker
2. Setup
- Place the Pondifex Board and the duckats (coin) in the centre of your gaming pond.
- Shuffle the player boards face down and deal one to each player. Players flip their player board and take the matching coloured: 10 cubes, 1 Favour tracker, 14-building starter deck (marked with the six faction symbols in the top right corner), 7 Protection cards.
- Players join their two unique faction buildings (one of each of the six faction symbols) to form a District, and place this in front of their player mat.
- Players shuffle the remaining buildings in their starter deck and place it to the left of their player mat.
- Players then draw 6 buildings face-up from this deck to form their hand.
- Place the Protection cards in a pile to the left of the player mat. Take one of these and place it underneath the starting district.
- Players place nine of their coloured cubes on the spaces indicated on their player board, representing the starting resources in their city. Place the remaining cube nearby for making donations.
- Players place their coloured Favour (heart) tracker at the beginning of the Favour (heart) track on the Pondifex Board.
- Place the yellow turn tracker on the first Build Action (hammer icon) at the top of the Pondifex Board.
2.1. Building Decks
Separate the non-starter buildings according to their building tier: Tier 1 (one duck symbol), Tier 2 (two duck symbols) or Tier 3 (three duck symbols). Shuffle each pile.
3. Card Anatomy
The card anatomy diagram numbers the parts of a building card. Each part is explained below.
- Tier: Buildings in Aqueducks are either Tier 1 (one duck symbol), Tier 2 (two duck symbols) or Tier 3 (three duck symbols). Higher Tier buildings offer better benefits but are harder to play, due to higher resource requirements and restrictions on storey placement.
- Building Title
- Storey Placement Restrictions: This graphic displays the Storeys on which this building can be played. Generally, Tier 1 buildings can be played on Storey 1 and above, Tier 2 on Storey 2 and above, and Tier 3 on Storey 3 only. This building can be played on Storeys 2 or 3.
- Resource Requirements: This banner displays the resources which your city must possess in order to build this building. Not all buildings require resources. Resources are not consumed in Aqueducks.
- Dousing Requirement: Buildings with this symbol must be played adjacent to a water resource (water drop) or doused another way.
- Resource Symbols: These symbols are the resources this building produces for your city when active.
- Building Ability: Each building has an ability, displayed here. Some abilities grant a benefit so long as the building is active and any requirements met. Some abilities occur only at a specified time.
- When Played (icon) abilities trigger when the building is played. Any requirements of the ability must be met at this time, and benefits are calculated and gained immediately.
- End of Era (icon) abilities trigger after the final Build action of the Era. Requirements must be met and benefits calculated and gained after the final Build action.
4. Play
Aqueducks takes place over 4 Eras. Each Era (except the 4th) is comprised of 11 actions. Some actions will be taken by all players simultaneously, but it is best to ensure that all players are finished an action before the turn tracker is moved to the next space.
The actions are laid out on the Pondifex board, as below: six Build actions across the top row, then Publican Visit, End of Era, Protect, Downfall and Draft along the lower row, in that order, looping back to the first Build action. (Diagram: the Pondifex action track.)
4.1. Build
On each Build action, each player plays one District. This action is taken by all players simultaneously.
Districts are the building blocks of your city, and are formed by slotting together two building cards from your hand. The cards are combined back-to-back so that the faces of both buildings in the District are visible, much like a traditional house of cards.
Districts can be placed atop two supporting Districts to a maximum height of three Storeys. When placing a District atop two supporting Districts, you must place an additional building from your hand face down to bridge the gap between the two supporting Districts before placing the new District on top.
Districts are constrained to a 3 wide x 5 long grid. Players may grow their city in any direction until they reach a total length of 5 Districts and a total width of 3 Districts. Districts can be placed anywhere within this grid (i.e. they do not need to be placed next to existing Districts). All Districts are played in the same orientation (i.e. never perpendicular to each other).
(Diagram: Building Up Example.)
Resolve build actions in the following order:
- Choose two buildings from your hand to combine into a District.
- Check that you have enough resources in your city to play the chosen buildings. Resources in Aqueducks are not consumed on use, so resources required by one building in a District can also be used for the other. Buildings being placed into inactive spaces (see 4.1.1. Inactive Spaces below) require no resources.
- Check that active buildings in the new District would meet any dousing requirements (water drop icon) (see 4.1.3. Water & Dousing) when placed into your city.
- Place the District in front of you. It is now in your city. It cannot be moved again this Era.
- Update resource trackers on your player board. Resources from obstructed buildings are removed and resources from active cards in the new District are gained.
- Resolve building abilities (except End of Era (icon)) in your desired order if requirements are met.
TIP: You may find that your new District has obstructed a resource which was required to build it. This is okay - your city had the necessary resources at the time of construction.
TIP: Some abilities on existing Districts may have been activated by your newly placed District.
(Diagram: Inactive Spaces Example. Active buildings are denoted by green rectangles and inactive buildings are denoted by X-marked red rectangles.)
4.1.1. Inactive Spaces
In Aqueducks, only buildings which are visible from the edge of your city are active. Buildings which cannot be seen from a side-on perspective are inactive and do not contribute to your total resource pool or provide benefits.
As your city grows over the four Eras of Aqueducks, building vertically will become essential, but to do so necessitates the obstruction of existing buildings, so you will need to plan ahead.
There is no resource requirement to play a building into an inactive space. Storey placement requirements also do not apply when playing a building into an inactive space (e.g. you may place a building with a Storey 1 placement requirement symbol into an inactive space on Storey 1).
Resources and ongoing benefits are lost from existing buildings upon obstruction.
4.1.2. Adjacencies
Many buildings in Aqueducks award benefits, bonus duckats (coin), or resources if an adjacency (adjacency icon) requirement is met.
Adjacencies (adjacency icon) are orthogonal (not diagonal) and from the side-on perspective. The buildings immediately beside, above or below a building when viewed from the side are considered to be adjacent to that building. See below for an example.
When one building is obstructed by another, the buildings that were adjacent to the obstructed building are now adjacent to the new building.
TIP: Remember that there are two side-on perspectives in your city - the view from the left and the view from the right.
(Diagram: Adjacency/Dousing Example.)
Shown in the example are active buildings with water resource symbols (water drop) - denoted by blue rectangles, active buildings on the left - denoted by green rectangles, active buildings on the right - denoted by yellow rectangles, and inactive buildings - denoted by x-marked red rectangles.
Buildings with the water resource symbol douse orthogonally adjacent cards from the side-on perspective, therefore the water building on F3 douses cards F2, E3, E4, but not E2.
However, water from C3 douses the building on A4, as they are orthogonally adjacent from the side-on perspective.
TIP: View your city from the front so you can see both sides of your city more easily.
4.1.3. Water & Dousing
Water works differently to other resources in Aqueducks. Buildings with a water resource symbol (water drop) douse all orthogonally adjacent buildings (see example on the previous page).
Some buildings must be played into an already doused space in your city - these cards have a dousing requirement symbol (dousing requirement icon).
The Reservoir and Cloaca Maxima buildings douse all active buildings. Cards with a dousing requirement may then be placed into your city without needing to be played adjacent to a water resource (water drop).
Once buildings with a dousing requirement (dousing requirement icon) have been played into a doused space, the building that was providing the dousing can be obstructed and the building with the dousing requirement will remain active.
4.1.4. Faction Abilities
Each Faction has a unique ability, shown in the top right corner of the player board. These may affect players' building strategies.
4.2. Publican Visit
The Publican visits twice each Era to collect donations for the Pondifex and the Eggpublic. Making contributions when the Publican visits is the only way to gain Favour (heart) in Aqueducks, and is therefore crucial to winning the game.
The Pondifex sends his Publican to his most pious subjects first, meaning players make donations in order from highest to lowest Faith (Faith icon). In the event of a tie, the tiebreaker is highest Military (Military icon), followed by Luxury (Luxury icon), then duckats (coin).
On their turn, each player may place one coloured cube onto an empty space on the Pondifex board, paying the corresponding duckats (coin). If a player cannot afford to make any donations, or wishes not to, play passes to the next player in Faith order.
However, a show of strength can convince the Publican to accept your donations over those of your more pious neighbours. A player with higher Military can push the donation cubes of players with lower Military to the right, and thus take their position.
The Pondifex is not immune to the allure of luxury. Players with Luxury (Luxury icon) in their city will gain additional Favour (heart) from their donations.
Once all players have placed a cube or passed, players gain the Favour (heart) indicated on the space where their cube now sits. Donation cubes are then returned to players.
Donation Example
Publican Visit #1
In this example 2-Player game of Aqueducks, it is the first Publican Visit (Publican Visit icon) of the second Era. The players have the following duckats and resources:
- Caesena (red cube) has 22 duckats, 1 Faith, 4 Military, and 1 Luxury.
- Florentia (purple cube) has 33 duckats, 4 Faith, 1 Military, and 0 Luxury.
Florentia has the most Faith and donates first, choosing to donate 25 duckats. Caesena goes last and chooses to donate 10 duckats.
After all players have donated, each player receives Favour (heart) equal to the value under their cube. In this case Florentia gains 4 Favour and Caesena gains 2 Favour plus an additional 1 Favour for having 1 Luxury in their city.
Publican Visit #2
Later in the Era, after earning duckats (coin) from End of Era abilities, Caesena now has 42 duckats, 2 Faith, 4 Military, and 1 Luxury.
Florentia has 26 duckats, 3 Faith, 1 Military, and 2 Luxury.
Florentia has the most Faith and donates first, choosing again to donate 25 duckats.
Caesena goes next and also chooses to donate 25 duckats, Strong-Arming Florentia with their higher Military. As Caesena has more Military than all other players in the donation row, Florentia is pushed to the right to allow Caesena to take the leftmost and highest Favour space.
Florentia gains 3 Favour plus an additional 2 Favour for having 2 Luxury in their city.
Caesena gains 4 Favour. Both players now have a tied Favour of 10.
4.3. End of Era Abilities
After the final Build action, all players simultaneously gain all End of Era (icon) abilities on active buildings in their respective cities.
4.4. Protect
After gaining End of Era abilities, players must choose which Districts in their city to Protect from the Gallic tribes. Protected Districts are fixed in location for the remainder of the game and. Players should place their Protection cards under the Districts they are Protecting.
Each player starts with an already protected District - their unique starting District. At the end of each Era, players choose a number of additional Districts to Protect according to the below table.
| Era | 1 | 2 | 3 | 4 |
|---|---|---|---|---|
| Existing Protected Districts | 1 | 2 | 4 | 7 |
| Districts Played | 5 | 5 | 5 | 5 |
| Total Districts in City | 6 | 7 | 9 | 12 |
| New Districts Protected (Protect icon) | 1 | 2 | 3 | - |
Districts on Storeys 2 or 3 can only be Protected if the Districts which support them are also Protected. Districts cannot be Protected if they would violate Storey placement restrictions at the beginning of the next Era. Districts with buildings which no longer satisfy dousing requirements or require more resources than your city currently has can be Protected.
4.5. Downfall
The Gallic tribes are attacking! Players remove all unprotected Districts (no Protection card underneath) from their cities and separate them into their component buildings. Players place all disassembled buildings and anything which remains of their hand or draw pile into their discard pile.
Players update their resource trackers to reflect the resources remaining in their toppled city.
4.6. Draft
To Draft, deal each player a Drafting Hand of six (6) buildings from the corresponding Buildings Decks according to the Drafting Hands table on the next page.
Players each choose one card from the Drafting Hand to keep and add it to their discard pile. Players then pass the remaining cards clockwise, continuing to take one from each Drafting Hand until no more cards remain.
Players then shuffle their discard pile and place it face down to the left of their player board to form a new draw pile for the next Era. Each player draws 6 cards to their hand (7 for Florentia players). The next Era can now begin.
4.6.1. Drafting Hands
| Era | 1 | 2 | 3 |
|---|---|---|---|
| Tier 1 (one duck symbol) | 4 | 3 | 2 |
| Tier 2 (two duck symbols) | 2 | 3 | 2 |
| Tier 3 (three duck symbols) | 0 | 0 | 2 |
4.7. End of Game
Aqueducks ends after the second Publican Visit (Publican Visit icon) of the 4th Era.
The player with the most Favour (heart) wins the game. In the event of a tie, the tied player with the most duckats (coin) wins.
5. Solo Mode
5.1. Setup
When playing Aqueducks solo, there are a few key changes to the setup, including:
- Players may choose the faction they wish to play.
- Solo mode is played without the Pondifex board.
5.2. Play
Aqueducks solo mode is played the same as the standard game, with two key exceptions:
- There are no Publican Visit (Publican Visit icon) actions. Players instead take the actions shown below, aiming to accrue the most duckats (coin) through optimal play.
(Diagram: the solo action track: five Build actions across the top row, then Draft, Downfall, Protect and End of Era along the lower row, looping back to the first Build action.)
- During the Draft action (Draft icon), players choose 6 out of 10 buildings from the below modified Drafting Hand to add to their discard pile.
| Era | 1 | 2 | 3 |
|---|---|---|---|
| Tier 1 (one duck symbol) | 7 | 5 | 3 |
| Tier 2 (two duck symbols) | 3 | 5 | 3 |
| Tier 3 (three duck symbols) | 0 | 0 | 4 |
5.3. Scoring
Players accrue duckats (coin) throughout all 4 Eras of Aqueducks, arriving at a final solo duckat (coin) score.
6. Leaderboard
Players can submit their solo (coin) or multiplayer (heart) scores, faction, favourite buildings and more using the Submit Scores QR code below. (QR code: Submit Scores.)
Players can then see how they fared against other Aqueducks players across the globe using the Community Leaderboard QR code below. (QR code: Community Leaderboard.)
7. Reference Sheet
7.1. Drafting Hands
| Era | 1 | 2 | 3 |
|---|---|---|---|
| Tier 1 (one duck symbol), cards per player | 4 | 3 | 2 |
| Tier 2 (two duck symbols), cards per player | 2 | 3 | 2 |
| Tier 3 (three duck symbols), cards per player | 0 | 0 | 2 |
7.2. Icon Reference
- Resource Requirement banner (banner with tree and brick symbols in the upper-left): Buildings with this banner have a Resource Requirement. The resources listed here must be in your city before the building is placed.
- Dousing requirement (blue water-drop banner below the Resource Requirement banner): Buildings with this symbol must be played adjacent to a water resource (water drop) or doused another way.
- When Played: Buildings with this symbol gain benefits immediately upon placement into an active space if requirements are met.
- End of Era: Buildings with this symbol gain benefits after the final Build action of the Era if requirements are met.
- Any Storey: Buildings with this symbol can be placed on any Storey of your city.
- Storeys 2 and 3 only: Buildings with this symbol can only be placed on the 2nd and 3rd Storey of your city.
- Storey 3 only: Buildings with this symbol can only be placed on the 3rd Storey of your city.
7.3. Ability Reference
| Cost / Trigger | Effect |
|---|---|
| 1 duckat / tree | Gain 1 duckat for each tree in your city. |
| 4 duckats / adjacency with Faith (cross) | Gain 4 duckats for each adjacent Faith resource symbol to this building. |
| 1 Faith / adjacency with column | Gain 1 Faith for each adjacent column resource symbol to this building. |
| 4 duckats / dousing requirement | Gain 4 duckats for each active building in your city with a Dousing Requirement symbol. |
| 7 duckats when you play brick wall / column | Gain 7 duckats for each brick wall and column resource symbol you play whilst this building is active. |
| 5 duckats / Tier 2 (two duck symbols) | Gain 5 duckats for each active Tier 2 building in your city. |
| 10 duckats / adjacency (building) | Gain 10 duckats for each adjacent building. |
| Ignore all dousing | Ignore any Dousing Requirements whilst this building is active. |
| Activate on another building (When Played icon) | Choose a When Played ability on another active building in your city and activate it again. |