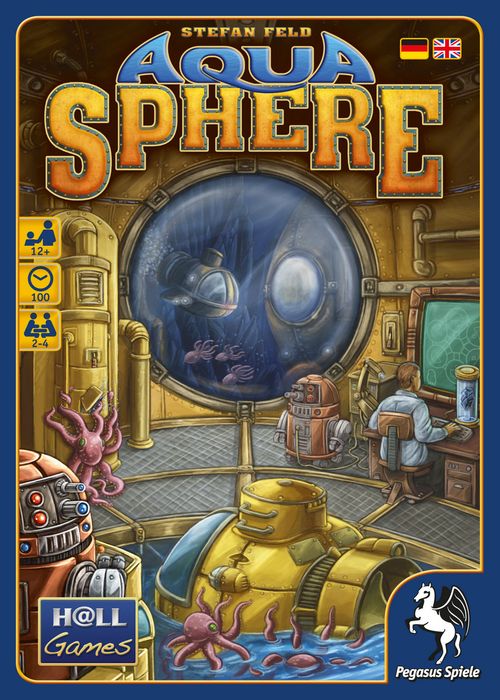
AquaSphere
AquaSphere Rulebook
Table of Contents
Table of Contents
Game Idea
Each player leads a research team consisting of an Engineer and a Scientist, which move on two different game boards, as well as a group of bots, which carry out actions.
In the Headquarters, the Engineer programs the bots and, thus, determines which action will be carried out. Meanwhile, in the Research Station, the Scientist determines where the bots will carry out the action. Over the course of 4 rounds, the teams use their actions to gain as much knowledge as possible. The player with the most Knowledge Points (KP) at the end wins.
Components
- 1 Research Station (the "Station"), consisting of 6 Sectors
- 1 Headquarters
- 4 Player Boards
- 6 Center Tiles
- 38 Time Markers
- 7 Programming Tiles
- 6 Base Labs
- 41 Research Cards
- 3 Setup Overviews
- 7 Program Cards
- 30 Lab Expansions
- 20 Crystals
- 15 Octopods
- In each of the 4 player colors: 1 Scientist, 1 Engineer, 6 Submarines, 16 Bots (14 used at start), 2 Counters
Setup
Changes due to player count are highlighted where relevant.
1. Game Boards
- Put the 6 Sectors of the Station together in any order.
- Place the Headquarters next to it, but not too closely.
- Leave some space for the general supply.
- Each player chooses a color and takes the wooden playing pieces of that color and a Player Board.
- Randomly determine a Starting Player.
2. Headquarters
- Shuffle the Program Cards and place 4 of them in a stack next to the Headquarters. Return the remaining Program Cards to the box.
- Place the Programming Tiles on the appropriate spaces in the Headquarters as indicated by the topmost Program Card. Then return that topmost Program Card to the box.
- The Starting Player places one Bot on the first space of the Play Order Track. Then, in clockwise order, each other player places one Bot on the next free space of that track.
- Each player places one Counter on space "0" of the Knowledge Track and the other on space "0+" of the Full Circle Counting Track.
- Each player places one Engineer on the Starting Space of the Programming Section.
3. General Supply
- Place the Crystals, Octopods and Time Markers next to the Station, along with the shuffled face-down stacks of Lab Expansions and Research Cards.
- In games with 2 or 3 players, also add the Submarines of the unused colors to the general supply.
4. Player Boards
Each player places on the corresponding spaces of their Player Board:
- 14 Bots
- 6 Submarines
Each player also receives 1 Base Lab at random and places it next to the Player Board. The letter on the tile indicates that player's Starting Sector.
5. Station
a) Center Tiles. Take the appropriate 4 Center Tiles according to the number of players (as indicated by the symbol below the light bulb). Place the tile with a 5 in its light bulb in the middle of the Station. Then place the tiles with a 4, 3 and 2 on top of it (in that order), each in a random orientation.
b) Setup Overview. Take the Setup Overview Card corresponding to the number of players. The upper block indicates the components that populate each player's Starting Sector (see c). The bottom rows indicate the components that populate the remaining sectors (see d).
c) Your Starting Sector. According to the Setup Overview Card, place in your Starting Sector:
- 1 Octopod in the purple area near the Octopod symbol
- 1 Crystal in the black area near the Crystal symbol
- the leftmost Submarine from your Player Board in the blue area, on the space depicting 1 Time Marker
- 1 Scientist somewhere in the blue area
- 4 Time Markers on the appropriate space in the yellow area
d) The other Sectors. Randomly select one of the remaining Base Labs and, in the Sector indicated by its letter, place 2 Octopods (purple area) and 1 Crystal (black area). Randomly select another Base Lab and, in its Sector, place 3 Octopods (purple area) and 2 Crystals (black area).
e) In each Sector:
- Draw 1 Research Card and place it face up next to the red area.
- Draw 1 Lab Expansion and place it face up next to the green area.
2-player game only: In the blue area of each of the remaining 2 Sectors, place a neutral Submarine on the space depicting 1 Time Marker.
3-player game only: In the blue area of the remaining Sector, place 1 neutral Submarine on the space depicting 1 Time Marker. Also place 1 neutral Bot in the Loading Station of each of the 3 Sectors that are not the Starting Sector of a player. (Playing pieces of unused colors are "neutral".)
f) Each player whose Starting Sector is adjacent to a "0" lock gets 3 Time Markers. Each other player gets 4 Time Markers.
g) Determine the color of the Programming Space in the white area of your Starting Sector. Place your remaining Bot on the corresponding Program Symbol of your Player Board.
The Game Boards in Detail
Headquarters
Programming Section. Consists of 7 spaces, each containing a Programming Tile, plus the Starting Space on which you place your Engineer at the beginning of each round. The Programming Tiles are redistributed among the spaces every round according to the topmost Program Card. During a round you move your Engineer from space to space along the arrows, thus choosing the program for one of your bots. Each round you may move your Engineer 3 times in this fashion. When you pass, you move your Engineer to the Pass Order Track.
Knowledge Track. The track around the Headquarters keeps track of each player's Knowledge Points (KP), symbolized by the light bulb symbol.
- Special Rule — red lines: Whenever you would move your Counter past a red line, you must pay 1 Crystal. If you cannot pay, you may instead choose to return an already-programmed Bot to your supply. If you do neither, your Counter must stop in front of the red line and the remaining points are lost.
- Note: During the Final Scoring, the red lines are ignored and you do not pay any Crystals.
Full Circle Counting Track. Whenever your Counter completes a full circle around the Knowledge Track, move your Counter on this track 1 space forward.
Play Order Track / Pass Order Track. Track turn order and the order in which players passed.
Station
The Station consists of 6 Sectors. The Sectors are identical except for the letter on their central Control Space and the type of Programming Space next to the white area.
Action Areas. Around the Control Space there are 7 colored areas, each depicting a distinct Program Symbol and providing a different action. In general, most actions are "take whatever is on or next to the area."
Control Space. Here you place the Bot carrying out the action. The player whose Bot is on the Control Space "controls" that Sector, which matters during Scoring at the end of each round.
Locks. The 6 Sectors are connected via Locks with values from 0 to 2. These values indicate the number of Time Markers your Scientist must pay to move from one Sector to another.
Loading Station. Collects the Bots that are removed from the Control Space. The permitted number of Bots per Loading Station depends on player count — 2 players: 2 Bots; 3 players: 4 Bots; 4 players: 5 Bots. Whenever the number of Bots in a Loading Station exceeds this limit, each player must remove all but one of their Bots from that Loading Station.
Player Board
7 Program Symbols. Bots must be programmed before you can carry out the corresponding action in a Sector. Indicate a Bot is programmed by placing it on a Program Symbol. A Program Symbol cannot be occupied by more than one Bot. You may have a maximum of 2 Bots on your Program Symbols at any time. When placing a third Bot onto a Program Symbol, you must immediately return one of the 3 Bots to your supply (and receive 2 Time Markers).
Supply of Bots and Submarines. You program Bots to carry out actions in the Station. Submarines are important during Intermediate Scoring; they can provide Time Markers and Knowledge Points. When taking Bots and Submarines from your supply, take them from left to right. When returning Bots to your supply, place them on the highest visible number.
Returning a programmed Bot. If you return a programmed Bot to your supply, you receive 2 Time Markers — but not if you return a Bot for crossing a red line.
Lab — Personal Supply
During setup you receive a Base Lab. The symbols in your Lab indicate how many of each resource you may keep in your personal supply; that is, the overall capacity of your personal supply is limited by the size of your Lab. You may never exceed your capacity, even where the rules do not mention it explicitly. To increase capacity, add Lab Expansions to your Lab.
Capacity symbols (starting values with the Base Lab in parentheses):
- Research Cards: 1 Research Card per symbol (start: 2)
- Crystals: 1 Crystal per symbol (start: 2)
- Octopods: you can catch 1 Octopod per symbol (start: 2)
- Time Markers: 1 Time Marker per symbol (start: 4)
Most Lab Expansions also have a letter. Every time you acquire such a Lab Expansion, you may place 1 Bot on the Control Space of the corresponding Sector if you wish.
Course of Play — Overview
- The game is played over 4 rounds.
- Beginning with the Starting Player, players take turns in the order indicated by the Play Order Track until everyone has passed.
- Then there is an Intermediate Scoring and the next round is prepared. The next round is played in the order in which players passed.
- After the 4th Intermediate Scoring there is a Final Scoring. The player with the most Knowledge Points after the Final Scoring wins.
Course of a Turn
On your turn, choose 1 of these 3 options:
- A: Program a Bot
- B: Carry Out an Action with a Programmed Bot
- C: Pass
A: Program a Bot
Take the next available Bot from your supply and place it on an available Program Symbol on your Player Board (remember: no more than 2 programmed Bots at a time). There are 2 ways to program a Bot:
- Move your Engineer in the Headquarters 1 space forward along an arrow. Each space has 2 outgoing arrows. The Programming Tile where the Engineer ends up indicates the Program Symbol on which you place the Bot; the Bot is now "programmed" for that action. (If you have Research Cards that activate on entering a specific space, you may use them now.)
- Once per round, you may pay 3 Time Markers to place a Bot on any unoccupied Program Symbol. Place one of the paid Time Markers on the Time Marker symbol in the top-right corner of your Player Board to indicate you have used this option.
B: Carry Out an Action with a Programmed Bot
This option has 3 steps, carried out in order.
1. Determine where to carry out the action.
- 1a) Optional: Move your Scientist to another Sector, paying the depicted number of Time Markers for each Lock it passes through (0–2 per Lock).
- 1b) Place your Scientist in one of the colored Action Areas for which you have a programmed Bot on the corresponding Program Symbol.
2. Place the Bot. Move the Bot from the corresponding Program Symbol to the Control Space of the Sector your Scientist is in. If the Control Space is occupied by another Bot, move that Bot to the Loading Station of the Sector. If the number of Bots in the Loading Station now exceeds the permitted number (2 players: 2; 3 players: 4; 4 players: 5), each player must return all but one of their Bots from that Loading Station to their supply.
3. Carry out the action of the Action Area occupied by your Scientist (see Actions below). (If you have Research Cards that activate on carrying out a certain action, you may use them now.)
C: Pass
Move your Engineer token in the Headquarters onto the next free space of the Pass Order Track. This ends your round. Your Engineer can only leave the Programming Section from one of the depicted spaces.
Any time during your turn you may return an already-programmed Bot to your supply to get 2 Time Markers from the general supply — unless you return it for crossing a red line, in which case you get nothing.
Actions
Expand the Lab (green)
- Take the topmost Lab Expansion from the Sector and place it next to your Base Lab (at any position).
- If the Lab Expansion shows 1 or 2 letters, you may place 1 Bot on the Control Space of each corresponding Sector. If a Control Space is occupied, move that Bot to the Loading Station (applying the overflow rule as above).
After completing your Lab (adding 5 Lab Expansions), you may not take another Lab Expansion. A completed Lab is worth 5 Knowledge Points at the end of the game.
Take Time Markers (yellow)
Take the Time Markers lying next to the yellow area. If you did not get at least 2 Time Markers, take additional ones from the general supply until you have received a total of 2. If you cannot take all of them (due to your Lab capacity), take only as many as you can hold and leave the rest in the Sector.
Take Crystals (black)
Take as many Crystals from the Sector as you can accommodate in your personal supply. Leave the excess Crystals in the Sector.
Catch Octopods (purple)
Catch at most as many Octopods in the Sector as your Lab allows. You gain Knowledge Points according to this table, then return the caught Octopods to the general supply:
| # of caught Octopods | 1 | 2 | 3 | 4 | 5 | >5 |
|---|---|---|---|---|---|---|
| # of Knowledge Points | 1 | 3 | 6 | 10 | 15 | 21 |
Place a Submarine (blue)
You may only have 1 Submarine in each Sector. If you have not already placed one in the chosen Sector:
- Take the next Submarine from the left of your Player Board and place it on the next available Submarine Space in the Sector.
- Pay as many Time Markers as depicted on the space. If you cannot pay, you may not choose this action.
- Gain as many Knowledge Points as depicted in the light bulb on the current Center Tile.
If you have placed all 6 of your Submarines in the Sectors, you gain a bonus of 5 Knowledge Points at the end of the game.
Take a Research Card (red)
Take the topmost Research Card from the Sector and place it next to your Player Board. Gain as many Knowledge Points as depicted in the light bulb on the current Center Tile. You may only take a Research Card if you can accommodate it (per your capacity). You may never discard Research Cards, even after they have served their purpose.
Program a Bot (white)
Take the next Bot from your supply and place it on the Program Symbol of your Player Board matching the symbol shown in the white Action Area of the Sector. If that Program Symbol is already occupied, take 2 Time Markers instead and leave the Bot in the supply.
Intermediate Scoring
When all players have passed, there is an Intermediate Scoring.
Time Markers. Gain 1 Time Marker per Submarine you have deployed in the Station. Return any Time Markers from the top-right corner of your Player Board to the general supply. If you have Research Cards usable during Intermediate Scoring, you may use them now (each player decides individually in which order to carry out these steps).
Knowledge Points. Add up each player's total Knowledge Points individually before adjusting Counters on the Knowledge Track. Reminder: to cross a red line you must pay 1 Crystal; if you have none you may return a Bot from a Program Symbol (without receiving Time Markers); otherwise your marker stops at the red line and extra KP are lost.
-
Majority on the 6 Control Spaces. The player with the most Bots on Control Spaces gets 6 KP. If two or more players are tied for the most, they each get 3 KP.
-
Bots in Play. In the Bot Supply Section of your Player Board, find the highest number in a column with no Submarine that is not covered by a Bot. Gain that many KP.
-
Crystals in Your Supply:
# of Crystals 1 2 3 4 5 >5 # of Knowledge Points 1 3 6 10 15 21 -
Negative Points for Leftover Octopods. In each Sector with one of your Bots on the Control Space, lose KP according to the leftover Octopods in that Sector:
# of leftover Octopods
Special case: In theory you could lose points during an Intermediate Scoring. If so, you cannot fall back behind a red line (this should happen very rarely).
Preparing the Next Round (after rounds 1–3 only)
Station
- Draw 6 Research Cards from the draw pile and place one in each Sector (on top of any existing ones).
- Draw 6 Lab Expansions from the draw pile and place one in each Sector (on top of any existing ones).
- The topmost Center Tile indicates additional components to place in each Sector:
- Time Markers: Remove any leftover Time Markers from the Station, then place new ones in each Sector according to the Center Tile.
- Crystals: add to any already there.
- Octopods: add to any already there.
- Neutral Submarines (2- and 3-player games): There may not be more than 1 Submarine of each color in a Sector. If you cannot place a neutral Submarine in the indicated Sector, place it in the next legal Sector clockwise where possible.
- Return the topmost Center Tile to the box.
Headquarters
Rearrange the tokens on the Play Order Track to match the Pass Order Track — this will be the play order for the following round. Return the Engineers from the Pass Order Track to the Starting Space of the Programming Section. Rearrange the Programming Tiles as indicated by the topmost Program Card, then return that Program Card to the box so the next one becomes visible.
Final Scoring and End of Game
Immediately after the 4th Intermediate Scoring, proceed with the Final Scoring. During the Final Scoring you do not pay Crystals for passing red lines. Gain Knowledge Points as follows:
-
Different letters in your Lab:
# of different letters 1 2 3 4 5 6 # of Knowledge Points 1 3 6 10 15 21 -
1 KP per Time Marker left in supply
-
5 KP if all 6 Submarines are in the Station
-
5 KP for a completed Lab (5 Lab Expansions)
The player with the most Knowledge Points wins. In case of a tie, the player with more Bots on Control Spaces wins; if still tied, the player with more Crystals wins; otherwise there are multiple winners.
Appendix: Research Cards
When gaining resources via Research Cards, always respect your Lab capacities. You may not discard any Research Cards; you keep them until the end of the game.
Cards you can use any number of times per round
- Every time you move your Engineer onto a space with the depicted Programming Tile, you get the depicted reward (2 Time Markers, 1 Crystal, or 4 KP). Example: 1 Crystal for reaching the red Programming Tile.
- Every time you catch at least one Octopod, you get the depicted reward (2 Time Markers, 1 Crystal, or 3 KP).
- While moving, you may pay 1 Time Marker to place your Scientist on the opposite side of the Station. You may do this at any time in addition to normal movement.
- You get 1 KP for each Bot (except your own) that is removed from a Loading Station because of you.
- For the remainder of the game, you do not have to pay Time Markers when moving your Scientist through the Lock with the "2".
- Every time you place a Submarine, you pay half of the depicted Time Markers (rounded down).
Cards you can activate at any time but only once per game
- When moving your Engineer, instead of moving according to the arrows, you may move sideways in the Headquarters. (In the round you activate this card, your Engineer will move 4 spaces in the Headquarters.)
Cards you can use during an Intermediate Scoring
- If you pay 1 Time Marker, you may place 1 Bot from your supply on the depicted Program Symbol.
Cards you have to use immediately
- Take 2 Time Markers and place 1 Bot on the depicted Program Symbol. If that Program Symbol is already occupied, take 2 additional Time Markers instead.