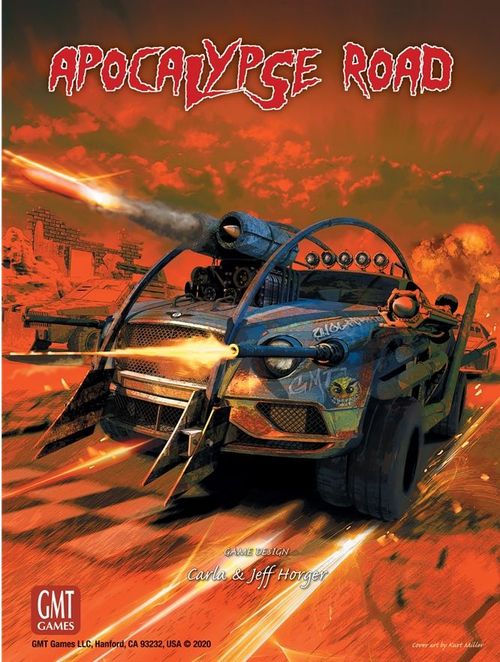
Apocalypse Road
Apocalypse Road Rulebook
Table of Contents
Table of Contents
- 1.0 Overview
- 2.0 Components
- 3.0 Setup
- 4.0 Sequence of Play
- 5.0 Important Concepts
- 6.0 Race Cards
- 7.0 Movement
- 8.0 Combat
- 9.0 Damage Markers
- 10.0 Movement Event Cards
- 11.0 Ending the Race & Winning
- 12.0 Rules for Integrating Thunder Alley
- 13.0 Rules for Integrating Grand Prix
- A Note from the Designer
- Race Card Distribution Table
- Glossary
1.0 Overview
Apocalypse Road is a game for 2 to 10 players simulating a more violent and dangerous type of racing in the apocalyptic near-future. Players control racing teams competing to score the most points in a single race by racing across the finish line while simultaneously trying to destroy their opponent's cars.
Objective
The first team to score 12 Victory Points (VPs) wins the game. Each car receives 1 VP for crossing the Start/Finish Line (see: Scoring). In addition, each time you eliminate an opponent's car you score 1 VP.
2.0 Components
- 4 Race Tracks on two boards (Front/Back)
- 80 Car Tokens
- 1 sheet of Tokens
- 96 Race Cards
- 52 Movement Event Cards
- 48 Combat Event Cards
- 10 Team Mats
- 1 Rule Book
2.1 Tracks
All tracks use the following track descriptions:
Apron: The inside boundary of the track.
Finish Line: The Finish Line is the line cars pass to score VPs. It is also the location that determines the Race End if the track is being used for Thunder Alley and Grand Prix.
Jump Section: These are the lanes on each side of the Trough (7.14).
Lanes: A lane is a number of spaces combined to form a continuous path. Corners on the track may cause lanes to separate or merge.
Outside Wall: The outside wall is the boundary line that encloses the track.
Race to the Finish Line: The Race to the Finish Line is the green line eight spaces from the Finish Line. It is only displayed for use in races using Thunder Alley or Grand Prix rules.
Restart Lanes: The restart lanes are the two innermost lanes on the track. There are no restarts in Apocalypse Road so this reference is only made for Thunder Alley and Grand Prix. If a restart requires use of a single lane space, utilize the rules for that situation in the game being played.
Rough (Dirt) Track: See 7.13
Sectors: Sectors are a group of spaces reaching from the inside Apron to the Outside Wall that are the same distance from the start/finish line. Cars on the inside of a sector are considered to be ahead of cars on the outside.
Spaces: Each enclosed rectangle is a space. Only one car may occupy a space.
Starting Grid: Where cars are placed at the start of the race.
The Chute: The space where replacement cars enter the track. On a Thunder Alley or Grand Prix track The Chute is assumed to be the space just past the finish line with the whole track to transit before crossing the finish line.
The Trough: See 7.14
2.2 Team Mats
Each team has a Team Mat with the data for the various cars on their team.
The Team Mat shows, for each car: Team Name and Information; Car Number; Defense Strength; Driver Name; Targeting Bonus; the base Movement Points a car uses on activation; the Weapon Type used by that car (this matches a section on the Combat Event Cards, and the direction indicates into which spaces the weapon fires); and Damage boxes to hold accrued damage.
2.3 Cars
Cars are represented by counters which show an overhead view of a race car. Car counters are double-sided. One side has a light background, while the other side has a dark background.
All cars should start a turn with the background turned face-up matching the color of the First Player marker's background. As cars are activated, they are flipped to their opposite side, to represent that they have been activated this turn.
Each car has two numbers displayed on the counter. The large number on the roof is the car's number and corresponds to a car on that player's Team Mat. The smaller number in the bottom right is the car's defense required to meet or exceed to hit the car when attacked.
3.0 Setup
1. Select a Track: Select one of the four tracks included in the game and place it in the center of the table. If you desire more track options, the tracks from Thunder Alley and Grand Prix are compatible with Apocalypse Road, however they can make for some longer games and are not highly recommended, especially ones over 40 sectors in length.
If you elect to use a Thunder Alley or Grand Prix track, ignore the printed starting grid, place the last car AHEAD of the finish line, and continue placement forward from there. Since points are scored for crossing the Finish Line, if a car is pushed backward over the Finish Line use the Lapped tokens from Thunder Alley or Grand Prix to indicate that these cars will not score a Victory Point (VP) for crossing back over it the second time.
2. Select a Team: Each player selects a team and takes the cars, VP Tokens and Team Mat of that team's color and symbol. Players will always start with four or five cars of their choice from among their eight possible cars.
- 2 to 4 players = 5 cars each
- 5 to 10 players = 4 cars each
3. Prepare Card Decks: Shuffle the Movement Event cards, Combat Event cards and Race Card decks separately and place them accessible to the board.
4. Place Cars on Track: Place one car from each team involved in the race into the draw bag. Draw these cars one at a time and place them on the starting grid in position order. Place the first car drawn from the draw bag in position one, the second in position two, continuing this order until all cars that were in the draw bag are placed on the starting grid. Repeat this process until all cars are on the grid. Place all car counters with their light background side up to start the race.
5. Place VP Tokens: Place each player's VP tokens in their team boxes on the board. Use 12 Tokens for each team for a standard game or 15 for a long game.
6. Place Markers: Give the player with the car in the first position on the starting grid the First Player marker (light side up).
7. Deal Cards: Deal out 6 Race Cards to each player.
Let's Rumble!
4.0 Sequence of Play
4.1 Turn vs Action Segment
A full Turn consists of players activating all of the cars on the track once. An Action Segment is each individual car's activation.
4.2 Sequence of Play for Each Turn
- Fill Hands (4.3)
- Perform Action Segments (4.4)
- Perform End of Turn Sequence (4.5):
- a. Discard Unwanted Race Cards
- b. Change First Player marker
4.3 Fill Hands
Every player has a hand size of 6 cards. At the beginning of every turn, each player draws enough cards from the Race Deck to fill their hand back to the 6 card limit. Car elimination does not reduce a player's hand size, so all players will have the same number of cards in their hand at the start of every turn. Players fill their hands in turn order, starting with the first player and continuing clockwise around the table. If at any time the Race Deck is empty and a card needs to be drawn, reshuffle all the Race Card discards to form a new Race Deck.
4.4 Action Phase
The Action Phase consists of a number of Action Segments. Action Segments are performed in turn order, starting with the player with the First Player marker and then proceeding clockwise around the table. The Action Phase is over once all cars have been activated for an Action Segment.
The Active Player performs the following actions during the Action Segment:
- Play one Race Card for one car from his team.
- Move that car based on the Race Card's Movement Points (6.0) and the movement type (7.1). The Active Car may shoot its weapon either before any movement is made or after all movement is completed.
- After that car has finished its activation, flip it to the side not matching the color on the first player marker. This indicates that the car may not be activated again this turn.
Play then proceeds to the next player in turn order and he conducts steps 1-3. If a player does not have any cars left when an opportunity to play arises, that player must pass and skip their turn. No card is played. Players may not pass if they have cars that can be activated.
4.5 End of Turn Sequence
Discard: Players may discard any and all unwanted Race Cards in their hand.
Assign First Player: Award the First Player marker to the player whose cars have the most total damage currently on the Team Mat. Eliminated cars do not count towards this total. If there is a tie, the player among those tied closest to the left of the current first player going clockwise around the table receives the marker. The First Player must rotate so the player currently holding the marker's damage is not considered in the count. The token must be passed to a different player.
Once the token is assigned flip it to the color matching the background of the cars on the track. Now the turn marker and all the cards that need to be activated share the same background color.
5.0 Important Concepts
5.1 Current Leader & Running Order
In Apocalypse Road players will not track the Current Leader and there is no Running Order as expressed in Thunder Alley or Grand Prix.
5.2 Lapped Cars
In Apocalypse Road it is not necessary to know when or if cars have been lapped. The only time a car is removed is if it is destroyed by damage.
5.3 Retirement or Elimination
Players may not voluntarily retire a car. Cars are only eliminated upon receiving their 6th Damage marker. This elimination is immediate.
5.4 Corners
5.4.1 In General: There are no special rules about corners. Cars may change lanes, displace cars, ram, and shoot while in corners.
5.4.2 Entering Corners: At some point on each track, the straightaways may funnel down to fewer lanes going into the corners. These are called Converging Lanes. If there is a choice of lanes that cars can enter, the active player decides which lane is moved into when entering the corner. See rule 7.11.2 if the Active Car is part of a line.
5.4.3 Exiting the Corners: When exiting a turn, some lanes have two eligible spaces ahead of them, these are called Diverging Lanes. If there is a choice, the Active Player decides which lane is moved into when exiting the corner. See rule 7.11.3 if the Active Car is part of a line.
5.4.4 Single Lanes: Certain portions of the tracks may narrow down to one lane. These lanes are simply tighter and act as a funnel for traffic.
5.5 Laps
Every time a car passes the Finish Line it scores 1 VP. The instant that one player accrues their final VP from that team's pool of VPs the race is over (11.1). There is no Lap Counter and laps are not tracked for the race.
6.0 Race Cards
Race Cards are the heart of Apocalypse Road, since they move the cars around the track and govern movement events and ramming.
Each Race Card shows: an On-track Speed Adjustment; a Movement Type icon whose arrows indicate the movement type; a card number; possibly a symbol requiring a Movement Event immediately after movement is completed; and Movement Instructions.
On-Track Speed Adjustment: Add this value to the base speed of the car, located on the Team Mat, to derive the total speed for this activation.
Movement Icon: The type of movement an activated car will use.
Movement Event: If the symbol is shown, a Movement Event card must be drawn at the end of the Active Car's movement. If combat was not initiated before movement, it must wait until the event is resolved before that car has an opportunity to fire its weapons.
Movement Instructions: Some cards have special effects. If any rules in this book are contradicted by the Movement Instructions, the Movement Instructions take precedence. Track rules always take precedence over Movement Instructions.
See the back of this manual for a complete list of Race Cards.
7.0 Movement
7.1 Basics of Movement
When a player activates a car on the track and plays a Race Card, the car receives a number of Movement Points (MPs) equal to the card's On-Track Speed value plus a fixed number of MPs indicated on the Team Mat for that car.
Cars may move forward or laterally (i.e. sideways) depending on the restrictions of the race card played. Cars may not move diagonally unless the Movement Instructions on the played Race Card specifically indicate that Diagonal Movement is allowed. The activated car may not move backward or enter the same space twice during an Action Segment. The activated car must spend all its available MPs.
PLAY NOTE: This rule prevents a player from intentionally burning MPs by moving left, then right, then left, then right between two spaces. Players are expected to maintain a spirit of racing and forward progress while playing.
Movement Cost: It costs 1 MP for the Active Car to move forward or to move laterally into an empty space. It costs 2 MPs to move laterally into an occupied space (see Lateral Displacement [7.10]). Cars may Laterally Displace even if a clear lane is available.
Forward and lateral movement cost 1 MP, lateral movement into an occupied space cost 2 MPs.
Cars in Front: Cars are never blocked; Race Cards allow the Active Car to either push other cars in front of it through Linking or to use Ramming Movement. Forward movement costs 1 MP even when pushing or ramming other cars.
Choices: There are never any choices for non-Active Cars regardless of movement type. All choices are made by the active player.
There are six types of movement in Apocalypse Road:
- Solo Movement
- Line Movement
- Pursuit Movement
- Lead Movement
- Ram Movement
- Overtake Movement
7.2 Linking
Cars that are adjacent to one another in the same lane and racing nose-to-tail may become 'Linked'. A Link can consist of any number of cars and can include cars in corners as well as straightaways. When a Linked Active Car moves, the cars linked to the Active Car move as well. Only the Active Car spends MPs. Generally, once a link is created it remains in effect for the entire activation. A chain of linked cars is also called a Race Line.
Cars that are nose-to-tail have the potential to be linked depending on the cards played.
NOTE: If you can affect the car ahead or behind, you can affect any number of linked cars in those directions as well.
7.3 Conditional Linking
A White Arrow on a Race Card indicates Conditional Linking may be used. Cars may link with cars in front of them and push those cars one space forward per movement point. Unlike normal linking, the Active Car in a conditional link may choose to stop pushing the cars in front of it and change lanes. Conditional Linking may be started or stopped at any time and any number of times during a car's movement. Cars behind the Active Car are never linked unless via a Line Movement or Lead Movement Race Card.
EXAMPLE: Car #23 is activated with a Solo Movement Race card. It moves forward three spaces pushing car B, then changes lanes, unlinking from car B and then moves forward.
7.4 Solo Movement
The Active Car moves alone but has the option of Conditional Linking with cars directly in front of it. No cars behind it will be moved at all.
7.5 Overtake Movement
The Active Car moves alone but has the option of Conditional Linking. No cars behind it will be moved. In addition, instead of pushing cars during movement, cars using Overtake may also 'leapfrog' cars in front of them by swapping places with a car linked directly in front of it. Overtake movement may be used or not used separately for each Movement Point expended.
EXAMPLE: A car using Overtake Movement could perform the following actions in one activation: Move Forward 1 Space – Overtake a car in front of it – Push another car forward 1 space (Conditional Link) – Overtake the car just pushed – Move laterally – Push another car forward 1 space.
7.6 Line Movement
When a car using Line Movement moves forward it links with the cars directly behind and in front of it. The whole line of linked cars move as a Racing Line. If a Racing Line encounters more cars in its path, the newly encountered cars become part of the Racing Line and move with it for the remainder of the action segment. Racing Lines cannot change lanes or be broken until the end of the active player's Action Segment.
A car activated with Line Movement may move laterally and displace cars as much as the active player desires before beginning forward movement with cars linked either in front or behind. During the active player's initial lateral activation cars ahead or behind are not considered linked. Once the activated car moves forward and causes cars to link, lateral movement is no longer allowed. Moving forward into an empty space where cars do not link does not trigger this restriction. It only occurs when another car is moved forward by the Active Car.
A car activated with Line Movement that is not linked moves in the same manner as a car using Solo Movement, until it is linked and moves forward.
A car may be at the front of a line, in the center of a line, or at the rear of a line, and use Line Movement.
EXAMPLE: Car #21 could change lanes first then pick up car B and F and move forward with them in a Line.
EXAMPLE: Car #21 decides to move forward and forms a Line with cars A, E and G.
EXAMPLE: Car #21 could be activated, and laterally push cars F and E before moving forward and linking the center line (A, D, #21, and G).
EXAMPLE: Car #21 activates and moves ahead one space and picks up car B. Both cars continue moving forward.
Line Movement in Corners: See 7.11
Cars using Line Movement cannot use Conditional Linking (7.3).
7.7 Pursuit Movement
Pursuit Movement works similarly to Line Movement except cars behind the Active Car are never considered linked and are never pulled along with the Active Car when it moves forward. The Active Car in Pursuit Movement can move laterally freely until it moves forward and links with another car directly in front of it. Once an Active Car in Pursuit Movement becomes linked it cannot change lanes during the remainder of its Action Segment. All cars encountered in a lane during forward movement form a Racing Lane with the Active Car. Like Line Movement, the Active Car moves like Solo Movement until it links with a car in front of it, and moves forward.
Like Line Movement, once it is linked and moves forward, it may not change lanes again until the end of its movement.
Pursuit movement is often thought of as "push" movement. The Active Car attaches to a line and pushes all the cars in front of it just like a draft and it leaves all cars behind it unaffected.
Cars using Pursuit Movement cannot use Conditional Linking (7.3).
EXAMPLE: Car #21 activates using Pursuit movement and pushes car A and B. Car C is left behind. Alternatively, #21 could push car D laterally and then move forward pushing car C.
7.8 Lead Movement
Lead Movement is like Pursuit Movement, except instead of pushing cars, the Active Car pulls cars. An Active Car moved using Lead Movement causes any cars already linked behind the Active Car prior to any movement to follow. When the Active Car moves, the car linked behind it will move into the space it just left, and a car linked behind that car moves into the now vacant space it left behind, etc., to the end of the line. In other words the Active Car "pulls" any cars that started behind it. The Active Car can use Conditional Linking (7.3) at any time. Unlike Pursuit and Line Movement, the Active Car using Lead Movement can move laterally at any time.
Circumstances Unique to Lead Movement
- Linking is only determined at the start of a movement and is not reassessed on the current activation. The Active Car will never pick up cars behind it that were not Linked with it prior to its activation.
- Lateral movement will not unlink cars behind the Active Car. When the Active Car moves laterally, the linked cars follow.
- If there are no cars behind the activated car at the beginning of the activation, this card works exactly like a Solo Movement card.
EXAMPLE: Car #21 activates using Lead Movement. Cars B, C and D follow directly behind #21. Car A is not affected by the movement.
EXAMPLE: Car #21 activates with a Lead Movement card. No cars are linked behind it so no cars move with it. Car #21 moves forward and then changes lanes in front of car A. Car #21 continues moving forward without taking car A with it.
7.9 Ramming Movement
Ramming Movement can be either a Solo Movement or a Lead Movement. The special effect is that when the Active Car would push into the back of a car in front of it, instead it stops all movement in the space behind that car (It does NOT push that car any spaces forward). Then it initiates a Collision attack against the car directly ahead (8.4).
Note two things:
- A Targeting Computer shooting modifier is not applied to this attack. There is no need to check if a hit occurs. A ram always results in damage being accrued from the Combat Card drawn.
- The Active Car may still shoot after the ram (provided it is not destroyed during the ram) if it did not fire prior to movement.
7.10 Lateral Displacement
Lateral displacement occurs when the Active Car spends two movement points to move sideways into an occupied space. The original occupant of the space is displaced and is pushed in the same direction to the next available space. If the displaced car is already against the Outside Wall (2.1) or the inside Apron, the displaced car moves forward one space. Displaced cars cannot be pushed into the pit lane (if playing on a track with a pit lane) or off the track.
If a displaced car is pushed into a space already containing a car, that car also becomes displaced and is pushed in the same direction. Lateral displacement may be used multiple times during an action segment, continually displacing the same car or different cars as the active player desires. Each Lateral displacement costs two movement points, no matter how many cars are displaced.
EXAMPLE: Car #300 spends two MPs to displace car A which also displaces cars B and C. Since B is against the wall it is displaced forward pushing car C.
7.11 Racing Lines and Corners
7.11.1 When a Racing Line enters or exits a corner and there is a choice of which lane to enter, the active player chooses which lane the Race Line enters. All cars in a Race Line must move into the same lane. You may not split some cars off into other lanes.
7.11.2 Racing Lines into a Corner: When a Racing Line enters a corner that converges into fewer lanes and the lane the Active Car wishes to leave has two or more choices, it is up to the active player to choose which lane is entered. Once a lane choice is made for a set of linked cars, all cars in that link must enter into that lane.
If conditional linking is used, the link may be broken and a new link formed that could use a different lane on the new link.
EXAMPLE: Car #TOR activates with Line Movement and pushes car A into the corner. The active player chooses the inside lane of the corner. Car B joins the Race Line.
7.11.3 Racing Lines out of a Corner: When a Racing Line exits a corner and has an option of multiple lanes to enter, the active player decides which lane the line will enter. Once a lane choice is made for a set of linked cars, all cars in that link must enter into that lane. You may not split some cars off into different lanes. If a race card, such as Outside Line, indicates that an Active Car must choose a certain lane (the outside lane in that case), that rule follows through for every car in the line of cars.
EXAMPLE: The active player activates car #TOR and chooses to move forward and form a Racing Line with car A. The active player could have moved into the empty lane below car A. Car B follows because car #TOR is moving forward.
7.11.4 Anomalies with Diverging and Converging Lanes: If a line of cars linked to the Active Car extends forward or backwards, out of or into a curve, and there is a choice as to which lane of cars can be considered part of the Racing Line, the active player chooses. This may include an empty lane even if there are cars in the other lane.
7.12 Crossover (The Figure 8)
One track, The Essendarium, has a crossover or figure-8 section. There are some special rules that govern the four spaces that make up the crossover. These crossover spaces can still hold only one car but those cars can be moving in one of two directions.
If a car ends an activation on a Crossover space it blocks the lanes moving perpendicular to it.
EXAMPLE: The blue car (#21) is blocking the Crossover for the white car (#X). If the white car would attempt to enter blue's space, white must stop where it is located in the example. Both cars take 1 Damage marker. White could go around blue using lateral movement as long as it is legal according to movement type.
Any car that would have to enter a space with a car already barring its way in the crossover is forced to stop in the space before the occupied space and it is considered to have collided with the other car. Both the moving car and the car in the crossover receive 1 Damage marker and the activation that attempted to force the move comes to an immediate stop: all remaining MPs are lost. Cars that have already collided once in the turn may be forced to do so again on a different activation. Each collision results in the taking of a Damage marker.
Thunder Alley Special Rule: If playing with Thunder Alley, assign each car in a collision 1 Temporary Gray Body Damage marker.
Grand Prix Special Rule: If playing with Grand Prix, the only action to be taken is the stoppage of movement, there is never a collision. No damage is accrued.
It is conceivable that a number of special cases could occur involving the Crossover. We will try to address each one here.
Lateral Displacement: Cars may not be laterally displaced if they are in one of the four crossover spaces.
Displacing Forward: Cars that would be displaced ahead, and when that displacement would force any car into the space of a perpendicular car, may not be displaced at all, even if the first displacement would occur far from the crossover.
Overtake or Work the Pack Movement: May not be used on a Perpendicular car.
Bulldoze: Cars may ram perpendicular cars but if the result includes a Bulldoze result the Bulldoze text is ignored.
7.13 Rough Track
Treat this section of the track as normal except no car may change lanes while in this area. Once a car enters these sections, that car must remain in their lane until the next non-Rough sector is reached. No Event or Race Card can override this rule.
7.14 Jump Sections and the Trough
These sections all have three lanes—the middle lane is the Trough and the two lanes on each side are called the Jump Section (cars don't actually fly through the air in this section unless forced to by a Movement Event card). All Jump sections of the track are considered Rough Track (no lane changes possible). No car can enter the Trough except via a Movement Event.
If a car is placed in the Trough by a Movement Event Card the first move it must make is to laterally move back into a space in the Jump Section (it may have to conduct Lateral Displacement). If multiple cars end up in the same Trough space, stack them on top of each other.
7.15 Diagonal Movement
If a Race Card allows diagonal movement, the Active Car can use it any number of times during its activation.
8.0 Combat
In Apocalypse Road cars will engage in combat on almost every activation. Cars can shoot once per activation at adjacent targets only. This adjacency may be orthogonal or diagonal.
The Activated car may fire before or after its movement.
To execute a combat, choose a legal target (see Targeting below) and look at the defense value of that car (it will be a number between 1 and 3). Then draw the top card off the Combat Event Deck. If the number on the card equals or exceeds the Defense value of the target car, that target car is hit. If a car is hit, using the same card, look at the type of weapon used and inflict that damage on the target car. Each Hit Point (HP) adds one damage marker (9.0) to the car.
Targeting Bonus: If the attacking car has a Targeting Bonus, indicated on the Team Mat, 1 is added to every Combat card drawn when that car makes an attack of any kind. This bonus is the only way to hit with a 0-value Combat Card.
In some cases, the Active Car or other cars also take damage. Each point of damage results is recorded by placing a Damage marker on the indicated car's holding box on the team mat.
8.1 Targeting
Active Cars may target (attack) only cars surrounding the Active Car within one space. All cars in this example may be targeted by the yellow car depending upon the type of weapon mount (front, rear or turret) the yellow car has.
EXAMPLE: Cars A, B, and C may only be targeted by front firing weapons including a turret. Cars D and E may only be targeted by weapons using a turret mount. Cars F, G, and H may only be targeted by rear firing weapons including a turret.
If the car's weapon is on a Turret, then it can fire at any adjacent space. Front firing weapons can fire at any adjacent space in front of the car (including diagonally), while rear-firing weapons have the same firing arc towards the rear.
8.2 Elimination
The instant that a car receives its 6th Damage marker, that car is eliminated and placed in the Destroyed Cars box.
8.3 Replacement Cars to the Chute
Every player that has lost cars and is currently below the maximum number of cars used in the race may place a car in the Chute to bring their total to the maximum number. Destroyed cars may never be used as a replacement car.
If it is a two to four player game, the maximum number of cars is 5 per player. Any player below 5 cars in the race must put a car in the Chute to bring their total to 5.
In a five to ten player game, each player may have a maximum of 4 cars in play at a time.
If, due to losses, a player cannot put cars in the Chute to match the race number, that player must put all of the cars possible in the Chute and then finish the race with a reduced number of cars. There is no effect on such a player's hand size.
Cars placed in the Chute are placed same side up as the eliminated car. If the eliminated car has already moved this turn, the car in the chute will not be able to move until the next turn. If the car that was eliminated has not yet activated, the car in the chute will be allowed to activate this turn.
To exit the Chute the Active Car must spend 1 MP to conduct Lateral Movement onto the track, or spend 2 MPs if Lateral Displacement is necessary. It moves normally after that.
8.4 Collision Attacks
Collision Attacks exist in the game in the form of Ramming and Sideswiping. The Collision Attack system works exactly the same as firing a weapon but is only allowed when either a Ramming Movement Card is played or as the result of a Sideswipe Movement Event Card. All Collision Attacks involve some damage to the target car and the Active Car and is shown in the relevant section of the Combat Card (target car damage shown first, Active Car damage shown second).
After any collision attack is resolved, if the targeted car is eliminated, the Active Car must enter the space the eliminated car occupied.
8.5 Attack Definitions
Many Attack results have additional effects other than simply accruing damage.
Bulldoze: Only occurs on a physical attack such as Ramming or Sideswipe. After all of the damage has been accrued to all cars, if the Active Car is still in play it takes the position of the targeted car. The target car, if it is still in play, is placed linked behind the Active Car. The result is exactly the same as a 1-space Overtake movement type (7.5).
Bulldoze does not take place if the target car is in the figure-8 interchange.
Chain: Multiple cars can be affected by the Collision Attack by way of a chain reaction.
- If Ramming Movement: All cars linked in front of the target car each receive 1 Damage.
- If Sideswipe: All adjacent cars in the same sector between the target car and the inner or outer wall (the wall not nearer the Active Car) each receive 1 Damage.
Spray: All cars adjacent to the target car, either orthogonally or diagonally, are hit for 1 point of Damage. The Active Car is not hit. Cars that could not be targeted legally by the Active Car are not hit.
EXAMPLE: A car in the same sector as the firing car cannot be hit if the target car was behind the Active Car and was targeted with a rear-mounted weapon.
Suppress: Place a Suppression marker on the target car. The next time that car is activated it may not fire its weapon or make a collision attack. Remove the marker at the conclusion of the affected car's activation. If a suppressed car uses a Ram Movement Race Card no Ram attack can occur, the car still stops, and no Combat Event card is drawn.
9.0 Damage Markers
The accumulation of these markers represents the general damage, referred to as HP on the Combat Event Cards, inflicted on the Player Cars throughout the race. Damage markers received from an event are placed immediately.
9.1 The Basics of Damage Markers
Damage markers are acquired when a car is hit and damaged during fire or ramming or due to a Movement Event card result. Damage markers are placed on the target car's space on the team mat, each car has 6 of these spaces.
9.2 Elimination Due to Damage
The instant a car receives its sixth Damage marker it is eliminated from the race immediately. When a car is eliminated, a replacement car (if available) is placed in the chute (8.3).
9.3 Event & Information Tokens
There are a number of tokens that match Movement Event Cards such as Spin Around and Reloading. These are placed on the car's holding box as well and indicate various states that must be overcome on its next activation. These tokens are not Damage. They are informational and reminders only. Once the car has overcome the effect of the token, all non-Damage tokens are removed.
10.0 Movement Event Cards
When a Race Card is played that also contains a starburst symbol, a Movement Event card must be drawn and played after completing the movement of the Active Car. The Movement Event must be resolved prior to combat if the Active Car elected to move first and then shoot. Full definitions and explanations of the cards are listed below.
If there is ever an instance where the Movement Event deck is exhausted and a new card needs to be drawn, reshuffle the discards to create a new draw deck.
Big Air (x1): The car (or cars, if in the same sector) furthest along the Jump section of the track takes 2 Damage and is moved to the adjacent Trough section. If any car(s) is eliminated through this card, no player receives the VP.
Blown Engine (x1): The Active Car takes 3 Damage. If the Active Car is eliminated through this card, no player receives the VP.
Blown Transmission (x1): The Active Car takes 3 Damage. If the Active Car is eliminated through this card, no player receives the VP.
Bottoming Out (x4): All cars in the Jump section of a track each take 1 Damage. If any car is eliminated by this card, no player receives the VP.
Bounty (x1): Place four damage markers on this card. While in play, all Kills are now worth 2 VPs each. Every Scored Kill made removes 1 marker from the card. When the card is empty, discard it.
Bump and Run (x3): The Active Car may choose to move one adjacent car (front-side-rear) into a different space. That space must be vacant and adjacent to the targeted car.
Bumpy Ride (x1): All cars in the Rough section of a track each take 1 Damage. If any car is eliminated by this card, no player receives the VP.
Dangerous Debris (x3): Each player must assign 1 Damage to one car on their team that is currently on the track. Cars in the Chute may not be chosen. Cars beside the track with Spin Around Tokens or in the Trough may be selected. Any player with no cars on the track ignores this card. If any car is eliminated through this card, no player receives the VP.
Drift (x3): The Active Car may swap places with a car linked directly in front of it.
Engine Failure (x1): If the Active Car has 0 or 1 Damage markers before drawing this card, it receives 1 Damage marker. If the Active Car has 2 or more Damage markers, it takes 2 more Damage markers. If the Active Car is eliminated through this card, no player receives the VP.
Fuel Leak (x1): The Active Car must take one Damage marker. If the Active Car is eliminated through this card, no player receives the VP.
Get There (x2): The Active Car may move Solo 1 or 2 MP as long as no occupied space is entered.
Greasing the Landing (x1): The car or cars (if in the same sector) furthest along the Jump section of the track takes 3 Damage and is moved to the adjacent Trough section. If any car(s) is eliminated through this card, no player receives the VP.
High Flyer (x1): The car closest to the front (fewest spaces to the end of the jump with inside favored over outside) in the Jump Section of a track makes an immediate 5 space Solo Overtake move. Do not count cars currently in the Trough.
Into the Weeds (x2): Place the Spin-Around token on the Active Car. Then place it in the same sector but off the track next to the outside lane. Its first move on its next activation must be to re-enter the track laterally from that space. The Active Car may not shoot until after its next move (it may not shoot and then move, it must move then shoot).
Missed Jump (x2): The car (or cars, if in the same sector) furthest along the Jump section of the track takes 1 Damage and is moved to the adjacent Trough section.
Open Road (x4): If alone in a sector, the Active Car may move any number of spaces forward to become linked with the next car in front of it. The lane may be changed in this movement. If playing on a track with a crossover, if both lanes of the crossover are blocked perpendicularly, the car must stop in either lane just in front of the blocking cars.
Outta Gas (x1): The Active Car takes 2 Damage. If the Active Car is eliminated by this card, no player receives the VP.
Race Bonus (x1): Place four Damage markers on this card. While in play, all cars crossing the Finish Line score 2 VP each. Each time a car crosses the finish line remove 1 marker from this card. When the card is empty, discard it.
Reloading (x3): If the Active Car did not shoot before moving, it may not fire this turn. If it did fire before moving, place a Reloading marker on the car. It may not shoot before moving on its next activation.
Roll (x1): The car (or cars, if in the same sector) furthest along the Rough section of the track takes 4 Damage. If any car is eliminated by this card, no player receives the VP.
Shredded Tire (x1): The Active Car must take one Damage marker. If the Active Car is eliminated through this card, no player receives the VP.
Shot of NOS (x1): The Active Car draws the top Race Card and moves solo that many spaces.
Sideswipe (x7): Active Car must move laterally one lane either inside or outside. Ignore this card if the Active Car is in a single lane section of track. If space is occupied by opponent, make a collision attack.
Snapped the Struts (x1): The car (or cars, if in the same sector) furthest along the Rough section of the track takes 3 Damage. If any car is eliminated by this card, no player receives the VP.
Spin-Around (x2): Place the Spin-Around token on the Active Car. Then place it in the same sector but off the track next to the inside lane. Its first move on its next activation must be to re-enter the track laterally from that space. The Active Car may not shoot until after its next move (it may not shoot and then move, it must move then shoot).
Suspension Failure (x1): The Active Car must take one Damage marker. If the Active Car is in the rough section or the jump section of the track it receives an additional Damage marker. If the Active Car is eliminated through this card, no player receives the VP.
Transmission Failure (x1): If the Active Car has 0 or 1 Damage markers before drawing this card, it receives 1 Damage marker. If the Active Car has 2 or more Damage markers, it takes 2 Damage markers. If the Active Car is eliminated through this card, no player receives the VP.
11.0 Ending the Race & Winning
The game is won by the first player to claim all of their VPs from the pool. A short game is played with 12 VPs in each player's pool and a long game is played with 15 VPs. VPs may be claimed for eliminating opposing cars and crossing the Finish Line. There are four specific rules regarding VPs.
11.1 Crossing the Finish Line
Each time a car crosses the Finish Line the player controlling that car claims 1 VP from that team's pool of available VPs.
11.2 Swapped Back Over the Finish Line
It is possible for a car to be affected in such a way that they could be moved backwards over the Finish Line after they have previously crossed it. (See Drift or Overtake card). If this occurs, the team that is moved backward must return one claimed VP back to the pool. At some future point when that car crosses the Finish Line again it may re-claim the token it lost.
11.3 Eliminating Cars
If a car is eliminated from the game by accruing its 6th Damage marker and belongs to a different team, the active player claims 1 VP token from the pool. This is not done for an eliminated car belonging to the active player. Some Movement Event cards indicate that no award should be made for the loss of cars due to the results of that card.
11.4 Countdown Clock
After all cars have been activated and players have drawn cards for the next round, each player removes 1 VP from the pool. If this would be the last VP in a player's pool, no player removes a VP token any more during this race due to the Countdown Clock. A player's last VP must be scored by crossing the Finish Line or eliminating a car.
11.5 Declaring the Winner
The winner of a game of Apocalypse Road is the first player to claim all of the tokens from their pool. The moment one player empties their pool, the game is over and that player is declared the victor.
12.0 Rules for Integrating Thunder Alley
The tracks from Thunder Alley are fully compatible with Apocalypse Road. If you wish to use those tracks for races, feel free to do so.
You may also play Thunder Alley on the tracks included in Apocalypse Road. These will be very unusual. Each track in Apocalypse Road should only consist of three laps for Thunder Alley races. Ignore the "Jump Trough" on the Apocalypse Road Tracks but treat the Jumps as dirt with no lane changes on any of the dirt/jump areas.
There is no Pit Lane on Apocalypse Road tracks. To pit move the cars off the track into a convenient place beside the sector they are currently in. Cars re-enter the track from the inside lane by moving laterally just as if they were recovering from a Spin-Around card. Any car that would pit inside the crossover is moved back to the first space beyond the crossover.
13.0 Rules for Integrating Grand Prix
The tracks from Grand Prix are fully compatible with Apocalypse Road. If you wish to use those tracks for races, feel free to do so.
You may also play Grand Prix on the tracks included in Apocalypse Road. Each track in Apocalypse Road should only consist of four laps for Grand Prix races. Ignore the 'Jump Trough', Dirt Track and Jump rules and treat all of the track as paved.
There is no Pit Lane on Apocalypse Road tracks. To pit move the cars off the track into a convenient place beside the sector they are currently in. Cars re-enter the track from the inside lane by moving laterally just as if they were recovering from a Spin-Around card. Any car that would pit inside the crossover is moved back to the first space beyond the crossover.
A Note from the Designer
The game is intended to be quick and easy once certain concepts are mastered. It is quite possible to agonize over every decision, but much of the game is out of your control and long-term planning is very difficult without experience gained through repeat play. Optimizing your gains and maximizing the losses you hand out to other players on any particular turn is a key to Apocalypse Road strategy. After a couple of plays, clear strategies will emerge and you should begin to be able to formulate more in-depth play styles that can span multiple turns. Always keep in mind that shooting is fun but it is still a race.
Race Card Distribution Table
Number of cards of each Speed Adjustment:
| Card Type | +1 | +2 | +3 | +4 | +5 | +6 | Total Cards of that type |
|---|---|---|---|---|---|---|---|
| Line Movement | 4 | 4 | 4 | - | - | - | 12 |
| Pursuit Movement | - | 4 | 4 | 4 | - | - | 12 |
| Solo Movement | - | 4 | 4 | 4 | 4 | 4 | 20 |
Glossary
Action Segment – This refers to a single car activation by a player. A car is activated when the current player plays a card and announces which car will be activated. Each car may only be activated once per Turn.
Activated Car/Active Player/Current Player – The Active Car (Player) always makes decisions on which lane to use for all moving cars when entering/exiting corners. The only car that can shoot or conduct Collision Combat is the Active Car.
Adjacent – Cars that share the same sector and are in adjacent lanes. Or could be linked in the front or back.
Car (or Race Car) – The basic playing piece of the game. Each team is usually made up of 4 to 5 cars on the track at a time. The cars are placed on the track, and information about the cars is kept on the Team Mat (2.2).
Combat Cards – Control the shooting and collision aspects of the game. One is drawn each time a player needs to resolve an attack.
Damage Markers – The Damage markers record how much Damage a car has suffered. The markers are placed on the Team Mat underneath the appropriate car.
In Line – Cars in the same lane and adjacent to one another are considered In Line. These cars may become Linked with the Active Car during movement.
Lap – A Lap is counted for each car individually. Whenever a car crosses the Start/Finish Line it is considered to have completed one Lap.
Linking (In-Line) – Linking is a very important concept, and is handled under Movement. The active car may be "linked" to cars it is "In Line" with, depending on the movement type being played. When linking occurs, the eligible In-Line cars become linked with the active car, and will move forward with it. Linking is not voluntary for the non-active cars, and once "linked," the active car may not unlink for the remainder of this Action Segment unless Conditional Linking is used. See rule 7.2.
Movement Event Cards – Movement Event cards are drawn as called for when indicated by a star-burst symbol on certain Race Cards. They are drawn and resolved after movement but before any (after Movement) combat is initiated. These represent things that happen during the race, and may affect one or more cars on the track.
Race Cards – Race Cards are held in the player's hand, and are used to activate and move cars on the track. Each player usually plays one Race Card each segment when it is their turn. This Race Card may move one, some, or possibly even all cars in the race given the type of movement indicated and the current state of cars on the track.
Race Line – A chain of linked cars.
Sector – A Sector is a series of side by side spaces on the track, extending from the apron to the outside wall. For positioning purposes, cars on the inside of a Sector are considered to be ahead of cars outside of them in the same Sector.
Starting Grid – The Starting Grid consists of the spaces numbered 1-40 that are placed at different locations on different tracks where cars will start a race. On the Essendarium, those spaces are on a separate starting section that will not be used again. It is important to note that all of the cars need to have their fronts pointing away from the Start Line at the beginning of the game and that is the direction all cars will run for the entire race.
Team Mat – A play aid that indicates each car's weapon and has boxes to hold Damage and special tokens for all eight cars on each racing team.
Turn – A Game Turn (Turn) starts with dealing of cards, and ends once all cars have been activated and moved followed by the End of Turn Sequence. This should not be confused with a player's "turn," which is referred to as an Action Segment.