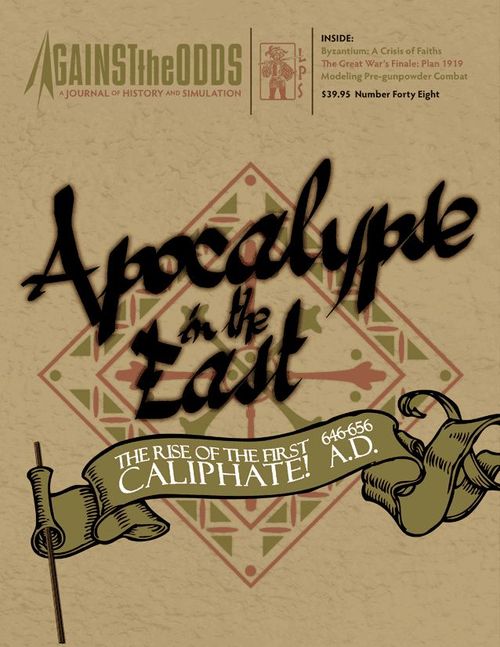
Apocalypse in the East: The Rise of the First Caliphate 646-656 A.D.
Apocalypse in the East: The Rise of the First Caliphate 646-656 A.D. Rulebook
Table of Contents
Table of Contents
- Read This First
- 1.0 Introduction
- 1.1 Components
- 1.2 Map
- 1.3 Counters and Markers
- 2.0 Sequence of Play
- 2.1 Victory Conditions
- 2.2 Events Table
- 2.3 Replacements
- 2.4 Fleet Maintenance
- 3.0 Modes
- 3.1 Garrison Mode
- 3.2 Patrol Mode
- 3.3 Expeditions and Expedition Mode
- 3.4 Destroyed Units
- 3.5 Leaders and Modes
- 4.0 Stacking
- 5.0 Naval Operations
- 6.0 Field Battle
- 7.0 Town/City Battles
- 8.0 Naval Battle
- 9.0 Succession
- 10.0 Setup
Read This First
We've organized the overall structure of the rules of this LPS simulation game to follow this game's sequence of play in introducing concepts. The rules themselves are written in a format known as the Case System. This approach divides the rules into Modules (each of which deals with a major important aspect of play). Modules are numbered sequentially as well as possessing a title. Each Module is divided into Sections (that deal with a major sub-topic inside the Module) which are also numbered sequentially. Modules and Sections are introduced by some text that briefly describes the subject covered by that particular Module or Section. Finally, the majority of each Section consists of Cases. These are the specific, detailed rules that govern play. Each Case is also numbered sequentially.
The numbering follows a logical progression based upon the number of the Module of which the Cases are a part. A Case with the number 7.5.1, for example, is the first Case of the fifth Section of the seventh Module of the rules. The numbering system is designed as an organizational aid. Use it to determine where a Case is located in the rules.
3.1.4
The example above is the number of the fourth Case of the first Section of the third Module of the rules.
Learning To Play the Game
Begin by familiarizing yourself with all of the components listed for this game. Then skim through the charts and rules, reading all the titles of the Modules and Sections. Set up a game scenario or portion of a scenario (after reading the applicable Module) and play a trial game against yourself. During this trial game, try referring to the rules only when you have a question and remember the numbering system we employ makes it easy to look up rules when you do. While a trial game may take you an hour or two, it is the quickest and most pleasant way to learn (short of having an experienced friend teach you). We also don't recommend attempting to learn the rules word-for-word. Memorizing all the details is an effort that few can do. We've written these rules to be as comprehensive as possible, but they are not designed to be memorized. Taking in the rules in this way (as you play along) is the best approach to mastering this game. We're always open to suggestions on how to improve the comprehension of our rules. Write to us (see addresses below) if you have an idea on how we can communicate better with you.
1.0 Introduction
The 1.0 Introduction text (the historical setting and the two-player premise) is printed as the flavour text under Table of Contents above, as in the source.
1.1 Components
Apocalypse in the East has:
- 2 map portions on 1 sheet. This is detailed below.
- 180 counters and markers. These are detailed below.
- These rules (with 2nd edition text changes printed in blue).
- 2 sets of Players Aid Charts (PACs).
1.2 Map
The map shows the eastern Mediterranean region in the middle of the seventh century.
Each hexagon (hex) represents approximately one hundred kilometers. They show natural terrain features. Some hex sides are also colored; blue hex sides, for example, denote rivers. Some hexes also have symbols for manmade features such as roads and cities. See the Terrain Effects Chart on the PAC.
The Game Turn Track and various holding boxes are located on the map.
Land and Seas Hexes Some hexes (like 1440) are considered both land and sea, but land units may not cross to/from Asia to/from Europe without sea transport. A Muslim force debarking there must declare which side of the straits it is on, Asia or Europe.
Alternate Armenian Boundary Ignore the alternate setup boundary line in Armenia that runs from 1009 to 2523. This was for a proposed scenario in the game that space restrictions precluded.
Irenopolis This city should be underlined to show that it is a Fabrica.
Errata (3/1/26): the Land and Sea hexes, Ports, Irenopolis and Alternate Armenian Boundary clarifications in the addenda are already reflected in the text above.
1.3 Counters and Markers
Counters represent military units, naval units, and personalities. Markers are provided to record turns; show pillaged towns, cities and Expeditions. Most military units represent formations having between 300 and 1000 officers and men. Picked units (Case 1.3.3) can be anywhere between 500 and 3000 officers and men. Naval units represent squadrons of 20 fighting ships. Personality counters represent one person. Below are some sample counters:
1.3.1 Title Each unit has a title in transliterated Arabic, Greek, or Latin at the top of the counter. It is strictly ornamental.
1.3.2 Army All military units have a background color that refers to the nationality of the unit. Muslim units have a green colored background, while Byzantine units have a red colored background.
The color stripe on the counter indicates which army they belong to. This is important for Expeditions and other rules. There are three Muslim armies: that of Syria (white stripe), Egypt (blue stripe) and Kufa (black stripe). There are five Byzantine armies: Obsequium (brick red stripe), Orientales (pink stripe), Armeniae (black stripe), Carabisianis (white stripe) and the African (yellow stripe).
Rebel units and leaders have a brown stripe.
1.3.3 Unit Class The 7 Byzantine Scola Units (named in blue text) and all ground units with a Combat Factor of 6 or more are the elite "Picked" class units--which affects their stacking cost (see Module 4.0).
Note that the "Domestici Equites" unit counter is a "picked" unit too, despite its CF being only 1 (the counter has a second, smaller shield printed on its front and reverse as do all other "picked" units).
Byzantine mounted class units have horse symbols on them. All other Byzantine foot units are normal units.
Muslim units have no class and are thus all the same.
1.3.4 Combat Factors (CFs) All ground military units have two numbers at the bottom of the counter. The number on the left is the CF used in clear and desert terrain. The number on the right is the CF used for battle in rough, mountain, and marsh terrain, and when fighting on ships at sea.
1.3.5 Reverse Side On the back side of the military counters is a Shield or Anchor icon. When land units are in Garrison Mode, or naval units are in a port, they are flipped over to show this.
1.3.6 Leaders Muslim Leader counters are green background with a banner in the color of their army they command. Byzantine are red background with banners of the army they command (except for the Imperial couple, who have white text stating Emperor/Empress). On the back of some Leaders, their impact on combat is noted.
2.0 Sequence of Play
Each turn equals one year. Use the following sequence for each turn.
A.) Administration Phase
- Events Table Segment (see Section 2.2)
- Generate replacements Segment (see Section 2.3)
- Maintain Fleets Segment (see Section 2.4)
- Mode Adjustment Segment (see Module 3.0)
- Attrition Segment (Case 3.3.3)
B.) Muslim Sea Move Phase
The Muslim player may now move any Expedition that is traveling by sea. While moving, he may have the Expedition attack enemy units, whether they are in Expedition or Garrison Mode.
C.) Byzantine Sea Move Phase
The Byzantine player may now move his Expedition if it is traveling by sea. While moving, he may have the Expedition attack enemy units, whether they are in Expedition or Garrison Mode.
D.) Byzantine Patrol Move Phase
The Byzantine player may move units in Patrol Mode.
E.) Muslim Land Move Phase
The Muslim player may move any Expedition/s that is/are not traveling by sea but by land only. While moving, he may have the Expedition attack enemy units, whether in Expedition or Garrison Mode.
F.) Byzantine Land Move Phase
The Byzantine player may move his Expedition now if it is not traveling by sea but by land only. While moving, he may have the Expedition attack enemy units, whether in Expedition or Garrison Mode.
G.) New Turn
After the Byzantine player completes the move of his Expedition, the turn ends. Move the turn marker to the next year.
2.1 Victory Conditions
Use the following to determin who wins.
2.1.1 Muslim The game ends immediately and the Muslim player wins by capturing Constantinople.
2.1.2 Byzantine The Byzantine player wins by either:
- Killing Mu'āwiyah ibn Abi-Sufyān (Syrian Leader)
OR
- Retaining control of Constantinople until the end of the game.
(Historical Note: which means that Caliph Uthmān b. Affān will be deposed and Dar-al Islam is thrown into civil war.)
2.1.3 Control of Hexes Control of a hex is determined by one of the three following conditions in their order:
- The hex is occupied by a player's garrisoning land unit, or;
- Player who solely has a fleet unit in a port hex, or;
- Player who last solely occupied the hex with a land or naval unit.
Errata (3/1/26): the control rule above is printed without a number after 2.1.2 in the source; the addenda number it 2.1.3 ("Victory Conditions, addition"). The text is unchanged.
2.2 Events Table
At the start of the Administration Phase, one player rolls 2D6 and consults the Events Table on the back page of these rules. When an event occurs, carry out its effects as detailed immediately. Most events can occur only once per game. If rolled again, it has no effect. The exceptions are: Events #3 (Earthquake) and #11 (Storms at Sea), which can occur multiple times in a game.
The Events Table itself is on the Players Aid Charts, not in the rules file, and is not reproduced here.
2.2.1 Armenians When the Armenians revolt, the rebel units that go into Garrison Mode do not block Byzantine unit movement. When the Byzantine Expedition arrives in Armenia, it does not have to defeat the rebel units, its purpose is to rally the other Armenian army units to itself. The remaining rebel Armenian units remain under the Muslim player's control for the remainder of the game.
2.3 Replacements
Both sides may replace units. There are six cities that are Fabricae. This means the city has the facilities to manufacture weapons and armor. These cities are: Constantinople (1235), Nicomedia (1332), Nakhchawan (1702), Ireneopolis (2015), Antioch (2819), and Damascus (3916). As long as the Fabricae is friendly to the player, then any replacements can be put in that city, with no restrictions.
Example: An Orientales (Byzantine) unit in the Destroyed Units Box can be placed in the Nakhchawan Fabrica hex if it is controlled by the Byzantines. Or if the Muslims control Nicomedia, they can place a previously destroyed Syrian unit there.
2.3.1 Byzantines For the possession of each non-pillaged Fabrica hex, the Byzantine player may select one Picked of Mounted unit or 1D6 worth of Foot-bound units from the Destroyed Units Box into friendly Fabricae.
2.3.1 Muslims For the possession of each non-pillaged Fabrica hex, the Muslim player may select one military unit of the Syrian army from the Destroyed Units Box into the friendly Fabrica. Only Syrian army units can be replaced as they are the only regular units the Muslim player has. Others (like the Egyptian and Kufa forces) if eliminated are gone for good.
Errata (3/1/26): the addenda's replacement clarifications (only Syrian units are replaced; any replacements may be placed in a friendly Fabrica with no restrictions; the example above) are already reflected in this text.
Note: the source numbers both the Byzantine and Muslim replacement cases 2.3.1.
2.4 Fleet Maintenance
The third segment of the Administration Phase, both players must check for their fleet maintenance.
2.4.2 Fleets and Ports Each city or town with Anchor symbols by its name is a naval port and can support a number of naval units equal to the number of anchor symbols. For places to be considered a port, there must be one or more port icons present.
Example: Abydos has one symbol next to its name. This base can support/shelter from storms 1 naval unit.
2.4.2 Fleet Size Both players count the number of symbols they control at the beginning of their turn and the result is the number of naval units the player may have for the turn. If the number is different from the number of friendly naval units on the map, the players must adjust this by adding or removing naval units. New naval units are placed in Garrison Mode in any friendly controlled port hex. If a port has a pillaged marker as a result of an assault, it no longer functions as a port, and the owning player's naval maintenance suffers accordingly in the next Administration Phase.
2.4.3 Fleet Basing The number of Anchor Symbols (Port Icons) next to a port city also denotes how many naval units can successfully stay there during the Administration Phase and avoid being lost. However, there is no limit to the number of naval units that can enter/exit a port city during the course of a turn.
2.4.4 Fleet Replacements Eliminated naval units can be replaced. When naval units are lost, they are automatically replaced the next year in any friendly port(s), up to the port's capacity.
Note: the source numbers both the "Fleets and Ports" case and the "Fleet Size" case 2.4.2.
3.0 Modes
All military and naval units exist in one of 3 modes if on the map: Garrison, Patrol, and Expedition. These modes determine what a unit can do during a turn. Modes can only be changed voluntarily in the Administration Phase. Muslims perform this first until turn 5. The Byzantine from Turn 6 onward. A unit's mode (Garrison, Patrol or Expedition) for the turn is determined during the Administration Phase only. So you cannot move a unit to take up Garrison Mode in a town or city, then have it join an Expedition so as to move the unit again. Players can change modes at any place on the map (be sure that there is enough stacking capacity in the nearby towns and cities).
Errata (3/1/26) addition to Module 3.0: the paragraph above is the addenda's added text and is included.
3.1 Garrison Mode
Any unit can be placed in Garrison Mode.
3.1.1 To do this, place a unit with its Shield/Anchor side up in a town or city that is up to 10 Movement Points (MPs) by land for Land units, and 10 MPs by sea for Naval units, from the unit's current location.
3.1.2 The town/city chosen cannot already be occupied by enemy units. Consult the Terrain Effects Display to see how many units may stack inside a city or town.
3.1.3 Units in Garrison Mode cannot move or attack, and can only be attacked by an opposing Expedition laying siege to the hex (see Module 7.0).
3.1.4 Units in already in Garrison Mode can move up to 10 MPs to another town/city and resume Garrison Mode as long as there are no enemy units there. Enemy Garrisons do not block the movement of Expeditions through their hexes.
3.2 Patrol Mode
Only mounted Byzantine units may be placed in Patrol Mode. This can be done whether the unit is in Garrison or Expedition Mode.
3.2.1 Simply take the unit and place it, non-garrison side face up, in its current hex in the Administration Phase.
3.2.2 During the Byzantine Patrol Movement Phase, it may move up to 10 MPs. It may not travel by sea.
3.2.3 Only one mounted unit in Patrol Mode may occupy a hex. This does not interfere with units in Garrison Mode or Byzantine Expeditions.
3.2.4 While on patrol, the unit has a Zone of Control (ZoC) of the six surrounding hexes. A Muslim Expedition which enters a ZoC hex loses 2D6 worth of MPs (in addition to the cost of entering the hex). Patrol ZOCs do not extend into sea hexes, to ships at sea, or naval landings.
3.2.5 If the Muslim Expedition continues to move into the hex occupied by the patrolling unit (just the terrain cost to enter), both the patroling unit and one Muslim unit (owning player's choice) are removed to the Destroyed units' box.
3.3 Expeditions and Expedition Mode
Source numbering: this section is printed as "3.2 Expeditions and Expediton Mode" (a duplicate of the Patrol Mode number); its cases are numbered 3.3.x and the addenda call it Section 3.3.
There are 3 Muslim Expedition counters and 1 Byzantine Expedition counter. Units currently in Garrison or Patrol Mde may be placed into an Expedition. Select a hex where the Expedition is to be gathered. This hex must be within 10 hexes (not MPs) by land or sea from one of the following friendly controlled cities: Constantinople (1235), Damascus (3916), or Fustat (2634), plus the following restrictions:
- While an Expedition can only be formed within 10 hexes of an indicated city above, the units selected to be put into it can be from anywhere on the map (no MP limit). Even units in other modes may be put into an Expedition.
- An Expedition may not be formed in enemy occupied hexes.
- Unit in Garrison Mode in a town/city with an enemy Expedition camping therein may not be used to form part of an Expedition.
- Land troops blockaded in besieged towns cannot be part of an Expedition. Exception: Land units in a port town or city besieged by land, but not also by sea, can be used.
Note: While the rules state a Byzantine Expedition must be formed within 10 hexes of Constantinople, a player can still form one on the Asian side of the narrows (i.e., "across the water"). Similarly, Muslin Expeditions must be formed within 10 hexes of Damascus or Fustat. So even if the Kufa Expedition disbands, its forces can only reform at these two cities.
The Muslim player places as many units from one of his armies as he wants to its army's Expedition Box on the map. The Byzantine player may place units from up to two armies to the Expedition Box on the map. Leaders of the mustered armies must be included in the Expedition, if available.
Exception, Constans (but never Fausta) may be substituted for another Leader in the Expedition at the Byzantine player's discretion. Lastly, place the Expedition counter on the map, in non-camp mode, where the player wants it to start. Make sure the Muslim Expedition counter matches the units in the Expedition.
Errata (3/1/26) change to Section 3.3: the addenda restate the formation rule as "within 10 hexes (not MPs) of one of its side's controlling cities." The three cities named above are kept as printed in the source text. The addenda's added restrictions are the numbered items 1 to 4 above, and its clarification on Asian-side formation is the note above.
3.3.1 Expedition Movement The base movement allowance (MA) of an Expedition by land depends on its composition. For all Muslim Expeditions and a Byzantine Expedition with only Mounted units the base MA is 40 MPs. Otherwise the Byzantine has a base MA of 20. Now subtract from the base 1 for each unit in the Expedition. The result is the number of MPs the Expedition has available for the turn.
Example: An Expedition of two Mounted units, two Picked units and five Foot units, would be 20 - 2 - 2 - 5 = 11 MPs.
An Expedition's MPs may never be traded or saved from turn to turn. To enter each hex and/or cross a hexside costs a number of MPs, as shown on the TEC (see PAC). If a moving Expedition does not have enough MPs remaining to enter a hex, then it must end its movement. While an Expedition cannot "pick up" units (existing Garrisons or newly arrived reinforcements) after it forms, it can "drop off" units as it moves without having to disband itself.
3.3.2 Expedition Activity While the Expedition moves, it may attack enemy units in either field or sea battle, or enemy towns and cities via siege. It costs +1 MP to enter a hex containing an enemy unit, regardless of its mode. After fighting the battle or conducting a siege, the Expedition may move further, provided it has MPs remaining to do so.
3.3.3 Camping and Attrition After ending an expedition's move for a turn, a player may choose to camp the Expedition. Invert the Expedition counter (to its camp side). During the following Administration Phase, Campaign Attrition will be checked for that Expedition. This is performed by rolling 1D6 on the Attrition Table (see PAC) and applying the result. On the next turn, the Expedition can move again.
3.3.4 Disbanding Expeditions If a player does not want to camp, or his Expedition has been defeated and has completed its rout move, then the Expedition must be disbanded. The Expedition marker is removed. All surviving military units are placed in Garrison Mode up to 10 MPs away into friendly towns and/or cities whose hex is not enemy occupied. Units unable to stack in the cities/towns moved to are placed in the Destroyed Units Box (see Map). Leader counters may be moved to any friendly occupied hex up to 10 MPs away and if there is none, they are removed from the game. Disbanded units from an Expedition can be placed up to 10 MPs from the last hex location of the Expedition, and enemy Garrisons do not block tracing a path through their hex when counting the 10 MPs.
3.4 Destroyed Units
Units can be destroyed due to battle, siege, attrition, event, or over-stacking. These units go into the Destroyed Units Box and are out of the game. (Exception: Replacements, Section 2.3)
3.5 Leaders and Modes
Leaders are on the map but do not have modes. Leaders individually can move up to 20 MPs during a player's Movement Phase.
4.0 Stacking
Each hex has a stacking limit. The number of units that can stack in a hex is noted in the Terrain Effects Chart (TEC) on the PAC. "Picked" units with a clear terrain hex combat value of 6+ count as two units against the stacking limit of a hex. Units that are part of an Expedition do not count towards stacking. Over-stacking is checked at the end of movement each phase and the owning player must destroy units (player's choice) to bring the hex back into stacking limit. Players are not allowed to inspect enemy stacks, even when units are flipped to their "Garrison Mode" side concealing their combat strengths.
Errata (3/1/26) addition to Module 4.0: the sentence above on inspecting enemy stacks is included.
5.0 Naval Operations
Player will find operations at, and command of, the sea indespensible to acheving ther victory conditons.
5.1 Guidelines
Use these rule to govern Naval Operations.
5.1.1 Byzantine naval units have an MA of 40 MPs; Muslim naval units have an MA of 30 MPs. Naval units normally move only when transporting or evacuating units, Empty naval units can also move towards a friendly force that needs transporting or evacuation. Naval units NOT carrying an Expedition or moving towards one, cannot freely roam the map or enter unoccupied enemy ports/coastal towns/cities and "capture it".
5.1.2 Naval units may only be used to carry an Expedition (during friendly Movement Phase) or evacuate units under siege in a port (during opponent's turn, Section 7.3). Surviving units of an Expedition that used sea transport to land atop an enemy Expedition on the coast and suffered an AR combat result may be transported back out of the hex by the fleets that landed them back to any friendly towns or cities within 10 hexes of the battle site. This is a free move and costs no MPs.
5.1.3 At the end of the campaign year, a player's naval units must have ended their movement in a coastal hex or be destroyed.
5.1.4 If a storm event has occurred, any naval units not in Garrison Mode in a port are destroyed. Port hexes are denoted by Anchor symbols next to the name.
5.1.5 Any military units stacked with the naval units must debark upon landing and may either:
- Continue moving during the Movement Phase if they have remaining MPs,
- Camp, OR
- Disperse into Garrison Mode.
Errata (3/1/26) correction: the first bullet above is the corrected wording from the addenda.
5.1.6 A Byzantine naval unit can carry either 4 Byzantine Foot, or 2 Mounted units, or 1 6+ Battle value foot unit. A Muslim naval unit can carry 2 Muslim units. Each naval unit may also carry an unlimited number of Leaders.
5.1.7 Military units pay 1 MP to embark or disembark in a port hex. Military units pay 2 MPs to embark or disembark in a coastal hex. After disembarking, an Expedition may continue movement on land.
5.2 Fleets in the Delta
Naval units of both sides may move into hexes that have hexsides consisting of the branches of the Nile River Delta, but they may not go further than Fustat (5634). If military units enter a hex with enemy naval units alone in the hex, the naval units are destroyed. Naval units in the Delta are not immune to storms.
Note: Fustat is not a port (no Anchor symbols), but it is a Coastal hex for purposes of embarking and disembarking.
6.0 Field Battle
A field battle is a form of combat that occurs when units of two opposing Expeditions occupy the same hex. The player who moved last into the hex is always the attacker and the other player with the encamped Expedition is the defender. When the player moves into the hex, he rolls 1D6. If the result is a 1, then the attacker has surprised the defender and performs a Storming the Camp (see Section 6.5), otherwise it is a Field Battle.
6.1 Resolution
Land combat will incur an Attriton, Rout or Destruction result below.
6.1.1 Players determine their total battle value of the units participating based on the terrain the battle is in.
6.1.2 They compare the totals (attacker to defender) and find the odds column on the Combat Results Table (CRT) that best represents the difference between the two armies (rounding down in favor of the defender). Then apply any Leader column modifiers that qualify. The attacker next rolls 1D6 and consults the CRT to determine the battle's result.
6.1.3 Destroyed Result If one side is completely destroyed, move all of the affected sides units into the Destroyed Units Box.
6.1.4 Attrition Result Both sides, starting with the attacker, must place one unit of their participating forces into the Destroyed Units Box. This continues back and forth until one of the players elects to rout or one side has no further forces to destroy. If the attacker is the one with remaining forces, the Expedition may continue its movement.
6.2 Rout
If a player suffers a routed result from battle, his army first must take losses.
6.2.1 If the defeated Expedition is the Byzantine, it loses as many units as there are in the Muslim Expedition.
6.2.2 If the defeated Expedition is the Muslim, it loses as many units as there are Mounted units in the Byzantine Expedition.
6.2.3 The losing player selects which units are lost.
6.2.4 Immediately remove the Expedition marker and move the surviving units to friendly towns and/or cities that are at least 10 MPs away and in stacking limits. Flip the units into Garrison Mode.
6.2.5 Ignore Cases 6.2.1 to 6.2.3 if routing from Attrition (no additional losses).
6.3 Leaders in Battle
Some Leaders can affect battle. On the back of the leader's counter it indicates the number of odds column shifts in favor of his force he provides and whether it is for field (ground) or Sea (naval) battles before resolving the battle. If all the units of an Expedition are destroyed, any Leaders with the Expedition are also destroyed. In the same manner, if a Leader is alone in a hex which is entered by an enemy unit, the Leader is removed to the Destroyed Units Box. A Leader may not be replaced.
There is no advantage to having two or more leaders in an Expedition as a maximum of only one Leader (owning player's choice) can affect a single battle. It is possible to have one Leader that affects land battles and one Leader affecting naval battles (which could be an advantage for that Expedition).
6.4 Byzantine Reserves
The Byzantine player (only) has the option to have units in reserve for a battle.
6.4.1 He declares this option before the start of battle.
6.4.2 He may select up to but not more than ½ (round down) of his units, plus one personality, and declare these as a reserve. These units are not counted in the battle.
6.4.3 Reserve units are unaffected by negative combat results. In that case, the reserve may perform one of three functions. The Byzantine player may declare after the battle result which role the reserve will be taking:
- a) Feed the Battle. If the result is Attrition, the Byzantine player may feed losses required by drawing on his forces in the reserve.
- b) Counter-Attack. If the result is rout or destruction, the Byzantine player may order the reserve to counter-attack. This is done after the initial combat roll, but before carrying out the result. The battle is refought with the Reserve units now standing in for the original units. If the Byzantine player loses, all his units, from original and reserve, are destroyed. If he wins, all the Muslim units are destroyed.
- c) Cover the Rout Move. If the Byzantine army routs, whether voluntarily or not, the Byzantine player can order his reserves to cover a Byzantine rout. This means that each mounted unit in the reserve removes the effect of one Muslim unit in determining loses before the rout move. Moreover, reserve units may not be taken as losses under this option, even if there is no other unit to lose.
6.5 Storming the Camp
If a 1 is rolled when an Expedition moves into an encamped enemy expedition, surprise has been achieved and resolution of the battle is performed similar to an Attrition result (Case 6.1.4) except the defender must eliminate 2 units for every unit the attacking player eliminates, Attacker eliminates first. This continues until one side decides to rout. Mounted units are counted for assault or defense.
7.0 Town/City Battles
Unlike field battles, an Expedition cannot attack an enemy Garrison except by laying siege or Assaulting. In both instances, the attacking player must have at least as many units in the Expedition as there are units in the town/city hex.
7.1 Siege
If the attacker declares a siege, place the Expedition stack on top of the Garrison.
7.1.1 The besieging player rolls 1D6 if the target is a town and 2D6 if it is a city. He multiplies the resulting sum by the number of units in the Garrison. The product result is the number of MPs lost by the Expedition.
7.1.2 If the Expedition has 0 or more MPs remaining, the town or city falls and its Garrison is destroyed. A successful besieging player may leave as many units from his Expedition's forces as he wishes in Garrison Mode in the conquered city or town and, if he has MPs remaining, continue moving the Expedition.
7.1.3 If the Expedition has -1 MPs or less, the siege is stalled and the Expedition will have to camp in the hex.
7.2 Assault
An Assualt is just that, a desperate attempt to storm the walls of a defending town or city.
7.2.1 Breach the Walls If the attacker declares an assault, he must first try to breach the walls of the city or town. Roll 1D6 and consult the Siege Assault Table (see PAC).
7.2.2 Assault Procedure If the walls are breached, then the assault can take place. The attacker removes one of his units and places it in the Destroyed Units Box; then the defender does the same. This alternating destruction of units continues until one side is completely eliminated. If the walls are not breached, nothing happens and the attacking Expedition must camp (Case 3.3.3) or Disband (Case 3.3.4).
Note: Mounted units cannot be used to assault or defend a town or city. If a Mounted unit is part of the defense, they are destroyed once other units in the Garrison are destroyed.
7.2.3 If a city or town is taken by Assault, roll 1D6. If a 5 or 6 is rolled, a pillaged marker is placed on the hex. From then on, the hex is treated like a pillaged town/city hex.
7.3 Ports and Siege
A player may not stop the escape of enemy units from a port, unless he has friendly naval units in the hex as well. If a player assaults a port and breaches its walls, the defender may elect to evacuate the Garrison, provided he has naval units in the hex. Keep in mind the naval unit transport capabilities. The naval units transport the escaping units up to 10 MPs towards the nearest friendly unpillaged port.
8.0 Naval Battle
When a naval Expedition encounters opposing naval units not in Garrison Mode, a Naval battle occurs. If any military units are camped in the same hex as the defending naval units, they may go into battle as well, provided there is room on the ships. For naval battles, players use the same CRT as for field battles. The last player to move into the hex is the attacker.
8.1 Resolution
Naval units have no battle value. Use the right-side CF of the ground unit counters that are on the ships. Determine the odds (with any applicable modifiers) and then roll 1D6 on the CRT (see PAC) as you would in a field battle.
If the defender has no ground units embarked on the naval units, his naval units are eliminated. When a port is captured by enemy land units (only), relocate any friendly fleets to the nearest friendly port (free move). Fleets with combat units onboard entering a port that has garrisoned enemy fleets and successfully sieges and captures the port, also eliminates the enemy fleets.
Errata (3/1/26) additions to Section 8.1: the two sentences above on the defender with no embarked ground units and on relocating fleets after a port capture, and the sentence on fleets with combat units entering a port, are included as printed.
8.2 Results
Naval combat will incur an Attriton, Rout or Destruction result below.
8.2.1 If the result is Attrition (A), then both sides continue to lose a naval unit with its passengers until one side elects to rout with no additional losses.
8.2.2 If the result is Rout (R), the losing player loses units equal to the number of naval units in the enemy fleet, the remainder move up to 10 MPs towards a friendly port. The victorious player loses half as many naval units as the loser.
8.2.3 If the result is Destruction (D), all the naval units of the losing player are destroyed. The victorious player suffers no loss.
8.3 Greek Fire
All Byzantine naval units may be equipped with Greek Fire on the turn or any turn later in which either event #2 or #12 is rolled. To use "Greek Fire", roll on the Greek Fire Table (see PAC) prior to resolving naval battle. Cross-index the number of units using "Greek Fire" with a die roll. The result is the number of Muslim naval units (with their passengers) destroyed (Byzantine player's choice). The Byzantine player also loses a naval unit (Muslim player's choice) if the result is shaded.
The Greek Fire Table is on the Players Aid Charts, not in the rules file, and is not reproduced here.
9.0 Succession
If Constans is killed, for any reason, then his counter is removed permanently from the map board. Empress Fausta Arshakuni is head of a new regency government with the sitting Patriarch, until her children are of age. Her counter must remain in Constantinople. Otherwise the game continues as normal.
10.0 Setup
Place the turn marker on the A.D. 646 space. Place their units in their home districts (denoted by color). Units must be placed "in Garrison Mode" side up--unless they are mounted, in which case they can be placed "on Patrol Mode" side up.
10.1 Byzantines
The Byzantine player sets up first.
10.1.1 The seven units of the Scolae must set up in cities and towns. They include: Constantinople, Nicomedia, Cios, Prussa, Cyzicus, Dorylalon, Kotyaion. Place one Scola unit in each of these locations in Garrison Mode.
10.1.2 The three units marked Excubitor, Domestici Equites, and Domestici Pedes are placed in Garrison Mode in Constantinople.
10.1.3 Place Paul's counter in the Patriarchal Chair box.
10.1.4 Place all ten Byzantine fleet units on the map. They are placed in Garrison Mode in port hexes up the limit of each port.
10.1.6 The six units of the Carabisianis (white) command must start in the city/town hexes denoted by their counters.
10.1.7 Constans, Fausta, and Komes Theodore counters are placed in Constantinople. Manuel's counter is placed in Alexandria. Either Musel Mamikonian's or Theodore Rshtuni's counter is placed in Dvin (1404). The Byzantine player must decide which of these two Armenian nobles may command the Armeniae army. The picked noble's counter starts in Dvin along with his clan unit. This unit will have the noble's surname. The clan unit of the unused noble is not placed on the map. The other Armeniae units appear regardless of leader.
Errata (3/1/26) counter correction: the Manuel Leader (Orientales) is backprinted with a -3 for Attrition rolls; it should be +3. Replace the backprint or ink in a + sign.
10.1.8 All Obsequium units set up at start in the territory labeled "Obsequium" in the northwest part of Asia Minor.
Errata (3/1/26) clarification to Section 10.1: all Obsequium units set up in the territory labeled "Obsequium" in the northwest part of Asia Minor, as stated in 10.1.8 above.
10.2 Muslims
The Muslim player sets up second.
10.2.1 Place all Syrian units in Syria; Muawiyah and Uunada's counters are placed in Damascus. Place Egyptian units in Egypt south and east of the start line. Amr ibn al-As counter starts in Fustat. Keep the ten Qurayah units to the side for now. Abdallah ibn Sad is set aside (he enters with Random Event 5). Kufan army units are kept off-board for now.
10.1.5 Up to one half of the units from the Orientales (pink) army may start in Egypt north and west of the start line (hexes 5131 to 5837). The remaining Orientales units must start in the Orientales district.
Note: this case is numbered 10.1.5 in the source but is printed after 10.2.1, under the Muslim setup text. It is kept in its printed position.
10.2.2 There are no Muslim fleets at start. The first fleet units will be placed in the Administration Phase for A.D. 647.
Setup Chart Note
The last printed page of the rules is a graphic setup chart (counter locations by district, and off-map units for Events 4, 5, 6, 7 and 10). It is not text and is not transcribed; the case text above governs. The chart also refers to "Case 10.1.9" (12 off-map Byzantine fleet units), which has no printed text in the rules file.