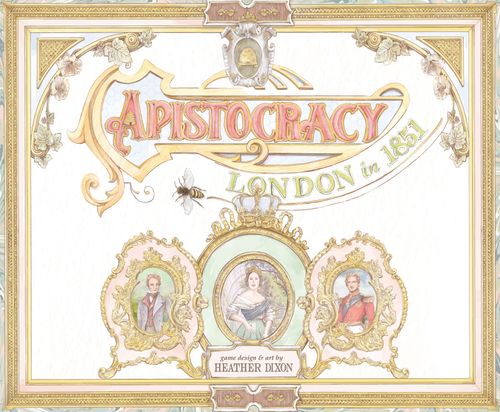
Apistocracy
Apistocracy Rulebook
Table of Contents
Table of Contents
- Components
- Game Overview
- Setup
- Important Concepts
- Game Structure
- The Season Phase
- The Social Beehive
- The Parlor
- The Ballroom
- The Gallery
- The Tea Room
- At Home with Host
- At the End of Each Week...
- The Whist Phase
- Scoring
- Character Host Abilities
- Card Clarifications
- Solo Mode
- Advanced Gameplay Mode
- Icons
Components
Main Components
- 26 Ton Cards
- 22 L&C Cards
- 20 Tea Cards
- Gallery Cards
- First Player Token
- Queen's Favorite, Artist's Muse, Favored Guest, Card Sharp tokens
- 4 Hive Bonus Tokens
- 4 Player Brooches
- 4 Bonus Personas
- 16 Player Calling Cards
- 8 Host Bonus Tokens
- 4 Player Aid Fans
- 16 Influence Track Tokens
- Queen Victoria Tracker
- Gallery Tokens: Miniature, Silhouette and Portrait tokens
- Hive Gameboard
- Assembly Room Gameboard
- 4 Player Mats
- Whist Cards: 16 Player Starting Cards, 4 Queen Cards (with a crown symbol), 16 Star Cards (with a star symbol), 16 Regular Cards (no symbol)
Solo Mode Components
These components are only needed for a solo game. For 2 to 4 player games they may be returned to the box. (Solo Mode - page 21)
- Character Token
- Host Tokens
- 5 Calling Cards
- 16 Solo Action Cards
Advanced Mode Components
These components are only needed for advanced gameplay. For both learning and more casual gameplay, these components may be returned to the box.
- 5 Advanced Host Tokens
- 5 Advanced Host Bonus Tokens
- 5 Advanced Goal Host Tokens
- 5 Advanced Host VP Tokens
- 4 AP Base Cards
Game Overview
Dearest Player, Welcome to the London social season. You are invited to make your debut at the behest of your titled host. Gain introductions in the ballroom, commission art in the gallery, learn secrets in the tea room, and play whist in the parlor. If you win the most admiration you will surely triumph as the season favorite. Yours Respectfully, Queen Victoria
Earn Victoria Points by...
- Adding ballroom connections to your Player Mat. (L&C & Ton Cards)
- Collecting tea room secrets about your Player Mat connections. (Tea Cards)
- Commissioning art. (Gallery Tokens)
- Climbing the social beehive. (Hive Gameboard)
- Winning tricks during the Whist phase.
Setup
Player Setup
- Give each player a player envelope containing all their necessary components: Player Mat, Starting Cards, Host Bonus Tokens, Influence Tokens, Player Broach, Player Aid Fan, Gallery Card.
- Place your 4 player starting cards in a deck face-down beside the mat in the player deck area.
- Place your 4 player calling cards in a stack on the Player Mat on the calling card space.
- Place both Host Influence Tokens on the Player Mat with side A face-up.
- Place your Influence Tokens on the bottom space of the appropriate suited tracks.
- Place your Gallery Card beside the Player Mat in the Gallery spot.
Hive Gameboard Setup
- Place the Hive Gameboard in the center of the play area.
- Place each Player Brooch on a starting space.
- Shuffle the Queen Whist Cards and place them in a deck face down in the Queen Card area.
- Place the Queen Tracker on the week 1 spot on the week Tracker area.
- Randomly place the 4 Hive Bonus Tokens on the Level 2 spots on the beehive. Do not place one on the leftmost spot.
- Place the Queen's Favorite Token on the topmost spot of the hive.
Assembly Room Gameboard Setup
- Place the Assembly Room Gameboard near the Hive Gameboard on the side matching the player count (1/2 or 3/4).
- Shuffle the Star Whist Cards and place them in a deck face-down in the parlor on the deck spot. Deal one card face-up in each of the 3 spaces. Place the Card Sharp Token beside the board near the parlor area. Shuffle the Regular Whist Cards and place them aside for the final Whist Phase.
- (a) Shuffle the Lord's & Commons (L&C Cards) and place them face-down in a deck below the gameboard near the ballroom area. Place one face-up card on each of the (L&C) spaces. (b) Shuffle the Ton cards and place them face-down in a deck below the gameboard near the ballroom area. Put one face-up card on each of the Ton spaces. (c) In a 3 person game do not place face-up cards on the Ton or L&C spaces with the 4 player icon. In a solo or 2 person game the deck goes on the deck space in the ballroom.
- Place the Favored Guest Token below the board near the ballroom area.
- Place the Silhouette, Miniature and Portrait Tokens in face-up stacks at the bottom of the board. Place the Extra Gallery Cards aside for later. Place the Artist's Muse Token below the board on top of the Gallery Cards.
- Shuffle the Tea Cards and place them in a deck face-down on the Tea Card spot in the tea room area.
The First Player Token goes to the player with the lowest number on their Player Starting Cards. At the beginning of subsequent weeks the First Player Token moves clockwise.
Important Concepts
Influence
The card suits represent the hierarchy of nobility, with the Hearts being the most powerful and the Clubs being the least.
- Hearts: Duke & Duchess / Marquess & Marchioness (highest)
- Diamonds: Earl & Countess
- Spades: Viscount & Viscountess
- Clubs: Baron & Baroness (lowest)
When influence is required, a higher suit can be substituted for a lower one (e.g., a Diamond can be used as a Diamond, Spade, or Club).
The only influence more powerful than the Heart is the Crown (i.e. Queen influence). In lieu of a Crown influence you may use 1 of each influence suit (Club, Spade, Diamond, Heart).
If you gain a Queen Card and none remain, gain one Club, Spade, Diamond and Heart on your player mat.
Starting Influence
Most actions require influence to be spent. Influence comes from the following sources:
- 4 Starting Cards. Discard one of your cards to your discard pile beside your player mat to gain one of the matching influence suit.
- Host Influence Token. Twirl the Host Influence Token sideways (tip it on its side) to gain one of the indicated influence suit. The Token untwirls (resets) at the beginning of the next week.
Additional Influence
Additionally, there are a few ways to upgrade or add influence to your Player Mat:
- When you achieve your first host goal (see p. 18) untwirl your Host Token and flip it to side B to increase the value.
- When your Brooch reaches your Host Token's indicated hive level shown, flip the Host Token to side B. This is now availailable to twirl to gain the indicated influence suit. (Example: your host has just been granted the title of Duke or Duchess!)
- When you gain cards from the Ballroom, immediately increase your influence on the indicated Suit's track on your Player Mat.
Raise the Influence Token on your Player Mat influence track 1 place to store the influence gained. You may use this stored influence at any time by moving the token down on the track, one space for each required influence.
"Influence is used during the Season Phase to place Calling Cards and to take actions!"
Helpful Iconography
- VICTORIA POINTS (VPs): a hexagon symbol. The winner is the player with the most VPs at the end of the game.
- GAIN a heart: when an item is on a dark background you gain the item or action.
- USE a heart: when an item is on a white background you use the influence for an action or to place a Calling Card.
- Other examples: (a heart-and-diamond frame, a club in a shield)
- A lightning bolt: Immediately gain the item or action.
Game Structure
I. The Season Phase (page 8)
Consists of 4 weeks (i.e. rounds).
A. Start of the Week
- Draw 4 cards from your Draw Deck.
B. Take Actions
- Each player takes turns placing a Calling Card and taking the action until all players have used all of their Calling Cards.
C. Week Reset
- Refresh Player Mat.
- Refresh ballroom and parlor cards.
- Move Queen Tracker.
- Pass First Player Token clockwise.
II. The Whist Phase (page 15)
Whist will consist of 7 to 9 tricks depending on the player count.
A. Whist Setup
- Determine winner of the Card Sharp Token.
- Determine lead player for Whist.
- Deal additional cards (if necessary).
B. Whist Tricks
III. Scoring (page 17)
Start of the Week Clarifications
At the beginning in Week 1, your Draw Deck will only have your 4 Starting Cards, but you may gain additional cards through various actions. When gained, these are placed directly in your discard pile next to your player mat. When you need to draw cards (i.e., at the beginning of the next weeks) but your deck is empty, shuffle your discard pile, place it face-down in your Draw Deck on the left side of your Player Mat, and continue drawing until you have 4 cards.
The Season Phase
The Season Phase consists of four weeks. Each week, players take turns, beginning with the player who has the First Player Token and moving clockwise. On your turn, place your Calling Card on an unoccupied space in one of the game board areas, spend the required influence, and take the associated action. Once all players have used all 4 of their Calling Cards, perform the steps to reset the Week, and proceed to the next week.
- The Social Beehive (page 9): Move on the beehive, attend events, ascend to the Queen's ball. (Beehive Action)
- The Parlor (page 10): Gain Star Cards, curate hand for influence and whist. (Parlor Action)
- The Ballroom (page 11): Gain connections to add to your Player Mat. (Ballroom Action: L&C or Ton)
- The Gallery (page 13): Commission and collect sets of art. (Gallery Action)
- The Tea Room (page 13): Gain secrets about connections on your player mat. (Tea Room Action)
Whenever you gain one of these icons (i.e. on a ballroom card, or beehive space), you gain the corresponding action for free.
The Social Beehive
- Take the beehive action by placing your Calling Card in the action space (with the infinity symbol) on the Beehive Board. (This space is the only one in the game not limited to one card.)
- Move your Player Brooch up 1 level to a connected space or sideways 1 to 4 spaces.
- Use the required influence based on your move. Note that to move all the way across on L4, 2 hearts are required.
a. Moving from the start level to level 1 does not require influence. Place your Calling Card and then move your Brooch up to either the left or right space.
b. The first player to reach the top of the beehive (level 6) claims the Queen's Favorite Token which is worth 3 additional VP. All players will gain VP corresponding to their final Brooch level. A Crown Influence is required to move to the 6th level (see page 5).
c. Immediately upon moving into a space with a Bonus Token, the player chooses whether to take the bonus or not, and the Bonus Token is removed from the game. The Bonus Tokens are:
- Use 1 club, then Gain 1 Queen Card
- Gain a Parlor Action
- Spend 1 club, then Gain 1 Tea Room Action
d. The center space on Level 4 - Dinner with the Prime Minister is significant for 2 reasons:
- d1. It is a shortcut to Level 6 - the Queen's Ball.
- d2. If a Player Brooch is on this space, extra action spaces are available for that player. On subsequent turns when the Brooch remains in this space, the player may place their Calling Card on one of the 2 bonus action spaces and gain a Parlor Action as indicated on page 8.
Players may share spaces on the Hive Board.
The Parlor
Parlor Icons
- Gain a Star Card from the Parlor.
- You may trash a card from your hand, discard pile, or draw deck.
Taking a Parlor Action
- Place your Calling Card on 1 of the 2 action spaces on the Assembly Room Board using the influence shown.
- Gain 1 of the 3 face-up Star Cards and place it in your discard pile.
- You may trash 1 card from either your hand, discard pile or draw deck.
- 3.a. Trash up to 2 cards with a ten.
When you trash a card it is removed from the game.
- Refill the empty card space with the top card from the Star Deck.
The Star Deck contains the princes, jacks, tens and remaining diamonds. Diamonds are trump in the Whist Phase.
The Ballroom
Gain influence and connections on your Player Mat.
- THE L&C CARDS: Gain end game scoring conditions when you add them to your Player Mat.
- THE TON CARDS: Gain an immediate action when you add them to your Player Mat.
- The family crests found on L&C and Ton Cards are worth VPs when matched with corresponding Tea Cards (See page 14).
Fact: In the 19th century, the British high society was referred to as "The Ton". The name derives from the French saying, le bon ton, which means "the good style" and described those possessed of both good manners and high style.
Fact: The Lords and Commons (L&C) refers to the British Parliament. In the 19th century the House of Lords members were titled peers granted hereditary, life-long memberships. The House of Commons members were elected to represent constituencies. The social season coincided with Parliament sitting as a means to entertain the Parliamentary members and their families during their time in London.
Taking a Ballroom Action
- Select one of the Ton or L&C Cards.
- Use the Club Influence shown on the action space.
- Place your Calling Card on the action space.
- Gain the influence shown on the card by moving that token up one space on your Player Mat. (See page 6.)
- New cards are placed in the matching column on your Player mat in ascending order so that all family crests are visible. Use the influence shown on the row of the new card i.e., the 4th placed card requires 2 Diamond influence. If you cannot afford to or choose not to place the card, trash it without further benefit.
- If it is a Ton Card you may take the action shown.
If you gain a Ton or L&C Card on level 5 of the Hive Board (pg.9): select a face-up card from the ballroom and then refill the empty spot with a new card from the top of the deck. If the ballroom cards are empty: draw a card blind from the top of the deck. (This is the only instance you draw blind.)
Some of the Ton Cards require additional influence to take the action. You must use the influence shown on the card to take this action immediately, or forfeit the action. Some cards have other prerequisites, such as being at or above a level on the beehive or having previously commissioned art.
On Your Player Mat...
Both the Ton and the L&C columns hold 5 cards. Gain 5 VPs for each column that you fill. If you fill both the Ton and the L&C column then gain an additional 3 VPs.
Once you fill a column you cannot place any more cards of that kind on your Player Mat, though you may still acquire them for their immediate influence gain before trashing.
The first player to fill either column gains the Favored Guest Token, which is worth 3 VPs.
The Gallery
In the gallery you commission art to gain VPs. Art must be commissioned in order: 1st SILHOUETTE then 2nd MINIATURE then 3rd PORTRAIT.
- (a) Use the influence shown on the chosen action space. (b) Then use the influence shown to commission 1 Art Token.
- Place your Calling Card on the action space.
- Gain the commissioned Art Token and place it beside your Player Mat on the Gallery Card.
You must always commission art in order, regardless of how the action was taken. You must complete a full set of art before starting a new one. (When starting a new set, take a new Gallery Card.)
The first player to complete a set of all 3 different art tokens gains the Artist's Muse Token which is worth 3 VPs.
The Tea Room
Gain secrets about your ballroom connections for either end of game VPs or a one-time influence boon during the Season Phase when taking the corresponding action.
- Use the influence shown on the action space.
- Place your Calling Card on the action space.
- Draw 2 Tea Cards. Select 1 card and place the remaining card at the bottom of the deck. Place the selected card face-down beside your Player Mat at the Tea Card space.
The Tea Room Continued
Tea Cards may be used in 1 of 2 ways:
-
Keep it for VPs at game end:
- (a) Gain 1 VP for each Tea Card
- (b) + Gain 1 VP for each connection on your Player Mat with a matching family crest.
OR
-
Trash the Tea Card to use as influence when taking a particular action (see p. 20).
When you trash the Tea Card it is removed from the game.
At Home with Host
The final action spot is on your Player Mat and allows you to untwirl your Host and Beehive Influence Tokens and gain 1 of the suit of your choice on your Player Mat influence track.
At the End of Each Week...
Refresh Player Mat
- Place any remaining cards in your hand (cards you did not use for influence) into your discard pile.
- Return your 4 Calling Cards to your Player Mat, and untwirl host Influence Tokens.
Refresh Ballroom and Parlor Cards
- Remove the face-up parlor cards and place them in a discard pile.
- Place 3 new cards from the Star Deck face-up on the empty spaces. If the Star Deck runs out, reshuffle its discards to create a new deck.
- Remove the remaining face-up L&C and Ton Cards and place them each in their own discard piles. Place new cards from the Decks face-up in their respective spaces.
Move Queen Tracker
- Move the Queen Victoria Tracker to the next week on the season track on the Beehive Board.
Pass the First Player Token Clockwise
The Whist Phase
At the end of the 4th week prepare for the Whist Phase:
- Count your Whist Cards in your discard and draw pile.
- Determine who has the most Star Cards. They are given the Card Sharp Token. The token allows the player to decide if they lead or go last at the start of the Whist Phase. It is also worth 3 VPs. If there is a tie for the most Star Cards, then no one receives the token, and the player with the First Player Token starts (leads) the first hand.
- Each player will need the following amount of Whist Cards based on the player count: Solo Mode - 7; 2 Players - 7; 3 Players - 8; 4 Players - 9.
- One of the players collects the Regular Whist Deck that was set aside during game set-up. They shuffle and deal cards to any players who do not have the required amount. (In the rare case you do not have enough cards, reshuffle the trashed cards and finish dealing.)
If a player has too many cards they must select and trash the extra cards.
Whist Cards & Concepts
Each trick won is worth 2 Victoria Points (VPs).
Diamonds are the trump suit. The highest diamond always wins the trick. You may play a diamond when:
- You are out of the suit the first player played (a.k.a. led suit)
- The first player plays (leads) a diamond.
Fact: "A diamond of the first water" referred to someone exceptionally fine in Victorian parlance.
Queens are the high card.
- Queen 13: Victoria
- Prince 12: Albert
- Prime Minister 11: John Russell "Jack"
If no diamonds are played, the highest card of the led suit wins the trick. If diamonds are played the highest diamond card wins the trick.
How to Play Apistocracy Whist
Apistocracy Whist is played in a series of rounds, each called a trick, during which each player will play one card. These tricks will play out as follows:
- The first player plays a card in the center of the table. The card's suit is called the "led suit". The first player cannot play (lead) a diamond until they have been "broken." Diamonds are considered "broken" after a player plays a diamond due to being void in the led suit.
- Each other player follows in clockwise order, and must play a card of the same suit as the led card. Only when a player does not have a card of the led suit can they play any other card, including diamonds (trump).
- Once everyone has played one card, the player who played the highest card of the led suit wins the trick unless any diamonds are played. Then the player who played the highest Diamond wins the trick.
- The player who wins the trick collects the cards played (this set of cards is also called a trick) and sets them beside their Player Mat, keeping track of how many they have taken. They are now the first player.
- Repeat 1 to 4 until all the players' cards have been played. See examples below:
Example, all players have the led suit: Player 1 (lead player) leads a club; Player 2 wins the trick with the highest club (led suit); Players 3 and 4 follow with lower clubs.
Example, Player 3 and 4 do not have the led suit: Player 1 (lead player) leads a heart; Player 2 follows; Player 3 has no hearts, plays and wins the trick with a diamond (trump card); Player 4 has no hearts, plays an off suit.
Tips for Building Your Whist Hand...
- Collect trump (diamond) cards.
- Try to eliminate one or more non-trump suit from your deck.
- Attempt to trash your club, spade and heart starting card before the end of week 4.
Scoring
The game ends after the Whist Phase. Each player counts the following:
- Number of whist tricks they won x 2 VP. Add 3 VPs if they won the Card Sharp Token.
- Gain VPs for the level reached on the Beehive Board. Add 3 VPs if they won the Queen's Favorite Token.
- Gain VPs for Commissioned art. Add 3 VPs if they won the Artist Muse Token.
- 5 VPs for each column (L&C & Ton) they filled on their Player Mat. Add 3 VPs if they filled both columns. Add 3 VPs if they won the Favored Guest Token. Add the VPs for completed L&C card goals. Add 5 VPs if they achieved their host goal.
- 1 VP for each Tea Card plus 1 VP for each matching family crest on their Player Mat. (Example: the Tea Card value: 1; the matching family crests on Player Mat: 2; this Tea Card is worth 3VP.)
- Score the host bonus on their Player Mat if they achieved the bonus goal.
The player with the most Victoria Points (VPs) wins the game! In the case of a tie, the player with the most influence on their influence tracker wins the game.
Score pad lines: 1. 2 VPs per whist trick, card sharp bonus: 3; 2. beehive level reached VP, Queen's favorite bonus: 3; 3. painting card VPs, artist's muse bonus: 3; 4. player mat column filled VPs, L&C card VPs, favored guest bonus: 3; 5. tea card VPs (1 per card), matching shield on mat VPs; 6. host bonus (on player mat); TOTAL.
L&C Card Clarification
When scoring an L&C Card that has VPs for influence, count the following:
- The Host and Hive Bonus Tokens on your Player Mat.
- Your influence tracker on your Player Mat.
- Upper right corner of your Tea Cards.
(This example shows 4 spades which will score 2 points for this L&C Card.)
Character Host Abilities
Lord Edward's host, the Baroness of Maxwell, is enamored with collecting secrets in the tea room. Edward has an in-game goal of collecting 3 Tea Cards, at which time they turn their Host Influence Token to side B for increased influence, and they get to draw 3 cards and pick 1 when they take a Tea Action. Also, they may choose to use 2 of their Tea Cards during the course of the game for both the influence boon and end game scoring. To do this, instead of trashing a Tea Card when taking the boon, they may place it in a face-up separate discard pile and score each card for its family crest match at the end of game. They have an end game goal of having 4 or more Tea Cards. This earns them 5 VPs.
Lady Tuesday's host, the Baron of Albany, is in attendance at many of the events of the social beehive. Lady Tuesday has an in-game goal of reaching Level 3 on the beehive, at which time they turn their Host Influence Token to side B for increased influence, and gain a bonus sideways move on the beehive when they move up the remaining levels. (They do not need to use influence to take said sideways bonus moves). They have an end game goal of reaching the top of the beehive (level 6). This earns them 5 VPs.
Lady Alexandria's host, the Baroness of Forester, is a Grand Dame of The Ton and the Assembly Rooms Ballroom. Lady Alexandria has an in-game goal of placing 2 Ton Cards on their Player Mat, at which time, they turn their Host Influence Token to side B for increased influence, and may enter the ballroom without using the club influence for the remainder of the game. They have an end game goal of filling the Ton column on their Player Mat. This earns them 5 VPs.
Lord Shae's host, the Baron of Esk, is a member of the House of Lords and the Assembly Rooms Ballroom. Lord Shae has an in-game goal of placing 2 L&C Cards on their Player Mat, at which time they turn their Host Influence Token to side B for increased influence, and may enter the ballroom without using the club influence for the remainder of the game. They have an end game goal of filling the L&C column on their Player Mat. This earns them 5 VPs.
Character Host Abilities Continued
- Look who is a Duchess now! When Lord Edward reaches Level 3 on the beehive, they flip the Beehive Influence Token on their Player Mat to the B side.
- Look who is a Duke now! When Lady Tuesday reaches Level 4 on the beehive, they flip the Beehive Influence Token on their Player Mat to the B side.
- Look who is a Duchess now! When Lady Alexandria reaches Level 5 on the beehive, they flip the Beehive Influence Token on their Player Mat to the B side.
- Look who is a Duke now! When Lord Shae reaches Level 5 on the beehive, they flip the Beehive Influence Token on their Player Mat to the B side.
Special Club Power
Each player's club card in their Starting Deck has a special power.
Lord Edward's and Lady Tuesday's club card may be used as either 1 or 2 clubs when discarded during their turn.
Lady Alexandria's and Lord Shae's club card may be trashed at any time during their turn and replaced with a Star Card from the parlor. They gain said Star Card directly into their hand. This is a one time power, and they may take it even if the club card is in their discard pile. It does not count as their action.
Card Clarifications
Tea Cards (there are 2 of each card)
Trash these cards in lieu of using the influence to move to their respective levels on the beehive from the level directly below it (Levels 2, 3, 4 and 5).
Trash these cards in lieu of using the influence to commission the respective paintings when taking the Gallery Action, provided you have already obtained the previous painting(s).
Trash these cards in lieu of using the influence to place your 4th or 5th Ton or L&C Card on their respective columns on your Player Mat.
Trash this card in lieu of using the influence to take a Parlor Action AND gain 2 Star Cards instead of 1.
Ton Cards
You must always place a Ton Card on your Player Mat before you take its action.
These cards require your Brooch to be on the same level or the level directly below the space you are moving to.
- This card takes you to the Marchioness event as explained above. Level 3: The Marchioness' Tea. Level 4: The Marchioness' dinner.
- This card takes you to the Prime Minister (PM) event as explained above. Level 3: Coffee with the PM. Level 4: The PM's Dinner.
These cards require that you have already commissioned the previous painting(s).
- You must already have the Silhouette to take this action.
- You must already have the Silhouette and Miniature to take this action.
Solo Mode
Meet Lady Catherine, known to all as Lady Cat, in part because she is accompanied most everywhere by her beloved cat Mimus. She is very well-connected and rumored to be a likely candidate for the season favorite designation. (She, being Lady Cat, not Mimus.)
Set up the game according to the normal 2 player setup starting on page 3, however the Card Sharp Token is not used in the solo mode. The second Player Mat will be for Lady Catherine. The following solo rules refer to Lady Catherine's components, and not the player's.
Lady Catherine Set Up
- Select a Player Mat that is not in use for Lady Catherine. Place the corresponding color components where they belong according to player setup on page 3. With the following exceptions:
- Flip the 2 Host Bonus Tokens to their B sides face-up on the Player Mat.
- Place the Lady Catherine Character Token on the space on the Player Mat covering the original Character Picture.
- Place the Solo Tokens on the Player Mat beneath the Character Token.
- Place the Lady Catherine Calling Cards on the Player Mat.
- Separate the Solo Cards with the cat symbol in the upper right corner from those without.
- 6a. Shuffle the cards with the cat symbol and place the deck face-down in the deck spot beside the Player Mat. This is the starting Solo Card deck.
- 6b. Shuffle the remaining cards and set the deck face-down and aside for later use. This is the Litter Deck.
Lady Catherine's Turn
The solo mode will play out as a normal 2 player game. Lady Cat's turns will play thusly:
During the Season Phase: Lady Catherine has 1 additional action each week and always goes first.
Lady Catherine (Lady Cat's) turn: Draw the top card from the Solo Deck and place it face-up in the discard space to the right of the Player Mat. Place Lady Cat's Calling Card according to the action depicted on the card, and take the corresponding action. Lady Cat does not use influence when taking actions. If you flip over a copycat card on Lady Cat's first turn, draw another card. If the action spaces for the shown action are full, draw another card. Take your turn per the 2-4 player rules starting on page 7.
Your turn.
Repeat until all of the Calling Cards are placed and actions have been taken.
Reset for new week - reset per the standard game rules and: Take the Solo Deck and discards and add the top card of the Litter Deck. Shuffle them and place them face-down in the player deck area.
Actions
Tea Action: Place a Calling Card on any open Tea room spot. Draw the top card from the Tea Deck. Place the card face-down in the tea room spot beside Lady Cat's Player Mat without looking at it.
Gallery Action: Place a Calling Card on any open Gallery spot. Take the next Gallery Token in the set and place it on her Gallery card. She gains the Gallery Tokens in order (I, II, III). If Lady Cat completes her gallery Card first, she gains the Artist's Muse Token.
Ballroom Actions: Place a Calling Card on either the Lords & Commons (L&C) or the Ton spot indicated by the compass on the bottom of the card. If the spot is full, place it on the other spot. If both spots are full, draw a new card. Take the associated card and:
- Lady Cat gains the influence on the card on the influence tracker on her Player Mat.
- Place the card in the associated column on her Player Mat.
- If it is a Ton Card, take the action. If she cannot take the action, then skip it.
If Lady Cat fills a column first she gains the Favored Guest Token.
Parlor Actions: Place a Calling Card on an open parlor spot. Remove one of the face-up cards and trash it. Select the card in this order: highest diamond, highest heart, highest spade, highest club.
Beehive Actions: Place a Calling Card on the beehive spot. Move Lady Cat's Brooch up one level using the compass on the bottom of the card to determine the direction. (Unlike the other actions, this direction will be the same regardless of the card orientation.) If she cannot move in the direction indicated, move straight up. If the Brooch moves to a spot with a bonus action, Lady Cat takes that action. If Lady Cat reaches the top of the beehive first, she gains the Queen's Favorite Token. If she draws a beehive card after reaching the top of the beehive, she draws a new card.
Copycat Actions: If you draw this card, Lady Cat copies your last action. Place a Calling Card on an open spot associated with the action and proceed with the action. If the action spots are full, draw a new card.
Whist Phase
Your Whist Setup: Set up per the 2-player whist setup.
Lady Cat's Whist Setup: Shuffle Lady Cat's Solo Deck and discards into a deck. Place them face-down in her deck spot. Lady Cat leads every trick in the Whist Phase.
Whist Phase Actions: Lady Cat plays the top card from her deck face-up in the center of the table. Play your card according to the rules of the 2-4 player Whist Phase. Place the trick beside the Player Mat. Repeat until all your cards are gone. (7 tricks)
Lady Cat's cards are all higher by .5 than your Whist cards. If you both play the same card, Lady Cat wins the trick.
Score the game per normal (pg. 17).
Advanced Gameplay Mode
The Advanced Gameplay Mode allows players to build their own character. You may continue to play Apistocracy using the Standard Gameplay Mode for more casual gameplay. However, the Advanced Gameplay Mode offers players the opportunity to have some agency over character design, including abilities and bonuses.
The AP Goals and Bonus Tokens mimic those in the base game, (see p.18.) with the following exception:
The Art Goal: Commission your first 2 paintings. Art Bonus: Gain a new Gallery Card and a Silhouette to begin a second set simultaneously. When Commissioning art in the future, use one less spade or diamond.
Advanced Play Setup
Set up Player Mats per usual with the following changes:
- Place The AP Base Card over the goal spot on the Player Mat.
- Starting with the first player:
- 1.a. Select a Goal Token and place it on the Goal Spot on the AP Base Card.
- 1.b. Select the matching Host Token and place it on the Host Token spot.
Achieving Goal Token
- When a player achieves the goal on their Goal Token:
- 2a. They select the Bonus Token of their choice and place it on the Bonus Token spot on their Player Mat. Then:
- 2b. They take the VP Token according to their order of selection.
First player to select their Host Bonus Token takes the -2 VP Token. Second player takes the 0 VP Token. Third player takes the +2 VP Token. Fourth player takes the +4 VP Token.
Bonus Personas
To play a different persona place the Persona Token on the persona spot on the chosen Player Mat. The Calling Cards may be used with the silhouette side face-up.
Icons
- Queen Influence; Gain Queen Card
- Tea Room; Gain Tea Room Action
- Ballroom: L&C; Gain L&C Card
- Ballroom: Ton; Gain Ton Card
- Parlor Action / Star Card; Gain Parlor Action
- Trash Card
- Victoria Point
- Deck
- Draw Card
- Gallery Action: Silhouette, Miniature, Portrait
- Beehive Action
- PM Event (on beehive); Marchioness Event (on beehive)
- When...: You have 2 paintings; You have 2 Ton Cards; You have 2 L&C Cards; You have 3 Tea Cards; Your Brooch has reached Level 3
- Influence Icons, highest to lowest: Queen Influence, Heart Influence, Diamond Influence, Spade Influence, Club Influence
- Gain Heart Influence; Use Heart Influence
- Immediate Action; Unlock Bonus; End of Game