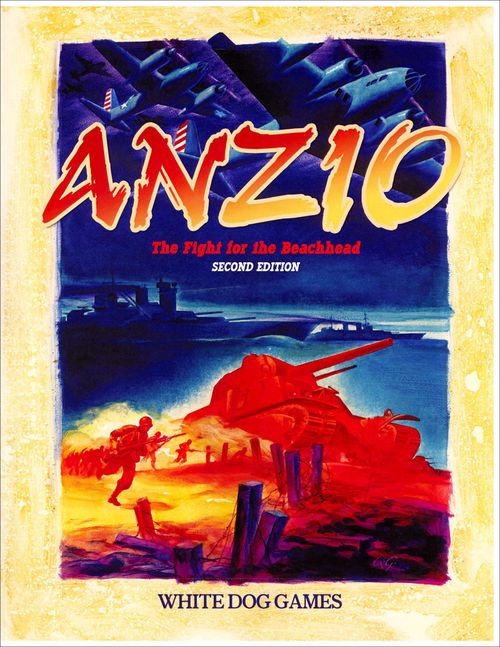
Anzio: The Fight For The Beachhead
Anzio: The Fight For The Beachhead Rulebook
Table of Contents
Table of Contents
1.0 Introduction
Anzio is a low-complexity, two-player or solitaire game that simulates the first weeks of the battle of Anzio when Allied forces defended and attempted to expand the Anzio beachhead against German opposition. For solitaire play, special rules manage the German side. The goal of the Anzio-Nettuno amphibious landings on January 22, 1944 was to outflank the German Winter Line and open the way to Rome. A major battle of World War Two, the initial landings were unopposed. Instead, the resulting fight developed to keep the beachhead.
2.0 The Map
The 17" x 11" game board includes a map of the area around the coastal town of Anzio where much of the battle was fought. Canal Mussolini and swampy ground marked the right flank for the Allies while the Moletta River was a barrier on the left flank. The map is overlaid with a 17 x 11 hexagonal grid to regulate movement and combat. Each hex represents 1 to 1.5 miles. Under the map title is a representation of Anzio Annie, the large German gun made famous in the battle.
3.0 The Counters
The opposing armies at Anzio were German forces under Field Marshall Albert Kesselring and Allied forces under Major General John Porter Lucas. Units of various types represent the forces involved, including infantry, armor, panzer grenadier, paratroopers, rangers and commandos. See the Counter Diagram for how to read the information on the counters. Most units are of division size and divided into A and B detachments. For example, the German 29th Panzer Grenadier division detachment A is shown in the diagram above. Each counter has a step loss side with reduced combat strength. German counters have gray backgrounds. British counter backgrounds are brown and the backgrounds for United States units are green.
4.0 Prepare To Play
When setting up the counters to play, the Allied side places its counters on the map first. Allied units listed below can be placed anywhere within one hex of hex 0308 (British units) and within one hex of hex 1010 (US units). The German side can place any of the German units listed below at any north map edge hex with road terrain. The stacking rule does not apply to setup or entry hexes. A "division" indicates that both detachments A and B are placed, except in the case of the US 1st Armored Division, which has no detachments. Place reinforcement units on the Turn Track corresponding to the turn they arrive.
German:
- 4 Parachute Infantry Division
- 65th Infantry Division
- 3rd Panzer Grenadier Division
- 71st Infantry Division
- 26th Panzer Division
- Hermann Goring (HG) Panzer Division
Allies:
- British 1st Infantry Division
- British 46th Royal Tank Regiment
- British Commando Battalions
- US (Darby's) Rangers
- US 509 Parachute Battalion
- US 504 Parachute Regiment
- US 3rd Infantry Division
5.0 Stacking
A stack is one or two units in the same hex. A maximum of two units can occupy a hex except during a unit's entry turn. Units belonging to a given nationality (US, British, German) can stack only with that nationality. Detachments A and B of a division may not stack with part of a different division. Units marked with a red star (British Commando, US Ranger, and US Paratroopers) can stack with any Allied unit, regardless of nationality.
6.0 Sequence Of Play
6.1 There are 12 game turns, each about 10 days of real time. Each turn consists of the phases listed below. The Movement, Off-Map Bombardment and Combat phases alternate phasing sides, the side with initiative acting first in each phase.
- Weather Check
- Initiative Check
- Reinforcements Arrival
- German Movement Orders (Solitaire Play Only)
- Movement
- Initiative Player
- Non-Initiative Player
- Off-Map Bombardment
- Initiative Player
- Non-Initiative Player
- Combat
- Initiative Player
- Non-Initiative Player
6.2 Expand the Beachhead! (Optional). This rule allows the Allied player to expand the beachhead immediately upon landing, simulating that the Allied commander conducted the operation more aggressively than was done historically. Immediately after setup, the Allied player gets a free movement phase after which turn one begins. Allied units conduct movement normally in the free movement phase. The one-time German beachhead bombardment phase (see section 11.1) automatically takes places after the Allied free movement phase and before turn one. Weather is not checked nor a factor in the free movement phase or with the German one-time bombardment phase when using this option.
7.0 Weather Check
Before the start of each turn, roll a single six-side die (D6) to determine the weather from the Weather Status Table. Place the appropriate Weather Marker next to the current turn box of the Turn Track.
(The Weather Status Table is not printed in the rules PDF.)
8.0 Initiative Check
8.1 Before the start of each turn, roll a D6 and consult the Turn Initiative Table to determine the side with the initiative.
8.2 Replace General Lucas (Optional). This rule allows the Allied side to be more aggressive in the conduct of the battle from the start than Allied commander General Lucas did historically. Add +1 to the Initiative die roll.
Turn Initiative Table
| D6 | Side with Initiative |
|---|---|
| 1-4 | German |
| 5-6 | Allied |
8.3 The side with the initiative moves first and decides which, if any, of its stacks conduct attacks during the combat phase. Place the Initiative Marker with the side having initiative face on the current turn box of the Turn Track.
Printed components: German and Allies Initiative Markers.
Designer's Note: Major General John Porter Lucas, the Allied commander, was criticized for not being aggressive in his management of the battle. This is modeled in the Turn Initiative Table and in the setup which reflects German units entering the battlefield before the Allies can move into the mountains north of Anzio.
9.0 Reinforcements Arrival
At the start of each turn, consult the Reinforcements Table below to check if any units enter the game that turn. German units enter at any north map edge hex with road terrain. Allied units enter at either the Anzio or Nettuno hexes. If both Anzio and Nettuno are occupied by German units, any land hex adjacent to those cities may be used as entry hexes as long as different nationalities do not stack together in the same entry hex. Each reinforcement unit has the reinforcement entry turn printed on its counter. Players set up reinforcements simultaneously. The entry hex does not count against a unit's movement allowance in the arrival turn.
Reinforcements Table
- Turn 2: US 45th Infantry and 1st Armored Divisions
- Turn 3: British 56th Infantry Division; German 114th Light Infantry and 362 Divisions; German 715th Motorized Infantry and 16th SS Panzer Grenadier Divisions
- Turn 5: US 34th Infantry Division; German 29th Panzer Grenadier Division
- Turn 7: US 36th Infantry Division
10.0 Movement
10.1 General. The side with the initiative moves first. (See 8.0 Initiative Check.) Each unit has an allowance per turn of movement points as indicated on the unit counter. (See How to Read Counters above.) Units must expend movement allowance points to enter a hex. The cost to enter a hex depends on the terrain of the hex. If a unit does not have enough remaining movement points to enter a hex it cannot enter the hex. Terrain movement cost is given in the Movement Cost Table. The predominant terrain in a hex is used to determine movement cost. Note that Road terrain has a Movement Cost of 1 only if moving from a Road hex. Otherwise, the Movement Cost is based on the predominant terrain in the hex.
(The Movement Cost Table is not printed in the rules PDF.)
10.2 Rainy Weather. Infantry units are reduced by one movement point during RAINY weather. Tank, Panzer Grenadier, Armor and Panzer units are reduced by two movement points.
10.3 Stacking and Movement. Units must adhere to stacking limits of two units per hex and may not move through friendly units if stacking limits would be exceeded doing so. Once in a stack a unit does not have to remain in that stack; it can move independently. However, units in a stack fight together.
10.3 Opposing Units. Units cannot enter or move through a hex occupied by an opposing unit.
Editor's note: the rules PDF prints section number 10.3 twice; both are kept as printed.
10.4 Zones of Control. If a unit moves into the zone of control (ZOC) of an opposing unit (any of the adjacent six hexes), the moving unit must stop for that turn. However, a unit can move out of an enemy zone of control during the next turn providing it does not immediately enter the zone of control of the same or another enemy unit.
10.5 Armored Units River/Canal Crossing Movement (Optional). This rule allows Armored Units (Armored, Mech, and PzGr) to cross river and canal hexes at points other than roads.
10.51 As indicated on the Movement Table, Armored Units can freely cross a river or canal at a road.
Editor's note: the rules PDF prints the number of this sub-section as "1052"; it is read here as 10.52. The Movement Table referred to is not printed in the rules PDF.
10.52 Armored Units can cross a non-road river or canal hex face on a D6 roll of 3-6. This crossing test is made once in a movement phase for each phasing Armored Unit occupying a hex with a river or canal hex edge declared by the owning player to be crossing the river or canal. If the test is successful, the phasing Armored Unit may cross the river or canal using normal movement rules. An Armored Unit that fails the crossing test remains in place and loses the remainder of its movement turn.
11.0 Off-Map Bombardment
Bombardment historically consisted of three components: air attacks, artillery fire and naval bombardment (Allied only). Weather affects bombardment by suppressing air attacks and reducing observation for target selection and therefore affects the effectiveness of bombardment.
11.1 One-Time German Beachhead Bombardment. After setup and before the first turn, if the weather is CLEAR, the German player rolls a D6. If a 6 is rolled, the result is a hit. Note the damage by turning over an Allied unit counter to show its step loss side. The German player selects the damaged unit. This is a one-time action not repeated the rest of the game.
11.2 Off-Map Bombardment Procedure. If the weather is CLEAR, any unit on the map can be the target of bombardment. When the weather is CLOUDY or RAIN, the targeted unit must be adjacent to a friendly unit. Both sides can attempt off-map bombardment damage each turn, starting with the first. The side with the turn initiative rolls first for bombardment results each turn. Roll a D6. Both sides get one bombardment roll per turn. Starting with turn 4, the Allies side gets two bombardment rolls each turn. Cross index the bombardment roll result with the army side column in the Bombardment Results Table. HIT/MISS indicates results for CLEAR/CLOUDY weather. The bombarding side selects the target hex to take a bombardment hit. If all units in a target hex are already at step loss, one unit in the target hex is eliminated, the unit chosen by the bombarding player. Otherwise, a full strength unit in the target hex must take the step loss. Flip the unit to its step loss side. If the Allies roll more than one hit in the same bombardment phase, the Allies player must apply those hits to different hexes.
(Solitaire: Select north-most Allied units for bombardment damage.)
(The Bombardment Results Table is not printed in the rules PDF.)
Designer's Note: Surprised by the Anzio operation, the German army was not able to bring much artillery or air presence to bear upon the initial landings. However, later they were able to conduct powerful bombardments with artillery, such as Anzio Annie, a 280 mm railroad gun.
11.3 German Air Attack Modifier. If the weather is CLEAR, check for a German air attack during the current turn. Roll a D6 and consult the German Air Attack Table. If the result is YES, add 1 to the German bombardment roll.
(The German Air Attack Table is not printed in the rules PDF.)
Designer's Note: The Allies off-loaded more artillery than the German army was able to bear on the landing and German air attacks were weakened by the interdiction of Allied fighter planes. In addition, the Allies had the advantage of off-shore naval bombardment. This overall advantage in firepower historically offset the German numerical advantage.
12.0 Combat
12.1 General. Combat takes place between two adjacent opposing stacks and is voluntary: a stack does not need to attack even if it is adjacent to an enemy stack. One stack in an individual combat is said to be the attacking stack and the other is the defending stack. All units in an attacking stack must be part of an attack. All units in a defending stack must be counted in defense. A stack can initiate combat (attack) only once per turn but a stack may be attacked more than once in a turn. Place an Attack Marker on any stack that has attacked in the combat phase.
Printed component: Attacked Marker.
12.2 Supporting Attacks. A phasing stack, whose units total at least 5 strength points when summed and which has not yet attacked in the combat phase (no Attack Marker), which is adjacent to the defending stack, can support the attacking stack at the option of the owning player. A stack that provides attack support in a combat phase cannot attack or support an attack again in the same combat phase. Place an Attacked Marker on the supporting stack.
(Solitaire: Stacks with smaller combat strength totals should provide attack support where possible rather than attack independently.)
12.3 Armored Units Attacking Across River or Canal (Optional). Armored Units (see definition in 10.5) can attack (an adjacent hex) across or support an attack across a road or non-road river or canal hex face on a D6 roll of 4-6. (The harder requirement simulates the implicit added difficulties of crossing a river or canal during combat, even at a road.) This attacking test is made once for each combat that includes one or more phasing Armored Units declared by the owning player to be attacking across a river or canal or supporting such an attack. If the test is successful, all the declared Armored Units may conduct or support the attack. If the test fails, the declared Armored Units cannot be included in that combat. Advance after a combat is conducted normally.
12.4 Combat Procedure. The side with the initiative conducts combats (initiates attacks) first with any of its stacks it chooses. Once all combats have been resolved by the side with the initiative, the non-initiative side can elect to conduct attacks with any of its stacks. The combat phase is over when the non-initiative player has performed his last attack or passes combat at which time all Attack Markers are removed.
(Solitaire: If the German side does not have turn initiative, German stacks with attack orders - see German Solitaire Play Tactics Table - automatically attack. A German stack attacks the weakest Allied stack if more than one Allied stack is adjacent. Among equal strength target stacks, select the one blocking an objective or holding a strategic hex.)
12.5 Resolving Combat. Combat is resolved by first summing the strength points of the units in the attacking stack (A) and in the defending stack (D). Next subtract A - D. A D6 is then rolled, any modifications made to the roll, and the modified roll is cross indexed with the A - D difference in the Combat Results Table. If the result is "AL" or "DL", a unit in the attacking or defending stacks, respectively, must take a step loss. The side taking the loss selects the unit to be reduced. If the unit selected is already at step loss, the unit is eliminated. Apply combat results immediately.
(Solitaire: A German loss in a stack should be allocated against a smaller full-strength unit when possible.)
(The Combat Results Table is not printed in the rules PDF.)
12.6 Combat Roll Modifiers. Apply the following die roll modifiers to the combat roll for a side if the situation applies. Combat roll modifiers are cumulative.
- +1 if the attacking stack includes one or more armored, panzer, or panzer grenadier division
- -1 if the defending stack includes one or more tank, armor, panzer or panzer grenadier units
- -1 if the attacking stack is attacking a stack in defensive terrain (MOUNTAIN, CITY or FOREST hex)
- -1 if the attacking stack is attacking across a RIVER or a CANAL
- -1 if the attacking stack is adjacent to an enemy stack, other than the stack being attacked, with at least one full-strength unit
- +1 for each supporting stack in a combat
On a result of ALR or AR, only the declared stack retreats; supporting stacks do not retreat.
12.7 Retreat After Combat. All units in a stack retreat together. Stacks generally should retreat opposite the line of attack, away from the attacker(s); retreats cannot move closer to the attacker(s). In a two-player game, if there is a choice of which hex to retreat to while still moving opposite the line of attack, the player whose side is retreating chooses the hex to retreat into. If hexes opposite the line of attack are occupied, the retreating player is free to retreat in a different direction but cannot retreat into the zone of control of the stack with which it just conducted combat or into the ZOC of any supporting stacks in the combat. Terrain movement costs do not apply but tank and armored units cannot cross rivers when retreating. The stacking rule applies for retreating stacks. If a stack cannot retreat, it is eliminated. A unit that retreats into the ZOC of an enemy unit must suffer a step loss to one of the units in the retreating stack, the unit selected by the owning player.
(Solitaire: Apply step loss in such a way that a full strength unit remains in the stack if possible to take advantage of the DRM bonus for adjacent full strength units in combat.)
12.8 Advance After Combat. If one side retreats or is eliminated, the winning stack has the option to advance or not into the vacated hex. All units in a stack advance together. A stack can advance into an enemy ZOC without penalty. If using optional rule 12.3, this also includes Armored Units.
Designer's Note: Advance after combat is optional so that the winning stack can remain in favorable terrain or in a favorable tactical position if desired.
(Solitaire: German stacks advance after Allied retreat or elimination if they have attack orders. For retreating German stacks, move them to the best advantage for the German side opposite the line of attack.)
12.9 Example of Combat. The German 16th SS Panzer Grenadier Division, parts A and B, both detachments at full strength, form a stack adjacent to a stack consisting of the British 1st Infantry Division B at full strength, which occupies The Factory. The German side has the initiative and decides to attack. The German side has 12 strength points in the attacking stack and the Allied side has 5 strength points in the defending stack. The difference is 12 - 5 = 7. A 3 is rolled. Since the German side has a panzer grenadier unit in its stack, the combat roll is modified by +1 from 3 to 4. However, the Allied side is in defensive terrain (Town), which modifies the combat roll by -1 from 4 to 3. Looking in the >= 6+ column of the Combat Results Table and cross indexing with the row for die roll = 3, it is noted that the combat result is "DR". The Allied 3rd Division must retreat one hex. The German side decides to advance its attacking stack into the hex (The Factory) vacated by the retreating British 1st Infantry Division.
Editor's note: the rules PDF's example names the defender as the British 1st Infantry Division, then refers to the "Allied 3rd Division" as the retreating unit; the printed text is kept as it appears. The Combat Results Table is not printed in the rules PDF.
13.0 Victory Conditions
The Allies win if they occupy the city hexes of Cisterna and Campoleone at the end of turn twelve or eliminate the German side. The German side wins if they capture and hold either Anzio or Nettuno for a full turn after the turn the city is captured at any time in the game or eliminate the Allied side. The German side also wins if they hold Anzio or Nettuno at the end of turn twelve. Anything in between is a draw, including if both sides occupy their victory cities at the end of the game.
14.0 German Solitaire Orders
14.1 General. When playing solitaire, the player commands the Allies.
14.2 Off-Map Bombardment. For German off-map bombardment, target north-most, full-strength Allied units for bombardment damage.
14.3 German Combat Tactics. The German combat tactic for the turn is determined by the German Tactics Table and is the tactic followed by all German units in the turn. Tactics are classified generally as either Attack Orders or Defend Orders. Only one German tactic is selected per turn. Before each German movement phase, roll a D6 and cross index the die roll result with the number of German counters on the map at that time. Count each unit as a counter. There is an Orders Marker for each tactic A - E. When playing solitaire, place the Orders Marker above the current turn box of the Turn Track.
(The German Tactics Table is not printed in the rules PDF.)
14.4 If the German side has the initiative for the turn, all German stacks follow the tactic determined by the German Tactics Table.
14.5 If the German side does not have the initiative and is under general Attack Orders (tactics A or B), German stacks which are not attacked in the turn attack per the particular attack tactic. When attacking, a German stack selects the weakest Allied stack to attack if more than one stack can be attacked. Among equal strength Allied target stacks, select the stack holding or blocking an objective.
14.6 Solitaire Combat Results. When a German stack takes a step loss, allocate the loss to the smallest unit in the stack. German stacks should retreat to the hex with the best advantage for the German side opposite the Allied line of attack. German stacks advance after an Allied retreat or elimination if under an Attack order. If under a Defend order, German stacks do not advance.
15.0 Reference
The rules PDF cites as its historical reference: The Day of Battle, The War in Italy and Sicily, 1943 - 1944, Rick Atkinson, Henry Holt, 2007.