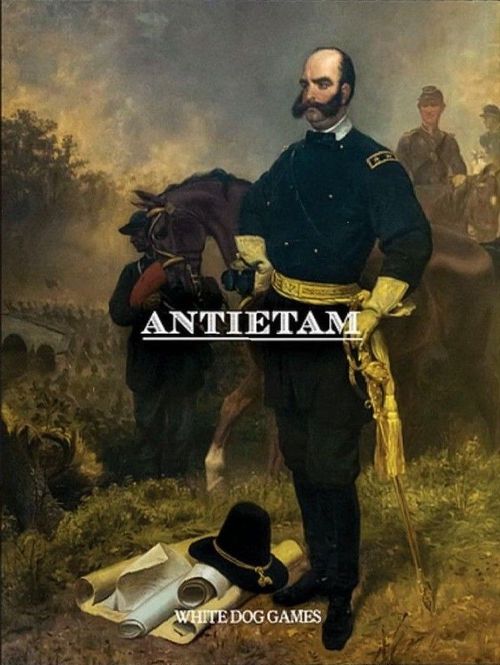
Antietam
Antietam Rulebook
Table of Contents
Table of Contents
- 1.0 Introduction
- 2.0 Game Components
- 3.0 Sequence of Play
- 4.0 Rally
- 5.0 Stacking
- 6.0 Movement and Terrain
- 7.0 Artillery Bombardment
- 8.0 Assault Combat
- 9.0 Resolving Combats (Artillery Bombardments and Assaults)
- 10.0 Applying Combat Results
- 11.0 Step Loss (A1, D1 and EX)
- 12.0 Elimination and Advance
- 13.0 Retreat Movement (AR and DR)
- 14.0 Search for a Hidden Ford
- 15.0 AP Hill Arrives!
- 16.0 Victory Conditions
1.0 Introduction
Antietam is an introductory board game at the brigade level of the bloodiest single day (September 17, 1862) of the American Civil War.
2.0 Game Components
The game is played using the following components to be found in your game box.
- One 27.5 x 21.0-inch game map of 37 x 24, 0.81-inch-wide hexagons.
- 112 5–8-inch double-sided Union and Confederate combat counters and 44 5-8-inch markers.
- One 4-page Example of Play (Hooker Attacks Scenario).
- One Player Reference Sheet.
- One Terrain Effects Chart.
- One Union and One Confederate Set Up Sheet: and
- One 4-page Rules Booklet (you are reading it now).
Combat Counters
There are three general types of combat counters in the game: infantry and cavalry brigades and division artillery sections. Artillery is further divided into regular, Parrott, and horse artillery.
Figure 1. Longstreet Confederate Infantry, II Corps Union Artillery, and Jackson Confederate Cavalry.
The relative strength of a combat unit is indicated by combat Strength Points (SPs), which are the large white numbers on each combat counter. One SP represents about 200 men, 400 horse, or 6 guns. The front side of each combat counter represents a unit at full strength (2 steps). The back side of the counter is the unit's strength reduced because of combat (1 step).
Combat counters also display the brigade leader's name printed at the top of the counter, and the division commander's name at the bottom.
Army corps affiliation appears on each counter in a white circle. The two Confederate corps are indicated by their commander's last name abbreviations: LS for Longstreet and JS for Jackson. The six Union infantry corps are identified by the numerals I, II, V, VI, IX, and XII, and the Union cavalry corps by the abbreviation CAV. The color bar at the bottom of each counter also identifies corps membership.
3.0 Sequence of Play
Players take turns conducting game actions (being active) in the following order.
- First Player
- Second Player
The Union player is always the First Player in the first turn. After turn one, players each make an Initiative Roll with a six-sided die (1D6) at the beginning of each turn. If there is a tie, the Union player is the First player.
When the Second Player has finished conducting actions, the turn ends, and players advance the Turn Marker on the Turn Track. At the end of sixteen turns, the game ends.
The Confederate player's units are all "active" when the Confederate player is active. However, the Union player can only activate the units in two infantry corps each turn when active. (The Union cavalry corps' units are active each Union turn.) Active Union infantry corps can be the same or different from turn to turn. Place Active Union Corps Markers on the Active Corps Track to remind players which Union infantry corps are active.
Each player, when active, conducts the following phases in the order shown, completing each phase before starting the next.
- Rally
- Movement
- Artillery Bombardment
- Assault
Solitaire. For a solitaire game, play the Confederate side and randomly select the two Union infantry corps to be active each turn and maneuver them, with the Union cavalry corps in support, to secure the nearest Key Landmark objectives listed in the Union Victory Points Table.
4.0 Rally
An active unit that has suffered step loss may rally back to full strength on a 1D6 roll of 4 to 6. The unit being rallied cannot be adjacent to an enemy unit when being rallied, except if the enemy unit is across Antietam Creek or in Woods or Town terrain.
Optional: Rally a Union unit from step loss on a 1D6 result of 4 to 6. When rallying a Confederate unit, roll 2D6 and rally on a 4 to 6 result on either rolled die.
A unit cannot perform an action of any other type in the turn (movement, etc.) before or after it conducts a rally action. Place a Rallied Marker on the rallied unit.
5.0 Stacking
Only one infantry or cavalry unit is allowed in a hex. One artillery unit can stack with a friendly infantry or cavalry unit in a hex. At most two artillery units can stack alone together in a hex. Units can freely move through hexes occupied by friendly units but must obey stacking limits when at rest. Units in a stack must belong to the same side.
6.0 Movement and Terrain
Each active unit can spend a maximum allowed number of Movement Points (MPs) in a turn based on its unit type as indicated in Table 1.
Table 1. Movement Allowance Points by Type of Unit
| Unit Type | Movement Point Allowance (MP) |
|---|---|
| Infantry | 4 |
| Regular Artillery | 6 |
| Parrott Artillery | 6 |
| Horse Artillery | 8 |
| Cavalry | 8 |
Units spend their allowed MP to enter or cross terrain. See the Terrain Effects Chart (TEC) for terrain movement costs.
Terrain and Zones of Control
Artillery and cavalry cannot enter Woods or Town terrain, but both may occupy or travel through a Road-in-Woods hex. Antietam Creek cannot be crossed except at Bridges or Fords.
A unit must enter a Road-in-Woods hex from a Road or Road-in-Woods hex to count as Road movement. Otherwise, the movement cost is the cost of entering Woods terrain.
Defensive Terrain: Woods, Road-in-Woods, Town, and Sunken Road terrain are considered "defensive terrain".
Zones of Control (ZOC): An infantry unit projects a Zone of Control (ZOC) into the six hexes adjacent to the hex it occupies. Exception: ZOC do not project across Antietam Creek, including Bridges or Fords, or across Streams, or into or out of Woods or Town terrain. Cavalry and artillery units do not project a ZOC. Enemy units are said to project an enemy ZOC or EZOC.
A moving unit must immediately stop moving for the turn if it enters an EZOC. It may leave an EZOC during a later turn but, when doing so, cannot not move immediately into the EZOC of the same or other enemy unit.
Once a unit stops moving, it cannot move again in the turn. Place a Moved Marker on the moved stack.
Optional Non-Phasing Cavalry and Artillery Withdrawal
Non-active cavalry or artillery units may immediately and freely move up to two hexes, not through or into an EZOC, if an active, enemy infantry unit moves into an adjacent hex.
7.0 Artillery Bombardment
Active artillery units in one or more hexes may together conduct an artillery bombardment combat against a single enemy-occupied hex that is a valid bombardment hex. See the conditions listed immediately below for identifying valid bombardment hexes.
Bombardment combat is resolved by summing the strength points (SPs) of the bombarding artillery units and comparing that total to the sum of SPs in the defending hex and applying section 9.0 Resolving Combats. Ignore any adverse Combat Result Table (CRT) results against the attacking (artillery) side.
Bombardment Range
There are three types of artillery units: horse, regular and Parrott. Artillery units can target opposing units up to their bombardment range in hexes, not counting the hex occupied by the firing unit. Firing from elevated terrain increases the effective range of an artillery unit.
Table 2. Bombardment Range
| Terrain Level Firing From | Horse Artillery | Regular Artillery | Parrott Artillery |
|---|---|---|---|
| Non-Elevated | 4 | 6 | 8 |
| Elevated | 6 | 8 | 10 |
Elevated Terrain is indicated on the game map by double dashed lines and a tan color treatment (for example, Dunker Church, Nicomedus Heights).
Figure 2. Example of Elevated Terrain.
Line of Sight
A valid artillery target hex must be in line of sight of all bombarding hexes in an artillery bombardment. Woods, Road-in-Woods, and Town terrain between target hexes and bombarding hexes block line of sight. If the target hex is in defensive terrain, it is not considered to be in line of sight.
Elevated Terrain between target hexes and bombarding hexes also blocks line of sight. However, artillery firing from Elevated Terrain allows line of sight to any hex in range regardless of intervening terrain.
Artillery can fire over friendly units.
Friendly Unit Adjacent to the Bombardment Target
A target hex cannot be adjacent to a friendly-occupied hex except if the target hex is separated from the friendly units by Antietam Creek.
Once an artillery unit conducts bombardment, it cannot conduct any further actions in the turn, including as support artillery in an assault. Place a Combat Done Marker on the unit.
8.0 Assault Combat
Assault combats are defined by the following conditions:
- An assault combat is a combat between one or more activated units and one or more inactive, adjacent enemy units.
- An assault combat may consist of activated units in one or more hexes against inactive units in one or more hexes, but
- each defending unit must be adjacent to each attacking unit in the combat.
Assault combats may be conducted against any inactive enemy unit or units, which are adjacent to an activated infantry, cavalry, or artillery unit or units, subject to the following limitations:
- Active cavalry and artillery may not conduct an assault combat into or be part of an assault combat into defensive terrain (see the definition above of defensive terrain).
- Active cavalry and artillery may not conduct an assault combat across or be part of an assault combat across Antietam Creek or a Stream.
- Active infantry may conduct assault combat across Antietam Creek but only across Bridges or Fords.
IMPORTANT: Not all activated units that are adjacent to inactive enemy units must participate in an assault combat, but all enemy units that are in a ZOC of an activated infantry unit must be assaulted.
One or more active artillery units which are at most two hexes from, and not adjacent to, any defending hex of an assault combat can participate in (provide artillery support to) the combat as if it were an adjacent attacker, assuming there is a clear line of sight from each of the active supporting artillery units in the combat to one or more of the defending hex or hexes in the combat which are not in defensive terrain.
Figure 3. Example of Artillery Support in an Assault Combat.
Defensive Terrain Modifiers
Defenders in defensive terrain have their Strength Points doubled when assaulted from non-defensive terrain. Attacking units do not get a benefit from terrain unless both the defender and at least one attacker are in defensive terrain in which case all attacking unit SPs are doubled.
Figure 4. Example of Bridge Assault.
Bridge and Ford Assaults Modifiers
An attack across a Bridge or Ford reduces the attacking total SPs by half. Bridge-Ford and defensive terrain modifiers may apply simultaneously.
In figure 4 above, for example, Union unit Crook is attacking Toombs across the Lower Bridge. Toombs strength of 3 in the combat is doubled to 6 SPs because it is in defensive terrain (Woods). At the same time, Crook's strength is halved from 8 to 4 because it is attacking across a Bridge.
9.0 Resolving Combats (Artillery Bombardments and Assaults)
Both bombardment and assault combats are resolved by performing the following steps.
- The active player announces which of his active units will attack which opposing units.
- Players sum the Strength Points of the attacking side and the defending side.
- Players form a Combat Ratio of Attacker to Defender total Strength Points.
- Find the column on the Combat Results Table (CRT) that represents the Combat Ratio, rounding up or down to the nearest column if an exact match is not available. For example, 8 to 4 is an exact match of the 2-1 column. The odds 4 to 8 is an exact match of the 1-2 column. If the ratio is 7 SP to 6 SP or 1.16, use the 1-1 column. If the ratio is halfway between columns (e.g., 1.50 <1.75 < 2.00), use the lower column (1.50).
- Roll a 1D6 to determine the row on the CRT.
- (Artillery Bombardment Combat Only) If any artillery unit in a bombarding combat is five (5) or more hexes to the target hex, not counting the firing hex, reduce the bombardment Combat Roll result in step 5 above by one; for example, a 1D6 roll of 5 becomes a 4.
- Find the CRT cell that is the intersection of the column and row. The owning player applies the result.
10.0 Applying Combat Results
Attacker Retreats (AR): Move all attacking units in the combat one or two hexes from all defending hexes in the combat.
Attacker Step Loss (A1): Reduce one attacking unit one step.
Exchange (EX): Attacker and defender each reduce one unit one step.
Defender Retreats (DR): Move defending units in the combat one or two hexes from all attacking units.
Defender Step Loss (D1): Reduce one defending unit one step.
11.0 Step Loss (A1, D1 and EX)
When applying a step loss, reduce infantry or cavalry before artillery if there is a choice.
12.0 Elimination and Advance
A unit that is to be reduced a step is eliminated if the unit is already at reduced strength. The attacker has the option to advance one attacking unit into a hex vacated by defender elimination or retreat because of the combat. Defending units do not advance if an attacker is eliminated or retreats.
13.0 Retreat Movement (AR and DR)
A unit can retreat as many as two hexes, not into an EZOC, following normal stacking rules, and into or through terrain it can normally occupy. A retreating unit can displace friendly units if stacking limits would be violated. Displaced units in turn obey defender retreat rules. Retreat across a Bridge, Ford, or Stream costs the retreating unit one step. If a unit cannot retreat, it remains in place and loses a step.
14.0 Search for a Hidden Ford
The Union player may attempt to discover a Hidden Ford across Antietam Creek by designating an Antietam Creek hex side of a hex occupied by a Union infantry or cavalry unit and rolling a 1D6. On a 5-6, the Ford Marker is placed on that hex side.
This procedure can be conducted in the Movement phase and only once per turn. Only one Hidden Ford can be discovered in the game. No actions can be performed by the searching Union unit after searching for a Hidden Ford whether successful in finding a Ford or not.
15.0 AP Hill Arrives!
AP Hill's Confederate division may arrive in the game after turn 10. At the start of the 11th turn and every turn thereafter until AP Hill arrives or the game ends, the Confederate player rolls one 1D6 and if the result is a 5 or 6, the units of AP Hill are placed on the map on hex 3716. When the Confederate player is active in the entry turn, AP Hill's units may unstack and conduct normal movement.
16.0 Victory Conditions
To determine the winner of the game, sum Union Victory Points in Key Landmark hexes occupied by or last occupied by Union infantry, and then examine the Victory Level Table (see Tables 3 and 4 on the Player Reference Sheet).