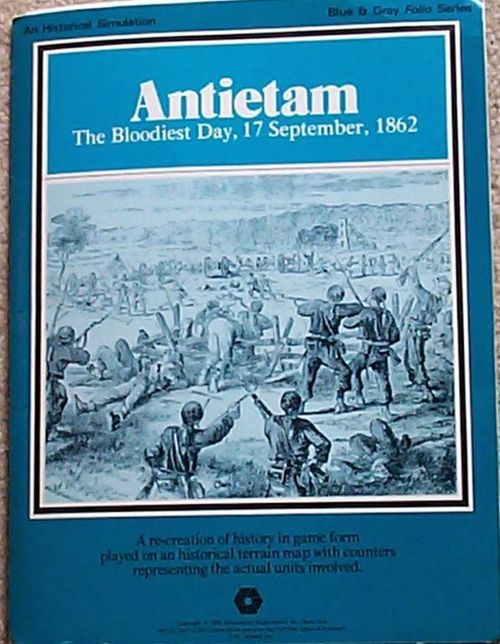
Antietam: The Bloodiest Day, 17 September 1862
Antietam: The Bloodiest Day, 17 September 1862 Rulebook
Table of Contents
Table of Contents
- A. Standard Rules
- 1.0 Introduction
- 2.0 Game Equipment
- 3.0 Setting Up a Game
- 4.0 Sequence of Play
- 5.0 Reinforcements
- 6.0 Movement
- 7.0 Zones of Control
- 8.0 Combat
- 8.1 Which Units Attack
- 8.2 Multiple Unit and Multi-Hex Combat
- 8.3 Combat Strength Unity and Order of Modification
- 8.4 Effects of Terrain on Combat
- 8.5 Diversionary Attacks
- 8.6 Combat Results Table
- 8.7 Retreating and Advancing as a Result of Combat
- 8.8 Displacement
- 8.9 Voluntary Reduction of Combat Odds
- 9.0 Artillery
- 10.0 Terrain Effects and Fieldworks
- 11.0 Night Game-Turns
- 12.0 Morale: Disordered, Shaken and Routed Units
- 13.0 Designer's and Developer's Notes
- B. Exclusive Rules: 7. Antietam
A. Standard Rules
1.0 Introduction
The Blue & Grey (revised) game system is a simulation of tactical warfare during the American Civil War era. Each game in the system represents one of the battles in the period. The playing pieces represent the actual units which participated, or could have participated, in the battles, and various information Markers to used assist in play. The map sheets represent the Terrain over which those units fought.
The rules are presented in two sections: the first contains standard rules, which are common to all the games in the Blue & Grey (revised) game system; the second section contains exclusive rules for each specific game, including Initial Deployment and Reinforcement Charts applicable to that game only.
This revision of the original system amends certain aspects to improve historicity without adding inappropriate complexity. A primary aim of these rules is to create a common system applicable to all games in this series, and to collate and codify certain of the various changes and developments that have occurred over the years into a unified whole. The "2nd edition" incorporates the more recent additions to the series published in the 1990s, which in turn has resulted in a further major overhaul of the system.
Players familiar with the classic S.P.I. Blue & Grey game system or any subsequent interpretation of it should read these rules carefully as they contain extensive changes and additions within the body of the text. In particular, the degree of differentiation in the functioning of the various unit types has been increased, and an enhanced element of tactical nuance has been added. In addition, an entirely new section on unit Morale replaces the original optional Attack Effectiveness rule.
This revised system does not attempt to recreate multi-battle campaigns. If these are of interest, Players should refer to the original rule books.
In summary, Players will hopefully find the system somewhat richer and more satisfying than hitherto, whilst retaining its essential simplicity.
S.P.I. capitalisation conventions are used throughout the rules and accompanying notes.
Amendments to previous versions of the 2nd edition will be included in light blue type when applicable.
2.0 Game Equipment
2.1 The Game Map
Each battle has its own individual map sheet. The map sheets portray the area in which each battle was fought. They include a representation of all the significant Terrain in the area of the battle. They may also display a variety of Charts and Tables; these are useful for identifying Terrain types, but are otherwise superseded by the Charts and Tables sheet included herein.
A hexagonal grid is superimposed over the Terrain features printed on the map sheets in order to regularize movement and positioning of the playing pieces. The hexagons comprising this grid are hereafter referred to as hexes.
Unless there are exclusive rules to the contrary in a particular game, it is not permitted for units to move off the map sheet; likewise, unless there are exclusive rules to the contrary, any units forced to retreat off the map sheet are eliminated.
2.2 Game Charts and Tables
Various visual aids are provided for the Players in order to simplify and illustrate certain game functions. These are the generic Combat Results Table and Terrain Effects Chart, and the individual Initial Deployment and Reinforcement Charts applicable to each game.
2.3 The Playing Pieces
Each battle has its own discrete playing pieces. The pieces represent the actual military units that took part in the original battle. The numbers and symbols on the pieces represent the strength, movement capability, and type of unit represented by that piece. These playing pieces will hereafter be referred to as "units". Most units are combat units; certain units represented in specific battles may be wagon trains; these are non-combat units.
Various Markers are also required for play. Each game will have a Game-Turn Marker used in conjunction with the Game-Turn Record Track to denote the present Game-Turn. In addition, Disrupted, Shaken, Routed and Rally Markers will have to be made by the Players or borrowed from other games. Finally, Breastwork Markers are provided with certain of the games in this series; otherwise they will have to be made or borrowed.
2.4 How to Read the Units
Unit Size, Unit Designation and Unit Type are shown on each unit, together with its Combat Strength.
The picture above displays a typical unit representation in this game system. Some games in the series include a second value on the face of each unit to the right of the Combat Strength. This represents the unit's Movement Allowance. Exception: cavalry units always have a minimum Movement Allowance of eight, regardless of any lower Movement Allowance printed on a unit itself.
Unit Designations. Union units are coloured blue and are generally identified by numerals in this sequence: brigade/division/corps (Roman numeral). Example: "2/3/IV" is the 2nd Brigade of the 3rd Division, 4th Corps. Alternatively, they may be identified by their commander's name. Confederate units are coloured grey and are generally identified by their commander's name. Differences in the shade of a unit's colour, or different colours within the unit's type indicator box or otherwise present on the unit counter reflect a unit's formation. Some games in the series may display this information in a slightly different manner.
Unit Types. The unit types are identified either by representative icons or stylized symbols (NATO symbology) within type indicator boxes on the counters:
- Infantry: Crossed webbing straps/infantryman icon
- Artillery: Cannon ball/cannon icon
- Horse artillery: Cannon ball & sabre/cannon and horse icon
- Cavalry: Sabre/cavalryman icon
- Gunboat: Gunboat symbol/icon
Certain other specialised units may exist in individual games.
Unit sizes (where given). Section: ••; Battery: I; Regiment: III; Brigade: X; Division: XX; Corps: XXX. Units not defined by a size notation are generally brigades.
Combat Strength. Combat Strength is the relative strength of a unit when attacking and defending, expressed in terms of Combat Strength Points. A unit's Combat Strength is subject to various positive and negative effects as a result of Range, Morale, Terrain and Night modifiers.
Movement Allowance. Movement Allowance is the maximum number of clear (level 1) Terrain hexes into which a unit may be moved in a single Movement Phase. In games where no Movement Allowance is shown on the counters, the Movement Allowance for all infantry and artillery units is six Movement Points, and the Movement Allowance for all cavalry units is eight Movement Points. More than one Movement Point may need to be expended for certain hexes entered.
2.5 Game Scale
Each hex on the map sheet represents 300 to 400 metres of real Terrain from side to side. Each Combat Strength Point generally represents between 125 and 500 men or a battery (4-6 guns) of artillery.
3.0 Setting Up a Game
The cardboard playing pieces for the game to be played should be punched out from the die-cut counter sheet. The blue coloured pieces represent Union forces; the grey coloured pieces represent Confederate forces. The map sheet should be unfolded and then back folded against the creases to make it lie flat. Players should determine who will be the Union Player and who will be the Confederate Player.
The Players then refer to the specific exclusive rules of the game to be played, and consult their respective Initial Deployment Charts. These charts identify the hex number, Combat Strength and historical designation of each unit which is in play on the map sheet prior to the first Game-Turn. Players should simultaneously place each of these units in its proper position on the map sheet. All remaining units should be placed aside and brought into play according to the Reinforcement Chart. Where units have reduced Combat Strengths on the reverse of the counter, these units are always set up or enter play with their higher values face up, unless specific instructions in the exclusive rules of the game being played otherwise dictate.
Once the units are set up, Players are ready to commence Game-Turn One; place the Game-Turn Marker in the first position on the Game-Turn Record Track.
In order to determine which Player is the First Player and which the Second Player, consult the exclusive rules applicable to the battle to be re-fought. There Players will also find a listing of any Reinforcement units, which are given on the Reinforcement Chart. Play proceeds according to the Sequence of Play through to the final Game-Turn.
4.0 Sequence of Play
The game is played in successive Game-Turns composed of alternate Player-Turns. During each Player-Turn, the Player manoeuvres his units and resolves combat in sequence, according to the following outline, and within the restrictions detailed in the rules which follow. Unless a Player has already achieved an automatic victory as determined under the exclusive rules of a specific game, at the conclusion of the final Game-Turn, the Victory Conditions are consulted and a winner is determined.
Sequence Outline
The Game-Turn is divided into a First Player-Turn and a Second Player-Turn. The Player whose Player-Turn is currently in progress is termed the Phasing Player. The activity which may take place during each Phase is outlined below:
1. First Player-Turn
A. Movement Phase: The Phasing Player may flip Breastworks Under Construction Markers to their Breastworks side. The Phasing Player may move all, some or none of his units as he desires within the limits and restrictions of the rules of Movement and Zones of Control, and the exclusive rules of the specific game being played. The Phasing Player may bring Reinforcement units on to the map as allowed by his Reinforcement Chart and the Reinforcement rules. The Phasing Player may indicate with a Marker certain units which are to construct Breastworks, or are intending to Rally in the ensuing Combat Phase; these units may not move in the present Movement Phase. The non-Phasing Player's units may not move.
B. Combat Phase: The Phasing Player may attempt to Rally any units indicated with a Rally Marker. The Phasing Player then uses his units to attack the non-Phasing Player's units according to the rules of Combat and Artillery. During this Phase neither Player may move his units except when required as a result of the retreat before combat or combat resolution procedures.
2. Second Player-Turn
The Second Player now becomes the Phasing Player and undertakes movement and combat in the manner described above.
3. Game-Turn Record Interphase
The Game-Turn Marker should be advanced one space on the Game-Turn Record Track to mark the passage of one Game-Turn and signal the start of another.
5.0 Reinforcements
General Rule. Both Players may receive Reinforcements according to their Reinforcement Charts. These enter on the edge of the map sheet in the appropriate hex or hexes. The Reinforcement units arrive in a columnar formation of stacks (one stack of two units behind the next stack of two units) at any time during the Player's Movement Phase of the Game-Turn indicated. The Owning Player may determine the exact order of arrival at the point at which he moves the Reinforcements on to the map sheet. He may hold back Reinforcements for entry in a future Game-Turn at his discretion.
Procedure. The Players should visualise the Reinforcements as a column of stacks of two units entering the map sheet from a chain of hexes off-map, so that the first two units brought on to the map each expend the appropriate Movement Points for entering the designated Reinforcement hex, the next two units expend one additional Movement Point to enter the Reinforcement hex, the third stack of two units each expend two additional Movement Points to enter the Reinforcement hex, and so forth. Exception: each subsequent stack of units entering the map sheet along a turnpike expend an additional 2/3rds Movement Point (not one Movement Point) to enter per prior stack entered in that map edge hex.
5.1 The Owning Player may enter his Reinforcement units on to the map sheet at any time during his Movement Phase.
5.2 Once a unit has entered the map sheet, it may move and engage in combat freely, just as any other unit already present.
5.3 If there are more Reinforcement units scheduled to arrive than can physically be entered on to the map sheet during a given Game-Turn; the un-entered balance of Reinforcement units may be brought into play on the following Game-Turn(s).
5.4 Reinforcement units may not enter the map sheet in a hex occupied by an Enemy unit but may enter the map sheet in a hex in an Enemy Zone of Control.
5.5 A Reinforcement unit that cannot move on to the map sheet on its scheduled Game-Turn of entry may enter at a map edge hex within three hexes of its scheduled entry hex on any later Game-Turn.
5.6 Units forced off the map sheet as a result of combat are considered eliminated for Victory Conditions purposes.
6.0 Movement
General Rule. During the Movement Phase, the Phasing Player may move as many or as few of his units as he wishes. They may be moved in any direction or combination of directions.
Procedure. Units are moved one at a time tracing a path of contiguous hexes through the hex grid. As a unit enters each hex, it must pay expend one or more Movement Points from its Movement Allowance.
6.1 Prohibitions
6.11 Movement may never take place out of sequence. A Player's units may be moved only during his own Movement Phase. During the Combat Phase, a unit which is either attacking or defending may have the option to retreat before combat, advance or be called upon to retreat after its combat is resolved. During the Enemy Player's Movement Phase and during both Players' Combat Phases, except when advancing or retreating before or as a result of combat, Friendly units may not be moved.
6.12 A unit may never enter a hex containing an Enemy unit.
6.13 A unit may never exit an Enemy controlled hex during any Movement Phase. Exception: Case 11.12. An Enemy controlled hex may be exited only during a retreat or advance before or as a result of combat (Case 8.7).
6.14 No combat may take place during the Movement Phase. Once a Player has begun to resolve combat, and has rolled the die, he has irreversibly initiated the Combat Phase.
6.15 The number of Movement Points expended by a unit during a single Movement Phase may not exceed the unit's Movement Allowance. Exception: Case 6.16. A unit may expend any portion of its Movement Allowance, but unused Movement Points may not be accumulated until another Movement Phase nor may they be transferred to another unit.
6.16 Units may always move one hex in a Friendly Movement Phase, unless prevented from doing so by Enemy units, Enemy Zones of Control, prohibited Terrain or play restrictions set out in the game's exclusive rules. Prohibited Terrain is a hex that a unit may not enter or a hex side that a unit cannot cross during movement, or when advancing or retreating before or after combat.
6.17 Movement from hex to hex must be through consecutive contiguous hexes.
6.18 Once a unit has been moved, and the Player's hand is taken from the unit, it may not be moved any further nor may the Player change its move without the consent of the opposing Player.
6.2 Effects of Terrain on Movement
6.21 A unit must expend one Movement Point to enter a clear (level 1) Terrain hex. To enter other types of Terrain, a unit must expend up to six Movement Points. Some hexes are prohibited to movement entirely. See Section 10.1, Terrain Effects Chart.
6.22 A unit which moves from one turnpike hex directly into an adjacent turnpike hex through a turnpike hex side expends two-thirds of a Movement Point, regardless of other Terrain in the hex. Exceptions: Cases 6.25 and 6.26.
6.23 A unit which moves from one road or railway hex directly into an adjacent road or railway hex through a road or railway hex side expends one Movement Point, regardless of other Terrain in the hex. Exceptions: Cases 6.25 and 6.26.
6.24 A unit which moves from one trail hex directly into an adjacent trail hex through a trail hex side expends one Movement Point unless the hex being entered contains woods/forest and/or rough Terrain, or swamp in which case the unit expends two Movement Points. If the hex being entered contains clear Terrain, the unit expends one Movement Point irrespective of the clear Terrain level. Exceptions: Cases 6.25 and 6.26.
6.25 Hex side Terrain costs are in addition to the Movement Point cost of entering a hex. These additional costs are not negated by turnpikes, roads, railways or trails. Exception: Case 6.26. In addition, units may not use turnpike, road, railway or trail Movement Point costs to move into the Zone of Control of an Enemy unit; they must use the Movement Point cost of the other Terrain in the hex.
6.26 A unit crosses a slope hex side when it moves to or from a slope hex from a non slope hex or from Terrain at one level to Terrain at another level. This movement may be up slope, costing one additional Movement Point, or down slope costing no additional Movement Points. A unit does not cross a slope hex side moving from one slope hex to another at the same level. Units moving up a slope along a turnpike, road, railway or trail do not incur the additional one Movement Point cost. Although rough Terrain is elevated, it is not considered a different level for the purposes of this rule.
6.27 Units may never enter river (exception: Case 9.6: Gunboats) or lake hexes. They may cross rivers only by moving through bridge, pontoon or river ferry hexes.
6.28 Units may never end their movement in a river ferry or pontoon hex unless this is specifically allowed in the exclusive rules of an individual game. They may enter a river ferry or pontoon hex only if they retain sufficient Movement Points to enter the river ferry or pontoon hex and the hex on the opposite bank in the same Movement Phase, and may only enter and exit river ferry hexes through the hex sides to which the arrow indicators point, or to which the pontoon symbol connects.
6.29 Units may never cross a non bridge or ford creek hex side. They may cross creek hex sides only by moving through bridge or ford hex sides. There is one additional Movement Point cost for moving through a bridge hex side. Movement through a ford hex side also costs one additional Movement Point.
6.3 Effects of Friendly Units (Stacking)
6.31 A Friendly unit may move through hexes occupied by other Friendly units. There is no additional cost for entering a Friendly occupied hex.
6.32 A Friendly unit may end any Phase stacked in the same hex with one other Friendly unit. That is, a maximum of two units (regardless of Combat Strength or unit type) may be stacked in a single hex. The stacking limit may be amended by the exclusive rules in a specific game.
6.33 There is no limit to the number of Friendly units which may pass through a single hex in one Movement Phase.
6.34 Friendly controlled hexes never inhibit the movement of Friendly units (Case 7.0).
6.4 Strategic Movement
6.41 Friendly units which begin the Movement Phase three or more hexes from any Enemy units (two intervening hexes) may use Strategic Movement.
6.42 Infantry, artillery and horse artillery units add two Movement Points to their Movement Allowance when using Strategic Movement.
6.43 Cavalry units add four Movement Points to their Movement Allowance when using Strategic Movement.
6.44 Units which use Strategic Movement may never move closer than three hexes to an Enemy unit. Strategic Movement may not be combined with regular movement in any way.
6.45 Units may only use Strategic Movement if their entire Movement Phase is spent moving along turnpikes, roads, railways and trails.
6.46 Units receive one less additional Movement Point when using Strategic Movement during a Night Game-Turn.
7.0 Zones of Control
General Rule. The six hexes immediately surrounding a hex constitute the Zone of Control of any combat units in that hex. Hexes upon which a unit exerts a Zone of Control are called controlled hexes and inhibit the movement of Enemy units. All units must cease movement when they enter an Enemy controlled hex. Friendly controlled hexes have no inhibiting effect on Friendly units.
7.1 All combat units exert a Zone of Control throughout the Game-Turn, regardless of the Phase or Player-Turn. The presence of a Zone of Control is never negated by Enemy or Friendly units (except as described in the exclusive rules with respect to the tracing of certain Lines of Communication). It follows that if a Friendly unit is in an Enemy controlled hex, the Enemy unit is also in its controlled hex; the two units are equally and mutually affected. Exception: Case 10.39.
7.2 The Movement Point cost to enter an Enemy controlled hex may never be less than two. Units do not pay any additional Movement Points to enter an Enemy controlled hex if the Movement Point cost to enter that hex is already at least two. Units may not enter an Enemy controlled hex whilst benefiting from turnpike, road, railway or trail Movement Point costs, and the Movement Point cost of hexside Terrain is always calculated in addition to the entry cost of the hex. For example, a unit crossing a stream to enter an Enemy controlled forest/woods hex would pay four Movement Points; similarly a unit crossing a stream to enter an Enemy controlled clear (level 1) hex would pay four Movement Points.
7.3 Artillery and horse artillery units may not enter the Zone of Control of an Enemy unit unless the hex is already occupied by a Friendly infantry or cavalry unit.
7.4 There are only two ways to exit a hex in an Enemy Zone of Control: either by retreat or advance prior to or as a result of combat, or by removal of the Enemy unit exerting the Zone of Control as a result of combat. Exception: Case 11.12.
7.5 If there is an Enemy and Friendly Zone of Control exerted over the same hex, both Zones of Control co-exist, and that hex is mutually controlled by both Players. There is no additional effect from having more than one unit exerting a Zone of Control into a single hex.
7.6 Zones of Control always extend into all six hexes adjacent to the controlling unit's hex, with the following exceptions: Zones of Control never extend through non-bridge and non-ford creek hex sides or into river, river ferry or pontoon hexes. Zones of Control do not extend into Breastworks Markers over Trench hexsides (Case 10.39). Zones of Control do extend across stream hex sides.
8.0 Combat
General Rule. Combat between opposing units in each others' Zones of Control is mandatory. Exception: Case 11.21. Artillery units (Section 9.0) are the only units which may attack units to which they are not adjacent. The Phasing Player is termed the Attacker; the non Phasing Player is the Defender, regardless of the overall strategic situation.
Procedure. The Attacker totals the adjusted Combat Strengths of all the units attacking a given hex and compares that total to the total adjusted Combat Strengths of the defending units in the hex or hexes under attack. The comparison is expressed as a ratio between attacking and defending Combat Strength Points (attacking Combat Strength Points divided by defending Combat Strength Points) and is simplified by rounding down to one of the odds ratios on the Combat Results Table. Example: if thirteen Combat Strength Points were attacking four Combat Strength Points, the combat odds ratio would be 3.25:1, rounded down (that is, always in favour of the defender) to 3:1.
Having determined the combat odds ratio, duly adjusted for the effect of any odds column shifts that are applicable, the Attacker rolls the die. The result indicates a line on the Combat Results Table (Case 8.6), which is cross-indexed with the column representing the combat odds. The intersection of line and column yields a combat result. This should be applied immediately to the involved units, before going on to resolve any other combat. Separate combats may be resolved in any order that the Attacker decides, as long as all combats are resolved during that Combat Phase.
8.1 Which Units Attack
8.11 All Enemy units that have Friendly units in their Zones of Control must be attacked by the Friendly (Phasing) Player's units in the Combat Phase. Exception: Case 11.21. The Phasing Player may resolve these attacks in any order desired, as long as all adjacent Enemy units exerting a Zone of Control on to Friendly units are attacked, within the requirements of Case 8.2.
8.12 All of the Phasing Player's units which end the Movement Phase in an Enemy controlled hex must attack some Enemy unit during the ensuing Combat Phase. Exception: Case 11.21. The Phasing Player may choose which attacking units will attack each defending hex, as long as all adjacent Friendly units participate in an attack, and all Enemy units exerting a Zone of Control on Friendly units are attacked.
8.13 An Enemy-occupied hex may be attacked by as many units as can be brought to bear in the six adjacent hexes, and by as many artillery units as are within Range and Line of Sight (Case 9.0).
8.14 No unit may attack more than once per Combat Phase and no Enemy unit may be attacked more than once per Combat Phase.
8.15 Units may only attack when adjacent to the defending unit. Exception: Case 9.0: Artillery.
8.2 Multiple Unit and Multi-Hex Combat
8.21 All units defending in a given hex must be attacked as a single Combat Strength. The Defender may not withhold a unit in a hex under attack. The Attacker must attack all the units in a stack together; the Combat Strengths of all the units in the hex are totalled, and this total Combat Strength is attacked. Different units in a given hex may not be attacked separately.
8.22 If more than one unit is in a given hex, these units may be used in separate attacks. Any adverse result suffered by a unit engaged in an attack does not affect another unit stacked with it that is engaged in another attack or is not attacking at all.
8.23 If a Phasing Player's unit is in the Zone of Control of more than one Enemy unit, it must attack all those adjacent Enemy units which are not engaged by some other attacking unit.
8.24 Units in two or more hexes may combine their Combat Strengths and attack a single hex, if all the attacking units are adjacent to, or are artillery within Range and Line of Sight of, the Enemy occupied hex.
8.25 Attacks may involve any number of attacking or defending units on different hexes. For an attack to be resolved as a single combat, however, all the attacking units must be adjacent to all the defending units, with the addition of bombarding artillery units, which need not be adjacent.
8.3 Combat Strength Unity and Order of Modification
8.31 A given unit's Combat Strength is always unitary; it may not be divided among different combats either in attacking or defending.
8.32 Unit Combat Strengths may be modified by Range, Morale, Terrain and Night effects. To avoid calculations involving the multiplication of fractions, rounding to the nearest integer is carried out at each stage of the adjustment to individual Combat Strengths, prior to final rounding. That is, after modification for each of Range, Morale and Terrain effects on an individual unit, a partial Combat Strength Point of 0.499 or lower is rounded down to '0', and a partial Combat Strength Point of 0.5 or higher is rounded up to '1'. Exception: the Combat Strength of any unit can never be modified at any stage to less than '1'. Each modifier is calculated using the rounded result of any preceding calculations. Finally, all adjusted Combat Strengths are combined and if necessary adjusted in total for Night, again rounding to the nearest integer.
8.4 Effects of Terrain on Combat
8.41 Units attacking into or over certain types of Terrain have their Combat Strength halved, with fractions rounded to the nearest integer. Example: a unit with a Combat Strength of '5' would attack a rough Terrain hex at an adjusted Combat Strength of '3'.
8.42 Certain types of Terrain may result in a one or two "odds column shift(s)" adjustment to the final odds ratio. This is enacted exactly as described, with the proviso that the odds cannot be shifted below 1:5. Odds Column shifts above 6:1 may confer a favourable die roll modification on the Attacker (Case 8.61). Example: an attack comprising 14 Combat Strength Points against a defence of 2 Combat Strength Points located in forest/woods would be modified to a 6:1 attack.
8.43 Where more than one Terrain type affects the Attacker's Combat Strength, only the Terrain type most favourable to the Defender is used. It is the Defender's choice which Terrain benefit to choose if the question arises. For example, a unit is attacking two hexes, one of which is clear and the other is rough Terrain; the Attacker's Combat Strength is halved. See the Terrain Effects Chart (Case 10.1) for a complete summary.
8.44 Where more than one Terrain type affects the combat with different odds column shift adjustments, only the Terrain type most favourable to the Defender is used. It is the Defender's choice which odds column shift Terrain benefit to choose if the question arises. Exception: certain odds column shifts are favourable to the Attacker (shifts to the right); the most favourable shift for the Attacker is compared to the most favourable shift for the Defender and the net shift is applied to the odds calculation.
8.45 The Attacker's units may suffer the halving of their Combat Strengths, in addition to adverse (or favourable) odds column shifts in an individual attack. Exception: the odds column shift for attacking a forest/woods hex is instead of any other Terrain benefit, that is, the defender may only choose to employ the odds column shift for forest/woods instead of and not in addition to any other Terrain benefit. For example: a unit is attacking two hexes, one of which is forest/woods and the other forest/woods-rough Terrain; the Attacker's Combat Strength is halved or the Defender may choose to use an odds column shift.
8.46 Redoubt and entrenchment hex sides are a special case in that they both halve the Combat Strength of units attacking over them, but also confer an odds column shift to the left. Redoubt hex sides are directional in that the Enemy side of a redoubt hex side is the side which contains the "barbed" redoubt Terrain symbol. Units on the Enemy side of a redoubt hex side gain no benefit. Entrenchments also are directional as explained in the exclusive rules of an individual game. Units on the Enemy side of an entrenchment hex side gain no benefit. Zones of Control extend both ways across redoubt or entrenchment hex sides. Both Confederate and Union units are eligible to gain the defensive benefit if applicable for any Friendly redoubt or entrenchment hex side.
8.47 The Combat Strength of artillery units attacking across water obstacles, including (but not limited to) bridge, ford and stream hex sides is not halved due to Terrain.
8.5 Diversionary Attacks
A Player may make certain attacks at poor odds in order that attacks against other Defending units may be made at higher odds (by allocating most of the attacking force to the major objective). These attacks are known as "diversionary" or "holding" attacks. Artillery bombardment (Case 9.1) is particularly effective in this role, as there are no mandatory adverse consequences.
8.6 Combat Results Table
(see Charts and Tables sheet)
| Die roll | 1:5 | 1:4 | 1:3 | 1:2 | 2:3 | 1:1 | 3:2 | 2:1 | 3:1 | 4:1 | 5:1 | 6:1 |
|---|---|---|---|---|---|---|---|---|---|---|---|---|
| 1 | AR | AR | AR | DR | DR | DR | DR | DR | DE | DE | DE | DE |
| 2 | AR | AR | AR | AR | DR |
Attacks at greater than (or shifted beyond) 6:1 are treated as 6:1 with the following die roll modifications: 8:1 '-1'; 10:1 '-2', 12:1 '-3'. Attacks at less than (or shifted beyond) 1:5 are treated as 1:5.
Combat Results (key as printed): AE = Attacker Eliminated; AE* = Partial Attacker Eliminated; AR = Attacker Retreat; EX* = Partial Exchange; EX = Exchange; DR = Defender Retreat; DE = Defender Eliminated.
- Ae = Attacker Eliminated. All attacking units are eliminated.
- Ae* = Partial Attacker Eliminated. One attacking units is eliminated (Defender's choice). All remaining attacking units must retreat one hex (case 8.7). All remaining attacking units are Disordered (Case 12.11).
- Ar = Attacker Retreats. All attacking units must retreat one hex (Case 8.7). All attacking units are Disordered (Case 12.11).
- Ex = Exchange. All defending units are eliminated. The Attacker must eliminate attacking units whose total printed (face value) Combat Strength at least equals the total printed Combat Strength of the eliminated defending units. Only units which participated in a particular attack may be eliminated. All remaining attacking units must die roll for Disorder (Case 12.13).
- Ex* = Partial Exchange. One defending unit is eliminated (Attacker's choice). The Attacker must eliminate attacking units whose total printed (face value) Combat Strength at least equals the total printed Combat Strength of the eliminated defending unit. Only units which participated in a particular attack may be eliminated. All remaining defending units must retreat one hex (case 8.7). All remaining units must die roll for Disorder (Case 12.13).
- Dr = Defender Retreats. All defending units must retreat one hex (Case 8.7). All defending units must die roll for Disorder (Case 12.12).
- De = Defender Eliminated. All defending units are eliminated.
8.61 An attack at odds exceeding 6:1 is resolved on the 6:1 column of the Combat Results Table, but one is subtracted from the combat die roll for each two odds levels above 6:1 as follows: 8:1: subtract '1', 10:1 subtract '2', 12:1 subtract '3'.
8.62 An attack at odds of less than 1:5 is resolved on the 1:5 column of the Combat Results Table.
8.7 Retreating and Advancing as a Result of Combat
8.71 When the Combat Result requires that a Player's units be retreated, the Owning Player must immediately move those units one hex so that they are no longer in an Enemy controlled hex. The Owning Player may decide the direction in which each of his retreating units moves. Two units in the same hex may retreat in two different directions.
8.72 A retreating unit may not retreat into a prohibited hex, cross a prohibited hex side, or enter an Enemy controlled hex. A retreating unit may not retreat into a pontoon or river ferry hex, or off the map sheet or any defined portion of the map sheet considered to be "in play". If no hex is available to retreat into, the unit is eliminated.
8.73 A retreating unit may enter a vacant hex (within the restrictions of Case 8.72) or it may stack with another Friendly unit (within the Stacking restrictions) as long as the unit it stacks with is not in an Enemy controlled hex. If there is no other alternative, it may Displace an adjacent Friendly unit (Case 8.8).
8.74 If a unit is retreated into a Friendly hex which is subsequently attacked (including by artillery bombardment), the previously retreated unit does not contribute its Combat Strength to the defence (Case 8.14), but it does suffer the result of the attack.
8.75 Whenever a hex is vacated as a result of combat one victorious non-Routed, non-artillery unit which participated in that combat may advance into the vacated hex. This advance may be made regardless of Enemy Zones of Control. The option to advance must be exercised immediately, before any other combat resolution. A unit is never forced to advance. A unit may never advance more than one hex as a result of combat. Advancing units may neither attack nor be attacked in that Combat Phase, even if their advance places them next to Enemy units whose combats are yet to be resolved, or who were not involved in any combat. Note that advances after combat are useful in cutting off the retreat of Enemy units whose combat has not yet been resolved.
8.76 Only one victorious unit may advance into each vacated hex. If two hexes are vacated as a result of a single attack, the victorious Player may advance one unit into each vacated hex.
8.77 Whenever one or more cavalry units are attacked, and the attacking units do not include any cavalry units, the defending Player may attempt to retreat some or all of his cavalry units before combat. The attacking Player must give the Defender the opportunity to make this decision, and the Defender must choose whether to retreat one or more of his cavalry units before the combat resolution die roll. The cavalry units must be able to retreat two hexes, and all normal retreat rules apply (including Displacement, Case 8.8). If the defending cavalry units cannot retreat two hexes, they may not retreat before combat. The Defender rolls a die; on a '1-5' all defending cavalry units chosen to retreat must retreat two hexes before combat. On a die-toll of '6' the cavalry units may not retreat before combat and defend as normal. The Attacker may advance one unit into each of the hexes vacated by the Defender before combat. The presence of non-cavalry defending units does not prevent defending cavalry units from retreating before combat, and not all cavalry units must retreat before combat; in this case the remaining defending units are attacked as normal. In circumstances where a hex(es) was vacated before combat, and a hex(es) was vacated as a result of combat, only one attacking unit may ever advance into each individual vacated hex.
8.78 Cavalry may not retreat before combat from a bombardment attack unless they are adjacent to other Enemy units. Any attacking artillery units involved are assumed to have completed their attack for that Combat Phase; they may not bombard or combine with any other attack. Cavalry may not retreat before combat in the Owning Player's Combat Phase. Retreat before combat never results in Disorder (Case 12.19).
8.79 In a combined attack, if all the defending units are cavalry and they all retreat before combat, any attacking artillery units involved are assumed to have completed their attack for the Combat Phase; they may not bombard or combine with any other attack.
8.8 Displacement
8.81 If the only hex available to a retreating unit is one into which the unit could not normally move because of stacking restrictions (Case 6.31), then one of the units in the hex retreated into must be Displaced. The Displaced unit is retreated by the Owning Player (as if it were retreating as a result of combat) and its position is taken by the original retreating unit. The Displaced unit itself may not be forced into Enemy controlled hexes nor other prohibited hexes. One retreating unit Displaces only one unit in a stack; two retreating units Displace two.
8.82 If the Displacement would cause any of the Displaced units to be eliminated, the Displacement does not occur and the retreating unit is instead eliminated. Displaced units can themselves Displace other Friendly units in a chain reaction of Displacement, if that is the only permitted path of retreat open to them. A unit may be Displaced more than once per Combat Phase. Displaced artillery units which have not yet engaged in an attack may no longer do so during that Combat Phase. This may affect the composition of any remaining attacks. Units may not Displace Friendly units if they have other paths of retreat open to them.
8.83 Displacement never results in Disorder (Case 12.18).
8.9 Voluntary Reduction of Combat Odds
Prior to the resolution of any attack, the Attacking Player may announce that he wishes to reduce the combat odds column applicable to that attack. He incurs no responsibility or penalty by doing this, but he may not change his mind subsequent to the die roll. Example: an attack is computed to be a 5:1 attack. The Player announces that he desires a 3:1 attack, and resolves it using that odds column. Players may wish to employ this option in order to avoid excess casualties through Exchange combat results, or in an attempt to retreat Friendly units.
9.0 Artillery
General Rule. Unlike infantry and cavalry units, artillery and horse artillery units may participate in attacks by bombarding a defending unit. Artillery units may bombard an adjacent Enemy unit if that unit does not exert a Zone of Control on the artillery unit, or from two or three hexes distance if they have a Line of Sight (Case 9.3). Artillery units must participate in combat when in the Zone of Control of Enemy units. In other words, artillery units may participate in two types of attack, depending on their proximity to an Enemy Zone of Control. Unlike other units, artillery units are never destroyed or forced to retreat when bombarding a unit; they are affected by all combat results when they are in the Zone of Control of the unit they are attacking. Horse artillery units are treated as artillery in all respects other than they have an increased Movement Allowance.
Procedure. Determine the odds of the attack in exactly the same manner as any other attack. All results are applied similarly, except that bombarding artillery units (i.e., artillery units not in an Enemy Zone of Control) are not affected by combat results (exception: Case 9.17). Thus, if an Exchange were the result in an attack conducted solely by bombarding artillery unit(s), the defending unit(s) would be eliminated, but the bombarding artillery unit(s) would not be affected. Of course, other units cooperating with the bombarding artillery unit(s) from an adjacent position (including adjacent artillery units if in the Zone of Control of any defending unit) would be affected by combat results, and they would suffer the effects of an Exchange result.
9.1 Bombardment Attacks
9.11 Artillery units may attack non-adjacent Enemy units up to three hexes distant, but they are never forced to attack an Enemy unit merely because it is within Range.
9.12 Range from the bombarding artillery unit to the target hex is counted by including the target hex, but not the bombarding unit's hex in the calculation.
9.13 Artillery units may only attack a single Enemy occupied hex when attacking from a non-adjacent hex, except when making a combined attack with infantry or cavalry (Case 9.2).
9.14 If two artillery units in the same hex are bombarding, they need not both bombard the same hex.
9.15 Artillery attacking from a non-adjacent hex or an adjacent hex not in an Enemy Zone of Control suffer no adverse combat results; in this circumstance they are never destroyed or retreated as a result of their own attacks (exception: Case 9.17). Artillery may bombard across a prohibited hex or hex side even if adjacent to the target hex without suffering any adverse effects.
9.16 The Combat Strength of bombarding artillery unit is not halved over water obstacles, including bridges, fords and streams (Cases 8.47 and 10.1).
9.17 Bombarding artillery units may voluntarily elect to comply with an Attacker Retreat if it is the combat result.
9.18 Artillery units may not bombard at less than 1:5 odds.
9.19 The Combat Strength of artillery units bombarding at three hexes Range is reduced by one-third, rounding to the nearest integer but with a minimum Combat Strength of '1' per artillery unit before Terrain adjustments.
9.2 Combined Attacks
9.21 Artillery units may attack in concert with other bombarding artillery units or in concert with any Friendly units which are adjacent to Enemy units, adding their Combat Strength to the attack. This is known as a combined attack.
9.22 If, in a combined attack, Friendly units are attacking Enemy units in more than one hex, artillery units need only be within Range and Line of Sight of one of the defending hexes to add their Combat Strength to the attack.
9.23 The Combat Strength of an artillery unit making a combined attack is not halved over water obstacles, including bridges, fords and streams (Cases 8.47 and 10.1).
9.24 When making a combined attack with bombarding artillery units, infantry and cavalry units, and attacking artillery units in an Enemy Zone of Control, always suffer all Combat Results, although bombarding artillery units do not.
9.25 The Combat Strength of artillery units contributing to combined attacks at three hexes Range is reduced by one-third, rounding to the nearest integer but with a minimum Combat Strength of '1' per artillery unit before Terrain adjustments.
9.3 Line of Sight
9.31 To determine if an artillery unit may bombard a given hex, lay a straight edge from the hex occupied by the bombarding artillery unit to the target hex. This straight line is the potential Line of Sight. If any of the hexes intervening between the bombarding hex and the target hex are blocking Terrain, the target hex may not be bombarded by that artillery unit.
9.32 If the potential Line of Sight is congruent to a hex side (that is, falling exactly between two hexes) it is blocked only if both hexes adjacent to that hex side are blocking Terrain.
9.33 Hexes containing forest/woods (with or without rough) and town/urban Terrain are blocking hexes if on the same or a higher Elevation as either the bombarding or the target units. Rough Terrain by itself does not block line of sight unless both firing unit and target are at a lower Elevation (Case 9.35).
9.34 Rough (and forest/woods-rough) Terrain hexes represent a higher Elevation than clear (level 1) Terrain. In addition, level 2 and 3 clear Terrain represent respectively higher Elevations. If a bombarding artillery unit and its target unit are both located on such Terrain, then blocking Terrain at a lower Elevation is ignored when tracing a Line of Sight.
9.35 The Line of Sight from one non-Elevated hex to another non-Elevated hex is blocked if there is an Elevated hex between them. Likewise, the Line of Sight between Elevated hexes may be blocked by an intervening hex of even higher Elevation (clear level 3).
9.36 Neither the Terrain in (or the hex side adjacent to) the target hex and the Terrain in (or the hex side adjacent to) the hex of the bombarding artillery unit block the Line of Sight. A ridge hex side blocks Line of Sight only if it is adjacent to neither the attacking or the defending units.
9.37 Enemy and/or Friendly units do not block the Line of Sight.
9.4 Adjacent Attacks
9.41 When occupying a hex in an Enemy Zone of Control, artillery units must participate in an attack against adjacent Enemy unit(s) that are exerting this Zone of Control. When an artillery unit begins the Combat Phase in an Enemy controlled hex it may not bombard.
9.42 When attacking from an Enemy controlled hex, artillery units may attack as many Enemy units as they are adjacent to, but may not attack non-adjacent Enemy units or adjacent Enemy units that are not exerting a Zone of Control into the artillery unit's hex.
9.43 Artillery units attacking from an Enemy controlled hex must suffer the Combat Results of their attacks.
9.44 Terrain never prohibits artillery attacks into adjacent hexes.
9.45 The Combat Strength of an artillery unit making an adjacent attack is not halved over water obstacles, including bridges, fords and streams (Cases 8.47 and 10.1).
9.46 An artillery unit not in an Enemy Zone of Control may make a bombardment attack when across a creek hex side from an adjacent Enemy unit. Any Enemy unit within Range could be bombarded, including the adjacent unit across the creek hex side.
9.47 Artillery units may never advance after combat.
9.48 The Combat Strength of artillery units making an adjacent attack is increased by one-half, rounded to the nearest integer, before Terrain adjustments.
9.5 Defence
9.51 Artillery units may never add their Combat Strength to another defending unit's Combat Strength by bombardment. They may only bombard during their own Combat Phase.
9.52 When artillery units are themselves attacked, they suffer all Combat Results in the same manner as other units, even when bombarded by Enemy artillery units.
9.53 The Combat Strength of artillery units is increased in defence by one-half (rounded to the nearest integer) if the attack includes adjacent units and the artillery unit is not Routed (Case 12.35) and either stacked with or adjacent to a Friendly infantry or cavalry unit.
9.6 Gunboats
9.61 The Union Player may begin the game with, or may receive as Reinforcements, Gunboats.
9.62 Gunboats have an unlimited Movement Allowance, but may only move through all river hexes (and hex 1701 in Shiloh). Each Game-Turn they may be moved through and to any number of contiguous river hexes.
9.63 Two Gunboats may stack in the same hex.
9.64 Gunboats have no Zone of Control and are not affected by Enemy Zones of Control.
9.65 Gunboats attack in the same manner as artillery but with a Range of six hexes. Exception: the Combat Strength of Gunboats is not affected by Range, that is, their Combat Strength is not increased by one-half for an adjacent attack, nor decreased by one-third for an attack at three or more hexes Range.
9.66 Gunboats may never be attacked.
10.0 Terrain Effects and Fieldworks
10.1 Terrain Effects Chart
(see Charts & Tables sheet; Terrain Key on map)
| Terrain type | Movement Points to enter or cross | Combat effect if attacking over or defender is in | Notes |
|---|---|---|---|
| Clear (level 1) | 1 | None | Default clear Terrain in all games |
| Clear (level 2) | 1 | None | May block Line of Sight |
| Clear (level 3) | 2 | None | May block Line of Sight |
| Forest/woods | 2/3* | One odds column shift left | May block Line of Sight |
| Rough | 3 | Attacker halved | May block Line of Sight |
| Forest/woods-rough | 5/6* | Attacker halved |
* Where two Movement Point costs are indicated for a particular terrain type, the first cost applies to infantry and cavalry units, and the second cost applies to artillery and horse artillery units.
# The Atlanta Campaign entrenchments. The Friendly side of an entrenchment hex side is defined as follows: a unit defending inside an entrenchment must be closer to hex 3613 than the Attacker. Exceptions: a unit is inside an entrenchment (i) on the Ezra Church/Atlanta map sheet between hexes 1026 and 2616 inclusive if it is positioned south of the entrenchment hex side; (ii) on the Peachtree Creek map sheet if it is positioned south of the entrenchment hex side or west of the entrenchment hex sides in hexes 5028, 5227 or 5327.
10.2 Terrain Effects
10.21 The Combat Strength of a unit may be halved in attack into or across certain Terrain types. Whilst halving the Combat Strength, always round to the nearest integer. The participation of other units (including artillery units), which may not themselves be halved in Combat Strength, has no effect on this. That is, the Combat Strength of some attacking units may be halved due to Terrain, whilst others are unaffected.
10.22 A unit's Combat Strength can never be reduced by more than half due to Terrain. A unit's Combat Strength may never be reduced to less than one. Exception: Night (Case 11.23).
10.23 All attacking units in a particular combat must be subject to the effects of an odds column shift in respect of at least one of the Defender's hexes in order for the Defender to benefit from the odds column shift. For example, if some attacking units are attacking across a redoubt hex side, and some attacking units are not, the odds column shift for the redoubt hex side would not apply. Note that the Combat Strength of those specific attacking units (including bombarding artillery) attacking across the redoubt hex side would be halved.
10.24 Units attacking from a particular hex are subject to odds column shifts if the odds column shift applies to any hex those units are attacking. For example, in the case of an attack against two hexes, if all the attacking units are attacking across a stream hex side against one of the two hexes, and into rough Terrain in the other hex, they would be halved in Combat Strength and one odds column shift to the left would apply.
10.25 The Defender may choose to employ only the most favourable odds column shift applicable to the combat. For example: a Breastworks Marker in a forest/woods hex has no effect, whereas a Breastworks Marker in a forest/woods-rough hex would confer a one odds column shift to the left in a combat where all the attacking units attacked over the Breastworks Marker's relevant hexsides, in addition to the attacking units being halved in Combat Strength.
10.26 Certain odds column shifts (shifts to the right) are favourable to the Attacker. The Attacker may choose to employ the most favourable odds column shift to the right applicable to the attack.
10.27 If odds column shifts to the left and odds column shifts to the right are both applicable to a particular attack, the most favourable opposing odds column shifts are compared and the net odds column shift applied to the attack.
10.3 Fieldworks
10.31 Fieldworks comprise Breastworks and Trenches. Other types of Terrain printed on the map sheet representing man-made defences and obstacles are not included in this definition and their effects are explained elsewhere.
10.32 Breastworks and Trenches are hasty defences represented by Breastworks Markers. The Markers have a Breastworks symbol and one odds column shift to the left notation on one side and an "Under Construction" symbol and one odds column shift to the right notation on the other side.
10.33 Breastworks may be called for in the Initial Deployment instructions of the exclusive rules of the game being played. Any Breastworks Marker placed as part of a Player's Initial Deployment is regarded as a Trench (Case 10.39); Trenches may not be constructed in the course a game.
10.34 In games taking place in 1863 onwards, Players may construct Breastworks according to the following procedure:
i) If an infantry unit does not move in the Owning Player's Movement Phase and there are no Enemy units within three hexes, a Breastworks Marker may be placed on the unit with its Under Construction symbol side showing. In any game in which a Player is restricted in the number of units he is able to move in a particular Game-Turn, any unit constructing a Breastworks must form part of that movement quota during each of the two Game-Turns of construction. If the unit is attacked in the Enemy Player-Turn, an odds column shift of one to the right is applicable and the Breastworks Under Construction Marker is automatically removed. Similarly, if an Enemy unit ends a Combat Phase adjacent to a Friendly unit with a Breastworks Under Construction Marker, the Marker is removed.
ii) If a unit with a Breastworks Under Construction Marker does not move in its following Movement Phase, the Breastworks Under Construction Marker may be flipped to its Breastworks side at the start of the ensuing Friendly Combat Phase. The Player must at this time determine the orientation of the Breastworks Marker, which must be positioned to face three adjacent hex sides. The orientation of the Breastworks Marker may not subsequently be changed.
A Disordered, Shaken or Routed unit may not construct Breastworks.
10.35 If a unit constructing Breastworks is forced to retreat as a result of artillery bombardment the Breastworks Under Construction Marker is removed.
10.36 No more than one Breastworks Marker may ever occupy a single hex.
10.37 Once placed, either Player may remove a Breastworks Marker at the end of any Friendly Combat Phase that at least one of his infantry or cavalry units remains in the Breastworks Marker hex. A unit may move into the Breastworks Marker hex in the Movement Phase but may not remove a Breastworks Marker until the end of a Friendly Combat Phase.
10.38 If attacked entirely through the Breastworks hex sides indicated on the Breastworks Marker, a unit receives an odds column shift of one to the left. If any adjacent units are attacking through hex sides not covered by the Breastworks Marker, the defending units lose the benefit of the odds column shift. Exception: units in Breastworks never lose the odds column shift to the left due to non-adjacent artillery attacks from any direction.
10.39 Breastworks Markers placed during the Initial Deployment are regarded as Trenches. In addition to having the attributes of Breastworks, Zones of Control do not extend into Trench hexes across Trench hex sides. Units under Breastworks (Trench) Markers are not required to attack adjacent Enemy units through a Trench hex side. However, if a unit under a Breastworks (Trench) Marker does attack, either voluntarily or due to being in the Zone of Control of Enemy units, it must attack all adjacent units in compliance with the normal rules of combat.
11.0 Night Game-Turns
General Rule. The tinted Game-Turns on the Game-Turn Record Track are Night Game-Turns, and differ from Day Game-Turns as follows.
11.1 Effect on Movement
11.11 The basic Movement Allowance of units is reduced by one. The additional Movement Points conferred by Strategic Movement are also reduced by one (Cases 6.42 and 6.43).
11.12 Units beginning the Friendly Movement Phase in an Enemy Zone of Control can leave that Enemy controlled hex during a Night Game-Turn. Units leaving an Enemy Zone of Control may not subsequently re-enter an Enemy Zone of Control in the same Night Game-Turn. Leaving an Enemy controlled hex during a Night Game-Turn expends no additional Movement Points.
11.2 Effect on Combat
11.21 Attacking during a Night Game-Turn is compulsory for all units that have moved into an Enemy Zone of Control during that Night Game-Turn. Attacking at Night is voluntary for any units that have remained in an Enemy Zone of Control during a Night Game-Turn. Other than the Attacker having the option not to include stationary units in an attack, the normal rules of Combat apply.
11.22 Non-attacking units are not affected in any way by Night attacks. They may not advance after combat, nor are they affected by the retreat of other Friendly units. An Enemy unit may not advance after combat into a hex containing a non-attacking unit, even if an attacking unit was retreated from that hex as a result of combat.
11.23 The combined total adjusted Combat Strengths of all attacking units during a Night Game-Turn combat may be doubled or halved (round to the nearest integer) after all other adjustments. Immediately prior to the attack die roll the Attacker rolls a separate die to determine whether his units' Combat Strengths are affected for the ensuing combat. A die roll of '1' results in the total attacking units' Combat Strengths being doubled. A die roll of '2-3' results in the total attacking units' Combat Strengths being unaffected. A die roll of '4-6' results in the total attacking units' Combat Strengths being halved.
11.24 Artillery may not attack from a non-adjacent hex during a Night Game-Turn.
11.3 Effect on Disrupted, Shaken and Routed Units
Disrupted, Shaken and Routed Markers are removed from all Friendly units not in an Enemy Zone of Control at the start of any Friendly Night Game-Turn Combat Phase (Case 12.41). Exception: Case 12.17.
12.0 Morale: Disordered, Shaken and Routed Units
General Rule. Whenever a unit engages in combat and receives a Partial Attacker Eliminated (Ae*), Attacker Retreat (Ar), Defender Retreat (Dr), Exchange (Ex) or Partial Exchange (Ex*) result, it may become "Disordered". Disordered units may become "Shaken", and Shaken units may become "Routed". Disordered, Shaken and Routed units may be "Rallied" by the Friendly Player. Players will be required to make or borrow from another game Markers showing Disordered, Shaken, Routed and Rallying status.
12.1 How Units Become Disordered, Shaken and Routed
12.11 Surviving attacking units become Disordered when they suffer a Combat Result of Partial Attacker Eliminated or Attacker Retreat. Attacking units only become Disordered if they attack from an Enemy controlled hex. Exception: attacking artillery units that retreat from an Enemy controlled hex suffer an additional Disorder result (that is, becoming at least Shaken).
12.12 Defending units in an Enemy Zone of Control may become Disordered when they suffer a Combat Result of Defender Retreat. After all retreats and advances relating to a particular combat are completed, the Friendly Player rolls a die for each retreating unit; on a result of '4-6' the unit becomes Disordered. Exception: retreating artillery units are automatically Disordered.
12.13 Any unit attacking from or defending in an Enemy controlled hex surviving an Exchange or Partial Exchange combat result may become Disordered. After all advances relating to a particular combat are completed, the Friendly Player rolls a die for each surviving unit; on a result of '4-6' the unit becomes Disordered.
12.14 Any unit already Disordered suffering a further Disorder becomes Shaken. Exception: Case 12.17.
12.15 Any unit already Shaken suffering a further Disorder becomes Routed. Routed units suffering a further Disorder are not affected. Exception: Case 12.17.
12.16 At the start of his Combat Phase a Player may voluntarily replace a Shaken marker with a Routed marker on any Friendly unit which did not move in the current Player-Turn, thereby avoiding the necessity of making an unfavourable attack.
12.17 Units entering or occupying town/urban hexes are automatically Disordered. Disordered, Shaken or Routed units are not additionally affected. A unit Rallying in a town/urban hex will remain at least Disordered regardless of the success of the Rally result.
12.18 A unit forced to Displace is not subject to Disorder.
12.19 A cavalry unit retreating before combat is not subject to Disorder.
12.2 Effects of Disordered, Shaken and Routed Status on a Unit's Combat Strength
12.21 A Disordered Marker is placed on Disordered units to denote their status. The Combat Strengths of Attacking Disordered units are reduced individually by one-third (rounded to the nearest integer). The Combat Strengths of Defending Disordered units are unaffected.
12.22 A Shaken Marker is placed on Shaken units to denote their status. The Combat Strengths of Attacking Shaken units are reduced individually by two-thirds (rounded to the nearest integer). The Combat Strengths of Defending Shaken units are reduced individually by one-third (rounded to the nearest integer).
12.23 A Routed Marker is placed on Routed units to denote their status. Routed units may not attack. The Combat Strengths of Defending Routed units are reduced individually by two-thirds (rounded to the nearest integer).
12.24 A unit's Combat Strength may never be reduced below '1', whether as a result of Terrain, Range, Night and/or Morale effects. Exception: Night (Case 11.23).
12.25 A unit's Combat Strength is adjusted individually for the effects of Terrain, Morale and Range, prior to combining the total adjusted Combat Strength of all units engaged in a combat. This total Combat Strength may then be adjusted for Night.
12.26 A unit's unmodified Combat Strength is always used to calculate losses in an Exchange or Partial Exchange combat result.
12.3 Additional Effects on Routed Units
12.31 Routed units may not enter an Enemy controlled hex until they have recovered from Rout. They may continue to move and defend in a normal manner, and retain a Zone of Control.
12.32 If, at the beginning of any Friendly Combat Phase, a Friendly Routed unit is in an Enemy controlled hex, either all the Enemy units must be retreated in combat such that no Enemy Zone of Control is exerted into the Routed unit's hex, or the Friendly Routed unit must retreat at the end of the Combat Phase according to the rules of retreat after combat (Case 8.7). This does not trigger an advance after combat by an Enemy unit.
12.33 A Routed unit which does not begin the Combat Phase in an Enemy controlled hex is not required to retreat as outlined in Case 12.32, even if (due to the advance of Enemy units after combat) the unit is in an Enemy controlled hex at the end of the Combat Phase.
12.34 Whenever one or more Routed units are attacked, the attacking Player may choose to retreat Enemy Routed units before combat. The Attacker must choose whether to retreat any or all Enemy Routed units before the combat resolution die roll. The Routed units must retreat two hexes, and all normal retreat rules apply. If any Routed units cannot retreat two hexes, those units are eliminated. The Attacker may advance one attacking unit into each of the Defender's original vacated hexes unless other non-Routed units remain in those hexes. The presence of non-Routed defending units does not prevent defending Routed units from being obliged to retreat before combat, and in this case the remaining defending units are attacked as normal. Only one attacking unit may advance into each vacated hex, irrespective of whether a hex(es) was vacated before combat, or a hex(es) was vacated as a result of combat.
12.35 A Routed unit may not advance after combat.
12.36 The Combat Strength of Routed artillery units is not increased in defence against adjacent attacking units (Case 9.53).
12.4 How Units Recover from Being Disordered, Shaken or Routed
12.41 A unit remains Disordered, Shaken or Routed until:
(a) The beginning of any Night Game-Turn Combat Phase. At the beginning of any Night Game-Turn Combat Phase all Disordered, Shaken and Routed Markers are immediately removed from any Friendly units not in an Enemy Zone of Control; or
(b) Disordered, Shaken and Routed units may also recover if the Friendly Player chooses to Rally them. At the beginning of the Friendly Movement Phase the Player places a Rally marker on any Disordered, Shaken or Routed units not in an Enemy Zone of Control that he wishes to Rally. Rallying units may not move in that Movement Phase. At the beginning of the Combat Phase, prior to the announcement of any combat, the Player rolls a die to Rally any unit with a Rally Marker. A die roll is required for each Rallying unit as follows:
i) If the unit is Disordered and the die roll is '1-5', the unit recovers from Disorder and the Disordered Marker is removed. If the die roll is '6', the unit becomes Shaken and the Disordered Marker is replaced with a Shaken Marker.
ii) If the unit is Shaken and the die roll is '1-3', the unit recovers from Shaken and the Shaken Marker is removed. If the die roll is '4-5' the Shaken Marker is replaced with a Disordered Marker. If the die roll is '6', the unit becomes Routed and the Shaken Marker is replaced with a Routed Marker.
iii) If the unit is Routed and the die roll is '1', the unit recovers from Rout and the Routed Marker is removed. If the die roll is '2-3', the Routed Marker is replaced with a Disordered Marker. If the die roll '4-5' the Routed Marker is replaced with a Shaken Marker. If the die roll is '6', the unit is immediately eliminated.
Exception: a unit in a town/urban hex always retains Disordered status unless it is Shaken or Routed (Case 12.17).
12.42 As each Rally attempt is made, the Rally Marker is removed from the unit regardless of the result.
12.43 Routed units eliminated as a result of a failed Rally attempt are treated similarly to units eliminated in combat for Victory Point and all other purposes.
Combat Strength Adjustment
Adjust each unit's Combat Strength at each stage and round individually to the nearest integer.
- Range
- Morale
- Terrain
- Combine all Combat Strengths
- Night
13.0 Designer's and Developer's Notes
13.1 Designer's Notes (edited by the developer)
In designing the Blue & Grey game series in the 1970s the S.P.I. staff started with the premise that the American Civil War battles were similar in scale and intensity to the Napoleonic battles of fifty years earlier, and that they could thus lift intact most of the design structure from the already existing Napoleon at Waterloo generation of games. They felt that the Napoleon at Waterloo game system as it stood combined the elements of playability and realism they were seeking in this game series. Thus, the scale of the Napoleonic games (400 metres per hex, 1-2 hours per Game-Turn) and certain salient play features, such as rigid Zones of Control, retreat and advance after combat, and sequential Player-Turns, were retained in the present games.
Yet the Civil War games could not be an exact copy of the Napoleonic designs. Civil War battles differed from Napoleonic battles in several important respects. First and foremost, they were not decisive battles in the sense of an Austerlitz or a Waterloo. The fact that a decisive battle of this ilk did not happen was a consequence of the general usage of the muzzle-loading, percussion capped rifle, which had been invented and refined in the decades prior to the war. This weapon was much more effective than the Napoleonic flintlock musket, enhancing the firepower of the infantry in Range and reliability.
The first consequence was that cavalry, or rather the traditional massed cavalry charge, was reduced to a battlefield relic. Whereas a well-timed Napoleonic cavalry charge could usually break a deployed infantry line, now anything except the most tenuous skirmish line was proof against a cavalry charge. This meant that infantry could deploy in lines, and mixed columns and lines, practically ignoring the presence of cavalry as a mounted threat.
The second consequence of the rifled musket was to reduce the effectiveness of artillery as an offensive weapon. Napoleon had used artillery aggressively, massing it just beyond musket Range of the enemy's infantry and using canister to literally blow holes in enemy positions which could then be exploited by cavalry and reserves. Artillery in the Civil War was vulnerable to rifle fire when proximate to the Enemy unless closely supported by other Friendly troops.
13.2 Developer's Notes (this variant)
I would begin by thanking the original designers and developers of these games for providing me with so much gaming pleasure over the years, and presenting a robust and error-free system that has stood the test of time.
Many changes, some of a minor nature, but others more radical in their effect, have been incorporated into the rules, which were originally based on the S.P.I. first edition (1975) rather than on any subsequent rewrite at the hands of T.S.R. or Decision Games. The extension of this revised system in its "2nd edition" to incorporate games published in the 1990s has resulted in a complete overhaul.
These rules have been developed by way of incremental changes and revisions over thirty years, prompted by an interest in the subject matter and a love of these elegant, simple but not simplistic games. The rules have in fact been extensively re-written over time, and this extends to the exclusive rules. Players will find the character of the games subtly changed, hopefully for the better.
The first major change newly introduced is the adoption of a revised Combat Results Table. This Table is more sensitive to the variation of advantage between roughly equal forces (1:1 odds) by the introduction a 3:2 odds column. This, together with the slightly less adverse consequences of low odds attacks works to counter the somewhat dampening effects on the action of the new Morale and revised forest/woods rules. The net outcome is that combat retains its vigour, despite the consequences of failure, and in particular the dead hand of the old Attack Effectiveness rule is removed.
As referred to above, after much consideration of the vexed question of the effects of woods on tactical combat in this era and at this scale, the second major change is that a new representation of this Terrain effect has been introduced. Obviously the result is a major compromise, as the representation of "forest/woods" in the system has to cover everything from the relatively contained and accessible Maryland arbours to the barely penetrable forests of the Wilderness.
The combined effect of the adverse odds column shift for attacking into a forest/woods hex and the introduction of Morale rules means that whilst an assault into an area of forest/woods is difficult to get started, if initial success is achieved and the Attacker advances after combat, the Defender then has a significant worry on his hands. Despite the lower Movement Point cost, forest/woods Terrain is now more problematic to both the Attacker and the Defender than hitherto. Therefore, the thesis adopted is that Terrain identified in this system as forest/woods will have a disrupting effect on both the Attacker's and the Defender's capabilities. In this regard I do subscribe to the view that on a more tactical level (100/200 metres per hex) forest/woods do not provide a palpable defensive benefit.
A degree of differentiation between infantry and cavalry has been incorporated by allowing cavalry an additional two Movement Points. In addition, cavalry may retreat before combat, allowing it a delaying role, and thereby it has the ability to disengage. Artillery, which was now much less of an offensive weapon than in the Napoleonic era, is not allowed to advance after combat. In addition, Range effects have been added, and artillery is more vulnerable to the adverse effects of close combat. Conversely, artillery effectiveness is no longer reduced over water obstacles.
Combat at very high odds is more advantageous to the Attacker, coincidentally reducing the potential damaging effect upon the Attacker of Exchange combat results against comparatively small units. Combat at very low odds is less damaging to the Attacker due to the substitution of Partial Attacker Eliminated combat results.
The most major and visible development is the addition of Morale rules to recreate the debilitating effects of combat in a relatively simple way that is not out of step with the remainder of the game. This replaces the original "Attack Effectiveness" optional rule that was always too heavy handed in its effect, particularly in games with very few units, or with no opportunity for recovery. The additional die rolling required is unfortunate, but is hopefully considered a price worth paying to allow representation of the armies becoming more brittle as a battle progresses.
As an adjunct to the Morale rules, units are now disrupted when occupying town/urban Terrain, reflecting that the problems inherent in the tactical usage of this Terrain had not been overcome in this era.
So, what has been left out? Unit facing at the grand tactical level is inappropriate; the brigade commanders are, one hopes, deploying their regiments to the best advantage of the Terrain and their situation. More importantly, there is no attempt to recreate the problems of division, corps and higher level command and organisation, or for that matter the fog of war. These should be assumed to be built into "the system", and are reflected inter alia in the Movement Points allowances, Combat Results Table and every aspect of the way this simple historical model works.
Indeed, Leaders and organisational hierarchy are almost completely ignored, with the exception of rules in several of the games that hamstring the actions of one or other (sometimes both) Players, reflecting noteworthy historical instances of surprise, command indecision, ineptitude or breakdown.
I have not attempted to include the various multi-battle campaign rules in this revision. This system simply does not recreate operational level action properly, and no practical amount of further development will ameliorate this.
Overall, I have endeavoured to incorporate elements which I trust will add a little here and there to a classic system, without detracting unduly from its clean and fast-playing nature.
Finally, I have taken the opportunity to include expanded historical notes for some of the less well known battles, and have appended order of battle notes for certain of the included engagements that have been posted on the internet, together with an article index on the various games, for which I thank the anonymous authors.
Omitted from this transcription: the section 14.0 credits, the battle-by-battle verse epigraphs, and Appendices I (Orders of Battle) and II (Article Index) of the source document.
B. Exclusive Rules: 7. Antietam
Sharpsburg, 17 September 1862
Source note: the exclusive rules below are reproduced from the community consolidated document (Tim Alanthwaite revised Blue & Grey, 2nd edition); numbering and headings are as printed there, including the printed inconsistencies noted in square brackets.
15.0 Introduction
Antietam is a tactical level simulation of the bloodiest one day battle ever to be fought on North American soil. It was the culmination of Robert E. Lee's summer offensive of 1862 and marked the end of the first Confederate invasion of the North. While tactically the battle was little better than a draw, it was a decisive strategic and political defeat for the Confederacy and profoundly influenced the eventual outcome of the war. The battle took place around Antietam Creek, a tributary of the Potomac River, in Maryland.
16.0 Initial Deployment Chart
On the Initial Deployment and Reinforcement Charts, an "a" following the unit's Combat Strength denotes the unit is artillery; a "c" denotes cavalry; all other unspecified units are infantry.
16.1 Union Army
| Hex | Strength/Type | Designation |
|---|---|---|
| 0804 | 4 | 1/1/I |
| 0706 | 4 | 2/1/I |
| 0804 | 4 | 3/1/I |
| 0805 | 4 | 4/1/I |
| 1106 | 4 | 1/2/I |
| 1206 | 4 | 2/2/I |
| 1107 | 4 | 3/2/I |
| 1008 | 5 | l/3/I [printed as "l" in source; read as "1/3/I"] |
| 0907 | 4 |
16.2 Confederate Army
| Hex | Strength/Type | Designation |
|---|---|---|
| 0517 | 3 | Barksdale |
| 0517 | 3 | Kershaw |
| 0416 | 3 | Semmes |
| 0416 | 3 | Cobb |
| 0715 | 2 | Wilcox |
| 0613 | 2 | Pryor |
| 0714 | 3 | Wright |
| 0714 | 2 | Featherston |
| 0613 | 3 |
The above units may not move on Game-Turn One.
| Hex | Strength/Type | Designation |
|---|---|---|
| 0917 | 3 | G.T. Anderson |
| 1218 | 2 | Toombs |
| 0818 | 2 | Drayton |
| 0819 | 2 | Kemper |
| 0817 | 3 | Pickett |
| 1016 | 3 | Jenkins |
| 0920 | 10 | J.G. Walker |
| 0811 | 4 | Hood |
| 0811 | 3 |
16.3 Player Sequence
The Union Player is the first Player. His Player-Turn is first in each Game-Turn.
The source prints the next heading as "16.3 Game Length" (numbering as printed).
16.3 Game Length
The game is comprised of ten Game-Turns.
17.0 Reinforcement Chart
17.1 Union Army
Appearing on Game-Turn Four on hex 2112:
| Strength/Type | Designation |
|---|---|
| 5 | 1/1/VI |
| 5 | 2/1/VI |
| 5 | 3/1/VI |
| 6 | 1/2/VI |
| 6 | 2/2/VI |
| 6 | 3/2/VI |
17.2 Confederate Army
The source prints this heading as "16.2 Confederate Army" (numbering as printed). Appearing on Game-Turn Seven on hex 0126:
| Strength/Type | Designation |
|---|---|
| 16 | A.P. Hill |
18.0 Union Rifled Artillery
18.1 Union artillery units are immobile; they may not be moved during the course of the game. If forced to retreat due to combat, they are eliminated instead. They are not affected by Retreat combat results when attacked solely by Enemy artillery units.
18.2 Union artillery units function in exactly the same manner as other artillery units, except that they have a Range of seven hexes. The Combat Strength of Union artillery is not subject to Range effects, neither is the Combat Strength of these artillery units increased by one-half under Case 9.53.
19.0 Victory Conditions
General Rule. Victory is determined by the accumulation of Victory Points. Points are awarded to each Player according to the Victory Point Schedule for the elimination of Enemy units and the possession of Sharpsburg.
Procedure. Each Player keeps track of the Victory Points that he has accumulated on a separate sheet of paper. These Victory Points are awarded for a variety of actions as detailed on the Victory Point Schedule (Case 19.1). At the end of the game, the number of Victory Points is totalled for each Player, and the Player with the higher number of Victory Points is awarded a victory.
19.1 Victory Point Schedule
Each Player receives one Victory Point for each Enemy Combat Strength Point eliminated. Confederate units which cannot, at the end of the game, trace a Line of Communication are considered eliminated for Victory Point purposes. A Line of Communication is a series of contiguous hexes free of Enemy units or Enemy Zones of Control to hex 0126. Friendly units do not negate Enemy Zones of Control for this purpose.
15 Victory Points for control of all four hexes of Sharpsburg (hexes 0815, 0816, 0716, 0616) at the end of the game. The controlling Player is defined as being the last Player to have a unit occupy or move through the hexes. No Victory Points are awarded for individual hexes of Sharpsburg; one Player must control all four hexes in order to receive the Victory Points. The Confederate Player controls Sharpsburg at the beginning of the game.
19.2 Victory Levels
The level of victory is determined by the ratio of Union Victory Points to Confederate Victory Points [Competition scoring]:
| Result | Ratio | Level |
|---|---|---|
| Union Decisive | 2:1 or greater | [2.0] |
| Union Substantive | at least 1.5 to 1, but less than 2:1 | [1.0] |
| Union Marginal | greater than 1:1, but less than 1.5:1 | [0.5] |
| Confederate Marginal | 1:1 or less, but greater than 1:1.25 | [1.0] |
| Confederate Substantive | 1:1.25 or less, but greater than 1:1.5 | [1.5] |
| Confederate Decisive | less than 1:1.5 | [2.0] |
Transcription note: the bracketed values and the Confederate ratio bands are printed as in the source. The Confederate "Marginal" band ("1:1 or less, but greater than 1:1.25") is self-contradictory as printed and is reproduced unchanged.
20.0 Movement Restrictions
20.1 Union Player
The Union Player may not move all his units on Game-Turn One. He may move only fifteen units on Game-Turn One. He may move only ten units on each following Game-Turn. There are no limitations on the number of units that may attack. Union Reinforcements arriving on Game-Turn Four do not count against this restriction until Game-Turn Five. All movement restrictions are permanently removed from the Union Player in the Union Player-Turn following the movement of any Confederate unit across a creek hex side. From this point on, the Union Player is free to move all units (which are capable of movement) every Game-Turn.
20.2 Confederate Player
The Confederate units which begin the game in hexes 0517, 0416, 0715, 0714, and 0613 may not move during Game-Turn One.
21.0 Players' Notes
21.1 Union Player
Your strategy must be offensive. The Union Player begins the game with the initiative and must maintain it in order to win. While you have a great advantage in strength, you must contend with the Union Movement Restriction and time limitations. Generally, it is best to open your attack on the Confederate left flank. There your units are already across Antietam Creek in force and you will be able to make the greatest use of your superiority in numbers and strength. An early move across the bridges should be a secondary effort because the South can generally contain these drives with relatively few troops. Elaborate outflanking moves, either across the lower fords or the fourth bridge (hex 1128) are also unattractive for this reason.
Instead, use a direct approach. Bring forward as many men as possible and keep hammering away at the Confederate line. Constant pressure should be maintained, particularly in the rough Terrain area to the northeast of Sharpsburg. The town is the key; if you end the game with control of any or all of the Sharpsburg hexes, you stand an excellent chance of winning. Cutting the South off from Boteler's Ford (hex 0126) assures complete victory. However, it is almost impossible to accomplish because to reach the hex you have to go through the entire Confederate Army. Still, it is a victory condition which should be kept in mind should the chance arise.
Tactically, the Union Player should be willing to accept exchanges and should increase odds in order to achieve them. Pin as many Enemy units as possible, especially artillery. Without free artillery units the Confederate Player will be unable to make safe diversionary attacks. As units become engaged, i.e., begin the Game-Turn in an Enemy Zone of Control, move up as many units to the front as possible. The Parrott guns, your only artillery, should be used for diversionary attacks, increasing odds on existing attacks, and even attacking alone at odds of 3:1 or better. Essentially, in a straightforward, knock-down fight (which is what the battle historically was) the Union should come out on top.
One final note: no matter how well things are going, beware the pitter-patter of little feet in the distance. The feet belong to A.P. Hill, and he should be treated with respect, if not outright reverence. He is the strongest unit in the game and should be pinned by Zones of Control if at all possible. The last thing you want is to leave him free to pick and choose his attacks. Give him half a chance to turn the game around and he will.
21.2 Confederate Player
You are forced to stand on the defensive for most of the game. Although the South is heavily outnumbered, it does have the advantages of freedom of movement and interior lines. These elements go hand in hand. The Southern Player must roll with the punches whenever possible. Avoid a direct strength on strength confrontation; a stagnant slugging match will emphasize the Union's strengths and minimize yours. Instead, shift forces rapidly between threatened areas, leaving a minimum of force to protect inactive areas: delay. The Union Player begins the game at a 15 Point disadvantage due to Sharpsburg. He must attack to make it up. Let him come to you on your terms. Time is on your side. To a limited extent, you can trade space for time, a doubly effective tactic because it forces the Union to expend his limited number of moveable units. This is especially true since only Sharpsburg and Boteler's Ford have any bearing on Victory Conditions. All other Terrain is essentially worthless and can be abandoned in a pinch. Guard the fords and bridges well, for if the North can get across them early and in force, you will be in trouble.
Counterattack when forced to and when opportunity presents itself. Attack when you can achieve odds of 3:l, or surround units, or simply make the Union fight over and over again for the same ground. Generally, keep as many units as possible out of Enemy Zones of Control. This is important in the case of the larger units, who must often play the role of fire brigades, moving back and forth to plug up weak points. At all costs preserve your artillery units and keep them free to make diversionary attacks. They should be thrown into the front lines only as a last resort. Once locked in an Enemy Zone of Control, they lose the ability to bombard from a safe distance and are likely to be eliminated.
When attacking, make sure you are prepared to take an Exchange. There is an immense difference between losing Strength Points on a one-to-one basis, and say, losing two 3-6s for a Union 4-6. It is a luxury you cannot afford. And, needless to say, hold on to Sharpsburg; if you lose possession of the town it will be extremely difficult to win. A.P. Hill, when he finally arrives, is particularly useful in assuring that Sharpsburg remains in Southern hands. In attacking with Hill, remember the possibility of an Exchange; losing a 16-6 for a 4-6 is inexcusable. As for crossing Antietam Creek, one word – don't. Releasing the Union hordes is the first step on the road to oblivion, and the road is an extremely short and painful one.
21.3 Tactical Appreciation
The Combat Results Table for Antietam is, essentially, of a "surround" nature; that is, it is relatively bloodless and uncertain even at the higher odds columns. Consequently, most units in the game will be eliminated by being unable to retreat rather than as a direct result of combat. For this reason, the Players must sequence their attacks and advances after combat for the express purpose of trapping Enemy units and forcing them to retreat when they have nowhere to go. Combat odds should always be voluntarily reduced to 3:1 when attacking units which are surrounded, since this ensures their destruction and minimizes the chances of an Exchange.
One other effect of this system of advance and retreat is that it encourages the use of "island" rather than "line" tactics. In other words, it is usually better to alternate Friendly occupied hexes with vacant ones than to have a completely solid line of units. That way a front can be held by a minimum number of units without any danger of being surrounded when adjacent Friendly units retreat. Of course, this is not always possible or even desirable, since it does allow the enemy to achieve greater concentration in his attacks.
Because of the limitations of advance after combat, it is often best to advance a weaker, more expendable unit into an exposed position rather than a larger and more valuable one. This will still pin the Enemy units and force them to counterattack, without risking a serious loss. Again, there will be some instances when the strongest unit should be advanced.
Artillery should be used for low odds diversionary attacks which will allow the concentration of strength against other specific Enemy units. By the way, you may want to reduce such attacks to the lowest possible combat odds in order to prevent your "winning" the attack and forcing the Enemy unit to retreat out of a Friendly Zone of Control. Terrain should also be taken advantage of; particularly the doubling effect of rough Terrain. However, Antietam is a fairly "wide open" game as far as Terrain is concerned because the battle occurred in a relatively civilized and cultivated farming district in Maryland. This was not true of many of the other Civil War battles.
22.0 Designer's and Developer's Notes
22.1 Designer's Notes
Antietam was a fairly uncomplicated game to design in as much as most of the game system and rules already existed - partly from earlier games, such as Borodino and Austerlitz, and partly from Antietam's companion games of Chickamauga, Cemetery Hill and Shiloh. Having one basic set of rules made much of the work simpler. The game did, however, have some problems and elements peculiar to itself.
For one thing, Antietam has largely been ignored by Civil War historians. Relatively few in-depth studies of the battle have been made. Most general histories seem content to write the battle off as an indecisive bloodbath and look no further. This attitude largely stems from the uninspiring nature of the campaign. In a war known for unique, illogical, and unpredictable battles, Antietam stands out as a triumph of mismanagement. For instance, Lee allowed a copy of his marching orders to fall unto Union hands and permitted himself to be trapped against the Potomac by an army twice his size in what was only a fair defensive position. In case of a major defeat, there would have been no place to go; the Army of Northern Virginia would have ceased to exist. Lee knew this, but took a calculated risk, apparently pinning his hopes of victory on McClellan.
For his part, McClellan did all he could to throw away whatever advantages he had. Once he had succeeded in trapping Lee, McClellan did nothing and allowed Reinforcements for both sides to come up. On the next day (17 September), he launched a series of ill-coordinated piecemeal attacks, keeping large parts of his army in reserve. On the 18th both sides did nothing, even though the number of previously uncommitted Union troops exceeded the number of men in Lee's entire army. That evening, the Confederates escaped across the Potomac into Virginia. Characteristically, McClellan did not pursue.
Naturally, for Antietam to be a game at all, these conditions had to be recreated. The Special Rules are an attempt to do this. The Union Movement Restriction reflects the uncoordinated nature of the Union attacks and their reluctance to commit the entire army to the struggle. Other rules represent various factors such as the presence of Parrott 20lb. guns (the Union rifled artillery units).
The orders of battle and the Union Combat Strengths were not difficult to arrive at. However, the Confederates presented a problem. On 17 September 1862, the Army of Northern Virginia had a paper strength of about 55,000. But straggling, desertion and disease had greatly reduced that number. While exact figures are impossible to arrive at, it is probable that no more than about 37,000 Confederates took part in the battle. Incidentally, the artillery units included in the game represent only corps and reserve artillery; with the exception of Stuart's horse artillery, divisional artillery was built directly into the brigade strengths.
Victory Conditions presented the final problem. In an objective sense, the South could not win Antietam. At best, Lee would come out on the plus side of an attrition battle. This, in itself, would accomplish little due to the North's overall manpower advantage. But a Confederate victory, or even a draw, would have important strategic and political effects. Although Lee would probably still have had to retreat out of Maryland, a Southern victory would prevent Lincoln from issuing the Emancipation Proclamation and would encourage foreign powers to recognize the Confederacy. Ultimately, this, and not the bloodshed, was what Antietam was all about. The Victory Conditions, as well as the game itself, are structured for this purpose.
22.2 Developer's Notes (revised version)
Slight modifications have been made to the Confederate set-up to mitigate the effects of the first Game-Turn Union attack. This serves to restore the balance of the game which hitherto somewhat favoured the Union.