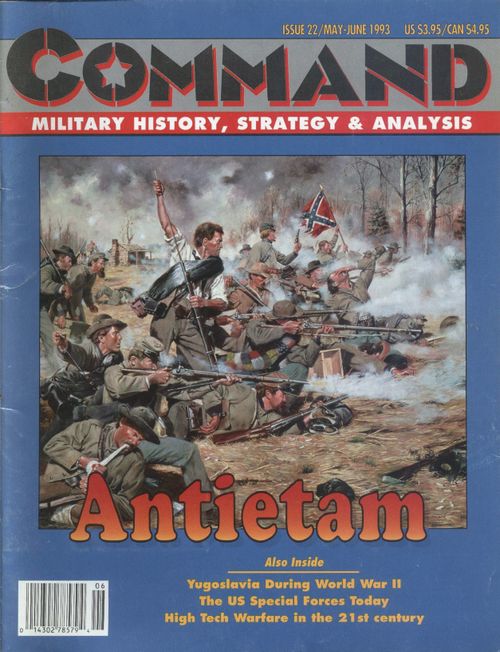
Antietam: Burnished Rows of Steel
Antietam: Burnished Rows of Steel Rulebook
Table of Contents
Table of Contents
- 1.0 Introduction
- 2.0 Components
- 3.0 How to Win
- 4.0 Setup and Movement Restrictions
- 5.0 Sequence of Play
- 6.0 Zones of Control
- 7.0 Stacking
- 8.0 Movement
- 9.0 Reinforcements
- 10.0 Artillery Fire
- 11.0 Combat
- 11.1 In General
- 11.2 Shot to Ribbons
- 11.3 Limit on Attacks
- 11.4 Multiple Defenses
- 11.5 Combat Procedures and Rounds
- 11.6 Union Corps Non-Cooperation
- 11.7 Artillery Defending Alone
- 11.8 Combat Modifiers
- 11.9 Encircled Defender
- 11.10 Morale
- 11.11 Confederate Elan and Superior Coordination
- 11.12 Antietam Creek Bridges
- 12.0 Regrouping
- 13.0 Union Corps Commitment
- Solitaire Rules
- 17.0 Union Artillery
- 18.0 Combat (Solitaire)
- 19.0 Winning Solitaire
- Appendices
- 22.0
- 23.0 Combat Example
- 24.0 D-ELIM
- 20.0 Charts and Tables
1.0 Introduction
1.1 Solitaire and Two-Player Play
This game can be played by either one or two players.
Special solitaire rules have been provided to allow one player to take the role of Gen. Lee, commanding the Army of Northern Virginia against Union forces controlled by the game system. The two-player rules encompass all the movement and combat mechanics used in both methods of play; the solitaire rules simply prescribe how to move and fight the Union forces. If you want to play the solitaire game, the best way to do it is first read the two-player rules, play a few trial turns against yourself using only those rules, then go to the special solitaire sections.
1.2 Game Scale
A. Each hex on the map represents 250 yards across.
B. Each turn represents 60 minutes.
C. Each infantry unit represents a brigade (500-2,500 men) or half-brigade.
D. Each artillery unit represents several batteries (usually 4-6 guns per battery).
1.3 Time Limits
For players familiar with the game, we recommend limiting the time allowed for the Movement Phase (5.0) to six minutes for the Confederacy, and four minutes for the Union.
1.4 Abbreviations
| Abbr | Explanation | Abbr | Explanation |
|---|---|---|---|
| CRT | Combat Results Table | MP | Movement Point |
| DRM | Die Roll Modifier | STR | Shot to Ribbons |
| EZOC | Enemy Zone of Control | VP | Victory Point |
| LOS | Line of Sight | ZOC | Zone of Control |
| MA | Movement Allowance |
2.0 Components
The components to a complete game of Antietam: Burnished Rows of Steel include these rules, the map, and the 283 die-cut counters (also referred to as units or counters). Players must provide a standard six-sided die to resolve combat.
2.1 The Map
A. The map represents the militarily significant terrain found in and around the town of Sharpsburg in 1862. A hexagonal (hex) grid has been superimposed on the map to regulate the placement and movement of units.
B. A unit is considered to be in only one hex at any one time. Each hex contains natural and/or artificial terrain features that may affect the movement of units and combat between units.
C. The terrain and artificial structures on the map have been altered slightly from their real-world configurations to make them fit within the hex grid, but the relationships between the terrain from hex to hex are accurate to the degree necessary for presenting players with the same space/time dilemmas faced by their historic counterparts in the actual battle.
D. Note that every hex on the map has a unique, four-digit identification number. These are provided to help you find places more quickly and to allow you to record unit positions if you have to put the game away before a match is finished.
Example: The Dunker Church is in hex 1916.
2.2 The Terrain Key
This is printed in the corner of the mapsheet, and depicts all the different types of terrain. The small streams are called runs. The only creek is Antietam Creek, a significant barrier in the game even though it is not a full-fledged river.
2.3 Counters
A. There are 283 counters included in the game, most of which represent combat units of infantry or artillery. Others are provided as informational markers and memory aids.
B. After reading through these rules at least once, carefully punch out the counters. Trimming off the dog ears on their corners with a fingernail clipper will facilitate handling and stacking during play (and enhances their appearance).
C. Each counter displays several pieces of information: the side the unit is on, its historical identification, its game identification, its morale value, its combat value, and its movement allowance (MA).
D. Artillery units have a fire value instead of a combat value.
Historical/Design Note: A number of cavalry units were present at Antietam, but most of them sat out the battle on the flanks or in the rear. The exceptions have been included as regular artillery and infantry units. In a large, set-piece battle like this one, cavalry fought dismounted. Rather than give you cavalry units and then write rules to prevent you from using them as such, we decided to model that combat arm's participation in this more simple, direct, and historical fashion. A special rule simulates the effect of the Union cavalry historically sent to guard the Middle Bridge. Certain elements of some divisions were not present and are therefore not included in the counter mix, such as the brigade of AP Hill's division that was left behind at Harper's Ferry.
2.4 Sample Combat Unit
This unit is an infantry brigade; it has a combat value of 5 (2.11), five strength steps (2.13), a morale value of 0, and an MA of 8 (2.14). Its unit ID is 1, and it belongs to the I Corps of the Union.
2.5 Side
The side a unit is on is indicated by its background color. All Confederate units are printed on a gray background; all Union units have a light blue background.
2.6 Union Corps
Each Union unit also has a colored bar across the counter. The different colors each indicate a particular corps within the Army of the Potomac. These differentiations are critical for Union movement (8.13).
| Corps | Color | Corps | Color |
|---|---|---|---|
| I Corps | Dark Blue | VI Corps | Gold |
| II Corps | Red | IX Corps | White |
| V Corps | Purple | XII Corps | Green |
Errata: The XII Corps counters should have a green band on their backs as well as their fronts.
2.7 Confederate Divisions
A. Most Confederate units have the abbreviation for their parent division printed in place of a corps numeral. The few exceptions are Evans (independent) brigade (unit 22, abbreviated Evn), the two Reserve (Res) artillery units (19 and 20), and (Confederate) Corps artillery (unit 21, abbreviated I).
B. The division commanders' names are abbreviated on the counters and maps as follows:
| Abbr | Name | Abbr | Name |
|---|---|---|---|
| And | Anderson | AH | A.P. Hill |
| Cav | Cavalry | DH | D.H. Hill |
| Evn | Evans | Ew | Ewell |
| Hd | Hood | Ja | Jackson |
| Jo | Jones | McL | McLaws |
| Res | Reserve | Wa | Walker |
Errata: Confederate unit 38 should have a morale of 0 at step strength 3. The other step strengths are printed correctly.
Note: Confederate unit 14 has a morale of +1 at a step strength of 4, -1 at a step strength of 3. This is not a misprint.
2.8 Game Identification
A. The full historical identification of all the units in the game involves the name of their brigade commander, their division, and their corps.
B. All brigades are identified by the names of their commanders.
C. Union brigades are organized into numbered divisions, while Confederate divisions are identified by the division commanders' names.
D. Both sides used Roman numerals for their corps, though the Confederate corps were not yet formal, and were really referred to as Longstreet's and Jackson's wings, but we have used the corps designation for brevity. Thus, the Union infantry unit in 2.4 is Phelps' Brigade of 1st Division of 1st Corps.
E. Rather than squeeze all that data onto the counters, we have streamlined things by assigning every unit in the game a sequential one-digit or two-digit game ID and printing it in its upper right corner. In these rules units will be referred to by their game ID. The full historic identifications of all units are presented at the end of the rules.
2.9 Large Brigades
A. Some large brigades are represented in the counter mix by two units with identical historical IDs (for instance, units 54 and 55 on the Union side, and 43 and 44 on the Rebel side).
B. Such counters are treated as individual units for all game purposes; they need not stay together once play begins.
2.10 Unit Types
There are two basic types of combat units in the game: infantry and artillery. These types are differentiated by the following illustrations: CSA Infantry, USA Infantry, and Artillery.
2.11 Combat Value
This number (also referred to as Combat Factor) is a measure of a units' ability to conduct defensive and offensive combat operations. Its use is explained in section 11.0.
Design Note: Artillery units have Fire Values instead of Combat Values (10.0, 11.0).
2.12 Morale Value
This number (also referred to as Morale Factor) is a composite measure of the psychological outlook of the men in a unit. In effect, it is an indicator of their willingness (or unwillingness) to do whatever is necessary to see a fight through to victory. Morale values can be positive or negative. The full use of morale factors is explained in 11.10.
Design Note: Artillery units do not have morale values, though they can still be affected by it (11.7).
2.13 Step Strength
A. All units in the game contain from two to six steps, which are an expression of a unit's ability to absorb losses before being eliminated. Combat losses are absorbed as steps.
B. Example: If a six-step unit takes a step loss, it is flipped over so its reduced side (with a step strength of 5) shows. If a one-step unit (or a multi-step unit already reduced to just one step) takes a step loss, it is removed from the map (eliminated) and placed in the dead pile.
C. All artillery units start play as two-step units. Infantry units begin the game ranging in strength from two to six steps.
D. All units containing more than two steps are represented by two or three counters (up to two strength-steps per counter). Only one of each of those counters may be in play on the map at any one time. The lower valued ones are substituted for the higher as the units take step losses. A counter's status as a substitute unit is shown by the presence of an asterisk next to its ID.
E. A unit's step strength may go up (12.0) or down during play, but no unit may be increased to a step value higher than the one it had at the start of the game.
F. All units start the game at their full strength.
2.14 Movement Allowance
This number (or factor) is a measure of a unit's ability to move across the hex grid printed over the map. Units pay different movement costs to enter different hexes, depending on the terrain in them (8.0).
2.15 Markers
There are also three types of informational memory aid markers provided in the counter mix. They are: Game Turn (5.0), Artillery Moved (10.8), and Union Corps Objective (13.0, 15.0).
3.0 How to Win
3.1 In General
The Union tries to earn Victory Points (VPs), while the Confederacy works to deny them. At the end of the last turn (Turn 11, 4:00-5:00 pm), the number of Union VPs scored determines the winner and the level of victory.
3.2 Victory Objectives
A. The Union receives VPs for controlling the listed objectives at the end of the game. For objectives consisting of more than one hex (such as Miller Cornfield around hex 1911), it receives the partial award got controlling some but not all hexes, and the full award for controlling all hexes.
B. In the list below, a hex number is given to help locate the objectives on the map more quickly. The hex number given is not necessarily the only hex involved in describing the full objective. For example, the entire objective of Nicodemus Hill consists of hexes 1008, 1009, 1010, 1108, and 1109. Objectives with dashes in the partial column are one-hex objectives.
| Partial | Full | Objective |
|---|---|---|
| 1 | 2 | Nicodemus Hill (1009) |
| 1 | 2 | Miller Cornfield (1911) |
| 2 | 3 | West Wood (1716) |
| 0 | 1 | North Wood (1707) |
| 1 | 2 | East Wood (2413)1 |
| - | 4 | Dunker Church (1916) |
| 2 | 4 | Sunken Road (2520) |
| - | 4 | Hex 1943 |
| - |
1 Only 3 VP are awarded, no matter how many Sharpsburg hexes the Union actually controls.
2 Only those hexes inside the dotted line are used for VP purposes.
3 Only 6 VPs are awarded, no matter how many of the road hexes between 1032 and 1300 are Union controlled.
4 The bridge straddles a hexside, so to control it the Union must control both 2836 and 2935.
Transcription note: The printed table has a stray symbol after the West Wood hex number, which is omitted here. The footnote numbers are placed as in the printed table.
3.3 Control
A. The Union gains control of a hex at the end of a turn if the hex is occupied by one or more of Union units or it is not occupied by a Confederate unit but is adjacent to a Union unit.
B. The Union retains control of such hexes until such time as the Confederate regains control by satisfying the same conditions. Control of a hex can change from side to side any number of times during the game.
Clarification: An unoccupied VP hex adjacent to one (or more) units from each side is not controlled by either player. One side or the other must occupy the hex, or must have a unit adjacent to the hex with no enemy unit adjacent to it. Once controlled, it remains so until the opponent gains control.
3.4 Eliminated Units
A. Eliminated units (those which lose their last step) of both sides count for VPs.
-
Each eliminated Confederate unit yields 1 VP to the Union.
-
Each eliminated Union unit reduces the Union VP total by ½ VP.
B. Partially eliminated (reduced) units do not count for VPs.
3.5 Levels of Victory
In the two-player game, the Union player, in the role of Gen. McClellan, is attempting to win a big enough victory to save his military career. Thus, the two-player victory levels demand more of the Union side than do the solitaire levels. (19.0) That is, the actual battle's outcome, a marginal Union victory when looked at in the context of the entire war, is considered to be a marginal Confederate victory in game terms. McClellan failed to save his career, though he did force Lee to retreat to Virginia.
| VPs | Victory Level | Description |
|---|---|---|
| 39+ | Union Decisive | Lee's army is shattered. The way to Richmond is open. The Confederacy sues for peace. McClellan becomes the next President. |
| 32-38½ | Union Substantial | McClellan is retained in command. Lee retreats to Virginia, but his army is too weak to resist the next Union offensive. The war ends within one to two years. |
| 25-31½ | Union Marginal | Lee is forced to withdraw to Virginia. McClellan remains in command. Lincoln issues the Emancipation Proclamation, but no end to the war is in sight. |
| 15-24½ | Confederate Marginal | Lee holds his position and his army escapes destruction, but he withdraws to Virginia soon after. McClellan is removed from command and spends the rest of his life writing memoirs in defense of his decisions. Lincoln issues the Emancipation Proclamation. All foreign powers remain neutral. The war lasts several more years. (This is the historic outcome.) |
| 7-14½ | Confederate Substantial | Lee is able to continue his invasion of the North, and enters Pennsylvania. Foreign powers recognize the Confederacy. McClellan is soon removed from command. His successor (either Hooker, Burnside, or Meade) will have to regroup the Army of the Potomac and fight another desperate and possibly climactic battle on Union soil within another month. |
4.0 Setup and Movement Restrictions
4.1 Preparing to Play
A. First choose sides, then take all the units of that side and sort them by their unit IDs. After doing so, the Union will have 69 small piles of units (full-strength units, plus their substitute counters beneath them), and the Confederate will have 53.
B. Union units 48-56 and Confederate units 48-53 do not start on the map; they enter during play as reinforcements (9.0). All other units begin the game on the map at full strength.
4.2 Quick Setup
A. The abbreviations for each Confederate division and the Roman numeral for each Union Corps have been printed on the map. The owner may place the units of each division/corps on any hex marked with the appropriate unit designation.
B. Stacking limits must be met (7.0).
C. The three Confederate non-divisional artillery units (19-21) must be placed on a hex occupied by any Confederate infantry unit.
D. The independent Evn brigade sets up in 2127.
4.3 Historical Set Up
For those players desiring to start each unit in its historical location, the historical set up hexes for both sides are given in the box below. The two forms of set up have no effect on game play or victory conditions, but both sides should use the same method.
| Side | Formation | Unit-hex placements |
|---|---|---|
| Union | I Corps | 1-1803, 2-1604, 3-1605, 4-1804, 5-1605, 6-2306, 7-2305, 8-2307, 9-2208, 10-2209, 11-2007, 12-1706, 13-1906 |
| Union | II Corps | 14-4117, 15-4118, 16-4119, 17-4021, 18-4017, 19-4213, 20-4113, 21-4114, 22-4115, 23-4014, 24-4214, 25-4215, 26-4216, 27-4116, 28-4214 |
| Union | XII Corps | 29-2900, 30-3001, 31-3000, 32-3100, 33-3101, 34-3202, 35-3201, 36-2800, 37-2801 |
| Union | V Corps | 38-4121, 39-4221, 40-4222, 41-4023, 42-3924, 43-3926, 44-4122, 45-3925, 46-4121, 47-3924 |
| Union | VI Corps | 48-59 R |
| Union | IX Corps | 57-3934, 58-3934, 59-3935, 60-3935, 61-3633, 62-3733, 63-3633, 64-3334, 65-3336, 66-3334, 67-3736, 68-3735, 69-3736 |
| Confederate | Ja Division | 1-1714, 2-1614, 3-1814, 4-1815, 5-1714 |
R: Reinforcements. * Res or I (the Artillery units are the Reserve artillery, 19 and 20, and the Confederate Corps artillery, 21).
Transcription note: The printed box lists VI Corps as "48-59 R" while units 57-59 also appear under IX Corps. It is transcribed as printed.
4.4 Solitaire Setup
Setup is the same as in two-player matches, except the Confederates must also determine and mark Union Corps Objectives (15.0).
4.5 Confederate 1st Turn Movement Restrictions
A. During the first Confederate player-turn, no unit of McLaws' or Anderson's divisions may move.
B. No unit of any division may double-time (8.17).
C. No unit of Hood's division (units 23-25) may move or fire during Turn 1, unless a Union unit moves adjacent to one or more of them. Artillery fire alone does not lift this restriction.
Design Note: This rule simulates the intelligence and communications delays with which the Army of Northern Virginia began the day. Hood's Division, with the permission of Gen. Lee, was taking time out to eat and cook their first real meal in days, so they would not fight except in an emergency.
4.6 The Middle Bridge
No Confederate unit may ever move within two hexes of 3324. This area was defended by the Union Cavalry Corps, not otherwise represented in the game.
Design Note: This rule simulates the historical effect of the Union cavalry without your otherwise having to worry about special cavalry restriction rules.
5.0 Sequence of Play
5.1 In General
A. Antietam is divided into eleven game turns (turns). Each turn is divided into two player-turns, one for the Union, and one for the Confederacy. Those player-turns are further divided into a sequence of steps (or phases).
B. Every action taken must be carried out in the appropriate phase of that side's-turn.
Exception: Both sides may fire some of their artillery during the other side's Combat Phase (11.5).
C. Once a phase is complete and a new phase begun, a player may not return to an earlier phase to complete a forgotten action or redo a poorly executed action unless the opponent graciously permits it.
5.2 The Game Turn Sequence
The Game Turn Sequence is given below in outline form. The rest of the rules are organized, as much as possible, to explain things in the order they are encountered each turn. The Union is the first player every turn.
A. Union Player-Turn
- Union Movement Phase a. Roll for corps availability (13.0). b. Conduct any corps withdrawal (13.5). c. Commit a new corps (13.1). d. Move any/all units of a Committed or Available corps (8.0/13.0).
- Union Artillery Fire Phase a. Fire eligible artillery units individually (9.0). b. When fire is done, remove Moved markers from friendly artillery units (10.8).
- Union Combat Phase (11.0) a. Round One b. Round Two
B. Confederate Player-Turn
- Confederate Movement Phase: Move any/all units.
- Confederate Artillery Fire Phase a. Fire each eligible artillery unit individually. b. When fire is completed, remove Moved markers from friendly artillery units.
- Confederate Combat Phase a. Round One b. Round Two
C. Advance Game Turn marker (or end after Turn 11).
5.3 Game Length
Each match of Antietam consists of 11 turns, representing one-hour periods between 6:00 am and 5:00 pm. Play stops and the victor is determined at the end of Game Turn 11.
6.0 Zones of Control
6.1 In General
A. All units in the game exert Zones of Control (ZOCs) into the six hexes surrounding their location hex at all times.
B. There is no qualitative difference between a hex containing a ZOC exerted there by one unit and a hex containing ZOCs exerted by several units.
C. The ZOCs of both sides can be exerted simultaneously into the same hex(es).
6.2 ZOC Limits
A. ZOCs do not extend across Antietam Creek hexsides except through Bridges (8.10) and Fords (8.11).
B. ZOCs extend across and into all other types of terrain, and within that limit they also extend into hexes occupied by enemy units.
6.3 Enemy Zones of Control
A. A unit that begins its Movement Phase in an Enemy Zone of Control (EZOC) may leave that hex, but may not reenter another EZOC that same phase. This rule precludes moving directly from one EZOC to another.
B. A unit entering an EZOC must stop and may move no farther that phase. Units must pay an additional movement point (MP) to enter and leave EZOC. That cost is in addition to all regular hex and hexside terrain costs (8.0).
6.4 Friendly ZOCs
ZOCs exerted by units of the same side have no movement or combat effects on one another.
6.5 Artillery and ZOCs
Artillery units (moving alone or with a friendly infantry unit) may not enter EZOCs during its side's Movement Phase.
Design Note: It is possible for artillery units to end up in EZOC when moving enemy infantry move next to them during the opposing side's Movement Phase.
7.0 Stacking
Piling more than one unit into the same hex is called stacking. Stacking limits in this game represent the number of units that would normally be deployed to fight effectively within a hex, not the maximum number of units that could conceivably be crammed into such a space.
7.1 General Limits
A. Each side may stack no more than one infantry and one artillery unit in a hex at one time.
B. Stacking rules are only in effect at the end of each unit's movement and at the end of every retreat-after-combat. Within the restrictions below, there is no limit to the number of units that may pass through a given hex during a Movement Phase.
C. Players may examine enemy stacks at any time. The top unit does not hide the one underneath it.
Design Note: The effect of stacking on retreats is discussed in 11.17.3.
7.2 Union Limits
A. Units from different Union corps may never stack together.
B. Within IX Corps, only units of the same division within that corps may stack together. Unit 57, the corps' artillery, may stack with any infantry unit of the corps.
7.3 Confederate Limits
Units from different Confederate divisions may stack together freely.
8.0 Movement
8.1 In General
A. Every unit in the game has its Movement Allowance (MA) printed in its bottom-right corner. The MA is the number of MPs available to the unit to use to move during its side's Movement Phase each turn.
B. Units move from hex to adjacent hex, paying the costs to do so depending on the terrain in and along the hex being entered.
C. The movement of each side's units takes place only during its own player-turn's Movement Phase.
Exception: Retreat After Combat (11.17).
8.2 Limits
A. MPs may not be accumulated from turn to turn, nor may they be loaned from one unit to another.
B. The phasing side may move all, some, or none of his units, as desired, in each of its Movement Phases throughout the game.
Exceptions: 4.5, 4.6, 8.12.
C. Units that do move are not required to expend all their MPs before stopping.
D. The movement of each individual unit or stack must be completed before that of another is begun. A player may only change the position of an already moved unit or stack if the opponent permits it.
8.3 Minimum Movement Ability
All units are guaranteed the ability to move at least one hex during their side's Movement Phase by expending all their available MPs. This guarantee does not allow units to enter hexes or cross hexsides otherwise impassable to them, nor does it allow units to move directly from EZOC to EZOC, nor does it supersede the restrictions in 4.5, 4.6, and 8.12.
8.4 Enemy Units
Moving units may never enter hexes containing enemy units.
8.5 Stack Movement
A. To move together as a stack, an infantry and artillery unit must begin their side's Movement Phase already stacked together.
B. Units that begin the Movement Phase in the same hex are not required to move together.
8.6 Splitting Stacks
A. A moving may halt it temporarily to allow a unit to split off and move away on a separate course. The unit left behind may then resume its own movement if so desired.
B. Once an entirely different stack (or individual unit that began in a different hex) begins moving, the earlier stack may no longer resume movement without the opponent's permission.
C. If two units with different movement factors are traveling together in a stack, the stack must use the MA of the slower unit. However, when the slower unit exhausts its MA, the other may leave it behind and continue on with what remains of its own MA.
8.7 Terrain Effects on Movement
8.7.1 Clear
Clear terrain is the base terrain of the game. It is just that: clear. Hexes with only clear terrain in them represent areas devoid of any features that would enhance defense or slow movement. Each clear hex entered costs units 1 MP.
8.7.2 Cornfield and Orchard
These hexes also cost units 1 MP per hex to enter.
8.7.3 Woods and Town
These hexes cost units 2 MPs per hex to enter.
8.7.4 Bridges, Runs, Slopes, and Crests
A. These are terrain features that run along hexsides, between hexes, rather than existing in-hex like the terrain types described above.
B. A unit crossing a bridge, run or slope hexside (no matter the direction it is traveling) must pay 1 MP in addition to the terrain cost of the hex being entered.
Example: A unit crossing a slope hexside into a woods hex would pay 3 MPs, 2 MPs to enter a woods hex and 1 MP for crossing a slope hexside.
C. Crests do not hexside crossing penalty, but they do have combat effects (11.14).
8.7.5 Fords
A. These are also hexside, rather than in-hex terrain, and units moving across ford hexsides must pay an additional 3 MPs.
B. All units crossing at a ford in the same Movement Phase must cross in the same direction.
8.7.6 Antietam Creek
The Antietam Creek runs along hexsides and it may only be crossed via bridges and fords.
8.7.7 Dunker Church
Dunker Church and various houses and farms are shown on the map only for historic detail; they carry no movement cost or penalties on its own.
8.8 Roads
8.8.1 In General
A. Any unit that moves from one hex to another through a road (primary and/or secondary) hexside pays 1 MP regardless of the kind of in-hex terrain involved.
B. Roads do not negate the costs of hexside terrain.
Example: Units crossing a bridge on a road still pay +1 MP for the bridge.
C. Units may mix road and off-road movement during the same move.
8.8.2 Road Bonus
A. Units that spend their entire move on a road may expend additional MPs.
B. Units moving solely along Primary Roads add 3 MPs to their printed MA.
C. Units moving solely on Secondary Roads, or on a combination of Secondary and Primary Roads, add 2 MPs to their printed MAs.
D. These bonuses are not available to units that enter or leave an EZOC during their move.
Design Note: The road bonus is proportionately greater for artillery to represent the much increased speed of caissons and limbered guns when on improved surfaces.
8.8.3 The Sunken Road
A. Units may move along the Sunken Road (between 2319 and 2721, inclusive) the same as any other secondary road.
B. To enter a Sunken Road hex through a non-road hexside costs 1 MP.
8.9 Double-Time
A. Units that spend their entire move three or more hexes away from all enemy units may move at double-time.
B. Units moving at double-time have their MA doubled.
C. Double timing units may use the road bonuses described in 8.8.1 and 8.8.2. The 8.8.2 bonus is increased to +6 for Primary Roads and +4 for Secondary.
D. No unit may mix regular and double-time movement during the same Movement Phase.
8.10 Confederate Cavalry
The two units of the Confederate Cavalry division may never use double-time movement.
Historical Note: In addition to this prohibition against double timing, you will notice the printed MA of the Confederate Cavalry Division units is considerably lower than those of their regular infantry counterparts. This has been done to reflect the fact the dismounted horsemen only participated in this kind of foot-slogger fracas with the greatest reluctance. (Hint: Just keep them on the hill.)
Design Note: Treat Confederate unit 17 as infantry for all purposes.
8.11 Artillery Movement
Artillery units may not move (in any way) and fire during the same player-turn (10.8).
8.12 Union Corps Commitment
A. The Union may only move and fight with the units of two of its army corps (its choice) per turn (13.0).
B. This restriction is lifted permanently the instant any Confederate unit crosses any Antietam Creek hexside. Rebel artillery fire across such hexsides does not lift the restriction.
8.13 Union Corps Movement
All units of a given Union corps must move before any units of another corps may be moved.
8.14 Terrible Mishap (Optional Rule)
It was characteristic of Civil War combat that despite "the best laid plans," command mishaps occurred in battle that often had immediate and bloody consequences. At Antietam this happened most notably at the Sunken Road, when Rodes' Brigade, thinking it was about to be relieved by another Confederate unit, moved out of line, allowing the Union attackers to enter that otherwise near-impregnable position. To simulate this possibility, use this rule.
A. Starting Turn 1, each side rolls a die at the very start of its own Movement Phase. On a 1, a terrible mishap has occurred on the other side. This allows the phasing side to move any one enemy unit one hex. It must be done immediately; it may not be saved for later.
B. The move itself may not be an illegal one.
Example: No unit could be forced across an unbridged or unforded Antietam Creek hexside, or moved from EZOC to EZOC.
C. Any number of terrible mishaps may occur for either or both sides during the game.
9.0 Reinforcements
Within the strictures below, all reinforcements of both sides arrive on the battlefield at full-strength and with all their movement and combat factors available for immediate use.
9.1 Confederate Reinforcements
A. The Confederacy receives the units of AP Hill's Division (units 48-53) at a randomly determined time during the afternoon. The boxes on the Turn Record Track for Turns 8-11 contain the roll needed on each turn for AP Hill to arrive.
B. At the start of the Confederate Movement Phase during each of those turns, roll one die. If the die roll falls within the span of numbers for that turn, AP Hill enters. If not, roll again next turn.
C. Once triggered, AP Hill's entry may not be delayed to another turn or beyond the end of the game unless all entry hexes are Union-occupied.
9.2 AP Hill Entry
A. AP Hill's division may enter anywhere on the south map edge between hexes 1044 and 2343, inclusive.
B. Units may enter directly into Union ZOCs, but must immediately stop moving.
C. Units entering via road hexes may use road movement.
D. Units may enter using double-time movement, within the limits of 8.9.
E. If more than one unit enters through the same hex, each unit after the first must pay 1 MP per unit entering in front of it via that same hex. (That is, units entering via the same hex are considered to do so in column, stretching off the map edge.)
9.3 Union Reinforcements
A. The Union VI Corps (units 48-56) arrives during the Union Movement Phase of Turn 6 (11:00 am).
B. The units may enter anywhere along the east map edge between hexes 4210 and 4224, inclusive.
C. The same entry rules apply as per 9.2.
D. During Turn 6, the units of VI Corps may be moved onto the map without counting toward the two-corps per-turn Union movement allotment. If any units of the VI Corps are in combat, then VI Corps movement and combat does count toward the two corps allotment.
10.0 Artillery Fire
Design Note: See section 8.11 regarding artillery movement, 11.7 for artillery defending alone in a hex, and 11.17.6 for retreating artillery.
10.1 In General
A. Artillery units use their Fire Values to attack. During the Artillery Fire Phase, the phasing side may fire with all, some, or none of its artillery units.
B. Artillery from available but inactive corps may fire (13.3).
C. During the opponent's Combat Phase, artillery in a hex undergoing an enemy infantry attack may fire at one of those attackers (11.5).
10.2 Artillery Fire Phase Procedure
A. Designate a firing artillery unit and a single enemy unit target. The firing artillery unit must have a Line of Sight (LOS) to the target or it cannot fire (see 10.5).
B. On the Artillery Fire Table, find the column corresponding to the firing unit's Fire Value.
C. Roll one die, applying all relevant die roll modifiers (DRMs) listed below the Artillery Fire Table, then cross-reference the modified roll under the proper column to obtain a result.
D. The result is the number of steps the target loses (11.15). Remove the steps immediately.
E. Perform this procedure once per artillery unit for all those the firing side wishes to fire.
10.3 Range Effects
A. The maximum range of all units is eight hexes, except for Union units 44 and 45. Those units are longer ranged Parrot Guns with a range of 20 hexes.
B. The DRMs for range are listed below the Artillery Fire Table (20.3).
C. When counting range, count as straight a hex path as possible. Do not count the hex the firing unit is in, but do count the hex the target unit is in.
10.4 Hexside Modifiers
There are DRMs listed for units behind a crest and behind Sunken Road hexside. Behind in this case means that the hexside in question forms part of the target unit's hex, and the artillery fire is passing through that hexside.
10.5 Line of Sight
A. A path of unblocked hexes is required for artillery fire. In applying the following rules, visualize the map as representing two general levels of terrain:
-
High ground, woods, and orchards (which are all about the same height), and
-
Low ground.
B. High ground is any hex on the upward side of a slope.
Example: Hexes 1108, 1916 and 2540 are all high ground.
10.6 Judging LOS
To judge LOS, lay a straight edge from the center of the firing unit's hex to the center of the target unit's hex.
10.6.1 Low-to-Low
A. If the firing unit and target are both on low ground, LOS is blocked if any intervening hex contains slopes, woods, orchards, or Sharpsburg town hexes.
B. Cornfields do not block LOS.
10.6.2 High-to-Low or Low-to-High
A. If the firing unit is on high ground and the target is on low ground, or vice versa, LOS is blocked if any intervening hex closer to the unit on low ground contains woods, orchards, or Sharpsburg town hexes.
B. LOS is blocked if it crosses a crest hexside, except one that is part of the hex of the unit on high ground.
C. Intervening slope hexsides do not block LOS, only crests do.
10.6.3 High-to-High
A. If both units are on high ground, no obstacles on low ground block LOS.
B. Obstacles on high ground block the same as between two units on low ground.
10.6.4 Hex Edges
LOS may be traced exactly along the edge of a blocking hex, but not along an edge between two blocking hexes.
10.6.5 Target Hex Terrain
In all cases it is the hex itself, not the printed outline of the terrain in the hex, which blocks LOS.
10.6.6 Units
Units do not block LOS.
10.6.7 LOS Examples
A. The woods in hex 3210 block the LOS from 3309 to 3110.
B. The woods in hex 3222 block the LOS from 3423 to 3121 and from 3423 to 3021.
C. The woods in 3426 do not block the LOS from 3526 to 3225 because 3526 is high ground.
D. The slope in hexside 3619/3719 blocks the LOS from 3820 to 3518. That slope hexside does not block the LOS from 3820 to 3418.
E. The LOS from 3720 to 3518 is not blocked by the slope.
10.7 Restrictions and Options
A. Each artillery unit fires individually.
B. A single artillery unit may not split its fire value to shoot at more than one target.
C. Only units may be fired at; terrain features cannot be targeted.
D. No target may be fired at by more than two artillery units in a single artillery fire phase. Defensive artillery fire does not count toward this limit.
10.8 Move or Fire
A. Artillery that moves during its Movement Phase may not fire in the immediately following Artillery Fire Phase.
B. Moved markers are provided as memory aids. These markers are removed at the end of the friendly Artillery Fire Phase.
C. An artillery unit that starts the player-turn already marked (11.17.6) may not fire in that Artillery Fire Phase.
10.9 Defensive Fire
Each artillery unit in a hex under attack by enemy infantry may fire at one attacking infantry unit (11.5).
11.0 Combat
11.1 In General
A. The phasing side may use its infantry units to attack enemy infantry and/or artillery units in adjacent hexes during the Combat Phase.
B. Attacking in the first round is always voluntary; however, if a unit attacks, then all enemy units that have that unit in their ZOCs must be attacked by it or other neighboring attacking units in that same Combat Phase. This requirement can set off a chain reaction of attacks along a line of opposing units.
C. Attacking in the second round is not mandatory for those units that attacked in the first round.
Design Note: Antietam is well known as the bloodiest single day of the Civil War, with more than 22,000 casualties. Most of those were inflicted in just a few hours of combat in the area between the Cornfield and the Sunken Road. A bloody Combat Results Table (CRT) and a system of combat rounds allows for this kind of dreadful slaughter to be duplicated in the game.
11.2 Shot to Ribbons
A. An infantry unit which has been reduced to one step is said to be Shot to Ribbons (STR).
B. STR units may not attack. This is the only restriction on STR units; they function in all other ways like a normal infantry unit.
C. Artillery units are not affected by STR status.
D. STR status does affect movement in solitaire play (16.4, 16.7).
11.3 Limit on Attacks
A. Each infantry unit may make no more than one attack per combat round.
B. Defending units in more than one hex may be the object of the same attack if the attacker is adjacent to all the defenders.
11.4 Multiple Defenses
A. Combat is always resolved as one attacking infantry unit against one defending unit or stack.
B. Defending units may be attacked any number of times during a single combat round, once per attacking unit arrayed against them.
C. All attacks against a single defending hex must be declared before the first attack on that hex is resolved.
D. Once dedicated to a particular attack, an attacking infantry unit may not take part in any other that same Combat Phase, even if the designated defending hex is cleared of enemy units.
E. In any one combat round, all attacks against a single defender hex must be resolved before any attack against any other defending hex is begun.
Design Note: It is entirely possible some attacking infantry units will be wasted if their designated defender is eliminated or retreated early in a multi-unit attack. This points up the relatively inflexible nature of the command and control systems of the time; once a unit had its orders, it took time to change them again.
11.5 Combat Procedures and Rounds
Resolve each attack as follows:
A. The attacker (the phasing side, regardless of the overall situation) indicates an enemy occupied hex and specifies the adjacent infantry units that will attack it.
B. An artillery unit in the designated defending hex may fire once at one enemy infantry unit attacking its hex. Resolve the fire immediately using the Artillery Fire Table. A single artillery unit may fire defensively only once per turn, not once per round.
C. Both sides determine their units' combat value for this combat. Then compute the ratio or the difference of the total attacking combat factor to the total defending combat factor to determine the column of the CRT to be used. The rightmost applicable column of the CRT is the one to be used.
Example: 5 factors attacking 3 factors uses the +2 column, but 4 factors attacking 2 factors uses the 2:1 column instead of the +2 column.
D. The attacker rolls one six-sided die, applying all relevant DRMs from those listed below the CRT, and cross-references the modified roll with the selected column to determine the combat result. Apply the result immediately. If all defending units in a hex are eliminated or retreated, the attacking unit must advance.
E. After resolving all declared attacks, the first round of the Combat Phase is over. If there are still units engaged (enemy units in each that just fought in round one still in each others' ZOCs) each side (defender first) has the option of declaring a retreat of all such engaged units on a per combat basis. (All or none from each combat must retreat.) If neither side calls a retreat, repeat the steps above for all originally designated defender hexes still engaged for a second round of combat. After that, each side again has the option of retreating.
11.6 Union Corps Non-Cooperation
A. Infantry units of different Union corps may not attack the same defending hex during the same Combat Phase.
B. Artillery units are not affected by this restriction.
11.7 Artillery Defending Alone
A. Artillery defending with no infantry unit in its hex uses a combat value of 1.
B. Ignore the attacker's morale.
C. See 11.17.6 for artillery retreats.
11.8 Combat Modifiers
A. Combat factors and combat die rolls may be modified for various reasons below. The modifiers are all listed beneath the CRT, and their effects are always cumulative.
B. Modifiers should be figured anew for each attack in the same round of a multi-attacker fight.
C. When units' combat factors are halved, round down any remainder.
11.9 Encircled Defender
A. A defending hex is encircled when it is entirely surrounded by designated attacking infantry units (and/or their ZOCs).
-
If a defending hex is encircled by two designated attacking units, that attack has +2 DRM.
-
If more than two designated attackers are arrayed around a defending hex, that attack has a +3 DRM.
B. The presence of other defending units in hexes adjacent to it in no way serves to overturn the encirclement.
11.10 Morale
A. Infantry units have a printed morale rating in their upper left corner. All artillery units have a morale of 0 (11.7).
B. If the attacker and defender have different morale ratings, apply the difference to the combat die roll as a DRM in favor of the side with the higher morale.
C. Ignore morale when attacking lone artillery (11.7).
11.11 Confederate Elan and Superior Coordination
The Confederacy always applies a +2 DRM to its infantry attacks, but not artillery fire. This simulates the superior coordination among units and sub-units in the Army of Northern Virginia, plus the famous offensive-dash of Lee's troops in the attack.
11.12 Antietam Creek Bridges
A. Halve the combat value of an infantry unit attacking through a bridge hexside.
B. Infantry may not attack across unbridged or unforded Antietam Creek hexsides.
11.13 Town Hexes
Halve the combat factor of any infantry unit attacking into or out of a Sharpsburg town hex. This applies regardless of the terrain in the defender's hex.
11.14 Terrain
A. If the defending unit is on high ground and the attacking infantry unit is attacking through a ford, slope, or crest hexside, apply a -1 DRM.
B. If the defending unit is in a Sunken Road hex, apply a -2 DRM unless the attacker is attacking from an adjacent Sunken Road hex.
C. If the defending unit is in a woods, orchard, or cornfield hex, apply a -1 DRM.
Design Note: The high corn in the fields at the time of the battle offered concealment for defenders, hence the -1.
11.15 Step Losses
A. One result of combat is that one or both sides may suffer step losses. (Units may also be required to retreat, 11.17.) For each combat result, the CRT gives the number of step losses suffered by the involved units on each side. The number to the left of the slash applies to the attacker, that to the right applies to the defender.
B. Upon obtaining a combat result for a given battle, each side immediately removes the appropriate total number of steps from its involved unit(s).
C. When the defending consists of an infantry/artillery stack, the infantry unit must be entirely eliminated before any losses are taken by the artillery.
Design Note: Combat resulted in dead and wounded, fatigue, and a significant number of men bolting for the rear. With time, a unit could recover from all those except the first. In the game, step losses reflect all these effects.
11.16 Applying Step Losses
A. To indicate a step loss, flip the involved unit over to its weaker side.
B. After another step loss, set aside that counter and replace it on the map with the next lower valued substitute unit (asterisked with the same ID).
C. This process continues for a unit until its last step is eliminated when the unit is then out of play.
11.17 Retreat
This is a special kind of movement that takes place during the Combat Phases of both sides. Unlike regular movement, retreats do not require the expenditure of MPs.
11.17.1 When to Retreat
Units may retreat for the following reasons and at the following times:
A. When breaking off combat at the end of any combat round, any units then in EZOCs may retreat one, two or three hexes. (The same retreat distance need not be used by every retreating unit.)
B. Any unit, attacking or defending, must retreat exactly three hexes if it receives a mandatory retreat result on the CRT.
11.17.2 Retreat Procedure
A. Retreating units do not pay MP costs, regardless of the number of hexes or whether the retreat is voluntary or mandatory.
B. Each side retreats its own units.
C. A unit must end its retreat as far as possible from the nearest enemy unit.
11.17.3 Retreat Limitations
A. A unit may not end its retreat in violation of stacking; if there is no other option, it must continue retreating the minimum number of hexes necessary to bring it to a hex where it does not violate stacking limits.
B. Units may retreat into and through hexes in violation of stacking, they may just not end a retreat in violation.
C. Terrain prohibitions must still be obeyed.
Example: No unit may retreat across an Antietam Creek hexside except at a bridge or a ford.
D. No unit may retreat off the map.
E. A unit may not enter the same hex twice during its retreat.
F. A unit that cannot fully and properly execute a retreat within these limitations is eliminated.
11.17.4 Retreats and EZOCs
A. A unit may retreat into and through EZOC hexes, but they may not end their retreat in them, even if friendly occupied.
B. The retreating unit must lose one additional step per EZOC hex retreated into unoccupied by a friendly unit.
11.17.5 Panic Effect
When a retreating unit moves into a hex occupied by other friendly units, the owner must roll a die for each unit in that hex (other than the retreating unit). Add the morale value of the unit in question to the die roll. If the modified result is 2 or less, that unit immediately loses a step.
11.17.6 Artillery Retreat
A. If an artillery unit is forced to retreat because of a combat result, the owner rolls a die and consults the Artillery Retreat Table.
B. If the retreat is possible, the artillery retreats normally.
C. If the retreat path takes the artillery through an EZOC, it must make the retreat roll again.
D. If an artillery unit retreats voluntarily after a round of combat, it retreats normally; no roll is necessary.
E. Regardless of the reason for an artillery retreat, mark the artillery unit with a Moved marker. That unit may not fire in the upcoming Artillery Fire Phase.
11.18 Attacker Advance After Combat
A. Immediately after resolving each combat, if the defending hex has been left vacant and the attacker has not been eliminated, that attacker must occupy the defender's hex.
B. In cases of multi-hex vacated defenses, the choice of which hex is occupied is up to the attacker.
C. If a defending unit retreats after either round of combat, any unit which attacked that hex (or was allocated to attack it) in the preceding round may advance into the vacated hex.
Design Note: There is never any defender advance after combat.
11.19 Supporting Advance
A. When an attacking unit advances after combat, a second infantry unit of that side may immediately advance into the hex of the first advancing unit, provided it (the second unit) meets all of the following requirements:
-
It is not in an EZOC.
-
It did not attack during that Combat Phase.
-
If Union, it must belong to the same Corps (same division in IX Corps) as the primary advancing unit.
B. Supporting advance is voluntary, but it must be declared and made immediately or the option is lost.
Design Note: This rule simulates the movement of supporting columns behind attackers.
12.0 Regrouping
12.1 In General
Regrouping allows infantry units to regain lost step strength during the course of the game.
12.2 Procedure
A reduced infantry unit may regroup by remaining motionless during its side's Movement Phase; however, in doing so it must also be located at least three hexes away from the nearest enemy unit. If both those conditions are met, at the end of that Movement Phase the unit immediately regains one strength step.
12.3 Limits
A. The first step loss is permanent; a unit may not regroup to its full, original, strength.
B. No unit may ever regroup to a step status higher than that with which it entered play.
C. Artillery and completely eliminated infantry units may never regroup.
D. Within the restrictions above, there is no limit to the number of units both sides may regroup each turn.
E. Artillery fire does not prevent regrouping.
F. There is no limit to the number of times a unit may go through the regrouping process, other than one step regained per time.
13.0 Union Corps Commitment
Historical/Design Note: The overall strength ratio between the two armies that fought at Antietam was so much in favor of the Union there is little doubt the Army of Northern Virginia could have been crushed had Gen. McClellan committed his forces entirely and at once. It is doubtful, however, there would have even been a Battle of Antietam if it were not for the fact Lee understood McClellan's fear-ridden and doubt-plagued psychology. That understanding gave the Southerner confidence he and his outnumbered force could indeed stand and defeat whatever piecemeal or ill-devised attack Little Mac could conceivably put into effect.
The following rules are necessary, then, to model the true historic parameters of the battle. Those wishing to see what might have been had McClellan undergone some psychological sea change on the morning of 17 September 1862 should ignore rules 8.7-8.13 and all of 13.0, and play a game wherein the Union can move all its forces every turn.
13.1 In General
A. Each Union corps is either Committed, Available, or Unavailable. The status can only change in the Corps Commitment Phase of the Union player-turn.
B. A given corps may be in any status any number of times through the game, and may remain in each status indefinitely.
Players Note: To keep track of the status of each corps, use the corps objective markers and make three piles, one for each status.
13.2 Committed Corps
A. All units of a Committed corps may move and fight normally.
B. Only two corps can be in Committed status during a turn. To commit another corps, it is first necessary to withdraw one of the already Committed corps.
C. Once committed, a corps remains Committed until it is withdrawn (13.5).
13.3 Available Corps
A. An Available corps is one that is ready and waiting to go into action. Only Available corps may be committed.
B. The units of an Available corps may move normally, with two exceptions: they may not use double-time movement, and may not move closer than five hexes (four intervening hexes) away from the nearest enemy unit.
Exception: Union units on the east bank of Antietam Creek are exempt from this restriction. They may move adjacent to enemy units as long as the creek is between them and the Confederates. They may not move adjacent to a Confederate unit if the hexside between them is a bridge or ford.
C. Available units may regroup.
D. Available artillery units may fire normally.
E. If a Confederate unit comes within five hexes of an Available unit, it need not move away; if it does move, it may only move farther away. It may not move closer or stay equidistant.
F. If a Confederate unit moves adjacent to an Available unit (whether or not it attacks), the movement and combat restrictions for that corps are lifted with regard to that Confederate unit; that is, the corps' units may attack the offending Confederate.
G. Confederate artillery fire does not lift the restrictions.
13.4 Unavailable Corps
A. An Unavailable corps may not be Committed.
B. The units of an Unavailable corps may not move at all, and the artillery may not fire.
C. As with Available Corps, if Confederate units move adjacent to Unavailable units, the restrictions of this section are lifted for the purposes of attacking the offending unit(s). Unavailable units may regroup.
D. At the beginning of each Union player-turn, roll one die for each Unavailable corps. On a 6, the corps becomes Available.
13.5 Withdrawal
A. The Union announces any corps withdrawal after rolling for any Unavailable corps.
B. The Union may withdraw none, one, or both Committed corps each turn.
C. All units of the withdrawing corps conduct withdrawal movement (13.6), and the corps becomes Unavailable.
13.6 Withdrawal Movement
A. Every unit of a withdrawing corps must move to a hex at least five hexes away from the nearest enemy unit. Conduct the movement as though the units were retreating voluntarily from combat (11.17-11.17.4). Do not use Panic Effect (11.17.5).
B. The units may use their full (current) MA.
C. If a unit has insufficient MPs to get five hexes away from the nearest enemy unit, it must move to the hex that is farthest away. There it will be subject to 13.4 in future turns until its corps becomes Available again.
D. If the only hex(es) a unit can reach during withdrawal is adjacent to any enemy unit, the retreating unit is eliminated.
13.7 Turn 1
A. On Turn 1, skip the Unavailability Roll and the Withdrawal Phases.
B. I Corps is automatically Committed, V Corps is Unavailable, and all other corps are Available.
C. The Union can commit either XII Corps or IX Corps.
13.8 Turn 6
VI Corps is Available for commitment on Turn 6.
Solitaire Rules
In general, to reduce the burden on the player, the solitaire rules have been kept as simple as possible. You must apply common sense when interpreting these rules, remembering their goal is to mimic competent tactics. Be guided by the spirit, as much as the letter, of each solitaire rule. There is little profit in rules-lawyering one's way past an opposing non-player in a solitaire game.
14.0 Corps Commitment
14.1 In General
The rules of 13.0 are used except as modified by this section.
14.2 Mandatory Withdrawal Roll
A. During the Withdrawal Phase, roll one die for each Committed corps. The corps is withdrawn on a roll of 1 or 2.
B. If the corps has three infantry brigades eliminated, apply a -1 DRM.
C. If the corps has lost half the total infantry steps with which it started the game, apply a -2 DRM.
D. These two modifications are cumulative.
14.3 Commitment Priority
A. The corps must be committed in this order of priority: I, XII, II, IX, VI, V. This means XII Corps must be committed on Turn 1.
Example: On Turn 3, XII Corps is withdrawn pursuant to a 14.2 die roll. The II Corps must be Committed.
B. If five corps are Unavailable when the Commitment Phase is reached, continue rolling (in the priority sequence given above) until one becomes available. That corps must be Committed.
C. If six corps were Unavailable, run through this process twice; the Union must always have two corps committed. (This extra rolling is not available in the two-player game; if the Union ends up with 0 or 1 corps committed, it is not at fault for withdrawing with no corps available.)
14.4 Recommitment Limit
Notwithstanding 14.3, no corps may be recommitted until every corps has been Committed at least once.
15.0 Union Corps Objectives
15.1 In General
Each Union corps has an objective at all times. This objective influences the movement of all the corps' movement.
15.2 Corps Objective Chart
A. Use the Corps Objective Chart to determine each corps' objective. When the first objective is taken, look on the chart under Second Objective, then Third Objective, and so on.
B. The exact choice of objective may involve a die roll, as shown on the table.
C. Use the Corps Objective Markers given in the counter mix to mark the various objectives on the map as called for by the chart.
[CORPS OBJECTIVE CHART: see Charts and Tables section at end of file]
15.3 Multi-Hex Objectives
A unit belonging to a Union corps with an objective covering more than one hex (such as Sharpsburg) treats the nearest Confederate-controlled hex of that objective as its objective hex. This may mean that the nearest hex may differ for different units in the corps.
15.4 Confederate Recapture of Objective
If a Confederate unit retakes a corps objective hex, the corps reverts to that objective.
15.5 All Objectives Achieved
If a corps runs out of objectives, its units no longer move or attack.
15.6 IX Corps
A. The four divisions of IX Corps (58-69) are each treated as a separate corps for purposes of assigning objectives.
B. The corps artillery (unit 57) is considered part of the 1st division as long as either infantry brigade is still on the map; after that, it becomes part of the 2nd division, then the 3rd, and finally the 4th.
C. Each division has its own objective marker. At the start of the game, randomly draw two of those markers, placing both on hex 2836. Draw one more, placing it on 2443. Place the remaining marker on 2942. This determines the divisions' initial objectives. (It allows one or more to assault across the Lower Bridge while the others attempt to flank it.)
D. The entire IX Corps is committed as a corps, not as individual divisions.
16.0 Union Movement
16.1 In General
A. Move Union units by corps, completing each corps' movement before that of the next is begun.
B. Move the divisions of IX Corps in numeric order, 1-4.
C. Move artillery/infantry stacks first, then lone infantry, and lone artillery last.
16.2 Infantry Priorities
A. When moving infantry units, if any unit can and will make an attack (according to the priority rules below), move all such units first.
B. Of those units, move those closer to the enemy (in terms of MPs, including EZOC entry costs) first.
C. If equidistant, move stronger (in printed combat factors) first.
D. If no unit in the corps can make an attack, move units farthest from the enemy first.
16.3 Definitions
The following definitions are used in these rules.
16.3.1 Attacking Unit
Any Union unit for which an attack has been declared in the current phase.
16.3.2 Attacked Unit
Any Confederate unit against which an attack has been declared in the current phase.
16.3.3 Can Attack
A Union unit can attack a Confederate unit if it can move into an adjacent hex. That is, if it can move into a position required for attack.
16.3.4 Favorable Attack
A favorable attack is one in which the sum of the combat difference and all applicable DRMs is at least 0, or one in which the combat ratio is at least +2, regardless of DRMs.
16.3.5 Best Attack
A. The best attack is the one in which the sum of the Combat Column Identifying Number and DRMs is greatest.
B. Identifying numbers appear along the bottom of the CRT, and range from 1 to 5. They are distinct from the odds/difference column headings at the top of the chart.
Example: The 0 column is CI number 2, and the 2:1 column is CI number 5.
16.3.6 Example of Best Attack
The +1 column is CI 3. Thus a +1 attack with +2 DRMs gives total of 5 (3 for the CI number, plus 2 for the DRMs). It is better than a 2:1 attack with a -1 DRMs, which would be 4 (5 for the CI number, minus 1 for the DRM).
Design Note: Now comes the most difficult part of the solitaire rules. Remember that these movement rules are intended to mimic competent tactics, then they will make more sense.
16.4 Non-STR Infantry
A Union infantry that is not STR (11.2) moves according to the following rules in order. 16.4.1 and 16.4.2 apply only if a unit of the same corps is already making an attack; otherwise go to 16.4.3.
16.4.1 Make a Supporting Attack
If a Union unit is attacking, and a Confederate unit other than the attacked unit is exerting a ZOC on it, and this unit can attack that Confederate unit, it does so. If more than one such enemy unit is available, attack the closest (16.5).
16.4.2 Attack the Same Division
If there is an unattacked Confederate unit of the same division as a unit already under attack, and this unit can make a favorable attack against that Confederate unit, then this unit immediately moves to attack that Confederate unit. If there is a choice, make the best attack possible.
16.4.3 Attack Adjacent Unit
If already adjacent to a Confederate unit against which it can make a favorable attack, the unit does so.
16.4.4 Protect Flanks
A. If an already moved unit of the same corps is vulnerable to an encirclement attack at a +1 combat differential or better, and this unit can move to block that encirclement, it does so per rule 16.6.
B. If more than one unit is in need of flank protection, protect the closest.
C. Do not move to protect the flank of a unit that has not yet moved. (The movement sequence is given in 16.2. For this rule to function correctly, it is important that units be moved in sequence.)
16.4.5 Move Toward Objective
A. The unit moves toward the present corps objective, along the straightest hex path possible, using lower-cost terrain when there is a choice.
B. If such a unit encounters the ZOC of a Confederate unit against which it can make a favorable attack, it does so.
C. If there is a choice, make the best possible attack.
D. If the unit encounters a Confederate unit and cannot make a favorable attack, it stops and does not enter the Confederate unit's ZOC.
16.5 Infantry Movement to Attack
A. A Union infantry unit moving to attack a Confederate under any of the movement priorities given above moves into a hex from which it can legally attack that unit.
B. Units moving to attack do so by the straightest and most direct path possible.
16.6 Flank Threats
A. A unit's flank is threatened if there is a Confederate unit which, in the next Confederate turn, could move so as to attack it encircled. Any Confederate infantry unit not in a Union ZOC and having sufficient MPs to reach the encircling hex qualifies.
B. A Union unit is said to be able to protect the flank if it can move into a position adjacent to the threatened unit such that it either prevents the encircling attack without exposing itself to such an attack, or it exerts a ZOC on the hex from which the encircling attack could be delivered, again, without exposing itself to encircling attack.
C. A unit never attempts to protect the flank of another if in so doing it would expose itself to possible encircling attack.
D. A unit always protects (or declines to protect) the flank of another unit according to the situation as it is, without consideration of whether some other unit might move in front and block the threatened Confederate movement.
16.7 STR Union Infantry
A. An STR unit, if at least three hexes from the nearest enemy unit, regroups instead of moving.
B. If fewer than three hexes from the nearest enemy unit, it immediately moves away from the enemy using the same rules as for a retreat.
C. It expends as many MPs as necessary to take it at least three hexes away from all enemy units, without exceeding its MA.
16.8 Available and Unavailable Union Infantry
Such units, if at least three hexes from the nearest enemy unit, regroup within the limits of 12.0.
17.0 Union Artillery
A. Each Committed or Available Union artillery unit moves to the position from which it can make the best fire attack on Confederate units, given their current positions.
B. If Union infantry units of the same corps are attacking, then consider only Confederate units that are being attacked by the infantry of that corps.
C. If an artillery unit cannot reach a position from which it can fire, it joins the infantry unit of the same corps that is closest to the corps objective.
D. An artillery unit will always move to stack with an infantry unit of the same corps, if possible, subject to the preceding rules.
E. It never moves to attack a hex where it would not be stacked with Union infantry but would be subject to attack by Confederate infantry.
18.0 Combat (Solitaire)
Source prints this heading as "I8.0 COMBAT"; the section number is given here as 18.0.
18.1 EZOCs
Union units in the solitaire game are not required to attack every unit which has an attacking unit in its ZOC. That rule is suspended. The first movement priority rule replaces that rule, giving the same effect.
18.2 Order of Union Combats
Resolve combats in the following order:
A. Attacks against encircled units.
B. Attacks that may result in Confederate units being encircled if the Confederate unit under attack is forced from its hex.
C. All other attacks (in any order).
18.3 Retreats
A. Attacking Union units retreat one hex at the end of a combat round if and only if the next combat round will no longer be a favorable attack.
B. Defending Union units retreat at the end of either round if and only if the sum of the combat column number plus modifiers for the next round's combat is at least 10.
C. Although there is no combat after the second combat round, make the retreat/no retreat determination as if there were.
D. A retreating Union unit must end its retreat as far away as possible from all Confederate units. This is governed by the retreat rules of the two-player game. Within those limits, it retreats as far as it can toward the northern or eastern map edge, whichever is closer.
E. Union artillery units attempt to accompany infantry units in their hexes when those units retreat.
18.4 Advances
Advances are mandatory for victorious attackers as in the two player game.
19.0 Winning Solitaire
A. In the solitaire game you, as the Confederacy, score VPs. At the end of the last turn, sum the VPs for the following.
| VPs | Event/Condition |
|---|---|
| 4 | Control of the Dunker Church and every hex of the Hagerstown Road between the church and Sharpsburg |
| 4 | Control of every Sunken Road hex and a path of road hexes from it to a Confederate-controlled Sharpsburg hex |
| 2 | Control some, but not all hexes of the Sunken Road |
| 4 | Control all Sharpsburg hexes |
| 6 | Control hex 1932 and the road from that hex to Sharpsburg |
| 4 | Control every hex of the Harper's Ferry Road (1831-1943, inclusive) |
| ½ | per Union unit eliminated |
| -1 | per Confederate unit eliminated |
B. The victory level is determined by the number of VPs.
| VPs | Victory Level |
|---|---|
| ≤ 3½ | Union Decisive |
| 4-8½ | Union Substantial |
| 9-12½ | Union Marginal |
| 13-16½ | Confederate Marginal |
| 17-20½ | Confederate Substantial |
| 21+ | Confederate Decisive |
Appendices
20.0 Union Roster
(Brigade Commander/Division #/Corps #)
| # | Unit | # | Unit | # | Unit |
|---|---|---|---|---|---|
| 1 | Phelps/1/I | 24 | 1/2 Kimball/3/II | 47 | Artillery/2/V |
| 2 | Hoffman/1/I | 25 | 1/2 Kimball/3/I | 48 | Torbert/1/VI |
| 3 | Patrick/1/I | 26 | Morris/3/II | 49 | Bartlett/1/VI |
| 4 | Gibbon/1/I | 27 | Weber/3/II | 50 | Newton/1/VI |
21.0 Confederate Roster
(Brigade Commander/Division Commander/Corps #)
| # | Unit | # | Unit | # | Unit |
|---|---|---|---|---|---|
| 1 | Starke/Jackson/II | 19 | Reserve Artillery/-/- | 37 | Armistead/Anderson/I |
| 2 | Jones/Jackson/II | 20 | Reserve Artillery/-/- | 38 | Pryor/Anderson/I |
| 3 | Winder/Jackson/II | 21 | Artillery/-/I | 39 | Featherston/Anderson/I |
| 4 | Taliaferro/Jackson/II | 22 | Evans/-/I | 40 | Mahone/Anderson/I |
Roster notes: the printed roster is transcribed as printed, including the blank commander fields shown above.
22.0
The printed rules have no section 22.0; the appendices run from 20.0 and 21.0 to 23.0.
23.0 Combat Example
The printed example is accompanied by a map diagram of the units, which is not reproduced here.
Union Combat Phase, Round One
A. Union unit 1 attacks Confederate unit 1. The odds are +2, with a -1 DRM (the difference in morale). The die roll is a 2, modified to a 1. The Union unit loses two strength steps, the Confederacy loses one.
B. Union unit 2 attacks Confederate unit 2. The odds are 2:1, with a 0 DRM. The die roll is a 5. The Confederate loses two steps and is eliminated. If the unit had three or more steps it would have lost two and been forced to retreat. The Union loses one step and advances.
C. Union unit 3 attacks Confederate unit 3. The odds are 2:1, with a -2 DRM. The die roll is a 1, modified to a -1. The Union unit loses 2 steps, the Confederacy loses none.
D. Union unit 4 attacks Confederate unit 4. The odds are 2:1, with a 0 DRM. The die roll is a 6. The Confederacy loses two steps and is eliminated, the Union loses one and advances. Union unit 6 makes a supporting advance into #4's vacated hex.
E. Because Union unit 4 attacked, Union unit 7 must attack Confederate unit 5. The odds are -1, with a -2 DRM. The die roll is a 3. The Union loses two steps, the Confederacy none.
Round Two
A. The Union can achieve an encircled attack on Confederate unit 3 by using (at least) units 2 and 4. However, to use those units, it must launch attacks on Confederate units 1 and 5.
B. Union unit 1 is the only unit which can attack Confederate unit 1. Union unit 7 is STR, so it cannot attack Confederate unit 5. Union unit 6 must make that attack.
C. This leaves Union units 2, 3, and 4 to attack Confederate unit 3 (one at a time).
24.0 D-ELIM
24.1 Both Sides
This game requires a lot of careful thought about unit commitment. Few units are good for more than a one or two turns of combat without regrouping, so reserves must always be available and used freely. On the other hand, even the best units only get to fight once at full strength, so care must be taken to keep some units completely fresh into the late turns.
24.2 Union
A. The burden of attack is entirely on you and you must shoulder that burden as soon as possible. Don't be subtle; just push your units up and start pounding. You will take heavier losses, but you can afford them.
B. About the only real choices you can make in the game concern when to withdraw one of your committed corps. Take note of the characteristics of each corps. For example, II Corps is far and away the largest, but also has some units of weak morale, especially after they've taken losses. The larger a corps, the more attacks it can make and the longer it can sustain them. The better a corps' morale, the more effective each attack is likely to be. A good rule of thumb is to plan on committing a large corps (II and VI) for three turns, a small corps (V and XII) two, and I and IX two or three, depending on casualties.
C. Consider also the likely speed of recovery. If a corps' brigades are all down to one or two steps, the corps cannot be ready for action in fewer than four turns, and then only if the bulk of its units can be withdrawn far enough to allow regrouping. If a corps can be withdrawn early enough that it can turn around in two or three turns, the Confederate will not be able to ignore it. You'll also have a viable reserve, which you will need.
D. One of the most critical aspects of the game is your ability to move available corps. The movement is slow, so you must decide beforehand where the corps will be committed. You will also be telegraphing your intent to the Confederate. There's no way around that - make your decisions and stick to them. Get the available corps as close to the front as you can: this makes their artillery more effective, covers the flank of the committed corps, and makes it more likely the corps will enter combat immediately when it is committed.
E. The first 3-5 turns will be spent causing casualties. Don't worry about the geographic objectives too early. You must reduce the Confederate ability to counterattack, because even one or two good counterattacks late in the day can be ruinous. This means hitting the larger Confederate brigades every chance you get, even if it's not the best attack available.
F. By Turn 7 at the latest, you should be ready to start moving the front line forward. If you can hold one good corps (VI is best) fresh to this time, it will make your job a lot easier. In any case, keep corps ready for recommitment. No corps will last more than three turns in combat.
G. One temptation built into the game is Rule 13.7, which allows you to commit IX Corps on Turn 1 (McClellan's original plan). In a word: don't. Doing so will force the Confederate to fight on two fronts, but it also creates several serious problems for you.
H. First, IX Corps can only fight by crossing the creek. The best it can manage on Turn 1 is a single attack at the lower bridge, and probably no more than two attacks per turn thereafter. Even a weak Confederate force will be able to hold the creek, and will certainly be able to cycle fresh troops into combat faster than you. Second, if you burn up IX Corps early, it will not be available later, when the Confederate defense is stretched. Third, I Corps will now have to fight alone, and it cannot both extend its flanks and concentrate to make the attacks it must. You are better off committing XII Corps on Turn 1, using it to help I Corps batter the Confederate left. Commit IX Corps after II Corps has entered the fight.
24.3 Confederacy
A. The big decisions, where the fighting will take place, will be made by the Union. You must conform your plans to that. Once the action is joined, you must make a number of minor decisions concerning when to retreat and when to counterattack.
B. As a rule, retreat rather than counterattack. Even successful attacks will cost more casualties than you can afford, especially as they will come from your stronger units. Counterattack only if necessary to avoid a penetration of your line. At all cost, you must avoid having your units attacked while surrounded. If the Union starts getting +2 and +3 DRMs, you're finished. Use your artillery to stiffen the line at critical points, but avoid stacking it with 1-step or 2-step units.
C. The one other time you should counterattack is if the casualties you cause will lead the Union to withdraw a corps. This is really the only way you can influence the course of the battle. If you can force it to suspend or weaken a corps' attack a turn early by hitting a strong unit, and it doesn't have a fresh corps available for commitment, you may gain a turn's respite. In this game, that can be a long turn.
D. You have a lot of weak brigades (2-step and 3-step) which will not be of much use to you once they've taken even a single casualty; they just can't regroup much. Still, avoid too early a commitment of your larger brigades, even if it means permanent loss of one of the weaker units.
24.4 Solitaire Notes
Most of what was said above for the Confederacy applies here also, but there is more of an incentive to counterattack. Because of the Union commitment priority, you can make selective counterattacks to force commitment of a fresh corps. What you want above all is a situation where the Union is attacking with IX Corps and any one other. This will give you enough units on the main front to hold off the committed corps while others are regrouping.
20.0 Charts and Tables
The charts below are not part of the 18-page rules file. They are the game's charts as printed in Command magazine issue #22 (May-June 1993), 20.0 Charts & Tables, reproduced here because the rules above refer to them.
20.1 Combat Results Table
| Die Roll | -1 | 0 | +1 | +2 | 2:1 |
|---|---|---|---|---|---|
| -1 | 2/0 | 2/0 | 2/0 | 1/0 | 1/0 |
| 0 | 1/0 | 1/0 | 1/0 | 2/1 | 2/1 |
| 1 | 2/0 | 2/1 | 2/1 | 2/1 | 1/1 |
| 2 | 2/1 | 2/1 | 2/1 | 1/1 | 1/1 |
| 3 |
Explanation of Results: Attacker Step Loss/Defender Step Loss. * = mandatory retreat (see 11.17).
Treat a modified die roll less than -1 as -1, and a modified die roll greater than 11 as 11. Treat a combat ratio greater than 2:1 as 2:1, and a ratio less than -1 as -1.
Combat Factor Modifiers: Halved - attacking across a bridge or attacking into or out of a Sharpsburg hex (round down).
Die Roll Modifiers (DRMs):
- +2 Defender encircled by two enemy units
- +3 Defender encircled by more than two enemy units
- +# Difference between attacker and defender morale if attacker's morale is the greater of the two numbers.
- -# Difference between attacker and defender morale if the defender's morale is the greater of the two numbers.
- +2 All Confederate attacks
- -1 Attacking up slope
- -1 Defender is in Woods, Orchard or Cornfield
- -2 Attacking through Sunken Road hexside
- -2 Attacking through Ford hexside
20.2 Terrain Effects Chart
| Terrain Type | MP Cost | Combat Effect |
|---|---|---|
| Clear | 1 | NE |
| Cornfield | 1 | -1 DRM |
| Woods | 2 | -1 DRM |
| Orchard | 1 | -1 DRM |
| Slope | +1 | -1 DRM |
| Crest | NE | -1 DRM, Blocks LOS |
| Road | 1* | NE |
| Bridge | +1 | Attack Across Halved |
| Ford |
Notes: P = Prohibited, DRM = Combat Die Roll Modifier.
* Roads negate the effects of other terrain and allow road movement bonuses (see 8.14-8.15).
** Artillery units may not enter EZOC during their movement. Any unit that begins its movement phase in an EZOC may leave it, but not enter another one any time during its move.
20.3 Artillery Fire Table
Fire Value columns 1 through 9. Entries are the result for the modified die roll in each row.
| Modified Roll | 1 | 2 | 3 | 4 | 5 | 6 | 7 | 8 | 9 |
|---|---|---|---|---|---|---|---|---|---|
| -1 | - | - | - | - | - | - | - | - | - |
| 0 | - | - | - | - | - | - | - | 1† | 1† |
| 1 | - |
Explanation of Results: - = No effect. 1 = 1 step loss. 1† = 1 step loss if target is infantry with more than 3 steps or any artillery unit.
Notes: Treat modified die rolls less than -1 as -1, and modified rolls greater than 6 as 6.
Artillery Fire Die Roll Modifiers:
- -2 Target is infantry
- -1 Target is in Woods, Orchard or Cornfield hex
- -1 Target is behind Sunken Road hexside
- -2 Target is in Sharpsburg hex
- -1 Target is behind Crest hexside
- +Range modifier: see the Range Effects Table below
Note: all modifiers are cumulative.
Artillery Range Effects
| Range in Hexes | Die Roll Modifier |
|---|---|
| 1 | +2 |
| 2-3 | 0 |
| 4-5 | -1 |
| 6-8 | -2 |
| 9-20 | -3 (Parrott Guns only) |
20.4 Artillery Retreat Table
| Die Roll | Result |
|---|---|
| 1 | Retreat O.K. |
| 2 | Retreat O.K. |
| 3 | Retreat O.K. |
| 4 | Retreat, Lose 1 Step |
| 5 | Eliminated |
| 6 | Eliminated |
20.5 Corps Objective Chart
Where a cell lists more than one die-roll range, the ranges are given with the objective for each range.
| Corps | 1st Objective | 2nd Objective | 3rd Objective |
|---|---|---|---|
| I Corps | Dunker Church | 1-4: Hex 1032; 5-6: Sunken Road | Sharpsburg |
| II Corps | Sunken Road | Sharpsburg | - |
| V Corps | 1-3: Sunken Road; 4-6: Dunker Church | 1-3: Sharpsburg; 4-6: Hex 1032 | - |
| VI Corps | Middle Bridge | 1-3: Sunken Road; 4-5: Hex 1032; 6: Lower Bridge | 1-3: Hex 1032; 4-5: -; 6: HFR |
| IX/1 Div | See 14.6 | 1-3: Sharpsburg; 4-6: HFR | - |
| IX/2 | See 14.6 | 1-3: Sharpsburg; 4-6: HFR |
Transcription note: The chart's "See 14.6" entries are printed as shown; the IX Corps objective rule in this rulebook is numbered 15.6. In the V Corps and VI Corps rows the die-roll ranges are read from the position of each line within the printed cell, as the scan lays them out.
20.6 Union Solitaire Corps Commitment Priority
I, XII, II, IX, VI, V