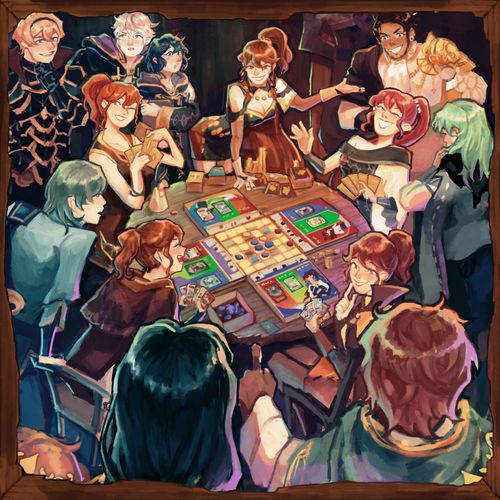
Anna's Roundtable: The Fan Made Fire Emblem Board Game
Anna's Roundtable: The Fan Made Fire Emblem Board Game Rulebook
Table of Contents
Table of Contents
I. Game Setup
- Shuffle the deck of unit cards. Place the Unit Deck, Shapestone/Special Ability/Dragon Vein tokens, Anna Coins, Damage Markers, and Victory Point coins in piles reachable by both players. Both players start with no resources of any kind.
- Deal 6 unit cards to both you and your opponent. Give the second turn player the card "Anna's Cheer". Just once during setup, you may discard up to 6 unit cards, then draw back up to 6.
- Sort the 9 Victory Point cards from smallest to largest, and place the entire deck face up with the smallest point value card on top. When gaining VP cards, take from the top of the deck. For your FIRST GAME (or just for a faster game), remove the two bottom 8 VP cards from the VP card deck.
- Place the 6 x 6 grid map in the center of the table and the player boards along the top and bottom edges of the map.
- Take all 4 meeples of a shape and have your opponent do the same. (Chrom takes all four lion meeples, while Robin takes all four deer meeples in the printed example.)
- Give each player one DV Map Tile. This is a reversible tile with Plains on one side (no effects) and Ruins on the other side (untraversable by all units).
- Try to get a hand that has at least 1 unit of each color (Red, Green and Blue)!
- Shuffle Anna's Shop Deck and deal 3 cards to the Anna's Shop Zone. Keep all cards face down. The numbers on the back of shop cards are their cost in Anna Coins. You only get to see what a card does once you buy it!
You are now ready to play Anna's Roundtable! (The player who last spent money on Fire Emblem gets to go first.)
II. Card Breakdown
1. Unit Name. Legendary units have red banners. They are stronger than normal, but are worth 2 VP tokens instead of 1 when defeated.
2. Combat Stats. The unit's base stats.
- ATK: Equals how much damage this unit deals with an attack, counter attack, or follow up attack.
- SPD: A unit with higher speed will perform a follow up attack during combat. No effect when speeds tie.
- DEF: Defense decreases the amount of damage taken from attacks, counter attacks, and follow up attacks.
- SS (Shapestone): Units with the [Shapeshifter] tag are deployed with a Shapestone token. While a unit has their Shapestone token, it uses their shapeshifted stats, shown in a smaller stat window next to their base stats.
3. Unit Tag(s). A unit's additional trait(s). Most tags are passive improvements to a unit, but some also grant the unit an Assist ability. See page 16 for a full list of tags and their effects.
4. Map Stats. Cardinal directions only.
- RNG (Range): Represents the number of spaces away a unit may attack, counter attack, or follow up attack an enemy unit. Range is not counted diagonally.
- MOV (Movement): Represents the number of spaces a unit may move UP to. Movement cannot be diagonal.
5. Unit Color. You can only deploy 1 unit of each color in its matching unit slot. A unit's color is used in the weapon triangle. (Pg. 15)
6. Skill Description. Each card's unique ability. The color of the skill name box indicates the type of skill: Passive, Assist, or Special.
- Passive: Passive Abilities are always in effect. Some passives have conditions, such as "while X is true" or "when X happens". These conditions are always checked when relevant. Passive effects do not stack (even if X is true multiple times, the passive only happens once).
- Assist: A unit can spend their action to use their Assist Ability (Pg. 13). Once used, simply resolve the Assist Ability as written. While Assist Abilities tend to target a friendly unit and have a beneficial effect, some can be offensive as well.
- Special: A unit can spend their action to use their Special Ability (Pg. 12). Unlike Assists, a unit must discard their Special Ability token in order to use their Special Ability. Once used, simply resolve the Special Ability as written. Special Abilities operate similarly to Assist Abilities, but are typically much stronger. A unit with a Special Ability is deployed with a single Special Ability token and will not gain more after deployment, so make sure to use it wisely! Reaction specials can be activated at any time as long as the requirement for it has been met. Reaction specials still remove the unit's Special Ability token, and thus can only be used once per unit. However, it does not use a unit's action, and can be used even during your opponent's turn.
III. Turn Actions
Start of Turn
- Gain 1 Anna Coin.
- Ready all of your Exhausted units.
Turn Action Summary
During your turn, you may perform any of the following actions in any order:
- Deploy a unit (one per turn).
- Activate a "Ready" unit and exhaust it.
- Pay 1 coin to discard a card (first is free).
- Pay 1 coin to change a Gray unit's unit slot.
- Buy a Shop Card.
- Use a Shop Card.
- Use a Dragon Vein Effect.
NOTE: Once you take an action, it cannot be interrupted except by Reaction special abilities or Reaction shop cards. An action must be fully completed before you may start taking another action.
Deploying Units
(once per turn) Place a unit card into an unoccupied unit slot matching the unit's color, then place your meeple of the corresponding color into an unoccupied map tile in your deployment zone.
- Gray units can be deployed to any unoccupied unit slot.
- You may only have one Gray unit deployed at a time.
- You may only have one Legendary unit deployed at a time.
- Units are deployed Exhausted, meaning they cannot be activated the same turn they are deployed.
- Immediately draw back up to 6 unit cards (you should always have 6 unit cards in your hand).
- If a unit has a Special Ability, it is deployed with a Special Ability token.
- If a unit has the [Shapeshifter] tag, it is deployed with a Shapestone token.
General Turn Actions
Other Actions (no limit per turn).
- Activate a "Ready" unit and exhaust it. Move a unit up to its MOV value, then perform one unit action. (Pg. 12)
- Pay 1 coin to discard a card (first is free). Always draw back up to 6 unit cards. The first discard on your turn is free.
- Pay 1 coin to shift a Gray Unit.
- Gray units can be deployed in any unoccupied unit slot, but you can only have 1 Gray unit deployed at a time.
- You may move your deployed Gray unit from one unit slot to another unoccupied unit slot by paying 1 Anna Coin.
- Buy a Shop Card.
- Pay the cost on the back of the shop card in Anna Coins and add it to your hand.
- Deal a new shop card to Anna's Shop.
- Use a Shop Card (3 types).
- Item: Resolve effect, then discard.
- Reaction: Can only be played when its condition is met. Resolve effect immediately, then discard.
- Attachment: Place beneath a ally deployed unit and give it the attachment's effect. Remove it if a new attachment is played for the same unit, or if the unit is discarded.
Dragon Vein Abilities
Dragon Vein Crystals (DV). DV can be earned in two ways:
- Earn 1 when your unit is defeated (2 if you already lost a unit this turn).
- Earn 1 when an opponent captures a castle.
Spend 1 DV to move your DV Map Tile.
- DV Map Tiles can only be placed on a map tile without units or other DV Map Tiles.
- DV Map Tiles cannot be moved if a unit currently occupies the tile.
- You cannot move an opponent's Map Tile.
- DV Map Tiles can be placed on a castle tile, preventing it from being captured. (Pg. 12)
- DV Map Tiles cannot be placed on Deployment tiles. (Pg. 10)
Spend 2 DVs to BUMP any unit 1 tile.
- You can BUMP ally OR enemy units.
- BUMPed units move 1 space in any direction.
- BUMPed units cannot be moved into a tile they cannot normally enter. (Pg. 10)
Spend 3 DV to deploy a unit and give it the [Haste] tag.
- This can be done in addition to your normal deploy action once per turn.
- [Haste] is a unit tag allowing a unit to be activated the turn it is deployed. (Pg. 17)
IV. Tiles & Movement Rules
General Movement Rules
- Once activated, a unit can move a number of spaces up to its MOV stat.
- Movement is never diagonal.
- Units cannot end their movement in the same space as another unit.
- Units cannot move through enemy units.
Terrain Effects
| Tile | Upon Entering | Can't Enter | Ignored By |
|---|---|---|---|
| Plain | No effect | — | — |
| Castle | No effect | — | — |
| Forest | End movement | [Cavalry] | [Flying]* |
| Water | End movement | [Cavalry], [Armored] | [Flying]* |
| Mountain | End movement | [Cavalry], [Flying] | — |
| Deployment Zone** | No effect | Enemy units | — |
* Ignores tile restrictions even if the unit also has [Armored] or [Cavalry].
** Deployment zones are the ONLY tiles that cannot be covered by DV Map tiles.
NOTE: Units can gain a new movement tag regardless of their location, but must obey movement rules on future moves.
DV Map Tiles
You can spend 1 DV to place or move your DV Map Tile on either of its two sides:
- Plain Side: Turns this tile into a plains tile, making it have no special properties.
- Ruins Side: Turns this tile into a ruins tile, making it always untraversable.
Map Overview
The game includes 4 maps with different layouts and uses. The boss mode map has no features, while the pixel art map has 2 special tiles (see * and ** below). For 1 vs 1 games, place the player boards at the top and bottom ends while the map is oriented upright.
The four maps are the Default Map, the Pixel Art Map, the Nohr & Hoshido Map, and the Boss Mode Map. The printed rulebook (page 11) shows each map's tile layout as a graphic, with tiles marked as Plains, Castle, Forest, Water, or Mountain. The layouts are not reproduced in this text; see the printed map on page 11.
- * Grant players 1 DV instead of 1 Anna Coin when their unit takes the Work action on this tile.
- ** Grant players 1 extra Anna Coin when their unit takes the Work action on this tile.
V. Unit Actions
A unit that has been activated can perform one of the following unit actions after it moves (or chooses not to move).
Attacking
Attack: Attack a unit RNG spaces away.
When you defeat an enemy unit, you gain 1 VP token (2 if the unit was legendary), while your opponent gains 1 DV.
Capturing
Capture: Gain 1 VP Card and give the opponent 1 DV.
- Capture can only be performed on top of a castle tile.
- You cannot capture more than once per turn, so only 1 of your units may capture each turn.
- A castle can be captured multiple times, even on consecutive turns by the same unit.
Special Abilities
Special: Use a unit's Special Ability (if they have one) & remove its Special Ability Token.
- Units with Special Abilities are deployed with a single Special Ability Token. Once they use this token, they cannot use their Special Ability again.
- Some Special Abilities are Reactions. These abilities can be used as a reaction whenever their condition is fulfilled. They do not have to be activated if the unit's player does not wish to activate them.
- A unit can trigger their reaction and still take their regular action (like Attack or Capture).
Assist Abilities
Assist: Use a unit's Assist ability (if they have one).
- Assist abilities that move units, just like BUMP, can only move a unit into a tile they can normally enter.
- Some units have assist abilities listed as unit tags. (Pg. 16)
Retire / Work
Retire: Pay 3 Anna Coins to discard the unit and gain 1 Dragon Vein (denies VP).
Retiring is a very risky move. Since it is a unit action, the unit must forgo other actions in order to retire, such as Attack or Work.
Work: Gain 1 Anna Coin.
VI. Combat Rules
Steps to Combat
- The attacking unit deals damage. Damage = attacker's ATK - defender's DEF.
- Remember: If a [Shapeshifter] unit has their Shapestone token, they use their shapeshifter stats instead of their base stats. At the end of combat, the Shapestone token must be discarded.
- The defending unit counter attacks (if within range).
- If the defending unit's range does not allow it to attack its attacker, no counter attack is performed.
- If the defending unit reaches 0 HP, it is discarded immediately and no counter attack is performed.
- The unit with higher SPD makes a follow up attack (if within range).
- The FASTER unit makes the follow up attack. It does not matter if it is the Attacker or Defender.
- If the two units have equal speeds, no follow up attack is performed.
- If the faster unit's range does not allow it to attack its opponent, no follow up attack is performed.
Attack Range
Range and Counter Attacks. If the defending unit is out of range, it cannot counter attack.
A unit can only counter attack if its attacker is within range. Some units have a range of 1-2, allowing them to attack and counter attack at range 1 AND range 2.
Weapon Triangle
- Red beats Green.
- Green beats Blue.
- Blue beats Red.
A unit with advantage gains +1 ATK during combat. A unit with disadvantage loses -1 ATK during combat. The Weapon Triangle does not take effect if both units are the same color, or if a unit is Gray.
Unit Death
When a unit is defeated:
- Discard Unit. Discard the defeated unit, putting the unit card and any attachments it had in the discard pile. Take the unit's meeple off of the board.
- Gain VP. When you defeat an opponent's unit, gain 1 VP token. If the unit was Legendary, gain 2 VP tokens instead.
- Gain DV. When you lose a unit, gain 1 Dragon Vein token. If this is NOT the first unit you've lost this turn, gain 2 Dragon Vein tokens instead!
Skill Effects in Combat
Tags, Passives, and other Abilities can change a unit's stats before or during Combat. For example, a unit with the [Eff vs Armor] tag will gain +2 ATK during combat against units with the [Armored] tag.
VII. Unit Tags
The game's many unit tags can be sorted into three primary categories: Assist Actions, Movement Types, and Passive Abilities. There are also Effectiveness tags, which are essentially a subcategory of Passive Abilities.
- Assist Action tags provide the unit with an Assist Action that the unit can take as its Unit Action. (Pg. 13)
- Movement Type tags define how the unit interacts with different spaces as it moves around the map.
- Passive Ability tags simply give the unit an ability that is always active.
| Category | Tag | Description |
|---|---|---|
| Assist | Grab | Target 1 adjacent ally unit, either swap their position with this unit OR move this unit 1 space, then move the target unit into this unit's former position. |
| Assist | Reposition | Target 1 adjacent ally unit, move them to ANY open space adjacent to this unit. |
| Assist | Shove | Target 1 adjacent ally unit, push them 1 space away from this unit. |
| Assist | Physic | Target 1 ally unit up to 2 spaces away, they restore 3HP. |
| Movement | Armored | Unit cannot enter Water tiles. |
| Movement | Cavalry | Unit cannot enter Forest, Water, or Mountain tiles. |
| Movement | Flying | Unit cannot enter Mountain tiles but ignores Forest and Water tile restrictions, even if this unit also has the [Cavalry] or [Armored] tags. |
VIII. Boss Mode
Anna's Roundtable includes a co-op mode for 2 to 4 players, where you and your friends must team up in order to defeat epic boss characters from Fire Emblem history.
Your turns happen similarly to the standard 1 vs 1 game mode, with three main changes:
- There are no Shop Cards or Anna Coins.
- DV usage is slightly different (Pg. 20).
- The map is flat, with no mountains, rivers, or forests.
Work together to defeat the boss by taking out all of their HP! But do so quickly, or else the boss will achieve their nefarious plans.
Setup
- Select a boss to face. Each boss comes with a boss board, a deck of boss cards, and some reference cards.
- Place the boss character's tile in the center of the Boss Map.
- Shuffle the deck of boss cards and place them with the mini map side face up, then collect the needed tokens and reference cards.
- Each player will place their player board (using the boss mode side with only 2 unit slots) along one edge of the map. In a 2 player game, the players must use opposite sides of the map.
- The player who last played Fire Emblem is the first turn player.
Clarifications & Changes in Boss Mode
- The [Pickpocket] tag will give players 1 DV instead of extra Anna Coins, no dice roll needed.
- When an effect says "until your next turn", it still means until YOUR next turn, so it will last throughout the other players' turns until it becomes your turn again.
- "Ally units" includes the units of all players.
- "All units you control" does not include the units of other players.
- When an effect refers to enemy units, it can target the boss or their summoned units, but not tokens.
- When an effect targets units within an area, the boss only counts as one unit. The effect does not target the boss multiple times even if it's within range multiple times.
- The Boss always has "more units" deployed than you for the purpose of effects that check.
- When an effect attempts to "move" an enemy unit, it cannot target the boss tile.
- Effects that deal damage directly to an enemy can target any 1 of the boss's HP bars.
- Damage that is Non-Lethal cannot deal the last damage to any 1 of the boss's HP bars.
- Dancers can Ready your allies' units during your turn. When this happens, that ally player can immediately move and act with that unit before your turn ends.
- Effects that spend or gain Anna Coins will always spend or use a single DV for the entire effect.
Boss Mode Basics
Turn Order. The players and Boss alternate taking turns, with the players taking turns in clockwise order. In 4 player mode, the boss only takes a turn after every 2 player turns instead.
- 2 & 3 players: P1 → Boss → P2 → Boss → P3 → Boss → Repeat
- 4 players: P1 → P2 → Boss → P3 → P4 → Boss → Repeat
Win / Lose Conditions. The win and lose conditions for each boss are different and defined by their boss board. Each boss has a different goal, but the condition for defeating the boss is always the same: depleting their lives to 0. How many lives a boss has is decided by player count and is listed on their boss board.
On Player Turns
Turn Overview. At the start of your turn: Gain 1 Dragon Vein Crystal and Ready all of your units.
During your turn, you may perform any of the following actions in any order:
- Deploy a unit (once per turn).
- Discard a card (once per turn).
- Activate a ready unit, then exhaust it.
- Spend Dragon Vein Crystals.
You may not deploy multiple units of the same color, and units are exhausted on the turn they are deployed.
Unit Actions. After a unit has moved (or chosen not to move) it can perform one of the following actions:
- Attack: Attack a boss tile or summoned boss unit within range.
- Special: Use the unit's special ability (must discard a Special Ability token).
- Assist: Use the unit's Assist ability.
- Work: Gain 1 Dragon Vein crystal.
- Boss Specific Action: Perform an action specific to the boss you're facing.
Units cannot perform the Retire or Capture actions in boss mode.
Dragon Vein Crystals (DV) in boss mode.
- You earn 1 DV at the start of your turn (not at the start of other players' turns).
- You earn 1 DV when a unit of yours is defeated (not when other players' units are defeated).
- You do not earn any DV when a Legendary unit is defeated.
You can spend your DV in three ways:
- Spend 1 DV: Move a unit YOU control up to 2 spaces in a cardinal direction.
- Spend 2 DV: Remove a unit YOU control.
- Spend 3 DV: Deploy a unit and give it [Haste].
Attacking Bosses
When you attack a boss tile, select the corner of the boss you are attacking.
- A unit may only attack a corner of the boss that is within that unit's range.
- The corner you attack tells you the color of the boss unit.
Each corner of the boss represents a different color. When dealing damage, apply it to the color of the corner you attacked. (For example, Laurent can attack the green OR colorless corners of Grima, but if he attacks the Green corner, he'll get color advantage!)
There's no point in attacking a corner of the boss that has already taken the maximum damage possible. So aim your attacks carefully!
Defeating a Boss. Once all of a boss's HP bars are fully damaged, the boss loses 1 life. The boss's number of lives is dependent on the number of players. When the boss loses its last life, all of its damage is removed. If it was the boss's last life, it is defeated and the players win!
Boss Stats & Counter Attacks. The ATK, SPD, DEF, and RNG of the boss is indicated on its current boss card. If the boss did not lose a life from being attacked and is within range to counter attack, it will do so. The color of the boss is decided by the corner being attacked. Its Range, Attack, Speed, and Defense are all defined by the current boss card. The boss's stats, range and tags can change from turn to turn!
On Boss Turns
A boss turn has 3 steps:
- Perform any start of turn effects as defined by the boss board.
- Roll a dice to decide where the boss will move (or attack units if it cannot move).
- Flip the current boss card and execute the boss effect on the card.
- Rotate the boss 90 degrees.
Step 1: Boss Effects & Summoning.
- The boss board will describe any start of turn boss effects it might have.
- When a boss summons a token or minion, roll 1 dice for X and 1 dice for Y. Then place the summoned token or minion on the matching location on the board. If you run out of tokens, the boss can no longer summon them. If the rolled space is occupied, follow the instructions on the boss's reference card.
- Example: if you rolled a 2 for X and 3 for Y, the summoned token would be placed on 2 spaces right and 3 spaces up, at (2, 3).
Step 2A: Boss Movement.
- Roll a single dice to determine where the boss will be moving. The spaces that a boss can move to on their turn are determined by the back of their current boss card.
- If there are player units in the boss's destination, this movement is canceled and the boss will attack all player units in the destination instead.
- Example: rolled a 4, so the boss moves to the (4~6) target space.
Step 2B: Boss Attack.
- If the boss could not move due to player units occupying its destination, it will instead attack all player units in the destination spaces.
- The boss's attack will hit regardless of how far away the boss is from its destination.
- If there are multiple units being attacked, the players get to decide the order in which units are attacked.
- The boss will always attack with the corner that gives it color advantage. If that corner is already at 0 HP, the players get to choose which corner the boss attacks with instead.
- The range at which combat is held is determined by the range on the boss's current card. If the range is 1-2, players get to choose the range at which combat is held.
- Example: rolled a 4, since player units are in the (4~6) target space, the boss attacks them instead of moving.
Step 3: Flip Boss Cards.
- Flip the current boss card, then execute the effect on that boss card. The next boss card in the deck becomes the new current boss card.
- If the boss deck runs out, shuffle all discarded boss cards and make a new boss deck.
- If the boss card affects more than one unit, players can choose the order for the effect (such as when an effect deals damage to all units, players can choose the order in which units are damaged).
Step 4: Boss Rotation.
- Whether the boss moved or attacked, rotate the boss tile 90 degrees clockwise. (Try your best not to forget this step!)
The printed rulebook closes with a section IX artist credit gallery and a list of Patreon supporters. These are attribution only and are omitted from this transcription.