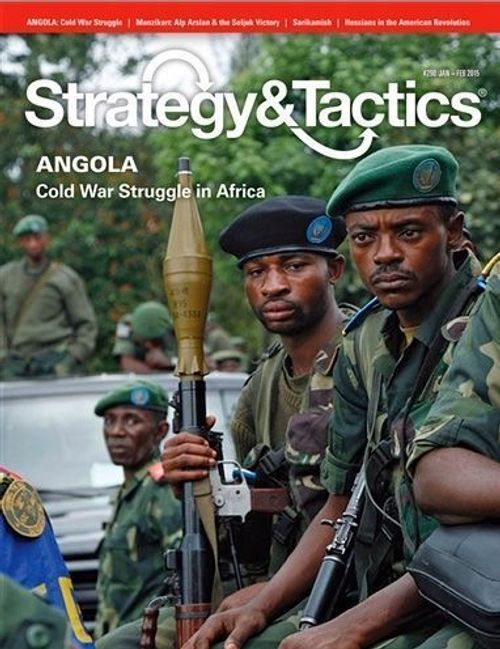
Angola: Cold War Struggle in Africa
Angola: Cold War Struggle in Africa Rulebook
Table of Contents
Table of Contents
- 1.0 INTRODUCTION
- 2.0 COMPONENTS
- 3.0 SET UP
- 4.0 SEQUENCE OF PLAY
- 5.0 FACTIONS & ACTIVATIONS
- 5.1 Factions
- 5.2 Faction Sequence
- 5.3 Pertinent Operations Phase
- 5.4 Special Operations Markers
- 5.41 Effects of special operations markers
- 5.42 One Special Operation per Turn
- 5.5 Multiple Faction Activations
- 5.6 Drawing the Opponent’s Faction
- 5.7 Disposition of Command Markers
- 5.8 Faction Marker Permanence
- 5.9 Stacking
- 6.0 INTERNATIONAL EVENTS TABLE
- 7.0 MOVEMENT
- 8.0 STACKING
- 9.0 ZONES OF CONTROL
- 10.0 GROUND COMBAT
- 10.1 Assault & Mobile Combat Results Table
- 10.2 Combat Procedure
- 10.3 Which Units May Attack
- 10.31 Defense only units
- 10.4 Attack Declarations
- 10.5 Mandatory Attack
- 10.6 Multidirectional Attacks
- 10.7 Attack Limit
- 10.8 Stack Attacks
- 10.81 Stack Defenses
- 10.9 Multi-Unit & Multi-Hex Attacks
- 10.10 Diversionary Attacks
- 11.0 RETREAT
- 12.0 PURSUIT
- 13.0 REINFORCEMENTS
- 14.0 REFIT
- 15.0 UNIT WITHDRAWAL
- 16.0 BASES & SUPPORT
- 17.0 AIRPOWER
- 18.0 AIR SUPERIORITY MISSIONS
- 19.0 INTERDICTION MISSIONS
- 20.0 CLOSE SUPPORT MISSIONS
- 21.0 AIR SUPPLY
- 22.0 AIR DEFENSE UNITS
- 23.0 SPECIAL UNITS
- 24.0 FOG OF WAR
- 25.0 WEATHER
- 26.0 POLITICAL RESTRICTIONS
- 27.0 VICTORY CONDITIONS
- 28.0 ANGOLA SCENARIO
- Variant Counter Rules (Angola, S&T 290; printed as "S&T 209")
1.0 INTRODUCTION
Angola is a wargame of the 1987-88 campaign which was the culmination of the civil war in that country. This campaign saw major offensives by both sides, with considerable intervention by the armed forces of Cuba and South Africa.
This is an operational level game. Each player commands the forces of several different Factions. Each faction represents major players in this conflict. The objective is to gain control of as much of Angola as possible, while inflicting losses on the enemy. Command control is a critical factor, and the game uses a variant of the Decision Games' “Boots” system to model this.
1.1 Game Scale
Each game turn represents one month of operations. Each hexagon is about 31 miles (50 kilometers) across. Each brigade or regiment is from 1,000 to 3,000 men, depending on the army. A battalion is 300-900 men. A cadre represents small teams.
2.0 COMPONENTS
2.1 Map
The map shows Angola and adjoining regions of Southwest Africa and Zaire. A hexagonal grid has been superimposed over the terrain features on the maps to regularize the movement and the positioning of the playing pieces. The hexagons are called “hexes” in the rules.
2.2 Playing Pieces
The pieces are referred to as “units” for military forces, and “markers” for informational pieces.
2.3 How to Read Ground Units
Combat Factor (first number): This is the unit's basic combat strength when attacking or defending. See rule 10.0.
Movement factor (second number): This is the basic number of hexes through which a unit can move. See rule 7.0.
Elite unit Indicator: This is a hexagonal symbol between the combat and movement factor. This indicates that the unit has a Zone of Control, and can use both combat results tables.
Airmobile Movement: This is an infinity symbol; it indicates that the unit can move by air (aircraft, parachute, organic helicopter transport).
Support Radius: This is printed on Base unit. It indicates how many hexes away a Base can provide support to units of the same side.
Air Defense Zone Radius: This is printed on Air Defense units. It indicates how many hexes away the unit can provide air defense coverage.
Unit Designation: The number or letter on the right side of the counter.
2.4 Unit Types
Unit size:
XX = division
X = brigade or battlegroup
| | | = regiment
| | = battalion or detachment
[ ] = task force
- = cadre
2.5 Sides & Factions
There are two sides in the game: Communist and Anti-Communist. Each side is composed of several Factions, with each Faction being a semi-autonomous force. The Faction is on the reverse of the counter, along with any Reinforcement number.
Communist Factions
FAPLA: Angolan government (Popular Armed Forces for the Liberation of Angola).
SWAPO: Namibian insurgents (Southwest Africa People’s Organization). This also includes (for sake of the game) the African National Congress.
East Bloc: East Bloc (Soviet, Cuban, East German, and North Korean).
Anti-Communist Factions
SADF: South African Defense Forces (includes both South African and Southwest African Territorial Forces).
UNITA: Union for the Total Liberation of Angola (the major Angolan insurgent organization).
FNLA: Angolan National Liberation Front (insurgents from the early days of the anti-Portuguese conflict).
FLEC: Front for the Liberation of the Enclave of Cabinda.
CIA: Central Intelligence Agency operatives that perform all manner of actions.
Communist Abbreviations
ANC: African National Congress
G: Guerilla (various government counterinsurgency forces)
FLNC: Congolese National Liberation Front (former Katangese gendarmes serving under Angolan control)
MININT: Ministry of the Interior (Cuban Security Service)
MR: Military Region
OMG: Operational Maneuver Group
Sp: Spetsnaz (special forces)
Anti-Communist Abbreviations
CF (SADF): Citizen Force (reservists)
CF (UNITA): Central Front
Comp: Composite
K: Operation Koevoet (Crowbar, special antiterrorist operation)
NF: Northern Front
R: Recce (special forces)
RF: Reaction Force
SF: Southern Front
SOF: Anti-Communist mercenaries/volunteers.
SSB: Special Service Brigade
SWASU: Southwest Africa Specialist Unit
SWATF: Southwest Africa Territorial Force
TF: Task Force
TG: Task Group
WF: Western Front
2.6 Air units
Tactical Air (TAC)
Helicopters
Air Supply
Wild Weasel Air (see on-line optional rules)
Each air unit has three numbers along the top. These are:
2.7 Command Markers
There are three types of command markers: Faction, Operation and International Events.
Faction markers have the names of Factions on them, corresponding to units in the game, also identified by the same colored band on the marker
Example: UNITA.
Operations markers allow special one-time activations plus reinforcements (for example: Operational Packer).
International Events markers generate random events.
2.8 PSYWAR Markers
These are used with the on-line optional PSYWAR rule.
2.9 Administrative Markers
These are three types of administrative makers:
Besieged Base: Indicates a besieged base; see on-line optional rules.
Suppressed: Indicates a suppressed unit.
Turn: Current turn. Each player has one of these for use on their Turn Record and Reinforcement track.
2.10 Player Display
Each player has a set of charts including a Turn Record and Reinforcement Track (used to show when units enter play), and boxes for various units which are held off map.
2.11 Do or Die
Players will need one six sided die to play the game.
3.0 SET UP
3.1 Setting Up Units
Set up according to the game's scenario (28.0). Play proceeds according to the sequence given in section 4.0 for the number of game turns specified in the scenario rules (See 28.0).
3.2 Command Pool
Players will need one large-mouth opaque container, such as a coffee mug. Throughout the course of a game, players will draw Command markers at random from this Command Pool. Place the starting
Faction markers from both sides, and
the International Events marker in the
“Command Pool.” Do not place the Operations markers (such as Operation Modular)—these must be purchased by the players.
3.3 Availability
Each player places his set of Operations markers to one side. They can be purchased in the course of the scenario.
3.4 Order
The scenario rules designate the order in which players set up their forces. Units may be assigned specific set up hexes, or the players may be instructed to choose set up hexes.
3.5 Reinforcements
After all units of the initial deployment have been set up, the remaining units are placed on the turn track or set aside off of the map for operations. They are available for purchase later in the game.
3.6 First Player
The scenario rules indicate which player is the “first player.” This is the player who draws first from the command pool each game turn. The other player is the “second player.”
Note: The player who sets up first is not necessarily the “first player.”
4.0 SEQUENCE OF PLAY
4.1 Game Turns & Phases
Angola is played in sequential “game turns,” each of which is composed of interactive “phases” and “sub-phases.” During each operations phase, the players alternate picking command markers; each such pick thereby indicating which Faction will be “activated” for movement and combat at that time (see 5.0). The player controlling a selected Faction then receives reinforcements for it, if any are available that game turn, and then moves and conducts combat with the units of that Faction. The player whom is currently conducting an operations phase is called the “phasing player”; the other player is the “non-phasing player.”
4.2 Sequence of Play
Each game turn consists of the following sequence, which players must go through in the order specified:
I. PLANNING PHASE
Each player places all his Faction markers in the Pool. Each player may then secretly choose one Operations marker and place it in the Pool. The International Events marker is always placed in the Pool.
II. PSYWAR PHASE (see on-line optional rules)
Players also commit PSYWAR markers for missions. Then reveal PSYWAR missions and execute PSYWAR combat.
III. OPERATIONS PHASES
A. First Operations Phase. The first player draws a marker from the pool. (a) If the player drew a marker reading “International Events” he must roll on the International Events Table (6.0). (b) If this is a Faction or Operation marker, then that Faction or Operation is “activated”. The player who controls that Faction or Operation—no matter who actually drew the counter—then executes the following steps with those units. That player becomes known as the “Phasing Player”. The Phasing Player then executes the following steps (1 through 5):
-
Reinforcement Sub-Phase (rule 14.0). The phasing player determines if he receives any new units of the activated Faction (per the Command Chart) and places them as indicated by the reinforcement rules. Also, any units which were Refit on a previous turn and are due this turn are placed on the map.
-
Refit Sub-Phase (rule 13.0). The phasing player determines if he wants to conduct refits (replacing eliminated unit) for the activated faction. If he does so, then he executes Refit but this faction skips the Movement, Air and Combat sub-phases.
Otherwise, execute the following phases for this command:
-
Movement Sub-Phase (rule 7.0). The phasing player moves all, some, or none of the units of his activated Faction or Factions.
-
Air Sub-Phase (rule 10.0).
4a. The phasing player places air missions on the map.
4b. The non-phasing player then places any intercepting air missions on the map.
4c. Resolve Air Superiority combat.
4d. Resolve any Interdiction missions..
- Combat Sub-Phase (rule 10.0). The phasing player uses ground units of his activated Faction to attack enemy units. Air units flying close support missions provide support.
B. Second Operations Phase. The second player draws a new marker as in “A” above, and the player owning that activated Faction becomes the Phasing player, performing steps 1 through 5 above..
C., D., etc. Subsequent Operations Phases. Continue alternating between the first and second players drawing markers to activate Factions until all command markers have been picked from the command pool.
IV. GAME TURN INTER-PHASE
A. Return Phase. Return all Faction and International Event markers to the command pool. Remove any Special Operations markers used this turn from play. Remove all suppression markers from on the map.
B. Game Turn Advance. Move the game turn marker to the next box on the Game Turn Record Track printed on the mapsheet. If this is the last turn of the scenario, the game comes to an end and victory is determined.
5.0 FACTIONS & ACTIVATIONS
5.1 Factions
The armed forces in Angola are divided into “Factions,” each of which operates as a semi-autonomous force within its overall army. Factions are defined by the faction name on the reverse of the counter, and colored stripes on the unit-counters. A particular Faction is said to be “activated” for an operations phase when its marker is picked during step III of the game sequence outline given above in rule 4.2. Certain Command markers will allow a player to conduct operations with more than one command.
Example: The UNITA marker activates both the UNITA and CIA factions.
Note: While the CIA is a separate faction, it does not have a separate Command marker. Instead, it is always activated by the UNITA marker.
5.2 Faction Sequence
If a player picks the marker of a Faction that’s part of his army, he executes the reinforcement, refit, movement, air and combat sub-phases for that Faction. But, if a player picks the marker of a Faction that is from the opposing player’s army, the player who drew that marker gives it to his opponent, and the player receiving the marker must then execute the refit, reinforcement, movement, air and combat sub-phases for that Faction.
5.3 Pertinent Operations Phase
A Faction may be activated (and thereby be reinforced, move and fight) only during an operations phase in which its own marker has been picked (also, see Operations markers, below). At the completion of that operations phase that Faction is no longer activated.
Example: If there are six Faction markers in the command pool, there would be six operations phases in a single game turn, plus an International Event.
5.4 Special Operations Markers
Each player has a set of “special” operations markers (for example, Operation Packer). A player can “purchase” these markers by expending the Victory Points listed on the Operations table. This is done during the Planning phase. Upon purchase, place the Operation marker in the command pool. A player may purchase a maximum of one Operation marker per turn. And once the operation marker has been picked and played, it is permanently removed from play.
Note: There is otherwise no limit to the number of VP which you can expend on Operations. The VP expended are debited only in the end of game victory determination.
5.41 Effects of special operations markers
When the player picks an operations marker, he activates all Factions listed for it on the Faction chart.
5.42 One Special Operation per Turn
You may purchase a maximum of one Special Operations marker per turn. This is in addition to the automatic placing of Faction markers and the Event marker in the Command pool.
5.5 Multiple Faction Activations
A player may have more than one marker in the command pool which can activate a given Faction, and in some cases, these can activate more than one Faction. In such cases, that/those Faction(s) may conduct more than one operations phase per game turn.
Example: The Operation Modular Faction marker will allow for the activation of both SADF and UNITA forces. And this would be in addition to any activations of those factions for the SADF and UNITA command markers.
5.6 Drawing the Opponent’s Faction
You may never carry out any action for units that are part of the enemy army, even if you were the player who actually picked its Faction marker. In such cases, you must hand the picked enemy Faction marker to your opponent, who then must use it to conduct an operations phase of his own.
Player’s Note: players may potentially conduct more than one operations phase in a row before the opposing player is allowed to react with an operations phase of his own.
5.7 Disposition of Command Markers
After a Command marker is picked, it is placed aside. Then during the Return phase:
Faction markers are returned to the command pool.
International Events markers are returned to the command pool.
Operations markers are permanently removed from the game.
5.8 Faction Marker Permanence
Even if no units of a Faction are on the map (owing, say, to combat losses), its marker is still put into the Command pool. If it’s picked, nothing will actually happen during that particular operations phase unless there are reinforcements or refits for that Faction due that turn.
5.9 Stacking
Units from different Factions on the same side may stack together. Exceptions are stated in the Political Restrictions rule (see 26.0).
5.10 Attacking
Since only activated units may attack, units from different Factions which may be stacked together may not generally participate in the same attacks, unless each of their Factions is activated by the same command marker.
5.11 Defending
Units always defend normally, regardless of which Faction, friendly or enemy, happens to be activated at the moment. Units from different Factions may be called on to defend together.
6.0 INTERNATIONAL EVENTS TABLE
6.1 International Events Marker
When a player picks the International Events marker, he must consult the International Events Table. Two dice are rolled and the results totaled. This gives the specific event. Results are applied immediately.
6.2 Event Irrelevance
If an event does not apply to the situation on the map, then there is no further effect. An event may occur any number of times in a game, unless otherwise stated. Special situations called for by Events supersede other game rules.
7.0 MOVEMENT
7.1 Freedom of Movement
During each movement sub-phase, the phasing player may move as many or as few of the units of his activated Faction(s) as he chooses. Eligible units may be moved in any direction or combination of directions to the limits of their movement factors. If more than one command is activated, the player may move units of those commands in any order.
7.2 Movement Allowance
Each unit has a movement factor printed on it. Units are moved tracing a path of contiguous hexes through the hex grid, until all movement points are expended or the player decides to cease moving the unit, whichever comes first. As each unit enters a hex it pays one or more movement points from its movement allowance. Consult the Terrain Effects Chart on the map for further details.
7.3 Zero Movement Factor Units
Units with printed movement factors of zero (0) never move once placed onto the map, except to go into the dead pile. They may be refit normally, however.
7.4 Restrictions
A player’s units may be moved only during a movement sub-phase in which one or more of his Factions has been activated. Once a unit has been moved and the player’s hand removed from it, it may not be moved again. A unit may expend all, some, or none of its movement points in any one movement sub-phase of its Faction. Unused movement points may not be accumulated from turn to turn or phase to phase or sub-phase to sub-phase, nor may they be in any way transferred from one unit to another.
7.5 Minimum Movement
All units are generally guaranteed the ability to always move at least one hex per movement sub-phase of their Faction. However, units may never enter an enemy occupied hex, nor enter prohibited hexes, nor move directly through enemy zones of control (rule 9.0).
7.6 Zones of Control (ZOC)
Enemy zones of control stop movement; see the zone of control rules section, 9.0.
7.7 Terrain
To enter any given hex, a unit must expend the number of movement points designated by the Terrain Effects Chart (TEC) for the kind of terrain in it. When the TEC calls for a movement point expenditure to cross a hexside (such as a river), that cost is in addition to the terrain cost for entering the hex.
7.8 Multiple Terrain
If there is more than one type of terrain in a hex, use the highest single movement cost from among all the terrain involved.
Exceptions: If there is a road, track or bridge, use the road, track or bridge movement cost regardless of any other terrain in that hex, as described below in 7.9. Furthermore, units using airmobile movement ignore terrain through which they move.
7.9 Roads & Trails
A unit that moves from one road or track hex directly into a connected, adjacent road or track hex expends one half movement point (0.5) per hex entered. (Effectively, movement along a road and track is at two times a unit’s movement rate)
7.10 River Hexsides
Units pay the movement cost of other terrain in a hex when crossing a river hexside. That cost is in addition to the cost of entering the next hex.
Note: The Zaire Delta is treated as sea hexsides.
7.11 Bridge Movement
A bridge negates the effects of rivers on movement for units crossing the river hexside. There must actually be a bridge symbol for this bonus to be operative; a road or track that crosses a river without a bridge symbol present on the map doesn’t count as a bridge, and crossing movement points must be paid in such cases.
7.12 Exiting the Map
Units may not leave the map.
8.0 STACKING
8.1 Stacking Defined
Having more than one friendly unit in a hex at the same time is called “stacking.”
8.2 Stacking Limits
Stacking Limits for ANGOLA are as follows:
Three ground units per hex; plus
Any number of cadre sized units; plus
one Base.
8.3 Enforcement of Stacking
Stacking limitations apply for all units of both sides only at the end of each movement, air and combat sub-phase, regardless of which Faction is activated. Friendly units may move through hexes occupied by other friendly units, even if they belong to different friendly Factions, at no extra cost. Also, reinforcements may be placed overstocked, but stacking limits would have to be met at the end of the ensuing Movement phase.
8.4 Stacking Irrelevancy during Movement
There is no limit on the number of friendly units that may pass through a single hex or cross a single hexside in one sub-phase, phase or turn. If at the end of any friendly or enemy movement or combat sub-phase any hex is over-stacked, the player must eliminate excess units. Place them in the Refit box.
8.5 Restriction
A friendly ground unit or stack may never enter a hex containing an enemy unit or stack.
8.6 Free-Stacking Units
The following never count for stacking: Air or Helicopter.
Such units may be added to any hexes as long as the particular rules for their use are observed. Also, air markers may be placed in the same hexes as enemy units or markers, and vice versa. See rules 18.0 and 19.0.
8.7 Stacking Order
In general, players are free to arrange their stacked units, from top to bottom, in any order they choose, when that command is activated. However, if there are any units in a stack with a ZOC, one of them must be placed on top of the stack.
9.0 ZONES OF CONTROL
9.1 Elite Units
Elite units have a Zone of Control (ZOC). Non-Elite units do not. The six hexes immediately surrounding an Elite unit’s hex constitute that unit’s “zone of control” (ZOC). Hexes into which a unit exerts a ZOC are called “controlled hexes.” ZOC stops movement for units entering a ZOC hex (although ZOC has no effect on units merely exiting such a hex). A friendly unit’s presence in an enemy ZOC at the start of its Faction’s combat sub-phase requires that unit to attack. ZOC also affect retreats after combat.
9.2 ZOC Indicator
In general, units with a ZOC indicator exert a ZOC at all times, regardless of the phase, sub-phase or game turn. Enemy ZOC extend into terrain a unit could not normally enter.
9.3 Multiple ZOC
Both friendly and enemy units may simultaneously exert ZOC into the same hexes. There is no additional effect if more than one unit, friendly or enemy, exerts ZOC into the same hex.
9.4 ZOC & Movement
A unit must STOP when it enters an enemy
ZOC. It may move no further this Phase. A unit may never move directly from one enemy ZOC to another enemy ZOC.
9.5 ZOC & Combat
During an activated Faction’s combat sub-phase, the phasing player must attack all enemy units exerting ZOC into hexes occupied by the units of his activated Faction (but non-activated units never attack, regardless of ZOCs.) All units belonging to an activated Faction within any enemy ZOC at the start of that Faction’s combat sub-phase must attack one adjacent enemy unit (exerting the ZOC.)
Note: If a hex contains some enemy units that are exerting a ZOC whereas others are not, then that entire hex must be attacked. In other cases, the player may (but is not required to) attack a hex containing enemy units which are not exerting a ZOC.
9.6 Retreat & Pursuit
See the Retreat (11.0) and Pursuit (12.0) rules for the effects of ZOCs on these game functions.
9.7 Bases
Units inside of Bases exert ZOC normally, and are effected by enemy ZOC.
10.0 GROUND COMBAT
10.1 Assault & Mobile Combat Results Table
Attacking is mandatory for ground units of an activated Faction in enemy ZOCs at the start of that activated Faction’s combat sub-phase. The phasing player is termed the “attacker”; the non-phasing player is the “defender,” regardless of the overall strategic situation. There are two different Combat Results Tables (CRT) in Angola: Assault and Mobile.
10.2 Combat Procedure
For each individual combat, follow the sequence below.
-
Attack Declaration. The phasing player declares which units of his side’s activated Faction will be attacking which defending enemy units.
-
CRT Determination. The attacker chooses the CRT for the battle: Assault or Mobile. See below for prerequisites.
-
Initial Percentage Determination. Total the combat strength of all involved attacking units. Total the defense strength of all involved defenders. Divide the attacker’s strength by the defender’s strength and multiply that result by 100 in order to get a percentage (see 10.13).
-
Combat Shift Determination. Determine percentage column shifts for terrain, close air support, base support radius., Operations, and other factors.
-
Final Percentage Determination. Consult the appropriate CRT under the appropriate percentage column heading. Apply all applicable shifts to the initial percentage column.
-
Combat Resolution. Roll a die and cross index that result beneath the final percentage column heading. Implement the combat result immediately. Execute any retreats. Execute any pursuits.
10.3 Which Units May Attack
Only the units of the activated Faction(s) may attack during a given combat sub-phase. Units of other friendly non-activated Factions may not attack at that time. Defending units may all belong to one or more than one enemy Faction. Note that in some cases a player may activate more than one Faction in an operations phase, in which case they could attack together.
10.31 Defense only units
Units with a parenthesized defense strength can never attack, regardless of activation or Enemy ZOC. Note that since Base units negate the presence of enemy ZOC, non-base units in the same hex do not have to attack adjacent enemy units which have ZOC, though they may do so if the phasing player desires.
10.4 Attack Declarations
The phasing player may resolve his combats in any order he chooses. He must declare which adjacent activated units will be attacking which defending enemy units at the beginning of each combat sub-phase in order to ensure all adjacent ZOC-exerting enemy units will be attacked.
10.5 Mandatory Attack
All activated units in any enemy ZOC must attack. All hexes containing ZOC-exerting enemy units adjacent to your activated units must be attacked. Within that overall limit, the phasing player may choose which attacking units will attack which defending hexes, as long as all activated friendly units adjacent to a ZOC-exerting enemy unit participate in an attack. A player may also, but doesn’t have to, attack enemy units that do not have ZOC.
Note: This rule applies to both phasing Elite and non-Elite units. An Elite unit is required to attack enemy units if they occupy their ZOC.
10.6 Multidirectional Attacks
A defended hex may be attacked from as many as six adjacent hexes, with all attacking units combined into one single attack.
10.7 Attack Limit
In general, no unit may attack more than once per combat sub-phase and no defending unit may be attacked more than once per combat sub-phase.
10.8 Stack Attacks
Units in the same stack may attack together, or be directed against different defending stacks.
10.81 Stack Defenses
Units defending in the same hex must be attacked as a single combined total; they may not be attacked separately. This is so even if some units have ZOC and others do not.
10.9 Multi-Unit & Multi-Hex Attacks
If an attacking unit is in the ZOC of more than one enemy unit, it must attack all those enemy units (and units in their hexes) that aren’t engaged by some other attacking unit(s). Units in two or more hexes may combine their combat strengths and attack into a single hex if all those attacking units are adjacent to all the involved defending units. Attacks may involve any number of attacking or defending units. For an attack to be resolved as a single combat, however, all involved attacking units must be adjacent to all involved defending units.
10.10 Diversionary Attacks
When making a series of attacks, a player may allocate his attacking units, on a hex by hex basis, so some attacks are made at poor percentages while others are made at more advantageous percentages.
Old Hand’s Note: This is what used to be called a “soak off” attack.
10.11 Combat Strength Unity
A single unit’s attack and defense strengths are always unitary. A given unit’s strength may not be divided among different combats, either for attack or defense.
10.12 Choice of CRT
The attacker chooses the CRT. If any attacking ground units are Elites, then the attacker can choose either the Assault or Mobile CRT. If all attacking ground units are non-Elite types, then the attacker must choose the Assault CRT.
10.13 Combat Percentage
Combat percentage is determined by dividing the attacker’s strength by the defender’s strength and then multiplying that result by 100. Then reference the corresponding column on the CRT when rolling the die.
Example: If the attacker has 20 combat factors and the defender 13, you divide 20 by 13 and get 1.53. Then you multiple 1.53 by 100 in order to convert it to a percentage, which yields 153. So that combat would be resolved on the 150-199% column of whichever CRT is chosen.
10.14 CRT Percentage Column Shifts
Certain game functions will “shift” the combat odds. They include:
-
Base Support;
-
terrain (see 10.18); close air support;
-
Operations.
10.15 Column Shift Defined
A CRT percentage column shift to the right means the column is increased by the number of columns indicated (that is, in favor of the attacker). A shift to the left means the column is decreased by the number of columns indicated (that is, in favor of the defender). If both the attacker and defender have shifts, use the cumulative difference. Even if the starting percentage is less than 49% or greater than 600%, use the 49% and 600% columns as the “base line” for shifts.
10.16 Base Support
If all attacking ground units are within the support radius of a friendly base, then the attack is shifted two columns to the right. If some but not all attacking ground units are within the support radius of a friendly base, then the attack is shifted one column to the right. If all defending ground units are within the support radius of a friendly base, then the attack is shifted two columns to the left. If some but not all defending ground units are within the support radius of a friendly base, then the attack is shifted one column to the left. If no units are within the support radius of a Base, then no shift is received.
Note: See 16.4 for a definition of “Support Radius”.
10.17 Close Support
The attacker gains one shift to the right for each air unit capable of performing Close Support. See 20.0.
10.18 Terrain
Defending units benefit (or sometimes penalized) from the terrain in the hex they occupy and, in certain cases, along that hex’s sides. The TEC gives the defensive shifts. Benefits for terrain are not cumulative. A defending force can receive only the shift for one type of terrain. If a force potentially has more than one defensive terrain shift available to it, it uses the single best one for that hex.
10.19 Abysmal Terrain
Certain terrain, such as desert, gives a one column shift to the right.
10.20 Hexsides
A force receives the benefit for defending behind a hexside (such as a river) only if all attacking units are attacking across the hexside.
10.21 Shifts for Operations
Certain operations will provide a shift for attacking units. This is for the combat phase in which that Operation activates units.
Example: Operation Hooper would provide the bonus to attacks in which SADF units are involved, but only for the Operations phase generated for it. If SADF and UNITA units were in the same attack, the column shift would still be applied.
10.22 Combat Shifts Example
The attacker has one combat factor and the defender 10, which would normally give <=49% odds. The attacker has three shifts to the right, and the defender one to the left, giving a final result of two shifts to the right. The final percentage column is therefore 100-149% because the starting column (<=49%) shifted two to the right is the 100-149% column.
Designer’s Note: This effect is intentional, to allow small forces the chance to win incredible victories and large forces to go down in unexpected disasters.
10.23 Combat Results Explanations
The results for both CRT are listed below in alphabetical order. Results must be applied in the order given, and only those results specifically called for are applied. The results affect only ground units involved in that combat.
Designer’s Note: If you are using the Mobile CRT, there is no necessity to eliminate Elite units before non-Elites when losses are called for. The reason is that both sides used lower quality troops as cannon fodder.
AD: Attacker Defeated
-
Eliminate 50% of attacking strength points.
-
Surviving attacking units withdraw two hexes.
-
No pursuit.
AE: Attacker Eliminated
-
Eliminate all attacking units.
-
No pursuit.
AP: Attacker Panics
-
All attacking units rout (see 11.0).
-
No pursuit.
AT: Attacker Disintegrates
-
Eliminate 50% of attacking strength points.
-
Surviving attacking units rout (see 11.0).
-
No pursuit.
AW: Attacker Withdraws
-
All attacking units withdraw one hex.
-
No pursuit.
BB: Bloodbath
-
Eliminate 50% of attacking strength points.
-
Eliminate 50% of defending strength points.
-
No retreat.
-
If all defending units have been eliminated, the attacker may conduct pursuit movement.
DD: Defender Defeated
-
Eliminate 50% of defending strength points.
-
Surviving defending units withdraw two hexes.
-
Attacker may conduct pursuit movement.
DE: Defender Eliminated
-
Eliminate all defending units.
-
Attacker may conduct pursuit movement.
DP: Defender Panics
-
All defending units rout (see Retreat).
-
Attacker may conduct pursuit movement. No pursuit.
DW: Defender Withdraws
-
All defending units withdraw one hex.
-
Attacker may conduct pursuit movement.
MA: Mobile Attack
-
The defender must eliminate one unit.
-
Surviving defending units withdraw two hexes.
-
Attacker may conduct pursuit movement.
MD: Mobile Defense
-
The attacker must eliminate one unit.
-
All defending units withdraw one hex.
-
Attacker may conduct pursuit movement.
OR: Overrun
-
Eliminate 50% of defending strength points.
-
Surviving defending units rout (see Retreat).
-
Attacker may conduct pursuit movement.
10.24 Eliminations
When unit eliminations are called for, the choice of which involved unit(s) is/are to be eliminated is up to the owning player. If a result calls for 50% of strength points to be eliminated, then the player controlling the affected units must eliminated units whose printed strength points equal at least of the total strength. A player could eliminate units with more strength than called for in order to preserve other units.
10.25 Retreat & Pursuit
See the Retreat (11.0) and Pursuit (12.0) rules below for details on how these are conducted after combat.
11.0 RETREAT
11.1 Retreat Procedure
When a combat result specifies units to be retreated, the owning player immediately move those units the indicated number of hexes away from their combat position. Retreat is not regular movement; its execution doesn’t use up movement points. It is carried out in terms of hexes, not movement points, and units must always retreat the number of hexes indicated, regardless of their printed movement allowances.
11.2 Types of Retreat
There are two types of retreat: withdrawal and rout.
A “withdrawal” result specifies the number of hexes to be retreated.
A “rout” result causes the player to roll one die and all retreating units must move that number of hexes.
11.3 Who does the Retreating
The retreat is always executed by the player who controls the units. You may move retreating units only into legal hexes. Only if no such legal hexes exist may you move them into prohibited hexes which will then cause them to be eliminated.
11.4 Retreat Restrictions
Retreat is subject to the following strictures. Within these limits, units may be retreated in any direction.
-
Units may not retreat into hexes containing enemy ground units, into otherwise prohibited terrain, or off the map. If there is no other alternative, they are eliminated in the last hex into which they were able to retreat. (Enemy air units do not block retreat.)
-
Units may retreat into enemy ZOC, but each time a stack of unit retreats into a ZOC, one unit from it is eliminated (of the owner’s choice).
Note: Many units do not have ZOC!
-
Units may retreat into and through hexes containing friendly units. Units must obey all stacking and Faction rules in the final hex of their retreat path. If they end their retreat in violation of any of those rules, the retreating unit retreats extra hexes until it reaches a hex in which it meets the limit.
-
A retreating unit may not be moved through the same hex more than once, nor re-enter the hex from which it began the retreat. It must end its retreat the indicated number of hexes away from its combat position. If it can retreat only a portion of the number of hexes called for in the combat result, it is eliminated in the last hex into which it was able to retreat.
-
Within the strictures given above, a player can retreat units as stacks or individually.
-
In no case may a unit be retreated into a hex that would cause it to be eliminated or over-stacked at the end of the retreat if another retreat path is available.
-
See the Base rule for the effects of retreat on Bases.
11.5 Attacked after Retreat
Under certain circumstances a unit may end its retreat adjacent to an enemy unit (for example, if the enemy had no ZOC). They may be attacked again if the enemy units had not been committed to any attack, or if they end up in stacked with units which are slated to be attacked.
11.6 Airmobile Retreat
Units with an airmobile indicator, when called upon to retreat, may instead be moved to any friendly Base within the base’s Support Radius. The base must be functional (see below for definition). Airmobile retreat may not be done through an enemy air defense zone.
11.7 Bases & Retreats
Bases (and units in them) ignore Retreat results. They are affected by Routs.
A base which is forced to Rout is eliminated instead. Units in them rout normally. If a hex has a Base in it, then: units in the hex which receive retreat results may choose to ignore the retreat (owning player’s choice on a unit by unit basis). This applies to both attacking and defending units. But, if in an individual combat there are some units attacking or defending in a base and some not, only those in the base itself can ignore the retreat. Units not in the base are affected normally. Also, units retreating into a hex containing a friendly a Base may cease their retreat in that hex and don’t have to retreat the full distance (though that may at the player’s option).
12.0 PURSUIT
12.1 Pursuit Defined
Pursuit is a special form of movement that may occur after each battle if allowed by its combat result.
Old Hands Note: “Pursuit” is what is usually termed “advance after combat” in other wargames.
12.2 Pursuit Choice
If a combat result allows a player to conduct pursuit, he may, but is not required to, immediately move some, none, or all of his eligible involved units a number of hexes as follows:
All SADF Elite and CIA Elite units: Three hexes.
All other Elite units: Two hexes.
All non-Elite units: One hex.
12.3 The Combat Hex
The first hex where the combat occurred must be the hex the enemy units formerly occupied. The second and subsequent hexes, if allowed, may be in any directions. This is in terms of hexes, not movement points.
12.4 In Pursuit
Pursuit may be made only into hexes into which pursuing units could normally move. Pursuing units are not affected by enemy ZOCs—they may move through them freely.
12.5 Incremental Pursuit
If a pursuit is more than one hex, some pursuing units may stop in the first hex, and others in the second or subsequent hexes. Pursuit movement may not be increased by road, track, or airborne movement.
12.6 Zero Movement Units
Units with a “0” movement factor may not conduct pursuit.
13.0 REINFORCEMENTS
13.1 Reinforcement Defined
Players may receive additional units over the course of a game. Such units are called “Reinforcements.” Reinforcements are generated (usually) by playing certain Operations markers, and sometimes by International Events.
13.2 Operations
Players pay the designated number of VP to take an Operations marker and place it in the command pool. When it is picked, take the Reinforcements listed for it, if any.
Note: Remember, each operation can be purchased only once per game.
13.3 Turn of Arrival
All reinforcements in Angola are received “immediately”: they appear in the Reinforcement phase activated by the pick of the Operations marker.
Example: The SADF Operation Hooper reinforcements would be received when Operation Hooper command marker is picked.
13.4 Turn Record & Reinforcement Track
Each player has a Reinforcement/Turn Record chart. Each player places reinforcements to appear on their own track, and when the scheduled turn comes up, the units are now available to be placed.
13.5 Reinforcement Sub-Phase
During each of his activated Factions’ reinforcement sub-phases, the owning player places reinforcement units which are available this turn in the hexes designated below. Reinforcements operate normally starting with their sub-phase of arrival.
- Anti-Communist Reinforcement Placement
SADF units are placed in functional SADF bases in Southwest Africa. Additionally, they may be placed on the south map edge within Southwest Africa.
UNITA units are placed in functional UNITA or CIA bases in Angola.
FNLA units are placed in functional FNLA or CIA bases in Angola or Zaire, or on the north map edge in Zaire.
FLEC units are placed in functional FLEC or CIA bases in Angola or Zaire, or on the north map edge in Zaire.
CIA units are placed in any airbase in Zaire (with or without friendly units), or in functional anti-Communist bases in Angola.
Air units are placed in the available box.
- Communist Reinforcement Placement
FAPLA ground unit reinforcements are placed in functional FAPLA bases in Angola.
SWAPO ground unit reinforcements are placed in functional SWAPO bases in Angola or Southwest Africa.
East Bloc ground unit reinforcements are placed in functional Communist bases in Angola in hexes which contain an airfield. They can also be placed in Angolan ports which contain any kind of Communist unit.
- Base placement
Base units received as reinforcements may be placed in the same hex as a friendly unit of the same side, provided that unit is within Support Radius of another functional friendly Base. See also Air Supply (21.0).
- Guerilla placement
Guerilla units may be placed per (1) and (2) above. Additionally, guerillas may be placed:
a) Within the support radius of a friendly functional Base. The hex in which the unit is to be occupied does not have to contain any friendly units (but can not have enemy units).
b) In the same hex as any special forces unit of a friendly special forces unit.
Note: Remember, a friendly unit is any unit on the same side; it does not have to be of the same faction.
13.6 Restrictions
Reinforcements may not generally be placed in a hex occupied by an enemy unit, nor in an enemy ZOC. However, a reinforcing unit which enters on a map edge may be placed in a hex containing an enemy ZOC. Reinforcements may be placed over-stacked.
13.7 International Events
Certain events will generate reinforcements. These are deployed when the event occurs.
13.8 Delay
A player may choose to delay reinforcements until a later turn.
Designer's Note: This can be useful when it comes to placing bases if you anticipate capturing territory on a later turn.
13.9 Reinforcement Placement
Reinforcements are simply placed on the map—they do not march onto it. There are no movement point costs for reinforcement placement.
13.10 Airmobile Reinforcements
Units with an airmobile movement symbol may enter play per above. Additionally, they can be placed on any hex into which they could conduct an airmobile move (including hexes with an enemy ZOC)--see the airmobile rule (23.0). (They are assumed to be moving onto the map from airbases off the map.)
Note: This placement occurs during the Reinforcement phase.
14.0 REFIT
14.1 Refitting Units
Generally, whenever a unit (ground or air) is eliminated, it is placed in the Refit box. Units in the Refit box maybe returned to play via Refit. Units in the permanently eliminated box may not be refit.
14.2 Prerequisites
To refit units, the following prerequisites must be observed:
-
For a unit of a particular command to be refit, that command must first be activated. By taking a Refit phase, the player cannot conduct any Movement, Air or Combat phases for that same faction in that operations phase. It may take the Reinforcement phase.
-
Base Requirement. The player may initiate a Refit attempt for one unit (any type) per each functional Base of that faction.
-
CIA Support. Additionally, the Anti-Communist player may initiate one UNITA (or CIA) refit per functional CIA base anywhere on the map.
-
Commands activated via Operations markers may not Refit.
-
Units of the refitting command cannot make any attacks even if in enemy ZOC.
Example: The Anti-Communist player picks the UNITA marker, so he can choose to conduct refit for UNITA units. He then picks the Operation Modular marker; no refits can be initiated.
14.3 Refit Procedure
For each unit which is to refit, consult the Refit Table, and conduct the following steps:
-
Roll one die.
-
Make the DRM die roll adjustments listed next to the Refit table.
-
Immediately apply the result.
14.4 Refit Results
Delay 1, 2 or 3: The unit appears one, two or three turns later.
Elim: Place the unit in the Permanently Eliminated box.
Refit Now: The unit is immediately returned to play (during the Refit phase).
Return: Place the unit back in the Refit box. You may attempt to refit it on a later turn.
14.5 Placing of Refit Units
Refit units are placed in the Reinforcement phase in the same manner as reinforcement units. However, the restriction of one unit Refit per base does not apply to placing units on the map. Any number of units which are due as refits or reinforcements in a turn may be placed.
Old Hands Note: All units eliminated from the map may be potentially refit, even if they were not supported or were cut off by enemy ZOC. Units end up in the Permanently Eliminated box only due to certain results on the Refit table.
15.0 UNIT WITHDRAWAL
15.1 Operation Packer
Certain Anti-Communist Operations (In Angola, this is Operation Packer only) require the player to withdraw units for them to go into effect. An Anti-Communist Withdrawals box is provided on the map for such units.
15.2 Procedure
To withdraw the unit, simply pick it up from the map and remove it from play. The unit must be within the Support Radius of a Base to perform a withdrawal. Additionally, SADF units may be on the south map edge. If there is no unit available (per above) to withdraw, then that Operation may not be selected.
16.0 BASES & SUPPORT
16.1 Grubstake
Bases provide enhancements to unit movement and combat. They are also used to Refit units, as well as for other game functions as noted.
16.2 Base Units
Bases provide enhancements to unit movement and combat. They are also used to Refit units, as well as for other game functions as noted. Also, they may be displaced, see below.
16.3 Functional & Non-Functional Bases
A Base is Functional if it is not suppressed.
16.4 Support Radius
Each functional Base unit has a support radius. This is the number of hexes out from the base from which it can support.
Example: A Base with a Support Radius of “2” could support all units in its own hex, adjacent hexes, and two hexes away.
16.5 Tracing Support Radius
Support Radius is not blocked by terrain, enemy units or enemy ZOC. Support radius may be traced across borders only if units of the base’s faction could enter that country.
16.6 Bases & Airfields
A functional Base which is located in an airfield hex has its printed support radius doubled.
16.7 No Road Extension
Support Radius is not increased along roads or trails.
16.8 Supported units
All units within Support Radius of a friendly Base are “Supported”.
16.81 Units which do not require support:
The following units do not require support to operate at full effectiveness:
a) Base: A base is always considered supported (by itself).
b) Cadre: Cadre sized units are always supported.
c) Air Units: Air units do not require support to conduct operations.
16.82 Effects of Support
Support has the following effects:
- Movement: A unit which begins its movement phase supported has its movement factor doubled. This is checked at the start of the movement phase.
Note: a unit which is not supported uses its printed movement factor.
- Combat: Bases provide shifts to friendly units attacking and defending within support radius. See the combat rule for the effect of support on combat.
16.9 Limitless Support
A single Base can support all friendly units within support radius, and of any faction on its side (but see the Political Restrictions rule; 26.0). This is regardless of faction activation. However, being within support radius of more than one Base provides no additional effects.
Example: A UNITA base may support SADF and CIA units.
16.10 Expeditions
Players may deliberately move their units into hexes in which they would be unsupported.
16.11 Reinforcements Reception
Bases are places to place certain reinforcements. However, a Base which itself was placed in a reinforcement phase may not be used in that same phase to place other units.
16.12 Replacing Bases
A Base which has been eliminated goes into the Refit box and is replaced normally.
16.13 Base Displacement
A player may remove a friendly base from the map to potentially move it elsewhere. This is done during a Reinforcement phase in which that base’s faction would be activated. Simply pick up the base and place it in the reinforcement box. On the following turn, it becomes available as a reinforcement, and may be placed then or on any turn thereafter. It does not go through the Refit process.
16.14 Retreating
See the Retreat rule (11.0) for the impact of Bases.
16.15 Special Units
See the Special Units rule (23.0) for more on support radius.
17.0 AIRPOWER
17.1 Airpower Defined
Airpower is represented by TAC (Tactical air) and Helicopter markers. These are placed in the Air Available box. When a player has airpower available, he may use the markers for purposes stated below, placing them on the map. After an air marker has been used, place it in the utilized box. An air marker may be used only once per game turn. Surviving air units are returned to Available box during the Return phase.
17.2 Activation
Air markers are activated as parts of commands.
17.3 Range
Air units have an unlimited range. However, if an Air Superiority or Interdiction attack is within the support radius of a friendly functional Base which also contains an airfield, then the column is shifted one to the right.
17.4 Air Unit Missions
There are three kinds of missions that may be performed by air units:
a) Air Superiority: Both player’s TAC units may conduct Air Superiority.
b) Interdiction (aka ground attack): Both player’s TAC and helicopter units may conduct Interdiction of enemy land units.
c) Close Support: Both player’s helicopter units and Anti-Communist TAC may conduct Close Support.
17.5 Air Unit Stacking
There is a maximum number of air units each side may have in a hex:
a) Anti-Communist: Three.
b) Communist: Two.
17.6 Stacking Irrelevancy
Air units can stack with enemy air and ground units while performing a mission.
17.7 Air Mission Procedure
All air missions are flown in the Air Sub-Phase, per the following steps:
-
The phasing player places some, none or all air units on the map.
-
The non-phasing player may place any TAC units he has available to conduct Interception by placing them in hexes containing phasing air units. The intercepting air units can come from any faction as long as they are in the available box. (Intercepting air units do not have to be activated.)
-
Resolve all Air Superiority combat.
-
Resolve all phasing Interdiction attacks.
-
Air units which will be used for Close Support missions remain in the hex and execute those missions during the ensuing Combat phase.
17.8 Mission Completion
Air units are removed from the map and placed in the Air Used box as soon as they complete their missions.
17.9 Ground-Air Interaction
Air units are not affected by the results of ground combat. (However, see the Air Defense Units rule; 22.0).
17.10 Multiple Missions
A phasing individual air unit can conduct both (1) Air Superiority and, assuming it survives, (2) either a Ground Attack or Close Support mission in the same Air Phase.
17.11 Airspace
Air units are assumed to be operating above all units and terrain, and otherwise have no effect on them, or vice versa, i.e., they have no ZOCs, do not count for stacking, do not block the movement of enemy units, etc.
17.12. Air logistics
Air units are not affected by supply considerations at this game’s scope and scale.
18.0 AIR SUPERIORITY MISSIONS
18.1 Air Superiority Defined
Air Superiority missions are flown when each side has air units in the same hex. Air Superiority is resolved on the Air Combat Table.
18.2 Air Superiority Procedure
To resolve air superiority, each player simultaneously does the following:
-
Total their Air Superiority points in the hex.
-
Compare that to the applicable column on the Air Superiority Table.
-
Roll one die and implements the result. Results are implemented simultaneously.
18.3 Air Superiority Results
These are listed on the Air Combat Results Table. When more than one type of enemy unit can be potentially eliminated, the player whose units are affected always chooses which units will be eliminated or suppressed. Losses are applied only against units in the hex in which a particular mission is being flown. If losses are called for which are in excess of units in the hex, then the excess are ignored.
Map Errata: On the Air Combat Results Table, under the "Air Superiority" column, the AA and "1" rows should be printed "One enemy air unit is aborted."
18.4 Aborting Air Units
Remove the air unit from the map. Place it on the turn Record and Reinforcement Track on the following turn, where it is received as a reinforcement (when its command is activated). It cannot complete any other mission this phase, however.
18.5 Elimination of Air Units
When any air unit is eliminated, remove the air unit from the map. Place it in Refit box
19.0 INTERDICTION MISSIONS
19.1 Interdiction Defined
Interdiction missions are conducted by air units attacking hexes containing enemy ground units. Interdiction is resolved on the Air Combat Table.
19.2 Interdiction Procedure
An Interdiction mission is conducted per the following steps:
-
Total the number of attacking Interdiction points.
-
Use this to determine the column which will be used on the Air CRT.
-
Apply any shifts (see the table).
-
Roll one die and apply the result. Results are explained on the table.
19.3 Suppression Results
Interdiction may cause suppression of ground units and bases, airbases, and ports. Place a Suppression marker on the hex. Suppression has the following effects:
-
Bases have their support radius reduced to just their own hex. They are otherwise not functional.
-
Airbases and ports in the hex do not provide any special functions.
-
Ground units are automatically out of support, regardless of their proximity to a friendly base.
-
Air Defense units lose their Air Defense Zone.
Note: Suppression markers have no other effects on play.
19.4 Duration of Suppression
All suppression markers are removed from the map during the Return Phase.
Air Interdiction Example: A player places three TAC air units (intruders) into a hex to conduct Interdiction. The enemy intercepts with two TAC of his own. The intruders then fire as Air Superiority, inflicting a “2” result, eliminating one interceptor TAC. The interceptors simultaneously fire back (including the interceptor that was just eliminated) and get a “1” result; One intruder is one aborted, and the remaining two intruder TAC conduct the Interdiction attack normally.
20.0 CLOSE SUPPORT MISSIONS
20.1 Close Support Defined
Close Support is used to provide a column shift for ground attacks. This type of mission is flown against hexes containing enemy ground units adjacent to friendly units. If a ground attack is being made against more than one hex, attacking close support need be flown against only one of those hexes. Close Support does not use the Air Combat Table, but is instead a shift to the Mobile or Assault CRT.
20.2 Close Support Procedure
A Close Support mission is conducted per the following steps:
-
Total the number of Close Support missions flown against the defending ground units in the hex.
-
In any ensuing ground combat against defending ground units in the hex, shift the column to the right a number equal to the total number of close support missions being flown.
20.3 Close Support in the Attack only
Close Support may only shift to the right (for the attacker). The defender may not use Close Support.
21.0 AIR SUPPLY
21.1 Air Supply
Players receive Air Supply markers via scenarios; These can provide temporary Support to units that have ventured beyond the support radius of any base.
21.2 Procedure
A player can place an Air Supply marker at the start of any phase in which the air supply’s faction would be activated (this does not have to be an air phase). Simply place the air supply marker in any hex on the map containing friendly units. The marker provides Support to all friendly units in the hex, but not outside of it for the rest of that Operations Phase. At the end of that Operations Phase, remove the air supply marker from the map and return it to the pool of available markers.
21.3 Base Construction
A player may place a Base unit reinforcement in a hex which contains both another friendly unit and an Air Supply marker.
21.4 Restrictions
Air Supply may not be conducted in hexes in enemy Air Defense Zones. Air Supply may not be intercepted by enemy air units. Air Supply may be placed in hexes containing enemy ZOC. An Air Supply marker may be reused any number of times in a game. Air Supply markers do not otherwise affect play.
22.0 AIR DEFENSE UNITS
22.1 Air Defense Defined
Air Defense units have a radius printed on them; This is the number of hexes away, in all directions, from that unit which constitutes its Air Defense range, otherwise known as its “Air Defense Zone”.
22.2 Air Defense Zone Effects
Friendly air units that are flying Air Superiority or Interdiction missions within an enemy Air Defense Zone must shift all their Air Superiority and Interdiction attacks one column to the left on the Air Attack Table. In addition, apply the special “AD” result to those units.
22.3 Other Air Defense Effects
Within an enemy Air Defense Zone, the following restrictions apply:
-
No friendly Close Air Support may be conducted.
-
Friendly Air Supply units cannot be placed.
-
No friendly ground units may conduct Airmobile movement or Air Transport.
-
The effects of friendly occupied printed airbases are negated.
22.4 Crossfire
If there is more than one enemy air defense unit covering the same hex(es), no additional effect or bonus applies there.
23.0 SPECIAL UNITS
23.1 Airmobile Units
Airmobile units (printed with an airmobile symbol) may make airmobile moves.
23.11 Airmobile Insertion Procedure
The airmobile unit must start in a hex containing a functional Base or an airfield. The moving player picks up the airmobile unit then places it on any hex on the map.
23.12 Airmobile Extraction
To remove (extract) an airmobile unit, the owning player picks up that unit (from any type of terrain or ZOC) and then places it a hex containing a functional friendly base or a friendly occupied airfield.
23.13 Over Hill, Over Veldt
Airmobile movement may be made over any type of terrain, enemy units and ZOC. The unit may land in any hex containing otherwise legal terrain. The move may be made into enemy ZOC. Airmobile movement may not be made out of, through or into hexes within an enemy air defense zone.
23.2 Light Forces Mobility
Special Forces and Guerilla units pay only one movement point to enter rough and forest terrain.
23.3 The SOF Unit
23.31 Soldier of Fortune
The Anti-Communist SOF unit enters play as a result of Events. It can be deployed on any Anti-Communist base. It may move anywhere on the map. If eliminated, the unit may not be Refit. However, if the event occurs again, it is restored to play.
23.32 SOF Activation
The Anti-Communist player may activate the SOF unit with any Faction marker. However, the unit may be activated only once per turn. Place a blank marker at the end of an operational impulse in which it was activated, and remove the blank at the end of the turn.
24.0 FOG OF WAR
24.1 Limited Examination
In general, players may examine enemy stacks only during the combat resolution process. But, once an attack has been declared, it may not be called off.
24.2 Air Recon Examination
The instant that any air mission is flown into a hex containing enemy ground units, the player can examine those ground units.
24.3 Known Information
A player has to notify the other player of the presence of units which apply ZOCs, Support Radius and Air Defense Zones where those special abilities come into effect.
24.4 Reinforcement Track Concealment
A player may not examine enemy units on the enemy turn record reinforcement track. A player may not examine enemy Operations markers chosen until played.
25.0 WEATHER
25.1 Rain
Rainy Season turns are indicated on the Turn Record and Reinforcement Track. During Rainy Season turns, the following go into effect:
- Air: A player can use only one half of their total air units, all types (round up fractions).
Example: A player has four TAC and one helicopter; He could use three TAC, or he could use two TAC and one helicopter (i.e., half of five, rounded up).
-
Trail: Trails are treated as other terrain in the hex for all game purposes (movement, Support Radius, etc.) Roads and bridges remain normal.
-
Terrain: Some terrain types cost more to enter during Rainy Season turns.
-
Support Radius: All bases have their printed Support Radius reduced by “one”. This is before doubling for being in an airbase.
26.0 POLITICAL RESTRICTIONS
26.1 General
Generally, all units on each side may operate together, stack together, gain support from each other’s bases, etc. The following restriction, however, applies:
26.2 FNLA-UNITA Rivalry
UNITA and FNLA units may never end a movement, air or combat phase stacked together. If for some reason they do, then the Anti-Communist player must eliminate all units from one of the factions (of his choice) and place them in the Refit box. Furthermore, FNLA units may not gain support from UNITA bases, and UNITA units may not gain support from FNLA bases.
26.3 Crossing Borders
Generally, units are free to move anywhere on the map, with the following restrictions:
-
No units may ever enter Zambia or Botswana.
-
Only FLEC, FNLA and CIA units may enter Zaire.
-
The TG 7/10, TG 8/10 and CF/10 brigades of the SADF 10th Division cannot leave Southwest Africa. Other units of its reinforcement group may, however.
26.4 Cross Border Combat
ZOCs extend across borders, even if units cannot move across them. Also, units can (and sometimes must, if in an enemy ZOC) attack across borders even if they cannot otherwise move across them. They cannot retreat or pursue across them if otherwise prohibited.
26.5 Cabinda
The Cabinda enclave (northwest map) is part of Angola for all game purposes.
27.0 VICTORY CONDITIONS
27.1 Victory Conditions
Victory conditions in Angola are in terms of victory points (VP). At the end of the game, players total their VP. The side with fewer VP subtracts its total from the side with more. The side with more VP wins the game (unless there is a draw).
27.2 VP for Occupying Hexes
Certain hexes have a VP value, listed below: To gain the VP for these hexes, the player must have a ground unit occupying it at the end of the game. Enemy ZOC do not contest hex occupation for VP. Certain hexes give points to only one player, as indicated on the chart.
| Objective | VPs |
|---|---|
| Luanda | 10 |
| Cabinda | 5 |
| Other Resource cities | 3 |
| Each Angolan provincial capital | 1 |
| Hydroelectric hexes | 3 |
| Each other Angolan town (Anti-Communists only) | 2 |
| UNITA Deployment hex | 5 |
| Each SADF sector HQ town | 3 |
| Each other Southwest African town (Communists only) | 1 |
27.3 VP for Eliminating Units
VP are also gained for enemy ground and air units that are in the Refit or Permanently Eliminated box at the end of the game.
SADF, CIA, SOF: 4 VP
East Bloc: 2 VP
All others: 1 VP
Enemy units which have been Refit and are on the Turn Record Reinforcement track do not count for VP.
Designer’s Note: It behooves you to attempt the refit of units early and often.
27.4 VP for Operations
Each Operation marker that a player chooses in the course of a game gives a number of VP to the enemy, as listed on the Command chart printed on the map.
27.5 Levels of Victory
There are three levels of victory: Tactical (lowest), Operational (median), and Strategic (highest). If neither player attains any victory condition, or both attain the same level, the game ends in a stalemate (draw).
Strategic: 76+
Operational: 51-75
Tactical: 26-50
Draw: 0-25
27.6 Sudden Death Victory:
If at the end of any game turn a player has accomplished the following, the game comes to an immediate end and he wins an Epic Victory:
The player’s units occupy all the following in Angola and Southwest Africa:
Cities
Resource hexes
Provincial capitals
UNITA deployment hexes
SADF HQ hexes.
28.0 ANGOLA SCENARIO
28.1 Players & Sides
There are two players: the Communist player and the Anti-Communist player. The Communist player is the First Player.
28.2 Game Length
August 1987 to July 1988.
28.3 Deployment Order
The Anti-Communist player first deploys his initial forces on the map. The Communist player then deploys his initial units. Reinforcements are placed off map and are brought on by Operations. Units in the Refit box are brought in via the Refit procedure.
28.4 COMMAND POOL
Place in the Pool the following markers:
Anti-Communist: SADF, UNITA, FNLA/FLEC.
Communist: FAPLA, SWAPO, East Bloc.
Other: International Event marker.
Then, place the Operations markers aside; players purchase these by expending VP:
Anti-Communist: Operations Modular, Hooper, Packer, Total Onslaught, Cadmus.
Communist: Operations Saludando Octobre, Maniobra XXXI Anniversario.
28.5 Anti-Communist Deployment
SADF
In Southwest Africa: 7 x bases; TG 50, 1st SWATF infantry brigade; 32nd infantry battalion; 61st mechanized battalion; 1st airborne battalion; K special forces battalion; A/R, B/R, SWASU special forces.
Special deployment: one battalion, one base, and one special forces cadre of the above units are deployed on any towns and/or hydroelectric hexes in Angola within two hexes of the SW African border.
UNITA: On or within two hexes of UNITA Deployment hexes: 5 x bases; 3 x combined arms brigades; 9 x infantry brigades; 6 x guerilla brigades.
Anywhere in Angola, but not on or adjacent to cities or towns: 5 x special forces, 6 x guerrilla brigades.
FNLA: In Zaire within two hexes of Kinzuzu: 1 x base;
1 x special forces; 2 x guerillas.
FLEC: In Zaire within two hexes of the Cabinda border: 1 x base; 1 x special forces; 1 x guerilla.
CIA
In Zaire: 2 x Bases.
In Zaire, or on UNITA deployment hexes: 2 x special forces.
Air Box
SADF: 4 x TAC; 1 x helicopter; 1 x air supply.
CIA: 1 x air supply.
Optional units: Place aside; use only with on-line optional rules:
SADF: 1 x armor battalion; 2 x air defense brigades; 2 x TAC; 2 x Wild Weasel air, 1 x helicopter.
Refit Box: 1 x FNLA guerrilla; 1 x FLEC guerrilla; 1 x FNLA base, 3 x UNITA guerillas.
Reinforcements: All other units. See the Reinforcement Table for details.
PSYWAR Box (see on-line optional rules):
5 x PSYWAR markers.
28.6 Communist Deployment
Deployment Restrictions:
Communist units may not deploy in hexes containing Anti-Communist units, nor on or adjacent to UNITA Deployment hexes. They may deploy in Anti-Communist ZOC.
FAPLA: In Angola, on or adjacent to cities and towns (within above restrictions) : 1st, 2nd special forces brigades; 10 x bases; 5 x mechanized brigades; 18 x infantry brigades; 2 x air defense brigades.
East Bloc: In Angola, on or adjacent to cities and towns (within above restrictions): 5, 6, 7 mechanized regiments; 8 armor regiment; OMG A combined arms; MININT special forces brigade; 7 x infantry regiments; 3 x Bases.
SWAPO: In Angola, within four hexes of the SW African border, but not adjacent to it (within above restrictions): 1 x special forces; 4 x bases; 4 x guerillas; 1 x ANC guerilla.
In SW Africa, not in or adjacent to South African units: 1 x special forces.
Air Box:
FAPLA: 1 x TAC;
East Bloc: 1 x TAC; 1 x helicopter.
Optional Units: Place aside; use only with on-line optional rules:
East Bloc: 2nd, 3rd special forces brigades; 1 x TAC; 1 x PSYWAR.
Refit Box: None.
Reinforcements: All other units. See the Reinforcement Table for details.
PSYWAR Box (see on-line optional rules):
4 x PSYWAR markers.
28.7 Special Rules
The Anti-Communist player may not purchase Operations markers on Turn 1. Other Command markers are placed in the Command Pool normally, however. Additionally, neither player may ever purchase Command markers two turns in a row (for example, the Anti-Communist player purchases Operation Modular on Turn 2; he could not purchase another operation until Turn 4).
Variant Counter Rules (Angola, S&T 290; printed as "S&T 209")
Communist Turn Counter: This is used on the Communist Turn Record and Reinforcement Track.
Soviet 7th Guards Airborne Division: This includes three regiments. It is used in the Superpower Intervention Scenario.
SADF SSB Armored Battalion: Historically, the armored unit that is part of the Operation Hooper reinforcement group was a battalion, but I showed it as a brigade as it also includes various other reinforcements, including more G-5 artillery. For players who think this is too strong, substitute the SSB battalion for the brigade.
SADF TF W (Whiskey) Airmobile Battalion: This unit can be used only with the optional No Sanctions rule. The SADF receives more helicopters and creates another air assault formation. It uses standard airmobile rules. This can be added to one SADF reinforcement group.
SADF TF Y (Yankee) Recon Battalion Group: This assumes the South Africans committed more of their regulars to the Angolan theater of operations. In this case, it's an armored recon battalion task force and can be added to one SADF reinforcement group.
Zaire 41 Cdo (Commando) and Base: This assumes Zaire's President Mobutu decided to commit elements of his army to provide direct support to the FNLA. The Zaire 41 Cdo (Commando) Brigade and Base are part of the FNLA/FLEC Faction, controlled by the Anti-Communist player. They initially deploy in Zaire. If eliminated and refit, place anywhere in Zaire. They have a Refit DRM of zero.
OAU: The Organization of African Unity puts together a brigade to support the Angolan government, as well as a training base. These units can be used only if the Anti-Communist player plays the Total Onslaught special operation, or if US or Zairian forces intervene. The OAU units are treated as FAPLA for all game purposes. However, they may also deploy on any eastern map edge hexes in Zambia (south of Zaire and north of Southwest Africa, within usual placement restrictions). They are received and refit per the FAPLA faction.
Super Power Involvement: This assumes that the Soviet Union and USA became more directly involved in the fighting. The Soviets commit an airborne division and elements of Long Range Aviation, and the US a carrier aviation wing plus B-52s. Players can add these forces by mutual agreement on any turn.
US air forces include the following units: 2 x carrier fighter-bomber (VF), 2 x carrier attack (VA), 1 x carrier based Wild Weasel (WW) unit, and 1 x B-52 (SAC). Each carrier air unit is a mix of different aircraft, with the unit icon representing the predominant mission. US air units are all based off the map, but otherwise conduct missions normally. The B-52 and LRA are is not affected by enemy air defense ground units.
The Anti-Communist player controls the US units, which are a separate contingent. Use the US Faction marker with them. The Anti-Communist player can add the US Faction marker to the Command Pool on any turn in which does not play a Special Operation marker. This is not restricted by, nor affects 28.7. All US reinforcements are received on the Impulse in which the US marker is first picked. US air units stack three per hex and use a +2 DRM for Refit. US ground and air units can not stack in the same hex as other friendly units (for various C2 reasons).
The Soviet 7th Guards Air Assault Division and ADA unit are part of the East Bloc contingent. The Anti-Communist player controls these units. They arrive as reinforcements per the Additional Forces Optional rule (two per turn, counting against other reinforcements). The LRA is received per East Bloc air reinforcements.
Victory Points: Eliminated US units count as 6 VP. Eliminated Soviet airborne regiments count as 4 VP.