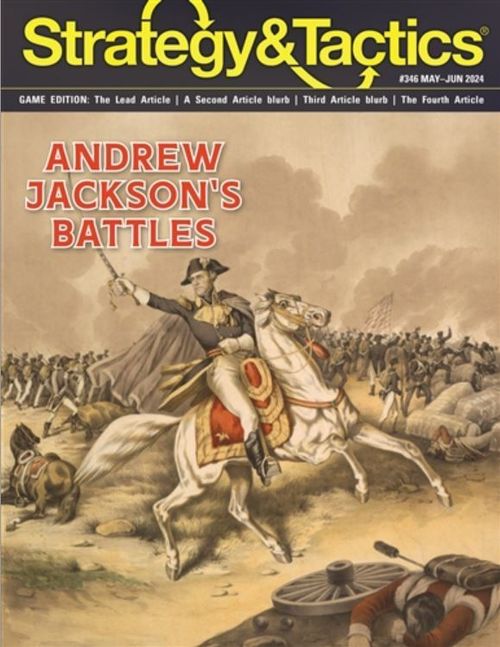
Andrew Jackson's Battles
Andrew Jackson's Battles Rulebook
Table of Contents
Table of Contents
- Counter Errata
- 1.0 Introduction
- 2.0 Components
- 3.0 Set Up
- 4.0 Sequence of Play
- 5.0 Victory Conditions
- 6.0 Visibility & Fog
- 7.0 Artillery & Bombardment
- 8.0 Movement & Stacking
- 9.0 Zones of Control
- 10.0 Combat
- 11.0 Retreat & Pursuit
- 12.0 Unit Status & Rally
- 13.0 Leaders
- 14.0 Demoralization
- 15.0 Reinforcements
- 16.0 Unique Units & Columns
- 17.0 Scenarios and Setup
- 18.0 Optional Rules
- 19.0 Charts and Tables
Counter Errata
Printed on page 1 of the magazine.
- The US Light and LA 6P artillery units should have N scenario codes for use in the New Orleans scenario.
- The dismounted Bean Spies counter should have an MF of 4, not 8 as shown on the counter.
1.0 Introduction
Andrew Jackson's Battles is a tactical simulation of battles on the American frontier during the early 19th century, concentrating on the two major actions (Horseshoe Bend and New Orleans) in which Andrew Jackson participated. While these battles often involved relatively small armies for the era, they proved decisive in shaping the future of the United States. Each game in the system is based on one battle of this period, with its own map, special rules and counters representing the military formations which participated in the original action. The rules model the overall effects of the weapons and tactics in an era in which regular tactics were tempered by frontier fighting, and include combat, leadership and morale.
1.1 Game Scale
Each hex on the maps represents 50–200 yards, depending on the scenario. Each game turn (GT) represents 10 minutes to one hour. Combat units represent anything from individual companies to wings (two or more companies) and/or battalions. Each artillery unit represents two to six guns. Leaders represent a single commander plus staff.
2.0 Components
A complete game of Andrew Jackson's Battles includes 22×34-inch map sheet, rules set, and sheet of 176 ⅝-inch counters. Players must provide a six-sided die (1d6) to resolve combat and other random game events.
2.1 Game Maps
Each scenario has its own game map, representing the terrain over which the battle was fought. A hexagonal grid is overlaid on the map in order to regularize terrain and positioning of counters. Individual hexagons are referred to as hexes.
2.2 Counters
There are two types of counters: units and markers. Units represent military formations and leaders which fought in the original battles. Markers are used to record administrative information.
2.2.1 Units
There are three general types of units: Leaders, Combat (infantry and mounted units) and Artillery.
Combat Unit (front and back): the front shows the Unit ID, Scenario Code, Unit Type, Rally Rating, Combat Factor and Movement Factor. The back shows the disordered side.
- Unit ID: the historical name of the unit.
- Scenario Code: indicates in which scenario the unit participates. H: Horseshoe Bend. N: New Orleans.
- Unit Identification: the historical name of the unit.
- Combat Factor (CF): strength of a unit when attacking or defending.
- Movement Factor (MF): the number of hexes that a unit can move in a friendly Movement Phase, expressed in Movement Points (MP).
Leaders (front and back): show the Leader ID, Scenario Code, Leader Value and Movement Factor.
- Leader Value: represents the ability of a commander to inspire the troops and control forces.
Artillery (front and back): the front shows the Range Factor, the back shows the disordered side.
- Range Factor: indicates the number of hexes to a target at which an artillery unit may fire.
2.2.2 Unit Types
Unit types printed on counters: Leader; Regular Infantry; Militia Infantry; Rifle Infantry; Indian; Mounted Rifles; Dismounted Rifles; Artillery; Rocket (artillery); Baggage Train; Gunboat.
2.2.3 Markers
Markers are generic and used with both scenarios.
Exception: Warband markers (17.1.6).
2.3 Charts and Tables
Charts and tables include a Terrain Key, Demoralization Tracks, and Turn Record Tracks (TRT) on the map for both scenarios, and a Terrain Effects Chart (TEC), Combat Results Table (CRT), and Artillery Bombardment Table (ABT) in the rules (19.0).
2.4 Terminology
- Demoralized: a general condition for an army which has reached its Demoralization limit.
- Disordered: a specific condition for an individual unit which has temporarily lost effectiveness, indicated by the reverse of the unit counter.
- DP: Demoralization Points, a quantification of an army's total morale losses.
- Good Order: a combat unit which is at full effectiveness, indicated by the front of the counter.
- LOS: Line of Sight, a path of unobstructed hexes from a firing artillery unit to a target hex.
- Occupy a hex: have a unit physically in a hex.
- VP: Victory Points.
- ZOC: Zone of Control; the six hexagons surrounding a Good Order combat unit.
2.5 Abbreviations
US:
- Dr: Dragoons
- ET: East Tennessee
- KY: Kentucky
- LA: Louisiana
- LT: Light
- LW: Left Wing
- MG: Mounted Gunmen
- MR: Mounted Rifles
- MS: Mississippi
- NO: New Orleans
- RW: Right Wing
- TN: Tennessee
- US: US Regulars
- USMC: US Marines
- USN: US Navy
- VMG: Volunteer Mounted Gunmen
- Vol: Volunteer
- WT/WTN: West Tennessee
British:
- HL: Highlander
- KO: King's Own
- LDr: Light Dragoons
- LI: Light Infantry
- LT: Light
- LW: Left Wing
- RF: Royal Fusiliers
- RM: Royal Marines
- RMA: Royal Marine Artillery
- RN: Royal Navy
- RW: Right Wing
- WI: West Indies
3.0 Set Up
The Scenario Rules & Set Up section provides instructions for setting up the different scenarios. Players select a scenario, then set up in the order indicated by the scenario rules (17.0).
3.1 Scenario Precedence
Scenario Special Rules take precedence over Standard Rules.
4.0 Sequence of Play
Each game turn (GT) of Andrew Jackson's Battles consists of two Player Turns, along with a Fog Determination Phase and an End of Turn Phase. During a GT, each side conducts a series of phases within which various actions are executed. All actions must be conducted in the sequence listed.
4.1 Turn Sequence
- Fog Determination Phase: The phasing side, or side moving first, rolls 1d6 to determine if there will be Fog during the GT (6.0).
- First Player Turn: The phasing side performs the following phases:
- Artillery Bombardment Phase: Bombardment may be conducted with any or all friendly artillery units (7.0).
- Movement Phase: a) Any or all friendly combat units, artillery and leaders may move (8.0). b) Any scheduled reinforcements are also moved onto the map (15.1).
- Combat Phase: Friendly combat units may attack enemy units adjacent to them (10.0).
- Rally Phase: Disordered units for both sides may attempt to be restored to good order status (12.0).
- Second Player Turn: The other side executes the same sequence as listed above.
- End Of Turn Phase:
- Move the Turn marker one space along the TRT.
- If this is the final GT of the scenario, the game ends and victory is determined (5.1).
5.0 Victory Conditions
Victory is evaluated at the end of the final GT of a scenario.
- Victory Points (VP) are received for eliminating enemy units and other conditions per scenario rules (17.0).
- VP are awarded only at the end of the game unless otherwise specified.
5.1 VP Procedure
- VP are awarded based on scenario Victory Point Schedules (17.1.4, 17.2.4).
- The side with the lower VP total subtracts their VP from the higher side's total to determine the victory level (17.1.5, 17.2.5).
- Consult the Victory Levels in the scenario rules to determine the extent of the victory (17.1.5, 17.2.5).
- If both sides have the same number of VP, the game ends in a draw (17.1.5, 17.2.5).
- VP for occupation of hexes requires a unit physically in the hex.
Example: In the New Orleans scenario the British gain VP for occupying an entrenchment hex. If US units retake the hex on GT 5, but the British retake it on GT 7 and hold it until the end of the scenario, the British would get the VP.
6.0 Visibility & Fog
Fog refers to a combination of smoke, weather and general battlefield chaos.
6.1 Procedure
- During the Fog Determination Phase of each GT, the phasing side consults the TRT.
- If there is number or range of numbers at the bottom of the current GT box, the phasing side rolls 1d6 to determine fog.
- If the die roll result equals the number, or falls within the range of numbers, fog occurs.
Example: On the Horseshoe Bend TRT, for GT 3, fog occurs on a DR of 1; on GT 8, fog would occur on a DR of 1 or 2.
- If fog occurs, the condition is in effect for the entire GT.
6.2 Effects of Fog
During fog GTs the following restrictions apply:
- Movement: MF for all units are halved, with any fractions rounded up. Important: Retreat and Pursuit are not affected (11.0).
- Artillery: The range at which artillery can bombard is limited to two hexes. The effectiveness of artillery at one or two hexes remains the same (7.0).
- Rally: Subtract one from all Rally die rolls, cumulative with other modifiers (12.2).
6.3 Fog of War
Fog of war is a term used to describe which units each player can examine.
- All friendly and enemy units on the map may be examined on GT without fog.
- During Fog GT, enemy stacks can be examined only if they are within two hexes of a friendly unit.
7.0 Artillery & Bombardment
During the Artillery Bombardment Phase, friendly good order artillery units may bombard enemy units.
7.1 General
- Artillery bombardment is defined as firing at enemy units located anywhere from one hex away to up to the range factor of the firing unit.
Important: Artillery units may bombard adjacent enemy units but cannot then attack during the ensuing friendly Combat Phase, even if adjacent to the same or other enemy units.
- Artillery may be fired in any order desired; bombardments do not have to be designated ahead of time.
- Artillery units are fired individually; they may never combine fire, although multiple artillery units may bombard the same hex in a single GT.
- Artillery can bombard any hex within LOS and which contains enemy units of any type, good order or disordered.
7.2 Bombardment Procedure
- Determine the range of the target hex. Range is determined by counting the number of hexes from the artillery unit (exclusive) to the target hex (inclusive). If the number of hexes is less than or equal to the artillery unit's printed range, then the target unit is within range.
Important: Range can be affected by both blocking terrain and fog (6.0).
Example: In the New Orleans scenario, the British "A" artillery unit with a range of 6, located in hex 3811, could bombard an American unit in hex 3210.
- Determine if the artillery unit has an LOS to the target hex. LOS is traced from the center of the firing artillery unit's hex to the center of the target hex. If any of the intervening hexes are blocked, the artillery unit cannot bombard that hex.
Important: Players may need to lay a straight edge to determine the existence of an LOS.
- An LOS is blocked by:
- The presence of friendly or enemy combat units (good order or disordered). Leaders do not block LOS.
- Blocking terrain: The TEC lists all terrain types which block LOS. a) If the LOS is congruent to a hexside with blocking terrain or units, and another hex which is not blocked, then the LOS is not blocked. b) The in-hex or hexside terrain in the firing unit's hex and the in-hex or hexside terrain in the target hex do not block LOS.
Example: An artillery unit in hex 3007 could bombard a target in hex 2707.
c) A hilltop is a hex adjacent to a slope hexside on the up-slope side. Artillery can fire onto a hilltop hex, but not beyond. Slopes themselves do not block LOS if being traced laterally.
d) An artillery unit on a hilltop hex may ignore any blocking terrain on its LOS that is less than half the total distance (in hexes) from the target hex.
Example: An artillery unit on a hilltop fires at a target five hexes away; there is a town two hexes from the artillery, so it can fire over that hex. If the town were three hexes away, it could not fire over it. The converse of the above also applies—an artillery unit could fire at a target on a hilltop hex but would be blocked by terrain that is less than half the distance from its own hex.
e) An artillery unit in a hilltop hex may fire at a target hex on another hilltop hex, regardless of terrain or units on lower hexes. The firing unit could not, however, fire beyond the first hilltop hex owing to other gradations in terrain below the scale of the game maps.
Important: Hilltop hexes are only present in the Horseshoe Bend scenario (17.1).
- Determine the Bombardment Strength: This is the modified strength of the artillery unit resulting from additions or subtractions of strength points, not column shifts, as follows:
- If the range to the target hex is: a) One Hex: +2 b) Two Hexes: +1 c) Greater Than Two Hexes: 0
- If the LOS crosses an entrenchment hexside: −1
- If the target hex contains light troops in a forest, swamp, or building: −1
Important: Range and terrain modifications do not apply to rocket units.
Important: Modifications for range and terrain are cumulative, but an artillery unit's combat factor may never be reduced to less than 1, nor increased to greater than 5.
- Consult the Artillery Bombardment Table (ABT) and locate the column corresponding to the modified combat strength. Roll 1d6 and cross reference the result with that column.
- Apply the results from the ABT. If there is more than one unit in a targeted hex, they are all affected by the result.
Important: Artillery cannot target individual units within a stack in a hex, nor are there separate die rolls for each unit in a hex.
7.3 Artillery Unit Operations
- Artillery units operate as infantry with the following restrictions:
- They cannot move in the Movement Phase of the GT in which they bombard.
- They may bombard an adjacent enemy occupied hex.
- Artillery units which are adjacent to enemy units during the friendly Combat Phase do not attack, even if in an enemy Zone of Control (EZOC). They are not affected by combat results of other units attacking out of their hex (10.1).
- Artillery units that defend against an enemy attack are affected normally by combat.
Exception: Artillery units that receive a Rout combat result are eliminated instead (11.1).
8.0 Movement & Stacking
During the friendly Movement Phase, as many units as desired may be moved up to the limits of their MF. Units expend MP to enter various types of hexes. The TEC summarizes movement costs.
8.1 Procedure
- Units move one at a time, tracing a path of contiguous hexes through the map grid. As a unit enters each hex, it must pay one or more MP from its MF.
- Movement is from hex to adjacent hex. Moving units cannot skip hexes. Units can move in any direction or combination of directions.
- Units may move only during their friendly Movement Phase.
Exception: Retreat and Pursuit are not considered movement and are conducted during the Combat Phase (11.0).
- The number of MP a unit expends during a single Movement Phase cannot exceed its MF. Unused MP cannot be accumulated from turn to turn.
- Units cannot enter certain types of hexes or cross certain types of hexsides as detailed on the TEC (19.1).
- Friendly units of all types may not enter a hex containing enemy units.
Exception: Friendly units may enter a hex containing only an enemy leader, in which case the leader is automatically eliminated (13.2).
- Units have different movement costs for entering certain types of terrain as explained on the TEC (19.1).
Important: A mobile unit can always move a minimum of one hex, regardless of terrain or hexside costs. This does not allow a unit to enter terrain which is otherwise prohibited.
8.2 Terrain & Movement
- A unit expends one MP to enter a clear terrain hex. To enter other types of terrain, the number of movement points designated by the TEC for that type of terrain are expended (19.1).
- Units crossing certain hexsides pay additional MP:
- Creek Hexsides: The crossing cost for creeks is the same in both directions.
- Slope Hexsides: Units pay one additional MP when moving across a slope hexside to the hilltop side (that is, uphill). Units pay no additional MP to move from hilltop to a down-slope hex. Units do not pay any additional MP to move laterally across slope hexes.
- Entrenchment Hexsides: Units pay one additional MP when moving across a slope hexside from outside the entrenchment to the inside. Units pay no additional MP to move from inside an entrenchment to the outside. Units pay no additional MP to move laterally across entrenchment hexes.
Example: A unit moving from hex 2809 to hex 2709 would pay an additional MP, but would pay no additional MP when moving from hex 2709 to hex 2809.
4) **Rivers:** Units may cross minor rivers (Tallapoosa) but may only cross major rivers (Mississippi) via transit means (17.2.6).
5) **Lakes:** Units may not cross lake hexsides.
Important: The MP cost for crossing a hexside is in addition to the cost for the terrain entered on the other side.
8.2.1 Roads, Trails & Bridges
- A unit which moves directly from one road or trail hex to another road or trail hex expends one MP regardless of other terrain in the hex.
- A unit can enter and move through otherwise prohibited terrain by moving along roads or trails; however, the units could not exit into a prohibited hex or hexside not crossed by the trail.
- A unit moving across a creek hexside via a bridge pays no additional movement costs.
- A unit can cross an otherwise prohibited hexside via a bridge.
8.3 Stacking
Stacking is placing more than one unit in a hex.
- Stacking restrictions apply at the end of each phase (friendly or enemy).
- The following number of friendly units may stack in a hex:
- One combat unit (infantry or mounted), plus;
- One artillery unit, plus;
- Any number of Leaders.
- Stacking limits must be observed during setup (17.0).
Exception: Two infantry units may stack together to form a Column (16.6).
Important: Friendly units can move through hexes containing other friendly units; however, stacking restrictions must be met at the end of the current Movement Phase.
8.3.1 Stacks and Movement
- Units in a stack may move together if they start in the same hex.
- Units may only move as far as their MF allows, and must be dropped off when reaching the limit of their MF.
- Units may be dropped prior to reaching the limit of their MF but must cease movement (8.1).
9.0 Zones of Control
The six hexes adjacent to a good order combat unit constitute its Zone of Control (ZOC).
Designer's Note: ZOC represent the area influenced by unit firepower and the generally rigid linear tactics of the era.
9.1 General
- All good order combat and artillery units exert a ZOC at all times, regardless of phase or GT.
- ZOC are never negated by units, enemy or friendly.
- ZOC extend into and across all terrain types with the following exceptions:
- ZOC do not extend across rivers but do extend across bridge and ford hexsides and creeks (8.2).
- Entrenchments do not negate enemy ZOC (EZOC).
- If both friendly and EZOC are exerted into a hex, then both co-exist. There is no additional effect of more than one unit exerting a ZOC into a single hex.
- Disordered units and leaders do not exert ZOC.
- Good order units of a demoralized army retain their ZOC (14.0).
9.2 Effects of ZOC
- EZOC affects units attempting to rally (12.2).
- Units must cease movement when they enter an EZOC.
- Units which begin a Movement Phase in an EZOC may exit the hex, but may only move one hex and may not move directly into another EZOC.
- Light units which begin a Movement Phase in an EZOC in wilderness, swamp, building, or Indian village hexes may exit the hex and continue normal movement (16.1).
- Mounted units which begin a Movement Phase in an EZOC in clear, building, or Indian village hexes may exit the hex and continue normal movement.
- A player must attack with all friendly combat units that are in EZOC (10.0).
10.0 Combat
Combat is used by combat units (mounted and infantry) to attack and then disorder, retreat or destroy enemy combat units which are in adjacent hexes. Combat is resolved on the Combat Results Table (CRT).
10.1 General
- All friendly combat units in an EZOC must attack (9.2).
- All enemy units which exert a ZOC into hexes containing friendly combat units must be attacked, including artillery units.
- At the beginning of the Combat Phase, the attacker must state which friendly units will attack which defending units.
- A given unit's CF is unitary; it cannot be divided among different combats whether attacking or defending.
- Only units that are adjacent to enemy units may conduct attacks.
- The attacker may resolve individual attacks in any order desired.
- A defending unit may be attacked by as many units that can be brought to bear in all adjacent hexes.
- The attacker may, at their option, attack disordered enemy units. There is no requirement for disordered units to be attacked.
Exception: Disordered units must be attacked if stacked with defending good order units.
- No unit may attack, or be attacked, more than once per Combat Phase.
- If two or more good order units are in the ZOC of a single enemy unit, they must combine their combat factors into a single attack against that enemy unit.
- If a combat unit is in the ZOC of more than one good order enemy unit, it must attack all such good order enemy units as one combined combat. The combat factors of all enemy units would be totaled into one combined defense strength. The attacker could also choose to target any adjacent disordered enemy units, thus adding their combat factors to the defense.
- If two or more good order combat units are in the ZOC of two or more enemy units, the attacking units may combine their combat factors into a single attack against those enemy units, which would defend as a single force. This type of attack may be initiated only if all attackers are adjacent to all defending units.
- When more than one attacking or defending unit participates in a combat, combat results are applied against all such units, respectively.
10.2 Combat Procedure
Combat is resolved as follows:
- Determine combat odds:
- The attacker totals the CF of all attacking units. Make all applicable adjustments to individual combat factors prior to totaling multiple units (10.4).
- The defender totals the CF of all defending units for that combat. Make all applicable adjustments to individual combat factors prior to totaling multiple units (10.4).
- Divide the total attacking CF by the total adjusted defending CF to obtain a ratio, or combat odds.
- Use the combat odds to determine which column on the CRT will be used to resolve the combat.
- The attacker rolls 1d6 and cross references the result with the combat odds column. This will provide a combat result which is applied immediately.
10.3 Determining Combat Odds
- High Odds Attacks: If the attacker's total combat factors are equal to or greater than the defender's, drop any fractions.
Example: 13 CF attack 4 defending CF. The combat ratio would be 3.25 to 1, which is then rounded down 3 to 1. Use the 3:1 column on the CRT to resolve the combat.
- Low Odds Attacks: If the defender's total combat factors are less than the attacker's, round down the resulting fraction to the next lowest column on the CRT.
Example: 7 CF attack 10 defending CF. The combat ratio would be 0.7 to 1, which is then rounded down to 1 to 2. Use the 1:2 column on the CRT to resolve the combat.
Important: The 1.5:1 column is used in situations when the Attacker's combat strength is at least 50% more than the Defender's but less than twice as much.
Example: 8 CF attack 5 defending CF.
- Odds greater than 6 to 1 are resolved on the 6:1 column.
- Odds less than 1 to 5 are resolved on the 1:5 column.
10.4 Adjustments to Combat Factors
Terrain, leaders, and other issues may affect combat factors for both attacking and defending units.
10.4.1 Terrain Effects
- Units attacking across certain types of hexsides will multiply the defender's strength. The multiplication applies only if all attacking units are across such hexsides. If a defending unit is attacked from both defensive and non-defensive hexsides, then use the normal combat strength.
- The increase is expressed as a multiplication of the unit's printed combat factor.
- In a situation where more than one unit is defending in different types of terrain, determine terrain effects for each unit separately.
- If more than one terrain multiplier can be applied, use the one most advantageous. In situations where more than one unit is defending, apply defensive multiples for each unit individually.
Important: Defensive hexsides include entrenchments (from the outside in), creeks, and slopes (when going uphill but not downhill).
Important: Terrain benefits for defense are not cumulative. Attacking units never derive a terrain benefit.
- Light units and Indians derive defensive benefits for certain terrain per the TEC (19.1).
- The Effects on Defense column on the TEC describes the defensive benefits for various terrain (19.1).
10.4.2 Other Adjustments
- Enfilade Attacks: If attacking units are on the opposite side of a single defending hex, or if three or more attacking units have an empty hex between each of them, this is considered an Enfilade Attack and doubles the CF of all attacking units.
- Leaders: A leader value is treated as a CF and added to the CF of any combat units with which it is stacked when defending or attacking (13.3).
- Artillery: Friendly artillery use their CF for defense, either by themselves or when stacked with other units.
10.5 Combat Results
- Results are executed in the order listed.
Example: In a Bx result, all defending units are disordered first, followed by attacking units.
10.5.1 CRT Results
- Ad (Attacker Disordered): Disorder all attacking units.
- Ae (Attacker Eliminated): Eliminate all attacking units.
- Ar (Attacker Routed): Disorder all attacking units; surviving attacking units rout.
- Bx (Disorder Exchange):
- If the attacker's combat strength is equal to or greater than the defender's: Apply a Dd, then disorder attacking units whose combat strength is at least equal to the defender's.
- If the attacker's combat strength is less than the defender's: Apply an Ad, then disorder defending units whose combat strength is at least equal to the attacker's.
- Dd (Defender Disordered): Disorder all defending units.
- De (Defender Eliminated): Eliminate all defending units.
- Dr (Defender Routed): Disorder all defending units; surviving defending units rout; artillery units are eliminated.
10.5.2 ABT Results
- Ds:
- If the targeted unit is in good order: It disorders.
- If the targeted unit is disordered: It withdraws.
- Dz:
- If the targeted unit is in good order: It disorders and routs.
- If the targeted unit is disordered: It is eliminated.
- Asterisk (*): If a leader is in the targeted hex it is eliminated.
11.0 Retreat & Pursuit
Retreat and Pursuit are special forms of movement after combat.
11.1 Retreat
- When combat results require units to retreat, affected units must immediately move the unit the indicated number of hexes away from the hex occupied during the battle.
- Each retreating unit is moved individually.
Exception: Leaders may retreat with one other unit.
- There are two types of Retreat:
- Withdrawal: All affected units, to include disordered units, retreat one hex. Withdrawals only occur due to a bombardment result on the ABT or if a leader changes the effects of a rout result (13.3, 19.3).
- Rout: Roll 1d6 for each good order unit and move the affected unit that number of hexes. Eliminate all previously disordered units. All surviving units become disordered.
Important: Artillery units withdraw normally. An artillery unit that routs is instead eliminated, regardless of status (7.3). Exception: (17.2.6)
- If a leader is in the same hex as units that receive a rout combat result, the rout result may be converted to a withdrawal (13.3).
- Retreats are by hexes, not MP. Each hex of retreat counts as one hex regardless of terrain.
- Within the following restrictions, a player can retreat units in any direction:
- Units may retreat into and through hexes containing friendly units unless those units are in an EZOC. Stacking limits must be obeyed at the end of the retreat (8.0).
- Units that retreat into overstacked situations must continue retreating until they end up in a legal stacking situation, or are eliminated.
- Retreating units must end their retreat the indicated number of hexes away from its battle hex. If it can retreat only a portion of the number of its obligated retreat hexes, it is eliminated in the last hex in which it was able to retreat.
- Units may not retreat into enemy units, EZOC, prohibited terrain or across prohibited hexsides, or off the map. Units that cannot thus retreat are eliminated instead.
11.2 Pursuit
- Any or all surviving victorious good order units that participated in an attack may pursue.
- Pursuit is by hexes, not MP. Each hex of pursuit counts as one hex regardless of terrain.
- Pursuing units ignore EZOC (9.2).
- Pursuing units may not enter enemy-occupied hexes, prohibited terrain, nor cross prohibited hexsides.
- Units must end their pursuit within stacking limitations (8.3).
- Infantry units may pursue one hex by advancing into the vacated enemy hex.
- Mounted units may pursue up to two hexes (11.2.1).
- Artillery and disordered units may never conduct pursuit.
11.2.1 Mounted Pursuit
- If there are any mounted units in the attacking force then they must pursue before any infantry units.
- The first hex must be the hex vacated by defending units, while the second may be into any eligible hex and does not need to follow the routing unit's path of retreat.
11.3 Exhaustion
Pursuing and retreating units cannot attack again during the current Combat Phase, even if their pursuit or retreat places them next to enemy units whose battles are yet to be resolved, or who were not involved in a battle.
12.0 Unit Status & Rally
Mounted, infantry, and artillery units are in one of two states: good order (front side of counter) or disordered (reverse side of counter).
- Good order units become disordered due to bombardment, combat results, or other designated actions (7.0, 10.5.1).
- Disordered units may be restored to good order via Rally (12.2).
- A unit which is disordered and then suffers a second disordered result is eliminated.
12.1 Effects of Disorder
- Disordered units move in the same manner as good order units during the friendly Movement Phase (8.1).
Exception: Disordered units may not move into an EZOC.
- Disordered units may not pursue (11.2).
- Disordered units may conduct a withdrawal due to bombardment and/or a leader converting a rout result to a withdrawal (11.1).
- Disordered units have their combat factor reduced to the number printed on their reverse. They can attack and must do so if in EZOC.
- Disordered units have no ZOC; enemy units are not required to attack them, although they may choose to do so (9.2).
- Disordered artillery units cannot conduct bombardment. If attacked, they defend normally (7.1, 9.2).
- Leaders are never disordered (13.1).
12.2 Rally
During the Rally Phase, disordered units may attempt to return to good order status.
Important: Units may attempt to rally while in EZOC.
- To rally units, the owning player rolls 1d6 for each friendly disordered unit and applies the following cumulative DRM:
- Rally Rating: Add the unit's rally rating to the die roll.
- Leaders: Apply a +1 DRM if the unit is within the number of hexes equal to a leader's value. No more than one leader can apply this modifier to a single unit's rally attempt.
- Fog: Apply a −1 DRM if fog conditions exist (6.0).
- Terrain: Apply any applicable DRMs per the TEC.
- EZOC: Subtract 1 from the die roll if the unit is in an EZOC (9.2).
- Modified die roll 6 or greater: The unit rallies, and the counter is flipped to its front side to show good order status.
- Modified die roll 5 or less: The unit remains disordered.
Important: Units belonging to a demoralized army cannot attempt to rally (14.3).
Example: A disordered unit with a rally rating of 2 is within two hexes of a leader with a leader value of 2. The rally die roll is 3, to which two is added for the unit's rally rating and one for the leader value to produce a modified outcome of 6, which would rally the unit. If this was a Fog GT, one would be subtracted due to the fog for a final outcome of 5, meaning the unit would remain disordered.
13.0 Leaders
Each leader has a leader value which serves three purposes:
- Augments the combat strength of friendly units with which the leader is stacked (10.4.2);
- Converts rout results to withdrawal for units in the same hex (11.1);
- Provides a DRM for units attempting to rally within its command radius (13.4).
13.1 General
- Any number of leaders may stack in a single hex in addition to any combat or artillery units (8.3).
- Leaders cannot enter hexes containing enemy units.
Exception: A leader moving while stacked with an infantry, mounted, or artillery unit may enter a hex containing only an enemy leader (13.2).
- Leaders are always in good order, and never disorder (12.1).
- Leaders do not exert ZOC (9.2).
- Leaders cannot attack or defend on their own.
Important: Leaders cannot attack enemy leaders.
13.2 Elimination of Leaders
- A leader is eliminated if:
- The leader is in a hex, not stacked with any combat unit, and an enemy infantry, mounted, or artillery unit enters its hex.
- The leader is in an EZOC and is not stacked with a friendly combat or artillery unit.
- A leader-eliminated result is obtained on the ABT, or if stacked with units which receive an Ae or De result on the CRT (18.2).
Important: A leader is not affected by being adjacent to enemy units which have no ZOC, but could be eliminated if by itself and an enemy disordered unit enters its hex. Also, the strict sequencing of Bx combat results for determining the instant at which a leader would be in an EZOC may result in leader elimination.
13.3 Leader Effects on Combat
- The leader value of one leader may be added to any infantry or mounted unit with which it is stacked (10.4.2).
- If more than one leader is in a hex, only one leader value may be applied.
Important: If friendly participating units are attacking or defending in multiple hexes in the same combat, one leader in each hex may contribute his leader value to the combat.
- When a leader participates in combat, its value is treated as its CF and is subject to all CF adjustments (10.4).
Example: A leader with a value of 2 would have it increased to 4 if stacked with a unit in doubling terrain.
- Leaders do not add their CF to artillery bombardments (7.2).
- Leaders may convert rout results on the CRT to withdrawals for any units with whom they are stacked (11.1).
13.4 Leader Effects on Rally
- Each leader has a command radius equal to the leader value.
- The command radius is the number of hexes from the leader unit in which it can provide a rally DRM (12.2).
Example: A leader with a value of 2 would provide a +1 DRM to all friendly rally attempts within two hexes.
- Command radius is not blocked by enemy units, EZOC or terrain.
14.0 Demoralization
Each army has a Demoralization Level, representing the point at which losses have gone high enough to create a general decrease in combat effectiveness and army cohesion.
- Scenarios will designate the Demoralization Level for each side as expressed through Demoralization Points (DP). This is usually in terms of elimination of unit combat factors which are recorded on the army's Demoralization Track and sometimes occupation of geographical objectives (17.0).
14.1 Demoralization Indexes
- Each side has a Demoralization Track printed on the map for use in recording that side's Demoralization Level.
- When an army's Demoralization Level reaches the threshold designated by the scenario, it becomes demoralized. Once demoralized, it can never recover from it.
Example: 32 DP would be indicated by placing the ×10 marker at 3 and the ×1 marker on 2.
14.2 Demoralization Points
- Each scenario will provide the conditions which raise the demoralization level (17.0).
- DP for eliminated units are for their full-strength combat value, unless otherwise stated.
- DP for routed units are ignored for units which convert a rout to a withdrawal (11.1, 13.3).
- DP for occupying hexes are recorded as they occur. They are not lost if the hex is later abandoned or retaken by the enemy.
14.3 Effects of Demoralization
- Movement: At the start of the Movement Phase after a side's Demoralization Level has been reached, the demoralized side rolls 1d6. The result is the MF for all disordered units.
- Disordered units cannot enter prohibited hexes and hexes containing enemy units, cross prohibited hexsides, or move adjacent to enemy units.
- Disordered units which begin the Movement Phase in an EZOC may exit; however, the unit may not move directly into another EZOC (9.2).
- Good order units retain their normal MF.
Important: The movement die roll is only conducted once, when an army becomes demoralized, and the effects are permanent.
Example: The British reach their Demoralization Level and at the start of their next Movement Phase roll 1d6. The result is 4, meaning all disordered British units can move a maximum of four hexes.
- Rally: Disordered units cannot Rally (12.2).
- Leaders: Leaders are not affected by demoralization.
14.4 Exiting the Map
- Units from an army which reaches its Demoralization Level may exit from the map via friendly map edges as defined by scenario rules (17.0).
- When exiting the map, the unit is moved to an eligible map edge hex and then must be able to expend an additional number of MP equal to the cost of entering the map edge hex per the TEC (19.1).
Important: Hexside terrain is not counted for this purpose.
Example: A British regular infantry unit withdrawing off the map from hex 4618 would be required to expend 3 MP to exit from the swamp hex.
- Exited units can never reenter the map.
- Exited units do not count as VP (17.1.4, 17.2.4).
Designer's Note: Demoralization is distinct from disorder insofar as the former is a general condition for an entire army as opposed to a temporary condition for individual units. The variable movement for demoralized units which are also disordered represents the tendency to withdraw from contact in a disorganized fashion after an army's morale broke. Exiting units from a demoralized army is useful for salvaging units which would otherwise be eliminated by the enemy and thus count for towards additional DP.
15.0 Reinforcements
Reinforcements are units which enter the map after the start of a scenario. Reinforcements are listed by scenario, and are indicated by an "R" on the left side of the counter.
15.1 Entry
- Reinforcements move onto the map during the Movement Phase of the designated GT from map edges as specified in scenario rules (17.0).
- Reinforcements pay normal movement costs for the entry hex.
- More than one unit can enter from the same hex; however, each successive unit pays one additional MP to enter.
- Reinforcements can enter the map in a hex containing EZOC but must stop in that hex. They cannot enter from hexes containing enemy units or prohibited terrain.
- If all entry hexes are blocked, or units cannot otherwise move onto the map, then remaining units enter on the next available friendly Movement Phase. Otherwise, units must enter on the designated GT.
16.0 Unique Units & Columns
16.1 Light Units
Light units are indicated by crossed swords between the CF and MF on the counter. They have the following special rules:
- Disengagement: Light units which begin their movement in an EZOC may exit and continue to move if they begin the movement in a wilderness, swamp, building, or Indian village hex (9.2).
- Combat: The CF of light units is doubled when defending in certain terrain types. Light units in wilderness or swamp hexes may also withdraw one hex when enemy units move into any adjacent hexes (10.4.1, 19.1).
16.2 Mounted & Dismounted Units
Certain mounted type units can dismount, as designated by scenario (17.0).
- Good order units can dismount and remount.
- Demoralized units may dismount and remount unless disordered.
- A unit which dismounts or remounts cannot move in the same Movement Phase.
- Units can dismount and remount while in an EZOC. They engage in combat normally.
- For DP value, use the CF of the counter side currently face-up on the map (17.1.3, 17.2.3).
- Both the mounted and dismounted version of a unit may not be on the map at the same time.
- Mounted units which begin their movement in an EZOC may exit and continue to move if they begin the movement in a clear, building, or Indian village hex (9.2).
16.2.1 Dismount Procedure
- Declare dismount at the start of the friendly Movement Phase.
- Replace the mounted counter with the dismounted version of the same unit (lower MF but greater CF).
- Dismounted units function as light units and rifles for all game purposes.
16.2.2 Remount Procedure
- Declare remount at the start of the friendly Movement Phase.
- Replace the dismounted counter with the mounted version of the same unit.
16.3 Rifle Units
Rifle units are marked with a rifle in the upper right corner of the counter.
- Rifle units which are not in an EZOC may engage enemy units at a maximum range of two hexes.
- Ranged fire is conducted during the friendly Artillery Bombardment Phase and follows the same procedure as artillery bombardment. Results are taken from the ABT (7.1, 10.5.2, 19.3).
- Rifle units conducting ranged fire always use their printed CF. They do not receive increases to their CF (7.1).
- Rifle units may move and engage in regular combat after executing ranged fire.
- Mounted rifle units may never conduct ranged fire.
16.4 British Rocket Unit
The British rocket unit is a special artillery unit.
- Its bombardment value is always 1 regardless of range or defender's terrain.
- It always uses the Rocket column on the ABT (19.3).
- It is affected by Fog (6.0).
- It traces an LOS in the same manner as a regular artillery unit (7.1).
16.5 Baggage Train
The Baggage Train is treated as a combat unit.
- It does not count for stacking (8.3).
- If it receives a rout result it is instead eliminated (11.1).
- It may only move along roads or in clear terrain hexes (8.2).
- It must remain within 6 hexes of the Jackson leader counter (17.1).
16.6 Columns
- All regular infantry and other units as designated by scenario rules may form columns.
- Up to two regular infantry units may be stacked in a hex as a column. Artillery and leaders may be in the same hex as the two regular infantry units, but not other infantry or mounted units.
- Disordered and demoralized units may not form columns.
- Leaders apply their leader value to the combined strength of the units in column (13.3).
Example: A leader with a leader value of 2 in the same hex as a column containing infantry units with CFs of 3 and 2 would produce a total CF of 7.
16.6.1 Effects of Column Formation
- Units in column cannot enter wilderness or swamp hexes.
- Units moving in column along roads or clear terrain hexes receive +1 to their MF (8.1).
- When attacking, units in column must attack the same enemy hex in a single combined attack (10.0).
- When defending, units in column form a single combined defense. However, the CF of units in column are halved, rounded up (10.0).
- When attacked by artillery bombardment, only a single die roll is conducted, with the results affecting both units (7.1).
- Units in column must move together for both retreat and pursuit (11.0).
- If forced to retreat into terrain which would be prohibited for column movement, one unit must retreat an additional hex (11.0).
17.0 Scenarios and Setup
17.1 Horseshoe Bend
Horseshoe Bend is a tactical-level game of Jackson's 27 March 1814 attack on the Red Stick Creek Indians at their fortified position on the Tallapoosa River in modern-day Alabama.
17.1.1 Administration
- Game Length: 10 GT.
- Setup Sequence: Red Sticks set up first, US set up second.
- Player Sequence: US move first, Red Sticks move second.
17.1.2 Deployment
- US:
- All US units enter as reinforcements on GT 1. US units may enter the map from any west edge map hex (hexes 0104–0124), but all units must enter within three hexes of that entry hex with the exception of the baggage train, which must enter at either of hexes 0105 or 0123.
- 39th Infantry units may form column (16.6).
- Red Sticks: All Red Stick units deploy within six hexes of Indian Village hexes.
17.1.3 Demoralization Levels
- US: 25
- Per eliminated US combat or artillery unit: DP equal to the unit's CF.
- Per eliminated US leader: DP equal to twice (2×) the combat value.
- Elimination of US baggage train: 10 DP.
Important: US-allied Indian units count toward DP levels.
- Red Stick: 15
- Per eliminated Red Stick combat unit: DP equal to the unit's CF.
- Per eliminated Red Stick leader: DP equal to twice (2×) the combat value.
17.1.4 Victory Points
- US:
- Red Sticks at 50–99% of demoralization level: 2 VP
- Red Sticks at 100% or higher of demoralization level: 4 VP
- US combat units occupy two or more Indian Village hexes: 2 VP
- Elimination of an Indian leader (per leader): 2 VP
- Red Stick:
- US at 50–99% of demoralization level: 3 VP
- US at 100% or higher of demoralization level: 5 VP
- US baggage train eliminated: 1 VP
- Elimination of a US leader (per leader): 2 VP
17.1.5 Victory Levels
- 0–1 VP: Draw
- 2–3 VP: Marginal Victory
- 4–5 VP: Substantive Victory
- 6+ VP: Decisive Victory
17.1.6 Special Rules
- Friendly Map Edge Hexes:
- US: All west edge hexes.
- Red Stick: All south and east hexes.
- Sam Houston: The US Houston leader may apply his leader value only to the two 39th Infantry units.
- Red Stick Warbands: The Red Sticks have three warband markers (A, B, C) which may be used as substitutes for units on the map.
- At the start of play, up to four Red Stick units may be placed in each of the Indian Bands boxes, with the corresponding warband marker then placed on the map. The marker(s) move with an MF of 6.
- A warband is revealed when a US unit is within 2 hexes, or the warband moves into a clear terrain hex. The warband marker is removed from the map and replaced with the corresponding units. Units are placed in or adjacent to the hex formerly occupied by the marker and must observe stacking restrictions (8.3).
- Units may not switch from one marker to another.
- Once removed, the marker may not return to play.
- Indian Rally: Indian units occupying village hexes receive a +1 DRM when attempting to rally (12.2).
- Indian Withdrawal: Indian units in a wilderness hex may refuse combat with US units by withdrawing one hex into another wilderness hex. This withdrawal occurs at the completion of the US Movement Phase and prior to the US Combat Phase.
- Dismount: All US mounted units may dismount (16.2.1).
17.2 New Orleans
New Orleans is a tactical-level game of Jackson's 1–8 January 1815 defense of New Orleans against Packenham's British veterans.
17.2.1 Administration
- Game Length: 12 GT.
- Setup Sequence: US set up first, British set up second.
- Player Sequence: British move first, US move second.
17.2.2 Deployment
- US:
- US at-start forces deploy west of the deployment line on both sides of the Mississippi River. The gunboat must be deployed in a full river hex.
- US reinforcements (units marked with an R) enter on GT 6 from any west edge map hex on either side of the Mississippi.
- US regular infantry may form columns (16.6).
- US units may not deploy or move east of the deployment line.
- British:
- British at-start forces deploy east of the deployment line north of the Mississippi. British units may deploy in an EZOC.
- British reinforcements (units marked with an R) arrive as follows: a) At the beginning of the British Movement Phase on GT 2, roll 1d6. Result less than current GT: All reinforcements are available. Result equal to or greater than current GT: No reinforcements are available and the process is repeated during the British Movement Phase on the subsequent GT. b) On the GT of arrival, all reinforcements enter along the east map edge north of the Mississippi.
- British regular infantry may form columns (16.6).
17.2.3 Demoralization Levels
- US: 40
- Per eliminated US artillery unit: DP equal to twice (2×) the unit's CF.
- Per eliminated US combat unit: DP equal to the unit's CF.
- Per eliminated US leader: DP equal to twice (2×) the combat value.
- First time a British infantry unit of any type enters a US entrenchment hex: 5 DP.
- British: 55
- Per eliminated British artillery unit: DP equal to twice (2×) the unit's CF.
- Per eliminated British infantry unit: DP equal to the unit's CF.
- Per eliminated British leader: DP equal to twice (2×) the combat value.
17.2.4 Victory Points
- US:
- British at 50–99% of demoralization level: 2 VP
- British at 100% or higher of demoralization level: 4 VP
- British occupy no entrenchment hexes at end of game: 2 VP
- Elimination of a British leader (per leader): 2 VP
- British:
- US at 50–99% of demoralization level: 1 VP
- US at 100% or higher of demoralization level: 3 VP
- Occupy one or more entrenchment hexes on the north side of the Mississippi: 2 VP
- Occupy one or more entrenchment hexes on the south side of the Mississippi: 1 VP
- Elimination of a US leader (per leader): 2 VP
17.2.5 Victory Levels
- 0–1 VP: Draw
- 2–3 VP: Marginal Victory
- 4–5 VP: Substantive Victory
- 6+ VP: Decisive Victory
17.2.6 Special Rules
-
Friendly Map Edge Hexes:
- US: All west edge hexes.
- British: All east edge hexes.
-
Phases of Battle: GTs 1–5 represent maneuvering by both armies over several days prior to the main battle.
- If the British occupy no entrenchment hexes at the end of GT 5, subtract 10 DP from the current US total.
- Starting on GT 6, US units occupying north bank entrenchments (Line Jackson, along hexsides 2711–2804) have their CFs tripled.
- Also beginning on GT 6, US militia units occupying north bank entrenchments receive a +1 DRM when attempting to rally (12.2).
-
Crossing the Mississippi: Units from both sides may attempt to cross the Mississippi.
- Units attempting to cross the river move to any river bank hex on their side of the start line (an embarkation hex) and are then placed in their respective transit displays.
- On the following GT, 1d6 is rolled for all units moving north across the river:
- 1–4: Units may leave the transit display and cross the river;
- 5–6: Units must remain in the transit display.
The procedure is then repeated for all units moving south across the river.
- Units which successfully cross the river are placed on a river bank hex directly across from the hex from which they embarked. Units may move normally during that Movement Phase.
- British units attempting to cross the river within range of the USS Louisiana are subject to bombardment. Units are returned to the transit display on a Ds or Dz result on the ABT (10.5.2).
- If the intended debarkation hex is occupied by enemy units or in an EZOC, the units return to the original embarkation hex.
- There is no limit to the number of units attempting to cross the river in a GT.
-
Dismount: All US mounted units may dismount (16.2.1).
-
Captured Artillery: Both sides may attempt to capture enemy artillery units.
- When an artillery unit receives a rout result on the CRT, instead of being automatically eliminated the capturing (attacking) side rolls 1d6:
- 1–2: The unit is captured and may be used as a normal artillery unit by the capturing side.
- 3–6: The unit is eliminated.
- Captured artillery may be recaptured by the original owning side following the same procedure.
- When an artillery unit receives a rout result on the CRT, instead of being automatically eliminated the capturing (attacking) side rolls 1d6:
-
US Gunboat: The US gunboat (USS Louisiana) functions as an artillery unit with the following special rules:
- The gunboat may only deploy and move in river hexes, not coastal/shoreline hexes.
- It does not exert a ZOC (9.0).
- It cannot be attacked by combat units although it may be the target of artillery bombardment (7.1).
- Bombardment attacks against the gunboat receive a +1 DRM on the ABT. The gunboat is eliminated if it receives a Ds or Dz result while already disordered.
- The gunboat may bombard British units, within range, attempting to cross the Mississippi. Such attacks receive a +1 DRM on the ABT.
18.0 Optional Rules
18.1 Tactics
Tactics are represented by markers which provide a number of combat bonuses.
18.1.1 Types and Benefits
- Each side has two of each of the following Tactics markers:
- Forced March: Doubles the MF of all friendly units that begin a Movement Phase within the command radius of a leader. Units using Forced March may not begin the phase in an EZOC, nor may they enter an EZOC (9.2, 13.4).
- Bayonet Attack: Doubles the CF of all attacking regular infantry for a single combat (10.0).
- Volley: Doubles the CF of all defending regular infantry for a single combat (10.0).
- Ambush: Doubles the CF of all attacking or defending light infantry located in wilderness, swamp, building, or Indian village hexes for a single combat (10.0).
Important: Light infantry, militia, and mounted/dismounted units may never use Bayonet Attack or Volley.
18.1.2 Procedure
Each scenario designates the number of Tactics markers which may be drawn during setup (17.0).
- For each combat, the attacker may employ one Tactics marker. The defender may employ a Tactics marker regardless of whether the attacker has employed a marker.
- Any benefits derived from each marker are applied, and combat is then resolved (10.0).
- Each marker may be used once per scenario, after which they are removed from play.
- Forced March markers are employed at the beginning of the friendly Movement Phase.
18.1.3 Effects and Limitations
- Tactics markers provide their bonus to all eligible units in a combat.
Example: If two regular infantry units and a dismounted unit conduct an attack for which a Bayonet Attack marker is employed, the CF of both regular infantry units would be doubled; the CF of the dismounted unit would remain unchanged.
- If a unit's CF would be doubled for terrain or an enfilade attack, it would be tripled if a Tactics marker were employed (10.4.1, 10.4.2).
- When calculating losses for a Bx combat result, use the printed CF for units involved (10.5.1).
- Leader values are unaffected by Tactics markers (13.0).
- Tactics markers may only be employed with Good Order units. Demoralized units may not benefit from Tactics markers.
- Artillery bombardment is unaffected by the employment of a Tactics marker.
- Tactics markers may only be employed during clear weather turns (6.0).
18.2 Burning
Artillery bombardment may be used to burn buildings and Indian village hexes.
18.2.1 Procedure
- Whenever an artillery unit fires at a building or Indian village hex, roll 1d6; Result of 1: The hex is considered to be burning and a Burning marker is placed in the hex.
- The hex targeted by the artillery units does not need to be occupied by enemy units. If enemy units are present, bombardment results are resolved first, then the die roll for Burning is conducted (7.1).
- If another building or Indian village hex is adjacent to a burning hex, roll 1d6 on each subsequent GT for each adjacent building and village hex; Result of 1: That hex is also considered to be burning and another Burning marker is placed in that hex.
18.2.2 Effects
- Disordered units in a Burning hex may not rally (12.2).
- Artillery units in a Burning hex may not conduct Bombardment (7.0).
- Units moving into a Burning hex must halt upon entry. Good Order units become disordered upon entering a Burning hex, but already disordered units remain disordered.
- Units beginning a Movement Phase in a Burning hex may exit the hex normally.
- Units in Burning hexes do not receive defensive benefits for defending in building or village hexes, nor may they benefit from Tactics markers (10.4.1, 18.1).
- Units attacking into a Burning hex are unaffected.
19.0 Charts and Tables
19.1 Terrain Effects Chart (TEC)
Reproduced from the magazine's chart. Column alignment was reconstructed from the PDF text layer; check any cell against the printed chart on magazine page R15 if in doubt.
| Terrain | Movement Point (MP) cost to enter or cross | Blocks LOS? | Effect on Bombardment | Effects on Defense | Units which can disengage | Notes |
|---|---|---|---|---|---|---|
| Clear | 1 | No | – | – | Mounted | – |
| Wilderness | 2 (Artillery: 3) | Yes | – | Defending light units doubled | Light | No columns. Baggage Train may not enter. |
| Swamp | 3 | Yes | −1 | Defending light units doubled | Light | No columns. Baggage Train may not enter. |
| Road/Trail | 1 | OTIH | – | OTIH | OTIH | – |
| Building | 1 | No | −1 | Defending light units doubled | Light, Mounted | – |
| Indian Village | 1 | Yes | – | Defending Indian units doubled | Red Stick, Light, Mounted | Red Sticks: +1 Rally die roll. |
| Entrenchment (outside to inside) | +1 | No | −1 | Defender doubled* | OTIH | *When attacked entirely through entrenchment hexsides. |
| New Orleans: 6+ Line Jackson Entrenchment (outside to inside) | +1 | No | −2 | Defender tripled* | OTIH | *When attacked entirely through entrenchment hexsides. |
| Entrenchment (inside to outside) | – | No | – | – | OTIH | US Militia inside entrenchments: +1 rally. |
| Slope (uphill) | +1 | See Bombardment | – | Defender doubled* | OTIH | *When attacked entirely through slopes. |
| Slope (downhill) | – | See Bombardment | – | – | OTIH | – |
| Creek | +1 | No | – | – | – | Baggage train and artillery can only cross at bridges. |
| Minor River | Light: +2; All others: +3 | No | – | Defender doubled | – | Baggage train and artillery may not cross. |
| Major River | Prohibited | No | – | May not attack across | – | Mississippi transit only. |
| Lake | Prohibited | No | – | – | – | – |
| Bridge | Negates Creek or River for movement | No | – | OTIH | – | – |
| Deployment Line | – | No | – | – | – | US may not move east of New Orleans Deployment Line. |
| Mississippi Transit display | 1 | n/a | n/a | n/a | – | Die roll to exit: 1–4 (all units in either direction); −1 to Rally die rolls. |
| Fog Turns | Movement factors halved* | Max LOS: 2 hexes | – | – | – | *Round up fractions; does not affect movement for Demoralized units. |
OTIH = Other Terrain in Hex.
19.2 Combat Results Table (CRT)
Attacker's combat odds across; attacker rolls 1d6.
| Die Roll | ≤ 1:5 | 1:4 | 1:3 | 1:2 | 1:1 | 1.5:1 | 2:1 | 3:1 | 4:1 | 5:1 | ≥ 6:1 |
|---|---|---|---|---|---|---|---|---|---|---|---|
| 1 | Ad | Ad | – | Bx | Dd | Dr | Dr | Dr | De | De | De |
| 2 | Ar | Ad | Ad | – | Bx | Dd | Dd | Dr | Dr | De | De |
| 3 | Ar | Ar | Ad | Bx | – | Bx | Dd | Dd | Dr | Dr | De |
| 4 | Ae | Ar | Ar | Ad | Bx | – | Bx | Dd | Dd | Dr | Dr |
| 5 | Ae | Ae | Ar | Ar | Ad | Bx | – | – | Dd | Dd | Dr |
| 6 | Ae | Ae | Ae | Ar | Ar | Ad | Bx | Bx | Bx | Bx | Dd |
19.3 Artillery Bombardment Table (ABT)
| Die roll | ≤1 | 2 | 3 | 4 | ≥5 | Rockets |
|---|---|---|---|---|---|---|
| 1 | Ds | Ds | Dz* | Dz* | Dz* | Dz* |
| 2 | – | Ds | Ds | Ds | Dz | Ds |
| 3 | – | – | Ds | Ds | Ds | – |
| 4 | – | – | – | Ds | Ds | – |
| 5 | – | – | – | – | – | – |
| 6 | – | – | – | – | – | – |
Bombardment Strength is the column heading. Modifiers:
- Range effect on Bombardment strength:
- One hex: +2
- Two hexes: +1
- Three or more hexes: Printed strength
- If the LOS crosses an Entrenchment hexside: −1
- Light troops in forest, swamp or building: −1
- Effects of Terrain: −1 or −2 per the TEC
* If a Leader is in the targeted hex: it is eliminated.
Important: Range and terrain effects do not apply to rocket fire.