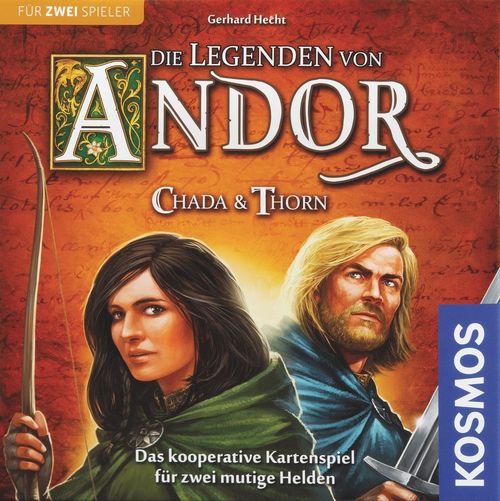
Legends of Andor: Chada & Thorn
Legends of Andor: Chada & Thorn Rulebook
Table of Contents
Table of Contents
- Preparation Before the First Game
- Preparation Before the Starting Adventure
- The Starting Adventure
- Preparations for Each Adventure
- Playing a Turn
- The Mist Cards
- The Equipment Cards
- The Curse Cards
- The Friend Cards
- End of a Stage
- End of the Adventure
- Summary: Moving a Hero
- Card Translations
- Adventure Cards
Preparation Before the First Game
- Remove all cardboard pieces from the punchboard.
- Insert the Chada, Thorn and Fluch (Curse) figures in the plastic bases.
- Note: the figure in the red frame is "Stinner, the Sea Warrior." This is a bonus figure that is not used in the normal game. When you want to play a Solo Adventure with Stinner, you can find the cards for that as a free download at legenden-von-andor.de.
- Sort the 36 large adventure cards according to the adventure names on their backs. All the adventures consist of 2 cards "Introduction and New Rules" and 8 stage cards.
- Note: the adventure "Stachelklippen" only contains 4 stage cards.
Hint: it's best to sit next to each other, so both players have a good overview of the game. Enjoy!
Preparation Before the Starting Adventure
- Get your Hero figures and the Curse figure ready.
- Lay the Willpower and the Campfire markers ready at hand.
- Both players have only one Hero card in the starting adventure (Chada or Thorn, with the picture of them from the front), which you place on the table with the "Sun Side" face up.
- Place the Curse card that's shown (the one of which there are three of the same in the deck) face down behind your Hero card. These cards make up your Card Row.
The Hero Cards
Each Hero card offers 3 possible actions: 1. Walk, 2. Fight, 3. Special Ability. When you activate your Hero card, you can always only use one of these three actions. In the starting adventure, you only use the action "Walk."
Walk (Laufen)
When you use the action Walk, you can move your Hero figure. The player chooses which of the depicted steps-symbols he wants to use for his Hero. The higher the number of steps, the higher the cost of the move.
Example: Chada can use the 2-Steps-Symbol, which doesn't cost her anything else. Or she can choose to use the 4-Steps-Symbol. In that case she has to move the Curse figure one field further (which can be dangerous — later more about that!).
Important: the cost for the chosen action has to be paid immediately; otherwise the action cannot be chosen! On the large Stage Cards there are fields depicted on the map. The number shown in a field determines how many steps are required to move a figure to that field. Any remaining steps you have can be ignored.
Example for walking: a) Chada uses the 2-Steps-Symbol and can move two fields (both having a value of 1). Or b) Chada uses the 4-Steps-Symbol and can move three fields (the first two having a value of 1, and the third having a value of 2), ending on the field with the hourglass.
Fight (Kämpfen)
The symbol on the top right of the card shows the Strength value of the Hero. This can be used to defeat enemies in later adventures. In the starting adventure there aren't any enemies yet.
Special Ability (Sonderfähigkeit)
In the starting adventure, the players cannot use any special abilities yet.
Explanation of the symbols on the cards
- Curse Head: move the Curse figure one spot.
- Red arrow with rain cloud and green arrow with sun: flip the Hero card to the other side.
- -2 Willpower: surrender 2 Willpower points.
- Card with a 1 on it: draw 1 Mist Card. This symbol cannot be used yet in the starting adventure.
Taking Turns
Players alternate turns. On his turn, a player must activate the card that's in the front of his card row. Only a card at the front can be activated!
Activating Hero Cards
To activate a Hero card, the player must choose and execute one of the 3 possible actions (in the starting adventure only the action "Walk"). Consequently, the activated Hero card is moved to the end of the same card row.
Curse Cards with "Resting" Side Up
After the player has activated his Hero card, the Curse card is now in the front of the card row. When it's the player's turn, he has to activate the Curse card. Without doing that, he cannot activate the Hero card that is now lying behind the Curse card, and therefore also not move any further ahead. When you have to activate the Curse card the first time, simply flip it face up and move it to the end of the card row, nothing else happens.
Curse Cards with "Awakened" Side Up
On the "awakened" side of the Curse cards there are a number of symbols depicted. When activating a Curse card with this side facing up, the player has to choose one of the symbols, execute the corresponding action, and then place the Curse card at the end of the same card row (it stays "awakened"). In the starting scenario, you cannot choose the middle symbol.
The Starting Adventure
Put page 4 of the manual on the table. The map depicted on this page is your playing board for this scenario.
Goal of this adventure: each player has to reach his target field! If the Curse figure catches either of the two Heroes, the adventure ends (and is lost) immediately.
- Place your Hero figures and the Curse figure on their respective starting spots, as depicted on the map. Each Hero gets 1 Willpower token.
- If there is a Hero on a field, this Hero covers the field, so that the numbers and symbols on this field do not apply to the next Hero stepping onto this field.
- When a Hero stops on this field (the field with the picture of the Bard card), he gets the Friend Card "Grenolin, the Bard" (with the green back). After placing your Hero card at the end of the card row, place the new card behind it. (When activating the Bard Card in a subsequent turn, take the action as written on the Bard card, see below.)
- Only when a Hero stops here, he must surrender 1 Willpower point. If there is another Hero on this field already, then the symbol and the number on this field is covered, so the next Hero getting onto this spot has to pay neither the step count, nor the willpower penalty for this field.
- Note: all the Willpower points are green. The colour "red" is just a symbolic depiction for losing a point.
- There are normally several paths to cross a map, however, the Curse figure always follows the shortest route (indicated by the continuous line). The Curse ignores the step counts and symbols on the fields (and later on also on the roads).
- This is a stop field (the red field). A Hero has to end his turn here, any remaining steps are not used. If there is a Hero on this field already, the field is covered and the next Hero can ignore it. That is, he/she doesn't have to count the step, doesn't have to surrender a Willpower point, and doesn't have to stop here.
- Both Heroes must reach their target fields (depicted by the faces of the respective Heroes). When a Hero reaches his/her target field, he takes the 3 campfire symbols. The other Hero plays on. Every time it's the turn of the player that has already reached his/her target area, the Hero has to hand in a campfire symbol. If he can't hand in a campfire symbol anymore, both players lose the adventure together!
Chada starts, by taking a "Walk" action. Next up is Thorn. When both have reached their target area, read on.
Congratulations! You have successfully completed the first adventure. You are now familiar with the most important rules. Further rules are explained on the following pages. After reading those, you are ready for your first big Adventure "Die Stachelklippen" (The Spiky Cliffs).
Text for Grenolin, the Bard: you get one Willpower point.
Preparations for Each Adventure
- Each player picks one of the Heroes and places the matching 3 Hero cards next to each other in front of him (with the sun side up). Behind each of the cards, a randomly drawn Curse card is placed, with the "resting" side up.
- Shuffle all Mist cards and place them face down ready at hand as a draw deck. The 12 Equipment cards and 3 special cards are also placed at the ready. Whether you need one of the special cards, and if so which one, will become clear during the adventures.
- Take the 4 Friend cards (with the green backs). You have to decide at the start of each adventure which friends (if any) you want to use.
- Note: for your first adventure, the advice is to use Grenolin as a friend for Chada and Merrik as a friend for Thorn.
- Friend cards are always placed in the middle card row, between the Hero and the Curse Card.
- Put the 20 Willpower tokens and the 3 Campfire tokens ready at the side.
- Take the big adventure cards for the adventure you are about to play.
- The adventure "Die Stachelklippen" (The Spiky Cliffs) consists of 6 big adventure cards: 2 cards "Introduction and New Rules" and 4 Stage cards. The first stage ("Starting-Etappe") is placed face up on the table. The two middle stages ("Zwischen Etappen") are shuffled and placed face down in a row next to the first stage. Finally, the end stage ("Ziel-Etappe") is placed at the end of the line.
- Important: later adventures always consist of 10 adventure cards. Instead of 2 middle stage cards, there are six for each adventure. For each game, pick two at random and put the other four back in the box. As a result, these adventures will be different every time.
- Place your Hero figures and the Curse figure at the respective starting fields on the first stage card.
- Every player gets 2 Willpower points, which are placed next to his card rows.
- Important: in the adventure "Die Mauerberge" (The Wall Mountains) every player gets 3 Willpower points instead of 2.
Your setup is now complete and should look like the picture shown on the bottom of page 5.
Playing a Turn
The player whose turn it is, is the active player. He/she has to activate one of the 3 cards that are at the front (one at the front of each of his card rows). You get to decide which of the three you want to activate. After activating the card, the card is placed at the end of the same row — unless a) the text on the card states something different (e.g. discard the card), or b) it is an enemy that you have defeated. After this, it's the next player's turn.
In addition to the action "Walk" (as explained earlier) you can now also choose the actions "Fight" or "Special Ability."
Note: as a result of the activation of cards, Mist cards and Equipment cards will keep coming into the game, and the card rows will grow longer.
Action "Fight"
When a player chooses the action "Fight" with a Hero card that is at the front of one of his card rows, he can fight an enemy card that is at the front of one of his other card rows. In order to do this, his strength value has to be equal to or higher than the strength value depicted on the enemy card.
Note: the enemy cards are introduced by means of the Mist cards. Their strength is shown in the red symbol, at the top right of the enemy cards.
You can also use other cards to help you in a fight, if those cards have a strength symbol at the top right of the card. Chada, for instance, can use the equipment card "Arrows" ("Pfeile") if it's in the front of one of her card rows, to help beat an opponent of strength 9 or lower.
After a successful battle, the player gets the amount of Willpower points as shown under the strength symbol on the beaten enemy's card. Subsequently, the defeated card is removed from the game and placed back in the box. Finally, the activated cards, used to beat the enemy, are placed at the end of the same card rows they were in.
Example (picture on page 6): Thorn uses his Hero card with strength 7 for the action Fight and attacks the Gor (Strength 4) in the adjacent row. Thorn collects 1 Willpower token as a reward and the Gor is removed from the game. The Hero card is moved to the back of its card row. Instead of his Hero card, Thorn also has the option to use his Equipment card "Orweyns Hammer" to defeat the Gor and get the Willpower reward.
Important: when the Heroes are on adjacent fields, the active player can choose to attack an enemy card at the front of one of the other player's card rows. In this case, the reward is still collected by the active player.
Joint Fight
If the Heroes are on adjacent fields, they can choose to fight together. The active player can invite the other player to assist him in the battle. If accepted, the other player then also has to activate a card in the front of one of his card rows. The strength points used by both players are added together to attack an enemy card. In this case, the reward for defeating the enemy can be divided in any way chosen by the players. Subsequently, all the activated cards used by both players to defeat the enemy are moved to the back end of their card rows.
Activating Enemy Cards Instead of Defeating Them
If the players cannot or choose not to defeat an enemy card which is in front of one of the rows, the card stays where it is. Many enemies have a special ability as well as a strength value. At the start of a battle, this special ability can be activated, and the action as described on the card executed. If this leads to the card being taken out of the game, the player does not get the Willpower points for defeating that enemy. The bonus is only collected after defeating an enemy card by fighting it (as described earlier). If a card in the front of a row is neither defeated, nor activated by using its special ability, then the card blocks all the cards in that row.
Attention: if at the start of a turn, all three rows of a player are blocked and he/she can neither activate nor defeat one of the three front cards, then both players immediately lose together.
The Heroes' Special Abilities
Instead of the actions "Walk" or "Fight," a player can choose to use the special ability of a Hero card that's in the front of one of his card rows. To do so, the action as described on the card for this special ability is executed, and the card is moved to the end of its card row.
Heroes on Adjacent Fields
When Chada and Thorn are occupying adjacent fields at the start of a turn, they can support each other. Chada can attack an enemy in the front of one of Thorn's card rows and vice versa.
It is also possible for the Heroes to use each other's Willpower points. E.g. if Thorn only has 1 Willpower point left, but he needs to spend 2 Willpower points to execute his desired "Walk" action, then Chada can pay the Willpower point for him. If she has more Willpower points than Thorn, she can also opt to pay both points for him.
It is allowed for players to give Willpower points to each other, as long as they are on neighboring fields, even if the points are not spent right away. The important condition is that both players are on adjacent fields at the start of the turn.
Two fields are considered adjacent when they are directly connected by a road (either continuous or dotted), without any other fields in between. The length of the road or any symbols that may be depicted on the road are not important for determining whether fields are adjacent. Connected fields are also considered adjacent across two Stage cards when there are no other fields in between.
The Mist Cards
Most of the Mist cards have negative events that happen when the card is in front of a card row and activated. When a player chooses the action "Walk" and there is a Mist card symbol depicted next to that action's symbol, the player has to draw and reveal 1 or 2 (as depicted) Mist cards from the current deck of Mist cards and place them at the end of the active card row (behind the Hero card he just activated to use the Walk action). If more than one Mist card is drawn, place them at the back of the row in the same sequence as drawn.
Important: if the current deck of Mist cards is empty and the player has to draw a Mist card, then both players lose together immediately.
The Equipment Cards
Most of the equipment cards make it into the game by the use of the Heroes' special abilities. When a player receives a piece of equipment, it is placed at the end of the active card row (behind the Hero card of which the special ability was triggered to acquire the Equipment card). The player can use the equipment as soon as it is at the front of a card row.
Unless stated otherwise, an equipment card is taken out of the game after being activated, and placed in the box. If a certain piece of equipment is not available on the table anymore, then the players cannot obtain that piece of equipment anymore.
It is allowed to use an action to place a piece of equipment back at the end of its row, without activating it. The equipment is then saved for later use.
If the Heroes are on adjacent fields, a player can also choose to use his action to hand a piece of equipment to the other Hero, who then has to place this equipment card at the end of one of his card rows.
The Curse Cards
Each card row contains a Curse card. At the start, it is lying upside down, with the "resting" side up. The first time the card is activated when lying at the front of a row, it is flipped to its "awakened" side and placed at the end of its card row. Later when it is lying at the front again, with its "awakened" side up, the player has to activate the Curse card and move it back to the end of its card row if he/she wants to use any of the other cards in that row afterwards. To activate the Curse card, a penalty has to be paid. The player can choose one of the penalties belonging to the symbols depicted on the card:
- Card symbol with -1 on it: the player has to take a Mist card from the current deck and place it at the end of the card row, behind the just-activated Curse card.
- Red Willpower symbol with -1 on it: the player has to hand in a Willpower point.
- Curse Head symbol: move the Curse figure one field along the road with the continuous line.
Important: Curse Cards are not Mist cards. They can never be defeated or moved to other rows!
The Friend Cards
The Friend cards make the game easier. There are four different Friend cards, from which the players each pick one card at random at the start of a game for Chada and Thorn. These are placed face up in the middle row, right behind the Hero card and in front of the Curse card. With the help of the friends, the players can influence the difficulty of the adventure. If the adventure was too hard, players can opt to use three or four friends in the next try. The players get to choose in which row the extra friends are placed, but there can never be more than 1 friend in each row. Alternatively, you can opt to choose specific Friend cards to use in an adventure, rather than picking them at random.
A greater challenge can be found by only giving a Friend card to one of the Heroes, or even playing without the help of any Friends at all.
End of a Stage
At the end of each stage, there is a red stop field. A player always has to end his/her turn here. Any remaining steps are ignored. Subsequently, the adventure card for the next stage is revealed (flipped over) and from the Mist deck a number of Mist cards is drawn, equal to the number shown on the top left of the newly revealed Stage card, and placed face down right above the newly revealed stage. If one of the special cards is used in this stage, this is also listed at the top left of the stage card.
Important: when one of the Heroes is already on the new stage, while the other is still on the previous stage, there are two current Mist decks. When one of the players has to draw a Mist card, take it from the current deck corresponding to the stage that that player is currently on. When both players have left a stage, take any remaining Mist cards from that stage and place them on top of the current deck of the next stage.
Stage Bonus: if there was at least one Mist card remaining in a completed stage, the Heroes get to take 1 extra Mist card from the draw deck, which is placed on top of the current deck.
End of the Adventure
The Adventure is successfully completed... when Chada and Thorn both reach their target fields at the end stage card. Both players have won together and can go and try the next adventure.
The Adventure ends in a bad way, when...
- the Curse catches up with or overruns one of the Heroes, or
- a Hero reaches his target field, but the other Hero doesn't finish in one of the four subsequent turns (use the campfire tokens for counting the rounds), or
- when a player has to draw a Mist card but the current deck is empty, or
- when at the start of his/her turn, all three rows of a player are blocked, and he/she is not able to defeat or activate any of the three cards in front.
In all of these cases both players lose together. Now that you know what happens during the adventure, you can opt to retry the adventure using the same stage cards, or shuffle all the stage cards again and pick two random middle stages before trying again.
Sequence of the Adventures
The adventures can be played in the order chosen. However, if you want to follow the story line, play them in this sequence:
- Die Stachelklippen (The Spiky Cliffs)
- Die Sturmweiden (The Stormy Meadows)
- Der Stumme Wald (The Silent Forest)
- Die Mauerberge (The Wall Mountains)
Before the start of an adventure, read the cards "Introduction and New Rules" out loud. Now start with the Adventure "Die Stachelklippen" (The Spiky Cliffs). Chada takes the first turn.
Summary: Moving a Hero
The sequence in which the different steps that are involved in moving a Hero are important and therefore summarized here:
- First, pay the cost, as depicted on the Hero card next to the chosen number of steps. If the Hero is moved as the result of a special ability, equipment card, Mist card or Friend card, follow the instructions printed on that card.
- Next, look at the symbols on the road that is to be travelled and execute the actions corresponding to those symbols.
- Subsequently look at the symbols on the field where the move ends and execute the actions corresponding to those symbols.
- Important: if the Curse has caught up with or overran a Hero, both players lose together immediately.
- Only at the end of this, the Hero is moved to the chosen field.
Note: determining whether Heroes are on adjacent fields, and therefore can exchange Willpower points, is done at the start of a turn.
Card Translations
Friend Cards
- Grenolin, der Barde (Grenolin, the Bard): you get one Willpower point.
- Unbekannter Krieger (Unknown Warrior): attack an enemy in the front of a card row. Or place the warrior at the end of his row.
- Merrik, der Kartograph (Merrik, the Cartographer): move your figure 1 field forward, ignoring the step number on that field.
- Kirr, der Zauberer der Zeit (Kirr, the Time Wizard): move one Curse card that's at the front of its row back one spot. Or place Kirr at the end of his row.
Chada Hero Cards (Special Abilities)
- Chada facing left — sun side: you receive Arrows ("Pfeile") or Mhares Amulett.
- Chada facing left — rain side: you receive the Storm Shield ("Sturmschild") or 1 Willpower point.
- Chada front facing — sun side: you receive Arrows ("Pfeile").
- Chada front facing — rain side: you receive Mhares Amulett or 1 Willpower point.
- Chada facing right — sun side: move your figure 1 field forward, ignoring the step number on that field, or receive 1 Willpower point.
- Chada facing right — rain side: you receive Arrows ("Pfeile") or 1 Willpower point.
Thorn Hero Cards (Special Abilities)
- Thorn facing left — sun side: you receive Orweyns Hammer.
- Thorn facing left — rain side: you receive the Storm Shield ("Sturmschild") or 1 Wineskin.
- Thorn front facing — sun side: you receive 2 Willpower points.
- Thorn front facing — rain side: you receive 1 Willpower point.
- Thorn facing right — sun side: move your figure 1 field forward, ignoring the step number on that field, or receive 1 Willpower point.
- Thorn facing right — rain side: you receive Orweyns Hammer or 1 Wineskin.
Equipment Cards
- Trinkschlauch (Wineskin): take anywhere from 1 to 5 steps. Remove from play only if you take more than 1 step.
- Hadrisches Stundenglas (Hourglass): flip a Curse card that's at the front of its card row (for you or for an adjacent Hero) to its "resting" side and place it at the end of its row. Remove the Hourglass from play.
- Sturmschild (Storm Shield): move your figure 1 field forward, ignoring the step number on that field. If you cross a road with Curse Head symbols on it, you may ignore these symbols. After this, the Shield is removed from play.
- Orweyns Hammer: attack an enemy. After that, move the Curse figure two fields ahead, or take Orweyns Hammer out of play.
- Pfeile (Arrows): attack an enemy then remove from play.
- Mhares Amulett: move 1 card that's at the front of its row (for you or for an adjacent Hero) to the end of its row. Surrender 1 Willpower point or remove Mhares Amulett from play.
Mist Cards
- Orril, der Schwarze Barde (Orril, the Black Bard): move the Curse Figure 1 or 3 fields ahead. Only when the Curse figure is moved 3 fields, Orril is removed from play.
- Kentar, Kenvilars Tochter (Kentar, Kenvilar's Daughter): all Chada's Curse Cards are moved to the front. Then Kentar is removed from play.
- Krumm, der Hexenmeister (Krumm, the Witch Master): take the top Mist card of the current deck out of play. Then remove Krumm from play.
- Pero, der Seeräuber (Pero, the Pirate): surrender 1 Willpower point. If you don't have any Willpower points, you receive one.
- Waldgeist (Forest Spirit): move all of Thorn's Hero cards to the end of his card rows. Then remove the Waldgeist from play.
- Gorain, Fluggors (Gorain, Flying Gors): shuffle all the cards from one of your rows and place them back in random order. Repeat for your other two rows. Then Gorain is removed from play.
- Thogger, Druide der Taren (Thogger, Taren Druid): both players must flip all of their Hero cards to their other side. Then Thogger is removed from play.
- Ean Quella, der Zauberin (Ean Quella, the Sorceress): move two cards from the front of their rows to the end of their rows, for you or an adjacent Hero. Draw 1 Mist card from the current deck and place it at the end of this card row. Then remove Quella from play.
- Niron, der Späher (Niron, the Scout): draw two Mist cards from the draw stack and place them at the end of this row. Then remove Niron from play.
- Meres, der Hexer aus Andor (Meres, the Warlock from Andor): draw 1 Mist card from the draw deck and place it at the front of one of the other player's card rows.
Note: the following Mist cards are enemies without any special abilities: Gor, Nordskral, Meerestroll, Vypera Schlange.
Special Cards
- Leam, der Schiffbrüchige — laying on the beach (Leam, the Castaway): flip this card over and place it at the end of its row.
- Leam, der Schiffbrüchige — standing (Leam, the Castaway): you receive 1 Willpower point.
- Drukil, der Hautwandler — man (Drukil, the Skin Shifter): add one card from the draw deck to the top of the current deck. Then flip this card to the "bear" side and place it at the end of its card row.
- Drukil, der Hautwandler — bear (Drukil, the Skin Shifter): defeat Drukil or move the Curse figure 2 fields to activate Drukil. In both cases, flip this card to the "man" side and place it at the end of its card row.
- Callum, der Abtrünnige — strength 13 (Callum, the Renegade): defeat Callum as normal to remove him from play (and get 1 Willpower point). Or surrender 2 Willpower points or move the Curse figure 2 fields to activate Callum. After activating, flip the card over and place it at the end of its card row.
- Callum, der Abtrünnige — strength 16 (Callum, the Renegade): defeat Callum or move the Curse figure 3 fields to activate Callum. In both cases, flip the card to its other side and place it at the end of its card row.
Adventure Cards
Die Stachelklippen (The Spiky Cliffs)
Introduction and New Symbols 1: The Spiky Cliffs. Summary: there's a curse on the island that wants to prevent Chada and Thorn from leaving. They have to try to cross the island, go over the Wall Mountains and reach the Silver Mountain. There their friends, the Silver Dwarfs, will give them a ship to escape the island with. They have to hurry, because something evil is following them! The card also shows pictures of the starting fields and target fields for Chada and Thorn.
Introduction and New Symbols 2: shows the starting field for the Curse figure, and explains:
- Green Willpower symbol with +1: a Hero that finishes his turn here gains 1 Willpower point.
- Red Willpower symbol with -1: a Hero that finishes his turn here loses 1 Willpower point.
- Hourglass symbol: a Hero that finishes his turn here gets an equipment card "Hadrisches Stundenglas" and places it at the end of one of his rows.
- Curse Head symbols: a Hero crossing this road must move the Curse figure as many fields forward, along the road with the continuous line, as depicted on the road (1 or 2).
- Picture of Castaway card: a Hero that ends his turn here gets the card "Ein Schiffbrüchiger" and places it with the side showing Leam standing up at the end of his active card row.
Stage setup notes (top left of each stage card):
- Start-Etappe (First Stage): place 3 Mist Cards above this card as the starting current deck.
- Zwischen-Etappe (Middle Stage), with the most text and the picture of the castaway: place 2 Mist Cards above this card as the current deck for this stage, also place the card "Ein Schiffbrüchiger" (a Castaway) at the ready.
- Zwischen-Etappe (Middle Stage), with the least text: place 2 Mist Cards above this card as the current deck for this stage.
- Ziel-Etappe (Final Stage): place 3 Mist Cards above this card as the current deck for this stage.
Die Sturmweiden (The Stormy Meadows)
Introduction and New Symbols 1: The Stormy Meadows. Summary: Leam, the castaway, has told Chada and Thorn that the island they are on is a prison island, created by the great sea king Varatan. Varatan had been chasing a black ship with evil murderers, thieves, witches and warlocks. When they fled onto this island, he cursed the island; anybody north of the Wall Mountains would not be able to leave the island ever again. And this curse is now chasing them; if it touches them, they also can never leave the island again. There is no time to lose!
- Picture of Mist cards with a 1 or a 2: a Hero ending his turn here or crossing a road with this symbol has to draw the next 1 or 2 Mist cards from the current deck and place them face up at the end of his active row.
- Picture of stack of Mist cards with +1: a Hero ending his turn here or crossing a road with this symbol gets to take the top card from the draw deck and place it on top of the current deck.
Introduction and New Symbols 2:
- Picture of field with Curse Head: a Hero ending his turn here has to move the Curse one field.
- Picture of the back of a Curse card with a green arrow: a Hero ending his turn here has to flip a Curse card in one of his rows from "resting" side to "awakened" side.
- Picture of arrows: a Hero ending his turn here receives an equipment card "Pfeile" (Arrows) from stock and places it at the end of his active row.
- Picture of a rock: if a Hero ends on a field with this symbol, then the other Hero has to go back one field. The symbols on the field that the Hero retreats to are ignored. If there are several ways leading back, the retreating Hero gets to decide which field he retreats to (but you have to go along a road you're allowed to cross). If you retreat onto the field with the Curse figure, both players lose the game immediately.
- Picture of Castaway card: a Hero that ends his turn here gets the card "Ein Schiffbrüchiger" and places it with the side showing Leam standing up at the end of his active card row.
- Black fields with +1, +2, +3: if the Curse figure is on any of these fields, the Heroes have to pay an extra number of steps equal to the number on this field, when walking. (So e.g. to get to a field with a symbol 3, you now have to use 3 steps.)
Stage setup notes:
- Start-Etappe (First Stage): place 2 Mist Cards above this card as the starting current deck.
- Zwischen-Etappe (Middle Stage), with the most text (one of them): place 1 Mist Card above this card as the current deck for this stage, also place the card "Ein Schiffbrüchiger" (a Castaway) at the ready.
- Zwischen-Etappe (Middle Stage), with the least text (all the other middle stages): place 1 or 2 Mist Cards above this card as the current deck for this stage, as listed top left.
- Ziel-Etappe (Final Stage): place 1 Mist Card above this card as the current deck for this stage.
Der Stumme Wald (The Silent Forest)
Introduction and New Symbols 1: The Silent Forest. Summary: Chada and Thorn entered a forest in which no sound could be heard. When they tried to speak, they found they could also make no sound. The forest was bewitched! The heroes spotted a pair of animal eyes watching them from some bushes. The eyes quickly vanished. The Heroes didn't know what animal they belonged to, but didn't let it stop them from continuing on their road.
- Picture of dotted roads with Hero pictures: only the depicted Hero is allowed to cross this road.
- Picture of field with strength 4 symbol: a Hero can only end his turn on this field if he has a strength of at least 4 at the start of his turn (counting only the strength on his active Hero card).
Introduction and New Symbols 2:
- Picture of rain cloud with red arrow: a Hero ending his turn here has to flip his active Hero card to the "rain" side (if it wasn't on there already). This only applies if he/she ended on this field by using the action "Walk."
- Picture of Drukil card: a Hero ending his turn here places the card "Drukil, der Hautwandler," with the side showing a man up, at the end of his active row. (Rest of the text is the same as on the Drukil card; see the Drukil card translation above.)
- Picture of bear on road: a Hero that has Drukil with his "bear" side up in one of his card rows is not allowed to cross a road with this symbol on it.
Stage setup notes:
- Start-Etappe (First Stage): place 5 Mist Cards above this card as the starting current deck. Also place the card "Drukil, der Hautwandler" (Drukil, the Skin Shifter) at the ready.
- Zwischen-Etappe (Middle Stages): place 1, 2, 3 or 5 Mist Cards above this card as the current deck for this stage, as listed top left.
- Ziel-Etappe (Final Stage): place 4 Mist Cards above this card as the current deck for this stage.
Die Mauerberge (The Wall Mountains)
Introduction and New Symbols 1: The Wall Mountains. Summary: Chada and Thorn now have to cross the steep Wall Mountains. Climbing them would have been hard enough without the Curse chasing them. But now they also have to deal with Callum. Leam has told the Heroes about him. Callum used to be the leader of the black ship, whose crew was cursed by King Varatan. He had drawn the curse to him and his men, and was not going to tolerate Chada and Thorn crossing the mountains.
In this adventure, Mist cards are only placed as the current deck at the starting stage. The Heroes can carry these over to the next stages as normal, but no cards are added to make a new current deck when flipping the other stage cards. There are some fields that let the Heroes add cards to the current deck.
Introduction and New Symbols 2:
- Curse Head with green arrow: a Hero ending his turn here moves the Curse figure one field back.
- Picture of Callum card: a Hero ending his turn here places the card "Callum, der Abtrünnige," with the side showing Callum with strength 16, at the end of his active row. (Rest of the text is the same as on the Callum card; see the Callum card translation above.)
- Picture of Callum on road: the Heroes cannot successfully complete this adventure without defeating Callum. The road with the Callum symbol on it cannot be crossed while the Callum card is in either one of the Hero's card rows (regardless which side of the Callum card is facing up).
Stage setup notes:
- Start-Etappe (First Stage): place 9 Mist Cards above this card as the starting current deck. Also place the card "Callum, der Abtrünnige" (Callum, the Renegade) at the ready.
- Zwischen-Etappe (Middle Stages): place no Mist Cards above this card as the current deck for this stage, as listed top left.
- Ziel-Etappe (Final Stage): place no Mist Cards above this card as the current deck for this stage.