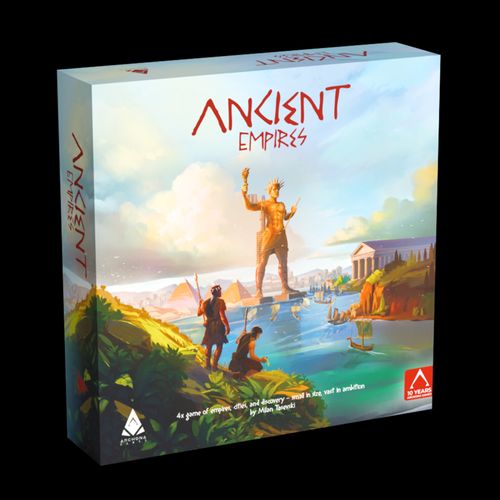
Ancient Empires
Ancient Empires Rulebook
Table of Contents
Table of Contents
Components
- 1 Double-sided Map Board
- 4 Player Screens
- 4 Player Resource Track Boards
- 1 Score Board
- 1 Pillars Board
- 3 Influence Boards
- 20 Technology Cards
- 8 City States Cards
- 10 Civilization Cards
- 14 Wonder Cards
- 52 Player Order Tokens (13 per player)
- 12 Neutral Order Tokens (4 of each action)
- 1 Direction Marker
- 4 Food Markers
- 4 Materials Markers
- 4 Gold Markers
- 4 Ideas Markers
- 4 Glory Markers
- 12 Explore Tokens (6 Barbarian, 2 Food, 2 Materials, 1 Gold, 1 Idea, 1 Glory)
- 12 Random Resource Tokens (5 Food, 4 Materials, 3 Gold)
- 4 Capital City Tokens (1 per player)
- 64 Army Meeples (16 per player)
- 24 Settlement Meeples (6 per player)
- 40 Improvements (8 per type)
- 12 Influence Flags (3 per player)
- 20 Pillars Markers (5 per player)
- 1 Age Marker
- 8 Score Marker (2 per player)
Setup
- Choose one side of the map board and place it on the table. For your first game, we recommend using the A side.
- Place the Score board near the map. Place the Age Marker on the I space on the Score board.
- Place the Pillar board near the map.
- Place one Influence board next to each of the three continents on the map. There are three continents on the map: orange, green, and black.
- Shuffle the City-State cards and randomly place one in each of the three slots on the Influence boards. Return the rest back in the box.
- Place the Direction marker between the orange and the green continent above the compass. The marker should point in a clockwise direction.
- Randomly place one Unexplored token face-down on each Sacred Site territory.
- Shuffle the Technology deck and place it near the map. Reveal five Technology cards to form the Technology market.
- Each player chooses a color and takes a player board, a player screen, and player pieces (Order tokens, Armies, Settlements, Resource Markers, Score Markers, Influence Flags, Envoy Markers and Pillars Markers) - all matching their color.
- Each player places two Armies on each of the Ancient Settlement on every continent.
- Each player places their Resource Markers on their corresponding space on the player board (Food and Materials on 2; Ideas and Gold on 1; Glory on 0).
- Each player places one Pillar Marker on each of the corresponding starting spaces on the Pillars board.
- Each player places one of their Influence Flag on the starting space on each Influence board.
- Each player places one Score Marker next to the Score Board.
- Deal two random Civilization cards to each player. Put the rest back in the box.
- Shuffle the Wonder deck and place it near the map.
- Place the City Improvements meeples near the Map, in reach of all players.
Randomized Setup
For a more randomized setup, do the following steps.
- Randomly place a Neutral Action token next to every Order token slot, covering the printed neutral action icons.
- Randomly place Resource Production markers on each resource-producing territory, covering the printed resources.
- Place the Direction marker pointing clockwise between any two continents of your choice.
Use your player screen to hide your available Order tokens from the other players.
Gameplay
A game of Ancient Empires is played over three Ages: the Stone Age (I), the Bronze Age (II), and the Iron Age (III).
During the Stone Age, players lead tribes. In the Bronze Age, those tribes evolve into great civilizations. In the Iron Age, civilizations build the great wonders of the world. The player with the most Victory points at the end of the game wins.
Each Age consists of two rounds. During each round, players place and program Order tokens into slots on the board. These tokens are later revealed and resolved.
Flow of the Game
Each Age has two rounds and each round of an Age has two phases - Planning and Resolution phase. During each Planning phase, you will place Order tokens around the map in player order. During each Resolution phase, you will resolve those Order tokens following the Direction marker around the map.
Planning Phase (Round I)
Taking turns in player order, each player must place one of their Order tokens face-down on an empty slot on the map. They do this three times i.e. each player places three Order tokens in total during this Phase.
After you place an Order token, you may immediately play the Neutral action attached to that slot. Neutral Actions are described in more detail on page 13.
After each player has placed THREE Order tokens total, proceed to the Resolution Phase (Round I).
Resolution Phase (Round I)
Starting with the Order token in the slot directly below the Direction Marker and then following its direction (arrow), each player turns their Order tokens face-up, one by one. The owner of the Order token must fully resolve an Order before flipping the next Order token on the map.
You can always choose not to resolve the actions of the Order token.
After you've revealed and resolved all Order tokens, flip the Direction Marker to point counterclockwise and proceed to the Planning Phase of Round II.
Do not return any Order tokens placed on the map to your supply.
Action Resolution
Whenever you resolve an action - either from Order tokens or from Neutral actions - that action can only affect game pieces on the continent that matches the color of the Order slot. Keep this in mind during the Planning Phase.
There are a total of twelve slots on the Map board. Nine slots are colored in one of the colors of the three continents, while three slots are colored with two colors. If a slot has two colors, you must choose in which continent you want to resolve your action(s). You cannot split an action to both continents (for example: if you play an enhanced Grow, you cannot place 1 Army in each continent).
Planning Phase (Round II)
As in the Planning Phase of Round I, players take turns placing Order tokens on the map. A total of two this time.
During this phase, in addition to placing Order tokens in empty slots, you may also place your Order tokens in a slot that already contains a face-up Order token that belongs to any player, including you. In this case, both tokens are considered to be in the same slot.
A slot cannot contain more than two Order tokens. You cannot place Order tokens on top of a face-down Order token placed during this round.
After each player has placed TWO Order tokens total, proceed to the Resolution Phase (Round II).
Resolution Phase (Round II)
As in the Resolution Phase from Round I, players will flip newly placed Order tokens face-up and resolve their actions following the Direction marker which shows counterclockwise this time.
In addition to resolving the newly placed Order tokens, players will also resolve the tokens placed in Round I by following the direction of the Direction marker.
Example: In the image above, firstly, Red reveals their token and resolves its action. Then, Blue will resolve the action of the token they placed in the previous round. Next, resolution will move to the next Order slot following the Direction marker. Yellow will reveal and resolve their face-down Order token, then, Yellow will resolve the Order token they placed in the previous round.
After resolving all Order tokens, flip the Direction Marker to clockwise and proceed to Age End Phase (page 12).
Order Tokens and Actions Overview
Each player has an identical set of 13 Order tokens:
- 2x Grow
- 1x Build
- 1x Explore
- 2x Produce
- 1x Build 2
- 1x Statecraft
- 2x Move 2
- 1x Move 3
- 2x Attack
Order tokens allow you to play actions during the Resolution phase. Some orders can be enhanced if you pay the required resource cost. Here is an overview of the types of orders in the game.
Move
Gain movement points equal to the arrows shown on the Order token. Each movement point lets you move one Army to one adjacent territory. Two territories are considered adjacent if they share a border. You can spend multiple movement points to move a single Army or spend the movement points across multiple Armies.
Move across the Sea
You can pay 1 Food to enhance this action with the ability to move your Armies across the sea. This way, each movement point lets you move an Army across one sea territory. Your armies can never end their movement on a sea territory, you must move them across, to an adjacent land territory.
You can have an Army cross to another continent. You are then still allowed to move that Army with your remaining movement, even though your Move Order token is in a slot on another continent. This is the only way to break the rule for Action Resolution (see Action Resolution).
Example: After paying 1 Food, Yellow spends one movement point to move their Army across one sea territory.
Example: Yellow resolves a Move action with 3 movement points. They pay 1 Food to enhance the action. Then, Yellow moves two Armies across one sea territory. Yellow uses their last remaining movement point to move one of the yellow Armies one additional time. They are allowed to move the Army on the green continent because it started the move on the orange continent, where the Order token is placed.
Explore
This order gives you two actions: Move and Scout. You can choose in which order to resolve each of these actions.
- Move: Gain one movement point and resolve it.
- Scout: Flip a face-down Unexplored token if you have at least one Army in that token's territory.
Gain the resource printed on the token's face and place the token near your components unless it is Barbarians.
Finally, score 1 Glory for each Sacred Site where you have at least 1 Army in on that continent.
If you encounter Barbarians, you gain nothing. The Barbarian token stays in the territory and blocks the Sacred Site (players cannot score it).
Unexplored Tokens distribution: 2x Food; 2x Materials; 1x Gold; 1x Idea; 1x Glory; 6x Barbarian. Not all tokens are used in setup.
Attack
Gain one attack point. You can pay 1 Material to gain an additional attack point. In a territory where you have at least one Army, pick A, B or C for each attack point. You can pick the same option more than once or you can pick different options as part of a single Attack Order.
A. Attack an Army: Remove one opponent Army. The opponent returns their Army to their supply.
B. Attack Barbarians: Remove one Barbarian token and place it near your components. Gain 1 Glory.
C. Attack an Improvement: Remove one Improvement in an opponent Settlement, but only if that opponent doesn't have any Armies in that territory. Gain the bonus from the destroyed Improvement (for example: if you destroy a Library Improvement, gain 1 Idea).
You cannot remove an opponent's Settlement meeple.
Regardless of how you resolve your Attack order, for each Army, Barbarian and/or Improvement you remove, gain 1 Glory.
Grow
Add one Army from your supply to the Ancient Settlement or to any territory with one of your Settlements. You can spend 1 Food to add an additional Army. You can distribute these new Armies among any valid territories in the same continent as described above. If you don't have any Armies left in your supply, then you cannot perform the Grow action.
Produce
Gain Food, Materials, or Gold for every resource-producing territory on this continent where you have at least one Army or Settlement. Resources are tracked on your resource track board. Move your resource markers to the right whenever you gain resources.
A resource-producing territory is a territory that contains a resource icon. If you are not present in any resource-producing territories on the continent, you gain nothing.
Build
Pick A, B or C for each hammer icon on your Order token. You can pick the same action more than once.
A. Construct a Settlement: First return two of your Armies from a single territory to your supply. Then, pay Materials equal to the number of the current Age - 1, 2 or 3 Materials. Place a Settlement in that territory.
Additionally, gain 1 Idea and 1 Influence on the continent where you built the Settlement.
When you build your first Settlement, place the Capital City token next to it. You've established your Empire's capital city. If you build your Capital City during Age II or III, immediately activate the Founding effect on your Civilization card.
You cannot build a Settlement in a territory already containing a Settlement nor in an Ancient Settlement territory.
B. Improve a Settlement: Pay 2 Materials. Place an available Improvement from the supply to one of your Settlements. Depending on the chosen Improvement, gain its bonus.
Example: Pay 2 Materials for a Monument, then gain Glory from its bonus.
Improvement Types and Bonuses
- Monument: Gain 1 Glory.
- Library: Gain 1 Idea.
- Port: Gain 1 Gold.
- Fort: Gain 1 Army.
- Market: Gain 1 Food or 1 Materials.
A Settlement cannot have two of the same type of Improvement and it cannot have more than four Improvements. You cannot build an Improvement type if there are no available pieces of that type in the general supply.
The more Improvements a Settlement has, the larger it becomes - starting as a Hamlet and ending up as a Megalopolis, if it has four Improvements. At the end of the game, larger Settlements reward you with more Victory points.
Place your Improvements with their broad sides touching the Settlement.
C. Construct a Wonder: This action is playable only during Age III.
Pick a card from the Wonder display. Pay the resource cost shown on the Wonder card. Take that Wonder card and place it near your player board.
Immediately advance on the Pillar track(s) that match the Pillar symbols on the Wonder.
Draw the top card of the deck to replenish the Wonder market. Wonders are scored at the end of the game.
Every Wonder has a unique scoring method that rewards Victory points for various achievements.
At the end of the game, you score Victory points from all Wonders you have constructed. Additionally you activate any effects your Wonder cards have.
Statecraft
Choose action A, B or C.
A. Invent: Spend Ideas to gain new Technology cards from the Technology market. Place them in an empty slot on your player board.
Technologies give you ongoing effects that modify how you play the game. If a Technology effect contradicts a rule from this rulebook, the Technology card always takes precedence. You can take advantage of their effects on the same turn you gain them.
After you gain a Technology, move your markers up on the Pillar tracks that match the card's symbols. You can gain more than one Technology as part of one Invent action, as long as you have sufficient Ideas.
Technology cards do not have fixed costs. Instead, each new card costs you a number of Ideas depending on the number of Technologies you have already gained:
- Your 1st and 2nd Technologies cost 1 Idea;
- Your 3rd and 4th Technologies cost 2 Ideas;
- Your 5th Technology and beyond cost 3 Ideas.
After filling up all slots on your player board, you can gain more Technology cards, but you must first discard one of your other Technologies.
After resolving the Invent action, draw new Technology cards from the deck to fill the empty spaces in the Technology market.
Instead of gaining a new Technology, you may resolve the Invent action to gain 1 Idea.
Example: Red resolves a Statecraft order. They choose the Invent action. Red decides to gain Philosophy from the market. They pay 1 Idea since this is their 2nd Technology card. They move their markers on the matching Pillars. They immediately gain 1 Idea from the first threshold bonus on that Pillar. They decide to acquire Shipbuilding as well. Since it would be their 3rd Technology they must pay 2 Ideas for this card. Luckily, they just gained 1 Idea from the previous threshold bonus. Next, they advance their markers up on the Pillars according to the symbols found on their new Technologies.
B. Trade: Gain one of the available bonuses/actions from the City-State card on this continent. These bonuses can be free resources or even free actions. City-States offer the bonus that matches the current Age, as well as all bonuses from previous Ages.
Additionally, advance one step on the Pillar track matching the City-State's Pillar symbol.
C. Diplomacy: Advance your Influence Flag one step on the Influence board on the continent where you resolved this order. Gain any bonuses if your Flag lands on a space with an icon.
If your Flag would move beyond the last space on the Influence track, gain 2 Victory points instead of moving.
Influence is scored at the end of the game.
Neutral Actions
Neutral Actions are resolved during the Planning Phases as you place an Order Token. Every Order slot has a Neutral action attached to it. Neutral Actions are essentially weaker versions of the actions available through Order Tokens.
Move: Gain one movement point to move one of your Armies of this continent. You can spend 1 Food to Move across the Sea (see Move).
Attack: Gain one attack point. You may Attack an Army, Attack Barbarians or Attack an Improvement (see Attack).
Grow: Add one Army from your supply to the Ancient Settlement or a territory with your Settlement.
Produce: Choose one resource-producing territory from this continent where you have at least one Army or Settlement and gain that resource.
Example: During the Planning phase, Red places an Order token on this slot. The Neutral action attached to that slot lets them place 1 Army. The color of the slot is black so they must place their Army on the black continent.
Age End Steps
After the end of the Resolution Phase in Round II, perform these steps:
1. Mainland and Island
Following the Direction Marker, determine how many territories each player controls on each continent. To control a territory, a player must have the most power in that territory. Each Army and Settlement add 1 power (see Power/Territory Control).
Every continent is made up of one or more landmasses - always one Mainland and potentially one or more Islands. Each landmass has one or more Victory point bonuses for controlling it.
In each landmass, the player that controls the most territories gains the larger bonus and the player with the second most territories gains the smaller bonus, if there is one. You must control at least one territory to be eligible for any Victory point bonus.
If players are tied for most territories, they gain the total of both bonuses divided evenly among them, rounded down, and no one gains the lower bonus. If there is a tie for second most territories, no one gains the bonus.
Example: On the black continent's Mainland, Red and Blue control 1 territory each. They both gain 2 Victory points each as they split the sum of both bonuses which is 4. On the black continent's Island, Red controls 2 territories and gains 2 Victory points while Blue controls 1 territory and gains 1 Victory point.
2. City-States Majority
Following the Direction Marker, for each continent determine which player placed the most Order tokens in slots of that continent. That player places one of their Envoys on the City-State card of that continent. If two or more players are tied for having the most Orders in a continent, all tied players place Envoys as described above.
Then, they advance on the Pillar track that matches the Pillar symbol of that City-State. Envoys placed this way will score 2 Victory points at the end of the game.
Order tokens placed on Order slots between two continents (slots with two colors) count toward the totals of both continents.
Example: Red has played the most Order tokens in slots attached to the continent. They take one Envoy from the supply and place it on the Sparta City-state card. Sparta's Pillar symbol is Military. That means that Red gets to move their marker once on the corresponding Pillar on the Pillar board. They immediately gain the bonus they passed.
If this is the end of Age III, proceed directly to Game End. Skip steps 3-6.
3. Advance the Direction Marker
Move the Direction marker above the next two-color slot on the board, clockwise. Make sure it is pointing clockwise.
4. Rearrange Turn Order
Arrange the player order on the Score board in reverse order according to current score. For the next Age, the player with the lowest score will go first, and the player with the highest will go last. If players are tied for points, then their order does not change relative to each other.
5. Return Order Tokens
Return all of your Order tokens to your supply.
6. Special Age End Steps
Depending on the Age, perform any applicable Special End of Age steps.
S1. Become a Civilization (end of Age I)
In player order, each player picks one of their two Civilization cards. Each player places the chosen Civilization card in the appropriate slot on their Player board.
If your Capital City is already on the board, immediately resolve your Civilization card's Founding effect. Otherwise, you will get to activate this effect when you do build your first Settlement i.e your Capital. Place your Capital city token on your Civ card as a reminder.
Additionally, move your markers up on each Pillar matching the symbols on your card.
Return the unused Civilization cards to the box.
S2. Reveal Wonders (end of Age I)
Reveal five Wonder cards from the deck. The revealed Wonders are still not available to be constructed. They are insight and public information for every player to plan ahead for Age III.
S3. Wonders Become Available (end of Age II)
The Wonder cards, which were revealed at the end of the Age I, become available to be built. You can construct Wonders using the Build order (see Build).
S4. Civilization End of Age Effect (end of Age II & III)
In the current player order, each player performs the End of Age effect on their Civilization card.
After all steps, move the Age marker to the next Age and start with Round I Planning Phase.
Game End Scoring
After Age III ends, calculate the final scoring. For each player, determine how many Victory Points they have from the following:
- Settlements: Gain Victory points for each of your Settlements, depending on the number of Improvements:
- No Improvement (Hamlet): 1
- 1 Improvement (Village): 3
- 2 Improvements (Town): 5
- 3 Improvements (City): 7
- 4 Improvements (Megalopolis): 10
- Wonders: Gain Victory points from your constructed Wonder cards. Activate any other effects your Wonders have.
- Ideas, Gold and Glory: Gain 1 Victory point for each unspent Idea, Gold and Glory at the end of the game.
- Envoys: Gain 2 Victory points for each Envoy you placed on any City-State.
- Pillars: Gain 2 Victory points for each Pillar where you are the furthest up. If players are tied, they each receive 1 Victory point.
- Final Influence: For each continent, count the total number of territories you control, then multiply that number by the Influence you have in that continent. Gain Victory points equal to this multiplication. Your Influence is equal to the number on your position on the Influence board for the given continent. Read more about Control under Concepts.
Finally, the player with the highest number of points is the winner and ascends to become the Eternal Ruler of the Ancient Empires!
Example: Red has constructed a total of 3 Settlements during the game. One of them has 4 Improvements which grants them 10 Victory points. The other Settlements have 3 Improvements and 2 Improvements. They give 7 and 5 Victory points, accordingly, to Red. Red has constructed two Wonders. They gain 9 Victory points from Parthenon and 1 Victory point from Colosseum Wonder cards. Red has 2 Ideas, 1 Gold and 3 Glory unspent at the end of the game. They gain a total of 6 Victory points from those resources. Red has placed a total of three Envoys among the City-states cards in the game. They gain a total of 6 Victory points. Red is above all other players on the Military Pillar, so they gain 2 Victory points. They are tied for the top spot on the Commerce Pillar and gain 1 Victory point from that placement. Red controls three territories on the green continent. They have 2 Influence according to their placement on the Influence board for the continent. This means that they gain 3 x 2 = 6 Victory points from the green continent. They perform this calculation for the other two continents.
Concepts
Pillars
The Pillars board marks the achievements of your civilization. Advance your marker(s) upwards on the Pillars board whenever you:
- Gain a new Technology card. Advance on the Pillars matching the Technology card's symbols.
- Become a Civilization. Advance on the Pillars matching your Civilization's card symbols.
- Construct a Wonder. Advance on the Pillars matching the symbols of the Wonder card.
- Trade with a City-state using the Statecraft Order token. Advance on the Pillar matching the symbol of the City-state you traded with.
- Place an Envoy during the City-state Majority step in the Age End Phase. Advance on the Pillar matching that City-state symbol.
Each Pillar has thresholds between certain spaces. When your marker passes a threshold immediately gain the depicted bonus. Some bonuses grant actions. They can be performed anywhere on the map.
The offered threshold bonuses by tier:
When you pass the third threshold on each Pillar, gain 2 Victory points immediately. If you are at the topmost space of a Pillar and you need to advance the marker further, score 2 Victory points and do not move the marker, instead.
When your Glory reaches the 5th space on the Resource track, return its marker to the 0 space on the track and receive one of the Tier 1 bonuses of any Pillar.
If you are above all the other players on a Pillar at the end of the game, you will earn 2 Victory points.
| Pillar | Tier 1 | Tier 2 | Tier 3 |
|---|---|---|---|
| Military | Gain 1 attack point. | Gain 2 Army. | Gain 2 Victory points. |
| Commerce | Gain 1 Food. | Gain 1 Gold. | Gain 2 Victory points. |
| Engineering | Gain 1 Materials. | Improve a Settlement without paying its cost. | Gain 2 Victory points. |
| Culture | Gain 1 Army. | Build a Settlement without paying its cost (you must remove 2 Armies). | Gain 2 Victory points. |
| Science | Gain 1 Idea. | Gain 1 Technology without paying its cost. | Gain 2 Victory points. |
Civilizations
During setup, each player gets two random Civilization cards. They are meant to guide your early turns toward a greater game plan. Civilization cards do not come into play until the end of Age I (the Stone Age).
Civilization cards have three types of effects (going from the topmost ability on the card and moving down):
Founding: This effect activates only once in the game, during the S1. Become a Civilization step - at the end of Age I, but only if you have already built your Capital.
Otherwise, this effect activates when you build your Capital during Age II or III. Resolve this effect after you fully resolve your build action.
Ongoing: These effects passively apply benefits that trigger from various conditions for the rest of the game.
End of Age: These effects trigger at the end of an Age. They reward you with Influence and Glory if you fulfil their conditions.
When you become a Civilization, move your markers on the Pillars matching the card's symbols.
Continents
Continents are a group of territories that share a color. There are three Continents on each map - green, orange and black. When playing actions you must perform them in the continent that matches the color of the Order token slot.
Every continent is made up of one Mainland and may have one or more Islands. These landmasses are relevant when scoring Victory points during the end of an Age.
When calculating Victory points at the end of the game for the Final Influence step, calculate all territories that belong to the Continent, regardless if they belong to the Mainland or Island.
Control
Control over territories and who controls the majority of a continent is a concept that comes up often in the game. A player controls a territory if they have the most Power among players in that territory. If two or more players are tied for having the most power in a territory, no one controls that territory.
Each Army and Settlement count as 1 Power for the player who owns them. Improvements do not give any Power.
If you control a territory with a Sacred Site, you control that Sacred Site. If you control a territory with an opponent's Settlement, then that Settlement as well as all Improvements belonging to that Settlement are considered to be under your control. The opponent does not lose any control over them and can still build Improvements and Armies as regular.
If a rule references control over a Continent or a landmass, the player that controls the most territories there, has control over it.
Territories
The Map is made up of a number of territories which are grouped into three continents. A territory is a piece of the map which is defined by its borders, depicted with white lines.
Two territories are considered adjacent if they share a border.
There are few types of territories:
- Ancient Settlements - every continent has one. All players start the game with two Armies in each Ancient Settlement territory. You cannot build Settlements here. You can place new Armies with the Grow action here.
- Sacred Site territories are places of spiritual importance. They start the game with face-down Unexplored tokens on them. They are relevant to the Scout action (Explore order) as well as to some Civilization and Technology effects.
- Resource-producing territories are identified by a resource icon. If you have an Army there, they provide their respective resources when you play the Produce action.
- Sea territories are blue colored territories that separate land masses. They are not part of any continent.
Resources
There are five types of resources in the game:
- Food is spent to enhance your Grow and Move actions.
- Materials are spent to build Settlements and Improvements, and to enhance your Attack actions.
- Gold is a wild resource that can be spent instead of Food and Materials. However, if a cost requires Gold specifically, you must pay it with Gold.
- Ideas are spent to gain new Technology cards during the Invent action (part of the Statecraft Order Token).
- Glory is a unique type of resource that you gain from removing Armies, Improvements and Barbarians. More details in the next section.
Resources are tracked on the Resource track on your Player board. Each resource has a marker that matches its icon. During setup, place your resource markers on their positions as depicted by the printed icons.
Each time you gain or lose a resource of any type, move its marker one space to the right or left, accordingly. The resource track has five spaces. You can't hold more than five resources of one type.
Glory
Glory in the game is marked on the player board resource track. Whenever you remove opponents' Armies, Improvements, or Barbarian tokens from the map, gain 1 Glory. You also gain Glory from building Monuments and Civilization effects. At Game End, each remaining Glory is worth 1 Victory point.
When your Glory marker reaches the 5th space on the resource track, after fully resolving the action or effect that caused to gain the Glory, do the following (any Glory that would go above 5 is wasted):
- Reset the Glory marker to the leftmost (0 space).
- Gain 2 Victory points.
- Gain one of the bonuses from the first row on the Pillar track.
Example: The Red player plays an Attack order. They remove the Blue player's Monument. As a result of this action, Red gains 1 Glory from their attack and 1 Glory for gaining the destroyed Monument's bonus. They move to the 5th space and forfeit one of the Glory. Red brings their Glory marker back to the 0 space. They gain 3 Victory points. They activate the first bonus from the Science Pillar, gaining 1 Idea. After resolving all this, play continues with the next Order token.