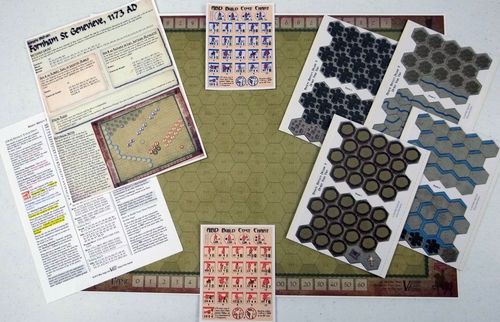
Ancient Battles Deluxe Expansion Kit 5: Design Your Own
Official rulebook: Victory Point Games · PDF
Ancient Battles Deluxe Expansion Kit 5: Design Your Own Rulebook
Source: the publisher's own PDF, "Ancient Battles Deluxe: Design Your Own Rules v1.0" (Victory Point Games, 2010), retrieved from the Internet Archive's Wayback Machine copy of the Victory Point Games download link. Transcribed as printed; the document has three pages and refers to a set-up diagram "on the next page" that is not included in the file.
Table of Contents
Table of Contents
[18.0] Design Your Own
Players receive a set amount of build points with which to create their respective armies, thus creating a mathematically balanced situation. This Design Your Own (DYO) system can also serve as the basis for developing campaign games. Follow the steps outlined below when creating your own scenario.
[18.1] Army Dispositions
There are two standard scenarios: Meeting Engagements and Assaults which involve a clearly defined Attacker and Defender.
[18.2] Building Armies
Players build their respective armies by selecting either a Camp (CP) or a War Wagon (WW) unit and then spending Build Points (BP) to purchase their remaining units.
Note that Cannon (CN) units have a variable cost of 4 times the Firepower Value the purchasing player opts to give it, up to a maximum Firepower Value of 5.
For Example, a player opting to purchase a CN unit with a 3 Firepower Value would spend 12 Build Points for it.
In a Meeting Engagement scenario, both players receive the same amount of BPs. Typically, this would be 100 BPs each.
When playing an Assault, the Attacker should have 25% more Build Points, rounding any fraction up, than the Defender receives (to offset the Defender’s positional advantage in using terrain. Typically, this would be 125 BPs for the Attacker and 100 BPs for the Defender.
Players can vary the amount of starting BPs from those suggested by mutual agreement.
The costs for each unit type are as show on the Build Cost Chart.
[18.3] Map Selection
Generally speaking, any Meeting Engagement scenario should use Map A (i.e., without terrain features).
When playing an Assault scenario, the Defender selects the map to use. When designing an historical engagement, select the map whose terrain most closely matches the historical situation or use the Terrain tiles to create a close approximation. These tiles are double-sided to provide maximum flexibility and the number of each has been optimally set to allow the recreation of any of the generic maps.
The ground (distance) and unit (aggregation) scales vary by time period. Earlier scenarios have larger ground and unit scales, while more “modern” scenarios have smaller ground and unit scales. This reflects changes in tactics and technology.
How to Build the Generic Maps
Follow the hex tile listings below to create the generic maps.
Streams: In the case of a Stream hex tile, these come in three varieties: Tight turn (T) where the stream enters and exits between adjacent hexsides, Easy turn (E) that is two hexsides apart, and a Straight through (S) that is three hexsides apart. In addition, a direction arrow is included on each tile to indicate its correct placement on the map. For Example: A stream placement instruction reads “G5|E3”. That means, in hex G5, place an Easy turning Stream hex tile, facing direction 3.
Rivers: River tiles come in four varieties indicating the number of hexsides traversed by the river terrain. Also, a direction arrow is included on each tile to indicate its correct placement on the map. For Example: A river placement instruction reads “G5|31”. That means, in hex G5, place a 3-hexside river hex tile, facing direction 1.
In addition to standard River tiles, there are also tiles that combine river terrain with woods or rough terrain. These are placed in the same fashion as regular river tiles. The placement instructions list these as Wooded River or Rough River.
Building Map B
- Woods: B8, C6, C7, E7, F7, G8, H8, H9, J10, Q6, R4, R5, R6, R7, R8
- Hills: E1, F2, G2, H3, I3, J4, K4, K5, L5, L6, M2, M5, M6, N3, N5, N6, O5, O6, P6
- River: A12|16, B12|34, C12|16, D12|34, E12|16, F12|34, G12|16, H12|25, I11|25, J11|25, K10|34, L11|26, M11|16, N10|44, N11|15, O10|26, P11|26, Q11|26, R12|16
- Stream: D1|S6, D2|E6, E2|S5, F3|S5, G3|S5, H4|S5, I4|S5, J5|E3, J6|E6, K6|S5, L7|S5, M7|S5, N8|E3, N9|S6
Building Map C
- Woods: A2, A3, A4, A6, A7, A8, B3, B4, B6, B7, C3, D4, M10, M11, N11, O9, O10, P10
- Hills: G9, G10, H9, H10, H11, I9, I10, J10, J11, K10, K11, L11, O3, O4, P3, P4, P5, P6, P7, P8, P9, Q3, Q4, Q5, Q6, Q7, Q8, Q9, R5, R6, R7, R8, R9
- Wooded River: A5|16, B5|22, C4|44, C5|24, C6|24
- River: C7|11, D8|35, D9|11, E9|35, E10|21, E11|11, F12|26, G12|16, H12|34, I12|16, J12|34, K12|16, L12|34, M12|16, N12|34, O12|16, P12|34, Q12|16, R12|25
Building Map D
- Hills: B2, C2, D3, E3, F4, G4, G7, G8, H5, H7, H8, H9, I2, I3, I8, I9, I10, J2, J4, J9, J10, J11, K10, K11, L10, L11, M10, M11, N10, N11, O10, O11, P10, P11
- River: R1|21, R2|21, R3|21, R4|21, R5|21, R6|21, R7|21, R8|21, R9|21, R10|21, R11|21, R12|21
Building Map E
- Hills: D5, D6, E5, E6, E7, F6, F7, F8, G6, G7
- Stream: F9|E1, F10|S6, F11|S6, F12|S6, G8|S1, H8|S1, I7|E2, J8|E5, K7|S1, L7|S1, M6|S1, N6|S1, O5|S1, P5|E2, Q5|E5, R5|E3
Building Map F
- Woods: B4, B5, B6, B7, B8, B9, C3, C4, C5, C6, C7, C8, C9, I3, I4, I5, I6, I7, I8, I9, J5, J6, J7, J8, J9, J12, K7, K8, L3, N3, O3, P3, Q2
- Hills: M10, M11, M12, N10, O7, O8, O9, P7, P8
- River: A9|13, B10|23, C10|14, C11|42, D11|13, E11|23, F12|14
- Stream: L10|E1, L11|S6, L12|S6, M5|E1, M6|S6, M7|S6, M8|S6, M9|E6, N5|S1, O4|S1, P4|S1, Q3|S1, R1|S6, R2|S6, R3|E4
[18.4] Army Deployment
Armies deploy using the Free Deployment Option Rule (17.1, substituting a War Wagon for a Camp unit’s placement, when necessary). In an Assault scenario, the Defender is Side B.
In a Meeting Engagement scenario, the Side B player is the one who spent more on his army (if tied, roll a die or flip a coin to determine who Side B is).
18.5 Panic Levels
An army’s Panic Level equals 50% of its total At Start, non-disrupted Combat Strength.
When creating your own scenarios, Panic Levels can be adjusted to reflect historical circumstances or as a play balancing device.
18.6 Victory Conditions
Victory is determined in the usual manner as per Rule 14.0.
When creating your own scenarios, one side or the other might also receive a “Scenario Assigned” Victory Point marker to reflect historical circumstances or as a play balancing device.
How to Build Your Own Scenario
So, less than one page of easy instructions later, you’re all ready to start building your own scenarios. Now what? Presumably, you wish to create an ABD version of a favorite battle and play it out on your game table, but where to begin?
This guide takes you through the scenario design process, moving you along the path to contributing your new scenario(s) to the ever-growing ABD collection. We can’t have enough scenarios for this great game series and Victory Point Games and I hope that you’ll be contributing your scenarios soon.
Step One: Selecting a Battle
It is not enough simply to want to recreate a favorite battle. You must first be confident that you have acquired sufficient knowledge of the subject to create a scenario that at least approximates the struggle it depicts. To accomplish this, you must research a solid account of what happened, answering the proverbial five “Ws.”
-
When did the battle occur? Although this is usually the easiest information to acquire, depending upon the battle and historic sources, it might be a debatable matter.
-
Who participated? While it might be easy to ascertain the names and ability of the battle’s leaders, getting an accurate account of the numbers and types of troops present can be difficult. Accurate records were seldom kept by (or survived from) ancient sources, so we must use available sources which are often vague or biased depending upon the sympathies of the writer.
In addition to the numbers of troops present, their types must be determined. When accounts of the battle lack this information (as they often do), take a look from a higher vantage point and try to determine what the typical make-up of an army from that period might be and then extrapolate from there. In this way, you can make an educated guess what the OOB (Order of Battle – a listing of the types and quantities of troops and their military organization into a larger unit) for both sides is to a reasonable degree of accuracy.
-
Where did the battle occur? This should be obvious, but can be quite difficult to ascertain. Many famous battle sites remain a matter of conjecture. And even for those battle sites where the location is well documented, the terrain likely looks nothing like it did 500 years ago, let alone 3000, so using Google Earth might not be the easy answer you seek. Instead, look to accounts of the battle describing the preeminent terrain features and how they impacted the fighting and the outcome. If you’re lucky, you might find a more contemporary map or diagram of the battle site, or at least some historian’s interpretation of it.
-
What happened? Ultimately, this is what your scenario tries to depict. How long did the battle last? Did environmental factors (air and ground conditions, key terrain features, omens, etc.) play a key role? Which side won and how decisively?
-
Why did the battle occur in the first place? You might think this factor is irrelevant, but it is not enough to merely know that it occurred. If you are to create proper victory conditions, it is vital to understand the motivation of the opposing forces. Without this understanding, every victory becomes hollow, and the struggle stripped of its romance and terror.
Source Material: You should reference at least two good sources to ensure that your information is corroborated. Personally, I find no harm in using other game designs as source material, but make sure to include at least one other non-game design source!
With your knowledge base established, you are ready to start creating a scenario.
The Hard Work Is Already Done!
You are fortunate to be designing a scenario for a well-established, sturdy game system that is already designed. This has its benefits. First, the types of units available and their function on the battlefield already exist in the game’s units, systems and mechanics. You just need to match these game pieces to their historical counterparts from your research. And with regard to selecting the numbers and types of units on both sides, the actual quantities you choose are not as important as their proportion. Since you are designing a scenario for a generic combat system, you can set the scale of the scenario to fit your impression of how the battle should “feel” to capture the flavor of the historical narrative.
Simply put, how many total pieces should go on the game board is a Goldilocks porridge problem – if the number of units in play is too small, the scenario ends too quickly; if the number of units in play is too large, then the scenario may become too static.
One useful way to determine how many units should be deployed during the game’s set up is to let the terrain on the map “speak.” If you have managed to find a good map or diagram of the battlefield, use it to recreate that battlefield on the game board with the terrain tiles provided in this expansion kit. Of course, if the battle took place in a vast, open, Zama-like plain, that makes cooking up the OOB more problematic, but where terrain constraints anchored the initial deployment of forces, you can use those distances on the maps to tell you how many units are required to form appropriate-length lines of troops.
How Good Were They, Really?
With the armies arrayed upon your battlefield, you must get them moving. This is done in Ancient Battles Deluxe through the proper assignment of Leader units. There are four types of Leader units to choose from and their selection determines how the armies will act and react once the dancing on the battlefield commences. The greater the number of high quality Leader units available to one side, the more flexible its forces are. Conversely, an army with a dearth of quality leaders soon finds itself mired and immobile.
When determining which types of Leader units to assign to an army, look beyond the personalities themselves and examine how the army behaved under its commanders at that battle. Even Julius Caesar had bad days, so don't feel compelled to give him an A rating in every scenario where he appears.
In addition to leadership, army morale affects the tenor and tempo of battles. The higher an army’s morale, the more losses it can sustain before breaking. In game terms, an army’s starting Morale Level is equal to one-half of its initial strength (i.e., the sum of the strength of all units within that army), but see below:
Special Rules: The “Fudge Factor”
History provides us few perfectly balanced battles. Usually, one side has a marked, if not overwhelming, advantage in quantity and/or quality of men and leadership. Such one-sided contests are usually only fun when playing the side with all of the advantages.
Fortunately, ABD offers a solution to this problem: the Special Rule. The rule of the Special Rule is that any Standard Rule can be modified or even broken. When designing a scenario, keep thinking ‘outside of the rules booklet.’ If the battle you're working on featured an event whose proper simulation would violate the normal rules of movement or combat, you can adjust things via that scenario’s Special Rules. However, be careful that your Special Rule's implementation does not completely break the game!
Check Your Ego at the Door
Okay, you've got your scenario built: the map is laid out, the units are set up and any Special Rules noted. Now you must test it.
Solitaire is a good way to start. Push the pieces around a few times and make sure it feels right. If you have sufficient information concerning the historical outcome, try to recreate it exactly (even if you have to fudge a few die rolls). If you’re confident that your scenario could accurately depict the battle, you're on the right track. If not, reconsider the use of Special Rules if necessary to bend it into shape, and then keep testing yourself until you’ve brought it along as far as you can.
When you have it where you’re satisfied and everything looks and feels right, it is time to hand it off to a friend or two to test out. A game or scenario is not properly tested until someone with some knowledge of what’s supposed to happen (other than the designer) has tested it. If it survives this testing, then it's good to go – congratulations! If the testers’ feedback tells you that some more changes might be needed, consider their comments and, if they ring true, tweak you game, even if it means undoing a lot of your hard work or rethinking your premises. This sort of thing happens all the time making games; trust me!
Palaver, Rinse and Repeat!
Game and scenario design is a very rewarding learning process. While players can glean a lot of information about a battle through playing a scenario, you will learn even more while digging into its internal workings at the level required designing it. Well done!
Now you have the tools you need to recreate your favorite ancient battles. Go to it!
My Money Where My Mouth Is
Allow me to present an example scenario.
After flipping through my copy of Michael Rayner's English Battlefields, I've decided to create a scenario for the battle of Fornham St Genevieve. Let's run through the five Ws:
When: This battle occurred on 17 October 1173. There is no specific reference to this date in my primary source, so I hopped onto Google Books and found the date reference in A History of the Art of War by Sir Charles William Chadwick Oman (1898).
Who: The battle involved Rebel forces under Robert Earl of Leicester and Hugh Bigod Earl of Norfolk against Royalist forces under Richard de Luci (the King’s Prime Minister) and Constable Humphrey de Bohun. According to my latter source, the Rebel army consisted of eighty knights and 3,000 Flemish mercenaries (both mounted and unmounted). The Royalist force was made up of a handful of knights and 300 of King Henry II's employed horsemen. These elite forces were bolstered by over 10,000 levies armed with flails and pitchforks. So even though the Royalists clearly outnumbered the Rebels, the latter had a major advantage in quality troops.
Where: This battle took place adjacent to the church of Fornham St. Genevieve, on the eastern bank of the River Lark, just north of Bury St Edmunds. There are contemporary writings indicating that this was the location of the battle and these writings have been confirmed through archeological evidence.
What Happened: The actual details of the battle are sketchy, so it is assumed that the battle became a general melee following a charge by the Royalist cavalry. The Royalists had crossed the River Lark at Bury St. Edmunds and caught the Rebels as they were crossing the river further north. There is an indication that the Rebels were caught by surprise with their backs to marshy terrain. The smaller force of Royalist cavalry was far superior to that of the Rebels, and the supporting levies had a severe grudge against the Flemish mercenaries, the latter of which had been marching through the countryside claiming how they would be taking over! So, surprise, superior position and a motivated army allowed the Royalists to quickly rout the Rebels (who were cut down against the bank of the River Lark).
Why: This battle was the largest of the Leicester Rebellion (or Revolt) of 1173-74, where forces under Prince Henry (the “Little King”) rose against his father, Henry II, after the latter had granted previously promised lands to his youngest son rather than Henry. The nobles advising young Henry (including Leicester) saw this rebellion as an opportunity to increase their holdings. This battle was the result of Leicester’s attempt to do just that.
Designing the Scenario
[Figure: terrain sketch with the printed labels "Leicester Rebels", "Royalist", "Church of Fornham St Genevieve (now ruins)", "River Lark" and "1173 road to Bury St Edmunds".]
The five Ws provide enough information to build this scenario (included in this Expansion Kit). I found a diagram of the terrain I used to create the map, which was my first task. I noticed that there is a river to one side and a church toward the forces’ flank. What was not shown, but mentioned in the text, is that the Royalists started on high ground and that the Rebels were backed up against marshy terrain.
With the map diagram interpolated into a map for my scenario, the next task was to turn my research on the forces into game pieces and their scenario set up. Starting with the Rebels, I saw their forces as a few knights and a whole lot of mercenaries. The knights translated easily as a couple of Knight units (40 men each), but what about the mercenaries? Light Infantry pieces are probably too underpowered (although they are just right for the Royalist levies). So I felt that something larger was required. Now, given that history records these units gave way pretty easily, Heavy Infantry is probably too good, so that leaves some nice, thuggish Medium Infantry pieces; say a half-dozen (representing 500 men each).
The bulk of the Royalist army should be comprised of Light Infantry units to represent the levies (with over 10,000 men, let’s make that a neat dozen game pieces). The mounted contingents include knights (one Knights piece to represent the “handful” there) and the King's paid horsemen who were of high quality, so we use two Heavy Cavalry units to represent them in our scenario.
Looking at the numbers, we know that the Rebel forces outnumber the quality Royalist forces by about ten to one. This does not mean that we have to have ten times the number of Rebel units to Royalist ones. There simply isn't enough space on the map! Instead, a nice three to one ratio should be enough to provide a palpable threat. Remember that in a generic game like Ancient Battles Deluxe, manpower ratios are fluid. With this in mind, we need to include enough levies (light infantry) to give the mercenaries pause. Even though the historical ratio was around four to one, two to one should suffice.
Now let’s consider leadership. The Royalist army was much more effective, so their leadership should be better. According to sources, the Royalist army included not only de Luci and Humphrey, but also the Earls of Arundel and Cornwall. Given this, let’s give the Royalists two B Leaders and one C Leader unit. There's no indication that Leicester was less competent than his opponents, so we'll give the Rebels two B Leaders as well. Both sides also get a Camp unit which will be placed far from the action.
Laying out the units on the map to match the diagram, I estimate something like that seen on the scenario set up on the next page.
[The set-up diagram referred to as "on the next page" is not present in the source file.]
Finally, to add that last bit of historicity, we need a few Special Rules. Given the ire of the levies, we'll let them enjoy the Barbarian Charge rule. We'll also specify that the River cannot be crossed, nor the church be entered. Finally, we must set the Morale Levels to 24 for the Royalists (half their strength) and only 20 for the Rebels (4 less than normal).
Now, it's time to test!
Playtesting Modifications
After testing the scenario, we discovered that the Royalists were having far too easy a time of it. While the results were historical, they didn’t make for much of a game challenge. To rectify this, I lowered the Royalist Morale Level to match the Rebels at 20 (letting them feel the pain, at least) and gave the Rebels a Victory Point at start (to put the onus of attack on the Royalists, where it was historically).