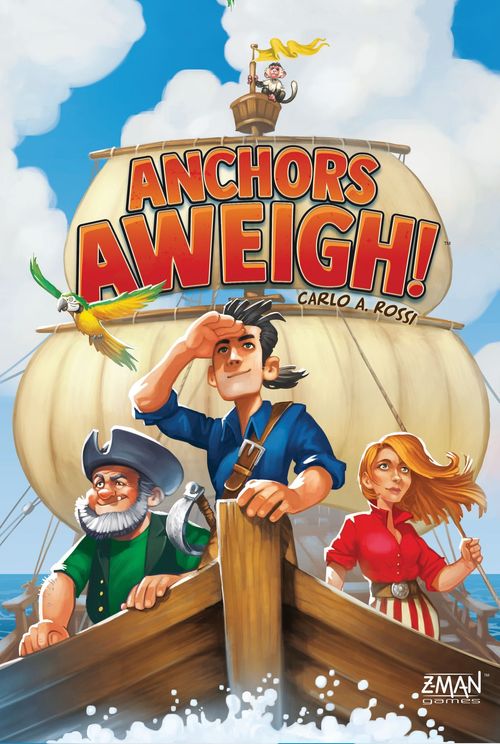
Anchors Aweigh!
Anchors Aweigh! Rulebook
Table of Contents
Table of Contents
Game Components
- 84 Assets: 9 Cannon, 9 Sword, 9 Sailor, 9 Shovel, 9 Spyglass, 3 Monkey, 9 Rope, 9 Compass, 9 Map, 9 Storage
- 4 Ship Boards with Screens
- 52 Adventure Cards: 20 Discovery, 8 Trade, 12 Pirates, 12 Contract
- 36 Coins: 24 value-1, 12 value-5
- 18 Treasure Chests
- 3 Parrots
- 64 Cargo Tokens: 16 Blue, 16 White, 16 Orange, 16 Purple
Important: Before your first game, assemble the ship boards by carefully sliding the screen into the slots on the colored side of the ship board. After the ships have been assembled, they fit inside the box and do not have to be taken apart after each game. A diagram shows how to put the ship boards in the box.
Setup
- Each player takes an assembled ship board. Keep your ship board in front of you. Each ship has 14 spaces: eight in front of the screen (above deck) and six behind the screen (below deck). While most of the spaces can store either one asset or one cargo token, two of the spaces below deck can store only cargo.
- Gather all the assets in the box lid and pour them onto the table into a loose pile. Leave the tiles where they fall; it doesn't matter if they are faceup or facedown.
- Sort the cargo, coins, treasure chests, and parrots into separate piles as a general supply within reach of all players.
- Sort the adventure cards by type and place them facedown into separate decks. Shuffle each deck separately and set aside 13 cards facedown: 5 Discovery, 2 Trade, 3 Pirates, 3 Contract.
- Combine the set-aside cards, shuffle them, and place them facedown in a circle around the pile of assets.
Playing the Game
Phase 1: Loading
Players shout "All aboard!" and flip the 13 adventure cards faceup.
Then off you go! In real time, all players simultaneously load their ships with tiles from the loose pile. While loading, be aware of the faceup adventure cards to keep track of what will be needed during the travel phase. The left side of an adventure card shows the required assets or cargo you need in order to complete the adventure, and the right side shows a reward in the form of cargo or coins.
When loading, the following rules apply:
- You must use only one hand and can take only one tile at a time.
- You can flip over a facedown tile, but once a tile is faceup, it stays that way.
- When you take a tile, you can decide to keep it or return it to the pile. If you return it, place it faceup on or near the pile.
- You can place each asset you take on any open space on your ship. You can place an asset above deck or below deck, but everything below deck is hidden from other players. After you place a tile on your ship, you cannot remove it during this phase. You cannot place assets on the cargo-only spaces.
- You must take two cargo tokens of your choice from the supply and place them on your ship. You must place them below deck on an open cargo-only space. After you place a cargo token on your ship, you cannot remove it during this phase.
Starfish: Some assets show a starfish in one corner. In a 3- or 4-player game, starfish have no effect. In a 2-player game, if you place a starfish asset on your ship, you can discard it and replace it during the loading phase. At the start of the travel phase (before flipping the first adventure card), you must return all assets with a starfish on them to the pile without taking a replacement.
In the basic game, monkeys have no effect and are in the pile as a distraction. They are used in some variants (see "Optional Rules").
The storage assets are not used to complete adventure cards. Instead, you can use them to store up to 2 cargo that you gain during the travel phase.
If you are the first player to have fully loaded your ship (all 14 spaces are filled), you are the captain. Call out "Anchors aweigh!" and immediately gather all 13 faceup adventure cards into a facedown deck in front of you. Players cannot look at the front of the cards for the rest of this phase. All other players continue loading assets and cargo onto their ships until each ship is fully loaded. As soon as all ships are fully loaded, the loading phase ends.
Note: While speed is important when loading, be sure to pay attention to the adventure cards so you know you have the right assets on your ship for later.
Phase 2: Travel
The captain shuffles the adventure deck and resolves one card at a time. Keep in mind that the type of each adventure is shown on the back, and remember that the front of each card shows assets required (on the left) to claim the reward (on the right). Resolve each type of card as follows:
Discovery: Flip this card faceup so that all players can see it. Simultaneously, each player chooses (if able) whether or not to resolve the card. If you do, return the required asset tiles faceup to the pile and take the reward shown. Then return this card to the box.
Trade: Flip this card faceup so that all players can see it. Simultaneously, each player chooses (if able) whether or not to resolve the card. If you do, return the required cargo token to the supply and take the reward shown. Then return this card to the box.
Pirates: The back shows a symbol in the bottom right corner. Do not reveal the pirate card yet! First, simultaneously, each player must say aloud whether they want to encounter the pirates or flee. Then flip the pirate card faceup. If you chose to flee, you cannot resolve the card, but you don't have to pay a penalty either. If you chose to encounter the pirates, resolve the card by returning the required assets to the pile and taking the reward shown. If you do not have all of the required assets or do not want to give them up, you must pay a penalty. Return two value worth of coins and one of your cargo tokens to the general supply. If you cannot afford the penalty, you must pay as much as you are able. Then return this card to the box.
Contract: The back shows a symbol in the bottom right corner. Do not reveal the contract card yet! Instead, place it (without flipping it faceup) at the bottom of the adventure deck. When the only cards left in the deck are contract cards (after all other adventure cards have been resolved) flip the top contract card faceup and resolve it. All players simultaneously choose whether or not to resolve the card. If you do, return the required cargo to the supply and take the reward shown. Then return this card to the box. Repeat this until there are no contract cards left.
Note: You can complete each adventure card only once.
When you take rewards, you must place the cargo you take on an open space, an open cargo-only space, or a storage asset on your ship. After you have returned an asset to the pile, you may store one cargo on its space. Cargo that you receive, but for which you have no room on your ship must be returned to the supply. You can choose to return your assets to the pile or your cargo to the supply any time during the travel phase, tossing them overboard to make more room.
Note: The assets (especially the sailors) that you toss overboard are rescued and dropped off unscathed at the next harbor!
Some pirate cards show gray cargo as a reward. When you complete these cards, you can take that many cargo tokens of any color (the same color or different colors) from the supply.
When multiple players complete the same card, if there are not enough cargo tokens of a color left in the supply, players take their rewards in clockwise order, starting with the captain. When there are no cargo tokens of that color left in the supply, remaining players can take any color.
Place the coins you take next to the sail of your ship; they don't occupy space on your ship. There is no limit to how many coins you can have at one time.
Note: You can make change at any time using coins (but not chests) from the supply.
End of a Round
When all 13 adventure cards have been resolved, the round ends. You must convert the cargo tokens on your ship into coins at a rate of a 1-value coin per cargo token. Return these cargo tokens to the supply.
Next, you must discard all assets from your ship, including any storage assets. Return them to the pile faceup.
Then, you must convert your coins into treasure chests at a rate of one chest for every ten in value of coins. Put each treasure chest in one open space above deck on your ship. You cannot place assets or cargo on treasure chest spaces in the second round. Keep remaining coins (up to a total value of 9) next to your ship.
The treasure chests are worth 10 coins. They stay in their space for the rest of the game, and cannot be converted back into coins. Treasure chests are protected from pirates and do not have to be paid as part of a penalty (the pirates may be terrifying, but they are not particularly smart).
Note: You cannot forfeit cargo at the end of the round; you can only exchange it for coins. You cannot forfeit coins.
Then prepare for the second round. If this is the end of the second round, proceed to the end of the game instead.
Preparing Round 2
Following the same ratios from step 4 of "Setup," gather 13 adventure cards, shuffle them, and place them facedown in a circle around the pile of assets.
If you have the lowest total value of coins and treasure chests after the first round, take a parrot from the supply and place it on the sail of your ship. If players are tied for lowest, all tied players take a parrot. If all players are tied, nobody takes a parrot.
In the second round during the travel phase, you may spend your parrot as one asset of your choice. When you do, return the parrot to the supply.
Note: Your parrot does not occupy a space on your ship, and cannot be used as a storage asset. Unspent parrots have no value at the end of the game.
The rest of the second round is played normally, starting with the loading phase. Note that some players might have fewer open spaces on their ship than because of treasure chests.
End of the Game
The player with the highest total value in coins and treasure chests wins! In case of a tie, the tied players share the victory.
Optional Rules
These optional rules offer new and exciting ways to play Anchors Aweigh!
The Meddlesome Monkey Handicap
When playing with one or more less-experienced players, any player can choose to play with the Meddlesome Monkey for a more challenging personal experience. Before pouring out the tiles during setup, each player using this variant takes one monkey asset from the box and places it in an empty space on his or her ship. It stays there for the entire game.
The Open Ocean Optional Rules
For a more customized game, you can play with the Open Ocean optional rules. During setup, you can assemble your own combination of 13 adventure cards (for example, adding or removing pirate cards), or use a completely random assortment of 13 adventure cards. In both cases, make sure that the set always contains at least one of each type of adventure card (discovery, trade, pirates, and contract).
The Rough Seas Variant
For a more challenging 3- or 4-player game, you can play with the Rough Seas variant. This variant cannot be combined with the Meddlesome Monkey handicap.
- Assets with a starfish are treated as they are in a 2-player game.
- The three monkey assets are wild and can be spent as one asset of your choice.
- At any time during the travel phase, you can return two tiles showing the same asset to the pile faceup and take one asset of your choice. If you return a storage asset to the pile, any cargo on it is returned to the supply.
Storing Ship Boards in the Box
Note: The ships can be easily put back into the box without being taken apart. To do this, stack them on top of one another as shown in the diagram and put the other components in the gaps between the ship boards.