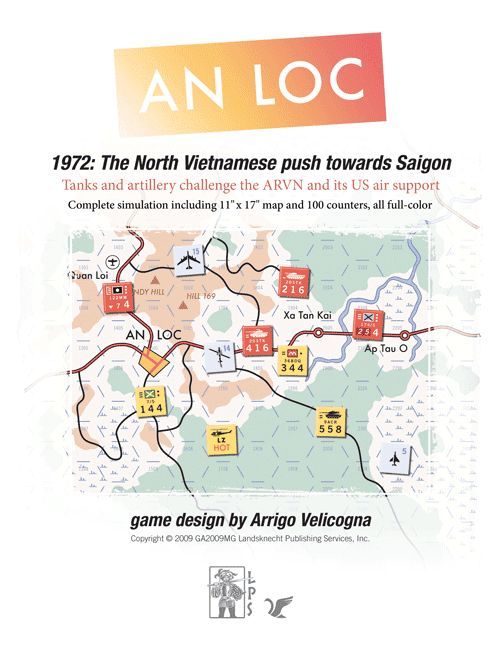
An Loc: 1972 – The North Vietnamese Push Towards Saigon
An Loc: 1972 – The North Vietnamese Push Towards Saigon Rulebook
Table of Contents
Table of Contents
1.0 Introduction
1.1 Read This First
We have organized the overall structure of the rules of this LPS simulation game to follow this game's sequence of play in introducing concepts. The rules themselves are written in a format known as the Case System. This approach divides the rules into Modules (each of which deals with a major important aspect of play). Modules are numbered sequentially as well as possessing a title. Each Module is divided into Sections (that deal with a major sub-topic inside the Module) which are also numbered sequentially. Modules and Sections are introduced by some text that briefly describes the subject covered by that particular Module or Section. Finally, the majority of each Section consists of Cases. These are the specific, detailed rules that govern play. Each Case is also numbered sequentially. The numbering follows a logical progression based upon the number of the Module of which the Cases are a part. A Case with the number 7.51, for example, is the first Case of the fifth Section of the seventh Module of the rules. The numbering system is designed as an organizational aid. Use it to determine where a Case is located in the rules.
1.2 Learning to Play the Game
Begin by familiarizing yourself with all of the components listed for this game. Then skim through the charts and rules, reading all the titles of the Modules and Sections. Set up a game scenario or portion of a scenario (after reading the applicable Module) and play a trial game against yourself. During this trial game, try referring to the rules only when you have a question and remember the numbering system we employ makes it easy to look up rules when you do. While a trial game may take you an hour or two, it is the quickest and most pleasant way to learn (short of having an experienced friend teach you). We also do not recommend attempting to learn the rules word-for word. Memorizing all the details is an effort that few can do. We have written these rules to be as comprehensive as possible, but they are not designed to be memorized. Taking in the rules in this way (as you play along) is the best approach to mastering this game. We are always open to suggestions on how to improve the comprehension of our rules. Write to us (see addresses below) if you have an idea on how we can communicate better with you.
1.3 Background
An Loc is an operational level game of the battle for An Loc fought by the Army of the Republic of Vietnam (ARVN) with US air support against the Army of the People's Republic of Vietnam (NVA) between April and June 1972.
1.4 Game Equipment
A. Each copy of An Loc includes the following:
- One 11" by 17" map
- 89 die-cut ½" counters
- This rule book
- Two pages of charts and tables
B. Players will also need one or two six-sided dice to play the game.
C. If any of the supplied parts are missing or damaged, contact the publisher at the postal address printed in the original game components.
D. Support questions may be directed to the publisher by e-mail, as printed in the original game components. The publisher recommends e-mail as the best way to resolve a query.
Note: the original rulebook lists postal and e-mail contact addresses for the publisher and for the An Loc discussion folders on BoardGameGeek and ConSimWorld. Those contact details are omitted here.
1.5 Scale
A. Ground scale is two kilometers per hex.
B. Unit scale is from regiment to company.
C. Time scale is weekly turns.
1.6 Rounding Rule
When the rules require halving something always round down.
2.0 Game Terms and Abbreviations
2.1 General Terms and Abbreviations
| Term | Definition |
|---|---|
| AAA | Antiaircraft Artillery |
| Arty | Artillery |
| Bde | Brigade |
| Bn | Battalion |
| CAS | Close Air Support |
| Column Shift | Modification of the final odd ratios in a combat, just before rolling the die. |
| CRT | Combat Results Table |
| Div | Division |
| DR/DRM | Die Roll, Die Roll Modifier. In many instances the final result of the roll of a die is modified by a plus or minus in the rules and tables; this is the DRM. |
| MA/MP | Movement Allowance/Movement Points. MA is the basic number of MPs that a unit can expend during its Movement Phase. Units expend MPs to enter hexes or cross hexsides. |
| Mechanized |
2.2 Unit Abbreviations
| Abbr | Name |
|---|---|
| ACR | Armored Cavalry Regiment (actually a battalion sized unit) |
| BCND | Bier Cach Nhay Du [sic; printed as "Bier", presumably "Biet"], airborne Ranger |
| BLPF | Binh Long Provincial Forces |
| LD | Lu Doan Brigade |
| LiD | Lien Doan; Combat Group (usually Ranger Group) |
| ND | Airborne |
| NVA | North Vietnam Army |
| RPPF | Regional Popular Forces |
| SD | Su Doan Division |
| TD | Trung Doan |
| VC | Viet Cong |
3.0 Playing Pieces
3.1 Combat Units
| Nationality | Color |
|---|---|
| ARVN | Yellow |
| NVA | Red |
A. The type of the unit is depicted by NATO symbols.
B. The color inside the NATO symbol denotes the unit's HQ subordination.
C. Tank units have their unit symbol substituted with a silhouette of the primary rank deployed in the formation.
D. All tank battalions of both sides are independent units.
E. HQ units have "HQ" in the unit box, artillery have an artillery symbol.
3.2 Unit Characteristics
| Characteristic | Definition |
|---|---|
| Attack Factor | A numerical rating of the unit's offensive capability. |
| Combat Bonus | One or two triangles, which translate to the numerical DRM the unit provides to a friendly force attacking or defending. |
| Defense Factor | A numerical rating of the unit's defensive capability. |
| Designation | Historical designation of the unit (regiment/division for NVA and VC, regiment, battalion number or unit designation/brigade or division for the ARVN). |
| Loss Indicator | A different color box behind the attack and defense factors on the back of the counter indicates that the unit has lost one step and is on its reduced side. |
| MA | The number of MPs a unit has. |
| Range | The maximum range in hexes an artillery unit can support. |
| Stacking Point | Black dots rating the size of the unit. They are used for stacking and transport. |
3.3 Unit Types
| Infantry Symbol | Type | Mechanized Symbol | Type |
|---|---|---|---|
| (NATO symbol) | Regular | (silhouette) | M-41 |
| (NATO symbol) | Airborne | (silhouette) | T-55 |
| (NATO symbol) | Militia | (silhouette) | PT-76 |
3.4 Unit Sizes
| Symbol | Size | Symbol | Size |
|---|---|---|---|
| XX | Division | II | Battalion |
| X | Brigade | I | Company |
| IIII | Regiment | (symbol shown in image) | Provisional Regiment |
3.5 Sample Units
3.5.1 Infantry
Tank units have similar characteristics.
3.5.1.1 Front (Full Strength) and 3.5.1.2 Back (Reduced Strength) are illustrated with counter images, not reproduced here.
3.5.2 Sapper
Illustrated with counter images, not reproduced here.
3.5.3 Artillery
3.5.3.1 Front (Available) and 3.5.3.2 Back (Used) are illustrated with counter images, not reproduced here.
3.5.4 Headquarters
3.5.4.1 Front (Available) and 3.5.4.2 Back (Used) are illustrated with counter images, not reproduced here.
3.6 Markers
The rulebook illustrates the following markers with images: Cold Landing Zone, Hot Landing Zone, Helicopter Transport Points, Level 4 Anti-Aircraft, Level 2 Anti-Aircraft, Surface-to-Air Missile, Bomber, Fighter Bomber, Gunship, Close Air Support, Cobra Air Unit, Turn, NVA Replacement, Operations Points, and Operational Effort Level. The images are not reproduced here.
4.0 Stacking
A. Stacking is having more than one ground unit in a hex.
B. A unit's stacking point (SP) value is the number of black dots on the counter.
C. Stacking limits are in effect at all times except for retreat moves.
D. The stacking limit is 4 SPs in a hex, 8 SPs in the city of An Loc.
E. Headquarters (HQs), Tanks, Sappers, and the ARVN 155mm artillery battery stack for free.
F. Units from different NVA divisions cannot stack together.
5.0 Zones of Control (ZOC)
A. Every ground unit, except HQs, exerts a Zone of Control (ZOC) in its hex and the six surrounding hexes.
B. If both enemy and friendly units exert a ZOC into the same empty hex, that hex is both in an enemy and friendly ZOC.
C. A unit must stop movement when entering an enemy ZOC. Movement from a hex in an enemy ZOC directly to another hex in an enemy ZOC is not allowed.
D. Units can freely leave an enemy ZOC at the beginning of their movement.
E. Friendly units negate an enemy ZOC into a hex, which allows friendly units to move or retreat through that hex ignoring the enemy's ZOC.
6.0 Sequence of Play
An Loc is played in game turns, which are divided into several phases. Each phase must be completed before starting the next phase.
6.1 Logistics Phase
A. ARVN spends OPs for its OEL and to purchase air units for the current turn.
B. NVA spends its OPs to set its OEL.
C. If the sum of both sides' OELs is 1 or less, proceed directly to the An Loc Surrender Segment of the End of Turn Phase, skipping the Operation Phases.
6.2 Air Phase
A. ARVN allocates purchased air units to the various missions.
B. Resolve SEAD and TAC missions.
C. NVA assigns its SA-7 markers to onboard units.
6.3 NVA Operations Phase
6.3.1 Combat
NVA declares and resolves combats in any desired order (10.0).
6.3.2 Movement
NVA moves some, all, or none of its units (8.0).
6.4 ARVN Operations Phase
6.4.1 Movement
ARVN performs movement (8.0) and air transport missions (9.5).
6.4.2 Combat
ARVN declares and resolves combats in any desired order (10.0).
6.5 NVA Second Operations Phase
If the NVA has an OEL of 5, it performs a second Operations Phase identical to the first (6.3).
6.6 ARVN Second Operations Phase
If the ARVN has an OEL of 5, it performs a second Operations Phase identical to the first (6.4).
6.7 End of Turn Phase
6.7.1 Administrative Segment
A. Remove SA-7 and LZ markers from the map.
B. Flip used Artillery and HQs to their front sides.
6.7.2 An Loc Surrender Segment
A. The ARVN checks to see if An Loc surrenders.
B. If it is not the last turn of the game, move the game turn marker to the next turn.
C. If it is the last turn, determine the victor.
7.0 Operation Points and Operational Effort Level
7.1 Operation Points (OPs)
A. OPs are the key to the game. They represent supplies and planning required to effectively wage combat operations, and are tracked on the General Track chart using the appropriate OP markers.
B. Each side starts with a fixed amount of OPs, then receives additional OPs per the turn record track.
C. OPs are spent at the start of each turn to set the Operational Effort Level and purchase air support (ARVN only).
D. NVA OPs can be reduced by ARVN TAC missions.
E. Neither side may voluntarily reduce its OPs below zero.
7.2 Operational Effort Level (OEL)
A. The OEL is equal to the number of OPs spent on it.
B. When either side has an OEL of 5, it is entitled to a second Operations Phase in the turn as well as movement and combat bonuses (see OEL Chart).
C. If the sum of both sides' OEL is 1 or less, skip the Operation Phases (representing a lull in the battle).
Example: The ARVN spends three OPs in generating operational effort and its other four points buying air units while the NVA spends four OPs to generate operational effort. The ARVN effort Level will be 3 and the NVA Level 4. This means that ARVN forces will move with their printed MPs and fight normally while the NVA units will do the same and receive a +1 to their combat die roll.
8.0 Movement
A. Ground will move from one hex to another hex along a continuous path on the map.
B. The unit's MA can be increased or decreased by the current OEL.
C. Units expend MPs to enter a hex or cross a hexside per the TEC.
D. A unit's MA is the upper limit of the MPs it may expend during its movement phase.
E. Infantry/artillery units have different MP costs for some terrain than mechanized units.
F. A unit's MA cannot be transferred or saved (Exception: Helicopter Transport, 9.6).
G. ARVN units in the Lai Khe holding box enter the map on or adjacent to Highway QL-13. Units entering the map pay the movement cost of the first hex they enter.
8.1 Road Movement
A. Units moving from one road hex directly into another connected road hex use the road MP cost instead of the other terrain in the hex.
B. Hexside MP costs must still be paid while moving on the road.
8.2 Strategic Movement
If a unit starts and spends its entire movement on a primary road, it can move an unlimited number of hexes until it enters an enemy ZOC.
9.0 Air Units
A. ARVN air unit counters represent a temporary grouping of aircraft performing a specific mission. The counters have a silhouette of a specific aircraft type to indicate their eligible missions (9.2) and a strike value.
B. Air units are purchased by spending OPs during the Logistics Phase.
C. Air units are allocated to missions (CAS, TAC, or SEAD) by placing them in the desired mission box on the Air Display chart during the Air Phase.
9.1 Air Unit Types
9.1.1 Close Air Support
A-37A Dragonfly or Cobra Attack Helicopter pictured. Represents a mix of A-4 Skyhawks, A-37As, AH-1 Skyraiders, F-8 Crusaders, and Cobra helicopters providing CAS to ground troops. The units also can attack enemy antiaircraft artillery.
9.1.2 Fighter Bombers
F-4 Phantoms pictured. Represents F-4 Phantoms and A-6 Intruders used in performing various casks by order of the Forward Air Controller.
9.1.3 Bombers
B-52 heavy bombers pictured. They are used to bomb enemy concentrations and enemy supply areas.
9.1.4 Gunships
AC-130 Spectre pictured. Modified cargo planes carrying heavy armament used to interdict enemy supply routes and for direct support of friendly forces.
9.2 Air Display
A. Place ARVN air units in the display to indicate the mission for the current turn. Each box has the depictions of the aircraft which can be used for that mission.
B. Once allocated to a mission, air units cannot be transferred to another mission.
C. When an air unit has performed a mission other than CAS, it is not available to be used for the rest of the turn (Exception: Broken Arrow, 9.9).
9.3 SEAD Mission
A. The SEAD mission is performed in the Air Phase.
B. ARVN totals the strike value of all assigned air units.
C. Roll a die, cross-referencing the result with the appropriate total strike value column of the Air Strikes Table.
D. Compare the result with the table below to determine the NVA's AAA value for the current turn.
| Value Result | NVA AAA Value |
|---|---|
| 0-2 No Effect | 4 |
| 3 Partial Suppression | 2 |
| 4+ Suppressed | 0 |
E. To indicate the result, place the AAA marker in the AAA box on the PAC at its appropriate value.
F. To represent total suppression, do not put an AAA counter in the box.
9.4 TAC Mission
A. The TAC mission is performed during the Air Phase immediately after the SEAD mission.
B. ARVN totals the strike value of all air units in the TAC box to determine the column to be used.
C. Roll a die, subtracting the current value of the NVA AAA.
D. Cross-reference the modified result with the appropriate column on the Air Strikes Table to determine the number of hits achieved.
E. For each hit, the ARVN can choose to assign it to:
- Eliminate an NVA replacement point.
- Have an NVA unit adjacent to an ARVN unit take a step loss. If the NVA AAA level is 2, a step loss requires two hits. (The NVA can expend replacement points to negate losses if any remain.)
- Reduce one accumulated NVA OP per three hits. This requires four hits when the NVA AAA level is 2.
9.5 CAS Mission
A. CAS units are allocated on a combat per combat basis.
B. One air unit in the CAS box can be used to support either an ARVN combat (defense or attack).
C. If an ARVN HQ on its Available side is involved:
- Up to three CAS units can be assigned to such a combat, or
- Up to two CAS units may be assigned to the combat and the HQ may use its DRM in support as well.
D. If an ARVN HQ on its Used side is involved, up to two CAS units can be assigned for defense of combat against the HQ's hex.
E. The value of each CAS unit is reduced by the NVA's current AAA value.
F. After accounting for NVA AAA, increase the ARVN's combat strength by the remaining summed CAS values.
G. At the end of the Combat Phase, replace the units used for CAS into the CAS box, effectively making them available again for further operations later in the same turn.
9.6 Helicopter Transport
A. The ARVN has six helicopter transport points per turn. This is reduced by the current NVA AAA value.
B. Each helicopter point can transport one stacking point of ARVN units during movement.
C. Helicopter transport allows the ARVN to move one non-mechanized unit (including artillery) from its hex, An Loc, or the Transport Box, to any other friendly or unoccupied hex on the map.
D. It costs a ground unit half of its MA to move by helicopter.
E. A ground unit can move its remaining MPs either before or after the transport, but not both.
9.6.1 Hot Landing Zone
A. If the starting or destination hex of a helicopter transport is adjacent to enemy units, the landing hex is deemed to be a Hot Landing Zone (LZ).
B. Place the red side of the LZ marker face up on the destination hex.
C. One Cobra or CAS air unit must be placed in that LZ hex as well, and must remain there until after the combat phase is done. The air unit may support any attacks in that hex.
D. A unit landing in a Hot LZ cannot move further that Movement Phase.
9.6.2 Cold Landing Zone
A. If neither the starting nor the destination hex of a helicopter transport is adjacent to enemy units, place the blue Cold LZ side in the destination hex.
B. The transported unit may continue moving if it has MPs remaining.
C. If no enemy units are adjacent, flip a Hot LZ to its Cold LZ side and return the supporting CAS unit to the CAS box.
Example: A unit with a MA of 4 uses helicopter transport in a normal impulse. It spends 2 MPs in the helicopter part of its movement and will be able to spend the other 2 MPs before or after the helicopter transport.
9.7 AAA Fire
A. ARVN air units performing CAS, TAC, or helicopter transport missions are affected by NVA AAA fire.
B. The NVA AAA is considered to cover the entire map, represented by a marker with a value determined by the result of the SEAD attack.
- During the resolution of a TAC mission, the AAA value is used as a negative DRM.
- During CAS missions, the AAA value is subtracted from the value of each air unit involved.
- The AAA value is also subtracted from the number of helicopter transport points available.
9.8 SA-7
A. Beginning with Turn 5, the NVA receives SA-7 markers.
B. Each marker must be used in the turn it is received (Exception: 11.2.1).
C. The NVA places one marker per NVA unit desired at the beginning of the Air Phase.
- If that unit is attacking or defending, halve the strike value of any CAS assigned to that particular combat.
- This reduction is done before subtracting the current AAA value from the strike value of the CAS unit(s) involved.
- The marker stays with the unit until it is removed from play in the End of Turn Phase.
D. The markers can be recycled for future reinforcements.
Example: A Cobra air unit is providing defensive CAS in a hex where one of the NVA units has a SA-7 marker. The current AAA value is 2. The Cobra will contribute only five points to the total defensive strength of the hex (14 divided by 2 = 7, minus 2 = 5).
9.9 Broken Arrow
A. During the NVA Combat Phase, the ARVN player can declare a "Broken Arrow." Once declared, every air unit on the air display, even the B-52, moves to the CAS box and is available to be used in CAS missions during the same turn.
B. Declaring a "Broken Arrow" costs 3 OPs. If the ARVN does not have 3 OPs available, then a "Broken Arrow" cannot be declared.
C. B-52 units are not affected by SA-7 effects or suffer AAA fire.
9.10 Air Example
A. At the start of Turn 6, the ARVN has decided to create a support base south of the besieged city. An NVA unit occupies the jungle hex directly to the east of Xa Than Kai. Other NVA units still block the highway south of Ap Tau O.
B. The ARVN spends five OPs for an effort level 5, two to buy two B-52 units, two to buy two Cobras, two to buy four fighter bombers, and one to buy two CAS planes.
C. During the Air Phase ARVN uses three fighter bombers and one CAS in SEAD, places the B-52s and a fighter bomber in TAC box, and both Cobras and one CAS plane in the CAS box.
D. First ARVN resolves the SEAD mission. The Strike rating of the involved planes is 27. A roll of a 3 results in partial suppression. The AAA value is 2 and 4 helicopter points are available.
E. ARVN then launches a bombing campaign with 35 points. A roll of a 4 is reduced to a 2 due to AAA, resulting in a 3 point loss for the enemy. ARVN chooses to inflict three step losses on enemy units. The NVA uses three replacement points to absorb the losses. In its Movement Phase the NVA simply hangs on doing nothing, hoping to survive.
F. It is now the first ARVN Operation Phase. A battalion of the 15th Regiment is moved to Xa Than Kai via air transport. The ARVN places a Hot LZ marker in the hex and a Cobra for support, then moves the unit. The unit is reinforced via land movement by an additional battalion and the 9th ACR. In the Ground Attack Phase ARVN attacks the regiment with the combined stack supported by a another Cobra amassing a total of 33 attack factors (each Cobra worth 12 due to the AAA modifier) forcing the NVA unit to lose a step and withdraw. The LZ is now clear and the marker is turned to its blue side because there are no more enemy units adjacent.
G. In the second Operations Phase ARVN brings additional units in the form of the last battalion of the 15th Regiment, a 105mm battalion, and the 155mm artillery, using the three remaining Helicopter Points. ARVN then moves the cavalry and two infantry battalions toward An Loc, smiling.
10.0 Combat
A. Combat is voluntary between adjacent units. The attacker decides which units will attack a hex or hexes and announces this.
B. An attacking unit must be adjacent to all the defending units being attacked to participate in the combat.
C. Units in a stack can attack different hexes or not at all.
D. Each attacking unit can only attack once per combat phase.
E. Each defending hex can be attacked only once per combat phase.
F. A unit's combat strength cannot be divided between more than one combat.
G. Defenders in a hex defend as one combined total.
H. A unit or stack can attack more than one hex, but all the defender's Defense Factors are totaled in those hexes and the attacker suffers all penalties due to terrain in each hex.
I. More than one hex can attack a single defending hex; combine all attacking unit's Attack Factors into one total and suffer all penalties for terrain from the attacking hexes.
10.1 Combat Procedure
A. Each combat is performed in the following order:
- Attacker announces all attacking units and the defending hex(es) involved.
- The ARVN can add up to three available CAS to the combat (9.5). Individually adjust all CAS units strike value for SA-7 (9.8), then reduce each unit's value by the current NVA AAA value (9.7).
- Total the all modified strengths of the attacking units.
- Divide this sum by the total of all modified strengths of defending units to determine the combat odds. Round fractional odds down in favor of the defender to correspond to one of the columns on the CRT.
- Roll the die, applying all DRMs applicable for the combat to determine the net roll result.
- Cross-reference the odds column with the net roll result to get the combat result and apply that result.
B. Attacks with combat odds of less than 1:3 are rolled on the 1:3 column.
C. Attacks with combat odds greater than 7:1 are rolled on the 7:1 column.
10.2 Terrain Effects on Combat
Terrain, whether hexsides attacked across or that occupied by the defender, influences an individual combat's odds or a unit's strength, or modifies the die roll. Consult the TEC for the effects.
10.3 Artillery, Sappers, and HQs
A. The number of triangles on the counter is used as a positive DRM for an attack (all three unit types) or negative DRM (Artillery and HQ) for a defense that a unit is supporting (11.0).
B. They can be used only once per turn and are flipped to their Used side after being used.
C. If a Sapper is alone in a hex when entered by an opposing unit, the Sapper is eliminated.
10.4 Tanks
Each tank unit involved in a battle provides both its combat strength and a DRM of 1 (positive if attacking, negative if defending) to a combat it is involved in.
10.5 Combat Results
A. Combat results are expressed as step losses and/or retreats.
B. The result to the left of the slash applies to the attacker, the right portion to the defender.
C. Results can be no effect (-), a number (the number of steps lost), an R followed by a number which indicates the number of hexes to be retreated, or a combination of the last two with step losses shown first and then retreats.
10.6 Combat Losses
A. Combat units have two steps, except artillery and sappers. After the first loss, flip a unit over to its weaker side. After the second loss, remove it.
B. The first step loss must be inflicted on the strongest unit. This is the one with the highest attack factor when attacking, and with the highest defense factor when defending.
C. If an NVA Sapper is part of the attacking force, then it must take the first loss.
D. Additional losses are assigned as the owner wants.
10.6.1 NVA Replacements
A. When an NVA infantry or artillery unit sustains a step loss, instead of reducing the unit, the NVA can choose to lose a replacement point. The NVA can even absorb the entire loss result of a given combat using replacement points. The only limit is the number of replacement points (30).
B. The use of replacement points entails a loss of confidence from the high command and an increased pressure put on the NVA to achieve its objectives (12.2).
10.6.2 NVA Tank Losses
When the NVA uses tanks in an attack, it also loses a number of tank steps per the rightmost column of the CRT, using the same modified DR as with the attack.
10.7 Retreats
10.7.1 In General
A. A unit must retreat so that it is the full retreat distance away from all the attacking enemy units if possible.
B. A retreating unit cannot enter or cross terrain which would be impassable to it during regular movement.
C. A retreat path cannot enter a hex more than once.
D. A retreating unit may not enter an enemy ZOC if there are hexes free of enemy ZOCs available.
E. If a unit or stack retreats into a hex containing an enemy ZOC, even if friendly occupied, it suffers an additional one step loss (per stack) per such hex.
F. Retreated units add their defense value to their new hex if subsequently attacked.
G. If a retreating unit would end its retreat in a fully stacked hex, move the unit additional hexes until it can be legally stacked.
H. The owning side can always cancel one hex of retreat by taking one additional step loss.
10.7.2 An Loc Garrison Retreat Restrictions
The An Loc garrison was under orders to hold at all costs. It cannot retreat and must suffer one step loss per mandated hex of retreat.
10.8 Advance after Combat
A. If the defender's hex is vacated, the attacker may advance one, some, or all of the adjacent attacking units into the hex.
B. Advance after combat must observe stacking limits.
C. Advance after combat is not considered movement and does not expend MPs.
10.9 Combat Example
A. It is the ARVN Combat Phase during Turn 2. The ARVN Effort Level is 5. The 1st Airborne Brigade has moved by helicopter south of An Loc to reinforce the city. The ARVN is now ready to assault Hill 169 occupied by an NVA regiment.
B. The ARVN adds one Cobra as air support. AAA is partially suppressed so the Cobra value is reduced to 12.
C. The ARVN will attack with the entire division including its HQ (stacked with the 81st). No friendly artillery is in range.
D. The NVA divisional artillery for the defending 9th VC is in range as well as two independent artillery. The NVA decides to use the divisional artillery and the 122mm independent guns.
E. Both sides check their combat value and DRMs. The ARVN has 25 attack factors with a +3 DRM (+2 for the HQ and +1 for the Effort Level. The NVA has 6 defense factors with a -2 DRM (-1 for the divisional artillery and -1 for the 122mm). The odds are 4:1, reduced to a 3:1 for the hill terrain in the hex. There net DRM is +1.
F. The ARVN rolls a 3, modified to a 4, resulting in a 1/2R1. The ARVN reduces the 81st Rangers, while the NVA decided to absorb its two step losses as replacement points, then retreats one hex to Windy Hill. The ARVN advances into the vacated hex with the 81st and the Brigade HQ. The ARVN HQ and all the NVA artillery are flipped to their Used side.
11.0 Special Units
11.1 ARVN HQs
A. The ARVN has two division and three brigade HQ markers. They must always be stacked with a unit of their formation.
B. They cannot be used to absorb casualties.
C. The 5th Division HQ commands the 5th and 48th Divisions (green units); the 21st Division commands the 21st and 9th Divisions (blue units) plus the 9th ACR.
D. At the start of its Movement Phase, the ARVN can place an HQ marker with any non-surrounded friendly subordinate unit except for the 5th Division HQ, which must remain in An Loc.
E. If an HQ is alone in a hex when entered by an NVA unit, the HQ is immediately moved to the nearest non-surrounded subordinate unit. If an HQ is unable to do the above, it is eliminated.
F. There are two 5th Division HQ markers provided with the game. The lower morale value counter begins the game on the board. It is exchanged for its higher value counter when the NVA 5th VC Division is committed (11.2.2).
G. HQs are used to determine available CAS (9.5) and combat DRMs (10.3), and for morale (12.1). Flip the HQ to its Used side after using it to determine available CAS or to provide a combat DRM.
H. HQs are returned to their Available side during the End Phase of the turn.
11.2 NVA Divisions
11.2.1 Divisional Cooperation
A. The NVA has three divisions (5th VC, 9th VC, and 7th NVA). Units from these divisions may not stack together.
B. If units from two or more divisions participate in the same attack, the NVA suffers a -2 DRM.
C. Independent units can operate and stack with any other units with no adverse effects.
11.2.2 5th VC Division Commitment
A. When the NVA replacement marker reaches the 19 box or higher, the NVA reserve of the 5th VC Division deploys on the next turn. The NVA receives as reinforcements the 5th VC division (less the infantry regiment which arrived earlier), one medium tank battalion (T-54), one light tank battalion (PT-76), one SA-7 marker (which can be saved until used), and 10 OPs.
B. The NVA must launch at least one major attack (OEL of 5) within the two turns following the commitment of the 5th VC or the NVA automatically loses the game.
C. When the 5th VC Division is committed, exchange the ARVN 5th Division's HQ counter with the higher morale value counter.
11.3 Artillery
A. Artillery can support one combat per turn within its printed range by providing a DRM per 10.3.
B. Each NVA artillery in range of An Loc affects An Loc surrender (12.1) by reducing ARVN HQ morale.
C. Artillery range is counted from the unit's hex (exclusive) to the defending hex (inclusive).
D. A unit can take one step loss, which eliminates it.
E. NVA replacements can be used to prevent artillery from suffering step losses.
F. Flip units to their Used side after supporting a combat (attack or defense). They return to their Available side in the End Phase of the turn.
G. Artillery cannot attack, but can defend normally with a strength of 2.
H. NVA organic artillery (artillery bearing the color of an infantry division) can only support combats when units of its division are involved (attacking or defending).
11.4 ARVN Replacements
A. Eliminated airborne battalions are automatically replaced. Place them on the Turn Record Track, six turns from the turn they were lost. They appear at Lai Khe or in the Air Transport Box available for entry via helicopter transport.
B. On Turn 9, the ARVN receives two replacement points that can be used to recover a step from its on-map reduced units.
C. Units in a besieged An Loc can only receive a replacement in this manner if the NVA AAA is reduced or suppressed.
Example: If the 6th Airborne battalion is eliminated at Windy Hill on Turn 2, it will reappear on Turn 8 at Lai Khe.
12.0 Morale
12.1 ARVN Morale Check
A. In the An Loc Surrender Segment, the ARVN checks to see if An Loc will surrender.
B. If Lai Khe has a unit garrisoning it and Hwy QL-13 (the primary road running from Lai Khe to An Loc) is free of enemy units or their ZOCs or if An Loc is captured already, no check is required.
C. Otherwise take the highest morale value of an HQ in or adjacent to An Loc, then apply the factors per the An Loc Surrender table. If the final sum is 0 or less, the garrison's morale has collapsed and it surrenders.
Note: the An Loc Surrender table is not printed in the rulebook text; it is on the game's charts and is not reproduced here.
D. Remove the units inside or adjacent to An Loc from the game. The city is considered captured.
12.2 NVA Morale
A. If the NVA Replacement marker reaches the 19 box or higher, the 5th VC Division enters play (11.2.1).
B. When the marker reaches the 27 box or higher the NVA morale is broken (flip the Replacement marker to its reverse side). The efficiency of the NVA divisions is compromised. Apply a -1 DRM to all NVA attacks.
C. When the marker reaches 30, no more replacements are available. Apply a +1 DRM to all ARVN attacks.
13.0 Scenarios
13.1 The Battle for An Loc
Description: This is the entire battle for An Loc until the end of the siege.
Length: 12 turns
OP Levels: ARVN begins with 10; NVA begins with 20.
13.1.1 ARVN Initial Set Up
| Location | Units |
|---|---|
| In or adjacent to An Loc | 5th Div (lower value HQ, 2 units, TF52) |
| In or adjacent to An Loc | 3rd Ranger Bde Group (HQ, 2 units) |
| In or adjacent to An Loc | 2 x RPPF militia Bn |
| Lai Khe | 1st Airborne Brigade (HQ, 3 Bns, 81st BCND) |
13.1.2 ARVN Reinforcements
A. If reinforcements are unable to enter the map via the highway from the Lai Khe holding box due to the NVA having blocking units there, these units may then enter from the closest hex to Hwy QL-13 unoccupied by a NVA or VC unit.
B. Units appearing at Lai Khe may enter via Air Transport.
| Turn | Location | Units |
|---|---|---|
| 2 | Lai Khe | 21st Div (HQ + 6 units); 9th ACR Bn; 3rd Airborne Bde (1 unit); 155mm Battery |
| 5 | Lai Khe | All units of the 9th Div (1 regt, 3 bns); Withdraw the 3rd Airborne Bde |
| 10 | Lai Khe | 48/18 Regt |
13.1.3 NVA Initial Set Up
NVA units may start the game adjacent to ARVN units.
| Location | Units |
|---|---|
| Anywhere south of An Loc along or adjacent to Hwy QL-13 | 101st Infantry Regt; 205th Infantry Regt |
| Anywhere within four hexes of An Loc | 9th VC Div; 429th Sapper Group |
| Any hexes unoccupied by ARVN units | 1 x range 11 arty group; 1 x range 7 arty group; 2 x T-55 tanks |
13.1.4 NVA Reinforcements
| Turn | Location | Unit(s) |
|---|---|---|
| 1 | West map edge | 7th NVA Div (3 regts, 1 arty) |
| 2 | West map edge | 1 x regt of the 5th VC Div* |
| 5 | (not stated) | 2 x SA-7 markers |
| 6 | (not stated) | 2 x SA-7 markers |
| 7-end | (not stated) | 1 x SA-7 marker per turn |
*It is considered independent until the rest of its division enters the game.
13.1.5 Conditional Reinforcements
See 11.2.1. They enter along the north or west board edge.
13.1.6 Victory Conditions
| Level | Condition |
|---|---|
| NVA Epic | NVA takes An Loc before May. |
| NVA Decisive | NVA takes An Loc before committing 5th VC Division. |
| NVA Basic | NVA takes An Loc without breaking morale. |
| NVA Pyrrhic | NVA takes An Loc before end of the game. |
| ARVN Pyrrhic | ARVN holds An Loc until Turn 12 (attainable only via downgrade, 13.1.7). |
| ARVN Basic | ARVN holds An Loc until Turn 12. |
| ARVN Decisive | ARVN holds An Loc until Turn 12, and breaks NVA Morale. |
| ARVN Total | ARVN holds An Loc until Turn 12 and breaks NVA morale. QL-13 free of enemy ZOCs. |
13.1.7 ARVN Victory Reduction
1st Airborne Brigade (HQ + 3 battalions) not withdrawn before game end: Victory goes one Level towards NVA Epic Victory.
13.2 The First Assault
Description: This scenario covers the first assault of the 9th VC Division against the city, the first attempt to relieve the city from the south, and the airmobile assault of the 1st Airborne Brigade to the city. It's a perfect introductory scenario.
Length: This scenario begins with Turn 1 and ends at the conclusion of the turn when the NVA replacement marker reaches 19.
Setup and Reinforcements: Identical to 13.1.
Victory Conditions: To win the NVA must take An Loc. Any ocher [sic; "other"] result is an ARVN victory.