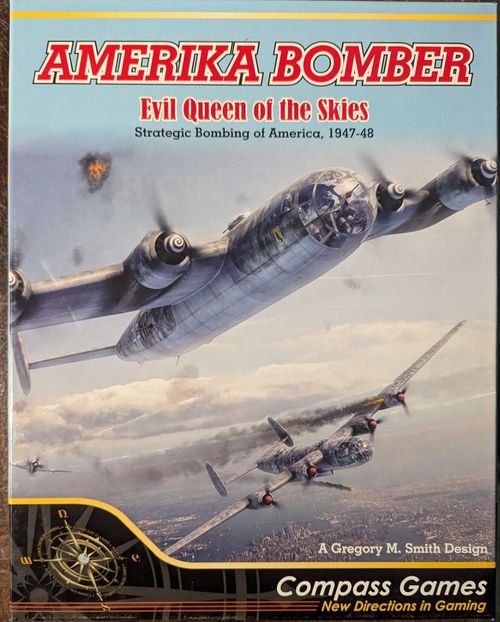
Amerika Bomber: Evil Queen of the Skies
Amerika Bomber: Evil Queen of the Skies Rulebook
Table of Contents
Table of Contents
1.0 Introduction
Amerika Bomber: Evil Queen of the Skies is a solitaire game which places the player in command of a German Amerika Bomber in an alternate history setting of World War II. If nothing else, the game should illustrate why it was so important that we defeated the Nazi regime - not only for ourselves, but truly for the future of mankind. Amerika Bomber is a frightening look at what might have been.
Each turn consists of a week, during which a combat mission will be flown from the proposed air base in the Azores to a target in America. As time progresses and players increase in experience, they may use the Experience points gained to improve their odds of success by purchasing skills. The player's eventual goal is to win the war by ravaging America with atomic bombs.
The rules are numbered and presented in sets of major sections, each section divided into numerous major and secondary cases. The rules of this game have been arranged both for ease of comprehension on first reading and for ease of reference later.
If you are new to or unfamiliar with historical games, don't panic! First look at any of the Aircraft Display Mats, the Combat Mat, and the playing pieces, then give the rules a quick read through. Please don't try to memorize them. Follow the setup instructions for play and then read Section 2.0 that describes the general course of play. Section 4.0 provides the framework to help you get started. As questions arise simply refer back to the rules. After a few minutes of play, you will find yourself becoming familiar with the game mechanics.
Throughout the rules you will see numerous sections in Italics. These sections are filled with examples, clarifications, play hints, design notes and other assorted wisdom in order to help ease you along.
2.0 How to Play the Game
Object of the Game
The object of the game is to conduct numerous sorties as the pilot of a German "Amerika Bomber" stationed in the Azores and to inflict the maximum damage possible to US installations on the East coast and the Midwest. The success of each sortie is reflected by the total % accuracy number achieved during the bombing run, and also for special missions completed, which can result in promotion and advancement - culminating in receiving the highly coveted Knight's Cross. You will face relentless risks as each sortie becomes more hazardous due to the passage of time and the new, and more advanced enemy aircraft you will be engaging, not to mention having to travel deeper into the American heartland. The ultimate success you achieve rests considerably on the decisions you make while conducting sorties during the course of your career.
Overall victory level is determined at the end of the game based on total % accuracy achieved during all bombing runs over the course of your career (which can also be determined posthumously if you are killed in action.)
The key game components used to facilitate play are the various Aircraft Display Mats to track the status of your aircraft, the Combat Mat for use when American fighters are attacking you, and the Air Operations Map showing your progress across the Zones toward your target, and the Sortie Log Sheet to track the activity and success of each. The various Player Aid Cards are used to resolve game functions.
General Overview
In general, play revolves around conducting numerous sortie assignments and resolving any encounters until safely returning to base. Upon completion of each sortie, you assess the success achieved by consulting your Sortie Log Sheet, which may result in a promotion/award for yourself. Between sorties you may check to see if you have become eligible to fly a more advanced type of aircraft. You may also need time to recuperate from any personal injury before being able to conduct your next sortie, or may have to sit out a sortie while your aircraft is being repaired.
Conducting Sorties
Your Aircraft Display Mat shows the overall status of your aircraft as you fly sorties. When conducting sorties, your aircraft progresses through Zones on the Air Operations Map, checking for possible encounters each time, including the possibility of a random event.
Typically encounters involve enemy carrier-based or land-based aircraft attacking your bomber. For each encounter you must decide how to engage the enemy fighters as they attack you. You cannot avoid combat - the US fighters will engage you. You will also record all aircraft you engage during combat on the Sortie Log Sheet, noting whether you damaged or destroyed them.
As you conduct combat, you will inflict and receive damage. At the end of a combat, you must decide whether to continue on your sortie or head back to base.
Damage of any kind is serious, but your bomber is reasonably sturdy. Regardless, damage should influence your decision on when it is time to abort your sortie. It can be a long way back to the Azores, and Type XXI U-boats will not always be able to find you or pick you up if you ditch in the ocean.
Return to Base
Once your aircraft completes its sortie by returning to base, you will possibly receive awards or decorations, and check to see if a more advanced type of aircraft is available. Convalescence due to wounds received may delay your next flight. Time needed to repair your aircraft may delay your next mission, if enough damage was done, or it may even be scrapped and you will receive a new aircraft.
End Game
Once all sortie assignments have been carried out through March 1948, the game ends. Also, should you be killed in action the game immediately ends. Whether you survive until your final sortie or not (at the end of March 1948) tally the total bombing accuracy % number to determine your level of victory achieved. Typically, to record an entire career, you will want to note all aircraft shot down, your final rank, and any awards achieved. Of course, if you have been killed, any accolades and results are recognized posthumously.
3.0 Game Equipment
3.1 Aircraft Display Mats
The 3 double-sided Aircraft Display Mats (6 aircraft) provided correspond to each aircraft type available to the player. This mat helps track the status of your aircraft and systems, including available weapons, bombs, and ammunition at your disposal. Select the appropriate Aircraft Display Mat corresponding to the aircraft type you have selected for play. This mat is the centerpiece when conducting game play and carrying out sorties. The use of this mat is explained in the appropriate rules section.
3.2 Combat Mat and Air Operations Map
The Combat Mat [B2] is used to resolve combat against aircraft and is typically set beside your Aircraft Display Mat during play. The use of these mats is explained in the appropriate rules section. The Air Operations Map is used to track your bomber's progress from the Azores toward your assigned target and the target itself.
3.3 Pilot and Crew Status Chart
The Pilot and Crew Status Chart [A2] is used to track skills, awards, and the "Ace" status of your gunners, if any. It also contains the Research Track, where the player each month decides how to direct research efforts for more advanced systems and electronics.
Research Track (Chart A2): Upon completion of the last sortie of each month, add 1 to any research area. Roll 1d6 for each research area with a value greater than zero, if the current value or less is rolled, that advance is achieved. The research areas are:
- Ta400: 1 month advance in availability
- Arado E555-1: 1 month advance in availability
- Improved Kettenhund 3 AA Jammer: +1 effectiveness
- Go 229 Fighter cover: -1 drm
- Fire suppression technology: engine fires automatically out
- Improved Lotfe Bomb Sight: +1 to B11 Bombing Results
- Improved PeilG 6 Navigation Aid: -1 to B10 Bomb Run Results
- Improved FuG 125 Blind Landing Aid: extra -1 to Landing roll
- Improved Survival Rafts: +3 drm to Chart B9 if rafts undamaged
- Improved Fuel Tanks: -1 drm on Chart B4 Fuel Tank hits
(The Pilot and Crew Status Chart also has spaces for the Officer rank, Medals & Awards, and the Ace Gunner status of the Flight Engineer, Copilot (Nose Gunner), Top Mid Gunner, Top Aft Gunner, Tail Gunner, Waist Gunner and Ventral Gunner, and the purchasable Skills: Sixth Sense, Shared Experience, Navigation, Weapons Maintenance, Air Combat Maneuver, Leadership, Accuracy, Parachute, Landing, Electronics Wizard.)
Medals & Awards: Various awards may be bestowed on you based on your career success. These are mainly provided for historical interest.
Crew and Wingman Skills: As you gain experience, another key game mechanic is the improvement of your pilot, wingman, and crew by the purchase of skills. These skills have a direct impact on your combat capabilities and survival. Your pilot begins the game with one Experience point, granted for having graduated from Flight School. Different skills have different costs to purchase.
3.4 The Playing Pieces
There are 228 playing pieces on a die-cut sheet included with Amerika Bomber. These playing pieces are referred to as markers (or counters) and are placed on either the Aircraft Display Mat to track the status of your plane and crew or on the Combat Mat. Markers are provided for individual aircraft, crew members, ammo rounds, random events, and the status of crew and systems.
Note: Some extra markers (damage markers, for example) have been printed as spare parts should any become missing or damaged. Extra markers are also provided for the game "Zeppelin Raider" based on customer request. Additionally, some corrected/optional markers for the game "Interceptor Ace" are included. If you do not own either of these games, you may ignore these markers.
3.4.1 How to Read the Markers
The Amerika Bomber counter mix provides markers to track the status of your aircraft and for resolving engagements. These markers may include information, such as die-roll modifiers, to facilitate play.
3.4.2 Game Markers
Aircraft: The various aircraft markers correspond to the type you have selected and is placed on the Aircraft Display Mat (while in the hangar) and on the Air Operations Map (while on missions) to track progress of your assigned sortie.
Officer Rank: Eight Officer rank markers (four pairs, left and right) are provided to track your promotion level as a pilot officer.
Random Events: While most random events are resolved immediately, some can be used later during play and these markers should be placed on the Aircraft Display Mat until used.
Armaments: Ammo markers represent typically cannon ammunition carried in your weapons, and are two-sided showing either "1" or "2" ammo points. These are only used optionally [9.2]. There are also "stores" markers for chaff (in German, "Duppel") which are always used.
Damage: Damage markers are provided to track damage to wings, the tail, the airframe and any possible damage to engines and other systems. These markers are only placed on your Aircraft Display Mat when damage occurs. They have an "INOP" side for systems that are knocked out (specifically, engines and weapons).
Electronics Damage: The nine onboard electronics systems have their own markers to represent damage. Damaged electronics systems cannot provide their normal benefits.
Crew Status: Crew status markers are provided to track severity of injury or KIA results.
Map Markers: Markers are provided for the Air Operations Map to represent your currently location, the weather and current target.
3.5 Charts and Tables
Five 2-sided and one 1-sided Player Aid Cards are provided to facilitate game play and resolve game functions. The use of these charts and displays are explained in the appropriate rules section. Specific charts and tables are referenced by their ID in [square brackets] unless already in parentheses.
When a die roll is called for, each table specifies the die roll combination necessary, which in some cases may include each die representing a different place value. In such instances, use a colored die to distinguish place values. For example, on Chart [A1] for a roll of "1d6+1d6," the first d6 represents the tens' place value and the second d6 the ones' place value. This means the result of a roll of 3+4 is a "34" and not a "7."
3.6 The Sortie Log Sheet
The Sortie Log Sheet is used to record information for each game session and damaged or downed aircraft. Feel free to photocopy these sheets as needed.
Logsheet Example: The player has chosen to start the game with an Me 364 "St. Pauli's Girl." His first mission is to the DuPont factory in Zone 5. After rolling "on target" he only manages 20% damage to the target, but this is a success. He notes his Top turret and Tail guns each get a defensive kill (which will help him track their Ace status if they can reach 5.) However, the Me 364 takes enough damage to cause him to lose the second sortie of April 1947 due to repairs. The second sortie is to the Hercules Powder Co., also in Zone 5. This time he does not get to bomb as he is shot down in Zone 3. The next sortie is a Special Mission to Boston, in Zone 5. His photorecon roll (just like a bombing run) is for 30% so the recon is a success and his Tail guns get a kill on the way home.
3.7 Game Scale
Each sortie is conducted in a day, with (typically) 4 sorties flown per month, corresponding to the number of major raids undertaken by the Germans for that month. Select markers represent individual aircraft, specific crew members, and ammunition.
3.8 Parts Inventory
A complete game of Amerika Bomber includes the following components:
- One Countersheet of 9/16" unit-counters (228 counters)
- Three Aircraft Display Mats 8.5" x 11" (double-sided, six bombers total)
- Five Player Aid Cards 8.5" x 11" (four x double-sided, one single sided)
- One Combat Mat 8.5" x 11" (single-sided)
- One Pilot Awards Display Mat 8.5" x 11"
- One Air Operations Map 8.5" x 11"
- Rules Booklet featuring extensive Alternate History Background
- One Sortie Log Logsheet 8.5" x 11"
- Two 6-sided (different colors) and one 10-sided die
- Box and Lid
If any of these parts are missing or damaged, please contact the publisher: Compass Games LLC, PO Box 271, Cromwell, CT 06416 USA, [email protected]
4.0 Game Setup
General Rule
Game setup consists of selecting your aircraft type, preparing your Sortie Log Sheet, and placing the corresponding Aircraft Display Mat in front of you for initial marker placement prior to conducting your first sortie. You should also have the Combat Mat [B2] set nearby, as it will be referenced when resolving engagements against enemy fighters. Nearby should also be the Air Operations Map. Place your aircraft marker on the "Hangar" box on the Aircraft Display Mat.
4.1 Base Assignment
Play begins by choosing either the Me 364, He 277, or the Fw 300 bomber (the other 3 types become available later in the game.) Game play consists of being the pilot of a single bomber rather than simulating control of larger formations. All bombers in the game are based at the proposed base in the Azores.
4.2 Raid Targets
Chart [A1] lists the actual target name, followed by the numbered geographical Target Zone to which it belongs. What matters for game purposes is knowing in which Target Zone the target is located. This will determine how far the bomber has to travel. The actual targets are identical in game terms for bombing purposes, but the names were included for historical interest. It is also important to note that Chart A1 comes in 4 sections - each one three months long. Players should refer to the appropriate part of Chart [A1] based on the date of the mission.
A1 Raid Chart (Amerikanische Zielliste) - Apr-Jun 1947 and Jul-Sep 1947
Roll 1d6+1d6 (first die tens, second die ones). "Special Mission *" results are resolved per 6.2.5.
| Roll | Apr-Jun 1947 Target | Zone | Jul-Sep 1947 Target | Zone |
|---|---|---|---|---|
| 11 | Allis-Chalmers (Boston, Mass.) | 5 | Allis-Chalmers (Cincinnati, Ohio) | 6 |
| 12 | Special Mission * | * | American Car & Foundry (Berwick, Penn.) | 6 |
| 13 | Fort Monmouth (Little Silver, N.J.) | 5 | Special Mission * | * |
| 14 | DuPont (South Charleston, W. Va.) | 6 | Standard Oil (Linden, N.J.) | 5 |
| 15 | Colt Manufacturing Co. (Hartford, Conn.) | 5 |
5.0 Sequence of Play
- Obtain the raid target by checking on Chart [A1] - the month/year versus 1d6+1d6 roll. Write this on the Sortie Log Sheet. If this is a "Special Mission" roll 1d6 to determine which one. Refer to 6.2.5 for specific objectives in that case.
- Move from the base out to each Zone. Nothing occurs in Zone 1. Roll for an encounter on Chart [B1] in each Zone, except Zone 1, and resolve the encounter (if any).
- In the raid Target Zone, roll for an encounter on Chart [B1] as normal. Conduct combat if an interception occurs. Then roll for anti-aircraft (AA) fire on Chart [B2a]. Bomb the target. Roll again for anti-aircraft fire.
- Turn around and move to the next Zone towards base, and repeat the movement/encounter procedure until the aircraft has gone through all endurance boxes or has reached the base.
- At the base, roll for landing weather on Chart [B6] and roll to land the aircraft, applying any applicable DRMs (die roll modifiers - numbers that increase or decrease the result).
- Obtain awards and Experience points. Spend Experience points if desired. Upgrade to a newer model of Amerika Bomber if possible/desired. If this is the final sortie of the month, conduct research on the Research Track (Chart A2).
- Repeat the process on the next sortie line on the Sortie Log Sheet, until shot down and killed, or until the last turn of March 1948.
6.0 Combat
6.1 General Procedures
6.1.1 Combat Overview
Combat is resolved for each Zone in which an interception occurs. Each combat consists of possibly 3 rounds. Enemy fighters will be placed on the Combat Mat [B2], and will attack from Long, Medium, and Close ranges if possible. More than one fighter may arrive from the same zone and altitude, depending on your rolls.
6.1.2 Interception
After moving to a new Zone, roll for interception. If there is no contact rolled in a particular Zone on Chart [B1], then nothing occurs. It is also possible that land-based fighters will be rolled over the ocean (Zones 2-4) or that carrier-based aircraft will be rolled over land (Zone 6.) In either of those cases, it is treated as "No Contact" and therefore nothing occurs. Zone 5 is unique in that both land-based AND carrier-based encounters result in an interception.
6.1.3 Combat Setup
To begin combat, the player rolls for each intercepting aircraft, and places it on the Combat Mat [B2]. This may be one of 26 locations (8 directions, with Low, Level or High results each, plus Vertical Dive and Vertical Climb.) This is done by rolling a 1d10+1d6 (although Vertical Climb and Vertical Dive positions do not require the 1d6, which gives the fighter's altitude automatically.) Use the Low, Level or High markers next to each attacking enemy fighter to indicate this.
The player then rolls for friendly fighter cover (Me262 jets operating from the Azores, and possibly Go229 jets if they have been researched) to drive off some of the American fighters. This roll on Chart [B2] may result in 1 or no fighters removed. The player chooses which American fighters to remove before combat begins. Friendly fighter cover only applies to Zones 2 and 3.
6.1.4 Conduct Defensive Fire and Attacks
The player fires first in all rounds of combat (Exception: Damage to FuG245 Air Search Radar, Chart [B4] or Random Event "Bounced!" Chart [C1]. The player assigns all guns that he wishes to fire to the incoming fighters, then resolves the fire. First, he rolls to hit the fighter (a 6, 5-6, or 4-6 depending on the incoming fighter's position.) If a hit is obtained, he rolls again to see if the fighter is damaged or destroyed. "FP" on Chart [B2] stands for "firepower" and each turret/gun position on the bomber has a FP rating, which affects the damage roll to US fighters. A fighter which is damaged twice (obviously requiring two different guns or turrets to have hit him) is destroyed.
After defensive fire by the bomber, damaged fighters fire, but then break off and are removed from combat. Undamaged fighters fire and then move closer to the bomber (from Long range to Medium, from Medium to Close) even if they had missed on the previous round. (Exception: Prop-driven fighters versus the Arado E555-1, which only fire once at Long range and then break off due to a lack of speed.) At each range the bomber fires, then surviving fighters fire. At Close range, after the bomber's defensive fire, any surviving fighters fire and then break off. After all fighters have either broken off or been shot down, combat ends. Defensive guns have limited arcs of fire, and not all can fire on every incoming fighter. Multiple defensive fire attacks against the same incoming fighter must be declared and processed simultaneously (you cannot decide to shoot again with a different gun after seeing the results of a previous gun's fire, and you cannot "retarget" a gun if a previous gun has destroyed the fighter.) Firepower is not combined; each defensive gun position fires independently.
6.1.5 Anti-Aircraft Fire
A bomber is attacked by AA fire on Chart [B2a] in the Target Zone (once before dropping bombs, and once after.) Roll first to see if the AA is Light, Medium or Heavy. The AA roll is not to see if it hits, rather, it is to see how accurate it is, and therefore, how many hits the bomber takes. The die roll for AA fire is reduced if it is Light AA (-2) or Medium AA (-1). It may also be reduced by the Kettenhund AA Jammer (-2 if it is operational) and each Duppel (the German word for Chaff) released (-2 each, up to a maximum of -4 if both chaff dispensers are used.) Finally, if the bomber is flying at 10,000 feet due to oxygen pressurization system damage, the roll is at +2.
AA example: The player rolls a 4 indicating he is about to take Medium AA fire. This gives a -1 DRM to the AA roll. The player decides to play it safe and uses both chaff dispensers, giving an additional -4 DRM. Finally, his Kettenhund jammer is active, for a final -2 DRM. He rolls 2d6 for the AA roll, getting a result of 8. This is modified down to a 1 so the bomber takes 1 random hit from the AA fire.
Historical Note: The United States had developed the 120mm M1 anti-aircraft gun before the end of the war to complement the M2 90mm gun. It was nicknamed the "Stratosphere Gun" because of its ability to reach 60,000 feet. Some were deployed to the Philippines in 1945, but were never really used. They would have posed a significant threat to any German strategic bombing offensive.
6.1.6 Ammunition Use
If playing with optional rules, each weapon expends 1 point of ammo each time it fires. Chaff dispensers "fire" Duppel during anti-aircraft attacks and have 2 uses each per sortie (place a "2" marker on each dispenser when beginning a sortie). Expend one chaff each time you use them against anti-aircraft fire (whether or not you are playing with optional rules, chaff use is tracked).
Design Note: Gun ammunition was so rarely completely expended during testing it became obvious it really wasn't worth tracking. However, feel free to do so if you wish with the ammo markers per optional rule 9.2.
6.2 Bombing Procedure
6.2.1 Bomb Run
The bomber rolls to see if he is on target or off target Chart [B10]. If the Navigator is seriously wounded or dead, this roll is at +1. If the Bombardier is seriously wounded or dead, or if the PeilG 6 Navigation Aid or the FuG 104 Altimeter are damaged, the run is automatically off target.
6.2.2 Results
After determining if the bomber is on or off target, cross reference the appropriate column on Chart [B11] versus a 2d6 roll and apply the bombload DRM (die roll modifier). Each of the 6 bomber types carries a different numerical rating for conventional bombs, as listed on the Aircraft Display Mat. The result is percentage of bombs dropped within 1,000 feet of the target, and serves as a metric for mission success.
6.2.3 Atomic Bombing Missions
Late in the game, you may receive a mission to drop an atomic bomb on a U.S. city. Such missions do not require any rolls whatsoever - if the bomb bay doors are not jammed shut and you are able to drop, it occurs. The mission is a success.
6.2.4 Mission Success
Any result higher than "zero" on the Bombing Results Chart [B11] means the mission was a success. A zero result, or failure to drop, means mission failure. Atomic bombs that drop are always a mission success and count as a "100" result.
6.2.5 Special Missions
If a Special Mission is rolled for on the Raid Chart [A1] roll 1d6 to determine exactly which one. Special mission objectives are defined below. If the special mission objectives are not met, the mission is a failure, regardless of any bombing that occurs. If the special mission is a success, your mission is a success as well, regardless of bombs dropped, if any. Special mission success results in an award of 100 bombing points for victory, promotion, and awards purposes.
6.2.5.1 Abwehr Agent Delivery
Using newly developed "HALO" techniques, you will be dropping an agent via parachute into the American heartland. You will bomb New York, then continue on to Zone 6 and drop the agent. If the agent is killed or seriously wounded before you can drop him, the mission is a failure.
6.2.5.2 Leaflet Drop
You are basically "bombing" with propaganda leaflets. You have no bombs, and no Duppel (the chaff dispensers have been modified to eject the leaflets for this mission.) Roll 1d6 for target city:
- 1-2: New York (Zone 5)
- 3-4: Philadelphia (Zone 5)
- 5: Boston (Zone 5)
- 6: Chicago (Zone 6)
If both of your chaff dispensers are damaged before you can drop, this mission is considered a failure. You will encounter AA fire upon reaching the target city, before and after you drop.
6.2.5.3 Strategic Reconnaissance
You have been fitted with extra cameras in the bomb bay (replace the bombload with the Rb 50/30 Camera marker). Roll 1d6 for target city:
- 1-2: New York (Zone 5)
- 3-4: Philadelphia (Zone 5)
- 5: Boston (Zone 5)
- 6: Chicago (Zone 6)
You are conducting post-strike photo reconnaissance on one of those cities. Roll to see if "on target" or "off target" like a normal bomb run, the mission is a success if the bombing percentage (in this case, photographic accuracy) is above zero. Use the "24 bombs" DRM of +2 when rolling for bombing percentage when conducing this mission. If both cameras are damaged before arriving home, the mission is a failure. For a recon mission, bomb bay hits that would hit the bombs damage the camera in the bomb bay instead.
6.3 Aircraft Damage
If an aircraft meets its damage threshold for the airframe, either side's wing roots, the rudder, loses both tailplanes, or has all engines knocked out, it is considered shot down. A fire in the fuel tanks also results in a lost aircraft, as all crew bail out. An explosion in the fuel tanks is catastrophic and also results in the loss of the aircraft. An explosion in the bomb bay also destroys a bomber. Refer to Chart [B4] for the specific results of damage. Additionally, if a bomber has 3 or more engines knocked out, it must immediately abort and return to base.
A second damage result against a system already knocked out is "no effect" instead. You can only kill the Pilot once, for example. However, most systems (Wing Roots, Airframe, etc.) require multiple damage results to destroy. Catastrophic damage (bomb bay or fuel tank explosions) result in an immediate KIA for all crew and the game ends.
6.4 Post Combat
A player may abort his sortie after combat or at any time if he desires, due to damage or other issues. Oxygen system damage forces an aircraft to dive down to 10,000 feet. Damage cannot be repaired while airborne (Exception: Electronics Wizard skill.) After landing, repairs on the bomber are made by the following:
| Hits | Result |
|---|---|
| 1-6 hits | Repaired by next sortie. |
| 7-12 hits | Lose one sortie for repairs. |
| 13+ hits | Aircraft is written off, receive new aircraft without missing a sortie |
6.4.1 Landing Procedure
Landing can be a hazardous procedure if the plane is damaged or the pilot is wounded. Total up all modifiers and roll on the Landing Chart [B7] then apply the results, if any.
6.4.2 Forced Landing
It may be that a bomber is forced down after a combat (for example, if all engines are hit and knocked out, or the aircraft is on fire, or there is a runaway engine.) In such cases the aircraft would not make it back to base. The player has two choices:
- If over Zones 5 or 6, he can make a forced deadstick landing on an emergency field or road somewhere at +1 DRM. If the player chooses to do this (perhaps to try and save an injured crewman's life) he must total up his landing modifiers and roll on Chart [B7.] Even if he lands successfully, his entire crew is captured and the game ends.
- All crew may bail out and roll for survival if over water (Zones 1-4.) Notice if forced to bail out, the crew does not get any life rafts and the -4 survival DRM applies (same as if the life rafts were damaged), see Chart [B9]. Alternately, the player may attempt to ditch in the water. Roll for landing. Apply any possible wounds, then the crew rolls for survival due to being in the water.
6.4.3 Rough and Crash Landings
A poor enough roll on the Landing Chart [B7] may result in a rough landing (each crew member receives a Light Wound, and the aircraft is lost for 1 sortie for repairs) or in a crash landing (each crew member receives a wound - roll for severity. The aircraft is written off as destroyed). At the far extreme of the Landing Chart [B7] (a roll 18+) the aircraft is destroyed during landing and all the crew are killed.
6.4.4 Crew Injury
The bomber usually has between 7-10 crew, depending on the model. Each crewman's injuries may result in lost time or replacement. An Abwehr agent may also be on board.
A roll that calls for an injury to a specific type of gunner when one is not present is treated as "no effect."
Three results may happen from crew injury: Light Wound (LW), Serious Wound (SW), and Killed in Action (KIA).
6.4.5 Injury Duration and Effects
LW: Miss 1 sortie. If this is any other crewman than the Pilot, use a temporary crewman as a replacement.
SW: If this occurs to the pilot, the co-pilot is now flying the bomber. If the co-pilot is also SW or KIA, the engineer is now flying the aircraft. Gunners who are SW cannot perform their duties. Other crewmen who are SW give negative modifiers to certain routines, such as bombing and on target/off target rolls. After landing, roll 2d6 on the Serious Wound Resolution Chart [C2] to determine the number of sorties missed by that crewman. If this is any other crewman than the pilot, use a temporary crewman as a replacement.
KIA: If this is anyone except the pilot, simply replace with a brand-new crewman for the next mission. If the pilot is KIA, the game ends at that point.
6.5 Weather Effects
The weather was obviously good enough to mount a raid, but the large distances involved means the weather when landing may be worse, or has changed for the worse. Weather affects the landing roll negatively with any other result than "good" weather. Apply the appropriate modifier (-1 through -3) if the landing weather is anything other than "good."
6.6 Parachuting to Safety
In certain cases you will be shot down by an American fighter or AA fire. In such cases, the crew is allowed to attempt to parachute to safety. Roll for each crew member on Chart [B8]. At this point, assuming you survive the parachute roll, you will need to roll for rescue over water (Zones 1-4.) If shot down and parachuting in Zones 5 and 6, you are all POWs.
6.7 Crew Skills
The crew may increase in skill during the course of the year. For every 4 sorties flown the crew gains an Experience point, which the player may spend to "buy" skills. Sorties that are skipped due to injury to the pilot, plane repair, or other reasons do not count toward gaining Experience points. The skills cost different amounts of Experience points to purchase.
The player begins with 1 Experience point.
The skills confer various benefits during game play, as listed below. The cost to buy each skill is listed after the skill name in parentheses.
Skills:
Ace Gunner (5 kills): +1 to defensive fire. (Gunner skill, applies per gunner with 5+ kills only). Not purchased, but earned by shooting down American fighters. This is tracked per gunner; if the gunner is SW or KIA, the skill is lost for that position.
Purchased Skills (Cost):
Shared Expertise (1): No penalty for the co-pilot or flight engineer to land the plane.
Sixth Sense (4): The pilot has developed an uncanny sense of impending danger. Any natural "6" rolled by a fighter for number of random hits becomes a 3 instead.
ACM (3): Air Combat Maneuvering. The bomber ignores the first random hit in each zone.
Leadership (1): Promotion Roll has a -2 DRM.
Accuracy (3): Bombing Results roll has a +1 DRM.
Navigation (3): The Bomb Run on target/off target roll has a DRM of +2. If a navigator is SW or KIA and replaced, this skill is lost and must be re-bought if still desired.
Weapons Maintenance (2): The first result knocking out a gun in a sortie is ignored. If ALL gunners on a crew are SW or KIA, this skill is lost and must be re-bought if still desired.
Electronics Wizard (2): The electronics warfare officer may repair one damaged electronics system per sortie. If he becomes KIA, this skill is lost and must be re-bought if still desired.
Parachute (1): Each crewman receives "-1" when rolling to bail out due to training of the crew.
Landing (1): The landing roll receives a "-1."
6.8 Awards
The various awards in the game are representative of the major awards given to German pilots. They are included merely for historical flavor.
6.8.1 The Wound Badge
This award was given in 3 classes, Black, Silver, and Gold. To receive the Wound Badge in Black, the player's pilot must have been injured during combat (not for parachuting from a stricken aircraft or during a bad landing). Keep track of a second wound by flipping the Wound Badge in Black to the "2" side. Upon receiving a third wound, the player is awarded the Wound Badge in Silver, placed on the "3" side. Track a 4th wound by flipping the Wound Badge in Silver counter to the "4" side. Finally, upon receiving a 5th wound, the player receives the Wound Badge in Gold. No further tracking is required at that point.
6.8.2 The Iron Cross 2nd Class
The Eisernes Kreuz 2 (or EK2) is was awarded upon completing the first successful bombing mission.
6.8.3 The Iron Cross 1st Class
The Eisernes Kreuz 1 (or EK1) is was awarded upon completing the 5th successful bombing mission.
6.8.4 The Amerika Shield
This hypothetical badge would have been worn on the left sleeve, similar to the Narvik Shield. It is awarded after 5 missions (successful or not.)
6.8.5 The Operational Flight Clasp (Frontflugspange)
This clasp was given in 3 classes: Bronze (after 20 flights); Silver (after 60 flights) and Gold (after 100 flights.)
Game Note: The Operational Flight Clasps in Silver and Gold are not obtainable within the 12 months of the game, as there are only theoretically 48 flights, but is included for historical interest and/or player variants.
6.8.6 The German Cross in Gold
This award was sometimes derogatorily referred to as "Hitler's Fried Egg" due to its size and gaudy design. It is awarded automatically after 10 successful missions.
6.8.7 The Knight's Cross
This highly coveted award (the Knight's Cross) was given to successful pilots. Although in reality the award came at many levels of achievement, and more often to fighter pilots, for this period of the war the following formula will be used: Add together the bombing results % results. At 300 total % bombed, the player receives the Knight's Cross.
To receive the Oakleaves to the Knight's Cross, the player must have 600% total bombing results.
To receive the Oakleaves and Swords to the Knight's Cross, players must have 750% total bombing results.
To receive the Oakleaves, Swords, and Diamonds to the Knight's Cross, players are automatically awarded it upon dropping their first Atomic bomb.
6.8.8 "Ace" Status
Upon reaching "Ace" status (5 kills) a gunner receives a +1 DRM when shooting at fighters. This effect occurs immediately after reaching 5 kills. If that particular ace gunner is subsequently SW or killed, the effect is lost until the new gunner achieves 5 kills.
6.9 Research Track
6.9.1 Research Requests
At the completion of the final sortie of each month (whether or not you actually fly) the player may request that research is focused in a certain area on Chart [A2]. Place a numerical marker in the box you wish the scientists to research. This is the current research level for that area. Players may either add a "1" to an area that has a research level of zero, or may increase an existing research level by one. Then roll 1d6 for every box with a research level higher than zero. If the current research level or less is rolled then that breakthrough has been achieved. Each area may only be achieved once. Once successful, place an "Advance Achieved" marker on Chart [A2] to indicate it is in effect.
6.9.2 Research Checks
Players check for research advances only once per month, after the new numerical marker has been placed.
6.10 Promotions
Unlike most fighter aircraft and conventional small bombers, a junior officer would not have been entrusted with piloting an Amerika bomber fresh out of flight school. Therefore, players begin the game with the rank of Hauptmann (Captain in US rank).
6.10.1 Ranks
The officer ranks are:
Hauptmann - the player's normal and lowest possible officer starting rank. No special abilities.
Major - allows the player to choose his target from available raids at a given time on a 1d6 roll of "1." He does not have to attempt to do this, he may roll normally and receive a random target.
Oberstleutnant - allows the player to choose his target from available raids at a given time on a 1d6 roll of "1-2." He does not have to attempt to do this, he may roll normally and receive a random target.
Oberst - no game impact as it occurs at the end of the game, however, it is included as another metric by which players may judge their performance.
6.10.2 Promotion Mechanics
The first promotion attempt is made after the 4th month of service (after the last sortie of July 1947) and the second attempt after the 8th month of service (after the last sortie of November 1947). The final promotion attempt is made at the end of the game (after the last sortie of March 1948).
Promotion to the next higher rank occurs on a successful 1d6 roll of 1-4, with the following modifiers:
- -2 for award of the Knight's Cross (applies to all promotion attempts).
- -1 per 10 successful missions during the period.
- -1 per award of the Iron Cross 1st Class or the German Cross in Gold during the period.
- +1 each aircraft lost due to crash landing or having been shot down during the period.
- -2 pilot has the "Leadership" skill (applies to all promotion attempts).
A player may have multiple + or - modifiers depending on how the period went.
6.11 Random Events
The first time a "12" is rolled, per sortie, on the interception track, a Random Event occurs. This replaces the normal encounter that is listed there (should you roll a second "12" later in the sortie, the listed encounter would happen normally at that point). These range from very good to very bad. Some will give a player a marker that may be used at a future point in the game. Place this marker on the Aircraft Display Mat. Other random events will need to be processed per the text of the event (you may be attacked, etc.) After processing the random event, move forward one box and continue your mission.
7.0 Reassignment to a Newer Aircraft
A player may be reassigned to a newer model aircraft when they become available, under certain circumstances:
7.1 Bomber Types
There are 6 aircraft in the game. The Me 364, He 277, and the Fw 300 are "starter" aircraft. Starting in August 1947, the Ju 390 is available. In December 1947, the Ta 400 and Arado E555-1 are available.
7.2 Upgrade Mechanics
If he desires a newer model of aircraft, and it is available (by date) the player simply switches to that aircraft. He loses one sortie in time while training on the new type.
7.3 Upgrade After a Serious Wound
If seriously wounded, the player is automatically given a new plane for "free" after getting out of the hospital. He gets a new crew which starts without any "Ace" "Accuracy" "Navigation" "Electronics Wizard" or "Weapons Maintenance" skills. Those, if previously bought, would have to be re-bought if still desired.
7.4 Upgrade After Crashing
A player who crash lands his plane or is shot down (and presumably survives) receives a new plane of the same type. He could, however, upgrade at that time if he desired and a newer plane was available. If upgrading, he loses 1 sortie in time while training on the new type.
8.0 Victory Conditions
I would assume most players will merely enjoy topping their previous performances when playing the game. However, for those who wish a general "yardstick" for their efforts, I offer these victory conditions: (Although downing enemy fighters give certain game benefits and count as "kills," you will notice they are not part of the victory conditions).
Besides the listed conditions, any game in which a player drops a total of 3 or more Atomic Bombs on America results in a Decisive Victory.
- Defeat (50 or less accuracy total): You are a disgrace to the Luftwaffe, your family, and yourself. After the war you return home and become an alcoholic (if you weren't already one.)
- Draw (51-100 or less accuracy total): You have fulfilled your obligations to the nation and you are a successful bomber pilot. Book and movie offers after the war are probably not in the cards, however.
- Marginal Victory (101-500 or less accuracy total): You have enjoyed great success as a bomber pilot. You are one of the better pilots currently assigned to the Luftwaffe's Strategic Bomber Force. Your crew respects your abilities, and Headquarters puts you in training in late 1948.
- Substantial Victory (501-750 or less accuracy total): You are one of the Luftwaffe's premier bomber pilots, and have gained the respect of your peers, your crew, and commanders. You are often mentioned in the nation's papers and are offered command of an Air Division in late 1948.
- Decisive Victory (751 or more accuracy total): You are the scourge of America and the pride of the entire Luftwaffe. Your legendary exploits place you at the top of the Luftwaffe elite and are mentioned prominently in propaganda efforts as the "Man who brought America to her knees." Your peers are amazed at your steel nerves and flying skill. You retire peacefully after the war.
9.0 Optional Rules
9.1 Variable Pilot Quality
For those who want to encounter enemy aces, I offer the following. Roll 1d6 when encountering American fighters:
| Time | 1d6 for quality |
|---|---|
| Apr 47 - Jun 47 | 1-4 Trained, 5 = Veteran, 6 = Ace |
| July 47 - Mar 48 | 1-3 Trained, 4-5 = Veteran, 6 = Ace |
Trained pilots are the default. Veteran pilots do 1 extra random hit. Ace pilots do 1 extra random hit and also receive -1 from German gunners when fired at.
9.2 Ammunition Expenditure
If using this rule, track and expend ammunition for the various gun positions using the ammo markers and the values on the Aircraft Display Mats. One ammo point is expended each time a gun position fires.
9.3 Range Effects on Combat
Players may wish to increase the difficulty of the game by using range effects on combat. If using this rule, U.S. fighters inflict +1 random hits in damage at close range (if they do damage).
9.4 Neutral Canada
A neutral Canada (after the failure of D-Day and negotiated peace with England, etc.) could be a possibility. To represent this, players MAY land a crippled bomber in Zone 5 or 6. Surviving crew are interned, but are considered to sneak back via the Swiss Embassy on a 2d6 roll of 2-3, and are available to fly again after a 4-sortie delay. On a roll of 4-12 the attempt fails, the crew remains interned, and the game ends.
Designer's Notes
After having completed Nightfighter Ace I had this crazy idea about what the true opposite of B-17: Queen of the Skies was, and therefore Amerika Bomber: Evil Queen of the Skies was born. Some people might say it's a ripoff of B-17: Queen of the Skies. To that, I would cheerfully say, "GUILTY!"
To me, this game (besides being just an absurd fantasy) is really about paying homage to probably the best, original solitaire system ever made. I think all solitaire war gamers really owe a debt of gratitude to Glen Frank for coming up with such a fun system in the original B-17.
However, I didn't just want to directly reverse engineer B-17. Many of the combat routines have been simplified. I have also included the ability to directly track all damage on the bomber mat. There is an experience system and research system to give the player a few more decisions to make - he's got to decide to improve his survival or his offensive capabilities. There are a few other changes, but I tried to make the heart of the game seem familiar to B-17 players. The strangest thing I found, when doing research, was the surprising amount of historical data that existed for a lot of aircraft that never got past the drawing board.
I'm sure I'll receive some grief for making a game where one of the objectives is to drop atomic weapons on America, but if nothing else, it shows why it was so important for us to defeat Nazi Germany. The game is just intended to be fun, as it's obviously fantasy. Make no mistake, you're playing the bad guys.