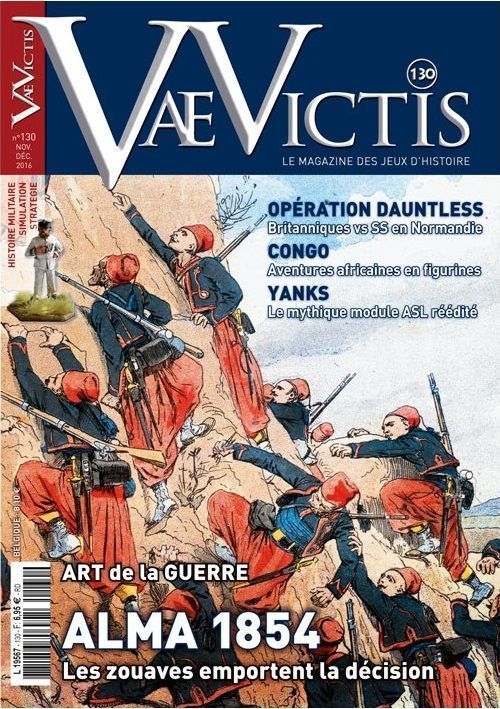
Alma 1854
Alma 1854 Rulebook
Table of Contents
Table of Contents
1 - The Map
The map represents the site of the combats. A hexagonal grid covers the map. Each hexagon represents approximately 400 metres. The contour lines represent the uneven nature of the terrain. The difference in colour allows for determining which units are higher than others.
A management table is provided to keep track of the game turn, victory points and Russian assaults.
The green arrows indicate the entry routes of the Russian units; the green flags indicate the set-up zones of the Russian units.
The red and blue hex edges indicate the entry hexes of the British and French units.
Yellow stars indicate the victory points of each objective.
2 - The Counters
They represent the combat units and markers.
2.1 - Combat Units
These are the units engaged by the two camps. The background colours identify the nationalities (green for the Russians, red for the British, blue for the French, red and blue with a crescent moon for the Turks).
In general the units are grouped into divisions that are distinguished with the help of a coloured sidebar.
Certain units have a white sidebar; even if they belong to a division, they are independent.
There are three types of combat units: Infantry or infantry detachment, Cavalry, and Artillery, represented by specific illustrations.
Movement corresponds to the unit's number of Movement Points (PM/MP). Artillery with 5 MP and a distinctive symbol corresponds to horse artillery.
Range corresponds to the artillery's effective range in hexes. Infantry units are all considered to have a range of 1 hex. A star to the right of the infantry units indicates that the unit benefits from a better armament (see 8.3).
The quality rating represents a unit's experience, training and comportment. If the quality rating is followed by a star, the unit may stack freely with another unit (see 9.3).
Fire represents the unit's value when it shoots.
Assault represents the unit's value when it is engaged in an Assault.
The unit's verso – with a light coloured strip – represents the diminished unit.
Exception: Artillery units, detachments and certain small units have no diminished side (see 3.5).
2.2 - Markers
They represent various information and elements necessary to play the game.
3 - Important Notions
3.1 - Facing
Units necessarily face the direction of a vertex of a hex. Each unit possesses a front formed by the two hexes facing it and a flank formed by the four other hexes.
Movement, assaults and fire occur by way of the unit's front.
Exception: Limbered-up artillery units and units in rout have 6 flank hexes when they suffer an attack.
3.2 - Zone of Control
The Zone of Control (ZoC) encompasses the 6 hex. surrounding a combat unit.
Exception 1: Unlimbered (ready to fire) artillery units only exert a ZoC on their frontal hexes.
Exception 2: Limbered-up artillery units have no ZoC.
Exception 3: A unit exerts no ZoC on a hex that it cannot enter.
A unit must stop when it enters an enemy ZoC.
A unit may not pass directly from an enemy ZoC to another enemy ZoC, except after an assault.
A friendly unit or a friendly ZoC does not cancel out an enemy ZoC.
3.3 - Fire Zone
The Fire Zone (FZ) is the totality of hexes a unit may reach with its fire. It is calculated from the unit's front (which counts as the first hex) to the maximum range of this unit by forming a cone.
Depending on the terrain and the situation, the FZ may be restricted (see 8.1 and 8.2).
3.4 - Contour Lines
The difficulty of the terrain is indicated by the number of contour lines present in the hex. Whether ascending or descending, the more difficult the terrain, the more difficult it is for a unit to maintain its formation while moving.
Movement: The cost to enter a hex reflects the number of different contour lines represented in the hex (see 9.1).
Fire/Assault: The defender is considered to benefit from a superior height if the highest level of his hex is strictly higher than the highest level of the attacker's hex.
3.5 - Unit's Status
A - A unit may be in good order, disorganised or in rout. Disorganisation and rout are indicated respectively by a "d" or "D" marker placed on the unit.
B - A unit may be at full strength, diminished, or eliminated. A diminished unit is indicated by turning the unit over to its diminished side. An eliminated unit is removed from the game.
Exception: An artillery unit doesn't have full strength and diminished sides but rather an unlimbered (ready to fire) side [en batterie in the French version] and a limbered up side [attelée in French]. On the first side, it may fire without moving; on the second, it must move in order to fire (see 9.2).
Note: Detachments, artillery units and some small units – that have no diminished side – are considered diminished units for Fire/Assaults.
3.6 - Test
Players may be required to test the quality of a unit following combat or to attempt to reorganise under the form "Tn". This means that the player must roll a die, add the unit's current quality rating and get a total of at least n to pass the test.
Example: Following fire, a British unit must take a T5. Its current quality rating is 2; the player rolls a die and must get at least 3 (3+2=5) to pass the test.
3.7 - Fire/Assault Table
A single table is used to resolve fire and assaults. Determine a base column according to the value of the fire or assault. This column is shifted depending on the tactical situation to obtain the final column that determines the result of the fire or assault. In practice, mentally add up all the column shifts before applying them to the base column.
The final column of a fire/assault cannot exceed column 10 + even if the column shift is greater and the final column of a fire/assault less than column 0 is always ineffective, even though it occur.
4 - Sequence of Play
Each game is composed of a certain number of game turns, each composed of the following phases:
- Reinforcements Phase
- Activation Phase
- Activation 1
- Activation 2
- Activation 3
- Victory Points Verification Phase
5 - Reinforcements Phase
Each player with units that enter during a game turn places them on the edge of the map by their entry hex. These units may enter the map during their activation.
6 - Activation Phase
6.1 - Initiative
Place the three "Etat-Major" (General Staff) markers – St-Arnaud, Raglan, Menchikov – in an opaque container. One player draws a marker at random. All the units of this nation may act during the first activation segment. Do the same for the second and then the third marker. When the last nation has acted, the activation phase is over.
The Turkish division acts at the same time as the French units.
6.2 - Activation
During his activation, a player can have his units act. The Allied player has two activations - one for each nation - as opposed to just one activation for the Russian player.
The player chooses in which order he moves his units and which action they take. The units act one by one, even if they are stacked with other units.
Exception: Fire from the same hex (see 8.3) and combined assaults (see 11.1).
An activated unit may carry out one of the following actions:
- Movement and/or Fire and/or Assault
- Reorganisation
When the player has finished the actions with all the units he wished to have act, the activation is over.
7 - Victory Points Verification Phase
During the game set-up, the Victory Points (PV/VP) marker is placed on square "4" of the management table.
At the end of each turn, adjust the victory points (VP) obtained by the Allied player by moving the "VP" marker.
Engagement of units:
- -1 VP for the engagement of certain Allied divisions (see 12.1).
Loss of units:
- +1 VP each time two Russian cavalry and/or artillery units are eliminated. The elimination of two units may occur over several turns.
- -1 VP each time a quality 3 Allied unit (except for detachments) is eliminated.
The "VP" marker may never go below 0. If this happens, the Allied player automatically loses the game.
If the marker must exceed square "9", the marker is turned over to its "VP +10" side.
If the scenario is not finished at the end of this phase, a new turn begins. The "Turn" marker is moved ahead one square on the management table.
During the victory points verification phase of the last turn, count additional VP for the objectives:
- +1 VP or +2 VP when an allied player effectively occupies victory hexes with an infantry or cavalry unit.
At the end of the game, determine the winner according to the Allied player's VP:
- 6 VP or less: major Russian victory;
- 7-8 VP: tactical Russian victory;
- 9-10 VP: tie;
- 11-12 VP: allied tactical victory;
- 13 VP or more: major Allied victory.
8 - Fire
A unit that decides to fire may do so against any unit or stack of units in its Fire Zone (FZ) if the target is eligible. Defensive fire is also possible (see 9.8).
8.1 - Shooter/Target
A unit may change facing before firing if it is not in an enemy unit's front other than its target but the artillery (only) suffers a column shift.
An artillery unit may only fire on the closest enemy target (player's choice in the case of a tie) even if the target is not initially in its FZ, unless the closest enemy target is in contact with a unit friendly to the shooter.
Following movement, if it has at least 1 MP left, a unit may fire with a column shift.
8.2 - Obstacle
To fire, a unit must have no obstacle between itself and its target; an obstacle is a hex in the FZ containing a level higher than both that of the shooter and the target.
Note: the edge of the hex blocks the FZ.
Always use the highest terrain present in each hex.
Artillery fire is prohibited if the target is higher than the shooter by at least 3 levels.
8.3 - Fire Resolution
The shooter designates an eligible target.
Use the fire value of the unit that shoots to obtain the base column. Two units in the same hex must add their fire values if they fire at the same target; this is the only case where the two units are activated at the same time.
Column shifts – for each unit – are cumulative:
- Artillery fire beyond 2 hex.: -1 col
- Artillery fire after a change in facing: -1 col
- Fire toward a redoubt hex: -1 col
- Fire toward a superior height: -1 col
- Fire by a disorganised unit: -1 col
- Fire after movement: -1 col
- Fire with a unit in good order with a better armament: +1 col
Then, roll a die on the Fire/Assault table and apply the result.
Fire example:
British activation. BUL advances one hex spending 2 MP and announces that it is spending its last MP to fire at VLA. The Russian carries out his defensive fire before the resolution of the British fire; VLA may fire as well as ART2 and ART3 since BUL moved by spending MP in the fire zone of each of these three units. Add the fire values (2+2+3) and divide by 2, round the result down for the Russians. The final column is 3. There is no column shift for defensive fire. The Russian die is a 5, so T6; the British die is a 3 or a failure. (3+2 is less than 6) and BUL becomes disorganised. Place a marker on top.
The British player fires with BUL, the base column is 4, the shifts are as follows: -1 for height, -1 for disorganisation, -1 for fire after movement. The final column is 1. The British die is 3 which has no effect.
Note that if BUL had not been disorganised, the column shifts would have been -1 for height, -1 for fire after movement, +1 for the best armament, for a final column of 3, which would have given a T5 for VLA with the same roll.
COD, observing that VLA was not disorganised by BUL's fire, decides to fire rather than engage in an assault.
There is no defensive fire since COD doesn't move.
The base column is 4. The column shifts are as follows: +1 for the best armament, for a final column of 5-6. The British die is a 5 = T6. The Russian die is a 4, thus a failure (4+1 is less than 6) VLA becomes disorganised.
During the next Russian activation, VLA can choose to retreat, to fire or to reorganise by passing a T5. But it is unlikely that he will attempt an assault alone since he is already disorganised.
8.4 - Result of Fire
The Fire/Assault table gives the result of the fire:
- –: no effect.
- Tn: All the targeted units take a test.
A unit that fails a test after fire may become disorganised, retreat one hex or leave in rout depending on its state (see Disorganisation/Rout Table.)
9 - Movement
Units move by spending their movements points (MP) when they enter a hex.
9.1 - Movement Cost
Entering a hex containing at most one contour line costs 1 MP.
Entering a hex containing n contour lines costs n MP.
There is no difference between ascending and descending.
Crossing the Alma (i.e. entering a hex containing the river) without a bridge/ford or entering an orchard or village costs 1 additional MP – these three cases are not cumulative amongst themselves.
There is no cost to change facing.
Fire after movement costs 1 MP.
Carrying out an assault after movement costs 2 MP (see 11.1).
Detaching a unit costs 1 MP.
Sea hexes are prohibited.
See the movement example on the following page.
Movement example: Movements in red are hypothetical.
- VIN cannot go to ESP's hex as long as ESP is there because it would exceed the stacking limit at the end of its movement.
- ESP cannot move for 4 MP as long as BOR is present because it is prohibited to go directly from one enemy ZoC to another.
- The following turn, if VIN manages to make BOR retreat after an assault, ESP could move there immediately.
- ART 1 may move to hexes containing 3 contour lines because it takes a path. The first MP spent corresponds to becoming limbered.
Artillery units cannot enter a hex containing more than two contour lines without following a path.
9.2 - Deployment of Artillery
An artillery unit is deployed when it is on its Unlimbered side. Going from Unlimbered to Limbered and vice versa costs 1 MP.
9.3 - Stacking
Units may be stacked together under certain conditions:
- A hex may contain a combat unit of any type, plus an artillery unit, plus a small unit – star to the right of the quality rating.
- A hex may not contain units of different nationalities.
Stacked combat units always adopt the same facing. The arriving unit must adopt the facing of the unit that is already present.
Exception: An artillery unit may adopt a different facing from the other units already present.
During its movement, a unit may exceed the stacking limit of a hex as long as it does not stop in this hex.
Example: An infantry unit may be stacked with an artillery unit, or two artillery units, or two small units and one artillery unit.
9.4 - Changing Facing
A unit may change facing during its activation. An unlimbered artillery unit may change facing before fire.
A unit, or stack of units, may also change facing by one or two vertexes during an adverse movement or following an advance after an adverse assault in order to have the arriving enemy unit at its front – if the enemy unit arrived at its flank – and on condition that it is not already in an enemy unit's front.
Change in facing alone does not provoke defensive fire (see 9.8).
9.5 - Detachment
Players may create up to two infantry detachments for each nationality – except for the Turk – at any point in the movement. The detachment costs 1 MP. The unit in question must be at full strength. The unit is then turned to its diminished side and a detachment is placed on top.
The unit may continue its movement if it still has MP but the detachment remains in place. It may move during the following turn.
If the unit is disorganised, the detachment is as well.
British and French detachments maintain the same quality as their parent unit.
Once detached, a detachment cannot be reattached.
Note: Since the British 4th division doesn't have the best armament, note, if necessary, that the created detachment will not benefit from the better armament despite the presence of a star.
9.6 - Entry of Russian Reinforcements
Russian reinforcements enter in a marching column. Also, each time a Russian unit enters by a hex that has already been used by one or more units before it, the entry hex costs +1 MP for each unit that has already entered.
Example: The Russian player must have three units enter by hex C; the first spends 1 MP to enter and then the rest of its MP, the second spends 2 MP to enter and then the rest of its MP, and the third spends 3 MP to enter and then the rest of its MP.
9.7 - Exit of the Russian Units
The Russian player may voluntarily exit his units during his activation. They are not considered eliminated but cannot return to the game.
9.8 - Defensive Fire
A unit eligible to suffer fire that moves to the FZ of one or more enemy units automatically suffers defensive fire. The defensive fire is resolved at the end of the unit's movement, after a possible declaration of offensive fire or assault but before the resolution of this fire or this assault.
Add the fire values of all the units carrying out the defensive fire and divide the total by 2, rounded up for the Allies and down for the Russians.
Defensive fire is resolved like fire without any column shift.
A unit may engage in as many defensive fires during an enemy activation as there are eligible units that move into its FZ.
Exception: A target is not eligible for defensive fire if it does not move before fire or an assault, or if it only changes facing.
Limbered-up artillery and units in rout may not carry out defensive fire.
A unit may not change facing to engage in defensive fire.
There is no defensive fire against units that advance, retreat or rout after an assault.
10 - Reorganisation
Disorganised units (d) may carry out a reorganisation action and their routed units (D) must carry out a reorganisation action.
A unit that is disorganised or in rout and reorganises loses a level of disorganisation: remove the "d" marker or turn the "D" marker over to the "d" side.
A unit must pass a T5 to reorganise if it is in contact with an enemy unit.
In the case of failure, a unit in rout must carry out a rout movement of 2 hex. if it is 3 hex. or fewer from an enemy unit by moving away from the greatest number of enemy units.
11 - Assault
A unit may launch an assault against the enemy units located in its frontal hexes.
11.1 - Engagement
A unit may engage in an assault directly or carry out movement followed by an assault for 2 MP and a column shift.
However, a unit may not engage an assault and follow it with movement – other than an advance after an assault.
Several units located in the same hex or in different hexes may engage together in a combined assault against the same hex.
On the first unit(s) activated, place an "Assault" marker while waiting for the activation of the other units the player wishes to engage in the combined assault. The "Assault" marker(s) are removed when the assault is resolved.
Each unit may only participate in one assault per activation.
An artillery unit may never participate in an assault in attack. It only suffers the consequences in the case of retreat of its stack.
A unit in rout may not launch an assault but can suffer one.
11.2 - Russian Limitation
When the Russian player engages in the first assault of his activation, he rolls a die to determine how many assaults he may carry out during this Phase.
| Die | Assaults |
|---|---|
| 1-2 | 2 |
| 3-5 | 4 |
| 6 | 6 |
This is calculated for each unit that engages an assault. An "Assault" marker is placed on the management table to record the number of assaults authorised.
11.3 - Procedure
The assault is resolved according to the following procedure:
- The attacker reminds which unit(s) combat.
- The defender resolves his combat indicating against which hex(es) he is defending.
- The attacker resolves his combat.
- Determine the victor of the assault.
Reminder: Combats always take place at the front of the units.
11.4 - Retreat Before Assault
A cavalry or tirailleur (shooting skirmishers) unit [Russian 6R and MAR] – even disorganised – may refuse the assault by retreating one or two hexes, except when facing the cavalry. The assailant must occupy the hex if it is empty with one of the assailing units.
11.5 - Resolution
To resolve his combat, the player adds up the assault values of his units; he determines the base column then the column shifts of his units; he rolls a die on the Fire/Assault table and applies the result immediately.
If the defender is attacked by his two frontal hexes, he may either attack one or two hexes, with a column shift in the latter case.
Once engaged, an assault must be resolved completely.
The column shifts of the combatting units are cumulative but the same column shift only counts once per hex.
Exception: Unlimbered artillery counts for each unlimbered artillery unit present.
- Disorganised unit: -1 col (ATT/DEF)
- Attack against a superior height: -1 col (ATT)
- Attack against a redoubt: -1 col (ATT)
- Flank attack: +1 col (ATT)
- Non-attacked enemy presenting its front to the attacker: -1 col (ATT)
- Assault preceded by movement: -1 col (ATT)
- Unlimbered artillery: +1 col (DEF)
- Line unit attacked only by the front: +1 col (DEF; British infantry or any cavalry only)
- Attack of both front hexes at once: -1 col (DEF)
11.6 - Combat Result
The Fire/Assault Table gives the combat result which is applied immediately.
- –: no effect.
- Tn: All the engaged enemy units take a test.
A unit that fails a test after an assault may become disorganised, retreat one hex, or leave in rout, be diminished or eliminated depending on its state (see the Disorganisation/Rout Table).
11.7 - Victor
After the attacker has engaged his combat, determine the victor of the assault. Three cases are possible:
- A- There remains at least one unit in good order for the attacker AND the defender: all the units remain in place.
- B- There remains at least one unit in good order for the attacker or for the defender: the player with no unit in good order retreats. The attacker advances.
- C- NEITHER the attacker, NOR the defender has a unit in good order remaining: the attacker decides to remain in place or to retreat. Then the defender decides to remain in place or retreat. No advance is possible.
Note: The artillery does not count in the determination of the victor unless there is only artillery in the hex.
11.8 - Retreat
In the case of retreat following an assault, the defender retreats two hexes and the attacker retreats one hex.
A unit must retreat by moving away from the greatest number of units that participated in the assault, owner's choice in the case of a tie.
In the case of a retreat movement, it cannot change facing.
In the case of a retreat movement in the front of an enemy unit without the presence of a friendly unit, the unit must take a T5 like it would after an assault and it suffers any consequences.
If a unit retreats to a hex and exceeds the stacking limit, it continues its retreat until it arrives in a hex where this is not the case.
If a unit cannot retreat, it is diminished (or eliminated) and becomes routed while remaining in place.
If a stack containing an unlimbered artillery unit must retreat:
- if an artillery unit is in good order, it moves to a limbered formation if it wasn't already, retreats and becomes disorganised.
- if the artillery unit is disorganised, it must take a T5. If it fails, it is eliminated. If it passes, it moves to a limbered formation if it wasn't already and retreats.
A unit that exits the map following a retreat (or a rout) is eliminated.
11.9 - Advance
Following a retreat, the attacker (only) must advance with a unit engaged in the assault and occupy the vacant hex, with the possibility of changing facing by one vertex.
11.10 - Rout
A diminished unit that fails a test after fire or assault may leave in rout (see the Disorganisation/Rout table).
A "D" marker is placed on the unit that carries out a rout movement of 2 hex. moving away from the greatest number of enemy units.
The rules of retreat apply to the rout movement.
If the rout follows on from an assault, the victor may advance one hex according to 11.9.
See assault example on the following page.
Assault example: French activation.
BOU advances one hex for 1PM. BOR cannot change facing since it is already in an enemy unit's front. With an additional 2PM BOU decides to carry out an assault. Place an Assault marker on top.
BOU suffers BIA's defensive fire only because BOU is not in BOR's fire zone. 1 divided by 2 rounded down gives the final column 0. The Russian die gives 3, with no effect.
AUT decides to participate in the assault. There is no defensive fire because it doesn't move.
It's BOR's turn to resolve its combat. It can only combat against AUT since BOU is not in its front. The base column is 4. There is no column shift, so the final column is 4. The Russian die is a 4 = T5. The French die is a 1 thus a failure (1+3 is less than 5) AUT becomes disorganised.
An assault that is engaged must proceed. It's the French player's turn to combat. The base column is 5-6 (3+3). The column shifts are as follows: for AUT's hex, -1 for height and -1 for disorganisation. For BOU's hex, -1 for the non-attacked unit presenting its front (BIA) -1 for the assault preceded by movement and +1 for the flank attack. The final column is 2. The French die gives 4 = T5. The Russian die gives 2 which is a failure. BOR is disorganised.
Then determine the victor of the assault. Since there remains one unit in good order on the French side and none on the Russian, the French player wins. BOR must retreat 2 hex. and the Allied player must advance an engaged unit. BOU changes facing to face BIA.
12 - The Battle of the Alma
12.1 - Set-Up
Place the "Tour" (Turn) marker on square 1 of the management table and the VP ("PV") marker on square 4.
12.1.1 - The Russians
With the exception of stacked units according to 9.5, and the artillery, no Russian unit may be adjacent to another.
- The 16th Div (4 x infantries and 3 x artilleries) at a distance of 2 hex. or fewer from hex marker "16".
- The 17th division (3 x infantries and 2 x artilleries) as well as the 2 x artilleries from the 14th and the 2 x infantries from the 13th at a distance of 2 hex. or fewer from hex marker "17".
- The detachment Det. M in the hex marked "M".
- The two units of tirailleurs (6R and Mar), in any orchard or village hex east of Bourliouk.
Note 1: the deployment of the other Russian tirailleurs/chasseurs is simulated by the +1MP to penetrate the orchard or village zones.
Note 2: The Russian artillery begins unlimbered.
Reinforcements
- Turn 1:
- By route A, the 2 x Cossack regiments of the Don (57D and 60D)
- By routes B and C, the 3 x reserve artillery, 2 x cavalries of the 6th, 2 x infantries of the 14th.
12.1.2 - The British
Entering by their entry zone.
- Turn 1:
- Division L; Division 2
- Division 1 and Division 3, but with only one MP available for use this turn.
- Turn 3:
- Division C and Division 4
Note 1: Engaging Division C or Division 4 (i.e. at least one unit of this division crosses the Alma) costs -1VP for each division engaged.
Note 2: the British artillery begins limbered.
12.1.3 - The French
Entering by their entry zone.
- Tour 1:
- Division 2
- Division 1 and Division 3, but with only 2 MP available for use this turn.
- Tour 2:
- Turkish Division.
- Tour 3:
- Division 4 and reserve artillery units.
Note 1: Engaging the Turkish division or Division 4 – but not the artillery reserve (i.e. at least one unit of this division crosses the Alma) costs -1VP per engaged division.
Note 2: the French artillery begins limbered.
12.2 - Specific Rules
A- The scenario begins on turn 1 and ends on turn 9.
B- The Russian units may not go beyond the Alma, only cross it (see 9.1).
Exception: The two units of Russian tirailleurs (6R and MAR) can advance one hex beyond the Alma.
C- On the first turn, the Russian player may only move his reinforcements or fire with his artillery.
D- Units of division 16 may only move more than 2 hex. from hex marker "16" if the British have crossed the Alma.
E- Units of Division 17 (and the associated units) may not move more than 2 hexes from hex marker "17" unless the French have crossed the Alma.
F- The other Russian units (including the reinforcements after the first turn) may only move if allied units have crossed the Alma or have attacked them.
G- Once per game turn, the Allied player may use the naval support of the "Allied Fleet".
Flotte alliée naval support icon: This naval support allows for either a +2 col shift for an allied attack or a -1 col shift against a Russian attack provided that the combat takes place in the 3 hexes along the coast.
12.3 - Optional Rules Benefitting the Russian Player
- Russian placement: The Russian units may position themselves up to 4 hex. from the set up hex without crossing the Alma, nevertheless.
- Russian reinforcements: The Russian units that enter by routes B and C may also use routes D, E or F.
Designer's Notes
After having simulated the battle of Inkerman (5 November 1854) for the publication of a large-scale game for VaeVictis, the idea to simulate another battle of the Crimean War (1853-1856) was a natural one. Aside from the long siege of Sevastopol which would be difficult to realise, or the Crimean campaign itself which wouldn't be much fun, three other battles took place during the war: the battle of the Alma on 20 September 1854; the small battle of Balaclava, with the famous charge by the light brigade, on 25 October of the same year; and the battle of the Chernaya on 16 August 1855.
I chose the battle of the Alma for reasons of historical interest as well as order of battle and size of terrain. It is the first land engagement of this war. The battle is famous for the comportment of the troops, including the zouaves and other African units, and despite the allies' final victory, there was nothing easy about this battle for them.
The battle objective is fairly simple - the Anglo-French-Turkish armies must open the road to Sevastopol, defended by the Russians from heights that are difficult to access.
The order of battle doesn't pose any major problems. The historical maps are fairly precise, but the adaptation to the Inkerman system is tricky.
In fact, the format of the large-scale Vae-victis games is different from the insert games. The aim was not to preserve the same scale for the map or the combat units and so we must move from a battalion to a regiment all the while maintaining the bases of the game system.
The Inkerman game system is based on the random alternation of activations of troops on a single table for fire and assault, on a system of quality tests to manage the playing out of the combats, and on a fairly subtle management of losses, fatigue and disorganisation of troops. Here it is not possible to keep everything, especially since Alma needs to be both faster and simpler to implement.
The single table for fire and assault is preserved almost exactly. The values of the units are just adapted to the change in scale. The quality test system is basically the same.
On the other hand, the notions of losses and fatigue are grouped to keep only the notion of a unit at full strength or diminished, coupled with a new disorganisation and rout table that tracks simply the change in the state of the troops.
Therefore, there is a lot less micro-management; the game is lighter and the players can concentrate on the progression of the battle and the tactical choices. In general, there are fewer small details of simulation that one accepts in a battle at the scale of the battalion, but that become less pertinent on a greater scale.
Conducting the battle becomes fairly simple - players draw at random the camp that will act - Russian, British or French - and the player makes his troops act according to the historical constraints.
The employment of troops is more flexible since one may choose to move, reorganise, fire or mount an assault, or to combine some of these actions. Players have fewer units to act with but more possibilities and choices with a game system that is faster once they have mastered the rules.
The idea that directed the development of the game was to propose a short game - two hours are enough in general - that best simulates the specificities of this battle in a transitional period in the art of war - from the Napoleonic era to the industrial age.
Reference Tables
Fire/Assault Table
| Die | 0 | 1 | 2 | 3 | 4 | 5-6 | 7-9 | 10+ |
|---|---|---|---|---|---|---|---|---|
| 1 | T5 | T5 | ||||||
| 2 | T5 | T5 | T5 | T5 | ||||
| 3 | T5 |
The printed heading of this table reads "FIRE/ASSAULT TABLE DE"; the stray "DE" has been dropped.
Fire (by unit)
- Artillery fire beyond 2 hex.: -1 col
- Artillery fire after a change in facing: -1 col
- Fire toward a redoubt hex: -1 col
- Fire toward a superior height: -1 col
- Fire by a disorganised unit: -1 col
- Fire after movement: -1 col
- Fire with a unit in good order with a better armament: +1 col
Assault (by unit and by hex)
- Disorganised unit: -1 col (ATT/DEF)
- Attack against a superior height: -1 col (ATT)
- Attack against a redoubt: -1 col (ATT)
- Flank attack: +1 col (ATT)
- Non-attacked enemy presenting its front to the attacker: -1 col (ATT)
- Assault preceded by movement: -1 col (ATT)
- Unlimbered artillery: +1 col (DEF)
- Line unit attacked only by the front: +1 col (DEF; British infantry or any cavalry only)
- Attack of both front hexes at once: -1 col (DEF)
Disorganisation/Rout Table
| Unit state | FIRE – failed test Tn | ASSAULT – failed test Tn |
|---|---|---|
| Full unit | Disorganised | Disorganised + possible retreat |
| Disorganised full unit | Retreat movement 1 hex. | Reduced + possible retreat |
| Reduced unit | Disorganised | Disorganised |
| Disorganised reduced unit | Rout | Rout |
| Routed reduced unit | Rout movement 2 hex. | Eliminated |
Russian Limitation
| Die | Assaults |
|---|---|
| 1-2 | 2 |
| 3-5 | 4 |
| 6 | 6 |