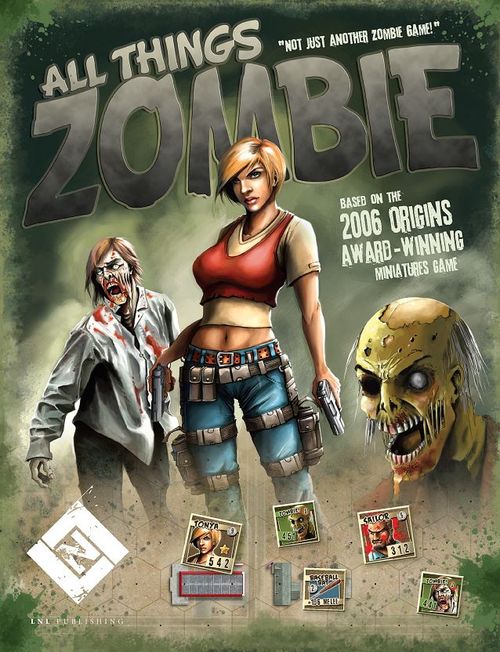
All Things Zombie: The Boardgame
All Things Zombie: The Boardgame Rulebook
Table of Contents
Table of Contents
2.0 Getting Started
Don't sweat memorizing anything. Skim through the basic rules, and then turn to the scenario "For a Few Bullets More." Set up the boards, punch out the counters, and start rolling dice. However, before we toss the bones, let's introduce the characters, game terms, and describe how to play.
3.0 The Inhabitants of Tomorrow
Yep, there are rats, dogs, and other four-legged beasts in our post-plague world, but the two creatures that concern you the most are survivors and zombies. Here's their story.
3.1 Survivors
Survivors are those not yet infected. Each survivor counter has a picture of the survivor in the center and their name on the top. The number in the silver coin is the Glory Point cost of the survivor in a Skirmish Game (14.0).
On the bottom of all survivor counters, from left to right, are numbers detailing the following information.
- Reputation – Often referred to as a survivor's Rep, this is a number that is an expression of a character's overall fighting quality, reflecting his or her training, experience, morale, and motivation. The higher the better.
- Movement Points – A measure of how fast and far the character can move.
- Melee Dice – The number of six-sided dice the character will roll in melee.
Each survivor counter has two sides. The numbers on the front of the counter represent the unwounded survivor. This man or woman is good-to-go and ready to fight. The back of the counter represents a wounded survivor. You'll notice that the survivor is less capable (their statistics/numbers are lower) and there's blood, a lot of it.
3.1.1 Stars and Grunts
Survivors come in two basic flavors…just kidding, survivors all taste the same to zombies. Seriously, survivors are divided into two groups, Stars and Grunts.
Stars are the big shots, the stars of the game, serious veterans of the zombie wars who stay calm and cool, even when surrounded by a roomful of zombies. Stars are usually Rep 5, and designated by a golden star on their counter.
Grunts are all the other survivors and are required to take all reaction tests, and—to be quite frank—die a lot.
- Stars aren't required to take Received Fire, Being Charged, or Wanting to Charge reaction tests (9.0).
- Grunts that begin the current turn adjacent to (in an adjacent hex) Stars that are eligible to take an impulse in the current activation, can also take an impulse (5.2). This counts as their only impulse in the activation. In other words grunts cannot activate just because they are adjacent to a Star and then activate again because their Rep is greater than the initiative roll.
For example, Beck is adjacent to Tonya, The survivors' initiative die roll is 5. Normally, Beck (Rep 4) would not be able to activate, but because she is in a hex adjacent to Tonya, she is eligible to activate.
3.1.2 Survivor Status Card
Each survivor has a corresponding status card. You'll use this card to track the survivor's wounds, the weapons he or she is carrying, and any additional gear stowed in their pockets, pants, pack, etc. Additionally, the card will list the survivor's additional skill, if they have one.
Survivors start each scenario with the wound marker on zero (0), their chosen weapon in the In Hand box, and any other gear in the appropriate boxes. Survivors cannot carry more gear than there are boxes for, and they cannot possess more than two weapons. For each wound a survivor takes (it's gonna happen, believe us), the wound counter is moved one space to the right. When the counter lands on the Flip space, the survivor's counter is flipped to its wounded side, which is signified by the changed statistics and blood. When the wound counter is moved onto the death-head skull, the survivor is dead and removed from the board.
The Rep box holds counters that alter the survivor's Rep, such as drugs. The blank boxes to the right of the skull and crossed bones are there to allow gamers to alter cards (i.e. increase a survivor's health) as they see fit.
3.2 Zombies
Each zombie counter has a picture of a zombie in the center. Makes sense, doesn't it? The three numbers at the bottom of the zombie counter represent the same things as their counterparts—the survivors. From left to right: Reputation, Movement Points, Melee Dice. Zombies don't carry weapons, and we're lucky they don't!
The number in the top right of a zombie counter determines in which direction the zombie is placed when randomly generated. More on that later.
Zombie facts:
- Zombies have a Reputation of 4.
- Zombies are unfeeling, uncaring, and have a one-track mind—or would if they had minds! Therefore, zombies never take Reaction Tests.
- Zombies can only cause damage through melee combat.
- Zombies use the Movement Points printed on the counter. Some are slow, some medium, and some fast.
Ed Sez: Don't let the Zombies fool you. Many of them are slow, but it only takes a couple of bad Activation rolls to have them on you like white on rice. What may seem to be a good spot can turn south real fast or quickly, depending on your grammatical preference.
3.3 Stacking
An unlimited number of zombies can stack in a hex. No more than one survivor can be in a hex (Exception, The Professor and the zombie he cures), but survivors can move through a hex that contains a survivor. Moving is the only action a survivor can perform while in the hex with another survivor (Exception, The Professor and the zombie he cures).
4.0 Other Markers
Myriad other counters are used to mark status, such as Out of Ammo (OOA), Searched, Entered, Shot, Weapons, Gear, and others.
4.1 Weapons
Hey, everybody loves killing zombies. It's why we play the game, right? And the best way to kill zombies is with weapons. Weapon counters sport a picture of the weapon they portray along with two numbers on the bottom. The left number is the weapon's range in hexes, and the number to the right of the dash is the number of Fire Dice the weapon uses when attacking. When determining range count the target's hex, but not the firer's. The reverse side of the weapon has the weapon silhouette stamped with OOA – out of ammunition . . . not good news for the survivor. More on weapons in section 8.1.2.
4.2 Shot Counter
Each shot counter is double sided with a number from 1 to 6 on it. These counters are used as follows:
- Whenever a survivor fires a weapon (Exception: the crossbow), place a shot counter with the number of fire dice used under the survivor's marker.
- Whenever a survivor uses a grenade, place a 1-shot counter in the grenade-impact hex. That's right, just one. Grenades explode with a quick, flat crack that is unlikely to attract zombies.
- When the survivor moves away, the shot counter remains in place. Shooting generates zombies and the shot counters are used to track this.
For example, Tonya fires three fire dice (3d6) at a zombie. Place a 3-shot counter under her counter. When she moves away, the shot counter will remain in the hex.
- Shots fired might generate zombies at the end of the turn. How many depends on the number of shots fired and the survivor's luck (see 11.0).
4.3 Searched Marker
Place a Searched marker on a building that has been searched. The building cannot be searched again during that scenario, nor will entering the building generate any additional zombies. It's a mixed blessing.
4.4 Entered Marker
Place an Entered marker on a building after it has been entered and zombies have been generated (Exception: also place an Entered marker on a building after Too Tall uses her skill to determine how many zombies are in a building.). Survivors do not chose a zombie card when entering a building marked with either an Entered or Searched marker. Buildings that are marked with an entered marker can still be searched for loot (see 10.3).
4.4 Scopes
Scopes are gear that may be attached to any weapon (including the crossbow) except the shotgun. To attach the scope place it with the weapon. Once attached to a weapon, it cannot be removed during a scenario. Scoped weapons roll an additional 1d6 when conducting ranged combat, but do NOT place an additional shot marker.
For example, a scoped pistol rolls 2d6 when firing, but only places a shot one marker. A weapon cannot receive both the scope and Panic Fire (8.1.8) bonus.
4.5 Drugs
Drugs are gear. Using drugs does not constitute an action. To use the drug place it in the survivor's Rep box after making the initiative die roll (5.2). The survivor's initiative is increased by one for the entire turn. Remove the drugs at the end of the turn.
For example, Beck has some drugs. The initiative roll is 5, a result that would normally prevent her from taking an impulse. She uses the drug by moving it to her Rep and activates.
4.6 Medkit
The Medkit is a piece of gear. Using the Medkit constitutes an action. The Medkit can either be used by the survivor carrying it, or an adjacent survivor. The Medkit removes one wound from the target survivor.
4.7 Vest
The vest is a piece of gear. If the survivor has the vest in a gear box, he is considered to be wearing it. Survivors wearing a vest roll an extra d6 in melee. They also receive advantages as described in the Ranged Combat Table.
5.0 Playing the Game
Okay, enough reading. Let's play the game. First, select a scenario or generate a skirmish game (14.0). Place the game boards that you'll be using on your game table. Pull the survivors and zombie counters out of the box, or punch them out of the sheet if you haven't already done so, and place them as indicated in the scenario. Place all the remaining zombies in an opaque container, such as a large-mouthed coffee cup. We call this the Cup of Zombies, or COZ.
5.1 Sequence of Play
Follow this sequence during each turn.
- Generate Zombies: Only done at the beginning of skirmish scenarios and as directed in scenario setup instructions, and only before the first turn.
- Roll 1d6 for the zombies' initiative, and another for the survivors'.
- Zombies and survivors move and fight according to the rules of the game.
- Roll to see if shots fired generate additional zombies.
5.2 How to Play
Playing All Things Zombie is really quite simple. Each turn has four phases.
- Initiative Phase: Players roll two d6 of different colors. One is for the zombies' initiative and the other is for the survivors'.
- The side with the highest initiative die roll goes first. If the dice are the same (in other words, if the player rolls a red one and a white one), reroll. Otherwise all the survivors (or zombies) with a Rep equal to or higher than the initiative die roll can conduct an impulse.
For example, the survivor die roll is 4 and the zombie die roll is 3. The survivors activate first, and any survivor with a Rep of 4 or more can take an impulse. After the survivors finish all zombies can take an impulse (all zombies have a rep of 4, which is greater than 3).
Another example, the survivors roll 4, and the zombies roll 5. Although the zombies have the higher initiative roll, none activate because all zombies' Reps are 4 (lower than 5). So, any survivor with a Rep of 4 or more can take an impulse.
- During his or her impulse, a survivor can move and conduct one action; at the conclusion of his or her movement, a survivor occupying a hex with zombies must melee the zombies.
- During their impulse, a zombie can move. After all zombies have moved, resolve all Reaction Tests prompted by charging zombies (zombies that will enter melee), and then conduct melee attacks in any hex that contains both survivors and zombies.
5.3 Using the Dice
You will use the six-sided dice (d6) in two ways. We've provided an example of each way they are used.
- Adding to Reputation – To do this add the score of each d6 to the Reputation of the character to generate a total score. You will use this method when shooting, or when checking to see if you surprise the zombies you just found in that burned-out gas station.
For example, Too Tall (Rep 4) is using a submachine gun and fires 3d6. She scores a two, three, and five. When added to her Rep of four she has scored a six, seven, and nine.
- Rolled versus Reputation – When doing this you roll 2d6 and compare each score individually against the character's Reputation. If the die score is equal to or less than the rolling character's Reputation, then you have scored a success. If the score is greater than the rolling character's Reputation, then it is a failure.
For example, Tonya (Rep 4) rolls 2d6 in melee combat (8.3). She scores a four and a five. She has scored one success. The four is equal to her Rep so it is a success. The five is greater than her Rep so it is a failure.
You'll roll the die/dice in this manner when either attacking in melee (8.3) or taking a Reaction Test (9.0).
6.0 Moving
This is common-sense stuff here. Both zombies and survivors move hex to hex, paying the cost to enter each hex as defined in 6.1. You can't save Movement Points (MPs) from turn to turn, and you can't use more than you have.
6.1 Terrain
Each map represents a variety of terrain that the survivors and zombies trod upon. Note that each hex has a small black center-point dot. The terrain surrounding the center dot defines the terrain in the hex.
There are three types of hexes:
Clear. These are hexes with no appreciable terrain feature on the center point. Movement into a clear hex costs one MP.
Rough terrain. These are hexes with woods and crop hexes on the center dot. Rough terrain costs two MPs to enter. Rough terrain counts as cover for survivors versus ranged-weapon fire. Survivors and zombies must spend two MPs to enter a rough-terrain hex. Zombies will ONLY enter rough terrain to melee a survivor; otherwise they will take the shortest path, measured in movement points, around rough terrain to attack a survivor.
Building hex. These are hexes with a building on the center dot. Buildings cost two MPs to enter. Building hexes can be entered or exited from any hex side. Building hexes count as cover for survivors versus ranged-weapon fire. When survivors enter a building hex they must draw a Zombie Card to see if they have encountered other survivors or zombies, unless the building is marked with an Entered or Searched marker. Zombies will ONLY enter a building to melee a survivor; otherwise they will take the shortest path, measured in movement points, around the building to attack a survivor.
6.2 Fast Move
Survivors can attempt to move a bit more quickly than normal. You know, kind of like the way you would move if your life depended on it. Kind of like the way you would move if a horde of zombies were after you. To do so, announce your intention at the beginning of the survivor's action (before moving or firing) and roll 2d6. Every success (a result of their Rep or less) adds one MP to the survivor for the turn.
For example, Too Tall (Rep 4) has a couple of zombies hot on her heels. Feeling the need for speed she decides to attempt a Fast Move. She rolls 2d6 and gets a 5 and 3. It's one success, and thus she now has 5 MPs to spend.
There are some drawbacks to a Fast Move. First, fast-moving survivors are always surprised when they enter a building (10.1). Second, the attempt to fast move is considered an action, whether you are successful or not, so if you use Fast Move you cannot conduct another action; you can only Fast Move. Survivors can enter the board using Fast Move, but must still roll for the attempt as described above.
6.3 How Zombies Move
Zombies move toward the closest survivor. If two survivors are equally close (in terms of Movement Points the zombie would expend to reach the survivor's hex) to a zombie, randomly determine which one the zombie will move toward (roll a die, draw straws, flip your cat, whatever it takes). Zombies move in a straight line, but will not enter a building or rough hex unless their targeted survivor is in the hex. If a zombie bumps into a building or rough, just move him in the shortest path around it. If you need to randomly select a path, flip the cat.
7.0 Actions
Unless stated otherwise on the survivor's card, a survivor can take one action per impulse, in addition to moving. Allowable actions are:
- Firing a ranged weapon.
- Reloading a weapon.
- Using a piece of gear, as appropriate.
- Searching a building.
- Attempting to Fast Move.
- Attempting to Charge.
- Switching weapons.
- Give gear or weapon to adjacent survivor. Only allowed if neither survivor is in a zombie's or enemy survivor's hex.
An action can be taken at any point in the survivor's impulse.
For example, Beck moves one hex, conducts ranged fire, and then spends the remaining four Movement Points allotted on her counter.
8.0 Combat
There are two basic ways to inflict damage in ATZ. The first way is with ranged-weapon fire and the other is in melee, using either hands or melee weapons, such as a baseball bat—you've all seen the movies.
8.1 Ranged-Weapon Fire
A survivor can fire at anytime during his impulse and at other times that Reaction Tests dictate. To do so, he or she must meet three requirements:
- Must posses a weapon that has ammunition (not out of ammo).
- The target must be within range of the selected weapon.
- The target must be within line of sight (LOS) of the firing survivor.
If the requirements are met the survivor rolls a number of d6 equal to the weapon's Fire Dice, adds each die to his or her Rep, and consults the Ranged Combat Table (RCT). There are no modifiers; they are built into the table.
Each Fire Die has the potential to do damage to a target, and in most cases each die in excess of the first can be applied to additional targets. The number of Fire Dice also defines the spread of the weapon in hexes, or the number of hexes the weapon can simultaneously attack (the shotgun is an exception; all its fire dice must attack the same hex).
Three fire dice can attack three adjacent targets.
For example, a submachine gun with Fire Dice of 4 can fire at up to four adjacent targets, as it has a four-hex spread. Each Fire Die rolled is referred to as a shot. Note that each target must be adjacent to at least one other target.
Apply the higher dice on the first target and work your way down.
For example, Nick (Rep 5) fires his Submachine Gun at three targets that are adjacent and in range. The dice are rolled and come up four, three, six and five. The dice are arranged in order and each one is added to Nick's Rep of 5. This gives a total of nine, eight, eleven and ten. The eleven and ten cause a hit to the first two targets while the eight and nine is a miss due to the result of "third target counts Miss!"
8.1.2 Weapons
Weapons have three characteristics, and they are:
Name – What they are. There are several types of weapons used in ATZ. For example, pistols, submachine guns, shotguns and assault rifles.
Range – This is the distance that the weapon can fire in hexes and have a chance to score a hit on the target. Ranges are counted from the first hex adjacent to the shooter to, and including, the target hex and all those in between.
Fire Dice (d6) – Represent the number of d6 that are rolled when a character shoots his weapon.
8.1.3 Submachine Gun
When firing the submachine gun, the owner can chose to fire 2, 3, or 4 shots. Remember, roll one Fire Die for each shot.
8.1.4 Assault Rifle
When firing the assault rifle, the owner can chose to fire 1, 2, or 3 shots.
8.1.5 Shotguns
A shotgun's Fire Dice are handled differently from other weapons. Shotguns roll 6 Fire Dice and chose the best three. Shotguns generate 6 shots and count all the d6 rolled for the purpose of running out of ammo 8.1.7.
8.1.6 Grenades
Grenades can be thrown into an adjacent hex. Doing so counts as an action, just like firing any other weapon, but grenades do NOT need to be the in-hand weapon, they can be in pack. Roll once for each target (zombie or survivor) in the target hex. Each target counts as the first target.
For example, Jimmy (Rep 4) throws a grenade into a hex with three zombies. He rolls three Fire Dice and a three, four and four turn up. He kills two of the zombies.
8.1.7 Running Out of Ammo
Each weapon has an infinite supply of ammo. But the magazine might need changing, and often at the worst of times.
When firing your weapon, whenever you roll two or more 1's, it must be reloaded. Resolve the attack and then flip the weapon to its Out of Ammo (OOA) side. You must spend one action to reload.
For example, the lovely Tonya has run out of ammo and flips her submachine gun to its OOA side. On her next impulse she walks down the street reloading her submachine gun. She cannot fire during this impulse; she is using the action to reload. At the end of the impulse, she flips the submachine gun off its OOA side on her Survivor Status Card.
8.1.7.1 Ammo Counter
If the survivor has an Ammo counter on his or her Survivor Status Card, they can discard the Ammo counter when they run out of ammunition; this automatically reloads their gun. This is immediate, and doesn't count as an action. Pretty neat, huh?
8.1.8 Panic Fire
A survivor can panic fire whenever he or she is eligible to fire. The survivor simply rolls an additional 1d6. After panic firing, a weapon is automatically out of ammo.
For example, Sailor wants to panic fire his pistol at a pair of zombies that are two hexes distant. He would normally roll 1d6 when firing the pistol, but adds 1d6 when panic firing, for a total of 2d6. He resolves the attack and flips the pistol to its OOA side. By the way, if Sailor has an Ammo counter on his Survivor Status Card he can discard it in lieu of flipping the pistol to its OOA side.
8.1.9 Multiple Weapons
Yes, it is possible for a character to have more than one weapon. Place the counter representing the spare weapon on the "in pack" space under weapons on the survivor status card. With the exception of grenades (8.1.6) only the "in hand" weapon can be fired.
8.1.10 Switching Weapons
You can switch weapons anytime during your impulse. Switching a weapon from in pack to in hand is considered an action. Doing so automatically switches the in hand weapon to in pack.
8.2 Line of Sight (LOS)
To shoot a target you need to see the target. A Line of Sight (LOS) is simply a way to determine if the shooter can see the target.
A shooter can always fire from one hex into an adjacent hex regardless of what type of terrain either hex may be.
For example, Bank fires his pistol from a building hex into an adjacent wooded hex.
Any other shooting must be done through clear hexes regardless of the hex type the target is in.
For example, Buffy fires his pistol from a building hex and through two clear hexes at a zombie in a wooded hex.
Any rough hex—woods, cornfields and buildings—that is between the shooter and the target denies the shooter a clear LOS and disallows any shooting.
For example, Nick wants to shoot at a zombie three hexes away, but because there is a wooded hex in between the two he cannot.
Line of Sight is assumed to extend the length of the board in daytime, is reduced to twelve hexes during the pre-dawn and evening, and is reduced to two hexes at night. A special scenario rule will state if a scenario doesn't occur during the day.
8.2.1 Tracing Line of Sight
Every hex has a small black dot in the center of it called the center dot. The type of terrain that the center dot is on determines the type of terrain the hex is regardless of what other type of terrain may be pictured in the hex. To determine if the shooter has a clear LOS place a straight-edge, such as a ruler or piece of thread, on the center dot of the shooter's hex to the center dot of the target hex. If the straight-edge passes through any non-clear hex then the LOS is blocked and no shooting can take place. If the LOS passes along a hex side of a non-clear hex it is not blocked, unless such hexes exist on both sides of the LOS. You can fire through a hex that includes a survivor or zombie.
Tracing a LOS from Tonya first to one zombie and then to the other shows that only one zombie can be fired upon. The wooded hex blocks the LOS.
If a target cannot be seen, it cannot be fired on, even if adjacent to a target or hex that can be seen.
For example, Beck fires her submachine gun at a visible hex and gets three hits. Normally she would be able to distribute the additional two hits to adjacent hexes, but cannot do so if she cannot see the hexes.
8.3 Melee
Melee depicts survivors and zombies fighting hand to hand, pistol to tooth, and baseball bat to whatever. Fight a melee whenever zombies and survivors, or hostile survivors, occupy the same hex. Melees are fought at the end of a zombie impulse or whenever a survivor enters a zombie or survivor's hex. Here's how:
The survivor rolls the number of dice indicated on their counter (unless modified by a weapon the survivor carries) and compares each to his Rep. The zombies roll one die per zombie in the hex. Resolution is described in detail on the Melee Table, but to summarize, if the survivor gets more successes than the zombies, or enemy survivors, he inflicts a hit. If he doesn't, he receives a wound. If both sides score the same number of hits nothing happens.
If there are at least four zombies in the hex, and they score three times as many successes as the survivor, the survivor receives two wounds.
For example, Beck is locked in melee with four zombies. The Zombies roll 5, 3, 4, and 3, scoring three successes. Beck rolls 1 and 5, scoring one success. Since there are four zombies, and the zombies have scored three times more successes than Beck, they inflict two wounds on Beck.
9.0 Reaction
Unfortunately the men and women that your square counters represent will not always react the way that you want. They are, after all, human ... or something like that.
As you play All Things Zombie, you'll be required to take Reaction Tests in four instances: Whenever a zombie or survivor is charging you (Being Charged test), whenever you wish to charge, (Wanting To Charge test) whenever an enemy survivor first comes into sight, (In Sight test) and whenever you receive fire (Received Fire test) that doesn't have any affect. Two dice are rolled for each reaction test and compared to the Rep of the taker. Each die that is equal to or lower than the taker's Rep is a success.
Stars, which are denoted by the gold star on their counter, can chose their reaction for the Being Charged, Received Fire, and Wanting to Charge tests.
9.1 Being Charged Reaction Test
After all zombies or enemy survivors have moved, if there are zombies or enemy survivors in a survivor's hex, the survivor takes a Being Charged Test. This test is only taken once, no matter how many zombies are charging your hex in the current turn.
A Star can choose their reaction. Keep in mind, however, that if a Star chooses to Runaway he or she must abide by all the provisions 9.1.1, including randomly determining their direction of movement.
Being Charged Reaction Test (taken versus the Rep of the tester; Stars can choose their reaction)
- Pass 2d6 – Those that can will fire and then melee. Those that cannot fire will melee instead.
- Pass 1d6 – Those in rough or building hexes will fire and then melee. Those in clear hexes charged by three or more enemy will Runaway. Others may not fire and will melee instead.
- Pass 0d6 – Those in rough or building hexes may not fire and will melee instead. Those in clear hexes will Runaway.
For example, Beck (Rep 4) is being charged by three zombies; she takes the Being Charged Test. She scores a result of three and two and passes 2d6. She is allowed to fire and will then melee any remaining zombies.
9.1.1 Runaway
A survivor that rolls a Runaway result moves in a randomly determined straight line (agree on numbers for the hex sides, roll 1d6, and move in the direction indicated), at its Fast Move pace, no roll required, just add two MPs to the survivor's listed MPs, until it spends all its movement points or enters a building or rough hex. If the survivor enters a building hex it must draw a zombie card (10.1). Zombies generated in this manner always surprise the survivor.
9.2 Received Fire Reaction Test
Whenever a survivor is fired at and missed he must take a Received Fire Reaction Test. Stars can choose their reaction.
For example, Too Tall (Rep 4) is in a clear hex and gets shot at by another survivor but does not get hit. She immediately rolls 2d6 versus her Rep and scores a five and a three passing 1d6. This means that she cannot return fire but will Duck Back instead.
Received Fire Reaction Test (taken versus the Rep of the tester; Stars can choose their reaction)
- Pass 2d6 – Those out of ammo or out of range will Duck Back. Chargers will continue their charge. Others will finish their move and return fire if they can.
- Pass 1d6 – Chargers will continue their charge. Those in rough or building hexes that are able to will return fire. Others will Duck Back.
- Pass 0d6 – Chargers will Duck Back. Those in rough or building hexes will Duck Back. All others will Runaway.
9.2.1 Duck Back
A survivor that rolls a Duck Back result will move in such a manner (at the owner's choice) as to either take cover in rough or building terrain, or place such terrain between him or herself and the survivor that instigated the Received Fire Reaction Test (i.e. blocking the firer's LOS to him or her).
The survivor can move no more than the movement points printed on the counter. No Fast Move. The survivor cannot end its move closer to the survivor that instigated the check (measured in movement points) than it was when it began the Duck Back movement.
9.3 In Sight Reaction Test
Anytime an enemy survivor cannot be seen at the start of a turn and moves to a spot within six hexes of and in LOS of a survivor, the sighting survivor must take an In Sight Test.
In Sight Reaction Test (taken versus the Rep of the tester; taken by Stars as well)
- Pass 2d6 – Those armed with in-range weapons will fire. Others will test to charge.
- Pass 1d6 – Both survivors roll 1d6 and add the score to their Rep. High total fires first with ties firing simultaneously. Shots generated by this roll off count as a "rushed shot" (see Ranged Combat Table). Those not armed with ranged weapons will Duck Back.
- Pass 0d6 – May not fire and remain in place.
For example, Jimmy (Rep 4) starts the turn in the middle of the street. He cannot see anyone. An enemy survivor activates and trots around the corner and into view. Jimmy takes one In Sight Reaction Test. He rolls a five and a three passing 1d6. This means that both survivors roll 1d6 and add the score to their Rep. Jimmy wins the dice off and he may fire first but has rushed his shot. Later Jimmy activates and moves down the street. He turns a corner and sees an enemy survivor. The other survivor takes the In Sight Test versus Jimmy.
Ed Sez: This is the most important check in all of ATZ. This determines who fires first and that could be the difference between living large or dying quick. Keep this in mind when you decide you want to play cowboy and rush out into the open.
9.3.1 When Do Survivors Stop Shooting Back?
Survivors will keep firing at each other as long as they pass a Received Fire Reaction Test, do not run out of ammo, do not score a hit, Duck Back out of sight, or Runaway.
For example, Jimmy fires at Nick and misses. Nick takes a Received Fire Test and passes 2d6. He returns fire and misses Jimmy. Jimmy takes a Received Fire Test and passes 2d6. He returns fire and scores a hit. The chain reaction of firing is over.
9.4 Wanting to Charge Reaction Test
Anytime a survivor wants to charge into melee or hand-to-hand combat it must take the Wanting to Charge Reaction Test. Stars can choose their reaction. Note that survivors that pass a Wanting to Charge Test may also Fast Move; this does NOT constitute two actions. A survivor cannot attempt to charge unless they can reach the target-charge hex with a Fast Move.
Wanting To Charge (taken versus the Rep of the tester; Stars can choose their reaction)
- Pass 2d6 – Charge!
- Pass 1d6 – Those armed with ranged weapons will fire instead. Those that cannot fire will charge instead.
- Pass 0d6 – Remain in place.
10.0 Finding Stuff
Much of your ATZ life will be spent finding stuff. Some times you'll find good stuff, like Medkits and submachine guns. Other times you'll find bad stuff, like evil-natured survivors and zombies. Lots of zombies.
10.1 Finding Zombies
You'll find stuff when you enter building hexes. Here's how.
When you enter a building that isn't marked with an Entered or Searched marker, pull a zombie card from the top of the zombie deck. The card lists how many zombies the survivor finds. Place the zombies in the survivor's hex. These are the undead who wish to make a meal out of the not-always-helpless survivor.
The zombies might surprise the survivor, or maybe the survivor is ready for them. To find out, the zombies roll 1d6 and add the number of zombies in the hex. The survivor adds 1d6 to his Rep. If the survivor's score is equal to or greater than the zombies' he surprises the zombies. Otherwise, the zombies do the surprising.
Ed Sez: Keep in mind that if the survivor used Fast Move to enter the building she is automatically surprised.
If the survivor surprises the zombies, he or she can fire his weapon before entering melee, or—employing discretion as the better part of valor—just back out of the hex, returning to the hex from which he entered. If the survivor chooses to fire her weapon, such fire is carried out normally, and any eliminated zombies are removed from the board before the ensuing melee. If the zombies roll the higher score and surprise the survivor, they immediately enter into melee.
If a building is marked with an Entered marker, there is no need to pull a zombie card. The building has already been cleared of zombies. Each hex in a building is NOT searched; the zombies found when first entering the building represent all the zombies that reside in the structure.
10.2 Finding Other Survivors
You aren't alone in this post-apocalyptic world, but that isn't always a comforting thought. When stated in the scenario special rules, or when agreed upon in a skirmish game (14.0), survivors might be generated when another survivor enters a building. For example, a scenario might tell the players to disregard a zombie card of "0"; instead, the card generates a survivor.
When such a survivor is generated, place a generic survivor in the same hex as the survivor that generated him or her. Randomly select a weapon for the survivor. Place the weapon on the survivor. Generic survivors (marked survivor on their counter) don't have Survivor Status Cards. The first wound flips them to their wounded side and the second wound eliminates them.
Of course, you'll need to know if the survivor is a friendly or not. It's easy, the player controlling the survivor that entered the building rolls 1d6 and adds it to her Rep. The just-discovered survivor rolls 1d6 (it doesn't matter which player physically rolls this die) and adds it to her Rep. If the player's total is greater than the just-discovered survivor the just-discovered survivor is friendly, if not the just-discovered survivor is an enemy. Modify the player's survivor's roll as follows:
- +1 if the player's survivor is the opposite sex of the discovered survivor.
- +1 if the player's survivor's ready weapon is a shotgun, assault rifle, or SMG, and the discovered survivor is armed with a pistol, double pistols, or crossbow.
Friendly survivors immediately join the player's band of survivors and are controlled by the player for the remainder of the game.
Enemy survivors will melee the player's survivor. In subsequent turns roll a separate initiative die for the enemy survivor (no, he does not join any other players that might already be in the game, he is a renegade). The enemy survivor takes a turn as described under 5.2.
During this turn the survivors will melee any survivor or zombie in his hex. If there isn't one of the above, the survivor will fire on the closest zombie or survivor. If no zombie or survivor is in his LOS he will move so as to place the closest zombie or survivor in his LOS and then fire on him, her, or it. If the zombie and survivor are equidistant, randomly determine which the enemy survivor will move toward or fire at. If the survivor runs out of ammunition he will attempt to charge the closest survivor or zombie. He won't reload his weapon.
It doesn't matter who performs these actions with the survivor. The game controls the survivor. Anyone can move the counter or roll the dice in melee, etc.
10.3 Finding Weapons, Medkits, and Other Stuff
After a survivor clears a building of zombies (and/or enemy survivors), and has an available action, he or she can search the building. Draw a card from the Loot Card deck. What you see is what you get.
After you have searched the building, place a Searched marker on it. The building can still be entered and used for cover, but cannot be searched again, nor does a player entering a building containing a Searched marker pull a Zombie Card.
If a survivor enters a building marked with an Entered marker he can immediately spend an action (if he has one available) to search the building. He need not pull a Zombie Card for a building marked with an Entered marker.
11.0 Generating Zombies
At the end of each turn roll 1d6 for each shot, indicated by a Shot marker, on the board.
For example, a Shot marker 3 requires a player (doesn't really matter who) to roll three dice.
A roll of 4, 5 or 6 places a zombie on the board. Pull a number of zombies from the Cup of Zombies (COZ) equal to the number indicated by the dice. Place them in the direction indicated on the zombie counter, six hexes from the Shot marker that generated them. If this puts them off the board, place them on the edge of the board instead. Remove all Shot markers.
Zombies can also be (and usually are) generated at the beginning of a scenario or a skirmish game (14.0). To do so, after the survivors enter the board, roll 6d6 for each survivor and place zombies as indicated in the section on placing zombies generated by the Shot counter. Zombies generated by survivors who have just entered the board do not move until the next turn. Players mutually agree on which direction each hex side represents before beginning play. If, for some bizarre reason, you can't reach an agreement, designate the north or northeast hex side as 1, and number the hex side clockwise.
12.0 Scenarios
Each scenario is given in the following format:
- Scenario Background: The scenario background sets the stage for the scenario.
- Survivors: The survivors that will participate in the scenario and any gear and weapons they are carrying or the points given to them to purchase gear and weapons.
- Enemy Survivors: Any enemy survivors in the scenario.
- Zombies: How the zombies are set up or generated.
- Special Rules: Special rules pertaining to the scenario.
- Winning: How to win the scenario.
A word about scenario locations. Sometimes the scenarios will specify specific locations on the game boards. In such cases the locations are given in the form of Board-Hex Row-Hex Number. For example 4C15, means hex C15 on Board Four.
If a location refers to a building, the hex given refers to the entire building. For example, if the scenario directs you to set up in building 4C6, you may set up anywhere within the building centered on hex 4C6.
For a Few Bullets More (Apocalypse +26)
Tonya and Beck used to run the nightclubs, searching the brightly-lit Vegas streets for a sucker with a fat wallet. Now they just run, searching for food, ammunition and weapons, but mostly weapons. Two women with a yuppie's worth of karate skills aren't going to last long in a swarm of zombies, and the 9 mm pistols they carried to fend off aggressive tricks aren't stopping the uncaring, unfeeling undead. They need real hardware. They hope to find some in Last Chance, a small desert-encrusted town outside Vegas.
Survivors: Tonya: 1 x Pistol, 1 x Medkit. Beck: 1 x Pistol, 1 x Ammo. Enter via the east edge of Board One.
Zombies: Generated after Tonya and Beck enter the board, as per 11.0.
Winning: To win, Tonya and Beck must each find an additional weapon and escape off the edge of the board or search every building and escape the board.
The Barricade (Apocalypse +29)
Tonya and Beck had found their weapons, and they had found Bank, and they had found Sailor—two of the most unlikely compadres imaginable. Unfortunately, the zombies had found them too—and they had ever-increasing numbers. Maybe it was the humans' smell, or maybe the sound of their guns, but run as they might, kill as they could, the zombies relentlessly continued to follow them. Tonya, recognized as the group leader, could think of nothing to do but lure the undead into a killing zone and exterminate them all.
Survivors: Tonya, Beck, Bank, Sailor, and 12 points of gear/weapons. Three of the survivors must set up on or within one hex of the Board One crossroads (1G9). Place an Entered marker on any building a survivor sets up, except 4D5. The survivor can still spend an action to search the building. The other survivor, who is guarding the survivors' redoubt, sets up anywhere within the 4D5 building.
Zombies: Generated after the survivors set up as per 11.0. The survivor in the large building doesn't roll for zombies, but each of the three crossroads survivors roll twice. The zombies are placed 4, instead of 6, hexes from the survivor who generated them. This is only for the initial placement. Shot-generated zombies are placed the usual 6 hexes distant.
Beginning with turn two, and every turn thereafter (if the zombies get an activation), 2d6 zombies enter via the east edge of the map at the start of the zombie activation. If the zombies don't activate (5.2), no zombies enter via the east edge. The zombies enter one per hex. The first zombie is placed on the "G" column road, place the next in the "H" edge hex, and the next in the "F" edge hex. Continue in this manner till all newly entering zombies are placed.
Special Rules: Building 4D5 is a redoubt. The Survivors have built a wall/obstacle of tires and trash to slow zombies, and boarded up the windows and doors. To represent this, zombies must pay 3 Movement Points (MPs) to enter any hex with the green hedge—for example, 4C4—(it represents the wall), and 3 MPs to enter the building from the outside, but only 2 MPs to move within the building. Survivors pay normal movement costs. Survivors entering any building except the redoubt must draw a Zombie Card to see if it is occupied, and can search the building after it is cleared.
Winning: To win, three of the four survivors must survive for 15 turns.
Search and Destroy (Apocalypse +30)
Tonya wept over her friend's corpse. It was a real corpse, not one that would reanimate. She had made sure of that, severing the head with a butcher's knife that was almost sharp enough to do the job without sawing. Almost . . .
She would get the suckers. This part of town was hers, not those maggot-infested pieces of crap. It was their turn to run. She and her buddies would clear out every building in the city or die trying.
Survivors: Tonya, Bank, Sailor, Buffy, Too Tall, Nick and 18 points of gear/weapons. The Survivors enter via the east edge of Board Three.
Zombies: Generated after the survivors set up as per 11.0.
Special Rules: None.
Winning: To win, the survivors must search seven buildings on Board Two, including the two multi-hex buildings (2H4, 2E5) before the end of turn 20.
Firefight (Apocalypse +36)
"I don't think so."
Tonya rested the binoculars on the window frame, careful not to cut her finger on the jagged glass. Cuts could mean infections, and infections—in a new age without a doctor on every corner or antibiotics in every drug store—could mean death.
"What is it?" queried Bank, just entering the room. Without a word Tonya handed him the binoculars and he scanned the burnt-out buildings, destroyed cars, and devastation that used to be southwest Las Vegas. The scanning didn't take long. There, not more than a quarter-mile distant, were four heavily armed survivors. They stopped at each building, searching, looking for supplies.
Bank handed the binoculars back to Tonya. "Think we should talk to them?"
The words were no sooner out of his mouth than a scream split the air. Tonya jerked the binoculars to her face, in time to see a woman, a real woman not the undead version, run from a house. The four toughs, who just a moment before had ducked into the same house, ran out behind the frantic girl. Without preamble, one of the pursuers—a red-haired woman in a rust colored coat—pulled an Uzi to her shoulder and fired a long burst, the sound not unlike that of tearing paper. The girl pitched forward, rolled and lay still, frantic no more.
"No," Tonya replied, her jaw set, "I don't think we should try to talk to them."
She snapped her M4 off the dirty floor. "Leave Sailor to watch our crap; get Beck and follow me."
Survivors: Tonya, Beck, Bank, and 12 points of gear/weapons. Enter on the east edge of Board Four.
Enemy Survivors: Nick, Jimmy, and Buffy and 12 points of gear/weapons. Enter via the west edge of Board Two.
Zombies: Tonya and her crew had already cleared out this section of Las Vegas, but these things have a habit of cropping up. Survivors don't roll for zombies after entering the board or when entering buildings. Shots, however, generate zombies normally. Zombies attack the closest survivor regardless of whose side the survivor is on.
Winning: The opposed survivors fight until one side is eliminated.
The Cure (Apocalypse +42)
"I don't believe it."
"What else is there to believe?" replied Tonya.
For a moment, Bank continued to clean the hunting rifle. Then he spoke. "Look, Tonya, we've seen what some of the so-called humans will do to find other survivors. To find and kill, if not worse. How do we know this isn't a trap?"
Tonya sat next to the window, its grimy panes admitting only slightly more light than the walls surrounding it. For the thirtieth time that hour, she glanced outside, always wary. In the room's corner a battery-powered radio hissed. At last she sighed.
"We don't know, but this is too big to ignore"
"Yeah, whatever. I wish we had never found the batteries for that thi–"
The hissing stopped and the scratchy voice spoke, as it had for every hour since they had snapped the batteries in a day ago.
"To anyone who can hear me: I have found the cure. I repeat: I can cure the infection. I am in a clinic surrounded by the infected, and I don't have the facilities to manufacture enough to cure them all. Help me. Save me, so I can save mankind."
Survivors: Tonya, Bank, Nick, Jimmy, Buffy, Too Tall, and 20 points of gear/weapons. Enter via the east edge of Board Two.
The Professor: Set up in 4E2. Place a Searched marker on the building. It cannot be searched during the scenario.
Zombies: Set up two zombies in each hex adjacent to the Professor's building. These zombies cannot move until a survivor is closer to them than they are to the Professor, or if the Professor leaves 4E2. After the Professor leaves the 4E2 building all the zombies surrounding the building are free to move.
Additionally, zombies are generated after the survivors set up as per 11.0, whenever the survivors fire shots or search a building.
Special Rules: The Professor carries no weapons, will not charge into melee (will defend himself) and cannot exit the building until a path is cleared through the zombies by the other survivors. The zombies cannot enter the Professor's building. It is boarded up.
Once per game, in lieu of meleeing a zombie in his hex, the Professor can attempt to cure a zombie. Roll 2d6 and compare each die to the Professor's Rep. If the Professor has at least one success, he cures the zombie. Replace the zombie with any generic survivor not in use. The melee ends for this turn.
The cured survivor is unarmed, but can subsequently receive a weapon. The survivor remains in the Professor's hex for the remainder of the scenario, moving when the Professor moves. The survivor melees any zombies the Professor melees, rolling separately, and absorbing the damage the Professor would have taken. The first wound flips the survivor to its wounded side, and the second hit removes it.
Winning: The Professor must exit via the north map edge of Board Two.
Race to the Helicopter (Apocalypse +44)
"That's crap and you know it," spat Tonya.
The thin, bespectacled professor spread his hands. "I know no such thing. You have rescued me, I have the cure, but we have no way to produce the cure in the quantities needed to turn back the plague."
He gestured toward the military grade PRC-77 two-way radio resting on the table in front of Tonya. "The men on the other end of that thing say they can reproduce the cure and save mankind, but to do so we need to get to the helipad near the hospital."
Tonya looked at Bank, who was smoking a cigarette as he leaned against the wall. "It could be a trick."
He shrugged. "It could be the salvation of man. I don't see how we have a choice."
"Women too," Tonya muttered as she grabbed her rifle and stood up.
Survivors: Tonya, Bank, Nick, Jimmy, Buffy, Too Tall, Sailor, Professor and 24 points of gear/weapons. Enter via the east edge of Board Three. Each board is placed with its designation number in the top left corner. See the special rules.
Zombies: Zombies are generated after the survivors enter the board as per 11.0.
Special Rules: The survivors want to make it to the helipad. To do so they must exit via the west edge of Board Three. The turn after ALL survivors exit Board Three they enter via the east edge of Board Two. All survivors get an impulse on this turn. After entering, zombies are generated as per 11.0. Additionally, in the first zombie activation after the survivors enter, any zombies remaining on Board Three when the survivors exited appear on the east edge of Board Two. The first zombie is placed on the "G" column road, place the next in the "H" edge hex, and the next in the "F" edge hex. Continue in this manner till all newly entering zombies are placed.
On the turn following the turn on which the all survivors exit via the west edge of Board Two, they enter via the east edge of Board Four. All survivors get an impulse on this turn. After entering, zombies are generated as per 11.0. Additionally, in the first zombie activation after the survivors enter any zombies remaining on Board Two when the survivors exited appear on the east edge of Board Four. The first zombie is placed on the "G" column road, place the next in the "H" edge hex, and the next in the "F" edge hex. Continue in this manner till all newly entering zombies are placed.
When the survivors move adjacent to the helipad building (the building marked with the "H" in a circle), roll 1d6 and place the number rolled + 4 zombies in the helipad building.
Winning: All survivors must be in the helipad building before the end of turn 24. At least four survivors and the Professor must survive.
13.0 The Campaign Game
You've played through the six scenarios, and being a bright gamer-type—which we all are since we don't waste our time vegging on the couch watching Cops reruns—have noticed they tell a story. The campaign game is you and your friends' chance to play through that story, recruiting your own party of survivors, amassing your own inventory of weapons, and telling your own tale. Here's how.
Begin the campaign with the first scenario, using Tonya and Beck equipped as described, and play the scenarios sequentially to the sixth. As you play the campaign, every building searched and zombie killed awards Glory Points (GPs). You can use these GPs between scenarios of the campaign to build, heal, and equip your team. Glory Points are awarded as follows:
- Building Searched – 1 Glory Point
- 5 Zombies Killed – 1 Glory Point
- Enemy Survivor Killed – 1 Glory Point
- Win Scenario – 2 Glory Points
Between scenarios these GPs can be used to purchase equipment, according to the equipment cost; recruit survivors (i.e. purchase); and heal survivors (two GPs per wound). Keep track of them on a sheet of paper during the scenario play.
In subsequent scenarios you can only use Tonya, Beck and any survivors or gear/weapons you have found or purchased. To win the campaign, you'll need to kill zombies, search buildings, and stay healthy.
Winning? If you get the Professor to the helipad at the end of scenario six and at least four survivors in your party survive, you win. Good luck.
14.0 The Skirmish Game
Sometimes you just want to hunt zombies or play a game less scripted than the scenarios. We have you covered. It's called the Skirmish Game.
- Randomly select two boards. Randomly determine how to place them. Randomly determine the board side from which the survivors enter. If playing competitively, survivors enter from the opposite sides of the board.
- Purchase survivors and equip gear/weapons as described below.
| Number of Players | Max number of Survivors per Player | Number of Glory Points per player |
|---|---|---|
| 1 – 2 | 3 | 30 |
| 3 – 4 | 2 | 20 |
| 5 – 6 | 1 | 12 |
- Determine if survivor discoveries are permitted. If so roll 1d6. Whatever the result, that is the number, when drawn on a zombie card, generates a survivor instead.
- Play 15 turns, and the side earning the most Glory Points wins.
15.0 Example of Play
I decide to play as Nick, armed with a shotgun. I take one Grunt and pull a counter from the pile of unused adventurers; it is Jimmy, and he is armed with a Submachine Gun. Off we go. I choose to play on Boards One and Three, placed end to end.
We enter the Board from the west edge and move full distance. I roll 12d6, six for each of us and score three die rolls greater than 4. That will start us off with three zombies. I pull three zombies from the COZ, and place them as indicated on their counter. Time for turn one.
Activation dice are rolled and I score a 5 while the zombies score a 4. Jimmy is adjacent to Nick, so he can activate with Nick, whose Rep equals or exceeds the initiative roll.
We move towards a building that is six hexes away. We don't have enough movement points to enter the building hex so we remain outside. We choose not to fire, as it will attract more zombies.
The zombies are now active and move towards us. They are now three hexes away. Their activation is over and now we roll activation dice again. I score a 6 and cannot move because 6 is higher than either survivor's Rep while the zombies score a 3. This is bad news.
The zombies activate and charge. Zombies never take Reaction Tests. Two of the zombies charge me and one of the zombies charges Jimmy. They end their move in our hexes, ready to melee.
I'm a Star (Nick) so I choose my reaction instead of taking a Being Charged Test. I choose to fire and prepare for melee. I roll 6d6 with my shotgun scoring a 2, 3, 5, 5, 6, and 6. I can only keep the three best scores so keep the 5, 6, and 6. Adding these results to my Rep of 5 I have totals of 10, 11, and 11. Three hits! That easily kills the zombies, and I place a "Shot 6" counter on the board under my counter.
Jimmy rolls 2d6 on the Being Charged Reaction Test and scores a 3 and 6. As a Rep 4 he passes only 1d6, so he cannot fire. Melee time. Jimmy gets 2d6 and rolls them, scoring a 1 and 2 for two successes. The zombie rolls 1d6 and scores a 3 for one success. Jimmy scores more successes so the zombie is dead.
I roll 6d6 for the shots I fired that turn and score two more zombies, pulling them from the COZ. They randomly appear behind and to our front.
Next turn I roll for Activation. I score a 3 and the zombies a 4.
They move first and move towards us. They can't contact us yet so it's our turn. We activate and I move Nick into a building. Jimmy stays adjacent, just outside.
I pull a card from the top of the Zombie deck. It reads that I stumbled into three zombies in the building. Now I need to see who surprised who. I roll 1d6 for the zombies and score a 5, which added to the three zombies for a Zombie Surprise Total of eight. I roll 1d6 for me and score a 4. Added to my Rep of 5 gives me a nine and I can fire.
I roll 6d6 and score a 1, 3, 3, 4, 5, 5, keeping the higher three for two hits (the final die -4- when added to my Rep of 5 does not score a third hit). I place a Shot 6 counter on my hex and Nick is ready for melee. He garners one success, but so does the remaining zombie. It's a stalemate and both remain in the hex. Jimmy chooses to do nothing.
Both sides have finished their turn so we roll for zombies from my six shots. Three more are generated. Now the zombies and survivors roll Activation dice to see who goes first. I activate first. Jimmy backs out of melee one hex and I unload 6d6 into the zombie killing him. I place another Shot 6 counter under my counter.
The zombies move towards us but are still outside of reach. We finish the turn and I roll for the shot fired this turn and place four more zombies down. That makes a whole lot of zombies within eight hexes of the building; they are now surrounding us.
I roll for Activation and we get to move first. The decision is: do I spend a whole turn searching the building, or make a run for it?
I decide there are too many zombies and we run for it. I try a Fast Move and roll 2d6, scoring a 5 and 6, and thus add one to my movement points. Jimmy rolls a 3 and 2, and adds two movement points. But he decides it's better to remain in a group, so he moves only five movement points, staying next to me.
We bust out back the way we come. The zombies activate and follow but we're outrunning them.
Next activation we score a 6 and cannot activate. The zombies activate and one charges Jimmy. He takes a Being Charged Reaction Test and passes 2d6. He fires and rolls a 1, 1, 4, and 5. Out of ammo! I flip the SMG counter to its OOA side on Jimmy's Survivor Status Card, and place a Shot 4 counter under him for firing four shots. The charging zombie is dead, way dead.
And so it goes…