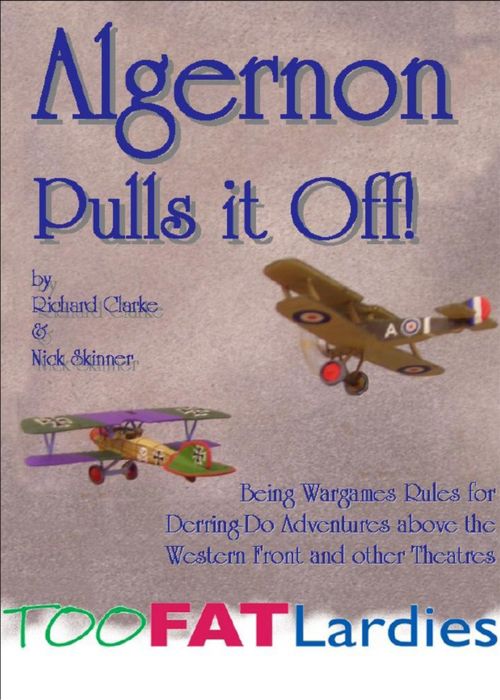
Algernon Pulls it Off
Algernon Pulls it Off Rulebook
Table of Contents
Table of Contents
- 2 Game Concepts
- 3 Aircraft Characteristics
- 4 Pilots and Crew
- 5 Turn Sequence and Initiative
- 6 Blinds and spotting
- 7 Movement
- 8 Manoeuvres
- 9 Firing
- 10 Effects of Damage
- 10.1 The Hit Effect Table
- 10.1.1 Firer sideslips
- 10.1.2 Overuse of ammo
- 10.1.3 Minor damage
- 10.1.4 Critical damage
- 10.1.5 Pilot killed
- 10.1.6 Pilot Wounded
- 10.1.7 Explode
- 10.1.8 Damage to other aircraft from exploding planes (optional rule)
- 10.1.9 Reduction of Manoeuvrability
- 10.1.10 Reduction in Robustness
- 10.1.11 Crash Landing
- 10.1 The Hit Effect Table
- 11 Archie
- 12 Bombing
- 13 Balloon Busting
- 14 Appendix 1 - Selected Aircraft Details
- 15 Appendix 2 – Suggested Aircraft Record Sheet
2 Game Concepts
Several core tenets run through these rules, the main one of which is that it was the personal qualities and skills of the men who flew these primitive machines that was the key differentiator that made the difference between life and death. Naturally aircraft specifications played some part, but if you believe that the number of rivets or calibre of weapon decides battles then these rules are not for you.
Within Algernon Pulls it off the following are considered to apply:
- Weather remains constant at all times
- Initiative counts for a lot in aerial combat, and altitude advantage is the key to this.
- The ability of one aircraft to shoot down another aircraft is determined by a combination of factors - mainly aircraft type, relative speed, aspect (relative to each other and the sun) and pilot skill.
- The ability of an aircraft to manoeuvre is determined by pilot skill, aircraft type and damage sustained.
- The ability to fly in formation is determined by pilot skill and damage sustained.
- Speed is determined by aircraft type and climb/descent angle.
- The chance of hitting a target is determined by pilot skill, aspect and proximity to target and the length of time it is fired at.
- Damage sustained is determined by the number of hits and the ability of the target aircraft to withstand damage.
2.1 Before the game you will need:
- A game mat overprinted with a hexagonal grid design (this is not essential, but if you do not have such a sheet you will need to convert the way movement is performed under these rules). At the time of writing, hex cloths suitable for "Algy" can be obtained in the UK from S&A Scenics.
- Model aircraft, based approximately to fit the hex pattern. Most common scales include 1/300th (Navwar/Skytrex) or 1/600th (Tumbling Dice) and 1/144th (Red Wing).
- Individual aircraft record sheets (see appendix 2).
- A 'compass' indicator showing where south is (because that's where the sun normally is).
- Some way of marking altitude next to the aircraft models. I use small d6 to mark the altitude band.
- A dozen or so six sided dice for rolling during the game, pus a d4 and at least one d10.
- A series of cards to govern the turn sequence (see section 5)
3 Aircraft Characteristics
Aircraft characteristics (see Appendix 1 for examples) are built from the following elements:
Speed ~ Manoeuvrability ~ Ceiling ~ Rate of Climb ~ Robustness ~ Size ~ Weapons
3.1 Speed
The speed of an aircraft is rated on a scale from 1 to 8, with 1 being the slowest and 8 being fastest. The factor represents basic movement distance in hexes (if you are not using hexes then use inches). Most aircraft will have a basic move of between 5 and 8. In general, 50mph of speed is represented by one hex. Aircraft may slow down and speed up within its maximum.
3.2 Manoeuvrability
This represents the aircraft's ability to twist and turn in flight. The aircraft is again rated from 1 upwards with 1 meaning that the aircraft handles like a brick and higher numbers meaning that the plane is highly manoeuvrable, turns well and is well suited to dog-fighting.
Additionally the manoeuvrability rating of an aircraft sets the limit for the number of changes of facing that it may make in a single turn.
3.3 Altitude (ceiling)
This represents the maximum height that the aircraft can reach. For simplicity, 'ALGY' assumes thirteen altitude bands:
- 0 = On the ground (planned or otherwise!)
- 1 = Hedgehopping to 200 ft
- 2 = 201 to 1,999 ft
- 3 = 2,000 to 3,999 ft
- 4 = 4,000 to 5,999 ft
- 5 = 6,000 to 7,999 ft
- 6 = 8,000 to 9,999 ft
- 7 = 10,000 to 11,999 ft
- 8 = 12,000 to 13,999 ft
- 9 = 14,000 to 15,999 ft
- 10 = 16,000 to 17,999 ft
- 11 = 18,000 to 19,999 ft
- 12 = 20,000 and beyond
The altitude of an aircraft can be indicated by one or two d6 placed on or next to the base stand of the aircraft. To engage in combat, aircraft must be in the same altitude band.
3.4 Rate of climb
This indicates the rate at which the aircraft is able to climb. It is rated from 0 to 3 with 0 being the worst (no climb possible) and 3 being the best. This factor may be decreased as the plan takes damage. As the altitude level increases these pre-supercharger planes will find their rate of climb decreasing.
The number equates to the number of altitude bands the aircraft can ascend in any one turn.
For each altitude level that the plane ascends it must expend three hexes of movement per level up to and including level 6 (i.e. the first dice of altitude). To attain level 7 or above the plane must expend four hexes of movement per level.
3.5 Robustness (or ability to withstand damage)
The robustness of an aircraft reflects its ability to withstand damage and is again given a number rating, with 1 being the poorest.
3.6 Aircraft size
This is a value which represents the overall size of the aircraft, which also suggests how easy that aircraft is to target and hit. Ratings are relative, with 1 being small (most tri-planes) through to six, which represents large aircraft such as the Gotha bomber.
3.7 Weapons and Fire factor
This lists the firepower that the undamaged aircraft is capable of putting out from each elevation (front, right, left, and rear). For aircraft armed with more than one weapon type, the factor allotted represents the combined firepower of cannon and machine guns.
Tables showing details for many of the aircraft engaged in the Great War from 1916 to 1918 are included in Appendix 2.
4 Pilots and Crew
4.1 Pilot ability
Algernon Pulls it Off assumes five basic pilot types:
- Sprog
- Regular
- Veteran
- Junior Ace
- Top Ace
All pilot grades are irrespective of rank (although flight leaders and above may not be Sprogs).
4.1.1 The Sprog
The Sprog is the new boy to the squadron. With only a few flying hours under his belt the Sprog knows enough to stay in formation but his reactions under fire are uncertain and his knowledge of tactics and his confidence in controlling his aircraft means that he will struggle to perform certain manoeuvres. Once on his tail, most higher-grade pilots can expect to cause him some damage (depending on what plane he is in of course). By contrast, he will struggle to stay latched onto the tail of any higher grade pilot should he find himself on the tail of one of them. Sprog pilots are also more likely to fire longer, inaccurate bursts.
Modifiers: -1 on luck throws
4.1.2 The Regular Pilot
The regular pilot has flown combat missions before and is familiar to squadron formation flying and keeping position during combat. He knows a few manoeuvres, and is more than capable of bagging a few kills given the opportunity.
Modifiers: None
4.1.3 The Veteran Pilot
The veteran Pilot knows well his own abilities, the capabilities of his aircraft and the tactics of his enemy. He is an excellent flyer, but without the combat kills and sixth sense that turns veteran pilots into Aces.
Modifiers: +1 on luck for tests involving flying skill. No modifier for test of gunnery skill
4.1.4 The Junior Ace
Pilots with 5 or more kills became Aces. In practice we can distinguish between Junior Aces (those with 5 or more kills) and Top Aces, with large numbers of kills to their name. Junior Aces are, to all extents and purposes, Veteran pilots with a killer edge and an extra slice of luck.
Modifiers: +1 on all luck throws
4.1.5 The Top Ace
Don't let him get on your tail. This man is the natural hunter of the skies, the man for whom his aircraft is an extension of his being. Can perform almost all manoeuvres and has that extra sense needed to stay one step ahead of the enemy.
Modifiers: +2 on all luck throws
4.2 Determining pilot ability
The table below can be used to quickly generate pilot ability for a game of any size. No national characteristics automatically apply. Alternatively, don't be afraid to use your imagination.
Pilot Generation Table (Scenario Method)
Roll a d10.
| Rank | Top Ace | Junior Ace | Veteran Pilot | Regular Pilot | Sprog |
|---|---|---|---|---|---|
| Major | 1 | 2 | 3-0 | Not possible | Not possible |
| Captain or Hauptmann | 1 | 2,3 | 4-8 | 9-0 | Not possible |
| Lieutenant or OberLeutnant | 1 | 2 | 3-5 | 6-9 | 0 |
| Second Lieutenant or Leutnant | Not possible | 1 | 2-3 | 4-7 | 8-0 |
5 Turn Sequence and Initiative
5.1 Turn sequence and cards
The turn sequence in 'Algy' is determined by cards, reflecting the chaotic uncertainty of aerial combat. To play the game you will need to include the relevant cards for he forces used which may be selected from the list below. These cards are then shuffled together and dealt in sequence. The respective player will act upon his cards immediately as they are drawn, no actions may be held for later in the turn. Once the entire deck has been dealt the cards will be shuffled and a new turn will commence.
You will need to prepare the following cards:
5.1.1 Flight/Kette Move Card
The Flight or Kette named on the card may move if still in formation. In this case only one plane needs dice for movement, but if manoeuvring then the 'maintaining formation test' may need to be applied.
Once a plane leaves the formation or become involved in combat it will no longer operate on the formation card, but will have its own individual move card put into the pack. It may return to the formation if it can manoeuvre into a suitable position. Planes that must test for engine failure or attempting to pull out of a spin will do so on their individual cards.
5.1.2 Aircraft Moves Card
One card for each individual aircraft to be used once formation is broken or combat joined.
5.1.3 Flight/Kette Fire Card
Aircraft in the Flight/Kette may fire. The card may not be reserved for use later in the turn. Machines flying in formation may only make easy manoeuvres. IMPORTANT: Once the formation is involved in combat this card will be discarded and fire cards included for the individual aircraft.
5.1.4 Aircraft Fire Card
One card for each individual aircraft to be used once formation is broken or combat joined.
5.1.5 Side A / Side B Blinds card
If using blinds (see section 6) a 'Blinds Move' card is included for each nationality. On the turn of this card all blinds may move, spot and/or attack.
5.1.6 Top Ace bonus move or fire
There may be one card for each side. A top ace may take an additional move or fire (not both). Top Aces may also attempt to bale out on their card.
5.1.7 Junior Ace bonus move
As above, but for junior aces only. If desired, top aces that have not already moved may use the junior ace card to do so.
5.1.8 Altitude bonus move
One aircraft or group of aircraft that has altitude advantage may make a bonus move. Any group of aircraft of any nation may claim this card. If no formation is recognised, then individual aircraft only may take advantage of this card. If more than one formation claims the highest point, the one with the most aces has the initiative (if no aces then the most veteran pilots, and so on)
5.1.9 Archie
Calculate the effects of ground to air fire. Once card will be included for each of the three types of Archie, light, medium and heavy. See section 11.
5.1.10 Tally Ho! / Flying Circus!
(one for each nationality) One full group of scout planes that are in a recognisable formation may make a group bonus move (but may not fire). If all formations have broken up this card should be ignored.
5.1.11 Character Cards
These are central and can add greatly to the fun of the game. It is expected that individual players control one or two key characters in the dogfight. This may be the Flight leader, or a headstrong new recruit, whatever takes your fancy. I would suggest that all commanding officers (i.e. Flight/kette leaders) are represented with a character card, as are all junior and top aces. In practice, you should have at least one character card for each player on each side.
When the character card is played that character may either:
a) Take his move if he has not moved already in the current turn. If he ends up in position to do so he may take the GETTING ON THE TAIL TEST.
Or
b) Fire (may also fire on his Flight card) or attempt to reload his weapon if required.
6 Blinds and spotting
6.1 Using blinds
Formations of aircraft may initially appear on the table as 'blinds'. Blinds represent 'something to spot', and may be formations of aircraft, single aircraft, or nothing at all (a flock of birds, strange shadow in the cloud, or even just a fear that the enemy is approaching). Each group of aircraft WITHIN THE SAME ALTITUDE BAND are placed on individual blinds. Where formations are at separate altitudes or some distance apart, then more than one blind should be used.
For instance, a formation of bombers at Altitude 5 which are accompanied by a fighter formation at altitude 8 are represented by 2 blinds. Were the fighters at the same level as the bombers (and flying close escort), then only one blind need be used. To add to the confusion, another blind might be added, representing no aircraft - merely the hint of them - and which can be removed when spotted.
6.2 Types of blind
There are three different sizes of blinds:
- Small Blind: This represents 4 planes or less
- Medium Blind: This represents 5 to 12 planes
- Large Blind: This represents 13 planes or more.
For blinds I suggest using cards of differing hex sizes, and suggest that a small blind be approx 6 hexes "square", medium blinds 10 and large blinds as much as 20. All blinds, even dummies, should also have an altitude marker showing what altitude band the blind is at.
6.3 Movement of Blinds
All blinds have a move speed of 12 hexes, and may go up or down by two bands per turn without penalty.
One blinds card should be included in the deck for each side. On the turn of this card, blinds may move and spot. To represent the 'strategic' value of blinds and to prevent the enemy discovering the type of aircraft represented by the blind, all blinds move with a speed of 12 hexes and may change altitude by up to two bands per turn without penalty. Blinds may manoeuvre into an attack position.
FAQ
Can blinds attack?
Yes, see section . There are plenty of historical examples where pilots were shot down by an enemy they never saw. In 'Algy' this is recreated when a blind gets into position to attack. A blind may well end its turn in position to attack. If desired, the player controlling the blind may voluntarily 'decloak' the blind and put the aircraft on the table. He may then fire.
In an attack of this sort, the player controlling the blind can position individual aircraft wherever he wishes (within the area covered by the blind) to maximise his chances of success. These attacks can be deadly and represent a surprise attack by an unspotted enemy. Don't get caught out. Always attempt to spot blinds before they get too close!
6.4 Spotting Blinds
When the character or unit card is turned that character/unit may spot. Nobody can spot more than once per turn. Fighter aircraft may not spot in hexes to the rear of their formation.
Roll 2 d6 and adjust as follows:
| Modifier | Situation |
|---|---|
| -1 (per gap) | Target is at lower altitude |
| +2 | Distance is 15 hexes or less |
| -1 | Distance over 15 hexes |
| -1 | Distance over 24 hexes (cumulative) |
| -1 | Distance over 36 hexes (cumulative) |
| -2 | Target is to South of spotter (into the sun) |
| +1 | Spotting medium blind |
| +2 | Spotting large Blind |
If the resulting score is 6 or more, then the enemy formation is spotted and must be deployed (i.e., the models placed on the table in a formation chosen by the player whose blind has just been spotted). If it is a dummy blind representing no aircraft then the blind is removed from the table.
6.5 When to spot
Players may spot and then move or move and then spot. There is no penalty either way.
6.6 Blinds on the attack
A blind may manoeuvre onto the tail of a formation of aircraft. If it has not been spotted, the player controlling the blind can choose to 'decloak' from the blind on the turn of his blind card – either before or after he moves (all movement still takes place at blinds speed). When 'decloaking', the player can position his aircraft anywhere within the area covered by the blind. This means an unspotted aircraft can appear on the tail of another. Blinds deploying in this way and which result in an attacking aircraft being positioned directly behind their target, may claim to be 'on the tail' without having to take the Getting on the Tail Test and may fire a burst of up to 8 seconds. Any aircraft that deploys in this way can fire as part of the blinds move. It is therefore possible for a blind to 'decloak' directly behind an enemy and shoot it down instantly. This is called 'bouncing'.
7 Movement
Aircraft speed is determined by the aircraft type, throttle setting and whether it is climbing or descending.
7.1 Moving an aircraft
Aircraft can move forward as many hexes as their speed rating. This will normally be between 6 and 10 per turn. To this base factor can be added the result of one d4 (to represent that little bit of extra thrust and tail wind!). The result is the distance (in hexes) the aircraft must move that turn.
| Movement type | Effect |
|---|---|
| Level Flight | Basic +1d4 (Top Aces do not throw the d4 but may add whatever extra distance they desire between 0 and 4". Junior Aces roll the D4 and may add up to the number they roll. For example a Junior Ace rolling 3 may add 1,2 or 3" to his basic move.) |
| Climbing | -3 hexes per altitude band up to 6, -4 thereafter (within max rate of climb boundaries – see also section 8.1) |
| Descending | +1 hex per band descended (see also section 8.2) |
To prevent continual 'what if's' and general shuffling by players desperate to get the best move, it is suggested that in games, players adopt a chess style rule of once you have started moving the plane, you must continue.
FAQ
As there is no throttle setting record keeping, when do you declare your base speed?
Ideally players ought to have worked out their movement plans before their card comes out, and ought to know whether they intend to use the extra dice or not. It shouldn't be unreasonable for a player to decide at the start of his turn if he intends to roll the dice or not. Certainly once rolled, dice results should be stuck with. For instance, a player wishing to go just one more hex must be forced to move four more hexes if he gets a four on the dice – he can't stick at just one – he must move the full score.
7.2 Chance of collisions
The altitude bands within 'Algy' are not overly large and it is possible for two planes to exist in the same hex without crashing. In 'Algy' the regulation that should be applied is that aircraft may move through hexes containing other aircraft but may not end their turn on in a hex containing an aircraft on the same altitude. Where this does happen 2 x d6 should be rolled. On a score of 11 or 12 a collision has occurred and both aircraft suffer two critical damages.
If no collision occurs, the plane that moved last should be moved forwards (in its direction of movement) one hex (or to the next vacant hex)
For ease of play, it is recommended that when aircraft in different altitude bands share the same hex, that the plane on the lowest altitude is shifted one hex forward (in its direction of movement) until a clear hex can be used.
7.3 Scramble!
Aircraft taking off move two hexes in their first move and climb to altitude 1. In the second move the aircraft increases to half speed and climbs to altitude two (if desired). In the third turn the aircraft goes its basic speed and may act as normal.
8 Manoeuvres
Ability to manoeuvre is primarily a function of aircraft type and pilot skill. The following manoeuvres may be undertaken, with success depending upon the pilot's ability.
8.1 Climbing
Aircraft wishing to climb may increase their altitude by one. It costs three pips to climb one level up to altitude level 6, four pips per level thereafter. The maximum number of altitude bands that can be ascended in one turn is three for very agile scouts and usually one for bombers. See the specific data listings for details.
8.2 Descending
Aircraft may dive to lose altitude or may lose altitude automatically when undertaking a manoeuvre. There is no cost for descending. Aircraft gain 1 hex of speed for each altitude level descended. All aircraft making a hard turn will automatically lose one level of altitude. Aircraft may descend up to two levels per turn without counting as being in a hard dive.
8.3 Other manoeuvres (Algernon's Patent Manoeuvre Handbook)
See Algy's notes below…
Ability to perform other manoeuvres are dependent upon the skill of the pilot:
- Sprogs must take a pilot control test to successfully complete TRICKY or HARD manoeuvres.
- Regulars must test to take HARD manoeuvres.
- Veterans and above need not test.
Level Flight
In Level flight Algy simply moves straight ahead. Each hex costs one pip.
Sideslip (an easy manoeuvre)
Algy uses this manoeuvre to lose speed when latching onto an opponent's tail. The diagram shows a sideslip to the right but you may chose to move to the left.
This manoeuvre uses 5 pips of speed.
Easy Turn (also known as a flat turn) (an easy manoeuvre)
A simple turn using rudder and aileron to keep the plane horizontal. Forward one, forward one and turn, forward one, forward one and turn, etc.
Pip expenditure as shown (example of 180 degree turn): the diagram numbers the hexes of the turn 1, 2-3, 4, 5-6, 7, 8-9.
Hard Turn (also known as a brake turn) (a tricky manoeuvre)
Algy uses this manoeuvre when somebody is on his tail. Aircraft moves forward one and then turns in the same hex, and so on.
Pip expenditure as shown: the diagram numbers the hexes of the turn 1-2, 3-4, 5-6.
Hard Dive (a tricky manoeuvre)
Aircraft descends two three or even four altitude bands, gaining speed at the rate of one pip per band descended. May attempt to dive five levels, but must test for structural damage (section 8.4). If a hard dive is failed, the pilot automatically goes into a spin, descending an extra altitude level and must test for structural damage.
Falling Leaf (a tricky manoeuvre)
Mainly used to slow down. A series of opposing side-slips taken to the point of stalling. The aircraft looses speed and altitude.
Lose one altitude level.
Costs 6 points to do.
Immelmann (a hard manoeuvre)
A gut wrenching manoeuvre that turns the aircraft up and round in a fast turn. Always makes Algy want to vomit.
Costs 6 pips.
Altitude goes up by one.
Loop (a hard manoeuvre)
Needs no explanation but make sure your lunch is safely stowed before you attempt this one. Net result is aircraft moves one hex forward.
Costs 6 pips.
Altitude unchanged.
Wing Over (a hard manoeuvre)
Bit like an Immelmann but relied on a controlled stall and side slip at the top of the climb to bring the aircraft back down to the same altitude.
Costs 5 pips to do.
Altitude unchanged.
Split - S (a hard manoeuvre)
Really an inverse Immelmann, so dive one instead of climb one.
Costs 5 pips.
Altitude falls by one.
Snap Turn (a hard manoeuvre)
Rotate left on the spot for rotary engined machines. One direction turn is the norm, but two can be made by Camels or Fokker Dr Is turning to the left.
Costs 1 pip per hex face (max 2).
Altitude unchanged.
Voluntary Spin (a hard manoeuvre)
Not for the faint hearted. Forward one, dive 3, roll D6 to see which direction to pull out of spin, forward one.
This manoeuvre costs 3 hexes.
Altitude reduces by 3.
8.4 The pilot control test
When attempting a manoeuvre that has a 'control test' assigned to it (i.e. Sprogs attempting TRICKY or HARD manoeuvres, and Regular pilots attempting HARD manoeuvres) the pilot must pass a Pilot Control Test to successfully complete the manoeuvre. If multiple manoeuvres of this kind are carried out in a turn each one must be diced for at the point when they are made.
Roll d6 and adjust for luck:
- 'Tricky' manoeuvres are completed OK on an adjusted score of 3 or more
- 'Hard' manoeuvres are completed OK on an adjusted score of 4 or more
Failure to perform a Tricky manoeuvre: manoeuvre failed but pilot retains control of aircraft. Aircraft moves straight ahead at basic speed.
Failure to perform a Hard manoeuvre: manoeuvre is failed and the pilot loses control. Machine goes into an uncontrolled spin (see below)
8.5 The Uncontrolled Spin
The aircraft spins directly down for that turn, descending two altitude bands. On his next movement card, the pilot must roll to recover from spin. This is done by rolling a d6. On a score of 5 or 6 (modified for luck) the pilot recovers without losing more altitude. His facing and position, however, will have changed. Roll a d6 to determine which hex face the aircraft is facing, then roll 1D6, halving the result, and moving the plane the resulting one, two or three hexes in that direction. This recovery from spin counts as his entire move.
If the pilot does not recover from the spin in that turn, he drops another two altitude bands straight away and must test again next time.
This process continues until the pilot either recovers from the spin or hits the ground.
If a plane that goes into a spin has an enemy on his tail (that has already passed the getting on the tail test when the spin begins), the enemy still counts as being on the tail for as long as he wishes. If/when the aircraft recovers from the spin the tailing aircraft is simply repositioned behind the target aircraft at the new altitude, the same distance as was the case before the spin occurred. This does not mean that the tailing aircraft has also gone into a spin, but rather that he is able to follow the target down and be in a position to fire on the enemy once the spin is recovered.
Aircraft tailing aircraft that are in a spin may be targeted by other aircraft. Aircraft may not attempt to get on the tail of another aircraft that is already in a spin, nor may spinning aircraft be targeted for firing by anyone.
8.6 Structural Failure
Structural failure occurs when a plane is pushed to the edge of its capabilities, either voluntarily or involuntarily. The test is made against the robustness of the plane and the pilot's luck. If it fails it will either suffer extra damage as the plane begins to tear itself apart, or quite fall to pieces in mid air, plummeting to the ground.
Take the current robustness of the plane, adjust for the pilot's luck. Roll a D6 needing to exceed this figure to success.
- If failed by one: The plane's robustness is reduced by one
- If failed by two: The plane falls apart in mid air. The pilot falls to his death.
8.7 Wind
In the flimsy, light-weight aircraft of the Great War wind often played a significant role in shaping aerial combat. In "Algy" light wind is considered to have little or no effect, however a stronger win will affect all aircraft. At the completion of their move each aircraft will be shifted one hex in the direction that the wind is blowing.
8.8 Getting on his tail
Pilots would try hard to get astern of a target and stay there until the target is destroyed.
In the diagram accompanying this section, "T" represents the target aircraft.
An enemy plane that ends its turn in any of the shaded hexes, AND is facing in the same direction and at the same altitude of the target may take a getting on the tail test. If the test is passed, any planes in the outer columns of hexes are repositioned to be dead astern of the target (but no closer).
THE GETTING ON THE TAIL TEST
| Situation | Modifier |
|---|---|
| Defenders plane is more manoeuvrable than target | -1 |
| Attacker is: Sprog | -1 |
| Attacker is: Veteran | +1 |
| Attacker is: Junior Ace | +2 |
| Attacker is: Top Ace | +3 |
| Target is: Sprog | +1 |
| Target is: Veteran | -1 |
| Target is: Junior Ace | -2 |
| Target is: Top Ace | -3 |
| Attacking "out of the sun" | +2 |
| Attackers plane is damaged | -1 |
| Target plan is damaged |
Add the result to the throw of a d6. A pilot has successfully got onto the tail of another if the final score is 4 or more. Anything lower than this fails (although the pursuer is still behind the target and he can fire with but with a lower maximum duration of burst of fire of 5 seconds). N.B. Pilots always FAIL the getting on the tail test on a natural roll of 1.
When locked on the tail of another plan, the attacking plane simply follows the defending plane. He ignores his own move card, but may break off when it comes up if he so wishes. Wingmen also become 'locked' to the main attacker.
8.9 Staying on his tail
The defender may attempt to shake of planes on his tail by attempting some evasive manoeuvres, as each plane will need to test for the complexity of the move. If the attacker fails the manoeuvre he is considered to have been shaken off and moves straight forward his full move.
If a plane moves first and get on the tail of another aircraft it will move again when the target aircraft moves and must test to stay on the tail of the defender, i.e., the attacker may get a double move, depending on the card sequence. It may only fir the next time its own card comes out.
Attackers attempting to stay on the tail of aircraft that successfully perform fancy manoeuvres must test to see if they stay on the tail. Wingmen stick with their leader. If he fails, so do they.
If target keeps flying in a straight line the attacker will not be shaken off.
- If target performs easy manoeuvre: Roll d6 and adjust for luck. 2 or more needed to stay on the tail
- If target performs tricky manoeuvre: Roll d6 and adjust for luck. 4 or more needed to stay on the tail
- If target performs hard manoeuvre: Roll d6 and adjust for luck. 5 or more needed to stay on the tail
Aircraft which are fired upon whilst on the tail of another aircraft will be shaken off. This however would not apply to Aces who are only shaken off by fire from the rear.
Any machine shaken off the tail will be moved one hex left or right by the successful player.
9 Firing
When the fire card comes up aircraft may fire on other aircraft. They may do so when the target aircraft is within range of firing aircraft, there is a clear line-of-sight between the aircraft, and the target aircraft is in the firing arc of one of the firing aircraft's weapons.
9.1 Range
Maximum firing range is 5 hexes. The same range band is assumed for all weapons simply to keep things simple. In practice, range of the weapon was irrelevant beyond the first few hundred feet.
9.2 Firing arcs
Fighter aircraft with fixed gun mountings may only fire directly forward along a row of hexes. The diagram accompanying this section shows firing arcs for other, non-fixed, gun positions. In the diagram, "F" represents the firing aircraft with its nose pointing towards the top of the page. The diagram key reads:
- Nose gunner arc of fire
- Rear gunner arc of fire on fixed mount
- Waist/side gunner arc of fire
- Waist/side gunner AND rear gunner on flexible mount
Only one plane can be targeted by any gun position (i.e. the waist gunner on a Gotha may only engage one enemy fighter at a time).
9.3 Deflection firing
An aircraft that is not locked onto the tail of another aircraft can still try deflection shooting. To determine the type of shot being attempted, consult the diagram accompanying this section.
In the diagram, "T" represents the target aircraft, with its nose pointing towards the top of the page. Fire aimed at the target through the "H" is Head On fire. "FD" stands for Forward Deflection, "RD" for Rear Deflection and "R" stands for Rear.
The angle of deflection is important when considering the maximum length of burst that can be aimed at the target.
9.4 Firing procedure
Firing is performed in bursts of one second, the actual duration being the choice of the firer. The maximum length of burst however that can be fired depends upon the amount of ammunition remaining and the angle of deflection on the target:
FIRING ASPECT AND MAXIMUM BURST DURATION
| Firing aspect | Maximum length of burst (seconds) |
|---|---|
| Head on | 2 |
| Forward Deflection | 3 |
| Rear or Rear Deflection | 5 |
| On the tail* | 8 |
| Rear gunners firing directly to rear | 4 |
| Gunners firing to side | 5 |
*must have passed a 'getting on the tail test'
Roll one d6 for each base fire factor, and amend as follows:
FIRING FACTORS
| Modifier | Situation |
|---|---|
| + 3 dice | Range to target: Dead Close (immediately adjacent) |
| +1 dice | Range to target: Close (2 hexes away) |
| -1 dice | Range to target: Long range (4 hexes away) |
| - 3 dice | Range to target: Extreme range (5 hexes away) |
| + 1 dice per size rate over 1 | Size of target |
| - 2 dice | Target hard manoeuvring* |
| - 1 dice | Sprog |
| +1 dice | Veteran |
| +2 dice | Junior Ace |
| +3 dice | Top Ace |
| -1 dice | Being shot at by rear gunner |
*The target must have successfully completed a "Hard Manoeuvre" already in this turn.
LENGTH OF BURST AND ITS EFFECT ON NUMBER OF DICE ROLLED WHEN FIRING
| Length of burst (seconds) | 1 | 2 | 3 | 4 | 5 | 6 | 7 | 8 |
|---|---|---|---|---|---|---|---|---|
| Modifiers to dice | -4 | -2 | 0 | +1 | +2 | +3 | +4 | +5 |
Attacker: Fire factor + length of burst modifier + firer's luck + target size > 1 = number of d6 thrown. Needing 5's and 6's to hit.
Defender: Own manoeuvrability + range (in hexes) + defenders luck modifier = No of d6 thrown. Needing 5's and 6's to save.
Subtracting the number of 'saves' from the number of 'hits' gives the result of firing.
When he fires, the firer must also roll a d10 at the same time as he rolls his d6's. This will be used to calculate the effect of any critical damage inflicted from the fire.
9.5 Gun jam
If the firer rolls more ones than fives and sixes then his guns have jammed. Aces ignore the first 'one' thrown.
9.6 Ammunition Restrictions
In normal circumstances planes will be considered to be fully loaded with ammunition at the start of the game. This will allow the following.
- Lewis gun. Three second bust only up to mid-1916 then an eight second burst after that. May be reloaded during the game. Up to five ammunition drums may be carried.
- Parabellum or German light machine guns. Eight or twenty seconds of ammunition on each belt. May be reloaded up to five times during the game for the former, or three for the latter.
- Vickers, Spandau or Maxim gun. 35 seconds of ammunition. May not be reloaded during the game.
9.7 Reloading Ammunition
With weapons where this is appropriate, such as drum fed Lewis guns, the player may choose to do this by sacrificing his fire card for that turn. Roll A D6 on the following table to see if the process happens smoothly. This is also used to un-jam a machine gun. In that case the roll is made before any firing is done. If the pilot rolls successfully he may immediately fire as normal with no penalty.
RELOADING/UN-JAMMING
| Pilot's Rating | Succeeds on |
|---|---|
| Sprog | 4-6 |
| Regular or Veteran | 3-6 |
| Junior Ace or Ace | 2-6 |
10 Effects of Damage
10.1 The Hit Effect Table
The number of hits is modified for the luck of the target pilot and then cross referenced with the target's robustness (ability to withstand damage).
HIT EFFECT TABLE
| Number of hits (after luck modifier) | Robustness 0-1 | Robustness 2 | Robustness 3 | Robustness 4 | Robustness 5 | Robustness 6 |
|---|---|---|---|---|---|---|
| -2 hits or less | Firer sideslips | Firer sideslips | Firer sideslips | Firer sideslips and overuse of ammo +1 | Firer sideslips and overuse of ammo +1 | Firer sideslips and overuse of ammo +1 |
| -1 | Overuse of ammo +1 | Overuse of ammo +1 | Overuse of ammo +1 | Overuse of ammo +1 | Overuse of ammo +1 | Overuse of ammo +1 |
| 0 | M | M | M | M | M | M |
Key: M = Minor damage, M* Minor damage with target sideslip, C = Critical damage, 2C = Bad critical damage, X = Extra bad critical damage
10.1.1 Firer sideslips
The firer has badly misjudged the angle off. The firer's aircraft sideslips one hex to the left or right (at the discretion of the target aircraft). Aircraft on the tail of target are shaken off if they get this outcome when firing. Aircrew gunners ignore this result.
10.1.2 Overuse of ammo
In all the excitement, and to increase his chances of hitting, the firer left his thumb on the firing button for one second longer than he meant to. Tick off another two ammo boxes.
10.1.3 Minor damage
The sound of frozen peas hitting tin plate resounds through the cockpit but there is no lasting damage other than a few holes in the fuselage and the sight of tracer whizzing past the cockpit.
On an M* result target planes sideslip one hex to left or right (firers choice) and any formation is broken. The firing aircraft may choose to stay on the tail and if so will move accordingly to conform to the new position of the target. If the target aircraft was on the tail of another aircraft then it is considered to have been shaken off by the burst.
10.1.4 Critical damage
The extent of any critical damage inflicted is determined by cross referencing the score on the firer's d10 with the corresponding column on the CRITICAL DAMAGE TABLE below. Editor's note: the table as printed is headed "2D6" and its rows run 2 to 12; the text above it says d10. The table is transcribed as printed.
CRITICAL DAMAGE TABLE
| 2D6 | Critical Damage (C) | Really Critical Damage (2C) | Extra Critical Damage (X) |
|---|---|---|---|
| 2,3 | Hard evade! Target evades 2 hexes to left or right immediately. Formation is broken. Firer moves too if he is on the tail of the target. | Fuel line cut/fuel leak. May proceed as desired but throws with +3 on damage next time aircraft is hit. Speed reduced to basic only. | Bad aileron or wing damage. May not climb and may only perform easy manoeuvres. Will descend 1 altitude band for each 1 rolled on movement d4. Manoeuvrability drops by 1. ALSO: Observer killed |
| 4 | Fuel line cut/fuel leak. May proceed as desired but throws with +3 on damage next time aircraft is hit. Speed reduced to basic only. | Structural Damage. Damage to the plane's fabric or wing struts means that it may not perform a hard manoeuvre or dive more than three altitude bands without the plane breaking up. Robustness is reduced by one. ALSO: Observer killed | Engine damage. Reduce speed by one each time a 1 is rolled for movement. ALSO: Observer killed |
| 5 | Structural Damage. Damage to the plane's fabric or wing struts means that it may not perform a hard manoeuvre or dive more than three altitude bands without the plane breaking up. |
10.1.5 Pilot killed
Plane goes into dive straight down. It descends two altitude levels per turn until it hits the ground.
10.1.6 Pilot Wounded
The pilot has received a wound and has a chance of blacking out (test in that pilot's next turn phase). Roll a dice and adjust for luck. Pilots blackout on a result of 1 or 2. This increases to 1 2 or 3 at very high altitude (5 or 6). Because Top Aces are +2 on their luck they cannot blackout after receiving one wound.
Wounded pilots must test for blackout each turn in their movement phase.
Blackout: When a pilot is hit and suffers a 'blackout", roll 1D6. If a score of 1 is rolled, the aircraft will fly straight ahead at the current speed. A score of a 2 or 3 puts the plane in a dive to the left and a score of 4 or 5 makes it dive to the right. The aircraft will dive straight ahead on a score of a 6. If the pilot fails to wake up, the plane will continue on the same course until it hits the ground or the pilot revives. Planes in a dive descend two altitude bands a turn. If they hit the ground before coming to then the pilot is killed.
Recovery from blackout: The pilot retakes the blackout test each turn he is blacked out. If he passes the test (i.e. he would not blackout) then he can regain control of the aircraft but is still wounded.
Pilots who are wounded have their luck reduced by one for the rest of the game. Top Aces who receive a second wound can therefore blackout.
10.1.7 Explode
Aircraft explodes and pilot and all crew are killed. Aircraft is removed from table.
10.1.8 Damage to other aircraft from exploding planes (optional rule)
Other planes within 2 hexes on the same altitude must test to see if they are damaged. Roll a d6 for each aircraft and modify as below.
| Modifier | Pilot |
|---|---|
| +2 | Top Ace (Luck) |
| +1 | Junior Ace (Luck) |
| -1 | Sprog (Luck) |
| Minus | Damaged Aircraft Size |
| Result | Effect |
|---|---|
| 3 or more | No damage |
| 2 or less | Temporary loss of control |
10.1.9 Reduction of Manoeuvrability
When an aircraft's manoeuvrability is reduced to 0 it may only turn one hex face in a turn. It must break off combat and attempt to return to its home airfield.
10.1.10 Reduction in Robustness
When an aircraft's robustness is reduced to below zero (-1) it will suffer complete structural failure and fall apart.
10.1.11 Crash Landing
Any aircraft which has suffered temporary (or permanent following engine failure) loss of control the pilot still retains control when he enters the 0 altitude band may attempt to crash land.
This is another simple throw of the dice, adjusting as follows:
| Modifier | Situation |
|---|---|
| -1 | Pilot wounded |
| -2 | Pilot not regained control |
| -1 | Engine Damage |
| -1 | Critical Instrument Damage |
| -1 | Enemy still in contact |
| +2 / +1 / 0 / -1 | Pilot Luck |
A net score of 4 or better is required to crash land safely.
11 Archie
At the beginning of the game the umpire should identify to himself what areas are covered by anti-aircraft (AA) fire (known at the time as "Archie"), however this also includes fire from infantry on the ground as well.
In the Great War both front lines can generally be considered to be covered liberally by Archie. As such any plane within 3 hexes of the enemy's front line will be subjected to this unless they are within three hexes of an enemy plane, in which case the gunners will hold their fire.
11.1 Determining the effects of "Archie"
When the Archie card is turned any aircraft within range may be hit by, or receive a narrow miss, from ground fire. To determine whether a plane is hit, roll 2d6 on the table below.
| Light | Medium | Heavy | |
|---|---|---|---|
| Examples | Rifle fire; Machine guns | 1pdr Pom-Pom 3.7mm; Flaming Onions | 3" AA; 75mm AA |
| Range (height bands) | 1-3 | 3-6 | 5-9 |
| 2d6 to hit | 10, 11 and 12 | 11 and 12 | 12 |
If a plane is hit roll 1D6 and consult the table below. Cross reference the dice score with the type of fire the plane has been hit by.
| D6 | Light | Medium | Heavy |
|---|---|---|---|
| 1 | A sprog will slip one hex to the left or right | A sprog will slip one hex to the left or right | A sprog will slip one hex to the left or right |
| 2 | A Sprog or regular will slip one hex to the left or right | A Sprog or regular will slip one hex to the left or right | A Sprog or regular will slip one hex to the left or right |
| 3 | A sprog, regular or veteran will slip one hex to the left or right | A sprog, regular or veteran will slip one hex to the left or right | A sprog, regular or veteran will slip one hex to the left or right |
| 4 | A sprog, regular, veteran or junior Ace will slip one hex to the left or right | A sprog, regular, veteran or junior Ace will slip one hex to the left or right | A sprog, regular, veteran or junior Ace will slip one hex to the left or right |
| 5 | Test once on the critical damage table | Test twice on the critical damage table |
12 Bombing
Before the game, the umpire should designate a hex (or range of hexes containing the target). This can either be marked on the table or disclosed only to the bomber's flight commander.
The last 10 hexes of any bombing run must be made in a straight line, dicing for movement variation as normal. Bombs may be released in the movement turn. This does not apply to scout aircraft converted to carry small bomb loads, who only move half distance in the move of their bombing run (after adjusting for modifiers) and must finish the turn at altitude 1 or 2.
Bombs may not be dropped if the target is obscured by cloud.
12.1 Determining hits
Roll 2d6 for each plane that is over the target and modify for luck. A nine or more is required for the bombs to cause damage to the target (this being a game about air combat the effect of the bombs is largely insignificant).
13 Balloon Busting
This was especially risky as they were well guarded with AA guns, long-range machine guns and a fighter CAP. Getting to the balloon was easy, shooting it up was difficult and getting away was very difficult. It required good nerves, quick reactions, and an all round good pilot to fight off the CAP, avoid the AA and mg fire, hit the balloon before it is pulled down and then get away again. It was a rule of thumb with British pilots to never go after balloons below 1,000 feet, the AA and mg fire was too dangerous.
The balloons could be pulled down very quickly as they were tethered to a motorized winch, so that once a fighter was spotted the balloon could be down in under a minute. The secret was to sneak up on them somehow. As the balloons were filled with hydrogen they burned easily once they were pierced with tracer bullets or bullets especially designed for Zeppelins. The balloon observers were the only people routinely outfitted with parachutes, which had been available since 1915.
13.1 Observation Balloons (Size 6)
Start at band 6 and are winched down as soon as enemy aircraft approach within 3 hexes. I'd suggest dropping them one band every other turn as soon as enemy aircraft get within range.
13.2 Ammunition
13.2.1 Le Prieur Rockets
Le Prieur Rockets have a Range of 3 and all fire as a single volley.
Throw six dice per attacking plane, subtract one dice for each hex of range and adjust for the pilot's luck.
A 6 achieves a hit which will ignite the balloon, thereby destroying it.
13.2.2 Pomeroy and Incendiary Ammunition
The Pomeroy bullet was filled with nitro-glycerine and these bullets, were interspersed with incendiary bullets of the Brock and/or Buckingham type. These were notoriously inaccurate so the pilot may fire at a maximum of a three hex range.
The firer will calculate his attack as normal, being considered a rear deflection shot. The balloon will roll four dice in defence. Whilst it is stationary this represents the fire coming up from the anti-aircraft defences and may be sufficient to force the attacker off the target.
13.3 Balloon hit effect table
| Result | Effect |
|---|---|
| -1 | Firer sideslips |
| 0 | Overuse of ammo +1 |
| 1 | Punctures gasbag (+1 on hit effect table next time) |
| 2 | Punctures gasbag (+2 on hit effect table next time) |
| 3 | Punctures gasbag (+3 on hit effect table next time) |
| 4 | Explodes* |
*Exploding Balloons use the damage to other aircraft rule 1.1.17. Editor's note: the source has no rule 1.1.17; the reference is printed as-is and the intended rule is most likely 10.1.8 (Damage to other aircraft from exploding planes).
13.3.1 Ordinary Ammunition
Same as above but ignore explosion results.
14 Appendix 1 - Selected Aircraft Details
Only the aircraft characteristics as printed in the appendix are transcribed below.
14.1 Royal Flying Corps
| Armstrong Whitworth FK8 | AVRO 504B | BE 2B | BE 2C & 2D | BE 2E | Bristol Bullet D Scout | Bristol Fighter F2B | DH1A | |
|---|---|---|---|---|---|---|---|---|
| Speed | 5 | 4 | 4 | 4 | 5 | 5 | 7 | 5 |
| Manoeuvrability | 3 | 3 | 4 | 4 | 4 | 3 | 4 | 3 |
| Ceiling | 8 | 8 | 7 |
*Hunting rifle or shotgun may be used. Ω Firing to starboard to miss the screw ∏ Firing to starboard and port to miss the screw
| DH2 | DH4 | DH5 | FE 2B | FE 8 | Martinsyde Elephant G100 | SE 5 | SE 5A | |
|---|---|---|---|---|---|---|---|---|
| Speed | 4 | 6 | 6 | 4 | 5 | 5 | 6 | 7 |
| Manoeuvrability | 3 | 4 | 3 | 2 | 3 | 3 | 5 | 5 |
| Ceiling | 8 | 11 | 9 | 8 |
Ξ Mixed weaponry. This plane combines belt fed and drum fed machine guns. After its first round of fire its factor will be reduced by one until it successfully reloads.
| Sopwith Pup | Sopwith Camel | Sopwith Triplane | Sopwith 1½ Strutter | Sopwith Snipe | Handley Page 0/400 | |
|---|---|---|---|---|---|---|
| Speed | 6 | 7 | 6 | 6 | 7 | 4 |
| Manoeuvrability | 5 | 6# | 6# | 4 | 5 | 2 |
| Ceiling | 10 | 11 | 12 | 9 | 12 | 6 |
| Rate of Climb | 2 | 3 |
# These planes can snap turn to the right due to the high torque from their rotary engines
14.2 Luftstreitkräfte
| AEG C.IV | Albatros C.III | Albatros DII | Albatros DIII | Albatros DV | Fokker EIII | Fokker DI | Fokker DIII | |
|---|---|---|---|---|---|---|---|---|
| Speed | 5 | 5 | 6 | 6 | 7 | 5 | 6 | 6 |
| Manoeuvrability | 4 | 3 | 3 | 4 | 4 | 2 | 2 | 3 |
| Ceiling | 10 | 7 | 10 |
¶ Twin Spandaus and parabellum, mounted and used separately
| Fokker DVI | Fokker Dr I | Fokker DVII | Fokker DVIII | Halberstadt DIII | Halberstadt CLII | Hanoverana CLIII | |
|---|---|---|---|---|---|---|---|
| Speed | 6 | 6 | 6 | 6 | 5 | 5 | 6 |
| Manoeuvrability | 5 | 6# | 5 | 5 | 4 | 4 | 3 |
| Ceiling | 12 | 11 | 12 | 12 | 9 | 9 |
| Pfalz DIII | Pfalz DXII | Rumpler C.V | Roland CII | Gotha GV | Zeppelin Staaken RVI | |
|---|---|---|---|---|---|---|
| Speed | 6 | 7 | 6 | 6 | 4 | 6 |
| Manoeuvrability | 4 | 6 | 3 | 2 | 2 | 2 |
| Ceiling | 10 | 11 | 10 | 8 | 12 | 8 |
| Rate of Climb | 2 | 2 |
# These planes can snap turn to the right due to the high torque from their rotary engines
14.3 French and United States
| Nieuport 17.CI | Nieuport 28 C.I | SPAD S-7 CI | SPAD XIII | |
|---|---|---|---|---|
| Speed | 6 | 7 | 7 | 7 |
| Manoeuvrability | 3 | 4 | 4 | 5 |
| Ceiling | 10 | 10 | 10 | 12 |
| Rate of climb | 3 | 3 | 2 | 2 |
| Robustness | 2 | 2 | 2 | 3 |
15 Appendix 2 – Suggested Aircraft Record Sheet
The source gives a blank aircraft record card (ID, type, basic speed, manoeuvrability, size, robustness, ceiling, rate of climb, pilot name and rank, kills at start, pilot grade, front/rear/left/right fire factors, and a 40-box ammunition track for each arc). The printed grid is a player form and is not reproduced here.
Algy players are invited to use a record card similar to the one shown to record individual aircraft details. All the major characteristics of aircraft and pilot can be added on this sheet, which players are free to reproduce for their own needs.
Pilot grades listed on the sheet: Top Ace (+2 Luck); Junior Ace (+1 Luck); Veteran (+1 Luck on flying tests only); Regular (No Luck); Sprog (-1 Luck).
Maximum burst length is 8 seconds per turn. Non turreted crew served weapons must fire in bursts of four seconds but may fire each turn.