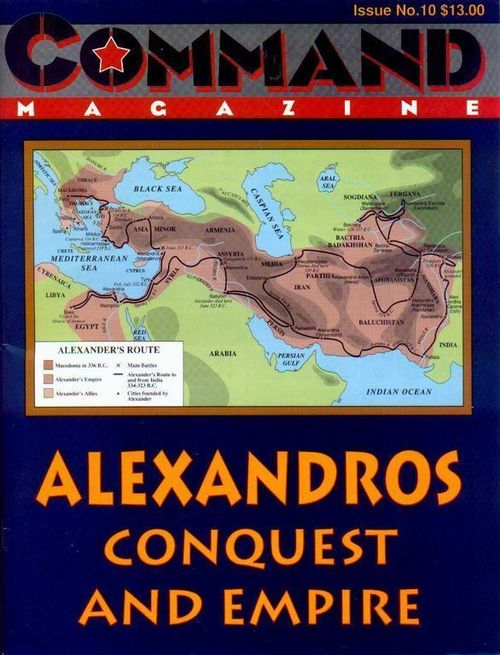
Alexandros: Conquest and Empire
Alexandros: Conquest and Empire Rulebook
Table of Contents
Table of Contents
- 1.0 Introduction
- 2.0 Components
- 3.0 SetUp
- 4.0 Turn Sequence
- 5.0 Province Control
- 6.0 Stacking
- 7.0 Supply
- 8.0 Movement
- 9.0 Combat
- 10.0 The Tactical Display
- 11.0 Siege Combat
- 12.0 Replacements
- 13.0 Reinforcements and Withdrawals
- 14.0 Random Events
- 15.0 Macedonian Objectives
- 16.0 How to Win
- 17.0 Optional Rules
- 18.0 Designer's Notes
- 19.0 Player's Notes
1.0 Introduction
Game Scale. On the strategic map, one inch equals approximately 80 miles and one game turn equals three months of real time. The tactical display is abstract and represents varying distances depending on the size of the battle. In a large battle, it would represent a frontage of over 3000 yards. Each tactical round represents 15-30 minutes of real time.
2.0 Components
The components of Alexandros and I am Spartacus are:
- 2 Maps
- 2 Rulebooks
- 2.5 Countersheets
- 1 Turn Record Track
- 2 Six-sided Dice
- 1 Box and Lid Set
2.1 The Rules. Read the rules before beginning play. Alexandros uses some concepts and terms that may be unfamiliar to players of more conventional wargames. The rules are organized by topic to assist players in locating a rule about which they have questions.
2.2 The Map. The map represents militarily significant terrain in the Persian Empire and neighboring lands. The strategic map has been divided into provinces to regulate movement, supply and combat. The oceans have been divided into sea zones, which affect the ability of players to supply their armies by sea.
2.3 The Counters. The counters represent combat units, leaders, walls (fortifications), Macedonian objectives, and various game function markers. Some of the combat units are double-sided, with the flip side indicating reduced strength. Other combat units and the wall markers have Macedonian colors on one side and Persian colors on the other. These units may be used by either side. Two of the Macedonian units, the Hypaspist infantry and Hetairoi cavalry, have two counters each. These units have four strength steps. Only one of the counters may be in play at any one time.
Each leader and combat unit counter contains the following information: nationality, unit identification, unit type, and combat strengths (attack and defense). Leader units have a single Ability (combat) rating while combat units have Attack and Defense strengths. A counter may also contain information concerning its location at the start of the game. Modern military size designations are not meaningful for units of the third century B.C. and unit size has no effect on play. Most combat units represent formations of between 1000 and 5000 men.
2.4 Sample Counters. [Sample counter diagram: labels Unit Set Up, Unit ID, Unit Type, Attack, Defense, Leader Name, Rating.]
2.5 Nationality. The background color on each counter identifies its nationality/affiliation. Note that many counters have one color on one side and another on the reverse – this is to show changing loyalties through the game. The colors used are:
- Macedonians & Greek Allies: Red
- Spartans: Black
- Greek Mercenaries: Orange
- Persians: Blue
- Indians: Green
- Barbarians: Gold
- Arabs: Sand
2.6 Unit ID. Some units have no identification beyond unit type and nationality. Others represent specific, named units. The following names have been abbreviated:
- Heta - Hetairai
- Hypsp - Hypaspistoi
- Massag - Massagetae
- Prod - Prodromoi
- R. Gd - Persian Royal Guard
- Thes - Thessalians
2.7 Unit Types. Each type of unit is identified by a unique silhouette. Unit type affects a unit's abilities in combat and pursuit.
[Counter diagrams: Heavy Infantry, Light Infantry (Thrace, Illyria, Arabs), Heavy Cavalry, Leader Examples.]
Note that Arabs are treated as light infantry. All other infantry is regular infantry, which has no special qualities.
All other cavalry is treated as light cavalry.
2.8 Combat Strengths. A unit's attack strength represents the unit's ability to attack enemy units. Its defense strength represents its ability to resist enemy attack. A leader's ability rating represents his ability to motivate troops to fight harder.
[Diagram: a leader counter labelled Rating, and a combat unit counter labelled Attack and Defense.]
3.0 SetUp
3.1 Choosing Sides. Choose which side each player will play. The Macedonian player controls all Macedonian and Greek Allied units. The Persian Player controls all Persian, Indian, and Barbarian units. If a Spartan Revolt (see section 14.2) occurs, Spartan units are also controlled by the Persian player. Greek Mercenaries can be controlled by either player. Decide whether you wish to play using the Random Events (section 14.0) or any of the Optional Rules (section 17.0).
3.2 Macedonian Set Up. Place Antipater and all the Macedonian units marked "M" in Macedonia. Place Alexander, Parmenio and all the Macedonian and Greek Allied units marked "I" in Ionia. All units start the game at full strength. Place 3 wall markers (Macedonian colors) in Athens (Hellas).
Place the Turn Record marker on Spring, 334 BC. Place your leaders and units named on the Turn Record Track in their proper spaces. All other units form the pool of potential replacements.
Set aside the second counter for the Hypaspistoi and Hetairai and the unnamed leader with the "0" rating. These counters will only be used after casualties are suffered in combat. Place the Macedonian Objective markers as follows:
| Objective | Placement |
|---|---|
| Royal Family | with Darius |
| The 4 Persian Treasuries | in the cities indicated on the markers |
| Gordian Knot | Gordium |
| Oracle of Ammon | Lybia |
| Alexandria | in Egypt |
| Roxana | Sogdian Rock |
3.3 Persian Set Up. Place a Persian 2-1 infantry unit in Sardis. Place Darius and all the Persian units marked "D" in either Susiana, Persis or Babylonia (all units must be in the same province.) Place Memnon and all the Persian and Greek Mercenary units marked "A" in Ionia. Place the Dahae horse archer unit in Bactria and the Massagetae horse archer unit in Sogdiana (both units with the Persian side up).
Place your leaders and units named on the Turn Record Track in their proper spaces. All other units form the pool of potential replacements.
Place the indicated number of wall markers (Persian side up) in the following cities:
- 4 - Tyre (Syria)
- 3 - Sardis (Ionia)
- 1 - Babylon (Babylonia)
- 1 - Susa (Susiana)
- 1 - Ecbatana (Media)
- 1 - Halicarnassus (Ionia)
- 1 - Gaza (between Syria and Egypt)
- 1 - Malli (Upper India)
- 1 - Sogdian Rock (Sogdiana)
- 1 - Aornos (Gandara)
Indians: Place two 2-1 infantry units in Lower India and two 2-1 infantry units in Gandara. All other Indian units are deployed with Porus in Upper India. Indian Units may not move or fight until a Macedonian unit enters Gandara, Upper India or Lower India.
Barbarians and Arabs: Barbarians and Arabs enter the game randomly. Set these units aside until they are needed.
4.0 Turn Sequence
4.1 In General. A game of Alexandros consists of a variable number of turns. Each turn includes several Phases. Every action taken by a player must be taken in the appropriate Phase. Once a player finishes a Phase he may not go back to perform some forgotten action unless his opponent graciously permits it.
4.2 Sequence Outline.
I. MUTUAL SUPPLY PHASE
- A. Roll for the depletion of any province supplying an army.
- B. Roll for attrition for any TURN army located in a depleted province (three or more units).
II. MACEDONIAN MOVEMENT
- A. Reinforcements. Place reinforcements in any friendly-controlled province(s).
- B. Replacements (Winter only)
- Make leader recovery rolls every turn.
- C. Movement
- Each leader may move, alone or with any number of friendly units, from one province to an adjacent province.
- Roll for forced-march attrition.
III. PERSIAN MOVEMENT
- A. Reinforcements
- B. Replacements (Spring and Winter only, except Winter 334)
- C. Land Movement
IV. COMBAT RESOLUTION
- A. Minor Combat Resolution
- Resolve combat in each province with 1 or 2 units on at least one side.
- B. Tactical Combat Resolution - Resolve combat between forces of at least three units on each side.
- Evasion
- Tactical Display Set-Up
- Tactical Rounds (up to 10)
- Pursuit
V. SIEGE COMBAT RESOLUTION
VI. RANDOM EVENTS CHECK (only in turns indicated)
4.3 Special First Turn Sequence. For the first turn (Spring 334 BC) there are no Supply or Movement phases. Movement has already taken place. Players go immediately to Tactical Display Set-Up (the Persians had no intention of evading combat). The Battle of the Granicus is about to begin.
5.0 Province Control
5.1 In General. A province is always in one of four states: Independent, Macedonian-controlled, Persian-controlled or Contested. The conditions for each status are outlined below. A province may change status any number of times in a single game.
5.2 Independent Provinces. Scythia, Chorasmia, Upper India, Lower India and Sind start the game Independent. The names of these provinces are outlined in red on the map. These provinces are always independent unless they are contested or Macedonian-controlled. Each of these provinces is Independent each turn it is not Macedonian-controlled or contested.
5.3 Macedonian Provinces. Macedonia is always Macedonian-controlled, regardless of the presence of Persian or Persian-allied units. Hellas and Thrace are always Macedonian-controlled unless occupied solely by Persian or Persian-allied unit(s).
Design Note. Even if a Persian army moves into Macedonia, the province is still treated as Macedonian-controlled, not contested. This home-court advantage derives from the fierce loyalty of the Macedonian people to their country. Even if the Macedonian Home Army were destroyed (very unlikely in the game), the hill folk would wage guerilla war against an invader. Since Macedonia can never be enemy controlled or contested, it is always available for the placement of reinforcements and replacements (see 12.0).
5.4 Persian Provinces. All other provinces are Persian-controlled at the start of the game. Any time a Macedonian unit(s) is alone in a province, the province becomes Macedonian-controlled. The province remains Macedonian until a Persian unit(s) is alone in it - becoming contested does not change the province's loyalty. Note the Macedonian need no longer leave a unit behind to keep control.
5.5 Contested Provinces. A province is Contested if both sides have at least one combat unit in the province.
5.6 Control of Sea Zones. Sea zones can be used for conveying supply to armies (see 7.5). A sea zone may be used to convey supplies to an army as long as the player seeking to convey supplies either controls or contests at least one province bordering on the sea zone. Note that it is possible for each player to use the same sea zone on the same turn, even if tracing supply in opposite directions.
Supply may be conveyed up to but not beyond an enemy-controlled fortress on the coast of a sea-zone (see 7.5).
Design Note. Oared warships had no endurance for long voyages. They usually had to beach every night to feed and rest the crews. Fleets of such ships could not exist without a friendly shore nearby.
6.0 Stacking
6.1 In General. There is no stacking limit on the strategic map. Any number of leaders and combat units of either or both sides may be present in a province. There are stacking limits on the Tactical Display (see 10.5-10.7).
6.2 Armies and Garrisons. Three or more units in a province are considered to be an "Army." One or two units alone in a province are considered to be a "Garrison."
A garrison is either a field garrison or a city garrison. To be a city garrison, the unit must be stacked with at least one wall marker in a city. Any other garrison is a field garrison. A city garrison may exist in a province exclusive of any field army there. A non-city garrison is automatically absorbed into any army in the province.
Design Note. The distinction between armies and garrisons is critical for both supply and combat. Three or more units means you can fight on the Tactical Display, but also imposes supply restrictions. Garrisons are free from supply requirements, but must fight on the Minor Combat Table. City garrisons aid in resisting sieges, but cannot assist armies in regular combat. City garrisons are also excluded from the necessity of retreating with a defeated army.
6.3 Unity of Forces. All units and leaders of one side (except city garrisons) in a single province are considered to be a single force. For purposes of calculating supply and engaging in combat (either on the Tactical Display or the Minor Combat Table), all units (except city garrisons) must participate as a single force. During the Movement Phase, subunits may be split off from the main force and moved to other provinces or left behind in the province if the main force moves. During the Siege Combat Phase, a single force with more than one leader may also conduct more than one siege in a single province.
Exception: Barbarian and Indian units may not stack with any other Persian-controlled units. If Barbarians and Persians or Indians are present in the same province, they are treated as completely separate forces for purposes of supply, movement and combat.
6.4 Stacking of Markers. Wall and Depleted markers do not affect the stacking of combat units. No city may accumulate more than five Walls.
Exception: the Temple of Ammon in Lybia may not be fortified.
7.0 Supply
Beginners Rule. Skip this section entirely. Ignore all references to supply and attrition elsewhere in the rules.
7.1 In General. Combat units require supply to ensure their long-term survival. Units are supplied by "living off the land" of the province in which they are located. This method of supply carries with it the chance to deplete a province of supplies. Once a province has been depleted of supplies, units stationed there are subject to losses by attrition. Provinces recover from attrition during the summer turn of each year.
Each province is classified as either Rich, Fertile, Mountain or Desert/Wilderness. The type of province indicates the ability of that province to sustain an army within its borders.
7.2 Supply Procedure. Any units stationed in an undepleted province are considered to be in supply. Count the units in each province. For each province in which there are three or more units, roll one die. If the result is 5 or 6, place a Depleted marker in the province. Add one to the die roll if there are more than 8 units in the province. Add one to the die roll if the province is a Mountain province. Add one to the die roll if it is a winter turn. These additions to the die roll are cumulative – an army of 10 units in a mountainous province during winter would add three to the depletion die roll.
Once depleted, a province can suffer no further effects.
7.3 Effects and Removal of Depletion Markers. In future game turns, any group of three or more units in a depleted province is subject to attrition. Remove all depletion markers at the start of each Summer turn.
7.4 Attrition. If more than three units are located in a depleted province, the group must roll for attrition. Count the number of units. Roll one die and cross-index the result with the appropriate type of province on the Supply Attrition Table. Reduce the force by the indicated number of steps.
A step may be lost either by reducing two-step units or by removing single-step or already-reduced units. The owning player has complete freedom in selecting the steps to be lost, but no unit may be eliminated by supply attrition as long as there is a unit in the same army that can satisfy the loss by being reduced.
7.5 Sea Transport of Supply. Supply may be "carried" by sea from one friendly-controlled province to units in another friendly-controlled or Contested province. Both provinces must border on a sea zone. The supply may be carried through any number of contiguous sea zones, provided each zone is controlled by the player (see 5.6).
Supply may not be carried beyond an enemy-controlled coastal fortress (a coastal city with at least one wall marker). Supply may be carried up to the fortress, but not beyond it.
When tracing supply by sea, roll for depletion of the supplying province as though the army being supplied was located in that province. If more than one army is being supplied, total all the units being supplied when rolling for depletion.
Example: The Persian player controls Tyre. A Macedonian army in Syria could trace supply to Ionia because the Macedonians contest Syria, which borders on the Phoenician zone. A Macedonian army in Egypt may not trace supply by sea from Ionia because Tyre blocks the Phoenician sea zone.
7.6 Supply in Desert/Wilderness Provinces. Desert/Wilderness provinces can never supply an army – they are considered permanently depleted. Armies in those provinces must roll for attrition each supply phase.
7.7 Supply in Contested Provinces. In any contested province, total all units on both sides when rolling for depletion. Each army rolls for attrition separately if a Contested province is depleted.
7.8 Supply in Macedonia. Macedonian units in Macedonia are never subject to supply attrition.
7.9 Garrisons. Supply is required only for armies (three or more units). Garrisons (one or two units) do not require supply. Garrisons may be stationed indefinitely in any province, even one which has been depleted.
8.0 Movement
8.1 In General. Combat units must start the turn stacked with a leader in order to move, and must remain with that leader throughout the move. Each leader may move from one province to any adjacent province in one turn. The presence of friendly or enemy units has no effect on movement. A leader can enable any number of friendly units to move. Not all units must move with the leader, but those left behind may not move unless stacked with another leader. Leaders can move alone.
8.2 Borders. Movement is made from province to province. There are two kinds of borders – normal and mountain. Normal borders have no effect on movement at any time.
All the borders of a Mountain province are treated as mountain borders. During Winter turns, Mountain borders are impassable (the passes are blocked by snow). No movement is allowed across Mountain borders during Winter turns. Treat mountain borders as normal borders during all other seasons.
Special Note. The fortress of Gaza is the border between Egypt and Syria. Units may not pass through Gaza if it is enemy-controlled. An army in either of those provinces may lay siege to Gaza; units in Arabia may not.
Special Note. The border between Thrace and Ionia is considered a normal boundary.
8.3 Movement Restrictions. Persian units and leaders may not move into Indian or the barbarian provinces listed in 14.3. They may move into all other provinces on the map.
The Macedonian Home Army (Antipater and the six infantry units marked with an "M") may not leave Europe – they can only enter Macedonia, Hellas or Thrace. If a Spartan Revolt (see 14.2) has occurred, and all Spartan units have subsequently been eliminated or have moved out of Europe, this restriction is lifted. Indian units may only enter Gandara, Upper India and Lower India.
8.4 Forced March. Certain Macedonian and Allied units stacked with Alexander may "force march" an extra province in a single turn. These units are: all cavalry units, all archers, the Agrianians and the Hypaspists.
A forced march begins in one province, passes completely through an adjacent province and ends in a third province. A forced march may not ignore impassable borders. The force marching units may begin the turn stacked with friendly units that are ineligible to force march as long as these are left behind in the starting province or the first province entered. The force marching force may "pick up" other units in the first province entered, even units which are not eligible to force march.
8.5 Forced March Restrictions. Alexander may not force march through a province containing an opposing Army, but may force march through a province containing an opposing garrison (see 6.2) as long as at least one Macedonian or allied combat unit is dropped off to contest control of the province.
8.6 Forced March Attrition. The units which complete the two-province forced march must make a separate attrition die roll on the Supply Attrition Table. Roll using the province type of the first province entered. For example, if Alexander force marches from Syria through Arabia to Egypt, roll for attrition on the Desert/Wilderness line of the table. The depleted/non-depleted status of the province has no effect.
Design Note. Alexander's logistic apparatus depended on commissary agents sent ahead of the moving army to arrange for the collection of supplies (much as Napoleon would do 2,000 years later). Forced marching precluded such arrangements.
9.0 Combat
9.1 In General. Combat occurs whenever there are opposing forces in a province at the start of the Combat Phase. City garrisons (see 6.2) do not count. If both sides have armies of three or more units, the Tactical Combat Display must be used (see 10.0). Any other combination of opposing forces must resolve combat using the Minor Combat procedures (see 9.4).
Combat is not voluntary, but forces may attempt to evade combat.
9.2 Evasion – Minor Combat. The defender (only) may attempt to evade Minor Combat (only) if the defending unit(s) is cavalry or light infantry, or if the defending unit is stacked with a leader whose ability rating is higher than the ability rating of any leader stacked with the attacking force. On a die roll of 1, 2, or 3 the evasion is successful and the defending unit is moved to any adjacent friendly-controlled or contested province. Evasion is not allowed if all adjacent provinces are enemy-controlled. Units that evade into a contested province may not take part in further combat during the turn of evasion, but must retreat with the friendly forces in that province if they are forced to retreat in a subsequent combat.
9.3 Evasion from the Tactical Display. Either player may attempt to evade tactical combat prior to setup on the tactical display. Evasion is only possible if the evading army can retreat into a friendly-controlled or contested province. Leader ratings and types of combat unit present are irrelevant. Tactical Combat evasion is successful on a die roll of 1 or 2 for the Persian player, and 1, 2, 3 or 4 for the Macedonian player. The Persian player may choose to have Indian or Barbarian units attempt evasion, but evading Indian units may only enter Gandara, Upper or Lower India, and evading Barbarian units may only move into their province of origin.
9.4 Minor Combat Procedure. The side with the larger force, based on the number of combat units, is considered the attacker, regardless of who wants or does not want battle. If both sides have the same number of units, the side with the higher total attack strength is the attacker. If both sides have the same attack strength, the Macedonian player is the attacker.
Total the attack strengths of all attacking units and add the ability rating of the highest-rated leader present with the attacking force. Total the defense strengths of all defending units and add the ability rating of the highest-rated leader present with the defending force. Divide the attacker's strength by the defender's strength, rounding any remainders down. The result is the odds for the combat. For example, an attack strength of 31 divided by a defense strength of 8 yields 3.875, which rounds to 3 (3:1 odds).
Locate the appropriate odds column on the Minor Combat Results Table. Roll one die and cross-index the die roll with the odds column to get the combat result. Apply the result immediately (see 9.5).
Note that odds greater than 4:1 result in the immediate elimination of the defender with no loss to the attacker. In many cases, it will be obvious that an attacking force has far more than four times the combat strength of the defending force – the players may dispense with formalities.
9.5 Minor Combat Results. There are five possible combat results on the Minor Combat Results Table. Do not confuse these results with those on the Tactical Combat Results Table (see 10.12). The results are:
- AE - Attacker Eliminated. All attacking units and leaders are eliminated.
- AL - Attacker Loss. One step of attacking units eliminated, owner's choice. If a leader is present roll for him on the leader casualty table.
- EX - Exchange. Each side loses one step, owner's choice. Roll for the highest-rated leader on each side on the Leader Casualty Table. Any surviving defender(s) (only) may retreat out of the province into an adjacent friendly-controlled or contested province. If no such province is available, the units may not retreat. Retreating is entirely discretionary for the defender; the attacker may not retreat.
- DL - Defender Loss. Same as AL but only defending units are affected. Surviving defending units may retreat (same as in Exchange).
- DE - Defender Eliminated. Same as AL but only defending units are eliminated.
10.0 The Tactical Display
10.1 In General. In any combat in which each side has at least three units, the players must use the Tactical Display. The tactical display has its own turn sequence, movement, stacking and combat rules. Once combat begins on the tactical display, players must continue fighting until the battle ends (see 10.19) – armies may never voluntarily retreat off the display.
10.2 Tactical Display Sequence. Combat on the Tactical Display is fought in rounds, of which there may be a maximum of 10 in a single battle. The Tactical sequence is:
- Evasion (see 9.3)
- Set Up (see 10.3)
- Combat (see below)
- Pursuit, if applicable (see 10.20).
Each combat round is fought using the following sequence:
- Macedonian Rally Phase. The Macedonian Player may attempt to rally units in his Routed Units Box (see 10.18).
- Macedonian Movement Phase. The Macedonian player may move second line units into the front line and vice versa (see 10.6), advance units into adjacent empty boxes (see 10.9), and move any two units from one box to another (see 10.8).
- Macedonian Combat Phase. The Macedonian Player conducts attacks from at least one box (see 10.10 to 10.15).
- Persian Rally Phase.
- Persian Movement Phase.
- Persian Combat Phase.
10.3 Tactical Display Setup. The players set up their forces according to the restrictions set out below. The Persian player always sets up first.
Place the first unit in the Center box, stacked with the highest-rated leader present. Place the second unit in the Right box, stacked with the second Leader present. Place the third unit in the Left box, stacked with the third leader present. Place the fourth unit in the Reserve box with the fourth leader present. The fifth and sixth units must be placed in the Center box. Any remaining units and leaders may be placed in any one of those four boxes subject to the capacity of the boxes.
No units may be set up in the outflank boxes.
Exceptions. Macedonian leaders are not subject to placement restrictions based on ability rating – any leader may be placed in any box, but two leaders cannot be placed in the same box until there is at least one leader present in every box occupied by combat units.
If Spartan units are set up on the Tactical Display, at least one Spartan unit and King Agis must be placed in the Right box.
Design Note. The Persian player is required to setup first because the Persian army was much less flexible and maneuverable than the Macedonian. The Macedonians were thus able to adjust their deployment to take advantage of any weakness in the Persian deployment. Players may, if they wish, use a simultaneous and secret deployment – just improvise some kind of screen.
10.4 The Boxes. Each army has 7 boxes. The Left, Center and Right boxes constitute the main battle line. The Reserve box represents the rear area of the army. The Left and Right Outflank boxes represent the flanks of the army. The Routed Units Box is a holding area for units which have been routed in combat.
Units in battle line and outflank boxes may move and attack into the opposing box in the enemy line, into any adjacent box in the friendly line (if it becomes occupied by enemy units), and into its own reserve box. Units in the reserve box may move and attack into any of the 5 frontline boxes.
10.5 Box Capacity. The Left, Center and Right boxes may contain up to eight units each – a maximum of four in the first line and a maximum of four in the second line (see 10.6). Generally, only units in the first line may engage in combat.
Each Outflank box may contain a maximum of 4 units – there is no first or second line in these boxes. Only Cavalry and light infantry units may be placed in the Outflank Boxes. All units in the boxes may engage in combat.
There is no limit to the number of units which may be placed in the Reserve Box. A maximum of four units from the Reserve Box may engage in combat, offensively or defensively.
No more than four units may advance into an enemy box – they may all advance in the same turn, but each enemy box can contain no more than four units of the other side (see 10.9).
Leaders do not count toward box limits.
Design Note. The relation of the boxes is an abstraction of the standard deployment of ancient armies. Heavy infantry units may not enter the outflank boxes because they are the slowest units on the field and the entire enemy army would be able to move quickly enough to turn any such outflanking attempt into an attack on the main line.
10.6 The Battle Line. The battle line boxes are divided into a first and second line. There must be at least one and no more than four units in the first line. The second line can consist of up to four additional units, but there is no requirement to have at least one unit in the second line. A player is not required to maintain four units in the front line just because he has available units in the second line. Second line units may be moved into the front line during the movement phase. This does not count as a tactical movement (see 10.8).
Only front line units may attack out of the box. Second line units may be attacked only from the flank or rear (see 10.15).
If the first line is vacated due to battle and there are units in the second line, at least one of those units must move into the front line during the next movement phase. This is true for units of both sides, not just the moving side. The first line may not be vacant if there are units in the box.
10.7 Unit Stacking. Combat units may not stack with each other on the tactical display. Each unit attacks and is attacked alone. One leader may stack with each combat unit.
Exception. Two Persian 3-3 Cavalry or two Persian 3-2 Infantry units may stack together to make a 2-step 6-6 Cavalry or 2-step 6-4 Infantry unit. A leader must be present in the box to allow such stacking.
The 2-unit stack is treated as a single 2-step unit for all purposes of movement and combat on the Tactical Display. When required to take a step loss, remove one unit.
Design Note. This simulates the battle-field cohesion of troops in the presence of a leader.
10.8 Tactical Movement. Each player may conduct one tactical movement per round, except the first. This consists of moving one or two units from any one box to any one adjacent box ("adjacent" means connected by a double-headed arrow).
Tactical movement may not leave the Left, Center or Right box empty – at least one unit must stay behind to hold the line. This does not apply to the Reserve or Outflank boxes.
10.9 Tactical Advance. If a box is vacant at the start of any round, units in any adjacent box may advance into it. Advancing units may not attack during the same round. An advance does not count against the limit on tactical movement. Any number of advances may be made in a given round, but only one into each empty box. No more than four units may advance from one box to another in a single round.
Example. Three Macedonian heavy infantry units advance into a vacant Persian Center box at the start of the Macedonian Movement Phase of Round 3. Those units may not take part in the Macedonian Combat Phase of Round 3. They may be attacked during the Persian Combat phase of Round 3, by Persian units in the Persian Left, Right and Reserve boxes. The Macedonian units may attack in the Macedonian Combat Phase of Round 4.
10.10 Tactical Combat. The Active player must attack out of at least one box per combat round. He may attack out of as many boxes as he wishes, providing each attacking box meets the requirements set out below.
Units in one box may only attack units in one adjacent box. Combat consists of a series of unit-to-unit duels. On the first round only one box may attack. On the second and subsequent rounds, each box may attack or pass as long as at least one box attacks.
If there are an equal number of attacking and defending units in the chosen boxes, then each attacking unit must attack a different defending unit. If there are more attackers than defenders, each defending unit must be attacked by one attacking unit, attacking player's choice. If there are more defenders than attackers, the attacker must fight the strongest defending units first (based on defense strength), ignoring the weaker ones.
Resolve each combat completely before proceeding to the next. Resolve all combats from one box before moving on to the next.
Exception. Cavalry units may not attack Elephants – if only cavalry units are present in a box opposed by Elephants, that box must pass, it may not attack.
10.11 Combat Resolution. To resolve a single combat, compare the attack strength of the attacking unit to the defense strength of the defending unit. If either unit has a leader, add the leader's rating to the appropriate combat strength.
Divide the attacker's strength by the defender's strength, rounding any remainders down. The result is the odds for the combat.
Locate the appropriate odds column on the Tactical Combat Results table. Roll one die and cross-index the die roll with the odds column to get the combat result. Apply the combat result immediately.
10.12 Combat Results. There are five possible combat results:
- AR - Attacker Rout. Place the attacking unit in the Routed Units box. If a leader is stacked with the unit, roll immediately on the Rout column of the Leader Casualty Table and apply the result. If the leader survives, place the leader with the unit in the Routed Units Box.
- AL - Attacker Loss. If the unit has only one step or is a reduced two-step unit, remove it from the board and place it in the dead pile. If the unit has two (or more) steps, flip it over to its reduced side. In either case, if a leader is stacked with the unit, roll immediately on the Loss column of the Leader Casualty Table and apply the result. If the unit is destroyed but the leader survives, place the leader with any other unit in the box (but he may not participate in another combat in the same phase).
- Eng - Engaged. The units are locked in combat and suffer no ill effects. Move the two units part way out of their boxes and next to each other to show they are engaged. During the next round, the engaged units must fight again, meaning the previous defender must now attack the previous attacker, and the box in which the engaged defender sits must attack; it cannot pass.
- DR - Defender Rout. Same as AR, but remove the defending unit/leader.
- DL - Defender Loss. Same as AL, but reduce/remove the defending unit/leader.
10.13 Missile Combat. Archers and horse archers resolve their attacks without computing odds or using the tactical combat results table. As a reminder, these units have their Attack Strength bracketed. To attack, select a target. Roll one die. If the die roll is less than or equal to the archer unit's attack strength, treat the result as DL. Any other result has no effect. The presence of leaders has no effect on missile combat, but a leader stacked with a unit that suffers a step loss must immediately roll on the Leader Casualty Table.
If the target unit is heavy infantry or heavy cavalry, add one to the die roll.
Example. An Indian 4-2 archer unit fires at the Hetairoi cavalry unit, stacked with Alexander. The die roll of 3 is modified to 4, because the target is heavy. Since the die roll is equal to the archer's attack strength, the target suffers a one-step loss and Alexander must roll on the leader casualty table. If the die roll had been 4 (modified to 5) the attack would have no effect.
10.14 Defensive Fire. Archers and horse archers that are attacked may fire at the attacking unit before combat is resolved. If the attacker is eliminated, remove it immediately. If the attacker is reduced, the attack must still be resolved, at new odds. An archer or horse archer unit that is engaged as a result of a previous combat round, or which is attacked by another archer unit, may not use Defensive Fire.
Optional Rule. If the players wish, all light infantry units may use defensive fire once per battle. They fire with a strength of 1. Rotate or mark in some way those units which have fired.
10.15 Flank and Rear Attacks. If there are attacking units in more than one box adjacent to a single box of defending units, each attacking box may launch a separate attack into the defending box. The attack from the first attacking box is restricted by the rules set out in 10.10. Each subsequent attacking box is also under those restrictions, but may ignore any units attacked from a previous box. These subsequent attacks may also be made against units in the second line of a Left, Right or Center box.
The priority for these subsequent attacks must be: units on the front line (strongest first), then units on the second line (strongest first).
A single defending unit may be attacked more than once, but no unit may be attacked twice until all units have been attacked once; no unit may be attacked three times until all units have been attacked twice, and so on.
Optional Rule. Any time a unit is attacked from two different boxes in the same turn, shift the final odds ratio one column to the right for each attack.
Design Note. In normal combat, it is virtually impossible to bring greater combat strength to bear because a single unit can occupy a box and can only be attacked once. Flank and Rear attacks allow an army to make better use of numerical superiority, but they can only be achieved after an advance has taken place by one side or the other.
10.16 Leaders. Leaders participate in combat by being stacked with a unit. Only one leader may participate in combat in any one box on any one round.
Any time the unit with a leader suffers a rout or loss result, roll one die and consult the appropriate column on the Leader Casualty Table. If the result is WIA, flip the leader to his reduced (wounded) side. Subsequent wounds have no additional effect. Note the leaders with "0" ratings have no wounded side – treat WIA results as KIA result for those leaders.
If the result is KIA, remove the leader from the game. If the dead leader was not the commander of his army in the battle (see 10.19), there is no further effect of his death.
A leader alone in a box into which enemy units advance is automatically captured.
10.17 Special Rules for Alexander. A unit stacked with Alexander may ignore all rout results, but Alexander must still be checked for Leader Casualty.
If Alexander receives a KIA result on a Leader Casualty check, roll again. On a roll of 1 he really is dead; treat any other result as WIA.
Design Note. They didn't call him Great for nothing. Alexander never ran away and provided a tremendous motivation for units in his immediate vicinity. We also had to make him relatively indestructible so the Macedonian Player would not keep him (ahistorically) out of battle. There is also a certain poetic justice that the superstitious Alexander dies only on snake-eyes.
10.18 Rallying. Any unit in the Routed Units box that begins a round stacked with a leader may attempt to Rally. A unit stacked with Porus rallies automatically. Other leaders can rally a unit on a die roll of 1, 2 or 3. Place the rallied unit and leader in the Reserve box. If it is enemy-occupied, place them in any other friendly-controlled box. Units which did not rout with a leader may not rally during a battle. Any routed unit which survives a battle rallies automatically at the end of the battle.
Darius may not attempt to rally – as Tarn observed, "Darius twice deserted brave men who were dying for him."
10.19 Ending a Battle. There are four ways to end a battle:
-
Death or Capture of Commander. If Alexander is killed or captured the battle is over and the game ends immediately with a Persian Decisive Victory.
If Darius or Bessus is present and is killed or captured, all remaining Persian units rout, and the players proceed to the Pursuit phase.
If Alexander, Darius and/or Bessus is not present, then the highest ranking leader of each army is the commander for that battle. If he is killed or captured, the battle ends. Place all remaining units of the losing side in the Routed Units Box and proceed to the Pursuit Phase.
-
Elimination of One Side. If all units of one side are eliminated or routed, the battle ends. Proceed to the Pursuit phase.
-
Breakthrough. If a player eliminates all enemy units from the opposing player's Reserve box AND occupies it with at least four units and a Leader, then a Break-through has occurred. The enemy camp is overrun and the entire enemy army Routs. Place all surviving enemy units in the Routed box and proceed immediately to the Pursuit phase.
-
Nightfall. If the battle has not ended by one of the above methods after all 10 rounds are completed, it ends automatically in a draw. There is no Pursuit by either player – both Armies remain in the province.
10.20 Pursuit. When a Battle ends in any way except Nightfall and some losing units survive in the Routed Units Box and there are victorious full strength un-routed cavalry and/or light infantry units, the victorious player may conduct a pursuit.
Roll one die for each full-strength un-routed victorious cavalry and light infantry unit and consult the Pursuit Table. Eliminate the indicated number of routed enemy units. The choice of units to be eliminated is up to the owning player.
Pursuing light infantry cannot eliminate enemy cavalry units. If the only remaining routed enemy units are cavalry, then light infantry cannot roll on the Pursuit table. Units that survive a Pursuit are retreated to any adjacent province in the following order of preference: friendly, contested or enemy controlled.
11.0 Siege Combat
11.1 General. Siege Combat is a special type of combat involving walled cities or fortresses. Siege combat is conducted after regular combat, so an army which has already fought a battle may conduct a siege. Sieges may be conducted in Contested provinces.
If an army has more than one leader (except those with a "0" rating), it may conduct one siege with each leader, but each unit in the army may participate in only one siege.
Siege combat is optional.
11.2 City Garrisons. A garrison unit may be "in the field" or it may be placed in a city. A field garrison must be attacked using the Minor Combat Results Table. It may not assist in defending the city from siege nor may it retreat into the city after combat.
A city garrison may not take part in any normal combat in the province. A city garrison may consist of one infantry unit (not step) for each wall marker on the city. Any number of leaders may be placed in the city; cavalry may not. A city with only one wall marker cannot support a garrison.
City garrisons control a province if no enemy units are present, and contest the province if enemy units are present. As with other garrisons, they never need supply. Units may switch back and forth from city to field garrisons freely during their movement phase.
11.3 Procedure. To resolve a siege, add up the number of attacking infantry and light infantry units – do not count archers or cavalry. Add 2 if the Siege Train is present. Add 1 for each leader present (as long as there is at least one infantry or light infantry unit for each leader).
Subtract 1 from that total for each wall marker and one for each garrison unit. Subtract 1 for each leader present (again, as long as there is at least one infantry or light infantry unit for each leader).
The result is the siege differential. Roll one die and cross-index the die roll with the appropriate differential column on the Siege Table. The result is the number of losses suffered by each side; the attacker's loss is to the left of the slash, the defender's loss to the right. Add 1 to the defender's loss result if the Siege Train is present (the presence of the Siege train automatically inflicts one loss).
11.4 Satisfying the Siege Combat Results. The Attacker may satisfy a loss by eliminating one attacking infantry or light infantry step. For each such loss, the attacker must designate a leader (if any took part in the siege) and roll once on the leader casualty table (but roll only once for each participating leader).
The defender may satisfy a loss by eliminating either a Wall marker or one step of the garrison. If any loss is satisfied by losing a garrison step and any leader took part in the siege combat, the defender must make a leader casualty check once for each such loss (one check per leader).
11.5 Defender Sortie. If at least one garrison step is present the besieged player may choose to make a sortie (a sudden attack) against the towers, rams and catapults represented by the Siege Train unit. The sortie must be announced and resolved BEFORE the attacker rolls on the siege table. Eliminate one garrison step and roll the die. On a die roll of 1 or 2, the Siege Train is destroyed. Only one sortie is allowed per turn.
11.6 Ending a Siege. When the last wall marker on a city is eliminated, the city and any remaining defending units and leaders are captured. The new owner is immediately awarded one wall marker (quick repairs on the ruined fortifications). Any desired additional fortification levels must be built normally (see 12.5). The attacking player may lift a siege at any time – he is not required to continue a siege that he has started.
11.7 Special Siege Train Rules. The Siege Train can only move if accompanied by at least one infantry unit. If it is ever caught alone in an enemy-controlled province, it is captured and destroyed. It can be rebuilt in Macedonia, at the cost of four replacement steps (see 12.0).
12.0 Replacements
12.1 In General. Replacements represent the rebuilding of units partially or completely destroyed in combat, the formation of entirely new units, and/or the diversion of such resources to building walls. Each player receives one replacement point for each province he controls at the start of the new turn. Note that the Macedonian Player receives replacements only at the start of each Winter turn, and the Persian Player receives replacements at the start of each Winter and Spring turn (except the Winter of 334 BC).
Replacements points must be used on the turn of availability – they cannot be saved from turn to turn. Contested provinces yield replacements to neither player.
12.2 Use of Replacements. The Unit Replacement Cost table on the map contains a summary of the replacement costs for the various unit types and for wall markers. Each player is free to purchase any combination of replacements, subject to the availability of units, wall markers and replacement points.
12.3 Rebuilding Reduced Units. Any two-step (or more) unit which has been reduced through combat or attrition may be rebuilt to full strength by purchasing the appropriate type of step(s). Expend the appropriate number of replacement points and flip the unit counter over to its full-strength (or next higher) side. The location of the unit is unimportant – it may even be under siege.
12.4 Rebuilding Destroyed Units. Any unit placed in the dead pile as a result of combat or attrition, or which began the game there, is available for rebuilding with replacement points. Expend the appropriate number of replacement points and pull the unit from the dead pile. Multi-step units may be rebuilt to any level of strength. Rebuilt units may be placed in any friendly-controlled (not contested) province during the Replacement phase.
Design Note. Armies of the day did not stay in the field year-round, and never manned extended lines. It was perfectly possible for bodies of reinforcements to make their way to a friendly army.
12.5 Building New Wall Markers. New wall markers may be placed on any city in any friendly-controlled province at a cost of 2 replacement points each. The number of wall markers in the counter-mix is a design limit – do not make extra markers. If a player wishes to make a new wall and there are no more counters left, he may freely destroy another of his wall markers (anywhere) and reuse the marker immediately.
Note that it is impossible to rebuild walls during a siege since new walls may not be placed in a contested province.
12.6 Indian and Independent Provinces. The Persian Player may not count the Indian or independent provinces in determining his replacements. Indian and barbarian forces never receive replacements.
Note that Lybia is part of the Persian Empire and does count for replacements (although Lybia is mostly desert, the Greek colony of Cyrene, just off the map, paid tribute to Persia).
12.7 Greek Mercenaries. Greek Mercenary units may be purchased as replacements by either player – first come, first served. Once bought by one player, they remain with his army until destroyed and placed in either dead pile. Mercenaries may change sides any number of times in the game.
Design Note. Because the mercenaries are two-step units, it was impossible to back-print them in opposing colors. Players will just have to keep track of their current loyalty as best they can.
12.8 Special Macedonian Recruitment. On the Winter turn following the Macedonian occupation of any Persian Capital (Susa, Persepolis or Ecbatana) the Macedonian player may start taking one-step Persian infantry and cavalry units as replacements. On the Winter turn following the Macedonian entry into Upper or Lower India, the Macedonian player may start taking one-step Indian infantry units as replacements.
In both cases, the units taken must be in the dead pile and must be back-printed with Macedonian colors. The Macedonian player may not take more than half his replacements in this way – for every special replacement he must take at least one Macedonian, Mercenary or Greek Allied replacement. The Special Replacements are placed on the map the same way as all other replacements.
Design Note. This represents the recruitment of former Persian troops into Alexander's army. Alexander made extensive use of such troops to supplement his limited Macedonian and Greek manpower.
12.9 Leader Casualty Recovery. Roll one die for each injured (reduced) leader during each replacement phase (not just those in which replacements are received). Alexander and Porus recover on a die roll of 1-5. All other leaders recover on a die roll of 1-3.
Design Note. Alexander was wounded over 20 times and had a remarkable ability to heal. Porus was an enormous and tough warrior. Kings always got the best medical care. It's good to be the King.
12.10 The "0" Leaders. The two leaders with "0" ratings can be used to replace any leader killed or captured in battle, to include themselves. After the end of the battle, place the "0" leader with any surviving units. If there are none, place the leader with any other friendly units. The "0" leaders act in all ways as other leaders, but note they have no flip (wounded) side.
When a new leader enters the game, remove the "0" leader. There can never be more than one "0" leader in play at one time for each side – the single counter is a design limit.
Design Note. During playtesting, we found that the Persian player could be reduced to having no leaders, while the Macedonians suffered greatly if Parmenio gets killed early in the game. The "0" leaders represent junior officers who would take over until someone of higher rank came along. For historical interest, Xenophon would have been such a leader.
12.11 Macedonian Recuperation - Optional. The reduction of the Macedonian phalanx from 8-8 to 7-7 in combat represents disruption and fatigue more than actual losses - the men's armor and tight formation prevented heavy casualties unless the formation was disrupted. On any turn in which a 7-7 Macedonian phalanx has not participated in combat (siege, minor or tactical board), flip it back to its 8-8 side. This does not cost any replacement points.
13.0 Reinforcements and Withdrawals
13.1 Reinforcements. Reinforcements are new units or leaders that enter the game at times specified by the turn record track. Reinforcements are always placed on the board at full (not reduced) strength, and are available at the start of each player's reinforcement phase of the appropriate turn. Reinforcements may be placed in any controlled (not contested) province.
13.2 Withdrawals. Withdrawals represent the disbanding of units or the non-combat death of leaders. Withdrawals are made during the owning player's reinforcement phase. For example, the Persian commander Memnon died in the Spring of 333, so in the game this unit is withdrawn during the Persian reinforcement phase of that turn. If the Turn Record Track calls for the Withdrawal of a Leader or unit that has already been eliminated, ignore the Withdrawal; no substitute is required.
14.0 Random Events
Beginners Rule. Ignore this entire section.
14.1 In General. Random Events are events which occurred during Alexander's campaigns. They have been made random so that players cannot plan ahead. The Turn Record Track indicates the timing of the random events. On those turns, take the actions indicated below.
14.2 Spartan Revolt. During the Random events phase of each Summer and Autumn turn beginning in 332, the Persian Player rolls one die. On a die roll of 1 or 2, the Revolt occurs. Place the Agis leader counter and the Spartan units in Hellas. Flip any Wall counters in Athens to the Persian (blue) side. These units are moved by the Persian Player, but may only enter Hellas, Macedonia, Thrace and Ionia. They do not require supply in Hellas.
If there are any Greek Mercenary units in the dead pile or replacement pool, roll one die. That number of Greek Mercenary units are placed with Agis and the Spartans.
Once all four Persian treasuries have been captured, add one to the Persian Player's die roll. If all four Persian treasuries have been captured, and Darius and Bessus have both been killed, it is no longer necessary to roll for Spartan revolt. Antipater and the Macedonian home army are released from the restrictions of 8.3.
Design Note. In 332, Agis II, King of Sparta led a revolt against the Macedonian domination of Greece. Antipater crushed the Spartans in 331 at the battle of Megalopolis. In the game, the chances of a revolt depend on how well Alexander is doing.
14.3 Barbarians and Arabs. On any turn marked with a "B" there is a chance of a barbarian incursion.
Roll one die to determine the location of the raid:
| Die Roll | Raid Location | Result |
|---|---|---|
| 1 | no raid | |
| 2 | no raid | |
| 3 | Scythia | |
| 4 | Chorasmia | |
| 5 | Sind | |
| 6 | Arabia | Use Arab units |
Roll another die to determine the size of the raid:
| Die Roll | Raid Size |
|---|---|
| 1 | 2 units |
| 2 | 4 units |
| 3 | 6 units |
| 4 | 8 units |
| 5 | 10 units |
| 6 | 10 units |
The Persian player places the units in the indicated province, and may move and fight with them as he wishes. As long as barbarian units remain in their original province they do not require supply. Once they move into the Empire, they are subject to normal supply rules.
The Persian player is not required to move Barbarian units on the turn of placement – he can hold them in readiness indefinitely until a suitable Macedonian target comes along. Note that Barbarians can establish Persian control over a province – the Barbarians are assumed to be Persian allies receiving payoffs from the Great King.
Barbarians never require leaders to move or fight, and may not combine forces with any other forces, Persian, Indian or other Barbarians. If a Barbarian group splits up, they may never recombine. In all other ways, they function the same as any other units.
The barbarian units in the counter mix are a design limit. If the die roll calls for more units than are available, ignore the excess.
15.0 Macedonian Objectives
Beginners Rule. Ignore this entire section.
15.1 In General. Alexander's prestige and charisma depended on the achievement of certain highly visible goals and public-relations events. In a sense, the campaign was a giant scavenger hunt for spiritual and physical treasures. These are represented by the Macedonian Objective markers which count for Victory points at the end of the game. Place the Objective markers on the appropriate boxes at the start of the game. As Alexander achieves each objective, remove it from the board.
15.2 The Persian Royal Family. After the Battle of Issus, Alexander captured the family of Darius, including his mother, Sisygambis, his wife, and his children. His courteous treatment of these noble prisoners was a major propaganda victory. The Royal Family counter is stacked with Darius and moves wherever he moves. If Darius routs or is killed or captured on the Tactical display, or if he is present in a city that falls to a siege, the Royal Family is captured.
15.3 The Gordian Knot. A temple in Gordium preserved an old Royal ox-cart to which a yoke was fastened by an elaborate knot. There was a prophecy that the man who could undo the knot would rule all of Asia. According to one version of the story, Alexander drew his sword and hacked through the knot. If Alexander enters Gordium (in Phrygia), scratch one knot.
15.4 Alexandria. Alexandria does not exist until Alexander enters Egypt. On the turn following that entry, regardless of the control status of Egypt, treat Alexandria as a normal city, which may be fortified and garrisoned.
Design Note. Alexander, with characteristic modesty, founded at least sixteen different Alexandrias throughout his newly-conquered empire. The Alexandria of Egypt was the only one to win lasting fame – as an unequalled center of intellectual pursuit.
15.5 The Temple (Oracle) of Ammon. The Greeks considered the Egyptian god Ammon to be identical to their god Zeus. Alexander never revealed what the priests at this desert oasis told him, but it had something to do with his claim to divine descent.
15.6 Darius. If the Macedonian player kills or captures Darius, treat the Darius counter as an objective achieved. When Darius leaves the board, Bessus becomes Great King – place him with any Persian army or garrison, or in any Persian-controlled province.
Design Note. Historically, Bessus deposed Darius, then murdered him to prevent his falling into Alexander's hands alive. In the game, Bessus simply waits in the wings as a replacement.
15.7 Bessus. If the Macedonian player kills or captures Bessus, treat the Bessus counter as an objective achieved. The highest-ranking Persian leader still alive after Darius and Bessus are out of action is entitled to call himself Great King, but Alexander gets no additional points for tracking him down.
Design Note. Alexander had Bessus mutilated and impaled for the crime of seizing the throne that Alexander claimed.
15.8 Persian Treasury. The four treasury markers represent the Persian Royal Treasury. The treasury markers may not be moved. When the Macedonians capture the treasury when they capture the cities in which the treasuries lie.
When the Macedonians have captured two of the treasuries, the Persian player loses his Spring replacements. When the Macedonians have captured all four of the treasuries, the Persian player may no longer rebuild or replace his foot archers or Royal Guard, and may not hire any more Greek mercenaries.
Design Note. The actual bottom line was: Babylon, 20,000 talents; Susa, 59,000; Persepolis, 120,000 (!); and Ecbatana, 12,000. It is good to be the King.
15.9 Roxana. Alexander needed a wife because he needed an heir. The most beautiful woman in Asia is the prize for capturing the Sogdian Rock.
Design Note. It is really good to be the King.
16.0 How to Win
16.1 Instant Persian Victory. If Alexander is killed or captured in combat, the game ends with a Decisive Persian Victory. This does not occur when Alexander dies at the end of the game or by Random Event (see 17.3).
16.2 Instant Macedonian Victory. At the beginning of any game turn, every province on the map except Arabia, Sind, and the barbarian provinces that border the North edge is Macedonian-controlled, the game ends with a Decisive Macedonian Victory.
16.3 Victory Points. If neither side achieves an instant victory, play continues until the end of the Summer 323 BC turn. At that time, the Macedonian Player receives 1 victory point (VP) for each Objective secured by Alexander and 1 VP each Macedonian-controlled province. Compare the total score to the following schedule to determine the winning player and the margin of victory:
- 0 - 10 VP: Decisive Persian Victory – Greek becomes a dead language, no Western Civilization survives, today we'd all be speaking Farsi.
- 11-15 VP: Marginal Persian Victory – No Hellenistic empires develop. Rome wins big a century or two earlier, and we're all speaking Latin.
- 16 - 20 VP: Draw – The Persian Wars drag on for centuries, exhausting East and West. We're all speaking Turkic.
- 21-25 VP: Marginal Macedonian Victory – What Actually Happened.
- 26 or more VP: Decisive Macedonian Victory – A universal world empire is established, resulting in a Golden Age of peace and progress that lasts for millennia. Sounds like Greek to me.
17.0 Optional Rules
Beginners Rule. Ignore this entire section.
17.1 Scorched Earth. Memnon of Rhodes, the brilliant Greek mercenary who led the Persian Army at the Granicus, wanted to fall back through Asia Minor, destroying all the crops in order to starve the invading Macedonians. He was overruled by the Persian satraps, who were itching for a fight and reluctant to see their family estates devastated. To see how Memnon's strategy might have worked, you may, by mutual agreement of both players, apply this rule:
During any supply phase, the Persian player may place a depleted marker in any province he controls (not in a contested province). The depleted marker is not removed at the beginning of the following summer turn (all the peasants starved or became refugees). Mark this any way that works – use two depleted markers, toss a penny on the province, flip the marker over.
17.2 Macedonian Fury. If Alexander is injured while leading a siege attack, all subsequent attacks against that city inflict double losses on the defender.
Design Note. After Alexander took an arrow in the chest at the Malli citadel, his men massacred every living thing in the town.
17.3 Death of Alexander. Alexander died in the Summer of 323, probably from illness complicated by heavy drinking and the debilitating effects of his multiple injuries. The historical game ends at the death of Alexander. In this hypothetical scenario, we give Alexander a chance to survive long enough to establish a dynasty.
On each turn beginning with the Summer turn of 323, roll one die during the Random events phase. On a die roll of 1 (1 or 2 if the Alexander counter is flipped over to its reduced side) Alexander dies and the games ends immediately.
17.4 Mutiny. There is a chance that the Macedonian troops will refuse to obey orders. There is also a chance that a disgruntled Macedonian general may attempt to stage a coup. On turns labeled "Mutiny Check," roll on the Mutiny Table during the Random Events phase. The chance of Mutiny depends on the current number of Objectives that have been secured – the higher the total, the more war-weary the troops will be.
- Effects. The Army stacked with Alexander may not move in the following Macedonian movement phase. Withdraw the indicated number of Macedonian units immediately.
- Treachery. If a Mutiny occurs and at least one other leader (except Hephaistion) is stacked with Alexander, roll for Treachery. Select one of the stacked leaders at random (by drawing from a cup, for example). On a die roll of 1 or 2 that leader is withdrawn (executed for plotting to over-throw Alexander).
- If no other leader is stacked with Alexander, but other Macedonian Leaders are still on the board, treachery is still possible – randomly select one of the leaders and roll one die. On a die roll of 1 or 2 that leader is withdrawn and any Macedonian combat units stacked with that leader may not move in the following movement phase.
17.5 City Surrender. Before declaring a siege attack against any Persian controlled city, the Macedonian player may elect to roll on the city Surrender Table instead. The table need not be used against any unfortified city.
| City | Die Roll |
|---|---|
| Sardis | 1-5 |
| Halicarnassus | 1-2 |
| Tyre | N |
| Gaza | 1 |
| Susa | 1-3 |
| Ecbatana | 1-4 |
| Persepolis | 1-3 |
| Pasargadae | 1-3 |
| Sogdian Rock | N |
| Aornos | 1-2 |
| Malli | N |
| Gordium | 1-4 |
| Athens |
Roll one die for the city – if the result falls within the span of numbers indicated below, the city surrenders with its fortifications intact. Flip the wall markers over to show Macedonian control. If a garrison is present it joins the Macedonian army immediately if the counter has a Macedonian flip-side, otherwise it is placed in the dead pile. Any leader or objective in the city is captured, and placed in the Macedonian Objectives box.
Only one surrender roll is permitted per city. If it fails, the city must be taken by siege. If a siege has already begun, the roll may not be made.
An entry of "N" in the Die Roll column means that this city or fortress never surrenders.
Design Note. Many of Alexander's campaigns of conquest were in fact little more than victory marches. The combination of his reputation and their dissatisfaction with Persian rule led many peoples to submit to him before he even began his march into their territory.
18.0 Designer's Notes
Alexandros, at least at first glance, seems to be more fun for the Macedonian player than for the Persian. Army, garrison or city, anything the Persian player deploys out there is inexorably steam-rollered by the Macedonian juggernaut. The Persian player has to constantly remember one overriding objective: Kill Alexander. Seek a battle whenever you have enough force to take a shot at Alexander. Since your best stack only has a 13 attack strength against the 17 defense strength of Alexander plus the Hetairai cavalry, you will need persistence and luck. Ignore everything else on the battlefield, and keep hitting at Alexander. A second-line archer can sometimes get in a shot that helps whittle the Hetairai down to a more vulnerable defense strength. Build up your Eastern fortresses as much as possible to force Alexander to risk his neck besieging them.
Some players will object to the rules governing tactical attacks – I have four strong units facing a box with one weak unit, why can't I just pile on with all four? The rigidly linear tactics of classical warfare made units very cautious about their flanks and rear. At battles from Marathon to Cannae, big armies learned it was dangerous to throw everything into a weakly held sector of the enemy line. There might be a second line waiting behind that screen of light infantry, or a mass of cavalry poised just off to the left. Sound tactics were to send one unit forward, while others waited to see what happened. A lone unit is subject to multiple attacks in one round only if there are multiple attacking boxes – this is a realistic way to model linear tactics without the added overhead of big, rectangular counters and complex flanking rules.
The naval side of the game is absent partly because of counter-mix limitations, partly because it added a lot of complexity, but mostly because it was no big deal historically. Neither Alexander nor the Persians (who initially commanded a much greater fleet) ever used sea power in an aggressive way. The use of ships to transport supply is modeled abstractly in Rule 7.5, and that was far and away the greatest effect sea power had on this campaign.
The most challenging part of the design was the humble reinforcement schedule. There is a vast historical literature about Alexander and his campaigns, but there is little to go on when you have to decide which of the many Persian satraps were qualified to command an army, or just when one of Alexander's companions was first trusted with an independent detachment. If you find better information, please let me know.
In the actual campaign, Sardis in Ionia was surrendered to Alexander by its commander, Mithrines. It was one of the strongest fortresses in Asia, with a triple wall and a strong natural position. In fact, many of the other walled cities in the Persian Empire gave up without a fight. In the basic game, we assume the Persian governors are made of sterner stuff. The Table for City Surrender is an optional rule based on the historical probabilities.
The walls of Babylon were one of the wonders of the ancient world, but they were basically a giant mud-pie (adobe brick, faced with glazed tile). The Persians had demolished sections of the wall, and removed the city gates, to discourage the cranky Babylonians from rebellion. Babylon probably should not be allowed a wall strength greater than 2. Pasargadae was the first capital of Persia, and the location of the tomb of Cyrus the Great. It was unfortified, but politically significant enough to include on the map – by fortifying and defending it the Persian Player may be able to deny Alexander control of his home province for another turn. It should be noted that the temple of Ammon in Libya is a holy place, and neither player may fortify it.
The Caucasus mountains, which form the northern border of Armenia, are treated as impassible. I know there is a perfectly good pass on the Caspian shore, but there is nothing on the other side (at this period of history) worth conquering. The Pamirs, beyond Sogdiana and Bactria are also treated as impassible, because I had to end the map somewhere.
19.0 Player's Notes
As in the actual campaigns, battles will not happen very often but they will be the focal points of the game. In between battles, the armies will march around to gain control of provinces, guard those already gained, and build their strength with replacements. But it is the battles which will determine the course of the game.
Your initial placement on the battle board is critical because of the limited movement capabilities. The only way to survive a battle without the defeat of one army is to survive 10 rounds. To do this, keep the action to a minimum by placing only a single unit in each combat box and place the rest in the Reserve. Since each unit can only attack or be attacked once per turn, you will have fewer units at risk on any given turn. On the other hand, should fortune smile on your army and one of the opposing battle boxes be empty, you will be less able to take advantage by making a strong advance (remember, you've got to leave one unit in the main battle line boxes). This can be solved by placing several units in the second line of the battle boxes.
If you want the battle to go more quickly (by causing higher casualties), cram those battle boxes to the brim. Both sides have to do this to generate the faster battle-either side can slow the action by keeping committed units to a minimum.
Leaders should generally be used, unless you only have one. He still has to start in the Center box, but you can keep him in the second line and move him to the Reserve later. Alexander is the exception – he can't rout and is hard to kill, so get him into action and keep him there. The most dangerous units, especially for the Persian, are the archers. One of the most effective tactics for the Persian is to fill a box (at least the first line) with 4 units, one of which is the archer. If the Macedonian has fewer than 4 units opposing the box, the archer is the first to attack each turn and has a fairly good chance to kill a step. On defense, the archers are weak and so will be the last unit attacked. The Macedonian is thus forced to commit 4 units (which will speed his losses) or stand there and take his lumps from the archers.
Keep a lot of cavalry and light infantry in the Reserve. These units will be available to make or guard against outflanking moves and also conduct pursuits (if you win). If the cavalry and light infantry is committed to battle too early and takes losses, it will not be able to pursue, and pursuit is the one chance to make some easy kills.
The one aspect of tactical combat which will sneak up on you is the number of step losses on the CRT. These are especially deadly to the big Macedonian units. Even a successful battle will require heavy sacrifice. This has the effect of reducing the relative power of strong units (like the Macedonian phalanxes).
Macedonian Player
Without a doubt, your army is the superior fighting force in the game. If you keep Alexander and most or all your available forces concentrated you should have nothing to fear from any army the Persian can put together. Unfortunately, keeping it concentrated means you will control only the province where the army is currently located.
You must pick up new provinces fairly quickly – this will not only give you the ability to replace your losses but will also deny those replacements to the Persian. If you fail to seize provinces, the Persian will be able to replace his losses almost at will.
On the other hand, each province seized requires a unit be left behind to control it. This will be difficult early in the game because while your army is very powerful in terms of combat strength, it has relatively few units. You will quickly dissipate your fighting power if you try to hold too much ground. An added problem is that while your main army can generally beat the Persians, an individual garrison unit will be easy pickings, though they probably can't take out more than one or two per turn. The fortresses will help, but you will probably not be able to build many walls in the early going because of lack of replacements.
One quick way to increase the number of units is to take one of the Persian capitals, which allows you to recruit Persian units into the army. These units are cheap garrisons. To get at this resource early, march on the Persian capitals. Remember, there is no need to maintain a supply line so you are free to march your army deep into the empire.
If there is a major Persian army on the board, stay close to it. You can't afford to leave it alone to gobble up your garrisons or, worse, march on Europe – Antipater's army can handle the Spartans but not the whole Persian army. Attack only if you are sure of victory – Alexander can't leave a battlefield alive, so it's conquer or die. This is a very real possibility if you've lost or left behind too many units or have too many reduced units. Keep this last point in mind when taking replacements – it may seem like a bargain to take a half-strength 7-7 instead of flipping a 7-7 to an 8-8, but taking a step loss from 8-8 to 7-7 is not as bad as from 7-7 to 0-0 (destroyed).
Remember, winning battles only gains you temporary freedom of action and will cost you casualties you probably can't replace (at least in the early going). Fight only when necessary, but when you do, go for the throat.
Persian Player
We have to say at the outset that the Persian side is harder to play. In the early going, it will look grim. But losing battles costs you nothing except units and those are replaceable – for you. The Macedonian will have a much harder time rebuilding his forces, so wade in and cause what losses you can. If you can weaken him enough, he may end up just retreating his way around the board to avoid battle or losing Alexander if he fights. You only have to win one battle to win the game, and that more than cancels out all previous losses.
When you get extra leaders, try to keep two forces on the board, one to tie down the main Macedonian army and the other to knock off any Macedonian garrisons.
In battle, keep the main battle line boxes strong. Each unit that must be attacked means another potential Macedonian casualty. Above all, keep those archers in the fray, they are deadly.