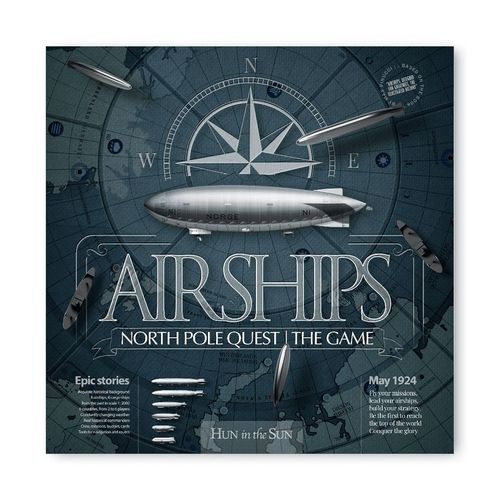
Airships: North Pole Quest
Airships: North Pole Quest Rulebook
Table of Contents
Table of Contents
- 1A. Scoreboard
- 1B. Weather Areas, Weather Windows and Weather Discs
- 2. Game Plan
- 3. Commanders and Specialist Token
- 4. Airships and Ships
- 5. Navigation Tools and Calculation
- 6. Cards
- 7. Other Objects
- 8. Purpose of the Game
- 9. Victory
- Game Example
- List of Actions
- 10. Detailed Explanation of Actions
- 11. The Game Price List
- 12. Solo Mode
- Transcription Notes
1A. Scoreboard
The players' miniatures move on the map, and they are not allowed to cross the outer limit of the map with their ships and airships.
All the miniatures move on the map for a certain number of Lengths.
The Lengths are the units of measure in the game for all the moves and for the calculation of distances. They are represented by the divisions on the Navigating Tool and Range Calculator (see Navigating Tool on page 23; see Range Calculator on page 24).
Beneath the display board (turns) revolves the weather disk which displays symbols of the weather conditions (see Weather on page 9).
Displayboard Assembly
Assemble the display board as per the instructions (see image page 218). The weather disk should be able to rotate freely under the map. Once positioned, turn the disc until the weather symbols appear in the holes provided (the weather windows) (see page 9).
The Pole
The last inviolate frontier, the most aspired destination for all the Commanders in the golden years of airships: to reach the North Pole. To fly over the immense expanses of perennial ice and to return unharmed from the crossing, is the main objective of the whole game. In order to win the game it is necessary to fly over the North Pole (located in the center of the board) with your airship and return back to your Arctic Base (see Purpose of the game on page 30; see Arctic Base on page 44).
Access to the clear geographical area surrounding the North Pole (indicated on the map as Barrage Area) is subject to a Barrage Limit: to unlock it, each player must perform at least 3 Missions, whose objectives are specified on the Mission Cards (see page 27). Under no circumstances can an airship pass through the Barrage Area without having unlocked the Barrage Limit; while ships have free access (see Airships on page 20; see Ships on page 22).
Advanced Rules: To unlock the Barrier, the player must perform at least 3 Quests and have at least 300 Bonds, the game's currency (see Bonds on page 29, see Purpose of the game on page 30).
Flags and Background Colors
The map on the game board shows territories belonging to different nations, whose borders are marked according to the world political situation of the historical period to which the game refers: 1924. The territories of each nation have their own "background color".
| Nation | Background color |
|---|---|
| Germany | Ochre |
| British Empire | Violet |
| Italy | Pink |
| Japan | Peach |
| USSR | Light Green |
| USA | Light Yellow |
| France | Light Blue |
There are also Nations that do not contribute to reaching the North Pole, whose territories are marked by the white background color and are called "Neutral Territories". On each Nation and each Neutral Territory, there are Bases and Ports that will be used by the players during the whole game (see Symbols Legend on page IX; see Airships on page 20; see Ships on page 22; see Bases and Ports on page 6).
Each Nation in the game is represented by its own flag. The flags are historically accurate and are those that officially represented the Nations in 1924 (see Table). The flags on the board positioned next to the Bases identify the Nation that owns them (see Bases and Ports on page 6).
Bases and Ports
On the Nations, present on the game board, are visible colored symbols that identify the Bases (blue) and Ports (red) (see Bases and Ports Table on page 6). Their position within the borders of a territory determines their ownership: if they are within the borders of a Nation in the game, they belong to the player who is using them in the game, while if they are on Neutral territories they are also neutral (see Background Color Chart on page XIII).
To distinguish the ownership of the Bases is essential for players who decide to use the advanced rules, because depending on the ownership of the Bases the costs of maintenance and Refuel can vary (see Repair on page 39; see Refuel on page 39; see Game Price List on page 47).
Around the Bases and Ports there is a tolerance area, represented by a gray ring (or red for the Missions) placed outside the icons: the arrow of the airship support base or the bow of the ship must be within it, so that the goal can be considered achieved.
Legend of symbols for bases and ports (see page IX, colored legend):
- 1a - Airship departure base. Miniatures that make use of it: Airships. Symbol on the board: blue square with the Airship symbol. Usage: The Starting Bases are the positions on which the participants' Airship miniatures are placed at the beginning of the game (see Miniatures Positioning on page 33). They can be used by players as any Base (see Bases and Ports on page 6).
- 1b - Base. Miniatures that use them: Airships. Symbol on the board: blue dot placed in the center of a gray ring. Use: They are used by all Airships to station, for example while waiting for a change in the weather that affects the area you are flying over, or to repair or refuel your airship (see Airships on page 20; see Weather on page 9; see Repair on page 39).
- 1c - Mission Base. Miniatures that use it: Airships. Symbol on the board: blue dot placed in the middle of a red halo. Usage: They are used as a reference point for completing Missions (see Missions on page 38). All the bases shown in the Mission Calculator can be used as a Mission Base (see Mission Calculator on page 25). They can also be used by players as any Base for resting or refueling.
- 1d - Ship Departure Base. Miniatures that use it: Ships. Symbol on the board: red square with Ship symbol. Usage: Starting Ports are the locations on which the participants' Ship miniatures are placed at the start of the game. They can be used by players as any Base for stopping or refueling.
- 1e - Port. Miniatures that use it: Ships and Airships. Symbol on the board: red dot placed in the middle of a gray ring. Usage: All players can use them in case the Ships have to make a stop. They can also be used by players as Bases for Airships (see Bases and Ports on page 6).
- 1f - Mission Port. Miniatures that use them: Ships and Airships. Symbol on the board: red dot placed in the center of a red halo. Usage: They are used as a port by the ships and as airports by the airships (double use): a Base is for stopover and repair and a Mission Base is the point of arrival of a Mission.
- 1k - Arctic Base. Miniatures that use it: Ships and Airships. Symbol on the board: snowflake on a colored background. The background color and the presence of the flag identify the (membership of) ownership by one of the Nations in the game (see color icons on page IX; see Nations Table on page XIII). Usage: They can be used in the game as a normal base. Once booked by a Nation, they will be reached by the Ships that will place the Mooring Mast there (see Ships on page 22; see Arctic Bases Organization on page 44; see Price List on page 47). When the airship reaches the base that hosts its Mooring Mast, from there it can leave to conquer the North Pole (see Purpose of the game on page 30).
Restricted Areas and Obstacles
Some special areas are represented on the game board:
- Geographical obstacles
- Marine obstacles
- Areas out of bounds for navigation (air and sea) (For advanced game mode only)
Encountering these crossings means taking the responsibility of facing a risk. To do so the player must draw a card from the "Venture" Cards deck. These cards can contain either penalties or bonuses and their effect is immediate on the player who draws them (see Venture Cards on page 27).
Ships are always allowed to cross an obstacle, while an airship will only be allowed to if you have a Commander in your crew: in his absence, the airship is forced to go around the obstacle.
Advanced Rules: In the advanced game mode, geographic and marine obstacles are also added to the "Areas forbidden to navigation": it is possible to circumvent or deal with these areas in the same way as you would deal with geographical and marine obstacles, as described previously in the Basic game rules.
Symbols for restricted areas and obstacles (see color icons on page IX):
- 1g - Consequences of crossing: Political - Economic. Can cross it: Airships and Ships. Affected by: Aircrafts or Ships. Characteristics: Airships can only cross these areas if they have a Commander on board. Ships can always cross these areas, they do not need a Commander. Effect: by crossing it, the player draws a Venture card, reads the description of the consequence on the card (for airships it is the second of the three) and suffers the described effect (see Venture Cards on page 27).
- 1h - Consequences of crossing: Geographical Obstacle. Can cross it: Airships. They suffer the effect of it: Airships. Features: Ships can always cross it, they do not need a Commander. Effect: when crossing, the player draws a Venture card, reads the description of the consequence on the card (for ships it is the third of the three) and suffers the effect described (see Venture Cards on page 27).
- 1i - Consequences of crossing: Sea Obstacle. Can cross it: Ships and Airships. They suffer the effect: Ships. Characteristics: Airships can cross it only if they have a Commander on board. Ships can always cross it. Effect: The player draws a Venture Card, reads the description of the consequence (the first of the three) and applies it to the miniature with which he crossed the forbidden zone, or to its budget, as specified on the card (see Venture Cards on page 27).
1B. Weather Areas, Weather Windows and Weather Discs
Weather Areas
The entire game map is divided into sectors bounded by thick gray lines that identify Weather Areas.
Weather Windows
Each Weather Area on the game map has a hole, called a Weather Window, through which the Weather Icons of the disc below are visible. The weather window icon changes at the beginning of each new round, as soon as all players have finished their turn. In the event that, by turning the Weather Disc, no icon appears in the displayboard windows, the influence of the weather on the movement is to be considered null.
The Weather Disc
Beneath the map slides the Weather Disc, one of the characteristics of the game: it is coaxial with the map and has several Weather Icons that identify the weather agents to which the reference Weather Area will be subject. At each turn the Weather Disc will be rotated counterclockwise (indicated by the arrows) until the new Weather Icon appears.
Each icon represents a different atmospheric agent (sun, wind, rain, fog, storm) and for Airships in movement it may lead to sudden changes of course, slowdowns, stops or structural damages. The player will then proceed in the game challenged by constantly changing weather.
Insights: The weather disk has been designed following the advice of an actual meteorologist, to simulate a consistent situation, however simplified. The distance between the icons is equal to about two degrees of longitude and they move counterclockwise (from west to east) to simulate real weather. The weather icons on the display board change in a sequence to mirror realistic weather conditions. The frequency of change varies with latitude. This can give experienced players insight into the evolution of the weather, helping them to predict and counteract possible hazards. The weather disc is rotated through openings in the sides of the game board.
Interaction with Miniatures
Weather icons: Sun, Fog, Wind, Storm, Rain.
The miniatures crossing a Weather Area are influenced by the symbol represented in the related Weather Window. Weather is a variable that only affects the flight of Airships over the affected weather area. The only exception being fog, which also affects Ships.
The Weather affects the miniatures only during the player's move: the Airships stationed on a Base and the Ships stationed in a port are therefore immune. For Airships, figures such as a Meteorologist or a Scientist within their crew can mitigate some weather effects (see Crew on page 35). This does not apply to Ships (see Ships on page 40).
The reference weather icon that affects a miniature during its movement is always the one in the zone where the movement starts, never the one where it ends. The player must be very careful before moving.
We can summarize the weather influences with an indicative scheme (see the Table on the next page). Each icon represents a different atmospheric agent (sun, wind, rain, fog, storm) and for moving airships it may cause sudden changes in course, slowdowns, stops or structural damage. You will then proceed in the game challenging a constantly changing weather (see more information on page IX).
| Symbol | Affected thumbnail | Consequences | Further information |
|---|---|---|---|
| Sun | --- | Nothing happens | --- |
| Wind | Airship | Use the Wind Indicator | See Wind Indicator on page 24; See Airships on page 20 |
| Rain | Airship | Suffers -1 in Speed | See Airships on page 20 |
| Fog | Airship | Stop: Airship stationary in place. If out of a Base, continues to consume Fuel (*** Advanced Rules) | See Venture Cards on page 27; See Crew Management on page 17; See Airships on page 20; See Ships on page 22 |
| Fog | Ship | Can cross, but draws a Venture Card with the effect "Sea Obstacle" | (as above) |
| Storm | Airship |
(***) In case of fog, low visibility may hide an unexpected obstacle. This risk factor results in a requirement to draw a Venture Card. (See Crew Interaction on page 23; see Range and Fuel on page 13)
2. Game Plan
Advanced Rules: The player can move the Airship in fog only if there is a Commander in the crew, then a Venture Card is drawn as required by the rules. If there is no Commander, the player cannot choose to move the airship in fog, so his miniature will remain stationary until the fog has cleared (see Crew Interaction on page 17; see Range and Fuel on page 13).
Each game board shows all the useful data to the players about their Airship: the Nation they represent, their assigned Budget and the starting locations of their miniatures (which may vary depending on the chosen Nation or the number of players participating in the game). On the game boards there are also some real technical data about the depicted airship (not useful for game purposes, but only for historical purposes). Each dashboard shows precise data regarding the Starting Bases and the performance of the airships in the game (Speed, Range, Structural Integrity), which can be modified and increased during the game through the engagement of specific crew members (see Airships and Starting Bases on page 31; see Crew and Interactions on page 21-23).
It is not possible to exceed the maximum values reached on the game boards (Speed max. 6, Range max. 6, Structural Integrity max. 3) not even by accumulating bonuses (crew and Commander). However, these limits can be temporarily exceeded thanks to the effects of the Cards, the weather, or both (see Cards on page 27; see Weather on page 9; for positioning indicators on the Game Board see page 32).
Speed
All miniatures move on the Map for a certain number of Lengths (the units of measure of the game).
The maximum number of Lengths a player can move his miniature during each turn is indicated by the "Speed Indicator" (see Airships on page 20; see Ships on page 22) and is represented on the Game Board by an arrow located at the maximum Speed value: this value varies according to the airship being used. The Speed value during the game can vary, as it can be influenced by several factors: by a specific Weather condition (see Weather Areas page 9; see Weather Disc page 10), by the Wind Weather icon, for which you will need the Wind Indicator (see page 24), by Venture Cards (see page 24) or by Strategy Cards (see page 27). You will need to use the repositionable clips to indicate the change of value during the game (see Positioning Indicators on page 32).
Moving the thumbnail is done using the Navigating Tool (see Navigating Tool page 23; see Actions on page 41).
Range (Tank Capacity)
With Range we indicate the amount of Fuel units available in the airship's tank, whose value is shown on each game board right next to the Range Indicator and can vary from model to model.
The Range is visually represented by a circular indicator placed in the upper left corner of the game board. The values shown in the indicator represent the Fuel units that can be used by the player during the game and are indicated by a pointer placed in the center of the Range Indicator (see Indicator Positioning on page 32). As in real life, the operator of an airship "in flight" will consume Fuel to perform each movement, and will therefore lower the Fuel gauge pointer in the Range area by one notch as soon as he finishes the current movement.
Airships do not consume Fuel when stationary on a base: they consume one Fuel marker every turn they are "in flight" (i.e., flying out of a base, even if constrained by Venture or Strategy cards).
Advanced Rules: Airships consume fuel even if they are in stationary flight outside a base, blocked by fog. Airships can be refueled each time they are stationed on any base by purchasing Fuel units and adjusting the Fuel pointer based on the number of Fuel units purchased. The purchase costs also vary depending on how many Fuel units are purchased by the player (see Price List on page 47; see Bases on page 6; see Refueling Actions on page 43).
Structural Integrity
With Structural Integrity we indicate the maximum value of the resistance of each airship, that is the amount of structural damage it can endure (see Weather on page 9; see Venture Cards on page 27; see Strategy Cards on page 27).
This value is indicated on the game board by an arrow, placed at the maximum "Structural Integrity" value. Airships have different maximum strength values. Removable clips will help players keep track of this value throughout the game (see Placement of Indicators on page 32).
Structural Damage can be caused by Storms encountered in the Weather Areas, by Venture Cards drawn when crossing an obstacle, or by Strategy Cards played by your opponents (see Weather page 9; see Strategy Cards page 27; see Venture Cards page 27). Regardless of the cause of the Structural Damage, it can be repaired once you have landed in any Base (see Bases on page 6; see Actions on page 41; see Price List on page 47).
Suffering excessive damage points can cause the Structural Integrity indicator to reach zero, forcing the player to make an emergency landing (see on page 45). It is therefore wise always to keep this parameter under control and plan stops for repairs.
3. Commanders and Specialist Token
The crew members interact only with the airships and are distinguished in:
- Commanders (who have only one skill symbol on their figure)
- Expert Commanders (called Advanced, they show on their figure two skill symbols)
- Specialists (represented by Specialist Tokens)
As in the real world, the interaction and rapport between Commander and crew increases the potential of the Airship, which, depending on the type of Commander and/or Specialist engaged, can improve its performance in terms of Range (Autonomy), Speed (Speed), Profitability or mitigate some effects of the Weather.
Advanced Rules: The management of the emergency landing and related payments differs in several respects from the version of the basic rules. (For more information on Emergency Landing see page 46).
Each crew member brings a bonus to the airship of the player who engages him, depending on the symbol shown on his Commander and/or Specialist Token Card (see page 15). The bonus brought by each Commander and/or Specialist hired is permanent, as long as the player has him in his crew (see Cession on page 18).
REMEMBER: the crew bonuses cannot exceed the respective maximum values indicated on the Game Boards (Speed max. 6, Range max. 6, Structural Integrity max. 3).
Commanders and Adv. Commanders
The characters shown on the Commander Cards and Advanced Commander Cards (hereafter identified as Adv. Commander Cards) are based on actual facts: they are historical characters who have participated in various missions with the giants of the air. Many of them flew in the Arctic and made explorations and flight records between 1920 and 1930; they are portrayed in the game with their authentic features.
Commanders and Commander Adv. are real leaders and make the difference in the course of the game: they allow the player to deal with forbidden areas, obstacles (and fog banks, for players who choose to use the advanced rules), drawing a Venture Card to symbolize the responsibility of a risk they are deciding to take (see Obstacles on page 8; see Venture Cards on page 27).
Commanders may be skilled Engineers or Scientists; some have extensive experience as Pilots or Managers. Adv. Commanders have two of these skills simultaneously.
The symbols below the name of the Commander Cards represent their skills, each of which brings a bonus for the airship of the player who engages them (one in the case of Commanders, two in the case of Adv.) The commander's bonuses add on to those of the specialists in the crew.
When you engage a commander, insert his card in the appropriate slot on the game board, then move the Clips of the bonuses indicated on the card:
- Engineer engagement or Pilot engagement: Adjust the Clip in relation to the ability for the "Speed" or "Range" parameters on the game board.
- Manager or Scientist engagement: no clip is moved, only the commander's card acts as a reminder of the acquired skill.
No more than one Commander is permitted in your crew: the same game board has in fact only one slot to accommodate one of their cards (see Engagement Rules on page 42).
Advanced Rules: Players can hire a Commander from the first turn of the game, while Specialists can be hired only from the second turn onwards. Advanced Commanders can be engaged only after the player has completed at least one Mission.
Specialists
Hiring experts and veterans is certainly the most advantageous way to best face the risky missions: the players can therefore hire specialists during the game to increase the performance of the airships or the profitability of the missions. The specialists are represented by two-sided Specialist Tokens (one gold and one silver), and their skills are represented by symbols, the same symbols that we find in the Commander and Commander Adv Cards.
Each time a player engages a Specialist, he takes the Specialist Token with the symbol that represents him and places it on the Game Board inside the slot with the same symbol, showing its silver side. As a consequence of the engagement, also the Clip of the same ability will be moved by the player one point more on the Game Board.
The skills of the Specialists are enhanced if Commanders with the same skills are engaged (with the same symbols): in this case the benefits are added and the corresponding Token is turned to show the gold face.
Summing up:
- Silver side: only the value of the specialist's skill.
- Gold side: the value of the specialist's skill, plus the Commander's skill.
As for Commanders and Commander Adv., the bonus added to the airship's performance is permanent in the game, as long as the corresponding Specialists are present in the player's crew.
No more than one Specialist with the same skill is allowed in your crew: the same game board has only one slot to house their Specialist Token (see Engagement Rules on page 42).
Example of Token Insertion Mechanism
- I start the game with an empty Bridge: Speed 4, Range 4.
- I purchase a Specialist Engineer, place the corresponding Specialist Token on the silver side, and move the Speed Clip by 1 point. The performances are modified: now the airship can reach a higher speed (Speed). Speed 4+1 = 5.
- I buy an Adv. Commander with Engineer and Scientist skills. I move the relative clip. Now the airship can reach an even greater Speed (speed). Speed becomes 5+1 = 6. I turn the Specialist Engineer Token to the gold face. The symbol present under the figure of the commander will serve as a reminder of his Scientist's skill (if or when I buy a Scientist, I will place his Token on the bridge directly on the gold face).
Specialist Bonuses
| Symbol | Bonus received | Consequences |
|---|---|---|
| Engineer / Mechanic | Speed (speed) +1 | Move Clip Speed one point higher |
| Pilot / Navigator | Range (autonomy) +1 | Move the Clip Range by one more point |
| Manager / Reporter | Remuneration in Bonds | Earn +10 Bonds each turn (the player gets them from the Bank before the weather disk is turned over) |
| Scientist / Meteorologist | Mitigates weather | In case of fog or storm: cancel the deviation of the route modified by the wind (***) |
(***) If the Specialist Token is turned to the gold face, he gains an additional bonus: the player who has the Specialist Token Scientist is not obliged to draw the Venture card through the fog, he has freedom of choice.
(***) If there is already a Specialist Token Scientist on the board, the Token is turned to the gold face and the player gains an additional bonus: he is not obliged to draw the Venture card through fog. He has freedom of choice.
Crew Management
At the beginning of the game the players are provided with some Commanders, Adv. Commanders and Specialists, in variable numbers depending on how many participants there are playing. During the course of the game you can hire them to take advantage of their bonuses, or you can decide to give them up (thus giving up their bonuses).
The dynamics of hiring and selling are regulated according to particular procedures and provide for the use of a share and a fixed cost of payment, or collection in the case of sale, in Bond (see Actions on page 41; see Game Price List on page 47).
Purchase
Players can choose to hire a crew member among those available at the beginning of the game (Commander, Adv. Commander, Specialist) only when they are stationary on any Base, spending an action and paying a cost in Bonds (see Actions on page 41; see Game Price List on page 47; see Game Preparation on page 32).
It is possible to engage more members during the game, always respecting the general rules of engagement and choice of actions to be performed (see on page 42).
The payment of the engagement is immediate. The bonuses added by the crew are active as long as the crew member, bearing the crew symbol, is on the board of the player who hired him. Remember that it is not allowed to have more than one Specialist with the same skill in the crew.
However, it is possible to hire a Commander or an Adv. Commander, who can further upgrade that same skill: the Specialist Token with the same symbol will be turned to the gold face. Similarly, it is not possible to have two Commanders in the same crew (even if it is a Commander and an Adv. Commander).
Once the Specialist Tokens made available at the beginning of the game have been used up, it will be possible to buy more among the tokens and the Commanders left in the box, paying for each of them a higher sum than usual (see Game Preparation Phase on page 32; see Game Price List on page 47).
Advanced Rules: Players can choose to declare the engagement of a crew member among those available at the beginning of the game (Commander, Adv. Commander, Specialist) at any time during their turn. Applying the advanced rules, it is allowed to do this while the airship is in flight: in this case the player can declare the engagement, but he must still reach a Base to receive the chosen crew member on board and use his bonus. Upon reaching any Base, the player can pay for the engagement and place the Specialist Token (or the chosen Commander figure) on the game board and consequently apply the bonus to the Airship performance (without spending a new action). Remember that the Commanders can be hired during the first turn of the game, the Specialists from the second turn on. Advanced Commanders can be hired only after the interested player has completed at least one of his Missions. If more than one player is interested in the same Commander or Specialist, an auction is held (see the following paragraph: "Engagement Auction"; see Engagement Auction on page 19).
Cession
Players can choose to "surrender" a crew member among those present in their Game Plan (Commander, Adv. Commander, Specialist) when they are stationary at any Base, spending an action and receiving a compensation in Bonds (see Actions on page 41; see Game Price List page 47).
More than one crew member can be "surrendered" during the game turns (always respecting the general rules of surrender and choice of actions to perform) (see page 41).
Each time a player performs the action of "transferring" a crew member, he receives a compensation in Bonds (see Actions on page 41; see Game Price List on page 47) and, once removed from the game board, he loses the bonus derived from it (therefore, if a player declares the action of transfer, he loses the bonus when he is removed from the board, as if he was actually getting off the airship). The crew member, once the transfer is completed, becomes available to all players again.
Advanced Rules: Players may choose to declare the transfer of a crew member at any time during their turn by spending an action. Applying the advanced rules, it is allowed to do this while the airship is in flight: in this case the player can declare the surrender, but must reach a Base before leaving the crew member he chose to surrender. Once the player has reached a Base, he can collect the Bonds from the surrender (see the Game Price List on page 47) and remove the Specialist Token (or the chosen Commander figure) from his dashboard, as if he was actually dropping the crew member from his airship. At the same time, he will obviously lose the bonus that that member brought. The player can eventually decide to start an auction for that crew member, in which all opponents can decide to participate, instead of selling him directly to the Bank (see Engagement Auction on page 19).
If you want to apply a more complex variant in the "cession", the crew member that is "ceded" to the Bank will remain available to other players, from that moment on, only at the Base where he was released by the previous player.
The Engagement Auction
Advanced Rules: If more than one player is interested in the same Commander, Adv. Commander or Specialist, proceed with an auction, with a fixed bid of 10 Bonds, starting from its base cost (see page 29). Each player who participates in the auction during another player's turn, will have one less action to spend during his next turn (either if he wins the auction or loses it).
It is not allowed to participate in the Auction of a Specialist Token that the player already has.
If a player already has a Commander or Commander Adv. in his crew, he can participate in the auction, but before having the new Commander on board, he must use another action to renounce the existing one. This renunciation action, as such, does not give any Bond revenue to the player who performs it: the character will simply be made available to the other players at his base price, once he has reached any Base (100 for the Commander; 180 for the Advanced Commander).
It may happen that a player decides to participate in an auction while flying and wins it: in this case he must still reach any Base before having the hired crew member on board and take advantage of his bonus (or the one where the character has been previously released, in case you have decided to apply the more complex transfer variant - see note above, end of "Transfer" paragraph).
Once the Base has been reached, the player can place the relevant Commander, Adv Commander or Specialist Token card on the game board, then add its bonus to the Airship performance (without spending a new action for this).
Design Note: You may have noticed that we allow players whose Airships are "in the air" to participate in auctions (presumably via wireless/radio communications), but not actually add the crew member to their board until they arrive at a base. In reality, there may be a longer time interval while the real person travels - perhaps halfway around the world - to join the Airship, but we will avoid taking that into account for the sake of simplicity. We also realize that, by the standard of reality, it would seem possible to hire a new commander during the flight and put him on duty immediately, and then "fire" or sell the old commander when you arrive at a Base and replace him with the new one. But given the limitations of the game, we won't allow that.
4. Airships and Ships
Two types of miniatures are present in the game, to be used for the movements on the map: Airships and Ships.
The point of reference used for all the miniatures (both for positionings, and movements) is the frontal central point of the support base, marked by the arrow for the Airships and identified in the prow for the Ships.
For Airships it is of fundamental importance to identify the reference point (arrow on the support base), both in departure and in arrival phase at a Base or Port: in case of departure it must be positioned in the center of the colored point of the start of movement; in case of arrival, it is enough that it is within the area enclosed by the gray ring (or red halo) placed around the colored point, because it is considered reached. Both playing figures move using the Navigating Tool. If for any reason a player is forced to deviate his route (due to wind, Strategy Card or Venture Card), he will use both the Wind Indicator and the Navigating Tool grid to make the relative movement according to the indicated degrees (see Movements on page 21-22; see Navigating Tool on page 23; see Wind Indicator on page 24; see Weather on page 9; see Cards on page 27).
Airships Thumbnails
All miniatures depict, in scale 1:2000, historical aircraft designed or really belonging to the nations in the game, with reference to the historical period of 1924. Some little forcing has been necessary for the playability, but the historical realism has been carefully preserved.
Airships Performance
Each Airship has 3 types of performance: Speed, Range, Structural Integrity. On the game board of the respective airship, the values for each model are indicated (see Game Plan on page 12; see Airship Performance on page 20).
Airships move on the map for a number of lengths allowed by their Speed value, through the Navigating Tool (see page 23). The Airships may face possible obstacles, i.e. geographical obstacles, areas forbidden to navigation, weather areas affected by fog. Obstacles can be negotiated only if a Commander or an Adv. Commander has been engaged: in this case the player who makes this decision is obliged to draw a Venture Card: the effect the player suffers is the one corresponding to the obstacle symbol (see Venture Cards on page 27). If you do not have a Commander or a Commander Adv. on board, the obstacles must be bypassed (see Restricted Areas and Obstacles on page 8).
Each game board shows the standard positions from which each Airship starts its journey at the beginning of the game (although these may be changed depending on the chosen nations or the number of participating players).
| Country | Airship | Range (autonomy) | Speed | Structural Integrity |
|---|---|---|---|---|
| British Empire | HMA R33 | 4 | 4 | 3 |
| France | Méditerranée (ex LZ121) | 4 | 3 | 3 |
| Germany | LZ120 Bodensee | 4 | 4 | 3 |
| Italy | N-1 I-SAAN | 4 | 4 | 3 |
| Japan | Nieuport AT-2 | 3 | 3 | 3 |
For Possible Interactions see page 39; for Crew see page 35; for Weather see page 27; for Obstacles and Restricted Areas see page 9; for Bases see page 24.
Airship Movement
Airships, once in flight, cannot remain stationary in the same place (unless they are stationary on a base, they have been forced to stop in a fog affected weather area, or they have been blocked by the effect of a Strategy Card or a Venture Card).
Before declaring the route and moving his airship, the player checks, through the weather window, the weather conditions of the flight area he is starting from (see Weather on page 9) to verify possible influences. It is important to remember that the player must always declare his route choice before moving.
If necessary, use the Wind Indicator (see Navigating Tool on page 23; see Wind Indicator on page 24; see Weather on page 9).
The displacement of the Airship is always in a straight line, along the central axis of the Navigating Tool (the displacement cannot be fragmented), for the maximum number of Lengths indicated on the nation's dashboard in the Speed Indicator, to which bonuses from the crew are eventually added (see Speed on page 12; see Crew Management on page 17).
Advanced Rules: In the advanced game mode, a player can use the Ship to recover a Airship that has ditched into the water. Remember that this intervention is mandatory in case of S.O.S. (see section "Emergency Landing Management" on page 46).
If, during the movement, the Airship is within the red halo (or the gray ring) drawn around the Bases or Ports icons, the objective is considered reached.
Please note: What happens if the airships are so close that they collide? In case of a possible collision, the miniatures can be replaced with the "place holder card", which can overlap without problems. When the place holder cards are far enough apart, the players can replace them with the playing figures again. Collisions are not included in the game.
Airship Interactions with Obstacles and Weather
Airships may face obstacles or adverse weather conditions (see Restricted Areas and Obstacles on page 8).
Airship Interaction with Crew
Airship performance values are modified by the interaction with the crew during the game, and they qualify for bonuses resulting from the engagement of Commanders or Specialists (see Scoreboard on page 5; see Crew Management on page 17).
Ships
Ship Performance
Ships cannot perform missions, their task is to sail to an Arctic base and place the Mooring Mast, which symbolically represents the setting up of a base to permit the last necessary preparations, before leaving for the center of the North Pole, to conclude the game: when a ship reaches the designated Arctic Base and the Mooring Mast miniature is placed on it, this becomes a full-fledged base, from that moment on usable by everyone also for repairs and supplies. Each player, in order to fly over the North Pole and win the game, must start from his own Arctic Base (see Bases and Ports on page 6; see Arctic Base on page 8).
Ships Movement
Ships do not have variable performance like Airships and do not consume Fuel. Unlike the Airships, Ships can always remain stationary in place, even if they are en route to a target. Ship movement is always in a straight line on the center axis of the Navigating Tool (see Navigating Tool on page 24). If necessary, in tight areas, segmentation of movement is allowed. Ships may not pass over land; if a group of islands or a strait are encountered, the ship may pass over the area where any water channel is visible, even a very narrow one. Ships may move for a standard maximum of 3 lengths per turn, except for passing inside the Arctic ring (through the ice of the Pole), where their Speed is reduced to 1 length per turn, until they leave it.
Crew Interaction
Ships do not have values modifiable by crew interaction during the game, nor are they subject to bonuses from engaging Commanders or Specialists.
Ships Interaction with Obstacles and Weather (Fog)
Ships may encounter sea obstacles or fog banks. The player can always decide to go around an obstacle or stay put until the fog clears. Players can decide to go through the obstacle or the fog, without the need to have a Commander in the crew (as is the case for Airships) (see Obstacles on page 8). If the player decides to pass through sea obstacles or fog banks, he must draw a Venture Card: in both cases, the effect he suffers is the one corresponding to the "sea obstacle" section. Wind is calculated using the Wind Indicator.
The distances between all the Bases on the board, object of potential Missions, are summarized in a simple tool: the Mission Calculator. This handy tool cross-references their distances (in Lengths) and displays their respective Bond gains.
5. Navigation Tools and Calculation
Using the navigation tools requires a minimum of practice, but is very simple and intuitive. The movements of the miniatures (Airships and Ships) and the possible deviations (in case of wind, or due to the effect of Venture Cards or Strategy Cards) are made using the Navigating Tool. To make the measurement of the distance between two points or the estimation of the Fuel consumption of a route faster and more practical, the Range Calculator tool is used.
Both tools display a graduated scale of Lengths (segments of equal size).
When crossing an area subject to wind (only for Airships), the direction and intensity of the wind is calculated using the Wind Indicator.
Navigating Tool
The Navigating Tool takes its design from those used in nautical navigation. Players use the Navigating Tool to direct and move their miniatures on the board towards the chosen target, using the lines and segments shown on the tool. The central axis indicates the direction declared by the player, while the ones on its sides are used for the possible course displacement suffered by the player due to weather or charts. The segments on the axes are the notches indicating the displacement lengths. The movement of the airships is always in a straight line on the axes of the Navigating Tool, without the possibility of segmenting the route, for a maximum of Lengths allowed by the model of the miniature itself (see Airships on page 20). Ships can segment the movement (see Ships on page 22).
How to Use the Navigating Tool
Using the Navigating Tool is very simple. Each miniature has a reference arrow on the front (Airships on the front of the board, Ships on the bow). The player checks the weather icon that affects the movement area, declares his target and positions the Navigating Tool on the map by matching the beginning of the central axis ("zero point", image 08c previous page) with the reference arrow on the miniature and directing the central axis of the Navigating Tool towards the target. Before moving the player calculates (undergoes) any weather influences, then makes the move, up to a maximum of the lengths allowed by his own Airship (as reported on his game plan) or by his own Ship (see on page 22).
Diagram captions: 08a - Direction of displacement by wind from the Wind Indicator tool; 08b - Lengths; 08c - Zero point.
Range Calculator
The Range Calculator, inspired by the rulers used in the past for navigation, will help you to quickly calculate the eventual consumption before deciding the route (see page 20-22).
Diagram captions: 09a - Example of autonomy calculation equal to 1 shift with max speed 5 Length. 09b - Example of autonomy calculation equal to 1 shift with max speed 4 Length. 09c - Length.
How to use: It is used as a ruler, placing it between a Starting Base and an Objective: the scale of the ruler is divided into segments (called Lengths, units of measurement of distances in the game). The tool allows you to calculate the navigation distances and the number of turns needed to cover them, based on the Range of your airship (3, 4, 5, 6, indicated on the short side of the tool). In this way, the player will be able to quickly estimate the approximate number of turns and supplies needed to cover the distances he/she wishes to travel.
Wind Indicator
The Wind Indicator is a disc containing an arrow that, rotated when necessary, will indicate to the player the effect of the wind on the movement of his airship.
How to use it: By rotating the arrow on its axis, when it stops it will indicate a portion of the disk where course deviations and/or speed changes will be indicated.
The numbers on this instrument indicate how much the airship's movement will be deviated: 12°R or 24°R (Right, i.e. 12 or 24 degrees to the right) and 12°L or 24°L (Left, i.e. 12 or 24 degrees to the left). These deviations are also reported in the same way on the Navigating Tool.
The wind can be either tailwind (FW - Forward) or frontal (BW - Backward):
- FW will favor you with a bonus: +1 in Speed. FW indicates the tailwind. (The source prints "FFW" here; read as "FW", matching the indicator's label.)
- BW will slow you down with a penalty: -1 in Speed. BW indicates headwind.
If the arrow points to only one of the words FW or BW, the airship suffers a change in Speed and the course is not deviated laterally.
Mission Calculator
The Mission Calculator is a table that allows you to easily estimate the gain from completing a Flight Mission (see Actions on page 41). Use this tool to quickly determine what the reward will be for each mission. First find the starting city at the top of the Calculator (on the cursor the cities are divided alphabetically, A-L on one side, L-Z on the other). When you have found the starting city, slide the cursor up or down until you read the destination city in the window.
The amount shown at the intersection of the two cities is the reward for completing that mission (shown in Bonds, of course) (see Airships on page 20; see Mission Cards on page 27).
Movement Examples
Example 1: Your airship has a speed (shown on the game board) of 3 lengths per turn, and your Weather Area indicates sunshine (clear), so there is no interference. Place the Navigating Tool in front of the airship's base and slide it over the Navigating Tool until it reaches the 3 mark.
Example 2: Your airship has a Speed (shown on the game board) of 3 lengths per turn, and your Weather Area indicates wind, so you will use the Wind Indicator to define the possible deviation of the route (see page 42). If the arrow, at the end of the rotation, indicates "12°R", the central axis of the Navigating Tool will continue to point to the target, while the miniature will be moved following the "12°R" line.
Game example: Elena's Airship is in flight, not stationed on a base, and has a Speed (reported on the relevant Game Plan) of 3 Lengths per turn, but the player has hired an Engineer who, as per rules, increases the Speed by 1 Length per turn as long as he is present in his crew (thus bringing the Speed to 4). The Weather Area that affects the flight zone indicates Wind.
- Elena declares the route and then puts the Navigating Tool in front of the base of her airship pointing towards the target.
- Activate the Wind Indicator by rotating the arrow. The arrow stops at -12°L, Elena has a head wind (BW), and undergoes a displacement of 12°L (L stands for Left).
- To make the displacement she uses the line indicated as 12°L on the Navigating Tool and she slides her airship on the tool until she reaches the notch 3 (the maximum of the notches allowed by her basic airship model is 3); having added an Engineer she would arrive at 4, but the headwind takes away 1 Length, thus returning to 3 in total.
- Elena holds the Airship and removes the Navigating Tool from under the miniature.
6. Cards
There are 4 decks of cards in the game:
- Venture (they are drawn when you face an Obstacle, a Restricted Area or the Weather indicates Fog)
- Strategy (can give facilities or hinder other players)
- Mission (indicate bases and cities that can be chosen as mission objectives)
- Telegrams (optional cards that can influence the game)
Venture Cards
Venture Cards represent random events: sometimes they can be disadvantageous, sometimes advantageous. They are drawn by the player who chooses to overcome an Obstacle (forbidden zones, geographical obstacles, sea obstacles and fog) by crossing it instead of going around it. The Venture Cards are drawn before moving a miniature and have immediate effect. They are then placed face down under their covered deck.
The effect of a Venture Card can be cancelled or mitigated by a Strategy Card at the cost of one action.
Strategy Cards
The Strategy Cards are used by the players to: obtain benefits, counter the effect of a Venture Card or another Strategy Card or to hinder another player. At the beginning of the game each player receives 3 Strategy Cards, but he can draw more during his turn. You can keep a maximum of 5 Strategy Cards in your hand at the same time during the whole game.
You may only play one Strategy Card in your turn, spending one action: these cards have immediate effect if played against yourself. If played against an opponent they take effect at the beginning of the opponent's turn. Once the card has exhausted its effect, it is placed face down at the bottom of the Strategy Cards deck (see Interactions with Airships on page 20; see Interactions with Ships on page 22; see Interactions with Crew on page 23).
NOTE: If a Strategy Card involves a specific crew member (Specialist) in its action, the crew of the player affected by the card must necessarily contain the mentioned Specialist, whether the card is played on themselves or against another player. For example, it is not possible to play a Strategy Card bearing the following text: "You will not receive bonuses from your Scientist for 2 turns" against a player who does not have a Specialist Scientist (the shipboard Meteorologist) present in his crew.
Mission Cards
Reaching the North Pole has always been extremely expensive, and no nation has ever allowed itself to face such an ambitious expedition without having a solid economic base. As in the history of airships (transport and exchange of mail and passengers were organized), this scenario also occurs in the game: the participants will be able to meet all the expenses of the trip only with the proceeds from the missions carried out with the airships. The Mission Cards, distributed at the beginning of the game, bear the names of the bases that players must reach with their airships. Completing missions earns Bonds. Each mission must always be declared to the other players before being undertaken, otherwise it will be invalid.
You can only choose missions that start and finish in cities mentioned in the Mission Calculator (repeated on the Mission Cards) and easily recognizable on the Game Board Map because they are marked by a red halo all around the arrival point (see Bases on page 6).
It is important that each player evaluates his Mission Cards from the first hand, so that he can immediately understand if the cards are favorable to the route to be traveled or if it will be more appropriate to change them with those available on the table (see Preparation on page 32) during the next game rounds.
You are not allowed to have more than 3 Mission Cards in your hand.
Once a mission has been completed, the Mission Card must be kept face up until the end of the game, placed near the Game Board and visible to the other players. If a player has run out of Bonds during the game, he can "sell" a completed Mission to the Bank and must then draw a new one from the deck of Mission Cards (see Game Price List on page 47).
If the player, after completing the 3 compulsory missions, wants to face an additional mission, he can draw a Mission card only from the covered deck, never from the uncovered cards placed on the table (see Preparation on page 32) and he must complete it, he cannot discard it, but can only exchange it with others. Until he has completed this "extra" mission, he cannot perform the mission to the North Pole.
It is not allowed to declare a new Mission while the previous one is still active.
The player can declare the mission objective only when he is on his own Starting Point, assigned at the beginning of the game (shown on his game board), or on any other Starting Point on the game board.
Telegrams
Advanced Rules: Telegrams are cards designed to let players become even more immersed in the historical and political context narrated in the game. These cards simulate radiograms, telegrams received via radio, regarding war, political and natural events; all historical facts that really happened between the spring and summer of 1924. These cards can concretely affect the course of the game, for example by influencing the agreements between nations or conditioning the paths and strategies of the players.
The use of the Telegram cards is simple: the deck is placed on the table next to the Mission Cards deck; at each new game turn, a Telegram card is drawn and read, and its effects apply to all players. At the end of the game turn the used card is placed at the bottom of the deck.
7. Other Objects
Bonds
Bonds are a form of money (they are Bonds issued by nations to finance shipping). In the game they appear as printed documents similar to letters of credit or bank checks. They act as a currency of exchange with which to make all payments: hire Commanders and Specialists, pay for repairs and supplies, set up Arctic bases, etc.
At the beginning of the game, each country receives a different sum of Bonds, insufficient to complete the mission to the North Pole. In order to earn the necessary Bonds, it is necessary to complete enough missions to achieve the necessary economic security. You may fortuitously earn Bonds by using Strategy Cards or by drawing Venture Cards.
If a player runs out of Bonds during the game, he can choose to give one of his crew members to the Bank (see page 41) or give up a completed mission by selling it to the Bank (obtaining 200 Bonds with the obligation to draw a new one) (see page 41).
The amount of Bonds assigned to each player varies from nation to nation and is shown on the Game Plan and in this table (to be evaluated according to the layout) (see Mission Token on page 30; see Mission Cards on page 27; see Arctic Base Token on page 30; see Mooring Mast on page 22; see Ships on page 22; see Airships on page 20; see Game Plan on page 12).
Table of Bonds assigned to each player at the beginning of the game:
| Nation | Airship | Bonds |
|---|---|---|
| British Empire | HMA R33 | 200 Bonds |
| France | Méditerranée (ex LZ121) | 240 Bonds |
| Germany | LZ120 Bodensee | 240 Bonds |
| Italy | N-1 I-SAAN | 240 Bonds |
| Japan | Nieuport AT-2 | 300 Bonds |
| USA | ZR-1 USS Shenandoah | 200 Bonds |
| USSR | Albatros II | 280 Bonds |
The Bank
To be used during the game to manage payments from and collections to the players. If you wish, one of the participants can also act as a banker (as well as a player), but make sure to keep their Bonds completely separate from those of the Bank.
Advanced Rules: The Bank is not involved when transactions take place directly between players.
Target Token Mission and Arctic Base
Target Token Missions are marked with national flags. When a player declares a mission, he places the token on the target city. Arctic Base Target Tokens have a snowflake symbol. When a player books an Arctic Base, he places the token on the latter.
8. Purpose of the Game
Airships North Pole Quest: The Game is a game of speed and strategy: as representatives of your nation, you plan profitable missions with your airship, set up your base in the Arctic, fly over the North Pole and return safely to base.
To complete the game, players will have to carry out Flight Missions around the world, facing an ever-changing weather component and an uncertain international political situation. They'll have to adopt a careful strategy and accumulate the finances necessary to carry out the undertaking, manage the crew with its commanders and specialists, their airship and their ship.
Act with honor, but beware: someone will be able to hinder you through deceptions and boycotts. You'll have to accumulate at least 3 preparatory missions before facing the last, decisive one: the flight over the North Pole.
Number of Players
For 1-6 players (see Solo Mode rules on page 51).
Recommended Age
14+ years
How to Play
Airships is played in "rounds", the term used to define the completion of each player's turn. The main modus of the game is to decide which actions you want to perform during your turn.
Each player has 3 actions at his disposal, which he can choose from a special list:
- Declare a mission
- Exchange a Mission card or draw a new one
- Complete a mission
- Abandon a mission in progress
- Sell a mission already completed to the Bank
- Move the Airship
- Move the Ship
- Hire a Commander or an Advanced Commander
- Hire a new Specialist
- Give up a Commander or an Advanced Commander
- Surrender a Specialist
- Distress Request (Advanced game mode only)
- Send a S.O.S. signal
- Play a Strategy Card
- Draw a Strategy Card
- Replace a Strategy Card
- Book an Arctic Base
- Set up the Arctic Base
- Move an Arctic Base
(for a detailed list of Actions and how to use them see page 38).
Players cannot perform the same action twice in the same turn (e.g.: you can hire a Commander and a Specialist in the same turn, but you are not allowed to hire 2 Specialists in the same turn; you can move both your airship and your ship in the same turn, using two different actions from the list, but you are not allowed to move either of your miniatures twice in the same turn).
Players are not required to complete 3 actions (though they will almost always want to!).
When all players have finished their turns, the weather disk is rotated 1 notch (equal to 10 degrees of longitude) as indicated by the arrows (counter-clockwise direction), until a new icon appears in the weather windows of each area. If you are playing with Telegrams, read a new one at the beginning of each new game round and find out how it may affect your progress. Remember that at the end of each round its "effect" will cease, to be replaced by the next one.
Remember: Each player, before moving his Airship, must check the Weather and its possible influence on the affected movement areas. The Range Calculator and the Mission Calculator are available to all players, to navigate with their miniatures, to facilitate the calculation of fuel consumption and to help in choosing a mission.
Advanced Rules: Remember: during the first round of the game, the Commander is the only crew member that can be hired. In subsequent rounds, players may choose to engage Specialists. Only after completing at least one mission can players hire an Advanced Commander.
2 to 4 Players
Many countries are located in Europe (France, Italy, United Kingdom and Germany) and, due to the proximity of the Starting Bases, crowding can occur during the early stages of the game. For a better functioning of the game, it is recommended to choose the starting countries on different continents (e.g. Italy + Japan; Germany + Japan + United States; United Kingdom + USSR + Japan + United States...).
From 5 to 6 Players
It is not recommended to use the standard game board for more than four players. If you still want to try, alternative starting points have been added for Italy (the airship will leave from Rhodes Island) and the United Kingdom (the airship will leave from Montreal and the ship from Goose Bay, both in Canada).
In order to be able to play with more than four players, a special 120cm (instead of 80cm) oversize board has been made, which can be ordered from www.huninthesun.it.
Preparation
To start the game, you must first of all: assemble the game plan (see page 12), prepare the Wind Indicator (see page 24), and have ready, to hand, 3 important tools that will help you to plan and carry out your movements:
- The Navigating Tool (see page 23)
- Range Calculator (see page 24)
- The Mission Calculator (see page 25)
Distribution of Game Materials
Each player chooses, in agreement with the others, which Airship or Nation he wants to play during the game.
Each player will be assigned:
- 1 Airship board (specific to the chosen Airship or Nation) with its pointer and 3 clips
- 1 Airship miniature (corresponding to the Airship board owned) with its support base
- 1 Cargo Ship Miniature
- 1 Mooring Mast
- 1 Target Token Mission Objective (with the flag of the corresponding nation)
- x1 Arctic Base Target Token (snowflake on corresponding country flag)
- Initial budget in Bonds (The budget for each nation is specified on the respective Airship board or see the table on page 29).
After distributing the Bonds to all players, who place them on their Game Board, the remaining Bonds are left in the Game Box. This, placed within reach, becomes the Bank.
Preparing the Decks of Cards
A player (or the "banker") takes the deck of Venture Cards and the deck of Strategy Cards, shuffles the Cards keeping the decks separate from each other and places them face down next to the board (see Cards on page 27).
Then he takes the deck of Mission Cards, shuffles the Cards and places them face down next to the board. He takes the first 4 Cards of the Mission deck and places them face up on the table, placing them next to each other so that they are clearly visible to everyone (see Mission Cards on page 27).
If you have chosen to dive even deeper into the story using the Telegrams take their deck, shuffle it and place it face down next to the other decks of Cards (see Telegrams on page 28).
Indicators Positioning
At the beginning of the game, each player prepares his own Game Plan with the indicators:
- Place the 3 Clips in the appropriate spaces to indicate Range, Speed and Structural Integrity of your airship in correspondence with the values indicated on the respective Game Plan.
- Place the arrow indicating the amount of Fuel in the Range Indicator and rotate it until it corresponds to the full Fuel tank of your airship model (the value of the Range is indicated on the Game Plan of the Airship you are using). Each time you move the Airship, the arrow will be moved one notch lower.
Drawing Cards
Each player draws from the top of the two decks of cards, Mission and Strategy, respectively:
- 3 Mission Cards
- 3 Strategy Cards
The cards in your hand must never be shown to other players. Each player must carefully study his cards and especially check the position on the map of the drawn Mission cards, so that a good game strategy can be devised from the beginning.
Preparation of Commanders and Specialist Tokens
At the beginning of the game, all the slots of your Game Boards are empty.
Take the Specialist Tokens and place them next to the Airship boards according to how many players are participating in the game:
- 2 players: 1 Specialist Token per symbol
- 3-4 players: 2 Specialist Tokens per symbol
- 5-6 players: 3 Specialist Tokens per symbol
All the remaining are placed back in the box (Bank). The Specialist Tokens on the ground represent the Specialists available for future engagements. If, as a result of the many engagements during the game, one or more Specialist Tokens with the same symbol on the game board run out, you can buy more from the Bank at the base price of 100 Bonds each.
Now take all the Commander Cards and shuffle them, then randomly draw 4 commanders and place them next to the board. Take all the Advanced Commander Cards and place them next to the Commander Cards.
Choosing the First Player
Players can decide who will start the first turn of the game (for example, the player who flew last in an aircraft will start, or the youngest, or you can draw lots). The game turn will continue in counterclockwise direction for the rest of the game.
Positioning of Miniatures
Each player places his miniatures on the map, matching the reference arrow on the base of his Airship and the bow of his Ship with the Base symbol (for Airships) or the Port symbol (for Ships). The starting positions are reported on the game boards (see Scoreboard on page 5) and highlighted on the Game Plan (see page 12), with a blue square symbol for Airships and red for Ships.
The starting bases and ports by nation are:
| Nation | Colors | Starting Bases | Starting Port |
|---|---|---|---|
| Germany | Ochre | Berlin | Königsberg |
| British Empire | Violet | Pulham | Dundee |
| Italy | Pink | Milano | Cagliari |
| Japan | Peach | Kasumigaura | Kushiro |
| USSR | Light Green | Perm | Tomsk |
| United States | Light Yellow | San Diego | San Francisco |
| France |
Advanced Rules: Draft Mission Cards. When all players have drawn their cards and are ready to start the game, a draft is performed: each player keeps one card for himself (without showing it to the others) and passes the others face down to the player on his right, in the direction of the game turn. Once again, each player studies the two new cards received, discards one and passes it face down to the player on his right, in the direction of the game turn. Each player will now have 3 Mission Cards and you can proceed with the game.
Note: If more players were to leave Europe, for convenience, the English and Italian starting bases will be:
| Nation | Starting Bases | Starting Port |
|---|---|---|
| British Empire | Montreal (Canada) | Goose Bay (Canada) |
| Italy | Rhodes (Greece) | Cagliari |
Start Working on Your Strategy
Now the players are ready to start! Each player must check the Cards in his hand: remember that in order to fly over the North Pole, you must first carry out at least 3 missions (see Mission Cards on page 27).
9. Victory
Whoever flies first and comes back wins! The game ends when a player flies over the North Pole in his Airship and returns safely to his Arctic base (NB. Players cannot declare the start of their trip to the Pole until they have completed at least 3 missions).
Advanced Rules: Players may want to continue to award 2nd place if the competition is strong! Players cannot declare the start of their journey to the North Pole until they have completed at least 3 missions and demonstrated that they have at least 300 Bonds at their disposal at the time of departure to the Pole.
Variant: It's Not Just "First"
This is an alternative victory condition. When this variant is chosen, after one player reaches the Pole, play continues until everyone finishes the current round. If more than one person reaches the Pole and returns to their Base, the player who has the most Bonds among them wins.
If the game is interrupted, the player who has the most Bonds at the end of the round is always considered the winner.
Game Example
Marco and Elena are playing an advanced game mode that includes Telegrams. They discover and read the first Telegram of the deck: it is a communication that does not involve the Nations in play, so it will not have any effect in the current round.
The airship of Marco, who plays with the nation Japan, at the beginning of the round is stationary on a base, nearby there is also his ship. He has not engaged any Commander, nor any Specialist.
Marco checks the icon in the weather window of the area where his airship is stationed: there is wind. He decides that he wants to leave anyway and declares his first Action: he declares a mission and turns face up the card corresponding to the Base he wants to reach. He then places his Target Token (flag) on that city. Marco chooses his second action and declares the movement of the airship.
Marco places the Navigating instrument in front of the Airship's Base, directing the central arrow of the instrument towards the set route. The starting Weather Area is subject to wind, as per the icon verified by Marco before. Therefore, spin the "Wind Indicator" before making the move: the result is "-12°R". This means that he will have a penalty on the movement (minus symbol "-"), so he will move one Length less (i.e. he will make 2 Lengths) than allowed by his game plan (Speed = 3 Lengths); moreover the wind is going to the right (Right=R), so he will use the line "12°R" on the Navigating Tool to make the movement.
At this point Marco removes the Navigating Tool and lowers the Fuel indicator, in the Range Indicator, by one point, because his airship has moved away from the base where it was stationed.
He then declares his third and final action: move ship. Marco positions the Navigating instrument in front of the prow (the tip) of his Ship, directs it towards the set course and moves the miniature. The ships are subject to the weather in the area only in case of fog, so Marco moves it 3 lengths (the maximum Speed a ship can reach). Moving the ship does not consume Fuel. Now he can remove the Navigating Tool and pass the turn to Elena.
It is Elena's turn to play with the nation Russia. Her Airship is 4 lengths from a base of her nation and has only one unit of Fuel remaining: it needs refueling. During the previous turn Elena hired a Specialist Engineer, thus gaining a permanent +1 in Speed. Her ship is 3 lengths away from the Arctic base that she took the concession for in the previous turn.
Elena checks the icon in the weather window of the area she is flying over with her Airship: it is sunny, so there are no effects on her Airship. She places the Navigating Tool in front of the base of her Airship, directing the central arrow of the tool towards the prefixed route, and moves her miniature 4 lengths (3 on the bridge + 1 gained with the Specialist Token Engineer), arriving at the Base.
At this point Elena removes the Navigating Tool and lowers the "Fuel" gauge by one point, because her airship has moved, thus consuming fuel. The Fuel indicator is at zero, but it is on the Base, so it is not considered an emergency landing and she can declare her second action: refueling. Elena pays 10 Bonds to the Bank (as it is one of her Bases) for each unit of fuel she decides to refuel, as there is no obligation to refuel.
Elena declares the third Action: setting up the Arctic Base. She then pays 100 Bonds to the Bank and replaces the Target Token (snowflake side) with her Mast (anchor pylon). The Base is now ready to welcome her airship and prepare it to fly over the North Pole: once set up the Arctic Base becomes to all intents and purposes a base like any other.
Elena passes the turn again to Marco, thus closing the round. Before Marco starts his new round, the weather disk is rotated until a new icon appears in the weather window and a new Telegram is read.
List of Actions
For ease of memorization, the list of actions has been divided into categories.
Missions
For Missions see page 41. For full description of the Action see page 41.
- Declare a mission - The player can decide to spend an action to declare a mission.
- Exchange a Mission card or draw a new one - The player can decide to spend an action to exchange a Mission card with one of those on the table or to draw a new one from the covered deck.
- Complete a mission - Completing a mission has no cost in Actions. Once a mission is completed, its Target Token reverts to its owner who can use it to declare a new mission.
- Abandon a mission in progress - The player can decide to spend an action to abandon a mission in progress at any time, but he will lose all related gains.
- Sell a mission already completed to the Bank - The player may decide to spend an action to sell a mission already completed to the Bank.
Movements
For Airship movement see page 20. For Ship movement see page 22. For full description of Action see page 41.
- Move the Airship - The player may decide to take an action to declare the movement of his Airship. The player can decide to spend an action to declare the movement of his airship: first he declares the course (by positioning the Navigating Tool), then he moves.
- Ship movement - The player may decide to spend an action to declare the movement of his ship: first he declares the course (by positioning the Navigating Tool), then he moves. The player can decide to spend an action to declare the movement of his airship: first he declares the course (by positioning the Navigating Tool), then he moves.
Crew Management
For Commander and Advanced Commander specifications see page 14. For Specialist Token specifications see page 15. For complete description of the Action see page 41.
- Hire a Commander or Advanced Commander - The player may decide to spend an action to hire a Commander or Advanced Commander.
- Hire a new Specialist - The player may decide to spend an action to hire a new Specialist.
- Surrender a Commander or Advanced Commander - The player may decide to spend an action to surrender a Commander or Advanced Commander.
- Surrender a Specialist - The player may decide to spend an action to surrender a Specialist.
Repair
(Actions usable only when the airship is on a base.) For Range specifications see page 13. For Structural Integrity specifications see page 13.
- Refuel - The player can decide to spend an action to refuel (regardless of the number of fuel units he wants to buy).
- Repair the Airship - The player may decide to spend an action to restore the Structural Integrity of his Airship (regardless of the number of damage points he wants to restore).
- Distress Request (S.O.S.) - The player manages the emergency landing following a specific set of actions (see Emergency Landing Management on page 63).
Use of Strategy Cards
For Strategy Cards see page 27. For complete description of the Action see page 41.
- Play a Strategy Card - The player can decide to spend an action to play a Strategy Card.
- Draw a Strategy Card - The player can decide to spend an action to buy a Strategy Card.
- Replace a Strategy Card - The player can decide to spend an action to replace a Strategy Card in his possession.
Arctic Bases Organization
For Arctic Base specifications see page 8. For Mooring Mast and Setup see page 22. For complete description of the Action see page 41.
- Reserve an Arctic Base - The player, at any time during his turn, can decide to spend an action to reserve any of the free Arctic Bases (i.e. that have not already been reserved) before someone else does.
- Set up the Arctic Base - The player may decide to spend an action to set up the Arctic Base. This action can be performed only if the player's ship is stationary on the Arctic Base port.
- Move an Arctic Base - The player, at any time during his turn, can decide to move the Arctic Base he has reserved, or to move one of his Arctic Bases already set up.
Additional Actions (Advanced Rules)
For Auction specifications see Advanced Rules Box page 19.
- Participate in an Auction - The player can decide to spend an action to participate in an auction.
For specific S.O.S. see advanced rules box page 45. For Emergency Landing Management see page 45.
- Rescue Request (S.O.S.) - The player whose airship has made an emergency landing can launch a distress call, spending one action. The player who owns the nearest Base or Ship is obliged to answer such a call.
10. Detailed Explanation of Actions
Actions Related to Missions
Declaring a Mission
The player can decide to spend an action to declare a mission.
The player declares the mission by uncovering the relevant Mission Card and placing the Mission Token Target (flag) on the chosen target point. The card remains visible to everyone until the end of the game (unless it is sold to the Bank).
Swapping a Mission Card or Drawing a New One
The player can decide to spend an action to exchange a Mission card or to draw a new one.
Mission cards cannot be discarded: the player can exchange a Mission card from his hand with one of the 4 uncovered cards placed on the table during the initial preparation. The player takes the chosen card from the table and places one of his own cards face up on the table to replace the card he has just taken, or he can replace it with the first covered card of the Mission Cards deck, placing one of his own cards face down at the bottom of the deck. In all cases, he is never obliged to make the card visible to the other players, except when he declares it as a target.
Remember: a player who has carried out his three missions may decide to carry out another one. He will draw a new Mission Card from the top of the covered Deck. Once drawn, the player is obliged to complete the mission (he can always exchange it with an uncovered card on the table or with a covered card from the deck, but he can never discard it).
Completing a Mission
Completing a mission has no cost in Actions. Once a mission is completed, the corresponding Target Token is removed from the map and taken back by its owner. When a mission is completed, the player places the corresponding Mission Card next to the game board, so that it is visible to all players.
Completed Mission Cards are not replaced with a new card.
Abandoning a Mission in Progress
The player can decide to spend an action to abandon a mission in progress at any time, but he loses all related gains. The Target Token of the mission that has been withdrawn returns to its owner, who can use it again.
Selling a Mission Already Completed to the Bank
If the player has a budget that does not allow him to continue the game, he can spend an action to sell a completed Mission card to the Bank.
The player who sells a completed mission to the Bank receives 200 Bonds. It is not allowed to sell a completed mission to another player. The sold Mission card is placed at the bottom of the Mission Deck.
The player who sold it must replace it with a new one drawn from the top of the covered Mission Deck, to be completed before leaving for the North Pole (or he will not be allowed to leave). Drawing this card does not require an additional action.
Note: if the player has a budget that does not allow him to continue the game, he can ask the Bank for a loan of up to 200 Bonds. The player who makes this request will be obliged to pay back all the money received from the Bank before leaving for his last journey: the North Pole.
Advanced Rules: If the player is about to leave for the North Pole and, by repaying the loan, falls below the threshold of 300 Bonds needed for the journey, he will not be able to enter the North Pole.
Actions Related to Movements
The player can decide to spend an action to move his miniatures. Players can move airships and ships, using the same navigation tool: the Navigating Tool (see page 23).
It is possible to perform movement actions for both miniatures, during the same turn, but it is not allowed to perform more than one action for the same miniature.
Remember: Venture Cards must always be drawn before crossing a forbidden zone or an obstacle or fog.
Airship Movement
Before declaring the course and moving his airship, the player will check for any weather window influences that affect that flight area.
How it moves: See Airship Movement on page 21 and see Navigating Tool on page 23.
Ship Movement
The player first declares his course, then moves his Ship.
How it moves: See Ship Movement on page 21; see Navigating Tool on page 23; in case of Fog, see page 23.
Obstacles and Restricted Areas for Navigation
- For Airships: See Airships on page 20.
- For Ships: See Ships on page 22.
Actions Related to Crew Management
Hiring a Commander or an Advanced Commander
The player can decide to spend an action to hire a Commander or an Advanced Commander (see Crew Management on page 17).
Hiring a New Specialist
The player can decide to spend an action to hire a new Specialist (see Crew Management on page 17).
Surrendering a Commander or Advanced Commander
The player can decide to spend an action to give up a Commander or an Advanced Commander (see Crew Management on page 17).
Surrendering a Specialist
The player can decide to spend an action to give up a Specialist.
Repair Actions
Repair actions can be used only when the airship is on a base. Players are never obliged to totally refuel their Airship or restore all damages in the same turn: the player can always choose how many points he wants to restore for each indicator.
Remember: If the "Fuel" gauge reaches zero, the Airship will have to make an immediate emergency landing on its location (see Emergency Landing Management on page 45). If this happens on arrival at any Base, it is not considered an emergency landing.
Refueling
The player can decide to spend an action to refuel (regardless of the amount of Fuel he wants to buy). The cost of each fuel point purchased follows the rules of the game price list (see page 47).
Repairing the Airship
The player can decide to spend an action to restore the Structural Integrity of his Airship but is not obliged to fully restore all Structural Integrity points at the same time (see Structural Integrity on page 13; see Game Price List on page 47; see Emergency Landing Management on page 45; see Emergency Landing Management Advanced Rules on page 46).
Distress Call
The player whose airship has made an emergency landing sends a distress signal (see Emergency Landing Management on page 45; see Emergency Landing Management Advanced Rules on page 46).
Using Strategy Cards
Playing a Strategy Card
The current player chooses which Strategy card to use and its intent:
- Helping himself (he plays the card on himself, he immediately suffers the effect and at the end of the turn he puts it under the Strategy Deck).
- Hindering another player (he passes the card to the player he wants to hinder, who suffers the effect at the beginning of his turn: at the end of his turn, he puts the card back in the Strategy Deck).
Alternative (valid both for Basic and Advanced Rules): "Trap Card": The player on duty may decide to place a covered Strategy Card on the board. The first player to pass over the "Strategy" logo circle uncovers the card by turning it face up and suffers the effect (this also applies to the player who placed it); it is always possible to go around the trap card. The game board can hold a maximum of 1 trap per player. The player who places a Trap Card cannot play any other Strategy Card as long as it is on the game board.
Withdrawing a Trap Card
The player who places a trap card can decide to withdraw it during his turn by spending an action. This card ends up in the Strategy Deck.
Drawing a Strategy Card
The player can decide to spend one action to draw a Strategy Card at the cost of one action, by drawing one from the top of the covered Deck. The card has no cost in Bonds.
Remember: you are not allowed to have more than 5 Strategy Cards in your hand at the same time.
Replace a Strategy Card
The player can decide to spend an action to replace a Strategy Card in his possession, with a new one drawn from the covered deck. The discarded card must be placed under the Strategy Cards deck.
This can happen, for example, but not necessarily only in this case, when you already have 5 Strategy Cards in your hand and you cannot add new ones.
Arctic Base Organization
The player who wants to try to win the game must fly over the North Pole and return to his Arctic Base which he must have booked before leaving (by marking it with his Arctic Base Token). Once reached the booked base can be set up, by placing the Mooring Mast; Once set up, the Arctic Base will be the only acceptable starting point to make the final journey to the Pole.
The Arctic Bases available for booking are marked by the snowflake symbol: it is not allowed to book Bases marked with a different symbol (see Symbol Legend on page IX). Some Arctic Bases are neutral, that is they don't belong to any Nation in the game, and the background of their symbol is light grey; other Arctic Bases instead have the flag of the Nation that owns them.
Attention: remember that owning an Arctic Base does not mean that it is ready to be used as a starting point for the last trip. Once you reach the Arctic Base with your ship you must still spend an action to set it up, placing the Mooring Mast on it.
Arctic Base Reservation
The player, at any time during his turn, can decide to spend an action to reserve any of the free Arctic Bases, even if they belong to an opposing Nation, as long as they have not already been reserved by another player. To reserve an Arctic Base, the player indicates the chosen Arctic Base, pays for the reservation according to the rules of the Game Price List (see page 47), and places a Target Token on the reserved Base. The payment for the reservation is immediate.
Setting Up the Arctic Base
The player can decide to spend an action to set up the Arctic Base.
This action can be performed only if the player's ship is stationed on the port of the previously reserved Arctic Base. The player declares that he wants to set up his Arctic Base and pays according to the rules of the game price list (see page 65). The player now places his Mooring Mast on the Arctic Base he has just paid for.
Moving an Arctic Base
The player, at any time during his turn, can decide to move the Arctic Base he has reserved, or to move one of his Arctic Bases already set up. There are two solutions:
- The player has not yet set up the Arctic Base. The player spends an action to remove his Target Token and pays a penalty (see Game Price List on page 47).
- The player has already set up the Arctic Base by planting his Mooring Mast. The player spends one action to remove the Mooring Mast and pays a penalty (see Game Price List on page 47). Obviously he must repeat all the procedures in the rules to reserve a new Arctic Base and place the new Mooring Mast.
In both cases the Base will become free again and will be available to be booked by other players.
Note:
- A player cannot place the Mooring Mast on already occupied bases.
- Arctic bases where a Mooring Mast has been placed remain usable at any time for airship refueling and repair (not only for Arctic missions).
If the emergency landing occurs upon arrival on a Base (any), it is not considered as an emergency landing, but as a simple stationing.
Emergency Landing Management
An emergency landing is performed in the following cases: the Fuel indicator (Range) or the Clip positioned on Structural Integrity reach zero. In both cases the effect is immediate and the airship "lands" where it is. The "landed" Airship cannot restart in the same turn in which it was recovered, but the player can end his turn using his remaining actions.
When an airship makes an emergency landing, the owner must spend an action, to symbolize the request for intervention of a rescue team by sending a S.O.S. signal. After that, he spends another movement action to move the airship to the nearest Base (or port, if it is on water). After he has fully restored, this time compulsorily, any performance of the airship useful to fly safely (Range and Structural Integrity) he can restart from that base and resume playing normally.
Advanced Rules: Emergency Landing. The player closest to the landing point is obliged to respond to the distress signal, at no action cost to the responder.
Ditching (Emergency Landing in Water)
If an Airship [source text is garbled here: "If an Airshiprescue the Airship"; a word is missing in the print] rescue the Airship. In case of equal distance between two players, the one to respond will be the one with the advantage (or in equal conditions the one with more Bonds) who will have to proceed to rescue the ditched airship.
Recovery mode: During the turn of the player who made the emergency landing, the closest ship will reach the ditched airship, moving immediately to the spot (with a single movement, regardless of distance). This movement costs the rescuing player a ship movement action (if already performed, it will be removed in the next turn).
In the next turn, both ships will be moved to the nearest port to the emergency airship. This move costs the owner of the Airship one Airship movement action. The cost of recovery is 20 Bonds per Length travelled by the ship, own or opponent (one way). If the ship is your own, this amount goes to the Bank; if the ship is an opponent, the Bonds go to the player who owns it. If the nearest Port is in an opponent player's territory, the player to whom the recovered Airship belongs must pay him a rent of 20 Bonds.
The movement cost for the player that made the emergency landing is 20 Bonds per Length, according to the Airship-Host Base distance. If the host base is an opponent's, the Bonds are paid to its owner; if it is its own or neutral, they are paid to the Bank. The player who owns the recovered Airship will also pay rent for the base (20 Bonds). For additional costs (refueling or damage repairs), the game price list is always valid.
Emergency Ground Landing
If an airship "falls" on a terrain, the nearest Base will be obliged to host it.
Recovery Mode: The player who made the emergency landing, during his turn moves his airship to the nearest Base, at the cost of an airship movement action and will have to remain stationary also for the next turn without the cost of further actions.
Emergency Landing on the Ice of the North Pole
In this case the recovery mode is the same as for the ground, but using the nearest Arctic Base as host and for all distance and cost calculations.
11. The Game Price List
The following table shows the Bond values of all possible transactions that can be made during the game:
Basic Game Price List
| Object of the transaction | Price | Pay a |
|---|---|---|
| Advanced Commander Engagement | 180 Bonds | Bank |
| Commander Engagement | 100 Bonds | Bank |
| Specialist Engagement | 50 Bonds | Bank |
| Fuel Units (For each fuel notch restored on Range Indicator) | 10 Bonds | Bank |
| Repairs (for each Structural Damage restored) | 10 Bonds | Bank |
| Arctic Base Rental (one-time payment) | 50 Bonds | Bank |
| Arctic Base Outfitting (one-off payment) | 100 Bonds | Bank |
| Object of the transaction | Embed | Withdraw from |
|---|---|---|
| Sale of a Mission (previously completed) | 200 Bonds | Bank |
| Sale of an Advanced Commander | 80 Bonds | Bank |
| Sale of a Commander | 40 Bonds | Bank |
| Sale of a Specialist | 20 Bonds | Bank |
Game Price List Advanced Rules
| Object of the transaction | Price | Pay a |
|---|---|---|
| Engagement Advanced Commander | 180 Bonds | Bank |
| In case of dispute between players: Auction base / Fixed bid in auction | 180 Bonds / 10 Bonds | (If hired at auction by a player, the payment goes to the player who sold him) |
| Engagement Commander | 100 Bonds | Bank |
| In case of dispute between players: Auction base / Fixed bid in auction | 100 Bonds / 10 Bonds | (If hired at auction by a player, the payment goes to the player who sold him) |
| Specialist Engagement | 50 Bonds | Bank |
| In case of dispute between players: Auction base / Fixed bid in auction | 50 Bonds / 10 Bonds | (If hired at auction by a player, the payment goes to the player who sold him) |
| Fuel Unit Purchase (for each fuel mark restored on Range Indicator): Refueling at opponent base |
(The Italian-language "In caso di contesa fra giocatori" line printed under the Commander and Specialist rows is the same dispute note as the English line; it is rendered in English here.)
| Object of the transaction | Price | Pay a |
|---|---|---|
| Arctic Base Rental (one-off payment): Arctic Base Opponent | 50 Bonds | To the opponent |
| Arctic Base Rental: Neutral Arctic Base | 20 Bonds | To the Bank |
| Arctic Base Rental: Own Arctic Base | 0 Bonds | - |
| Arctic Base Setup (one-time payment): Opposing Arctic Base | 100 Bonds | To the opponent owner |
| Arctic Base Setup: Own or neutral Arctic Base | 100 Bonds | To the bank |
Airship Recovery in case of Emergency Landing:
- Standard: 20 Bonds for Length (Length).
- Relief from own Ship or own Base: Bonds go to the Bank.
- Relief from an opponent: Bonds go to the opponent who intervened.
How to perform the calculation:
- At sea: calculate the distance from the ship that responds to the S.O.S. to the ditching airship.
- On land: calculate the distance from any base closer to the landed airship.
- Ice: calculate the distance from any base closer to the landed airship.
| Object of the transaction | Price | Collect from |
|---|---|---|
| Sale of a Mission (previously completed) | 300 Bonds | Bank |
| Transfer of an Advanced Commander | 80 Bonds | Bank / Player (If sold at auction by a player, they are received by the player who signed him) |
| Transfer of a Commander | 40 Bonds | Bank / Player (If sold at auction by a player, they are received by the player who signed him) |
| Transfer of a Specialist | 20 Bonds | Bank / Player (If sold at auction by a player, they are received by the player who signed him) |
12. Solo Mode
The Solo Mode version is intended to allow the player to experiment, train and test himself. In this mode the Mission cards, the Venture cards and a small deck of Solo Mode cards will be used. Strategy cards cannot be used.
The rules applied are very similar to the mode of the Base game, with the introduction of some special rules, due to the intrinsic nature of the mode:
- If before reaching any Base the Structural Integrity reaches zero or if the Fuel runs out, the Airship suffers irreversible damage: the game ends;
- All Bases in territories other than the player's home nation are neutral;
- The player can have a maximum of 5 Mission cards in his hand, unlike the 3 cards used in Basic and Advanced modes;
Optional secondary objectives have been added to the classic missions (Mission), which at the end of the game, if completed, will earn "Stars". Within the mode there is also a system to evaluate your game, expressed in "Match Points".
The "Match Points" will be used by the player to have a summary evaluation of the result of his journey to the Pole (see Points Table). Additionally, the stars will be used to unlock additional bonuses (see Stars Table). The Stars are cumulative during the various games.
At the beginning of the game the player can choose up to 3 secondary objectives to complete before ending the game. Completing an objective earns Stars (see Stars Table). Failure to complete a secondary objective among those chosen involves a penalty of 30 Match Points at the end of the game.
At the end of the game, the player can opt for a score. To calculate the "Match Points", the resources left at the end of the game are totalled. The score can be calculated even if the game has failed (See Table "Match Points" on page 54).
At the beginning of the game, the player can decide to add previously unlocked bonuses. Bonuses remain active throughout the current game, except in specific cases. Each game can have a maximum of 3 active bonuses, all different from each other. (E.g. I cannot have two "+1 Speed" bonuses active during the same game.)
To have a reminder of the active bonuses, during the game, the player uses the Solo Mode deck of cards (composed of 10 cards). Each time the player chooses the bonuses to be applied to the game, he must draw from the deck the card corresponding to the chosen bonus. The card must be placed next to the board of the airship.
Stars Table
Each completed side mission will earn Stars. Arriving at a predetermined amount of Stars will result in the acquisition of passive bonuses that can be used during Solo Mode matches. Below are the tables summarizing the missions and the unlockable bonuses:
| # | Mission | Reward |
|---|---|---|
| 1 | Total lengths traveled to reach the 3 missions must be at least 20 Lengths | 1 star |
| 2 | Complete 1 mission at least 12 Lengths away while maintaining a maximum Range of 2 points | 1 star |
| 3 | Complete the game without crossing the Neutral Territories (white background) | 1 star |
| 4 | Reach the maximum Speed bonus shown on your game board | 1 star |
| 5 | Achieve the maximum Range bonus | 1 star |
| 6 | Stop at least 5 Ports during the whole game | 1 star |
| 7 | Stop at 3 Ports at least 6 Lengths apart | 1 star |
| 8 |
100 Stars Bonus Table
| Stars | Bonus unlocked |
|---|---|
| 5 | +1 Speed |
| 10 | +1 Range |
| 20 | +1 Airship Rescue* (-100 points) |
| 30 | +1 Specialist Engineer free at departure |
| 40 | +1 Specialist Scientist free at departure |
| 50 | +1 Specialist Pilot free at departure |
| 60 | +1 Specialist Manager free at departure |
| 70 | +1 Commander free at the start |
| 80 | +200 Bonds at departure |
| 90 | +1 Advanced Commander free at start |
* If end-of-game scoring is calculated, subtract the amount of Match Points scored next to the bonus. (In the event of an airship "crash", this bonus is used up for the current game, but allows the airship to be transported to the nearest Base for repairs and refueling).
Match Points Table
Table "Match Points" earned (count at the end of the game):
| Element | Match points earned |
|---|---|
| 1 Bond | 1 point |
| 1 Specialist | 20 points each |
| 1 Commander | 50 points |
| 1 Advanced Commander | 80 points |
| Secondary mission not completed | -30 points |
| Fuel Quantity Remaining | 10 points per notch |
| Structural Integrity | 10 points per notch |
| Completed missions (beyond the 3 mandatory ones) | 50 points each |
Transcription Notes
The English section of the publisher's multilingual PDF was transcribed (printed pp. 1-54). The following deviations from the print are disclosed here:
- Printed p. 1 is the cover and index of the rulebook with no rules text; it is not transcribed. The publisher's credits and the designer signature are omitted.
- Printed "FFW" (Wind Indicator, tailwind) is rendered "FW", matching the indicator label.
- Printed "Structural Integry" (weather table) is rendered "Structural Integrity".
- Printed "1 Special Tokens per symbol" (preparation) is rendered "1 Specialist Token per symbol".
- Printed "Articulated Base" and "Artic Base" (Scientist/Arctic sections and the Target Token heading) are rendered "Arctic Base" as the rules context shows.
- Printed "Sky Blue" (France, Starting Bases table) differs from "Light Blue" in the Flags table; both are kept as printed.
- Printed "Russia" (game example) is kept as printed; the nation elsewhere is USSR.
- Printed "Emergency Landing Management on page 63" (list of actions) and "page 45" elsewhere are kept as printed.
- Printed "they are3 paid" is rendered "they are paid"; the stray glyphs "E", "I", "Il" and the trailing "3" after "Venture Cards" in the Stars table are dropped.
- The ditching paragraph's printed text is garbled ("If an Airshiprescue the Airship"); the missing words are marked in place.
- The Italian-language sidebar headings and the Italian "In caso di contesa" lines are rendered in English; the Italian text in the "Helping himself" / "Hindering" strategy card options is translated.
- The "Ship movement" paragraph in the List of Actions repeats the airship sentence as printed.