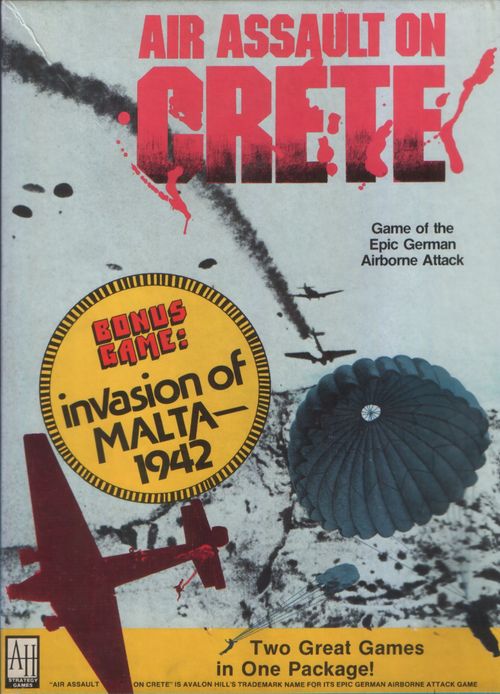
Air Assault on Crete / Invasion of Malta: 1942
Air Assault on Crete / Invasion of Malta: 1942 Rulebook
Table of Contents
Table of Contents
- Introduction
- I. Background on Crete
- II. Description of Play
- III. Game Components
- IV. Sequence of Play
- V. Basic Game Rules
- VI. Advanced Game Rules
- Examples of Play
- Rules of Play – Invasion of Malta, 1942
- Tactical Briefing – Air Assault on Crete
- Historical Perspective – Crete
- Historical Perspective – Malta
- Vertical Envelopment – The German Approach
- Bibliography
- Glossary of Abbreviations
- Design and Production
- Errata
Introduction
AIR ASSAULT ON CRETE marks a departure from the usual Avalon Hill practice of releasing only a single game in one package. With the inclusion of INVASION OF MALTA, 1942, players may play two different and complete games from the same box. Each game includes its own mapboard and counters and shares only a minimum of components with the other. For the sake of brevity, however, the rules for each game are not written independently of one another. Since both share the same basic rules system, the rules for Air Assault on Crete are presented as the rules system for both games while the Invasion of Malta, 1942 rules encompass only variations and expansions of that basic system. Therefore, it is strongly recommended that players first play Air Assault on Crete before venturing into Invasion of Malta, 1942. Approached in this manner, players should find the reduction in the total length of the rules most advantageous.
I. Background on Crete
Early on the morning of May 20, 1941, the German Army launched the first totally airborne invasion that the world had ever witnessed. Even the Germans themselves admitted that it was an awesome and daring undertaking. As their objective, the German High Command had chosen the island of Crete, strategically located in the middle of the Mediterranean Sea between Greece, Cyprus, and the coast of North Africa. Defending this rugged and isolated island were the rag tag Allied survivors of the ill-fated Greek Campaign consisting of British, New Zealand, Australian, and Greek units. Although 42,000 strong they were woefully weak in ammunition, artillery, rifles, heavy weapons, radios, wheeled transport, and other logistical equipment. Also, their ranks were swelled with large numbers of noncombatant technicians and specialists who, valuable as they were, could not fight. The German airborne assault force consisted of the 7th Flieger Division with its four assault regiments. As follow-up support, the 5th Mountain Division was to be landed by air transport and sea convoy to relieve the main assault force. The initial airborne assault went according to plan; four separate assault forces dropped on four different objectives. One group attempted the capture of Canea, seat of the Allied headquarters, while each of the others assaulted one of the three airfields on the island. After reaching ground, however, the situation deteriorated quickly for the German paratroopers. Surprised at the much-stronger-than-anticipated resistance, the Germans failed to capture any of their primary objectives. Only after much desperate hand-to-hand fighting did they finally grab Maleme airfield. Reinforced at last by the mountain units arriving by JU-52 transports the airfield, the Germans finally drove the weakened Allied forces across the mountains. In an operation reminiscent of the Dunkirk evacuations, the British Navy rescued over half of the garrison before the island fell. The Germans had won, but at a terrible price. Some parachute companies suffered over 70% casualties. Officer casualties were five times greater than expected. It was a "very near run thing." It was almost an Allied Victory.
Air Assault on Crete re-creates this campaign in detail. Each player controls either the German or Allied Order-of-Battle as actually existed in the real battle. The Allied player plans his defense and attempts to keep the airfields out of German hands. The Axis player on the other hand, executes his assaults on the airfields with vigor before the Allied player can recover from the shock of the initial landing and counter-attack. Neither player can afford to hold back or stand pat. It quickly becomes a no-holds-barred contest.
II. Description of Play
The game is played in turns with each player alternately moving his playing pieces and resolving combat in succession. A player may move all of his pieces during the movement portion of his turn and then may have "combat" with any enemy pieces his units are adjacent to. The combat procedure is simply a mathematical method of determining who wins a particular combat situation and consists of comparing the numerical strengths of the opposing pieces as a ratio and then consulting a table to find out who wins or loses. The die has nothing to do with movement! It is only used to represent a range of possible outcomes reflecting the uncertainties of real battle.
III. Game Components
A. The Mapboard
The playing board consists of three rectangular sections which, when arranged in the proper configuration, create a map of the northern coast of Crete. Printed over the map are symbols in a hexagonal grid which serve the same purpose as squares on a chess board of regulating movement. These hexagons are called "hexes" for short. Each hex represents a scale distance of 1.6 kilometers.
B. Charts and Tables
There are three player-aid cards included in the game which contain all of the information required during play of the game. These cards include the following:
-
Combat Results Table: Used to resolve combat situations and determines effects on units involved.
-
Terrain Effects Chart: Lists the functions and effects on movement and combat of the various types of terrain represented on the mapboard.
-
Miscellaneous Charts and Tables: Included on the CRT/TEC card, used as called for in the game to resolve functions that have only occasional use during play.
-
Axis and Allied Organization Charts: Organizes playing pieces for play, outlines where and when they appear in the game, and describes limits of placement and entry for both sides. Also contains the Turn Record Track, which is used to record elapsed turns.
C. The Unit Counters
The printed die-cut cardboard squares are the playing pieces for the game. Variously called "unit counters," "units," or "counters," each piece represents an actual military unit or acts as a marker to identify special game conditions on the mapboard.
-
Each unit counter contains a symbol identifying its unit type and size, along with its combat/movement statistics printed in the corners.
-
Size Symbols: The organizational size of a given unit is indicated by the small symbol located above its type symbol:
- XXX — Corps
- XX — Division
- X — Brigade
- III — Regiment
- II — Battalion
- I — Company
- ••• — Platoon
- •• — Section
- The units in the game are classified into several broad categories according to their real-life characteristics for several very important rules purposes. A unit's classification is determined by the unit type symbol printed on its counter:
a. Combat Unit Types:
-
Infantry-type units: infantry; ranger, commando, special forces; parachute infantry; glider infantry; machine gun; engineer; headquarters; reconnaissance; anti-tank.
-
Ranged Artillery-type units: field artillery; light support artillery; anti-aircraft artillery (light and heavy); coastal defense artillery (light and heavy).
-
Armored-type units: tank (light or heavy); assault gun.
-
Aircraft-type units: bomber, fighter, fighter-bomber.
-
Naval-type units: HMS York (heavy AA unit); Coastal Steamer (transport unit).
b. Noncombat Unit Types: truck, docks operations; noncombat units.
c. Indicator Markers: neutralization markers; demolition markers; beach destination markers; port destination markers; convoy markers; beachhead markers.
NOTE: Airborne units, either infantry- or ranged artillery-type, are designated by the gull-wing (parachute) symbol or by the glider symbol.
IV. Sequence of Play
AIR ASSAULT ON CRETE is played in turns. Each turn is divided into two player segments with each player segment further divided into several "phases" which organize a player's activities during his segment. The step-by-step sequence of play for the Basic game is outlined below:
A. Axis Player Segment
-
Aircraft Placement and Bombardment Phase: Axis player places his aircraft units on the board and executes any aircraft bombardment attacks.
-
Airborne Assault and Air Landing Phase: Axis player places his airborne units on the mapboard during the proper turns, rolls for drift, and executes drift combat. Also, he may bring air landing units into the game as allowed by the rules.
-
Sea Movement Phase: Axis player brings "convoy" units into the game and places them on beach landing boxes.
-
Movement Phase: Axis player may move all of his units to the limit of their movement allowance as modified by enemy unit and terrain restrictions.
-
Combat Phase: Axis player resolves any land attacks against adjacent enemy units at his option.
B. Allied Player Segment
-
Sea Movement Phase: Allied player brings reinforcements into the game via sea movement as indicated on the Turn Record Track.
-
Movement Phase: Allied player may move all of his units to the limit of their movement allowance as modified by enemy units and terrain restrictions.
-
Combat Phase: Allied player resolves any land attacks against adjacent enemy units, at his option.
C. Players repeat steps A. and B. for each turn of the game. Use the Turn Record Track printed at the bottom of the Organization Card to record elapsed turns by sliding the "Turn Now" counter along the track from left to right.
V. Basic Game Rules
A. Movement
During the movement phase of a player's segment, he may move all, some, or none of his units, at his option. Each unit counter may be moved as many hexes as possible within the limits of its movement allowance, terrain restrictions, and other game rules:
-
Each unit counter is moved by tracing the path of movement through each separate hex.
-
The number of hexes through which a unit may move in one turn is indicated by its movement allowance. A unit's movement allowance is expressed in terms of a certain number of movement points. In general, each unit counter expends one movement point (MP) of its movement allowance for each hex it enters. Quite often, however, terrain restrictions (see below) will require units to expend more than one movement point to enter a hex of a particular type.
-
In any given movement phase, a player may move as many or as few of his units as he chooses. Movement is always voluntary, never mandatory (EXCEPTION: see Sea Movement, below).
-
A unit may be moved in any direction or combination of directions. A unit may expend some, none, or all of its movement allowance each turn. Un-used movement points may not be transferred from unit to unit or accumulated from turn to turn.
-
Each unit is moved individually, tracing the path of movement through each hex in turn. Once a unit has completed its movement, it may not be changed, repositioned, or realigned. A unit's movement is considered completed when the player begins to move another unit.
-
No combat may take place during the movement phase. No enemy units may move during a friendly movement phase.
-
A unit may freely pass over or stop in the same hex with other friendly units, subject to stacking limitations. A friendly unit may not enter hexes containing enemy combat units (EXCEPTION: See Airborne Assault).
-
A unit must stop and end all movement for that phase when it moves adjacent to an enemy combat-type unit. It is not required to stop for NONCOMBAT-type units.
-
A unit with a movement allowance of "0" may never move from its initial starting hex.
EXAMPLE: A unit, moving as illustrated, expends movement points in the following manner: 1 MP (clear terrain to clear terrain hex) + 2 MP (clear terrain hex to rough terrain hex) = 3 MP total expended. The unit cannot enter another rough terrain hex because it costs 2 MP to enter and it has only one MP remaining in its movement allowance.
B. Road Movement
- A unit may move from a road hex to an adjacent, connecting road hex of the same road at the road movement rate for that class of road. There are two classes of roads; primary and secondary.
a. Primary: A unit may move into a primary hex from another road hex (primary or secondary) at the rate of ½ MP per road hex, regardless of the other terrain in the hex.
b. Secondary: A unit may move into a secondary road hex from another road hex at the rate of 1 MP per road hex, regardless of the other terrain in the hex.
- EXCEPTION: Roads do not negate the effects of rivers on movement except where a road crosses a river at a bridge. If there is no bridge symbol at the point where the river intersects the road, a unit must expend the river hex movement penalty to leave that hex.
C. Stacking Limitations
Each side may have more than one unit in a common hex. Each side, however, is limited in the number of unit counters allowed in a hex at the same time.
-
No more than SIX "stacking points" of friendly units may be in the same hex at the end of any friendly movement or combat phase.
-
Each combat and non-combat unit has a certain stacking point value which is determined by the stacking value number printed in the upper left corner of each unit counter.
-
Units with a stacking value of "0" may be freely placed with other friendly units at no stacking cost.
-
If the stacking capacity of a hex is exceeded at the end of a player segment, the owning player must eliminate excess units from the hex until capacity equals six or less. The owning player has the choice of which units to eliminate.
-
Aircraft, naval, and indicator counters have a "0" stacking point value.
D. Zone of Control
-
The six hexes surrounding a unit constitute that unit's "zone of control." A hex in a unit's zone of control is said to be a "controlled hex."
-
Only COMBAT-type units have zones of control. Noncombat, naval, and aircraft units do not have a zone of control.
-
Whenever a friendly unit enters an enemy unit's zone of control, it must stop and end all movement during that movement phase.
-
If a unit begins a turn in an enemy zone of control, it may move out of that controlled hex but it may not re-enter another enemy controlled hex during that movement phase. (EXCEPTION: See "6," below.)
-
Units with a movement allowance of "4" or greater may, however, move directly from one enemy controlled hex to an adjacent enemy controlled hex. To do so, it must begin its turn in an enemy controlled hex, move to the adjacent controlled hex, and then stop and move no further in that movement phase.
-
Ranged artillery and noncombat units may NEVER voluntarily move into, through, or out of an enemy controlled hex. If forced to do so by retreat after combat (see below) they are eliminated instead.
E. Friendly Hex
-
A hex is considered friendly to a player if it is physically occupied by a friendly combat or noncombat unit. Aircraft and naval units have no effect.
-
An unoccupied hex is friendly to neither side.
-
Enemy zones of control have no effect on the friendly condition of a hex.
F. Combat
Combat occurs between opposing units in adjacent hexes at the discretion of the player who has just finished moving. The player who initiates combat is said to be the attacker while the other player is considered the defender.
-
During the combat phase of his segment, a player may only attack those enemy units that are adjacent to friendly units. Only friendly units that are adjacent to specific enemy units may attack those units.
-
A unit is never required to attack during the combat phase, but always has the option of doing so. (EXCEPTION: See Sea Movement.)
-
No enemy unit may be attacked more than once per combat phase. No friendly unit may attack more than once per friendly combat phase.
-
All defending units in a hex must be attacked as one combined defense strength. Individual units in a hex cannot be attacked while others in the same hex are ignored.
-
Attacking units may attack the same defending unit from as many different hexes as possible, provided all of the attackers are adjacent to the defender's hex.
-
Not all of the friendly units in a hex are required to attack. Some may attack while others in the same hex do nothing.
-
Not all of the friendly units in a hex are required to attack the same defending hex. Different units in the same hex may attack adjacent defenders in different hexes.
-
Defending units in adjacent hexes may be attacked as one combined defense strength provided that all attacking units are adjacent to all defending units. Each attacking unit must be adjacent to all of the units being attacked.
-
Each attack against a group of defending units is resolved individually. To determine the results of the attack, follow this procedure for each attack:
a. For each separate combat situation, total all of the attack strength points of the attacking units together, then total all of the defending units' defense strength points.
b. Convert these two totals into a numerical odds ratio (attacker to defender). Round-off this odds ratio downwards to conform to the simplified odds ratio categories printed on the Combat Results Table. EXAMPLE: Three Axis units totaling 21 attack strength points attack two Allied units totaling 10 defense strength points. This is converted into an odds ratio of 21 to 10, which is rounded down to 2-1 to conform to the Combat Results Table.
c. Where applicable, modify attack and defense strengths (due to terrain effects) as indicated on the Terrain Effects Table, before converting the odds ratio to the simplified odds categories.
d. Roll the die once for each attack situation, cross-indexing the number rolled with the proper odds category column on the Combat Results Table, to determine the result of the attack.
e. Apply the results to the attacking or defending units immediately before resolving any additional combat.
- Retreat After Combat: When called for on the Combat Results Table, units are retreated according to the following principles:
a. Each player may retreat his own units.
b. A unit may be retreated in any direction, but it cannot retreat into sea hexes, enemy-occupied hexes, or empty hexes in an enemy zone-of-control.
c. A unit may be retreated into hexes occupied by friendly combat units (which are not involved in the current combat situation) even if those hexes are also in enemy zones of control. If such a retreat creates an over stacked hex, the owning player must remove units in excess of the stacking limit. Specific units removed are chosen by the owning player.
d. Units which retreat into other friendly units which are subsequently attacked do not affect the outcome of that attack in any manner. They must, however, suffer the effects of any adverse combat results applied to that hex by subsequent attacks.
-
Advance After Combat: Victorious infantry and armored units may advance after combat into those hexes vacated by defeated enemy units, whether they are attacking or defending. Such advance after combat must be executed immediately before any other combat is resolved.
-
SPECIAL: Each ranged artillery-type unit defends with a provisional defense strength of "1" when defending in a hex without infantry or light armored units. When in a hex with infantry or light armored units, ranged artillery-type units defend with a defense strength of "0." The provisional defense strength is never doubled or tripled due to terrain considerations.
G. Ranged Artillery Fire
Field artillery, light artillery, and light antiaircraft units may apply their artillery attack strength against non-adjacent enemy units within range as follows:
-
Each ranged artillery unit may "fire" (use its attack strength) in both the friendly combat phase and the enemy combat phase in the same turn.
-
Each artillery unit has a specified range in hexes over which it may apply its attack strength. It may apply its attack strength against any single hex within range.
-
An artillery unit may always fire into adjacent hexes regardless of terrain. When firing at a range of two hexes or more, however, blocking terrain may prohibit fire:
a. To be able to fire into a particular hex, an artillery unit must have a clear line-of-fire (LOF) from the hex it occupies to the target hex. This line-of-fire is defined as a straight line running from the approximate center of the firing hex to the approximate center of the target hex.
b. City and rough terrain hexes block a unit's line-of-fire. If the line-of-fire is traced through or along a hex side of one of these types of hexes, the unit may not fire at that target hex.
c. The firing unit's hex and the target hex are always ignored for blocking terrain determination.
- Support Fire: Artillery may assist regular combat units during the friendly combat phase as follows:
a. During the friendly combat phase, each artillery unit may add its attack strength to any attack by other combat units against enemy units occupying hexes which are in range and line-of-fire.
b. The defending unit must be attacked by at least one friendly infantry-type unit in order to be fired upon.
- Defensive Fire: Artillery may attack enemy combat units during the enemy combat phase as follows:
a. During the enemy combat phase, each artillery unit may fire at enemy units that are attacking friendly defending units. As the opposing player announces each combat situation, stating the odds, and specifying the units attacking, the defending player may announce defensive fire against attacking enemy units before the die is rolled to resolve the attack.
b. Defensive fire may be directed against any single enemy unit or group of enemy units occupying the same hex that are attacking friendly units. NOTE: In this exceptional case, whole stacks of enemy units do not have to be fired upon (German airborne battalions must be attacked as a whole, however.)
c. Defensive fire attacks are resolved in the same manner as regular attacks. Note, however, that the artillery unit is immune to adverse combat results.
d. If the defensive fire is successful in eliminating or retreating enemy units, the enemy attack must be recomputed and the attack odds revised. No additional enemy units may participate in that attack. Enemy units forced to retreat may not participate in any other attacks during that combat phase.
e. Defensive Fire may not be directed against enemy artillery units.
-
Artillery units may only fire at enemy units that are adjacent to, and involved in combat with, friendly combat units.
-
Artillery units always ignore adverse combat results when attacking. They may not be retreated nor may they be removed as combat losses except when attacked directly by enemy infantry- or armored-type units. (See Zone of Control rules.)
-
Artillery units may use defensive fire and defend normally in the same segment.
H. Battalion Substitute Counters
-
Each German parachute and glider infantry battalion is provided with company-sized substitute counters for mandatory use during the initial airborne assault and for optional use as the tactical situation dictates.
-
German airborne infantry and engineer battalions must be broken-down into company-sized units for entry into the game via airborne assault.
-
Re-formed battalion counters may be replaced with the proper company-sized substitute counters any time during the game provided such a break-down does not violate stacking limitations.
-
Company-sized units may re-combine into battalion units only at the beginning of the Axis movement phase, provided that all units to recombine occupy the same hex. Battalion counters may function normally in the turn they are reconstituted.
-
To recombine, company-sized units must occupy the hex with a battalion headquarters company.
-
Battalions break down and re-form according to the Battalion Substitution Chart. (No substitutions are allowed for units marked SPECIAL on that chart.)
a. Each battalion has specific company-sized units attached to it. These run in numerical order from "1" to "16" with each consecutive group of four companies representing one battalion when coupled with a battalion headquarters company.
b. See the Battalion Substitution Chart for a complete illustration of all battalion organizations.
- SPECIAL: To re-form into battalions, it is not necessary to have the specific companies belonging to the battalion headquarters in the same hex. In fact, all that is required to re-form a battalion is the battalion HQ company and any four parachute, glider, engineer, or machine gun companies or combinations thereof.
a. EXCEPTION: To re-form the airborne engineer battalion, at least one of the combat companies must be an engineer company.
b. EXCEPTION: The IV Battalion of the STURM regiment was an ad hoc battalion put together shortly before the beginning of the campaign. Consequently, it lacked the cohesiveness and experience of other battalions. Therefore, it may only be reconstituted by the exact companies listed on the Battalion Substitution Chart.
I. Airborne Assault
Axis airborne units enter the game via the airborne assault procedure which consists of three steps: placement, drift, and drift combat:
-
During the designated turn of entry, airborne units are broken down into company-sized units and transferred from the Assault Organization Card and placed on the mapboard during the air assault and air landing phase.
-
Airborne units must be initially positioned within the area described on the Organization Card:
a. Airborne units must be initially positioned on non-rough terrain hexes.
b. Airborne units must be positioned in hexes within stacking limitations.
c. Airborne units may be positioned in hexes containing enemy units.
- Airborne Assault Placement Restrictions: Follow the instructions listed above each group of units on the Organization Card for location and turn of entry. Placement is restricted as follows:
a. Each "block" of units listed for a specific sector destination must enter the game on the turn and in the sector so designated. All units must enter on the same turn.
b. Each "block" of units listed for "any single sector" must enter the game on the turn indicated, but the Axis player has the option of choosing the sector in which they will be initially positioned. Placement of these units is limited, however, to those sectors in which airborne units have been previously dropped or convoys have successfully landed units. All units must enter on the same turn.
c. The block of units constituting the first battalion of the Sturm Regiment is listed as being initially positioned "anywhere." This means that the battalion may be split and dropped by companies in any number of different sectors. All units must enter on the same turn.
- After completing initial placement, each individual airborne unit must undergo the effects of drift. Referring to the Drift Diagram printed on the Playing Aides card, roll one die for each unit and move that unit to the hex that corresponds to the number rolled. Make certain the "north" orientation of the diagram matches that of the mapboard.
a. Any unit that drifts off of the mapboard, into sea hexes, or onto hexes containing friendly units in violation of stacking limitations is automatically eliminated from play.
b. For GLIDER units, subtract "2" from the die roll number for drift.
c. If a unit is initially placed on an enemy-occupied hex, add "1" to the die roll number for drift.
- Drift Combat: If the final position of an airborne unit is an enemy occupied hex, a "drift combat" situation exists. All such drift combat situations are resolved as regular attacks at the end of the air assault and air landing phase:
a. Determine combat odds as normal. Note, however, that only those opposing units in the same hex are counted. Units in adjacent hexes are ignored for drift combat purposes. The Axis units are always the attacker; the Allied units always defend.
b. Automatically add "1" to the die roll result of all drift combat situations.
c. SPECIAL: If a retreat is called for on the Combat Results Table, for either the attacker or the defender, the retreating unit is allowed to move to an adjacent hex provided that hex is only in the zone of control of the enemy unit involved in the drift combat, or that hex contains a friendly combat unit.
-
Airborne units may not engage in any other type of movement or combat during the player segment in which they execute airborne assault.
-
SPECIAL SURPRISE RULE: During the first turn of the game, Allied units may only move a maximum of one hex during the Allied player segment. This restriction applies ONLY to the first turn of the game. Allied units may engage in combat with enemy units normally during turn #1.
J. Air Landing
Only those units designated as "Air Landing" on the Axis Organization Card may enter the game via air landing procedures:
- Air landing units enter the game during the airborne assault and air landing phase by being transferred from the Organization Card to any airfield hex that was friendly to the Axis player at the beginning of the player segment.
a. Air landing units may not enter the game during NIGHT TURNS.
b. Air landing units may not land on an airfield hex if there is an un-neutralized enemy light antiaircraft unit within range of that hex.
-
The maximum number of air landing units that may enter the game through a friendly airfield hex in one turn is indicated by the number printed next to the airfield symbol. This number represents the number of stacking points that may be air landed on that hex during the air landing phase, subject to stacking limitations. Air landing units may not enter the game in violation of stacking limits.
-
Units may not move out of the airfield hex in the turn in which they arrive. They may, however, engage in combat and move-after-combat normally.
K. Aircraft Units
The Axis player is provided with several aircraft units as indicated on the Axis Organization Card. These are employed in the game to abstractly represent the air support available during the campaign:
-
During the aircraft placement and bombardment phase, the Axis player allocates his aircraft to any desired hex or hexes on the mapboard. They have no stacking limitations.
-
Bomber units may be positioned on top of Allied units that the Axis player intends to attack during the combat phase.
-
During the combat phase, the Axis player adds the attack strength of each bomber unit to that of regular ground units attacking Allied units in the bomber's hex.
-
Bomber units may not attack enemy units without at least one Axis ground unit also attacking those units. If bomber units are allocated to an enemy occupied hex and the Axis player does not attack those units in the combat phase, the bomber units have no effect.
-
Bomber units are removed from the mapboard at the end of the Axis combat phase. They suffer no adverse combat effects and may not be removed as combat losses.
L. Sea Movement
Certain Axis units enter the game by being transferred from the Organization Card to the beach landing boxes printed on the mapboard. These units are organized into convoys on the Organization Card and enter the game at a time and place chosen by the Axis player:
-
Prior to the commencement of play, the Axis player determines both the turn of arrival and the beach destinations of his convoys. He does this by placing a convoy marker and a beach destination marker for each convoy on one of the blocks of the Turn Record Track. These indicators are positioned inverted to keep the destination and turn of arrival secret from the Allied player.
-
At the same time, the Axis player also places up to three groups of decoy counters to further confuse the Allied player as to Axis intentions.
-
Each of the two regular convoys may enter the game at any time after turn one. Each convoy is independently designated for arrival. Both convoys may be designated for the same turn of arrival. They may not, however, land at the same beach in the same turn.
-
During the sea movement phase of the turn of arrival for a convoy, the Axis player must roll one die on the Sea Movement Table to determine if the convoy arrives successfully during that turn. Roll one die for each convoy and apply the indicated results to the units involved. NOTE: To preserve secrecy, it is suggested that the Axis player also roll for decoy convoys, revealing the true nature of the convoy on non-elimination results only.
-
Any units that survive the Sea Movement Table are placed on the landing boxes of the designated beach, as the player desires, within stacking limits.
-
During the regular movement phase, convoy units must be moved from the landing boxes to the connected coastal hex. They may move no further in the turn of arrival.
-
If enemy units occupy the connected coastal hex, they must be eliminated or forced to retreat during the combat phase to allow units in the landing boxes to advance after combat:
a. Units in landing boxes may attack enemy units on the connected coastal hexes by themselves, or in conjunction with other convoy units that moved to adjacent coastal hexes, or with other friendly units attacking from land, or with aircraft units previously designated to that hex.
b. Combat is resolved normally, except that units attacking from landing boxes are reduced to HALF their normal attack strength.
c. If the attack fails to remove all defending units from the coast hex and thus does not allow the units in the landing box to advance after combat, those units are automatically eliminated.
d. SPECIAL: Ranged artillery units in landing boxes may NOT participate in an attack on defending enemy units on coastal hexes. They may, however, automatically advance onto the vacated coastal hex if other friendly units force the defender to retreat.
- Emergency Convoy: Whenever the Sea Movement Table calls for convoy units to be "aborted," such units are placed in the aborted units box on the Organization Card. Infantry-type units that are aborted may be formed into an emergency convoy:
a. During any sea movement phase after the last regular convoy has attempted to land, the Axis player may position the Emergency Convoy counter on the Turn Record Track along with a beach destination counter. The emergency convoy cannot be scheduled for arrival until at least three turns after placement of the destination counter. No decoy counters may be placed with the emergency convoy although the emergency convoy could itself be a decoy and contain no units (blank counters being placed in the emergency convoy box).
b. No more than nine stacking points worth of aborted units may be allocated to the emergency convoy.
c. Only infantry-type units may be allocated to the emergency convoy. Ranged artillery and armored units are prohibited.
d. The emergency convoy must roll on the Sea Movement Table in the same manner as regular convoys. SPECIAL: Subtract "2" from the die roll for the emergency convoy. Aborted units are not considered as eliminated units for victory condition purposes. They are merely units which cannot enter play.
M. Inverted Units and Decoys
-
During preparations for play, the Allied player may position his units on the mapboard secretly, in an inverted position.
-
Allied units may remain inverted until they move adjacent to an Axis combat or aircraft unit or whenever they attack. When this occurs, they are immediately exposed.
-
Whenever an Axis combat unit (not aircraft) ends its movement adjacent to an inverted Allied unit, the Allied unit must be exposed at the end of the Axis movement phase.
-
Exposed Allied units may be re-inverted at the beginning of each Allied player segment if they are not adjacent to Axis combat or aircraft units.
-
During preparations for play, the Allied player may position up to ten decoy counters on the mapboard, face-down. They may not move and they have no effect on stacking or combat. Until exposed, however, they must be treated like real units. Thus, Axis units must stop whenever they move adjacent to decoy counters. When exposed at the end of the Axis movement phase, however, the decoy counters are removed from play.
N. Night Restrictions
During night turns, as indicated on the Turn Record Track, the following special limitations prevail:
-
No airborne or air landing operations may be executed.
-
No aircraft operations may be executed.
-
Ranged artillery units may only fire at targets in adjacent hexes.
-
SPECIAL: All Allied infantry and armored units (EXCEPT headquarters and Greek units) may both move out of and re-enter enemy zones of control in the same turn. Also, they may move directly from one enemy zone of control to another regardless of their movement allowance.
O. Preparations for Play
Before beginning the game, punch out the appropriate unit counters and position them in the designated boxes on the Allied and Axis Organization Cards. Then set up the units on the mapboard in this order:
-
Allied player positions his units designated for specific sector locations on the mapboard.
-
Axis player positions his real and decoy convoy counters on the Turn Record Track.
-
Allied player positions his units designated for "Anywhere" on the mapboard.
-
Begin play with turn #1, Axis aircraft placement and bombardment phase.
P. Victory Conditions
-
AXIS: Axis player wins by maintaining any one of the three airfield hexes in a friendly condition for four consecutive turns before the end of the Basic Game.
-
ALLIED: Allied player wins by avoiding the Axis victory conditions.
-
See the Turn Record Track for length of Basic and Advanced Games.
VI. Advanced Game Rules
The Advanced Game rules are presented for those players desiring more detail, realism, and historical accuracy in their game. Caution! Adding these rules will increase game complexity and playing time. Several of the Advanced Game rules sections are long and complex even though their impact on the game system is, quite frankly, minor. Treat them accordingly.
A. Additional Aircraft Missions
Support missions by bomber units were introduced in the Basic Game. The Advanced Game rules include fighter (F) and fighter-bomber (FB) aircraft types as well as additional aircraft missions:
-
Air Support: Executed by bomber and fighter-bomber units in the same manner as presented in the Basic Game rules. Air support units are removed at the end of the Axis player segment.
-
Interdiction: Executed by fighter and fighter-bomber units only. Interdiction units are placed on or adjacent to road hexes. Allied units may not enter a hex adjacent to or containing an aircraft unit at the road movement rate, nor may they ignore other terrain in the hex. Only Axis aircraft units on interdiction missions impede Allied road movement. Interdiction units are removed at the end of the Allied player segment.
-
Bombardment: Executed by bomber and fighter-bomber units only. Bombardment units are placed directly on their target hexes and their attack is resolved on the Bombardment Table during the aircraft placement and bombardment phase. Bombardment units are removed at the end of the phase.
a. Aircraft units may bombard the following types of targets:
-
Anti-aircraft units: Neutralization result on the Bombardment Table means the unit may not function offensively or move for one or two turns, as indicated. Place a neutralization marker on the target unit.
-
Coastal Defense Artillery units: Same as antiaircraft units.
-
Ports: Neutralization result means that no unit may embark or debark at port for one or two turns as indicated. Place bombarding aircraft units and neutralization markers in port landing boxes.
-
HMS York and the Coastal Steamer: Neutralization means the target unit is destroyed. Remove the unit from the mapboard.
b. Neutralization is effective immediately. A target that is neutralized for one turn regains full function at the beginning of the next Axis player segment. A two-turn neutralization means the target will regain full function at the beginning of the second Axis player segment after bombardment.
c. Effects of neutralization are cumulative. If a target already has an N-1 marker on it and then suffers another N-1, an N-2 marker would be placed on it.
d. At the beginning of each Axis player segment, remove all N-1 markers and reduce all other neutralizations by "1."
e. The effects of bombardment apply to ALL target units in a hex. EXAMPLE: If a heavy AA unit and a coastal defense artillery unit occupy the same hex, both would be subjected to neutralization if that hex is bombarded. EXCEPTION: The coastal steamer cannot be bombarded while it is in a port landing box. It may only be bombarded when out of port.
f. Blind Bombardment: The Axis player may attempt to bombard positions containing inverted units. In this case, the hex may or may not contain bombard-able targets. The Axis player conducts his bombardment attack as usual, but the Allied player must reveal the target units and position a neutralization counter in the hex ONLY if the Bombardment Table outcome is successful. If the result is "No Effect," the Allied player reveals nothing.
B. Anti-Aircraft Units
Allied anti-aircraft units have three functions; they reduce the effect of Axis aircraft missions, they disrupt airborne landings, and light AA units may act as ranged artillery:
- Effects on Aircraft: Aircraft units within range of a non-neutralized light or heavy AA unit are reduced to HALF normal effectiveness as follows:
a. Two fighter or fighter-bomber units must occupy the same hex to successfully perform an interdiction mission. One aircraft unit in a hex within range of an AA unit has absolutely no interdiction effect.
b. Attack strength points of bomber and fighter-bomber units are HALF normal value (rounded down) when executing air support or bombardment missions against hexes in range of an AA unit.
c. Aircraft effectiveness is never reduced to less than half regardless of the number of AA units within range.
- Effects on Airborne Assault: Each anti-aircraft unit in range of an airborne unit during the airborne assault phase adds "1" to the drift die roll for that unit.
a. Anti-aircraft effects on airborne units are cumulative. If three AA units are within range of an airborne unit, "3" would be added to the drift die roll.
b. Refer to the Drift Diagram for a complete listing of all drift modifiers.
- As Ranged Artillery: Light (not heavy) antiaircraft units may be used as regular ranged artillery during the friendly and enemy combat phases. Light AA units may function as antiaircraft units and ranged artillery units in the same turn.
C. Coastal Defense Artillery Units
Coastal defense artillery units are a specialized type of ranged artillery units that may only be used against targets in beach or port landing boxes:
-
Coastal defense (CD) artillery units must be positioned on or within one hex of a coastal hex prior to the start of the game.
-
CD artillery units have a range and attack strength like other ranged artillery units. They are restricted, however, in that they may only attack units in beach or port landing boxes during the Axis sea movement phase.
-
Unlike other ranged artillery units, each CD artillery unit may fire upon ALL targets that are within range and line-of-fire during the Axis sea movement phase:
a. CD artillery units resolve the effects of their fire on the Bombardment Table in the same manner as bomber units. Any "N" result means that the target unit is eliminated from play.
b. Each CD unit may attack each and every target unit within range, individually, during the same sea movement phase.
c. Each CD unit attacks each target unit individually. Each target unit represents a separate resolution on the Bombardment Table.
d. CD artillery units may not combine their attack strengths for resolution on the Bombardment Table. Note, however, that a target unit may be attacked more than once in each sea movement phase.
- All CD artillery units are reduced to HALF attack strength (rounded down) during night turns.
D. Allied Reinforcements
Certain Allied units enter play during the course of the game as reinforcements. They may enter the game through friendly ports or from the south edge of the mapboard as follows:
-
On the first turn of availability, as indicated on the Allied Organization Card, the Allied player may allocate each group of reinforcements to either the port or south edge box on his Organization Card. Once placed in a box, a reinforcement group is committed to that game entry method unless aborted. Reinforcements may attempt to enter the game on the same turn that they are available, or on any subsequent turns.
-
Reinforcement groups must roll a die on the Allied portion of the Sea Movement Table in the same manner as Axis convoys. Aborted units are returned to the aborted box on the Allied Organization Card and may attempt to enter the game during the next turn by being transferred from the aborted box to the port or south edge box.
-
Port Entry: Reinforcement groups may enter the game through any friendly port landing box during the Allied sea movement phase.
a. Allied reinforcements may only land at port landing boxes during night turns.
b. Units are placed on the port landing box and are moved directly to the connected city hex to the maximum stacking limit of that hex.
c. Units that cannot move from the port landing box to the city hex because of stacking limitations must remain in the landing box until there is room available on subsequent turns.
d. If the port landing box is neutralized by bombing attack or if the city hex becomes enemy-occupied, the units in the port landing box must be eliminated.
e. Units may not move in the turn in which they are transferred from the landing box to the city hex. They may engage in combat normally, however.
f. SPECIAL: Armored or ranged-artillery type units may not move from or to a port landing box to a connected city hex unless there is a DOCKS unit in that city hex.
- South Edge Entry: Successfully landed units may enter the game via the road marked on the south edge of the Heraklion sector. Units entering the game may execute movement and combat normally in the turn of arrival.
E. Axis Port Entry
Axis convoys may be re-directed to captured ports at the Axis player's option:
-
Any convoy may be redirected to a friendly port landing box instead of its scheduled beach destination if the port is captured and made friendly at least two turns prior to the convoy's intended turn of arrival at a beach.
-
To change destination, simply replace the beach marker with the appropriate port counter on the Turn Record Track. Roll one die on the Sea Movement Table as normal.
-
Axis units landing at ports must follow the same procedure as outlined above for Allied port entry. Any number of Axis units may attempt to land at a port subject only to the city hex stacking limitations. Subtract "1" from the Sea Movement Table for Axis convoys landing at ports.
-
SPECIAL: If the intended port destination becomes unfriendly at any time prior to landing, even if subsequently made friendly again, the convoy is immediately aborted.
F. Allied Evacuation
As explained in the Advanced Game victory conditions, under certain circumstances the Allied player may accrue victory points for evacuating certain units:
-
Allied units with a movement allowance greater than "0" may be evacuated (removed from the mapboard) in a procedure which is simply the reverse of that used for landing Allied reinforcements.
-
Port Evacuation: Units may evacuate from friendly, un-neutralized port landing boxes during night turns only:
a. Units to be evacuated are simply moved to a port city hex and then transferred to the evacuation box of the Allied Organization Card.
b. NOTE: A maximum of 14 stacking points may evacuate from a port hex in one turn if there is a DOCKS unit in the same hex. If there is no DOCKS unit present, then only 7 stacking points may be evacuated.
-
South Edge Evacuation: At any time during the Allied regular movement phase, units may move off of the mapboard via any road hex indicated by the letter "E" by expending one additional movement point to leave the mapboard. The units are then placed in the evacuation box.
-
Noncombat Units: The Allied player must deploy and evacuate noncombat units in the Advanced Game. These units represent formations of skilled specialists and technicians which were to prove critical to the re-formation of the Allied forces in the Middle East theater of war:
a. Noncombat units are positioned inverted at the beginning of the game in the same manner as other unit types. Unlike other types, however, a noncombat unit is exposed IMMEDIATELY whenever an enemy unit moves adjacent to it.
b. Noncombat units have no zone of control. Enemy units may move adjacent to or through them without stopping, or remain in their hex, if no Allied combat units are in the hex.
c. When in a hex without friendly combat units, noncombat units are automatically eliminated if an enemy combat unit is adjacent or in the same hex with them at the end of the Axis combat phase.
d. Noncombat units have a stacking value printed on their counter in the same manner as combat units.
- IMPORTANT: No unit may be evacuated before turn eight. No noncombat unit may move out of the sector of its initial placement before turn eight UNLESS enemy units enter the Georgeopolis sector before that turn.
G. Special Units and Functions
- Allied Coastal Steamer: The coastal steamer is a naval unit that may transport combat and noncombat units between the landing boxes of Heraklion, Retimo, Suda, and Canea:
a. The coastal steamer may move only through sea hexes and into and out of landing boxes. It may land units at port landing boxes and the beach landing boxes connected to Retimo and Canea. It expends one movement point for each sea hex or landing box entered.
b. The coastal steamer may transport up to three stacking points or ONE armored unit from one port landing box to another.
c. Embarkation: To embark (load) units for transportation, the steamer must occupy the landing box and the units to be transported must occupy the connected city hex at the beginning of the Allied sea movement phase. A unit is signified as being loaded by being placed under the steamer counter.
d. Debarkation: To debark (unload) units, the steamer unit must occupy a landing box at the beginning of the Allied sea movement phase. The transported units are simply transferred from the landing box to the city hex.
e. The coastal steamer may not move in the turn of embarkation or debarkation. Unloaded units may not move in the turn of debarkation, but may engage in combat normally. If the city hex is stacked to capacity, they must stay in the landing box.
f. Armor and ranged artillery units may only embark or debark at a port landing box connected to a city hex containing a docks unit.
g. Units may only embark/debark at friendly, un-neutralized landing boxes. If the connected city hex is captured by enemy units (and thus made un-friendly), the steamer and any units in the landing box are eliminated.
h. The coastal steamer cannot be the target of a bombardment attack while in a port landing box. If attacked and destroyed while in a sea hex or non-port landing box, any units being carried are also destroyed.
- Truck Units: The truck units represent transport companies which may carry regular land units:
a. A truck unit may transport up to three stacking points of infantry-type units at the truck unit's movement allowance.
b. Loading and Transporting: A truck unit may load any infantry unit that occupies the same hex at the beginning of the friendly movement phase. It must expend three movement points to load and may then expend the remainder of its movement allowance in normal movement in the same turn.
c. Unloading: A truck unit may unload at any time during the movement phase by expending three movement points. It may expend any remaining movement points in regular movement or it may load other units.
d. A transported unit may not move or attack in the turn of transporting or unloading. When loaded, it is ignored for combat purposes and treated as a noncombat unit. If the truck unit is destroyed, any units being transported are also destroyed.
e. A truck unit may not load or unload while in an enemy zone of control.
-
HMS York: The HMS York counter represents the partially sunken hulk of the British cruiser York which was used as an anti-aircraft gun platform in the middle of Suda Bay. The York functions as a heavy AA unit. It is a potential aircraft bombardment target which is destroyed by any "N" result on the Bombardment Table.
-
Special Functions For Armored Units:
a. Whenever an armored unit (heavy or light) participates in an attack, "1" is automatically subtracted from the combat results die roll for that attack. No more than "1" is ever subtracted from the die roll regardless of the number of armored units participating.
b. No combat results die roll modifications are made when an armored unit is defending, only attacking.
c. Heavy Armored Units: Allied heavy armored units are regular combat units. They have a defense strength of "0," however, and are automatically eliminated at the end of the Axis combat phase if attacked while in a hex that does not contain at least one other non-heavy armored Allied unit. If not actually attacked, they are unaffected. In addition, heavy armored units must determine "reliability" each time they attack by rolling one die on the Armor Reliability Table:
-
After the Allied player has announced an attack and indicated the units that are participating, he rolls one die for each heavy armored unit participating and determines whether it can participate in the attack.
-
If "SUB 1" result is rolled, the unit may participate normally.
-
If "No Effect" is rolled, the armored unit is ignored for combat purposes.
-
If "ELIM" result is rolled, the armored unit is immediately removed from the game before resolving the attack. No subtraction is made to the combat results die roll.
-
SPECIAL: Add "1" to the Armor Reliability Table die roll for each enemy armored or anti-tank unit in the defender's hex.
d. Axis armored units and Allied light armored units never roll for reliability.
- 42nd Field Company, Royal Engineers: The 42nd Field Company, RE, was the only true engineer unit available to the Allied forces on Crete. As such, it was used to great advantage in destroying various roads and bridges thus impeding the Axis advance:
a. Demolition: The 42nd Fd Coy may destroy the following types of mapboard terrain features:
-
Ports: Demolition destroys the port facilities for purposes of sea transfer, evacuation, and embarkation/debarkation. Indicate demolished port by placing a "DEMO" counter in the port landing box.
-
Road/Rough Terrain Hexes: Demolition destroys roads in the hex. Thereafter, the hex is treated as a non-road rough terrain hex. Indicate demolition by placing a "DEMO" counter in the hex.
-
Bridge/River Hexes: Demolition destroys road and bridge in the hex. Thereafter, the hex is treated as a non-road river hex. Indicate demolition by placing a "DEMO" counter in the hex.
b. Procedure:
-
The engineer unit may execute demolition in any appropriate hex that it occupies at the beginning of the Allied player segment.
-
Actual demolition occurs at the end of the Allied combat phase by simply announcing the type of demolition being executed and placing a DEMO counter in the hex.
-
Demolition procedures may not be executed in hexes which are in the zone of control of enemy units or in hexes containing Allied units which retreated in the current combat phase.
H. Advanced Game Victory Conditions
- ALLIED: The Allied player wins by fulfilling either one of the two following conditions:
a. Maintain all three airfields friendly at the end of the May 22 NIGHT turn (only!); OR, maintain all three airfields friendly at the end of the May 27 NIGHT turn.
b. Failing in either of the two alternatives in "a," above, evacuate Allied units totaling at least 80 casualty points while ALSO eliminating Axis units totaling at least 75 casualty points before the end of the May 27 NIGHT turn.
-
AXIS: The Axis player wins by avoiding the Allied victory conditions.
-
Casualty points are evaluated according to the following schedule:
Allied — Evacuated Units:
- Each headquarters unit: 5 points
- Each noncombat unit: 5 points
- Each battalion-sized combat unit: 5 points
- Each company-sized combat unit: 2 points
- Each platoon-sized (or smaller) combat unit: 1 point
- Each Greek unit (any size): 1 point
Axis — Eliminated Units:
- Each airborne headquarters unit: 7 points
- Each non-airborne headquarters unit: 5 points
- Each company-sized (or smaller) airborne unit: 2 points
- Each battalion-sized airborne unit*: 15 points
- Each company-sized (or smaller) non-airborne unit: 1 point
- Each battalion-sized non-airborne unit: 7 points
*NOTE: Award the Allied player 15 points (instead of 13) if all three German airborne engineer companies and the battalion headquarters company are in the Eliminated box.
Examples of Play
Simple Combat Examples
A. German 9-9-4 opts to attack the Allied 4-4-4. Combat odds would be 9 to 4, which rounds down to 2-1. Attack is resolved on the 2-1 odds category column on the Combat Results Table.
B. German 9-9-4 and one of the 2-2-4's attack the two Allied units shown stacked together. The third German unit, the 2-2-4, elects not to participate. The attack is resolved as 11 (9+2) to 3 (2+1), which rounds down to 3 to 1. The die is rolled once and the result is a "DR"; defender must retreat one hex. Since enemy zones of control surround the defenders, they must retreat to the friendly occupied hex containing the 4-5-4. All three units, however, cannot occupy the hex since that violates stacking limits. The Allied player therefore removes the 0-1-3 and retreats the 2-2-4. Both attacking German units advance into the enemy-vacated hex after combat.
River Combat
The defender receives a die roll bonus only if all attacking units are on a river and the defender is behind the same river. In the above example, "1" is added to the die roll result only as follows:
- #1 and #2 attack A: No die roll addition.
- #1 and #2 attack B: Add "1" to die roll.
- #1 and #3 attack B: No die roll addition.
Note that "ends of rivers" are treated as full river/wadi hexes for all purposes.
Airborne Landing and Drift
The five companies of the First battalion all drop in the same hex, within stacking limitations. They are within range of two Allied AA units and they are also dropping into an enemy-occupied hex. Each drift die roll is therefore modified by adding "3" ("2" for AA and "1" for the enemy unit). The die is rolled once for each company and produces the following series of die rolls: 6, 5, 4, 3, and 1, which are increased by "3" to produce the following hex locations: 9, 8, 7, 6, and 4. Drift is determined and resolved for each unit in turn before proceeding to the next. Notice that the 2nd Company has drifted into an enemy-occupied hex and must therefore execute a drift combat attack at the end of the phase.
Sea Movement and Combat
A. Following a successful landing attempt on the Sea Movement Table, the German player places units from that convoy onto landing boxes of the appropriate beach in an inverted position.
B. The Allied coastal artillery fires at each of the three units attempting to land. For purposes of the example, assume the CD unit, firing on the 2-3 column of the Bombardment Table, succeeds in eliminating one of the three enemy units.
C. The surviving convoy units move ashore. The surviving 2-2-4 unit, however, must attack the defending enemy unit on the coastal hex. During the combat phase, the 2-2-4 in the landing box, the 8-8-4 on the coastal hex, and the other 2-2-4 attack the defending unit at 11 to 3 (the 2-2-4 on the landing box is halved), which rounds down to 3-1 odds.
D. The die is rolled, and the result is "NE," "No Effect." Since the defender was not removed from the coastal hex, the 2-2-4 in the landing box is eliminated.
Advanced Rules Combat Example
A. German player executes an attack by four ground units (22 attack strength points) supported by 2 strength points of artillery and 2 strength points of bomber air support. Note the following:
-
The 4 strength points of bombers are halved to "2" because the Allied light AA unit is within range of the target hex.
-
The 2-2-8 light armored unit automatically subtracts "1" from the attacker's die roll result.
-
The combat odds for the attack are 22+2+2 = 26, to 6, which rounds down to 4-1 (plus the "1" subtracted from the die roll).
B. After the attack is announced and the attacking units indicated, but before the attack is actually resolved, the defender announces defensive artillery fire and executes the following defensive artillery fire attacks:
-
The Allied 4-2 light AA unit attacks the German 2-2-8 armored unit at 2-1 odds.
-
The Allied 3-6 ranged artillery unit attacks the German 2-2-4 unit at 1-1 odds.
C. Assume for purposes of the example that both defensive artillery fire attacks are successful and both German units are forced to retreat. The retreat of those two units lowers the odds from 26-6 to 22-6. Therefore Allied defensive artillery fire reduces the attack from 4-1 (-1 on die) to 3-1 (no die modification). The German player must then resolve the attack at 3-1.
Rules of Play – Invasion of Malta, 1942
In any listing of German strategic mistakes during World War II, the failure to capture Malta must rank very high. Yet it is wrong to assume that Malta was a plum ripe for easy picking. An invasion, if attempted, could have failed. As advanced as the Germans were in the techniques of airborne invasion, they and their Italian allies were equally backward in amphibious invasion techniques. Once on the island, any sizeable force would have to win quickly or fail through thirst and hunger. Under the best of circumstances, it would have been a calculated risk. Unwilling to gamble as he had done in the past, Hitler begged off and the invasion was never carried out. The Italian General Staff, however, had planned for an invasion, had trained troops for amphibious and airborne assault, and had laid the logistical groundwork for a sizeable operation. Yet, they depended on German support that was not forthcoming. Had that support been tendered, history would have been written quite differently. The Italian plan, called Operazione C3, was a plausible effort that could have been initiated if the Germans had cooperated and three military prerequisites had been attained:
-
Axis control of the air over Malta.
-
Axis temporary control (several weeks) of the sea around Malta.
-
Good weather.
These prerequisites were never attained. They very nearly were, however. This game assumes that they were. It is 1942; Rommel has failed to take Tobruk, the Italian Navy has won the Second Battle of Sirte and cut supplies to the island, and British aircraft reinforcements from Gibraltar have been turned back. Hitler gives conditional and indecisive support by throwing the Luftwaffe and the few Fallschirmjäger regiments available into the fray.
It is the spring of 1942, and history is about to be re-written:
A. Rules Changes
Invasion of Malta, 1942 uses the Air Assault on Crete rules system with variations and expansions listed below. Aside from minor differences in application, the biggest departure in the rules is in the sea movement and amphibious assault procedures which are explained below. For order of appearance, starting location, and turn record information, refer to the Organization Cards for Malta. Minor variations to existing rules are:
-
Prepare for Play: Same as Crete, except Allied player positions all of his units after the Axis player has indicated his invasion beach and turn of arrival.
-
Sequence of Play: Same as Crete, except there is no Allied Sea Movement Phase.
-
Substitute Counters: Do NOT use German airborne company substitute counters. Axis airborne units drop and drift as BATTALIONS and independent companies as shown on the Axis Organization Card.
-
Anti-Aircraft Battalions: The Allied light and heavy AA units are of two sizes: companies and battalions. Battalion counters count as three AA units for purposes of Axis airborne drift modification. One battalion-sized AA unit, then, would add "3" to an airborne unit's drift die roll.
-
There are no Allied sea movement, evacuation, or reinforcement functions.
B. Axis Amphibious Assault
Landing procedures are basically the same as in Crete, except there are five convoys whose arrival times and locations are interdependent and functionally different:
- There are three different types of convoys:
a. Assault Convoy: The first convoy landed. It determines the beach landing location for all subsequent convoys.
b. Follow-up Convoys: There are three follow-up convoys which, as the name implies, act as reinforcements for the assault convoy.
c. Special Convoy: This convoy carries the heavy artillery and equipment of the invasion force. It may only land at a captured port.
-
The Axis player determines the time of arrival and beach location for the assault convoy only. He may place two decoy counters on the Turn Record Track to confuse the Allied player as to the actual turn of arrival.
-
Initial Assault Convoy Landing: On the designated turn of arrival, units of the assault convoy are transferred from the Axis Organization Card to the beach landing boxes of the appropriate beach.
a. No more than THREE stacking points may be placed on any one landing box during any single turn.
b. Units that cannot be placed on a landing box due to stacking limitations must remain on the Organization Card until space is available in subsequent turns.
c. Landing units must undergo coastal defense bombardment, engage in combat, and advance onto vacant coastal hexes as in Crete rules.
d. Surviving assault convoy units (only!) that advance onto coastal hexes automatically create a BEACHHEAD marker in their hex at the end of the Axis combat phase in their turn of arrival. Beachhead markers may never be moved and are eliminated if an Allied unit enters their hex. Any assault convoy unit may create a beachhead marker in any coastal hex in the turn in which it successfully moves from the landing box to the coastal hex.
- Follow-Up Convoy Landing: Follow-up convoy units may attempt to enter the game at the times indicated on the Organization Card.
a. On their indicated turn of availability (or later, at player's option), each follow-up convoy must roll one die on the Malta subsection of the Sea Movement Table to determine if it may land in the current turn. If an "All Arrive" result is rolled, units may begin to land immediately.
b. Follow-up convoy units may only land on landing boxes connected to hexes containing beachhead markers. No more than three stacking points may be placed on each landing box.
c. The Axis player may not roll on the Sea Movement Table for entry of a follow-up convoy until ALL the units of the preceding convoy (assault or follow-up) have landed.
- Port Landings: Any follow-up convoy may change its beach destination and land at a friendly captured port landing box (as previously described) if such a port is captured at least two turns before the scheduled arrival of that convoy.
a. If the port/city hex becomes un-friendly, units occupying the port landing box are eliminated. Other units in the convoy, however, which have not been placed on the port landing box, are not eliminated. They may continue landing at a beachhead landing box after a delay of at least two turns after the port's recapture.
b. Special convoy units may ONLY land at a friendly port. They may not begin landing until after turn twelve and at least two turns after the port has been made friendly. Also, they may not land until after ALL units from follow-up convoy #2 have landed. If the Axis player has begun rolling for or landing units from follow-up convoy #3, the special convoy units may not begin landing until after all of those units have landed.
c. Do not roll on the Sea Movement Table for special convoy units. They may begin landing automatically at their earliest availability.
- IMPORTANT: If all beachhead markers are destroyed after the last assault convoy unit has landed, no other units may be landed at beach or port landing boxes.
C. Malta Coastal Defenses
Coastal defense artillery units function as previously described, with these added capabilities and restrictions:
-
Coastal defense artillery units may only be placed in those hexes containing a fort or a battery symbol. Only ONE coastal defense unit may be placed in each hex. EXCEPTION: CD units may not be placed in Ft. Musta and Ft. Tarja.
-
Heavy coastal defense artillery units are those units with a range of "24." Heavy CD artillery units may fire at any target in a landing box within range. They do not require a direct line-of-fire to the target unit if there is a friendly combat unit adjacent to the target unit's landing box.
D. German Airborne Withdrawal
-
All GERMAN airborne units must be withdrawn from the game by the end of the fifteenth game turn.
-
German units may withdraw from friendly ports, beachhead hexes, or friendly airfields. Withdrawal may occur at the beginning of any Axis player segment before the aircraft placement and bombardment phase is executed.
-
To withdraw a unit, it must occupy a withdrawal hex at the beginning of the player segment. It is then simply removed from the mapboard and placed in the withdrawal box on the Organization Card.
-
Premature Withdrawal:
a. If, before turn #15, German airborne units suffer more than 50 casualty points (as determined by the formula in the Malta victory conditions section), ALL German airborne units must attempt to withdraw beginning in the next Axis player segment.
b. Prematurely withdrawing units may not attack in any manner and must avoid moving adjacent to Allied units unless no other withdrawal route is available.
c. If no port, beachhead, or airfield withdrawal route is available, the German airborne units must move towards the closest coastal hex in the most expeditious manner. Upon entering a coastal hex, they are automatically withdrawn from the game.
d. German airborne units that have not yet entered the game must remain on the Axis Organization Chart.
e. Withdrawn units are not considered eliminated for victory condition purposes.
- Any German unit on the mapboard at the end of the fifteenth turn is considered eliminated, removed from the game, and placed in the eliminated units box on the Organization Card.
E. Italian Commandos
The three Italian commando units, the San Marco (SM) companies, were highly trained units assigned special, highly dangerous missions for the Malta invasion. One company is a glider — hence airborne — commando unit and the other two are amphibious commando units:
- The two amphibious commando units land with the assault convoy forces. They may not, however, create beachhead markers in their landing hex.
a. Unlike other units, the two amphibious commando units may land on ANY coastal hex. They are not required to land at port or beach landing boxes but may be positioned initially on any sea hex.
b. If the amphibious commando units land in a hex by themselves (with no other non-commando units) during NIGHT turns, they do not undergo any type of coastal defense bombardment. If they land during a daylight turn, they may be bombarded normally.
-
The airborne commando unit functions like a regular glider unit.
-
Commando units may expend their full movement allowance during their initial turn of entry onto the mapboard unless they enter an enemy zone of control, or a landing box connected to an enemy-occupied hex, or drift onto an enemy-occupied hex.
-
During their initial turn of entry onto the mapboard, commando units may attack at full attack strength regardless of their location with no die roll modification. In addition, they may ignore any enemy defense strength bonuses for terrain or fortifications if they land at NIGHT and do not attack in conjunction with any other type of friendly units.
F. Axis Supply Limitations
The Axis player must capture and hold friendly at least one port city by the end of turn #12, or else his units suffer the following penalties:
- If the Axis player fails to hold a port city under friendly control and fails to maintain the connected port landing box free from Allied Coastal Defense artillery fire by the end of turn #12, Axis offensive capabilities are reduced as follows:
a. All attacks made by Axis ground units, including defensive artillery fire, are modified by adding "2" to the combat result die roll.
b. All Axis ground units are reduced to HALF (rounded down) their normal movement allowance.
- These modifications are effective beginning on the Axis player segment of turn #13 and continue until such time as the requirements have been met at the beginning of any subsequent Axis player segment. Axis units are restored to full effectiveness at the beginning of any Axis player segment in which the supply requirements have been satisfied.
G. Victory Conditions
- AXIS: The Axis player wins by fulfilling the following two victory conditions before the end of the game:
a. Capture and simultaneously hold friendly Luqa Airfield, Valletta, and Birzebbugia for four consecutive Axis movement phases after the last objective has been captured.
b. Suffer less than 120 AXIS airborne casualty points by the end of the game.
-
ALLIED: The Allied player wins by avoiding EITHER of the two Axis victory conditions.
-
Casualty points are incurred by the Axis player whenever Axis airborne units are eliminated, as follows:
- Each airborne headquarters unit: 5 points
- Each battalion-sized GERMAN airborne unit: 21 points
- Each battalion-sized ITALIAN airborne unit: 11 points
- Each company-sized (or smaller) airborne unit: 2 points
Tactical Briefing – Air Assault on Crete
A Primer on Tactics and Strategy
Probably the most difficult aspect of successful play in Air Assault on Crete for novices to appreciate is the impact of planning on final victory or defeat. In this game, much will be decided by what the players do before the first turn of the game. For the Allied player, the most difficult task is the placement of his units to repel the initial airborne attack. For the German player, the whole complexion of the game will be determined by where he lands his convoys and how he places his first airborne battalions. Once these decisions are made, both players will be irrevocably committed to a course of action which will ultimately lead to defeat or victory. The following paragraphs are written to aid the inexperienced player in planning and executing his pre-game options:
The German Player
Tactical Situation: The German player is on the offensive. His first and most primary objective is the capture of one of the three airfields. It will not be easy. The German player is faced with these realities:
-
He is forced, by the order of appearance charts, to attack all three airfields.
-
Each of his three airborne forces is separate and independent. They cannot help each other directly.
-
The least difficult airfield to capture is Maleme. The other two, Retimo and Heraklion, may prove impossible to take.
-
Distances are too great and time too short for the forces of one airfield to help another before turn 8.
-
German airpower is potentially decisive. It is the strongest weapon in the German arsenal, IF it is used correctly.
-
Convoys, because of their unpredictability, are not decisive. Never depend upon them. Often, however, their fortuitous appearance can tip the balance in a close game.
Tactical Options: Unfortunately, the German player is locked into a prescribed mode of attack leaving little opportunity for tactical improvisation. In spite of this, the German player must still possess an airfield by turn 8, or the game is lost. In the main, he has two general options:
-
Dump all airpower, convoys, and reinforcements into Maleme and go for broke. Or, he may opt to:
-
Attack the Maleme/Suda area with the first turn forces only, and hit one of the other two sectors with the glider battalion, the airborne reinforcements, airpower, and the convoys in the hope of building up an advantageous balance of forces to allow the capture of an airfield.
The first method requires the Maleme forces to be dropped east of the airfield with token blocking forces dropped to the west. The Suda forces are dropped as close as possible to the Maleme/Suda sector line and drive towards Maleme and/or Galatas in an effort to separate these two Allied forces. The glider battalion and airborne reinforcements are landed in Maleme. The convoys are targeted for either Kisamos, Maleme, or Galatas Beaches. Airpower is used in direct support of land attacks in the Maleme sector and to interdict road movement in Suda sector.
The second method depends upon a certain amount of subterfuge for success. To use this method successfully, the Allied player must be predisposed to expect an all-out attack in the Maleme sector. In this method, the Maleme forces are dropped as before. The Suda forces, however, are dropped closer to the port of Suda in an effort to cut all Allied movement between Suda and Georgeopolis. The glider battalion is dropped in either Retimo or Heraklion, whichever one is the point of the main attack. All convoys and additional airborne reinforcements are thrown into the same sector so that a concerted, all-out drive for the airfield (either Retimo or Heraklion) can be made during turns 6, 7, and 8. During this time period, all B and FB units are used in direct support of the land attacks. The fighters interdict the Allied road movement in the Suda/Georgeopolis sectors.
Neither of these plans is anywhere near to being foolproof. The second option, however, does allow the German player a better opportunity to capture either one of two airfields instead of throwing everything against one airfield.
Tactical Hints: Here is a collection of tactical miscellany which may help the first-time player:
-
Attack the HMS York on the first turn. Airpower can do little else during this turn and will be too busy to attack it on subsequent turns.
-
In certain critical situations ("Flak Trap," for example) it may be worthwhile to "blind bomb" suspected AA sites on the first turn.
-
Neutralize ALL suspected Coastal Defense artillery positions in the turn prior to a convoy landing if they are within range of the intended landing boxes. Repeat during the actual turn of arrival.
-
Daylight convoy landings are probably best, with all things considered. CD positions cannot be neutralized at night.
-
Protect RHQ and DHQ units during the initial parachute drop. They are worth a lot of points even if they are not all that useful.
The Allied Player
Tactical Situation: The Allied player is on the defensive. He is also faced with serious problems:
-
Available Allied forces are inadequate to defend all areas adequately.
-
The most vital sector is Maleme/Suda.
-
The forces at Retimo and Heraklion have a better than even chance of holding their own against the expected German attacks in those areas.
-
For evacuation purposes, Heraklion is the easiest to evacuate from; Retimo is the most difficult. The most important evacuation route, however, is the one that follows the road from Suda to Georgeopolis. If the port of Suda is captured, this is the only way out for the bulk of the Allied units.
Tactical Options: The Allied player has two possible paths to victory: denying the German player an airfield on the eighth turn of the game, or failing that, evacuating Allied units. The first task is difficult. The second task is somewhat easier, but requires absolutely perfect tactical execution. The greatest danger in an evacuation is realized if a small German airborne force is allowed to land between Suda and the Georgeopolis evacuation route. To maintain both options viable as long as possible, consider the following:
-
Keep both ports in Allied hands as long as possible. They are the best and quickest evacuation routes.
-
Units in Maleme can be easily cut off from Suda. If the Germans land east of Maleme, defend the ridge to keep the southern evacuation route open.
-
Build several "killer packs" in the Suda area for counterattack purposes. They should consist of the strongest offensive units coupled with a light armor unit. Their defense strength should total a minimum of "9." The Allied player has a very "brittle" force. With few strong units and many weak ones, he can afford few major losses. His counterattack capability rests in the hands of his "killer packs." Once these are gone, he is on the tactical defensive as well as strategic defensive.
Tactical Hints: For the Allied player, the "little things" will often spell the difference between defeat and victory. The Allied player must maximize every advantage he has in order to survive:
-
AA protection: Uniform, even coverage is not that effective. It is possible to form a "Flak Trap" in the Maleme or Suda area by pulling every extra unit within range and placing AA units from the adjacent sector on the sector border. It is possible, then, to get a +4 or +5 on the Drift die roll which would seriously impede a German airborne landing. This tactic does, however, strip other sectors of available AA coverage. Weigh the advantages and disadvantages carefully.
-
Position, if possible, one light AA unit within two hexes of each airfield. This prevents use of the airfield until the AA unit is neutralized and also provides strong "artillery" support for defending units.
-
Position artillery over a wide area. There is not enough of it to use it effectively en masse.
-
Cover ALL major beaches with at least one coastal defense artillery unit. Even one CD unit has a 50% chance of destroying a convoy unit.
-
Position one heavy armored unit at each airfield. As unreliable as they are, they can still provide some extra "juice" in a desperation-attack situation.
-
Use decoys in critical areas — like a Flak Trap — to gain an extra +1 on the Drift die roll. (They act as "real" units for drift purposes.)
-
Use weak units in clear terrain to impede a para drop. They add +1 to the Drift die roll and present a single German parachute company with a poor Drift Combat situation.
-
Defend the critical Suda-Georgeopolis road area with weak units to guard against interdiction by light German parachute forces.
-
Protect non-combat, artillery, AA, and CD units with combat units during initial para drops. Do not leave them exposed.
-
The coastal steamer can move from port to port safely at dusk. German airpower is already committed on the evening turn thus allowing the CS unit two turns of safe movement.
The Tactical Set-Up
The mapboard diagrams presented herein are included for illustration purposes only. They do not purport to be "perfect" defenses or "foolproof" attacks. Players will do well to study the mapboard illustrations in conjunction with the tactical hints outlined above as a constructive way to improve playing skills:
Maleme/Suda Sectors: Operationally, these two sectors are very interdependent. The obvious German objectives are the port of Suda and Maleme airfield. Important secondary objectives are the evacuation routes leading off of the mapboard. Probably the most critical piece of real estate, besides the primary objectives, are those hexes constituting the "Galatas Hills," that grouping of rough terrain hexes between the sector border and the town of Galatas. If the Germans can control these hills, they can split the Allied defenses in two and consolidate the two separate para-drops into one combined force of crushing power. The Allied player must keep the coast road between Canea and Maleme airfield open. He must also attempt to frustrate the consolidation of the two German forces. Some thought can also be directed to the defenses around Suda itself. In the event of an evacuation, this area must be in Allied hands.
Georgeopolis/Retimo Sectors: Although these two sectors look like "side shows," they can often be the key to a German victory. Nominally, the Allied garrison has an easy time holding onto the airfield. Leaving the Georgeopolis sector undefended, however, invites disaster. An opportunistic German player can dump his convoys and his glider battalion into that sector and block the main Allied retreat route. Yet, if the Allied player defends the Georgeopolis sector too strongly, he may imperil his airfield defenses. A very dangerous area, because the Allied player cannot afford to defend against all contingencies.
Heraklion Sector: Again, on the face of it, the Allied player has an easy time defending the airfield. If he can hold onto the port/city of Heraklion, he can even evacuate with relative ease. The natural cul-de-sac position of the airfield makes it a very formidable defensive position. A neat tactic for the Allied player is to start his coastal steamer in Heraklion, load the Black Watch battalion onto it, and ship it to Suda during the first night. An extra 6-7-4 battalion can make a big difference in Suda while not weakening the Heraklion defenses to a dangerous degree. If the Allies must evacuate, the situation changes markedly. If they lose the port, they can be very easily bottled up by an inferior German force. What was once a great defensive position would then become something of a cage, leaving the Allied player with little chance of a breakout. A two-edged sword, indeed.
Summary: In most cases, this will be a desperate game for both players. Neither will feel too comfortable regardless of the game situation. The possibility of sudden disaster always exists. A desperation attack by one side could very likely change the whole complexion of a game. Failure by either side to use all the resources available will result in great disadvantage. In any circumstance, the issue will ultimately be decided in the outcome of the struggle between the German paratroops and the Allied infantry. If the German player fails with his airborne units, all his great material advantage will be of no avail.
Malta – The Player's Challenge
No tactical analysis will be presented herein for Malta. Rather, it seems as though the two-games-in-one-box idea presents an excellent opportunity to transfer lessons learned in one situation to a totally new yet conceptually related situation. The basic principles are the same in both games. Yet, the game player is faced with certain peculiar applications in Malta. Once again, the Axis player will win or lose on the placement and performance of his airborne forces. Unlike Crete, however, the Axis player will enjoy many more tactical options as to invasion beaches and drop zone combinations. Of the half-dozen or so viable beach/drop zone combinations, some are clearly more productive than others. Players will quickly discover that even a weak combination can be devastatingly effective if it is not expected. Surprise is the Axis player's most powerful weapon. This is a finely balanced game (in spite of superficial appearances) when played between two thinking opponents. It is also a high-powered game in that every decision made by each player will be decisive to the outcome. Enjoy.
Historical Perspective – Crete
On the morning of May 20, 1941, the British and Allied forces in Crete awaited the German invasion expected since the fall of Greece. Thirteen days later, on June 1st, the evacuation of these forces ended. The British had once again performed an evacuation very much like Dunkirk just one year before. The battle for Crete was one of the most bitter battles of the war. It marked the first and, notably, the last time the Germans used parachute and airborne forces on a large scale. The battle for Crete was an important battle: important primarily for the military lessons it taught, but also because of the strategic implications drawn from its outcome.
Strategic Position of the Island
The central position of the island in the Mediterranean has made Crete of importance since antiquity. Since the Minoans of 1500 BC, it has witnessed successive invasions of Greeks, Romans, Arabs, Venetians, and Turks. In WWII it was viewed by all antagonists as a potential bomber base. In Allied hands, it would threaten Rumanian oilfields, but in Axis hands, it would dominate the eastern Mediterranean and serve as a bomber base against the Suez Canal. Hitler's Directive No. 28, the authorization for the attack on Crete, emphasized this last objective. So long as Greece and the Balkans were neutral, however, neither side had anything to fear.
With the Italian invasion of Greece on October 28, 1940, Crete took on immediate importance. Within a week, the British had landed forces at Suda Bay with the intention of holding it as an advanced naval refueling base. Sufficient Allied bomber aircraft were not yet available, which mattered little since the Cretan airbases were not yet ready to receive bombers. Even less ready was the port. British Prime Minister Churchill envisioned the Suda port as a "second Scapa Flow." Churchill was perhaps over-enthusiastic in his appraisal. The Allied command in Egypt did not possess enough equipment and troops to adequately guard existing bases, let alone create a major port where none previously existed. Suda's port was primitive and of the other ports on the island only Heraklion could handle even the smallest ships. Yet Crete was desirable because of its military potential as a base for forays into the Balkans, for its political worth as a symbol of Britain's commitment to treaty obligations, and to help persuade Turkey to enter the war on the side of the Allies. The German naval staff tried to encourage Italian occupation of the island as it lay athwart British supply lines to Greece. Possession of Crete (including conquest of Greece) would also protect Italy's oil flow by the route Rumania-Dardanelles-Corinth-Italy. The Italians, as it turned out, had no plans for the capture of Crete and were utterly incapable of sustaining an expedition in the face of British control of the sea lanes.
Allied Preparations
The British and Commonwealth troops on Crete constituted the remains of the defeated British Expeditionary Force to Greece. They had been subjected to the German Blitzkrieg in Greece and were now exhausted, disorganized, and depleted. They brought no heavy equipment from Greece and precious few light weapons. The army was even considerably short on rifles. In particular, the artillery and service troops were virtually stripped of all essential equipment.
The Greek forces on Crete were in even worse shape than the British. The regulars had long since been shipped to Epirus (Albanian border area) where they were subsequently captured during April. The units in Crete were composed of recent recruits and Gendarmes (policemen). The Gendarmes were a disciplined group but had little or no training as a military formation. The Greeks were further handicapped by a lack of weapons. Even those who possessed rifles had few rounds of ammunition. However, during the battle, the Greeks partly compensated for their handicaps with their ferocity and use of captured German weapons.
The island garrison was not prepared for defense until very late. For a long time, only the Suda Bay area was guarded with a total garrison numbering not much more than 6,000 men. Part of the problem was the high turnover of command. Crete had no less than seven commanders in six months. With the arrival of remnants of the British Expeditionary Force, Churchill wanted an aggressive fighter in command. Accordingly, he sacked the British commander, and replaced him with New Zealand General B.C. Freyberg, previously commanding the 2nd New Zealand Division in Greece.
Freyberg established his headquarters near Canea and dispatched units to guard all three airfields. Existing equipment was distributed and unit positions improved. Fortifications remained woefully incomplete, due to a paralyzing shortage of engineering equipment. Shortages of all materials were so great that even ordinary hand shovels were lacking. Freyberg appealed for supplies and weapons to no avail. The logistical network was a shambles. During the three week "Blitz" preceding the attack, Suda's capacity of 700 tons per day quickly dropped to 100 tons because only night offloadings were possible. Only some 15,000 tons of supplies were landed as Suda Bay filled with the wreckage of 13 ships.
Strategically, the British were ready. Allied intelligence operatives in Greece reported the preparations of the impending attack. They also reported the gathering of enemy seaborne forces which caused great concern in Crete. Basically, the defense plan relied on self-contained brigade groups of combined arms, each covering its own sector of responsibility. Each was to guard its airfield and closely watch the adjacent beaches. These requirements caused the Allied units to be deployed in three areas instead of concentrating in the vital Maleme/Suda enclave. The Allied forces were divided in the following manner (the figures below and particularly those for the Germans are estimates):
| Sector | Men |
|---|---|
| Maleme/Galatas | 11,859 |
| Suda | 14,822 |
| Retimo | 6,730 |
| Heraklion | 8,024 |
| "Creforce" HQ | 405 |
| Later landed | 800 |
| Total | 42,640 |
Axis Preparation
Why did the Axis attack Crete? The situation itself was the product of circumstances, but given the Allied decision to defend Crete, Hitler was concerned about security on his Balkan flank. Foremost in his mind were plans for the upcoming invasion of Russia (Operation Barbarossa). He could not afford to allow a plan of this importance and magnitude to be upset by British intervention in the Balkans. The resources of the region were vital, particularly Rumanian oil. Indeed, his Directive No. 18 (Nov. 1940) emphasized the need to protect the Ploesti oilfields in Rumania against the danger of Allied air attack, presumably from bases in the Aegean. The addition of the Axis allied armies from the Balkans to Operation Barbarossa would greatly ease his manpower shortage in the campaign against Russia. These considerations meant that the Allied forces had to be driven completely out of the Balkans.
The fact that the invasion was conducted with paratroops had its roots in the plan for Operation Marita, the plan for the attack in the Balkans. German parachutists were to stand by, ready to seize any Greek islands containing British bases. Only the reinforced 2nd Parachute Regiment was actually ready in early April, but it was subsequently used instead to seize the bridge over the Corinth Canal.
The idea for an airborne invasion of Crete was encouraged by General Student, the commander of Germany's parachute forces. He and his men were anxious to prove the decisive value of the parachute arm. Crete looked like the opportunity, and he prepared an audacious plan, to be known as Operation Merkur.
At the core of Student's plan was the promise of a quick capture of Crete. He proposed to attack seven different points simultaneously with the objective of seizing all during the first day. Later, he was persuaded to limit his ambitious plan to the capture of only four major objectives: the three airfields and the port of Suda. The Allies were expected to offer only weak resistance. The boldness and speed of the plan appealed to Hitler. It fulfilled his requirement for a campaign that freed the air forces involved quickly to move north to support the invasion of Russia.
The parachute attack was planned in two phases, owing to a shortage of transport aircraft. The first wave would land in the morning and capture Maleme airfield, Canea, and Suda harbor facilities. Glider detachments would lead the assault and seize key positions and eliminate AA batteries. In the afternoon, the second wave would arrive. One regiment would attack Retimo airfield and another reinforced regiment would attack Heraklion airfield. The airlanding forces, consisting of the 5th Gebirgsjäger Division, would comprise a third airlift and were scheduled primarily for Heraklion. Seaborne forces were subsidiary to the main effort, largely due to lack of proper landing craft. The invasion "fleet" was actually a motley collection of fishing caiques guarded by a few Italian destroyers. The convoys carried the heavy weapons that could not be airlanded plus extra infantry. One convoy made for the Maleme beaches while the other sailed for the beaches just east of Heraklion. The total forces employed in the operation were composed as follows:
| Sector | Men |
|---|---|
| Maleme | 2,460 |
| Suda | 3,000 |
| Retimo | 1,500 |
| Heraklion | 2,360 |
| Later landed | 600 |
| Total Paratroops | 9,920 |
| Seaborne | 5,330 |
| Airlanding | 7,500 |
| Total All Forces | 22,750 |
The German air forces arrayed against Crete comprised nearly the whole of Luftflotte 4, totaling some 716 combat and recon aircraft, plus 493 Ju-52 transport aircraft and 78 gliders. Since the end of the campaign in Greece, the Luftwaffe had bombed and besieged Crete continuously. The RAF could not make good its losses and withdrew all operational aircraft from Crete on May 19th. The next day the Germans attacked.
Action at the Critical Point
The battle was bloody and bitterly fought. The paratroops had dropped into a hornet's nest and in all sectors suffered disproportionately high casualties. But eventually the Allies began to feel the impact of the Luftwaffe. The real turning point in the campaign occurred during the first night when the veteran 22nd New Zealand Battalion at Maleme inexplicably withdrew, thus abandoning the strongest position in the sector, Hill 107.
The Germans did not discover Hill 107 and Maleme airfield to be abandoned until their attack against it was already underway, early on the second morning. Still believing the British to be just out of sight, they took most of the remaining day to secure the airfield. That night the expected British counterattack failed to leave its start line due to a lack of communications. During the next day, the Germans worked desperately to bring troops into their expanding airhead, all the time expecting the counterattack. That night it came, but it was too little, much too late. The Allies never regained the initiative.
The continued German buildup could not be stopped, and the Luftwaffe disrupted Allied troop movement. By the 25th, the Germans had established a strong continuous front from the "prison valley" directly to the sea. The Germans attacked with four regiments and the Allied front crumbled. General Freyberg ordered evacuation on the 27th and the long march to the south coast began. By June 1st, it was all over. The cost to both sides was incredibly high:
Allies:
| Killed | Wounded | Prisoners | |
|---|---|---|---|
| British | 797 | 263 | 6,576 |
| Australian | 274 | 507 | 3,079 |
| New Zealand | 671 | 967 | 2,180 |
| Royal Navy | 1,828 | 183 | — |
| Total | 3,570 | 1,920 | 11,835 |
Axis:
| Killed | Wounded | Missing | Total | |
|---|---|---|---|---|
| Paratroop | 1,520 | 1,500+ | 1,502 | 4,522+ |
| Mountain | 395 | 504 | 257 | 1,156 |
| Others | 75 | 127 | 236 | 438 |
| Total | 1,900 | 2,131+ | 1,955 | 6,116+ |
Retrospect and Aftermath
The Germans won the battle for Crete. The Allies suffered another "Dunkirk" with the usual heavy toll in casualties, equipment lost, and ships sunk. This battle had effects that reached much farther than the immediate military consequences, however. The battle is much better known for its influence on the development of airmobile warfare than for its tactical lessons.
The British failure was not necessarily due simply to lack of material, although this had a great bearing. It was, ultimately, failure of command. Particularly, the individual sector commanders showed a persistent lack of initiative to use the forces and equipment they had. At Heraklion, the brigade commander never quit his defensive stance despite decisively defeating the German attack. At Retimo, on the other hand, the sector commander vigorously pursued the defeated parachutists by use of continuous aggressive patrolling. He destroyed one group of parachutists and pressed the remainder into a small enclave. This should have been the attitude and outcome throughout the island.
By nightfall of the first day at Maleme, the 22nd New Zealand battalion found itself split up and with only tenuous communication with brigade headquarters. The afternoon counterattack had failed, and the promised support from neighboring battalions did not materialize. With little information from other fronts, a loss of cohesiveness within the battalion, and pressure on the flanks, the battalion withdrew in good order from Hill 107 which protected Maleme airfield.
A large reason for the failure lies with brigade headquarters. Units were deployed for beach defense, not air landing defense. The critical position at Maleme airfield wound up on the brigade perimeter, not in the center of the defense. Within the perimeter of the 22nd battalion was a considerable force of tanks, AA guns, coast artillery, and RAF personnel. None of these forces was under command of the battalion commander. After the morning parachute assault, all sector units except the 22nd were only lightly engaged by enemy forces, but yet they did nothing. If the brigade commander had impressed upon the 22nd the fact that it held the key position and must be exceptionally stubborn, there might not have been a withdrawal during the first night. Furthermore, if a clear plan of reinforcement had been arranged, the airfield defenses would have been reassured.
Airborne warfare was new, and its newness caused a certain awe. The Allied commanders had all fought in WWI and could not relate to this "futuristic" warfare. A major handicap was the mistaken British impression that German transport aircraft could land anywhere, even without an airfield. Additionally, the landing of parachutists all over the countryside gave the impression of a much larger attack than what actually took place. The main attack was not readily identified. When reports arrived that the parachutists were either defeated or held in check, the battle was thought to be won. What was not known, and could not be known, was that about 1000 parachutists had dropped unopposed and unobserved just west of the Tavronitis River. There was also the uncertainty of amphibious invasion. In this case, Allied Intelligence performed almost too well. General Freyberg was informed that the German amphibious forces would be ready for action beginning May 17th. Constant alert from this warning was taken to mean the primary weight of the invasion would be amphibious. This was something to which the British were accustomed, after anticipating a German amphibious invasion of England for over a year. Expecting the invasion, the troops were deployed along the beaches. The British deployment and Intelligence expectation actually hampered the defense against the real assault force.
Despite the many problems in the Allied camp, the Germans nearly lost. The forces assaulting Hill 107 at dawn on May 21st were desperate, decimated, and exhausted. If the British had not withdrawn, there was an excellent chance the Germans would have failed. Failure at Maleme would have meant the complete destruction of all German airborne forces on Crete.
From the start, the airborne operation was a hurry-up affair. The decision to attack did not come until April 21st with a May 15th deadline. With only 23 days to make staff and operational preparations, the Germans faced such problems as lack of amphibious invasion craft, difficulty in gathering invasion forces, and the primitiveness of the Greek airfields. The lack of fuel caused an extra five days of delay (due to the blockage of the destroyed Corinth Canal bridge). The major German problem was faulty intelligence. The Allies actually numbered three times more manpower than the Germans expected to oppose.
Buoyed by the intelligence reports, Student thought he could take everything important on the first day. Crete would be an easy opportunity to collect the final bag of Allied prisoners in the Balkan campaign. This feeling, coupled with the lack of knowledge of Allied dispositions, resulted in the paratroopers jumping on top of the Allied units. What eventually saved the plan was the conservatism of Student's superiors in reducing the number of points attacked from the original seven to four.
It was this conservatism that turned against the parachute arm. Hitler later told Student that, "The day of the parachutist is over. The parachute arm is a surprise weapon and without the element of surprise there can be no future for airborne forces." Others took the cue and the parachutists found themselves on the Russian front in an infantry role starting in September 1941.
Student later said "Crete was the graveyard of the paratroopers." Not only had too many paratroopers died trying to capture Crete, but the idea of airborne assault as the primary mode of assault died with them. Student had hoped to follow his success in Crete with an attack on Cyprus. From there, landings would be made into Vichy French-held Syria thus threatening both the Iraqi oilfields and the Suez Canal. Like Hitler's invasion of India, these plans were never more than a pipe dream. Never again did the Germans launch a major parachute assault.
The lesson, however, was not wasted on the Allies. The British press and public were deeply impressed by the quickness of the conquest and the novelty of the battle. The best of the British Empire had been defeated by men dangling from tiny parachutes. This was widely regarded as the dress rehearsal of the invasion of Britain. Churchill lamented, "We have to contemplate the descent from the air of perhaps a quarter million parachutists, glider borne, or crash landed aeroplane troops. Everyone in uniform, and everyone else who likes, must fall upon these wherever they find them and attack them with the utmost alacrity." Indeed, the novelty of the operation so impressed the Allied planning staffs that even before the battle was over, Churchill ordered the expansion of the British parachute arm: "Thus we are always found behindhand by the enemy. We ought to have 5000 parachutists and an airborne division on the German model, with any improvements which might suggest themselves from experience." Eventually the Allies created many airborne divisions and organized several multi-division drops, the most famous being Operation Market-Garden utilizing some 35,000 airborne troops.
Despite their many sacrifices, the German paratroopers gained only a tactical success. It could still have been a strategic success, if the German command had not let the number of casualties influence their decision. They had won the tactical battle despite faulty planning and an absolute lack of surprise. Yet their crushing strategic defeat was in the total deprivation of the airborne threat in their future campaigns. It was primarily the paratroopers that could threaten the British in the Middle East. In Russia, an airborne operation, coupled with the deep panzer thrusts, might have given the Germans Moscow before that first terrible winter. But because of Crete, there were no more airborne options open to the German General Staff.
The British realized they had crippled the airborne forces sent against them, but did not know that there were no other parachute formations available to strike elsewhere in the Mediterranean. Three weeks later, Operation Barbarossa changed the entire strategic problem. Through the remainder of the war, Crete was fortified as a defensive German base, receiving only very little offensive equipment. Ironically, the British had defended Crete partly to deny to the Germans a jumping off point for further Mediterranean operations, and the Germans had attacked it to prevent the British from using it as a naval and air base against the Balkans. As it happened, Crete remained a backwater throughout the war, of no strategic interest to either side.
Historical Perspective – Malta
Although only a tiny pile of rocks in the Mediterranean, Malta's strategic position caused it to be a major contributing factor to the demise of the Axis in North Africa and, ultimately, the whole Axis southern flank. Churchill stressed the importance of maintaining the island at all costs many times, and many high-ranking German officers, including Admiral Raeder, the commander of the German navy, realized that it was the key to control of North Africa. So the question naturally arises: why was Malta never invaded?
Strategic Assessment
While both the Allies and the Axis realized the relationship of Malta to events in Egypt and Libya, Hitler essentially saw the Mediterranean as a sideshow, and thus relegated control of the whole theater to Mussolini for all practical purposes.
German troops and equipment sent to the Mediterranean theater were often there for political reasons alone, and German efforts in the region rarely had a strategic purpose. Because of this, many golden opportunities were overlooked that might have meant great triumphs for Axis arms: opportunities such as the seizure of Gibraltar, trapping the BEF in Greece, fomenting Arab revolt, or even the possibility of capturing Egypt and the Suez Canal.
All these prizes eluded the Axis, because each involved a political precommitment with political objectives to be complemented by military action — instead of the opposite sequence which more often than not was the case. Such is the case with Malta.
The temporary Axis solution to the Malta problem was the "neutralization" of the island's striking power through blockade and aerial bombardment. Neutralization was intended as destruction of all airfields and aircraft, and the rendering of the ports as unsafe for ships. The belief that air power alone could accomplish such a task was common to all of the major belligerents of the war throughout its duration, despite a general lack of evidence that it could be done.
The German air force, geared as it was to tactical support of the ground forces, was particularly unsuited to such an operation, and the Italian bombers were even worse. Oriented to tactical operations, they were further encumbered by increasing obsolescence and abysmal maintenance. Although the pilots were fairly good and bombs dropped on Malta usually fell accurately, they were too small to do much damage. Despite the first-ever use of "carpet bombing" techniques against Malta, the bomber offensive proved to be a costly failure. When it was over, after three years of action over Malta, the Allies claimed some 1,493 Axis aircraft destroyed over Malta, against their own losses of 547 aircraft in the air.
Axis Invasion Preparations
There were no less than six major invasion plans produced by the Italians for Malta, and the Germans had their own variations. Out of that total, only two plans looked as though they might actually be carried out. In March 1942, detailed plans were made for the invasion, known to the Germans as Operation Herkules and to the Italians as Operazione Esigenza C.3. The operation was to be primarily an amphibious one, with landings on the southeast supported by paratroops seizing the beach area one day in advance. Some 20,000 paratroops in one Italian and one German division would be dropped.
Another 10,000 troops in another Italian division would be airlanded. Some 40,000 men organized in three divisions and two regiments had been trained in the primary sea assault role. They were to be followed ashore by another 24,000 men in two divisions. In all, about 100,000 men would be employed, along with about 1,500 aircraft and over 200 landing craft plus as many Italian warships as could be made available. Clearly the invasion would not fail due to the lack of troops.
From the start, the major limiting factor was the lack of landing craft. Earlier plans had been scrapped for the same reason, and the Italian command had once again failed to anticipate the requirements for an invasion of Malta. Training began almost too late, and German landing craft had to be imported to supplement the scant Italian force. By the summer of 1942, enough craft had been assembled for the landing, but some units would still have to settle for fishing boats. By mid-July the force was ready, and awaited only the official go-ahead from Hitler and the final destruction of the RAF defenses.
The heavy Allied buildup of strength in the Western Desert during the summer of 1942 forced the Axis into a crucial strategic decision. Basically the Axis could either risk an Allied attack in the desert while the Luftwaffe helped reduce and invade Malta, or the Afrika Korps could attempt to defeat British forces in front of Tobruk, and then attempt the capture of Tobruk itself. Later would come the invasion of Malta.
Important factors that had to be given consideration were, first of all, the state of readiness of the Malta invasion army versus that of the Afrika Korps. The availability of supplies in Africa, training status of Italian paratroopers, release of German transports from the Russian Front, and other factors all had to be considered. On April 30th Hitler and Mussolini met at Obersalzberg, and the key decision was made: First capture Tobruk, and then invade Malta in July.
Ironically, the sheer magnitude of Rommel's success was probably the most important factor in saving Malta from invasion. On June 30th, 1942, Hitler gave his final approval for the drive toward Alexandria, and the Malta invasion was shelved. Hitler never had much enthusiasm for the project in the first place, as he felt certain that the Italian navy would abandon the paratroopers.
According to Hitler, the Crete battle one year before had demonstrated that the paratrooper had lost his surprise value, and with it his tactical edge, and consequently would suffer unacceptably heavy losses.
The final major Axis effort against Malta was now to maintain the blockade. But even this failed with the arrival in early August of the "Pedestal" convoy at Malta.
By late July of 1942 Italy was prepared to make the invasion alone. Plans were made for amphibious landings at Gozo, just northwest of Malta. But a lack of necessary fuel prevented the invasion fleet from sailing. Once again it had become a political matter. Germany had defeated the British at Gazala, Germans had captured Tobruk, and Germans were at El Alamein seemingly about to take Alexandria. It seemed as though Italy could not win without the assistance of the Germans. Mussolini needed an Italian victory.
But it was too late. The Italians had at last recognized the critical importance of capturing Malta, but the defeat at El Alamein sealed the Axis fate in the Mediterranean and once again other matters took priority over Malta (although that defeat was caused in large part by the grave restrictions on the German supply network caused by the failure to take Malta). As Kesselring was later to write:
"In order to guarantee supplies, the capture of Malta was essential; and now (mid-July) it was no longer possible. The abandonment of this project was the first death blow to the whole undertaking in North Africa."
Vertical Envelopment – The German Approach
Today's concept of vertical envelopment, known as airmobile warfare, traces its origins directly back to the Russian exercises in mass airborne landings in the middle thirties. German observers present at these exercises included then-Colonel Student, who was later to command the German parachute forces. He took command (as General Student) on July 1, 1938, and was essentially given a free hand to develop the new "sky battalions" and his idea of massed formations. Thus began the famous German "Fallschirmjäger" divisions.
Training
All German paratroopers were volunteers and were intensively screened before entry into the training program. Even so, two-thirds washed out before they completed training. The actual program was in three stages. The first consisted of a basic course similar to the normal infantryman's army training. The next stage took place at the parachute training school and lasted two months. The third and final stage was attachment to a parachute unit, where an additional six months training took place.
Before proceeding to the unit the parachutist would make six training jumps, with the final jump being made in company formation from about ten aircraft. Because German tactical doctrine called for avoiding dispersal on the ground, parachutists were expected to jump from between 350–400 feet. At this height they would be in the air less than one minute, thus minimizing the drift effects caused by wind. Ideally, the entire company would be assembled 5 to 10 minutes after hitting the ground.
General Theory
General Student subscribed to what we today would call the "ink spot" theory of strategy for control of an area (his analogy was based on "scattered oil drops"). After the initial landing, paratroopers would form into their units, which would then merge with others and increase the area under their control. The wide dispersal of the landings would give the impression of a much larger force than was actually present, while at the same time serving to confuse the defenders as to the main objective.
The whole key to such an operation was timing — simultaneous arrival at many points to give surprise and a tactical edge. Timing is also essential for follow-up landings and ground reinforcement, as anyone familiar with the sad results of Operation Market Garden in 1944 will recall.
The German theory was a resounding success in the air assaults into Holland and Belgium in 1940, largely because of the surprise that accompanied the landings. Such was not the case on Crete, where a parachute attack was expected.
Perhaps a major fault of the German approach was the dependence upon quickly seizing an airfield. An airfield was necessary in order to bring in the heavy equipment and reinforcements essential to sustained combat. This weakness is amply borne out in the game, for unless the Germans can seize an airfield, and rather quickly at that, they will be unable to continue their offensive, and may actually have to revert totally to the defensive.
Equipment
The German paratrooper was lightly equipped as he was not expected to hold positions for extended periods of time. He carried with him rations for two days, which included amphetamines and thirst quenchers. For Crete he was armed with the 9mm Schmeisser sub-machinegun (MP 38), but carried only two full magazines. Only the platoon leader of each first platoon actually carried his weapon when he jumped. The others obtained their weapons and ammunition from the weapons containers dropped with each "stick" of 12 men.
Other weapons used by the parachutists included the 81mm mortar, MG 42, 28/20 squeeze bore anti-tank gun, and the 75mm/LG40 recoilless rifle. The standard air transport was the durable Ju-52/3m. As a standard load it carried 12 parachutists and 4 arms containers.
Organization
Until the Crete operation, parachute units were used exclusively in an air assault role. They lacked the heavy weapons they were later to carry in the campaigns in Russia, Africa, and Italy. The manual illustrates, for comparison, the organization of a German Parachute Battalion, a German Mountain Battalion, and a standard British Infantry Battalion as fielded on Crete, although only two British units on Crete actually were organized to the full standard pattern, and even they were lacking somewhat in equipment.
The Glider Units
Gliderborne assault was a new item in warfare introduced early in WWII. First organized in November 1939, the Germans did not use them until the stunning assault at Eben Emael, Belgium. They were used again on Crete in considerably larger numbers. But the Germans had comparatively few gliders available. The entire Sturm Regiment, on paper, was supposed to be carried in gliders, but only enough were available for one battalion. The following table shows the probable composition (all figures are estimates) of the glider forces used in Crete. All were used in the first wave in Maleme and Suda sectors:
| Commander | # Men | # Gliders | Objective |
|---|---|---|---|
| Maj Koch | 108(?) | 12(?) | Hill 107 |
| Cpt Altmann | 150 | 15 | HAA guns – Akrotiri Peninsula |
| Cpt Genz | 90 | 9(?) | HAA guns – south of Canea |
| Lt von Plessen | 108 | 13 | LAA guns – RAF camp, Maleme airfield |
| Cpt Sarrazin | 120 | 15 | — |
| Maj Braun | 90(?) | 9 | Bridge over Tavronitis River |
Both sides were to later compensate for the weakness of the initial drop by using larger gliders, designed to carry heavy equipment including antitank guns and light vehicles. The Allies also tended to restrict their airborne operations to the extent that they would as much as possible work in conjunction with a ground relief force moving swiftly to the airborne drop zones. One final lesson both sides learned the hard way was the necessity of landing at the objective.
Bibliography
Primary Sources
- Ansel, Walter, Hitler and the Middle Sea, Durham, N.C., 1972.
- Baldwin, Hanson W., Battles Lost and Won (Great Campaigns of World War II), Hodder & Stoughton, 1967.
- Bekker, Cajus, The Luftwaffe War Diaries, Ballantine, 1972.
- Churchill, Winston S., The Second World War, Vol. III: The Grand Alliance, Houghton Mifflin Co., Boston, 1950.
- Clark, Alan, The Fall of Crete, Anthony Blond, 1962.
- Cocchia, Adm. A., The Hunters and the Hunted, U.S. Naval Institute, Annapolis, 1957.
- Davin, D.M., Crete, Official History of New Zealand in the Second World War, 1939–45, Oxford University Press, 1953.
- Edwards, Roger, German Airborne Troops, Doubleday & Co., Garden City, N.Y., 1974.
- Gabriele, M., Operazione C.3: Malta, Ufficio Storico della Marina Militare, Rome, 1965.
- Green, Wm., Warplanes of the Third Reich, Garden City, N.Y., 1970.
- Gundelach, Dr. Karl, "The Battle for Crete," Chronicle IV in Decisive Battles of World War II: the German View, editors Dr. H.A. Jacobsen and Dr. J. Rohwer, Putnam, 1965.
- von der Heydte, Baron F.A., Daedalus Returned, Hutchinson, 1958.
- Hogg, Ian V., Barrage: the Guns in Action, Ballantine, N.Y., 1970.
- Joslen, Lt. Col. H.F., Orders of Battle 1938–45, (HMSO).
- Lloyd, Sir Hugh, Briefed to Attack.
- Long, Gavin, Greece, Crete, and Syria: Australia in the War of 1939–45, Series I Vol. II, Canberra, 1953.
- "Malta," no author, After the Battle, issue #10, 1975.
Secondary Sources
- Bragadin, M., The Italian Navy in World War Two, U.S.N.I., Annapolis, Md., 1957.
- Cunningham, Viscount A.B., A Sailor's Odyssey.
- Fechter, H. and Hümmelchen, G., Seekriegsatlas Mittelmeer-Schwarzes Meer 1940–45, J.F. Lehmanns Verlag, Munich, 1972.
- Hogg, Ian V. and Thurston, L.F., British Artillery Weapons and Ammunition 1914–1918, Ian Allan, London, 1972.
- Hogg, Ian V., The Guns: 1939–1945, Pan/Ballantine, London, 1969.
- Hogg, Ian V., The Guns of World War II, MacDonald & Jones, London, 1976.
- Korotkin, I.M., Battle Damage to Surface Ships during World War II, tr. Alexandria, Va., 1964, orig. pub. 1960.
- Lupinacci, Capt. P.F., and Tognelli, C-Adm. V.E., La Marina Italiana nella Seconda Guerra Mondiale, Vol. IX: La Difesa del Traffico con l'Albania, la Grecia e l'Egeo, Ufficio Storico della Marina Militare, Rome, 1965 (2nd ed.).
- Maurice-Jones, Col. K.W., The History of Coast Artillery in the British Army, The Royal Artillery Institute, Woolwich, London, S.E. 18.
- Pafi, B.; Falessi, C.; & Fiore, G., Corazzati Italiani 1939–45, D'Anna Editore, Rome, 1968.
- Rohwer, J. and Hümmelchen, G., Chronology of the War at Sea, 1939–1945, Vol. 1, Ian Allan, London, 1973.
- Tugwell, M., Airborne to Battle, William Kimber, London, 1971.
- Weldon, Lt. Col. H.E.C., "The Artillery Defense of Malta," The Journal of the Royal Artillery, Vol. LXXIX #1, Jan. 1952, The Royal Artillery Institute, Woolwich, London, S.E. 18.
- Wheeler, Capt. E.J., Ship Salvage, Geo. Philip & Son, London, 1958.
Glossary of Abbreviations
- A — Australian.
- AA — Anti-aircraft.
- AS — Attack Strength.
- ASH (A&SH) — Argyll and Sutherland Highlanders.
- ASSIETT — Assietta Division.
- AT — Anti-tank.
- B — Bomber.
- CCNN — "Camicie Nere"; Blackshirts; fascist party troops.
- CD — Coastal Defense.
- CDO — Commando.
- CHES — Cheshire Regiment.
- COMP — Composite Battalion.
- CS — Coastal Steamer.
- DEV — Devonshire Regiment.
- DHQ — Divisional Headquarters.
- DIV CAV — Divisional Cavalry.
- DLI — Durham Light Infantry.
- DOR — Dorsetshire Regiment.
- DS — Defense Strength.
- ENG — Engineer.
- F — Fighter.
- F — Fortress.
- FB — Fighter-bomber.
- FD — Field.
- FOLGOR — Folgore Parachute Division.
- FR — Field Regiment.
- GEB — Gebirgsjäger: Mountain.
- GEN — General.
Design and Production
Original Research and Design: Vance von Borries.
Additional Design and Game Development: Randall C. Reed.
Additional Research: Andrew Smith, Esq., Epping, England.
Graphics and Components: Randall C. Reed.
Production Coordinator: Thomas N. Shaw.
Playtesting: Jack Greene, Jr., Bruce Milligan, Richard Hamblen, James Stahler, David Fram, William Barr, Dale Wetzleberger.
Special Thanks for additional research to: Andrew Smith, Epping, England; Enrico Manfredi, Pisa, Italy; Maurillo Tamaio, Milan, Italy; and Ruggero Croce, Naples, Italy.
Printing: Monarch Services, Baltimore, Maryland.
Composition: Colonial Composition, Baltimore, Maryland.
© 1977, The Avalon Hill Game Company, Baltimore, Maryland.
Printed in the United States of America.
Errata
The Question Box questions and answers below are reprinted from The General magazine, Vol. 15, No. 1.
Q: Where does Creforce HQ start, Canea or Suda? A: Canea, in either hex, at player's choice. "Suda" is a mistake.
Q: Is the "Sea Movement and Combat" example of play correct? A: No. The Allied 2-2-3 unit in the example should be a 2-3-3.
Q: Where does the HMS York counter set up? A: On the red dot in hex F-26 (not F-25).
Q: If a German 9-9-4 parachute battalion is defending, suppose the Allied player obtains an "EX" result against it and chooses to remove only one attack strength point. Must the German battalion break down and eliminate the one strength point HQ unit? A: No. The German player has the option of breaking down the battalion; he is not required to do so. In this case, the German player does not break down and consequently loses nothing.
Q: Suppose two German 2-2-4's attack an Allied 2-2-2 and a coastal artillery unit in the same hex at 2-1 odds and roll an "EX." If the German player removes one 2-2-4, the Allied player must remove the 2-2-2. What happens if the German player removes both 2-2-4's? A: Since all of the defending units are totaled into one combined defensive strength, the Allied player removes both units (2 + 0 = 2) if the German player removes one 2-2-4. If he removes two 2-2-4's, he is simply wasting a unit.
Q: Is bomber strength halved if the only AA unit in range is being bombarded by other air units? A: Yes. The effects of AA units are determined at the moment the air units attempt to execute aircraft missions. If the AA unit is neutralized before the bomber units execute their bombardment or air support missions, they are not halved. If the AA unit is still functional at the moment the bombardment attack is resolved, the bombers are halved. This would hold true even if the target for the bombardment mission was the AA unit.
Q: If there is five stacking points of German infantry occupying Maleme Airfield at the beginning of the German player segment, how many air landing units may land at that airfield during the air landing segment? A: Only one stacking point may land that turn. Airborne, air landing, and sea movement units may not overstack on their initial placement on the mapboard. Note that this is an exception to the stacking rules which apply only at the end of the movement and combat phases. Airborne units that drift and overstack are not eliminated until the end of the movement phase.
Q: May the 42 Coy RE execute demolition procedures while loaded in the truck unit? A: No.