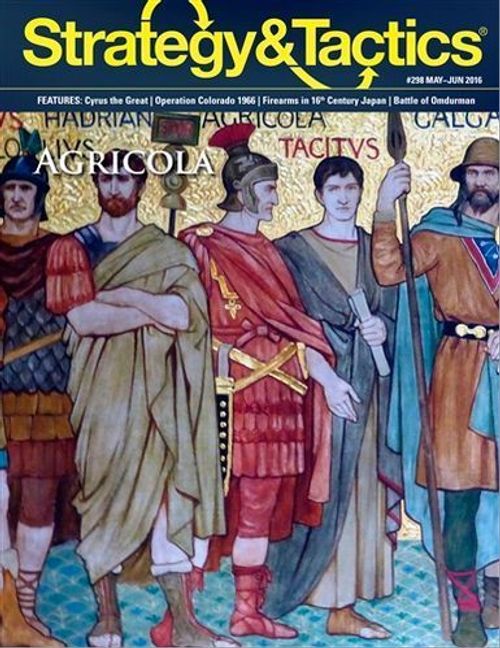
Agricola: Roman Campaign in Britain, AD 82-84
Agricola: Roman Campaign in Britain, AD 82-84 Rulebook
Table of Contents
Table of Contents
- 1.0 Introduction
- 2.0 The Map
- 3.0 Playing Pieces
- 4.0 Definitions
- 5.0 How to Win the Game
- 6.0 How to Set Up the Game
- 7.0 How to Play
- 8.0 Winter Turns
- 9.0 Events Phase
- 10.0 Action Points (AP)
- 11.0 Recruiting
- 12.0 Marches
- 13.0 Land Unit Movement
- 14.0 Stacking
- 15.0 Battle
- 16.0 Combat Procedure
- 17.0 Winning Battles
- 18.0 Supply
- 19.0 Unit Status & Rally
- 20.0 Fog of War
- 21.0 Stratagem Markers
- 22.0 Leaders
- 23.0 Roman Praesida
- 24.0 Caledonian Tribal Centers
- 25.0 Fortified Positions
- 26.0 Fleets & Naval Operations
- 27.0 Roman Britannia Base
- Advanced Rules
- 28.0 Additional Special Unit Effects
- 29.0 Roman Road Construction
- 30.0 Multiple Battle Lines
- 31.0 Looting & Pillage
- 32.0 Effects of Siege
- 33.0 Optional Rules
- 34.0 Charts
1.0 Introduction
Each player has a set of Stratagem markers. Players use these markers to recruit new units, move their forces on the map, and take special actions. Whenever opposing forces are in the same hex, a battle will ensue. Various Stratagem markers can also be used to enhance operations.
1.1 Components
Agricola includes 130 game pieces, one 22 x 32" map, and these rules. Players must provide at least one six-sided die.
2.0 The Map
The game map shows the region of northern Britannia where the original campaign took place. Each hex is about 10 miles across.
2.1 Map Features
The hexagons on the map are used to position units and to determine unit movement and other game functions. There are two general types of hexes: Land and Sea. The Terrain Effects Chart explains the various terrain types and their effects.
The Britannia Box represents the Roman bases off-map to the south and is explained later.
2.2 Holding Boxes
Recruit Box: This is a convenient place to put units not in play or units destroyed due to combat or other game actions.
Stratagem Marker Available Box: This is a convenient place to put Stratagem markers which can be held for later use.
Map Errata: The following spelling errors were discovered after the map was printed: Hex 2226 "Taevali" should be "Taexali," hex 2334 "Cerones" should be "Creones," hex 2826 "Otaoini" should be "Otadini," and the "Britannica" box should be "Britannia." On the Events Chart, the Tribes Go Home result applies once per game. After the first time, any subsequent results are No Effect.
2.3 Game Length on the Turn Record Track
The game covers three years (AD 82, 83, 84). Each year will have three Campaign turns; 82 and 83 will also have one Winter turn. The turns are recorded on the Turn Record Track.
3.0 Playing Pieces
There are several types of square cardboard pieces. Roman combat units represent two to four cohorts or their equivalents, Caledonian units represent tribal war bands of various sizes, and fleets represent a group of warships plus transports. Leaders represent a great commander plus elite guard troops. There are three basic types of combat units: mobile units, static units, and leaders (explained below) as well as various individual kinds of combat units (see 3.2).
3.1 Unit Abbreviations
- Ad: Adiutrix
- Atecotti: Elite Warriors
- Aug: Augusta
- Aux: Auxilium
- Batav: Batavian
- Coh: Cohort
- Class: Classiarrii
- Eq: Equites
- Gaes: Gaesatae
- H: Hispania
- Imped: Impedimenta
- Praef: Praefectus
- Sing: Singulares
- Tung: Tungrian
- VV: Valeria Victrix
3.2 Unit Types
Unit types shown on the counter illustrations: Leader, Exploratores, Warband infantry, Auxiliary infantry and Evocati (recalled veterans), Classiari/Fleet, Alae/Cavalry, Impedimenta (supply / siege train), Chariots. Note: Legionary infantry have concave shields.
3.3 Mobile Units
Battle Strength (lower left number): the unit's relative effectiveness in combat.
Movement Allowance (lower right number): the unit's ability to move across the map.
Identification. The historical numbers for legions, the name of a leader, or some other info identifying that unit.
Elite Status ("+" symbol): Unit counts toward Battlefield Advantage.
Elite Units: Certain non-Leader units also have an Elite symbol (+).
Back-printing: Most units are printed on both sides. The front is the "Good Order" side; the reverse is the Disrupted side.
3.4 Static Units
These are units which cannot move.
Praesidium: Roman camps, forums, and other edifices.
Caledonian Tribal Centers: Caledonian centers of activity. There are several types, explained per 24.3.
Leaders. These are special units, representing a high-level commander plus his bodyguards and retinue. There are also "Supreme Leaders," which are a special class of leader (see below).
Supreme Leaders: These are Agricola for the Romans and Galgacus for the Caledonians. Note: Calgacus, the more common spelling, has been used throughout the rules, however the less frequent, but equally correct spelling, Galgacus, was used on the Leader counter.
3.5 Markers
Markers are used for various administrative purposes during the game.
Marker types: Army Substitution Markers, Stratagem Markers, Road Construction, Siege Markers, Pillage Markers.
Army Substitution Markers: Players use these to reduce on-map congestion. These include the Roman Exercitus (Army) and Caledonian Tribal Confederation markers.
Stratagem Campaign Markers: The game includes one set of Stratagem markers for each side. Stratagem markers generate actions and special events. Note there is one optional Stratagem marker for each side. Set these two counters aside unless using an optional rule calling for their inclusion.
Road Construction: Indicate the terminus of a newly constructed Roman road.
Siege Markers: These indicate the presence of a Siege.
Pillage Markers: These are on the reverse of the Siege markers - they are for a future variant.
Note: Additional information about markers can be found in rules 21.0-25.0.
4.0 Definitions
Control: Tribal Center hex is Caledonian controlled if there are no Roman units (of any kind) occupying it. There is no need for the Caledonians to occupy them to have control. A Tribal Center is Roman controlled if there are any Roman units occupying it.
Elite: Units with "+" symbol. The side with the greater number of elite units at the start of each battle round receives a +1 die roll modifier towards the Battlefield Advantage die roll.
Force: A group of units taking an action together.
Friendly/Enemy Units: Friendly units are the ones controlled by one player; Enemy units are the ones controlled by the other player.
March: A specific action consisting of one Force moving and then potentially attacking.
May: You can choose to take the action or not.
Must: You have to take the action.
Occupy: Having a unit in a hex.
Pick or Pick at Random: Pick at random from the designated marker pool.
Reveal: Show the opposing player friendly units in a hex or off-map box.
Roll against a Value: Roll one die and then compare it to a unit combat factor. If the die roll is less than or equal to the factor, the die roll succeeds. If it is greater than the combat factor, it fails.
Example: A unit has a combat value of three. To destroy an enemy unit, it would require a die roll of one, two, or three. A roll of four or higher would miss.
Select: Sort through the markers and choose the one you want.
Stratagem marker bin: This is a wide mouth opaque container, such as an inverted helmet, a convenient place to put Stratagem markers. Each player maintains a separate Stratagem marker bin.
5.0 How to Win the Game
There are two ways to win in Agricola - Sudden Death and End Game Victory Points, explained as follows.
5.1 Sudden Death Victory
The game comes to an immediate end if one of the following conditions is in effect at any point in the game:
a) The Romans win if, at any time, they occupy all Tribal Centers.
b) The Caledonians win if, at any time, Caledonian units occupy three or more Roman fortress hexes.
5.2 End Game Victory
Otherwise, check victory at the end of the last turn. Victory is in terms of Victory Points (VP).
The Romans gain VP for each of the following:
- 1 VP: Each Tribal Center occupied by a Roman unit (including Brigantes).
- 1 VP: Each Historical Site (e.g., Mons Graupius) occupied by a Roman praesidium.
- 5 VP: Calgacus leader eliminated.
- 1 VP: Each other Caledonian Leader or Elite unit eliminated.
The Caledonians gain victory points for each of the following:
- 3 VP: Each legionary fortress occupied by Caledonia units.
- 5 VP: Agricola eliminated.
- 1 VP: Other Roman Leaders eliminated.
- 2 VP: Each Tribal Center occupied by Caledonian units.
- 1 VP: Each legionary infantry unit in the dead pile.
Subtract the Caledonian player's total from the Roman player's total to determine the degree of victory:
- 21+: Decisive Roman victory
- 11-20: Marginal Roman victory (this is the historical result)
- 0-10: Caledonian Provincial victory
- less than 0: Caledonian Imperial victory
Note: VP for units eliminated are only for those in the Eliminated Box at the end of the game. Units which have been eliminated and then replaced (11.2) do not count for VP - so you will need to replace units to avoid VP loss.
6.0 How to Set Up the Game
Players set up the game in this order.
Note: All two-step units are deployed at full strength. Also, you can use the Army markers as part of initial setup (see 20.0).
Caledonian Set-up First
-
Place all Caledonian Tribal Centers face down. Mix them up. For each Tribal Center hex, pick and place one Tribal Center in that hex. Place them only on Tribal Center hexes north of the hex row of the Trimontium (hex 2731 or less). There are more Tribal Center units than hexes; place the extras aside in the Tribal Centers available box, face down. After all have been placed (12 total), the Caledonians can examine them (but do not reveal them to the Romans).
-
Select the Calgacus unit. Then pick (at random) eleven more Caledonian units. Examine the units and then place all these units on any Caledonian Tribal Center hexes north of the hex row of Trimontium (hex 2731 or less). You can place them in stacks (14.0), but no more than three units per hex (plus the Tribal Center). Place the remaining Caledonian units in the Caledonian Recruit box (you can cover them with a piece of paper so the Romans cannot examine them).
-
Place all Caledonian Stratagem markers in the Caledonian Stratagem Campaign marker bin.
Roman Set-up Second
- Place the following units in any printed fortresses or the Britannia base box:
- Agricola;
- Karus;
- All legionary Legates and infantry units of II Ad, IX Hispania, XX, and VV (one leader and three infantry each for twelve units total),
- Coh Eq I;
- Alae I, II;
- Aux I Bat, Aux II Tung, Aux III, Aux IV;
- Exploratores;
- Imped I, II.
In the Brigantes Tribal Area: One Praesidium
In the Britannia Area: Praef Class; Classis I, II
-
Other Roman units are placed in the Recruit box.
-
Place all Roman Stratagem markers in the Roman Stratagem Campaign marker bin.
7.0 How to Play
7.1 Game Length & Turns
Agricola has eleven turns. The game ends after the XI turn. It can end sooner if one side gains Sudden Death Victory (5.1).
7.2 Sequence of Play
During each turn, players must follow the sequence of play, in the order of "Phases" listed below.
I. Events Phase
Check the Events Table and apply the results.
Note: Skip this phase on Turn 1 and Winter turns.
II. Roman Turn
-
Action Point Determination Phase (10.0): The Roman player rolls one die and adds that to his Action Point (AP) index to a maximum of nine APs (excess is lost).
-
Recruiting Phase (11.0): The Romans, by expending Action Points, can build reinforcement units and pick Stratagems.
-
March Phase (12.0): The Romans conduct Marches (by expending APs). Each March consists of the following:
a) Movement sub-phase (13.0): Move one Roman force up to its movement allowance.
b) Battle sub-phase (15.0): If the force ends its move in the same hex as an enemy force, it must attack.
Note: Upon completion of one March, the Romans can initiate another March (by expending an AP).
-
Supply Phase (18.0): The Romans must make a Supply Check for all Roman forces on the map.
-
Rally Phase (19.0): The Romans may Rally disrupted Roman units.
III. Caledonian Turn
-
Action Point Determination Phase (10.0): The Caledonians roll one die and add that to his Action Point (AP) index to a maximum of nine APs (excess is lost).
-
Recruiting Phase (11.0): The Caledonian, by expending Action Points, can build reinforcement units and pick Stratagems.
-
March Phase (12.0): The Caledonians conduct Marches (by expending APs). Each March consists of the following:
a) Movement sub-phase (13.0): Move one Caledonian force up to its movement allowance.
b) Battle sub-phase (15.0): If the force ends its move in the same hex as an enemy force, it must attack.
Note: Upon completion of one March the Caledonians can initiate another March (by expending an AP).
-
Supply Phase (18.0): The Caledonians must make a Supply Check for all Caledonian forces on the map.
-
Rally Phase (19.0): The Caledonians may Rally disrupted units.
IV. End of Turn
Proceed to the next turn (moving the Turn marker to the next hex on the turn track). The sequence of play then begins starting with the Roman turn.
8.0 Winter Turns
Winter Turns are different from Campaign turns. During a Winter Turn, execute the following in this order:
- Romans withdraw to Winter Quarters (see 8.1).
- Caledonians withdraw to Winter Quarters (see 8.1).
- Reset AP Indexes (see 8.4).
- Eliminated elite units become available for replacement (see 8.5).
8.1 Winter Quarters
The Roman player checks all units not located in fortresses, Praesida, or the Britannia area. He must move all such units to any friendly Roman fortress, Praesidium, or the Britannia Base. Fleets move to the Britannia base or Praesida on the coast (Praesida stay in place).
The Caledonian player checks all units not located in Tribal Centers or occupying Roman fortresses. He must move all such units to any Tribal Centers not occupied by Roman units.
8.2 Moving units to Winter Quarters
The player picks up the units in question and places them in the location. There is no movement per se and no AP are expended.
8.3 No Winter Campaigning
During Winter turns, skip all phases of the Sequence of Play (7.0). Essentially, it's a reset.
8.4 Reset AP
Both players move their AP Index to zero (AP not used during the year prior are lost).
8.5 Eliminated Elite Unit Return
During the Winter Turn, place all units in the Elite Units Eliminated box (on the map) in the Recruit Pool (11.2).
Note: Supreme Leaders (Agricola, Calgacus) are exceptions: if eliminated, they are never available to be recruited.
9.0 Events Phase
During the Events Phase, go to the Events Table. Each player rolls one die; total the results, then cross index the total to obtain a final result. Apply it immediately.
Note: Skip the Events Phase on Turn 1. Also, note that you check events only at the start of the complete turn, not each player's turn, nor during the Winter Turn.
Note: The rules for an event may supersede the regular game rules.
10.0 Action Points (AP)
Players use Action Points to initiate various game actions: Recruiting (11.0), Initiating Marches (12.0), Rallying units (19.0), and other things as stated in the rules. (See the Action Point Expenditure Charts on the map.)
10.1 Action Points Phase
During the Action Point Determination Phase, the player rolls one die and adds that number of APs to their Index.
10.2 Recording AP
Players record APs on their AP index using their AP marker. A player can never have more than nine (IX) or less than zero AP.
10.3 Gaining & Losing Additional AP
Various Events (9.0), play of Stratagem markers (21.0), and Battle (17.0) may cause players to gain or lose APs. See also 8.4.
11.0 Recruiting
Players bring additional units into play via Recruiting; they can also purchase Stratagem markers (21.0). Players recruit by expending APs. Each unit costs a certain number of APs.
11.1 Recruiting Units
The procedure for recruiting Romans vis-a-vis Caledonians is different.
Romans: The Romans 1) select the units to be recruited; 2) expend the APs for them; 3) move those units from the Recruit Box to the map per Deployment instructions.
Note: Romans pay the same cost for a particular type of unit regardless of its combat strength or elite status. For example, a three-strength auxiliary costs the same as a two-strength auxiliary.
Caledonians: The Caledonians 1) state how many APs will be expended; 2) for each AP, pick (at random) one unit from the Recruit box; 3) move those units from the Recruit Box to the map per the Deployment instructions. (Once picked, the Caledonians can examine the units.)
Deploying Units: The Recruit Tables designate where players place (deploy) newly recruited units.
11.2 Replacements
Generally, units that have been eliminated are placed back in the Recruit box and are available for recruiting. The following are special cases.
-
Supreme Leaders: Once eliminated, these cannot be replaced. They are permanently eliminated.
-
Other elites: When eliminated, units with an Elite symbol are placed in the Elite Units Eliminated box. During the Winter Turn, they are restored to the Recruit Pool.
-
Caledonian Tribal Center units: Place in the Tribal Center Available box, face down. They can be replaced via the Nova Gentes stratagem.
Note: Remember, there is no Winter turn in the year 84.
11.3 The Recruit Box
Units in the Recruit Box may be either those which have not yet entered play, or were eliminated during play and placed in the box, and may now therefore be replaced (per 11.2).
11.4 Stratagem Markers
See 21.0.
11.5 Roman Praesida & Caledonian Tribal Units
These are explained in 23.0 and 24.0.
11.6 Unit Withdrawal
Certain events call for units to be withdrawn. To withdraw units, pick them up from the map and place them in the location dictated by the event. There is no movement involved. If a player does not have sufficient number or types of units to withdraw, there is no additional effect. See also 8.1.
11.7 Praesidium Dismantling
The Romans can remove any Praesidium unit on the map at the start of a Recruiting phase. This does not restore the recruiting AP cost, but does free up the Praesidium for recruiting elsewhere.
12.0 Marches
A March is a group of units (or force) which first moves and then possibly engages in combat.
12.1 Forces
A force can consist of a single unit or more than one unit. All units in a force must start in the same hex and then move together.
If you have more than one unit starting in a hex, you may form some of them into a force and leave the rest behind.
Example: You have three units in a hex. You could form them into one combined force (of three units), or two forces (one of two units which then moves, and a second of one unit which stays behind, or vice versa).
12.2 Marching
To conduct a March, a player must expend one AP per March (see 10.0).
Note: Therefore, each March consists of one Force moving (see 13.0) and then, if it ends the March in the same hex as an enemy force, initiating battle (see 15.0).
12.3 Multiple Marches
You may March an individual unit or force more than once per turn as long as each March is initiated by expending one AP. Further, the player is not required to march any force.
Example: The Romans initiate one March (by expending one AP). The Roman moves one force into a hex containing Caledonian units. That force then must initiate combat. Following the combat, the Romans could initiate another March by expending another AP. Or the Romans could initiate a March with one force, then initiate a March with a second force, then come back to the first force and initiate another March (by expending APs).
12.4 Combat
All units in a hex form a single combined force for attacking and defending. See 15.0.
12.5 Supreme Leaders & Free Marches
A Supreme Leader can perform one march per March phase without having to use an Action Point. Further, the Leader can form a force using any units in his hex, and they can move with the Leader (but no further than the leader moves).
Note: The Free March is just that; this can't be used to get free Recruits.
13.0 Land Unit Movement
A player moves his forces during the Movement sub-phase of a March. Units in the moving force can move up to a number of hexes equal to their printed movement factor.
You may move eligible units in any direction via adjacent hexes. Movement is always voluntary; a unit never has to move.
13.1 Forces and Movement
You move units as a force, and only one force can move per March. A moving force can drop off units during the conduct of a single March. The dropped off unit remains in that hex - it cannot move further in that March. Moreover, a moving force cannot pick up units during the conduct of a single March.
Note: Also see 26.0 Fleet Movement and Naval Ops for sea movement.
13.2 Movement Restrictions
Terrain affects Roman and Caledonian units differently. See the Terrain Effects Chart (TEC).
Terrain: The TEC lists the effects of each type of hex on movement. If a hex states "Stop," then units entering that hex must cease movement in it. They can move out normally on an ensuing March.
Sea: Generally, land units cannot enter sea hexes. But see Naval Movement (26.0).
Engagement: A unit may enter a hex containing enemy units, but must stop there. Battle will commence during that March's Battle step (15.0).
Note: Due to the combat mechanics, there will never be a situation where a unit starts its movement in the same hex as enemy units.
13.3 Special Movement
Roman Auxiliary Infantry: These units do not Stop when entering Wilderness hexes - they move through them normally.
Roman Roads: Roman units that move along roads can move an unlimited distance as long as they stay on the road. The entire movement must be via roads (they cannot move off the Road in that March). Caledonians do not get a road movement bonus.
Note: Roads negate other terrain in the hex for road movement, but not for non-road movement, combat, etc.
Note: Roads under construction do not provide this bonus; see Road Construction (29.0).
13.4 Static Units
Some units have a movement factor of zero. They may never move.
13.5 Hibernia
Units may not enter coastal or all-land hexes in Hibernia - it is unplayable.
Note: These are the islands along the western edge of the map.
14.0 Stacking
Stacking is when more than one unit is present in a single hex. After set-up, a player may have any number of units in the same hex; i.e., stacking is unlimited. Friendly units may move through other friendly units without hindrance.
14.1 Supply
See rule 18.0 for the impact of stacking on supply.
14.2 Combat
Friendly units can enter hexes containing enemy units, but they must stop and then engage in combat (15.0).
Old Hands Notes: There are no Zones of Control in Agricola.
15.0 Battle
Battles occur during the Battle sub-phase of a March when a player has a force in a hex that is also occupied by an enemy force.
15.1 Attacker & Defending
The player conducting the March is termed the "attacker," while the other player is the "defender."
Example: It is the Roman turn, and the Romans move a force into a hex containing Caledonian units. The Romans are therefore the attacker.
Note: Since you can move only one force per March, you will not be able to move more than one force into a single battle situation.
15.2 Battle Sequence
Each battle must be resolved according to the following sequence:
- Deploy units on the Battle Board
Both players reveal and line up all their units on the Battle Board (see the map).
- Rounds of Battle
Each battle is fought in one or more rounds. During each Round, players must execute the following.
A. Determine which side has the "Battlefield Advantage."
Battlefield Advantage is determined by each player rolling one die and then adding to it modifiers as indicated in the sequence below.
-
The attacker (first) declares if he will expend one AP.
-
The defender (second) then declares if he will expend one AP.
-
Each player rolls one die.
-
If a player expended one AP, then add one to his die roll result.
-
If a player has a total number of Elite units greater than the enemy, that player adds another one to his die roll result. Count the number of units with "+" symbols. The side with more gets +1 drm.
-
Whichever player rolled the higher outcome has the Battlefield Advantage for that battle.
-
In the event of ties, the Battlefield Advantage is determined via the Terrain Effects Chart.
Note: Players are not required to expend APs to engage in battle; in that case they do not receive the die roll modifier. Also, if both players have an equal number of elite units, or no elite units, there is no modifier.
B. Retreat Decision
The player who has the Battlefield Advantage selects one of the following.
-
Conduct a Retreat (see 16.3).
-
Engage in Battle.
C. Engage in Battle
-
The player with the Battlefield Advantage initiates combat with his units. He rolls one die per unit (per the combat procedure, 16.0).
-
After the player with the Battlefield Advantage has completed rolling for all his units (and inflicting any losses), the player without the Battlefield Advantage initiates combat with his units (per 16.0).
-
Determine if one side has won the Battle Victory (see 17.0). If so, go to Victory (step below). Otherwise, go to the next round of combat (starting at "A" above).
Note: You determine Battlefield Advantage at the start of each round of battle.
D. Victory Determination
-
A player wins a battle if at the end of any round he has one or more surviving units and all enemy units are eliminated or retreated (see below for definitions).
-
Determine if either player has won a Major Victory. See 17.0 for gaining and losing APs.
Note: Since only one force can move per March, this means you cannot move two different forces into the same hex and attack. You could move one force into a hex containing another friendly force; then, in a subsequent March, move the combined stack into an enemy hex. This models the general lack of coordination of armies in pre-radio days.
16.0 Combat Procedure
For each unit, roll one die and resolve as follows.
-
If the result is less than or equal to the unit's combat factor, it inflicts one hit on one enemy unit.
-
If the die roll is greater than the unit's printed combat factor, there is no effect (see below for effects of hits).
16.1 Implementation
After determining the total number of hits inflicted by the first player and possibly halving for fortified defense (25.2), any combat results are implemented immediately. A unit is affected by a result regardless of its type or strength. The player against whom the combat result was inflicted determines which of his units will be affected. A player can distribute losses in any order he desires.
16.2 Effects of Hits
-
A hit inflicted on a Good Order unit flips it to its Disrupted side. A unit with no Disrupted side is instead eliminated.
-
A hit inflicted on a Disrupted unit eliminates it.
Example: A Caledonian force inflicts three hits against the Romans; the Roman player could disrupt three Good Order/two-step units, or eliminate one two-step unit and disrupt one two-step unit (or any other combination of three step losses).
Note: Combat is not simultaneous for both sides. Any opposing unit that is eliminated before it has rolled its own combat die is not eligible to execute combat in that battle. Similarly, a unit which is Disrupted rolls using its reduced strength. This is a value of having the Battlefield Advantage.
16.3 Retreat
A player who gains the Battlefield Advantage can declare a Retreat (or not). If so, then implement the following.
The player moves all units in the engaged force one hex. This must be into a hex which all units in that force could enter. Once the Retreat is completed, the battle comes to an end.
The Romans can retreat units on the south map edge into Britannia (see 27.0).
16.31 Retreat Restrictions
A retreat cannot be made into a hex containing enemy units. A force cannot retreat into a water hex (but see Fleets; 26.0).
If a force has no hex into which it can retreat, then it must stay and engage in battle.
16.4 Fortresses, Camps, & Oppida
The Romans cannot retreat if in a Fortress or Camp.
The Caledonians cannot retreat if in an Oppidum (fortified position).
Note: For their effects on combat, see Fortified Positions (25.0).
Note: While many Caledonian units are stronger on their Good Order side than opposing Roman units, they have relatively weak disrupted sides (or none at all). Therefore, the Romans will last longer in a prolonged battle.
17.0 Winning Battles
A battle ends when one side is completely eliminated or one side declares a Retreat (16.3). The side with units in the hex wins the battle. The other side, whose units were all eliminated or retreated, loses the battle.
17.1 Winning Major Battles
If a particular battle involves units totaling at least 20 strength points from each side at the start of the battle (before determining Battlefield Advantage for the first time), it is considered a "Major Battle."
17.2 Gaining/Losing AP
When a player wins a Major Battle, he rolls one die. Add that number of APs to the player's AP Index (to a maximum of nine). When a player loses a Major Battle, he rolls one die. Deduct that number of APs to the player's AP Index (to a minimum of zero).
Note: Obviously, winning or losing a Major Battle is going to be a significant event in the game, so maneuver wisely!
18.0 Supply
A player checks supply for all units during the friendly Supply phase. Units which are not In Supply are subject to Attrition checks.
18.1 Always in Supply
The following are In Supply.
Romans
- Units in the Britannia Base.
- Leaders, Praesida, and Exploratores.
- Roman units in the same hex as fortresses and Praesida.
- Impedimenta and all Roman units in the same hex as Impedimenta.
- Units adjacent to Roman occupied fortresses or impedimenta units (but not Praesida).
- Fleets on coastal hexes, and all Roman units in the same hex as fleets (embarked or not). See 26.0.
Caledonians
- Caledonian Leaders.
- Tribal Centers.
- Units in Tribal Center hexes or Historical Sites.
18.2 Supply Attrition Procedure
The player must roll one die for each unsupplied unit. Results are as follows:
- Die roll = 1-2: A Good Order unit is reduced; A Disrupted unit is eliminated.
- Die roll = 3-6: No effect.
19.0 Unit Status & Rally
Most Combat units have two sides: the front is their full-strength Good Order side; the reverse is their reduced strength Disrupted side. Units are reduced either due to combat, being out of supply, or by certain Events.
19.1 Deployment
Units placed during initial setup (6.0) and as recruited units are always placed on their Good Order side.
19.2 Rally Procedure
A player can restore disrupted units to Good Order status during the Rally Phase. The player may do this for each hex which contains Disrupted units. For each such hex expend one AP. Flip all Disrupted units in that hex to Good Order.
19.3 Supply Requirement
The hex in which Rally takes place must be In Supply (see 18.0).
19.4 Britannia
The Romans can rally all Disrupted units in the Britannia box by expending one AP.
20.0 Fog of War
Generally, you may examine enemy player's forces under the following circumstances only.
- When each side has units in the same hex.
- When permitted by a Stratagem marker or special rules.
- Caledonians: The Caledonian player can examine Roman units located in a Tribal Center hex.
20.1 Muster Rolls
The Roman player can always examine his units.
The Caledonian player picks units randomly for initial deployment and recruiting, and once in play, he can always examine them.
20.2 Exercitus & Confederation Markers
Players can place Exercitus (Army) and Confederation markers on the map as substitute counters for combat units. Place the corresponding units in the box on the map. Units in an Exercitus or Confederation box act as if they are on the map.
21.0 Stratagem Markers
Stratagem markers represent various subterfuges and major political advantages of the campaign.
Note: Players should read the Stratagem descriptions (see the Chart) thoroughly because they can have a major impact on the game. Note there are differences between Roman and Caledonian stratagems. Also note there are two optional Stratagem markers, one for each side - set them aside unless playing with optional rules that include them.
21.1 Stratagem Bins
During initial deployment, each player places all their Stratagem markers in a Stratagem Campaign Marker Bin (one per player). During the Recruit phase, a player may pick one or more Stratagem markers by expending one AP for each. You must declare the number of AP to expend for Stratagems before picking.
21.2 Utilization
After picking a Stratagem marker, a player holds it until played (use the Campaign Markers box on the map). Each Stratagem is played according to its instructions; see the Stratagem Explanation Chart on R16. The chart gives the phase in which the marker can be played - this can be any time during that phase.
21.3 Disposition
The Stratagem Chart will indicate:
Return: Return to the bin after playing; or
Remove: Remove the marker permanently from the game.
22.0 Leaders
Leaders function as combat units, with the following special rules.
Note: Leaders are elite units.
22.1 Supreme Leaders
Agricola is the Roman Supreme Leader; Calgacus is the Caledonian Supreme Leader.
-
Free March: A Supreme leader generates one Free March for itself and any force in its hex each turn (see 12.5).
-
Concentrate on Supreme Leader: This is a special action you can take if your Supreme Leader is on the map. Declare "Concentrate on Leader." You then may move any or all units within their movement allowance to the Supreme Leader's hex (if the Supreme Leader is beyond their movement allowance, they can't move). You can't move the Supreme Leader as part of this Action. This can't be a Free March (i.e. it costs one AP). The Romans can perform this into and out of the Britannia area.
-
Fall on your sword: If a Supreme Leader is eliminated, roll one die and reduce that side's AP index by that number. Eliminated Supreme Leaders may not be replaced.
Note: If a Supreme Leader is eliminated, another leader on the map is not promoted. Other leaders can be replaced.
22.2 Legionary Legates
There are three Legions (II Ad, IX Hisp, XX VV). Each has a Legate (Commander) leader unit. A Legate can provide its elite status combat bonus only if at least one legionary unit of the same Legion is in the same battle. (All other elite units are counted without condition.)
Note: There are several legionary units which do not have Legates such as the Evocati.
22.3 Praefectus Classiarii
This Roman leader is also treated as a fleet (26.0). It can use only naval movement.
23.0 Roman Praesida
Roman Praesida represent fortified camps and various advances for Roman civilization.
23.1 Recruiting
The Romans recruit Praesida via 11.0. Praesida are recruited only after the recruiting of other Roman units has been completed.
The Romans may build a Praesidium in any land hex where a legionary unit is present (except in hexes where a Praesidium already exists).
Note: The Romans may not build more Praesida than are available in the game as pieces.
23.2 Praesidium Effects
Hexes containing Praesida entail the following effects.
- They are places for certain unit deployments (11.0).
- They count as fortified positions (25.0).
- They provide supply (18.0).
- They are positions for Winter redeployment (8.0).
- They can be dismantled (11.7).
24.0 Caledonian Tribal Centers
Tribal Centers represent various Caledonian fortified localities, Caledonia forces which are not otherwise present on the map, and the terra incognita of the region.
24.1 Deployment
At the start of the game, the Caledonians player places Tribal Center per the Set Up procedure (6.0). These are picked and placed face down; at that point the Caledonians player can examine them. Otherwise, they remain face down until some condition would allow the Romans to reveal them (20.0); at that point they are flipped face up and remain so for as long as they are on the map.
24.2 General Effects
A Roman force must cease movement the instant it enters a hex containing a face down Tribal Center unit. If the Tribal Center is face down, reveal it (flip the counter face up). Once revealed, it remains revealed for as long as it is on the map. A Tribal Center unit can also be revealed by Roman play of a Treachery marker or by the Caledonian player at any time.
24.3 Tribal Center Types
There are various types of Tribal Centers listed as follows.
Ambush: If this is revealed by a Roman Force entering the hex, that force must cease movement; the Caledonian player rolls one die, picks that number of Caledonian units from the Recruit pool, and places them in the hex. This will trigger combat with an automatic Caledonian Battlefield Advantage for the first round. Remove the marker from the map the instant it is revealed. If revealed by a game action other than the Romans entering the hex (see Treachery), then the Caledonians do not receive the units. Caledonian units that survive combat remain on the map.
Monoliths: If a player has a Leader in the hex, and the counter is revealed (24.2), then at the end of the friendly Action Point Determination Phase, the player may expend one AP and roll one die. On an even result, nothing happens. On an odd, the player selects one Stratagem he holds, returns it to the Bin, and then selects one Stratagem from the Bin and places it in his available box. Only one Leader may attempt this per Action Point Determination Phase. Once revealed, the Monolith remains on the map. It does not act like a unit but as terrain. It cannot be destroyed.
Mines: If a Roman force occupies a Mines hex at the end of a Combat phase, the Romans receives two AP and the Mines marker is removed from play.
Oppidium: This counts as a fortified position (and is also a static unit); see 25.0.
Trackless Wastes: Remove the marker the instant that it is revealed.
24.4 Replacing Tribal Centers
A Tribal Center which has been removed from the map can be replaced only by the Caledonians playing the Novae Gentes marker. Otherwise, they cannot be recruited.
25.0 Fortified Positions
Praesida and Oppida are static combat units which provide defensive advantages to their own side. Printed Fortresses also give the Romans certain defensive advantages.
25.1 Fortified Defense
Units defending in the following locations gain Fortified Defense explained as follows.
- Roman units in the same hex as a Praesidium and in fortresses.
- Caledonian units in the same hex as an Oppidum.
25.2 Fortified Defense Effects
Reduce the total number of hits by 50% against a fortified defense. Round up any fractions (15.0, 16.0); If the Praesidium or Oppidum is eliminated in the course of a battle (to satisfy one step loss), then this advantage is not received for the remainder of the combat (however, the defending force could then potentially retreat in an ensuing round of battle).
Example: A Roman force is attacking a Caledonian force in an Oppidum. Three hits would become two hits. Six hits would become three hits.
Note: Praesida and Oppida provide defensive advantages to themselves. So, if alone, hits are reduced.
Note: Roman units can never benefit from an Oppidum. Caledonian units can never benefit from a Praesidium or Roman fortress.
26.0 Fleets & Naval Operations
The Romans have several Fleet units. They conduct naval operations as a modified form of Marches.
26.1 Fleet Operation
Fleet units may only be placed in coastal or sea hexes or the Britannia Box (27.0). You can move Fleets and land units that they transport via sea and coastal hexes, and the Britannia box.
26.2 Sea Movement
Fleet movement is conducted per the March and Movement rules (12.0, 13.0). Form a naval force, roll two dice, total the results, and move that number of sea or coastal hexes. The total indicates how many contiguous sea and/or coastal hexes through which that naval force may move (although it is not required to move that full amount or even at all).
26.3 Engaging Enemy Land Forces
If a fleet enters a coastal hex containing enemy units, it can continue moving or stop. If it stops in an enemy-occupied hex, this will trigger combat. Combat is resolved.
26.4 Naval Battles
Fleets engage in battle in the same manner as land units. Any land unit(s) transported by a fleet (26.6) are automatically debarked in that same hex and participate in the battle normally.
26.5 Fleet Retreat
A player can order a Retreat per 16.3 for Fleets. In this case, move the Fleet one sea or coastal hex (if the latter, there can be no enemy units in it).
A retreating fleet may transport friendly land units in the same hex (per 26.6 - you may embark them and retreat them with the fleet. You may (or must if there are not sufficient fleets) retreat fleets into one hex and land units into another - this is the only time units can retreat into separate hexes.
26.6 Fleet Transport
A fleet that starts in a coastal hex or the Britannia box may embark (pick up) up to three friendly land units and move them with that fleet.
A fleet may debark (drop off) land units on a coastal hex or Britannia at the end of its movement. A land unit may not move prior to or after being embarked during the same Movement Phase.
Transported land unit(s) may remain embarked for any number of turns. However, if the fleet engages in combat (on a coastal hex) the transported land units must be dropped off.
Land units may only enter sea hexes by being transported by fleets. Fleets cannot transport other fleets.
26.7 Fleet Supply
Fleets must make a supply check if they are in an all-sea hex during the supply phase. Roll once for the fleet; if the fleet fails the check, then it and any units it is transporting are all reduced one step.
27.0 Roman Britannia Base
Britannia represents Roman bases off the southern edge of the map.
27.1 Entry & Exit
Britannia is adjacent to the south map edge for both land and sea movement.
The Romans may move their units to and from Britannia via land and naval movement. It costs one movement point to enter or leave Britannia. Further, units must cease movement when they enter Britannia (they exit normally).
Roman roads leading off the south map edge are connected to Britannia; thus, the Romans can use road movement into and out of Britannia (13.0).
Only Roman units may enter Britannia. (Hence, there never will be in combat in it.)
27.2 Other Effects
For Force formation, Britannia counts as one hex.
Britannia counts as a Roman Port.
Roman units in Britannia are always in Supply.
Advanced Rules
28.0 Additional Special Unit Effects
28.1 Legates & Legionary Eagles
Each of the three Roman legionary Legates leaders includes the Aquila (Eagle) standard for that legion. If a Legatus is eliminated entirely in a combat in which the Caledonians win, then:
- The Romans lose one additional AP, and;
- The Caledonians gain one additional AP (regardless if this is a Major Battle or not; see 17.0). This is for losing a Legionary Eagle.
Note: if a Legatus is eliminated in other circumstances, do not apply this rule.
28.2 Exploratores
The Roman Exploratores unit may make one free march per Movement phase (per 12.4). Move the Exploratores unit without having to expend an AP. This is in addition to any Supreme Leader Free March. For the free march, the Exploratores moves by itself (not with other units).
28.3 Praetorians & Equites Singulares
These represent elite infantry and cavalry units. The Romans must pay two AP per unit to recruit them.
29.0 Roman Road Construction
The Romans may build the road from Trimontium to Victoria.
29.1 Procedure
A legionary unit must start a Movement phase in Trimontium. It moves one space (into the outline of the road). Then cease movement. Place the Road Construction marker in that space. The Road now extends that far. Repeat this process until the Road reaches Victoria (at which point it can go no further).
29.2 Details
The Romans expend one AP to build one hex of road. A new road hex must be adjacent to an already constructed road (no skipping!). A road cannot be built into a hex containing enemy units.
29.3 Via Britannia
Roads are permanent and may not be destroyed. The Construction marker has no other effect on play.
30.0 Multiple Battle Lines
The Romans (only) can divide their force in a battle into two lines: a Front and Reserve.
30.1 Procedure
At the start of a battle, the Romans can put up to 50% of his units into a Reserve (round fractions down).
Example: A Roman force has three units; two can be placed up front and one in reserve.
30.2 Effects
During a particular round of combat, only Roman units in the Front can roll for combat, and only they can be affected by enemy combat - not the Reserve.
At the start of any round of Roman combat after the Caledonians have conducted a combat, the Romans can move any and all units in the Reserve up to the Front. The converse is not so - units in the Front cannot be moved to the Reserve. This means if the Romans have the Battlefield Advantage, the Roman Reserve may not move up on the first round.
Units which move from the Reserve to the Front roll twice for that one round of combat (they use their normal combat strength thereafter).
If all Roman units in the Front line are eliminated, then all Roman units in the Reserve automatically move up to the Front at the start of the next Roman round without receiving a bonus.
31.0 Looting & Pillage
If a force wins a battle in a hex which contains an enemy Praesidium or Oppidum, eliminating that unit, the winning player gains one AP.
If the Caledonians attack a Roman force defending in a printed fortress and win the battle, they gain 2 APs. The APs are gained only if there actually was a defending Roman force.
Place a Pillage marker in the hex. As long as the marker is in the hex, it can not be pillaged again.
Add to the Sequence of Play Winter Turns: (5) (Optional rules): Remove all Pillaged markers from the map.
Design note: Only defended hexes generates loot. The idea is that if one side abandons a position, they will take anything worth looting with them or destroy it before leaving.
32.0 Effects of Siege
Movement: Besieged Caledonian units can't exit the hex. Caledonian units outside the hex may enter it, but then stop and must attack. Roman units outside the hex may enter it, but must stop (and join the Siege).
Combat: The Roman force does not have to attack that hex. Both forces may co-exist in it without fighting.
If the Romans attack a besieged Caledonian force, then increase the combat factor of all Legionary units by one each (for example, a three would become a four).
The besieged Caledonian force may attack the besieging Roman force (paying one AP). Romans gain defensive advantage for the Praesidium. If an external Caledonian force (the Relief Army) enters the hex, it must attack. This attack can't be combined with the besieged force. The Relief Army does not gain any advantage for the Oppidum.
Supply: Besieged Caledonian units must make a supply attrition check (see 18.2). Roman units are supplied by the Praesdium.
Duration of Siege: The Siege remains in effect for as long as the Praesidium is in the hex.
If the Romans dismantle a Praesidium (11.7), then the units in the hex must either exit or immediately attack.
Roman Siege Stratagem Marker: The Roman player can still use this.
33.0 Optional Rules
33.1 Players desiring a more balanced AP accumulation can substitute the following procedure for the die roll in 10.1: roll one die, divide by two, round up, and add +1 (for a range of 2-4).
33.2 Before starting the game, both players secretly bid a number of Action Points. The high bidder becomes the Roman player and that bid is added to the Caledonian AP Index at the start of the game.
34.0 Charts
Terrain Effects Chart
Columns: Effect on Movement / Who Wins Battlefield Advantage Ties / Effect on Combat / Supply / Notes.
- Open: Movement: None. Ties: Romans.
- Wilderness: Movement: Caledonians move normally; Romans must stop (). Ties: Caledonians. Notes: () Roman auxiliary infantry move normally.
- Caledonian Tribal Center: Movement: None. Ties: Caledonians. Supply: Caledonian. Notes: Place Caledonian units and Oppidum markers.
- Roman Fortress: Movement: None. Ties: Romans. Combat: Hits on Roman defenders are reduced by 50% (round up fractions). Supply: Roman (also for adjacent Roman units). Notes: Caledonians treat fortresses as Open terrain.
- Roman Road: Movement: Normal (). Notes: () Roman units have unlimited movement if they stay on the road for the entire March.
- Roman Road Route: Movement: Normal (). Notes: See the Roman Road Construction rule. () Act as Road is Built.
- Historical Site: Movement, Ties, Combat: Other terrain in hex. Supply: Caledonian.
- Coastal: Movement: See Sea Movement. Ties: Other terrain. Notes: See naval movement.
- Sea: Movement, Ties, Combat: N/A. Notes: See naval movement.
Units:
- Caledonian Tribal (as printed): Movement: Romans must stop. Notes: See the Tribal Unit rule.
- Caledonian Oppidum: Movement: Romans must stop. Combat: Hits on Caledonian defenders are reduced by 50% (round up fractions). Supply: Caledonian. Notes: See Looting rule.
- Roman Praesidium: Movement: Caledonians must stop. Combat: Hits on Roman defenders are reduced by 50% (round up fractions). Supply: Roman. Notes: See Looting rule.
Events Table (9.0)
| Die roll | Event |
|---|---|
| 2 | Omens: Each player rolls one die: on an odd result, the player selects one Stratagem marker from his bin; on an even result, select one of their available Stratagems and return it to their bin. |
| 3 | Emperor Visits Britannia: If Agricola is in a map hex, Romans can choose to either (1) pick up the counter and move it to the Britannia box, say "Ave" to the Emperor, and then recruit one Roman unit (at no cost in AP); place it in the Britannia box; or: (2) graciously refuse; roll one die and lose that number of AP. |
| 4 | Revolt in Britannia: Romans roll one die. Select and withdraw Roman mobile combat units (on the map) whose total combat strength is at least equal to the result. Place the withdrawn units in the Britannia box. |
| 5 | Emperor Campaigning in Germany: Romans roll one die. Select and withdraw a number of Roman units whose total combat strength at least equals the total. Place them in the Recruit box. As compensation, pick one Stratagem marker (for glory). |
| 6 | Unrest in the Roman Ranks: Romans select one of their full strength units and disrupt it. |
| 7 | Weather: Each player rolls one die: on an odd result, gain that number of AP; on an even result, lose that number of AP. |
| 8 | Tribes Go Home: Caledonians roll one die; then select that number of Caledonian units on the map and withdraw them to the Recruit pool. Leaders cannot be selected and are not affected. |
Action Point Expenditure (10.0)
| Action | Phase | AP Expended | Effects |
|---|---|---|---|
| Recruit Units | Recruiting (11.0) | See Recruit Table | See Recruit Table. |
| Recruit a Stratagem marker | Recruiting (11.0) | 1 | Pick one Stratagem marker |
| Initiate a March | March (12.0) | 1 | Initiate one Move-Attack Phase. |
| Concentrate on a Leader | March (12.0) | 1 | Move any number of units to a hex containing a friendly leader. |
| Modify Battlefield Advantage die roll | Combat (16.0) | 1 | Add one to the friendly Battlefield Advantage die roll. |
| Rally | Rally (19.0) | 1 |
Roman Recruits (11.0)
| Unit Type | Cost in Action Points | Deployment |
|---|---|---|
| Supreme Leader | N/A | Can't be replaced. |
| Other leaders | 3 | Any hex containing Roman units or Britannia base. |
| Legionary infantry | 2 | Roman occupied Fortresses or the Britannia base. |
| Fleet (Classis) | 3 | Roman Praesidium on the coast or the Britannia base area. |
| Praesida | 1 | Any hex with a Roman legionary unit (other than hexes with Praesida). |
| All other Roman units | 1 | Place in Roman occupied Fortresses, Praesida or the Britannia base area. |
| Stratagem marker | 1 | Pick at random. |
Caledonian Recruits (11.0)
| Unit Type | Cost in Action Points | Deployment |
|---|---|---|
| Supreme Leader | N/A | Can't be replaced. |
| Other leaders | 1 | Any hex containing Caledonian units or a Caledonian controlled Tribal hex (4.0). |
| All other Caledonian units | 1 | Any hex containing a Caledonian leader, or a Caledonian controlled Tribal hex (4.0). (See the Novae Gentes rule for a special case.) |
| Tribal Center Unit | - | Via initial deployment or Novae Gentes marker in Tribal Center hex. |
| Stratagem marker | 1 | Pick at random |
Battle Results Table (15.0, 16.0)
- Die roll <= unit combat factor: Inflict one hit.
- Die roll > unit combat factor: No effect.
Stratagem Campaign Marker Explanations (21.0)
Caledonian Stratagems
Caledonians Unite! (Caledonian Action Point Phase): To play this, the Caledonians must reveal a leader in the same hex as either a revealed Oppidum or Monolith unit tribal unit, or in any Historical site. Then roll two dice and total them. (1) If the result is less than or equal to the number of Roman occupied Tribal Centers, the Caledonian (i) roll two dice, total the results, and pick that number of Caledonian units from the bin (at no cost in AP), place them in the same hex as the leader, and (ii) Caledonians select one Stratagem marker from the Bin. (iii) Disposition: Remove. (2) If the die roll is greater than the total, there is no effect. Disposition: Return.
Caledonian Fury (Battle): For the first round of combat, raise the combat value of each Caledonian Gaesatae and Chariot unit by "one" (ex: a four would become a five). This declaration is made after Battlefield Advantage is declared.
Druids (Caledonian turn): Caledonians can play this to re-roll any one die roll made by Caledonian player. Disposition: Return.
Novae Gentes (Caledonian Recruiting Phase): Pick one Tribal Center from the available ones and place it on any Tribal Center hex. (That hex can not be occupied by any Tribal Center unit or Roman unit.) Disposition: Return.
Speech to the Warriors (Caledonian or Roman Battle Phase): Add an additional plus one to the Caledonian Battlefield Advantage die roll (15.0). (Play only during the first round of combat. If attacking, declare before the defender; if defending, play after the attacker declares. This is in addition to any AP expenditure per 15.2) Disposition: Return.
Treachery (Any Time): Do one of the following: (1) Reveal all enemy units in one hex. (2) After the enemy has played a Stratagem marker but before it has been implemented, return that marker to the Bin without it being played. The enemy may still play other Stratagem markers. (This can not be played against Imperium). (3) Negate the play of one enemy Treachery. Disposition: Return.
Tribute (End of Caledonian Movement Phase): Reveal a Caledonian leader occupying a hex containing an Oppidum. Reveal both to the Romans. Then roll one die and pick that number of Caledonian units from the Bin and place them in the hex. Disposition: Return.
Roman Stratagems
Circum-navigation (Roman March Phase): The Romans can play this to initiate a special naval move (which requires no AP expenditure). Designate one naval force. Roll four dice (instead of two), total them, and move that force up to a number of hexes equal to the result. This is otherwise conducted per the Naval rules (26.0). If the naval force ends its move on the Ultima Thule hex, then the Romans roll one die and receive that number of AP. Disposition: Remove.
Imperium (Roman Action Point Phase): Roll two dice and total them: (1) If the result is less than or equal to the number of Roman controlled fortresses, plus Praesida currently located in Tribal Center hexes, then the Romans (i) roll one die and receive that number of AP, and (ii) Romans select one Stratagem marker from the Bin. (iii) Disposition: Remove. (2) If the die roll is greater than the result, there is no effect. Disposition: Return.
Officium (Roman Turn): Romans can play this to do one of the following: (1) initiate one free March action with a force containing any Roman leader (in the same manner as a Supreme Leader Free March). Or: (2) put one Roman force In Supply regardless of location (for one supply check and rally in the same hex). Disposition: Return.
Siege Attack (Roman Battle Phase): Declare this at the start of any Roman attack involving at least one legionary unit against a hex containing a Caledonian Oppidum. For the remainder of the attack, apply combat results normally against the Caledonians (i.e., the Oppidum does not reduce Caledonian losses by 50%).
Speech to the Troops (Roman or Caledonian Battle Phase): Add an additional plus one to the Roman Battlefield Advantage die roll (15.0). (Play only during the first round of combat. If attacking, declare before the defender; if defending, play after the attacker declares. This is in addition to any AP expenditure per 15.2) Disposition: Return.
Treachery (Any Time): Do one of the following: (1) Reveal all enemy units in one hex (including Tribal Centers). (2) After the enemy has played a Stratagem marker but before it has been implemented, return that marker to the Bin without it being played. The enemy may still play other Stratagem markers. (This cannot be played against Caledonians Unite!) (3) Negate the play of one enemy Treachery. Disposition: Return.
Tribute (End of Roman Movement Phase): Designate a Roman leader occupying a hex containing a Caledonian Oppidum. Roll one die. (1) If the result is odd, then the Oppidum surrenders - remove it from the map and place it in the Tribal Units available box. Other Caledonian units in the hex must retreat (per 16.3). (2) If the result is even, no effect. Battle ensues normally in the Battle Phase. This occurs after movement is complete but before any combat in the hex. Disposition: Return.