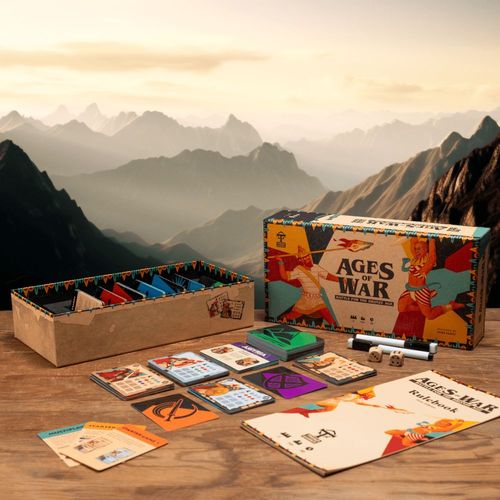
Ages of War: Battle for the Bronze Age
Ages of War: Battle for the Bronze Age Rulebook
Table of Contents
Table of Contents
Goal of the Game
Play as the general of a bronze age army and fight an epic battle - move, attack and destroy your enemy on the battlefield encircled by terrain.
You begin by creating the game area, then draw and deploy warrior unit cards to intercept opposing army's formations and take turns moving or attacking.
When attacking, roll a die to score damage and cross off health boxes, until the unit is destroyed (removed from game area). To win, eliminate all your opponent's units from the battlefield!
Components
- Players | 2 - Players fight against each other in armies, using identical red-sandstone and blue-granite decks.
- Factions | 2 - 12 cards. Each army will have one faction card, which contains required elite units, and a faction power (p13) that can be used in battle.
- Elite Units | 2pp - 24 cards. When the faction is selected, the player must draw the shown units into their army. Elite units have a black border.
- Regular Units | 2-8pp - 44 cards. Players will draw a number of regular units to fill their army, depending on the agreed game size.
- Terrain - 32 cards. Terrain cards are laid out by the players to define the shape and size of the game area.
- Attacker/Defender | 2 - 2 cards. Each army will have an attacker or defender card. This is used to show who acts first in certain stages of the set up.
- Pen | 2 - Each army will have a dry-wipe pen, to cross out health boxes when damage is taken or faction power boxes when they are used in an action.
- Dice | 2 - Both armies have a die to roll when resolving combat (attacking or counter-attacking, but not defending).
On the Cards
While learning the basics of the game, a number of card elements will be referred to - here is a quick guide (more details are provided in the Playing the Game section).
- Unit Class & Weapon
- Defence Strength
- Movement
- Damage
- Attack Range
- Stat Points
- Health Boxes
- Counter Attack
- Charge
- Faction Power (p13)
- Elite Unit
- Power Boxes
If you are new to the game, put the rules aside and pick up the demo book. Here you will be able to step through a 15 minute tutorial that will teach you everything you need to know about the game. If you have played before already, please turn over.
Standard Game
There are four stages to preparation, each with a few steps to follow:
- Choose your card colour and who attacks or defends.
- Shuffle all card decks separately, then draw your army.
- Build the game area in the playing space.
- Deploy your army within the playing space.
1. Card Colour & Attack/Defend
Players should first choose which card colour they are going to play, separating the red-sandstone and blue-granite elite and regular decks. Players should then take and display who is attacking and who is defending for each army.
2. Draw Your Army
Before drawing your army, the players should decide the size of battle they want to play - every faction always has two elite units, but the amount of regular units is flexible:
- 2 - Small, light skirmish game (10 mins)
- 4 - Average, tactical game (20 mins)
- 6 - Large, strategic game (30 mins)
- 8 - Epic, multi-phase strategic game (40 mins)
Step 1 | Factions - Each player should draw one faction card at random, keeping it hidden from their opponent, and review the faction's power and elite units.
Step 2 | Elite Units - Each player may now look through the elite deck to find their two elite units (shown on the faction card), also keeping them hidden.
Step 3 | Regular Units - Finally, each player may draw from a shuffled regular unit deck, the number of cards agreed for the game size - once more keeping them hidden.
3. Build the Game Area
Once you have your armies made up of a faction card, elite and regular units, you will need to build your game area. The size of the game area, with the number of units, will reflect the game time - and epicness of the battle.
- 6x8 - Small, light skirmish game (10 mins)
- 8x8 - Average, tactical game (20 mins)
- 8x10 - Large, strategic game (30 mins)
- 10x10 - Epic, multi-phase strategic game (40 mins)
Matching number of units to game area (small with small, epic with epic), will offer the best game experience, but mixing and matching is still fun.
The game is best played with large army size, and large game area.
[Diagram: small game area.]
When making a game area, always make sure that there are an even number of rows, splitting the area in two. The two most inner rows are no man's land - this cannot be deployed on be either army. [Printed as "cannot be deployed on be either army".]
4. Deploy Your Army
With the game area set, the armies ready, attacker and defender can now deploy their units either side of no man's land. Starting with the attacker, place a single unit, elite or regular, face up in on your side of the game area.
Once placed, the defender can deploy their first unit the same way. Attacker and defender should now take turns in deploying a unit at a time unit all units are placed. [Printed as "a unit at a time unit all units are placed"; "until" is presumably intended.]
With armies deployed, both players may reveal their faction cards and the game can begin - with the attacker taking the first turn.
Everything is set for you to now enjoy the game. Read on to uncover detailed information about the mechanics, units, powers and how to solve edge case situations.
Playing the Game
Turns and Actions
Armies take turns starting with the attacker. Each turn has three action points, which must be spent in a number of ways:
Movement - A unit must move no more than the number of spaces displayed, forward, backward or to the sides - no diagonals. Not all moves need to be carried out in an action. Movement must occur within the turn prior to an attack to power up a charge.
Attack - A unit may attack forward or to the sides. Attack damage is always the same, no matter the unit health or roll of the die. An attack (including charge), and any counters, must be completed before moving to the next attack or action. A player does not have to attack when an attack is viable and an action is available.
[Diagrams on this page: the attack patterns for Melee & Mounted units (forward and both sides, adjacent), Ranged (1 Space) units (forward and both sides, adjacent) and Ranged (2 Spaces) units (forward and both sides, up to two spaces).]
About Face - A unit can turn 180 degrees. This action can only be played on a single unit at a time (see adjacent actions), and doesn't power a charge.
Swap Position - The unit may swap positions with a friendly unit it is adjacent to. This action can only be played on two adjacent units, and doesn't power a charge.
Faction Powers - On their turn, a player may spend an action point to use a faction power. The player must mark the power to show it has been used - once marked the action cannot be undone.
NOTE: Powers can define style of play and tip the balance in favour of your side when used. They can instantly grant an effect or power up remaining actions in your turn.
Adjacent Actions
Adjacent units may move or attack together for one action per group (rather than one per unit). This counts for only one line at a time (column or row) - if there is a T shape of units, the top horizontal line or the lower vertical line can move or attack in unison.
The player must state before the outset of the action which line they are going to attack with or move with, if there are multiple available. They are, however, allowed to choose the target of attack on a per unit basis within the chosen line, and only required to announce this when the attack takes place.
If adjacent cards have different values for movement, they must all perform the lowest number.
[Diagram: the player wishes to move three adjacent cards, but they are adjacent in both column AND row, which is not allowed (in one action).]
Combat
When a player uses an action to attack, the card(s) may act just once (one target) per attack card - units may have two viable targets, but only act on one. Diagonal attacks are not permitted.
Attack - Units may only attack in certain directions and by a certain number of tiles. Units may have more than one attacking option, the player may choose which to go for when they resolve that card's attack. When attacking with adjacent units, your units can attack independently (a unit attacks forward, whilst the adjacent unit attacks to its side).
Defence Strength - First the attacking player checks the defence of the card being attacked (shown as marks along the card's edge).
Attacker's Roll - The attacker can roll a single die to get a higher number than the defender on the side they're being attacked.
Success - If the player's attack is successful, their damage reduces the health of the defender. This is done by using the pen to mark the defender's health boxes that equal the attack.
Failure - If the player's melee attack fails, the defender counters if they both have a unit with the counter symbol - only one counter roll can take place.
Counter - A defending unit may only counter the attacker targeting them (who fails their die roll), and may only occur when both units have the same icon. The counter, if successful, reduces the attacker's health by the defender's damage. This in of itself cannot be countered.
Charge - Power up by moving within the turn, when a successful attack is scored, the charge will push the unit a number of spaces equal to charge strength. If the unit cannot move back, they concede additional damage by that number. When the attack is successful, charge is always applied and cannot be ignored. Charge can only be used once per unit per turn.
Ranged Attack - This may be done over the distance highlighted on the card (+1 range means it can attack the adjacent card, +2 can attack the neighbour of the adjacent). Both melee and ranged +1 units seem the same, they both hit adjacent enemies, but the ranged unit cannot be countered - they are not 'engaged'.
Ranged Targets - Ranged units can only fire forward and sideways by 1 or 2 tiles - although this is adjacent, unlike melee units, they cannot be countered (or counter). They cannot fire diagonally or backward, but can fire over ally or enemy units (though only if they have 2 range).
Faction Powers
3 Uses - Next attack scores +1 charge point. After actioning, this power grants the next attacking unit +1 charge to their attack, no matter what type of unit they are OR whether they are adjacent to the enemy. Normal charge knockback/damage rules apply.
3 Uses - 2 Free move actions this turn. The player may essentially sacrifice one standard action, where they can attack, move, turn or swap, in exchange for two movement actions. When applied to a unit, this allows them to take a normal movement action with their speed (1-3 spaces).
2 Uses - Next attack may use all units with valid target. All units on the player's side may now attack a valid target, ignoring grouping rules. Valid targets are, as normal, adjacent or within range that are not diagonal. Charge and counter rules act as normal.
2 Uses - Add 1 splash damage to enemy units adjacent to the target this turn. When a player is targeting an enemy and rolls a successful attack, the enemy unit cards adjacent to the target also have 1 damage applied. Diagonals are not allowed and charges are resolved normally (and prior to the splash damage).
2 Uses - Revive any dead unit to the back row with half health (3). Any dead player unit, which has received 6 damage and removed from battle, can be added back to the game area on the closest row to you - making sure the unit has three health boxes crossed off, so is at half health. Once placed, this unit can be used as if any other unit.
3 Uses - Move a single enemy unit up to 2 movement points. A player may pick any unit on the opponent's side and move them two spaces in any allowed direction, including an about face. This cannot be diagonal, or moved into an occupied space, or swapped with a friendly unit.
Additional Rules
This section lists specific rules or edge case resolutions. Feel free to determine your own outcomes for these conflicts in 'house rules', though these should be agreed upon before play begins.
Can actions be broken up?
No, the player cannot begin an action, say attack with three adjacent units, and begin a new action, say a move order, then return to the attacks. If the player sees a new opportunity during an action, they can sacrifice the remainder of moves or attacks in the action to begin a new one.
Can group moved cards go in different directions?
No, when you begin a group move with adjacent cards, they must move in the block they started with. They can move in any direction, except diagonal, but the adjacent edges must always be connected.
Group attack resolutions
When attacking in a group, or attacking multiple cards with multiple cards, the player may choose the target of each card when they get to them. They don't have to attack in any specific order, and they can pass any further attacks after the first one is made. By making the first roll of the first attack in a group, the player has committed to this action and cannot change their mind.
When is an action over?
When the player removes their finger from the card and is no longer touching it, the action is committed and is not reversible. If they then realise a consequence or a better action, they cannot change the action.
Can a unit attack with back to a unit?
No, all units cannot attack behind their facing, they must about face to carry out an attack or carry out another action.
What is a valid die roll?
A roll is valid when it leaves the player's hand and rolls on the table - it cannot be dropped or spun. If the die rolls off the table or is compromised and cannot land flat, then it must be rerolled.
Passing an action or turn
If a player chooses to pass an action, their opponent can apply 1 damage to any unit, even if it kills or defeats them. If a player chooses to skip a turn, then their opponent can apply 3 damage to any unit(s) - they can spread this around how they wish.