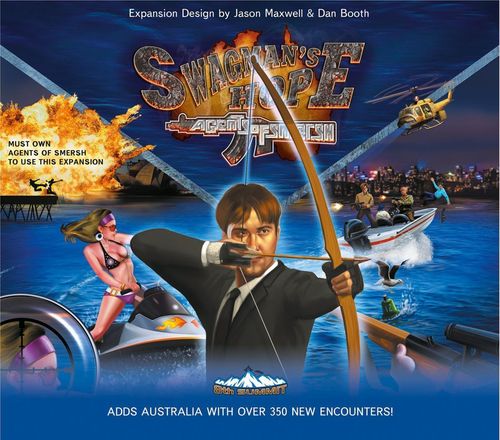
Agents of SMERSH: Swagman's Hope
Agents of SMERSH: Swagman's Hope Rulebook
Table of Contents
Table of Contents
Components
1 Australia Board 1 Book Of Encounters For Australia 1 Reaction Sheet For Australian Encounters 7 Australia Encounter Cards 6 Status Cards 4 Fate Cards 4 Villain Cards 6 Stranded Cards 2 Plastic Standees 2 UN Agent Player Mats 10 White Cubes 1 Black Cube 1 Aussie Butcher Henchman Mat 1 Token Sheet That Adds:
- 5 Red Intel Tokens
- 2 UN Agent Punchouts
- 1 Aussie Butcher 'Location' Token
- 7 Dead Drop Tokens
- 2 Red UN Tokens
NOTE: Swagman's Hope must be played with the base game of Agents of SMERSH and cannot be played independently. This expansion adds Australian locations to the base game, as well as over 350 new encounters.
Special Note about Solo play: to play with the Swagman's Hope expansion, a solo player must control two or more UN Agents. Australia is too much of a challenge for one agent!
Australia Setup
Follow the rules of setup for the base game according to the number of character cards in play, with the following additions and modifications:
- Place the Australia Board next to the main board, preferably near where Australia appears on the original game board.
- Place the brown Location Track marker on 0 (zero) on the Location Intelligence track on the Australia board. The original Location Intelligence track is not used.
- Place a Red UN Transport token at Swagman's Hope.
- Place a Closed Airport marker on Sydney.
- Arrange the Red Intel according to the number of players, as follows:
- 2 or 3 PLAYERS. Find the Red Intel token with the number 2 and the blue 'Weapons' icon. Place this token face up at Swagman's Hope and advance Dr. Lobo's track to 2. Proceed to Step 6 below.
- 4 PLAYERS. Find the Red Intel token with the number 1 and the blue 'Weapons' icon. Place this token face up at Swagman's Hope and advance Dr. Lobo's track to 1. Proceed to Step 6 below.
- 5 PLAYERS. The game does not start with any face up Red Intel in Swagman's Hope.
- Flip the remaining Red Intel tokens face down and mix them up. Place one Red Intel token face down on a random Australian city by drawing a Fate Card and looking at the number in the BLUE circle near the center of the card. Each number (1–4) corresponds to one Australian city, as shown by the blue circles on the Australia board.
- Shuffle the 7 Dead Drop tokens, face down, and place one, without looking at it, on each of the remaining Australian cities without a token.
- After players draw their Secret Mission cards, shuffle the 4 new Fate cards – corresponding to the coastal Australian cities – into the Fate deck. Note that Swagman's Hope does not have a Fate Card. When players draw Fate Cards for their Secret Mission, and when adding starting Yellow Intel to the board for a 2-character game, ignore any Australian Fate cards and redraw. After all players have selected their Secret Mission Cards, shuffle any discarded Fate Cards back into the deck.
Sticky note (setup): An Australian location cannot be a card selected for a Secret Mission, nor can an Australian Location be a starting location for Yellow Intel in a 2-character game.
Aussie Butcher Henchman Card
The Aussie Butcher. The Aussie Butcher's real name is Malcolm Duval, but he is referred to as the Butcher due to his rather bloody methods. Duval controls a loyal gang of criminals he pays to do his smaller jobs. If you want the Butcher to take care of a problem personally, it will cost you. Duval haunts dark streets and alleyways, and is never without a set of his favorite throwing knives.
Level 1. TEST SPYCRAFT -1 to foil the Aussie Butcher's plans.
- WIN: UN TRANSPORT.
- LOSE: 2 INJURIES OR LOSE 1 RESOLVE.
Level 2. Roll a D6 to determine what Basic Skill is tested at [-2] modifier. Result: 1 = SPYCRAFT; 2 = PERSUASION; 3 = DECEPTION; 4 = ATHLETICS; 5 = HAND TO HAND; 6 = YOUR CHOICE.
- WIN: GAIN 2 RESOLVE. FLIP THIS CARD.
- LOSE: LOSE 1 RESOLVE; MOVE TO INDONESIA.
Changes to Base Game Rules
Secret Missions
IMPORTANT RULE CHANGE: Characters now receive a reward for EACH of the two Secret Mission city locations they visit. The reward is selected at the end of the turn in which the character started an encounter at that location. It does not matter if the player is forced to change locations during their turn. The Fate Card for the completed mission should be discarded and is not replaced. Thus each character may complete a maximum of two Secret Missions. Rewards available are the same as in the base game.
Sticky note (how to select a random city in Australia): Australian cities are numbered from 1 to 4. Draw a Fate Card and look at the number written inside the blue circle (the number used in Ocean Encounters when using the Encounter Book). Find that corresponding city on the map.
Movement in Australia
Movement between the four coastal Australian cities occurs as normal, with the exception that it requires 2 movement points to travel between DARWIN and SYDNEY, and between MELBOURNE and PERTH. Players may spend 1 Resolve to gain 1 movement point if the player already has 1 movement point and needs another movement point to cross a route that requires 2 movement points. Partial travel between these spaces is not allowed.
Swagman's Hope is considered to be connected to all four coastal cities. Moving from a coastal city to Swagman's Hope, or vice versa, takes up the player's entire movement phase, regardless of how many movement points they have. Players may not make any other move before or after moving into or out of Swagman's Hope. Note: players may not enter Swagman's Hope under any circumstances unless at least 1 Red Intel token is present there (no one in their right mind would go to Swagman's Hope unless it was absolutely necessary).
Players may not move into the Australian Outback except as the result of a Stranded Card (see below).
Character Limits on UN Transports and Top Secret Cards
IMPORTANT RULE CHANGE: A player, at the end of his turn, may have no more than 3 of either UN Transports or Top Secret cards (not combined, so a player may have 3 UN Transports and 3 Top Secret Cards). They must discard down to 3 at the end of their turn.
INTEL OVERFLOW = 6 or more... No matter the number of characters in the game, even in a 5-player game.
New Rules
Red Intel
Red Intel represents brilliant scientists of interest to the UN… and to SMERSH!
Whenever Red Intel must be added to Australia, if there are no Red Intel tokens left in the supply, no Intel is placed in Australia. Red Intel never appears outside of Australia.
Any reward in either Encounter Book, card or Henchman that rewards 'Intel' being gained refers only to YELLOW INTEL. Players may never gain Red Intel from base-game encounters.
Any penalty that results in Intel being lost from the pool or board may apply to EITHER COLOR unless a particular color is specified.
On the face of each Red Intel token is a number and an icon:
- Weapons (blue)
- Tech (green)
- Double Agent (yellow)
- Atomic (red/yellow)
At the end of the game, when determining whether the players have defeated Dr Lobo, the icons on Red Intel are counted in the same way as those on Yellow Intel. The numbers have no meaning during the endgame.
INTEL OVERFLOW: Red Intel in the four Australian coastal cities – but not in Swagman's Hope – is counted towards the overflow limit.
IMPORTANT CHANGE: When playing with SWAGMAN'S HOPE expansion, Intel Overflow limit is 6 or more, regardless of the number of players. This is different from base game rules.
If Intel Overflow Occurs
- Remove all Yellow Intel and all but one Location token, as in the base game (the Aussie Butcher token counts as a standard Location token for the purposes of overflow). Red Intel remains on the board.
- If there is Red Intel at any of the four Australian coastal cities, players must choose one of those Red Intel tokens to flip up and move into Swagman's Hope. If Red Intel is moved into Swagman's Hope, Dr. Lobo's track should be advanced by the number written on the Red Intel (1 or 2). Swagman's Hope may contain any number of face-up Red Intel.
- If there is no Red Intel at any of the four Australian coastal cities, players must place one Red Intel token from supply face down at a random Australian coastal city. If no Red Intel is available in supply, then no Intel is added to the board.
Rescuing Red Intel
In the city of Swagman's Hope, Red Intel can only be rescued by a player who PASSES the encounter first (if outside Swagman's Hope you do not need to pass the encounter first to pick up the Red Intel). On successful completion of an encounter (even if the player was moved away), the player may take ONE Red Intel from Swagman's Hope (player's choice if there is more than one token there) and place it, face up, into the Intel Pool. Dr. Lobo's track then moves BACK 1 or 2 spaces, corresponding to the number on the token.
The Aussie Butcher
Whenever an Australian Fate Card is drawn while placing a Location Token, place the Aussie Butcher's token on the appropriate city instead of a green Location Token. His identity is never hidden. If subsequent Location Tokens are to be placed in Australia while the Aussie Butcher is already on the board, green Location Tokens are used instead.
When the Aussie Butcher's token is on the board, treat it as a green Location Token for the purposes of encounters and Intel overflow. If a player encounters the Aussie Butcher's token and passes the skill check, remove the token from the board and advance the Aussie Butcher (and Location Track) by 1.
During book encounters, players may run into the Aussie Butcher's gang. The difficulty of the skill check may be based upon the current LEVEL of the Aussie Butcher. If a player passes such an encounter, do not increase the Butcher's level or advance the Location Intelligence track. The Butcher only levels up when his token is encountered on the board and the player passes the encounter.
Encounters in Australia
Encounters in Australian cities are conducted largely as in the base game, using the rules for the Book of Encounters. Each Australia Encounter Card includes two sections: one for the four coastal cities, and one for Swagman's Hope. Make sure you use the correct encounter for your location. Remember that you may not travel to Swagman's Hope if there is no Red Intel present there.
All skill checks in Australia are conducted using the base-game rules. If the check is failed, advance Dr Lobo's track by 1 space as normal unless the encounter states otherwise.
IMPORTANT: ENCOUNTERS IN SWAGMAN'S HOPE. When drawing a Fate Card to determine the last number of your encounter in Swagman's Hope, players always use the number in the BLUE circle that ranges 1–4. Ignore the numbers for "With Intel" or "No Intel". Determining the final number of a Swagman's Hope encounter is exactly the same as if you were at an Ocean location.
The following recaps the base-game encounter rules, modified for use with the Swagman's Hope expansion:
- If you are in a coastal city and there are no Intel or Location tokens, or you do not wish to encounter them, draw an Australia Encounter card and have a 'No Intel' encounter as per the base-game rules.
- If you are in a coastal city and encounter an Intel token, place the token in the Intel Pool or exchange it for a Location token, as per the base-game rules. Then draw an Australia Encounter card and have a 'With Intel' encounter.
- If you are in a coastal city and encounter a Location token or the Butcher, encounter the appropriate Henchman as per the base-game rules.
- If you are in Swagman's Hope, draw an Australia Encounter card and have an encounter by referencing a Fate Card and using the number in the BLUE circle (1–4) to determine the third number of the encounter paragraph (the process is similar to Ocean Encounters in the base game with Book of Encounters). You may take 1 Red Intel from Swagman's Hope only if you PASS the encounter.
The Stranded Deck
As a penalty (or reward) for some encounters in Australia, a player may be STRANDED! If this happens, the player immediately moves their character token to the Australian Outback region, then draws a card from the Stranded Deck and places it face down next to their character mat without looking at it. On that player's NEXT turn they skip their movement phase and read the Stranded Card as their encounter. The encounter will provide details, perhaps moving the player again, and revealing where the player should move their character token when the encounter is complete.
Red UN Transport Token
This is immediately claimed by the first player to travel to Swagman's Hope; they do not need to pass an encounter to claim it. That player must immediately decide either to keep the Red UN Transport for himself or give it to any other player. The Red UN Transport may only be used once to fly INTO Australia. An extra Red UN Transport is available that may be used for Epic games.
Blue UN Transport Tokens
Blue UN Transport tokens may be used to travel OUT OF Australia, but may NOT be used to fly INTO Australia.
Dead Drop Tokens
Dead Drop tokens are claimed by the first player to land on a city that contains one. The bonus should be applied immediately, before any encounter. Tokens are not replaced.
Setup of Dead Drop tokens: At start of game place all Dead Drop Tokens in a pool, this side up, and shuffle. Once Dead Drop Tokens are collected by any player, remove that
[Source note: the printed sentence above ends at "remove that"; the rest of the sentence is not present in the source, so nothing further is transcribed here.]
- The Bomb: All players in Australia take 1 Injury. If any player meets or exceeds their maximum injuries, move their player token to Paris, and advance Dr. Lobo by drawing a Villain Advancement card.
- Intel: The player may either take a Yellow Intel Token from supply and place it in the Pool, or may exchange one Yellow Intel in the Pool with one Red Intel from supply.
- Blue UN Transport: Player receives a BLUE UN TRANSPORT from supply.
- Top Secret: Draw 2 Top Secret Cards, keep 1 and discard the other. A Player may not have more than 3 Top Secret Cards in their possession by the end of their turn.
- Up Any Skill: Raise any Basic Skill by 1.
Sydney Airport
Sydney airport starts the game closed, but can be opened (and re-closed) by 'End of Turn' events on the new Villain cards.
Encounter Cards
Encounter Cards for Australia refer to two sets of encounters per card. The top information applies if the player is having an encounter at a coastal city, and the bottom information applies if the player is having an encounter in Swagman's Hope.
(Card callouts: "If having an Encounter in a Coastal City in Australia" points to the top section; "If having an Encounter in Swagman's Hope" points to the bottom section.)
New Characters
Vinny Carter
During setup, add a third Fate Card for Vinnie's third Secret Mission. The player controlling Vinny must complete Locations 1 and 2 (in either order) before he can complete the third Location. If the player has an encounter at Location 3 before visiting Locations 1 and 2, he forfeits the special reward for Location 3. The player may still claim standard mission rewards for completing Locations 1 and 2 as per the base-game or Swagman's Hope rules.
If the player has an encounter at the third location after completing Locations 1 and 2, the player receives the V-1 reward: take all the Villain cards that have advanced Dr. Lobo's track, shuffle them, and remove one at random, adjusting Dr. Lobo's track accordingly.
Sheena Mars
The player controlling Sheena gets to assign 7 points to her starting Basic Skills. For example, the player may start Sheena at 3 for Persuasion, 2 for Hand to Hand, and 2 for Spycraft. That totals 7 points, leaving the other two Basic Skills (Athletics and Deception) at 0.
Optional Rules
Making the Game Easier
Open Sydney airport and keep it open the entire game, ignoring any instructions to close it.
Next, allow each player to select an additional TOP SECRET card during setup. Remember, players may not hold more than 3 Top Secret Cards at the end of their turn.
Top Secret and UN Token Limits
As noted above, players may not hold more than 3 TOP SECRET cards and 3 blue UN tokens at the same time. You may wish to rule that, instead of discarding down to 3 at the end of the player's turn, a player who draws a fourth TOP SECRET card must immediately discard either the card just drawn or one from their hand without playing it.
Epic Rules Variant
Are you ready for a real challenge?
Epic rules require at least 3 UN agents and may play with up to 5 UN agents. Players must reach 6 on the Location Track located on the Swagman's Hope board.
When playing with epic rules, no matter the number of UN agents (players), Intel overflow occurs when there are over 6 or more Intel tokens on the board, including Red Intel not in Swagman's Hope.
Setup: Each player begins the game with one of their basic skills increased by 1 and with an additional Top Secret Card. Also, a 2nd Red UN Transport Token is provided to help players in Epic Scenarios. Whenever a player is rewarded a UN Transport for any reason (not during setup), this 2nd Red UN Transport may be taken instead of a Blue UN Transport. It may be rewarded only once then returned to the box after use.
Frequently Asked Questions
Q: Does the 'Explorer' Status card give a player a (+1) when having an encounter through a stranded card?
A: Yes.
Q: When instructed to remove Intel from a region or continent, do I remove all Intel from that region or continent?
A: Yes.
Important Rules to Remember
-
OVERFLOW: When using this expansion, Intel Overflow is equal to 6 or MORE no matter the number of players or UN Characters in the game. When determining Intel Overflow, Red Intel must be counted, but only when it is in Coastal Australian Cities. You do not count Red Intel that has moved into Swagman's Hope. Additionally, Red Intel is not removed during an Intel Overflow. It stays on the board and will count towards the next Intel Overflow Limit.
-
Red Intel in Swagman's Hope will temporarily advance Dr. Lobo's track by the number on the Red Intel.
-
SECRET MISSIONS: When using this expansion, players may claim a separate reward for each of the two cities on their 'Secret Mission' Fate Cards. Secret Mission Fate Cards are not replaced after the reward has been claimed. If you draw an Australian Fate Card for a secret mission, draw a replacement, then shuffle the Australian Fate card back into the deck.
-
Don't Forget to add the Bonus Dead Drop Tokens to the coastal cities in Australia during setup.
-
There is now a limit to the number of Top Secret Cards and UN Tokens a player may have in their possession by the end of their turn (3 each).
-
To pick up Red Intel in the city of Swagman's Hope, players must PASS the encounter first. For coastal Australian cities, players pick up and use Red Intel in the same manner as Yellow Intel.
-
SOLO PLAY. A single player must control at least 2 UN Characters to play solo.
-
TIP: A 5 player game with this expansion is challenging. It is a good idea to get two characters inside Australia quickly and have them spend most of the game there.