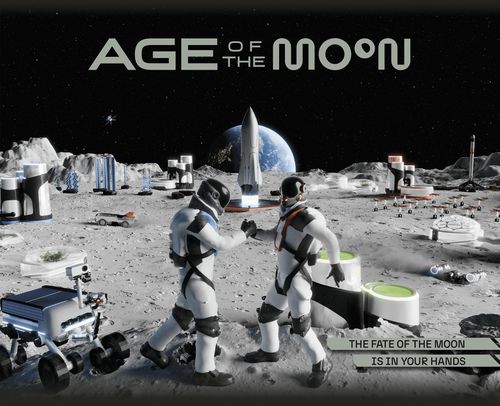
Age of the Moon
Age of the Moon Rulebook
Table of Contents
Table of Contents
Mission Objective
Your mission: build a fully functional lunar base.
To succeed, you must construct all four core modules - the habitat, greenhouse, crewed rover, and orbital habitat. But building a base on the Moon isn't easy. You'll need to develop supporting assets, manage resources wisely, and adapt to challenges along the way.
Only the most prepared and strategic commander will complete the mission.
Mission Control Map (Moon Board)
Your Mission Control Map (referred to as the Moon Board) is the central command grid for all lunar activity. Here, you'll oversee deployment, infrastructure status, and geopolitical positioning across the lunar surface and orbit.
Infrastructure Token Regions: In these hexagonal spaces, you will place the hexagonal tokens of the different structures you build during the game.
Rocket Market: This is where you can purchase launch vehicles to both lunar surface and orbit.
Round Marker: You can use the round marker to track the six mission phases.
Ongoing Impact Area: Some negotiation or event cards have effects that last for several rounds or the entire game. These cards are placed in this area of the board.
Nodes: These lines connect one space to another. For a structure to be considered operational, all of your structures must be connected by adjacent spaces. This rule does not apply to rovers.
Resource Bonus Areas: Indicates high-value lunar zones. Infrastructure built in these areas is powered up, producing an extra resource of the same type each round to support your mission.
Moon Quarters: Some events directly impact a quarter of the lunar surface. Roll the die to see which area is affected!
International Community Points Scale (ICP): The ICP reflects your diplomatic standing and influence. Positive prestige may unlock support or bonuses, while negative standing may trigger penalties or isolation.
Lunar Orbit: Place your orbiters (round tokens) in any space within the lunar orbit. Any orbiter token placed here is immediately considered active (operational) - no adjacency required.
Mission Infrastructure Modules
Constructing Operational Capability
Each infrastructure card has two sides. One side displays the blueprints for building the infrastructure, characterized by the player's color and featuring a blueprint illustration. The other side represents the fully constructed infrastructure, showing a detailed illustration of the operational asset.
- Side A (Blueprint): The side showing the blueprint of the infrastructure.
- Side B (Constructed): The side showing the fully constructed, operational asset.
Purchase Cost: Shows the resources you need to spend to buy this asset. Once purchased, flip the card to indicate it has been bought.
Payload: The rocket symbol indicates how much space the asset will take up inside a rocket when it is launched.
Produces: Indicates the resources you will receive each round when this infrastructure is operational.
Operating Cost: Some infrastructures require you to spend a certain amount of resources to keep them operational. Each round, you must pay this cost to receive the resources from its production. If you don't make the payment, you won't receive its production.
Categories
This information appears on both sides of the card. It helps you organize your cards in your play area. Each category has its own unique characteristics:
- Energy: These assets produce energy for your base.
- Science: These assets contribute discoveries and grant you science tokens.
- Commercial: These assets allow you to earn "Lunars" (the game's currency).
- ISRU: These assets enable you to extract resources (primarily water) from the lunar surface.
Habitation Infrastructure Cards
Build your base as efficiently as possible on the lunar surface. To win the game, you must construct the four main habitable infrastructure assets (habitat module, greenhouse module, crewed manned rover, and orbital habitat) and have them operational by the end of the round. You can distinguish these cards from others because they are placed horizontally instead of vertically.
Placement Type
This information appears on both sides of the card and helps you identify how and where each asset can be deployed on the board. Each placement type has specific characteristics and limitations:
- Orbital: These assets can be placed anywhere in the lunar orbit.
- Rover: These mobile assets can be placed independently from your main infrastructure.
- Habitational: The core infrastructure assets essential to achieving victory.
Tokens
Every time you successfully launch and construct an infrastructure module, place the corresponding token on the Moon's surface or in orbit. This token represents your deployed asset. Think of the token as the body of your infrastructure - the card holds the specs, but the token brings it to life on the map. Until it's deployed, your infrastructure is just a blueprint.
- Orbiter token (round).
- Surface token (hexagonal).
- Habitational token (hexagonal).
- Rover sign: Indicates the asset is mobile, it can be placed independently from your main infrastructure.
- Production: Indicates the resources you will receive each round when this infrastructure is operational.
Rocket Cards
Rockets are necessary for transporting your assets to the lunar surface or orbit.
The elements we can see on them include:
- Side A (Blueprint): Purchase Cost: The amount of resources needed to acquire the rocket. Once purchased, place it in your play area with the constructed side facing up, so you can launch it whenever you want.
- Both sides - Capacity: Indicates the capacity of the rocket to transport assets according to their payload.
- Both sides - Reuse Cost: Some rockets can be reused by paying only the amount indicated in the lower left corner of the card. You can reuse a reusable rocket only once per round.
Event Cards
Event Cards simulate the unpredictable reality of lunar operations: solar flares, political shifts, resource shortages, and more. Each round, one may strike, forcing you to adapt. Based on real-world scenarios, these events test your resilience, challenge your plans, and reshape the mission landscape.
There are two types of events:
- Global: Events that affect all players simultaneously and change the dynamics of the game for everyone.
- National: Events that affect only one player, providing them with a unique advantage or challenge.
Description: This section provides a detailed description of the event. Some events will remain active for the rest of the game and will be placed in the "Ongoing Events Area" of the board.
Impact: This section indicates the repercussions the event will have on the game.
Negotiation Cards
Negotiation Cards are your commander's toolkit for diplomacy and disruption, use them to strike deals, forge alliances, or spark conflict at critical moments. Keep them hidden until played, and gain more by trading four identical resources. Mark official agreements with extra meeples on the board. On the Moon, power isn't just what you build - it's what you negotiate.
There are two types; conflict and negotiation:
- Conflict: These cards are used to create confrontations between players or to interrupt actions.
- Negotiation: These can be used to exchange resources, propose alliances, or resolve disputes during the game.
When proposing a negotiation to a rival (whether it's a negotiation or conflict card), you must read them the negotiation description, and they will decide whether to accept it or not.
If they accept, you will receive the benefit indicated in green; if they reject, you will suffer the penalty indicated in red.
You can make ongoing deals with players and place the negotiation card in the "Ongoing Negotiation Area" of the board.
Game Set-up
-
Moon Board: Place the board in the center of the table within reach of all players.
-
Rockets: Shuffle the rocket cards and place the deck next to the board. Flip the top 4 cards face up and set them aside. This will be the rocket market. Reveal a new one each time a rocket is bought or scrapped.
-
Resource Reserve: Set up the resource reserve to one side of the board. Each player takes 3 lunars at the beginning of the game.
-
Negotiations: Shuffle the negotiation cards and place them on the board in their designated area to form a deck. Afterward, give 3 negotiation cards to each player. Keep them secret.
-
Events: Shuffle the event cards and place them on the board in their designated area to form a deck.
-
Players: Each player draws a player card to determine your team.
- 6a. Arrange all your color cards in your play area, organized by category. Place the cards with the side showing your player color. Additionally, place the corresponding infrastructure token next to each card.
- 6b. Place a player marker on the 0 space of the ICP scale located on the board. Keep the remaining extra markers in your play area.
- 6c. Each color starts the game differently. Read the player cards and assume your starting positions.*
Component List
The set-up page lists the following components:
- 1 Moon Board.
- 2 Rocket Market (16 cards).
- 3 Resource Reserve (116 tokens).
- 4 Negotiations (32 cards).
- 5 Events (38 cards).
- 6 Infrastructure (64 cards).
- 7 Die (1).
- 8 Player cards (4).
- 9 Player markers (4+4).
Player Cards
Each player draws one player card. The four player cards are:
- P-01 Ecoharmonist (green): Looking for harmony and nature. Team advancing sustainable living and environmental engineering. Their unique approach centres around achieving harmony with the lunar environment, ultimately resulting in the creation of a fully self-sustaining ecosystem.
- Unique Starting Advantage: Start with an H2O Prospecting Orbiter (ISRU) deployed in orbit and take 1 additional water resource.
- Ongoing Player Advantage: 2:1 Water Exchange Condition: Exchange 2 tokens of the same resource type to receive 1 water. General 4:1 Exchange Rule: At any time, exchange 4 tokens of the same resource for 1 resource of your choice or a Negotiation Card.
- P-04 Innovator (blue): Technology innovators. This team aims to push the boundaries of technology on the lunar surface, led by elite engineers and entrepreneurs from the world's leading tech companies, known for their innovative spirit.
- Unique Starting Advantage: Take one Reusable Rocket card. You can use it straight away.
- Ongoing Player Advantage: Rocket Reuse Conditions: Pay any resource to reuse a reusable rocket. 4:1 Exchange Rule: At any time, exchange 4 tokens of the same resource for 1 of your choice or a Negotiation Card.
- P-03 Diplomat (red): Visionaries and diplomats. A team known for their collaborative spirit and scientific expertise. Their international backing gives them an edge in negotiations and alliances, allowing them to secure favourable trade deals and collaborations.
- Unique Starting Advantage: Take one more Negotiation Card from the stack.
How To Play
A game of Age of the Moon is divided into rounds, which follow these six steps in order. Before beginning the next step, you must have completely finished the previous step.
TIP: You can trade 4 tokens of the same resource for a different resource or a Negotiation card.
Turn Order
At the start of the game and each new round, the player with the highest ICP becomes the Start-Player. Then, the play proceeds clockwise.
At game start, the Diplomat (Red Player) is the Start-Player due to their unique advantage, until another team ties or passes them in ICP at the start of a round.
If there's a tie for highest ICP, tied teams roll the die, and highest roll becomes the Start-Player.
Important: Turn order never changes mid-round, even if ICP shifts due to Events or Negotiations.
Phase 1 - Refill & Produce
1.1 Budget Refill: Each player receives 3 Lunars at the beginning of each round.
1.2 Asset Production: Take production only from assets that meet all three conditions:
- Card is on its Constructed side.
- Matching token (surface or orbital) is deployed on the board.
- If applicable, card was Operated in the previous round (Phase 6).
Collect the exact amount of resources shown on the card "Produces" section.
1.3 Additional Resources from the Board: If a surface token sits on a Lunar Region with a matching resource icon, take +1 extra of that resource. Rovers also gain this bonus. You must operate the asset to earn both the regular production and the bonus. Skipping operation means no resources are gained.
1.4 Resource Shortage Resolution: All resources are finite, scarcity is part of the challenge! If the supply runs out, claim produced resources in Start-Player order until a pool empties. Proceed to Phase 2 once every player has finished collecting their production.
Phase 2 - Events
From the second round on, each player (in Start-Player order) draws, reads, and resolves one Event card.
If you're asked to pay a token you don't have, pay what you can and ignore the rest (resources can't go negative). Discard each card after resolving, or place relevant cards in the Ongoing Events Area.
Phase 3 - Negotiation (optional)
Conversations start now and end when no player wishes to negotiate further.
Playing Negotiation / Conflict Cards:
- When you wish to negotiate, choose a target player and show them your selected Negotiation or Conflict card.
- Read the card aloud.
- The target player must choose to Accept (apply the green effect) or Reject (apply the red effect). A STOP card can cancel one Conflict card when revealed.
Discard all played cards afterward.
If required, use the additional player meeples to mark the agreements on the board.
When all are "Done," move clockwise to Phase 4.
TIP: Additional Negotiation Cards can be obtained through other negotiations and events, or by paying 4 tokens of the same type to draw a new negotiation card.
Phase 4 - Purchase Assets & Rockets
4.1 Buying Infrastructure: Now it's time to grow your space program by spending your hard-earned resources. Starting with the Start-Player and proceeding clockwise, take turns buying as many assets and rockets as you want and can afford. Spend the corresponding resources on your turn, and continue taking turns until all players have passed.
When you purchase an asset, flip it to its constructed side and place the matching infrastructure token on top. The asset is not yet operational - you'll need to send it to the Moon on a rocket before it can be used.
For example: In the first round, the green player decides to construct the infrastructure "POWER ORBITER" by paying 1 Lunar they received during setup. They also choose to invest in a "REUSABLE ROCKET," using their remaining 2 Lunars. Since they no longer have resources left, they pass their turn to the next player in a clockwise direction.
At any time, you may trade 4 tokens of the same type for 1 of another type or use your Player Advantage.
4.2 Buying Rockets: When you buy a rocket, place it in your play area with the constructed side facing up - this is your ride to the Moon! Rockets are used to transport assets into orbit and onto the lunar surface.
After each purchase, draw a new rocket to refill the transport market, keeping 4 available at all times.
You may buy and launch more than one rocket per round, as long as you can afford them. Each rocket can carry multiple payloads, as long as you don't exceed its capacity.
TIP FOR BEGINNERS: The orbiters are the cheapest infrastructure to jump-start production; bigger projects need a solid resource production first.
Phase 5 - Launch & Deploy
Once all players have finished their purchases, it's time to launch! In Start-Player order, each player may launch one rocket at a time, continuing in turns until everyone has launched all they wish.
You may launch multiple rockets per round. You may also pause between launches, especially if you're waiting to see how risky landings go.
5.1 Launching into Orbit: No risk involved. Rockets heading into Lunar Orbit don't require a die roll. Load your rocket with asset tokens (just make sure not to exceed its maximum capacity) then place the cargo in orbit. You don't need to fill the rocket completely - send what you want, when you're ready.
5.2 Landing on the Moon Surface: Landing on the Moon involves risk. For each rocket carrying at least one surface asset, roll the die to see if the landing succeeds:
ROLL A DIE
- (3, 4, 5) - Success! Your rocket lands safely. Place the asset tokens on the Moon.
- Face (1) - Success + Bonus! Your launch makes headlines and captures public imagination. Gain 1 extra Lunar for future investments.
- Face (2) - Payload at risk! You must spend 1 Science token to recover the mission. If you don't, all carried assets are lost (but the rocket remains safe).
- Face (6) - Critical Failure (explosion)! Your mission ends in disaster. Both the rocket and its assets are lost. Discard the rocket card to the bottom of the rocket pile. Flip each asset card back to its blueprint side and place the tokens beside them. You'll need to reconstruct them before attempting another launch.
5.3 Deploy Successfully Launched Assets: If your launch is successful, you may deploy your assets on the lunar surface or in orbit:
- Orbital assets (round tokens) can be deployed in any orbital space.
- Surface assets (hexagonal token) must be placed on an empty hex on the board.
Surface Deployment Rules:
- Initial Placement Matters: Your first landing creates the foundation of your cable network. Choose your initial hex wisely - it determines the direction of future expansion. Landing in a crowded area or next to an aggressive player may limit your growth or force you into high-stakes negotiation.
- Adjacency Required: Except for rovers, all surface assets must be placed adjacent to your existing deployed assets.
- No Skipping or Overlapping: You may not place assets on hexes already occupied by another player's tokens, or skip over them. The only exception is if you've played a Negotiation card (e.g. Share a Region) that allows shared placement.
Once all rockets are launched and all assets placed (or lost to failure), the Launch phase ends. Time to Operate.
Phase 6 - Operate
Each team now has the opportunity to activate their deployed assets, turning their investment into real output. This step is optional but essential if you want your assets to generate resources or ICP.
Assets that require an operation cost won't produce anything unless they are activated during this phase (even if they were just deployed).
To operate an asset, the player must declare which asset they are activating and pay the operating cost printed at the bottom of that asset's card. This cost typically includes combinations of Water, Power, and Science. Once the cost is paid, the asset becomes active for one round.
Players may operate as many of their assets as they wish in a round, so long as they can afford to pay each one's operating costs. There is no penalty for skipping operation.
Special Case - Rovers: Special rules apply to rovers, which are mobile assets rather than fixed infrastructure. Use them as scouts or to block other players.
During the Operate phase, rovers may move one adjacent hex at a time by paying their Operating cost. Movement is optional.
Rovers can't enter hexes occupied by other assets, except for other rovers (your own or other players') or when allowed by a sharing agreement.
You can place a rover in any empty hex on the board, away from your cable network.
TIP FOR PRO PLAYERS: For an extra challenge, keep playing until one player deploys all four habitation modules and covers their operating costs. Only then is the lunar base fully mission-ready!
End of Round
The round ends after completing step 6. The player with the highest ICP score becomes the Starting Player for the next round. Then, begin the new round starting again from step 1.
End of Game & Victory Conditions
The game ends when one or more players have fully deployed the four critical components required for a habitable lunar base.
These four Habitation Modules are:
- Habitat Module: your crew's shelter on the lunar surface.
- Greenhouse Module: for long-term food and oxygen supply.
- Crewed Rover: essential for lunar mobility and exploration.
- Orbital Habitat Module: your emergency escape and orbital logistics node.
Tiebreaker
If two or more players finish their four critical components in the same round, proceed to tiebreakers in the following order:
- Fully Operational Base: The tied player who is able to successfully operate all four habitation modules during that round wins. This proves their base is not only built but also functioning.
- Highest ICP (International Community Points): If multiple players can operate all their habitation modules, the player with the highest position on the ICP Track wins.
Shared Victory by Collaboration
If two or more players formally agree during the Negotiation Phase of the decisive round to share responsibility for completing the final colony components, and this agreement is made explicitly and publicly, then all collaborating players are declared joint winners once all four habitation modules are fully deployed and operational.
Important:
- The deal must be explicit, public, and finalized before the Launch & Deploy phase begins.
- Victory is only granted when all four habitation modules are deployed on the board.
- Both players must prove their habitation modules are operational, either by paying operational costs individually or through joint effort.
- If any collaborator fails to provide promised resources or withdraws support before the Operate phase, the shared victory collapses and normal tiebreak rules apply.
Other Endgame Scenarios
The Board is Full: If you cannot place more modules due to overcrowding or blockage, your options are:
- Use Negotiation cards to share a region and expand through another player's area or to collaboratively construct new assets.
- Use the "Destroy an Asset" Negotiation card to remove one of your own or another player's surface assets.
- Move your rovers to scout new areas or free up space for your expansion. While you can't start a new base from a rover that's disconnected from your existing network, you can use it to block opponents or secure a hex for later asset deployment.
Appendix: Negotiation Cards FAQs
The appendix table lists each Negotiation Card with its impact (Accepted / Rejected) and its Tips & FAQs.
Exchange Resources: Propose to exchange equal amount of resources with another player, e.g. 2 water cards for 2 power cards.
- Accepted: 1 ICP for each player in the deal.
- Rejected: -1 ICP for a player who deliberately rejects the card.
- Tips & FAQs: Only equal-value resource trades are allowed. Unequal or mixed exchanges are not permitted. This card applies strictly to resource exchanges, not services or other assets. If a player refuses a valid exchange they are able to fulfill, they lose 1 ICP. If they do not have enough resources, the exchange simply does not proceed and there is no penalty. Agreements remain valid for the rest of the game unless one of the involved players suspends it.
Sharing a Region: This card allows two players to share a single space on the board, with a maximum of two assets placed in one spot. It also applies to fields containing extra resources.
- Accepted: 1 ICP for both players involved.
- Rejected: -1 ICP to the player who rejects the card.
- Tips & FAQs: To mark a deal, place your player marker or both asset tokens on the shared location. Use this card when space is limited or to access another player's infrastructure (e.g. cables, pipes). A maximum of two assets can be placed in a single Moon location as part of this deal. Any additional resources provided by the board apply to both eligible assets in the shared location. If the shared area is destroyed, all assets there are lost.
Collaborative Construction: Offer to collaborate on the construction of an asset. Both players will share the production equally. This effect takes place immediately, and both players must cover the full operational costs.
- Accepted: 1 ICP for each player.
- Rejected: The rejecting player loses -1 ICP, and the card is discarded.
- Tips & FAQs: Mark the deal by placing an additional player marker on the asset. Collaboratively constructed assets must be connected to the base of at least one participating player, unless no modules have been deployed on the board yet. Both players must cover the full operational costs individually to benefit from production. This requirement does not apply to rovers.
Temporary Sharing Agreement: Propose sharing any existing asset - yours or another player's, on the surface or in orbit. Both receive equal production for one round and cover full operation costs (if applicable).
- Accepted: 1 ICP for each player.
- Rejected: Minus 1 ICP to the player who rejects the card.
- Tips & FAQs: Mark the deal by placing the other player's marker on the asset or replacing it with their asset token. Shared assets produce the same as normal assets. If placed on a privileged field, both players benefit from the increased output. Both players must be able to cover production costs when applicable; otherwise, the asset does not produce. Shared rovers may only be moved if both players agree. If a shared asset is destroyed, all associated benefits are lost.
Sell an Asset: Sell an infrastructure asset to another player in exchange for money, resources, or other assets of your choice.
- Accepted: 1 ICP to each player in the deal.
- Rejected: No impact.
- Tips & FAQs: Multiple assets can be exchanged in one deal, if both players agree. Once exchanged, the new owner assumes all risks and may move or use the asset according to its nature. Completed exchanges are final and cannot be renegotiated. Be strategic: consider both current and future value before agreeing to a trade.
Peace Treaty: Offer a peace treaty to end a conflict between the other players, promoting stability.
- Accepted: 1 ICP to each player participating in the treaty.
- Rejected: Minus 2 ICP if any player breaks the treaty.
- Tips & FAQs: A diplomatic way to earn ICP, especially when not directly involved in conflict. Breaking the treaty means any involved player deliberately attacks another treaty member. Place this card in the Ongoing Negotiation Area to keep the treaty active.
Free Negotiation: Open the floor to trade and negotiate anything you need with another player (e.g., assets, resources, ICP, etc.).
- Accepted: 1 ICP to each player in the deal.
- Rejected: No impact.
- Tips & FAQs: No initiation cost is required to use the Free Negotiation Card. The card may be used once per negotiation, after which it should be discarded. If a negotiation fails, there is no ICP impact, and the card can be used again. Free negotiations may involve more than two players if all parties agree. Always clearly state all agreements to avoid any confusion. Use this card to launch surprise negotiations anytime, even outside the Negotiation Phase, e.g. to disrupt or support opponents' construction or launch.
Open Negotiation Privilege: [ONGOING] When revealed, you may initiate a negotiation at any time, even outside the Negotiation Phase, using your current hand.
- Accepted: This card stays in play unless an event forces you to discard it.
- Rejected: No impact.
- Tips & FAQs: Keep it visible and active; it doesn't get discarded after use. Only forced discard or exchange events can take it from you.
Stop Card: This card can be used to prevent any attack or action by another player that may cause loss of resources, ICP points, or assets. Applies to one action only. Play for yourself or to save others.
- Accepted: No impact.
- Rejected: Can't refuse the card.
- Tips & FAQs: Can be used only once, then discarded. It does not block future actions from the same player. The attacking player cannot refuse it. Must be played as the action occurs; cannot undo completed actions. Using this card causes a significant ICP penalty - plan it carefully to balance risk and reward.
Resource Steal: Request all resource tokens of one type from another player.
- Accepted: Minus 3 ICP for the player using the card.
- Rejected: Possible to reject only with the stop card.
- Tips & FAQs: Choose the resource type to steal from the targeted player's cards. You can use multiple Resource Steal cards separately, each causing its own ICP penalty. Be ready for possible counteractions from the targeted player.
Resource Monopoly: Request resources of one type from all opponents.
- Accepted: Minus 5 ICP for the player using the card.
- Rejected: Possible to reject only with the stop card.
- Tips & FAQs: Be mindful of the significant ICP penalty; weigh benefits against the cost. Timing is key - use when it offers the greatest strategic advantage. Prepare for possible retaliation and have a defense ready. If any opponent plays a Stop Card, your action is blocked but ICP penalty still applies. Opponents without the requested resource don't contribute.
Asset Destruction: Destroy a chosen infrastructure item (either another player's or yours) and restore access to a chosen Moon region.
- Accepted: When used against an opponent, move to the bottom of the ICP scale.
- Rejected: Possible to reject only with the stop card.
- Tips & FAQs: Clear key lunar regions strategically to open new construction opportunities. All assets in the targeted field must be removed. Brace for a heavy ICP penalty - choose your moment wisely. Prepare for pushback from those affected. Destroy your own or opponents' infrastructure; the area then becomes open to everyone. Destroying your own asset spares you from ICP penalty. If any opponent plays a Stop Card, your action is blocked but ICP penalty still applies.
Diplomatic Tension: Blame the other player for political tensions they are causing with their actions on the Moon. This card's effect lasts for one round only. A single player's accusation is enough to activate it.
- Accepted: -1 lunar when using the card, minus 2 ICP for the accused player.
- Rejected: Possible to reject only with the stop card.
Lunar Summit: Call a summit to discuss a major issue affecting all players. This can lead to a global agreement, such as clearing space or addressing ongoing events. Propose a new rule to address major issues affecting all players - either as a one-time effect or lasting for the rest of the game. Lead negotiations to reach majority consensus; proposals may be accepted, rejected, or require further discussion.
- Accepted: 1 ICP to the players that reached the agreement.
- Rejected: No impact.
- Tips & FAQs: Ensure fair, open dialogue where all players have a voice. This card can be used once to call a single summit. If no agreement is reached, it may be reused. Once an agreement is made, discard the card. New rules may override existing agreements and can be renegotiated with consent.
Lunar Espionage: Choose a player and decide whether to look at their negotiation cards.
- Accepted: -1 ICP for the player using the card.
- Rejected: Possible to reject only with the stop card.
- Tips & FAQs: May be used once to view all negotiation cards held by another player. You may keep this information private or choose to share it with others. The penalty applies even if the action is blocked by a Stop Card.
Joint Venture: Start a joint operation on a specific asset, e.g., building a shared power plant, or construct over an already existing asset. Negotiate the terms.
- Accepted: 1 ICP for each player involved.
- Rejected: No impact.
- Tips & FAQs: Team up to build major assets (e.g. power plant, base, orbiter) with one or more players. Clearly define contributions, profit/resource sharing, and exit conditions. Changes or exits must be agreed upon by all parties. Production halts if costs aren't fully covered. The asset produces normally; divide output as agreed - equally or proportionally.
Trade Embargo: Propose a trade embargo against another player to prevent their commercial assets from generating lunars. Requires approval from more than one player. The embargo is valid until the target player's ICP improves.
- Accepted: Voters lose -1 ICP. Place the card.
- Rejected: No impact.
- Tips & FAQs: The card remains in the Ongoing Negotiation Area as long as the embargo is active (i.e., until the target player's ICP improves).
Mutual Defense Pact: Enter a pact to defend each other against any conflicts. Agree not to use conflict cards against each other, defend each other with "Stop" cards if attacked, and support each other in votes.
- Accepted: Each player involved gains 1 ICP. Place card in the Ongoing Negotiation Area.
- Rejected: Players lose 2 ICP for breaking or rejecting the pact.
- Tips & FAQs: Great for alliance-building. Breaking the pact means knowingly refusing to protect the other player involved.
Economic Sanctions: Propose economic sanctions against a player who is advancing too quickly, to slow down their progress.
- Accepted: Targeted player - 3 on resources of their choice. Voters - 1 ICP.
- Rejected: Possible to reject only with the stop card.
- Tips & FAQs: The targeted player chooses which resources to give up. Only the voters lose ICP. Sanctions require a minimum of two voters to take effect.
Power Play: Use influence to manipulate a negotiation in your favor. Steal 1 negotiation card from another player or the bank.
- Accepted: -1 ICP for the player using the card against another player.
- Rejected: Possible to reject only with the stop card.
- Tips & FAQs: No impact if the card is taken directly from the bank.
Empty Card: Fill in the blank: Create your own Negotiation or Conflict scenario. What actions could disrupt lunar exploration?
Notes
- The printed manual labels the board's ongoing-card area "Ongoing Impact Area" on page 6, but "Ongoing Events Area" in the Event rules. Both names are kept as printed.