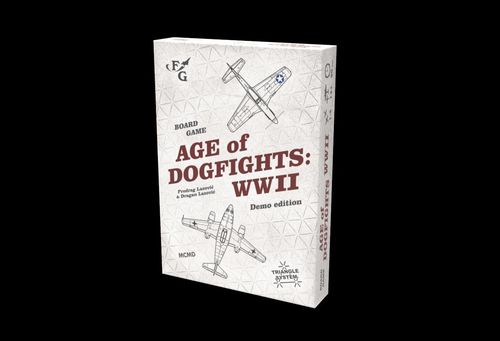
Age of Dogfights: WWII
Age of Dogfights: WWII Rulebook
Table of Contents
Table of Contents
- 1. Introduction
- 1.0.1 Rulebook Conventions
- 1.1 Game Components
- 1.1.1 Board
- 1.1.2 Dial Counter
- 1.1.3 Aircraft Tokens
- 1.1.4 Altitude Stands
- 1.1.5 Control Panels
- 1.1.6 Dice
- 1.1.7 Speed Indicators and Speed Calculator
- 1.1.8 Damage Markers
- 1.1.9 Chits
- 1.1.10 Task Markers
- 1.1.11 AA Gun Markers
- 1.1.12 Barrage Sectors
- 1.1.13 Pilot Markers
- 1.1.14 Weather Markers
- 1.1.15 Terrain Markers
- 1.1.16 Player Aids
- 1.1.17 Scenario Book and Posters
- 2. General Rules
- 3. Aircraft Movement
- 3.1 Movement Speed
- 3.1.1 Booster
- 3.2 Horizontal Movement (Level Flight)
- 3.2.1 Aircraft Agility (Turn Rate)
- 3.2.2 Turn Radius Limited by Speed
- 3.2.3 Turn Radius Limited by Mass
- 3.2.4 Changing Turn Direction
- 3.2.5 Zig-Zag Movement
- 3.2.6 Parallel Shift
- 3.3 Changing Altitude
- 3.3.1 Climbing
- 3.3.2 Descending
- 4. Air-to-Air Firing
- 4.1 Aircraft Armaments
- 4.2 Ammunition
- 4.2.1 Ammunition Tracking Using 'Re-sliding' (simplification symbol)
- 4.2.2 Decreasing Firepower (simplification symbol)
- 4.3 Aircraft Durability
- 4.3.1 Frontal Durability (simplification symbol)
- 4.4 Firing Directions
- 4.4.1 Fixed Guns
- 4.4.2 Flexible Guns
- 4.4.3 Flexible Guns When Tilted (optional rule)
- 5. Air-to-Surface Attacks
- 6. Surface-to-Air Firing
- 7. Other Rules
- Player Aid (summary sheet)
1. Introduction
1.0.1 Rulebook Conventions
Only text and diagrams without highlighted borders are necessary to play the game. Highlighted border colors are used for examples, optional rules and additional information:
- Green: text and images that describe and illustrate examples.
- Orange: text that adds suggestions, explanations or commentary.
- Purple: text that describes optional rules.
Rules and details marked with a "A" symbol (shown in the book as a triangle symbol) can be skipped if desired to further simplify the basic rules, as explained in 7.11 on page 51.
1.1 Game Components
The game comprises the following components, some of which must be assembled as explained in the Assembly Instructions sheet:
- Board (3 bi-fold segments with 4 clips)
- 2 Temporary Board Extensions
- 6 Approach Panels
- Dial counter
- 100 aircraft tokens
- 112 Altitude Stands
- 10 spacers
- 2 tilt compensators
- 41 Control Panels with 74 sliders (45 red and 29 green)
- 11 dice
- 36 Speed Indicators
- 2 Speed Calculators
- 46 Damage Markers
- 154 chits (bomb, rocket, fuel tank, mission, initial position, etc.)
- Task Markers (orange and purple): 6 rectangular, 6 ships, 18 point markers and 26 area corners
- 18 AA Gun Markers (orange and purple)
- 3 Barrage Sectors
- 40 Pilot Markers (red, green, blue and yellow)
- Weather Markers: 10 cloud markers, sun indicator and wind indicator
- 16 Terrain Markers
- 2 Player Aids
- Scenario Book
- 2 posters
1.1.1 Board
The board consists of three bi-fold segments, which can be firmly connected using clips included in the set. One side represents land and the other represents water.
If limited by table space, the board can be assembled from only two segments and the game can be played with fewer aircraft. If additional board segments are available (available for separate purchase), a larger board can be assembled.
Temporary Board Extensions are used for tracking flight paths beyond the board limits [3.9.1 - p.24].
Approach Panels are used if an aircraft or group of aircraft does not enter the battle at the start of the game (defined in each Scenario).
1.1.2 Dial Counter
The dial counter is used to track the number of Rounds played if the game is limited [2.1 Round Sequence - p.6], or if otherwise needed for a Scenario.
1.1.3 Aircraft Tokens
Age of Dogfights: WWII includes aircraft used by Germany, Great Britain and the USA between 1942 and 1945, mainly on the European battlefield. To provide maximum diversity within the basic game, almost all aircraft categories are represented: fighters, bombers, scouts, transport aircraft, patrol aircraft, etc. Some types have been included because of their specific characteristics, even if they did not play an important role during the war, to make the game more interesting.
Each token shows an aircraft illustration and designation number, as well as the most important aircraft characteristics.
Diagram 1 labels: Firepower (e.g. 16); Aerobatics ability; Basic Speed (e.g. 15); Agility (e.g. III with dots); Ceiling (e.g. L11); Durability (e.g. 3); Climb Rate; Descent Rate; Designation number; Double damage capacity; Large target; Flexible guns firing directions.
1.1.4 Altitude Stands
Aircraft tokens are attached to Altitude Stands that represent 14 different altitude levels, from LL (Low Level) to L13.
A small number of stands in each level have their tip folded, representing roll tilt (which indicates that the aircraft turned during its last movement Step [3.2 Horizontal Movement]).
If using many aircraft in a game, it is possible to run out of Altitude Stands for a certain height, so the kit includes spacers to lift Altitude Stands of a lower height to substitute the missing ones. There are small spacers (5mm tall) that add height L+1 and large ones (10mm tall) that add L+2. For example, if a large spacer is placed under an Altitude Stand L3, it means the aircraft token is currently at altitude L5.
Spacers can also be used to avoid frequent changing of Altitude Stands - it is simpler to insert a spacer under the stand than to detach the aircraft token and attach it to another stand.
During the game, two or more aircraft can occupy the same point on the board, provided they are at different heights. To represent this, the aircraft tokens are stacked on top of each other, together with their stands, as shown in the diagrams.
Diagram 2: The top aircraft is at altitude level L7 and the lower is at L2, so the top aircraft must be temporarily fitted with an L5 Altitude Stand (L2+L5 = L7).
Diagram 3: The actual height of the top Altitude Stand does not match the exact altitude it represents (it is visually a little higher than it should be), but represents the simplest solution.
Diagram 4: If the lower token is tilted, a tilt compensator must be placed on top of it to provide a level base for the aircraft above it.
1.1.5 Control Panels
Aircraft of the same type share the same Control Panel. The top of each panel shows an illustration of the aircraft and all its characteristics. The lower part is divided into sections, each with slots for various sliders and markers and a designation number corresponding to the individual aircraft token.
Diagram 5 labels: aircraft type; aircraft role; firepower and load; firing directions; main characteristics; individual aircraft.
At the start of the game, plastic sliders of the matching color are placed on all the far-left rectangles of each red and green section. Sliders should be placed with the hollow side facing downwards.
1.1.6 Dice
The game includes seven 'movement' dice, marked with a lowercase 'm' on each side, together with numbers used for speed calculations [3.1 Movement Speed - p.10]. Dice marked with 'm1-m6' ('m1-m5' are blue and 'm6' is green) are used for the basic rules. The purple die (without an 'm' mark) is used for optional rule 3.6 Inertia.
These dice also include secondary symbols, which are used for modifying other parameters [3.2.1 Aircraft Agility - p.11, 3.3.1 Climbing - p.13].
Two standard dice are used for firing and for resolving various other random events.
The 'damage' die is used for determining aircraft damage. It has two blue sides, one yellow, one red, one green, and one showing all four colors.
The 'A-F' die is used for large-caliber anti-aircraft guns firing [6.2.1 - p.46] or for Solo rules (see 7.9 on page 51).
1.1.7 Speed Indicators and Speed Calculator
Speed Indicators are used for tracking the movement speed of aircraft in each Round. These are used only if some optional rules are applied (3.6 Inertia and 4.9 Speed Difference When Firing).
Speed Calculators, each with a slider (any available can be used, red or green) are used for calculating movement speed.
1.1.8 Damage Markers
As aircraft are damaged during combat, colored Damage Markers are placed on top of the aircraft token to indicate the damage type [4.6.1 - p.31].
1.1.9 Chits
Some aircraft can carry bombs, external fuel tanks or other loads, and some can take photographs, etc. This is represented by round chits, which are placed in appropriate positions on the aircraft Control Panels.
- Bomb, Rocket and Torpedo Chits are used when attacking surface targets [5.1 - p.36].
- Fuel Tank Chits are used when aircraft carry external fuel tanks during the game [7.2.3 - p.48].
- Photo and Mission Chits are used for tracking photographed zones or other special tasks, such as dropping cargo or paratroopers [7.1 - p.47].
- Steep Dive Chits are used to mark aircraft that have initiated a Steep Dive [3.4.2 - p.15].
- Evading Chits are used to mark aircraft that are required to turn in their first movement Step [optional rule 4.5.8 Defensive Twitch - p.30].
- Re-slide Chits are used for tracking the amount of ammunition on Control Panels with limited space [4.2.1 - p.25].
- AA Fire Chits are used to mark anti-aircraft guns that have fired, to indicate that they cannot fire again in the same Round [6.1.1 - p.43].
- Movement Point Chits can be used to mark every point of movement where an aircraft has turned (this is useful when it is important to remember an aircraft's path, such as when passing near anti-aircraft guns - see Diagram 173 on page 44).
- Initial Position Chits can be used to mark the initial position and direction of aircraft, for example when considering multiple paths for movement.
1.1.10 Task Markers
Task Markers are different shapes (orange and purple tinted plastic) placed anywhere on the board. They can represent the game goal or various landmarks.
- Area Corners are used to mark large zones by placing them at each of its six (or more) corners.
- Zone Task Markers are placed between the white-dashed rectangles on the board, covering six points.
- Ship Task Markers are placed across any four, five or six adjacent points, representing ships.
- Point Task Markers are small hexagons, indicating individual targets or landmarks, placed on any point on the board.
1.1.11 AA Gun Markers
Hollow hexagonal markers represent small-caliber anti-aircraft guns [6.1 - p.43]. The gun itself is in the center, while the ring around it represents its inner firing zone [6.1.2].
1.1.12 Barrage Sectors
Transparent plastic sheets with 'explosion' points represent sectors where large-caliber anti-aircraft guns fire [6.2 - p.45].
1.1.13 Pilot Markers
Red and green transparent markers are used for optional rule 7.5 Pilot Skill [p.49].
Blue and yellow transparent markers are used only for Solo rules (see 7.9 Single-Player Games on page 51).
1.1.14 Weather Markers
Cloud markers (tinted black) represent shadows, indicating that thick clouds are located above, where aircraft can temporarily hide from enemy fire. Sun (yellow) and wind (blue) indicators are used to show the position of the sun or wind direction. Weather Markers are used by optional rule 7.6 [p.49].
1.1.15 Terrain Markers
Terrain Markers (printed cardboard shapes) represent hills and mountains, placed anywhere on the board [7.8 - p.51].
1.1.16 Player Aids
Player Aids are separate sheets (one for each player) with reminders for all the charts, speed modifiers, restrictions, hit probability, firing outcome factors, etc.
1.1.17 Scenario Book and Posters
This rulebook includes several simple Missions [2.2 - p.6], while the Scenario Book includes more complex Scenarios, as well as text for all aircraft types from the basic game. Two posters show aircraft illustrations, printed at the same scale for easy size comparison.
2. General Rules
Age of Dogfights is designed primarily for two players, but can also be played solo or by four players [7.9 Single-Player Games, 7.10 Four-Players Games - p.51]. Each token represents an individual aircraft.
One player chooses German aircraft and the other chooses American and/or British. The game is played only with the aircraft specified by each Mission [2.2] or Scenario [separate Scenario Book].
The game setup and goal of the game can be determined by a Mission or a Scenario.
The board is covered with a grid of equilateral triangles with tiny hexagons at their intersections (points). The aircraft tokens move along the dotted lines between these, and the distance between two adjacent points is referred to as '1d' (d = distance).
Aircraft movement is divided into Steps - each movement between two points for 1d is one movement Step (except in some complex maneuvers when an aircraft moves vertically and thus spends multiple Steps for 1d on the board [3.4-3.5]).
Aircraft can exit the board and thus leave the battle (except during a maneuver using a Temporary Board Extension, in which case the aircraft must return to the board during the same movement [3.9.1 - p.24]). If not specified otherwise in a Scenario, an aircraft may leave the board only through the edge it started from. Once an aircraft leaves the battle, it cannot re-enter.
2.1 Round Sequence
It would be impossible to reproduce simultaneous movement of aircraft in a board game, therefore movement is divided into player Turns, each representing a period of around ten seconds.
Each Round comprises one player's Turn, followed by the other. In their Turn, the first player moves all of their aircraft that are on the board. The other player then repeats the process, and the two alternate until the end of the game.
The dial counter (if used) is set to 1 at the start of game, and is increased by one increment at the end of each Round, after both players have completed their Turn for all aircraft.
2.1.1 Aircraft Movement Order
In general, in their Turn, one player moves all of their aircraft on the board in order of their designation numbers, starting with the one with the lowest number, then the other player does the same on their Turn.
This is the simplest way of tracking which aircraft have been moved, but if players prefer, they can choose any other aircraft movement order, as long as the system is well-defined and consistent.
However, if different categories of aircraft are participating in the game (e.g. agile fighters and sluggish bombers), it is recommended to change the movement order: first move the aircraft assigned to a particular task (bombers, fighter-bombers, transport aircraft, etc.), then move fighters. Or follow the movement order given in each Scenario.
Example 7: A player currently has four P-47 D Thunderbolt fighters (numbers 5-8) and three B-25 J Mitchell bombers (numbers 15-17) on the board. Using the sequence suggested in the paragraph above, the movement order should be: 15, 16, 17, 5, 6, 7, 8.
This change in movement order allows fighters to take better positions based on the chosen location of bombers.
To make it easier to follow a modified movement order, it is recommended to arrange Control Panels in the same order, as a reminder.
2.1.2 Actions
If any aircraft is in a position to fire at enemy aircraft [4. Air-to-Air Firing], attack surface targets [5. Air-to-Surface Attacks] or perform any other action [7.1 Non-combat Tasks], the procedure is performed immediately after completing its movement. If any opponent's aircraft or anti-aircraft guns can return fire defensively, a Break Action is performed [4.7 Passive Firing - p.33, 6.1 Small-Caliber Anti-Aircraft Guns - p.43]. Each of the player's other aircraft are then moved in turn, following the same procedure.
2.2 Missions
To play a short and simple game, with a relatively small number of aircraft, Missions provide guides and setup examples.
In general, the following should be decided:
- The goal of the game (mission) and appropriate placement of Task Markers (if used)
- Win criteria
- Aircraft to be included (or a suitable criteria for choosing aircraft)
- Starting positions of the aircraft tokens (e.g. east/west) and their starting altitudes (see 3.3.4 Ceiling on page 14)
- If Weather [7.6] and Terrain Markers [7.8] are to be used, and their placement
- Whether AA Gun Markers are to be used and their placement [6.1 - p.43]
- Whether the game should be limited to a specific number of Rounds (tracked by the dial counter)
- Who should take the first Turn (usually the player with a specific mission to achieve)
2.2.1 Dogfight
The primary role of fighter aircraft was to intercept or protect bombers. However, groups of fighters very often flew over enemy territory, provoking their fighters to engage in dogfights.
This is the simplest game setup, where both players have the same task - to shoot down as many opponent's aircraft as possible [4. Air-to-Air Firing]. The winner is easily determined by counting each destroyed enemy aircraft as 1 point and each damaged aircraft as 0.5 points.
Within dogfight missions, aircraft may only leave the board if they are either damaged or have run out of ammunition.
Example 8: A simple game with only fighter aircraft. Each player chooses any three fighters. Aircraft tokens are attached to altitude stands of any desired height up to each aircraft's Ceiling. One player places their aircraft along the northern edge of the board, and the other along the southern edge.
Example 9: Players choose six fighters each, German vs British aircraft, placed along the eastern and western edges. The German player chooses four Fw 190 A-8 and two Me 262 fighters, and the British player chooses three Spitfire Mk IX fighters and three Tempest FB Mk II fighter-bombers. Tokens are attached to Altitude Stands anywhere between L3 and L6. The game lasts 15 Rounds. Sun indicator is used, in SE position [7.6.2 - p.50].
2.2.2 Bomber Escort
This is an asymmetrical setup. One player has fighters that must protect a group of bombers, which must cross the board and exit on the opposite side. The other player has only fighters, tasked to destroy the enemy bombers.
The game lasts until all bombers either exit the board or are shot down.
Example 10: The British player has three B-25 J Mitchell bombers, starting around the middle, along the western edge of the board, at altitude L4. A group of four Spitfire Mk IX fighters start on the western edge, a little north from the bombers, at L5. The German player has four Bf 109 G-6/U4 fighters, starting on the southern edge at L3. The British player plays first.
The British player wins if all three bombers exit the board along the eastern edge. The German player wins if they destroy at least two bombers. The result is a draw if only one bomber is destroyed, in which case the winner can be determined by counting destroyed and damaged fighters.
2.2.3 Surface Attack
For surface attacks, the task is to destroy surface targets by bombing, torpedoing, rocketing or strafing [5. Air-to-Surface Attacks].
Place Task Markers on the board and decide what targets they represent (buildings, tanks, infantry, etc.) and determine appropriate target Durability (as specified in 5.2 Surface Targets on page 36).
Choose aircraft capable of attacking targets (bombers, attack aircraft, fighter-bombers, torpedo bombers, etc.), and suitable fighters to try to stop them.
This setup can be symmetric, where both players have the same mission, using Task Markers in separate colors for each; or asymmetric, where one player tries to destroy targets and the other player has only fighters.
Players should evaluate which aircraft types are likely to be most suitable for each task, then choose accordingly. This depends on several factors, such as aircraft flight characteristics, type of armament and target Durability.
For targets with low Durability (e.g. light tanks), fighter aircraft are a good choice because they can perform accurate strafing attacks while being inherently less vulnerable to enemy fighter attacks.
For targets with higher Durability (e.g. heavy tanks), where strafing is mostly ineffective, the best choices are light bombers, fighter-bombers or fighters armed with bombs or rockets.
Example 11: Six orange and six purple Point Task Markers are placed on the eastern and western side of the board to represent an ongoing tank battle, as targets with Durability of 20 (medium tanks).
Each player chooses seven aircraft of any type, except large bombers (marked by the large target symbol [4.5.6 Target Size - p.30]). The aircraft are placed along the eastern and western edges of the board, at any altitude levels.
Players should decide whether all seven aircraft have offensive armaments for destroying enemy tanks, or to use several pure fighters (i.e. not fighter-bombers), intended to protect the attack group.
Both players are tasked with destroying as many enemy tanks as possible. The game lasts for as long as non-destroyed ground targets remain, or until there are no more aircraft capable of destroying them. The winner is the player who destroys the most enemy tanks.
Example 12: Three orange Ship Task Markers are placed in the south-eastern corner of the board to represent a convoy of German cargo ships. The Durability of the ships is 40, 70 and 100, proportional to their size.
Four German fighters (any type) start the game at altitude L5, along the southern edge of the board.
A group of eight British aircraft (any type) start in the north-western corner of the board, at any chosen altitude levels. The British player plays first.
The British player wins if they sink at least two ships. It is a draw if only one is sunk, and the German player wins if all ships survive.
2.2.4 Targets of Opportunity (optional, marked with the simplification symbol)
Groups of fighters armed with bombs or rockets often flew over enemy territory in search of ground targets, but they were also ready to face enemy fighters if intercepted. Germans often performed these kind of missions above England during 1940 and 1941, while Allies mostly did so over Europe after 1941 ('Rhubarb' being the British codename for such a mission).
The task is to destroy as many targets as possible. Ground targets and enemy aircraft are of equal importance.
Task Markers are placed on the board and suitable Durability values assigned [5.2 Surface Targets - p.36]. If different Task Marker types are used, they can be allocated different Durability values.
Use of AA Gun Markers [6.1] and Terrain Markers [7.8] is recommended.
Determine which aircraft types to use (fighters and fighter-bombers), their armament [5.1 - p.36], starting positions and altitudes.
Each destroyed target on the ground (including AA Guns) counts as 1 point. Targets with higher Durability (50 or higher) count as 2 points each. Destroyed enemy aircraft count as 1 point each, and damaged aircraft as 0.5 points each (including any hit by enemy anti-aircraft guns). The player with the most points wins.
This setup is primarily asymmetric, with one player using fighter-bombers (and fighters) to attack targets on the ground, while the other player only has fighters. However, it can also be played symmetrically, using Task Markers in different colors for each player.
Example 13: The British player has three Typhoon Mk I B fighter-bombers armed with rockets (Power 25), starting at L3, and four Tempest FB Mk II fighters armed with bombs (Power 50) starting at L4. The German player has four Bf 109 G-6/U4 fighters starting at L6 and four Fw 190 A-8 fighters starting at L5.
Markers are placed as shown in the diagram. Clouds cover altitudes L2-L3 [7.6.3 - p.50]. Zone Task Markers have Durability 50 (therefore count 2 points each), while Point Task Markers have Durability 15.
The game lasts until only one player has aircraft remaining (ignore fuel limits). The winner is determined by counting points.
The British player can simply focus on destroying ground targets to win, but will risk being outmaneuvered by more agile German fighters that are not encumbered with bombs. The other possibility is to jettison the bombs and rockets immediately to allow dogfighting without reduced performance caused by their load, then take the opportunity to destroy ground targets by strafing.
2.2.5 Reconnaissance
In this setup one player is tasked to take photographs of designated areas [7.1.1 Photo Reconnaissance - p.47], while the other must prevent it.
Place Zone Task Markers on the board and decide the altitude levels from which the photographs must be taken (e.g. L5-L6).
Players choose aircraft capable of taking photographs, and suitable fighters to try to stop them.
Example 14: Two German Ju 388 L reconnaissance aircraft with two fighters (free choice) start the game on the eastern edge of the board, at altitude L8.
Four American fighters (free choice) start the game on the south-western edge of the board, at altitude L4.
Three Zone Task Markers are placed on the western side of the board. The German reconnaissance aircraft must photograph the zones from altitude L10 and exit the board at the eastern edge. They win if at least one aircraft returns photos of all three zones. It is a draw if only two zones are successfully photographed, and in all other cases the American player wins. The German player plays first.
Example 15: A Zone Task Marker is placed on the board as shown in the diagram, representing a forest suspected of hiding a group of German tanks. There are also three Terrain Markers and four AA Gun Markers.
Four American fighters (any aircraft with designation numbers 1-10) are placed on the north-western edge of the board, at any desired altitudes. Two of these are unarmed, but instead are equipped with cameras. Their task is to fly next to the Zone Task Marker from the southern edge, at altitude L1 (to perform oblique reconnaissance).
The German player chooses four fighters, which start at the north-eastern edge of the board at any altitude.
The American player wins if at least one camera-equipped aircraft completes the task (takes a photo and leaves via the western edge of the board). Otherwise the German player wins. The American player plays first.
2.2.6 Special Tasks
Various special missions (such as transport, dropping paratroopers, towing gliders, rescue, minesweeping, etc.) can be performed by aircraft with a different primary role (e.g. bombers can be used for transport), or by specialized aircraft, such as minesweepers.
This is an asymmetrical setup. One player has the special mission, while the other player tries to prevent it.
Example 16: Three Lancaster B Mk I bombers, together with two Dakota transport aircraft, start the game in the north-western corner of the board, at L5.
Their task is to fly over at least three points in the zone marked by Area Corners (shown in the diagram) at altitude L3 and drop cargo (supplies for landing troops).
They are protected by four British fighters (free choice). Their starting position is in the south-western corner at L6.
The German player chooses six fighters and places them in the north-eastern corner of the board at L2. Clouds: L2-L5.
If either four or all five aircraft successfully drop their cargo [7.1 Non-combat Tasks - p.47], the British player wins. If only three aircraft drop cargo, it is a draw. In all other cases the German player wins.
Example 17: The German player has a BV 138 MS minesweeper and three fighters (free choice). These aircraft start at the south-western corner of the board, at altitude L4.
The minesweeper's task is to fly over the marked area twice at altitude LL (in any direction).
The Allied player has three fighters (free choice), starting in the north-western corner at L6.
The German player wins if the minesweeper flies over the area twice (clearing the mines) and exits off the board at the western edge. It is a draw if the mines are cleared but the minesweeper is subsequently destroyed. Otherwise, the Allied player wins.
2.3 Aircraft Effectiveness Values
Many factors influence aircraft Effectiveness ratings, which vary based on the particular task that needs to be performed. For example, a fast climb speed is important for intercepting high altitude bombers, agility is important for chasing down low flying attack aircraft, long range is necessary for escorting bombers, etc. Therefore, there is no single criteria for valuing each aircraft type, and in some circumstances a generally lower-rated aircraft may be better at performing a task than a more 'valuable' aircraft.
A formula devised for this game takes over 20 in-game aircraft characteristics into account, such as speed, agility, ceiling, armament, etc. Each aircraft type has a calculated Effectiveness value. These values exist for information only, and do not influence the game during play.
Aircraft Effectiveness values are available at the weblink provided on page 52. Instead of choosing an equal number of aircraft, both players should choose aircraft with equal total Effectiveness values, unless otherwise specified by a Scenario.
3. Aircraft Movement
Aircraft change direction in all three axes as they move, which is challenging to simulate in a game, particularly for fighters that can fly in highly irregular trajectories. Age of Dogfights uses innovative Altitude Stands to represent aircraft tilt in two axes, enabling the game to simulate almost any aircraft maneuver during combat.
This chapter covers rules for changing position in both horizontal and vertical planes, as well as complex maneuvers.
In flight, aircraft can rotate in three axes: yaw, roll and pitch.
In Age of Dogfights, aircraft tokens can be placed in any combination of six yaw positions, three pitch and three roll positions (Diagram 18: level, banked right/left (roll tilt), pitched up and pitched down). In all diagrams throughout this rulebook, tilted tokens, used to represent various maneuvers, are depicted by their tilt: level, banked left (roll tilt), banked right (roll tilt), pitched up, pitched down, and banked left/right (roll) combined with pitched up/down.
3.1 Movement Speed
Every aircraft type has a Basic Speed value, as shown on its token [1.1.3 - p.3] and Control Panel.
When considering aircraft characteristics, the Basic Speed does not represent the maximum speed, but is useful for comparing relative speeds of different aircraft types. The Basic Speed is best described as 'average maximum cruise speed'.
Before moving an aircraft, roll either a blue or green 'movement' die. A player can choose any of the permitted dice for that particular aircraft type, as shown on its Control Panel.
Use of the green 'movement' die represents applying full throttle, and is generally permitted only for single-engine fighters (with some exceptions). The use of full throttle is limited, as indicated by the number in the far-left green rectangle on the fighter's Control Panel. Each time an aircraft uses full throttle, move its green slider one slot to the right.
When the green slider is on the rightmost rectangle (marked with '!'), the aircraft can use full throttle once more (then the slider is removed), but with a risk of damaging its engine - see 4.6.3 on page 32.
The number of Steps an aircraft must move in a given Turn is the Final Speed, which is calculated by adding the number rolled on the blue or green die to its Basic Speed, together with any other modifiers (it must move the number of Steps equal to the calculated Final Speed).
Example 19: An Fw 190 A-8 has a Basic Speed of 11. A blue 'movement' die 'm5' is rolled, resulting in '+1'. The Final Speed (number of Steps to move the aircraft) is 11+1=12.
To approximately predict the Final Speed, refer to the average values of each 'movement' die shown below (or on the Player Aids). Faces of each die:
| Die | Faces | Average |
|---|---|---|
| m1 | -8, -8, -7, -7, -6, -6 | -7 |
| m2 | -7, -6, -6, -5, -5, -4 | -5.5 |
| m3 | -5, -4, -4, -3, -3, -2 | -3.5 |
| m4 | -3, -2, -2, -1, -1, 0 | -1.5 |
| m5 | -1, 0, 0, +1, +1, +2 | +0.5 |
| m6 (green) | 0, +1, +2, +3, +3, +3 | +2 |
An aircraft will always move at least one Step, even if the calculated Final Speed is zero or a negative number.
3.1.1 Booster
Some aircraft have the ability to inject water or other liquid into the engine cylinders for a short period of time to boost engine power, thus increasing speed.
Aircraft with this 'booster' ability have it marked on their Control Panel.
Each aircraft can only use its Booster once, and only in combination with full throttle (i.e. the green 'movement' die). To show that the Booster has been used, the green slider on the Control Panel should be turned hollow side up. Booster cannot be used if the aircraft has engine damage [4.6.1 - p.31].
When a Booster is used, the number of movement Steps is increased by the number shown on the Control Panel (for example '+3').
Example 20: A P-51 D Mustang has a Basic Speed of 12. A green 'movement' die 'm6' is rolled, resulting in '+3', and Booster ('+2') is used. The Final Speed is 12+3+2=17.
3.2 Horizontal Movement (Level Flight)
Each Step of aircraft movement must be to a neighboring point either directly ahead or 60 degrees to the left or right (see diagram). When moving, take care to orient the aircraft token properly at each point.
If an aircraft moves directly forwards in a straight line for the entire Round, it must be moved one extra Step forwards (i.e. its Final Speed is increased by one).
If an aircraft turns by 60 degrees in its final movement Step, attach the aircraft token to an Altitude Stand with a bent tip (see 1.1.4 on page 4), with the aircraft banked to the appropriate side.
Example 21: The aircraft, marked A, B and C in the diagram, moved the following Steps:
- Aircraft A - 12 (Basic Speed) -5 (die) = 7 Steps.
- Aircraft B - 8 (Basic Speed) +0 (die) +1 (straight movement) = 9 Steps.
- Aircraft C - 11 (Basic Speed) -3 (die) = 8 Steps. Note that it has already turned by 60 degrees in the first Step.
To further clarify the rules above, Examples 22 and 23 show incorrect movement.
Aircraft cannot pass through others if they are at the same altitude. Also, movement must never end directly in front of another aircraft if it is at the same altitude and in level flight. If an aircraft is pitched nose-up, others must not end their movement at the point directly in front of it if they are one level higher, or one level lower if it is pitched nose-down.
3.2.1 Aircraft Agility (Turn Rate)
During movement, an aircraft may make a 60 degree turn a limited number of times. This is determined by its Agility value, represented by Roman numerals and dots (e.g. III with dots).
In one Round, an aircraft can turn by 60 degrees as many times as indicated by the Roman numeral value.
An additional 60 degree turn can be made if the number of dots next to the Roman numerals on the token is equal or greater than the number of dots shown on the 'movement' die already rolled. If 'X' is shown on the die, no additional 60 degree turn can be made.
Example 25: dots on token < dots on die, therefore it cannot make an additional turn.
Agility is a basic aircraft characteristic, indicating how sharply it can turn. This could be represented by a different turn radius for each aircraft type, but would be limited due to the board geometry. Instead, Agility is expressed simply as the maximum number of 60 degree turns, which roughly represents 'turn rate' (a certain number of degrees per second).
However, Agility generally varies only between II and IV (with rare exceptions), which gives too little differentiation between aircraft types. The solution is provided by using variable Agility, whereby aircraft types have different probabilities of being able to make additional turns.
As in real conditions, it is impossible for an aircraft to perform a maneuver identically each time, due to influences such as atmospheric conditions (air density, temperature, wind, etc.), aircraft condition (amount of fuel and ammunition, general condition of the airframe, position of trim tabs, engine temperature, etc.) and pilot condition (stress, fatigue, possible injury, preoccupation with other problems, etc.).
Turn rate also varies at different speeds, but this is not taken into account, as it would add too much complexity.
Example 26: Aircraft A has Agility III with a dot and the die roll permits an additional 60 degree turn. It turned left in the first Step, then left twice more, then once to the right. Aircraft B (Agility II with a dot) turned twice to the right, but cannot turn a third time because the die roll does not permit it.
Example 27: The aircraft in this example has Agility II with a dot and the die roll did not permit an additional turn, but the player forgot to count the first movement Step as a turn, thus mistakenly made three turns in total.
3.2.2 Turn Radius Limited by Speed
When the Final Speed of an aircraft is above certain limits, it cannot make two turns without a straight movement Step in between:
- There is no limitation if the Final Speed is 9 or lower.
- If the Final Speed is between 10 and 16, an aircraft must make at least one straight Step between turns.
- If the Final Speed is 17 or higher, an aircraft must make at least two straight Steps between turns.
| Final Speed | Turn Radius Limit |
|---|---|
| 9 or lower | no limit |
| 10-16 | at least one straight Step between turns |
| 17 or higher | at least two straight Steps between turns |
If an aircraft token was banked at the end of the previous Round, showing that it turned in its last movement Step, the rule above must be considered to check whether it is permitted to turn by 60 degrees in the first Step of the current Round. If it was not banked, it may always turn in its first Step.
Example 28: Aircraft A (Bf 109 G-6/U4) moved 11 Steps (Final Speed), so according to the rule above it had to make at least one straight Step after each turn. Since it was banked at the start of the Round, it was not permitted to turn in the first Step. Aircraft B (Me 262 Schwalbe) used full throttle and moved 17 Steps, so it had to make at least two straight Steps between turns. (Symbols on the diagram mark the points on the route where the aircraft was forced to move straight ahead because of its limited turn radius.)
Example 29: This example shows two mistakes in one movement. Since the aircraft was moving faster than 9 Steps, it was not permitted to turn in the first Step (because it was banked) nor turn in two consecutive Steps.
3.2.3 Turn Radius Limited by Mass
Large, massive aircraft are more sluggish, so their turn radius is even more limited. Aircraft types with their Agility value shown inside a square (e.g. a boxed II) must always make an additional straight Step between each turn.
Example 30: The Final Speed of Aircraft A is less than 10, but it cannot make consecutive turns because its turn radius is limited by its mass (boxed II). Aircraft B moves 10 Steps, and its Agility is boxed II, therefore it must make at least two straight Steps between turns.
3.2.4 Changing Turn Direction
If an aircraft turns left then right (or vice versa), it must make an additional straight Step in between.
This also applies if an aircraft begins its Round banked to the left or right and wishes to turn in the opposite direction.
Example 31: The aircraft turned twice to the left, followed by one straight Step before turning twice to the right.
Example 32: Incorrect movement (it turned to the left immediately after a right turn, which is not permitted).
If an aircraft has a turn radius limited by both speed [3.2.2] and mass [3.2.3], and changes turn direction [3.2.4], all three restrictions are added together (e.g. if an aircraft with a boxed Agility moves 10 Steps, it must make three straight Steps between 60 degree turns in opposite directions).
3.2.5 Zig-Zag Movement
The exception to rule 3.2.4 is for aircraft types with a zig-zag symbol on the token and Control Panel. These may change turn direction without the additional straight Step (i.e. move in a zig-zag path).
3.2.6 Parallel Shift
For various reasons, an aircraft may need to move to a position that is only slightly to the left or right of its current position, but exactly parallel to it. According to the rules above, only some aircraft types may do this (those capable of zig-zag movement), leaving other aircraft types disadvantaged. To remedy this, an additional rule is introduced to give all aircraft more movement flexibility, by temporarily circumventing the six-direction limitations of the board grid.
All aircraft can perform Parallel Shifts.
At any point during movement, an aircraft can make a 30 degree turn by moving diagonally (between points on the board), then make another 30 degree turn in the opposite direction.
Regarding Agility (the maximum number of turns), each 30 degree turn counts the same as a 60 degree turn. The diagonal movement (between points A and B in the diagram) costs two movement Steps.
A Parallel Shift must be completed in a single game Round (the aircraft must make two 30 degree turns in opposite directions). This is to avoid leaving the aircraft token in an undefined position (halfway between points on the board grid).
If an aircraft makes a 30 degree turn in its last movement Step, it remains banked in the appropriate direction. 60 degree turns made before or after a Parallel Shift are restricted by turn radius limits [3.2.2 and 3.2.3] and Changing Turn Direction [3.2.4] rules.
The remaining movement Steps (before or after a Parallel Shift) can be spent normally.
Points close to the diagonal path (marked red in the diagram) must not be occupied by other aircraft at the same altitude.
Example 35: The aircraft turned 30 degrees left in the third Step, then turned 30 degrees right in the fifth Step and spent the remaining two Steps moving straight ahead.
3.3 Changing Altitude
Age of Dogfights uses Altitude Stands of different heights to represent flying at different altitudes. When considering aircraft Ceilings, the Altitude Stand heights represent increments of 1000 meters, with the tallest at 13000m (L13) and the lowest very close to the ground (LL).
However, in one Round (which represents around ten seconds), an aircraft is more likely to climb or descend by only a few hundred meters. Therefore, in this context, the height difference between two Altitude Stands represents approximately 100m.
If distances between altitude levels were absolute, aircraft either would not be able to change altitude levels in a single Round, or the game would require ten times as many Altitude Stands of different heights. For this reason, altitude in the game is relative, which allows for fine differences in Ceiling and Climb/Descent Rate between different aircraft types, while still remaining practical for playing.
When changing altitude, the aircraft token should be detached from its current Altitude Stand and attached to one of the new altitude value (e.g. from L5 to L7).
3.3.1 Climbing
Each aircraft type has a specific Climb Rate, represented by a number and dots next to an upward-pointing arrow (e.g. up-arrow 2 with dots).
An aircraft may climb as many altitude levels as indicated by the number, plus an additional level if the die roll permits (as with Agility, the number of dots on the token must be equal or greater than the number of dots shown on the die, with 'X' denoting that no additional climb is permitted).
Instead of separate die rolls, a single die roll affects Final Speed, Agility and Climb Rate together, hence providing a simpler playing procedure.
Regardless of its Climb Rate, if an aircraft starts the current Round in level pitch, it will be able to climb only one altitude level (or remain at the same level).
For an aircraft to climb more than one altitude level, the player must first tilt its nose up (pitch) at the end of its movement (after its last movement Step). Only after this, when it starts the current Round pitched up, is the aircraft permitted to climb at its maximum Climb Rate.
Once pitched up, the aircraft must climb at least one altitude level in the next Round.
Aircraft always lose some speed when climbing, so when calculating Final Speed, subtract a number equal to the number of altitude levels climbed.
A Climb Rate of 0 (with dots) means that sometimes (if the die roll does not permit an additional climb level) the aircraft must remain at the current altitude. If it was pitched up, however, still subtract 1 when calculating movement speed, despite not gaining altitude.
If climbing only one altitude level, the aircraft flies at the new altitude from the first movement Step onwards.
When climbing multiple levels, the first altitude change is made in the first Step, the second in the third Step, and so on (in odd-numbered Steps). The Final Speed number must therefore be large enough to permit this (for example, to climb three levels, the Final Speed must be five or greater).
In most cases (when flying fast enough and not through points occupied by other tokens) it is not necessary to calculate exactly when altitude level changes happen - only that the token is attached to the appropriate Altitude Stand at the end of its movement.
At the end of each aircraft's movement, the player may again choose to pitch it up or down, or to place it in level flight.
Example 37: Aircraft A started the Round pitched up. Its Climb Rate is 1 (one dot) and the die roll did not permit an additional climb level. It moved: 6 (Basic Speed) -1 (die) -1 (climb) = 4 Steps, changing altitude from L3 to L4. At the end of its movement, it remained pitched up.
Aircraft B: The die roll permitted Aircraft B to climb two altitude levels, but it started in level flight, so could only climb one level. It moved: 6 (Basic Speed) +0 (die) -1 (climb) = 5 Steps, climbing from L4 to L5.
Aircraft C started pitched up and climbed three altitude levels (from L4 to L7), even though the die roll permitted four (Climb Rate 3 with dots). It moved: 11 (Basic Speed) +2 (die) -3 (climb) = 10 Steps. As it does not intend to continue climbing in the next Round, it finishes the movement in level flight.
3.3.2 Descending
Each aircraft type has a specific Descent Rate, represented by a number next to a downward-pointing arrow (e.g. down-arrow 3), which is the maximum number of levels the aircraft may descend. (Unlike climbing, Descent Rate does not vary.)
Regardless of its Descent Rate, if an aircraft starts the current Round in level pitch, it will be able to descend only one altitude level (or remain at the same level).
For an aircraft to descend more than one altitude level, the player must first tilt its nose down (pitch) at the end of its movement (after its last movement Step). Only after this, when it starts the current Round pitched down, is the aircraft permitted to descend at its maximum Descent Rate.
Once pitched down, the aircraft must descend at least one altitude level in the next Round.
When losing altitude, aircraft naturally gain speed, so when calculating the Final Speed, add one for each level the aircraft descends.
As with climbing, altitude changes are made during odd-numbered Steps (the first is made in the first Step, the second in the third Step, the third in the fifth Step, etc.), which also means that the Final Speed must match or exceed that number of Steps.
An aircraft may end its movement pitched in any way (up, down or level).
Example 38: Aircraft A started the Round pitched down and banked right. It descended its maximum of 4 altitude levels, from L8 to L4. It moved: 10 (Basic Speed) -5 (die) +4 (descent) = 9 Steps. At the end of movement, it remained pitched down.
During its path, aircraft A flew over aircraft B and under aircraft C.
3.3.3 Diving
Not to be confused with 3.4.2 Steep Dive and 3.4.3 Vertical Dive, which can be performed only by certain aircraft types.
Diving is performed the same way as descending, except altitude changes are made in consecutive Steps (not in odd-numbered Steps), starting from the first Step.
All aircraft can perform diving, respecting their Descent Rate and the speed gain for each altitude level change. To dive, an aircraft must start the Round pitched down.
When diving, an aircraft may only make one 60 degree turn at most, regardless of its Agility value.
Diving is an important maneuver when bombing - see rule 5.4.2 Dive Bombing on page 39.
Example 39: The aircraft dived three altitude levels, from L5 to L2, by moving: 8 (Basic Speed) -4 (die) +3 (dive) = 7 Steps.
If an aircraft does not have an Aerobatics symbol [3.5 Aerobatics], or if it has a damaged tail or wings [4.6.1 Damage Type], it has the following restriction:
After diving the maximum allowed number of levels, an aircraft cannot be pitched up at the end of the Round (doing so would put too much strain on the airframe). It must end the movement either in level flight or pitched down.
3.3.4 Ceiling
Each aircraft type has a Ceiling, indicating the maximum Altitude Stand height it can use (e.g. L11). When an aircraft reaches its Ceiling, it cannot pitch up while at that level.
3.3.5 Dynamic Ceiling (optional rule)
With this optional rule, all aircraft are permitted to climb to an altitude one level above their Ceiling, but must always pitch back down at the end of their movement (i.e. they must descend immediately after exceeding their Ceiling). With this optional rule, aircraft may pitch up when at their Ceiling.
In this way, if an aircraft pitches up when at its Ceiling, it can fire at an enemy aircraft that is one level above [4. Air-to-Air Firing].
To reach an altitude level above the Ceiling, the 'm5' or 'm6' movement die must be used. If using optional rule 3.6 Inertia, the Final Speed must be equal to or higher than the aircraft's Basic Speed (if carrying load [3.7 - p.23], the Final Speed must be at least equal to its Basic Speed, not Loaded Speed).
This minimum speed restriction does not apply in the next Round, when the aircraft is already above its Ceiling and must descend.
If an aircraft starts the Round pitched up at its Ceiling, and rolls 'm4' or lower movement die (3.6 Inertia: the Final Speed is below Basic Speed), it will not climb (it will stay at its Ceiling). Despite not gaining altitude, still subtract 1 when calculating movement speed.
For aircraft with a Service Ceiling of L13, to represent altitude L14, place an 'L+1' spacer under the L13 stand (as shown in 1.1.4 Altitude Stands on page 4).
3.3.6 Slow Climbing Near Ceiling
If an aircraft begins a Round three levels below its Ceiling or higher, its Climb Rate 'loses' two dots (e.g. 3 with three dots becomes 3 with one dot, while 2 with two dots becomes 2 with no dots... see the Climb Rate notation on the token).
Example 40: A Mosquito PR Mk 34 has a Ceiling of L12 and a Climb Rate of 2 with dots. It starts the Round at altitude L9, therefore its Climb Rate is temporarily reduced (by two dots).
However, the Climb Rate will never be reduced below 0 (no dots).
3.3.7 Flying at High Altitude
Because of the thinner air at higher altitudes, aircraft performance is reduced.
For all aircraft, if starting a Round at altitude level L9 or higher, the Agility is reduced by one sub-category, i.e. one dot is 'lost' (if an aircraft has only one dot next to the Roman numerals, the Agility becomes one number lower, with three dots, e.g. III with one dot becomes II with three dots).
The variation in maximum speed at different altitudes is not taken into account in this game, as it would add too much complexity.
If players wish, they can add this element to the game, making some aircraft types slower at certain altitudes (due to different engine performance at different air density). This requires researching data and deciding performance for each aircraft type (e.g. taking into account supercharger configurations).
Altitude levels are grouped in three categories - low: LL-L4, medium: L5-L8, and high: L9+. Each aircraft type would have no speed penalties in at least one height category, and some may have penalties of up to -2 in certain categories (e.g. Typhoon Mk I B fighter-bomber has a penalty of '-1' at medium and '-2' at high altitude).
3.4 Special Maneuvers
In addition to basic maneuvers (turning and changing altitude, in various combinations), some aircraft types can also perform special maneuvers such as steep turns and vertical dives.
3.4.1 Steep Turn
Only aircraft types marked with a Steep Turn symbol can perform a Steep Turn. All aircraft that can perform Aerobatics [3.5 - p.17] can also perform a Steep Turn, so their tokens include only the Aerobatics symbol, without the Steep Turn symbol.
An aircraft can make one extra 60 degree turn if the following conditions are met:
- It starts the Round in level pitch.
- It turns in the same direction throughout the current Round.
- When commencing turns (whether in the first movement Step or any other), all 60 degree turns (including the extra one) must be performed at equal intervals: either consecutive (if allowed by rule 3.2.2 Turn Radius Limited by Speed), or in every nth Step (e.g. every third Step).
When a Steep Turn is performed, the aircraft must descend one altitude level. In this case, the aircraft will not gain speed by losing altitude. The altitude change takes place at the same time as the extra 60 degree turn.
Example 41: The aircraft Agility is III with a dot and the die roll did not permit an additional 60 degree turn, but since it turned in regular intervals in the same direction, the aircraft was able to make one extra turn and thus lose one altitude level.
Aircraft with a Steep Turn symbol that includes an arrow can only perform a Steep Turn in one direction, as indicated by the direction of the arrow on the symbol.
If an aircraft has damaged wings or tail [4.6.1 Damage Type - p.31], after rolling a 'movement' die and deciding to perform a Steep Turn, roll a standard die. If 3 or more is rolled, the maneuver is performed safely, otherwise a structural failure occurs - the aircraft is destroyed and its token is removed from the board.
3.4.2 Steep Dive
Aircraft types that could dive at a steep angle, usually 60 degrees, used air brakes to control their speed during the maneuver to prevent excessive stress on the airframe. Steep dives enabled more precise bombing [5.4.3 Steep Dive Bombing - p.40], but were demanding on both the aircraft and crew.
Only aircraft with a Steep Dive symbol (two variants exist) may perform a Steep Dive. To prepare for a Steep Dive, an aircraft must first end its movement pitched down and not banked (no roll tilt). To indicate this, place a Steep Dive Chit on the board next to the aircraft. Once prepared for a Steep Dive, the aircraft must perform this maneuver in the next Round.
Instead of using Steep Dive Chits, an aircraft preparing for a Steep Dive can simply be pitched down at a steeper angle. This is not recommended, however, as it can be difficult to discern between this and a normal tilt angle.
Two movement Steps are spent for moving 1d straight ahead and losing two altitude levels. This can be repeated up to three times, after which the aircraft continues in level flight for the remainder of its movement Steps.
The number of changed altitude levels in a Steep Dive can be greater than the aircraft's Descent Rate (e.g. an aircraft with Descent Rate 3 can lose six altitude levels in a Steep Dive).
The aircraft will gain speed according to the number of altitude levels it dives, but no more than four - even if diving six altitude levels (due to air brakes). The requirement for one extra Step forwards if moving directly forwards in a straight line does not apply for a Steep Dive.
After completing the steep part of the path, the aircraft must move at least one Step straight ahead, after which it may make no more than one 60 degree turn (if it has any movement Steps remaining).
The aircraft may not end its movement pitched up (it must either stay level or pitch down).
Example 43: Aircraft P performed a Steep Dive, losing two altitude levels. It moved: 7 (Basic Speed) -4 (die) +2 (dive) = 5 Steps. It turned left in the last Step and finished the movement in level pitch.
Aircraft Q dived six altitude levels, moving: 7 (Basic Speed) -2 (die) +4 (dive) = 9 Steps. It pitched down at the end of its movement.
If an aircraft has damaged wings or tail [4.6.1 Damage Type - p.31], after rolling a 'movement' die and deciding to perform a Steep Dive, roll a standard die. If 3 or more is rolled, the maneuver is performed safely, otherwise a structural failure occurs - the aircraft is destroyed and its token is removed from the board.
When bombing [5.4.3 Steep Dive Bombing - p.40], a structural failure will not affect bombing success (it will fall apart after dropping the bombs).
When an enemy aircraft fires at an aircraft that is prepared for a Steep Dive, subtract 1 from the die roll before consulting the Targeting Chart [4.5 Active Firing - p.27]. Also, Double Burst [4.6.5 - p.32] is not possible if the attacker is only 'normally' pitched down, rather than at a 'steep pitch' in preparation for a Steep Dive. If the attacker is also prepared for a Steep Dive, there are no restrictions (a specific case when a bomber attacks another bomber, possible when using rule 4.9 Speed Difference When Firing).
3.4.3 Vertical Dive
The Germans went a step further in making the Ju 87 Stuka dive bomber, which was capable of diving completely vertically (at a 90 degree angle). Vertical diving was so stressful that it was normal for the pilot to lose consciousness for a few seconds during the maneuver, but the aircraft was designed to automatically pull out of the dive. This maneuver provided significantly better bombing accuracy than any other bombing technique [5.4.4 - p.40].
Only aircraft with a Vertical Dive symbol can perform a Vertical Dive. Minimum starting altitude is L4.
Vertical Dive is split into two parts, 'entry' and 'pull-up', which are performed in two Rounds.
Entry
The aircraft must start the Round in level pitch, but it may be banked.
First, it may move several Steps in any direction (without changing altitude). It then moves a minimum of two Steps straight ahead (rolling into an inverted position), then one Step straight ahead, descending one altitude level.
The aircraft may then move vertically either one or two more altitude levels.
The aircraft does not gain speed by losing altitude in the entry part of the maneuver. The rule to move one extra Step if going directly forwards in a straight line does not apply (because it is turning sharply in a vertical plane).
At the end of the entry Round, the aircraft token must be attached to its Altitude Stand in a vertical position, with the top of the aircraft oriented towards the direction it came from.
Example 45: Aircraft P started at L7, then descended to L6 after performing the required Steps for Vertical Dive entry, then moved one more Step vertically, finishing at L5. It moved: 5 (Loaded Speed [3.7 - p.23]) +1 (die) = 6 Steps.
Aircraft Q moved only the minimum required Steps for performing Vertical Dive entry, starting at L7 and finishing at L6. It moved: 5 (Basic Speed with load) -2 (die) = 3 Steps.
While in a vertical position, other aircraft cannot fire at it [5. Air-to-Air Firing].
Pull-up
When an aircraft starts the Round in a vertical position, it moves one, two or three Steps vertically down, losing one altitude level per Step, then pulls up, moving 1d and losing one more altitude level, and finally moving the remaining Steps straight ahead in level flight. It cannot make any 60 degree left/right turns during this Round.
The aircraft gains 4 movement Steps, regardless of how many altitude levels it dived. The rule of moving one extra step if going directly forwards in a straight line does not apply. The aircraft must end its movement in level pitch.
Example 47 (continuation of Example 46): Aircraft P started in a vertical position at L5. It descended vertically three levels, reaching L2, then pulled up at L1, then moved four more Steps. It moved: 5 (Loaded Speed [3.7 - p.23]) -1 (die) +4 (dive) = 8 Steps.
Aircraft Q started at L6, descended vertically to L5 and pulled up at L4. It moved: 5 (Loaded Speed) -2 (die) +4 (dive) = 7 Steps.
If an aircraft has damaged wings or tail [4.6.1 Damage Type - p.31], after performing the 'pull-up' part of the Vertical Dive, roll a standard die. If less than 3 is rolled, a structural failure occurs - the aircraft is destroyed and its token is removed from the board.
If an aircraft ends its movement on altitude level LL after the 'pull-up' part of the Vertical Dive, it may crash into the ground (pulling up a little too late). Roll a standard die, if less than 3 is rolled, it will crash - the aircraft is destroyed and its token is removed from the board.
If an aircraft is both damaged and pulls up at LL, roll the die twice. It will only survive if both die rolls are favorable (3 or more).
When bombing [5.4.4 Vertical Dive Bombing - p.40], a structural failure or crashing will not affect bombing success (it will fall apart/hit the ground after dropping the bombs).
3.4.4 Forward Slip
A Forward Slip is a useful maneuver, often used when landing from a steep approach to avoid an excessive increase in speed. By crossing controls (e.g. using ailerons to roll left and rudder to yaw right), more drag is created, causing the aircraft to lose altitude without gaining speed.
Any aircraft can perform this maneuver.
At the end of movement, the aircraft rolls in one direction and yaws in the other (e.g. rolls left and yaws right). This counts as one 60 degree turn.
The final movement Step must be straight relative to its flight path, even though the aircraft yaws at the end.
If the turn radius is limited by speed [3.2.2] or mass [3.2.3], one or more additional straight Steps must be made before the last Step (e.g. if an aircraft with a boxed Agility moves 10 Steps, the last three Steps must be straight). Rule 3.2.4 Changing Turn Direction does not influence a Forward Slip (it does not matter whether the last turn before the Forward Slip was left or right).
When a Forward Slip is performed, the aircraft will descend one altitude level in the final movement Step, but its speed will not increase by 1, despite losing altitude.
At the end of movement, the aircraft can be pitched in any way.
Example 49: (the aircraft turned, climbed, and) in the sixth Step, and finally moved in a straight path in the seventh Step, performing a Forward Slip. It moved: 12 (Basic Speed) -3 (die) -2 (climb) = 7 Steps. It ended at altitude L6.
If the aircraft fires after performing a Forward Slip, subtract 1 from the die roll before consulting the Targeting Chart [4.5 - p.27 or 5.3.2 - p.37]. Also, Double Burst [4.6.5 - p.32 or 5.3.3 - p.38] is not possible in this case (because the attacking aircraft's nose is not directed towards its flight path during a Forward Slip).
3.5 Aerobatics
From the earliest days of aviation, pilots tried to amaze onlookers with complex aerial maneuvers. Some of these aerobatic maneuvers could be used in battle, as the sudden change in altitude and direction allowed pilots to move quickly into an advantageous firing position or evade an attacking opponent.
Only aircraft with an Aerobatics symbol may perform aerobatics, and only if not carrying any load [3.7 Limited Performance with Load - p.23].
A minimum number of movement Steps (Final Speed) is required to complete each aerobatic maneuver. If the Final Speed is not high enough to complete the whole of a desired maneuver, it cannot be performed - an aerobatic maneuver must be completed within a single game Round.
Each maneuver 'costs' some turns (Agility), therefore if an aircraft's Agility currently has a lower value than required, the maneuver cannot be performed (e.g. the die roll did not grant an additional turn [3.2.1 - p.11], or it has a damaged tail [4.6.1 - p.31]).
Maximum speed for performing any aerobatic maneuver is 16.
3.5.1 Roll Over the Top
A Roll Over the Top is a 180 degree turn in a vertical plane, while climbing. It is performed in the following way:
- The aircraft must start the Round pitched up.
- The aircraft climbs one, two, or three altitude levels to the point directly above the starting position and facing in the opposite direction (making a half loop). Climbing one level spends two movement Steps (aircraft A in the diagram), two levels spend four Steps (B), and three levels spend six Steps (C).
Climb Rate must be respected (e.g. if an aircraft has a Climb Rate of 2 with dots and the die roll did not permit an additional climb level, the aircraft cannot perform a three-level Roll Over the Top in that Round).
If the Final Speed is greater than 9, an aircraft cannot perform this maneuver by climbing only one level - it must climb either two or three levels (it cannot turn sharply when going too fast).
- Then it must move at least two Steps straight (rolling back from inverted to upright, level flight).
Performing a Roll Over the Top counts as three 60 degree turns. After moving the minimum Steps required for the maneuver, the aircraft can move in any direction at the final altitude to spend its remaining Steps (it can turn only if its Agility permits more than three turns).
Reduce the movement speed by one more than the number of climbed altitude levels (e.g. if climbing 3 levels, reduce the speed by 4).
To be able to pitch up or down at the end of movement, the aircraft must move at least one more Step after completing the minimum required for the maneuver (if the Final Speed is barely enough to complete the maneuver, it must stay level).
To perform a Roll Over the Top by climbing more than one level, the points located 1d in front of the aircraft's initial position on each intermediate altitude level (red dots in the diagram) must not be occupied by other aircraft.
Example 51: The aircraft performed a Roll Over the Top by climbing two altitude levels. It moved: 12 (Basic Speed) -1 (die) -3 (maneuver) = 8 Steps. Its Agility is III and the die roll did not permit an additional turn, therefore it had to move straight for the rest of its movement.
3.5.2 Split S
A Split S maneuver is similar to a Roll Over the Top, but with the aircraft losing altitude rather than gaining it. It is performed in the following way:
- The aircraft must start the Round in level pitch.
- The aircraft moves at least two Steps straight (rolling into an inverted position).
- It then descends one, two, or three altitude levels to the point directly below the current position and facing in the opposite direction (making a half loop). Descending two levels spends four movement Steps (aircraft A in the diagram), three levels spends six Steps (B), and four levels spends eight Steps (C).
Descent Rate must be respected.
If the Final Speed is greater than 9, an aircraft cannot perform this maneuver by descending only two levels - it must descend either three or four levels (it cannot turn sharply when going too fast).
- Finally, it must move at least one Step straight ahead.
Performing a Split S counts as three 60 degree turns. After moving the minimum Steps required for the maneuver, the aircraft can move in any direction at the final altitude to spend its remaining Steps (it can turn only if its Agility permits more than three turns).
Increase the movement speed by one less than the number of descended altitude levels (e.g. if descending 2 levels, increase the speed by 1).
The aircraft may end its movement in any pitch.
When performing a Split S, the points on intermediate altitude levels, marked with red dots in the diagram, must not be occupied by other aircraft.
Example 53: The aircraft performed a Split S by descending three altitude levels. It moved: 11 (Basic Speed) +2 (die) +2 (maneuver) = 15 Steps. It moved one Step straight before starting the maneuver, then performed the maneuver (Steps 2-10), finally moving five more Steps, turning in the 14th Step (as its Agility is III with a dot and the die roll permitted an additional turn).
If an aircraft has damaged wings or tail [4.6.1 Damage Type - p.31], after rolling a 'movement' die and deciding to perform a Split S, roll a standard die. If less than 3 is rolled, a structural failure occurs - the aircraft is destroyed.
3.5.3 Inside Loop
An Inside Loop is a 360 degree turn in a vertical plane, returning to the starting altitude. It is performed in the following way:
- The aircraft must start the Round pitched up and not banked.
- The aircraft loops and returns to the starting position, spending either seven Steps - small loop (aircraft A in the diagram), or nine Steps - large loop (B).
If the Final Speed is greater than 9, an aircraft cannot perform a small loop - it can only make a large loop.
- Then it must move at least one Step straight ahead.
Performing an Inside Loop counts as three 60 degree turns. After moving the minimum Steps required for the maneuver, the aircraft can move in any direction at the same altitude to spend its remaining Steps (it can turn only if its Agility permits more than three turns).
Movement speed is reduced by 1.
The aircraft may end its movement in any pitch.
The points marked with red dots in the diagram must not be occupied by other aircraft.
Example 55: The aircraft performed a small loop. It moved: 10 (Basic Speed) +0 (die) -1 (maneuver) = 9 Steps. Its Agility is III with a dot and the die roll did not permit an additional turn, so it had to move straight in the final Step.
If an aircraft has damaged wings or tail [4.6.1 Damage Type - p.31], after rolling a 'movement' die and deciding to perform an Inside Loop, roll a standard die. If less than 3 is rolled, a structural failure occurs - the aircraft is destroyed.
3.5.4 Canopy Roll
A Canopy Roll allows an aircraft to quickly move sideways while maintaining its current flight direction. It is performed in the following way:
- The aircraft must either start the Round in level pitch or pitched up. If banked, it can only perform the maneuver by rolling to the same side as the initial bank (roll tilt).
- The aircraft moves one Step forwards, climbing one altitude level.
- It then turns in one direction (while rolling), either followed by a 'straight' Step (Diagram 57) or not (Diagram 56).
If the Final Speed is greater than 9, the aircraft must make a straight Step after the first turn (if the speed is below that, it may make a straight Step if desired).
- Next, it turns in the 'other' direction (from the aircraft's perspective, it is rolling in the same direction throughout the maneuver) - see Step 3 in Diagram 56 or Step 4 in Diagram 57, descending one level (returning to the original altitude).
- Finally, it must move at least one Step straight ahead.
Performing a Canopy Roll counts as two 60 degree turns. After moving the minimum Steps required for the maneuver, the aircraft can move in any direction at the same altitude to spend its remaining Steps, respecting rules 3.2.2 Turn Radius Limited by Speed and 3.2.4 Changing Turn Direction [p.12], taking into account when it made the last turn and in which direction (e.g. if the last turn in the maneuver was left and it moves more than 9 Steps, it cannot turn right without an additional straight Step in between).
Movement speed is reduced by 1.
The aircraft may end its movement in any pitch.
Example 58: The aircraft started the Round pitched up and banked to the left. It performed a Canopy Roll by rolling to the left. It then moved one Step straight, then turned left. It moved: 11 (Basic Speed) -2 (die) -1 (maneuver) = 8 Steps.
3.5.5 High Yo-Yo
By climbing, an aircraft loses some speed, enabling it to make a sharper turn, after which it regains some of the speed by losing altitude. It is performed in the following way:
- The aircraft must either start the Round in level pitch or pitched up. If banked, it can only perform the maneuver by turning to the same side as the initial bank.
- The aircraft moves one Step forwards, climbing one altitude level.
- It makes a 60 degree turn, followed by at least two straight Steps (it may move more straight Steps if desired).
- It then makes two consecutive 60 degree turns in the same direction as the previous turn, descending one level in the last turn (even if moving faster than 9 Steps, it is possible to make consecutive turns at this stage of the maneuver).
- Finally, it must move at least one Step straight ahead.
Performing a High Yo-Yo counts as three 60 degree turns. After moving the minimum Steps required for the maneuver, the aircraft can move in any direction at the same altitude to spend its remaining Steps.
Movement speed is reduced by 1.
The aircraft may end its movement in any pitch.
Example 60: The aircraft performed a High Yo-Yo by turning to the right. Despite moving faster than 9, the maneuver allowed the third turn to be made immediately after the second. It moved: 10 (Basic Speed) +1 (die) -1 (maneuver) = 10 Steps.
3.5.6 Wingover
A Wingover allows a very sharp turn, which would otherwise be impossible in a horizontal plane. It is performed in the following way:
- The aircraft must start the Round pitched up and not banked.
- The aircraft climbs steeply, turns sharply while pointing vertically upwards, then dives back in the opposite direction, pulling up at the starting altitude. This is performed by moving straight ahead, then making a 120 degree turn, followed immediately by a 60 degree turn.
If the Final Speed is up to 9, five Steps are spent for the above movement - see Diagram 61. If the Final Speed is 10 or more, seven Steps are spent - see Diagram 62 (if flying faster, more time is spent climbing before the aircraft loses enough momentum before turning).
- Finally, the aircraft must make at least one Step straight ahead, but only if moving 10 or more Steps (see Step 8 in Diagram 62).
Performing a Wingover counts as three 60 degree turns. After moving the minimum Steps required for the maneuver, the aircraft can move in any direction at the same altitude to spend its remaining Steps (it can turn only if its Agility permits more than three turns).
Movement speed is reduced by 1.
The aircraft may end its movement in any pitch.
The points marked in red in the diagrams must not be occupied by other aircraft, either on the altitude level the aircraft started from or one level above (Diagram 61), or up to two levels above if moving 10 or more Steps (Diagram 62).
Example 63: The aircraft performed a Wingover by turning to the left. As it moved faster than 9, it first climbed two levels, turned 180 degrees and dived back two levels. After the maneuver, it turned once to the right, as soon as it could. It moved: 11 (Basic Speed) +0 (die) -1 (maneuver) = 10 Steps.
3.5.7 Unsuccessful Maneuvers (optional rule)
Aerobatic maneuvers are demanding and were only used by experienced pilots. When performed incorrectly, they could lead to loss of control of the aircraft.
To play using this rule, it is necessary to also use rule 3.6 Inertia.
After rolling a 'movement' die and deciding to perform an aerobatic maneuver, roll a standard die. If 2 or more is rolled, the maneuver is successful. Otherwise, the aircraft will move three Steps straight ahead, lose one altitude level (regardless of which maneuver was attempted) and enter a spin [3.6.5 Spin - p.22].
If using rule 7.5 Pilot Skill [p.49], subtract one from the die roll for Rookie pilots. Maneuvers are always successful for Ace pilots (there is no need to roll a die).
3.6 Inertia (optional rule)
Many successful fighter pilots recorded their experiences in their own books, as rules to be followed in air combat. One particular rule that stands out is that pilots should maintain high energy of their aircraft during combat, by converting potential energy (altitude) to kinetic energy (speed) and vice versa.
The principle of 'energy' is partially reflected in the rules for changing altitude, where aircraft lose speed when climbing and gain speed when descending. To fully implement energy, it is necessary to take into account one of the basic laws of physics - inertia. With this optional rule, aircraft are not allowed to make sudden speed changes, so it may take several Rounds for an aircraft to restore energy after losing it.
When this rule is applied, only use purple (instead of blue) and green 'movement' dice.
The average values of purple and green dice are shown below:
| Die | Faces | Average |
|---|---|---|
| purple | -1, 0, 0, 0, 0, +1 | 0 |
| green | 0, +1, +2, +3, +3, +3 | +2 |
Movement speed is tracked using Speed Indicators. After moving each aircraft, place a Speed Indicator next to it, showing a number equal to its Final Speed (the number of Steps the aircraft moved).
There are four different kinds of Speed Indicator, each covering a range of numbers. These are distinguished by color: white has numbers 2-6, yellow 7-11, green 12-16 and blue 17-21. This is also shown on the Speed Calculators.
Example 64: The aircraft moved 10 Steps, therefore a yellow Speed Indicator is placed next to it, with the number 10 facing up.
Since movement speed is already tracked using Speed Indicators, it is recommended to also use rule 4.9 Speed Difference When Firing [p.34] whenever using the Inertia rule.
3.6.1 Acceleration and Deceleration
Before moving an aircraft, calculate its speed as below:
-
Read the number shown on the Speed Indicator (or use the aircraft's Basic Speed at the start of the game) and place the slider on the Speed Calculator on that number. This is called Initial Speed.
-
Adjust the speed - move the slider to a higher number (accelerate) or lower number (decelerate), anywhere between +2 and -3, making sure that it is not above the aircraft's Basic Speed (or Loaded Speed [3.7 - p.23]). However, if the Initial Speed is 4 or more above the Basic/Loaded Speed, the maximum deceleration of -3 must be respected (e.g. if an aircraft's Basic Speed is 12 and the Speed Indicator shows 16, move the slider to 13).
If an aircraft carries any load (bombs, external fuel tank, etc.), it may only accelerate +1.
If a bomber has engine damage ('-2' speed penalty [4.6.1 - p.31]), it will struggle to maintain speed without descending, and will not be able to climb without losing speed, as long as it carries bombs.
If an aircraft can perform a Steep Dive (has a Steep Dive symbol), it can decelerate as much as -4 (using air brakes).
- Roll the die (purple or green) and move the slider according to the rolled number.
Note that with this optional rule, the green die (full throttle) can be used not only to achieve a higher maximum speed or maintain speed when climbing, but also to accelerate more quickly.
-
Apply all other modifiers (move the slider to a higher or lower number), such as speed increase/decrease when descending/climbing [3.3 - p.13], engine or wing damage [4.6.1 - p.31], straight movement [3.2 - p.10], etc. to obtain the Final Speed.
-
Move the aircraft and place an appropriate Speed Indicator next to the new position, showing the new Final Speed.
Example 65: A Typhoon Mk I B has an Initial Speed of 9. It accelerated by +1, moving the slider to number 10 (it could not accelerate more than +1 because 10 is its Basic Speed). The purple die roll resulted in 0, therefore the slider remains in place. The aircraft has engine damage, i.e. a speed penalty of -2, so the slider is moved to number 8. There are no other speed modifiers, so the Final Speed is 8 (this will be its Initial Speed in the next Round).
Example 66: An He 177 Greif has an Initial Speed of 6. It decelerated by -2, moving the slider to number 4 (it will descend, so is reducing the throttle in order to maintain a speed below 7, in order to have a higher hit probability when bombing [5.4.1 Level Bombing]). The die roll resulted in -1, so the slider is moved to 3. The aircraft descends two altitude levels, so the slider is moved by +2. The Final Speed is 5.
Example 67: A P-47 D Thunderbolt has an Initial Speed of 15. Because its Basic Speed is 11, it had no choice but to move the slider to the left as much as possible, which is -3. The die roll resulted in 0 (slider is not moved). There are no speed modifiers, so the Final Speed is 12.
3.6.2 Absolute Maximum Speed
An aircraft may never go faster than a certain limit (due to air resistance). Absolute Maximum Speed depends on the aircraft's Basic Speed:
| Basic Speed | Absolute Maximum Speed |
|---|---|
| 4 or less | Basic Speed + 2 |
| 5-7 | Basic Speed + 3 |
| 8+ | Basic Speed + 4 |
If the calculated speed is higher, the aircraft token must instead be moved the number of Steps equal to its Absolute Maximum Speed, which becomes the Final Speed for that Round, and the Speed Indicator placed at that number.
When an aircraft carries a load [3.7 - p.23], the Basic Speed is taken into account for determining Absolute Maximum Speed, even if it has a lower Loaded Speed.
There are several different terms for 'maximum' speed used for real aircraft, such as maneuvering speed (Va), diving speed (Vd), never exceed speed (Vne), etc. None of these terms are used in Age of Dogfights, as it does not simulate any of these precisely. 'Absolute Maximum Speed' simply represents a speed that, for various reasons, cannot be exceeded.
Example 68: An Me 262 Schwalbe has an Initial Speed of 16. It decelerated by -1, moving the slider to number 15 (it had to decelerate at least one, because its Basic Speed is 15). The green die roll (full throttle) resulted in +3, so the slider is moved to 18. The aircraft descends three altitude levels, moving the slider +3 to number 21. However, the Absolute Maximum Speed is lower (Basic Speed 15 + 4), so instead the Final Speed is 19.
Example 69: A B-25 J Mitchell has an Initial Speed of 5. It accelerated by +1. The die roll resulted in +1. The aircraft descends two altitude levels (+2), and it moved in a straight path (+1), resulting in number 10. However, the Absolute Maximum Speed is lower (Basic Speed 6 + 3), so instead the Final Speed is 9.
Note that if using this optional rule, in Example 20 on page 10, the Final Speed would be capped at 16.
3.6.3 Maintaining Speed
Instead of rolling a die and calculating speed, an aircraft can simply continue flying at its Initial Speed if all the following criteria are met:
- The aircraft starts the Round in level pitch (it may end the movement in any roll tilt).
- The Initial Speed is not above its Basic Speed (or Loaded Speed if carrying a load).
- The aircraft does not have engine or wing damage.
- The aircraft does not change altitude in the current Round.
- The aircraft must make a maximum of one 60 degree turn.
Speed modifier for straight movement (+1) is ignored in this case.
3.6.4 Stall
Stall Speed is the lowest speed at which an aircraft can fly, and each aircraft has its Stall Speed printed on the Control Panel. If the Final Speed is lower than the Stall Speed, the aircraft will stall.
To avoid stalling, be sure to fly fast enough at all times. When adjusting speed [3.6.1], take into account all speed modifiers, with an extra margin to account for possible bad die rolls (the purple die has a 1/6 chance to roll '-1'). To increase speed, an aircraft should move in a completely straight path and descend if possible.
If stalled, move the aircraft normally (for the calculated Final Speed), but lose an additional altitude level in the final Step (without gaining speed as a result). If the calculated Final Speed is zero or lower, the aircraft will remain on the same point on the board, but attached to the next lower Altitude Stand.
Then roll a standard die to determine whether the aircraft will recover. If 3 or more is rolled, it will recover [3.6.6]. Otherwise, it will enter a spin [3.6.5]. If using rule 7.5 Pilot Skill [p.49], add one to the die roll for Ace pilots and subtract one for Rookies.
A large aircraft with its Agility value shown inside a square (e.g. boxed II) will crash if it enters a spin - if it does not recover immediately after stalling, remove the token from the board.
3.6.5 Spin
If stalled and in a spin, after moving the aircraft, attach the token to an Altitude Stand with a bent tip, with the token pointing vertically down, as shown in the diagram (the horizontal orientation of the Altitude Stand is irrelevant).
In the next Round, roll the standard die again to attempt to recover from the spin, with the same outcome as above, under 3.6.4 (3+ to recover). If the aircraft still does not recover, attach the token in the same way, on a stand two altitude levels lower, at the same point on the board. It may then attempt to recover again in the same way on each subsequent Round.
While an aircraft is falling in a spin it is not permitted to fire, and no other aircraft nor small-caliber anti-aircraft guns can fire at it. However, a large-caliber anti-aircraft gun barrage can hit it [6.2 - p.45].
Intentional spin
In some situations, it may be beneficial to intentionally stall and enter a spin, for example to escape other fighters. This is a risky maneuver, however, as it can result in a crash, especially if starting at low altitude.
When an aircraft stalls (the Final Speed is lower than the Stall Speed of that aircraft), the player may choose not to roll a die to recover - therefore the aircraft automatically enters a spin. The die roll may then be skipped again in the next Round to continue the spin. In any subsequent Round, the player may choose to roll the die to try to recover from the spin.
3.6.6 Recovery
Recovery from a stall
If an aircraft recovers immediately after stalling, simply pitch its nose down at the end of movement, and place a Speed Indicator showing the Final Speed (which is therefore below the Stall Speed, so the aircraft will have to restore speed in the next Round by descending, to avoid stalling again).
Recovery from a spin
If an aircraft recovers from a spin (in one of the Rounds after entering the spin), it will descend one further altitude level and fly in a straight line. Roll a standard die to determine the direction of movement: 1 = NE (northeast), 2 = E, 3 = SE, 4 = SW, 5 = W, 6 = NW.
The slider on the Speed Calculator is then placed exactly on the Stall Speed value of that aircraft type, and the speed cannot be adjusted (increased nor decreased). A die is then rolled and other modifiers taken into account, except for the increase in speed for descending and for moving straight.
The aircraft will not stall if the Final Speed is below its Stall Speed during recovery.
The aircraft must end its movement pitched down.
Example 70: The aircraft's Stall Speed is 3 and the calculated Final Speed is 2, so the aircraft stalled. It first climbed one altitude level, then descended one level due to stalling. The die roll did not result in a recovery, so it enters a spin. In the next Round, it again tries to recover, but with no luck, this time losing two altitude levels.
In the following Round, it finally manages to recover (rolling 4 on a die). The die is rolled again to determine the flight direction, resulting in west. The Speed Calculator is set to 3 (the aircraft's Stall Speed), which is the Final Speed, as there are no speed modifiers. It was required to pitch down at the end of movement, so it must descend at least one level in the next Round, barely avoiding crashing into the ground, because it finished its movement on the lowest level - LL.
If, while descending in a spin, recovering, or in the Round after recovering, an aircraft reaches the ground (i.e. it is required to descend below the lowest altitude level - LL, or into a hill [7.8 Terrain - p.51]), the aircraft is deemed to have crashed, and is removed from the board.
3.7 Limited Performance with Load
Flight characteristics are changed when an aircraft is carrying a load, which depends on the load size relative to the aircraft. Besides increased weight, an external load also impairs aircraft aerodynamics more significantly than an internal load.
If an aircraft can carry any load (bombs, external fuel tank, etc.), its loaded characteristics are shown on its Control Panel, inside a black border.
The top value inside the black border shows the Loaded Speed, which is used instead of the Basic Speed when calculating movement speed. The three values below this show reduced Agility, Ceiling and Climb Rate. Of these four characteristics, only those that are different to their default values are shown. If the bordered area is empty, no characteristics are changed when carrying a load.
If using Inertia rules, maximum acceleration is limited to +1 [3.6.1].
When all the load is dropped, the limitations cease to apply from the next Round.
If an aircraft carries a different kind of load, marked with a Mission Chit (e.g. cargo), each Scenario defines whether the load is considered heavy enough to change the aircraft's flight characteristics.
3.8 Group Movement (simplification symbol)
Instead of rolling a 'movement' die for each aircraft separately, it may be rolled once for a whole group (such as bombers in a formation). This is possible if all the following criteria are met:
- A blue 'movement' die is rolled. Or a purple die, if using optional rule 3.6 Inertia.
- All aircraft participating in Group Movement must have the same Basic Speed or Loaded Speed (whichever is currently relevant for each aircraft). If using Inertia, all aircraft must be able to adjust their speed to the same number [3.6.1], even if their Basic/Loaded Speeds are different.
- None of the aircraft has engine or wing damage (or all have the same damage) [4.6.1 Damage Type - p.31].
- Each aircraft is no more than 3d and L2 away from at least one other aircraft in the group, both at the start and end of the Round.
- All aircraft must either not change altitude, or they all climb/descend the same number of altitude levels.
- All aircraft must start and end the Round in the same yaw direction (pitch does not matter, as long as all the aircraft change altitude the same number of levels, and bank is irrelevant).
- All aircraft must make a maximum of one 60 degree turn.
Example 71: All three aircraft started the Round oriented in the same yaw direction and close to at least one other aircraft. The die is rolled only once and all three aircraft move the same way: climbing one level and making one 60 degree turn to the right.
An aircraft may not participate in Group Movement if it is performing an action (e.g. firing) in the same Round, with a few exceptions: Level Bombing of Zone Targets or Large Areas [5.4.1 - p.38], and dropping cargo or paratroopers [7.1 - p.47].
Aircraft without bombsights (e.g. fighter-bombers) can bomb from a higher altitude if participating in Group Movement, led by an aircraft that has a bombsight [5.4.1 Level Bombing].
3.9 Board Edge
Unlike land or water battlefields, which are often limited by terrain such as coastlines, rivers, hills and forests, aerial battles are fought across a relatively unlimited space.
The board for Age of Dogfights is quite large, but still limited. To prevent players from continually moving through points along the edges of the board to reduce the likelihood of being fired at, aircraft may not end their movement in the edge zone (marked red in the diagram) on two consecutive Rounds.
3.9.1 Temporary Board Extensions
Aircraft are allowed to temporarily move beyond the board edges, provided they end their movement back within the board. Temporary Board Extensions are used to track their movement path outside the board. One side of these aligns with the grid when placed on the eastern or western board edge, while the other side aligns with the northern or southern edge.
3.10 Collisions
In real combat, some pilots made deliberate contact with enemy aircraft in an attempt to damage them, which most often resulted in the destruction of both aircraft. However, most pilots would not sacrifice themselves in such a way. To avoid abuse, this is not permitted in Age of Dogfights.
Moving through a point on the board occupied by another aircraft while flying at the same altitude level must always be avoided (unless specified otherwise in a Scenario).
However, if an aircraft does fly through a point occupied by another aircraft unintentionally, if there is no other choice (e.g. if an aircraft enters an uncontrolled spin [3.6.5]), roll a standard die. If 1-4 is rolled, it is a near miss, with no further consequences. Otherwise (5+) it is a collision and both aircraft are destroyed.
If one of the aircraft is large [4.5.6 Target Size - p.30], add +1 to the die roll (i.e. rolling 4-6 will result in a collision), and if both aircraft are large, add +2. If an aircraft is a very small target, apply the opposite (lower probability of a collision).
If flying through occupied points is inevitable but there are multiple options, the player may choose where to move the aircraft (e.g. if the choice is between hitting the ground or flying through a point occupied by an allied aircraft, the player may choose to crash into a hill instead of risking to lose both aircraft).
If intentional collisions are permitted in a Scenario, add +1 to the die roll for intentional ramming attacks. This does not apply if the 'target' aircraft is in a cloud [7.6.3] or fog [7.6.4].
4. Air-to-Air Firing
This chapter covers rules for aircraft attacking other aircraft, as well as defensive firing.
4.1 Aircraft Armaments
Unlike WWI, when the typical armament for fighter aircraft was two small-caliber machine guns, fighters in WWII had very diverse armaments, comprising machine guns and/or cannons (2-12 in various combinations) of different calibers. Apart from rare exceptions, all guns on fighter aircraft fired directly forwards. Attack aircraft, bombers, and some transport and patrol aircraft were armed with one or more guns (up to 16) with flexible mountings, located at various points in the fuselage, used mainly for defense against enemy fighters.
Most of the aircraft in Age of Dogfights have one or more guns of various calibers. Guns can be fixed (aimed straight ahead), or on flexible mounts that can aim in multiple directions.
Whether an aircraft has fixed guns, flexible or both, Firepower and firing directions are shown on the Control Panel of each aircraft type, in the top-right corner.
Firing directions are shown by arrows (pointing in 1-6 horizontal directions), while the type(s) of guns and their properties are distinguished by different arrow shapes:
- sharp arrowhead = fixed guns
- blunt arrowhead = flexible guns
- dashed arrow line = cannot fire actively
- hollow blunt arrowhead = not covering all vertical angles
Guns that have their firing directions marked with dashed lines cannot be used to actively attack other aircraft [4.5 Active Firing - p.27]. These can only be used passively, to fire at enemy aircraft approaching them (in a Break Action [4.7 Passive Firing - p.33]). This restriction does not apply if optional rule 4.9 Speed Difference When Firing is used [p.34], or if specified in a Scenario.
During WWII, bombers and other large aircraft occasionally maneuvered in order to attack enemy fighters, but success odds were rather slim because of their low speed and agility, and because dogfighting was not their primary role. In Age of Dogfights, a bomber can easily move into a position behind an enemy fighter, but is not permitted to fire, to maintain realism within the game.
Firepower
Fixed guns have a Firepower value (FP), which is different for each aircraft type.
Firepower values represent the sum of all fixed guns, taking into account their calibers and rate of fire. Some aircraft types have their gun calibers listed on the ammunition slider on the Control Panel, which is for information only and is not used in the game.
Flexible guns have multiple Firepower values, which may vary according to firing direction.
Aircraft can have one or more flexible guns mounted at different locations: on the back, flanks or bottom of the fuselage, in the nose or tail, or in separate nacelles, each covering different firing angles. For each firing direction, the Firepower values of flexible guns are determined based on how many of the guns cover that angle.
4.2 Ammunition
Aircraft carry a limited amount of ammunition. Each aircraft type has a certain number of bursts it can fire, indicated by the number in the far-left red rectangle on the Control Panel.
The allocated number of bursts for each aircraft type is proportional to the amount of ammunition it carries and inversely proportional to the rate of fire of the guns.
Each time an aircraft fires, the red slider is moved one slot to the right (regardless of the firing outcome).
When the slider is on the rightmost slot and the aircraft fires once again, the slider is removed from the Control Panel, indicating that the ammunition is empty.
For some guns (mostly defensive machine guns), the amount of ammunition is not tracked (no slider is used on the Control Panel). These guns can fire an unlimited number of bursts.
Defensive machine guns would rarely run out of ammunition, and keeping track of it would make Control Panels unnecessarily larger.
The amount of ammunition is tracked separately for each individual aircraft (on separate sections of the Control Panel - see 1.1.5 on page 4). If an aircraft has both fixed and flexible guns, the ammunition is either tracked separately for the two, only tracked for the fixed guns (while flexible guns are unlimited), or neither is tracked.
If ammunition is not tracked, the Firepower numbers of those guns are black (no slider is moved when they fire).
4.2.1 Ammunition Tracking Using 'Re-sliding' (simplification symbol)
Because of limited space on some of the aircraft Control Panels, one row of slots for the slider is used multiple times. When the slider reaches the far-right slot and the aircraft fires again, simply return the slider to the leftmost red rectangle that contains two numbers (see diagram) and place a Re-slide Chit anywhere next to the slider.
For each subsequent ammo use, move the slider to the right, as before. When it reaches the rightmost slot for the second time, only one burst is left (when the last burst is fired, remove the slider).
4.2.2 Decreasing Firepower (simplification symbol)
Some aircraft types have different amounts of ammunition for each gun (some of the guns will run out of ammunition before others). An asterisk next to the Firepower number in the top-right corner of the Control Panel indicates that the Firepower is not the same for all gun bursts.
Each slider slot shows a Firepower value for that burst (if the amount of ammunition is equal for all guns, all slots have the same value).
When firing, use the Firepower value printed on the slot where the slider was before moving it to the right.
Example 76: The aircraft fires its third burst. The slider was on the slot with Firepower of 11 and is moved to the slot with Firepower of 7. This burst has a Firepower value of 11.
If using a Tracer Burst [4.5.7 - p.30], use the Firepower value printed on the slot where the slider was before it was moved to the right the second time.
Aircraft with mixed armaments can generally fire their guns selectively, e.g. using only machine guns to save on ammunition when firing at weak targets, or both cannons and machine guns when firing at tougher targets. However, Age of Dogfights does not provide rules for selective fire, as this would be too complex to track.
If players wish, they can improvise to achieve selective fire, e.g. by writing the number of cannon and machine gun bursts for each aircraft separately on paper. Alternatively, use multiple sliders, placing one on each slot, so when an aircraft fires the player may remove the sliders in any order (e.g. first to fire with weak Firepower to save higher Firepower bursts for later).
4.3 Aircraft Durability
Durability represents aircraft resilience to hits by enemy fire. The Durability value depends on the aircraft category (bomber, transport aircraft, etc.), number of engines, engine type (air-cooled or liquid-cooled, radial or inline), construction type (traditional or monocoque), armor (if present), fuel tanks (self-sealing or not), and other specific characteristics (glass nose, very flammable rocket fuel, etc.).
Each aircraft type has a specific Durability value, represented by a bold purple number on the token and the Control Panel (ranging from 0 for very weak targets to 10 for large and very durable multi-engine aircraft).
This number is used when resolving firing outcome [4.6 - p.30 or 6.1.3 - p.44].
4.3.1 Frontal Durability (simplification symbol)
Some aircraft types have a different Durability at the front (usually weaker, due to a glass nose). This value is printed in brackets next to the regular Durability value on the Control Panel.
Frontal Durability is used when the target is attacked directly from the front (i.e. the target's '12 o'clock' position), regardless of aircraft tilt and altitude levels (e.g. frontal position [4.5.3 - p.29]). Also, when an aircraft finishes its movement facing directly towards an anti-aircraft gun (e.g. when strafing [5.3.1 - p.37]), use its Frontal Durability if the AA Gun fires at it [6.1 - p.43].
4.4 Firing Directions
Aircraft can only fire in directions where their guns can aim.
4.4.1 Fixed Guns
Fixed guns fire straight ahead, relative to the aircraft's position (along the longitudinal axis).
If the aircraft is pitched up/down, its guns are aimed at the altitude level immediately above/below.
When firing, the pilot is aiming with the entire aircraft, pointing its nose towards the enemy.
4.4.2 Flexible Guns
Firing directions and Firepower values for flexible guns are shown in the top-right corner of the Control Panel of each aircraft type. There are six possible horizontal directions, and three vertical.
For each of the six horizontal directions (indicated with arrows), the aircraft can aim at targets located on the same altitude level, above or below, depending on where the Firepower values are shown (on, above and/or below a line): above the line = one level above; on the line = same level; below the line = one level below.
To keep the game simpler, firing directions for flexible guns ignore aircraft tilt. This can lead to some unrealistic situations where, for example, dorsal machine guns on a pitched-down aircraft are allowed to fire at a target that is directly behind, which is not logical because the target would be obscured by the aircraft's own fuselage. To avoid such situations, use optional rule 4.4.3 below.
For aircraft that have both flexible guns which can fire straight ahead and fixed guns, if firing straight ahead, the player may choose to fire only from fixed guns, only from flexible guns, or both at once (moving only one red slider or both, if ammunition is tracked [4.2]). On the Control Panel of such aircraft (e.g. the P-61 B Black Widow), the firing direction covered by both types of guns has two Firepower values, which are added together if using both at the same time.
Example 82: When the P-61 B Black Widow fires straight ahead, the player can choose to fire with Firepower 9 (spending only fixed guns ammunition), with FP 5 (using only flexible guns), or with FP 14 (spending ammunition for both).
4.4.3 Flexible Guns When Tilted (optional rule)
If an aircraft is tilted (pitch, roll, or both), the possible aiming directions are changed and the Firepower values correspond to different vertical directions.
It would be logical that flexible guns could cover all angles, including directly above or below the aircraft (at the same point on the board but different altitude levels), but this is not permitted in Age of Dogfights, as it would be too complex to define firing directions.
If flying level (with no bank or pitch), firing directions and Firepower values correspond to the values on the Control Panels, as shown in 4.4.2 above.
If tilted, the values correspond to different altitudes, depending on which side of the aircraft is raised/lowered.
Firepower values on the raised side:
- above the line: does not apply for any altitude
- on the line: applies to the altitude level above
- below the line: applies both to the same altitude level and below
Firepower values on the lowered side (opposite from above):
- above the line: applies both to the same altitude level and above
- on the line: applies to the altitude level below
- below the line: does not apply for any altitude
Pitch: When pitched up, the three front directions count as raised and the three rear directions as lowered. When pitched down, raised/lowered points are the opposite.
Roll: When banked left, the two left directions count as lowered and the two right directions as raised. The single front and rear directions remain unchanged. (Opposite when banked right.)
Pitch and roll: The two left and two right directions change according to the roll tilt, while the single front and rear directions change according to the pitch tilt (see above).
4.5 Active Firing
Active Firing takes place when an aircraft comes into position and fires during its Turn.
To fire, an aircraft must end its movement in an appropriate position (suitable for the type of guns it has, whether fixed or flexible). When in a firing position, roll a standard die and consult the Targeting Chart. Depending on the position of the attacking aircraft relative to its target, a different column in the chart is used (A, B or C). Depending on the aircraft tilt, the die roll may be reduced. If the final number is equal to or greater than the corresponding number in the chart, the target is hit.
Targeting Chart (one standard die)
| Position | A | B | C |
|---|---|---|---|
| Minimum final number to hit | 2+ (5/6 probability) | 4+ (3/6 probability) | 3+ (4/6 probability) |
If using rule 7.5 Pilot Skill [p.49], before consulting the chart, add one to the dice sum for Ace pilots and subtract one for Rookies. This applies only for fixed guns and Active Firing.
If the target is hit, resolve the firing outcome - see rule 4.6 on page 30. If missed, the game is continued with no further consequences.
4.5.1 Strictly From Behind (Position A)
This applies only to aircraft with fixed guns or flexible guns that can fire straight ahead.
The attacking aircraft must end its movement directly behind the target at a distance of 1d or 2d, facing in the same direction (i.e. at the target's '6 o'clock' position). If firing from a distance of 2d, the attacker must be at the same altitude level as the target (in level pitch), while the target may be in any pitch.
To fire at 2d, there must not be any other aircraft on the point between the attacker and the target (firing is not permitted through other aircraft).
Refer to column A in the Targeting Chart. Before consulting the chart, consider the aircraft tilt and firing distance. The die roll is reduced in certain conditions, and if multiple conditions apply '-1' each, it may be reduced by a total of -2 or -3. If at least one condition disallows firing, firing cannot be performed.
Distance: There is no penalty when firing from 1d. When firing from 2d, subtract 1 from the die roll. If at 3d or more, firing is not permitted.
Roll tilt: If both aircraft are level or tilted in the same direction (banked left or right), there is no penalty. If one aircraft is level and the other is banked, subtract 1 from the die roll. If both are tilted in opposite directions, firing is not permitted.
Pitch tilt: If both aircraft are level or tilted in the same direction (pitched up or down), there is no penalty. If one aircraft is level and the other is pitched, subtract 1 from the die roll. If both are pitched in opposite directions, firing is not permitted.
Example 88: Aircraft P came into a firing position, and rolled a 5. There are no penalties because the distance is 1d, and both aircraft are tilted left, with no pitch, which is a hit. This still does not mean the target is destroyed, as the firing outcome is yet to be resolved (see Example 116 on page 31).
Aircraft Q attacked the enemy from above. It rolled a 3, which is reduced by 1 for different roll tilts, resulting in a 2, which is barely enough for a hit.
Aircraft R attacked the enemy from a distance of 2d, resulting in: 4 (die) -1 (distance) -1 (roll) -1 (pitch) = 1, which is a miss.
Aircraft S moved behind an enemy aircraft from below. It is pitched up, but the target is in the opposite pitch (down), therefore it cannot fire.
4.5.2 Angled From Behind (Position B)
This applies only to aircraft with fixed guns or flexible guns that can fire straight ahead.
The attacking aircraft must end its movement behind the target at a distance of 1d, at an angle - 60 degree yaw (i.e. at the target's '4 or 8 o'clock' position). In any case, the attacker must be at the same altitude level as the target, in level flight (without roll or pitch tilt), while the target may be in any tilt.
Refer to column B in the Targeting Chart. Before consulting the chart, consider the target aircraft's tilt. The die roll is reduced by 1 if the target aircraft is in roll or pitch tilt. If tilted in both pitch and roll, reduce the die roll by a total of -2. If the attacker is tilted or at a distance greater than 1d, firing is not permitted.
Target roll tilt: level = no penalty; roll tilt = -1.
Target pitch tilt: level = no penalty; pitch tilt = -1.
When a fighter fires at an enemy aircraft straight from behind ('position A'), it can maintain a constant distance (if flying at the same speed) and therefore has enough time to aim accurately at the target. When attacking from an angle ('position B'), the flight paths of the aircraft converge, so the attacker is constantly closing in on the target, and hence aiming time is reduced. The hit probability from 'position B' is therefore significantly lower than from 'position A'.
Firing positions from an angle are further limited within the game, forcing the attacker to be in level flight (no roll or pitch tilt). This makes it simpler to resolve the firing position, and easier to acquire 'defensive' positions during combat (by reducing attack options for the enemy).
4.5.3 Frontal (Position C)
This applies only to aircraft with fixed guns or flexible guns that can fire straight ahead.
The attacking aircraft must end its movement directly in front of the target at a distance of 2d, facing in the opposite direction (i.e. at '12 o'clock'). The attacker must be in level pitch (at the same altitude level), while the target may be in any pitch. Neither aircraft can be in roll tilt.
Refer to column C in the Targeting Chart. Before consulting the chart, consider the target aircraft tilt. The die roll is reduced by 2 if the target aircraft is pitched up or down. Firing is not permitted if the target aircraft is in roll tilt, or if the attacker is tilted in any way.
Example 101: Aircraft P came into a firing position by passing beneath the target and moving in front of it, at a lower altitude level. It rolled a 3, which is a hit (there are no penalties, because both aircraft are completely level).
Aircraft Q pitched down at the end of movement to be in the same pitch as the target. The result is: 6 (die) -1 (roll) -1 (pitch) = 4, which is a hit. Note that the target already has a Damage Marker attached, which means it had received damage previously during the game [4.6.1 - p.31].
Example 103: Aircraft P came into a firing position, and rolled a 5, which is reduced by 2 because the target is pitched, resulting in barely enough to hit (continued in Example 118 on page 31). Aircraft Q has ended its movement in front of the enemy aircraft, but cannot fire because the target is banked. Aircraft R has ended its movement banked, so cannot fire.
4.5.4 Parallel (Position C)
This applies only to aircraft with flexible guns. Firing is possible only if the guns cover the direction facing the target.
The attacking aircraft must end its movement next to the target (at any of the six points around the target, at the same or adjacent altitude level) at a distance of 1d, in the same yaw direction and pitch tilt as the target. The attacker must not be banked.
Refer to column C in the Targeting Chart (except if the target is directly in front of the attacker [4.5.1]). Before consulting the chart, consider the target aircraft tilt. The die roll is reduced in certain conditions. If multiple conditions require reducing the die roll, it may be reduced by a total of -2. If at least one condition disallows firing, firing is not permitted.
Target roll tilt: level = no penalty; roll tilt = -1.
Pitch tilt: both level = no penalty; both pitched in the same direction = -1; different pitch = firing not permitted.
Example 99: Aircraft P came into a firing position, and rolled a 6 with no penalties (both aircraft are level), which is a hit (continued in Example 117 on page 31).
Aircraft Q rolled a 5, which is reduced by a total of 2 (the target is both pitched and banked), resulting in 3, which is a miss.
Aircraft R has ended its movement banked (it turned in the last Step), therefore cannot fire.
4.5.5 'Schrage Musik' (Position C)
This refers to guns mounted in an unusual position - fixed, but aimed upwards. The firing position is the same as for flexible guns, only limited to a single option. These guns are marked with a hollow, sharp arrowhead.
Aircraft with 'Schrage Musik' guns are not included in the basic game, only some expansions.
The attacking aircraft must end its movement behind the target in the same yaw direction, at a distance of 1d, one altitude level below. Both aircraft must be completely level (no pitch or roll tilt).
Refer to column C in the Targeting Chart. There is only one possible firing position, therefore there are either no penalties or firing is not permitted.
4.5.6 Target Size
This rule applies to all firing positions and all types of guns (fixed/flexible).
Large aircraft are marked with a large-target symbol. On the token, the Durability number is printed within this symbol to save space. When aircraft with this symbol are targeted, add +1 to die roll before consulting the Targeting Chart (it is easier to hit large aircraft).
Very small aircraft are marked with a small-target symbol. When these are targeted, subtract 1 from the die roll before consulting the Targeting Chart.
Very small aircraft are not included in the basic game, only some expansions.
4.5.7 Tracer Burst
A Tracer Burst can only be used when firing from fixed guns (and only during Active Firing).
Every time an aircraft fires, before rolling the dice, the player may decide whether to use a Tracer Burst to increase hit probability. If a Tracer Burst is used, move the red slider an additional slot to the right (for a total of two slots), and add +1 to the rolled number before consulting the Targeting Chart.
Tracer Bursts are permitted even if ammunition is not tracked (i.e. it is unlimited) [4.2 - p.25], so there is no reason not to use it.
Example 113: The German aircraft came into the best firing position (strictly from behind, at a distance of 1d, with the same roll and pitch tilt as the target). It also fires a Tracer Burst, which means there is no need to roll the die, as a hit is guaranteed (column A in the Targeting Chart requires a minimum of 2 for a hit, so with Tracer Burst, it would be enough even if 1 is rolled).
This still does not mean the target is destroyed, as the firing outcome is yet to be resolved (see 4.6 below and Example 121 on page 32).
4.5.8 Defensive Twitch (optional rule)
Some aircraft had canopies that provided full 360 degree visibility (mostly in the late war), such as the P-51 D Mustang, Tempest Mk II and Me 262. When attacked by an enemy fighter from behind (at 6 o'clock), the pilot could see the attacker approaching and 'twitch' the aircraft at the last moment, thus avoiding being hit by enemy fire.
Only aircraft with a Defensive Twitch symbol can perform a Defensive Twitch (small aircraft that have good rear visibility). These aircraft can reduce the hit probability of enemy aircraft if attacked strictly from behind [4.5.1 - p.27] and if the defending aircraft is not banked. Also, Defensive Twitch is not permitted if the attacker is 'below the tail' from the defender's perspective (Diagram 114).
If the opponent is using a Defensive Twitch, subtract 1 before consulting the Targeting Chart.
Before the die is rolled, the player controlling the defending aircraft must decide whether to use Defensive Twitch (and reduce the hit probability) or not, and say so.
In some situations the player may choose not to evade enemy fire, to avoid turning immediately in the next Round (e.g. if the attacking aircraft has weak Firepower and therefore is not a serious threat).
If performing this maneuver, place an Evading Chit next to the aircraft. In the next Round, if it survived the enemy fire, the aircraft must turn left or right in the first movement Step (to reflect the evasive maneuver).
Example 115: The British aircraft is attacked from 'position A', so the player decides to use Defensive Twitch and places an Evading Chit. The attacker uses a Tracer Burst. The firing results in: 3 (die) -1 (roll) -1 (pitch) +1 (Tracer Burst) -1 (Defensive Twitch) = 1, which is a miss.
4.6 Firing Outcome
If the target is hit [4.5 Active Firing - p.27 or 4.7 Passive Firing - p.33], proceed to resolve the firing outcome. Reminder: move the red slider each time the aircraft fires (if ammunition is tracked), even if the target is missed.
Roll two standard dice. Add the firing aircraft's Firepower [4.1 - p.25] to the sum, and subtract the target Durability [4.3 - p.26], then consult the Firing Outcome Chart:
Firing Outcome Chart (two dice)
| Final sum | Firing result |
|---|---|
| 6 or less | unaffected |
| 7-10 | damaged |
| 11-12 | double damage |
| 13+ | destroyed |
The target may be destroyed, damaged or unaffected. If both dice roll a 1, the target is always unaffected, regardless of Firepower and Durability values.
If the result is 'unaffected', the target aircraft suffers no consequences. If the result is 'destroyed', the target aircraft token is immediately removed from the board.
Example 116 (continuation of Example 93 on page 28): Aircraft P's firing outcome is: 3 + 5 (dice) +11 (Firepower) -5 (Durability) = 14, which means the target is destroyed.
Aircraft Q fires its fifth burst, therefore its current Firepower is 7 [4.2.2 Decreasing Firepower - p.26]. The firing outcome is: 2 + 2 (dice) +7 (Firepower) -5 (Durability) = 6, so the target is unaffected.
If the result is 'damaged', the targeted aircraft remains in play, but suffers certain restrictions for the remainder of the game. Roll the 'damage' die to determine which part of the aircraft is affected - see 4.6.1 below.
If the result is 'double damage', the aircraft is either immediately destroyed, or it receives two damages at once (roll the 'damage' die twice), depending on the aircraft type - see 4.6.2 below.
Players may agree to alter the Firing Outcome Chart if they consider it is too easy/difficult to shoot down aircraft, e.g. increase range for damage (6-11) to make it easy to cause damage but rarely destroy from the first shot, or lower the threshold for destruction (10+) when playing with many aircraft, or increase all numbers when playing with a small number of aircraft, to make the game last longer.
4.6.1 Damage Type
There are four types of damage: wings, tail, guns or engine. When an aircraft is damaged, place a Damage Marker of the appropriate color on the token. The marker will remain on the token for the rest of the game.
Since a Damage Marker partially obscures details on the aircraft token, if preferred, it can be placed on the Control Panel instead.
Wings
If the blue side is rolled on the die, place a blue Damage Marker on the aircraft. With damaged wings, aircraft movement speed is reduced by 1 in each Round (due to reduced aerodynamic efficiency).
Tail
If the yellow side is rolled on the die, place a yellow Damage Marker on the aircraft. With a damaged tail, aircraft Agility is reduced by I (one whole number) in each Round (due to impaired control of the tail surfaces).
Engine
If the green side is rolled on the die, place a green Damage Marker on the aircraft. With a damaged engine, aircraft movement speed is reduced by 2 in each Round.
When the engine is damaged, Booster cannot be used [3.1.1 - p.10].
If an aircraft receives both wing and engine damage, the total penalty for movement speed is not added together (-1 and -2). Instead, apply only the higher penalty (-2).
Guns
If the red side is rolled on the die, place a red Damage Marker on the aircraft. With damaged guns (part of the cannons or machine guns are destroyed or jammed), Firepower values (each value, for fixed and/or flexible guns, for each firing angle) are divided by 2, rounded down (e.g. 9 becomes 4).
If Firepower is reduced to zero due to damage (1 divided by 2, rounded down), the aircraft will not be able to fire at all.
If an aircraft does not have any guns, the red marker is still placed on the token (indicating that it suffered general damage which does not change aircraft performance).
If the multicolor side is rolled on the die, simply re-roll the die until any other side is rolled.
If the firing aircraft is piloted by an Ace [7.5 Pilot Skill - p.49] and the multicolor side is rolled, the player chooses which of the four damage types are inflicted (Ace pilots can deliberately aim at a certain part of the target). This applies only for fixed guns and Active Firing (in the case of flexible guns or Passive Firing, the die is always re-rolled).
Example 117 (continuation of Example 99 on page 29): The firing outcome is: 4 + 1 (dice) +7 (Firepower) -3 (Durability) = 9, which means the target is damaged. The 'damage' die roll results in wing damage, so a blue marker is placed on the target token.
Example 118 (continuation of Example 103 on page 29): Aircraft P fires its seventh burst, with Firepower 6. The firing outcome is: 6 + 4 (dice) +6 (Firepower) -6 (Durability) = 10, resulting in tail damage (yellow marker).
4.6.2 Damage Capacity
Most aircraft types are immediately destroyed if they receive a second damage, whether on two separate occasions or if the firing outcome is 'double damage' (there is no need to roll the 'damage' die to determine the type of damage).
Aircraft with a double-damage-capacity symbol (large multi-engined aircraft) can receive two damages before being destroyed, but only if the two are not of the same type (e.g. double tail damage means the aircraft is destroyed).
To mark an aircraft with two damages, use Damage Markers of different shapes (designed to both be visible when placed on top of each other).
When such an aircraft receives a total of three damages, it is destroyed.
Aircraft with a fragile symbol (small and flammable aircraft, included in some expansions) will not survive a single damage (they are immediately destroyed if the firing outcome is 'damaged').
Example 119 (continuation of Example 110 on page 29, and will continue further in Example 128 on page 33): Aircraft P attacked its target from the front, so the Frontal Durability of 6 is used [4.3.1 - p.26]. The firing outcome is: 6 + 6 (dice) +5 (Firepower) -6 (Durability) = 11, which means double damage. The 'damage' die is rolled twice, resulting in engine and gun damage.
Aircraft Q's firing outcome is: 5 + 5 (dice) +5 (Firepower) -8 (Durability) = 7, which means a single damage, in this case wings.
4.6.3 Self-Inflicted Engine Damage
Unrelated to firing, if an aircraft uses full throttle one more time after safe usage (the green slider was on the rectangle with a '!') and the green die shows a red number (i.e. '0' or '+1'), its engine will be damaged (due to overuse). A green Damage Marker is placed on the token (or it is destroyed if it already received one damage).
If engine damage is self-inflicted, the penalty of '-2' will immediately apply in that Round.
Example 120: The aircraft has already used full throttle three times (its maximum), but the player wishes to attempt full throttle once more to escape from danger. The player rolls a red '+1' on the green die, resulting in engine damage. A green Damage Marker is placed and the aircraft moves: 10 (Basic Speed) +1 (die) -1 (climb) -2 (damaged engine) = 8 Steps.
4.6.4 Higher Effectiveness of Cannons
When firing at armored or otherwise tough aircraft, machine gun bullets tend to bounce off, while cannon shells penetrate more easily, causing more damage. For weak targets, cannons and machine guns are equally effective.
Red slider slots on the Control Panel that have a cannon symbol represent gun bursts that consist mostly or solely of cannon shells. If this kind of burst is fired at a target with Durability 6 or higher, add 1 to the sum of numbers before referring to the Firing Outcome Chart (applies both to 4.6 [p.30] and 5.3.3 [p.38]).
4.6.5 Double Burst
Double Burst can be used only for Active Firing (any firing position, except 4.5.2 Angled From Behind and 4.5.3 Frontal).
If the targeting resulted in a miss [4.5 - p.27], or if the firing outcome did not result in a destroyed target, a Double Burst can be fired, but only if the firing aircraft is in a position completely parallel to the target, pointed in the same direction, in exactly equal tilt (both roll and pitch).
When firing a Double Burst, move the red slider an additional slot to the right (for a total of two), regardless of the firing outcome.
If both Tracer Burst and Double Burst are fired, the red slider is moved a total of three slots to the right.
Hit probability
Repeat the procedure described in 4.5 on page 27. In the case of fixed guns, always add +1 before consulting the Targeting Chart, as the previous burst has served as a Tracer Burst (a bonus is always applied, so no additional bonus can be obtained for using a Tracer Burst), regardless of whether the previous burst was a hit or not.
If using rule 4.5.8 Defensive Twitch [p.30], and the target has applied it, subtract one from the die roll, even for a Double Burst (it is more difficult to keep the target in the gunsight after its sudden change of flight path).
Firing outcome
If the target is hit, re-roll two standard dice to determine the firing outcome of the Double Burst, as described in 4.6 Firing Outcome on page 30 (add Firepower and subtract Durability, etc.).
If the first burst targeting resulted in a hit (but the firing outcome was not destruction of the target), add +2 to the sum before consulting the Firing Outcome Chart for the Double Burst.
Some of the destructive power of the first burst (if it was not a miss) is passed on to the Double Burst, making it more effective.
Example 121 (continuation of Example 113 on page 30): Both dice for firing outcome resulted in 1, which always means the target is unaffected. However, since the attacker is in exactly the same orientation as its target (same yaw, pitch and roll), it fires a Double Burst. As in the first burst, there is no need to roll a die for targeting because it is a guaranteed hit. The Double Burst firing outcome is: 4 + 1 (dice) +9 (Firepower) -4 (Durability) +2 (Double Burst bonus, as the first burst was also a hit) = 12, which means the target is destroyed.
4.6.6 Short Burst
To conserve ammo, an aircraft can fire a Short Burst. This can be used both for Active Firing [4.5] and Passive Firing [4.7]. (If ammunition is not tracked [4.2 - p.25], there is no point in using it.)
Instead of moving the red slider to the right, it is instead turned hollow side up. If a Short Burst is used again later, the slider is turned hollow side back down and moved to the right. If the slider starts hollow side up and a 'normal' burst is fired, it is moved one slot to the right with the hollow side still facing up. In other words, for example, if the slider is hollow side up on number 5, it means there are four and a half bursts left.
If using a Short Burst, it must be announced before rolling the die for targeting [4.5 - p.27].
When firing a Short Burst, the Firepower value of the current burst [4.2.2 Decreasing Firepower - p.26] is divided by 2, rounded down.
If the aircraft has damaged guns [4.6.1 Damage Type - p.31] and fires a Short Burst, the Firepower value is reduced (and rounded down) twice (e.g. 7 becomes 3, which then becomes 1).
If Firepower is reduced to zero because of a Short Burst (if it was not already reduced to zero because of damage), the aircraft will still be able to fire, but simply with no Firepower added to the die roll.
Double Burst rule [4.6.5] can be combined with Short Burst rule, i.e. both the first and the second part of the Double Burst can be either normal or a Short Burst.
Example 122: A Tempest FB Mk II has Firepower 9 and fires its second-last burst at a Bf 109, resulting in a hit and damage to the target. The red slider is moved one slot to the right. It can fire a Double Burst, and decides to use a Short Burst this time so the Firepower is reduced to 4, because it has only one burst left and the target is already damaged and has a relatively low Durability of 3, with an additional bonus of +2 for the Double Burst. The slider is not removed, but instead is flipped to hollow side up, which means it will have half a burst remaining.
Ammunition cannot be saved on a Tracer Burst in this way (always move the slider normally to the right when using a Tracer Burst).
4.7 Passive Firing
During WWII, besides fighter aircraft that were specialized in attacking other aircraft, bombers often took down fighters that attacked them. With rare exceptions, all bombers had one or more defensive machine guns.
When an aircraft is attacked, if it has suitable guns (guns that are currently oriented towards the attacker, either fixed or flexible), it can fire back at the attacker. This is called Passive Firing, because it can only be performed if an opponent aircraft approaches it first.
To carry out Passive Firing, the attacker's Turn is interrupted in order to play a Break Action. The Break Action is performed after the attacker has fired, therefore only if the attack did not result in the destruction of the target (either because of a miss or partial damage). Once the Break Action is completed, the attacking player then continues their Turn, which may result in further opportunities for Break Actions by defending aircraft.
If the attacker fires a Double Burst [4.6.5], it will be performed after the Break Action, only if the Passive Firing did not result in destruction of the attacker (in other words, the Break Action is performed in between the two bursts of the attacker).
4.7.1 Firing Position
The general principle is that Passive Firing is possible if an opponent's aircraft ends its movement in such a place and orientation that could be a position for Active Firing - see 4.5.1-4.5.4 on pages 27-29 (any position, regardless of whether the opponent's aircraft actually fired, or if it even has guns that can aim in that direction), provided that the defensive shooter has guns that can fire in the direction of the opponent's aircraft [4.4 Firing Direction - p.26].
Detailed explanation:
Passive Firing is possible if the 'attacker' (the target of Passive Firing) is positioned relative to the 'defender' (the aircraft that uses Passive Firing) in any of the following ways (as already explained in 4.5 but from the opposite point of view):
- Strictly behind (see 4.5.1). The aircraft must be at a distance of 1d on the same or adjacent altitude levels, or at 2d but on the same altitude level. The 'attacker' must be facing the 'defender', both horizontally and vertically (i.e. if they are on different altitude levels, the attacker must be pitched up or down accordingly [4.4.1 - p.26]). Both aircraft may be in any pitch/roll, but not in opposite directions.
- Behind at an angle (see 4.5.2). The aircraft must be at a distance of 1d, on the same altitude level. The 'attacker' must be facing the 'defender', with no tilt. The 'defender' may be in any pitch and roll tilt.
- Frontal (see 4.5.3). The aircraft must be at a distance of 2d, on the same altitude level. The 'attacker' must be level, facing the 'defender' (flying in the exact opposite direction). The 'defender' may be in any pitch, but not banked.
- Parallel (see 4.5.4). The aircraft must be at a distance of 1d, on the same or adjacent altitude levels. The two aircraft must be in the same yaw direction and pitch tilt. The 'defender' may be in any roll tilt, while the 'attacker' must not be banked.
4.7.2 Hit Probability and Firing Outcome
The hit probability of a defender's Passive Firing is equal to the attacker's Active Firing (refer to the same column in the Targeting Chart and apply the same penalties for unfavorable tilt and/or distance, if any - see 4.5.1-4.5.5), but subtract an additional -1 from the die roll.
If players consider Passive Firing to be too ineffective, the hit probability can be made the same as for Active Firing, without the additional '-1'.
Rule 4.5.6 Target Size [p.30] applies, with the attacker aircraft's size taken into account.
Tracer Burst [4.5.7 - p.30] cannot be used for Passive Firing.
If the target is hit, proceed to resolve the firing outcome, as described in 4.6 Firing Outcome on page 30.
Example 127: After being attacked by aircraft P (which resulted in a miss), aircraft X fires passively in a Break Action. The result is: 5 (die) -1 (Passive Firing penalty) = 4, which is a hit according to column B in the Targeting Chart. The firing outcome is: 5 + 6 (dice) +1 (Firepower) -3 (Durability) = 9, resulting in wing damage (blue marker).
Aircraft Q has caused engine damage to aircraft Y, but aircraft Y cannot return fire because its machine gun does not cover the altitude level below.
Example 128 (continuation of Example 119 on page 31): Aircraft X fires passively, resulting in: 4 (die) -1 (Passive Firing penalty) = 3, which is a hit (column C in the Targeting Chart). The firing outcome is: 3 + 5 (dice) +2 (Firepower at that firing angle is 4, divided by 2 because of guns damage) -6 (Durability) = 4, which means the target is unaffected.
Because aircraft P survived the defensive fire, and the positions of the two aircraft are completely parallel, aircraft P can fire a Double Burst [4.6.5], which results in a hit. The Double Burst firing outcome is: 4 + 2 (dice) +5 (Firepower) -6 (Frontal Durability) +2 (Double Burst bonus) = 7, which means the target is destroyed (a single damage on top of two damages previously caused).
Example 129: Aircraft Y fires passively at aircraft Q, resulting in: 6 (die) -1 (roll) -1 (pitch) -1 (Passive Firing penalty) = 3, which is a hit. The firing outcome is: 4 + 6 (dice) +3* (Firepower) -6 (Durability) = 7, which means a damage, in this case wings (blue marker).
* If optional rule 4.4.3 Flexible Guns When Tilted is used [p.27], a Firepower value of 2 would be used instead, because aircraft Y is tilted in such a way that aircraft Q is 'below' from its perspective. The sum of numbers would therefore be 6, making the target unaffected.
Example 130: The British bomber incautiously approaches the German fighter, which then fires its flexible guns in a Break Action. The Passive Firing result is: 4 (die) -1 (roll) -1 (Passive Firing penalty) = 2, which is a miss according to column C in the Targeting Chart.
If the attacker did not fire at the defender, but at another aircraft, consider its position relative to the defending aircraft that is currently performing Passive Firing to resolve the hit probability (see example below).
Example 131: Aircraft P attacked aircraft X and rolled a 3, which is a hit according to column A in the Targeting Chart. The firing outcome resulted in a tail damage.
Aircraft X does not have any guns, so cannot return fire. However, aircraft Y can use a Break Action, despite it not being attacked. Its targeting resulted in: 4 (die) -1 (Passive Firing penalty) = 3, which is a hit according to column C in the Targeting Chart (aircraft P is in a parallel position relative to aircraft Y [4.5.4 - p.29]). Note that a fighter with no flexible guns would not be able to attack other aircraft from a parallel position, but Passive Firing is still permitted.
An aircraft can become the target of Passive Firing from multiple enemy aircraft in a single Break Action (e.g. when bombers fly in a tight formation, thus protecting each other from enemy fighters, as shown in the example below).
Example (continued): Aircraft P attacked aircraft X from 'position B', but did not cause any damage. Aircraft X returns fire in a Break Action, resulting in: 2 (die) -1 (pitch) -1 (Passive Firing penalty) = 0, which is a miss (column B in the chart).
Aircraft Y is not permitted to fire passively at aircraft P, because no firing position is possible from their relative position.
Relative to aircraft Z, however, aircraft P is in a parallel position, therefore it can also use Passive Firing in the same Break Action (before the attacker's Turn is continued). The targeting resulted in: 6 (die) -1 (roll) -1 (Passive Firing penalty) = 4, which is a hit (column C in the chart). The firing outcome is: 1 + 5 (dice) +3* (Firepower) -3 (Durability) = 6, resulting in an unaffected target.
* If optional rule 4.4.3 Flexible Guns When Tilted is used [p.27], a Firepower value of 4 would be used instead, because aircraft X's left wing is tilted downwards, towards aircraft P, so the firing direction is taken into account as if the two aircraft are on the same altitude level. The sum of numbers would therefore be 7, leaving the target damaged.
4.8 Firing at Multiple Targets
Whether an aircraft may fire at multiple targets in a single Turn (and a Break Action during the following opponent's Turn) depends on the type of guns, and if firing actively or passively, as below.
Active Firing
An aircraft may only fire actively at a single target in each Round, even if it has both fixed and flexible guns.
Example 132: Aircraft P came into a position from which it could attack two enemy aircraft, but it must choose only one of the two - it can either fire at aircraft X from 'position B' (using fixed, flexible, or both guns), or at aircraft Y from a parallel position (using flexible guns).
Passive Firing
An aircraft may use flexible guns to fire passively only at a single target in each Round.
Example 133: After aircraft P has fired and missed, aircraft X returned fire in a Break Action. Later in the opponent's Turn, aircraft Q also attacks aircraft X and misses. However, aircraft X cannot return fire at aircraft Q because it already fired at aircraft P.
Some aircraft have several flexible machine guns, aimed at different angles, but to keep the rule simple, no aircraft is permitted to fire at multiple attackers at once.
Players may agree to allow some aircraft to fire at more than one attacker if the aircraft has multiple gun turrets and the enemy aircraft are attacking it from different sides.
An aircraft can passively fire only at the enemy aircraft that was just moved. If there is another enemy aircraft already positioned in such a way that it could be a firing position (because it was still not moved when the opponent's Turn is interrupted by a Break Action), the defender cannot passively fire at it.
Example 134: After being attacked by aircraft P, aircraft X can return fire. There is also another aircraft nearby, in a parallel position, but aircraft X cannot fire at it in the Break Action because aircraft Q was not the one that was most recently moved (simply because its designation number is larger than aircraft P's, so it comes later in the movement order [2.1.1 - p.6]).
If an aircraft has both fixed and flexible guns, it can fire passively at two targets in a single Round: one from the frontal position using fixed guns, and the other from any other position using flexible guns.
Active and Passive Firing
If flexible guns are used for Active Firing, if the aircraft is attacked during the following opponent's Turn, remember that the flexible guns were just used, so cannot be used again for Passive Firing (the machine guns cannot instantly be aimed in a different direction).
If fixed guns are used for Active Firing and the aircraft is attacked during the following opponent's Turn, it can freely use fixed and/or flexible guns for Passive Firing (no need to remember whether fixed guns were used in the previous Turn).
4.9 Speed Difference When Firing (optional rule)
From WWI until the 1980s, fighter aircraft became faster from generation to generation. A faster fighter can easily intercept an opponent and can always escape from combat if outnumbered or in a worse tactical situation. Generally, it is desirable to have a higher speed than the opponent when attacking. However, too high a speed difference is disadvantageous, even for faster-moving aircraft, because the aiming and firing time is extremely short.
To use this rule, current movement speed of each aircraft must be tracked using Speed Indicators. After moving each aircraft, place a Speed Indicator next to it, showing a number equal to its Final Speed (as shown in Example 64 on page 21).
When using this rule, all aircraft can actively attack other aircraft using all their guns (the restriction for guns with dashed arrow lines [4.1 Aircraft Armament] does not apply).
Flying in the same direction
When attacking from any firing position except frontal [4.5.1, 4.5.2, 4.5.4 or 4.5.5], if the attacker's current movement speed does not match the number shown on the target's Speed Indicator, some penalties and restrictions may apply.
When resolving targeting [4.5 - p.27], before referring to the Targeting Chart, reduce the die roll according to the Speed Difference Chart. The penalties are applied for different speed difference ranges, depending on whether the attacker's speed is higher or lower than the target's speed.
Speed Difference Chart
| Attacker faster by | Attacker slower by | Effect |
|---|---|---|
| 0-3 | 0 | no penalty |
| 4-6 | 1 | -1 |
| 7-10 | 2-3 | -2 |
| 11+ | 4-6 | -3 |
| (n/a) | 7+ | firing not permitted |
When the faster aircraft attacks, it is closing in on the target and can easily follow the target's flight path. If slower, the attacker has to predict the target's path and position to let the target overshoot it, which reduces aiming time, which is why firing is more restricted when the attacker is slower.
Double Burst [4.6.5] can only be used if the speed difference is 3 or less.
If the speed difference is 7 or above, firing is only permitted if attacking Strictly From Behind (i.e. 'position A') [4.5.1] or Angled From Behind ('position B') [4.5.2].
When firing in a Break Action, apply the same penalties from the chart above, but check whether the attacker is faster or slower (the aircraft that was just moved, not the aircraft that fires passively).
Example 135: Aircraft P fires at aircraft X, resulting in: 4 (die) -1 (pitch) -2 (speed difference of 3, attacker slower) = 1, which is a miss according to column A in the Targeting Chart.
Aircraft Q fires at aircraft Y, resulting in: 5 (die) -1 (pitch) +1 (large target) -1 (speed difference of 6, attacker faster) = 4, which is a hit (column A in the chart). The firing outcome is a wing damage.
Aircraft Y returns fire in a Break Action, resulting in: 3 (die) -1 (pitch) -1 (same as above: speed difference of 6, attacker faster) -1 (Passive Firing penalty) = 0, which is a miss (column A).
Flying in opposite directions
When firing from the frontal position [4.5.3], add the attacker's and target's speed together and refer to the following chart:
Frontal Speed Difference Chart
| Total speed | up to 12 | 13-16 | 17-21 | 22-27 | 28+ |
|---|---|---|---|---|---|
| Effect | no penalty | -1 | -2 | -3 | firing not permitted |
Example 136: The German fighter attacked the British fighter from the front, resulting in: 4 (die) -2 (total speed 21) = 2, which is a miss (column C in the chart).
The British fighter fires back passively, resulting in: 6 (die) -2 (total speed 21) -1 (Passive Firing penalty) = 3, which is a hit (column C). The firing outcome is destroyed target.
4.10 Air-to-Air Rockets (simplification symbol)
Because of the need to shoot down large and tough Allied bombers, German fighters used air-to-air rockets developed at the end of WWII. These were unguided rockets that had low accuracy, so they were fired in salvos.
Aircraft with a rocket symbol on their Control Panel may carry air-to-air rockets (Me 262).
A-A Rockets are represented by a slider (one salvo per slot). If carrying A-A Rockets, the slider is placed on the far left rectangle before the start of game.
While carrying rockets, the aircraft's flight characteristics are changed [3.7 - p.23]. When a salvo is launched the slider is moved to the right, and is removed from the Control Panel when the last salvo is launched (restoring the flight characteristics from the next Round).
Launching position and hit probability
To launch A-A Rockets, the aircraft must finish its movement strictly behind the target at 2d or 3d, at the same altitude level. The attacker must be in completely level flight, while the target may be in any tilt.
Roll a standard die and consult the Air-to-Air Rocket Chart. Before consulting the chart, consider the target aircraft's tilt. The dice roll is reduced by 1 if the target aircraft is in roll or pitch tilt. If tilted in both pitch and roll, reduce the die roll by a total of -2.
Air-to-Air Rocket Chart
| Distance | Minimum final number to hit |
|---|---|
| 2d | 4+ |
| 3d | 5+ |
Rule 4.5.6 Target Size [p.30] applies when launching A-A Rockets (+1 for large targets, -1 for very small targets).
If using rule 7.5 Pilot Skill [p.49], before consulting the chart, add one to the dice sum for Ace pilots and subtract one for Rookies.
If the target is hit, it is always destroyed (regardless of the target's Durability and damage capacity).
Example 141: The Me 262 launched rockets at the enemy bomber from a distance of 3d, resulting in: 4 (die) +1 (large target) -1 (target roll tilt) = 4, which is a miss. The bomber cannot fire its defensive machine guns at the attacker because it is out of range (3d).
A-A Rockets cannot be launched at the same time as firing guns (even if the aircraft acquires a position suitable for both guns and rockets, i.e. 2d behind the target).
Rules 4.5.7 Tracer Burst, 4.6.5 Double Burst, 4.6.6 Short Burst and 4.9 Speed Difference When Firing do not apply for A-A Rockets.
5. Air-to-Surface Attacks
During WWII, air attacks on surface targets often played a decisive role in both land and sea battles. Any initial advantage in ground units or ships was often negated by attacks from enemy bombers and attack aircraft. Compared to WWI, when aircraft capabilities for air-to-surface actions were quite limited, WWII weapons and tactics were significantly improved.
Surface targets can be destroyed using various weapons, such as guns, bombs, rockets, or torpedoes.
5.1 Ammunition
Firepower and tracking of ammunition for guns (machine guns and cannons) is the same as explained in 4. Air-to-Air Firing [p.25].
The quantity of other weapons (bombs, rockets and torpedoes) is tracked using chits. Each chit has a Power value and a symbol showing the weapon type. Bomb Chits have Power values ranging from 10-500, Rocket Chits have a Power value of 25 on one side and 15 on the other, and Torpedo Chits have a value of 50.
Bomb Power values are equal to 1/10 of their mass in kilograms (e.g. a Bomb Chit of 50 represents 500kg).
Weapon types and the maximum Power values each aircraft type can carry (if any) are shown on their Control Panel. Some aircraft types can carry different types of weapons, but not simultaneously (e.g. they can carry either bombs or rockets, but not both). Also, an aircraft cannot carry an external fuel tank [7.2.3 - p.48] at the same time as bombs, rockets or torpedoes.
Example 142: A Fairey Swordfish can carry either a Torpedo Chit of 50, or a Bomb Chit of 75, not both.
Some aircraft types carry bombs inside their fuselage ('Int.' = Internal Load), some on external mounting points ('Ext.' = External Load), and some use a combination of both. Although irrelevant to gameplay, this information may be useful when creating Scenarios.
Chits are placed on a dedicated spot on Control Panels. Bomb Chits can be placed on top of each other, with a total value matching the aircraft's maximum Power value for bombs.
Whether or not an aircraft starts a game loaded with bombs, rockets or torpedoes is determined either by a Scenario or by free choice.
Remember that while carrying a load, flight characteristics for most aircraft types are changed [3.7 Limited Performance with Load - p.23].
When an aircraft drops bombs or launches torpedoes or rockets, the chits are taken from the Control Panel and either removed from the game or placed on the targeted Task Marker (if hit).
5.1.1 Load Jettison
An aircraft is allowed to jettison bombs, rockets or torpedoes at any time (e.g. to restore unrestricted flight characteristics and be able to engage in a dogfight), by simply removing the chits from the Control Panel. When the load is dropped/launched, the aircraft will regain unrestricted flight characteristics from the next Round.
5.2 Surface Targets
Surface targets can be troops, vehicles, vessels, fortifications, cities, etc., and are represented by Task Markers. Target Durability is determined by each Scenario or pre-agreed for each Mission. When destroyed, a Task Marker is removed from the board. Targets can be points, ships, small zones or large areas.
Point Targets (individual tanks, artillery, various vehicles, small objects, etc.) are marked by hexagonal markers (Point Task Markers), each covering a single point on the board. General guidelines for setting Durability values of Point Targets are:
- Tanks: 10 (light), 15-20 (medium), or 25-30 (heavy)
- Artillery positions: 5-10
- Bunkers: 20-50
- Trucks and other unarmored vehicles: 4-6
- Unsheltered infantry: 2
- Infantry in trenches: 4-10
- Small houses and other objects: 8-30
- Small vessels: 5-40
Area Corners can also be used as alternative Point Targets. In a single game, these can have a different Durability compared to hexagonal Point Task Markers. Also, Area Corners can be used to represent targets with different Durability (tanks, bunkers, etc.) depending on the direction of attack by strafing or rockets (low Durability or high Durability, Diagram 144), while attacks by bombs always use the lower value.
An AA Gun Marker also counts as a Point Target, with the hollow hexagonal center being the target point. It represents small-caliber anti-aircraft guns with a recommended Durability of 5-10. (Note that these can also fire back, as described in rule 6.1 on page 43.)
Ships are represented by suitably-shaped Task Markers. Their Durability can vary from 25 (small unarmored ships) to 300 (battleships). Ships occupy height LL (aircraft must fly above that altitude through points directly above ships).
Zone Targets can represent any large target or group of small targets (factory buildings, harbor, fortifications, etc.), marked by rectangular markers (Zone Task Markers). The Durability can be any value, usually 200-2000.
Large Areas are bounded by Area Corners and can be any size and shape (city quarter, industrial zone, etc.). These areas have unlimited Durability (they are non-destructible), but some Scenarios can specify a certain goal for bombing (e.g. 3000).
When firing with guns (strafing), the target is either destroyed or remains unaffected, leaving no further consequences (i.e. surface targets cannot be partially damaged by strafing).
Conversely, all hits from bombs, rockets and/or torpedoes are cumulative, so a target with high Durability can be destroyed with multiple hits by weapons of lower Power (chits are placed on the Task Marker until the total Power value reaches the target Durability value), unless otherwise specified in a Scenario.
5.3 Strafing
Strafing primarily refers to aircraft firing at targets using fixed machine guns or cannons. Fighters and fighter-bombers were mostly used in this role, as well as specialized attack aircraft.
Such attacks are performed only from low altitudes and generally achieve high precision, but also present a great risk for attackers if the targets are defended by anti-aircraft guns.
Aircraft with forward-firing, fixed guns can perform strafing. These aircraft have an upward-facing arrow with a sharp head in the top-right corner of their Control Panels [4.1 Aircraft Armament - p.25]. Strafing is permitted even if the arrowed line is dashed.
Besides aircraft with fixed guns, those with flexible guns (with a blunt arrowhead) that can fire straight ahead can also strafe surface targets.
Large aircraft with defensive machine guns were not used for strafing because they were not designed for that purpose. However, aircraft with suitable guns were technically capable of strafing.
If an aircraft has both fixed and flexible guns, the Firepower of both can be combined (see Example 82 on page 27).
5.3.1 Firing Position
If the target is located at sea level (i.e. not elevated), the attacking aircraft must fire from altitude L1. To strafe, an aircraft must end its movement aimed at the target, pitched down, at a distance of 2d. The final movement Step must also be straight.
To get into a firing position while following the rule above, if not starting already facing towards the target, the aircraft must first aim to reach a point that is no less than 4d away before turning towards the target (Diagram 149: turn, mandatory straight step, firing position).
If another aircraft is located directly in front of the strafing aircraft on the altitude level below (or the same level in the case of aircraft C in Diagram 151), strafing is not permitted (firing is not permitted through other aircraft).
Elevated targets
If the target is located on elevated terrain [7.8 Terrain - p.51], the attacking aircraft can strafe from a higher altitude, exactly two levels above the target (position A in the diagram).
The aircraft can also strafe from a position only one altitude level above the target (position B in the diagram), or from the same level without pitching down (position C), but must ensure that the terrain allows an exit path after strafing (without crashing into the terrain in the next Round).
Example 152: The aircraft strafed an elevated target from an altitude only one level above (see position B in Diagram 151). In the following Round, it turned right to avoid crashing into the ground.
As ships always occupy altitude LL, when strafing, apply the same principle as for Terrain Markers (e.g. an aircraft can fire from altitude L2, or from LL without pitching down).
5.3.2 Hit Probability
After reaching a firing position, roll two standard dice, add the resulting numbers and consult the Strafing Targeting Chart. The hit probability depends on the firing aircraft's Final Speed in that Round. If the sum is equal to or greater than the corresponding number in the chart, the target is hit.
Strafing Targeting Chart (two standard dice)
| Final Speed | 6 or less | 7-9 | 10-12 | 13-15 | 16+ |
|---|---|---|---|---|---|
| Minimum final sum to hit | 4+ (92%) | 6+ (72%) | 8+ (42%) | 11+ (8%) | strafing not permitted |
Double Burst: not permitted at Final Speed above 6 (see 5.3.3).
If using rule 7.5 Pilot Skill [p.49], before consulting the chart, add one to the dice sum for Ace pilots and subtract one for Rookies.
Rule 4.5.7 Tracer Burst [p.30] also applies here (before rolling the dice, move the red slider an additional slot to the right, then add +1 to the sum).
5.3.3 Firing Outcome
If targeting is unsuccessful, the target is missed and there are no consequences (but ammunition is still spent).
Strafing Outcome (two standard dice): If the target is hit, re-roll two standard dice to determine the firing outcome. Add the firing aircraft's Firepower and subtract the target Durability from the resulting sum. If the final sum is equal to or greater than 6, the target is destroyed, otherwise it is unaffected.
If both dice roll a 1, the target is unaffected regardless of the final sum.
Rule 4.2.2 Decreasing Firepower applies [p.26].
Optional rules 4.6.4 Higher Effectiveness of Cannons and 4.6.6 Short Burst also apply here [p.32].
Double Burst
If firing was unsuccessful, a Double Burst can be fired (similar to rule 4.6.5 on page 32), but only if the attacker's Final Speed is 6 or less.
More ammunition is spent when firing a Double Burst, therefore move the red slider an additional slot to the right.
Repeat the procedure described in 5.3.2 on the previous page, but always add +1 before consulting the Strafing Targeting Chart, as the previous (unsuccessful) burst has served as a Tracer Burst (a bonus is always applied, so no additional bonus can be obtained for using a Tracer Burst).
If the target is hit, re-roll two standard dice to determine the firing outcome of the Double Burst, as above (the target is destroyed if the sum is equal to or greater than 6), and add +2 to the sum, but only if the first burst was not a miss.
Example 153: The Durability of Point Targets is 8.
After moving 10 Steps, aircraft A has come into position to strafe a surface target. Two standard dice are rolled (targeting), and the sum of numbers (6+2=8) is barely enough for a hit. The dice are then rolled again to determine the outcome, with the final sum: 3 + 2 (dice) +10 (Firepower) -8 (Durability) = 7, which means the target is destroyed (the Task Marker is removed from the board).
Aircraft B has moved only 5 Steps, therefore it has the best hit probability for strafing. The targeting dice roll results in a sum of 5, which is a hit. The outcome dice roll results in a sum of 3 + 4 (dice) +5 (Firepower) -8 (Durability) = 4, which is not enough, so the target is unaffected. However, since the aircraft moved slowly enough, a Double Burst is permitted, this time resulting in a sum of 1 + 2 (die) +1 (inherited Tracer Burst) = 4 (barely a hit), then in a sum of 6 + 3 (dice) +5 (Firepower) -8 (Durability) +2 (Double Burst bonus) = 8. The target is destroyed, and the red slider is moved a second time to the right.
5.4 Bombing
The simplest way of destroying surface targets from the air is by dropping bombs. In early WWI, aircraft crews simply threw modified cannon shells on enemy positions by hand. By WWII, bombs and bombing techniques had improved to include various types of bombs with masses ranging from a few kilograms to several tonnes. Aircraft designed specifically for dropping bombs were rapidly developed, and in WWII, bombers ranged from small, single-engined to heavy multi-engined aircraft.
The most common procedure for bombing is from level flight. Large bombers usually had a dedicated crew member to visually observe the target through a bombsight and determine the exact moment to drop the bombs. However, despite instrument improvements, small targets such as bunkers and tanks could not be successfully targeted in this way. Therefore, bombing from level flight was used mostly for large targets and in conditions of reduced visibility when other techniques were not feasible.
For small targets, dive bombing is a much more precise technique, where the aircraft flies towards the ground at a sharp angle, allowing the pilot to observe the target throughout the bombing approach.
An aircraft must drop all bombs at once (on a single target), unless specified otherwise in a Scenario (for example, an aircraft that can carry a total Power value of 100 may be allowed to drop Power 50 in two separate bombing runs).
When bombs are dropped and hit the target, the target is not considered destroyed during the current or following Turn. This is significant if the target is able to return fire, such as with anti-aircraft guns.
Bombs take time to fall to the target if dropped from higher altitudes, and have delayed fuses to prevent the aircraft from being caught in the explosion when bombing from low altitude.
Elevated targets
If the target is located on elevated terrain [7.8 Terrain - p.51], subtract the terrain height from the aircraft altitude before referring to a bombing chart or determining a Drop Point location (subtract 1 if the target is on L1, subtract 2 if on L2).
Also, the minimum and maximum starting altitude for bombing is increased accordingly (by 1 if on L1, by 2 if on L2).
Example 154: An aircraft is flying at L8 and bombs a target located on elevated terrain at L1. Therefore, when referring to a chart, the aircraft altitude counts as L7.
However, for targets located on height LL, including ships, altitude adjustments do not apply (LL represents a very low height, and is therefore considered the same as surface level - both starting altitude and flying altitude before referring to charts remain unchanged).
5.4.1 Level Bombing
Level Bombing is performed from level flight or descent [3.3.2 Descending]. Minimum altitude is L1 (an aircraft may not start or end movement on LL).
For simplicity, when considering bombing, descending is considered equivalent to level flight.
Due to forward momentum, bombs must be dropped shortly before the aircraft flies over the target. If the aircraft flies at altitudes L1-L6, the Drop Point is located 1d in front of the target. If flying at L7 or higher, the Drop Point is located 2d in front of the target.
| Altitude | L1-L6 | L7+ |
|---|---|---|
| Drop Point distance | 1d | 2d |
The aircraft must move straight at least one Step before and after reaching the Drop Point. It is not permitted to drop bombs after the final movement Step, but is permitted at any previous point.
Example 155: Aircraft B dropped bombs from high altitude, 2d away from the target, then turned after the mandatory forward Step (so did not fly over the target).
Example 156: This example shows incorrect flight paths for bombing. Aircraft A did not move one straight Step before the Drop Point, while aircraft B turned immediately after reaching the Drop Point.
If an aircraft starts a Round already located at a Drop Point, bombs can be dropped immediately, before movement, but only if the aircraft was not banked left or right (indicating that the last movement Step in the previous Round was straight). In this case, the first movement Step must be straight.
Example 157: The aircraft dropped bombs immediately because the starting position of the aircraft was already on a Drop Point (1d from the target because the aircraft is at low altitude), and it was not banked.
If bombing a larger target (Ship, Zone Target or Large Area), the Drop Point may be located at either 1d or 2d from any point inside the target.
If an aircraft has correctly passed through a Drop Point, roll two standard dice to determine whether the target is hit. The hit probability depends on the aircraft's altitude and target type (Point, Ship or Zone) - see chart below.
For aircraft that do not have a bombsight symbol on their Control Panels (lacking a bombsight, e.g. fighter-bombers), if attacking Point Targets, Ships or Zone Targets, the maximum altitude for bombing is L3. (In the chart, rows requiring a bombsight are marked with the bombsight symbol.)
Level Bombing Chart (two standard dice)
| Altitude | Point Target | Ship | Zone Target |
|---|---|---|---|
| L1-L3 | 7+ (58%) | 6+ (72%) | 4+ (92%) |
| L4-L6 (bombsight) | 9+ (28%) | 8+ (42%) | 6+ (72%) |
| L7-L9 (bombsight) | 11+ (8%) | 10+ (17%) | 8+ (42%) |
| L10+ (bombsight) | 12 (3%) | 11+ (8%) | 10+ (17%) |
If the aircraft's direction of flight at the moment the bombs are dropped is parallel to the length of the targeted ship, add +1 to the sum before referring to the chart above.
If an aircraft's Final Speed is 7-9, subtract 2 from the sum of rolled numbers before referring to the chart above. Maximum speed for Level Bombing is 9.
Bombing a Large Area always results in a hit (no need to roll the dice).
Example 158: The Durability of Zone Targets is 1800. Three bombers, each carrying bombs with Power 700, have passed over a Zone Target and all of them dropped bombs. Aircraft A rolled: 4 + 5 = 9, which is a hit. Aircraft B rolled: 3 + 1 = 4, which is a miss. Aircraft C rolled: 6 + 4 = 10, which is a hit. Bomb Chits with a total Power value of 1400 are placed on the Zone Task Marker, leaving 400 more to destroy it.
If an aircraft is bombing while descending, use the altitude level of the aircraft at the Drop Point.
Group Movement [3.8 - p.23] is permitted for Level Bombing of Zone Targets or Large Areas, while Point Targets and Ships must be bombed by moving each aircraft individually.
5.4.2 Dive Bombing
Dive Bombing can only be performed while diving [3.3.3 - p.14]. The minimum starting altitude for Dive Bombing is L3, and the maximum is L8.
Unlike diving without bombing, where the aircraft may start banked and turn during the dive, the Dive Bombing procedure is more strict.
The aircraft must start the Round pitched down and with no roll tilt (bank). It must then fly straight ahead and dive (i.e. lose altitude in each movement Step) at least until reaching the Drop Point, exactly above the target. It must then move one more Step straight ahead, then may make no more than one 60 degree turn.
When the aircraft reaches the Drop Point, it must not be on an altitude level lower than L1 (it is not permitted to drop bombs from LL).
The starting position must be at least 2d away from the target (pointing directly towards it). If the Descent Rate and starting altitude allow, the maximum starting distance from the target can be up to 4d.
Roll two standard dice and refer to the chart below to determine whether the target is hit, using the altitude level of the aircraft at the Drop Point (add +1 to the sum if flying parallel to the length of a targeted ship):
The maximum altitude for aircraft without a bombsight symbol is L3.
Dive Bombing Chart (two standard dice)
| Altitude | Point Target | Ship | Zone Target |
|---|---|---|---|
| L1-L3 | 6+ (72%) | 5+ (83%) | 3+ (97%) |
| L4-L6 (bombsight) | 8+ (42%) | 7+ (58%) | 5+ (83%) |
If an aircraft's Final Speed is 9-11, subtract 2 from the sum of rolled numbers before referring to the chart above. Maximum speed for Dive Bombing is 11.
Example 159: The aircraft dived two levels when it reached the target, but continued diving for one more Step. It rolled: 2 + 3 = 5, which is not enough to hit a Point Target.
If the aircraft reaches the Drop Point after the diving part of the movement, bombing is still possible, but it is counted as Level Bombing (refer to Level Bombing Chart).
Example 160: The aircraft dived, but had to pull up before reaching the target (to retain the Descent Rate of 4), therefore Dive Bombing is not possible. Instead, use the Level Bombing Chart, using L2 as the altitude. The dice roll resulted in 3 + 3 = 6, which is a miss.
5.4.3 Steep Dive Bombing
Only aircraft capable of Steep Dive [3.4.2 - p.15] can perform Steep Dive Bombing. Minimum starting altitude is L3, maximum is L8.
An aircraft must start the Round prepared for a Steep Dive (with a Steep Dive Chit next to it). It must steep-dive (i.e. spend two Steps to descend two levels for each movement 1d straight ahead) at least until reaching the Drop Point, exactly above the target.
When the aircraft reaches the Drop Point, it must not be lower than L1 (it is not permitted to drop bombs from LL).
The starting position must be at least 1d away from the target, and can be up to 3d if the starting altitude and Final Speed allow.
Roll two standard dice and refer to the chart below to determine whether the target is hit, using the altitude level of the aircraft at the Drop Point (add +1 to the sum if flying parallel to the length of a targeted ship):
Steep Dive Bombing Chart (two standard dice)
| Altitude | Point Target | Ship | Zone Target |
|---|---|---|---|
| L1-L3 | 5+ (83%) | 4+ (92%) | 2+ (100%) |
| L4-L6 | 7+ (58%) | 6+ (72%) | 4+ (92%) |
Example 161: Aircraft A approached a ship from its broadside and successfully hit it by rolling: 4 + 4 = 8.
Aircraft B rolled low numbers for Steep Dive Bombing, but because it approached the ship parallel to its length, the sum is increased: 1 + 2 (dice) +1 (lengthwise bonus) = 4, which is a hit.
If the aircraft reaches the Drop Point after the diving part of the movement, bombing is not possible (not even as Level Bombing, because aiming is not possible after pulling up from a Steep Dive).
5.4.4 Vertical Dive Bombing
Only aircraft capable of Vertical Diving [3.4.3 - p.16] can use this bombing technique (Ju 87 Stuka). Minimum starting altitude is L4, maximum is L8.
The aircraft must first position itself exactly above the target, in a vertical position ('entry' part of the maneuver).
To get into a vertical position above the target, if not already on a path leading to the point directly above the target, an aircraft must first aim to reach a point that is no less than 4d away from the target (Diagram 162: turn, mandatory straight steps, start of dive).
In the next Round ('pull-up' part of the maneuver), the aircraft moves vertically down 1-3 altitude levels, drops its bombs, then pulls up (loses one more altitude level and moves 1d), then flies away. The Drop Point is located directly above the target, at the altitude just before pulling up.
Roll two standard dice and refer to the chart below to determine whether the target is hit, taking the altitude level at the Drop Point.
Vertical Dive Bombing Chart (two standard dice)
| Altitude | Point Target | Ship | Zone Target |
|---|---|---|---|
| L1-L3 | 4+ (92%) | 3+ (97%) | 2+ (100%) |
| L4-L6 | 6+ (72%) | 5+ (83%) | 3+ (97%) |
Example 163: The aircraft reached its target and descended only one altitude level (from L5 to L4) in Vertical Dive entry. In the next Round (pull-up), it dived two levels, reaching L2, dropped its bombs, then pulled up at L1. It rolled: 3 + 6 = 9, which is more than enough for a hit.
5.4.5 Skip Bombing
Skip Bombing is performed from level flight at altitude LL. In general, Skip Bombing is only possible when above water.
In specific conditions determined by a Scenario, it is also possible to perform Skip Bombing on land, but only from a single direction (e.g. to drop bombs on a railway leading to a tunnel).
Bombs are dropped in the final movement point. The aircraft must end its movement facing towards the target, at a distance of 2d. The final movement Step must be straight (see Diagram 149 on page 37), in level flight (if descending, all altitude changes must be done before the last two movement Steps). Also, Skip Bombing is not permitted if the aircraft dives in the same Round.
Maximum speed for Skip Bombing is 9.
Roll two standard dice and refer to the Skip Bombing Chart to determine whether the target is hit.
Skip Bombing Chart (two dice)
| Point Target | Ship |
|---|---|
| 6+ (72%) | 4+ (92%) |
If the aircraft ends its movement parallel to the length of the targeted ship (attacking from the bow or stern), subtract 1 from the sum before referring to the chart above.
The position required for Skip Bombing is the same as for strafing [5.3.1 - p.37]. Therefore, if the target is defended by anti-aircraft guns and the aircraft aims at them, it can both drop bombs and strafe at the same time (in an attempt to neutralize anti-aircraft guns before being shot at by them).
Example 164: Aircraft A came into position for Skip Bombing, which resulted in a hit. Aircraft B has both dropped bombs and strafed the target. Strafing cannot achieve any damage to the ship itself, but destroyed its AA Gun [6.1.4 - p.45], while its bombs damaged the ship.
If an aircraft comes into position for Skip Bombing and gets shot down by anti-aircraft fire, dice are rolled to determine whether the bombs will hit regardless (the aircraft has forward momentum, so even if destroyed, it may, together with its bombs, crash into the ship).
5.5 Rocket Launching
During WWII, especially in the latter years, unguided rockets were used extensively against ground targets. Rockets were carried under wings and attached on rails to ensure safe launching straight ahead. Compared to strafing, aircraft were less exposed to anti-aircraft fire when launching rockets, as they were fired from a greater distance.
Aircraft with a rocket symbol under Load on their Control Panels may carry and launch air-to-surface rockets.
5.5.1 Launching Position
If the target is located at sea level (i.e. not elevated), the attacking aircraft must launch rockets from altitude L1 or L2. To launch rockets, an aircraft must end its movement aimed at the target, pitched down, at a distance of 3d or 4d. The final two movement Steps must also be straight.
To get into a launching position, if not already pointing towards the target, the aircraft must first aim to reach a point no less than 6d (or 7d) away, before turning towards the target (Diagram 166: turn, mandatory straight steps, launching distance 3d or 4d).
Elevated targets
If the target is elevated (a ship on LL, or a target located on a hill [7.8 Terrain - p.51]), the launching position is shifted upwards, to an altitude two or three levels above the target (position A-D in the diagram).
Also, rockets may be launched either from one altitude level above the target (position E and F), or from the same level without pitching down (position G and H).
As rocket launching distance is greater than the firing distance when strafing, aircraft can easily avoid crashing into the terrain or ship in the next Round, but an exit path should still be planned carefully.
5.5.2 Hit Probability and Outcome
After reaching a launching position, roll two standard dice to determine whether the target is hit. The hit probability depends on the distance and target type - see chart below. If the sum is equal to or greater than the corresponding number in the chart, the target is hit.
Air-to-Surface Rocket Chart (two standard dice)
| Distance | Point Target | Ship | Zone Target |
|---|---|---|---|
| 3d | 6+ (72%) | 5+ (83%) | 3+ (97%) |
| 4d | 8+ (42%) | 7+ (58%) | 5+ (83%) |
If using rule 7.5 Pilot Skill [p.49], before consulting the chart, add one to the dice sum for Ace pilots and subtract one for Rookies.
Targeting a Large Area always results in a hit (no need to roll the dice).
Rocket Chits have different Power values on the front and back faces. If launched from a distance of 3d, use Power 25. Use Power 15 if launched from 4d (due to the greater dispersion of rockets from a longer distance). However, when a Zone Target or Large Area is hit, Power 25 is always used, even if launched from 4d.
Example 168: Aircraft A came into position to launch rockets and hit the target, which has Durability 20. Since rockets were launched from a distance of 3d, their Power value is 25, therefore the target is destroyed.
Aircraft B launched rockets from a distance of 4d, therefore the Rocket Chit is placed on the targeted ship, showing Power 15.
5.6 Torpedo Launching
From the beginning of WWI, the British began experimenting with torpedoes dropped from aircraft in low-level flight. By the end of the war, almost all countries were using specialized aircraft to launch torpedoes. WWII brought further advances in the design and tactics used for aerial torpedoes.
The advantage of torpedoing ships rather than other forms of attack is that it could be carried out from a greater distance, usually beyond the range of the ship's anti-aircraft guns. Also, the probability of hitting the target is relatively high, since almost all torpedoes have some kind of self-guidance system (magnetic, acoustic, etc.). On the other hand, the disadvantage of torpedo bombers was that they had to fly slowly in a straight line when dropping torpedoes, which made them easy targets for enemy fighters.
Aircraft with a torpedo symbol under Load on their Control Panels can carry and launch torpedoes.
To launch a torpedo, an aircraft must start and end its movement at altitude LL. Torpedoes can only be used against Ships and Point Targets.
Torpedoes are launched in the final movement point. The aircraft must end its movement pointing directly towards the target, at a distance of 3d-6d. The last two movement Steps must be straight.
To launch a torpedo, the aircraft must fly at a speed of 6 or less.
Roll two standard dice and refer to the Torpedo Chart to determine whether the target is hit.
Torpedo Chart (two standard dice)
| Distance | Point Target | Ship |
|---|---|---|
| 3d-4d | 5+ (83%) | 3+ (97%) |
| 5d-6d | 6+ (72%) | 4+ (92%) |
If the aircraft ends its movement parallel to the length of the targeted ship (attacking directly from the bow or stern), subtract 1 from the sum before referring to the chart above.
If the target can fire using anti-aircraft guns and the dice roll results in a hit, first place the Torpedo Chit on a point in front of the aircraft, with the arrow pointing towards the target. In each of the following Rounds, move the chit two Steps straight towards the targeted Task Marker, until it reaches the target. During this time, the anti-aircraft guns can still fire, and the target is considered destroyed only from the moment the torpedo hits it (if the total Power value of hits reached the target Durability).
If the target does not have anti-aircraft guns, the Torpedo Chit can be immediately placed on the Task Marker.
Example 169: Aircraft A launched a torpedo from distance 3d and hit the target (by rolling 6 + 2).
Aircraft B launched a torpedo from distance 5d and rolled: 3 + 1 = 4. However, the sum is reduced by 1 because the ship is parallel to the torpedo path, thus resulting in a miss.
It is not possible to hit a target that is behind another target (i.e. the torpedo will hit the first target it reaches).
6. Surface-to-Air Firing
In WWI, bombers had already proved to be effective in destroying objects and troops on the ground. The best means of preventing this was using fighter aircraft. However, fighters are not always available. Ground troop commanders were keen to protect their troops on their own, without waiting for fighters to arrive. Cannons and machine guns of the time were not adapted for use against fast-moving aircraft, but they could still prove effective. The first recorded downing of an aircraft using an ordinary cannon was on September 30, 1915, when Serbian soldier Radoje Ljutovac hit an Austro-Hungarian aircraft over the city of Kragujevac with his first shot. All armies subsequently searched for ways to effectively use their existing cannons and machine guns against aircraft, and the development of special anti-aircraft weapons also began.
In WWII, anti-aircraft artillery was very effective and significantly reduced the effectiveness of aviation. Anti-aircraft artillery is roughly divided into small-caliber (for operations against low-flying aircraft) and large-caliber (for operations against high-flying aircraft).
6.1 Small-Caliber Anti-Aircraft Guns
Machine guns and small-caliber automatic cannons proved the most effective means of destroying low-flying aircraft. Anti-aircraft guns are distinguished by a high rate of fire and usually have 2-4 barrels on a flexible mount. The skill and experience of the gun crews were of crucial importance for their effectiveness, which reached its peak at the end of the war, as Pierre Clostermann (a celebrated French RAF ace pilot) testifies in his book 'The Big Show'. Literally until the last day of the war, the Allies suffered heavy aircraft losses from trained German AA gunners.
Small-caliber anti-aircraft guns are represented by AA Gun Markers placed on the board, according to each Scenario or pre-agreed for each Mission.
AA Guns can be destroyed in the same way as Point Targets [5.2 Surface Targets - p.36], with a recommended Durability of 5-10. When destroyed, they are removed from the board.
If not otherwise defined in a Scenario, standard characteristics of AA Guns are: Firepower 10, maximum range 3d (covering all points around the AA Gun, as shown in the diagram), and height range up to L3.
Point Task Markers can also be used to represent anti-aircraft guns, alongside AA Gun Markers, with different values. For example, AA Gun Markers: range 3d, height range L3, Firepower 12, while Point Task Markers represent tanks, each with a single heavy anti-aircraft machine gun: range 2d, height range L2, Firepower 2.
If AA Guns are located on elevated terrain [7.8 Terrain - p.51], their height range is extended upwards by the terrain height (e.g. with a standard height range of L3, if guns are located on elevated terrain on L2, they can fire at aircraft flying anywhere from LL to L5). The altitudes in the AA Targeting Chart [6.1.2] are also shifted upwards.
If an AA Gun is located on LL (either on a Terrain Marker or on a ship), AA Targeting Chart and the height range are not changed.
6.1.1 Firing
AA Guns act passively - they can only fire in a Break Action (similar to 4.7 Passive Firing), if an enemy aircraft flies within their range. When this happens, the player on the current Turn should finish moving the aircraft normally, placing the aircraft token on its final movement point. Before moving the remaining aircraft, the Turn is temporarily interrupted to perform a Break Action.
If an aircraft intends to perform Level Bombing, Dive Bombing or drop cargo, the Break Action is performed before the aircraft drops its load, unless the Drop Point was passed before entering range of an AA Gun (if bombing another target, and only afterwards comes within range of an AA Gun).
When an aircraft performs Steep Dive Bombing or Vertical Dive Bombing (pull-up), it will drop its bombs first, then the AA Gun will fire in a Break Action. (Reminder: even if the bombs target the AA Gun and successfully hit, it will be able to fire, because it does not immediately count as destroyed [5.4 Bombing].)
If an aircraft intends to fire (at enemy aircraft, strafe, or launch rockets/torpedoes), and no more than two of its last movement points are in range of an AA Gun (all points prior to the last two must not be in range), the aircraft will fire first. Otherwise, the Break Action (AA Gun firing) is performed immediately after aircraft movement (the aircraft will be able to fire only if it survives anti-aircraft fire).
If an aircraft attacks an AA Gun by strafing or with rockets, and it only enters AA Gun range within the last 2 movement points, the aircraft will fire first, and if it destroys it, the AA Gun will not be able to fire back.
If only one movement point (counting the starting position) is within range, the AA Gun cannot fire at that aircraft in that Round.
Example 172: Only one of aircraft A's movement points was within range of the AA Gun (at 3d), therefore a Break Action cannot be performed.
The movement path of aircraft B ended within AA Gun range, with a total of five points in range. If it survives this Round, the AA Gun will be able to fire at it again in the next Round, because more than one movement point would be within range.
If an aircraft fires a Double Burst [4.6.5 or 5.3.3], it is always performed after AA Gun firing.
An AA Gun can only fire once per Round. To indicate that it has fired, place an AA Fire Chit on the board next to the AA Gun Marker. AA Fire Chits are removed from the board at the end of the Round.
When an aircraft flies close to an AA Gun, the opposing player chooses whether it will fire (perhaps they are waiting for a more valuable or more dangerous aircraft to fly within range).
If an aircraft flies within range of multiple AA Guns, each AA Gun fires independently, considering the aircraft path - the number of points within range - separately for each AA Gun.
To help remember aircraft paths more easily, along with the Initial Position Chit, Movement Point Chits can be placed on every point of movement where the aircraft turned. After resolving AA Gun firing, the chits should be removed.
6.1.2 Hit Probability
After determining the moment for a Break Action, roll two standard dice, add the resulting numbers and consult the AA Targeting Chart below. The hit probability depends on the targeted aircraft's altitude and Final Speed in that Round. If the sum is equal to or greater than the corresponding number in the chart, the target is hit.
AA Targeting Chart (two standard dice)
| Final Speed | 6 or less | 7-9 | 10-12 | 13-15 | 16+ |
|---|---|---|---|---|---|
| Aircraft altitude up to L2 | 4+ (92%) | 6+ (72%) | 8+ (42%) | 11+ (8%) | firing not permitted |
| Aircraft altitude L3+ | 5+ (83%) | 7+ (58%) | 9+ (28%) | 12+ (3%) | firing not permitted |
If the targeted aircraft has passed 4 or more points (counting the initial position) within AA Gun range, add +1 to the sum before referring to the chart. The number of points within AA Gun range are counted separately for each Round (i.e. if an aircraft spends two or more Rounds within range, the total number of points are not added).
If the targeted aircraft passes through at least one of the 7 central points above and around the AA Gun (the 'inner zone', covered by the AA Gun Marker), add +1 to the sum before referring to the chart.
If the targeted aircraft has a large-target symbol, add +1 to the sum. If it has a very-small-target symbol, subtract 1 from the sum.
If an aircraft changes altitude, the lowest altitude level at which it was within the AA Gun range is used.
If an aircraft ends its movement in a position to attack the AA Gun by strafing [5.3], Skip Bombing [5.4.5] or Vertical Dive Bombing [5.4.4], add +1 to the sum before referring to the chart above (the AA Gun can aim more easily, because the aircraft is moving straight towards it).
If an aircraft makes at least three 60 degree turns in the same Round, and it turns both left and right, subtract 1 from the sum before referring to the AA Targeting chart (flying in a less predictable path reduces the chance of being hit by AA Guns).
For the 'entry' part of a Vertical Dive maneuver [3.4.3 - p.16], the same hit probability rules apply (take the lowest altitude level into account, add +1 if 4 or more points are within range, +1 if passing through the 'inner zone', +1 if diving directly above the AA Gun, etc.).
For the 'pull-up' part of a Vertical Dive maneuver, always add +1, regardless of how many movement points are within AA Gun range, while other rules remain the same.
6.1.3 Firing Outcome
If targeting is unsuccessful, the target is missed and there are no consequences. If the target is hit, re-roll two standard dice to determine the firing outcome. Add the AA Gun Firepower (10, if not otherwise defined by a Scenario) and subtract the targeted aircraft's Durability [4.3 - p.26] from the resulting sum, then consult the Firing Outcome Chart below. For the firing result - see rules 4.6, 4.6.1 and 4.6.2 on pages 30-31.
Firing Outcome Chart (two dice)
| Final sum | Firing result |
|---|---|
| 6 or less | unaffected |
| 7-10 | damaged |
| 11-12 | double damage (or destroyed) |
| 13+ | destroyed |
The air-to-surface Firing Outcome Chart is identical to the air-to-air Firing Outcome Chart [p.30]. If desired, players may agree to alter either one or both, to increase or decrease the probability of causing damage.
If an aircraft ends its movement facing directly towards the AA Gun, use its Frontal Durability, if specified [4.3.1 - p.26].
Example 174: AA Guns range is 3d, L3, Firepower 10.
Aircraft A passed close to AA Gun P, with 5 movement points within its range. It started at altitude L5 and descended to L3, therefore entered the AA Gun height range only from the third movement Step. Its Final Speed is 8. AA Gun P fires at it in a Break Action, resulting in: 3 + 2 (dice) +1 (4 or more points in range) = 6, which is a miss.
Aircraft A also passed within range of AA Gun Q for 3 movement points. It fires at aircraft A, resulting in: 3 + 6 = 9, which is a hit. The dice are re-rolled, resulting in: 5 + 2 (dice) +10 (Firepower) -6 (aircraft Durability) = 11, which means the aircraft is destroyed.
Aircraft B flew within range of AA Gun Q, but the AA Gun cannot fire again in this Round because it already fired at aircraft A.
If the targeted aircraft is damaged, the same rules apply as for air-to-air firing - see 4.6.1 Damage Type on page 31. If the 'damage' die roll results in the multicolor side, re-roll the die until it shows a different result (AA Guns cannot aim at specific parts of an aircraft).
Example 175: AA Guns characteristics: range 3d, L3, Firepower 8, Durability 6.
The aircraft attacked the AA Gun by strafing, with a Final Speed of 10. Only two final movement points are in range of the AA Gun, therefore the aircraft fires first. It rolled: 3 + 4 = 7, which is a miss [Strafing Targeting Chart - p.37]. Since it survived the strafing attack, the AA Gun fires back and rolls: 6 + 4 = 10, which is a hit. The dice are re-rolled, resulting in: 1 + 3 (dice) +8 (Firepower) -5 (aircraft Durability) = 7, which means the aircraft is damaged. The 'damage' die is rolled, resulting in 'engine damage'.
In the next Round, the aircraft flies away at altitude LL, with 6 movement points being within AA Gun range. The AA Gun fires again, resulting in: 3 + 3 (dice) +1 (4 or more points in range) +1 ('inner zone') = 8, which is a hit. The dice are re-rolled, resulting in: 5 + 4 (dice) +8 (Firepower) -5 (aircraft Durability) = 12, which means the aircraft is destroyed.
6.1.4 AA Guns on Ships
AA Guns on ships can be represented in two ways: with separate markers or integrated with the ship.
Separate markers
Up to three AA Gun Markers can be placed on top of a Ship Task Marker. Each AA Gun fires independently, and each can fire only once per Round.
Ship-mounted AA Guns can be destroyed either by destroying the ship (by bombs, rockets or torpedoes, with their total Power value reaching the ship's Durability), or by hitting the AA Gun directly (by bombs or rockets, or by strafing, matching the Durability of the AA Gun). When the AA Gun is hit by bombs or rockets, the ship also takes damage (those hits also count in the total Power value needed to destroy the ship).
Integrated with the ship
If specified in a Scenario, ships can have anti-aircraft guns without being represented by separate AA Gun Markers. This means that the ship has many anti-aircraft guns, and their range extends from all the points occupied by the ship. The 'inner zone' occupies points at 1d all around the ship (and directly above).
In this case, the guns can fire multiple times in a single Round (at all aircraft in range), and they cannot be destroyed independently (the whole ship must be destroyed in order to neutralize the AA guns).
6.2 Large-Caliber Anti-Aircraft Guns
During WWII, large-caliber anti-aircraft guns were used to target aircraft at high altitude. Anti-aircraft gun batteries were grouped to achieve a high density of fire within a target area. Shells were timed to explode in the air at a given height as barrage fire, based on the altitude of incoming aircraft, determined using optical instruments and/or radar.
In the last years of the war, Germany was exposed to almost round-the-clock bombing by the Allies. The German 88mm AA gun proved to be the best of the war. Due to their effectiveness, Allied bomber crews had great respect and fear for German artillery.
A Barrage Sector represents an area of fire for one or more large-caliber anti-aircraft guns. Each Barrage Sector has 36 'explosion' points, marked from A1 to F6, which are placed so they align with the points on the board.
One, two or three Barrage Sectors can be placed on the board in various configurations.
When three Barrage Sectors are placed from edge to edge on the board (north-south), they cannot cover the last row of points (because the number of points on the board is not divisible by 3). For this reason, rule 3.9 Board Edge [p.24] is particularly important.
Individual large-caliber anti-aircraft guns can be represented by Point Task Markers placed within a Barrage Sector, but if their exact positions are irrelevant for gameplay, the markers can be omitted.
If Task Markers and/or small-caliber AA Gun Markers are placed on the same space on the board as a Barrage Sector, the Barrage Sector should be placed on the bottom, so that smaller markers can easily be removed if, for example, the targets they represent are destroyed.
6.2.1 Barrage Sector Action
In each Round, guns in each Barrage Sector can fire several times. If not defined by a Scenario, the recommended number of shots per Barrage Sector is 2-6 (typically 3). If anti-aircraft guns are represented by Point Task Markers, the number of shots corresponds to the number of guns in the Barrage Sector (one or two shots per marker). If individual guns are destroyed, the number of shots is reduced accordingly. (Reminder: if some of the guns are destroyed by bombs, the number of shots will not be reduced until after the next Turn, because they do not immediately count as destroyed [5.4 Bombing].)
Large-caliber anti-aircraft guns fire at the start of the Turn of the player controlling them (before moving aircraft). The player decides whether or not to fire (for each Barrage Sector independently). If there are no enemy aircraft in the Barrage Sector (nor up to 2d away, since the explosions can damage nearby aircraft - see below), there is no reason to fire.
The player controlling the anti-aircraft guns chooses the height at which the shells will be set to explode, and each shot in every sector can be set at a different height. Before rolling the dice for the first shot, the player must announce target heights for each (e.g. 'I will fire four times at altitude L5 and twice at L7'). The minimum height is L4 (shells cannot be set to explode any quicker). The maximum height is defined in each Scenario (e.g. L9).
For each shot, roll two dice: the 'A-F' die and a standard die. The resulting letter and number determine the point where the shell will explode.
If any aircraft is at the explosion altitude it may receive damage, depending on its position relative to the point where the shell exploded (even if not on the Barrage Sector):
- If exactly at that point, it is destroyed.
- If at an adjacent point (1d away), it will receive double damage (which means aircraft without a double-damage-capacity symbol are destroyed immediately [4.6.2 Damage Capacity - p.31]).
- If 2d away, it will receive a single damage (the rules for damage are the same as for air-to-air firing [4.6.1 - p.31]. If the 'damage' die roll results in the multicolor side, re-roll the die until it shows a different result).
If multiple aircraft are close to the explosion (up to 2d away), all of them will receive damage.
Example 178: Five British bombers are passing through a German Barrage Sector, all flying at L6. The Barrage Sector has 3 shots, and the German player announces all three at L6.
The first dice roll results in 'explosion' point C1: aircraft V is destroyed and aircraft W receives one damage ('wings').
The second roll results in A3: aircraft Z receives two damages ('engine' and 'tail').
The third die roll results in D6, which does not affect any aircraft.
Aircraft X and Y are undamaged.
If any aircraft is located at an adjacent altitude level from the explosion (above or below), either at the explosion point or 1d away, it will receive a single damage.
If the player controlling the guns has any of their aircraft in the Barrage Sector, they too may receive damage or be destroyed, in the same way.
These guns cannot aim at any particular aircraft. Instead, fired shells are always set to explode at a particular height, damaging anything within the barrage area.
Example 179: The German player announces one shot at L4 and two at L6. The first two shots explode at B6 (L4) and D1 (L6), which do not damage anything.
The final shot explodes at C2 (L6), which damages aircraft X, which is 2d away on L6, but also damages aircraft W, which is 1d away at one altitude level above.
6.2.2 Proximity Fuzes
During WWII, several countries tried to develop a fuze that would trigger when in close proximity to targets, rather than at a set altitude. Only the Americans succeeded, using a type of radar small enough to be fitted inside shells, which significantly improved the effectiveness of anti-aircraft artillery. This was a top-secret project, and the Allies avoided using shells with proximity fuzes on land-based artillery until late in the war, to prevent the enemy from capturing the shells and thus acquiring the technology.
If defined in a Scenario, Barrage Sectors can use proximity fuzes. In this case, the shells are not set to explode at a certain height, so the player controlling the guns does not need to announce detonation heights before rolling the dice.
Shells with proximity fuzes will explode at the lowest altitude where at least one aircraft is within 1d of the 'explosion' point, but not lower than L4. The maximum height where the shells will explode is defined in each Scenario (e.g. L10).
Once triggered, the explosion affects all nearby aircraft, exactly as for shells with regular time fuzes (damaging aircraft up to 2d away at the same altitude as the explosion, and 1d away at adjacent altitudes).
7. Other Rules
This chapter includes special rules that are not classified under the main chapters (2-6), and cover less common events.
7.1 Non-combat Tasks
'Combat' tasks, such as bombers attacking surface targets or fighters attacking other aircraft, form the primary role of every nation's air force. However, 'non-combat' tasks, such as observation, correction of artillery fire, photo reconnaissance, electronic reconnaissance, electronic jamming, patrolling, liaison, troop transport, equipment transport, dropping paratroopers, dropping cargo, towing gliders, etc. also have an effect, either directly or indirectly, on battle outcomes.
Aircraft are also used to perform tasks that are not battle-related, such as training, rescue missions, meteorological reconnaissance, towing air targets, dropping leaflets, testing various equipment, etc.
The procedure for performing these tasks is mostly very simple. When dropping cargo or paratroopers, an aircraft must fly through at least two points over a marked area, after which its Mission Chit is removed from the Control Panel and placed on the board. Special tasks are described in each Scenario.
Only photo reconnaissance has more specific general rules, as below.
7.1.1 Photo Reconnaissance
Reconnaissance aircraft have three slots dedicated for Photo Chits on their Control Panels.
If defined in a Mission or Scenario, any aircraft type can be equipped with cameras (e.g. a fighter with its armament removed).
To take a photo, an aircraft must fly through at least two points over a Zone Task Marker. If defined in the Mission or Scenario, the zones must be photographed from certain altitude levels. The aircraft must not change altitude in the same Round when taking photos.
When an aircraft takes a photo, place a Photo Chit with the appropriate symbol (triangle, square, or circle, matching the Zone Task Marker) on its Control Panel.
Photo reconnaissance is successfully accomplished only if the aircraft with the photos returns safely to its base (exit the board on the side it started from, if not otherwise defined in a Scenario).
7.2 Limited Fuel (simplification symbol)
Range or combat radius (the distance the aircraft can fly from its base to the zone of action and back) largely depends on the amount of fuel the aircraft can carry. This characteristic does not directly influence the outcome of a specific aerial battle, where speed, maneuverability, armament, etc. are more important, but it is one of the most significant characteristics of combat aircraft. Aircraft with a larger combat radius can perform more complex tasks across a wider area, which makes them much more valuable from the air unit commander's point of view. Combat radius is expressed as distance, but if converted to time the aircraft can stay in the air, it is called 'endurance'.
7.2.1 Aircraft Endurance
Each aircraft type has a specific Endurance value, shown on its Control Panel.
If an aircraft can carry an external fuel tank, it has an additional value next to the basic Endurance value (note that if an aircraft carries bombs or rockets [5.1 - p.36], the additional Endurance value cannot be used, as the aircraft cannot carry an external fuel tank together with another load).
If taken into account that one Round lasts roughly 10-20 seconds, Endurance values are shorter than they would be in real life, as they are scaled down to improve playability.
In general, Endurance determines how many Rounds an aircraft can fly. However, this value is used only as information when creating Scenarios, to produce time limits for groups of aircraft [7.2.2], taking into account the assumed tactical situation where aircraft arriving from a nearby airport will be able to stay longer in combat, compared to aircraft coming from far away, or if they were patrolling for a long time prior to the start of the Scenario.
Depending on the Scenario, it is possible that an aircraft with a low Endurance value can stay in combat longer than an aircraft with a high Endurance, if it came from (and plans to return to) an airfield that is nearby.
7.2.2 Flight Time Limits
Fuel consumption varies depending on exactly how an aircraft flies (at cruise speed or full power, low or high altitude, etc.), but this is not taken into account, as it would require more complex rules. Instead, fixed limits are used, which are easy to track.
In each Scenario, if limited by fuel rather than game duration, each group of aircraft has specified flight time limits.
Active Flight Limit is the last Round an aircraft may actively participate in combat or perform any task. After that, it may only fire passively if attacked by enemy aircraft [4.7 - p.33], or jettison its load (bombs, rockets, etc.) [5.1.1 - p.36].
After exceeding its Active Flight Limit, an aircraft should generally move towards the board edge (the side it came from, if not otherwise specified in the Scenario), but does not have to exit the board using the shortest path (e.g. it can fly in an irregular path to avoid being an easy target for enemy fighters).
A player may calculate and decide that it pays off to sacrifice an aircraft and thus lose a point in the final score, keeping it in combat for longer and thus having a chance to earn 2 or more points by destroying enemy aircraft or surface targets. However, pilots would not want to die due to running out of fuel, so they would start returning when low on fuel.
Safe Return Limit is the last Round in which an aircraft must exit the board to avoid losing points in the final score of a Scenario. If it exits the board any later, the player will lose points as specified in each Scenario (e.g. 0.5pts).
If still on the board after its Safe Return Limit, the aircraft should continue flying towards the board edge (even if it cannot safely return, the aircraft would at least try to get closer to their base and perhaps perform an emergency landing on friendly territory).
Example 181: On the board from Round 5 (at L7); Active Flight Limit: Round 12; Safe Return Limit: Round 18; then Exit.
Fight to the end
It is normal for pilots to plan a safe return to their home base when performing tasks. However, Japanese soldiers, including pilots, had a different code, often disregarding their own safety and trying to complete the task at any cost. Therefore, the player may decide to sacrifice an aircraft by keeping it in combat until the last drop of fuel, in order to achieve the main goal of the Scenario.
If specified in a Scenario (included in some expansions), some aircraft may be allowed to actively participate in combat as long as they have fuel.
The Safe Return Limit is followed by the Uncertain Return Limit, which is the last Round in which an aircraft must exit the board, after which it will count as destroyed in the final score of a Scenario (more points will be lost, e.g. 1pt). If the Uncertain Return Limit is exceeded, there is no point in exiting the board, as the aircraft is already 'lost' (e.g. it is low on fuel in the middle of an ocean).
As a final restriction, the Fuel Limit is the last Round in which an aircraft can fly, after which it is removed from the board.
If using optional rule 7.4 Engineless Gliding, the aircraft will not immediately crash when it is out of fuel, but will be able to glide for a few more Rounds (depending on the starting altitude).
Example 182: On the board from Start; Safe Return Limit: Round 6; Uncertain Return Limit: Round 10; Exit; Fuel Limit: Round 25.
7.2.3 External Fuel Tanks
External fuel tanks are represented by Fuel Tank Chits. The chits are rarely used, as the additional fuel is usually only accounted for when creating flight time limits for Scenarios, assuming that the aircraft would have dropped their external tanks before the start of the Scenario.
In some Scenarios aircraft still carry external fuel tanks during the battle, when the Fuel Tank Chits are placed on the Control Panels and removed when dropped.
Remember that while carrying an external fuel tank, aircraft flight characteristics are changed, and are restored in the Round after dropping the tank [3.7 Limited Performance with Load - p.23].
7.3 Takeoff and Landing
This rule is rarely used, but is provided to enhance some specific Scenarios.
When an aircraft is on the ground (or water, in the case of seaplanes), its token is placed on the board without an Altitude Stand.
While on the surface, an aircraft can taxi by moving a single Step in a Round, straight ahead or make a 60 degree turn (but not in the same Round when taking off or landing). If on the ground, it can also rotate in place by 60 degrees (being pushed by ground crew).
Boundaries of an airfield where aircraft can take off, land and taxi are determined in each Scenario.
Takeoff
First determine the distance required for takeoff, that is, the number of Steps the aircraft will spend on the surface before becoming airborne. This depends on the number of engines the aircraft has:
| Aircraft category | Takeoff distance |
|---|---|
| One engine | 3 |
| Two engines | 4 |
| Three engines | 5 |
| Four engines | 6 |
In other words, the number of Steps required on the surface is equal to the number of engines plus two (except for aircraft with a special symbol shown in the book).
The number of engines is a rough categorization of aircraft, which does not precisely correlate to the runway length required for takeoff. To remedy this, a few exceptions can be made, for example:
- Fw 189 Uhu can be categorized as single-engine.
- Fairey Battle, Ju 87 Stuka and P-47 Thunderbolt as twin-engined.
- Wellington DWI can be categorized as an aircraft with three engines.
If an aircraft carries any load, the takeoff distance is increased by 1.
If takeoff is directly upwind [7.6.1 Wind], the distance is shortened by 1 Step. If directly downwind, it is increased by 1. Crosswind (any of the remaining four wind directions) is ignored.
If an aircraft is damaged [4.6.1 Damage Type - p.31], the takeoff distance is increased by 1 Step (wing damage) or 2 Steps (engine damage).
Takeoff procedure is as follows: place an Initial Position Chit under the aircraft token and move the aircraft three Steps straight ahead (no die is rolled). If three is equal to or greater than the required takeoff distance for this aircraft in the current conditions, immediately attach the aircraft token to an 'LL' Altitude Stand (level or pitched up). If not, leave the aircraft on the surface, and move it three straight Steps in each of the following Rounds until the distance from the Initial Position Chit reaches or surpasses the required takeoff distance.
If the required takeoff distance is greater than 6 (e.g. four-engined aircraft with bombs), the aircraft will spend three Rounds taking off.
If using optional rule 3.6 Inertia or 4.9 Speed Difference When Firing, when attaching the aircraft to an Altitude Stand, place a Speed Indicator with a number equal to its Stall Speed.
While an aircraft is taking off but is still on the surface, it can be destroyed in the same way as any other surface target (by strafing, bombing, etc.).
Landing
The required distance for landing is defined the same way as for takeoff, but shorter by one Step, and aircraft damage is ignored.
To land, an aircraft must first descend to altitude level LL and end its movement in level pitch, above the start of a runway (or a stretch of water), with enough available clear surface directly in front of it.
If using rule 3.6 Inertia, the Final Speed must not be below its Stall Speed (otherwise it will crash). If the Final Speed is by more than 2 above the Stall Speed, the required distance for landing is increased by one for each extra Step (e.g. if 5 above Stall Speed, increase the landing distance by 3).
In the next Round, detach the aircraft token from the Altitude Stand and move it on the board straight ahead by a number of Steps equal to the required landing distance (no die is rolled). Unlike takeoff, landing is performed in a single Round, regardless of the required runway length.
If the aircraft runs into an obstacle (such as another aircraft on the ground) or the end of the runway, it is deemed to have crashed, and is removed from the board.
7.4 Engineless Gliding (optional rule)
This rule can be used only if also using optional rule 3.6 Inertia.
If an aircraft reaches its Fuel Limit [7.2.2], instead of immediately crashing, it will be able to glide for some time, depending on the initial speed and altitude.
When adjusting the speed [3.6.1], always decelerate by the number equal to the aircraft's Descent Rate (maximum deceleration of '-3' is ignored in this case). Always roll purple die, and apply all other modifiers.
While gliding, an aircraft cannot perform Aerobatics [3.5].
Without an engine, the aircraft must either slow down or lose altitude to maintain speed. If starting with enough energy (high speed and altitude), it will be able to glide for several Rounds before crashing (or landing).
Besides running out of fuel, an aircraft can be forced to glide if its engine(s) stop running due to damage: if an already damaged aircraft receives an engine damage that renders it 'destroyed', roll a standard die. If 1-3 is rolled, it will not be completely destroyed and will start gliding (it is marked with the appropriate number of damage markers, e.g. a fighter with two markers). Otherwise (4+), it will catch fire and the token is removed from the board immediately.
Also, if an already damaged aircraft self-inflicts engine damage [4.6.3 - p.32], it will not catch fire and will start gliding.
If an aircraft with dead engine(s) receives any additional damage, it is immediately removed from the board.
7.5 Pilot Skill (optional rule)
In aerial combat, the quality of the aircraft is extremely important, but even more important is the skill of the pilot who flies it. Ever since WWI, successful pilots who received the title of 'Ace' have been glorified and celebrated.
If not already specified in a Scenario, players may choose any number of aircraft to be piloted by Aces or Rookies. Pilot Markers are placed over the designation numbers on the Control Panels, red marking Ace pilots and green marking Rookies. Only fighter aircraft (including fighter-bombers) may be marked with Pilot Markers.
Pilots of other classes of aircraft (e.g. bombers) and other crew members (e.g. defensive gunners) also had different skill levels which affected their performance. To avoid unnecessary complexity, however, this is not taken into account in Age of Dogfights.
Ace pilots have some advantages in the game compared to average pilots (aircraft not marked with Pilot Markers), while Rookies have disadvantages:
- Rookie pilots have a lower chance of successfully performing aerobatic maneuvers, while Aces are always successful [3.5.7 - p.20].
- The chance of recovering from a stall is changed (Aces: +1, Rookies: -1) [3.6.4 - p.22].
- Hit probability is changed when firing or strafing (Aces: +1, Rookies: -1) [4.5 - p.27, 5.3.2 - p.37].
- Ace pilots have an increased chance of causing the desired damage type when firing at enemy aircraft [4.6.1 - p.31].
- Hit probability is changed when launching rockets (Aces: +1, Rookies: -1) [4.10 - p.35, 5.5.2 - p.42].
Hit probability change due to pilot skill level does not apply when using flexible guns [4.4.2 - p.26] and/or Passive Firing [4.7 - p.33].
7.5.1 Gaining Experience
When playing episodic Scenarios (e.g. 'Warming Up for the Final Fight' - see Scenario Book), pilot skill level can increase between battles. Aircraft score points for causing damage to enemy aircraft, which is tracked for each aircraft separately. If an aircraft gathers enough points in a game, it will stop being a Rookie or become an Ace for the next game.
Alternatively, to have an immediate effect, players may agree to apply the advantages as soon as an aircraft scores enough points to become average or an Ace.
Each damage caused is worth 0.5pts, and each destruction of an enemy aircraft is worth 1pt (a whole point is scored, even if the target was already partially damaged).
A Rookie pilot will become average by scoring 0.5 or more points (it is enough to cause a single damage). The green Pilot Marker is removed.
An average pilot will become an Ace by scoring 3 or more points (or a total of 3.5 points if starting from Rookie level). A red Pilot Marker is placed on the Control Panel.
In Age of Dogfights, the number of 'victories' required to become an Ace does not refer to historical numbers required for earning a title, but simply a skill level.
7.6 Weather (optional rule)
Modern combat aircraft can operate in all weather conditions, day and night. However, this was not the case during WWII, and air operations were often prevented by fog or bad weather. Even when it was possible to fly, strong winds or heavy clouds significantly hindered performance.
Weather rules are optional, as the weather can also be calm and clear, with the sun too high in the sky to disturb aiming.
7.6.1 Wind
Wind direction is shown by a wind indicator (blue), placed anywhere on the board, pointing in one of the six directions, as agreed or according to each Scenario.
For each aircraft movement, after the final movement Step, simply move the aircraft 1d in the direction of the wind, without rotating the token or changing tilt. This additional movement caused by wind does not count as a movement Step (if using optional rules 3.6 Inertia or 4.9 Speed Difference When Firing, the Final Speed shown on the Speed Indicator remains the same).
To reach a desired position (e.g. behind an enemy aircraft), the final movement Step may temporarily lead to a point occupied by another aircraft (only the final Step - all previous Steps must go through unoccupied points), as the aircraft will be moved back or sideways by wind (provided that it will end on an unoccupied point). This does not apply if the final movement Step is directly downwind (as the wind would move it further in the same direction, thus passing through other aircraft).
Example 185: Both aircraft in this example temporarily moved 'into' another aircraft, and were moved back or to the side by wind. Aircraft B's 'real' movement path can be imagined as shown by the orange dashed arrow (where the flight path is gradually affected by wind).
7.6.2 Sun
Sun position is shown by a sun indicator, placed anywhere on the board as agreed or according to each Scenario. It can be placed in any of four positions (for the northern hemisphere): E, SE, SW or W.
When firing, if the sun is directly behind the target, subtract 2 from the die roll when resolving targeting: Targeting Chart on page 27 (applies both to Active and Passive Firing), Air-to-Air Rocket Chart on page 35, and AA Targeting Chart on page 44.
If the sun is in the east or west, the target is directly in front of the sun if it is on the same altitude level as the firing aircraft. If the sun is in the southeast or southwest, the target is directly in front of the sun if it is above the shooter.
If a cloud (see below) is behind the target, the shooter will not be blinded by sun.
7.6.3 Clouds
Clouds are represented by their shadows, placed anywhere on the board in any orientation, as agreed or according to each Scenario. Clouds can cover any range of altitudes, between L2 and L6, defined in each Scenario.
Air-to-air firing [chapter 4 - p.25], strafing [5.3 - p.37] and rocket launching [5.5 - p.41] is not permitted if either the target or the attacker is in a cloud, or if a cloud is in between the two.
Example 189: Clouds cover altitudes L3-L6. Aircraft A-C are not permitted to fire because clouds obscure their view. However, Aircraft D and its target are both below clouds, so firing is permitted.
Bombing [5.4 - p.38] is not permitted if a cloud is directly above the target, except if the attacker starts the Round below clouds. If a Zone Target or ship is partially covered with clouds, bombing is still permitted if the aircraft aims at a point that is not covered by clouds. Large Areas can be bombed without restrictions.
When counting the number of points of an aircraft's path that are within range of an AA Gun [6.1 - p.43], simply do not count the points in which the aircraft is in (or above) clouds.
If there is wind [7.6.1 - p.49], clouds can be moved 1d in the direction of wind in every Round (before or after all aircraft have moved and fired), or every second Round, etc. When a cloud completely exits the board, place it on the opposite edge to start entering the board in the following Round.
7.6.4 Fog
Fog can either cover the entire board or be bounded by Area Corners, covering a height range e.g. from LL to L1 (depending on each Scenario).
Fog prevents firing and bombing the same way as clouds (fog is effectively just a type of cloud, after all).
If an aircraft flies through fog on altitude LL above ground (or barely above a Terrain Marker) for at least two movement Steps, roll a standard die. If 1-2 is rolled, the aircraft has crashed into a random obstacle.
7.7 Night
In nighttime Scenarios, the following restrictions apply:
- Aerobatics [3.5] cannot be performed.
- If an aircraft flies at altitude LL above ground (or barely above a Terrain Marker) for at least two movement Steps, roll a standard die. If 1 is rolled, the aircraft has crashed into a random unseen obstacle.
- Air-to-air firing is possible only at a distance of 1d, strictly from behind [4.5.1] or in parallel position [4.5.4] (including 'Schrage Musik' [4.5.5]). Passive Firing [4.7] is also possible only from these positions (strictly behind or parallel). In all cases, before consulting the Targeting Chart, subtract one from the die roll (due to lower visibility).
- Aircraft with radar (marked with a radar symbol on its Control Panel) can perform Active Firing normally (but with the above restrictions). In the basic game, only P-61 B Black Widow has radar. When any other aircraft intends to fire actively, before moving the aircraft, roll a standard die. If less than 5 is rolled, it is not permitted to fire in this Round (the target was not found).
This is a simplified approximation of low visibility at night, as a detailed system for searching out enemy aircraft would be too complex, requiring a means to keep aircraft positions hidden, yet tracked precisely.
- Dive Bombing [5.4.2], Steep Dive Bombing [5.4.3] and Vertical Dive Bombing [5.4.4] are not permitted. For all other air-to-surface actions and small-caliber AA Gun firing, subtract 3 from the dice roll when resolving targeting [5.3.2, 5.4.1, 5.4.5, 5.5.2, 5.6 or 6.1.2].
7.8 Terrain (simplification symbol)
Dogfights are mostly fought at medium or high altitudes, so the terrain has no significant effect on them. However, if attacking targets on the ground, the configuration of the terrain is very important. Targets are often located in places that are at least partially hidden by hills and cannot be approached from every direction. This is why the game includes Terrain Markers that represent hills and mountains. If placed on the 'water' side of the board, Terrain Markers can represent islands.
Terrain Markers are placed on the board, aligning the printed triangle grid with the board grid. The colored contour lines and small hexes (points) represent different altitude levels. Yellow points occupy altitude level LL, orange occupy L1 and red occupy L2. Aircraft must fly above these altitudes through points directly above Terrain Markers.
Elevated terrain influences the following rules: 5.3 Strafing [p.37], 5.4 Bombing [p.38], 5.5 Rocket Launching [p.41], 6.1 Small-Caliber Anti-Aircraft Guns [p.43], 7.6.4 Fog [p.50] and 7.7 Night [p.50].
7.9 Single-Player Games
It is not always easy to find a partner for a game that can last several hours. However, this game can provide great satisfaction when the same player controls both sides. Since the result of each firing or bombing depends on dice rolls, the overall effect at the end of each Turn is uncertain.
A solo player can try out different fighter aircraft in simple dogfights, to see which aircraft characteristics have the greatest impact on the outcome of air battles and which tactics are the most effective for different aircraft. Most Scenarios are asymmetric, where the player can make a plan for the attack, then do their best to achieve the goal when controlling the attacking side. In the defending side's Turns, the player would try to prevent the same outcome.
This way, a player can test various tactics, such as the difference between attacking with all aircraft at once or splitting them into multiple groups that would attack at different times and from opposite directions, or which aircraft types are the most suitable for performing certain tasks. Such experience can then be used in games involving two players.
Single-player games do not of course permit secret plans, but even during WWII it was rare for one side to completely surprise the opponent, considering that radar could detect enemy aircraft at a great distance. Despite this, solo games can still be interesting and full of unexpected events.
As an alternative, dedicated Solo rules are planned to be written (with 'bots', based on Solo rules for Age of Dogfights: WWI). When ready, these will be made available at the weblink provided on page 52.
7.10 Four-Player Games
Age of Dogfights can be played with four players, operating in two teams of two, which can be applied to any Mission or Scenario (e.g. one player in a team controls eight fighters, while the other controls six bombers). The Round sequence can be agreed as desired (clockwise, criss-crossed, etc.).
Though not historically accurate, the game can also be played 'everyone against everyone' by either three or four players. In this case we recommend Dogfight Mission [2.2.1 - p.6], with just four fighters per player. Aircraft that are damaged or have run out of ammunition may leave the board in any direction. The game lasts as long as there are aircraft on the board that can still fight. The winner is determined by counting points. Each player scores 1 point for destroying an enemy aircraft. If an already damaged aircraft is shot down, the player who destroyed it gets the point. Each player also receives 1 point for each of their surviving aircraft, even if damaged.
7.11 Adjusting Complexity
The basic rules (not highlighted with a purple border - see 1.0.1 on page 3) are recommended for the first few games. After mastering these, more complex optional rules can be added. On the other hand, if players prefer a simpler game, some of the basic rules can be omitted.
Simpler
All rules marked with a symbol (a minus in a purple triangle) may simply be ignored. If a title is marked, that whole section is skipped, and if the symbol is next to a paragraph, only the encompassed lines are skipped.
With these simplifications, the game becomes easier and faster to play, but at the expense of realism and the balance of some aircraft characteristics.
Omitted rules include: roll tilt, variable Agility and Climb Rate, turn radius, special maneuvers, Tracer and Double Burst, the whole of chapter 5 (Air-to-Surface Attacks) and 6 (Surface-to-Air Firing), etc. Note that examples throughout the rulebook are for the basic rules, so they do not accurately describe simplified rules.
Depending on what is omitted, some Missions and Scenarios are not compatible with simplified rules, apart from the simplest ones, such as 2.2.1 Dogfight or 2.2.5 Reconnaissance Missions.
More realistic
Optional rules should be added in stages. It is recommended to add rule 4.9 Speed Difference When Firing [p.34] first, which increases the advantage of faster aircraft without much additional complexity. It is recommended to add rule 3.6 Inertia [p.21] next, which takes acceleration and energy conservation into account.
The remaining optional rules, such as 3.3.5 Dynamic Ceiling [p.15], 3.5 Aerobatics [p.17], 4.5.8 Defensive Twitch [p.30], etc. can be added as desired, in almost any combination with other optional rules.
For even more realistic gameplay, players may experiment with their own 'house rules'. Some suggestions on how to add more details that are not otherwise covered in the game are provided, such as varying maximum speed at different altitudes (see the comment under 3.3.7 Flying at High Altitude on page 15) or ideas for tracking selective fire (see the comment under 4.2.2 Decreasing Firepower on page 26).
Player Aid (summary sheet)
The two-page Player Aid sheet repeats the charts and modifiers given above; its consolidated modifier lists are transcribed here. Purple boxes on the sheet denote optional rules; "rounded down" is used for halved Firepower.
Aircraft Movement
- Speed modifiers [3.1-3.3.3]: 'movement' die; Booster (from +2 to +4); straight movement (+1); climb (from -1 to -4); descent (from +1 to +4); damage (-1 or -2) [4.6.1]. Die averages as in 3.1.
- Inertia speed calculation [3.6.1]: 1) Read Initial Speed on Speed Indicator. 2) Adjust speed: up to +2 or -3 (up to +1 if carrying load [3.7]); must not end above Basic Speed (or Loaded Speed), except if deceleration limit of -3 would be exceeded. 3) Roll the die (purple or green). 4) Apply all other modifiers. 5) Place new Speed Indicator.
- Absolute Maximum Speed: Basic Speed 4 or less: Basic Speed +2; 5-7: Basic Speed +3; 8+: Basic Speed +4.
- Stall, spin and recover [3.6.4-3.6.6]: If Final Speed < Stall Speed, stall: move normally but -L1. Recover on 3+ (Ace: +1, Rookie: -1). Spin (after stalling): -L2 vertically (Agility value in square box = crash). Recover from stall: simply pitch down at the end. Recover from spin: set at Stall Speed (no adjustment), -L1 (but no speed gain), straight flight (but no speed gain) in random direction, plus modifiers, end pitched down.
- Variable Agility and Climb Rate [3.2.1, 3.3.1]: if dots on token >= dots on die (and not X): +1 60 degree turn / climb level.
- Limited turn radius [3.2.2-3.2.5]: Final Speed 9 or less: no limit; 10-16: at least one straight Step between turns; 17+: at least two straight Steps between turns. Agility in a box: additional straight Step. Between opposite turns: additional straight Step (except zig-zag aircraft).
- Changing altitude [3.3]: Level pitch: climb/descend one level or remain at the same level. Pitched up: must climb one or more levels. Pitched down: must descend (or dive) one or more levels. Climb/descent: altitude changes every odd step. Dive: altitude changes every step, max one 60 degree turn.
- 3 levels below Ceiling or higher: Climb Rate loses two dots. L9 or higher: Agility loses one dot.
- Special maneuvers and aerobatics [3.4-3.5]: Steep Turn: +1 60 degree turn, -L1 (without speed gain). Steep Dive: 2 Steps for 1d forward and -L2 (up to 3 times), speed increase up to +4 (even if diving 6 levels), max one 60 degree turn. Vertical Dive: 'entry' - minimum starting altitude L4; 'pull-up' - speed +4, no 60 degree turns, must finish level. Wing or tail damage (Steep Turn, Steep Dive, Vertical Dive 'pull-up', Split S, or Inside Loop): structural failure on 1-2. Vertical Dive 'pull-up' at LL: crash on 1-2. Aerobatics: max speed 16. Unsuccessful maneuver (die 1; Ace: always successful, Rookie: -1): 3 straight Steps, -L1, enter spin [3.6.5].
Air-to-Air Firing
- Targeting Chart (one standard die): Position A 2+, B 4+, C 3+.
- Modifiers: Ace +1, Rookie -1 (only fixed guns and Active Firing) [7.5]; large target +1, very small target -1 [4.5.6]; Tracer Burst (or Double Burst) +1 (only fixed guns and Active Firing) [4.5.7, 4.6.5]; sun directly behind target -2 [7.6.2]; Passive Firing -1 [4.7]; Defensive Twitch -1 [4.5.8].
- 'Position A' (1-2d) [4.5.1]: 2d: -1; different roll: -1; different pitch: -1; opposite roll/pitch: not permitted.
- Frontal - 'C' (2d, attacker level) [4.5.3]: target pitch: -2; target roll: not permitted.
- Parallel - 'C' (1d, attacker not banked) [4.5.4]: target roll: -1; both pitched: -1; different pitch: not permitted.
- 'Position B' (1d, attacker level) [4.5.2]: target roll: -1; target pitch: -1.
- Speed difference [4.9]: speed difference above 6: only 'position A' or 'B'; speed difference above 3: Double Burst not permitted. Speed Difference Chart and Frontal Speed Difference Chart as in 4.9.
- Firing Outcome Chart (two dice, plus Firepower [4.1, 4.2.2] (damaged guns: FP divided by 2, rounded down [4.6.1]; Short Burst: FP divided by 2, rounded down [4.6.6]), minus Durability [4.3]; cannon burst and Durability 6 or higher: +1 [4.6.4]; Double Burst: +2 if previous burst hit [4.6.5]): 6 or less unaffected; 7-10 damaged [4.6.1]; 11-12 double damage (or destroyed); 13+ destroyed. Both dice roll 1 = 'unaffected', regardless of other factors [4.6]. Double damage capacity symbol: two damages if not the same type [4.6.2]; fragile symbol: no damage capacity.
- A-A Rockets [4.10] (strictly behind, 2-3d, attacker level): 2d 4+, 3d 5+; large target +1, very small -1 [4.5.6]; target roll -1; target pitch -1.
Surface-to-Air Firing
- Small-caliber [6.1]: typical Firepower 10, range 3d, L3. AA Gun fires before the aircraft performs Level Bombing, Dive Bombing, or drops cargo. AA Gun fires after the aircraft performs Steep Dive Bombing or Vertical Dive Bombing (pull-up). Aircraft fires first if no more than two last points are in range. If only one point (including initial) is in range: AA Gun cannot fire.
- AA Targeting Chart as in 6.1.2. Modifiers: 4 or more points in range +1; 3 turns, both left and right -1; 'inner zone' +1; large target +1, very small -1; sun directly behind target -2 [7.6.2]; aircraft attacks the AA Gun (strafing, Skip Bombing or Vertical Dive Bombing) +1.
- Large-caliber [6.2] (min L4): exact altitude - direct hit: destroyed; 1d: double damage; 2d: single damage. Adjacent altitude - same point or 1d: single damage.
Air-to-Surface Attacks
- Level Bombing [5.4.1] (min L1, level flight or descent, max speed 9): chart as in 5.4.1; Drop Point 1d at L1-L6, 2d at L7+; ship lengthwise targeting +1; Final Speed 7-9: -2; Large Area = always hit.
- Dive Bombing [5.4.2] (min L1, starting altitude L3-L8, max speed 11): chart as in 5.4.2; ship lengthwise +1; Final Speed 9-11: -2; Large Area = always hit.
- Steep Dive Bombing [3.4.2, 5.4.3] (min L1, starting altitude L3-L8): chart as in 5.4.3; ship lengthwise +1.
- Vertical Dive Bombing [3.4.3, 5.4.4] (starting altitude L4-L8): chart as in 5.4.4.
- Skip Bombing [5.4.5] (LL, level flight, 2d, final Step straight, max speed 9): Point Target 6+ (72%), Ship 4+ (92%); ship lengthwise -1.
- Non-combat Tasks [7.1]: dropping cargo/paratroopers or taking photos: must pass at least two points over target area.
- Strafing [5.3] (2d, L1, attacker pitched down, last Step straight): Strafing Targeting Chart as in 5.3.2; Tracer Burst (or Double Burst) +1; Ace +1, Rookie -1 [7.5]. Strafing Outcome (two standard dice, plus Firepower, minus Durability; cannon burst and Durability 6 or higher +1 [4.6.4]; Double Burst +2 if previous burst hit): 6+ to destroy; both dice roll 1 = 'unaffected'.
- A-S Rockets [5.5] (L1-L2, 3d-4d, pitched down, last two Steps straight): chart as in 5.5.2; Ace +1, Rookie -1 [7.5]; 3d: Power 25; 4d (Point Target or Ship): Power 15; Large Area = always hit.
- Torpedo [5.6] (LL, level flight, 3d-6d, last two Steps straight, max speed 6): chart as in 5.6; ship lengthwise -1.