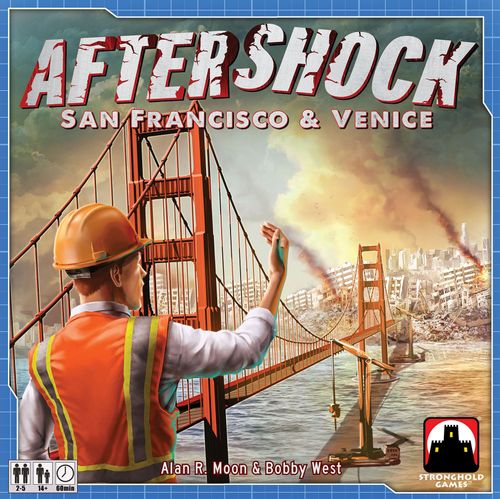
Aftershock: San Francisco & Venice
Aftershock: San Francisco & Venice Rulebook
Table of Contents
Table of Contents
Object of the Game
Aftershock is an area control game. Players will spend money to acquire cards, which are used to increase population, build bridges, and determine where Aftershocks occur. You will negotiate with other players in order to score areas. The player with the highest population in the scored areas will score the most points. The player with the most points at the end of the game wins!
Components
- 1 game board
- 5 player screens
- 5 plastic clips
- 5 Planning boards
- 53 cards
- 105 meeples in 5 colors
- 25 houses in 5 colors
- 80 bridges in 5 colors
- 7 Aftershock markers
- 15 Buy tokens in 5 colors
- 5 Influence markers
- 1 Aftershock die
- 20 Score markers in 5 colors
- 55 coin tokens
- 1 first player token
Setting Up the Game
- Place the game board in the middle of the table.
- Give each player a player screen, a clip (set the clip to zero on your player screen), and a Planning board.
- Each player receives a matching set of meeples, houses, bridges, and Buy tokens for their personal supply.
- Give each player Score markers based on number of players (see table below). Place any remaining Score markers back in the box, they will not be needed.
- 3 Players: 4 Score markers
- 4 Players: 4 Score markers
- 5 Players: 3 Score markers
- Each player places their Buy tokens face up in front of their screens with -$2M, -$1M, and +$1M tax showing.
- Each player places one meeple on the 0/100 space on the Score Track.
- Give each player $15M: one $5M coin token, and ten $1M coin tokens. Place any remaining coin tokens back in the box, they will not be used.
- Give each player one bridge card. Shuffle the rest of the cards and deal each player an additional seven cards so that each player starts the game with eight cards. Place the deck near the game board. Be sure to leave room for a discard pile.
- Place the Aftershock die, the Aftershock markers, and the Influence markers near the game board in the common supply.
- Give the youngest player the first player token.
The game is ready to begin...
Card Anatomy
There are four different types of cards: Area cards, Bridge cards, Aftershock cards, and Influence cards.
Area cards
Area cards are used to place meeples on the corresponding area on the game board during the populate phase. Area cards have four parts:
- A. Name - Name of the area on the game board where the meeples will be placed.
- B. Cost - How many coins this card costs to buy.
- C. Meeples - Number of meeples placed in the area.
- D. Area - Where this area can be found on the game board.
Aftershock, Bridge, and Influence cards
Aftershock cards, Bridge cards, and Influence cards are used to gain components. These cards have four parts:
- A. Type - The type of card.
- B. Cost - How many coins this card costs to buy.
- C. Reward - This shows what components are gained when you play this card: bridge and meeple, Aftershock markers, or Influence markers.
- D. Explanation - An explanation of when the gained components are used.
Examples:
- Aftershock ($2M): Gain a normal Aftershock marker to place during Planning.
- Big Aftershock ($3M): Gain a big Aftershock marker to place during Planning.
- Bridge ($4M): Gain a bridge and a meeple to place during Planning.
- Influence ($5M): Gain an Influence marker to place during Scoring.
Game Play
Aftershock is played in rounds. There are 4 phases each round.
- Phase 1: Acquire Cards. Players choose which cards to buy. The remaining cards are placed up for sale to be bought by other players.
- Phase 2: Populate and Plan. Players place their meeples on the Planning board, plan where their bridges will be built, and where Aftershocks occur.
- Phase 3: Resolution. Build bridges, place meeples/houses, and resolve Aftershocks.
- Phase 4: Scoring. Players determine which areas are scored and advance on the Score Track.
With 2-4 players, the game consists of three rounds. With 5 players, the game consists of two rounds. The player with the most points at the end of the game wins.
Phase 1: Acquire Cards
- A. Decide which cards to keep
- B. Buy cards from other players
- C. Keep one unbought card
Phase 1A: Decide which cards to buy
Players look at their eight cards and decide which cards they want to buy. The remaining cards will be placed up for sale, and other players may purchase them later in the phase. The cards you wish to buy remain in your hand, and you must pay for them. Place the cards you want up for sale face down in front of your player screen.
Note: Do not reveal and pay for your cards until all players have decided which cards to buy. You do not want to give other players any information that may alter their decision.
Pay for the cards
After all players have made their selections, they need to pay for the cards they decided to buy. Reveal all of your cards to the player on your left and pay the sum of their costs to the bank. After you pay for your cards, place them face down behind your player screen.
EXAMPLE: Jake decides to buy Hayward for $6M, a bridge card for $4M, and a big Aftershock card for $3M. He reveals his cards to the player sitting on his left, places $13M in the bank, and places the cards behind his player screen.
Placing cards up for sale
After all of the players have paid for the cards they wish to buy, the cards that were placed up for sale are turned face up so that all players can see them. The cards remain in front of the player screens to show which player placed that card up for sale.
Phase 1B: Buy cards from other players
Starting with the first player and proceeding clockwise around the table, each player may either use a Buy token to buy a card that is up for sale or pass. You cannot buy a card up for sale from yourself. Buying continues until all players pass consecutively.
Buy Tokens
You MUST use a Buy token to buy a card from another player.
If a player uses a:
- -$2M token: You buy one card for $2M less than the regular price. Flip this token over when used.
- -$1M token: You buy one card for $1M less than the regular price. Flip this token over when used.
- +$1M tax token: You must first pay $1M tax to the bank, then you buy one card for the regular price. DO NOT flip this token over when used.
Further rules:
- When you buy a card, pay the money to the player that placed the card up for sale.
- Place the bought card behind your player screen.
- The +$1M tax Buy token never flips, players can use it several times a round.
- If you buy a card that costs $1M with your -$2M Buy token you give $0M. The difference is lost, you do not get change.
- You can use your Buy tokens in any order you wish.
- You cannot buy a card up for sale from yourself.
Buying continues until all players pass consecutively. You can pass and then buy next time even if no one has bought a card from you.
EXAMPLE: Eliza has the first player token, she starts the buying.
- Eliza flips over her -$1M Buy token and buys Oakland $1M from Tera. Since Eliza used her -$1M Buy token, no money is needed. Eliza buys the card for free and Tera does not receive any coins.
- Tera flips over her -$2M Buy token and buys San Rafael $3M from Zach. Since she used her -$2M Buy token, she pays Zach the difference of $1M.
- Jake uses his +$1M tax Buy token (it does not flip) and buys San Francisco $6M from Tera. First Jake places $1M in the bank to pay for the tax, then he gives Tera $6M.
- Zach really wants Tera's Influence $5M. He only has $2M. If he uses his -$2M Buy token he is still short $1M. He decides to pass and hopes someone will buy a card from him later.
- If Eliza, Tera, and Jake pass on their next turn, this phase would end since all players would have passed consecutively.
Phase 1C: Keep one unbought card
After all players pass consecutively, each player keeps one card for free from the unbought cards that they placed up for sale. Add that card to your cards behind your player screen. If you have no unbought cards, you keep nothing. After each player has decided which card to keep, any remaining cards that were placed up for sale are placed in the discard pile.
Phase 2: Populate and Planning
- A. Populate
- B. Play cards
- C. Planning
Phase 2A: Populate
All players simultaneously place meeples and houses on the game board for all of their Area cards. After the players have placed their meeples and houses, place all of the Area cards in the discard pile.
Note: One house equals three meeples.
EXAMPLE: Eliza has the Fremont $6M card. She places three of her meeples on Fremont then places the card in the discard pile. Eliza could place one house instead of three meeples since one house equals three meeples.
Phase 2B: Play cards
Each player reveals all of their remaining cards in hand.
- For each Bridge card you reveal, gain and place one bridge and one meeple of your player color behind your player screen.
- For each Aftershock card you reveal, gain and place the corresponding Aftershock marker behind your player screen.
- For each Influence card you reveal, gain and place an Influence marker behind your player screen.
Place all of the revealed cards in the discard pile.
EXAMPLE: Ephraim has two Bridge cards, one big Aftershock card, and one Influence card. He reveals his cards and he places two of his meeples, two of his bridges, one big Aftershock marker, and one Influence marker behind his player screen. Finally, he places the cards in the discard pile.
Phase 2C: Planning
In the Planning Step, place the bridges, meeples, and Aftershock markers that you gained in the previous Step on your Planning board behind your screen. The bridge and meeple gained from a Bridge card can be placed in different areas on the Planning board. A player can place more than one Aftershock in the same area.
In the Resolution Phase, you will build bridges from the areas where you placed the bridge piece on your Planning board. You will also place meeples in the areas you chose during this phase. You will resolve Aftershocks in the areas you placed your Aftershock markers.
Do not place Influence markers during the Planning Step. Influence markers will be used during the Scoring Phase.
Note: Never place a bridge, meeple, or Aftershock marker on the "most bridges" area on the Planning board. The most bridges area on the Planning board is only used in the Phase 4: Scoring.
After all players have placed their bridges, meeples, and Aftershock markers on their Planning board, Phase 3: Resolution is ready to begin.
EXAMPLE: Ephraim decides to place a bridge, meeple, and the big Aftershock marker in San Francisco. He also places a bridge in Fremont and a meeple in Oakland. He does not place his Influence marker until the Scoring Phase.
Phase 3: Resolution
- A. Build bridges and place meeples
- B. Aftershocks
Phase 3A: Build bridges and place meeples
Starting with the first player and proceeding clockwise around the table, players take turns removing their player screen and placing their bridges and meeples if they have them. Placing bridges and meeples can be done in any order.
Note: Do not remove your screen until it is your turn to build bridges and place meeples. You do not want to give other players information that may alter their decision.
EXAMPLE: Ephraim removes his player screen and builds a bridge from San Francisco to Richmond by placing four bridge pieces in the matching spaces. He also builds a bridge from Fremont to Hayward by placing one bridge piece in the matching space. He places one meeple in Oakland and one meeple in San Francisco. He does not resolve his Aftershock marker yet.
Build bridges
To build a bridge, place one bridge piece in each section of the bridge leading from one area to the next.
- The bridge built must be placed in a vacant bridge space leading from the area that you selected on your Planning board.
- You can only build a bridge if you have enough bridge pieces to do so. You may dismantle another bridge you have previously built and use some or all of those pieces to build the new bridge. Bridges can never be partially built.
- In the rare instance where there is no vacant bridge space and you cannot build from the chosen area, place one meeple in this area instead.
Tip: Building bridges reconnects the city after the destruction of the mega earthquake. They make it possible to move meeples from one area to another. However, building bridges is expensive. Usually, the more bridges you build, the fewer meeples you are able to place. There are more opportunities to score with the meeples than building bridges.
Place meeples
The meeples must be placed in the area on the game board that was selected on the Planning boards.
After all players have placed their bridges and meeples, Aftershocks are resolved.
Phase 3B: Aftershocks
Starting with the first player and proceeding clockwise around the table, each player who has one or more Aftershock markers resolves them. When you resolve an Aftershock marker, you will cause meeples in that area to become Shocked, which means they will have to leave that area. If a player has more than one Aftershock marker, they resolve them in any order. They must resolve all of them before the next player resolves their Aftershock markers.
To resolve an Aftershock, the player rolls the die.
- If it is a normal Aftershock, the number of meeples Shocked is equal to the number rolled on the die.
- If it is a big Aftershock, the number of meeples Shocked is equal to the number rolled on the die +1.
- If it is a mega Aftershock, the number of meeples Shocked is equal to the number rolled on the die +2.
The player that resolved the Aftershock marker chooses which meeples in that area are Shocked.
- The total number from the die roll must be Shocked, even if this means a player must Shock their own meeples. If the total number from the die roll is more than the meeples in that area, Shock all meeples and ignore the overage.
- Additionally, a player may choose to Shock their own meeples.
When a meeple is Shocked, the player that controls that meeple must move it out of that area or remove it from the game board. Players controlling Shocked meeples move them starting with the player to the left of the one who resolved the Aftershock marker.
When moving Shocked meeples you may:
- Move them across a bridge you own to an adjacent area for free. The meeple may even be moved across several bridges to an area farther away from the starting point.
- Move them across another player's bridge by paying $1M per bridge for each meeple you move. You may combine movement across your own bridges and movement across other players' bridges.
- If you don't want to move them, or can't, you must remove them from the game board and return them to your supply.
Note: It is possible to move a Shocked meeple back into an area that it started in, if it is Shocked by a different Aftershock in a different area.
Tip: An aftershock is not as powerful as a full-sized earthquake. It can scare some people into relocating. Use the Aftershock cards to either move meeples out of an area, or possibly move your own meeples into an area where you can score more points.
EXAMPLE: Ephraim resolves the big Aftershock in San Francisco. Ephraim is yellow, Zach is green, and Jake is blue. Ephraim rolls a 2 on the die. Since it is a big Aftershock it is now a 3. Ephraim chooses three meeples to be Shocked in San Francisco. He chooses two blue meeples owned by Jake and one green meeple owned by Zach to be Shocked.
- Zach moves his Shocked meeple to Hayward. This is free since he owns the bridge connecting San Francisco and Hayward. This gives Zach the majority in Hayward.
- Zach realizes that if he continues to move, he will have the majority in Oakland. A majority in Oakland is worth more points than a majority in Hayward. Zach has a bridge connecting Hayward and Oakland so he moves his meeple to Oakland. Again, this move is free since he also owns that bridge.
- Jake wants the majority in Hayward, but he does not have a bridge that connects San Francisco and Hayward. But Zach does, Jake pays Zach $1M and moves one of his meeples from San Francisco to Hayward. Jake now has the majority in Hayward.
- Jake wants to move the second Shocked meeple to Hayward but he is out of money. Jake is forced to remove the other Shocked meeple in San Francisco and places it in his supply. Which gives Ephraim the majority in San Francisco.
Phase 4: Scoring
- A. Place Score markers
- B. Score points
Phase 4A: Place Score markers
Players now determine which areas on the game board will score. To do this, players place their Score markers and Influence markers on the areas of their Planning board behind their player screen that correspond with the areas that they want to score on the game board.
- You CANNOT place more than one Score marker of your player color on the same area on your Planning board.
- You MUST place all of your Score markers.
- You may make agreements and negotiate with other players to place a Score marker in the same area as you.
- No agreement is binding. You can make an agreement and not keep it.
Influence markers
Influence markers are special Score markers. They function the same as Score markers except that Influence markers may be placed in the same space on the Planning boards as a Score marker. This insures that this area will score this round.
EXAMPLE: Zach has the most meeples in Fremont. Jake has the second most. Zach entices Jake by saying, "Jake, if you score Fremont with me, you will score a lot of points." Jake wants to score Oakland since he has the majority. He counters Zach, "Zach, if you score Oakland, I will score Fremont." Zach agrees. Zach nor Jake have to keep their agreement.
Tera has the most bridges, she asks, "Who can I count on to score bridges with me?" The table is silent, but Jake offers a slight nod when no one is looking. Tera trusts Jake and places a Score marker on the most bridges space, hoping Jake will place a Score marker on most bridges and score bridges with her.
Phase 4B: Score points
After all players have placed their Score markers, including Influence markers, on their Planning board, players remove their player screens. Then, players determine which areas will score starting with top row on their Planning boards, moving from left to right. Next, score the areas on the bottom row finishing with the "most bridges" space. An area scores if that area has at least two Score markers placed on it among all of the players' Planning boards. Any area that has zero or one Score markers does not score.
Note: San Rafael will score if only one Score marker is played on it.
Note: Influence markers count as Score markers.
EXAMPLE:
- San Rafael: Blue placed a Score marker on San Rafael. No one else placed a Score marker on San Rafael. San Rafael is the only area that scores with 1 or more Score markers, it scores.
- Vallejo: Red placed an Influence marker on Vallejo. No one else placed a Score marker or Influence marker on Vallejo, it does not score.
- Richmond: Blue, Green, and Yellow placed a Score marker on Palo Alto. There are at least two Score markers on Palo Alto, it scores. (sic, as printed in the rulebook)
- Oakland: Yellow is the only player that placed a Score marker on Oakland, it does not score.
- Hayward: Blue and Yellow placed a Score marker on Hayward, it scores.
- San Francisco: Yellow was the only player that placed a Score marker on San Francisco. They also placed their Influence marker on San Francisco, it scores.
- S. San Francisco: Green and Red placed a Score marker on S. San Francisco, it scores.
- Palo Alto: Only Red placed a Score marker, it does not score.
- San Jose: No one placed a Score marker on San Jose, it does not score.
- Fremont: Blue and Green placed a Score marker on Fremont, it scores.
- most bridges: Green and Red placed a Score marker on most bridges, it scores.
When an area scores, players score points based on how many meeples they have in that area and advance their meeple on the Score Track. The player with the most meeples in that area scores the highest point value. The player with the second most meeples there scores the second highest value. Continue this for every player that has at least one meeple in that area. If players are tied, they split the points for the tied positions, rounding down. The player or players that score the most points for the area remove one of their meeples from that area and place it in their personal supply.
EXAMPLE: Richmond scores (7,5,4,3). Ephraim has the majority and scores 7 points. Jake and Zach are tied with the second most and each score 4 points (5+4 = 9 divided by 2 = 4.5, rounded down = 4 points each). Tera is fourth and scores 3 points. Eliza does not have a meeple in Richmond, so she does not score any points. Because he scored the most points there, Ephraim removes one of his meeples from Richmond and places it in his supply.
If the most bridges scores, the player with the most total bridge pieces (not the most completed bridges) will score the highest points, the player with the second most total bridge pieces will score the second highest points, etc. After scoring bridges, the player that had the majority does NOT remove a completed bridge or any bridge pieces. Unlike meeples, players do not remove bridge pieces after scoring.
End of Round
- A. Shuffle ALL the cards together. Then, deal each player eight cards
- B. Evenly distribute the coins in the bank
- C. Reset Buy tokens
- D. Return markers
- E. Pass the first player token
- F. Acquire free Aftershock marker
A. Shuffle ALL cards and deal each player eight cards
All the cards played during the round should be in the discard pile. Shuffle the discard pile into the deck to form the deck for the next round. Then, deal each player eight cards.
B. Evenly distribute the coins in the bank
Players distribute the coins in the bank as evenly as possible. Any extra coins are left in the bank.
EXAMPLE: It is a 5 player game, and there are $43M coins in the bank. Each player will receive $8M coins and $3M coins will be left in the bank.
C. Reset Buy tokens
All players turn all of their Buy tokens face up (-$2M, -$1M, +$1M tax showing).
D. Return markers
Return Aftershock markers and Influence markers to the general supply.
E. Pass the first player token
In games with three or four players, the player with the first player token passes it to the player sitting on their left. In games with five players, the player with the first player token passes it to the player sitting second on their left.
F. Acquire free Aftershock marker
The player with the lowest score receives the free Aftershock marker. If two or more players are tied for the lowest score, the player furthest from the first player token amongst the tied players receives the free Aftershock marker. The free Aftershock marker is resolved the same as a normal Aftershock, and is used in the same way as the normal Aftershock marker.
Game End
The game ends after the 3rd Round (2nd round with 5 players). Each player receives 1 point for every $2M they have left. The player with the most points is the winner. If players are tied, the player among them with the most money wins. If still tied, the player furthest from the first player token wins.
Card Distribution
53 cards:
- 5 San Francisco (two $1M, two $3M, one $6M)
- 4 Oakland (one $1M, two $3M, one $6M)
- 4 Richmond (two $1M, one $3M, one $6M)
- 3 Fremont (two $1M, one $6M)
- 3 Vallejo (three $3M)
- 3 Hayward (one $1M, one $3M, one $6M)
- 3 San Jose (two $1M, one $6M)
- 3 Palo Alto (two $1M, one $3M)
- 2 South San Francisco (one $1M, one $3M)
- 2 San Rafael (one $1M, one $3M)
- 10 bridge cards (Wild Cards allow the player to place one meeple and one bridge)
- 6 Aftershock cards (3 Regular, 2 Big +1, one Mega +2)
- 5 Influence cards
Turn Reference
- Phase 1: Acquire Cards: A. Decide which cards to keep; B. Buy cards from other players; C. Keep one unbought card
- Phase 2: Populate and Planning: A. Populate; B. Play cards; C. Planning
- Phase 3: Resolution: A. Build bridges and place meeples; B. Aftershocks
- Phase 4: Scoring: A. Place Score markers; B. Score points
- End of Round: A. Shuffle ALL the cards together, then deal each player eight cards; B. Evenly distribute the coins in the bank; C. Reset Buy tokens; D. Return markers; E. Pass the first player token; F. Acquire free Aftershock marker