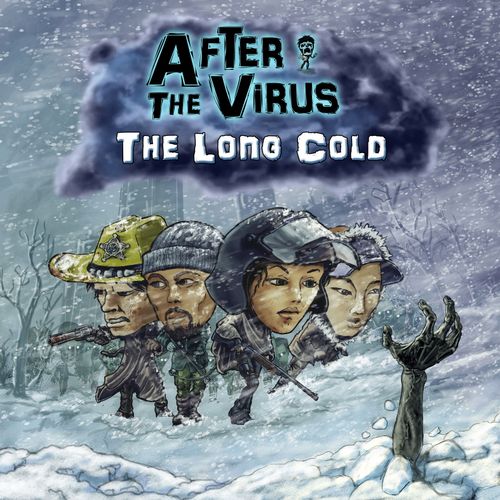
After the Virus: The Long Cold
After the Virus: The Long Cold Rulebook
Table of Contents
Table of Contents
Overview
This expansion to After the Virus adds a campaign system to the game, with new cards to customize your deck, zombies with special abilities, 4 new characters to play, and a new campaign with a total of 12 missions.
All new cards have this icon (a snowflake) to easily separate them from the base game cards.
The Long Cold (TLC) adds a way to specialize your deck. You start with a normal character deck, but will develop it over time. The new cards are called TLC zombie cards, and TLC player cards, and are kept separate from the player decks until included. Each new mission will give you one more TLC zombie card, and an opportunity to get some new TLC player cards for your deck.
Each new chapter contains missions that may affect subsequent missions. Therefore, each chapter is played as a mini-campaign, or combined with the other chapters. You may also add chapters or stand-alone missions from the original game for a longer campaign. Over time, your character will grow into a true specialist!
Components
1 Rule book (including missions), 4 character boards, 40 zombie cards, 67 player cards.
Handling the TLC cards
All the new player cards and zombie cards start the campaign out of play and are not part of any deck. Whenever gaining a TLC card, it replaces another card in your deck (zombie cards replace other zombie cards, and player cards replace other player cards). In order to keep things orderly, it is recommended that each character deck is sleeved with different card sleeves, and that the TLC cards are unsleeved until they are included in your deck, replacing a card there.
Each player has a Trash Pile, and any original cards that are replaced by TLC are taken out of the game, into that player's Trash Pile, where they are kept (unsleeved), separate from your deck. They may be needed later, especially when resetting the deck to play a new campaign or a new character.
Using a new character
When using one of the new characters, take a normal character deck from the base game and search among the TLC cards for the new starting cards printed on the character board. The new character board also specifies which base game cards should be replaced by the TLC cards. The replaced cards are kept in your Trash Pile.
TLC zombie cards
The new zombie cards all have special abilities, and when you reshuffle your deck and add zombie cards for the new wave, you always add the TLC zombie cards of each level before the normal zombie cards for that level (see example).
Example: Mia places crawling zombies first in the zombie pile, since it is a TLC-level 1 zombie card. She places the small gang on top of all other 2-zombie cards.
TLC zombie cards may have different amounts of zombies on them from their level. For example, Crawling Zombies is a level 1 zombie card, but has 2 zombies on it. This is shown both on the picture and below the level number. The TLC zombie cards may also have human opponents on them. For all gameplay purposes, these count as zombies. For example: the last mission requires killing 60 zombies. This includes any humans on zombie cards that you kill.
Delayed: Some zombie cards have (or can get) the keyword 'delayed'. Delayed zombies may be killed or discarded as usual, but will not attack this turn (see action G on page 5 in the original rulebook). You may end the turn even if they are still in play, and you may use healing effects as if they were not in play. Next turn, all 'delayed' effects are removed so the zombies can attack as usual.
Ambush! Some zombies have the keyword 'ambush!', which means that no player may prepare cards while they are in play (they block action E in the rulebook, page 5). As soon as they leave play, the effect is gone and you can prepare cards as usual again. Remember that you can let them attack and be killed (action G), or deal with them with already prepared cards or events. Note also that it is important that no player starts the action phase until all players have placed their zombies on the table. Zombies with Ambush! can never be delayed.
Some zombie cards have effects "when revealed". These must be activated (in any order) after all zombies have been placed on the table, but before the action phase starts. Wait for the other players!
The text on your TLC zombie cards only affects and interacts with you, not with any other player. Example: Feeding zombies allow you to pay 1 to remove them from play. No other player may use this ability on your Feeding Zombies. The notable exception to this rule is the keyword "ambush", which affects all players.
Playing a campaign
In contrast to the base game, the missions in The Long Cold campaign are designed to be played in sequence, not as single missions. However, the TLC campaign system described below can be used in both the new campaign and with the old missions.
Mission setup
In addition to the normal setup, perform these two steps:
-
Add a TLC zombie card. For each new mission, each player gains a new TLC zombie card to his/her deck. Shuffle the TLC zombie cards and draw 1 to add to your zombie pile, replacing an original zombie card of the same level (going to your Trash Pile). Each zombie card level may only have 2 TLC zombie cards, so if you already have 2 TLC zombie cards of level 1 (from previous missions) and draw another one with level 1, you must replace one of your previous TLC zombie cards (it is shuffled back into the other TLC zombie cards).
-
Shuffle the TLC player cards and take 4 of them to form a joint area deck for this mission, placed face down at the center of the table (see below).
The joint area deck
The joint area deck works like an additional area deck available to all players. Any player may scout or retrieve from the joint area deck, BUT when you retrieve a card from there, you must immediately exchange it with a card in your own scouted row so that you keep the same number of cards in your deck. The exchanged card is placed in your Trash Pile, unless it is a TLC card, in which case it goes back to the TLC card pool.
Note! If you play with sleeved cards, we recommend you move the sleeve from the trashed card to the new card, making cards in the Trash Pile easier to identify because they are not sleeved.
Example: Micah is buying a Helmet from the joint area deck by replacing Leather Jacket from his scouted row.
You may only retrieve scouted cards from the joint area deck. Therefore you can't save survivors to retrieve unscouted cards from here, nor use cards that take cards from the top of the area deck (for example with Abandoned Home). The joint area deck starts at 4 cards per mission, regardless of player count. If you fail the mission, you may try again, but will not get new cards for the joint area deck – just reshuffle any remaining cards from the failed attempt. When starting a new mission, return any remaining cards in the joint area deck to the TLC player cards. Then take 4 fresh cards for the new joint area deck.
Over time, more and more cards will be exchanged, gradually transforming your area deck and specializing your character.
Between missions
You may switch back original cards from your Trash Pile into your deck between missions; return a TLC card from your area deck to the TLC cards, and replace it with a card from your Trash Pile. This can be important when a mission requires some of the original cards (for example the Lab). However, the starting cards listed on a player board may not be changed, and you may not switch back a card that was taken out as part of the printed setup.
Special cases and clarifications
-
You may discard a card from hand without effect as an action. For example, when all cards are scouted and you don't know what to do with your cards in hand.
-
When killing / removing / discarding single zombies on cards with more zombies, that effect stays in play until the end of turn. Example: You kill 1 zombie on a 2-zombie card and discard the other. The zombie card is put in the discard pile, where you can kill the second zombie with another effect this same turn. Now both are killed and the card is put in the zombie pile.
-
Medkit, Food, and Bandage are not stopped by delayed zombies.
-
Cure can only be used on original 1-zombie cards.
-
Armored Zombie and Mutant cannot be "killed", not even from the discard pile, but may be "removed".
-
Scientist can be prepared, even if he doesn't find any medical equipment in the area deck. After searching, shuffle the area deck.
-
Some cards (MC, Crowbar, Throwing Knives, Canned Food, Errand Boy, Nail Gun, City Ruins.) have effects that trigger when you prepare the card. This is not considered using the card (action F in the rulebook, page 5). Therefore, it does not trigger the effects of cards like Sure Aim, Fighter, Thrower, and
Optional Hardcore Variant
When a character dies, complete the turn. The mission is lost, but any surviving characters manage to escape and can continue to be used. Reset the deck of the killed character, and that character can't be used anymore. The player may start another character from scratch to continue the campaign with.
Airstrike
A) Raid the camp (short)
Supplies are running low, and your situation is getting untenable. One of your scouts finds an abandoned camp with signs of a desperate last stand. This is a golden oppurtunity to get new supplies!
Goal: End your turn with no cards in your deck.
Setup: Shuffle all but 13 cards from your area deck into your starting deck. Then shuffle all 1-zombie cards into the top half of the deck, and all remaining zombies into the lower half. The zombie wave marker is not used in this mission.
Special Rules: When running out of cards, do not reshuffle. You draw no more cards. When all players have drawn their last card, and survived that turn, you win. All retrieved cards go to your hand.
Aftermath: Save any 2 cards in play for the next mission. They will start in play, unprepared.
B) Reach the com hub (medium)
When raiding the camp, you found notes of a still operational communication hub in a town nearby. However, there are swarms of zombies at the hub. You´ll have to lure them away.
Goal: End your turn with 20 progress (track it with your white marker).
Setup: Start on wave 4, with the cards saved from the previous mission in play.
Special Rules: Each time you reshuffle, you gain 1 progress for each zombie already in your discard pile. You may give progress to other players.
Aftermath: Save any 3 non-event cards (from deck, play, or discard pile) for your next mission. They will start in play, unprepared.
C) Escape (short)
As you start up the power in the Com Hub, it triggers a very loud non-stop alarm. All the zombies you lured away will be back in no time, hungry for brains. As the zombies are gathering outside, you are able to contact a surviving airbase and request an airstrike of the area. Run!
Goal: End the turn on wave 6 or higher.
Setup: Start on wave 1 with the cards saved from the previous mission in play. Remove the 4-zombie cards from the zombie deck (they won't be used in this mission).
Special Rules: Reverse the order of the zombie pile, thus first taking the 3-zombie cards, then the 2-zombie cards, and lastly the 1-zombie cards when reaching new waves (TLC zombie cards are still first in their respective level). This also means you start with 3-zombie cards in your deck instead of 1-zombie cards.
Aftermath: You may search your deck and area deck for 1 weapon and 1 armor to save for the next mission. They will start in play, unprepared.
D) Airstrike (long)
As you leave the zombie hordes behind you, you hear the heavy sound of airplanes. 3 bomber planes appear, and within a minute, the airstrike has eradicated both the com hub and the surrounding buildings. Hoping that there were no survivors there, you realize this is your chance to sweep the area to kill any remaining zombies and perhaps create a guarded safe zone.
Goal: End the turn with no cards in your area deck.
Setup: Start at wave 1, with the cards saved from the previous mission in play. Start with 4 zombie cards in your deck, regardless of player count. After taking zombies for your starting deck, shuffle all remaining zombies into the area deck.
The Journey
A) Autumn Falls (medium)
Autumn is here. Supplies are almost depleted in this area and it's getting harder to find food. You must find a better place before winter, but first gather what little you have before you leave.
Goal: Save exactly 8 cards (see below). After that, discard a prepared vehicle to leave the game immediately (remove any of your remaining zombies from play). Players may leave the game at different times, leaving the others to continue the game. When all players have left the game, you win.
Setup: Start on wave 2.
Special rules: Safe House is used to save any prepared weapons, persons, equipment, and armor. You may not save cards from your starting deck. When a card is saved it is taken out of play and is kept separately during the next mission. It will be used again in mission C. Safe House cannot be used to retrieve cards.
Aftermath: The saved cards are not used the next mission.
B) The Journey (medium)
You are on your way, but you have a long road to travel, through a land infested with hungry zombies.
Goal: Use vehicles to travel 4 times. The game ends after the turn when all players have traveled 4 times.
Setup: Start on wave 1. (8 cards are out of play this mission. see previous mission.)
Special rules: In order to travel, you must shuffle a prepared vehicle into the area deck. Keep track with a white marker.
Aftermath: Add all the saved cards from mission 1 to your starting deck for the next mission.
C) Finding a safe place (medium)
This seems like a good place to start over. The buildings are easy to defend and there is an unraided supermarket nearby... and prices are better than ever! Unfortunately the town is swarmed by zombies right now. You must clear the area and see what you can make of it.
Goal: End the turn with 2 raided facilities each.
Setup: Start on wave 7. Add 3 additional zombie cards to your starting deck, but also 8 saved cards from mission A.
Special rules: Raiding: When a facility is prepared, you may raid it: immediately put 5 or more zombies from the zombie pile into play. (Choose any combination of zombie cards. In case you do not have 5 zombies in the zombie deck, just add all you can).
Aftermath: Save 2 prepared facilities. They start the next mission in play and prepared.
D) Bring 'em home (long)
With the town center fortified, enough food and equipment, and a farm coming along nicely, this is your safe haven for the forseeable future. Let's search far and wide for more survivors to invite into the community. The more the merrier... and safer.
Goal: Save 7 survivors.
Setup: Start on wave 3 with the prepared facilities from the previous mission.
The Long Cold
A) Preparing For Winter (Short)
Autumn is coming to an end, and it's time to settle in for the winter. There are not many zombies around now, but time is running out for gathering enough supplies to survive the long cold season. Better get started!
Goal: The game ends automatically after the first turn when all players have reached wave 5.
Setup: Start on wave 2.
Aftermath: Save all equipment in play for the next mission.
B) Cold Snap (Short)
You've never seen the temperature drop so fast. It's freezing cold, and you need to stay warm at all costs. Were your preparations enough?
Goal: End the turn on wave 6 or higher.
Setup: Start on wave 2. Start with all equipment saved from the previous mission in play, unprepared.
Special rules: Biting cold: Each turn, each player must discard a prepared equipment, or destroy a prepared person or animal, or take 1 wound.
Aftermath: Save 2 cards in play for the next mission.
C) The Long Cold (Long)
It's not as cold anymore, but everything is covered with snow. Scavenging for more supplies will be difficult, and it's easy to lose things in the frequent snow storms. It's going to be a long winter. Luckily, it will take time for the zombies to find their way here.
Goal: End the turn on wave 9 or higher.
Setup: Start at wave 0. You start with the saved cards in play, unprepared. Remove a basic 1-zombie, 2-zombie, and 3-zombie card from the zombie pile. They are out of play this mission.
Special rules: Snow cover: All retrieve costs are +1. When saving survivors, you can at most retrieve 1 new card. Blizzard: Each time you increase the wave, one of your cards from play and all your scouted cards are shuffled back into the area deck (not the scouted joint cards). Do this before drawing cards for the turn.
Aftermath: Save 3 non-event cards from play, deck, or discard pile for the next mission.
D) Final Clean Up (Long)
With spring finally here, the remaining zombies are waking up. If you can just clear the surroundings one last time, maybe life can finally go back to some kind of normality?
Goal: End the turn with 60 killed zombies (keep track with the saved marker, and a wound marker for laps of 20 kills). You may give "kills" to other players.
Setup: Start at wave 5. Start with the 3 saved cards in play, unprepared.
Aftermath: You made it! You grow old and die eventually anyway, but with your grandkids at your side, and long After the Virus.