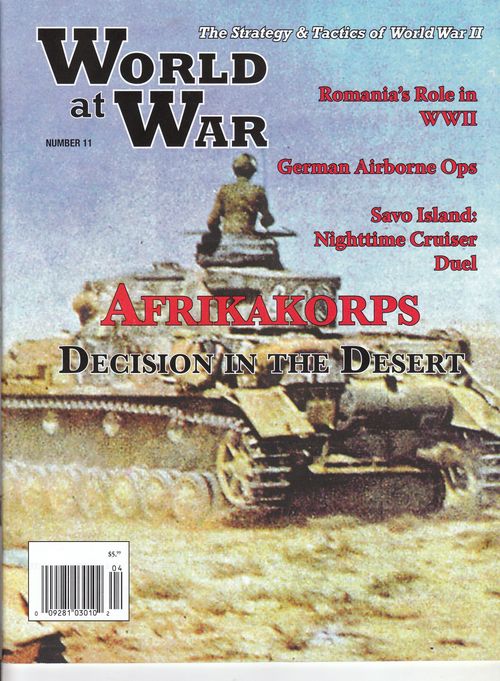
Afrikakorps: Decision in the Desert, 1941-42
Afrikakorps: Decision in the Desert, 1941-42 Rulebook
Table of Contents
Table of Contents
- 1.0 Introduction
- 2.0 Components
- 3.0 Set Up
- 4.0 Sequence of Play
- 5.0 Planning Phases, Sub-Commands & Activations
- 6.0 Bulletins
- 7.0 Movement
- 8.0 Stacking
- 9.0 Zones of Control (ZOC)
- 10.0 Combat
- 11.0 Retreat After Combat
- 12.0 Pursuit
- 13.0 Reinforcements & Refitting
- 14.0 Supply
- 15.0 Fog of War
- 16.0 Fortified Boxes
- 17.0 Unique Units
- 18.0 Airpower
- 19.0 Naval Bombardment
- 20.0 Naval Movement
- 21.0 Upgrades
- 22.0 Off-Map Bases
- 23.0 Victory Conditions
- 24.0 Scenarios
- 25.0 Charts & Tables
- Optional Rules
- 26.0 Major Operations
- 27.0 Special Forces
- 28.0 Special Tactics
- 29.0 Amphibious Landings
- 30.0 Coastal Shipping
- 31.0 Battlefield Salvage
- 32.0 Additional Air Operations
- 33.0 Advanced Supply
- 34.0 WDF HQ Capture
- 35.0 Appeal to Berlin
- 36.0 Malta
- 37.0 Designer Q&A
1.0 Introduction
1.1 They Died With Their Boots On (“boots” for short) is a wargame system that simulates what might appear to be otherwise hopeless campaigns in World War II. Afrikakorps: Decision in the Desert, 1941-41, uses that system to simulate those campaigns in the Western Desert in which Italo-German forces under the command of Erwin Rommel took on the forces of the Commonwealth.
2.0 Components
2.1 Map
The game map shows Egypt and Libya as they were in 1941-42. A hexagonal grid has been superimposed over the terrain features on the map to regularize the movement and positioning of the playing pieces. The hexagons are called “hexes” in the rules. Prior to playing the game the first time, you should cut apart the two map sections and reassemble them into one long (east-west) playing area.
2.2 Playing Pieces
The pieces are referred to as “units” for military forces, and “markers” for informational pieces.
2.3 How to Read the Units
2.4 Unit Types & Sizes
Unit Sizes
XXX = corps III = regiment
XX = division II = battalion or
X = brigade or detachment
battlegroup
2.5 Unit Designations & Abbreviations
Units may be identified by a title, a number, or a two-part designation. See the scenario set up sections for details.
The term “Axis” includes all German and Italian units. The term “Allied” includes all British Commonwealth and US units. The term “British” includes all Allied units other than US units.
Abbreviations
German
BB: Brandenburger
FFA: Fliegerfuhrer Afrika
KGS: Kampfgruppe Schmid/Herman Goering Division
KR: Kasta Rommel
R: Ramcke
Italian
B: Bersagliere RM: Regia Marina
CCNN: Blackshirt Militia Sah: Saharan
GGFF: Young Fascists
Allied
8A: Eighth Army LRDG: Long Range
A: Australian Desert Group
AL: Arab Legion NZ: New Zealand
DC: Desert Column Pol: Polish
FF: Free French SA: South African
Gd: Guards SAS: Special Air Service
GK: Greek USA: United States Army
Ind: Indian USAFIME: US Armed
Forces in the Middle East
2.6 Air Units have one or more symbols on them, each representing “one point” of airpower. They are used like change; that is, at any time a player may exchange an equal number of air units of the same type.
2.7 Sub-Command Markers are used to activate various corps-level and army-level sub-commands. They have printed on them the names of specific sub-commands, corresponding to units in the game. They are also identified by having the same color scheme. For example, the German DAK sub-command marker has the same color scheme as all actual units of the Deutches Afrikakorps, such as 15^(th) Panzer Division.
2.8 Major Operations Markers are special command markers. They’re used only in the Optional Rules.
2.9 Bulletin Chits generate random events. They are placed in the command pool.
2.10 Player Displays & Orientations
Both players have a set of charts, tables and holding boxes, including a Turn Record Reinforcement Track (used to show when units enter play), and boxes for various units that are held off map. The Allied player should sit off the south edge of the assembled map, facing north. The Axis player should sit off the north edge of the assembled map, facing south.
2.11 Players need to provide themselves with a six-sided die to play the game.
3.0 Set Up
3.1 Set up according to the following general rules. See section 24.0 for more details. Play proceeds according to the sequence given in section 4.0 for the number of game turns specified in the scenario rules.
3.2 Command Pool
Players will need a large-mouth opaque container, such as a coffee mug. Throughout the course of a game, players will draw command markers at random from that “command pool.” Place the starting command markers from both sides and the Bulletin markers into the same command pool.
3.3 The scenario rules designate the order in which players set up their forces, as well as the locations in which units are deployed.
3.4 After all units in the initial deployment have been set up, the remaining units are placed on the Reinforcement Tracks showing when they will potentially appear. If a unit may appear more than once, place it in the box corresponding to its first potential appearance. Place all other counters to one side.
3.6 First Player
The scenario rules indicate which player is the “first player.” He is the player who draws first from the command pool each game turn. The other player is the “second player.” Note that the player who sets up first is not necessarily the “first player.”
4.0 Sequence of Play
4.1 AK is played in sequential “game turns,” each of which is composed of interactive “phases” and “sub-phases.” During each Operations Phase, the players alternate picking command markers (aka “chits”); each such pick thereby indicating which sub-command will be “activated” for movement and combat at that time. (The draw of the “Bulletin” marker causes the Bulletin Table to be consulted; see section 6.0). The player who controls a selected sub-command moves and conducts combat with the units of that sub-command. The player who’ s currently conducting an Operations Phase is temporarily called the “phasing player”; the other player is temporarily the “non-phasing player.”
4.2 Sequence of Play
Each game turn consists of the following sequence, which players must go through in the order specified.
I. Planning Phase. Both players simultaneously decide on which command markers they will place in the pool this turn by expending supply units. They then place the markers into the pool without revealing them to their opponent.
II. Mutual Reinforcement & Refit Phase. Both players do the following, Axis player first.
A. Place any reinforcements scheduled to arrive this turn.
B. Roll for the arrival of supply units and then place them.
C. Initiate the refit of any eliminated friendly units.
III. Operations Phases
A. First Operations Phase. The first player draws a sub-command marker from the command pool. The sub-command named on the drawn chit is thereby “activated.” In general, the player who controls that sub-command—no matter who actually drew the chit—then executes the following steps with those units. If the “Bulletin” marker was drawn, the player who drew it must consult the Bulletin Table.
1 Movement Sub-Phase. The phasing player moves all, some or none of the units of his activated sub-command, as he chooses.
2. Combat Sub-Phase. The phasing player uses units of his activated sub-command to attack enemy units.
B. Second Operations Phase. The second player draws a new chit as in Step A above, and the player owning that activated sub-command works through steps one through two, again, as described above.
C., D., Etc., Subsequent Operations Phases. Continue alternating between the first and second players drawing chits to activate sub-commands until all command markers have been picked from the pool, or until both players have passed consecutively. For example, if there are five sub-command markers in the command pool, there could be up to five Operations Phases in a single game turn.
IV. Air Return Phase
A. Remove all air interdiction markers from on the map and replace them in their owning players’ Air Utilized boxes.
B. Check for anti-aircraft fire against each air unit in the Air Utilized boxes.
C. Place air units in the Utilized boxes in their own side’s Available boxes.
V. Game Turn Inter-Phase
A. Sudden Death Victory Phase. Check to see if either player has attained the conditions for a sudden death victory.
B. Game Turn Advance. Move the game turn markers to the next box on the Game Turn Record Tracks printed on the mapsheet. If this is the last turn of the scenario, the game comes to an end and victory is determined.
5.0 Planning Phases, Sub-Commands & Activations
5.1 The armies in AK are divided into “sub-commands,” each of which operates as a semi-autonomous force within its overall army. Sub-commands are defined by abbreviations and common color-combinations on their unit-counters. A particular sub-command is said to be “activated” for an Operations Phase when its marker is picked during Step III of the turn sequence outline given in section 4.0. Sub-command markers become available according to initial deployment instructions and the reinforcement charts. Once available, they generally remain available for the rest of the game, with exceptions stated in the reinforcement schedule. See the game charts for the Command Activation Chart, which spells out which units are activated by each command marker (section 25.0).
5.2 Planning Phase
During the Planning Phase, both players simultaneously and secretly decide on which sub-command markers he will place in the pool this game turn. That’s done by expending supply units. Supply units expended for this may be located anywhere on the map in either their convoy or depot states. Expend supply units according to the costs below, and choose which sub-commands you plan to activate. You may choose some, none or all of your markers: army-level command (XXXX)—two supply units: corps-level command (XXX)—one supply unit; Rommel—no supply unit needed; Bulletin marker—no supply unit needed. Both players then put the markers selected into the pool without the other player having an opportunity to examine them until a marker is actually picked.
5.3 Operations Phase
If a player picks the marker of a sub-command that’s part of his army, he must at that time execute the movement and combat sub-phases for that sub-command. In general, if a player picks the marker of a sub-command that’s part of the opposing player’s army, the player who drew that marker gives it to his opponent, and the player receiving the marker then executes the movement and combat sub-phases for that sub-command.
5.3 In general, a sub-command may be activated (and thereby move and fight) only during an Operations Phase in which its own marker has been picked. At the completion of that Operations Phase that sub-command is no longer activated. For example, by playing the DAK sub-command marker, the Axis player could activate all units with the “DAK” designation, plus one supply unit and two German air points.
5.4 Certain command markers activate more than one command. For example, say the Axis player picks the Panzerarmee Afrika marker. He could then activate the German DAK and the Italian 20^(th) and 21^(st) Corps, plus three supply units, three German/Italian air points and one special forces unit (see 25.8).
5.5 A player may, by picking certain markers, cause an individual command to activate more than once per turn. For example, the Rommel marker will allow for the activation of an Axis command more than once per turn. So, despite the general rule against it, certain sub-commands or individual units may conduct more than one Operations Phase per turn.
5.6 You may never carry out any action for units that are part of the enemy army, even if you were the player who actually picked its sub-command marker. In such cases, you generally hand the picked enemy sub-command marker to your opponent, who then must use it to conduct an Operations Phase of his own. Note that means you may potentially conduct more than one Operations Phase before the opposing player is allowed to react with an Operations Phase of his own.
5.7 Disposition of Markers
After a marker is picked, it’s placed aside. It may be returned to the pool during the Planning Phase of a subsequent turn.
5.8 Passing
You may decide to pass rather than conduct an Operations Phase for your own just-picked command marker. If both players pass consecutively, the Operations Phases for that turn end and play moves to the Air Return Phase.
5.9 Stacking
Units from different sub-commands may generally stack together. Exceptions are given in the rules below.
5.10 Attacking
Since only activated units may attack, units from different sub-commands that may be stacked together may generally not participate in the same attack, unless each of their sub-commands is activated by an overarching marker.
5.11 Defending
Units always defend normally, regardless of which sub-command, friendly or enemy, happens to be activated at the moment. Units from different sub-commands may be defend together.
5.12 British Eighth Army (8A) Units
British units designated “8A” may be activated only by the Eighth Army marker.
5.13 Air, Naval & Supply Units aren’t part of specific sub-commands; instead, they’re activated via certain sub-commands; see the Command Activation Charts. An individual supply unit may be activated more than once per turn.
5.14 US Units may be activated only by the US Middle East Command marker.
5.15 Substitution of Command Markers
Certain reinforcement arrivals will cause one sub-command marker to be permanently removed from play and replaced with another marker. For example, in the Axis “1942-A” reinforcement event, the Panzergruppe Afrika sub-command marker is replaced by Panzerarmee Afrika sub-command marker. The Panzergruppe marker is thereafter permanently out of play (and out of the pool).
6.0 Bulletins
6.1 Both players have a Bulletin marker. When one is picked, the player to whom it belongs must roll on his own side’s Bulletin Table (see section 25.0), and then immediately apply any result.
6.2 A given bulletin event may occur any number of times in a game unless otherwise stated on the table.
7.0 Movement
7.1 During each Movement Sub-Phase, the phasing player may move as many or as few of the units of his activated sub-command(s) as he chooses. Eligible units may be moved in any direction or combination of directions to the limits of their movement factors (MF). If more than one sub-command is activated, the player may move units of those sub-commands in any order.
7.2 Each unit has a movement factor printed on it. Units are moved tracing a path of contiguous hexes through the hex grid, until all its movement points (MP) are expended or the player decides to cease moving the unit, whichever comes first. As each unit enters a hex, it pays one or more MP from its MF. Consult the Terrain Effects Charts (TEC) printed on the mapsheet for details. In AK there’s no distinction between mechanized and non-mechanized movement; all units pay the same terrain costs.
7.3 Zero MF Units
Units with printed MF of zero (0) never move by ground once placed onto the map. They may use naval transport; see section 20.0.
7.4 Restrictions
Your units may be moved only during a Movement Sub-Phase in which one or more of your sub-commands are activated. Once a unit has been moved and your hand removed from it, it may not be moved again. A unit may expend all, some, or none of its MP in every Movement Sub-Phase of its sub-command. Unused MP may not be accumulated from turn to turn, or phase to phase, or sub-phase to sub-phase, nor may they be in any way transferred from one unit to another.
7.5 Minimum Movement
All units are generally guaranteed the ability to move at least one hex in Movement Sub-Phase of their sub-command; however, units may never enter an enemy occupied or prohibited hex, nor may they move directly from one enemy zone of control to another (see section 9.0).
7.6 Enemy Zones of Control (EZOC) stop your units’ movement for that sub-phase(see section, 9.0).
7.8 Retreat & Pursuit, which occur as part of combat results, aren’t considered regular movement and, as such, they don’t use MP (see sections 11.0 & 12.0).
7.9 Terrain
To enter any given hex, a unit must expend the number of MP shown on the TEC for the kind of terrain in it. When the TEC calls for an MP expenditure to cross a hexside, such as a river, that cost is in addition to the terrain cost involved in entering the hex into which the moving unit is crossing.
7.10 Multiple Terrain
If there is more than one type of terrain in a hex, use the highest single movement cost from among all the terrains involved.
7.11 Special Moves
If there’s a railroad, road, track or bridge in the hex entered, use the railroad, road, track or bridge movement rate regardless of any other terrain in that hex, as described below. Also note units using amphibious or airborne movement ignore the terrain through which they move.
7.12 Roads
A unit that moves from one road hex directly into an adjacent road hex through a hexside traversed by that road expends a quarter MP (0.25) per hex entered. Effectively, movement along a road is at four times a unit’s movement rate.
7.13 Tracks & Railroads
A unit that moves from one track or railroad hex directly into an adjacent track or railroad hex through a hexside traversed by that track or railroad expends half an MP (0.5) per hex entered.
7.14 Allied Railroad Movement
The Allied player may use railroads to conduct a special form of movement. A unit to be moved by railroad must start its sub-command’s Movement Sub-Phase on a rail hex, and then it pays one MP. It may then move along an unlimited number of contiguous railroad hexes. Units using rail movement may not be in an EZOC at any point in the move. Rail movement may be combined with other forms of overland movement in the same Movement Sub Phase. The Allied player may move one supply convoy per turn via railroad prior to the Allied upgrade. Two Allied supply convoys per turn may be moved after the upgrade. No other units may use rail movement. The Axis may not use the railroad for this kind of movement.
7.15 Escarpments
A unit must expend all of its MF to cross an escarpment hexside. That is, it starts the crossing move on one side of the escarpment, then completes it on the other side with no further movement.
7.16 Rivers & Lake Hexsides
Units pay the movement cost to cross a river or lake hexside in addition to the terrain cost on the other side. Bridges negate the cost for such hexsides. Units may not enter all-lake hexes.
7.17 Bridge & Ferry Movement
A bridge or ferry negates the effects of river and lake hexsides on movement for units crossing through that hexside. There must actually be a bridge or ferry symbol for this bonus to be operative; a road or trail that crosses a river without a bridge or ferry symbol present on the map doesn’t count as a bridge or ferry, and regular crossing MP must be paid in such cases.
7.18 Exiting the Map. See section 22.0.
8.0 Stacking
8.1 Having more than one friendly unit in a hex at the same time is called “stacking.”
8.2 Stacking Limits for AK are as follows.
Pre-Upgrade (see section 21.0)
German: three units per hex.
Italian: two units per hex.
British & Commonwealth: two units per hex
US: two units per hex
Post-Upgrade (see section 21.0)
German: four units per hex.
Italian: three units per hex.
British & Commonwealth: three units per hex
US: two (no upgrade)
8.3 Stacking limits apply for all units of both sides at the end of every Movement and Combat Sub-Phase, regardless of which sub-command is activated. Friendly units may move through hexes occupied by other friendly units, even if they belong to different friendly sub-commands, at no extra cost. There is no limit on the number of friendly units that may pass through a single hex or cross a single hexside in one sub-phase, phase or turn. If, however, at the end of any friendly or enemy Movement or Combat Sub-Phase, a hex is over-stacked, the excess units must be eliminated by the owning player.
8.4 A friendly unit or stack may never enter a hex containing an enemy unit or stack.
8.5 Cities
Stacking in cities is always four units per hex.
8.6 Free-Stacking Units
Supply units never count for stacking. Air, naval bombardment, and fortified box markers also have no stacking value. Such markers may be added to hexes as long as the particular rules for their use are observed. Also, under certain circumstances, air and naval markers may be placed in the same hexes as enemy units or markers, and vice versa. See sections 18.0 and 19.0.
8.7 No Stack Movement
Units should not be moved as stacks in AK. Move each unit of an activated sub-command one at a time, no matter if they begin a Movement Sub-Phase stacked together in the same hex.
8.8 Stacking Order
In general, players are free to arrange their stacked units in any order they choose. The exception is, in any stack containing a fortified box marker, that marker must always be kept as the top unit in that stack.
8.9 Inter-Sub-Command Stacking
Friendly units from different sub-commands may stack together.
8.10 International Stacking
German and Italian units may stack together. Use the German stacking limit for mixed stacks. British Empire and US units may not end any Movement or Combat Sub-Phase stacked together.
9.0 Zones of Control (ZOC)
9.1 The six hexes immediately surrounding a unit’s hex constitute that unit’s “zone of control” (ZOC). Hexes into which a unit exerts a ZOC are called “controlled hexes.” ZOC stop enemy movement and block enemy supply lines. A friendly unit’s presence in an enemy ZOC (EZOC) at the start of its own sub-command’s Combat Sub-Phase requires that unit to attack. ZOC also affect retreats after combat.
9.2 In general, all units exert a ZOC at all times, regardless of the phase, sub-phase or game turn. EZOC aren’t negated by other units, enemy or friendly. ZOC generally don’t extend into terrain the projecting unit couldn’t normally enter (but see Fortified Boxes, section 16.0, for an exception.)
9.3 Multiple ZOC
Both friendly and enemy units may simultaneously exert ZOC into the same hexes. There’s no additional effect if more than one unit, friendly or enemy, exerts ZOC into the same hex at the same time. If a given unit is in an EZOC, that enemy unit is also in its ZOC, except as note in 9.2 and 16.6. The two units/stacks are equally and mutually affected.
9.4 EZOC & Movement
A unit must stop moving when it first enters an EZOC. It may move no farther in that sub-phase. A unit may not move directly from one EZOC to another EZOC. A unit which starts in an EZOC may exit it.
9.5 ZOC & Combat
During an activated sub-command’s Combat Sub-Phase, the phasing player must attack all enemy units exerting ZOC into hexes occupied by the units of his activated sub-command. (Non-activated units never attack, regardless of ZOC.) All units belonging to an activated sub-command in an EZOC at the start of that sub-command’s Combat Sub-Phase must attack one adjacent ZOC-exerting enemy occupied hex during that sub-phase.
9.7 See the Retreat (11.0) and Pursuit (12.0) rules for the effects of EZOC on those game functions.
10.0 Combat
10.1 Attacking is mandatory for units of an activated sub-command found to be in an EZOC at the start of that activated sub-command’s Combat Sub-Phase. The phasing player is termed the “attacker”; the non-phasing player is the “defender,” regardless of the overall strategic situation. There are two different Combat Results Tables (CRT) in AK: Assault and Mobile.
10.2 For each individual combat, follow the sequence below.
1) Attack Declaration. The phasing player declares which units of his side’s activated sub-command will be attacking which enemy units.
2) Support Declaration. The attacker commits any air support (18.0) and naval bombardment (19.0), plus offensive supply (14.5).
3) CRT Determination. The attacker chooses the CRT for the battle: Assault or Mobile. He may always choose the Assault CRT. To choose the Mobile CRT, at least one attacking unit must be mechanized.
4) Combat Strength Determination. Total the combat strength of all involved attacking units. Total the defense strength of all involved defenders. Account for any multipliers for attack supply and fortified boxes (14.0, 16.0). Divide the attacker’s strength by the defender’s strength and multiply that result by 100 in order to get a percentage (see 10.13 & 10.14).
5) Combat Shift Determination. Determine percentage column shifts for terrain, air/naval support, combined-arms, flak and other factors.
6) Final Percentage Determination. Consult the appropriate CRT under the appropriate percentage column heading. Apply all applicable shifts to that initial percentage column.
7) Combat Resolution. Roll a die and cross-index that result beneath the final percentage column heading. Implement the combat result immediately. Execute any retreats. Execute any pursuit.
10.3 Which Units May Attack
Only the units of the activated sub-command(s) may attack during that sub-command’s Combat Sub-Phase. Units of other friendly non-activated sub-commands may not attack at that time. Defending units may belong to any number of enemy sub-commands. Note that in some cases a player may activate more than one sub-command in an Operations Phase, in which case units of those sub-commands could attack together.
10.4 Defense-Only Units
Units with a parenthesized combat strength never attack, regardless of activation or EZOC.
10.5 Attack Declarations
The phasing player may resolve his combats in any order he chooses. He must declare which activated units will be attacking which defending enemy units at the beginning of each Combat Sub-Phase in order to ensure all adjacent ZOC-exerting enemy units will be attacked.
10.6 All activated units in EZOC must attack except as described above in 10.4. All ZOC-exerting enemy units adjacent to your activated units must be attacked. Within those strictures, the phasing player may choose which attacking units will attack which defending units, as long as all activated friendly units (again, except as given in 10.4) adjacent to a ZOC-exerting enemy unit participate in an attack. A player may also, but doesn’t have to, attack enemy units that don’t exert ZOC (such as units in fortified boxes).
10.7 A defended hex may be attacked from as many as six adjacent hexes, with all attacking units combining into one single attack.
10.8 No unit may attack more than once per Combat Sub-Phase, and no defending unit may generally be attacked more than once per Combat Sub-Phase. (Exception: see 11.6.)
10.9 Stack Attacks
Units in the same stack must be combined together for combat. That is, all attacking units in a hex must be involved in the same attack as one combined force. Units defending in the same hex must be attacked as a single combined total; they may not be attacked separately.
10.10 Multi-Unit & Multi-Hex Attacks
If an attacking unit is in the ZOC of more than one enemy unit, it must attack all those enemy units that aren’t engaged by some other attacking unit(s). Units in two or more hexes may combine their combat strengths and attack into a single hex provided all those attacking units are adjacent to all the involved defending units. Attacks may involve any number of attacking or defending units. For an attack to be resolved as a single combat, however, all involved attacking units must be adjacent to all involved defending units.
10.11 Diversionary Attacks
When making a series of attacks, a player may allocate his attacking units, on a hex-by-hex basis, so some attacks are made at poor percentages while others are thereby enabled to be made at more advantageous percentages.
10.12 Combat Strength Unity
A single unit’s attack and defense strengths are always unitary. A given unit’s strength may not be divided among different combats, either for attack or defense.
10.13 Combat Strength Multipliers are as follows.
1) Maximum Attack Supply. Attacking units that have maximum attack supply have their combat strengths doubled (see 14.7).
2) Fortified Boxes. A fortified box in a hex doubles the defender’s combat strength in addition to any other applicable benefits (see section 16.0).
10.14 Combat Percentage is determined by dividing the attacker’s strength by the defender’s strength and then multiplying that result by 100. Then refer to the corresponding column on the CRT when rolling the die. For example, if the attacker has 20 combat factors and the defender 13, you divide 20 by 13 and get 1.53. Then you multiple 1.53 by 100 in order to convert it to a percentage, which yields 153 percent. So that combat would be resolved on the 150-199% column of whichever CRT is chosen.
10.15 CRT Percentage Column Shifts
Certain things will “shift” the initially calculated combat percentage. They include: terrain (10.17); combined-arms (10.19); flak (10.20), close air support (18.4) and naval gunfire (19.0).
10.16 A CRT column shift to the right means the column is increased by the number of columns indicated (that is, in favor of the attacker). A shift to the left means the column is decreased by the number of columns indicated (that is, in favor of the defender). If both the attacker and defender have shifts, use the cumulative difference. Even if the starting percentage is less than 49% or greater than 600%, use the 49% and 600% columns as the “base line” for all such shifts.
10.17 Terrain
Defending units benefit from the terrain in the hex they occupy or, in certain cases, along that hex’s sides. The TEC gives the defensive shifts. Benefits for terrain aren’t cumulative. A defending force may receive only the shift for one type of terrain, in-hex or hexside. If a force potentially has more than one defensive terrain shift available to it, it uses the single best one.
10.18 Hexsides
A force may receive the benefit for defending behind a hexside (such as an escarpment) only if all attacking units are attacking across the hexside.
10.19 Combined-Arms Shifts are available as follows. Note, that in any one combat, you may enjoy no more than one combined-arms shift regardless of the number of involved and qualified stacks.
German: If an Axis attack or defense contains at least one German armor unit and one German motorized or armored infantry or recon unit, the Axis player receives a one-column shift to the right if attacking, and a one-column shift to the left if defending.
Italian: If an Axis defense contains at least one Italian assault gun unit and one Italian motorized or armored infantry or armored unit, the Axis player receives a one-column shift to the left when defending; however, this occurs only after the Italian upgrade.
British: If an Allied attack contains at least one British armor unit and one British armored infantry or infantry unit, the Allied player receives a one-column shift to the right if attacking; however, this occurs only after the British upgrade.
US units never get combined-arms shifts.
10.20 Axis Flak Units
If an Axis flak unit is present in a hex, and any Allied mechanized units are attacking that hex, the Axis enjoys a one-column shift to the left. This is in addition to other shifts, including combined-arms.
10.21 Combat Shifts Example
The attacker has one combat factor and the defender 10, which would give a combat percentage of ≤49%. The attacker has three shifts to the right, and the defender one to the left, giving a final result of two shifts to the right. The final percentage column is therefore 100-149% because the starting column shifted two to the right is the 100-149% column.
This effect is intentional, to allow small forces the chance to win improbable victories and large forces the chance to go down in pitiful disasters.
10.22 Combat Result Explanations
The results for both CRT are listed below in alphabetical order. Results must be applied in the order given, and only those results specifically called for are applied. For example, unless a result specifically calls for pursuit, no pursuit takes place.
10.23 Eliminations
When the Mobile CRT is used, the first unit lost on each side must, if available, be a mechanized unit. That initial loss counts against total combat factors lost for BB and other results. In all other cases, when unit eliminations are called for, the choice of which involved units are to be eliminated is up to the owning player.
10.24 See the Retreat (11.0) and Pursuit (12.0) sections for details on how they’re conducted.
AE: Attacker Eliminated
-
Eliminate all involved attacking units.
-
Defender may conduct pursuit.
AD: Attacker Defeated
1) Eliminate at least half of the attacking force’s printed attack strength.
2) Surviving attacking units retreat two hexes.
3) No pursuit.
AP: Attacker Panics
-
All attacking units rout.
-
Defender may conduct pursuit.
AT: Attacker Trounced
1) Eliminate at least half of the attacking force’s printed attack strength.
2) Surviving attacking units rout.
3) Defender may conduct pursuit.
AW: Attacker Withdraws
-
All involved attacking units retreat one hex.
-
No pursuit.
BB: Bloodbath
1) Eliminate all units on the side with lower printed combat strength.
2) The other side must eliminate at least that many combat strength points.
3) Surviving attackers may conduct pursuit.
DD: Defender Defeated
1) Eliminate at least half of the defending force’s printed defense strength.
2) Surviving defending units retreat two hexes.
3) Attacker may conduct pursuit.
DE: Defender Eliminated
-
Eliminate all involved defending units.
-
Attacker may conduct pursuit.
DP: Defender Panics
-
All defending units rout.
-
Attacker may conduct pursuit.
DW: Defender Withdraws
-
All involved defending units retreat one hex.
-
Attacker may conduct pursuit.
MA: Mobile Assault
-
Eliminate one involved defending unit.
-
Surviving defending units retreat one hex.
-
Attacker may conduct pursuit.
MD: Mobile Defense
-
Eliminate one involved attacking unit.
-
All defending units retreat one hex.
-
Surviving attackers may conduct pursuit.
OR: Overrun
1) Eliminate at least half of the defending force’s printed defense strength.
2) Surviving defenders rout.
3) Attacker may conduct pursuit, and his mechanized units may move up to twice the normal number of hexes.
11.0 Retreat After Combat
11.1 When a combat result requires units be retreated, the affected player immediately moves those units the indicated number of hexes away from their combat position. Retreat is not regular movement; its execution doesn’t use MP. It is carried out in terms of hexes, not MP, and units must always retreat the number of hexes indicated, regardless of their printed movement allowances.
11.2 Conducting Retreats/Routs
Retreats are always conducted by the player who owns the retreating/routing units. You may move retreating/routing units only into otherwise enterable hexes. If no such hexes exist to receive retreating/routing units, those units are eliminated.
11.3 Retreat and rout are subject to the following strictures. Within these limits, units may be moved in any directions.
1) Units may not retreat or rout into hexes containing enemy units or their EZOC, into otherwise prohibited terrain or off the map. If there’s no alternative, they’re eliminated in the last hex into which they were able to retreat. Enemy naval and air markers don’t block retreat or rout.
2) Units may retreat or rout into and through hexes containing friendly units. Remember, though, units must obey all stacking and sub-command rules in the final hex of their retreat or rout. If they end their retreat or rout in violation of any of those rules, the unit retreats or routs extra hexes until it reaches a hex in which it meets the limit.
3) A retreating or routing unit may not be moved into the same hex more than once, nor may it re-enter the hex from which it began the retreat. It must end its retreat or rout the indicated number of hexes away from its initial position (more sometimes, see above). If it can retreat or rout only a portion of the number of hexes called for in the combat result, it’s eliminated in the last hex into which it was able to retreat or rout.
4) Within the strictures given above, stacks don’t have to stay together when they retreat or rout. They may be split up into separate sub-stacks or individual units, determined by the player moving the units.
5) In no case may a unit be retreated or routed into a hex that would cause it to be eliminated or over-stacked if another path is available.
6) Zero movement factor units are eliminated if forced to retreat or rout.
7) Each unit is retreated individually before the next one begins its retreat or rout.
11.4 Rout
If a ”rout” is called for, the player rolls a die for each involved unit and then retreats it that number of hexes. Execute the rout for one unit before proceeding to the next.
11.5 Fortified Cities & Retreats
If a city hex has a fortified box on it, it provides the following additional bonus when units are defending in or attacking out of it: units in the hex that receive retreat or rout results while attacking or defending may ignore that portion of the combat result (owning player’s choice on a battle by battle basis). Also, if a unit retreats or routs into a city hex containing a friendly fortified box, it may cease its movement in that hex. Fortified boxes in non-city hexes don’t negate retreats or routs.
11.6 Under certain circumstances a unit may end its retreat or rout adjacent to enemy units (if that enemy unit or stack exerts no ZOC). They may be attacked again if that enemy force hadn’t been committed to any attack, or if they end up stacked with units that had been slated to be attacked. This is an exception to 10.8.
12.0 Pursuit
12.1 Pursuit is a special form of movement that may occur after each battle if allowed by the combat result. (There’s no “pursuit combat” in AK.)
12.2 If a combat result allows a player to conduct pursuit, he may immediately move some, none or all of his eligible involved units a number of hexes as follows. German mechanized: two hexes. All other types: one hex.
12.3 The first hex moved into must be the hex the defeated enemy units formerly occupied. The second and subsequent hexes, if allowed, may be in any directions. This movement is counted in terms of hexes, not MP.
12.4 Pursuit may be made only into hexes into which pursuing units could normally move.
12.5 Pursuing units ignore EZOC. They may end their pursuit in an EZOC. They may not attack again; however, pursuit movement may be useful for cutting enemy retreat routes.
12.6 In certain cases, defending units may pursue; however, when doing so they may not enter EZOC.
12.7 If a pursuit is more than one hex, some pursuing units may stop in the first hex, and others in the second hexes. Pursuit movement may not be increased by railroad, road, track, amphibious or airborne movement.
12.8 Zero-Movement Units
Units with a “0” movement may not conduct pursuit movement.
13.0 Reinforcements & Refitting
13.1 Players receive additional units and command markers over the course of a game. Such units are called reinforcements. Reinforcements are usually generated by bulletins (see section 6.0). The bulletin will designate on which turn the reinforcements arrive. They appear in the Mutual Reinforcement & Refit Phase during the game turn indicated.
13.2 Each player has a Turn Record Track. Each player places reinforcements to appear on his own track, in the box corresponding to the turn indicated in the triggering bulletin, and when that turn comes up, the units are available to be placed on the map.
13.3 Immediate Reinforcements
Certain reinforcements are received immediately. Place them on the map as and when designated.
13.4 Delay of Reinforcements
Certain reinforcements will be designated as occurring one or more turns later. Place them on your Turn Record Track that number of turns later. For example, a bulletin on Game Turn 3 informs you that you will get two units a die roll of turns later. You roll a die for the first unit and the outcome is two; so it’s received on Game Turn 5. You roll a second die for the other unit, and that result is one; so it’s received on Game Turn 4.
13.5 The receiving player places reinforcement units scheduled to arrive that turn in the designated location. Reinforcements operate normally during the turn of arrival.
1) Axis Placement. Ground unit reinforcements (combat and supply) are placed in the Tripoli Base box. They may also be placed in Benghazi, Tobruk or Bardia if Axis-occupied and if the port capacity requirement is met (see section 20.0). Airborne and airlanding units may also be placed in any Axis occupied city or town, or on Axis depots. Air and naval units are placed in the Available box as soon as they’re received. Command markers are also placed in the available box.
2) Allied Placement. Ground unit reinforcements (combat and supply) are placed in the Middle East Base box. They may also be placed in Suez City, Port Said, Alexandria, Bardia or Tobruk, if Allied-occupied and if the port capacity requirement is met (see section 20.0). Air and naval units are placed in the Available box as soon as they are received. Command markers are also placed in the Available box.
13.6 Reinforcements are simply placed on the map; they don’t march onto it. There are no MP costs for reinforcement placement.
13.7 Restrictions
Reinforcements may not be placed in a hex occupied by an enemy unit. They may be placed in EZOC. Reinforcements may not be placed over-stacked. Neither player may delay reinforcements.
13.8 Other Reinforcements
Certain scenario rules will include “special” or “contingency” reinforcements. They appear only if particular conditions have been met.
13.9 Supply Unit Reinforcement
During the Reinforcement/Refit Phase, each player rolls once on his respective Supply Arrival Table (section 25.0). Apply die roll modifiers listed below the table. The outcome indicates the number of supply units the player will receive that turn. Those units are placed as per 13.5. They may be placed as depots or convoys.
13.10 The number of supply units in the game is a design limit; you may not create additional units.
13.11 Withdrawals
Certain events will call for units to be withdrawn. The units in question are simply picked up and removed from the map or Refit box, regardless of their position. Withdrawn units are placed in the Withdrawn box. Generally, they’re permanently out of play; though, under certain circumstances, they may return to play. A unit that was permanently removed prior to being called on to be withdrawn remains in the Permanently Eliminated box. You must withdraw units first from among those on the map, then from among those in the Refit box. If you don’t have sufficient units to withdraw, there is no further effect.
13.12 Refitting
Whenever a combat unit is eliminated in combat, it is placed in the player’s Refit box.
13.13 Refit Procedure is as follows.
1) Refit is conducted during the Reinforcement/Refit Phase.
2) You must expend supply to refit units. The supply unit must be located in your side’s off-map base or a port.
3) One supply unit will refit one mechanized unit or one air unit. One supply unit will refit two of all other types of unit.
4) For each unit to be refit, roll a die, divide by two and round up any remainder to get a final number from one to three. The unit is received that number of turns later; however, if a six is initially rolled, that refit attempt failed and the unit isn’t received. You may attempt to refit it again on any later turn.
5) Naval units may never be refit once eliminated.
13.14 Refit units are placed on the map in the same manner as reinforcements.
13.15 POWs: If a unit is entirely surrounded in all six adjacent hexes by enemy units, EZOC and/or forbidden terrain, when it is eliminated place it in the POW box. Such units cost twice as many supply units to refit.
14.0 Supply
14.1 Units trace supply to supply units. Supply is used to enhance ground unit movement and attacks and to execute certain other actions.
14.2 Supply Units have two sides. The front is the convoy (mobile) side; the reverse is the depot (static) side. A player may flip a friendly supply unit from one side to the other during any Movement Sub-Phase in which the unit is activated; however, such status changes use all of that supply unit’s MP for that sub-phase. Status change may be done in or out of EZOC. Supply units aren’t part of any particular sub-command. They may be activated by several of the command markers on each side, and each one may be activated more than once per game turn.
14.3 Supply Status
Units are always in one of two states: 1) general supply; or 2) offensive supply.
14.4 General Supply
This is the default supply condition of all units. They may perform all game functions normally other than those that require expenditure of a supply unit. General supply doesn’t cause the expenditure of supply units. To emphasize: a unit doesn’t need a supply unit to conduct normal movement and combat. General Supply is subsumed into the supply created by expending a supply unit to place a sub-command marker into the pool for a game turn. Since units of sub-commands that don’t activate may neither move nor attack during a turn, their being out supply is accounted for at that higher level.
14.5 Offensive Supply
A unit has offensive supply if: 1) It’s in the same hex as a friendly supply convoy or depot; or 2) it’s able to trace a line of supply to a friendly depot; and 3) in addition to one or both of the above, the supply unit providing that supply is expended.
14.6 Tracing Lines of Supply (LOS)
An LOS is traced from a unit to a supply unit of its side. The following terrain blocks LOS: all-sea hexes and hexsides and the Qattara Depression. Escarpments also block LOS unless crossed by a road, track or railroad.
14.7 Blocking LOS
LOS may not be traced through a hex if there is an EZOC in that hex. Friendly units do not negate EZOC for purposes of tracing supply lines. When counting supply line lengths, count from the unit to be supplied to the supply source. A unit in an EZOC may trace an LOS out of its hex and back to a supply unit. A supply unit in an EZOC may provide supply only to units in its own hex.
14.8 Length
LOS length is a maximum of five hexes from a unit back to a depot.
LOS may be traced from a unit to a convoy only if in the same hex. That is, you may not trace from any other hex to a convoy unit’s hex. LOS is counted in terms of hexes, not MP. An LOS may be traced into and across any kinds of terrain other than those forbidden by above. Units in an off-map base box may be supplied by supply units within the same box, but not from outside it, and vice versa.
14.9 Railroads, Roads Tracks don’t in any way work to extend LOS.
14.10 Limits
A single supply unit may supply all units of the activated sub-command within its radius.
14.11 Offensive Supply
Offensive supply includes Forced Motor March and Maximum Attack Supply. They require a player to expend supply units.
14.12 Forced Motor March
You may double the MF of units of an activated sub-command by declaring a forced motor march. To do so, expend a supply unit at the start of that Movement Sub-Phase. All activated units within the expended supply unit’s radius double their MF.
14.13 Maximum Attack Supply
You double the attack strength of attacking units by declaring maximum attack supply. To do so, designate a supply unit(s) to be expended for this purpose at the start of the Combat Sub-Phase. All activated units within the expended supply unit’s radius double their combat factor for attack. The expended supply unit(s) shouldn’t actually be removed until the end of that Combat Sub-Phase, and would provide maximum attack supply throughout that entire sub-phase.
14.14 Note that some units in the same attack may be in maximum attack supply and others not, depending on each one’s ability to trace an LOS. Also note that a single supply unit could provide maximum attack supply to more than one friendly attack provided they were all within supply radius. There is no maximum defense supply. The same supply unit may not be expended to provide forced motor march and maximum attack supply during the same Operations Phase.
14.15 Supply Units may themselves use forced motor march if another supply unit (that’s expended) provides them with offensive supply.
14.16 Replacing Supply Units
Supply units that have been expended or eliminated are available for use again as a supply reinforcement; they don’t go through the refit process, nor are they ever placed in a POW box.
14.17 Players may deliberately move their units into hexes in which they will, or might, be unable to trace an LOS.
14.18 All supply in AK is via supply units; no hex on the map provides any kind of supply. Units may remain indefinitely inactivated or OOS without being eliminated.
14.19 Alliance Supply
All units on each side may use any friendly supply source regardless of their nationality.
14.20 Other Uses for Supply Units are as follows.
1) Command Activation: see rule 5.2. Supply units expended for this purpose may be anywhere on the map or mapsheet.
2) Refit: see rule 13.12. Supply units expended for this purpose must be in a friendly port or off-map base box.
3) Building Fortified Boxes: see rule 16.2. The unit building the fortified box must be able to trace an LOS to a friendly supply unit as per 14.5, and that supply unit is then expended.
14.21 You may always use any supply unit for an supply purpose, regardless if activated. One sub-command could take advantage of supply units that might’ve earlier been moved forward by another sub-command. For example, the Axis player activates the DAK sub-command*,* and with it, supply unit “A.” A DAK unit moves into the supply radius of depot “B,” which wasn’t activated. Nonetheless, that DAK unit could use supply depot “B” for maximum attack supply. Similarly, supply expended for planning (5.2) and refitting (13.13) doesn’t have to be activated.
Also, the same supply unit may be moved more than once per Operations Phase as long as it’s activated by different sub-commands each time. For example, Supply unit “C” could be activated and moved first by the German DAK and then by Italian 21^(st) Corps in the same turn.
14.22 Capturing Supply
If your units attack a hex containing an enemy supply unit(s) and completely eliminate all defending units located there, check for capture of that/those unit(s). Roll a die for each endangered supply unit. If a German unit is involved in the capturing attack, the enemy supply unit is captured on a one through four. If only Italian or Allied units are involved in a capturing attack, the enemy supply unit is captured on a one through three. On any other result, the supply unit is eliminated.
14.23 Procedure
Eliminate a captured enemy supply unit and replace it with a friendly supply convoy in the same hex (even if the original was a depot). Also, if a depot is forced to retreat, which would otherwise eliminate it, roll for capture instead. Convoys retreat normally. If they would be eliminated by retreating into an EZOC, then make a supply capture check as per 14.22 in the hex in which they would otherwise be eliminated.
14.24 Aerial Supply. See 18.11.
15.0 Fog of War
15.1 In general, players may examine enemy stacks only during the combat resolution process. Once an attack has been declared, it may not be called off.
15.2 You may generally not examine enemy units in off-map boxes or reinforcement tracks. Players may cover their boxes and track with note cards or pieces of paper. Nor may you generally look through the command pool to see what chits are in there. Certain bulletins and air interdiction zones (18.6), may lead to enemy units being revealed.
16.0 Fortified Boxes
16.1 You may build fortified boxes to enhance the defense of your units in them. Any kind of activated ground unit may potentially build a fortified box.
16.2 To fortify, an activated unit must remain in place for one complete Movement Sub-Phase of its sub-command and be able to trace an LOS to a supply unit. Expend the supply unit and place a fortified box marker on the unit. One fortified box may be created per supply unit expended.
16.3 All friendly units of all types in a fortified box hex receive its benefits regardless of which unit built it.
16.4 A Fortified Box marker, once placed on the map, remains in place until/unless there are no longer any friendly units in that hex at the end of a phase or sub-phase. You may also choose to remove a friendly fortified box at the end of any of your Operations Phases if one or more units of an activated sub-command is in it. You may construct additional fortified box markers if they run out.
16.5 It doesn’t cost any extra MP for a unit to enter or leave an already built fortified box. Fortified Box markers may be recycled in and out of play any number of times during a game.
16.6 Effects of fortified boxes are as follows.** **
1) ZOC: fortified boxes negate EZOC projected into their hexes for all purposes. They also negate the projection of ZOC by friendly units in their hexes for all units.
2) Combat: the combat effect of a fortified box is to double the combat strength of units in it when defending (but not when attacking). The Mobile CRT may not be used against defenders in a fortified box. Also, if a fortified box is in a city hex, it negates the effect of any retreat for units in that hex, whether attacking or defending (see 11.5).
16.7 If you have a fortified box in a hex, all your units in that hex are thereby automatically considered ‘inside’ that facility. In such stacks, always keep the Fortified Box as the top unit in the stack.
17.0 Unique Units
17.1 Recon Units
If the only defending unit in a hex is a recon unit(s), the defender has the choice of CRT.
17.2 Airborne & Airlanding Units
See the Reinforcement rules for the special way in which they may enter play (13.5). Otherwise, treat them as infantry.
17.3 Flak Units. See 10.20.
17.4 Heavy Armor
This unit gives an additional one-column shift when attacking or defending if other activated and involved friendly units are in the same hex with it.
18.0 Airpower
18.1 Airpower is represented by SAC (strategic), TAC (tactical) and MAC (airlift) markers. They’re placed in the Air Available box. Airpower markers are activated as parts of sub-commands. You may use available air markers for the purposes stated below, placing them on the map to do so. After an airpower marker has been used once, place it in the Utilized box for the remainder of that game turn. Each airpower marker may be used only once per game turn.
18.2 Range
SAC have unlimited range. MAC may be used within 20 hexes of a friendly depot. TAC may be used within 10 hexes of a friendly depot. That function doesn’t expend the depot.
18.3 Airpower Missions
Airpower units may conduct tactical support, interdiction, air superiority and aerial supply.
18.4 Tactical Support
Axis and Allied TAC and Axis SAC may conduct tactical support. The attacker adds one or more air markers when he makes a ground attack. For each eligible marker added, the combat is shifted one column to the right. The defender may not add airpower to a battle. At the end of the battle, airpower markers are removed from the map and placed in the Utilized box. The number of airpower markers that may be added as tactical support to a single battle is limited as follows. German: two; Italian: one; Allied: two.
18.5 German and Italian air units may not be combined on the same tactical support mission, nor may British and USA airpower units.
18.6 Interdiction. All TAC and SAC may conduct interdiction. Place the marker on the map. A maximum of one interdiction mission air marker may be placed per hex. Interdiction has the following effects.
1) Interdiction Zones: the hex the marker occupies, and all six hexes adjacent to it, form the “interdiction zone” (IZ). Enemy units that enter an IZ must pay one extra MP per hex. Units conducting forced motor march pay two extra MP per IZ hex entered. Railroad movement into an IZ costs one extra MP from the non-RR portion of the unit’s movement allowance. If more than one air unit is exerting an IZ into the same hex, there’s no additional effect.
2) Supply. A depot unit in an IZ has its LOS reduced to three hexes; however, LOS don’t count extra movement to enter or leave IZ hexes.
3) Recon. You may examine all enemy stacks in a friendly IZ at all times.
4) Duration. An interdiction marker remains on the map until the Return Phase of the game turn.
18.7 Air Superiority
TAC and SAC conduct air superiority. Simply declare which units are on that mission. They don’t have to be placed on the map, nor does range make a difference. Roll a die for each unit involved in air superiority. Consult the Air Combat Table (section 25.11) for outcomes. The targeted player selects which airpower units he will lose in this order: 1) units on the map on interdiction missions; 2) units in the Available box; and 3) units in the Utilized box. Units in refit or already eliminated may not be selected.
18.8 Anti-Aircraft (AA)
During the Anti-Aircraft Sub-Phase of the Air Return Phase, roll a die for each air unit in the Utilized box and consult the Air Combat Table. Apply any results. Note that all air units that flew missions during the turn will be subject to AA fire. AA fire is in addition to losses from Air Superiority.
18.9 Airpower markers may be re-used from turn to turn, unless otherwise specified.
18.10 Activation
Some sub-commands will activate airpower as part of their overall force mix. Some sub-commands will activate only airpower units and no ground units, such as the FFA. In that case, airpower markers may not be used for tactical support, since no ground units will be engaging in combat. You don’t have to activate an air unit if you don’t want to do so.
18.11 Aerial Supply
You may place an activated MAC in a hex to provide offensive supply for that hex for any one function that would otherwise expend a supply unit (forced motor march, maximum attack supply, building a fortified box). The MAC is then placed in the Utilized box. In order to do this, you must expend one supply unit located in an off-map base. LOS may not be traced to an aerial supply unit from other hexes.
18.12 Airpower units have no other effects on play. That is, they have no ZOC, don’t count for stacking, don’t block the movement of enemy units (other than as noted for interdiction), etc. Friendly and enemy air units may occupy the same hexes and don’t affect each other.
18.13 Air Unit Logistics
Air units aren’t affected by supply. You generally don’t need to expend supply in order to have them conduct operations, nor can their effects be doubled by offensive supply.
19.0 Naval Bombardment
19.1 The attacker may add an available Naval bombardment marker when he makes an attack. Naval bombardment may be used only against enemy units defending in coastal hexes. The combat percentage is thereby shifted one-column right. At the end of a supported battle, naval bombardment markers are placed in the Utilized box.
19.2 Naval bombardment markers are never affected by combat results.
19.3 A maximum of one Naval Bombardment marker may support an eligible attack. The defender may never add naval bombardment to a battle. Naval bombardment may be combined with tactical support shifts.
19.3 Only the Allied player has naval bombardment, and it may be used only against hexes on or east of Tobruk.
20.0 Naval Movement
20.1 Naval Transport is from port to port. The activated ground unit to be transported must start in a port and end its movement in a friendly occupied port. Naval transport consumes half a transported unit’s movement allowance for that sub-phase.
20.2 Qualifications
All types of land units may use naval transport, including zero movement factor units. Naval transport may be into or out of EZOC; however, if a unit debarks into an EZOC it must cease movement for that sub-phase. Within these strictures, units that conduct naval transport may conduct all other actions normally in the same Operations Phase.
20.3 Port Capacities
You may move a number of units into or out of a port up to its port capacity, as given on that table in section 25.0. The numbers given are per sub-command activation and Reinforcement & Refit Phase. For example, Benghazi could have one unit move into it and one unit out of it in a single Movement Sub-Phase, plus the placement of two units during the Reinforcement & Refit Phase.
20.4 Port Limits
Port capacity includes both supply and combat units. Axis units may never use Alexandria or Suez as a port. Allied units may never use Benghazi as a port. You may never use an enemy off map box as a port.
20.5 Friendly off-map boxes contain ports that are always considered to be friendly occupied.
21.0 Upgrades
22.1 You may upgrade your side’s national armies (German, Italian and British) according to certain reinforcement group instructions. See the Reinforcement Groups Tables in section 25.0. When you get an upgrade, it immediately triggers all actions for that upgrade: 1) increase in stacking as given in 8.2; 2) the British may employ combined-arms when attacking, as given in 10.19; 3) the Italians may employ combined-arms when defending, as given in 10.19; and 4) other benefits as listed in the rules.
22.0 Off-Map Bases
22.1 You may place your units in certain off-map base holding boxes.
22.2 Tripoli is the Axis off-map base. It’s considered to be off the west map edge. Only Axis units may enter it.
22.3 Middle East Command is the Allied off-map base. Middle East Command is considered to be off the east map edge. Only Allied units may enter it.
22.4 Movement
Units may enter and leave off-map bases by land, naval transport and air transport movement. It costs a unit half its MF to enter or exit an off-map box via land. When moving by air or sea, use normal air and naval movement costs. A unit may not both enter and leave an off-map base in the same Operations Phase.
22.4 Retreat/Pursuit: A unit may retreat and pursue into a friendly off-map base via a friendly map edge as one hex of a combat-result-authorized pursuit.
22.5 Stacking
There may be an unlimited number of units in an off-map box.
22.6 Supply
You may not trace an LOS to or from an off-map base. A unit in a base may use any supply unit in it for supply.
22.7 Combat
You may never attack enemy units in an off-map base, nor may ground units attack out of them.
22.8 Air Operations
Air operations may be conducted from an off-map base by SAC and MAC units. TAC units may not do so. Tripoli is considered to be 10 hexes off the west map edge. Middle East Command is considered to be 10 hexes off the east map edge.
23.0 Victory Conditions
23.1 Victory in AK is defined in terms of victory points (VP). Certain hexes have a VP value. They’re listed on the VP Table in section 25.12. You gain VP at the end of the scenario if your units are currently occupying VP hexes. Each player totals his own VP. The player with the higher VP total generally wins, but draws are possible. The player with fewer VP subtracts his total from the side with more VP in order to determine the exact level of victory
23.2 There are three levels of victory: tactical (lowest), operational, and strategic (highest). For example, if after making the subtraction described above, the Axis player had 10 to 14 more VP than the Allied player, he (the Axis player) has won a tactical victory.
Axis VP Superiority Allied VP Superiority
Draw: 1-9 Draw: 1-4
Tactical: 10-14 Tactical: 5-9
Operational: 15-19 Operational: 10-14
Strategic: 20 or more Strategic: 15 or more
23.3 Sudden Death Victories
If, during any Sudden Death Phase, either player has accomplished one of the following, the game comes to an end and that player wins an “Epic Victory” (the best kind).
Axis Sudden Death Epic Victory
1941: Axis units occupy 10 or more VP of objective hexes.
1942: Axis units occupy 20 or more VP of objective hexes.
Allied Sudden Death Epic Victory
1941 & 1942: Allied units occupy all objective hexes.
24.0 Scenarios
24.1 Players & Sides
There are two players: the Axis player and the Allied player. The Axis player controls German and Italian forces; the Allied player controls British Commonwealth and US forces.
24.2 Scale
Each game turn represents one month. Each hexagon is 12.5 miles (20 km) across.
24.3 Scenario Length
**Short Scenario: March 1941 through November 1941.
Long Scenario: March 1941 through November 1942.
24.4 Deployment Order
The Allied player first deploys his initial forces on the map; then the Axis player deploys Axis units. Normal stacking limits are in effect during both sides’ set ups. See below for further details.
24.6 Command Pool
Command markers available at start are as follows.
Allied: 13 Corps, Western Desert Force (WDF), Desert Air Force (DAF)
Axis: Rommel, DAK, 20 Corps, 21 Corps
Other: Axis Bulletin, Allied Bulletin.
24.7 Allied Initial Deployment
1) On and/or adjacent to Agedabia (0620): 3/2 armor; SG/2 armored infantry.
2) Mechili (1313): 3 Ind M recon.
3) On or adjacent to Benghazi (0513) and/or Tobruk (2113): 24/9A, 25/9A, 26/9A infantry.
4) Alexandria (1733) & Mersa Matruh (0534), at least one per hex: 16/70, 23/70 infantry, 22 Gd mechanized.
5) Alexandria (1733), Cairo (2537), Suez (3035): one garrison unit each, according to their unit IDs.
6) Tobruk (2113), Mersa Matruh (0534), Alexandria (1733), Suez (3035): one supply depot each, four total.
7) Mid-East Command box: 14/70, 5/4 Ind, 7/4 Ind, 11/4 Ind, Pol infantry.
8) Refit Pool: 4/7, 7/7 armor; SG/7 armored infantry; ME Cdo amphibious, 1 x TAC airpower.
9) Airpower available (all British): 1 x TAC, 1 x SAC.
24.8 Axis Initial Deployment
1) Within two hexes of El Agheila (0122) : German 5 armor; 200 armored infantry; 3 recon. Italian 132 armor; 7B, 8B motorized; 15, 16, 19, 20, 27, 28, 39, 40, 61, 62 infantry. 2 x supply convoys.
2) Tripoli box: 3 x depots.
3) Refit box: Italian 85 & 86 infantry; 1 x Italian TAC.
4) Air available:
German: 1 x TAC, 1 x SAC
Italian: 1 x TAC, 1 x SAC
5) Reinforcements: the 1941A German reinforcement group is automatically triggered at the start of Game Turn 1’s Reinforcement & Refit Phase.
24.9 Game Turn 1 Special Rules
During the March 1941 Game Turn, only the Axis Rommel command marker is placed in the pool. No other command marker or bulletins of either side are placed there. Also on Game Turn 1, neither player may expend supply units for any reason. Other than as described in point five in rule 24.8, skip the Planning and Reinforcement & Refit Phases on Game Turn 1.
24.10 Western Desert Force
The Western Desert Force (WDF) command marker is permanently removed from play at the end of the April 1941 game turn.
24.11 Special Forces units are used only in the optional rules.
24.12 Geography
Both sides’ units may freely cross borders and enter both Egypt and Libya.
24.13 Automatically activate the 1941A German Reinforcement Group.
25.0 Charts & Tables
25.1 Axis Bulletin Table
| Die Roll | Bulletin |
| 1-2 | Reinforcement Group. The Axis player picks any one of this year’s available reinforcement groups. |
| 3 | Emergency Reinforcement Group. This goes into effect only if the Axis occupies 0–4 VP in objectives. If so, the Axis player picks any one of this year’s available reinforcement groups and also places a new supply unit in Tripoli. |
| 4 | Rommel Drives On, Deep into Egypt. This goes into effect only if the Axis occupies 10 or more VP in objectives. If so, the Axis player picks any one of this year’s available reinforcement groups. |
| 5 | Radio Intercepts. The Axis player may examine all Allied stacks in either Egypt, Libya or the Middle East Command boxes. |
| 6 |
25.2 Axis 1941 Reinforcement Groups
[TABLE]
25.3 Axis 1942 Reinforcement Groups
[TABLE]
25.4 Allied Bulletin Table
| Die Roll | Bulletin |
| 1-2 | Reinforcement Group. The Allied player picks any one reinforcement group available for this year . |
| 3 | Emergency Reinforcement Group. This goes into effect only if the Allies occupy 0–9 VP of objectives. The Allied player then picks any one reinforcement group available for this year and immediately receives two supply units in the Middle East Command box. |
| 4 | Ultra. The Allied player may immediately select one of the following: 1) examine all Axis stacks on the map and in the Tripoli box; or 2) examine the Axis reinforcement track and move all reinforcement units scheduled for any one turn to the following turn. |
| 5 | Trouble in Egypt. If Axis units occupy 13 or more VP of objective hexes, the Allied player must eliminate one Allied supply unit located anywhere in Egypt. |
25.5 Allied 1941 Reinforcement Groups
[TABLE]
25.6 Allied 1942 Reinforcement Groups
| Allied 1942 Reinforcement Group | Trigger |
| 1942A. All Allied units marked 42A. | Via bulletin in 1942. Roll a die for each unit; it’s received that number of turns later. |
| 1942B. This group may be selected only if 1942A has been previously selected. The 10 Corps marker received the following turn, plus eventually all units marked 42B. | Via bulletin in 1942. Roll a die for each 42B unit; it’s received that number of turns later. |
| Montgomery In Command. The Allied player must expend two depots in the Middle East Base box to trigger this. All British units are immediately upgraded; see section 21.0. | Via bulletin in 1942. Next turn remove the Eighth Army marker and replace it with the Montgomery marker. |
| 1942 Air Force. British & 1x |
25.7 Allied Command Activation Table
[TABLE]
25.8 Axis Command Activation Table
[TABLE]
**25.9 Assault Combat Results Table **
| Die Roll | ≤ 49% | 50-99% | 100-149% | 150-199% | 200-299% | 300-399% | 400-499% | 500-599% | ≥ 600% |
| 1 |
25. 10 Mobile Combat Results Table
| Die Roll | ≤ 49% | 50-99% | 100-149% | 150-199% | 200-299% | 300-399% | 400-499% | 500-599% | ≥ 600% |
| 1 |
25.11 Air Combat Table
[TABLE]
25.12 Objective Hex Victory Point Summary Table
| Objective | VP |
| El Agheila (0122) | 3 |
| Benghazi (0513) | 2 |
| Tobruk (2113) | 4 |
| Bardia (2814) | 1 |
| Mersah Matruh (0534) | 1 |
| Alexandria (1733) | 4 |
| Cairo (2537) | 4 |
| Port Said (2830) | 2 |
| Suez (3035) | 2 |
25.13 Axis Supply Arrival Table
| Die Roll | Supply Units Received |
| 1 | 1 |
| 2 | 2 |
| 3 | 2 |
| 4 | 3 |
| 5 | 3 |
| 6 | 4 |
| 7 | 4 |
| 8 |
Die Roll Modifiers (use single best)
+2: March – June 1941
0: July – December 1941
+1: January – June 1942
0: July – December 1942
+2: 1942 & the Axis player has declared Operation Herkules invasion of Malta
25.14 Allied Supply Arrival Table
| Die Roll | Supply Units Received |
| 1 | 2 |
| 2 | 2 |
| 3 | 3 |
| 4 | 4 |
| 5 | 4 |
| 6 | 5 |
| 7 | 6 |
| 8+ |
Die Roll Modifiers (cumulative)
+1: 1942
+1: Axis occupy 10 or more VP in objective hexes.
25.15 Port Capacities Table
| Port | Capacity |
| Tripoli (Axis only) | Unlimited |
| Benghazi | Two Units |
| Tobruk | Two Units |
| Bardia | One Supply Unit |
| Alexandria (Allied only) | Three Units |
| Port Said (Allied only) | Three Units |
| Suez (Allied only) | Three Units |
| Middle East Command (Allied only) | Unlimited |
Optional Rules
Players are free to experiment with the Optional Rules. They are not necessarily more realistic, but they do add considerable variation to play.
26.0 Major Operations
26.1 Planning. Each player has a command marker labeled “Major Operation”. A player can “purchase” this marker by expending a number of supply units equal to the total number of command markers he has available this turn (do not include Rommel and Bulletin markers for this total). Supply units for this may be anywhere on the map. This is done during the Planning Phase. However, the marker is not placed in the Command pool that turn. Rather, it is held off-map. During the following turn’s Planning phase, the player must place the marker in the Command pool. Note: To emphasize, a Major Operations marker will be used on the turn following its purchase. This means you have to anticipate the situation a turn ahead.
26.2 Effects of Major Operations Markers. When the player picks a Major Operation marker, the player can activate ALL friendly commands. This includes all ground, supply, air, naval and special operations units. This is in addition to normal activations which occur at other times in the same turn. After the Operations phase in which it was picked, roll one die. The Major Operation marker is placed on the turn record track and becomes available at the start of that turn (it must be purchased as per above to be used again). Example: It is the start of game Turn 3. The Allied player has two command markers available (13^(th) Corps, Desert Air Force). The Allied player expends two supply units to purchase the Allied Major Operations marker. He places the marker in the Pool during Turn 4’s Planning phase. During Turn 4, he picks the Major Operations and uses it to activate all of his units. He then rolls one die and comes up with a “3”. This means he can purchase it again on Turn 7.
26.3 Intelligence. A player does not generally have to reveal whether or not he has purchased a Major Operation until he has played it. However: the Intelligence special operations outcome, and the Ultra and German Radio Intercepts bulletins, in addition to their other results, also allows you to examine any enemy Operations marker being held off-map.
27.0 Special Forces
27.1 Special forces units are markers. They may be received via initial deployment or as reinforcements. The player keeps them in the Available box. If a command activation allows for utilization of Special Forces, the player may initiate a Special Forces Mission. Expend one supply unit anywhere on the map, and roll one die on the Special Forces Mission Table, making any die roll modifiers. This will give an outcome. Each special forces marker can conduct a maximum of one mission per turn. An individual special forces marker can otherwise conduct any number of missions in a scenario.
27.2 Initial Deployment. The Allies start with the LRDG special forces unit in the March 1941 turn. All other special forces units enter as reinforcements.
27.3 Reinforcements. Special forces reinforcements are placed in the Available box as soon as they’re received.
27.4 Special Force Mission Table
| Die Roll | Result |
| 1-2 | Disaster. Roll a die. The SF marker is removed from play and returns as a replacement that number of turns later. There’s no supply cost for this. |
| 3 | No Effect |
| 4 | Intelligence. You may do one of the following: 1) examine all enemy stacks in Egypt or Libya; or: 2) examine all units on the enemy Reinforcement Track; or 3) examine all markers in the Command Pool while your opponent must also show you any Major Operation marker he picked this turn. |
| 5 | Sabotage. Designate Egypt or Libya; your opponent must eliminate a supply unit in that country. |
| 6 |
Die Roll Modifier
Friendly forces occupy one or more oasis hex: +1.
28.0 Special Tactics
28.1 Infiltration. A mechanized unit may move directly from one enemy ZOC to another ZOC if all of the following are in effect:
1) None of the non-moving units are mechanized. (The enemy player must reveal these ratings if a mechanized unit attempts such a move.)
2) The unit moves a maximum of one hex.
3) The unit is not moving across an escarpment, unless by road, track or railroad.
4) The unit makes no other move in that movement sub-phase.
28.2 Mechanized Retreat A mechanized unit may retreat into hexes containing enemy ZOC if all enemy ZOC are from non-mechanized units. For 28.1 and 28.2, remember that motorized infantry does not count as a mechanized class unit.
28.3 Recon units of an activated command may conduct recon (who else?). Recon occurs at the start of each movement sub-phase, before any movement is begun for the activated sub-command. The player who controls the reconning units rolls one die for each and if the result is “1-3”, the recon is successful. He may then examine all enemy stacks within two hexes of the unit. A unit conducting a recon may conduct no other movement in the same phase. The player conducting the recon must indicate to the opposing player any units conducting recon.
28.4 Crossing the Qattara Depression. A player can attempt to have his recon units cross the Qattara Depression. Each hex entered costs 4 movement points. For each hex entered, roll a die. On a “1” the unit is eliminated. On a “2-6” it may continue moving. If the unit ends its movement in a Qattara hex, it is eliminated.
29.0 Amphibious Landings
** **
29.1 Amphibious Landing Procedure. Amphibious Landing is a special form of naval transport (20.0). It may be conducted only by amphibious-qualified units. The amphibious unit must either begin in a port and end the movement on a coastal hex, or begin in a coastal hex and end in a friendly port. The player must expend one supply unit in either the embarkation or debarkation hex. An amphibious move may be no more than twenty hexes from the start hex.
29.2 A maximum of one unit per sub-command activation may conduct an amphibious landing. The debarkation and embarkation hexes may be in EZOC.
29.3 The following units are amphibious-qualified:
Axis: all marine type units.
Allied: all marine type units. Additionally, post-Upgrade, one Allied non-mechanized infantry unit per activation phase may conduct an amphibious assault.
29.4 Amphibious Assault. Units making amphibious landings may also attack from all sea hexes against a coastal hex. if they fail to clear the defender’s hex and advance into it, they are eliminated. This may not use maximum attack supply.
** **
30.0 Coastal Shipping
30.1 Both sides were able to bring in small amounts of supply through minor ports. When using this rule, each player may land one supply unit in Derna and one in Mersa Matruh if they have a friendly unit occupying the hex. This occurs only during the Reinforcement Phase. These hexes may not be otherwise used as ports.
31.0 Battlefield Salvage
31.1 A player can declare “Battlefield Salvage” whenever he ends a combat with at least one friendly unit in possession of hex which the enemy held at the start of the battle, and the enemy had five or more combat factors in the hex. This will be due to pursuit movement. Roll one die. If a German unit, then on a “5-6” the attempt succeeds. For other units, a roll of “6” succeeds. If successful, place a friendly supply convoy unit in the hex. A maximum of one salvage die roll per combat may be made.
31.2 This is not the same as supply capture (14.26). It occurs regardless of whether or not there was an enemy supply unit in the captured hex. Supply units in the hex do not count towards the five combat factors in 31.1. This represents the capture of equipment and transport and from enemy units.
32.0 Additional Air Operations
32.1 Increased Sortie Rate
Procedure. Air units may fly more than one mission per turn via this rule. During the start of any friendly activation phase, you may expend a supply unit anywhere on the map. This allows you to take a number of air units in the utilized box equal to that command’s air activation limit and place them in the available box. This is in addition to normal air activations. A particular air unit may be re-used any number of times in this fashion in a single turn, as long as you have the supply to expend.
AA. When an air unit is removed from the Utilization box and placed in the Available box due to this rule, you must make an anti-aircraft roll for it. If it is shot down, then it is placed in the Refit pool instead of the Available box.
32.2 Air Reserve. A player can place air units in Reserve. Air units which are in Reserve may not conduct any missions. However, they may not be attacked by enemy Air Superiority missions. And, obviously, they are not subject to AA die rolls. An air unit may be placed into or out of Reserve during via any Command which would normally activate them. This counts against the air activation total for that Command. You can indicate air units in Reserve by placing them in the friendly off-map box.
32.3 Port Interdiction. If an airpower marker is conducting an interdiction mission and one of the affected hexes is a port, then its port capacity is reduced by one. This reduction is in effect for as long as the interdicting air unit is in or adjacent to the port. A port with a capacity of one would be reduced to zero. If there is more than one air unit conducting interdiction against a port, there is no additional reduction.
32.4 Defensive Air. Any unit within a friendly Interdiction Zone receives a one column shift in the defense in addition to other shifts. This is at the defending player’s option—he can decide to do so on a case by case basis. At the completion of the ground combat in which this takes place, place the defending air unit in the Utilized box. Being in the interdiction zone of more than one friendly air unit provides no additional defensive benefit.
32.5 British Close Air Support Limits. The British player may activate a maximum of one air unit per corps activation until the British 1941 Air Reinforcement event is activated. The Desert Air Force activation still allows for the activation of all British air. Comment: it was not until mid-1941 that the Royal Air Force worked out an efficient system of close air support.
32.6 Air Transport. MAC units may move certain types of land units. These include all airborne, airlanding, amphibious, non-mechanized infantry, and supply. The unit to be transported must start in a friendly off map base, or depot hex (or be a depot unit). It is then moved to any hex containing a friendly depot, or off map area. This consumes 50% of the ground unit’s entire movement for the phase. Each MAC can air transport one qualified unit.
32.7 Range for air transport is 20 hexes.
32.8 Airborne and airlanding units may take off from and land in hexes containing enemy ZOC, as long as other requirements are met. Other air transported units can not.
32.9 Aerial Supply. MAC units no longer provide “free” air supply. They can instead be used to transport supply units, as per above. In addition to other landing hexes, a MAC unit may move a supply unit to any clear terrain or town hex containing a friendly unit.
32.10 Airborne Assault. Airborne units may make airborne assaults (via parachute/glider). This conducted in the same manner as an Air Transport mission, except as follows.
1) The airborne units must start in position from which it can conduct offensive supply at the start of the air transport move, and the player must expend supply as per the Offensive Supply rule to initiate an airborne assault. One expended supply unit can provide this support for all airborne units which can trace a LOS to it. An airborne unit in an off-map base may trace LOS to a supply unit in that same base.
2) The player moves the MAC plus the airborne unit to the landing hex. This must contain either clear terrain, town, oasis, or a road, track or railroad. The landing hex may (but does not have to) contain an enemy ZOC.
3) The player must roll on the Airborne Assault Table for each unit which executes an airborne landing. This is done after the unit has landed but before it takes any other action.
4) A unit making an airborne assault determines supply for attack in the hex in which it lands—the supply from (1) does not carry through to the combat phase.
5) An airborne assault uses up all of the unit’s movement for the phase.
6) Only airborne units may make an airborne assault. Airlanding units may not, though they still gain the advantages as per 13.5(1) and 32.8.
32.11 A player must expend two supply units to replace an airborne unit (instead of one, see 13.13)—this is regardless if it were lost in an airborne assault or due to other reasons.
32.12 Airborne Assault Table
| Die Roll | Result |
| 0-1 | Airborne unit & MAC transport eliminated. Put both in Refit box. |
| 2 | Abort. Airborne unit remains in start hex. MAC unit goes into Utilized box. |
| 3-5 | Unit lands in target hex. MAC unit goes into Utilized box. |
| 6-7 | Surprise achieved. Unit lands in target hex. MAC unit goes into the Utilized box. Any attack with the airborne unit this turn gets an additional 1R shift. |
**Cumulative Die Roll Modifiers **
-1: Unit lands in EZOC
+1: German airborne unit.
33.0 Advanced Supply
33.1 These rules are in addition to the standard supply rule.
33.2 Supply Status. Units are now in one of three states of supply: 1) out of supply; 2) general supply; or 3) offensive supply.
33.3 General Supply. A unit is in general supply if one or more of the following apply:
It’s in the same hex as a friendly supply convoy or depot.
It is able to trace a line of supply to a friendly depot.
It is in an off-map box with a friendly supply unit.
An Operations Phase in which it is making an amphibious assault (28.4) or airborne assault (32.10).
General supply does not cause the expenditure of supply units.
33.4 Tracing a General Line of Supply. A general supply LOS is traced in the same manner as an Offensive LOS. However, a supply unit used to provide general supply is not expended—it remains in play. A single supply unit may supply general supply to all friendly units within its radius.
33.5 Effects of General Supply. A unit in general supply uses its printed movement and combat factors. It may also conduct any action which requires general supply.
33.6 Offensive Supply A unit is in offensive supply as per rule 14.5. Note this supersedes any general supply effects.
33.7 Out of Supply. A unit is out of supply (OOS) if it can not meet the conditions for general or offensive supply.
33.8 Effects of Being OOS
1) Movement. Supply for movement is checked for all units of a command at the start of the movement phase. Any unit found to be OOS has its movement factor halved.
2) Combat. Supply for combat is checked at the instant of combat. An OOS unit has its combat factor halved when attacking or defending. Note that this applies to defending units as well as attacking (unlike maximum attack supply, which only the attacker can use).
3) Remainders are retained when halving.
33.9 Aerial Supply. As stated above, MAC units no longer provide “free” supply. But you can now use MAC units to transport supply units as per 32.6.
33.10 Oases. A unit beginning its movement phase in an Oasis is in general supply for movement, but not for other game functions.
33.11 Additional Supply. During each supply reinforcement phase, each player receives one extra supply unit, in addition to those rolled for on the table. This is to balance the impact of the additional requirements for general supply.
34.0 WDF HQ Capture
34.1 Historically, the commander (General O’Connor) and much of the headquarters staff of the Western Desert Force were captured by Axis forces in the early stages of Rommel’s first offensive. In the standard rules, this was simulated by simply removing the WDF marker from play. Instead of 24.9(S3), use the following. If the Axis player picks the WDF marker, then it is considered captured. Remove the marker from the game permanently. If the Allied player picks the WDF marker, it is played normally (and not removed).
34.2 Regardless of its location, the WDF marker is removed from the game when the Allies gain the Eighth Army command marker.
35.0 Appeal to Berlin
35.1 At the start of any turn, the Axis player can announce an “Appeal to Berlin.” The Rommel marker must be removed from the command pool for this turn.
35.2 At the start of the Support phase, the Axis player rolls one die. Apply the following results.
1: the Fuhrer is not pleased. Subtract one from the Axis supply die roll this turn.
2-4: no effect.
5: Commando Supremo sends an emergency convoy. Add one to the Axis supply die roll this turn.
6: the Fuhrer declares North Africa to be the key to Europe. The Axis player may activate any one reinforcement group for this year.
35.3 Regardless of the outcome, the Rommel marker is available normally on the following turn. Rommel may not appeal to Berlin two turns in a row.
36.0 Malta
** **
36.1 Malta was the British island base in the central Mediterranean from which attacks against Axis shipping were conducted. In the standard rules, Malta is factored into game functions such as the Supply Table. Using this option, players can attempt to use their airpower to affect operations on Malta. When using this option, do not use the die roll modifiers listed on the Axis Supply Table; instead, follow the procedure below.
36.2 Procedure. At the start of each Support Phase, each player secretly commits SAC and TAC points to Malta. Players then simultaneously reveal the number of air points committed. For each two air points committed, the die roll is modified by “1” (that is, total the number, divide by two, and drop fractions; so you have to commit an even number). The resulting Axis number is added to the die roll; the resulting Allied number is subtracted from the die roll. The cumulative difference is then used as a die roll modifier.
36.3 Restrictions. Air units committed to Malta may not have been otherwise activated in the game turn. The Increased Sorties optional rule may not be used with them. The Allies may never commit more than 3 TAC to Malta. They may commit any number of SAC. The Axis may commit any number of air points to Malta.
36.4 Additional Air Forces. When using this option, the following additional air units are received:
Axis Initial Deployment: German 2 x SAC, 1 x TAC; Italian 1 x SAC, 1 x TAC.
German 1941B Air Reinforcements: 1 SAC, 1 x TAC.
Allied Initial Deployment: 1 x SAC, 1 x. TAC.
Allied 1941 Air Reinforcements: 2 x TAC.
Allied 1942 Air Reinforcements: 2 x TAC.
36.5 Command & Logistical Arrangements. All extra units above must be committed to Malta (attacking or defending it). However, a player may transfer them to conduct operations on the map. It takes an entire turn to transfer an air unit, during which it may not conduct any mission, including those against Malta or on-map targets. Similarly, air units in play on the map may be transferred to Malta operations by following this procedure. Furthermore, a player must expend one supply unit from anywhere on the map for each air unit so transferred.
36.6 Operation Herkules. If the Axis chooses the Invade Malta option, then the Axis player must commit 2 x SAC and 3 x TAC to the invasion or it will not happen. Following the invasion, neither player commits airstrikes to Malta. The Axis gets the +2 die roll modifier for the Malta invasion automatically.
If the Axis player chooses to not invade Malta, then the Axis player receives no additional air units in the Malta reinforcement group (the 2 x TAC, 1 x SAC, since these units are figured into the above).
36.7 Antiaircraft. All air units committed to Malta must roll for AA and on a die and on a “1” are eliminated. Axis air units committed to Operation Herkules (2 SAC, 3 TAC) are eliminated on a die roll of “1-2”.
Design Note: This rule is actually ahistorical insofar as the decisions each side made about allocating airpower to Malta operations were made at a higher level than the players represent. Nonetheless, it is included so players can experiment with different contingencies.
37.0 Designer Q&A
Q1. In the Axis Command Chart, the Rommel command is listed as "One Axis Corps plus all Rommel units”; however, I can't find any units with "Rommel" printed on them. Should this read: "One Axis Corps plus all DAK units"?
A1. There are no “Rommel units.” They were deleted in playtesting. Originally, there was one, the Kasta Rommel unit, but then it was not worth making it an entire command.
Q2. The LRDG unit is listed as "START" on its flip side, but it isn’t included in the set up section of the rules. I presume it starts in the Available Allied Air and Commando Box?
A2. Correct, but only if you’re using the optional rules.
Q3. On the CRT, “Overrun” is abbreviated as “OR,” but in the rules it’s “OV.” So perhaps it should say “OR” in the rules.
A3. You are correct.
**Q4. The British "Desert Air Force" command marker is listed in both the starting command pool and in the 1941 reinforcements. Which is correct? **
**A4. 1941 reinforcements. **
**Q5. When command markers are received as reinforcements, may they be used on the turn of arrival, or should they arrive in the reinforcement phase and be used on subsequent turns? The rules as written imply the latter. **
**A5. Correct. Remember, you need to burn a supply unit to get them into the pool. **
Q6. A question regarding the intent of the optional supply rule: it looks like nearly every unit on the map will be out of supply most of the time, unless it’s within five hexes of a depot or stacked with a supply unit. As those supply and depot units are scarce, I wanted to check if that is indeed the intent.
A6. That was the original rule, but it proved to be mechanically cumbersome. So we went to the rule that now appears in the Standard Rules, which is much more elegant and probably more realistic, given the scope of the game. I included the other rule as an optional, simply to give players a chance to experiment with it. As the title implies, it is "optional" and shouldn’t be considered to be better than the standard rule.
Q7. May we make extra fort. Counters, or is 3 the limit per side?
** **
A7. You may make extras.
** **
Q8. What if a reinforcement group isn't called up during it's designated year - is it lost forever, still eligible the next year, or what?
** **
A8. Lost. The troops would’ve been sent elsewhere.
** **
Q9. Do "corps commands" activated by higher commands include their supply & other units?
A9. Yes.