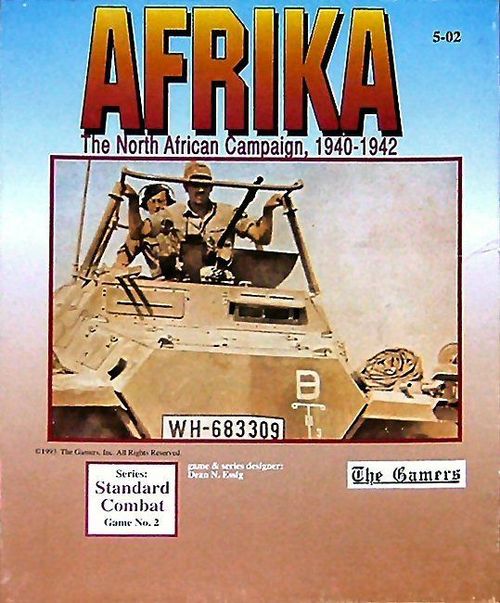
Afrika: The North African Campaign, 1940-1942
Afrika: The North African Campaign, 1940-1942 Rulebook
Table of Contents
Table of Contents
- 1.0 General Special Rules
- 1.1 Specialized Sequence of Play
- 1.2 Scale and Basic Game Data
- 1.3 Stacking
- 1.4 Steps and Step Losses
- 1.5 Map Notes
- 1.6 Supply
- 1.7 Truck Points
- 1.8 Dumps and Dump Capture
- 1.9 Supply Arrival
- 1.10 Air Support Points
- 1.11 Replacement Steps
- 1.12 Artillery and Barrage Attacks
- 1.13 Off Map Boxes
- 1.14 On-Map Holding Boxes
- 1.15 Fortifications
- 1.16 Boxes
- 1.17 Divisional Integrity
- 1.16 Combined Arms
- 2.0 Axis Special Rules
- 3.0 Allied Special Rules
- 4.0 Short Scenarios
- 5.0 Major Scenarios
- Designer's Notes
- Player's Notes
- Axis Order of Arrival
- Allied Order of Arrival
1.0 General Special Rules
1.1 Specialized Sequence of Play
The following is the Standard Combat Series Sequence of Play as it pertains to this game. Included in it are notes regarding the timing of certain specialized game functions.
Important Note: The sequence of play on the gamemap leaves the impression that the Initialization and Reinforcement Phases are in some sort of joint-Overphase (à la GB) and not within each players Player Turn. That is incorrect. Those two phases form the first part of each player's Player Turn as shown below.
(All phases are for the phasing player only)
Initialization Phase
Reset Air Support Points and Truck Points (ignore truck points in short scenarios) to the numbers available for this turn.
Reinforcement Phase
(in short scenarios, apply only step 4 as given in the particular scenario)
- The Axis player assigns up to four of his Air Points to Malta Suppression.
- Acquire new SPs (Axis player rolls on the Axis Supply Table with the appropriate Malta Suppression modifier (if any); Allied player looks his up on the Allied Supply Arrival Table).
- Roll for applicable Coastal Shipping and Port Capacities. Note: These do not accumulate from turn to turn, even if unused.
- Place reinforcements called for by the Order of Arrival on the game map or Off-Map Holding Box required of the player (Tripoli for the Axis, Alexandria for the Allied).
- Roll on the appropriate Variable Reinforcement Table and apply results.
- Roll two dice for Rommel if he is on the game map. On a 4 or less, remove him from play and place him on the Turn Record Track for the following turn.
Movement Phase
Units move and conduct overruns. Apply friendly and enemy Air Support Points to overruns as desired.
Combat Phase
The phasing player may conduct Barrage attacks with his artillery and Air Support Points. Execute friendly attacks and use friendly and enemy air points as desired.
Exploitation Phase
Eligible units move and conduct overruns. Apply friendly and enemy Air Support Points to overruns as desired.
Supply Phase
(use special rule (in 4.0) for short scenarios)
Expend SPs to supply units. Apply Out of Supply effects and Italian Surrender rule to any affected units. Friendly units which become out of supply at this time remain as such until the end of the next friendly turn at which time their condition is re-assessed.
1.2 Scale and Basic Game Data
Each hex represents a distance of 10 miles. Each game turn represents one month. Units in this game range in size from battalion through division.
Due to the intense nature of the short scenarios, each short scenario uses a biweekly turn scale. In the campaign game, the intense periods are interspersed with lulls which allow the longer scale to work. The short scenarios deal with operations at a "sprint" speed.
1.2a Unit Colors, Nationalities, and Ownership. The Axis Player controls the Germans (yellow-tan), Italians (light green) and Blackshirt (grey) units. The Allied Player controls the British (rust), Polish (red), Indian (tan-brown), New Zealand & Australian (Beige), South African (orange), French (blue), and Greek (white).
1.2b Table Arrangement. The gamemap was designed for the players to sit side by side, with the Axis player in the west (left) and the Allied player in the east (right). It was not intended for players to sit across the table from each other.
1.3 Stacking
Each unit has a stacking point value based on its organizational size. Stacking point values are never affected by step losses. Count each unit separately, regardless of organizational affiliation—in other words, if all the units in a hex are from the same division, they count for stacking purposes individually and not as a single division.
Stacking Point Values are as follows:
Divisions: 2 points Regiments, "Groups", and Brigades: 1 point Battalions: 1/2 point.
Up to 6 'stacking points' may stack in any map hex. Off map holding boxes may hold any number of stacking points. Unit type and nationality have no effect on stacking other than the fact that units of the two opposing sides may not stack together. Rommel, game markers, and supply points have no effect on stacking. Any number of supply points may stack in a given hex.
1.4 Steps and Step Losses
Each unit has the number of its steps printed on the counter. A unit can take up to four steps depending on the number printed on the counter's front. The first step is taken by flipping the counter to its reduced side. Step 2 is shown by placing a one step loss marker under the unit after it has been flipped. Likewise, step 3 is shown by placing a two step loss maker under a reduced unit. Note that the second or third step loss has no additional effect on the unit's combat strength. No unit can take more step losses than the number printed on the counter. When a unit has no steps remaining, remove it from the map and place it in the appropriate dead unit box.
Design Note: The intended effect of the above is that fresh units have a great deal more combat strength that those who have "had the shine taken off". After their first dose of combat, units tend toward an equilibrium of strength which they can maintain even as losses accumulate until they later "snap like a twig" and end their usefullness in one sudden drop off.
1.5 Map Notes
1.5a Escarpment Hexsides. These hexsides may never be crossed by units, ZOCs do not extend across escarpment hexsides, and units can never attack across them—except where negated by road-type features. Escarpment hexsides do not effect Barrage attacks and they may be made freely across these hexsides. Destroy units forced to move across such features.
1.5b Sand Desert. No unit may ever enter or fight in these areas, indicated by a lack of printed hexes. Destroy units forced into Sand Desert. Artillery may freely fire over the Sand Desert.
1.5c In addition to 1.5b, no unit may enter any area of the map which does not contain hexes—which includes the sand desert and the ocean. There are a couple of coast areas which are not contained in hexes, this was done to keep illegal "over the ocean" moves from occuring. Unit transfers using coastal shipping (or the movement of the KG Hecker unit) do not count as regular movement and are allowed to move across the non-hex ocean areas.
1.6 Supply
This game has a slightly more involved supply system than the usual SCS game. The nature of the campaign demanded a more explicit treatment. It has been designed to make operations follow logistical constraints without becoming a playability burden.
Note: Use only case 1.6d in the short scenarios (4.0) as they use an abbreviated supply system and not the majority of the following.
1.6a Supply Points. The supply system in this game uses supply points which are actually placed on the map (no pencil records). Each supply point represents about 20,000 tons of supplies. Supply points remain under the control of their owning player until such time as they might be captured by the enemy. Supply points may be freely added together or broken down to conserve on supply point markers as they are moved about or expended. Supply points cannot move on their own (with the exception of the 'movement' which occurs when a dump displaces due to a Supply Capture Table result). They are moved using truck points and coastal shipping.
1.6b Units of both sides are automatically in-supply at the start of every scenario in that 'grey-zone' before their first Supply Phase.
1.6c Use of Supply (Consumption, etc.) During his Supply Phase, a player must expend supply points to place his units into supply. Any unit which does not have supply expended for it is automatically considered to be out of supply and suffers the Out of Supply Effects below. A player may choose to not supply units if he desires, with the understanding that they will suffer the adverse Out of Supply effects.
Every dump on the map has a supply range in MPs. In effect, it can supply any number of units within that range provided there are enough SPs in the dump. Supply range is always counted from the SPs to the units. The range for a player's dumps differs according to the following:
Axis, turn 6 or earlier: 5 MPs Axis, turn 7 and after: 10 MPs Allied, at all times: 10 MPs
Supply range MPs may never enter hexes containing EZOCs unless negated by friendly units.
To determine the number of required SPs to supply the local units, the player counts one per unit (exception: Italian divisions count as three, Rommel and the LRDG unit never count for supply) drawing from a given dump, and then divides by 10. Units count as per the preceding regardless of step losses. Round the result according to the standard rounding rule. For instance, a player counts 13 units drawing from a particular dump and would need to expend one SP from the dump to supply them. Exception: Do not round .4 or less down to zero—if a dump is used at all, at least one SP must be expended. A player can expend more SPs than required by his units in order to not leave SPs for the enemy (this includes expending SPs where there are no units)—but this can only be done in a friendly Supply Phase.
Important: Players may assign units to groups in any way they desire and may fully take advantage of the rounding rule. In other words, a player with 28 units drawing from a dump may divide them into two-fourteen unit groups and pay only 2 SPs to supply them.
1.6c Combat Supply. There is no specific supply cost for combat or barrage operations. The regular supply and out of supply conditions take care of the needed effects.
1.6d Out of Supply Effects. When found to be out of supply, a unit suffers the following effects:
- If the unit is Italian (turns 1 through 6, inclusive, only): Apply the Italian Surrender Rule to the unit. The unit surrenders and is removed from play.
- Defense, Barrage, and Movement values are x1/2.
- Attack values are x1/4.
- Delete one step from the unit (destroy it if necessary) due to attrition.
1.7 Truck Points
(Do not use truck points in the short scenarios)
Each player is given one or more truck points to use each turn. A player may never expend more Truck Points in a given turn than he has available. Keep track of available Truck Points on the Truck Point Track for each player on the game map. Subtract Truck Points from this track as they are expended—when the track reads zero, no points remain to be used. Refill the track with Truck Points during the friendly Initialization Phase of each game turn. Unused truck points cannot be saved from turn to turn. Truck points have one purpose and that is to move SPs about.
One truck point may move one SP up to 10 MPs on the game map. More than one truck point may be used on a single SP so as to move it further—for instance, two truck points may be used to move an SP up to 20 MPs. Proportional use is not allowed (one truck point cannot move two SPs 5 MPs) and unused MPs generated by a truck point cannot be saved for future use. SP movement via truck points may only occur in a player's Movement Phase, never during the Exploitation Phase. Truck MPs may never enter hexes containing EZOCs which are not negated by friendly units. Unnegated EZOCs block all truck type movement. Friendly units negate EZOCs in the hex they are in.
1.8 Dumps and Dump Capture
(Do not use in short scenarios)
Any stack of SPs on the game map is a dump. SPs in a dump may be freely combined and broken down during any phase—friendly or enemy. Dumps have no combat strength or movement ability of their own. A dump may never advance or retreat as a part of a combat result affecting the units in its hex. There is no provision for destroying one's own dumps—although in a player's Supply Phase he can expend more SPs than is required of his units in order to eliminate excess SPs.
An enemy dump may be captured when a friendly unit enters its hex. Dump hexes may never be attacked by enemy units if no friendly unit is in the hex—in such a case, enemy units must move using their own movement allowance to get into the hex. Entry into an unoccupied enemy dump hex does not cost additional movement points.
Immediately upon entry into an enemy dump hex, the moving player rolls on the Supply Point Capture Table to determine the fate of the SPs in the dump hex. Regardless of the result, take the result's percentage and multiply it by the number of SPs in the hex. Round the result by the Standard Rounding Rule. That number is captured. Any remainder displaces up to five hexes.
The originally owning player displaces the remainder. He may displace any number of hexes between one and five that he desires and the SPs may split up and displace to different locations. Displacement is not movement of any sort and is unaffected by enemy units, their ZOCs or any type of terrain. If the SPs are within five MPs of an off-map holding box, they may displace into that box.
Dumps cannot be blown or destroyed in any way by the owning player—they may only be abandoned or 'used up' (see the end of 1.6c).
1.9 Supply Arrival
(Do not use in short scenarios)
Player must roll two dice on his Supply Table to determine the number of SPs that arrive. The Allied player gets a set amount determined according to the current game turn. Once placed in the correct ports of entry, these SPs may be moved by any combination of coastal shipping and truck points in the same turn.
1.9a Coastal Shipping. Coastal Shipping may only be used during a player's Movement Phase, never during the Exploitation Phase. Coastal Shipping is given in terms of SPs. Each unit of any size or type counts as one SP of shipping capacity. Units (and SPs being moved by Truck Points) may be moved by Coastal Shipping and move under their own power fully in the same phase, vice versa, or in any combination, provided the total ground movement of the unit does not exceed its Movement Allowance. For instance, a unit with an MA of 10 can move 3 MPs to a port, have one Coastal Shipping point expended for it, be transferred to another port, and then move using the remaining 7 MPs. There is no additional MP cost for loading or unloading from Coastal Shipping. Coastal Shipping may only pick up and drop off SPs and units at ports—there is no amphibious landing capability for any unit EXCEPT the special KG Hecker rule.
1.9b Axis Shipping. At the same time he rolls for his port capacities, the Axis player also rolls to determine the amount of coastal shipping available to him in the coming turn.
1.9c Allied Shipping. The Allied player has all the coastal shipping he needs to make full use of all his available port capacities. In other words, if the Allied player controls three ports each with a capacity of two, he'll have 6 points worth of coastal shipping. Ignore the capacity of Alexandria when calculating the coastal shipping available to the Allied player!
1.9d Ports. Only map hexes and Off-Map Holding Boxes which contain the Port Symbol can function as ports. Port capacities change from turn to turn. Each player rolls one die for each of the ports he controls. Do this during the owning player's Reinforcement Phase. According to each port's Port Capacity Boxes, the die roll determines the port's capacity for the turn. Roll for each port separately. Port capacity is a property of a port for the entire game turn. Port capacity is given in terms of SPs. Each unit of any size or type counts as one SP of port capacity. Port capacity only affects arriving units and SPs only, never the departure of them. A player may never exceed the capacity of a port for a turn in terms of incoming SPs and units (each unit equaling one SP). Once the capacity of the port has been used in a turn, no further arrivals are allowed there.
For Example: A player has a port with a capacity of three for a turn. During his Movement Phase, he uses one point of Coastal shipping to move 1 SP of supplies to the port. Later in that phase, he decides to ship an infantry division into the port, which costs another SP worth of capacity—leaving one left. He then ships another unit out of the port (using more coastal shipping, but no port capacity). Just before the end of this phase, the player takes a quick look around to see if he has set himself up correctly for the next Supply Phase. To his horror, he finds himself 2 SPs short at the port above. While he has enough coastal shipping to do the job, his one point of remaining port capacity will not let him do it. He then ships in the one SP he can and prepares to be SOL for a turn...Men, don't let this happen to YOU!
Both Tripoli and Alexandria have an infinite port capacity.
1.9e Capture of Ports. A player can capture another player's ports by moving a friendly unit through the port's hex. A captured port has no port capacity for the turn of capture. In the next game turn, the port (under new management) begins to function for the capturing player with the same port capacities as it did under the former owners—only the capturing player now rolls for it.
A helpful way to record this change over is to place the port capacity marker on the turn record track on the next turn. That turn, the new owner can roll for and use the port.
EZOCs have no effect on a player's ability to use his ports.
1.9f Damage of Ports using Air Support and Barrage Points. During a player's Combat Phase, he may attempt to interdict enemy ports by the use of air support and artillery barrage attacks. Make a barrage attack against the port using the regular Barrage Table. Regardless of the table's result, no unit in the port hex will be affected by the attack if the attack was made specifically against the port (the reverse is also true). Both the port and the units in the hex may be barraged (separately) in a single phase. Apply any Barrage Table result as a degradation of ability on the following enemy turn. For example, a one result on a barrage attack in the last turn would require the enemy player to drop his port capacity for the attacked port by one, say from 2 to 1, etc.; port hits have no other effect, do not last longer than the one turn, and cannot be used against Coastal Shipping. A port can be hit the turn before a capturing player can use it so as to degrade that port on its first turn of use. Tripoli and Alexandria cannot be affected in this manner. A port may be degraded to zero capacity in this manner.
Barrage attacks against ports never have any terrain or box column shifts applied to them.
1.10 Air Support Points
Each player is given one or more Air Support Points to use each turn. A player can use his points to support any friendly attack or defense, and to conduct friendly Barrage attacks (independently or in conjunction with friendly artillery). The Axis player may use them to reduce Malta in order to assist his supply convoys coming from Italy. A player may never expend more Air Support Points in a given turn than he has available. Keep track of available Air Support Points on the Air Support Point Track for each player on the game map. Subtract Air Support Points from this track as they are expended—when the track reads zero, no points remain to be used. Refill the track with Air Support Points during the friendly Initialization Phase of each game turn. Unused air points cannot be saved from turn to turn.
1.10a Restrictions on Use. Air support points may be used in any phase in which friendly units are either attacking or defending—to include overrun attacks and defenses. They may also be used during the resolution of friendly Barrage attacks in the friendly Combat Phase, which occurs before any ground combat attacks are made. Air Support Points can be applied in either independent barrage attacks or in conjunction with friendly artillery.
Air Support Points may be used on any map hex, but never in an Off-Map Holding Box.
1.10b Use as Barrage Points. Any number of friendly Air Support Points may be used to make Barrage attacks against enemy units either alone or in conjunction with friendly artillery and against enemy ports. Air Support Points may barrage anywhere on the map (except Off-Map Holding Boxes), whereas artillery is restricted by range. Each air point equals 5 barrage points for use on the Barrage Table (plus any artillery points also used).
1.10c Use as Combat Odds Shifts—as Attacker and Defender. When any combat is announced, either player can opt to apply Air Support Points to affect the battle. The attacker must announce his Air Points before the defender need decide.
Each attacking Air Support Point shifts the odds column used for the combat one to the right. Each defending Air Support Point shifts the combat odds column one to the left. These two effects may cancel each other out and the net shift is based on the differential between the two side's allocation of Air Support Points to a given combat.
Any number of Air Support Points may be applied by either side in a given ground attack, but the maximum Combat Table Shift restrains the effect to a two column shift in any direction. To use an extreme example, if the attacking player applies 1000 Air Support Points and the defender sends in 2, the net shift will still only be two to the right.
1.11 Replacement Steps
(Do not use in short scenarios)
Each player has a Variable Reinforcement Table. A player rolls two dice on his table once each turn in the Reinforcement Phase. With the exception of no effect and potential Allied withdrawals, the results from these tables will consist of replacement steps. These steps represent both new men and equipment arriving from elsewhere and repaired equipment and wounded returning to the battle.
A player must use his replacement steps immediately upon their acquisition. If he cannot use them fully at that time, the excess is lost. Each replacement step can be used to rebuild a step of any friendly unit regardless of nationality or type.
1.11a Requirements to Replace Step Losses. To replace one or more step losses on a unit, the unit must not be in an EZOC. Based on the number of replacement steps available, any number of steps may be rebuilt of a single unit at one time.
1.11b Rebuilding Dead Units. These units appear in any hex adjacent to any friendly supply dump which does not contain an EZOC or in an Off-Map Holding Box which contains an SP (or more). Note that the hex of the rebuild must not have an EZOC in it. EZOCs in the hex containing the SPs have no effect.
1.11c Bringing Back Withdrawn Units. The replacement steps also represent the return of withdrawn units (as well as the rebuilding of dead ones). Withdrawn units return to the campaign by being rebuilt using replacement steps. If you don't rebuild them, they'll never come back. The Allied Variable Reinforcement Table has been weighted to allow this system to function smoothly.
1.12 Artillery and Barrage Attacks
Artillery units may conduct barrage attacks against units at or within their 2 hex range. Resolve barrage attacks in the friendly Combat Phase before making any regular attacks. As available, a player can incorporate air support points as if they were other artillery units.
1.12a Artillery may not conduct more than one barrage attack per Barrage Segment, and may not split its Barrage strength. Artillery may only barrage during the friendly Barrage Segment of the friendly Combat Phase.
1.12b Effects on Combat and Barrage. A given hex may only be Barraged once in a given phase. Exception: a hex may have separate barrages made against the units and port in it in the same phase. Any number of artillery and air support points may engage in a single Barrage Attack and resolve these attacks on the Barrage Table.
1.12c Terrain and other features affect Barrage attacks according to the Terrain Effects on Combat Chart.
1.12d Artillery units defend themselves with a regular defense strength of 1, when attacked in ground combat.
1.12e Out of Supply artillery fires at 1/2 Barrage strength.
1.13 Off Map Boxes
(Do not use in short scenarios)
An off-map box is one that does not represent a given map hex. Instead, such a box represents areas adjoining the game map.
Units in off-map boxes must draw supply (if they are to be in supply) from the same box as they occupy.
Units may move one box per phase (Movement Phase, usually, exploit capable units can also do so in the Exploitation Phase) or by expending 10 MPs (whichever is better for the unit). A unit need not expend all 10 MPs to get into a box, one MP will do that, 10 MPs is the amount needed to cross the entire box. Therefore a unit with a movement allowance of 15 can expend 10 MPs to cross an off-map box and enter the next box or use the remaining MPs to move onto the map (depending on where the box is). To move an SP into a box from another box will cost a full truck point.
The only off-map boxes in the game are fully under Axis control (Tripoli and the box connecting it to the map) and no Allied unit may ever enter these boxes. Combats and Barrages never occur inside off-map boxes.
1.14 On-Map Holding Boxes
On-map Holding Boxes represent individual map hexes in an expanded fashion so as to break up a few congested hexes. Units may not overstack in such hexes or in the Holding Box representing the hex. Both the units in the Holding Box and the hex it represents count together when applying the stacking limit to that hex.
1.15 Fortifications
Map printed fortifications may never be built or destroyed. Such hexes have additional effects as listed on the Terrain Effects on Combat and Barrage Chart.
1.16 Boxes
Boxes are fortifications the player may build for his units. They represent both earthworks and extensive minefields. Boxes may be built at the beginning of any friendly Supply Phase and never at any other time. To build a box, a unit (of any type) must occupy the hex. This unit may not have moved in that game turn nor be in an EZOC. The unit must be in supply. Expend one SP per box made. A box is automatically removed the instant no unit of the side which built the box is in the box's hex. Overrun attacks may be made against box hexes.
Boxes may be built in any map hex except those which already contain printed fortifications. Boxes may never be built in Off-Map Holding Boxes.
The number of boxes used in play is limited by the countermix. Players may want to split the available markers 50-50 before play begins. In our experience, there has always been enough to allow for both sides to have all they want.
Important Note: The Terrain Effects Chart on the map describes a hex with a minor city, fortification and box in the same hex. This is not allowed (as a hex can never have a box and a fortification in it), but was done merely to show how these effects accumulate—I was just a little over-enthusiastic when adding them together!
Boxes cannot be built in the short scenarios, but some may exist in the initial set ups of such scenarios.
1.17 Divisional Integrity
In any attack (or defense) where one or more multi-unit divisions participate using all of their currently on-map components, shift the combat odds one column in that side's favor. If both sides are eligible, they cancel each other out. This shift can be beyond the usual two column shift max on the Combat Results Table—for instance, an attack with two air points and divisional integrity would get a three column shift.
If a division currently only has one counter on the map, it is not eligible for this shift. No side ever gets a shift of more than one column in its favor for this reason, even if more than one eligible division participates. In the attack, the participating elements from a given division need not stack together, provided they are all involved in the combat and are subject to any adverse combat results.
The artillery of a division (if any) must be adjacent to the defending stack (for the attacker) or in the defender's own stack to allow divisional integrity. These units do not have to make a token barrage to qualify—simply being there is enough.
1.16 Combined Arms
In any attack (or defense) where the player has at least one stack that has both an armor unit and an infantry unit (see below), the player receives a die roll modifier of one in his favor. The attacking player may get this modifier for up to four stacks or a +4 total. If both players have combined arms, use the net modifier.
Armor units (for the attacker) include all pure armor and recon type units. For the defender, armor units includes anti-tank units as well. For either, infantry units include: infantry, marine, commando, amphibious, and motorized infantry. All other unit types not mentioned above do not count for either class of units, but do not interfere with the combined arms bonus in any way.
2.0 Axis Special Rules
2.1 Initiative
The Axis Player Turn is always first. Except in those Short Scenarios where the first player is defined for each scenario.
2.2 Italian Surrender Rule
Any Italian unit found to be out of supply on turns 1 through 6 (inclusive) automatically surrenders before suffering any of the regular out of supply effects. When a unit surrenders, remove it from play and place it in the dead pile.
Do not apply this rule to any unit (Italian or otherwise) on or after turn 7.
If such a "surrender" occurs deep behind friendly lines, what occurs is actually attrition due to desertion, poor maintenance, and lack of repair parts. The unit is destroyed anyway, but this description allows the player to more accurately visualize what is going on.
2.3 Rommel
"...able to leap tall escarpments in a single bound, faster than a speeding Spitfire...the man of steel..." (We'll, you get the idea.)
On the Map: The Combat Table lists the Rommel shift for attack only, it is for attacks and defense.
Rommel has a number of special capabilities in the game, but is not a unit in the normal sense. He has no attack, defense, ZOC, or movement allowance. Rommel can move from any Axis occupied hex to any other over any distance—but must always stack with Axis units, should the stack he is in be destroyed by enemy combat, the Axis player automatically displaces Rommel to any desired Axis stack. He ignores enemy units and terrain as he moves—but may never end his movement in a hex containing either enemy units or prohibitive terrain. He may move in the friendly Movement Phase or the Exploitation Phase. He is never affected by combat results and can never be killed (exception: see 3.5). If the units he is stacked with advance after combat or retreat, Rommel may go with them. Rommel doesn't count for supply and is never considered out of supply or subject to out of supply effects.
The units he stacks with at the beginning of a given phase have the following abilities:
Movement Phase:
Units may conduct overruns even if they start in a EZOC.
Units he stacks with at the moment of an overrun get the Rommel Combat bonus.
Combat Phase:
Defense: If the hex he is in is attacked, the defenders get a one column shift to the left as a combat bonus.
Attack: If he stacks with one of the stacks involved in an attack, that attack gets a column shift to the right. If units in his hex are involved in more than one attack, each gets the bonus.
Exploitation Phase:
Units which begin this phase stacked with Rommel may use the Exploitation Phase even if in an EZOC or not exploitation capable.
Rommel may use his special rule to affect any Axis stack—German, Italian, or a mix.
2.4 Going to See Adolf: The Nazi Battery Re-Charge
(Do not use in short scenarios)
Roll two dice for Rommel every turn after he enters play. On a 4 or less, remove Rommel from the game map and place him on the Turn Record Track in the next turn. He returns to play that turn as a reinforcement—with his Nazi batteries fully recharged by Adolf.
2.5 Trento Truck Option
(Do not use in short scenarios)
There are two versions of the Italian Motorized division "Trento" in this game. Before play begins, the Axis player must decide if he wants to use the Trento Truck option or not. If he uses the option, he gets one truck point beyond what the Axis Truck Point Chart lists each turn. When the Trento division enters play, use the single-counter version of the division.
If he decides not to use the option, do not add to the Axis Truck Point total and bring on the multi-counter version of Trento.
Design Note: Historically, Trento's trucks were reassigned to up the available truck tonnage for the Italian 1940 offensive. Here, the player can choose between the added truck point and the usefulness of an Italian semi-motorized division.
2.6 Malta
(Do not use in short scenarios)
Each turn, the Axis player may use up to four air points to help his cause by reducing Malta's effectiveness. Assign these points at the beginning of the Reinforcement Phase. Once assigned to Malta Suppression, air points cannot be used for any other purpose and remove the total assigned from the available Axis Air Points for the turn. The number of air points assigned to Malta Suppression gives a dice roll modifier (see the Malta Suppression Chart on Map A) for the Axis Supply roll. Each turn a fresh batch of air points must be assigned to this purpose.
2.7 Axis Reinforcement Entry
(Do not use in short scenarios)
Place all Axis reinforcements and supply points in the Tripoli Holding Box.
2.8 Kampfgruppe Hecker Exchange
As part of the preparation for the Battle of Gazala, KG Hecker was formed from the San Marco Marines, a company of Brandenburgers, and a motley assortment of pioneers. It also had a few British tanks and other vehicles which were to assist in its special forces role. It was to land amphibiously to cut the coastal highway connecting Tobruk with the British rear areas.
On turn 21, the Axis player may exchange the KG Hecker unit for the San Marco Marines during his Reinforcement Phase. Once in the remaining turns of the game this unit may move from one coastal hex (or from the Tripoli Box) to any other coastal hex (both hexes must be free of EZOCs and units). To do the amphibious move, KG Hecker must begin its movement in any coastal hex and the move uses its entire movement allowance. This amphibious move does not cost the Axis player any of his coastal shipping points. This unit (like the Long Range Desert Group) ignores the MP cost of EZOCs.
2.9 The Lehr Parachute Battalion
This unit was the first of the battalions assigned to the Ramcke Parachute Brigade. The player uses it as any other unit until the rest of Ramcke shows up a few turns later. On that turn, remove the Lehr Battalion from play permanently (even if in the dead pile) and the Ramcke Brigade enters play. The Lehr unit is picked up off the map regardless of its situation.
2.10 Axis Reinforcement Entry
All Axis reinforcements enter via the Tripoli port into the Tripoli Box. The Allied player may not interfere with this entry in any way.
3.0 Allied Special Rules
3.1 Allied Air Support Points at the Beginning of Scenarios
Because the Axis player is always first, the Allied player has no chance to initialize his Air Support Points before play begins. For this reason, before play starts, the Allied player may reset his Air Support Point Track to the applicable number of Air Support Points before play begins.
3.2 Allied Reinforcement Entry
(Do not use in short scenarios)
Allied reinforcements and new SPs always arrive at Alexandria. There is no ability for the Allied player to bring units and SPs directly to any other port on the map—they must always go to Alexandria first. Should Alexandria fall to Axis hands, no reinforcements or new SPs will arrive for the Allied player until the port is liberated—this may mean the game... Reinforcements scheduled to arrive during the period of Axis occupation are forfeited and lost forever. Moral: Don't lose Alexandria, or else.
3.3 Withdrawals
(Do not use in short scenarios)
Allied withdrawals happen according to the Allied Variable Reinforcement Table. When a withdrawal is called for by the roll on that table, remove from play the units and types called for by the result. If the required unit type is not available, ignore that portion of the withdrawal. Withdrawn units return to play by being rebuilt using replacement steps, see above 1.11.
Units in EZOCs cannot be used to fulfill withdrawal requirements. Exception: if a particular unit type is called for in a withdrawal and no units of that type are on the map which are not in EZOCs, then those units can be used.
3.4 The Long Range Desert Group (LRDG)
This unit represents an amalgamation of all the Special Service Commando units (Layforce, Sterling, the SAS) which roamed all over the desert during the period covered by the game. Once in play, the unit functions like any other except that it ignores all EZOC MP costs and supply considerations (it is always in supply).
3.5 The LRDG Raid on Rommel
Did someone say something about Kryptonite???
After a time in play, the Allied player usually gets a little fed up with that chap Rommel and wants to be able to do something about it (aside from hoping he gets called back to Berlin again). This rule allows a method of dealing with that pesky bugger with the Blue Max.
Once per game (only once) during any Allied Movement Phase, the Allied player may announce a "Raid on Rommel". When he does so, remove the LRDG unit from the map and place it in the dead pile (a raid on Rommel cannot occur if it is already in the dead pile, or not yet in play). Roll one die.
On a 6, Rommel is captured (or killed) and permanently removed from play.
On a 5, Rommel is injured and returns as a reinforcement three turns later.
On any other roll, there is no effect.
4.0 Short Scenarios
A number of major rule sections are not used in these scenarios due to their short duration. Also, these scenarios take advantage of the "short scenario" time scale (two weeks) due to the nature and intensity of the actions portrayed. Each can be played in a short period of time, uses but a fraction of the units in the game, and uses only a small map area. The major scenarios allow a deeper look at the North African campaign—these are designed with an hour or so of fun in mind!
Simplified Supply Rules for these scenarios only:
For the short scenarios, use these supply rules. During each player's Supply Phase, check each friendly unit for supply by checking to see if a path free of enemy units and EZOCs can be traced off the appropriate map edge (east for Allies, west for Axis) or to a friendly owned port. Friendly units negate EZOCs for this purpose. The trace must be through passable terrain exclusively. If the unit or stack can trace, it is in supply for the next turn. If it cannot, apply the out of supply effects in rule 1.6d.
When using only Map B, Axis supply trace to the west map edge must be north of the Qattara Depression.
4.1 Scenario 1: Operation Crusader
Turn Length: 3 turns Map Area: Map A only First Player: Allied
Axis Information: Set Up: 35.24: 3-4-15 Inf Rgt (288) 36.21: (65, 66 Mtrd Inf Rgts)-Trieste Div 38.23: Brescia Inf Div (It) 38.22: Trento Inf Div (single counter version), 21 Artillery Rgt (It) 39.20: (132 Armor Rgt, Comp Recon Rgt, 8 Brs Mtrd Inf Rgt, 132 Artillery Rgt)-Ariete Div, 5 AT Bn (It) 39.22: Pavia Div (It) 40.21: (361 Mtrd Inf Rgt (less one step), 190 Artillery Rgt)-90 Le Div, 104 Artillery Bde, (605 PJ Bn)-5 Le Div 40.22: (155 Mtrd Inf Rgt (less one step))-90 Le Div, Bologna Inf Div (It) 43.22: (200 Inf Rgt (less one step))-90 Le Div, (8 Pz Rgt (less one step), 33 Recon Bn (less one step), 115 Shu Rgt (less one step), 33 PJ Bn, 33 Artillery Rgt)-15 Pz Div 43.21: (104 Shu Rgt (less one step), 155 Artillery Rgt (less one step))-5 Le Div 44.21: Rommel, (5 Pz Rgt (less one step))-5 Le Div 45.20: (3 Recon Bn, less one step)-5 Le Div 45.17: Recam Recon Grp (It) 46.18: Savona Div (It), Box 47.19: (9 Brs Mtrd Inf Rgt)-Trieste Div (It), Box 48.19: 1-18 Flak Bn, (39 PJ Bn)-5 Le Div, Box
Reinforcements: None Air Support Points for each Turn: 3
Allied Information: Set Up: 39.23 (Tobruk): 32 Ar Tank Bde, (14, 16, 23 Inf Bdes)-70 Inf Div, Polish Bde, 1x Artillery Grp 47.15: 22 Tank Bde, (1 SA, 2 SA, 5 SA Inf Bdes)-1 SA Inf Div, 4-6 SA Recon Rgt, 22 Gds Mtrd Inf Bde 47.16: (4 Arm, 7 Arm Bdes, 11 Hus Recon Bn, Support Grp, Divarty Grp)-7 Arm Div 47.17: 1 Ar Tank Bde, (KDGds Recon Bn)-2 Arm Div, (4 NZ, 5 NZ, 6 NZ Inf Bdes)-2 NZ Div 47.18: (7 Ind Bde)-4 Ind Div 48.18: (5 Ind Bde)-4 Ind Div 49.19: (11 Ind Bde)-4 Ind Div
Reinforcements: None Air Support Points for each Turn: 5
Victory Conditions: Allied: The Allied player wins if he both occupies the hex of Tobruk and has a bridge of hexes occupied by Allied units or free of Axis units (and their ZOCs) from Tobruk off the East map edge. Axis: Other than the above.
4.2 Scenario 2: Gazala
Turn Length: 3 turns Map Area: Map A only First Player: Axis
Axis Information: Set Up: w/i 2 28.20: (580 Recon Bn, 155 Mtrd Inf Rgt)-90 Le Div, 288 Mtrd Inf Rgt w/i 2 29.21: (3 Recon Bn, 5 Pz Rgt, 104 Shu Inf Rgt, 39 PJ Bn, 605 PJ Bn, 155 Artillery Rgt)-5 Le Div, (33 Recon Bn, 8 Pz Rgt, 115 Shu Inf Rgt, 33 PJ Bn, 33 Artillery Rgt)-15 Pz Div, 1-18 Flak Bn w/i 2 30.21: (132 Armor Rgt, Comp Recon Rgt, 8 Brs Mtrd Inf Rgt, 132 Artillery Rgt)-Ariete Armor Div, Med Armor Grp, (65, 66 Mtrd Inf Rgts)-Trieste Inf Div, 5 AT Bn (It) 32.21: Pavia Inf Div (It) 31.22: 10 Artillery Rgt (It) 31.27: Lehr Parachute Bn 32.22: Brescia Inf Div (It) 33.25: (200, 361 Inf Rgt, 190 Artillery Rgt)-90 Le Div 32.25: 21 Artillery Rgt (It) 32.24: Sabratha, Trento (one counter version) Inf Divs (It) 30.28: KG Hecker With any Axis Unit: Rommel
Reinforcements: None Air Support Points for each Turn: 3
Allied Information: Set Up: 34.24: (5 SA Inf Bde)-1 SA Div, Box 34.23: (2 SA Inf Bde)-1 SA Div, Box 34.22: (1 SA Inf Bde)-1 SA Div, Box 35.23: 32 Army Tank Bde, 1x Artillery Grp 35.22: (69, 151 Inf Bdes)-50 Inf Div, Box 35.21: (150 Inf Bde)-50 Inf Div, Box 36.21: 22 Tank Bde 37.22: 22 Gds Mtrd Inf Bde, (12 Lncr Recon Bn, 2 Arm Bde, Support Grp)-1 Arm Div 36.19: 1 French Mtrd Inf Bde, 1x Artillery Grp, Box 37.19: 3 Ind Mtrd Inf Bde 38.20: (11 Hus Recon Bn, 4 Arm Bde, Support Grp)-7 Arm Div, 1 Ar Tank Bde w/i 1 39.23 (Tobruk): (3 SA, 4 SA, 6 SA Bdes)-2 SA Div 45.17: 4-6 SA Recon Rgt 47.20 (Bardia): (9 Ind, 10 Ind, 29 Ind Bdes)-5 Ind Div
Reinforcements: None Air Support Points for each Turn: 5
Victory Conditions: Axis: The Axis player wins if he controls hex 37.23 and the road hexes: 34.21, 35.21, 36.21, 37.21 and 37.22 AND if he invests Tobruk and Bardia. "Invest" here means surround in a continuous arc from the sea on one side of the city to the sea on the other side of the city with a line of units or ZOCs. Each city must be "invested" separately—the player cannot draw a ring around both at once and claim that they are invested. Occupation of one or both of these cities fills the investment requirement for the occupied city. Allied units do not negate Axis ZOCs when determining investment. Allied: The Allied player wins if he avoids the German conditions.
4.3 Scenario 3: The First Battle of El Alamein
Turn Length: 3 turns Map Area: Map B only First Player: Axis
Axis Information: Set Up: 3.15: (65, 66 Inf Rgts)-Trieste Division (It) 2.16: (155, 200, 361 Mtrd Inf Rgts (each less one step), 190 Artillery Rgt)-90 Le Division 2.15: (132 Tk Rgt (less one step), 8 Brs Mtrd Inf Rgt, 132 Artillery Rgt)-Ariete Arm Division, 5 AT Bn (It) 2.14: (33 Recon Bn, 8 Pz Rgt, 115 Shu Rgt (each less one step), 33 Artillery Rgt)-15 Pz Division 2.13: (3 Recon Bn, 5 Pz Rgt, 104 Shu Rgt (each less one step), 39 PJ Bn, 155 Artillery Rgt)-5 Le Division, 1-18 Flak Bn with any of the above: Rommel
Reinforcements: These enter anywhere along the west map edge, north of the Qattara Depression. Turn 2: (3-LNvra Recon Bn, 133 Tk Rgt, 12 Brs Mtrd Inf Rgt, 133 Artillery Rgt)-Littrio Arm Div (It) Turn 3: Trento (one counter), Sabrtha, Brescia, Pavia Infantry Divisions, 10, 21 Artillery Rgts (It)
Air Support Points for each Turn: 3
Allied Information: Set Up: 7.15: (4 Arm Bde)-7 Arm Division 7.12: (9 Ind Bde)-5 Ind Division 8.12: (11 Hus Recon Bn, Support Grp, Divarty)-7 Arm Division 9.14: (6 NZ Bde)-2 NZ Division 10.12: (4 NZ, 5 NZ Bde)-2 NZ Division 11.14: (1 SA, 2 SA Bdes (each less one step))-1 SA Division 11.15: Box, (4 SA Bde (less one step))-2 SA Division 11.16: Box, (3 SA Bde (less one step))-2 SA Division 12.13: (12 Lncr Recon Bn, 2 Arm Bde, Support Grp, Divarty)-1 Arm Div, 22 Tk Bde 12.14: Box, (6 SA Bde (less one step))-2 SA Division 19.18 (Alexandria): (20 Aus, 24 Aus, 26 Aus Bdes)-9 Aus Division
Reinforcements: All arrive at Alexandria. Turn 2: 23 Army Tk Bde, 1x Artillery Grp, (131, 132, 133 Inf Bdes)-44 Inf Div, (Royals Recon Bn, 8 Arm, 24 Arm Tk Bde, Divarty)-10 Arm Division
Air Support Points for each Turn: 5
Victory Conditions: Axis: The Axis player wins if he occupies either a hex of Cairo (any one hex) or Alexandria at the end of the game. Allied: The Allied player wins if he avoids the Axis conditions and occupies both hexes of Alam Halfa. Draw: Other than the above.
4.4 Scenario 4: Alam Halfa
This is about it for Rommel's army. Good luck in getting an Axis win out of this. If not, you can stick a fork into the Germans...(see also, El Alamein #3)
Turn Length: 3 turns Map Area: Map B only First Player: Axis
Axis Information: Set Up: 5.13: (3 Recon Bn, 5 Pz Rgt, 104 Shu Rgt, 155 Artillery Rgt)-5 Le Division (each unit less one step) 6.12: (33 Recon Bn, 8 Pz Rgt, 115 Shu Rgt, 33 Artillery Rgt)-15 Pz Division (each unit less one step) 6.13: (132 Arm Rgt, 8 Brs Mtrd Inf Rgt)-Ariete Arm Division (each unit less one step), (133 Arm Rgt, 12 Brs Mtrd Inf Rgt)-Littrio Arm Division, 5 AT Bn (It) 6.14: (580 Recon Bn, 155, 200, 361 Mtrd Inf Rgt, 190 Artillery Rgt)-90 Le Division (each—except the Recon Bn—less one step) 8.12: (186, 187 Abn Inf Rgt)-Flgre Division (It) 8.13: Ramcke Abn Infantry Bde 8.15: 10, 21 Artillery Rgts (It) 9.14: Bolgna Division (It) 9.15: Trento Division (one counter version) (It) 9.16: (220 Recon Bn, 125, 382, 433 Mtrd Inf Rgts)-164 Inf Division with any of the above: Rommel
Reinforcements: None Air Support Points for each Turn: 4
Allied Information: Set Up: 10.15: Box, (20 Aus, 24 Aus Bdes)-9 Aus Division 10.14: Box, (1 SA, 2 SA Bdes)-1 SA Division, 161 Ind Mtrd Inf Bde 10.13: Box, (5 NZ, 6 NZ Bdes)-2 NZ Division 11.13: Box, (4 Arm Bde, Support Grp)-7 Arm Division 11.14: Box, (5 Ind Bde)-4 Ind Division 12.14: 23 Army Tank Bde 13.15: Box, (26 Aus Bde)-9 Aus Division 13.11: (11 Hus Recon Bn, 7 Arm Bde, Divarty)-7 Arm Division 13.13: Box, (133 Inf Bde)-44 Inf Division, 22 Tank Bde 14.12: (8 Arm Bde)-10 Arm Division 14.13: Box, (131 Inf Bde)-44 Inf Division, (Divarty)-10 Arm Division
Reinforcements: (All arrive at Alexandria) Turn 2: (Royals Recon Bn)-10 Arm Division, 1 Greek Bde
Air Support Points for each Turn: 5
Victory Conditions: Axis: The Axis player wins if he occupies either a hex of Cairo (any one hex) or Alexandria at the end of the game. Allied: The Allied player wins if he avoids the Axis conditions and occupies both hexes of Alam Halfa. Draw: Other than the above.
4.5 Scenario 5: The Battle of Third El Alamein
Turn Length: 3 turns Map Area: Map B First Player: Allied
Axis Information: Set Up: 5.15: (580 Recon Bn, 155, 200, 361 Mtrd Inf Rgt, 190 Artillery Rgt)-90 Le Division (each unit less one step) 7.16: (33 Recon Bn, 8 Pz Rgt, 115 Shu Rgt, 33 Artillery Rgt)-15 Pz Division (each unit less one step) 7.15: (133 Arm Rgt, 12 Brs Inf Rgt)-Littrio Arm Division (each unit less one step), 29 AT Bn, 503 AT Bn (It) 6.13: (3 Recon Bn, 5 Pz Rgt, 104 Shu Rgt, 155 Artillery Rgt)-5 Le Division (each unit less one step) 7.13: (132 Arm Rgt, 8 Brs Inf Rgt)-Ariete Arm Division (each unit less one step), 5 AT Bn, 501 AT Bn (It) 8.14: 10, 21 Artillery Rgt (It) 9.16: Box, (125, 382 Mtrd Inf Rgt)-164 Division (each unit less one step) 9.15: Box, (220 Recon Bn, 433 Mtrd Inf Rgt)-164 Division (each unit less one step) 9.14: Box, Trento, Bolgna Divisions (each unit less one step) (It) 10.13: Box, Brescia Division, (186, 187 Abn Rgt)-Flgre Abn Division (each unit in hex less one step) (It) 10.12: Box, Pavia Division (less one step) (It) with any of the above: Rommel, Ramcke Abn Bde
Reinforcements: None Air Support Points for each Turn: 3
Allied Information: Set Up: 10.15: (152, 153, 154 Inf Bdes)-51 Division, (20 Aus, 24 Aus, 26 Aus Bdes)-9 Aus Divisions 10.14: 23 Army Tank Bde, 9 Arm Bde, (1 SA, 2 SA Bdes)-1 SA Division, (5 NZ, 6 NZ Bdes)-2 NZ Division 11.15: 3x Artillery Grps 11.14: 161 Ind Bde, (131, 132, 133 Inf Bdes)-44 Division, (5 Ind, 7 Ind Bde)-4 Ind Division 11.13: 1 French Bde, 22 Tank Bde, (4 Arm Bde, Support Grp)-7 Arm Division 12.14: 1 Greek Bde, (69, 151 Bdes)-50 Division 12.13: 2 French Bde 12.12: (11 Hus Recon Bn, Divarty)-7 Arm Division 15.15: (12 Lncr Recon Bn, 2 Arm Bde, Support Grp, Divarty)-1 Arm Division 16.15: (Royals Recon Bn, 24 Arm Bde, Divarty)-10 Arm Division
Reinforcements: None Air Support Points for each Turn: 5
Victory Conditions: Axis: The Axis player wins if he still holds three of the original boxes and controls Mersa Matruh. Allied: The Allied player wins if destroys at least three Axis boxes and occupies Mersa Matruh at the end of the game. Draw: Other than the above.
5.0 Major Scenarios
5.1 Starting with the Italian Offensive
First Turn: Turn 1 Turn Length: 28 turns Map Area: Both First Player: Axis
Axis Information: Set Up: (all are Italian) w/i 3 Benghazi (A13.23): 20 Artillery Rgt, 2 Supply Points Soluch (A14.20): 10 Artillery Rgt w/i 3 Cyrene (A24.28): Sirte Div, 28 Oct Div w/i 3 Tobruk (A39.23): 25 Artillery Rgt, Tobruk Garrison Grp, 2 Supply Points Bir el Gubi (A39.20): 23 Mar Div w/i 2 of the Egyptian Border: Sahara Cav Rgt (must be inside Libya) w/i 3 Bardia (inside Libya): 21 & 22 Artillery Rgt, Bardia Garrison Grp, Maletti Grp, 1 Lib Div, 2 Lib Div, Cirene Div, Marmarica Div, (1 Lib, 2 Lib)-Babini Tank Bde, 3 Gen Div, Catanzaro Div, 3 Supply Points Tripoli Box: Bologna, Brescia, Pavia, Sabratha, Savona Divisions, 4 Supply Points
Reinforcements: As per the Order of Arrival
Allied Information: Set Up: w/i 3 Mersa Matruh: (4 Arm (less one step), 7 Arm (less one step))-7 Arm Div, (4 NZ)-2 NZ Div, (5 Ind, 11 Ind)-4 Ind Div, 2 Supply Points w/i 10 Mersa Matruh: (11 Hus, Support Grp, Divarty)-7 Arm Div Mersa Martuh (B1.18): 1x Box w/i 3 Alexandria: (16)-70 Div (less one step), 3 Supply Points w/i 5 Cairo: (23)-70 Div (less one step), 10 Supply Points
Reinforcements: As per the Order of Arrival
Victory Conditions: Axis: The Axis player wins a sudden death victory if, at the end of any Allied Player Turn, he occupies both Alexandria and Cairo. (That is the only way to win a victory which might be meaningful in a historical sense.) In strictly game terms, the Axis player also wins if he occupies Bardia, Tobruk, and Benghazi at the end of the game. Allied: The Allied player wins if he occupies Mersa Matruh, Bardia, and Tobruk at the end of the game (as well as avoid the sudden death conditions for the entire game). Draw: Other than the above.
5.2 Starting with Rommel
First Turn: Turn 8 Turn Length: 21 turns Map Area: Both First Player: Axis
Axis Information: Set Up: Tripoli Box: Brescia Div (less two steps), Pavia Div, 2 Artillery Rgt, 29 AT Bn, 4 SPs (It) Box joining Tripoli to the map: Bologna Div, 3 SPs (It) w/i 4 A2.12 (Marble Arch): Rommel, (3 Recon Bn, 5 Pz Rgt, 39 PJ Bn, 605 PJ Bn)-5 Le Div, 606 Flak Bn, 1-18 Flak Bn, 2 MG Bn, 8 MG Bn, 4 SPs (Ge) Med Armor Grp, 10 Brs Mtrd Inf Rgt, Savona Div, Trento Div (one counter version), (Comp Recon Rgt, 132 Armor Rgt (less one step), 8 Brs Mtrd Inf Rgt (less one step), 132 Artillery Rgt)-Ariete Arm Div, 5 AT Bn (It)
Dead Pile (all are Italian): 3 Gen, 23 Mar, 28 Oct Div, 1 Lib, 2 Lib, Catnzaro, Cirene, Marmrica, Sabrtha, Sirte Inf Divs, Maletti Grp, Sahara Cav Rgt, Recam Grp, (1 Lib, 2 Lib Arm Rgt)-Babini Arm Grp, Bardia & Tobruk Garrison Grps, 10, 20, 21, 22, & 25 Artillery Rgts
Reinforcements: As per the Order of Arrival
Allied Information: Set Up: w/i 3 A14.14: (3 Arm Bde (less one step), KDGds Recon Bn)-2 Arm Div A18.20: (Support Grp)-2 Arm Div w/i 3 A13.23 (Benghazi): (Divarty)-2 Arm Div, (20 Aus, 26 Aus Bdes)-9 Aus Div, 1 SP w/i 3 A39.23 (Tobruk): 3 Ind Bde, (24 Aus Bde)-9 Aus Div, 2 SPs w/i 3 B1.18 (Mersa Matruh): (Support Grp)-7 Arm Div, 3 SPs B12.15: Polish Bde any hex of Cairo: (14, 16, 23 Bdes (each less one step))-70 Inf Div w/i 3 B19.18 (Alexandria): (11 Hus Recon Bn, 4 Arm Bde (less one step), 7 Arm Bde (less one step), Divarty)-7 Arm Div, (18 Aus Bde)-7 Aus Div, 10 SPs anywhere in Egypt: 22 Gds Mtrd Inf Bde
Dead Pile (includes both uses of the 'big' withdrawal roll): (5 Ind, 7 Ind, 11 Ind Bdes)-4 Ind Div, (21 Aus, 25 Aus Bdes)-7 Aus Div, (16 Aus, 17 Aus, 19 Aus Bdes)-6 Aus Div, (4 NZ, 5 NZ, 6 NZ Bdes)-2 NZ Div, (1 Arm Bde)-2 Arm Div
Reinforcements: As per the Order of Arrival
Victory Conditions: Axis: The Axis player wins a sudden death victory if, at the end of any Allied Player Turn, he occupies both Alexandria and Cairo. (That is the only way to win a victory which might be meaningful in a historical sense.) In strictly game terms, the Axis player also wins if he occupies Bardia, Tobruk, and Benghazi at the end of the game. Allied: The Allied player wins if he occupies Mersa Matruh, Bardia, and Tobruk at the end of the game (as well as avoid the sudden death conditions for the entire game). Draw: Other than the above.
Designer's Notes
Like its older brother, Stalingrad Pocket, Afrika was designed with an eye to a quick playing moderate to low complexity game with enough meat on its bones to give reasonable interest, but a simple enough game package so as to be very user friendly. Also like that game, it was not intended to be a definitive model of the situation, only one that gave reasonable results given reasonable input.
The heart of the main game is the supply system. It amounts to the infant version of the one I used in Guderian's Blitzkrieg. In most campaigns, supply is critical—here it is more so. As the Axis player (as in real life) you will watch tons of supply accumulate at Tripoli with no way to move it to the front. In real life, contrary to many myths about the campaign, the Italian Navy did an acceptable job of moving supplies from Italy to North Africa—even with losses due to Allied activity. The problem was that most of this supply was dumped at Tripoli. Rommel's coastal shipping never lived up to expectations, and he never had enough trucks, so therefore most of it stayed there. In the game, the player's challenge is to get enough supply forward to maintain a credible offensive. It's not easy.
Be wary of rapid pendulum swings! Frequently corrosion will build up unseen in a force (losses, supply difficulties) and only make themselves known in one giant chaos-like collapse. I've seen this happen a couple of times now and it isn't pretty. Remember this when the other guy looks unstoppable—he might be on the verge of a complete disaster! Be sure to guard your rear areas—the first time some rapidly moving enemy unit slips around your rear, takes out your supply dumps, and occupies your main port, you will lose and never forget again.
A few simplification decisions were made with respect to the OB which should be noted here.
The entire withdrawal system for the Allies is based on my desire not to see yet again the standard North African game mind-set: "Well, I'm getting the 4th Indian Division next turn, but they are only going to be here for a turn, so why move them to the front where they will cost supply?" The way it is, you can't tell when or how much will be drawn from your theater to others by your superiors (just like real life). In the game's world, we can't predict what (if anything) is going on outside the game's area of operations, we shouldn't be able to predict when we will be called on to protect the home isles, the Balkans, or India from a real (or illusionary) Axis threat. The variable withdrawals take care of all this as well as allowing our superiors to have their whims and what-not. Games rarely remind the player that he is not a god and that real military commanders have superiors to answer to.
The Giarabub Garrison was left out on purpose because it rarely (if ever) had any effect on play during playtesting, was difficult to remember that it was down there, and was forever being knocked off the table by unknowing elbows.
In general, units which changed names, but kept the same organization, were left with one name and a significant counter wastage was avoided—as well as many unnecessary counter exchanges! Most notable here is the 5th Light Division and its conversion to the 21st Panzer Division. As far as I can tell, this change was strictly cosmetic (changing unit signs and bumper numbers), so—while near and dear to the hearts of many, it seems—it was left out. If you wish, remember to read "5 Le" as "21 Pz" on or after August 1941.
The two MG battalions have been left as heerestruppen for the sake of simplicity. Both acted as part of the 5th Light until April, 1941 when the 8th MG was destroyed. The 2nd MG was later used as replacement troops for the 115 Shutzen. To avoid a great deal of pointless dancing with these units, I left them independent—assume that they are attached to whomever they stack with, heck, the Germans did!
The heavy flak units in the game are a representitive sample of those available. Quite a few of these units were in the campaign and an earlier version of the game included all of them. The result was a brutal WWI slugfest which was nothing like the real campaign. As well as cluttering up the map, their importance was exaggerated beyond belief. I opted to take a little liberty in the form of "consolidation" of these units and the result is, I think, a much better representation.
The Italian AT Battalions are the contribution of ground-breaking research conducted by Jack Greene and Alessandro Massignani. These units, ignored in German and British histories (to the point of not even being mentioned or being accused of being German), made a major contribution to the Axis effort in the Battle of Gazala. The 5th Bn (originally the 18th) and the 29th Bn were both armed with German 88mm AT/AA guns. The 501st and 503rd were armed with the excellent Italian 90mm AT/AA gun. I wish to thank Jack Greene for sharing this (as yet) unpublished original research with us for use in this game. Thanks, Jack, you are a true gentleman.
The British 22 Gds Bde changed names a number of times. I kept it the 22 Gds.
A number of small unit reorganizations and realignments were also ignored. None of these would have any effect on play and the accumulation of silly little unit changes would be a pain to the player. All of these were simplified as much as possible.
In order to avoid building a whole set of rules regarding the British Egyptian railroad, I increased the Allied Truck Point total a little to cover for its effects.
All these little things put together would have been an uneeded headache for the player and detracted from the fun of the game without adding (even slightly) to the game's simulation of events. I hope you agree. Feel free to add in any homespun rules you like.
Player's Notes
The most important thing you'll find in Afrika is that you must guard your rear areas. For the Allied Player, this means Alexandria and Cairo. For the Axis, it means all those inefficient little ports of yours. It is possible, should the Allied player abandon Alexandria and Cairo right away, for the Italians to win the campaign game on turn 2! Recon and armored units in the game are terribly fast. Don't cry to me if your port gets taken becuase you left it undefended and some little unit zipped in to take it!
For the Axis player, I can only offer a little advice—go for the sudden death victory whenever you can. If you let the game bog down into straight, to-the-bitter-end, attrition, you'll probably come up on the short side of the stick. An aggressive Italian strategy is good at start as long as you can keep them fed—if not, you are in for a disaster. Remember to assist yourself in building up for future offensives during lulls by assigning air points to Malta Suppression. A few turns of max effort there while the airforce is unneeded elsewhere can reap big dividends. In otherwords, don't use your air points for long range pesky bombardment during lulls—the Allied player will, but he can afford to!
For the Allied Player, I suggest leaving a strong garrison in Mersa Matruh and pulling everyone else back deeper into Egypt at the start. If the Italians want to advance, let them. Killing those Italian divisions isn't at all easy while they are supplied. Killing them when out of supply is a snap. That should be the cornerstone of your pre-German entry strategy—destroy as many Italian divisions as possible using the Surrender Rule. Draw him forward, build up a decent force, and then rush his rear. If successful, you will occupy Tobruk and Bardia and in a turn his army will simply evaporate. After you have duplicated the late-1940, early-1941 British offensive, pray the withdrawal rolls are kind and be prepared to defend your gains. The game will go back and forth several times after the starting Italian Offensive, but you (as the Allied player) must see to it that the Germans, when they enter, have a disaster to deal with first. Anything else, and you will have a harder road to travel for the rest of the game, because the surviving Italians will come back with a vengence under Rommel, while most in the dead pile will never see the light of day again.
Axis Order of Arrival
| Turn | Month | Units |
|---|---|---|
| 2 | Oct 40 | It: 5 AT Bn |
| 4 | Dec 40 | It: Med Armor Group, 29 AT Bn |
| 5 | Jan 41 | It: (Comp Recon, 132 Tank Rgt (less one step), 8 Brs (less one step), 132 Artillery Rgt)-Areite Div, 10 Brs Rgt, 2 Artillery Rgt |
| 6 | Feb 41 | It: (61, 62, 7 Brs)-Trento Division (Use Trento Division unit counter if Trento Truck Option is in play); Ge: Rommel, (3 Recon Bn, 5 Pz Rgt, 39 PJ Bn)-5 Le Div |
| 7 | March 41 | Ge: 2 MG Bn, 8 MG Bn, (605 PJ Bn)-5 Le, 1-18 Flak Bn, 606 Flak Bn |
| 8 | April 41 | Ge: (15 MC, 33 Recon, 115 Shu)-15 Pz Div, (104 Shu)-5 Le |
| 9 | May 41 | Ge: (155 Artillery)-5 Le Div, 104 Artillery Bde, (8 Pz Rgt, 33 Artillery Rgt, 33 PJ Bn)-15 PzDiv |
| 10 | June 41 | Ge: (361 Inf Rgt, 190 Artillery Rgt)-90 Le Div |
| 11 | July 41 | Ge: 288 Inf Rgt |
| 12 | Aug 41 | It: Recam Recon Grp |
| 13 | Sept 41 | It: (65, 66, 9 Brs)-Trieste Division; Ge: (155, 200)-90 Le Div |
| 16 | Dec 41 | It: (3-Lnvra Recon, 133 Tank Rgt (less one step), 133 Artillery Rgt, 12 Brs (less one step))-Littorio Arm Division |
| 17 | Jan 42 | It: GGFF (less one step), San Marco Marine Bn, Lehr Parachute Bn |
| 21 | May 42 | Ge: (580 Recon)-90 Le Div, KG Hecker exchange (if desired) |
| 23 | July 42 | It: 501 AT Bn, 503 AT Bn; Ge: 1 Afrika Artillery Rgt |
| 24 | Aug 42 | It: Pistoia Division, (186, 187)-Folgore Div; Ge: Ramcke Airborne Bde (remove Lehr Bn from play or dead pile permanently), (220 Recon, 125, 382)-164 Div |
| 25 | Sept 42 | Ge: (433)-164 Div |
| 27 | Nov 42 | It: Spezia Div |
Allied Order of Arrival
| Turn | Month | Units |
|---|---|---|
| 2 | Oct 40 | (14)-70 Div, (7 Ind Bde)-4 Ind Div, Polish Bde |
| 4 | Dec 40 | (20 Aus Bde)-9 Aus Div, (16 Aus, 17 Aus, 19 Aus)-6 Aus Div (**Each unit of 6 Aus Div is less one step) |
| 5 | Jan 41 | (KDGds, 1 Arm, 3 Arm, Support Grp, Divarty)-2 Arm Div, (18 Aus, 21 Aus)-7 Aus, (6 NZ)-2 NZ Div |
| 6 | Feb 41 | (24 Aus, 26 Aus)-9 Aus, 22 Gds Bde |
| 7 | March 41 | 3 Ind Bde, (25 Aus)-7 Aus Div, (5 NZ)-2 NZ Div |
| 9 | May 41 | (5 SA)-1 SA Div |
| 10 | June 41 | (2 SA)-1 SA Div, (3 SA, 6 SA)-2 SA Div, (150)-50 Div |
| 11 | July 41 | 1 Army Tank Bde, (1 SA)-1 SA Div, (29 Ind)-5 Ind Div |
| 12 | Aug 41 | (4 SA)-2 SA Div, 1x Artillery Grp, LRDG Grp |
| 13 | Sept 41 | 4-6 SA Cav Rgt, 1x Artillery Grp, 32 Ar Tank Bde |
| 14 | Oct 41 | 22 Arm Bde |
| 16 | Dec 41 | (12 Lancers, 2 Arm Bde, Support Grp)-1 Arm Div |
| 17 | Jan 42 | 1 French Bde |
| 18 | Feb 42 | (69, 151)-50 Div |
| 19 | March 42 | (8 Arm)-10 Arm Div, 21 Ar Tank Bde |
| 20 | April 42 | 2 French Bde, (9 Ind, 10 Ind)-5 Ind Div |
| 22 | June 42 | 18 Ind Bde, 161 Ind Bde, 9 Arm Bde, (20 Ind, 21 Ind, 25 Ind)-10 Ind Div |
| 23 | July 42 | (131, 132, 133)-44 Div, 1x Artillery Grp, 23 Ar Tank Bde |
| 24 | Aug 42 | (Divarty)-1 Arm Div, (152, 153, 154)-51 Div |
| 25 | Sept 42 | 1 Greek Bde, (Royals, Divarty)-10 Arm Div |
| 26 | Oct 42 | (24 Arm)-10 Arm |