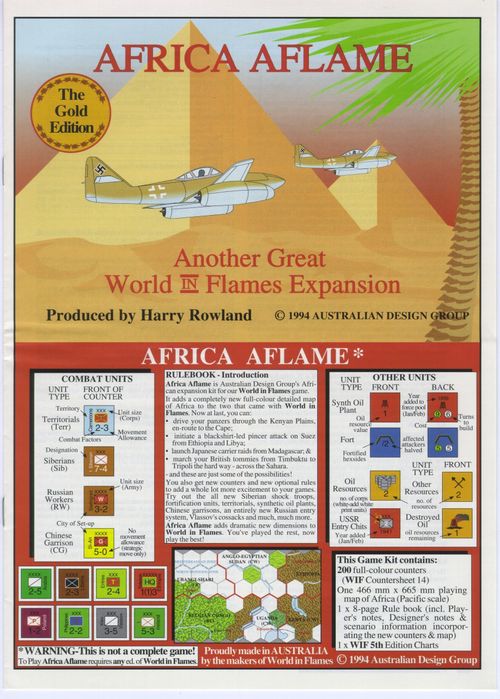
Africa Aflame
Africa Aflame Rulebook
Table of Contents
Table of Contents
Africa Aflame Gold: Rules
Africa Aflame (AfA) is an expansion kit for World in Flames (WiF). All 5th edition World in Flames (WiF5) rules apply, except as explained here. The Gold rules have incorporated all the errata and some new rules. Is it possible that ADG has produced errata-free rules? Probably not!
This Africa Aflame booklet contains everything you need to know to set up the new African map and counters for your next game of WiF.
Whenever rounding is required, retain fractions until all halving is complete, and then round the remaining fraction to the nearest whole number (0.5 rounding up).
Editor's Note: I used the higher resolution counter images from AfA/AsA 1997 Update kit instead of the counter images from AfA Gold 1994. There are many differences between these counters, such as the factors that are different between the units. Where possible, I provided examples to highlight these differences. Also, for example, the following units that appear in AfA Gold 1994 were removed from the AfA/AsA 1997 Update kit: Ireland units, Ethiopian units, Chinese GARR unit, Russian Work units, extra Resources etc. Even the colors may be slight different – more due to the orienting process than anything else.
1. Africa Map
You can add the African map to any WiF scenario. If you are playing a scenario that uses the European map, place the African map to the south of the European map. If you are playing a scenario that only uses the Pacific map, place the African map to the west of the Pacific map (where it mates exactly with the eastern half of India).
To move from a hex on the African map to one on the European map, you must through a lettered hexside on the African map to a hex on the European map with the same letter. You reverse the procedure to move from the European map to the African map.
Similarly, a unit on the European map can only attack, or be attacked by, a unit on the African map through a hexside which shares the same letter as its hex on the European map.
Zones of control extend from hexes on one map to hexes with the same letter on the other map.
The top of the African map has these letters already printed on its hexsides. You will have to mark the European map with the same letters. Simply write a capital 'A' in the hexdot in the Persian Gulf, a 'B' in the Kuwait hex, and so on to a capital 'Z' in the '(IT)' part of the name 'Libya (IT)'. In the next hex, you write a lowercase 'a' and so on until you reach a lowercase 'w' in the bottom coastal hex in Morocco.
The 'A' hex dot in the Persian Gulf connects to the two African map coastal hexes at the tip of the Persian Gulf. This is indicated on the African map.
1.1 Scale
The African map uses the same scale as the Pacific map. All the movement costs and supply ranges that apply on the Pacific map also apply here.
1.2 Off-map boxes
The African map somewhat changes the arrangement of the sea zones between India and Africa. The new arrangement replaces the old. All African land sections are replaced by the hexes on this map.
1.3 Desert & Desert Mountains
In addition to the other restrictions on desert movement and supply, if an HQ traces supply through any desert hexes, it may only supply a number of land and aircraft units this impulse up to the HQ's reorganization value. You may supply one unit in one impulse and another in another, but you must specify at the start of the impulse, which aircraft and land units are in supply.
The new terrain type of Desert Mountains has the movement and combat effects of mountains but the weather and supply effects of desert.
1.4 Qattara Depression
The Qattara Depression hexes are prohibited terrain. Aircraft can fly over them but cannot base there. No other unit can set up in or enter those hexes.
1.5 Reference Towns
Some towns are represented in grey. These towns are not big enough to be cities. You can start or end a strategic move at reference towns but only one unit can start or end a strategic move in each reference town per impulse.
Only 1 unit may strategically move to or from a reference town per impulse.
Reinforcements may not arrive at reference towns. Even if a country's capital is a reference town, an enemy unit still conquers it by controlling its capital (WiF5 14.).
You don't have to resolve a combat against a reference town on the Assault table. A reference town isn't a supply source. The other terrain in the hex determines stacking except for aircraft. 1 aircraft is allowed to stack in a reference town.
1.6 Kuwait
The Kuwait hex on the European map is no longer Kuwait. It is now an extra Iraqi hex. The Kuwait hex on the African map is the real Kuwait.
1.7 Railways
Instead of the standard rule preventing strategic movement in Africa (WiF5 10.7.3), you can move strategically along railways. The unit must start on a city, port, or reference town on a railway. It can then move along any number of controlled railway hexes to another city, port, or reference town.
Furthermore, resources may only be transported overland (see WiF5 9.1) along railways.
The European map parts of Egypt, Palestine, Trans-Jordan, Arabia, and Syria are fully railed like other parts of the European map. Railways on the African map join up to the net at the points where they meet the European map.
Libya is still unrailed. Tunisia, Algeria, Morocco, and Er Rif are still unrailed except for a railway which runs from Tunis, along the coastline until it reaches the Er Rif border. It doesn't cross that border but swings south-west into Morocco where it follows the hexes along the border until it reaches the coastal hex. From there, it forks; one line running north-north-east 2 hexes along the coast to Tangier and the other running south-west along the coast 3 hexes to Casablanca. You should mark these rail lines on the European map.
The blue railway in the Belgian Congo is actually river transport which linked to the rail net. Treat it as a railway for all purposes.
1.8 French Territories
As well as the southern portions of Algeria and Morocco, there are five new French territories on the African map:
- French West Africa (consisting of Mauritania, French Sudan, Senegal, French Guinea, Ivory Coast, Upper Volta, Togo & Dahomey, and Niger Colony);
- French Equatorial Africa (Cameroons, Gabon, Middle Congo, Ubangi-Shari and Chad);
- French Somaliland;
- Madagascar (including the Comoro Islands); and
- Reunion Island.
If Germany installs a Vichy government, a die roll of 1-5 converts French West Africa to Vichy control. A die roll of 1-4 does the same for Madagascar, Reunion, and French Somaliland. A die roll of 1-3 does the same for French Equatorial Africa.
As Japan, you may choose to occupy Madagascar if it is presently a Vichy territory, and Japan has occupied French Indo-China in a previous turn. Apply the same rule (WiF5 11.5.2). The US Entry Modification has an automatic "*" in addition to the extra die roll against Action 1.
1.9 Commonwealth Territories
South Africa is a Commonwealth home country. All other Commonwealth territories on the African map are Commonwealth-controlled minor countries.
1.10 Belgian, Danish, Spanish & Portuguese Territories
The territories controlled by these minors are treated as a Govt.-in-Exile (WiF5 14.2) once someone declares war on that minor.
Iceland may be occupied by the USA (US Entry Option 3 - WiF5 11.5.1) even while Denmark is neutral. The US must still roll for US Entry even if the Commonwealth currently controls it (due to invasion, a friendly coup, or enemy control of Denmark).
1.11 New Resources & Victory Condition Hexes
The African map contains a few more resources and victory condition hexes than the land sections it replaces used to. This is intentional. The new victory condition hexes are Aden, Cape Town, Dakar, and Diego Suarez.
2. Counters
These are explained on the front page. All these counters may be built during National Effort (see WiF5 22.0).
2.1 Ethiopian Units
You will only need Ethiopian units for playing Days of Decision with the African map. Ethiopian units are available if Ethiopia is liberated (WiF5 14.3).
Editor's Note: The Ethiopian images on the left are images from AfA Gold 1994. They do not exist in the AfA/AsA 1997 Update kit.
Ethiopian units are controlled by the CW player at the start of the Days of Decision 1936 Game. If war can lapse against Ethiopia, it only lapses if the CW chooses to do so.
Each Italian aircraft's tactical factors are doubled against Ethiopian units. [Designers' Note: Italy illegally used Gas against Ethiopia].
2.2 Irish, Liberian and Arabian Units
Treat these units like those of any other minor country. They are set up when the country is declared war upon or when it joins aside (WiF5 18.1).
Editor's Note: The 2 Ireland units on the left, which only come with AfA Gold 1994 and not in the AfA/AsA 1997 Update kit. The Liberian and Arabian units are from the AfA/AsA 1997 Update kit.
3. Optional Rules
Each of the following rules is optional. You can add any of them as you see fit.
3.1 Chinese Garrison Units
Discard any Chinese garrison units you have from the first edition of Planes in Flames. The units provided here replace them.
Editor's Note: I only have low resolution images from AfA Gold 1994. They do not exist in AfA/AsA 1997 Update kit.
Chinese garrison units are Militia (Iv1IL). However, you can only move garrison units by strategic movement and cannot advance them after combat. They can't leave, or attack outside of, China and Occupied China.
If its city is Chinese-controlled, you can only place a reinforcing garrison unit on that City.
If its city is not Chinese controlled, its garrison is removed from the game. It is returned to the Chinese force pool immediately that city is next Chinese controlled.
Set up each Chinese garrison unit in its named city if it is Chinese controlled at the start of the scenario being played.
3.2 Territorial Units
Some of the controlled minor countries have one or more territorial units.
Territorial units form a new force pool but count against infantry gearing limits. They take as long to arrive and you build them for the same cost as MIL units.
Territorial units can only be built by the Major Power that currently controls the Territorial's country. They can only arrive as reinforcements on a friendly controlled city (not a reference town) in their country.
All of a minor country's territorials are set up in a territory (not the home country) of that minor when it is declared war on or fast enters the war.
The Italian AOI can be built provided any of Ethiopia, Eritrea, or Italian Somaliland are Italian controlled. When built, it is placed on the map in a city in any of these countries. The Italian East African territorials are only available while Ethiopia is an Italian controlled country and must set up there when they are scheduled to arrive as reinforcements.
For all purposes, Territorials are treated as minor country units controlled by a major power or minor country (exception: the AOI may cooperate with all other Italian territorials). Territorials may only leave their territory while their controlling major power or minor country are at war.
All of a minor country's territorials are set up in a territory (not the home country) of that minor when it first enters the war.
If you establish a minor country Govt.-in-Exile (see PiF 17 - WiF5 Errata 14.1.3), all its territorials remain on the map under its control rather than needing to roll for survival (see WiF5 14.1.1) provided those territorials are in their own territories.
Territorials are treated just the same as any other units of the controlling Major Power except:
a) they may not cooperate with any units of other territories or minor countries or other Major Powers that may cooperate with the controlling Major Power, and
b) territorial units may only leave their territory while their controlling Major Power or minor country are at war with a Major Power. Furthermore, a territorial may only leave its territory if less than half of its territorials that are on the map are currently outside that territory.
For movement purposes only, territorial units treat mountain, forest, and jungle terrain as clear in their own country. They pay normal movement costs outside their own country.
The Philippines' territorial may be built by the US player even before the Philippines are reinforced (see WiF5 11.5.1 - US Entry option 23).
3.3 Partisan Units
When a minor country is selected on the Partisan Table and is eligible for partisan activity, you can place a partisan unit in that country, if one is available, instead of rolling for partisan activity (WiF5 11.1). The choice is made by the player who controlled the country prior to conquest (or enemy occupation) and adversely affects only the aggressor (the enemy MP(s) occupying part or all of its territory).
Editor's Note: I only have low resolution images from AfA Gold 1994. They do not exist in the AfA/AsA 1997 Update kit.
A non-Russian partisan unit may only be placed on the map (in its home country) if the sum of the roll of two dice is greater than the garrison value (see WiF5 17.2) in that country.
The Commonwealth player controls the French partisan unit. It can enter hexes in Belgium and the Netherlands as well as those in France, after those hexes become Axis controlled.
The US player controls the Italian partisan unit. It is only available after Italy is conquered by the Allies.
Place these units, and otherwise treat them, like Russian partisan units (WiF5 11.2). They can only move and attack within their home country. You can now attack with Russian partisan units as well.
Example: Regardless of whether Russia declares war on Finland or Germany and its Axis minor Finland declares war on Russia, Germany will control the Finnish Partisan. It may still only be placed in a Finnish hex out of the ZOC of an enemy ZOC, and if none exist, may not be placed.
As well as the effects partisan units normally have, you should subtract the number of partisan units in a country from the conquering Major Power's garrison value before resolving normal partisan consequences in that country.
3.4 Russian Worker Units
Russian worker units form a new force pool but count against infantry gearing limit. They take as long to arrive as MIL units and 1 BP to build.
Editor's Note: I only have low resolution images from AfA Gold 1994. They do not exist in the AfA/AsA 1997 Update kit.
They are placed in the force pool whenever any enemy Major Power unit is occupying any hexes or land section on the European (and Asian if you are playing with Asia Aflame) map(s). If destroyed while no enemy MP unit is on this map(s), the unit is removed from the game rather than returned to the force pool.
You can only place a reinforcing worker unit on its city if that city is Russian controlled. If a worker city isn't Russian controlled during a production phase, its worker unit is removed from the game. Worker units move and attack as MIL units. They may not leave or attack outside of Russia.
If you use this rule, all cavalry units (not just Russian) cost two build points.
3.5 The Vlassov Unit
Add the Vlassov unit to the German cavalry force pool as soon as Kiev is Axis controlled. You can build it like a normal cavalry unit, but it can only arrive as a reinforcement in Kiev.
The Vlassov unit is removed from the game when Kiev is again Russian controlled during any future production phase.
The Vlassov unit can only co-operate with German units.
3.6 Fortification Units
You can build fortification units for 5 build points. They take 5 turns to arrive (use the TRS symbol on the Production Spiral). They are not subject to a gearing limit.
Editor's Note: AfA Gold 1994 introduced the 3 hexside fort. The 1 hexside and 2 hexside forts are from Mech in Flames 1995.
A Major Power can place reinforcing fortification units in any hex or land section (even outside your home country) controlled by that Major Power (not friendly Major Powers), that is not in an enemy ZOC.
No more than two fortification units can occupy the same stack except an already fortified hex (e.g. Gibraltar) where only 1 may be placed. You can voluntarily remove them in any Production Phase. You must remove them as soon as their hex or land section becomes enemy controlled.
A Fort has no further effect on an already fortified hexside (the effect of printed fortified hexsides superseding that of fort counters).
Fortification units cannot move. They do not control their hex or land section. They have no intrinsic combat value. Their combat benefits are not affected by lack of supply.
Land units attacking through fortified hexsides halve their combat value (in addition to any other modifiers). A unit landing on the stack by paradrop is never halved by a fortification unit. If any land unit attacks through a fortified hexside, the Assault table must be used.
The orientation of the counter determines which three contiguous hexsides are fortified. If two fortification units occupy the same stack (or 1 is placed on a fortified hex), they can be oriented to fortify all six hexsides.
If a stack in a land section is fortified, units from the first three stacks that attack it are attacking through a fortified hexside.
3.7 Alternative Convoy System
You no longer get a free Resource Transportation move in a Land or Combined impulse.
For all campaigns commencing in 1936, 1 additional Japanese CONV is added to the on-map units. For all campaigns commencing in 1939 & 1941, 2 additional Japanese CONV are added to the on-map units.
3.7.1 Introduction
Replace the present resource transportation system with this system. You set up CONVs and TRSs as per the World in Flames set-up except that, for all campaigns commencing in 1939 & 1941, 1 additional Japanese CONV is added to the on-map units.
CONVs have the same values as TRS (movement of 4 sea-areas and 1 AA factor).
TRSs may only transport land and aircraft units (and Minisubs if playing with them). To convert a CONV to a TRS and vice versa is a naval repair (i.e. costs 3 build points and takes 2 turns).
CONVs may only transport resources. At any one time, they can carry a maximum of 3 resources each.
3.7.2 Resource Transport Move
The only activity performed in the Resource Transportation Segment is designating which resources are moving (exclusively) overland to factory sites.
There is a new sort of naval move; the resource transport move. Each resource transport move counts against your Naval Moves limit (WiF5 10.2.2).
A resource transport move is just like a naval move except that:
- only CONVs and escorting naval units can take part; and
- the CONVs can only carry resources.
When a CONV starts a resource transport move, it can pick up resources. Designate which resources it will take and move them by overland transport to the port (WiF5 9.1). Make sure that you use an oil barrel marker for oil resources and the pick and shovel marker for other resources. Mark the resource hex with the reduced number of resources (use either marker for this purpose).
Alternatively, a CONV performing a resource transport move can end its move in a sea area and pick up resources from a friendly controlled port in that sea area. Move the resources to the port in the same way.
When a CONV starts an impulse in a port or moves into a sea area next to a port, it can load resources at that port. Move them onto the CONV. You can make changes with the counters provided if necessary.
A CONV may load one resource per impulse from each non-port coastal hex. It may load and/or unload 2 resources per impulse from/to each minor port. You may load and/or unload any number of resources per impulse from/to each major port.
CONVs may only pick up resources in the impulse they move and must cease their movement in the sea area in which they pick up resources.
As a further restriction, a CONV may load/unload a maximum of 1 more resource than the sea-box search number that it occupies (e.g. a CONV in the '2' or '3' sea-box section may pick up a maximum of 3 resources from a major port, 2 from a minor port, or 1 directly from the coast, and only in the impulse that it moves).
If unloading during an action impulse, each resource unloaded counts as 1 land move.
You can't unload resources or Return to Base into Archangel in Winter or Severe Winter. Similarly, in Winter and Severe Winter, Germany can only load the Finnish, Swedish, and Norwegian resources onto a CONV from Oslo and then only if neither Narvik nor Bergen is Allied controlled.
3.7.3 Naval Combat
There is now no convoy attack phase. Instead, CONV transporting resources suffer the effects of naval combat and port strike in the same manner as TRS in WiF5. However, if a CONV carrying resources suffers an 'X' (sunk), 'D' (damaged), or 'A' (abort) result in any combat, its cargo is destroyed.
If a SUB intercepts (WiF5 10.5.5.1) any stack of naval units (not just those transporting resources), the naval units receive support from friendly face-up aircraft in the sea-area. Subtract -2 from the SUB roll if one or more such NAVs are in the 3 sea-box. -1 if in the 2 box. The return roll of the naval units are unaffected by the NAV. Other friendly face-up aircraft with naval-air factors provide more limited support, -1 from the SUB roll if any such aircraft are in the 3 box.
3.7.4 Partisans
When a country loses its resources through partisan effects (on the Partisan Table, not because of partisan units), you must remove any resources transported from or through that country to a CONV, regardless of where they are now.
3.7.5 Return to Base
The Return to Base Phase occurs immediately before the Production Phase.
CONVs in a sea area return to base in the same way as any other surface naval unit (WiF5 11.7.1).
Unloading may not occur during the Return to Base Phase.
All Major Powers (except the US) CONVs (but not their escorts) may return to base to neutral or friendly ports.
If you are in a neutral port when that country becomes an enemy (i.e. it declared war on you or you on it), your naval units must be rolled for. If a '1' through '3' is rolled, the destroyed unit is replaced by a randomly chosen unit of the same type from the force pool of the Major Power that controls the port. This unit is placed face-down in that port. On a '4' or '5', it is removed from the game. On a '6', it remains on the map under the control of the owning player, and must immediately rebase to a friendly port, then turning face-down.
3.7.6 Production
At the start of the Production Phase, perform overland transport of:
- resources from resource sites; and
- resources from CONVs in ports;
to factories in the normal way (WiF5 9.1).
At the end of the Production Phase, remove any reduced resource markers and any resources which are not on a CONV unit.
Resources loaded on a CONV can stay with the CONV for as long as you like (so you can save them from turn to turn).
3.7.7 Lending Resources
You can now lend and be lent resources in the same turn.
While the USA is required to lend resources to Japan, the US player must always return to base 3 CONVs on the US West Coast land section. These CONVs must move the required number of resources in a resource transport move from the US West Coast to the Okhotsk Sea in the first Allied impulse in each turn. They must stay there until the return to base phase (dropping off the resources in the Japanese Major Port in that sea area before doing so). The Japanese player may immediately load these resources onto any Japanese TRS in the Major Port (i.e., before production).
All lent units are turned face down when they are replaced with a recipient's unit. Naval units may not be lent in this manner but can be lent as described in WiF5 11.6.2.6, SiF 15.9, and SiF 13.1.
3.7.8 US Entry
From the turn that the US plays US Entry Option 7 or Option 11 (US may lend 5 resources to the CW or Russia), US CONVs may return to base to any port in the United Kingdom. The US CONVs are ignored for combat purposes until the US is at war with Germany. If their CW base is occupied by Axis units, they are placed on the Production Spiral to arrive as reinforcements in the following turn.
From the turn that the US plays US Entry Option 5 (US may escort in American East Coast), CW TRS & CONVs may return to base to the USA off-map box and may be escorted by US naval units into the American East Coast sea-box (where the escorts are dropped off).
From the turn that the US plays US Entry Option 18 (US may escort in Central Atlantic), CW TRS & CONVs may be escorted by US naval units into the Denmark Strait (sic!) sea-box (where the escorts are dropped off).
3.7.9 Lend Lease
In order to lend-lease a country a unit now, you transport one of your units of that type to a friendly Major Power under the same restrictions as for resource transportation. As the unit is dropped off in the friendly Major Power port, it is converted into a random unit of the same type but from the friendly Major Power's force pool. Your unit is then returned to the force pool.
You can lend-lease units and receive lend-lease units in the same turn.
Example: The US player decides to lend-lease an ARM to the Commonwealth this turn (having previously chosen US Entry Option 19). Franklin declares a combined impulse and uses one of his naval moves to transport an ARM to the North Atlantic sea area.
The ARM may only be unloaded in the Return to Base phase (lend-lease having the same restrictions as for unloading resources), so the US player waits patiently until the end of the Action Phase (the US being invulnerable to the Axis until at war). At the start of the Return-to-Base Phase, Franklin places the US ARM back in his force pool while Winston randomly picks an ARM (the Canadian, by chance) from his force pool, placing it in Liverpool (adjacent to the North Atlantic Sea Area).
If lend-leasing to Russia via Persia, the unit is placed in Astrakhan provided Teheran and Astrakhan are Allied controlled.
If playing Planes in Flames, lend-leasing aircraft units are placed in the Reserve Pool if no pilots are available for the recipient Major Power.
3.8 Oil Resources & Synth Plants
The total number of offensive chits, and naval, aircraft, HQ, and ARM units you can build in a turn is limited by the number of oil resource points you turn into build points in that turn. You can always build one of these units even if you have no oil resources available. Only 1 of these units may be built at each factory, and only at factories which have not lost all their build points due to Strategic Bombardment.
The US has the same total of resources as stated on the map (40) but 13 of them are now oil resources (not 3), 5 extra in the USA and 5 extra on the West Coast, leaving only 27 non-oil resources in the USA and US West Coast.
The oil synth plant units (not the oil barrel markers) represent the creation of artificial oil plants. You can build them for 7-9 build points (as marked). They take 6 turns to arrive (use the HS symbol on the Production Spiral).
You can place them on any friendly controlled hex and thereafter they produce 1 oil resource point per turn for whoever controls the hex.
If you get an asterisk result ("*") against an oil resource hex on the Strategic Bombardment Table, the hex is reduced by 1 oil resource point. Use the oil destruction markers to show the reduced number.
Oil resources are repaired in the same way and for the same cost as factories (4 BPs and 2 turns). Use the oil barrel markers with your control marker on top to show that you are repairing an oil resource.
Half the resources Russia must lend to Germany and those that the US must lend to Japan, are oil resources.
Each Oil synth plant has an intrinsic anti-aircraft value of 1 (see ASA - 3.2.2).
3.9 Alternate Russian Entry
Instead of point (c) in the present system used to permit Russia to declare war on Germany or Italy (WiF5 17.2), try this.
Russia cannot declare war on any country in 1939.
At the start of 1940, put the 10 Russian entry chits marked '1940' into an opaque cup. In 1941, you add the 6 '1941' chits to the cup, and so on.
At the end of each turn starting with Jan-Feb 1940, the Russian player secretly pulls one chit from the cup.
If Germany declares Finland, Hungary, Rumania, or Turkey in the war, Russia immediately pulls two extra chits and then adds the entire next available year's chits to the cup.
If Russia declares limited war on a minor country, randomly select one of the chits already chosen and put it back into the cup. If a full declaration is made on: Finland, Hungary, Rumania, or Turkey, 4 chits go back; on any other minor, 3 chits go back; or, if Russia declares war on a Major Power, 5 chits go back. If not enough chits have already been chosen, the deficit is reduced, instead of choosing chits when due, until the deficit is cleared.
The Garrison ratio when using the Alternative Russian Entry System is that specified in WiF5 17.2 rather than a standard double over the years.
[Designers' Note: We wanted to make the Russian entry slightly tougher and a bit more unpredictable for the Germans, rather than a Russian walkover victory in 1941!]
If the garrison ratio (see WiF5 17.2) of Russian units (counted normally) plus the garrison value of the chits drawn so far is greater than the German garrison value (counted normally), then Russia may declare war on Germany and Italy.
There are two Russian entry chits printed in white. When the first one is drawn, add the non-GD white print INF and the 4th-9th GD ARM units to the Russian force pools. When the second one is drawn, add the remaining Russian white print units to the force pools. This replaces the relevant parts of the Russian force pool additions in appropriate scenarios.
If you use this rule, the Russian production multiple is only '1.5' when it would otherwise be '2' (WiF5 11.6.2.2) while there is not 1 German, Japanese, or Italian unit on either the Asian map (contained within Asia Aflame) or the European map, in:
- the USSR;
- Estonia, Latvia, or Lithuania; or
- Poland or Rumania east of the Russo-German partition line.
3.10 Saudi, Iraqi and Persian Resources
Provided they are neutral, Iraqi, Persian, and Saudi Arabian resources are available to the Commonwealth from the start of each scenario. However, France has the right to transport 1 resource per turn from Iraq (while it is neutral) to a factory in France.
3.11 Alternate Land CRT
On page 11 of this rule book, you will find an optional Land Combat Results Table (transcribed below as the 2 Die 6 Land Combat Results Table). Instead of rolling one die, you now roll two dice and add their results together. You compare this roll to the appropriate column, either Assault or Blitzkrieg, which you choose in the normal way. The results mean the same things they normally do.
There are a number of modifiers to the dice roll, some necessary, some optional.
The necessary ones are:
- a replacement for the odds columns on the standard tables. You work out the odds in the usual way (except that there are some new odds levels - 9:1, 8:1, 6:1, 3:2, 2:3, 1:3, 1:4, 1:5, and <1:5). For 3:2 odds, there is a '+1' modifier to the dice roll. For all other odds greater than 1:1, you add the odds level (e.g. if the odds are 4:1, the modifier is '+4'). If the odds are 2:3, the modifier is '-1'. If they are 1:2, the modifier is '-2'. If they are 1:3, the modifier is '-4'. If they are 1:4, the modifier is '-6'. If they are 1:5, the modifier is '-10' and, if they are less than 1:5, the modifier is '-20'. All of these modifiers are listed on the Table;
- a '+1' for each face-down land unit in the target stack (including HQs);
- a '-1' for each different major power or minor country beyond the first which has a unit attacking the target stack (note that territorials are considered major power units). For example, if a Commonwealth, US, and Free French unit attacked the same hex, there would be a '-2' modifier;
- a '+1' if the attacker successfully adds HQ support and a '-1' if the defender successfully adds HQ support;
- a '-1' if the target hex is in a weather zone experiencing Mud weather. If the weather is Winter or Monsoon, the modifier is '-2' and, if it is Severe Winter, the modifier is '-3'. (Note: If half the attacking units are ski, Russian white print, Finnish, Swedish, or Norwegian units, the owning player may elect to attack as if in mud (die roll modifier of -1). If so chosen, their first loss must be from these units); and
- a '-1' modifier if the target hex is forest terrain. If it is jungle, the modifier is a '-2', unless the attacking units are Japanese, in which case it is a '-1'.
The optional modifiers are:
- A Blitzkrieg modifier (only applies if the hex to be attacked using the Blitz table, is in a weather zone experiencing clear weather). The modifier is '+1' if the attacker has more than twice as many ARM units as the defender has ARM, AT &/or AA. If the defender has more than twice as many ARM units as the attacker has ARM, AT &/or AA, the modifier is '-1'. In either case each corps/army unit = 2 division/brigade units;
- If all defending land units are territorial (rule 3.2), and all attacking units are not territorials, there is a '+1' modifier;
- If all attacking land units are territorials, and all defending units are not territorials, there is a '-1' modifier.
If using this combat results table system, an overrun (WiF 10.7.4.2) now requires a final modifier of +8 during the movement of 1 stack of land units.
When calculating whether you have the required "+8" during an overrun, you do include the armor modifier (in addition to all other modifiers), if playing with that option.
If using this combat results table system, then whenever WiF5 mentions an unmodified '6' being rolled in land combat, this is converted to a result of '10' through '12' on the 2 Die 6 table.
4. Setting Up
First, choose which scenario or campaign you wish to play (see WiF5 26-28) and which maps, counters, and optional rules you intend to play with.
4.1 Maps
Lay out the African map (back-folding if necessary) in any position convenient to you.
You may use the African map with both the European and Pacific maps.
If playing one of the single-map European games (WiF5 26.2 & WiF5 27.4), India on the African map is out-of-bounds (i.e., prohibited hexes).
4.2 Counters
4.2.1 Introduction
Cut out the counters (using a sharp knife will produce the cleanest edges).
All units with an availability date (on the back of the counter) of a future year (compared to the start date of the scenario) are placed to one side. These are only available at the start of that year.
The remaining combat units are placed into force pools and are available to be built from the start of this scenario.
4.2.2 Oil, Other Resources and Destroyed Oil
The oil resources, other resources, and destroyed oil markers are available from the start of the scenario. No oil is destroyed at the start of any scenario.
4.2.3 Oil Synth Plants
Editor's Note: Images on the left are images from the AfA/AsA 1997 Update kit which matches those of AfA Gold 1994. On the right are additional images from AfA Gold 1994 only.
In all scenarios & campaigns starting in 1939, Germany starts the scenario with 1 oil synth plant set up on the map. In all scenarios & campaigns starting in 1941 or later, Germany starts the scenario with 2 synth oil plants.
Editor's Note: The 2 images from AfA Gold 1994 are on the left (front and back). The 2 images on the right are images from AfA/AsA 1997 kit (front and back).
No other Major Power begins the game with any synth oil plants.
4.2.4 USSR Entry Chits
These chits are available in games commencing in 1936, 1939, and 1941. If playing the 1936: Days of Decision Campaign Game, the '1940' chits are added 2 turns after the start of General war, the '1941' chits 6 turns later, etc.
If playing any game starting in 1939, the '1940' chits are added in Jan/Feb 1940 as per normal (rule 3.9).
If playing the Lebensraum: 1941-45 campaign, the Russian player places the 10 '1940' chits in a cup and then pulls out 6. The Russian player then places the '1941' chits in the cup and pulls out 2 more chits from the cup. These are the chits already chosen at the start of the game and count towards the Russian total.
4.2.5 Forts
Forts may not be placed on the map in games commencing in 1936-39. For all games commencing after 1939, Forts may be placed on the map, or the Production Spiral provided an equivalent (or greater) amount of land build points specified to be set up on the map is instead placed in the force pool.
The units substituted must be those from that same minor country, home nation, or territory (e.g. you cannot remove a French INF from Indo-China to help you build a fort in Metropolitan France).
Your Forts are set up in any hex or land sections where your land units are permitted to set up on.
Example: Josef is setting up the Russians for the Lebensraum Campaign game (WiF5 28.3). He decides not to set up an ARM and 2 INF that are specified to set up on the map, placing two forts (both costing 5) on the map (inside the USSR) instead.
4.2.6 Partisans & Vlassov
Partisans are available from the start of all scenarios. However, none are initially set up on the map.
Vlassov is available while Kiev is German controlled. The unit starts all scenarios beginning after 1942 on the map on a German controlled hex in the USSR.
4.2.7 Workers
Workers are available from the start of all scenarios where an enemy Major Power unit is currently occupying any hex or land section in the USSR on the European (or Asian if playing with Asia Aflame) map(s).
If available, Worker units (chosen randomly) may be substituted for any cavalry scheduled to set up. The substituted CAV are returned to the force pool.
4.2.8 Siberians
Siberians are available from the start of all scenarios. They may be substituted for any INF specified to be set up in the same manner as Workers substitute CAV.
4.2.9 Chinese Garrisons
Chinese Garrisons are available from the start of all scenarios. They are set up in their city, provided it is currently Chinese controlled. All others are removed from the game (until their set-up city is again Chinese controlled).
4.2.10 Territorials
Territorials are available from the start of all scenarios in all countries that have any, provided that territory is not currently conquered.
In the 1936: Days of Decision campaign, set up one territorial unit (randomly chosen) on the map in each territory that has more than one territorial in the force pool. Additionally, the Italian player begins this game with Eritrean, Italian Somali & AOI Territorials set up in their territories (the AOI setting up in Eritrea or Italian Somaliland).
In all other campaigns, set up all but one territorial in each country having any.
Example: I am setting up the CW in the 1936-46 Days of Decision II campaign. I set up J of the 3 Indian territorials in India [the figure is printed as "J" in the source reconstruction; the intended number is not legible there]. In any other campaign involving India, I would set up 2 of the Indian territorials. In no game could I set up the Kenyan territorial as there is only 1 available.
4.2.11 Ethiopians
In the 1936: Days of Decision campaign set up all Ethiopians except 1 INF on the map anywhere in Ethiopia. That INF is placed on the Production Spiral to arrive as a reinforcement in the following turn. Italians specified to set up in Italian East Africa, must set up in Eritrea and/or Italian Somaliland instead. Italy is at war with Ethiopia.
In the 1936: Days of Decision II campaign, set up all Ethiopians and Italians as specified in the DoD II rulebook.
In games commencing in 1939, the Ethiopians are conquered by the Italians. Italians specified to set up in Italian East Africa can set up anywhere in Ethiopia, Eritrea, and/or Italian Somaliland.
In games commencing after 1939, the Ethiopians are controlled by the CW, but not yet liberated.
5. Player's Notes
Africa Aflame provides many new options and some intriguing possibilities for the Axis and the Allies in World in Flames.
The first thing you will notice about this map is the absence of a southern flank to the North African front. If you as Mussolini wish, you can start driving your forces southwards from Libya from the start of the game. However, the biggest difficulty about negotiating Africa is realizing just how darn big the place is. South Africa is 30 hexes from North Africa and unless you attack with a consistent goal in mind, the war will be over before you have got halfway there.
There are three basic directions you can launch any drive southwards. From Morocco south along the coast towards Dakar; a drive through the Sahara Desert towards the heart of darkness or a drive down the Red Sea towards Ethiopia.
For the reasons discussed above, the drive through the Sahara is the least optimal and doesn't particularly lead anywhere. Another advantage of the two coastal drives is that you will be in sea-supply (unless blocked by enemy naval forces) allowing you to supply more units.
Of the 2 coastal advances, the Red Sea drive appears to open up the most strategic possibilities. Gaining control of ports in the Arabian Sea will allow you to invade anywhere from Iraq to India, as well as threatening South Africa.
A particularly intriguing possibility for the Italians is to build up Italian East Africa with 2 HQs and 2 separate forces. Launch 1 force northwards towards Suez in conjunction with an attack from Libya while the second force launches a diversionary drive southward. It will be extremely difficult for the Commonwealth player to be able to simultaneously defend Suez, South Africa as well as France and Gibraltar. Something should give, and with luck, they all might.
For the Allies, Africa could well end up being the springboard for your drive back into Europe. Just as it is difficult for you to defend Africa early on in the war, it is very difficult for the Axis to defend North Africa when you return (particularly if the Axis are deep into Russia).
A critical area to counterattack is towards Suez (assuming you have lost it already). If you can break back onto the European map here, then you can drive into Iraq and pocket all German units in Persia and Southern Russia.
Wherever you decide to counterattack, the Axis will be scraping the bottom of the barrel to rustle up some defenders. After all those years with the Axis having the initiative, it is great at last to finally kick butt yourself!
Well, that's all for now. Good luck & Good gaming!
6. Designer's Notes
Africa Aflame is an attempt to add some extra flavor to World in Flames as well as correct some realism deficiencies.
The biggest change is the incorporation of the new Resource Transportation system. This has been introduced to correct the most glaring problem in the current CONV system, the lack of a capacity constraint on the Convoy pipeline. For a while, I toyed with the idea of establishing a capacity on each Convoy Pipeline you establish. The approach finally adopted will add more decision-making while also being more realistic.
The big side-effect of the new system is the ability to save resources (on TRS). These TRSs also represent the warehouses on the wharves, which is the reason you cannot save resources not loaded on a TRS.
The new USSR Entry System is an attempt to add more uncertainty to the German garrison requirement on the Russian border. Now, every spare German unit will be sent to the east to maintain the garrison, thus lessening the pressure that the Axis can maintain against the CW.
The territorials were included to represent the myriad forces stationed throughout Africa, especially the CW. Winston Churchill used to moan that his army chiefs kept telling him how many divisions he had, but he never seemed to be able to use them to stop 2 German Panzer divisions under Rommel. These units are cheap to build and should save you some build points when taking losses, so use them.
7. Bibliography
Would you believe 2 Boy's Own Annuals & a few war comics?
- Angelucci, E., Rand McNally Encyclopedia of Military Aircraft, The Military Press, New York 1990
- Bartholomew J., Joseph's Reference Atlas, London 1935
- Beevor, A., The Spanish Civil War, Orbis Publishing, London 1982
- Costello J., The Pacific War: 1941-1945, NY 1982
- Dyer G., War, London 1985
- Gilbert M. (ed.), Marching to War: 1933-39, London 1989
- Greene J., Handbook on the Italian Army in World War II: 1940-43, Cambria 1988
- Griess, T., Second World War in Europe, Asia and the Pacific, Avery Publishing Group, New York 1984
- Keegan, J. (ed.), Times Atlas of the Second World War, Times Books, London 1989
- Kennedy P., The Rise and Fall of the Great Powers, NY 1987
- Lamb A., The Drift to War: 1922-39, London 1989
- Salmaggi, C. & Pallavisini, A., 2194 Days of War, Gallery Books, New York 1977
- Taylor AJP, The Second World War, Penguin, Middlesex 1987
- Trevor-Roper H.R., Hitler's War Directives: 1939-45, London 1964
- Ulam A., Expansion and Co-existence: The history of Soviet Foreign Policy: 1917-67, NY 1974
- von Manstein E., Lost Victories, London 1982
8. Alternate Land Combat Results Table (2 Die 6)
- The same procedure for land combat is followed as in WiF5 10.7.6.7 except that: a. 2 six-sided dice are rolled for each combat rather than 1, b. the final odds are converted to a die-roll modifier rather than cross-referencing an odds column on the Land CRT, and c. you retain all fractions when determining odds.
- Priority when choosing Land CRT: a. Some terrain requires the Assault column (see TEC on Pacific Map), b. Attacker's choice if attacker has more ARM units, c. Defender's choice if defender has more ARM units, d. Attacker's choice if odds are 3:1 or better and attacker has any ARM, e. Otherwise, Defender's choice.
- All losses expressed as Attacker/Defender. a. - Attacker is not turned face-down. b. R - Remaining defending units must retreat. c. S - Remaining defending units that can retreat are removed from map & placed on Production Spiral to arrive as reinforcements in the following game turn. Units that cannot retreat are destroyed. d. B - 'S' result plus breakthrough (see WiF5 10.7.6.10).
| Die Roll | Assault | Blitz |
|---|---|---|
| 0 | 4/- | 3/- |
| 1 | 3/- | 3/- |
| 2 | 3/- | 3/- |
| 3 | 3/- | 2/- |
| 4 | 2/- | 2/- |
| 5 | 2/- | 1/- |
| 6 | 1/- | 1/- |
| 7 | 2/1 | 1/1 |
| 8 | 1/1 |
Odds Mods (die-roll modifier from the final odds):
| Odds | Mod | Odds | Mod |
|---|---|---|---|
| 10-1+ | +10 | 2-3 | -1 |
| 9-1 | +9 | 1-2 | -2 |
| 8-1 | +8 | 1-3 | -4 |
| 7-1 | +7 | 1-4 | -6 |
| 6-1 | +6 | 1-5 | -10 |
| 5-1 | +5 | <1-5 | -20 |
| 4-1 | +4 |
Other modifications (cumulative; a modified dice roll greater than 15 becomes 15, less than 0 becomes 0):
- Each face-down defending land unit (including HQs): +1
- HQ Support: +/-1
- More than one (co-operating) Major Power or minor attacking: -1 for each (excluding the first)
- * Non-territorials attacking territorials: +1 (optional)
- * Territorials attacking non-territorials: -1 (optional)
- Mud: -1
- Forest: -1
- Jungle: -2 (exception: Japanese -1)
- Winter: -2 †
- Monsoon: -2
- Severe Winter: -3 †
- * Optional
- † -1 in attacks involving half or more ski, Russian white print, Finnish, Swedish or Norwegian Infantry
Blitz attack modifier (* on the Blitz column; clear weather only):
- Attacker has more than twice the ARM units as the defender has ARM, AA or AT: +1
- Defender has more than twice the ARM units as the attacker has ARM, AA or AT: -1
- (Each Corps/Army = 2 Divisions/Brigades)
Overruns require a +8 modifier (including the Blitz attack modifier) during movement.