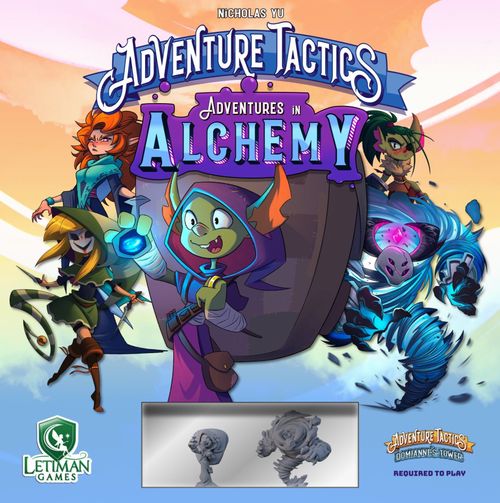
Adventure Tactics: Adventures in Alchemy
Adventure Tactics: Adventures in Alchemy Rulebook
Table of Contents
Table of Contents
Components
- 1 Laine miniature
- 1 Boss miniature
- 1 player board
- 4 class cards
- 4 class feature cards
- 13 action cards
- 5 Boss decks
- 1 Ally deck
- Level-up cards
- Dice cards
- Passive abilities cards
- Laine & Event initiative tokens
- 1 tuck box
- Devour tokens
- 5 bramble terrain tiles
- 1 cyclone terrain tile
- Standees
- Rules leaflet
New Gameplay Elements
Adventures in Alchemy introduces new gameplay elements in its campaign. Apart from these changes, the gameplay remains the same as Domianne's Tower.
The Alchemist
The Alchemist is a new Basic Class that joins the Archer, Cleric, Fighter, Rogue and Wizard as possible starting classes. The Alchemist follows the same rules for Creating Your Hero as the other Basic Classes (page 6 of the Rulebook).
When checking the requirements for leveling up into an Elite Class, the Alchemist counts as either a Cleric or Wizard of one level lower (but not both). For example, a level 3 Alchemist counts as either a level 2 Cleric or a level 2 Wizard. After the next encounter, they could level up into the Bishop (requires a level 2 Cleric) or the Necromancer (requires a level 2 Wizard). You are not locked in to this choice, and you only check it when leveling up.
Elixirs
The Alchemist uses Elixir Action cards. These cards all have "Elixir" in their name, and when they are used they are removed from play for the rest of the encounter. Some of the Alchemist's abilities and class features improve the effects of Elixirs.
Player Generated Obstacles
The Druid, a new Elite Class, can spawn Briar obstacles. These follow the rules for Obstacles (page 15 of the Rulebook). Some of the Druid's abilities and class features improve the effects of Briars.
Ally Deck
Certain encounters in the Adventures in Alchemy campaign introduce a non-player character (NPC) Ally who will fight alongside your party. This will be mentioned in the setup section for that encounter in the Campaign Guide.
The Ally's initiative is represented by a new Event token (see Initiative, below), and their behavior is defined by a deck of Ally cards. At the beginning of the encounter, shuffle the Ally deck and place it beside the Boss deck. When the Event token comes up in the initiative order, reveal the top card of the Ally deck and follow its instructions to determine the Ally's actions.
Initiative
Adventures in Alchemy introduces some changes to the Determine Initiative step of each round (page 11 of the Rulebook).
Events
Certain encounters will use the Event initiative token. When directed in the setup for that encounter, shuffle the Event token face-down with the hero and boss tokens, then arrange in a line and reveal as normal. Then refer to the encounter details to see what happens when the Event token comes up in the initiative order.
Fate Counter
At the beginning of each encounter, your party is given a Fate Counter. Once, during that encounter, you may discard this counter to swap any two initiative tokens with each other. Whenever a hero passes on their turn, you may take back a discarded Fate Counter.
Static Initiative Variant
Instead of a randomized initiative order, you may instead use one of these fixed initiative patterns. Randomize the hero tokens face-down, but set the initiative line in the following order (depending on player count):
3 Heroes
- Odd-numbered rounds: Hero, Boss, Hero, Boss, Hero, (Boss)
- Even-numbered rounds: Boss, Hero, Hero, Boss, Hero, (Boss)
4 Heroes
- Hero, Boss, Hero, Hero, Boss, Hero, (Boss)
5 Heroes
- Boss, Hero, Hero, Hero, Boss, Hero, Hero, (Boss)
Note 1: (Boss) is for encounters which use all three Boss initiative tokens.
Note 2: With a predictable initiative order, you might find the game a bit easier.
Class Guide
Icons are described in brackets as they appear on the printed cards. Corner badges and small symbols are transcribed as printed.
Alchemist
Starter. Basic class.
- Giant Backpack (class feature): You may search your deck or discard pile for an Elixir card and place it in your hand. Shuffle your deck and discard pile together.
- Potion Toss (passive): The range of your Elixir card increases by 2.
- Adrenaline Elixir (action, Elixir): Target may make a basic move or a basic attack. (Printed icons: [gold coin], [red X]. Corner badge: [red circle with a die symbol and 1].)
- Healing Elixir (action, Elixir): Target heals [white die] [white die]. (Printed icon: [red X]. Corner badge: [red circle with a die symbol and 1].)
- Explosive Elixir (action, Elixir): Icon-only card. Printed icons: [red X] above a line, and a small [red icon] below it. Corner badges: [red circle with 1-5] and [orange burst with 2]. No text is printed on the card.
Oracle
Alchemist 2. Elite class.
- Heavenly Barrier (action): When the target is damaged by an attack, you take [white die] damage to reduce the damage by [blue die] [grey die]. (Printed icon: [blue shield]. Corner badge: [red circle with 0-5].)
- Petrify (action): Target is stunned. (Printed icon: [red X]. Corner badge: [red circle with 0-3].)
- Celestial Fury (action): You take [white die] damage. (Printed icons: [blue die] [red heart]. Corner badge: [red circle with 0-5]. The end of the printed line is partly covered by the artwork.)
- Philosopher's Stone (class feature): At the start of each scenario, replace this card with any other card from your deck and remove this card.
- Master of Woods (passive, tab reads "Druid"): Briars block line of sight for enemies. (Printed beside the Oracle cards on the Class Guide page.)
Druid
Cleric 2, Fighter 1, Rogue 1. Elite class.
- Thorn Wall (class feature): Place a wall of 5 Briar obstacles in range (only 1 space needs to be in the range, the rest can stretch outside of it). These Briars last until the end of the scenario. (Printed icons: [gold coin], [red X]. Corner badge: [red circle with 1-3].)
- Master of Woods (passive): Briars block line of sight for enemies.
- Vine Lash (action): You may create 3 Briar obstacles in unoccupied spaces in range. Remove these Briars at the beginning of your next turn. (Printed icons above the text: [white die] [red heart]. Corner badge: [red circle with 1-5].)
- Thorn Shield (action): When damaged by an adjacent enemy, ignore all damage. The attacker takes that much damage instead. You may create 3 Briar obstacles within range 1. Remove these Briars at the beginning of your next turn. (Printed icon: [blue shield].)
- Thorn Wall (action): Place a wall of 5 Briar obstacles in range (only 1 space needs to be in the range, the rest can stretch outside of it). These Briars last until the end of the scenario. (Printed icon: [gold coin], [red X]. Corner badge: [red circle with 0-3].)
Mimic
Fighter 1, Archer 1, Wizard 1. Elite class.
- Command Words (action): Move an enemy up to 5 squares. (Printed icons: [gold coin], [red X].)
- Instincts (action): Draw 5 cards. Discard drawn cards that are not [text hidden by overlapping cards on the printed page] or basic move. (Printed icons: [gold coin], [red X]. The rest of this card's text is obscured where other cards overlap it on the printed page.)
- Absorption (action): Ignore the damage from a basic attack from a non-adjacent enemy. Heal for that many HP instead. (Printed icon: [blue shield].)
- Devour (action): Heal equal to the amount of damage dealt. If this defeats an enemy, you permanently gain +1 maximum HP. (Printed icons: [red X], [red heart] [red heart].)
- Devour (class feature): Heal equal to the amount of damage dealt. If this defeats an enemy, you permanently gain +1 maximum HP. (Printed icons: [red heart] [red heart].)
- Basic Mimicry (passive, tab reads "Mimic"): You may use the BASIC ATTACK of the closest Hero instead of your own.
Campaign Guide
Adventures in Alchemy brings two new elements to Adventure Tactics: Laine, the Alchemist, as well as a new Act for the campaign: An Alternate Path. You can use Laine in Act I: The Child of Destiny, or you can play the new Act presented in this campaign guide. Each option has its own unique introductions, which you will find below.
Using Laine in Act I: The Child of Destiny
Laine, the Alchemist, is created as normal (see page 6 of the Rulebook), and begins at level 1 alongside any of the original heroes. Before choosing your first encounter, read the following:
You are walking along the path to the village of Severance, a remote hamlet where you hope to trade some of your wares and restock on supplies before moving on to the capital, when you see smoke in the distance. You hear the unmistakable sound of steel clashing against steel. You haven't quite finished all of your alchemical training yet but you sprint forward as fast as your feet can carry you. Someone might need your help!
Choose an option:
- Guard the Gate. Go to 1 on page 5 of the original Campaign Guide.
- Investigate the Alarm. Go to 2 on page 7 of the original Campaign Guide.
Act I: An Alternate Path
If you are using Laine in this Act, read:
You see the village of Severance on the near horizon and your heart lifts. Perhaps you're not too late to warn them after all! You think back to the events of the previous day. A mysterious stranger, clad in long scholar's robes and stinking of the sewers of a large city, visited your clan, asking to speak to your mother, the clan chieftain. The stranger pushed up the glasses on her nose as she promised a bounty of gold if your clan joined other local goblin forces in a raid on the practically defenseless Severance. Your mother refused but also did not volunteer to send a scout to warn the village, so you took it upon yourself. You snuck away in the dead of night as you knew your mother wouldn't be pleased, but sometimes the right thing isn't the easy thing! She'll almost certainly forgive you after you've warned the village and returned to the clan!
You reach the feet of the village gate and are about to call for the guard on duty for entrance when you hear a familiar clarion call. Your heart drops in your chest. One of your mother's scouts has found you and sounded their horn.
Otherwise, read:
There's quite the scene at the village gates. You recognize the young goblin shouting to be let in. He's the friendly peddler who comes by each fortnight to sell his elixirs and tonics. Didn't Elwyn say he had some promise the last time he visited? What's he going on about now in such a panicked state?
Your brief reverie is broken up by the sound of shouting. A small group of goblins, led by the biggest toughest goblin you've ever seen, is marching straight towards the young trader. He looks scared and in need of assistance. You throw open the gates and rush to his side. It's time for action!
Continue the Story: The Goblin Chieftain. Go to 1 on page 5.
1. The Goblin Chieftain
As you rush to the young goblin's side and draw your weapons, he grabs your arm and mutters, 'Wait, that's my Mom! Don't hurt her!' The battle-scarred goblin leader steps forward and menacingly punches her fist into a large steel gauntlet. It doesn't look like she's here to talk.
Do not turn the page until you have completed the fight.
Objective: Defeat Chieftain Maple.
Bonus Objective: Defeat the Goblin Enforcers before defeating Chieftain Maple.
Enemies
Chieftain Maple (CM)
- Hit points: 3 heroes: 24. 4 heroes: 28. 5 heroes: 33.
- Basic attack: [red badge] 1. Basic movement: [boot] 3.
- Active Abilities
- Bonk: [white die] [red X]. If the Target is not Laine, move them up to 2 spaces towards the closest Goblin Enforcer.
- Passive Abilities
- Now I'm Mad: When Chieftain Maple is at half HP or fewer, she deals an additional [white die] damage with all attacks.
- Don't Make Me Come Over There: If Laine is at half HP or fewer, then whenever Chieftain Maple takes damage, she ignores the first point of damage.
- Behavior: Targets Laine if she can reach Laine. Otherwise, target the closest hero.
Goblin Enforcer (GE)
- Hit points: 3 heroes: 8. 4 heroes: 10. 5 heroes: 12.
- Basic attack: [red badge] 1. Basic movement: [boot] 3.
- Behavior: Targets closest adjacent hero, otherwise targets Laine.
Set-up
- Standees needed: Chieftain Maple, Goblin Minions (as Goblin Enforcers).
- Chieftain Maple Boss Encounter Deck: 4x Mama Bear, 4x Mama Said, 2x All Together Now.
- Goblin Enforcers placed: 3 heroes: Goblin Enforcer 1 (GE1) and Goblin Enforcer 2 (GE2). 4/5 heroes: Goblin Enforcer 3 (GE3) is also used.
Resolution (1)
Success (partial): If the heroes defeat Chieftain Maple but not the enforcers.
Partial success! You have captured the Goblin Chieftain Maple but the village has taken some damage in the fight and flight of the other goblins. Time to sit down and have a chat with Laine's mother.
- All heroes advance 1 level.
- Heroes receive the following from: 1, 2, or 3 items randomly selected from Maple, depending on hero count (3, 4, or 5 heroes): Maple's Gauntlet, Maple's Boots, Maple's Furs.
- Heroes receive 1x Bag of Gold.
- Heroes may choose to put the Wandering Merchant card on the top of the Random Encounter deck.
- Continue the story: It's time to have A Fireside Chat. Go to 2 on page 7.
Success: If the heroes defeat Chieftain Maple and her Enforcers.
Success! You have captured the Goblin Chieftain Maple and her enforcers! The village seems to be mostly unharmed. Time to sit down and have a chat with Laine's mother.
- All heroes advance 1 level.
- Heroes receive the following from: 1, 2, or 3 items randomly selected from Maple, depending on hero count (3, 4, or 5 heroes): Maple's Gauntlet, Maple's Boots, Maple's Furs.
- Heroes receive 2x Bag of Gold.
- Heroes may choose to put the Wandering Merchant card on the top of the Random Encounter deck.
- Continue the story: It's time to have A Fireside Chat. Go to 2 on page 7.
Failure: If the Party is defeated or two heroes are knocked out.
Failure! The goblins have absconded with Laine! I guess you'll never learn what that was about.
- Re-play the encounter.
2. A Fireside Chat
Laine's mother, the goblin chieftain Maple, glares at you as you herd her and her compatriots together. Laine turns to you, tears glistening in his eyes, and implores you to let his mother go.
'She's only here for me. She doesn't mean you or the villagers any harm. I know you don't know me very well, but please trust me on this.'
You hem and haw as you mull over the decision. Laine has an outstanding reputation with the villagers and has never given you any reason to doubt him, but he's also inadvertently brought an armed band of goblins to your door.
Maple spies your indecision and clears her throat. 'My son is an idiot but he's a well-meaning one. He came here to warn you. There are other goblin forces marshaling for an attack on your village on the morrow. They want to take away all of the children in your village. Makes no sense to me, village in the middle of nowhere, but we didn't want to get involved either way.'
If Olette is in the party, read:
Olette nods her head in assent, 'She speaks true. This is what I came to warn your village of as well.'
Read:
Chieftain Maple gathers her thoughts and continues, 'I'm sorry. We should have sent a messenger to warn you. My son, Laine, did the right thing when no one else in our clan would. The stranger who came to our village, she spoke of The Old Prophecy and the ancient ways come again. It scared us. I'm sorry.'
If Elwyn is in the party, read:
Elwyn's ears perk up at the mention of The Old Prophecy. He looks more alert and focused than he has in years. He muses, 'Yes, yes. I see. It all makes sense now. We must seek out The Sisters of the Woods. They will be able to guide us. As for Severance, we should help evacuate the village so that no one is here when the goblins arrive tomorrow.'
Otherwise, read:
Everyone falls silent as they soak in her words. Laine is the first to pipe up. 'The Sisters will know!'
Read:
Laine exclaims, 'Yes, The Sisters'll help, I'm sure of it! I'll take you to them myself! They like me, I think!'
Maple pauses and nods her head. 'If you free us, we'll help you like we should have all along. My clan and I will guide your villagers to safety while my son takes you to The Sisters.'
You put your heads together and talk it over. It doesn't seem like you have much choice. You free Chieftain Maple and her companions and prepare to evacuate the village.
Continue the Story: Time to visit The Sisters of the Woods. Go to 3 on page 8.
3. The Sisters of the Woods
After an entire's day of travel, you end up at the foot of the Witchwoods. Laine smiles exuberantly and presses forward. 'It's only another league or two more! Let's go!' Tired as you are, his enthusiasm is contagious and you find a hidden reserve of energy that allows you to continue into the forest.
Without a clear trail, you dive deeper and deeper into the Witchwoods. Your companions look lost but Laine barrels forward, undeterred. Suddenly, you arrive at a large clearing and hear the din of a spirited shouting match.
Two elves face off against each other, yelling at the top of their lungs. They could not be further apart in appearance and temperament. One is short and clad in furs with a wild tangled mane of hair. The other is tall with perfectly-combed hair and dressed in the finest colored silks.
'I can't believe you did that! That was mine, and you know it!'
'Wrong! It was mine. I just let you borrow it!'
'No, Father bequeathed it to me!'
'Wrong again! It was Mother's originally, and she left it to me!'
Before you can interrupt, the argument turns into a magical duel. Vines erupt from the earth, only to be engulfed and burned away with cosmic fire. The earth heaves and the very heavens themselves shake as the two elves clash.
'Oh, no,' Laine sighs. 'Not again. They might squabble for days like this.'
The taller elf finally notices your presence and turns to you for a moment. 'Strangers, nay, honored visitors of the sacred grove, I call upon your aid! Serve me well, and Beh'La the Star-Seeker will grant you a boon!'
The shorter elf snarls and retorts, 'Don't listen to her lies, noble guests! Aid me, and K'Lar the Earth-Touched will grant you that which you desire!'
Laine looks at you, shakes his head, and shrugs his shoulders.
Note: The printed page carries a "Draw a card from:" label above the illustration of the two elves. It has no rule attached and is not transcribed.
Choose an option:
- If the party decides to aid Beh'La the Star-Seeker, you'll face The Raging Fury of the Earth. Go to 4 on page 10.
- If the party decides to aid K'Lar the Earth-Touched, you'll face The Cold Embrace of the Heavens. Go to 5 on page 14.
4. The Raging Fury of the Earth
As you move to assist Beh'La, K'Lar howls with rage. 'No, no, no! Wrong, wrong, wrong!' She gestures with both hands, and the ground seems to come to life.
Objective: Defeat K'Lar the Earth-Touched.
Bonus Objective: Beh'La the Star-Seeker is not Knocked Out.
Special: Use the Beh'La Ally Deck and Event Initiative Token for this encounter. Beh'La acts when the Event Initiative Token is revealed. Reveal and resolve the top card of the Beh'La Ally Deck when it is her turn. Beh'La is treated as a hero for the purposes of targeting but cannot be healed after being Knocked Out or use hero resources like Revive Potions or the Fate Counter.
Set up the Direction Deck with the cards for North, South, East, and West.
Enemies
K'Lar the Earth-Touched (KET)
- Hit points: 3 heroes: 45. 4 heroes: 55. 5 heroes: 70.
- Basic attack: [red badge] 3. Basic movement: [boot] 3.
- Active Abilities
- Thorn Wall: Reveal a random direction. Spawn a 1x5 Thorn Wall extending from K'Lar in that direction. If the wall would be placed fully or partially off the map, reveal a different direction instead. Heroes in the spaces where the Thorn Wall is placed take [white die] damage and must move 1 space off of the wall. Heroes starting their turn next to the Thorn Wall take 1 damage. Only 1 Thorn Wall may be in play at a time. A new Thorn Wall replaces the previous one. Heroes treat the Thorn Wall as a Wall, while K'Lar and the Living Brambles ignore it.
- Earthquake: [Area of Effect icon] centered on Beh'La. 6 damage (4 heroes: 9 damage; 5 heroes: 12 damage), divided evenly among all heroes within the area of effect.
- Passive Abilities
- Relentless Defenders: Any defeated Living Brambles respawn in their starting spaces at the beginning of each round.
- Behavior: Targets Beh'La if she can reach Beh'La and will move as close to Beh'La as possible. Otherwise, targets closest hero.
Living Bramble (B)
- Hit points: 3 heroes: 1. 4 heroes: 1. 5 heroes: 1.
- Basic attack: [red badge] 1. Basic movement: [boot] 3.
- Behavior: Targets closest hero.
Set-up
- Standees needed: Beh'La the Star-Seeker, K'Lar the Earth-Touched.
- Additional elements: Thorn Walls (1x5) / Living Brambles (1x1).
- K'Lar the Earth-Touched Boss Deck: 3x Into the Woods, 3x Witch's Lament, 4x Your Fault.
- Beh'La the Star-Seeker Ally Deck.
- Living Brambles placed: 3 heroes: Living Bramble 1 (B1) and Living Bramble 2 (B2). 4 heroes: adds Living Bramble 3 (B3). 5 heroes: adds Living Bramble 4 (B4).
Allies
Beh'La the Star-Seeker (BSS)
- Hit points: 15.
- Basic attack: [red badge] 4. Basic movement: [boot] 3.
- Active Abilities
- Divination: All heroes may look at the top card of their deck and either put it back or discard it.
- Written in the Stars: You may arrange the remaining Initiative Tokens in any order that you choose.
- Behavior: Targets K'Lar the Earth-Touched if she can reach K'Lar. Otherwise, targets the closest Living Bramble. Moves as far away from K'Lar as possible while keeping her in Basic Attack range.
Resolution (4)
Success (partial): If the heroes defeat K'Lar but Beh'La is Knocked Out.
Partial success! You have defeated K'Lar the Earth-Touched! You spend a few moments waiting for Beh'La the Star-Seeker to wake up.
- All heroes advance 1 level.
- Unlock the Oracle class for play.
- Heroes receive the following from Supply > Loot: 1, 1, or 2 items randomly selected from The Sisters, depending on hero count (3, 4, or 5 heroes): Bramble Shield, Silk Robes.
- Heroes receive 1x Bag of Gold.
- Heroes receive items from Supply > Items and Party > Items.
- Continue the story: Now you must Consult the Sisters. Go to 6 on page X.
Success: If the heroes defeat K'Lar without Beh'La being Knocked Out.
Success! You have defeated K'Lar the Earth-Touched. Beh'La the Star-Seeker wears a grin that spreads from ear to ear.
- All heroes advance 1 level.
- Unlock the Oracle class for play.
- Heroes receive the following from Supply > Loot: Beh'La's Pouch and 1, 1, or 2 items randomly selected from The Sisters, depending on hero count (3, 4, or 5 heroes): Bramble Shield, Silk Robes.
- Heroes receive 1x Bag of Gold.
- Heroes receive items from Supply > Items and Party > Items.
- Continue the story: Now you must Consult the Sisters. Go to 6 on page X.
Failure: If the Party is defeated.
Failure! K'Lar has defeated Beh'La in their magical duel.
- All heroes advance 1 level.
- Unlock the Oracle class for play.
- Continue the story: Now you must Consult the Sisters. Go to 6 on page X.
5. The Cold Embrace of the Heavens
As you move to assist K'Lar, Beh'La shakes her head in disapproval. 'That mistake will prove costly, strangers!' She gestures with both hands, and the heavens themselves begin to crash down upon you.
Objective: Defeat Beh'La the Star-Seeker.
Bonus Objective: K'Lar the Earth-Touched is not Knocked Out.
Special: Use the K'Lar Ally Deck and Event Initiative Token for this encounter. K'Lar acts when the Event Initiative Token is revealed. Reveal and resolve the top card of the K'Lar Ally Deck when it is her turn. K'Lar is treated as a hero for the purposes of targeting but cannot be healed after being Knocked Out or use hero resources like Revive Potions or the Fate Counter.
Set up the Direction Deck with the cards for NW, SW, NE, and SE. Randomly assign a direction card, each representing a Star Pillar, to each hero (in a 5-hero party, use an additional Direction Card to randomly assign the 5th player to Beh'La the Star-Seeker).
Enemies
Beh'La the Star-Seeker (BSS)
- Hit points: 3 heroes: 45. 4 heroes: 55. 5 heroes: 70.
- Basic attack: [red badge] 3. Basic movement: [boot] 3.
- Active Abilities
- Black Hole: Each hero is pulled 3 spaces towards their Star Pillar if it is not Knocked Out (or Beh'La if it is). K'Lar is pulled 3 spaces towards Beh'La.
- Meteor Strike: [Area of Effect icon] centered on K'Lar. 6 damage (4 heroes: 9 damage; 5 heroes: 12 damage) divided evenly among all heroes within the area of effect.
- Passive Abilities
- Ring of Frost: Heroes starting their turn next to Beh'La take [red heart] damage.
- Behavior: Targets K'Lar if she can reach K'Lar. Otherwise, targets closest hero.
Star Pillar
- Hit points: 3 heroes: 3. 4 heroes: 4. 5 heroes: 5.
- Basic attack: [red badge] 3. Basic movement: [boot] 0.
- Passive Abilities
- Biting Cold: Heroes starting their turn next to a Star Pillar take 1 damage.
- Stellar Fusion: Star Pillars heal to full HP at the end of each round even if Knocked Out. Star Pillars cannot be moved.
- Behavior: Targets closest hero.
Set-up
- Standees needed: Beh'La the Star-Seeker, K'Lar the Earth-Touched.
- Additional elements: Wraith Spawn Points (for Star Pillars), Thorn Walls (1x5).
- K'Lar the Earth-Touched Boss Deck: 2x I know things now, 5x Witch's Lament, 3x Agony.
- K'Lar the Earth-Touched Ally Deck.
- Star Pillars placed: the printed table lists one Star Pillar entry under 4/5 heroes and three Star Pillar entries under 3 heroes. The set-up map shows four marked spaces (NW, NE, SW, SE).
Allies
K'Lar the Earth-Touched (KET)
- Hit points: 15.
- Basic attack: [red badge] 2. Basic movement: [boot] 3.
- Active Abilities
- Thorn Wall: K'Lar spawns a 1x5 Thorn Wall adjacent to her (You choose N, S, E, or W). Enemies treat the Thorn Wall as a Wall, and if they start their turn next to the Thorn Wall they take 1 damage. K'Lar and the heroes ignore the Thorn Wall. Only one Thorn Wall may be in play at once. A new Thorn Wall replaces the previous Thorn Wall. The Thorn Wall must be able to be fully placed on the map (it cannot hang over the side).
- Barkskin: While the card that activates this ability is the top card in the Ally Deck discard pile, K'Lar and all heroes reduce damage by 1.
- Behavior: Targets Beh'La the Star-Seeker if she can reach Beh'La. Moves as far away from Beh'La as possible while keeping her in Basic Attack range.
Resolution (5)
Success (partial): If the heroes defeat Beh'La but K'Lar is Knocked Out.
Partial success! You have defeated Beh'La the Star-Seeker! You spend a few moments waiting for K'Lar the Earth-Touched to wake up.
- All heroes advance 1 level.
- Unlock the Druid class for play.
- Heroes receive the following from Supply > Loot: 1, 1, or 2 items randomly selected from The Sisters, depending on hero count (3, 4, or 5 heroes): Bramble Shield, Silk Robes.
- Heroes receive 1x Bag of Gold.
- Heroes receive items from Supply > Items and Party > Items.
- Continue the story: Now you must Consult the Sisters. Go to 6 on page X.
Success: If the heroes defeat Beh'La without K'Lar being Knocked Out.
Success! You have defeated Beh'La the Star-Seeker. K'Lar the Earth-Touched howls with glee and wipes tears of mirth from her eyes.
- All heroes advance 1 level.
- Unlock the Druid class for play.
- Heroes receive the following from Supply > Loot: K'Lar's Staff and 1, 1, or 2 items randomly selected from The Sisters, depending on hero count (3, 4, or 5 heroes): Bramble Shield, Silk Robes.
- Heroes receive 1x Bag of Gold.
- Heroes receive items from Supply > Items and Party > Items.
- Continue the story: Now you must Consult the Sisters. Go to 6 on page X.
Failure: If the Party is defeated.
Failure! Beh'La has defeated K'Lar in their magical duel.
- All heroes advance 1 level.
- Unlock the Druid class for play.
- Continue the story: Now you must Consult the Sisters. Go to 6 on page X.
Note: The printed "Go to 6 on page X" reference is reproduced as printed. The Campaign Guide in this set ends at Chapter 5; the Consult the Sisters chapter is not included here.
Transcription note: the printed text ends one sentence with a doubled full stop ("eyes..") in the Encounter 5 success box; it is rendered here as a single full stop. No other wording was changed.