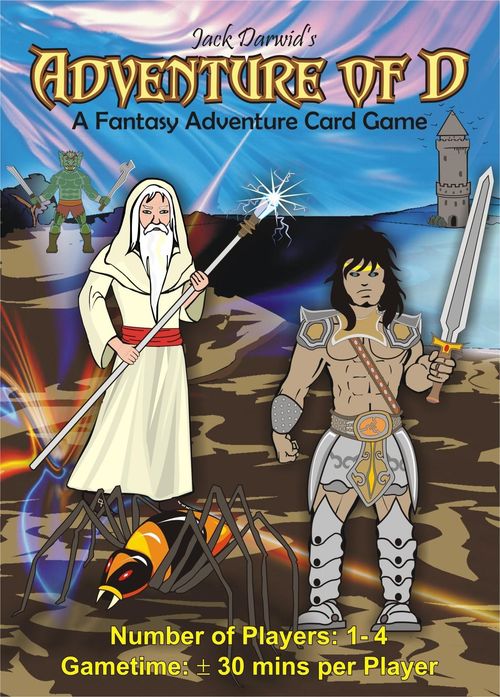
Adventure of D
Adventure of D Rulebook
Table of Contents
Table of Contents
The Mission
Enter the Tower of Death and defeat Elzoof!
The Components
- 1 Manual Book (16 pages)
- 112 cards:
- 60 Power Cards
- 12 Location Cards
- 20 Hero Cards
- 16 Upgrade Cards
- 4 Hero Token Cards (cut to make 20 Hero Tokens, or use any miniatures)
Hero Cards
The Hero Cards are used:
- as a Hero (each Player will use one Hero).
- as Skill Cards (Heroes may learn Skills throughout the adventure).
A Hero with INT=0 may only have his original Skill. A Hero can learn an additional Skill (other than his original Skill) for each additional INT he has.
Example: INT=2 means you may learn 2 more Skills.
If at any time you have more Skills than allowed, immediately discard Skill(s) until the condition above is met. You may discard any Skill anytime (put that discarded Skill at the bottom of the Hero Deck), but you may not discard your original Skill.
If you LEARN SKILL during your journey, draw a card from the Hero Deck. If you want to learn that Hero's Skill (and you have enough INT) put it under your Hero Card, if not discard it (put at the bottom of the Hero Deck).
The back of the Hero Card will be used as the Fairy Dust Item. If a Hero gets a Fairy Dust, take the top card from the Hero Deck and put it in his Item place (don't look what Hero it is). If later the Fairy Dust is used or discarded, put it at the bottom of the Hero Deck.
Upgrade Cards
The Upgrade Cards are used when a Hero upgrades his STR / INT / AGL / MP. A Hero's STR / INT / AGL / MP may not exceed 8.
Example: the Monk has MP 7 and he gets +1. The Monk has MP 8 now.
Put the STR / INT / AGL Upgrades on the left of Hero Card and put the MP Upgrade Card on the right side of Hero Card (because you will rotate the MP Upgrade Card more frequently).
(The sample Monk card shows STR=4, INT=0, AGL=2 and MP 8. Because of his Meditation Skill, the Monk can learn any number of Skills regardless of his INT. In this example the Monk has learned the Gladiator's Exercise Skill.)
Power Cards
There are 4 types of Power Card: STR (type STR), INT (type INT), AGL (type AGL) and NoType, and each type has Power 1-5. There are 3 sets of Power Cards (with different Events), so there are (4 types x 5 Power) x3 sets = 60 Power Cards.
Example for meaning of symbols:
- NoType card: a NoType Power Card (with any Power)
- INT card with Power=1: an INT Power Card with Power=1
- STR / INT / AGL card with Power >=3: [a STR Power Card with Power>=3] or [an INT Power Card with Power>=3] or [an AGL Power Card with Power>=3].
The main use for Power Card is to represent your HP (Health Points): your HP equals the number of Power Cards in your hand. Example: 4 Power Cards in your hand means HP=4. Your HP max is 8 (eight). At any time your HP can't exceed your HP max. If you do, immediately discard any cards from your hand until your HP = HP max.
A Power Card consists of 3 parts: Power, Shadow and Event part.
The Power part (big number on top left) is used as an Effort Card (in a Test) and used as many kinds of random number throughout the game.
The Shadow part (the Shadow icon with a number) is used only when you meet a Shadow (Elzoof's Minion). Every time you defeat a Shadow you get MP equal to the Shadow's Power.
The Event part represents the Event that occurs in the written Location. The type of the Event is the same as the type of the Power Card. Sometimes there is an Item as the result of the Event ("get an Item"), you may keep the Item in that Event Card. You may bring any number of Items, put Items below MP Upgrade Card. Sometimes there is an Effect in an Event. An Effect in an Event means that as long as this Event is in play, this Effect is applied.
(Example card: a NoType Power Card with POWER=1; its Shadow has Power=6, so if you defeat this Shadow you will get 6 MP; the Event occurs in Lake of Hope; the Event type is NoType; Item: Tasty Tomato; "A Tasty Tomato!" Action. Example Items held: a Potion of Agility, a Tasty Tomato and a Fairy Dust, with MP 8.)
Note: when you hold the Power Cards as HP in your hand, the Power and Shadow parts are the ones that matter, ignore the Event part.
Discard Pile
When a Player discards any Power Card (including discarding an Item / Event, etc), put it face up on the Discard Pile. No Player may check the cards in the Discard Pile (only the top card is visible).
Keywords connected with Power Cards
- LOSE X HP = discard X Power Cards (of your choice) from your hand to the Discard Pile.
- HEAL X HP = draw X Power Cards from the Power Deck and put it to your hand.
- SHOCK X = discard X Power Cards at random from your hand to the Discard Pile (random = an opponent takes X cards from your hand without looking).
- CHECK 1 = put 1 Power Card from the Power Deck to the Discard Pile. That card is the Result of this CHECK 1.
- CYCLE X = discard X Power Cards from your hand and draw X Power Cards from the Power Deck (X = same numbers). Example: if your HP=5 you may choose to [discard 4 then draw 4] or [discard 1 to draw 1], but you may not choose to discard 5 because your HP will be 0 (see If your HP=0).
- SHOW = show the required card(s) to all Player and put it back in your hand. Note: a Player with HP=1 may still SHOW a card (your HP is still 1). Example: "SHOW [two required cards] and spend MP 4" (Priest's Healing Hand Skill). To use this Skill you must spend MP 4 and must have the two required cards, show those cards to all Players and put them back to your hand.
Location Cards and Hero Tokens
The Map in this game consists of 12 Location Cards. All Heroes will move around in these Locations using their Hero Tokens.
(Each Location card shows its Danger Level, its name, and the Action available in this Location.)
There can be only one Event on a Location at a time. If an Event occurs on a Location, cover the whole Location with the Event. No Player may DO any Action on the "original" Location before the Event is discarded somehow.
Example: An Event occurs in the Lake of Hope. Before this Event is removed, the Tranquilty Action is not available.
Setup
- Make the Map: Shuffle all Location Cards then place all the Location Cards at random facedown in 4x3 matrix. Flip all the Location Cards face up, this is the Map for this game.
- Shuffle all Hero Cards, this is the Hero Deck. Give each Player 1 random Hero. All Heroes start with STR=INT=AGL=0. Put all Hero Tokens in the Castle of Light.
- Shuffle all the Power Cards, this is the Power Deck. Hero Background Bonus: CHECK 1 for each Player. If the Result is: a STR card = STR+1, an INT card = INT+1, an AGL card = AGL+1, a NoType card = STR / INT / AGL +1 (that Player's choice). Example: Amy gets an AGL card (her Dwarf AGL=1), Bob gets an INT card (his Wrestler INT=1), Chad gets a NoType card (Chad chooses STR, so his Scholar STR=1).
- Determine the First Turn Player at random. Give 8 Power Cards (HP=8) to the last Player then moving anti-clockwise give each Player one Power Card less than the previous Player. Note: this is for Setup only. All Player's max HP is 8. Example: in a 4 Players game, A is the First Turn Player then B, C, D. Their starting HP are: A=5, B=6, C=7, D=8.
- Shuffle the Discard Pile, put at the bottom of the Power Deck. The First Turn Player gets the Power Deck. Let the game begin!
(Setup diagram, 3 players: the active Player always has the Power Deck in front of him/her. Each Player's playing area holds the Character (Hero Card), the Upgrade Cards, the MP Upgrade Card and Items, the Power Deck, the Discard Pile, and a place for Effort Cards and the Shadow Card. The Hero Deck and unused Upgrade Cards lie next to the Map. All Players start in the Castle of Light.)
Gameplay
This game is played in Turns. The First Turn Player takes the first Turn and the Turn will move clockwise after that until someone wins the game by defeating Elzoof.
In each Player's Turn, follow these phases in order:
- REVEAL NEW EVENT
- REVEAL NEW EVENT
- MOVE / DO ACTION
- REST
At the end of your Turn: shuffle the Discard Pile, put at the bottom of the Power Deck, then give the Power Deck to the next Player. This will end your Turn.
Reveal New Event
- Say "New Event" and flip the top card of the Power Deck, this will be the New Event. Show the New Event to the next Player (clockwise), that Player must choose to Discard or Accept the New Event.
- That (next) Player may Discard the New Event by discarding any 1 Power Card or by spending MP 3, then put the New Event on the Discard Pile and repeat step 1 above.
- If that (next) Player Accepts the New Event, place the New Event on its Location:
- If there is already an Event in that Location, discard the old Event in that Location.
- If there is already an Event in any Location with the same type as the New Event, discard that old Event with the same type.
Note: this way, there will be a maximum of 4 Events on the Map.
Reveal New Event example (Amy-Bob-Chad, at the beginning of Amy's Turn):
- Reveal New Event: Amy says "New Event" then shows the New Event. Bob discards it by spending MP 3. Amy flips a New Event again, Bob accepts. The New Event is placed.
- Reveal New Event: Amy says "New Event" then shows the New Event to Bob. Bob discards it by discarding a NoType card. Amy flips a New Event again, Bob discards it again by discarding a STR card. Amy flips a New Event again, Bob accepts. The New Event is placed.
Placing a New Event Example: There are 2 (old) Events already on the Map: a STR Event in Castle of Light and a NoType Event in Lake of Hope. Then a New Event is accepted. If the New Event is (all 4 examples below are independent with each other):
- a STR Event in Mountain of Proph, discard the (old) STR Event in Castle of Light.
- an AGL Event in Lake of Hope, discard the (old) NoType Event in Lake of Hope.
- a NoType Event in Castle of Light, discard both old Events. There is only one Event on the Map now.
- an INT Event in Village of Dew, there are 3 Events on the Map now.
Move / Do Action
You can MOVE or DO ACTION one by one in any combination as long as you wish, but as soon as your HP=0 by any means immediately follow the procedures of If your HP=0.
Example: you MOVE, DO ACTION, MOVE, MOVE, DO ACTION, DO ACTION, REST.
Tip: as in real life, you will lose HP constantly as you travel between Locations, so it is important to keep looking at your HP and choose the best Location to REST.
MOVE
- Say "Move". Choose 1 Power Card from your hand to use as the Shadow Card and put that card on the Shadow place (see Diagram in Setup). If you meet a Shadow in your journey to the new Location, this will be the Shadow you must defeat (see the Shadow part of the Power Card).
- Move your Hero Token to an adjacent Location (no diagonal moves). If you move off the edge of the map, you will appear on the other side of the map. (Example: on a 4x3 grid with Locations A B C D / E F G H / I J K L, if you MOVE from A, you may move to B / E / I / D.)
- Check for Shadow: CHECK 1:
- If Power of the Result > the Danger Level of the new Location:
- safe! You meet no Shadow this time, put the Shadow Card on the Discard Pile.
- if there is another Hero in your (new) Location check for Friendly Blow (see Friendly Blow).
- If the Power of the Result <= the Danger Level of the new Location:
- you meet a Shadow and the Shadow attacks you!
- you must defeat the Shadow by discarding any number of Power Cards from your hand with a total Power >= the Shadow's Power, then discard the Shadow Card and you get MP equal to the Shadow's Power. If you can't defeat the Shadow then put the Shadow Card to the Discard Pile and discard all your hand (your HP=0, see If your HP=0).
- If Power of the Result > the Danger Level of the new Location:
- If in the (new) Location there's an Automatic Action, you must DO that Automatic Action immediately.
MOVE Example: To MOVE, you play a NoType card with Power=2 in the Shadow Card place. The (new) Location has Danger Level=3. The CHECK 1 result is 3, it means you meet a Shadow (with Power=5). To defeat the Shadow with Power=5, you must discard Power Cards with total Power >=5, example: a NoType card with Power=5 or [a NoType card with Power=3 and a STR card with Power=3], then you will get 5 MP.
Tip: do you notice that the lower the Power is in a Power Card, the bigger is the Shadow's Power? When you MOVE, choose your Shadow Card wisely!
Friendly Blow
You must make a Friendly Blow if you meet no Shadow when you MOVE and there is another Hero in your (new) Location. If there is more than one other Hero in the new Location, you may choose which Hero to fight. You can not attack a Hero with HP=0, but you may laugh at him.
Friendly Blow:
- The defensive Player (your opponent in this Friendly Blow) chooses the stat to use in this Friendly Blow: STR / INT / AGL (this stat will be used by both Players).
- Each Player plays one Power Card at the same time.
- Each Player's score = the Power from the Power Card played + the stat (chosen by the defensive Player in Step 1 above). The Player with higher score wins the Friendly Blow and draws 1 Power Card as the bonus for winning. If the score is the same, it is a draw, no Player get the bonus.
Example: Amy (STR=0, INT=2, AGL=3, HP=4) MOVE, meet no Shadow during the MOVE and meet both Bob (STR=3, INT=2, AGL=0, HP=6) and Chad (STR=0, INT=1, AGL=2, HP=7) in the new Location. Amy chooses to attack Chad (because Bob will choose STR with 3 points advantages, while Chad will choose STR with no point advantage for both Players).
- As Amy expected, Chad (as the defensive Player) chooses STR as the stat.
- Amy plays an INT card with Power=4 and Chad plays a STR card with Power=3 (at the same time).
- Amy scores: 4+0=4, Chad scores: 3+0=3. Amy wins and draws 1 Power Card.
Q: I MOVE then meet a Shadow. I use Fairy Dust to bypass the Shadow. There is another Hero in the (new) Location. Should I make a Friendly Blow? A: No. You already met a Shadow when you MOVE. You only check for Friendly Blow if you meet no Shadow at all when you MOVE.
TELEPORT
When you TELEPORT to a Location, put your Hero Token on the destination. Since you immediately go to that Location, do not check for Shadow.
If there's an Automatic Action in that (new) Location, you must immediately DO that Automatic Action.
Note: there will be no Friendly Blow when you TELEPORT.
DO ACTION
Say "Action", then choose one Action / Automatic Action to DO in your current Location or in your Item/Skill, or you may DO one of these special Actions in any Location:
- Action: Spend MP 5 or discard any number of Power Cards with total Power >=5: REVEAL NEW EVENT (see Reveal New Event)
- Action: Spend MP 8 or discard any number of Power Cards with total Power >=8: Discard an Event on any Location.
If at the end of an Action / Automatic Action there is no Event on the Map, immediately REVEAL NEW EVENT (see Reveal New Event). This means that there will always be at least one Event available on the Map.
Usually (not always) an Action contains a Test (STR / INT / AGL), see A Test.
In some Locations, there's a continuous Actions (there's a red hand symbol for each Action following the first Action). Unless you have the option to ESCAPE (means you may end the Action immediately), you must continue taking those continuous Actions until the last red-hand Action.
Remember: whenever you DO a continuous Action, always start from the beginning Action!
Example: You attack the Black Orc. You win the first Test (STR 8) but lose the second Test (STR 4), then you choose to ESCAPE. After you use the Tasty Tomato Item (HEAL 1 HP), you want to attack the Black Orc again. You have to take the first Test again, STR 8.
Remember: If a Location is covered with an Event Card, you must somehow discard the Event first before you can DO the Action in the "original" Location (so basically you can only do a visible Action).
KEYWORDS:
- (ONCE A TURN): you may DO this Action only once a Turn.
- (ONCE A GAME): once a Player DO this Action, this Action is no longer available in this Game (turn the Location card 180 degrees to represent this). Note: treat everything else normally.
A Test (STR / INT / AGL)
The number in the Test symbol is the Test Difficulty.
In a Test there's a W (win) result and an L (lose) result. If there is no L result (example: in the Woods of Mana) then nothing happens when you lose the Test.
- Put 1 Power Card from your hand in the Effort Card place (see Diagram in Setup), this is called your First Effort Card.
- Bonus card: If your First Effort Card has the same type as the Test (STR card in a STR Test, INT card in an INT Test, or AGL card in an AGL Test), draw 1 card from the Power Deck and add it to your hand.
- Draw 1 card from the Power Deck (this is your Second Effort Card) then put it together with your First Effort Card, add two Powers together.
- For a STR Test: If the Effort Cards total Power + your STR >= the Test Difficulty, you W. If the Effort Cards total Power + your STR < Test Difficulty, you L. For an AGL Test: If the Effort Cards total Power + your AGL >= the Test Difficulty, you W. If < Test Difficulty, you L. For an INT Test: If the Effort Cards total Power + your INT >= the Test Difficulty, you W. If < Test Difficulty, you L.
- Put the Effort Cards on the Discard pile.
Example: Your STR=0, INT=1, AGL=2.
- You challenge INT 6:
- You play a STR card with Power=3 as the First Effort Card.
- You get no bonus card.
- You draw and get a NoType card with Power=2 as your Second Effort.
- Result: 3+2+1 = 6, which is >= 6 (the Test Difficulty), you W (win) this Test.
- You challenge AGL 8:
- You play an AGL card with Power=4 as the First Effort Card.
- You get a bonus card.
- You draw and get an AGL card with Power=1 as your second Effort.
- Result: 4+1+2 = 7, which is < 8 (the Test Difficulty), you L (lose) this Test.
Rest
- Say "Rest". You may discard any number of Power Cards from your hand (leave at least 1 card in your hand!).
- Draw Power Cards until your HP = (your max HP - your Location's Danger Level).
Example: your HP=3 in a Location with Danger Level=2 (if you choose to REST here, you can draw until your HP=8-2=6). You choose to REST here, then choose to discard 2 cards from your hand (your HP=1), it means you will draw 5 more cards (so your HP=6).
Example: your HP=4 in a Location with Danger Level=4 (if you REST here, you may draw until your HP=8-4=4). If you choose to REST here & discard no card, you may draw no card. (if you want to draw any cards you must first discard 1 or more cards, then draw until your HP=4).
If Your HP=0
If your HP drops to 0 by any means then:
- if you're in the middle of an Action / MOVE immediately end the Action / MOVE.
- If you're in the middle of a Friendly Blow immediately ends the Friendly Blow (your opponent wins this Friendly Blow). If your opponents HP=0 too, then this Friendly Blow is a draw.
- As long as your HP=0, you may not MOVE / DO ACTION and may not use any Item/Skill (but you may choose to Accept or Discard a New Event)
- Skip your next REST Phase. You may Rest as normal after that.
Example: your HP=2 and you have a Tasty Tomato. You challenge a Test (HP=1) then LOSE 1HP. Your HP=0 (you can't use the Tasty Tomato, too late!). You end the MOVE/DO ACTION Phase then skip the REST Phase. You end your Turn with HP=0. On your next Turn you may Rest as normal.
Example: on other Player's Turn you reject too many New Events and your HP=1. Suddenly a Player attacks you in a Friendly Blow, your HP=0 immediately. On your Turn you skip the REST Phase. On your next Turn you may Rest as normal.
Timing
Since there are a lot of Skills and Items, sometimes it can be difficult to judge the result of the Player's action. Here's the concept for timing: FIFO (First In First Out).
Q: My HP=1 (a NoType card with Power=4) and my STR=1. I want to challenge STR 6. May I play my STR card (I will get a bonus card and I will win the Test)? A: Nope. As soon as you play your last card, your HP=0 (see If your HP=0).
Winning and Losing
The Player who successfully defeats Elzoof wins the game. To win the game, that Player must have HP >=1 after Elzoof is defeated.
Optional Scoring
Each Player counts their Legend Points / LP.
The winner = (STR + INT + AGL) x2. Other Players = (STR + INT + AGL) / 2 (rounded down).
Note: all Items & effect from Items are useless after the game ends.
Example: Amy defeats Elzoof and wins the game. Amy (STR=0, INT=5, AGL=0) = 10 Legend Points. Bob (STR=3, INT=5, AGL=4) = 6 LP. Chad (STR=4, INT=1, AGL=2) = 3 LP.
One Player Game
For One Player Game there are some adjustments in the Rules:
- since there are no other Players, ignore "other Player" effects in some Events
- when you REVEAL NEW EVENT, you are the one who choose to Accept or Discard it (because you are the next Player)
- if your HP=0 you lose the game immediately (beware of Master Baqem!)
- At the beginning of the game, set aside X Hero Cards as the Timer Cards, where X = 4 (hard level), 5 (normal), 6 (easy) or 7 (beginner level). Before you REST, you must put 1 Timer Card on the bottom of Hero Deck. If you don't have any Timer Card left, you may not REST (Elzoof has conquered the island!).
- If you lose, you get no points. If you win you get points = (STR + INT + AGL) x2. Get as many points as you can!
Note: all Items & effect from Items are useless after the game ends.
Playing Tips
- If the Power Deck is empty, shuffle the Discard Pile to make a new Power Deck. If the Hero Deck is empty, then no new Fairy Dust / Skill can be achieved (until someone fills the Deck).
- Don't forget to use the Skills/ Items. If you forget to use them, what has happened can not be re-done (can't take 'take-back' move).
- When you have a high HP but it seems that you have nothing to do (maybe the available Events are not interesting enough for you), try to look what's available on the Locations or use the special Actions (see DO ACTION). There are many ways to upgrade your STR / INT / AGL (so you can enter the Tower of Death!)
- An opponent is ready to finish (and win) the game? Try blocking the Tower of Death with a difficult or useless Event. Or reduce his HP somehow (to disturb him, since defeating Elzoof needs a lot of HP). This will (hopefully) give you the time to catch him up.
FAQ
- I use the Ring of Deven (my HP max+1). Should I discard it? No. Discard something only when it says "discard this Item".
- I use the Scroll of Vision, can I move from the edge of the map and move diagonally? If you MOVE from A (top-left corner of the 4x3 map, Locations A B C D / E F G H / I J K L) using the Scroll of Vision, you may move to B / E / I / D or to F / H / J / L.
- May I TELEPORT to the Great Chasm? Yes.
- A New Event with an Automatic Action occurs in my Location. Should I immediately DO the Automatic Action? No. DO Automatic Action immediately only at the end of a MOVE or TELEPORT.
- The Orc Magician (Effect: all Danger Level+1) is in play. I REST in Castle of Light. So? You draw until HP=(8-Danger Level)=8-1=7.
- I have three STR cards with Power=4,5,5. Can I meet Master Bob in Swamp of Talis so my STR+1? No, all three STR cards must have different Powers.
- I defeated the Harpy. A Player fail to SHOW a STR card and I teleport him to a Location with an Automatic Action. Should he DO that Automatic Action immediately? Yes. See TELEPORT.
- I lose a Test against Goblin Warrior and I have to discard 1 Item. I have a Fairy Dust. I don't want to lose my Fairy Dust, can I choose to LOSE 1 HP instead? No, if you have any Item you must discard one Item (without using it).
- My HP=3 (a NoType card, a STR card, an AGL card), I challenge a Test, STR 10. May I use Barbarian's Smash and Wrestler's Grapple Skill (I have both Skills) with my only STR card? Yes. Example: your First Effort Card is a NoType card with Power=4, then SHOW a STR card (+1, Smash Skill) then discard a STR card (+2, Grapple Skill). Now your HP=1. Your First Effort Card's Power = 4+1+2=7.
- My HP=5 but I only have one AGL card with Power=5. I have the Thief's Stealth Skill. I challenge a Test, AGL 10. After I use an AGL card as my First Effort Card, I get an AGL card with Power=3 as the bonus card. Can I use my Stealth Skill using the bonus AGL card? No. "Use this Skill right after you play your First Effort Card", this means before you get the bonus card.
- To MOVE, I use an AGL card with Power=5 as my Shadow Card (I use the Elf's Friend of Nature Skill). In the new Location there is another Hero, should I start a Friendly Blow?
Errata for Version 1.0
Text in 'Armor of Alexa' Item in Rock Golem Event (INT card with Power=5): "Action Max HP+1". There should be no Action symbol, so the correct text is: "Max HP+1". Sorry for this inconvenience.
Rules Summary
(The last page of the manual is a four-panel summary of the rules above: Setup; Gameplay (phases: Reveal New Event twice, Move / Do Action, Rest); Reveal New Event; Rest; If your HP=0; Move; Friendly Blow; Teleport; Do Action; A Test. It adds no rules beyond the sections already transcribed, apart from these keyword lines:)
- ESCAPE = end the continuous Action.
- ONCE A TURN = do this Action only once a Turn.
- ONCE A GAME = do this Action only once a Game (flip the Location 180 degrees to represent this).
- 1 PLAYER: use X Timer Cards, where X = 4 (hard), 5 (normal), 6 (easy) or 7 (beginner).