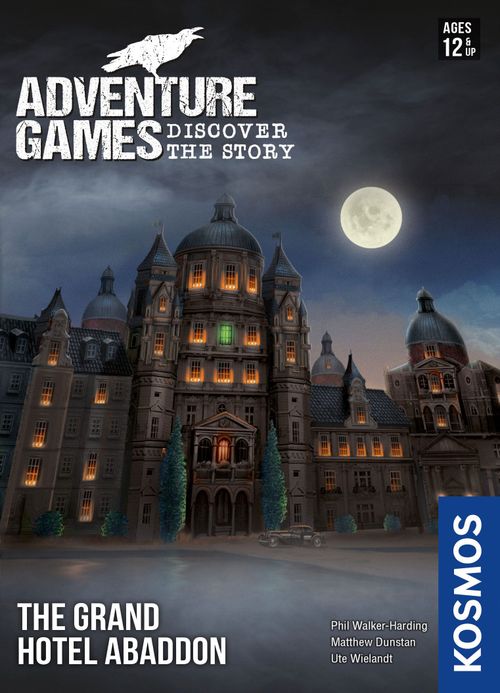
Adventure Games: The Grand Hotel Abaddon
Adventure Games: The Grand Hotel Abaddon Rulebook
Table of Contents
Table of Contents
Game Materials
- Location cards (A–R)
- Adventure cards (10–84)
- Misc. cards (H1–H6)
- Misc. cards (L1–L6)
- Misc. cards (F1–F4)
- Rule cards (R1–R5)
- Mission cards (M1–M7)
- End of chapter cards (X1 & X2)
- Character figures
- Characters (C1–C4)
- Adventure book
- Turn overview card
- Misc. tokens
Game Setup
Place the adventure book on the table. Place the location cards and adventure cards back-side up in a face-down stack on the table.
Be sure not to look at the front sides of the cards!
Check to make sure that the location and adventure cards are arranged in ascending order according to their letters or numbers.
Carefully remove board 1 and the tokens (characters, question marks, check marks, ritual tokens) from their cardboard frames. Insert the four character tokens into their matching stands. Those are your figures. Set aside the remaining tokens as a supply.
Note: Board 2 has the non-player characters (NPCs), whom you will encounter during the game. You are only allowed to take tokens from this frame when the game explicitly tells you to do so!
The setup should look as it is shown to the right. Location card A lies face up (or front side up) in the center of the table. Leave enough space around it for more location cards! Keep the other location cards available as a face-down location card stack. Next to them, place the adventure cards as a face-down adventure stack, sorted into one stack of cards with numbers on their back sides (10-84) and five additional stacks: F1-F4, H1-H6, L1-L6, M1-M7, R1-R5, X1-X2. Since the cards have letters and numbers on their backs, you will be able to look through them during the game without unintentionally learning too much of the story. If you don't have a lot of room on the table, you can instead sort the letter cards alphabetically in one stack and keep them within reach (F1-F4, H1-H6, L1-L6, M1-M7, R1-R5, X1-X2).
Now each of you has to choose a character. Take a figure and the corresponding character card, along with the two adventure cards mentioned on that character card, from the adventure stack.
Game for 2 – 4
Each of you will play at least one character, but you can also play with several (or all) of them if you like.
Solo game
The game is also fun to play alone. In that case, you will play with two (or more) characters at the same time. You can choose which characters you want to play.
Important Information
If the text on a card or in the adventure book contradicts the rules in this rulebook, the text on the card or in the adventure book applies!
- This is a cooperative game. Discuss with your team what you want to do, what objects you want to combine, and which locations you want to explore.
- At the end of each chapter and at the end of the game, scoring takes place. However, the score you achieve does not affect the story.
- We strongly recommend that you take thorough notes during your adventure: story hints, which locations you haven't yet explored on a location card, what items you want to combine, and so on. This is especially true if you save the game and want to continue playing another day. Some entries in the adventure book give you a choice, but allow you to come back later and decide differently. Often you will also be asked for adventure cards that you don't have yet. It may therefore be worthwhile to return to these places later.
- Alternatively, you may also use the question mark tokens. These tokens are free to use, and you can use them to mark locations, adventure cards, or other tokens during the game. For example, if you think they might still be important for the progress of the story, in order to remind you to try doing something with an object that you do not yet have, etc. Simply place one of the question marks next to the entry or on the adventure card. Don't forget to remove the question mark once it has served its purpose.
- If you are not sure what to do, check out the walkthrough available on our website. To get there, you can either scan the QR code below or enter the following web address in your web browser: https://www.thamesandkosmos.com/walkthroughs/abaddon.pdf. Another option is to consult the help tips on pages 10-15 arranged according to adventure card number, location, or token. For each one, there is information about what you can do there or with it or what you need to do to keep the story moving forward.
Note: The help tips will not give anything away about the story, and the walkthrough reveals very little. So don't be afraid to make use of them before getting too frustrated by what might seem to be a dead-end! Using them will not result in any point deductions!
- You can read the story aloud yourselves or you can have the story read to you by the free Kosmos Helper App.
Game Overview
The person who has most recently read a ghost story begins. Each team member goes through the following adventure phases during his or her turn:
Exchange adventure cards at anytime
- Move character figure
- Reveal a location card
- Take one action
Then, the next team member in a clockwise direction takes his or her turn.
Anytime: Exchange adventure cards
You may exchange as many adventure cards as you like with team members who are on the same location card as you at any time during your turn. You may also give any number of cards without receiving any in return or receive any number of cards without giving any in return.
Free exchange variant: If you wish, your team can also decide that you can exchange cards at any time, no matter where you are (unless an adventure card says otherwise). This is unrealistic, but reduces the playing time a little.
Note: Some cards have the following written on them: Cannot be exchanged. Obviously, you are not allowed to exchange these cards among yourselves.
1) Move character figure
You have to move your figure either to another face-up location card or within the location card on which your figure is already standing, or remain standing at one location.
a) Move to another face-up location card
At the beginning of the game, only location card A is available to explore. Over the course of the game, more cards will be added. As soon as more than one location card is face up, you can move from one to the other as often as you like, unless an adventure card says otherwise!
b) Move within a location card
You can also move from one location to the next within a location card to explore a location or combine an adventure card with a location (see pages 5 and 6).
c) Remain at a location
You can remain at your current location if you re-explore the location or combine an adventure card with it (see page 6).
Hint: Multiple characters may be on the same location at once. Place your characters next to the location number, rather than directly on top of it, so you can still see it.
2) Reveal a location card
If you move your character to a location card that has not yet been revealed, reveal it and read the corresponding entry in the adventure book. There you will find a detailed description of what you see on the card. You can move freely on face-up location cards unless an entry or a card tells you otherwise. If you have already discovered a location card (the card is already face up), you may re-read its entry again at any time.
Note: Wait until afterward to place your figure next to the location that you want to visit or that you want to combine with an adventure card.
3) Take one action
Unless an adventure card tells you otherwise, perform one of the following actions:
a) Explore a location, or b) combine two adventure cards with each other, or c) combine an adventure card with a location, or d) speak with an NPC or combine an NPC with an adventure card
a) Explore a location on a face-up location card
On each location card, there are several locations that you can explore. Each location is identified by a three-digit number.
If you want to explore the location where your character is standing, read the entry of the same three-digit number in the adventure book. This will reveal more information about the story and/or give you new adventure cards. If you would rather have the text read to you, then select the game in the Kosmos Helper App and enter the three-digit number. The app will read the corresponding entry.
Hint: Some locations may appear insignificant at first glance. As the story develops, however, they may become really important! So don't be afraid to return to a location at a later time and combine something with it that you didn't have at first. Also consider: You cannot always solve every riddle or task at the moment that you come across it. Often, you will need to obtain certain objects first, and a task or mission may sometimes extend across several chapters. So be sure to use the question mark to mark those locations!
b) Combine two adventure cards
In some locations, you will receive adventure cards. You can (and must) combine these with other specific adventure cards, or specific locations, and even with specific tokens during the course of the game. Sometimes it may seem obvious what goes together — and sometimes it will not. So be creative!
c) Combine an adventure card with a location
If you want to combine an adventure card with a location, you must be standing at that location.
About combining
To combine one adventure card with another adventure card or location, you will need to combine their numbers. On the adventure cards, the two-digit number is shown in the top left corner. Locations are marked with a three-digit location number. The smaller of the two numbers comes first, followed by the larger number. Combined, they yield a new four- or five-digit number (see example below). Look up the entry for that combined number in the adventure book and read it aloud.
Example: You have found adventure cards 10 (can of cat food) and 11 (can opener). You are at location 601, where you see a lemon. You want to try to use it to spice up the cat food. But first you have to open the can. So combine card 10 with card 11 and look under entry 1011: "Success, you opened the can. Return cards 10 and 11 to the box and take card 12 in exchange." Card 12 shows an open can of cat food. On your next turn, hopefully, you will be able to combine card 12 with the lemon at location 601. So look under entry 12601 and read what is written there. Go ahead and take a look to see if that worked …
Important: If there is no entry for a combination, you cannot combine the adventure cards with each other or with the location. Continue to the next player's turn. You will have to wait until your next turn to take another action.
The game will tell you explicitly if you need to put cards back in the box at some point. If this is not explicitly stated, keep the cards! Adventure cards cannot be combined with your character cards. Some adventure cards can be combined multiple times, and with multiple adventure cards or locations.
d) Speak with an NPC or combine an adventure card with them
During the course of the game you will encounter NPCs represented on tokens with a two-digit number. You can speak to them or combine an adventure card with them, unless an adventure card or an entry tells you something different! To do this, your figure has to be standing next to the NPC in question.
To speak with an NPC, combine the letter of the location card on which the token is lying with the number of the token and read the corresponding entry in the adventure book. IMPORTANT! You must speak with NPCs to progress the game! Make sure you speak with NPCs when they show up in different locations.
To combine an adventure card with an NPC, combine the number of the adventure card with the number of the token and read the corresponding entry in the adventure book.
Example: To speak to the blonde lady (94) in the dining room (A), read entry A94. To show her the can of cat food (12), read entry 1294.
Card Rules
Some entries may ask you to take or discard adventure cards. When you are instructed ...
- ... to take one or more adventure cards from the adventure card stack ("take #XY"), find them in the stack and show them to your team, unless they say otherwise. They are now part of your character's inventory.
- ... to place an adventure card back in the adventure card stack, sort it back into the stack according to the original order.
- ... to put one or more adventure cards back in the box, take the cards out of play and put them back in the box. It does not matter where or with whom the affected adventure card is located.
Important: If you must put adventure cards back into the box directly from the adventure card stack, you may look at them only after the game has ended, otherwise they will tell you too much about the story!
Note: During the game, you might be instructed to take a card from the adventure card stack that is already in your possession, or you might be instructed to put an adventure card back into the stack that has already been removed from the game. These instructions are obviously inapplicable. If you are instructed to take an adventure card that is already in the box, you may do so only if the entry explicitly allows it (e.g., "Take #XY out of the box"). Follow all other instructions to the extent that they are possible.
Token Rules
There are several types of token. The four main characters, various other characters (NPCs), check marks, question marks, and ritual tokens. The game tells you when and how they come into play.
If the game asks you to place a check mark at a location, use it to cover the location number. This location is no longer available and you cannot combine anything with it.
Miscellaneous Adventure Cards
(F1-4, H1-6, L1-6, M1-7, R1-5)
At several points in the game, some of the rules will be changed by these miscellaneous adventure cards that will come into play. The game will always let you know when this is the case by having either the card or an entry explain what to do with those cards. Simply follow the instructions.
Adventure Book
Every time that you investigate a location, combine adventure cards (see page 6), or talk to an NPC or are told to do so by the game, you will read an entry in the adventure book out loud or have it read to you by the Kosmos Helper App.
The entries are arranged in increasing numerical order in the book. The combinations corresponding to speaking to an NPC (letter + two-digit number) appear at the very end of the adventure book.
Make sure that you only read the entry you are supposed to read!
A lot of adventure book entries contain technical playing tips in addition to the story. Be sure to carry them out in order and re-examine the entry to make sure you haven't forgotten anything.
Note: We will be abbreviating the phrase "Read entry XYZ" as follows: "XYZ."
Saving the Game
To save, use your smartphone to take a photo of the current game setup and the adventure cards you've found so far. Alternatively, you can record this with pen and paper. Note where your characters are, where you haven't been, where you suspect there are unresolved things, where and what you want to try out, etc. For these be sure to make use of the question mark tokens!
Then place all your face-up location cards, the adventure cards in your inventory, and the characters and tokens in use in one bag. Unrevealed location cards and undiscovered adventure cards should be put into the other bag. Leave all the other items in the box. When you want to continue the game, reposition all location cards and adventure cards according to your photos or notes and place the characters and tokens on their previous positions.
The Game Begins
AND NOW THE GAME BEGINS. START BY READING ENTRY 100!
Notes
Note the current game status here or on a sheet of paper: the already-discovered location cards, your adventure cards, where your characters are standing, etc.
Hints
See the adventure card hints to find out where to get a specific item, what you need it for, or where to use it. Check out the location hints if you want to know what you need to do in a particular location or what items you can get or need there.
Important: If a hint refers to an undiscovered location or an adventure card that you don't have yet, you can refer to the corresponding hint to find out what to do.
Where = at which location // How = with which combination // With what = combine with?
Note: Some combinations will use up an adventure card. So it may be that you cannot try out all combinations!
Example 1: "Where: A/501. With what: 11. 1 point." means that you get the adventure card at location card A at 501 and that you have to combine it with adventure card 11 in the course of the game. Also, it is worth 1 point at the end of the game if you still have it.
Example 2: "How: 11 with 16, to get 17." means that you combine adventure card 11 with 16 (and then read entry 1116) to get adventure card 17.
Example 3: "With what: 11 with A/111, to get 12." means that you combine adventure card 11 with location 111 at location card A (and then read entry 11111) in order to get adventure card 12.
Example 4: "Yolanda + M9: F/123" means that only Yolanda finds something special or can do something at this location if she has M9.
Adventure Card Hints
- 10: Where: F/410. Provides clues for adventure card 20. 1 point.
- 11: Where: A/501. With what: 16, to get 17. 1 point.
- 12: Where: J/613. With what: L/316. Unlocks labyrinth.
- 13: Where: C/611 or H/604. With what: NPC 94 in A. Unlocks A/701.
- 14: Where: B/307, if NPC 95 is not on B. With what: J/313. Unlocks K.
- 15: Where: B/207.
- 16: Where: A/601. With what: 11, to get 17. 1 point.
- 17: How: 11 with 16. 1 point.
- 18: Where: I/108. With what: F/310, to get 46.
- 19: Jack + M5: Where: I/308 338. Required for Jack's personal mission.
- 20: Where: H/204. Clues for adventure card 22. 1 point.
- 21: Where: F/510. With what: C/111. Unlocks H. 1 point.
- 22: How: Uses clues from 10 and 20, along with 42 (2), 31 (3) and 28 (7). Solution = 237. Accordingly 237. 1 point.
- 23: Where: M/405. With what: 32, to get 39. Later at end of Chapter 2 as well. With what: P/515. Unlocks Q.
- 24: Where: L/416. With what: 33 or L4/712, to get rid of 33 and get 32.
- 25: Yolanda + M7: How: 56 with H/504 or C/511 534. Clue for getting 59.
- 26: Susan + M4: Where: G/214 244. Clue about L5/612.
- 27: Where: L/516. With what: NPC 88.
- 28: Where: A/601. With what: One of 3 objects required for getting 22.
- 29: Susan + M4: How: after L5/612 is unlocked 672 772.
- 30: Where: C/411. Clue for combining 37 with 46. 1 point.
- 31: Where: E/106. With what: One of 3 objects required for getting 22.
Location Hints
- 101: Combine 2 room keys (51, 53, 55, 57), to unlock B.
- 102: Is and remains locked!!!
- 103: Background information, depending on character.
- 104: Information.
- 105: Jack: 135, to get 35.
- 106: Get 31.
- 107: Unlocks DEFG assuming you have the key for it.
- 108: Get 18.
- 109: Get 70.
- 110: Get 37.
- 111: Combine with 21, to unlock H.
- 112: Information.
- 113: Combine with 74, to fulfill F2.
- 114: Combine with 47, to trigger end of Chapter 1.
- 115: Get 81.
- 116: Get 65.
- 117: Yolanda: 617 491, to conclude personal mission.
- 119: Get 71.
- 120: Unlocks L3.
- 126: Get 77.
- 201: Hint about Gersende P.
- 202: Signpost.
- 203: Get 68.
- 204: Get 20.
- 205: Yu: 235, to get 41.
- 206: Susan: 236, unlocks Susan's personal mission M4.
- 207: Get 15.
- 208: Combine with 82, to unlock O.
Location Card Hints
- A: Game automatically starts with A.
- B: Combine 2 room keys (51, 53, 55, 57), to unlock B.
- C: Investigate B/707. If H is in the game: With 13, lure NPC 94 away from A, then A/701 731 761.
- D: Either play with Susan or lure NPC 95 away from B with bell cords in EFG. Then 307 337. Get keys 14, 51, 53, 55, 57.
- E: Either play with Jack or lure NPC 95 away from B with bell cords in DFG. Then 307 337. Get keys 14, 51, 53, 55, 57.
- F: Either play with Yu or lure NPC 95 away from B with bell cords in DEG. Then 307 337. Get keys 14, 51, 53, 55, 57.
- G: Either play with Yolanda or lure NPC 95 away from B with bell cords in DEF. Then 307 337. Get keys 14, 51, 53, 55, 57.
- H: Combine 21 with C/111, to unlock H.
- I: Combine 22 with C/211, to unlock I.
- J: Combine 47 with G/114, to end Chapter 1 and unlock J.
- K: Combine 14 with J/313, then 343, to unlock K.
- L: Investigate 402.
- L1: Combine 12 with L/316, to unlock L1.
- L2: Investigate L1/312.
- L3: Investigate L2/120.
- L4: Investigate L5/812.
- L5: Investigate L2/412.
- L6: Investigate L3/320 or L5/520.
- M: Requires code from labyrinth via clues 36 and 60 4312.
- N: Combine 39 with L3/220, to end Chapter 2. Start Chapter 3 takes place on N.
- O: Combine 82 with I/208, to unlock O.
- P: Investigate N/526 626, to unlock P.
NPC Hints
- A94: Automatic at start of game. Hint about 13.
- A96: Automatic at start of Chapter 2.
- A97: Automatic at start of Chapter 2.
- B90: In Chapter 3: 65, 67 or 68 with 807 combine 676568, to fulfill F1.
- B95: Combine 2 room keys (51, 53, 55, 57), to unlock B.
- B98: Automatic at start of Chapter 3. Leaves B if 79 is combined with P/315.
- B99: Automatic at start of Chapter 3. Leaves B if 79 is combined with P/315.
- C94: Combine 13 with 94.
- C96: After 4th haunting (H4) NPC 96 is moved to C.
- C98: Combine 79 with 315, to move NPCs 98 and 99 from B to C.
- C99: Combine 79 with 315, to move NPCs 98 and 99 from B to C.
- D95: D/303 323.
- D96: After 2nd haunting (H2) NPC 96 is moved to D. Hint about safe and M.
- E95: E/406 443.
- F95: F/210 243.
- G95: G/314 344.
- H94: Combine 13 with 94.
- I93: Combine room key 51, 53, 55, 57 with 508, to unlock R.
- I98: In Chapter 3, talk to NPC 98 on B or C, to move her to I.
- J91: Combine 74 with 113, to fulfill F2.
- J96: After 5th haunting (H5), NPC 96 is moved to J.
- J97: After 1st haunting (H1), NPC 97 is moved to J.
- K97: After 3rd haunting (H3), NPC 97 either remains on J or is moved to K.
Scoring
Refer to the ranges below to see how well you did! (for two characters):
- 0–5 points: Phew, that was a close call. Well done!
- 6–10 points: You have potential. Congratulations!
- 11–15 points: You have discovered most of the Grand Hotel's secrets. Very good!
- 16–20 points: Efficient, imaginative, eloquent, keen to experiment, in short: excellent!
- 21 points and over: Miss Marple, Sherlock, and Columbo have nothing on you! This was an achievement worthy of the movies!
With 3 characters, you will each need three more points, and with four characters, four more points each!
The Authors
Phil Walker-Harding has loved to play and develop board games since childhood. He particularly likes games that bring people of different ages and types together. Phil is also interested in theology, classical Hollywood movies, and the myths of Ancient Egypt. He lives with his wife Meredith in Sydney, Australia.
Matthew Dunstan was born in Sydney, Australia in 1987. His earliest memories of playing parlor games go back to card games with his grandmother and to a travel chess game which he received from his aunt as a six-year-old and with which he pestered everyone to get them to play with him. Today he works as a chemist at the University of Cambridge in England and is researching materials for the capture and storage of CO2.