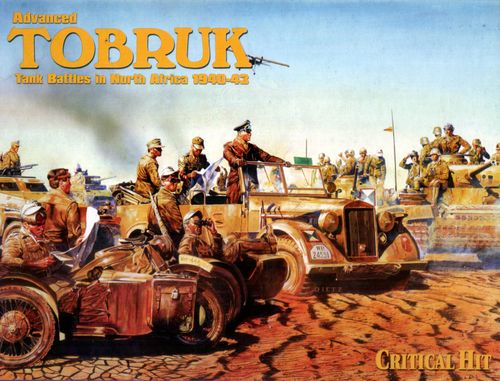
Advanced Tobruk: Tank Battles in North Africa 1940-43
Advanced Tobruk: Tank Battles in North Africa 1940-43 Rulebook
Table of Contents
Table of Contents
- Glossary of Abbreviations
- 2. Components
- 3. Game Scale
- 4. Stacking In General
- 5. Sequence of Play
- 6. Movement In General
- 7. Towing, Transporting and Riders
- 8. Weapon Units
- 9. Crews
- 10. Morale
- 11. Broken Units and Surrender
- 12. Direct Fire Combat in General
- 13. Armor-Piercing vs. Vehicle Combat
- 13.1 Gun Rating and Size
- 13.2 Determine the Range
- 13.3 Rate of Fire
- 13.4 Direct Hit Attempt Die Roll
- 13.46 Target Acquisition and Burst on Target
- 13.5 Hit Location
- 13.6 Target Damage
- 13.7 Burning and Non-Burning Wrecks
- 13.8 AFV Bail Out
- 13.9 Main Armament Defined
- 13.10 Multiple Vehicle Weapons
- 13.11 AFV Suppression
- 13.12 Marker Placement
- 14. Personnel Direct Fire vs. Armor Combat
- 15. Personnel Unit Combat
- 16. Anti-Personnel HE Direct Fire
- 17. Details on Anti-Personnel Direct Fire
- 18. Off-Board Indirect Artillery Fire
- 18.1 Artillery Order of Battle
- 18.2 Artillery Acquisition Process
- 18.3 Artillery Accuracy
- 18.4 Direct Hit Determination
- 18.5 Registrations
- 18.6 Artillery Concentration
- 18.7 Artillery Barrage
- 18.8 Artillery Forward Observers
- 18.9 Artillery OP Tanks
- 18.10 Alternate Forward Observers
- 18.11 Counter-Battery Fire
- 19. Mortars
- 20. AFV and On-Board Gun Indirect Fire
- 21. Overrun
- 22. Personnel Close Assault
- 23. Personnel vs. Vehicle Close Assault
- 24. Armor Command Control
- 25. Carriers and Armored Personnel Carriers
- 26. Open Topped and Partially Armored AFVs
- 27. Sponson and Hull Mounted Gun Limitations
- 28. Portees
- 29. AFV Crews
- 30. AFV Visibility Restrictions
- 31. Field Emplacements
- 32. Limited Intelligence
- 33. Terrain
- 34. Weather and Aerosols
- 35. Aircraft
- 36. Designer's Notes
Glossary of Abbreviations
- A — APCR
- AA — Anti-Aircraft weapon
- AAMG — Anti-Aircraft Machine-gun
- AFV — Armored Fighting Vehicle
- ACV — Armored Command Vehicle
- AP — Armor-Piercing
- APC — Armored Personnel Carrier
- APCR — Armor-Piercing Composite Rigid
- ART — Artillery
- AT — Anti-Tank Gun
- ATR — Anti-Tank Rifle
- BMG — Bow Machine-gun
- BOT — Burst On Target
- C — 'Continued Fire'
- CA — Covered Arc
- CFF — Call for Fire (artillery)
- CMG — Coaxial Machine-gun
- CS — Close Support
- F — Fired (counter)
- F-KILL — Firepower Kill
- FRAG — Fragmentation (artillery and mortar attack factors)
- (f) — French
- FFE — Fire for Effect (artillery)
- FO — Forward Observer
- FOF — Field-of-Fire
- FOW — Fog of War
- FRD — Fractions Rounded Down
- G — Gun
- Gunfire — Gunfire (infantry and machine-gun attack factors)
- H — Hull; Heavy Crew-Served Weapon; HEAT
- HE — High Explosive
- HOW — Howitzer
- HPN — Hit Probability Number
- HPT — Hit Probability Table
- HQ — Headquarters
- K-KILL — K-KILL
- L — Light Infantry Weapon
- LH — Lower Hull
- LOS — Line-of-Sight
- M — Medium Weapon
- MG — Machine Gun
- M-KILL — Mobility Kill
- MP — Movement Point
The glossary icons also identify fully-tracked, half-track and wheeled vehicles by icon shape.
2. Components
2.1 The Game Map
2.11 The game map represents the desert terrain where the actual campaign occurred. The hexagonal grid system is used to regulate movement and combat. Each hex is provided a unique coordinate for identification purposes and contains a 'center dot' for use in tracing Line-of-Sight (LOS) during play. In some scenarios, only a portion of the map is used. In others, more than one map is used. The map-sheets are 'geomorphic', i.e., they can be laid out to connect on all sides. When laying out the map for play, orient the 'Tobruk' logo on the map in keeping with the map diagram found on each scenario card.
2.2 Overlays
2.21 Overlays are moveable terrain representations that are placed in certain map locations as specified in some scenarios. Not all scenarios use overlays. Overlays are used to depict wadis, deirs, villages, hillocks, forts, and other desert terrain.
2.22 Overlays are placed in keeping with Scenario Special Rules (SSR). Each overlay will be identified by a letter-number ID and placement by 'X' and 'Y' coordinate. Simply match the X and Y found on the overlay with the matching hex on the map.
2.23 Hex ID's for overlays remain those of the hex coordinate found beneath that overlay (e.g., if an overlay in placed on hex AA2, it is still identified as 'hex AA2' for any hex identification purposes).
2.3 Charts and Tables
2.31 Central to play is the play aids containing numerous charts and tables. The most important of these are the Hit Probability Table (HPT) and the Casualty Table. Each player uses the tables provided to resolve combat and assess damage.
2.4 Scenarios
2.41 The historical scenarios referred to in the rules are provided on their own individual cards. Each scenario contains orders of battle for the combatants, a turn record track, any Scenario Special Rules (SSR) unique to that scenario, pertinent map information and victory conditions. Each scenario card also provides an historical summary.
2.42 The OB area of the scenario card shows the forces available to each side. The instructions those units must follow when setting up is also found here, including order of set up. Each unit counter shown on the scenario has a number printed under it that corresponds with the quantity of that type of unit provided for a scenario. There is no need to pick out a specific piece from those provided. A squad depiction in the order of battle with an "8" under it means you need to pick eight of that squad type, e.g., 8 x 7-6-8 squads.
2.43 Some units enter the game from off-map. All units may enter in keeping with the listed entry instructions.
2.44 Victory or defeat is based on fulfilling the scenario Victory Conditions. Victory may involve seizing terrain, advancing on the battlefield or causing enemy casualties. In order to win, a side has to COMPLETELY fulfill the stated Victory Conditions. If victory conditions are provided for ONE side only, failure to fulfill these conditions results in victory for the other side. Draws are sometimes possible.
2.45 Some scenarios call for one side or the other to earn Victory Points. Use the values provided on the Victory Point Table.
2.46 Units exited to meet scenario Victory Conditions are worth the same value to the exiting side as if they were eliminated. These units simply move off the map from the exit hexes listed in a scenario, paying ONE movement point to move off the map from any map-edge hex.
2.47 A group of rectangular boxes on each scenario card shows how many turns the scenario lasts. Place the Turn marker in the box for that turn.
2.48 Players set up in the order listed in their OB, with the side setting up first completing all set up before the side setting up second places any units on the map. In any scenario that has ALL the units of one side entering play from off map, the non-entering player sets up first.
2.5 Marker Counters and Side Notes
2.51 Marker counters, also referred to as markers, are provided to record all functions. In the rare instance players may wish to make a side note, use a scrap of paper.
2.6 Unit Counters
2.61 The die-cut playing pieces provided, variously called units, unit counters, or counters, represent individual vehicles, weapons, or small groups of personnel. Printed on each unit counter is information pertinent to the play of the game. Some units also use cards to present information (e.g., AFV cards).
2.62 Counters come in three types and three sizes. Marker counters are used to provide information and come in 1/2" and 3/4". All other counters are units, either personnel, weapons, emplacements or vehicles. Vehicles and heavy crew-served weapons are provided on 3/4" counters. Counters depicting infantry, light infantry weapons and medium crew-served weapons use 5/8" counters. Emplacements use a 3/4" counter in desert yellow, as do all truck transport, the latter to signify that they may be used freely by all nationalities when provided in an order of battle or captured during play.
Sample counter types depicted in the rules include: AFV, APC, Aircraft, Heavy Crew-Served Weapon, Carrier, Crew, Leader, Squad, Minefield, Mine Lane, Truck, SPG, AFV, Light MG, Medium MG, FO, Weapon Pit, Bunker, AT Trench, Sangar, Hedgehog, Suppressed marker, Heavy AA, Portee, APC, SPG, AFV Turret marker, Light Mortar, Medium Mortar, Light ATR, Medium ATR, AFV/APC/Light Mortar/Light MG/Medal Fire For Effect, FOW Tank, FOW Gun, Sidecar Motorcycles, Armed Truck.
2.63 Vehicle Counter Types
2.631 There are THREE types of vehicle counters in the game: Armored Fighting Vehicles (AFV), including turreted tanks and SP Guns (non-turreted); Armored Personnel Carriers (APC) including half-tracks and Carriers; and soft-skinned transport, including trucks and staff cars. Each of these vehicle types is further identified by its movement type, consisting of fully-tracked, half-track and wheeled vehicles.
2.632 Movement Class—There are three movement classes for vehicles, denoted by the SHAPE of the icon its movement points are printed on. An 'oval' denotes a fully-tracked vehicle. An 'oval plus small circle' denotes a half-track. Two large circles denotes a wheeled vehicle.
2.633 Target Class—There are three target classes for vehicles, denoted by the COLOR of its movement class icon. A GRAY icon denotes an armored vehicle (AFV). A yellow icon denotes an APC, or 'lightly armored' vehicle. A white icon denotes a truck-type vehicle, i.e., un-armored. All 'gray' vehicles are provided their own 'AFV Card' and use the Armor Factors provided on the card for each facing and aspect when fired on. All 'yellow' (APC) and 'white' (Truck) icon vehicles use the 'Direct Hit Results For APC And Non-AFV Vehicles' table when fired on.
2.7 AFV Cards
2.71 Each AFV is provided its own card, detailing the Armor Factors and other information pertinent to that unit. It is suggested that the AFV Cards for each AFV type in play for a particular scenario be laid out in a convenient spot for viewing during play.
2.8 Dice
2.81 Tobruk uses ten-sided 'percentile' dice to represent fate. When one die is used, a roll of '0' is read as TEN. When two dice are used, the colored die is used as the TENS die and the white die as the ONES die (e.g., a colored '7' and a white '2' is read as 'seventy-two'). A roll of '00' is read as ONE HUNDRED.
2.82 Rounding—Unless stated otherwise, all fractions are rounded DOWN.
3. Game Scale
3.01 Each hex represents 50 yards of terrain from hexside to hexside. Each game turn equals ninety seconds of elapsed time. Each weapon or vehicle counter represents one weapon or vehicle. Personnel units vary, representing squads, crews, artillery forward observers, non-commissioned officers and officers (NCOs and officers are referred to collectively as leaders).
4. Stacking In General
4.01 Stacking refers to the number of counters that are allowed in any one hex. Stacking limits refer to each side. Thus, one vehicle from each side (a total of two) can be stacked in each hex without violating stacking rules.
4.02 A unit may enter a hex in excess of stacking limits but may not end its Movement Segment with units in a hex in excess of stacking limits. If stacking limits are exceeded due to enemy fire (e.g., an AFV receives an M-KILL result in a hex that already contains a friendly AFV), the over-stacking needs to be cured at the earliest opportunity. Over-stacking penalties apply to over-stacked hexes.
4.1 Overstacking Penalties
4.11 In any hex that has two or more friendly vehicles or heavy crew-served weapons an HPN DRM of –1 is applied per vehicle/heavy crew-served weapon in excess of one against all targets in the hex. An HPN DRM of –1 OR a one column shift RIGHT on the Casualty Table is also applied per additional STACKING POINT for non-vehicle unit.
4.2 Vehicular Unit Stacking
4.21 One friendly vehicular unit is allowed in a hex at any one time before overstacking occurs.
4.3 Personnel Unit Stacking
4.31 Each side is limited to SIXTEEN Stacking Points of personnel in a hex at any one time before overstacking occurs. Stacking points are determined by the number of figures depicted on a counter. Thus, a squad has three figures on it and totals THREE stacking points; half-squads [back of squad counter] and crews have two figures and total TWO stacking points each). Leaders and Forward Observers (FOs) have one figure and total ONE stacking point.
4.32 The presence of vehicular units (which have their own stacking limit) does not affect personnel unit stacking in any manner.
4.33 Weapons units do not affect stacking limitations. Weapon units may not move by themselves.
4.34 Aircraft are not affected by stacking rules, nor are markers.
4.35 Emplacement counters do not affect stacking in any way. Note that units stacked under and on top of emplacement counters are totaled for stacking purposes in a hex.
5. Sequence of Play
5.01 TOBRUK is played in turns. Each turn contains four SEGMENTS:
- COMBAT SEGMENT
- MOVEMENT SEGMENT
- CLOSE ASSAULT SEGMENT
- END OF TURN SEGMENT
5.02 The Combat Segment is further broken down into phases and includes the Indirect Fire Phase and the Direct Fire Phase. During each segment, players alternately move or fire their units.
5.03 Random First Fire and Movement
5.031 Random First Fire—Each player rolls a die once at the beginning of the EACH phase of the Combat, Movement and Close Assault Segments (i.e., one die roll at the start of each segment) to determine which side fires and moves first. The player rolling the lowest number fires or moves first during the respective segments.
5.0311 OPTIONAL—Players may wish to experience additional uncertainty and excitement during play by using VARIABLE fire and movement opportunities. Whenever a player has the opportunity to fire or move a unit (exception: do not roll for Opportunity Fire) during the Direct Fire Phase of the Combat Segment and the Movement Segment, a die is rolled. This die roll is HALVED and represents the number of CONSECUTIVE units that may use direct fire or movement. Thus, instead of moving or firing one unit at a time, players alternate rolling for the number of units they may move or fire.
5.1 Combat Segment
5.11 Indirect Fire Phase
5.111 Following a die roll to determine the side that fires first, the players alternate conducting indirect fire in the following order:
- SMOKE SHELLS
- AIRCRAFT ATTACKS
- OFF-BOARD INDIRECT FIRE
- ON-BOARD MORTAR INDIRECT FIRE
- ON-BOARD INDIRECT FIRE
- COUNTER-BATTERY FIRE
5.12 Direct Fire Phase
5.121 Following a die roll to determine the side that fires first, the players alternate firing the weapons of one (or a group in some cases, e.g., firegroups) of their units. The dice are rolled to determine the effects of their fire. An 'F' marker is placed on top of the units that fired.
5.13 Firing Routine
5.131 Players repeat firing in the Indirect and Direct Fire Phases until all desired weapons have been fired. If one player finishes firing all of his weapons before the other player, the other player may continue firing until all weapons are fired. There is no requirement to fire any or all of one's units in a given turn. All fire of each type—all smoke shells are fired before any aircraft attacks are conducted—all Indirect Fire is concluded before any Direct Fire is conducted.
5.2 Movement Segment
5.21 Following a die roll to determine the side that moves first, the players alternate moving one of their units (or a group in some cases, e.g., platoon movement), placing movement arrow counters to mark units that moved.
5.22 Players alternate moving until all desired units have been moved. If one player finishes moving all of his units before the other player, the other player may continue moving until all units are moved.
5.23 During the Movement Segment Opportunity Fire may be used in the form of direct fire (only, i.e., not indirect fire) against any enemy unit that moves while it is in the act of moving. Mark units that use Opportunity Fire with an 'F' marker normally as if they fired during the Combat Segment. Once all units have been moved, Final Opportunity Fire may be conducted by eligible units (i.e., not yet marked as fired or moved) against units marked with movement arrows.
5.3 Close Assault Segment
5.31 Following a die roll to determine the side that moves first, the players alternate moving any non-Broken or Surrendered personnel units they wish to move ONE hex during the Infiltration Phase. Conduct the Close Assault Segment in the following order:
- INFILTRATION PHASE
- MELEE PHASE
5.32 Mark any hex containing units of both sides with a Melee marker immediately upon entry of an enemy unit.
5.33 Being marked with a melee marker freezes all personnel units in the hex. They may not move out of the hex during the remainder of the Infiltration Phase. New units of both sides may enter, but the first unit(s) from the opposing side determine ATTACKER and are placed on top of all enemy units in the hex. All new friendly units that enter the hex during the Infiltration Phase are also considered attackers and are placed on top of all enemy DEFENDER units. The ATTACKER is denoted by an 'A' on the Melee Table; the DEFENDER by a 'D'.
5.34 Infiltration Phase
5.341 All units that the players wish to MOVE one hex are moved before any melee is conducted. This one-hex movement is considered 'infiltration'.
5.35 Melee Phase
5.351 Each hex containing opposing units is considered a melee hex. Melee in each hex is conducted in each hex in a series of 'rounds' until only the units of ONE side remain in the hex.
5.4 End of Turn Segment
5.41 At the end of the turn, all movement arrow (exception: vehicles that continue moving between turns), melee, '2' Smoke markers and 'F' counters are removed. All Fire for Effect (FFE) markers are flipped to their Call for Fire (CFF) side. All other markers remain.
5.42 Make rally attempts for all broken personnel units in the same hex with a leader and for surrendered units in the same hex with any type of friendly unit.
6. Movement In General
6.01 Movement is calculated in terms of movement points that are paid to enter each hex. In general, each unit expends one movement point of its total movement (point) allowance for each hex it enters with the exception of certain terrain that entails an expenditure of two or more movement points.
6.02 In any one turn, a player may move as many or as few of his eligible units (e.g., M-KILLed units may not move) as he desires. Movement is voluntary, never required.
6.03 Each unit is moved individually, tracing the path of movement through each hex in turn. Once a unit has completed its movement, it may not be changed, repositioned, or re-aligned.
6.04 Whenever a unit moves out of the hex it occupied at the beginning of the Movement Segment a movement arrow marker is placed on it (or behind it) at the conclusion of its movement.
6.05 Each vehicle counter has its movement point allowance printed on the counter in two-part form: 'cross-country' movement | assault movement. Weapon units may never move on their own, and may only move by being transported (i.e., towed by vehicles or carried by personnel). Personnel units may move by using CRAWLING, ASSAULT or RUNNING movement and do not have a movement allowance printed on their counters.
Example: A squad that uses FOUR movement points, one each to enter each open ground hex and two MP to enter a scrub hex, is marked as 'winded' since it must use RUNNING movement to use 4-6 movement points. If the scrub hex was instead open ground, the squad could have made this trip using Assault Movement (and would NOT be marked as 'winded').
6.06 Aircraft counters do not 'move' in the same manner as other units. They are simply placed in the hex the owning player wishes to attack.
6.1 Friendly Map Edge
6.11 Some rules reference the 'friendly map edge' (e.g., broken unit movement). A friendly map edge is any map edge where friendly units are listed as entering during a scenario AND any map edge specified by SSR as a friendly map edge.
6.2 Alternating Movement and Fire
6.21 Random Alternating Movement—Movement in a scenario is done in the same manner as combat, one unit at a time, alternating sides. A roll of the die is used to determine which player moves first and which player fires first in each new segment and phase.
6.3 Terrain Costs
6.31 The entry of open ground costs all units one Movement Point (MP). Most other terrain is entered at a cost of TWO movement points, with the exception of roads and tracks (and sand dune hexsides) and hexes combining a contour and other terrain. Roads cost all vehicles HALF a movement point each and are treated as open ground by all other units (i.e., they enter at the cost of one MP). Tracks cost TRACKED (including half-tracked) vehicles HALF a movement point each and all other units treat them as open ground.
6.4 Personnel Movement
6.41 Personnel Movement Types
There are no Movement Points printed on personnel counters. All personnel may use ONE of the following movement types during a Movement Segment:
6.411 CRAWLING—Allows a personnel unit to move ONE hex, including one-hex-and-under an emplacement (e.g., hedgehog). Personnel using crawling are considered in a STATIONARY cover state. Place a movement arrow ON TOP OF units using crawling movement.
6.412 ASSAULT—Allows a personnel unit to use up to THREE movement points. Personnel using assault movement are considered in an ASSAULT cover state. Place a movement arrow marker BEHIND the unit(s) using assault movement.
6.413 RUNNING—Allows a personnel unit to use up to SIX movement points. Personnel using running movement are considered to be in RUNNING cover state for Opportunity Fire while in the act of moving and ASSAULT for any subsequent fire. Personnel carrying MEDIUM crew-served weapons may not use running movement. No personnel unit may use running movement on two consecutive turns. Place a movement arrow marker BEHIND the unit(s) using running movement and a 'winded' marker on the units to remind players so-marked units may not use running movement the following turn.
6.42 Personnel Platoon Movement
6.421 Personnel, including those carrying light and medium weapons, may move as a multi-unit 'stack' using personnel platoon movement. Each hex of personnel units may move together, representing ONE unit moved for that player during the Movement Segment, as long as there is at least one leader in the hex. The leader MUST move with the stack at all times. Otherwise, all personnel units are moved individually.
6.4211 When using personnel Platoon Movement, personnel in adjacent hexes may ALSO move with the leader-led stack, but all personnel must use the SAME movement type. Up to THREE hexes of personnel units may move using Platoon Movement, each stacked within stacking limits. However, a leader must accompany the 'platoon' at all times. If the leader is unable to continue for any reason (broken; eliminated), all units in the 'platoon' must immediately stop moving unless there is another leader in one of the 'platoon' hexes, allowing them to continue. When moving as a 'platoon', all units expend movement points simultaneously, paying the same cost as the HIGHEST expenditure of any personnel unit in the platoon.
6.4212 Once Platoon Movement is initiated, individual units may NOT voluntarily 'break off' from the platoon.
6.5 Vehicular Movement
6.51 Cross Country and Assault Movement
6.511 Each vehicle has a set of two movement point values on its counter. The left-hand value is the cross-country movement rate. The right-hand value is a slower, assault movement rate. Assault movement is used to load or unload personnel for transport, for overruns and when a vehicle wishes to move and fire during the same turn (with some limitations imposed).
6.512 Place a movement arrow marker on top of a vehicle using assault movement and behind a vehicle using cross-country movement. When placing an arrow behind a moving vehicle, the marker is placed in the hex just vacated by the unit.
6.52 Facing and Covered Arc
6.521 Each vehicular unit counter has a front, rear, and flank orientation determined by the hex spine to which the front (i.e., to the right, in the same direction that the text is read) of the unit's silhouette is pointed. This is its facing, also known as covered arc (CA). Covered arc is also important for the facing of a turret, known as Turret Covered Arc (TCA) and the facing of a vehicle, known as Vehicle Covered Arc (VCA). Note TCA and VCA can be different (i.e., when a turret is turned from its front facing), denoted by placing a turret marker on the vehicle counter.
6.522 A vehicular unit must always face towards one definite hex spine in the hex it occupies.
6.523 Vehicular units must move in the direction of their front facing (i.e., through one of its two front hex sides) when moving from one hex to another. Vehicles may also use reverse movement to move in the direction of one of their two rear facing hex sides, at a cost of DOUBLE movement point expenditure per hex.
6.53 Pivoting
6.531 Pivoting—A vehicular unit may change its facing to any hex side within a hex in one of the following two ways:
6.532 A unit that does has not fired during the Combat Segment and does not move out of its hex during the Movement Segment may pivot (including pivot any turret) to any other hex side in that hex at no movement point cost. Pivoting, without leaving the hex occupied at the beginning of the Movement Segment, is still considered as 'movement.' Pivoting still triggers Opportunity Fire.
6.533 While moving, a unit may pivot to any other hex spine at the cost of one movement point per hex spine change.
Example: The Grant tank may move FORWARD into either of the front two hexes in its vehicle covered arc. It must pivot to enter other hexes outside its VCA.
6.534 NOTE: Vehicles that do NOT have a 360-degree turret noted on their counter by a black circle around the gun (or machine gun in some vehicles that have machine gun turrets, e.g., Pzkw 1B) information are Self Propelled Guns (SPG) and may only fire through their front two hexes unless they pivot to bring targets within their two-hex 'vehicle covered arc' (VCA).
6.54 Continued Vehicular Movement
6.541 Any vehicle that moves may opt to 'continue' moving during the End of Turn Segment. Leave the movement arrow marker in place for such vehicles, denoting that they are considered to be moving during the next Combat Segment. During the next Movement Segment, they may move using cross-country OR Assault Movement, no matter the movement type used during the previous turn.
6.542 Vehicles that use continued movement are considered moving for all purposes during the Combat Segment of the next turn.
6.55 Convoy Movement
6.551 In some scenarios SSR may state all or some of the vehicles in a side's order of battle set up or enter play using Convoy Movement. Vehicles using Convoy Movement must set up or enter play in adjacent hexes with one vehicle per hex and all vehicles facing in the same direction. The 'convoy' moves as a multi-unit stack, using the Assault Movement of the SLOWEST vehicle in the convoy.
6.552 Disbanding—No vehicle may move independent of the convoy, including the loading or unloading of personnel or weapons, until at least ONE unit in the convoy spots an enemy unit. All units in the convoy must use Continued Movement between turns (retain movement arrow markers on the convoy accordingly).
6.56 Vehicle Platoon and Troop Movement
6.561 A group of up to FIVE ADJACENT Italian or German AFVs or THREE British AFVs may move together as a multi-unit 'stack' using Platoon Movement. This form of movement represents the movement of ONE friendly unit during a player's portion of the Movement Segment.
6.5611 When using Platoon Movement, the 'platoon' (or 'troop' for British AFVs) may not exceed the movement points of the SLOWEST vehicle in the group. Only 'gray' and 'yellow' icon vehicles may use Platoon Movement.
6.5612 Vehicles wishing to use Platoon Movement must begin the Movement Segment ADJACENT. During their move, they must remain adjacent at all times unless one or more of the vehicles in the platoon are unable to continue due to M-KILL, K-KILL or F-KILL (forcing immediate movement toward the nearest friendly map edge). All remaining vehicles in the platoon MAY continue moving (after pausing to move an F-KILLed AFV toward the nearest friendly map edge to the limit of its movement points—it is no longer restricted by the vehicles in the platoon).
6.5613 Vehicles using Platoon Movement MAY conduct overruns if using Assault Movement. No unit may voluntarily 'break off' from a platoon once using Platoon Movement in a Movement Segment.
6.5614 When moving as a 'platoon', all units expend movement points simultaneously, paying the same cost as the HIGHEST expenditure of any vehicle in the platoon.
6.6 Opportunity Fire
6.61 The purpose of Opportunity Fire is to prevent the unopposed movement of units from one hex to another without being engaged by enemy units in the area. In this rule any enemy units moving (including loading personnel for transport and pivoting vehicles, turrets, and heavy crew-served weapons and their crews) within a hex or from one hex to another in the firing units line-of-sight DURING THE MOVEMENT SEGMENT may be fired on by the firing unit using DIRECT FIRE. Opportunity Fire may also be used against any unit that changes its vehicle or turret covered arc, but not before one hex spine change in covered arc is made.
6.62 A unit that wishes to use Opportunity Fire must be otherwise eligible to fire, i.e., it may not have fired or moved already or suffer other limitations that prohibit firing (e.g., broken or surrendered personnel; F-KILLed gun; out of spotting range; etc.)
6.63 Opportunity Fire is conducted during the Movement Segment against MOVING units only (including units that pivot), but all rules for direct fire apply normally. The column shifts for RUNNING are only applied to target units only when fired on by Opportunity Fire. Otherwise, the cover state of all moving units is ASSAULT (exception: units that CRAWL are considered STATIONARY).
6.64 An individual unit may not use more opportunity fire ROF, against a moving unit, than that unit spent in movement points in the hex entered (or moved in if moving within a hex) unless it ends its move there.
6.65 Final Opportunity Fire
15.51 After both sides have concluded moving, any units marked as moved (i.e., with a movement arrow marker) may be fired on by any units still eligible to conduct Opportunity Fire. The player that would be eligible to move next fires first.
Example: The Grant tank may move in REVERSE into either of the rear two hexes in its vehicle covered arc. Using reverse movement costs DOUBLE the normal MP to enter a hex.
7. Towing, Transporting and Riders
7.1 Towing
7.11 The ability for each vehicle to tow a heavy crew-served weapon is denoted on the Tow/Personnel Table. In addition to carrying units, each eligible transporting unit may also tow one heavy-crewed weapon unit that does not exceed its towing capabilities.
7.12 Towing capacities are in addition to transport-carrying capacities.
7.13 In addition to the stated capacities on the Tow/Personnel Table, each transport vehicle capable of towing a gun may also carry ONE light infantry weapon and ONE leader per Stacking Point capacity listed for that vehicle.
7.2 Loading and Unloading Procedures
7.21 Loading and unloading procedures are exactly the same for both transporting and towing. All loading and unloading is executed in the Movement Segment. In addition to towing heavy crew-served weapons, vehicles may be towed by other vehicles.
7.22 Load—To load, the transporting vehicle and passenger or towed unit must be in the same hex. A vehicle may move to the hex it wishes to 'pick up' a personnel unit in, but may only use Assault Movement in order to load a personnel unit or hook up a towed unit. Units being loaded (including units being towed) are placed on top of the transporting vehicle counter. No movement or fire is allowed in the turn of loading by the transporting unit once it enters the hex of the unit to be transported or towed. Passenger/towed units may not fire or move during the turn they are loaded or hooked up for towing. Towed units may never fire while being towed. Personnel units may fire in some instances (e.g., personnel units in a Sdkfz 251/1).
7.23 Unload—Unloaded units are placed UNDER the transporting vehicle and the act of unloading may only be conducted by vehicles using Assault Movement. Any personnel units or heavy crew-served weapons unloaded may not move further that turn. No fire is allowed in the turn of unloading by the weapon or personnel units but vehicles are still eligible to move and fire using the full movement point allowance provided by Assault Movement, during the Movement Segment they unloaded a transported unit. Guns and their crews are placed in the hex UNDER the formerly towing vehicle, with the gun facing the covered arc of its owning player's choice.
7.231 Personnel units may unload from a STATIONARY vehicle and INFILTRATE one hex in the Close Assault Segment normally in the same turn.
7.24 Units may move and fire normally in the turn after unloading.
7.25 Towing other vehicles and heavy crew-served weapons is executed at the ASSAULT MOVEMENT rate of the towing vehicle. All other transporting of personnel and light and medium crew-served weapons do not restrict the towing vehicle in any way (i.e., cross-country movement rate may be used in the turn(s) after picking up personnel to be transported).
7.26 Vehicular units may hook up to tow another vehicle regardless of their apparent facing in respect to the unit being towed. When towed, both units are assumed to have the same facing. Once hooked up, turn the VCA of the vehicle being towed to match that of the towing vehicle. Place the vehicle being towed on top of the towing vehicle. A vehicle may never tow a 'larger' vehicle, i.e., a 'small' (white circle behind unit ID letter) vehicle may only tow small or very small vehicles; a 'very small' (red circle behind unit ID letter) may only tow very small vehicles; a 'large' (black circle behind unit ID letter) may tow all other vehicles. A 'normal' sized vehicle may tow other normal, small and very small vehicles. A wheeled vehicle may not tow a normal or large tracked vehicle. No vehicle may be towed INTO a soft sand hex. Towing a vehicle OUT of one requires both vehicles to begin and spend an entire Movement Segment in the sand hex. They may exit the following turn normally.
7.27 When the transporting vehicle is fired upon (including in the act of loading/unloading), the units being transported (not towed units) are also affected. A non-AFV (or APC) vehicle is affected as per the Direct Hit Results for APC and Non-AFV Vehicles table and the passengers receive the full FRAG or Gunfire factors of the rounds fired at their vehicle. Any personnel unit that is broken or surrenders when attempting to load or hook a gun up for towing may not load/hook up and remains in the hex (i.e., such units remain UNDER the transporting vehicle) marked accordingly as broken or surrendered. Casualties are incurred normally by personnel when transported and any personnel unit broken or surrendered while being transported is immediately unloaded.
7.3 Transported Personnel Cover States
7.31 Personnel units being transported are assumed to be in either a GOOD or FULL cover-state if indicated on the vehicle counter by a 'G' or 'F' notation (e.g., Sdkfz 251/1 half-track) OR STATIONARY (all other vehicles) and suffer casualties accordingly. Note that this rule does not apply to tank riders, which are transported in an ASSAULT cover state.
7.32 Personnel units in vehicles receiving K-KILL results from direct fire are not eliminated, but receive an attack from fragmentation on the Casualty Table from any AP or HE rounds hitting the vehicle. After resolving the effects of any AP or HE fire, place the personnel units in the hex with the burning or non-burning wreck AND take an immediate morale check, applying all results of the morale check normally. Personnel units in vehicles K-KILLed by INDIRECT FIRE are eliminated.
7.4 Carried and Towed Weapon Units as Targets
7.41 Medium and light weapon units being carried (i.e., not towed—only heavy crew-served weapons are towed and they are NOT eliminated by a K-KILL on the towing vehicle) by vehicles receiving any type of K-KILL results are eliminated.
7.42 Weapon units being towed are considered as separate targets for fire determination, adding '2' to the Hit Probability Number for target movement where applicable (and any size modifier indicated on the weapon counter). If the towing vehicle is K-KILLed, the towed weapon is unaffected (i.e., place it in the hex with the vehicle wreck) unless the towing vehicle results in a BURNING wreck, whereupon the gun is marked with an F-KILL marker. Towed heavy crew-served weapons must be targeted separately for direct hits using the HPT.
7.5 Riding AFVs
7.51 Riding AFVs—In certain situations, it is advantageous to transport personnel units on top of tanks or self-propelled guns (tracked vehicles with GRAY movement symbol). The rules that follow do NOT apply to APCs or truck-type transport (e.g., Horch; Medium Truck).
7.52 Each AFV may transport up to FOUR stacking points.
7.53 Loading and unloading procedures are the same as for regular transport.
7.54 When riding on AFVs, personnel units are considered in ASSAULT cover (receive a one-column shift RIGHT on the Casualty Table).
7.55 When fired upon, both the AFV and the passenger units are affected; the AFV is affected according to the applicable tables and the personnel units receive the effects of any fragmentation factors generated by that fire (HE or '4' FRAG factor for AP). Whenever an AFV is hit by a projectile of 20mm or larger, any riders must be unloaded, immediately after receiving an attack of four FRAG factors from the AP that hit the AFV or the applicable HE, using the Casualty Table. If the AFV is K-KILLed by DIRECT FIRE, the passenger units receive the effects of fragmentation and must unload, taking a morale check upon unloading. This involuntary unload morale check is in addition to any results from the HE or AP fragmentation. If the AFV is K-KILLed by INDIRECT FIRE, the passenger units are eliminated.
7.56 Indicate transported units by placing them on top of the AFV counter.
7.57 AFV Firing With Riders—Personnel units must unload from an AFV whenever it fires its main armament or non-AA machine-guns.
8. Weapon Units
8.01 Weapon units are represented by three different classes of units.
8.1 Light Infantry Weapons
8.11 Light Infantry Weapons—Includes anti-tank rifles (ATR), machine guns and light mortars. These weapons are usually the standard armament in an infantry company. Light infantry weapons are all weapon units using 5/8" counters marked with an 'L' designation on their counter (e.g., a weapon marked with the designation "L | MG" is a light infantry weapon and a machine-gun.)
8.12 Light infantry weapons may be carried by any personnel unit using CRAWLING, ASSAULT or RUNNING movement.
8.13 Each personnel unit may carry AND fire a number of light infantry weapons equal to its stacking points value (the number of men depicted on its counter).
8.2 Medium Crew-Served Weapons
8.21 Medium Crew-Served Weapon—Includes medium mortars and medium machine guns. These weapons are usually attached to an infantry company and are operated by their own crew personnel. Medium crew-served weapons are all weapon units using 5/8" counters marked with an 'M' designation on their counter. One crew per 'M' weapon is assigned for each scenario and all 'M' weapons must set up possessed by their manning crew.
8.22 Non-crew use penalties—Any 'M' weapon NOT fired by a crew receives a one-column shift LEFT (or a +1 HPN modifier) for all fire. If the non-crew personnel firing the weapon includes a leader, this penalty is ignored.
8.221 Medium crew-served weapons may be carried by personnel units using CRAWLING or ASSAULT movement. They may not use RUNNING movement.
8.222 Each personnel unit may carry one medium weapon for each TWO stacking points it represents. That is, for each two stacking points, the unit may carry one medium weapon counter (e.g., a squad may carry one medium and one light weapon; a crew or half-squad one medium or two light weapons). Two ONE stacking point units (e.g., leaders) may combine to carry a medium crew-served unit.
8.223 Medium crew-served weapons that are moved in the Movement Segment may not fire using Assault Fire. However, any remaining Gunfire factors (after deducting for the carried weapon) left to the carrying personnel unit MAY be used if NOT a crew.
8.3 Heavy Crew-Served Weapon
8.31 Heavy Crew-Served Weapon—Includes anti-tank guns (AT), anti-aircraft guns (AA), heavy anti-aircraft machine guns (AA), infantry howitzers (HOW), and field artillery (GUN). These heavier-caliber guns also have their own crews and are the only weapon units that use 3/4" counters. One crew per heavy crew-served weapon is assigned for each scenario and all heavy weapons must set up possessed by their manning crew.
8.32 Non-crew use penalties—Any heavy crew-served weapon NOT fired by a crew receives a +2 HPN DRM for all fire. If the non-crew personnel firing the weapon includes a leader, this penalty is ignored.
8.33 Pushing Guns
8.331 Non 'large' (those without a –1 HPT target size modifier) HEAVY crew-served weapons that have not fired may be 'pushed' one hex during the Movement Segment (NOT the Close Assault Segment). Units pushing these may only push their weapons one hex and are considered in a RUNNING cover-state during the act of pushing and an ASSAULT cover state (normally) after being marked as moved.
8.34 Towing Large Guns
8.341 Large target-size guns (those with a -1 HPT DRM signified by a unit ID in a black circle) may ONLY be towed. Further, to hook up these guns the transporting vehicle and gun must start and spend an entire turn in the same hex.
8.4 Stacking and Carrying Weapon Units
8.41 Weapon units may not move by themselves. They do not affect stacking limitations. They require either a personnel unit (for L and M weapons) or a vehicle unit (for heavy guns unless pushed one hex) to carry or transport them. A personnel unit must be able to carry a light or medium weapon to load it in transport. A personnel unit may also 'load' a weapon into non-tank transport without itself loading. Later, another personnel unit would have to be in the hex (or subsequently load into the vehicle) to unload the weapon.
8.42 Pick Up and Carry Routine
8.421 Unless already in possession of them, personnel units intending to carry weapon units must begin the Movement Segment in the same hex (and location in a hex in the event of a weapon in FULL cover) as those weapons. They may 'pick up' weapons found in the hex or currently being carried by another unit at the cost of one movement point (and continue to move in the same segment). A unit that intends to use CRAWLING movement may not pick up a weapon during the same Movement Segment; it would have to have the weapon already in its possession to carry it to a new hex that turn.
8.43 Light and Medium Weapon Firepower Reduction
8.431 Personnel units that fire while carrying LIGHT infantry weapons must subtract one from their PRINTED (or base) Gunfire factors (before any modification for long range fire) of the carrying unit (i.e., the printed gunfire on a squad or crew, not that of the weapon itself) for each light weapon unit being carried. For each medium weapon, subtract two from the base Gunfire of the unit. Two ONE stacking point units may combine to fire a medium weapon (both losing their '1' Gunfire factors of firepower when firing the weapon).
8.5 Pivoting
8.51 All light (L) infantry and medium (M) crew-served weapons have a 360-degree field-of-fire and may be fired in any direction without restriction. All heavy (H) crew-served weapons that use the HPT to obtain direct hits have a restricted field-of-fire (or Covered Arc [CA]) and may be pivoted to another hexside within the same hex by any personnel unit eligible to carry the weapon. A heavy crew-served weapon must be pivoted to fire at any target outside of its current CA. There are two ways a weapon unit may be pivoted.
8.511 Pivoting may be executed in the Movement Segment by any unit that possesses a weapon unit. Pivoting is a 'trigger' for Opportunity Fire, but the pivoting unit may change covered arc one hex spine before Opportunity Fire can take place against it. A weapon may pivot any number of hexspines during the Movement Segment.
8.512 Pivoting may be executed during the Combat Segment. A weapon unit is pivoted during the Combat Segment when it wishes to fire outside of its current covered arc. Unless marked as a 'fast traverse' gun (with a circle or dashed-line circle around the gun value in the same manner as a turreted tank and paying the same penalties to pivot, i.e., +1 per hexspine for black circle; +2 for the first hexspine and +1 thereafter for dashed black circle) a penalty to HPT direct hit attempts in the form of a +3 HPN DRM for the first hexspine change, AND +1 per hexspine change thereafter is assessed to weapon units that pivot to fire during the Combat Segment. Only weapon units that change covered arc to fire may be pivoted during the Combat Segment. All other pivoting takes place during the Movement Segment. Turn the entire gun counter to face its new covered arc.
8.6 Spiking Weapon Units
8.61 Any type of weapon unit may be 'spiked', or rendered useless, by any personnel unit in the same hex that possesses the weapon.
8.62 Weapons may not be spiked if the hex is occupied by an enemy AFV capable of firing any weapon.
8.63 Procedure—A weapon may be spiked instead of fired. Spiking is conducted as direct fire during the Combat Segment.
8.64 Each personnel unit may only spike one weapon per turn.
8.65 Spiked weapons are not removed from the map-board. Instead, place an F-KILL marker on the weapon to indicate it may no longer fire.
8.7 Camouflaging Weapon Units
8.71 The camouflaging of weapons was critical to desert survival. See the LIMITED INTELLIGENCE section later in these rules for the treatment of weapons and other units.
9. Crews
9.01 Crew counters have two sides, full strength and reduced. A crew 'flips' to its reduced side after receiving a 'C1' result on the Casualty Table. Another 'C1' result (or an initial 'C2' result or greater) eliminates the crew.
9.011 Any weapon unit operated by a reduced crew fires at less than its normal effectiveness.
9.1 Crew Counters
9.11 Crew counters are used to operate 'M' and 'H' weapon units, designated as being crew-served. Light infantry weapons may also be operated by crews normally.
9.12 Before beginning play, assign a crew counter to each MEDIUM and HEAVY crew-served weapon provided in the scenario.
9.13 Crews are indicated as OPERATING a particular weapon by being placed UNDER that weapon counter. If a crew enters a hex with an 'M' or 'H' weapon lacking a crew, a medium or heavy crew-served weapon must be possessed in the same manner as a light infantry weapon during the previous turn before it may be fired in the current Combat Segment.
9.14 Crews are personnel units. They function within all previously cited rules in regards to stacking, gunfire, movement, etc.
9.15 Casualty absorption by weapon crews is handled in the same manner as for any other type of personnel unit. Crews have two steps for 'C' results: on a 'C1', flip the crew to its reduced side. A second 'C1' result eliminates the crew (as does an initial 'C2' result).
9.16 Crew counters operating medium and heavy weapons may not fire their inherent weapons (i.e., function as infantry) in the same Combat Segment. They may, however, engage in melee in the normal manner.
9.17 Personnel units operating light infantry and medium crew-served weapons are so indicated by being placed UNDER the weapon units.
9.18 For each light infantry weapon fired, reduce the firepower of the personnel unit by ONE during the Combat Segment; for each medium weapon, reduce the firepower by TWO. Use of a light or medium weapon has no impact on a units melee value.
9.19 Light and medium weapons may not be fired in melee. Light and medium weapon units do not affect the operating unit's cover state.
9.2 Effects of Crew Losses
9.21 Medium and heavy crewed-served weapons using the HPT (i.e., not M|MG weapons)—Normal rate-of-fire is HALVED (rounded down) to a minimum of ONE for all fire. The –3 HPN DRM for BOT is still received.
9.22 Machine Guns: Normal ROF is HALVED (rounded down) to a minimum of ONE for all fire.
9.23 Smoke shell fire remains normal regardless of crew situation.
9.24 Two reduced crews may combine to fire one weapon normally. If a leader fires with a reduced crew ignore the ROF penalties of reduced crews.
9.3 Alternate Crews
9.31 Leaders are provided with training in the operation of a variety of weapons. Therefore, TWO leaders or FOs (i.e., two counters) may substitute for a reduced crew (crew counter flipped to its reduced side) to operate a weapon. THREE leaders or FOs are considered the equivalent of a full-strength crew. When manning weapons, leaders function as crew units and must abide by crew rules.
9.32 Medium and heavy crew-served units may be fired by other personnel units ONLY if a non-broken/surrendered leader (not FO) is in the hex with the squad or half-squad. Such usage is considered the equivalent of a depleted crew for fire purposes (i.e., restricted to a ROF of '1').
9.33 Heavy crew-served weapon units are targets for direct fire in the same manner as AFVs and personnel units (i.e., using the HPT). ANY hit by a direct fire weapon firing AP or HE GREATER than 20mm will F-KILL a heavy weapon unit and ELIMINATE the personnel unit(s) operating it. Do NOT remove F-KILLed weapon units from the map-board.
9.34 Personnel operating guns (exception: unless the gun has been moved at any point during the scenario) are considered in GOOD cover for attacks against them even if not in weapon pits.
10. Morale
10.01 Each personnel unit has a morale value that is a quantification of the mental state of the men in that unit. The morale value is located on each personnel counter as the third number on the counter (e.g., a 5|4|6 squad has a morale of '6').
10.1 Morale Modifiers
10.11 A unit's current morale value is altered by units, friendly and enemy, within 'morale support range'. By definition, this range is two hexes. All modifiers to morale are summarized below and on the Morale Table.
10.111 FRIENDLY units within a unit's morale support range INCREASE its morale value as follows:
a) For each multiple of personnel units worth THREE stacking points, add '1' (e.g., three crews = modifier of '2');
b) For any ONE un-broken leader (not FO), add '2', noting the following exceptions: German leaders add '2' to both Italian and German units. Italian leaders, however, add nothing to German units and add only '1' to other Italian personnel units;
c) For EACH non K-killed, non bailed-out AFV, add '1'.
10.112 ENEMY units within a unit's morale support range DECREASE its morale value as follows:
a) For each multiple of personnels unit worth THREE stacking points, deduct '1';
b) For EACH non K-KILLed, non bailed-out AFV, deduct '1'.
10.113 SITUATIONS affect its morale value as follows:
a) Any unit ON or UNDER an emplacement counter providing at least one column shift LEFT adds '1' to its morale value;
b) Any unit in a MINEFIELD hex deducts '1' from its morale value;
c) Any personnel being fired upon for effect (FFE) deduct '1' from its morale value and those receiving barrage FFE deduct '2' from their morale value.
10.114 There is no 'maximum' morale value. Note a unit ALWAYS passes a morale check upon rolling a '1' and fail on a '0' (unless courage results).
10.2 Morale Check
10.21 Whenever a personnel unit incurs casualties, a 'morale check' on that unit is performed immediately and all effects of the morale check are applied. The casualty 'level' incurred is ADDED to the die roll as a DRM to the morale check (e.g., if a squad receives a C1, add '1' to the morale check die roll; on a C2, add '2' and so on).
10.22 When more than one unit in a hex is being checked, the units with the highest morale are always checked first, continuing in descending order.
10.23 A morale check is performed by rolling one die and comparing the number rolled to the unit's ALTERED morale value after applying all cumulative morale modifiers, including the DRM for the casualty level incurred. If the result is a number GREATER THAN the unit's morale value, the unit's morale has broken and the unit is immediately marked as broken (or surrendered if already broken or if broken when within morale support range of an enemy unit). If the result is LESS THAN OR EQUAL TO the altered morale value, the unit is unaffected.
10.24 Courage and Morale Swings
10.241 Units that roll a '1' ALWAYS automatically pass a morale check. Conversely, any unit that rolls a '0' ALWAYS fails a morale check (exception: Courage results).
11.242 Courage—Any personnel unit that rolls a '0' on a morale check immediately makes a subsequent die roll. Another '0' results in COURAGE. The personnel unit is NOT broken. Instead, mark the unit with a medal (e.g., iron cross) marker and ignore any additional morale checks for other units in that hex otherwise called for by the same fire that caused the courage unit to check morale. The courage unit is immune from further morale checks for the rest of the scenario. If a second '0' is NOT rolled after a first '0' morale check roll, the unit fails normally.
11. Broken Units and Surrender
11.01 Morale check failure—Units whose morale breaks remain on the map-board marked as either broken or surrendered.
11.1 Broken Units
11.11 Units whose morale breaks outside of any enemy unit's morale support range are BROKEN and do one of two things:
11.12 Broken units in emplacements that provide FULL cover immediately drop into FULL cover if available and remain there until rallied or surrendered. They may not move, fire or infiltrate or melee in the Close Assault Segment. Personnel units at Level +10 in a wadi hex drop to the 'bottom' of the wadi. Broken personnel riding on AFVs (not those IN half-tracks or trucks, which suffer no additional effect) immediately unload. Mark broken units with a broken marker.
11.121 If an enemy personnel unit uses infiltration to enter a hex with friendly broken personnel, treat the friendly units as DEFENDERS that failed their morale check during melee.
11.13 Broken Unit Movement
11.131 During any Movement Segment that a personnel unit begins broken and NOT in FULL or IMPROVED cover, it must move in the shortest path towards the nearest friendly map edge OR hedgehog/weapon pit/AT Trench OR building, whichever is closest, at the rate of THREE hexes per turn until they are rallied, surrendered, or move off the map-board. They may not fire, melee, close assault, or carry weapons. Broken units may not move closer to enemy units that are within their spotting range and LOS. If a friendly broken unit is ineligible to move due to enemy units, it may ALWAYS crawl one hex in any direction. Broken units do NOT infiltrate.
11.132 Broken units MAY be fired on normally. A broken unit that fails another morale check is marked as surrendered.
11.2 Surrender
11.21 Units whose morale breaks when they are already broken OR within an enemy unit's two-hex morale support range are SURRENDERED. In the turn AFTER a unit surrenders, it may be maneuvered by the opposing player as desired at the maximum rate of THREE hexes per turn but movement must be conducted toward the nearest map edge friendly to the capturing unit. It is considered using Assault Movement for target purposes. Surrendered units may not fire or be targeted directly for fire (except through collateral damage, e.g., fire targeted at another enemy unit in the hex; an FFE against an adjacent hex; mistaken Stuka attack; etc.). Surrendered units immediately drop all carried weapons. Units remain surrendered until rallied. Mark surrendered units with a surrender marker.
11.22 Any surrendered unit that fails a morale check resulting from FIRE is eliminated.
11.23 Surrendered Unit Movement
12.231 Surrendered units may be moved by the opposing player until they move off the edge of the map-board at which time they are permanently captured. No enemy 'escort' is required to keep them surrendered.
12.232 SPECIAL: Units in the following situations are not eliminated from play but are surrendered instead: units whose morale breaks during an overrun attack; units whose morale breaks during an unsuccessful close assault; the weaker unit in a melee at odds worse than 1-2 or 4-1.
11.3 Interrogation
11.31 Any time an enemy unit surrenders, the opposing player may make an 'interrogation' die roll. On a die roll of '1', the opponent must place on map his nearest HIDDEN unit with its UNIT side up (not its Fog of War back side). Apply a -1 DRM to this roll for Italian units being 'interrogated' (making them more likely to 'talk').
11.4 Pinned Down Units
11.41 Any MOVING unit that passes a morale check resulting from Opportunity Fire by rolling equal to the highest number it may without failing must immediately stop moving UNLESS a non-broken leader is also in the hex. Such units are considered temporarily 'pinned down' but may infiltrate normally during the Infiltration Phase.
11.5 Rallying Broken and Surrendered Units
11.51 Rallying—Broken or surrendered units may be restored to normal function by rallying. To 'rally', a unit must pass a morale check with an un-broken leader in the hex. Any broken leader must first rally before it may rally another unit.
11.52 Units that are broken or surrendered may only be rallied if they are not ADJACENT to an enemy unit.
11.53 BROKEN units may be rallied by being in the same hex with an un-broken friendly leader unit (noting that German leaders may rally German and Italian personnel but Italian leaders may only rally Italian personnel) AND passing a morale check during the End of Turn Segment. Remove their broken marker if rallied.
11.54 SURRENDERED units may be rallied by being in the same hex with any friendly (unbroken) personnel (German units are considered friendly for German and Italian personnel but Italian units are considered friendly only for Italian personnel) or non-K or M-KILLed vehicular unit during the End of Turn Segment AND passing a morale check. Remove their surrendered marker if they pass the morale check.
11.55 Failure to Rally—Any unit that fails to rally suffers no further consequences of that failure (i.e., the unit remains broken or surrendered).
11.6 Intimidation
11.61 Intimidation—The presence of overwhelmingly superior forces often was enough to force units to surrender without having suffered any casualties. During ANY segment, if enough enemy units are within a unit's morale support range to reduce its altered morale value to LESS THAN ZERO, it immediately surrenders without having suffered any casualties. Mark the unit(s) with surrendered marker(s) accordingly. Surrendered units may be moved by the opposing player in the next Movement Segment.
11.7 Chain Surrender
11.71 Any surrendering units inflicts an immediate two-point morale value loss on every other friendly personnel unit IN THE SAME HEX and causes an IMMEDIATE morale check. Each of these units have their morale checked without having suffered any casualties and surrender if they fail a 'chain surrender' morale check.
11.72 Each subsequently surrendered unit inflicts an ADDITIONAL two-point morale value loss on any units in the hex that has not already undergone a chain surrender morale check in that turn.
11.8 Captured Weapons and Vehicle Units
11.81 Any weapon unit or non-K-KILLed vehicular unit may be captured and used as if it were a friendly piece of equipment or retained as 'war booty'.
11.82 Weapon units are captured if they are alone in a hex at the End of Turn Segment with an unbroken enemy personnel unit. Weapons are never captured if they are with a friendly, unbroken personnel unit.
11.83 Un-armed, non-AFV vehicular units (white movement icons) are captured if they are in a hex at the End of Turn Segment with non-moving enemy AFV, APC, or unbroken personnel units.
11.84 Only abandoned (crew bailed out) AFVs may be captured. The procedure is the same as for weapon units, noting a captured AFV may not move; it may only be towed (unless M-KILLed).
11.85 Captured heavy crew-served weapons and vehicles may be towed normally.
Example: The Grant tank may fire its '5' Gunfire factor coaxial machine-gun at the leader OR the 2|3|8 crew AND the '8' Gunfire factor BOW machine-gun at either infantry target. The machine-guns may be combined into a 'firegroup' for a '13' Gunfire factor attack against the leader OR the crew. The tank may NOT fire its 75mm sponson-mounted weapon at the leader due to covered-arc restrictions for this weapon. It may be fired at the crew. It may NOT fire its turret-mounted 37mm gun at either infantry target as this weapon has no HE. A weapon that ONLY has Armor Piercing (AP) ammunition may NOT engage personnel. AP may fire at vehicles and heavy crew-served weapons AND at personnel in bunkers ONLY. AP ammunition will cause a collateral attack against any personnel riding a tank hit by AP.
To use direct fire for the 75mm at the crew, use the HPT. At the range of THREE, a direct hit requires a roll of '9' or less. If a hit is secured, another roll is made on the Casualty Table in the '75' HE row (resulting in '14' fragmentation factors). On a die roll of '7', the crew suffers a 'C1' result—flip the crew counter to its reduced side.
11.86 Where applicable (i.e., in those scenarios utilizing a victory point system) award a capture bonus of DOUBLE the normal value for all enemy units captured.
11.87 Captured weapons and 'yellow' counter non-AFV vehicles may be used without penalty.
12. Direct Fire Combat in General
12.01 While complex in appearance, combat between armor-piercing weapons (tank weapons and anti-tank guns) and armored-fighting vehicles (AFVs), as well as infantry, artillery and aircraft use simple procedures. Combat resolution will speed up tremendously as players become more familiar with the system. Direct Fire combat in Tobruk consists of the following categories:
- ARMOR PIERCING VS. ARMOR COMBAT
- ANTI-PERSONNEL COMBAT FROM WEAPONS AND AFVS
- PERSONNEL VS. ARMOR COMBAT
12.02 During the Combat Segment, opposing players alternately fire their units in an effort to damage or destroy enemy units. During a player's portion of the Combat Segment, he may fire the armament of ONE (or stack of adjacent units using a firegroup) of his units at ONE enemy target or hex before giving the opposing player an opportunity to fire one of his units.
12.03 All units in the same hex may be affected by one 'shot' of direct fire or an attack on the Casualty Table. The units in the least favorable cover state (to the defender) take any casualties that result FIRST, noting all units in a hex where a 'C1' or greater result occurs take any resulting morale check and units in FULL cover may not be affected by certain types of attacks.
12.1 Field of Fire and Covered Arc
12.11 Personnel units, light infantry weapons and medium crew-served weapons (all using 5/8" counters) have a field-of-fire of 360-degrees. This includes medium crew-served weapons that use the HPT. They may fire in any direction regardless of the facing of the counter itself and never need to pivot. Field-of-Fire is also referred to as Covered Arc.
12.12 Heavy crew-served weapons and non-turreted vehicles have a field of fire consisting of their front two hexes. They must pivot to fire outside of this facing. All heavy crew-served weapons use 3/4" counters.
12.2 Turrets
12.21 Turreted vehicles also have a field-of-fire of 360-degrees. All vehicle turrets are assumed to be facing 'front', i.e., in the same direction the vehicle is facing, unless a turret marker is placed on the vehicle counter. Turreted weapons need to turn their turret to fire outside the front two hexes the vehicle/turret is facing. Vehicle turrets are noted by a black circle around the gun information on a vehicle counter. Note that some 3/4" heavy crew-served weapons ALSO have a 360-degree field-of-fire and are marked in the same manner as a turreted vehicle. In the case of heavy weapons, the entire weapon counter is turned. No turret marker is placed.
12.22 Some vehicles have a main armament in the form of a gun mounted in the hull (e.g., M11/39), and a machine-gun(s) in a turret. Only the machine gun(s) have a 360-degree field of fire, denoted by the turret 'circle'. A hull-mounted gun fires in the same manner as an SP-gun (e.g., Semovente).
12.23 Turret Turning and Turret Types
12.231 Turrets provide a reduced penalty for pivoting than is assessed for non-turreted AFVs (i.e., SP-Guns) and non-360-degree heavy crew-served weapons.
12.232 Turning a turret—Any AFV equipped with a turret may turn it ONE hexside per movement point spent during the Movement Segment. Place a turret marker on the vehicle accordingly. Turning a turret is not considered movement and the AFV may turn a turret without leaving its hex. Turning a turret is an Opportunity Fire 'trigger' but one hex spine change in turret facing may be made before the vehicle may be fired on.
12.233 If an AFV wishes to turn a turret during the Combat Segment, it adds an HPN modifier (+1 for solid line; +2 for dashed line turret circle) FOR EACH HEXSPINE CHANGE in turret facing to any direct hit attempt on the HPT. Turrets are provided in two varieties, FAST and SLOW. Turning a fast turret causes a +1 HPN DRM for each hexside change during the Combat Segment. A slow turret causes a +2 HPT DRM for the first hexside change and +1 per hexside thereafter. FAST turrets are denoted by a black circle around the gun value (e.g., Crusader II); SLOW turrets have a dashed line (e.g., Pzkw IIf).
12.234 Place a turret marker on the AFV to indicate its current turret facing if it is not 'straight', i.e., the same as the vehicle's facing. Any hits on the turret aspect strike the front, side or rear of THE TURRET and use the appropriate armor for that facing and aspect.
12.235 EACH + penalty for pivoting a turret also provides a one column shift LEFT for vehicle machine-gun (or semi-automatic weapon) firing on the Casualty Table (a +2 turret change applied TWO left shifts).
12.3 360-Degree Guns
12.31 Guns that are able to fire 360-degrees are turned in the same fashion as a turret on an AFV. However, the entire gun counter is turned; no turret marker is used.
12.4 Fire Through Hexes Containing Units
12.41 Personnel and weapons may fire through hexes containing other personnel units, enemy or friendly, at targets beyond with no adverse effects.
12.42 Wrecks, vehicles and smoke (including that from burning wrecks) do not individually block LOS but add HPN DRM and Casualty Table column shifts LEFT for any line-of-sight that passes through such hexes.
Note: The facing of a target is determined by the hexside incoming fire crosses as it enters the target hex.
13. Armor-Piercing vs. Vehicle Combat
13.01 In resolving armor-piercing vs. vehicle combat, three questions must be answered for each weapon firing at a particular target:
- QUESTION #1—HAS THE TARGET BEEN HIT?
- QUESTION #2—WHAT PART OF THE TARGET HAS BEEN HIT?
- QUESTION #3—WHAT DAMAGE DID THE HIT DO TO THE TARGET?
13.02 If the target vehicle is NOT a tank or self-propelled gun (i.e., an AFV [gray movement icon]), Question #2 does NOT have to be answered. Use the Direct Hit Results for APC and Non-AFV Vehicles table to determine the outcome of direct hits against these vehicle-types (denoted by white and yellow movement icons).
13.1 Gun Rating and Size
13.11 Each gun is rated for caliber using one of four gun ratings, A, B, C, and D. The gun-rating of the weapon that is firing is cross-referenced on the Hit Probability Number Table.
13.12 Guns are also rated by size (in millimeters). The gun size affects the HPN at ranges of 17 or greater hexes. For guns of 70mm or less (70 gun size), use the '70' column for ranges 17-24, 25-32, 33-40, and 41-60+. For guns of 75mm or larger use the '75' column.
13.2 Determine the Range
13.21 Determine the RANGE from the firing unit to the target. This is found by simply counting the number of hexes (inclusive of the target hex but not including the firing hex) in the shortest path from firing unit to the target unit (or hex for fire against personnel).
13.22 The range is then located on the Hit Probability Table and cross-indexed with the gun-rating (and size at 17+ hexes) of the weapon firing. The number found at this intersection is the Hit Probability Number (HPN) which is the maximum number that can be rolled and still obtain a Direct Hit on the target (i.e., roll equal to or less than the HPN to obtain a Direct Hit, a.k.a. a 'hit').
13.23 IMPORTANT: If the intended target is at a range such that the firing weapon's modified Hit Probability Number would be an automatic miss ('-'), or less than one, the target may not be fired upon by that weapon. Units beyond any spotting range limit may also not be fired on.
13.3 Rate of Fire
13.31 The number of rounds available to fire (i.e., attempt HPT to hit attempts) is determined. Each counter with a Rate-of-Fire (ROF) greater than ONE has a ROF number printed on it in a blue square. All other units have a ROF of ONE.
13.32 Each ROF provides one direct hit attempt die roll on the HPT or one attack on the Casualty Table for machine-guns.
13.33 All ROF 'shots' available to a non-AA heavy crew-served weapon and vehicle-mounted MA must be fired at the SAME target in a Combat Segment to use a ROF greater than one.
13.331 Machine-Gun ROF Limitations—When firing on the Casualty Table OR making a direct hit attempt, machine-guns may use their ROF to fire at more than one hex OR may fire more than once at the same hex (or twice at the same hex and once at anther target hex for machine-guns with ROF of '3'). Machine-guns may not 'add' their Gunfire factors for an attack. They must make a number of attack die rolls equal to their ROF, using their printed Gunfire (or HALF for long-range fire) for each attack.
13.4 Direct Hit Attempt Die Roll
13.41 Apply any HPN die roll modifiers to the direct Hit attempt die roll (e.g., if the target moved during the Movement Segment of the current turn, '2' is added to the To Hit Attempt die roll).
13.42 One die is then rolled for each ROF 'shot' available. If the die roll is equal to or less than the Hit Probability Number, the target has been hit by the round fired, i.e., a direct hit is obtained. If no rounds hit the target, the weapon has finished combat for the current Combat Segment.
13.43 For EACH direct hit obtained against a specific target AFV, proceed to Question #2.
13.44 Moving Vehicle Targets
13.441 The HPN modifier for a moving vehicle target is only applied if movement by a target already hit (i.e., with a BOT marker placed) is not made in a path DIRECTLY at or away from the firing unit.
13.45 Target Aspect and Sizing
13.451 Target Sizing—The smaller a target's profile, the more difficult it is to hit. Conversely, large targets, like the 88mm Flak, are easier to hit. Some units have a target size modifier of +2, +1 or -1 for use on the HPT signified on their counter by a black dot (+1) to signify a 'large' target profile; a white dot (-1) to signify a 'small' target profile; and a red dot (+2) for 'very small' targets. The target size modifier must be added/subtracted to the Hit Probability Number along with any other modification due to target movement, target aspect, wrecks along same-level LOS, etc.
13.452 At ranges of one hex or less, do not ADD anything to the HPN for Target Sizing.
13.453 Target Aspect—When firing at target vehicles showing a FLANK aspect to the firing unit, '1' is SUBTRACTED from the Hit Probability Table die roll (making it easier to hit it). This is in addition to any other modifications.
13.46 Target Acquisition and Burst on Target
13.461 A target is considered 'acquired' if a direct hit was previously obtained against it. Use Burst On Target (BOT) markers to note target acquisition. Simply place a colored BOT counter on the target unit, making a note such as 'all Pzkw IIIh's use blue BOT markers' to remind yourself. A side-record may also be used to record this information although use of the BOT markers has shown to be effective for this purpose. If the firing unit switches targets, moves, becomes newly Suppressed, broken, or receives an F-KILL or K-KILL result, remove the BOT marker from the target.
13.462 If the weapon fired at the SAME target (and the target is still in its LOS i.e., at least a '1' die roll will result in a hit), it may DOUBLE its printed ROF (or any remaining ROF for weapons with multiple ROF printed in a blue square on the counter) for any hit attempts after a direct hit has been obtained (during the current or a previous Combat Segment) using the HPT. All units with a 'standard' ROF of ONE may fire twice at a target previously hit by that unit (i.e., with a Burst on Target [BOT] marker on it from the PREVIOUS turn) but only during a subsequent turn after a hit is obtained.
13.463 BOT DRM—A BOT marker ALSO provides a –3 HPN DRM for all HPT direct hit attempts against so-marked target units.
13.4631 Some units do not receive the ROF-increasing effects of BOT markers (e.g., sIG II). Such units still receive the BOT –3 HPN DRM.
Example: The turret marker placed on Pzkw IIIg 'A' in the top example is there to illustrate placement oriented in the same direction the AFV is. Pzkw 'A' and 'B' are exactly the same as regards status. A turret marker is not needed for this facing UNLESS the AFV is Suppressed.
If 'A' chose to turn its turret ONE hexspine during the Direct Fire Phase, a +1 HPN DRM would be added to its to-hit attempt. A one column shift LEFT would also apply to any Casualty Table fire using its coaxial machine-gun ONLY (it is in the turret) after such a turn. If the turret was turned another hexspine, a +2 HPN DRM (and two column shift LEFT) would be applied. If this was a Pzkw IIf, a +2 HPN DRM would apply for the FIRST TCA change (and TWO column shifts LEFT) and a +1 HPN DRM for each hexspine change that phase. Note the facing for any turret hit is applied for 'A' in the lower example.
13.5 Hit Location
13.50 If the target IS a tank or self-propelled gun (any vehicle with armor factors provided on an AFV card), the part of the target hit by the round is determined as follows.
13.51 Target Facing
13.511 Determine the target unit's facing in relation to the firing weapon. By definition, this is the target's hex side that faces towards the firing weapon. In other words, it is the target hex side crossed in tracing the SHORTEST path of hexes from the firing weapon to the target.
13.512 If, in counting the range from the firing weapon to the target, an equal number of hexes lie to the FRONT and to a FLANK hex side, the aspect is assumed to be FRONT.
13.513 If an equal number of hexes lie to the FLANK and to the REAR, the aspect is assumed to be REAR if the target is stationary or FLANK if it is moving.
13.52 Target Aspect
13.521 The target aspect hit is determined by making a die roll on the Hit Location Table after each hit is obtained on an AFV target. Alternately, roll two dice for each HPT direct hit attempt and use the colored die for the hit die roll, and the white die for the aspect of any hit obtained.
13.522 Hit Location Table Aspects:
13.5221 For Turreted Vehicles:
| Die Roll | Aspect Hit |
|---|---|
| 1-2 | Turret (TUR) |
| 3-6 | Upper Hull (UH) |
| 7-9 | Lower Hull (LH) |
| 0 | Track (TR) |
13.5222 For Non-Turreted Vehicles:
| Die Roll | Aspect Hit |
|---|---|
| 1-5 | Upper Hull (UH) |
| 6-9 | Lower Hull (LH) |
| 0 | Track (TR) |
13.53 Same-Hex Fire vs. AFV
13.531 A firing weapon in the SAME HEX as the target does not require a roll on the Hit Probability Table. All rounds fired are assumed to hit the target. Target facing in this case must be determined by the direction the latter entered (or currently faces in, if it entered, then changed covered arc) the hex. If both occupy the same hex at the beginning of a turn, the aspect is assumed to be FRONT for both units. Additionally, if firing at an AFV, the attacker may select, without rolling on the Hit Location Table, to score each hit as an Upper Hull, Lower Hull, Turret or Track hit.
13.6 Target Damage
13.61 Types of Target Damage
13.611 K-KILL—Catastrophic vehicle destruction. Vehicle destroyed or 'brewed up'. Replace the vehicle counter with a wreck counter (non-burning or burning).
13.612 M-KILL—(Mobility); suspension or track damage, mobility lost. Vehicle may not move or pivot for remainder of game. Any turret may still pivot.
13.613 F-KILL—(Firepower); ability to fire lost for remainder of game. Unit may not fire main armament and turret-mounted machine guns or hull mounted armament or machine guns for remainder of game. In the event of an F-KILL against turret-mounted weapons, the turret may no longer pivot during the remainder of the scenario. F-KILL results against hull-mounted weapons do NOT affect a vehicle's ability to move or change its vehicular facing.
13.62 Target Damage Determination
13.621 Unless hit in the track (TR), this is found using the armor factor listed on the target AFV Armor Factor table, found on the AFV cards, for the corresponding Target Aspect and Facing hit, and comparing it to the penetration number of the weapon firing. This is done for EACH Direct Hit obtained in the case of ROF greater than one.
13.622 If the penetration number is one less, equal to, or 1-5+ greater than the target's armor factor make a roll on the K-KILL TABLE for each direct hit obtained against the target AFV.
13.63 Explanation of Damage Table Results
13.631 K-KILL Table
13.6311 The K-KILL Table provides rows for HE and AP (the 'AP' row is used for all non-HE ammunition, including APCR and HEAT) K-KILL results. On a roll LESS than the K-KILL number, the AFV has been K-KILLed. On a roll EQUAL to the K-KILL number, the vehicle may receive an F-KILL (or M-KILL) result INSTEAD of a K-KILL.
13.632 Track Hit and M-KILL Table Usage
13.6321 M-KILL Results—In the event of a Track hit (and rear or front [only] UH hits when a roll is made equal to the K-KILL number), a roll is made on the M-KILL Table. Using the correct column for that aspect and the appropriate row for gun-size, a roll less than or equal to the number provided results in an M-KILL. Use the UH column for Upper Hull hits on FRONT or REAR facings ONLY. If an M-KILL does not result following a roll using this table, the AFV receives a K-KILL result INSTEAD.
13.6322 Any vehicle that suffers an M-KILL from an UH hit also has any hull-mounted weapons F-KILLed automatically if the M-KILL results from a FRONT hit.
13.633 F-KILL Table Usage
13.6331 In the event of a Turret hit on the front aspect of the turret (or front aspect UH hit for non-turreted AFVs) when a roll is made equal to the K-KILL number, a roll is made on the F-KILL Table. Using the appropriate row for gun-size, a roll less than or equal to the number provided results in an F-KILL instead of a K-KILL. If an F-KILL does not result following a roll using this table, the AFV is a K-KILL result INSTEAD.
13.6332 Any unit suffering an F-KILL on its 'main armament' must exit the map along the nearest friendly map-edge at its earliest opportunity. If already M-KILLed, the crew automatically bails out.
13.7 Burning and Non-Burning Wrecks
13.71 Any AFV K-KILLed is replaced by a burning wreck if the K-KILL roll is less than or equal to the number found in column corresponding to the 'BURN' row on the K-KILL Table. Subtract '1' from this roll (for burning wreck purposes ONLY and making it easier for a burning wreck to result) for all rear hits.
13.72 Burning Wrecks—Add '4' for any HPT line-of-sight that passes through a hex containing a burning wreck. Add '1' for each non-burning wreck. Note any unit with a +5 or greater LOS height advantage may see over non-burning wrecks in its LOS. Smoke rises to a height of +30 above the ground level of its hex and affects any LOS drawn through it. Any LOS that passes through two or more burning wrecks or smoke hexes is BLOCKED.
13.8 AFV Bail Out
13.81 BAIL OUT—Any time an AFV receives an M-KILL or F-KILL result, a roll is made on the AFV Bail Out Chart, using the appropriate row. Mark a Bailed Out AFV with a bail out marker to signify it may no longer move or fire. An AFV may never be 're-manned' during play once its crew bails out.
13.82 The command tank modifier on the AFV Bail Out Chart is only used when an SSR states armor Command Control is in play for that scenario.
13.9 Main Armament Defined
13.91 The main armament (MA) of a vehicle is the gun provided in the lower left corner of the vehicle counter. In the absence of such a weapon, any vehicle that has a machine-gun in a turret (denoted by a circle around the machine-gun value) is considered to have THAT weapon as its main armament. No other vehicles are considered to have a MA, and thus they are not forced to exit if any other vehicle armament is F-KILLed.
13.10 Multiple Vehicle Weapons
13.101 An individual vehicle may use ALL of its weapons to represent the firing of ONE unit before the opponent may fire. A vehicle may NOT fire some of its available weapons, 'saving' others to fire later. No vehicle unit may 'save' weapons to fire in more than one Segment, i.e., a unit that fires during the Combat Segment may not use Opportunity Fire during the Movement Segment.
13.102 Place 'F' counters on units immediately when they conclude their fire.
13.11 AFV Suppression
13.111 Suppression—Whenever a direct hit has a chance to, but fails to K-KILL an AFV (including after M-KILL and F-KILL results), a roll is made on the Suppression Table, using the appropriate row for gun-size. On a roll less than or equal to the number provided, the target is marked with a Suppressed marker, found on the back of turret markers.
13.112 Turret aspect hits rolled for on the K-KILL table result in automatic suppression if a K-KILL does not result.
13.113 Removing Suppressed Markers
13.1131 Removing Suppressed markers—During the End of Turn Segment, any vehicle that wishes to have its suppressed marker removed must pass a suppression removal morale check. German and British AFVs check with a morale of '7'; Italian AFV with a morale of '6'.
13.12 Marker Placement
13.121 Players mark all damage to their own vehicles using M-KILL, F-KILL, bail out and suppressed markers. An AFV that receives a K-KILL result is removed from play and replaced with a burning or a non-burning wreck marker.
13.122 Upon completion of the three-question fire sequence (or two question sequence for non-AFVs), an 'F' marker is placed on the firing unit to indicate that it has finished firing in the owner's portion of the Combat Segment.
Example: The Fiat-Revelli medium machine-gun, possessed by the 2|3|8 crew '9' will form a firegroup with the 1|1|7 leader '1', noting the leader may not fire its '1' Gunfire factor if 'leading' another unit's fire. The crew manning the M|MG also may NOT use its '2' Gunfire factors when operating the weapon. The attack is made directly on the Casualty Table, no HPT 'to hit' attempt is needed for direct fire by personnel and machine-guns. The attack will be made on the '8' column of the Casualty Table ('6' for the MG and a one column shift RIGHT provided by the leader). Due to its ROF of '2', the MG may make a SECOND attack against the 6|5|8 squad or another hex. It may NOT attack the enemy squad by 'combining' its ROF to 'create' a '12' Gunfire factor attack (2 x '6'). Mark all units in the firegroup with an 'F' marker after both shots are made and note the leader may 'lead' one multiple ROF LIGHT infantry weapon for ALL of its shots in a Direct Fire Phase.
14. Personnel Direct Fire vs. Armor Combat
14.1 Heavy Weapons Units
14.11 Personnel units may damage or destroy AFVs by using heavy crew-served weapons are used in the manner outlined in the rules section on Armor Piercing vs. Vehicle Combat.
14.2 Gunfire Damage F-KILL
14.21 Gunfire directed at an AFV in large amounts has a small chance of destroying the optics on an armored vehicle.
14.22 Whenever '36' or more Gunfire factors are applied to the FRONT aspect of an AFV, a roll is made on the F-KILL Table using the 36+ Gunfire row. A successful die roll means the optics have been destroyed and the AFV's turret armament (or hull main gun for SP guns) is F-KILLed (including any coaxial machine-gun in a turret).
14.3 Anti-Tank Rifles
14.31 Anti-tank rifles (ATR) fire using the HPT in exactly the same manner as other armor-piercing weapons but may not fire beyond the maximum range listed on each ATR counter after the "#" notation. An ATR may also fire in the same manner as semi-automatic guns on the Casualty Table.
14.32 ATRs are not crew-served weapons (exception the Italian Solothurn ATR is a medium crew-served weapon), but light infantry weapons.
14.33 Target acquisition, ROF, BOT, HPN DRM and other direct fire rules apply to ATRs using the HPT.
15. Personnel Unit Combat
15.01 All personnel units are equipped with infantry weapons as expressed by the Gunfire factors found on each personnel unit. This unit firepower is independent of any weapon units and may be applied to targets as direct fire within the printed range (or a HALF Gunfire factors out to DOUBLE the printed range) using the Casualty Table with no 'to hit' attempt needed. Note the reduction in firepower for personnel units using weapon units.
15.02 Personnel units have an all-round, 360-degree field-of-fire and thus never need to pivot.
15.03 Personnel units may not fire into hexes containing other friendly personnel units or surrendered enemy units (unless non-surrendered enemy units are also in the hex).
15.04 As in armor-piercing combat, no more than one unit (or a group of units, e.g., a firegroup) at a time may be fired before giving the opposing player the opportunity to fire.
15.1 Fire into Hexes with More Than One Unit
15.11 If there is more than one target unit in a hex, the target unit in the poorest cover state (i.e., the unit receiving the most shifts RIGHT or the least shifts LEFT) absorbs any casualties suffered. In the case of ties (i.e., two target units with the same number of shifts RIGHT), the targeted player may choose. If the targeted unit is eliminated before all casualties have been absorbed, excess casualties are applied to the unit with the next poorest cover state, and so on. All casualties must be absorbed by target units in a hex (with the exception of units in FULL cover in hexes fired on by non-HPT/artillery/aircraft fire). All units in a hex (except the aforementioned FULL cover units) must take a morale check following ANY 'C' result in the hex; not just units that absorb casualties.
15.2 Opponent's Options
15.21 The opposing player has several options when being fired on.
15.22 If otherwise eligible (i.e., not marked as fired; not broken; in a hex with an anti-tank trench or hedgehog counter; or wadi) one or more of the personnel target units in an eligible emplacement or terrain may be dropped into FULL cover (before the Casualty Table roll is made) in which case any casualties (including morale checks) that occur would be applied against any other units in the hex that the target unit formerly maintained. If all such units in the hex drop into FULL cover, all casualties are ignored.
15.3 Personnel Fire Restrictions
15.31 Each personnel unit may fire only once per Combat Segment (exception: unless using desperation fire). A single personnel unit's fire may not be divided between two different hexes in the same Combat Segment.
15.4 Firegroups
15.41 Personnel units stacked in the same hex or adjacent hexes may combine their fire to target the same hex. Units may not split fire into multiple hexes (i.e., only one hex may be targeted at a time by multiple units using a firegroup).
15.42 Personnel units in the same hex may ALWAYS form a firegroup (exception: unless German and Italian and no German leader is in the hex). Only personnel units and direct fire weapons that may use the Casualty Table without the need to secure direct hits (using the HPT) may form a firegroup.
15.43 If a leader is in ANY hex of the firegroup a one column shift RIGHT may be applied to any firegroup fire. A leader that 'leads' a firegroup must be otherwise eligible to fire (e.g., not broken; not firing a L|MG; etc.) but may not use its own Gunfire factors as part of the firegroup. If a leader leads a firegroup, even if just the fire of one machine-gun and crew in its own hex, the 'leadership' column shift may be applied to ALL shots provided by the ROF of an MG.
15.44 Units in the same hex that wish to fire at the SAME target hex need not form a firegroup.
15.5 Assault Fire
15.51 Personnel may fire their printed Gunfire factors AND move under certain circumstances.
15.52 A personnel unit that moves only one hex (CRAWLING) or 2-3 movement points (ASSAULT MOVEMENT) may fire at HALF its normal Gunfire factors during the Movement Segment before moving, during its move or in the last hex it enters. Assault Fire must be used by a unit DURING its move, i.e., it cannot be 'saved' for use later in the Movement Segment.
15.53 A personnel unit that uses RUNNING movement may NOT fire in the Movement Segment of the same turn.
15.6 Desperation Fire
15.61 Desperation Fire is a form of Opportunity Fire. Personnel units may fire their printed Gunfire factors (only) if already marked as fired by using Desperation Fire. Desperation Fire may only be used against enemy units within normal range AND in the act of moving. The Casualty Table attack die roll also serves as a morale check for all firing units taking part in the desperation fire attack. All morale modifiers from the morale table are applied normally to Desperation Fire. Mark units that fail this morale check as broken or surrendered normally.
15.7 Resolution of Anti-Personnel Direct Fire
15.71 Resolution of anti-personnel fire is a three-step procedure.
15.711 STEP #1—TOTAL THE NUMBER OF GUNFIRE FACTORS BEING APPLIED TO THE TARGET HEX.
Example: If 'D' pivots its vehicle covered-arc one hexspine during the Direct Fire Phase a +3 HPN DRM will be applied to any 'to hit' attempt it makes. A three column shift LEFT will also be applied to any Casualty Table fire using the '4' factor bow machine-gun on the tank destroyer. If another hexspine change was made, an additional +1 HPN DRM would be applied (+1 per hexspine after the initial +3), as well as an additional column shift LEFT (a total of +4 or FOUR shifts LEFT).
15.7111 Total the number of Gunfire factors from the firing unit(s) by adding all personnel (noting reduction in Gunfire factors for personnel manning weapons) and weapon units that do not require use of the HPT (i.e., machine-guns and ATRs may be used in this total; NOT guns or mortars). Determine the range from the firing unit to the target hex.
15.7112 Personnel, L|MG and M|MG weapon units may fire beyond their printed range, to a maximum range of DOUBLE their printed range (as may vehicle machine-guns). When firing beyond their printed range HALVE the Gunfire factors of these units.
15.7113 The amount of Gunfire factors applied to the target hex is calculated for all units firing and combined into one total for use on the Casualty Table. Note that multiple units in a hex may be fired on in the same Casualty Table attack noting the effects of different cover states.
15.712 STEP #2—USING THE COVER STATE EFFECTS TABLE, ANY COLUMN SHIFTS ON THE CASUALTY TABLE FOR THE TARGET UNIT(S) ARE APPLIED.
15.7121 'Cover State' refers to a unit's vulnerability to gunfire, dependent upon its degree of exposure.
15.71211 Cover States
Personnel may be in one of the following cover states:
- RUNNING
- ASSAULT
- STATIONARY (INCLUDES CRAWLING UNITS)
- GOOD
- IMPROVED (INCLUDES FULL AND PERSONNEL IN BUILDINGS AND BUNKERS)
15.712111 RUNNING—A personnel unit is only considered in RUNNING cover if it is using running movement while being targeted by Opportunity Fire. All other moving personnel units, or those marked as moved (exception: crawling units) are considered to be in ASSAULT cover.
15.712112 ASSAULT—All moving personnel units not considered RUNNING or CRAWLING are in ASSAULT cover. Personnel riding on AFVs are also considered to be in ASSAULT cover. Place a movement arrow marker BEHIND any unit using Assault Movement.
15.712113 GOOD—Any unit on top of a hedgehog counter (or its equivalent emplacement) is considered to be in GOOD cover, as is a unit not in FULL cover in a half-track.
15.712114 STATIONARY—All personnel units NOT on or under an emplacement counter and NOT moving are considered to be in STATIONARY cover. Crawling units are also considered in STATIONARY cover as are personnel units being transported in vehicles NOT marked as 'G' or 'F' (and not riding on tanks).
15.712115 IMPROVED—This form of cover provides a two column shift LEFT and is provided for any unit in a building, bunker, blockhouse and units in FULL cover. Not all units in IMPROVED cover are considered to be in FULL cover. Only specific emplacements, half-tracks, and units at the bottom of wadis are in FULL cover.
15.712116 FULL—A unit that begins play or moves UNDER a hedgehog (or equivalent) marker is considered to be in FULL cover. Units in FULL cover may not fire during the Combat Segment (exception: mortars may fire and FOs may spot for indirect fire from FULL cover). Direct anti-personnel Gunfire factors-based fire (i.e., fire not involving the HPT) has no effect on units in FULL cover. A unit may only move from FULL cover to on top of a hedgehog counter in the same hex during the Movement or Close Assault Segments. Once 'outside' of (placed on top of) a hedgehog (or equivalent emplacement) in a hex, such units may fire normally.
15.712117 Cover State Shifts Cumulative
Cover state shifts are cumulative, that is, if a unit moves using Assault Movement and ends movement on top of a hedgehog counter, a cumulative shift of '1 RIGHT' will be applied (1 shift LEFT for the hedgehog + 2 shifts RIGHT for moving).
15.713 STEP #3—TOTAL GUNFIRE FACTORS APPLIED TO THE TARGET IN STEP #1 AND ANY SHIFTS DUE TO COVER STATE OF THE TARGET FOUND IN STEP #2 ARE USED ON THE CASUALTY TABLE. ROLL ONE DIE AND CROSS INDEX THE NUMBER ROLLED WITH THE PROPER GUNFIRE FACTOR COLUMN AND APPLY ANY LISTED CASUALTY RESULTS ('C1' OR GREATER).
15.8 Casualty Results
15.81 If the result is listed as 'C1' or greater, the defender takes casualties equal to that number among all eligible target units.
15.82 A 'C1' places a 'Casualties' marker on a personnel counter with three figures (i.e., a squad) and flips any other type of personnel unit to its reduced side. Leaders and FOs are flipped to their 'wounded' reduced side by a 'C1' result. A second 'C1' result flips a squad to its reduced side (i.e., it becomes a 'half-squad') and eliminates all other personnel already flipped to their reduced side, including wounded leaders and FOs. A third 'C1' result marks a reduced squad with a casualties marker. A fourth 'C1' result eliminates a half-squad already marked with a casualties marker. A 'C4' or greater eliminates a squad. A 'C8' would eliminate TWO squads, etc.
15.83 Crews, FOs and leaders do not receive casualties markers. They only have two steps: normal and reduced. They flip to their reduced side upon receiving any 'C1' result (and are eliminated upon a second 'C1' result or immediately upon a 'C2' result).
15.9 Casualty Effects
15.91 The placement of a casualties marker reduces the printed Gunfire factors AND morale level of a personnel unit by one. Casualties markers have no effect on the use of light infantry weapons. A reduced crew reduces the ROF of a non-MG heavy or medium crew-served weapons.
15.911 Wounded Leaders
15.9111 Any leader flipped to its reduced or 'wounded' side may not use Running Movement for the rest of the scenario.
15.92 Casualty Morale Checks
15.921 Morale Check for survivors—For all 'C1' and greater results a morale check is taken by all units in the hex (exception: units in FULL cover not targeted) after casualties are applied, with a morale check DRM equal to the C# (e.g., following a 'C1' result, all surviving target units takes a MC, applying a +1 DRM, i.e., making it harder to pass). Any unit that fails this morale check is immediately broken (or surrendered if already broken or broken within the two-hex morale support range of an enemy unit).
15.93 Continued Fire Morale Checks
15.931 Place a Continued Fire ('C' marker) in any hex that receives Gunfire or FRAG factors of '6' or more during any segment (including Opportunity Fire). A Continued Fire marker is NOT placed for FFE, aircraft attacks, or fire from a MOVING vehicle (e.g., overrun final fire).
15.932 Any personnel unit that enters a hex with a Continued Fire marker must take an immediate morale check. Failure of this morale check causes casualties EQUAL TO the amount the unit failed the check by. A Continued Fire morale check is treated as normally in all other ways.
16. Anti-Personnel HE Direct Fire
16.01 Direct Fire With High Explosive (HE) Ammunition—HE direct fire is very similar to armor-piercing (AP) direct fire with the greatest difference being that HE direct fire is applied to personnel and weapon targets while AP direct fire is usually applied to armored targets. The following rules apply to all AFV, guns, and light infantry weapons with HE capability that fire at personnel using the HPT. As with AP fire, HE direct fire resolution is a three-step procedure:
- STEP #1—THE RANGE TO TARGET AND HIT PROBABILITY NUMBER ARE DETERMINED AND IMPLEMENTED IN THE SAME MANNER AS USED AGAINST ARMORED TARGETS NOTING THAT COVER STATES ARE USED AS HPN DRM.
- STEP #2—THE NUMBER OF FRAGMENTATION FACTORS APPLIED TO THE TARGET IS PROVIDED BY CROSS-REFERENCING THE GUN SIZE, LISTED IN THE 'HE' ROW ON THE CASUALTY TABLE WITH THE 'FRAG' ROW. THE RESULTING NUMBER IS THE 'FRAGMENTATION (FRAG) FACTORS' FOR THAT GUN (E.G., A 75MM GUN PROVIDES 14 FRAGMENTATION FACTORS).
- STEP #3—CASUALTIES ARE DETERMINED ON THE CASUALTY TABLE IN EXACTLY THE SAME WAY AS WHEN USING GUNFIRE FACTORS.
16.02 The fragmentation factors created by HE are exactly equivalent to Gunfire factors described in anti-personnel direct fire. ALL HE rounds fired at a personnel target (whether a 'hit' or a 'miss') inflict fragmentation factors on the target. A 'miss' is simply considered HE fire that did not strike an optimal location in the target hex. The EFFECT of these rounds varies depending on the cover state of the target unit(s).
16.03 Roll a die using the HPT to determine hits and misses as usual. The results of each hit and miss are applied immediately using the Casualty Table.
16.1 Resolving Direct Hits
16.11 If the target is in FULL cover, all HIT fragmentation factors are applied to the target (on the Casualty Table) as if in a STATIONARY cover state (i.e., no shifts on the Casualty Table). All MISS fragmentation factors are NOT applied to the target.
16.12 If the target is in GOOD, STATIONARY, ASSAULT, or RUNNING cover, all HIT fragmentation factors are applied to the target using the full FRAG factors. All MISS Gunfire factors are applied using half the normal fragmentation factors. Both HIT and MISS fire uses the target's ACTUAL cover state (i.e., apply all column shifts LEFT and RIGHT).
16.13 IMPORTANT: If the target is at a range such that the firing weapon's modified Hit Probability Number would he an automatic miss ('-') or less than '1', the target may not be fired at using direct fire HE (i.e., a 'miss', applying HE fire in a hex, may not be generated if the HPN is '-' or less than '1').
16.2 Machine Gun Direct Fire
16.21 Direct Fire With Machine Guns—There are two types of machine gun mounts used in the game; those represented by weapon units and those mounted on vehicles. For vehicles, the number, location, and type of machine-guns carried by each type of vehicle is listed on the counter (and AFV card for AFVs). Regardless of the type of mount, all machine guns follow the same fire procedure (exception: machine gun anti-vehicle fire).
16.22 There is no 'hit or miss' die roll associated with machine gun fire (exception: anti-vehicle machine gun fire). The Gunfire factors listed on the counter are used on the Casualty Table in the exact same manner as infantry Gunfire factors.
16.3 Light and Medium Machine Guns
16.31 Light and medium machine-guns (listed as L|MG and M|MG on their counters) function within the carrying and firing rules outlined for medium crew-served weapons. They may fire 360-degree without pivoting and may fire in more than one hex during a Combat Segment, to the limit of their printed ROF. Their ROF is never increased for any reason.
16.4 AFV Machine Gun Fire
16.41 There are three types of vehicle machine-guns: Coaxial—mounted in the turret (and sharing the turret field-of-fire) of a vehicle; Bow—mounted in the front hull (and sharing the vehicle field-of-fire restrictions of the front two hexsides); and anti-aircraft (mounted on the turret and firing in an unlimited 360-degree field-of-fire but capable of fire ONLY if the vehicle is NOT suppressed). The Coaxial machine-gun is abbreviated "CMG"; Bow is "BMG" and anti-aircraft machine-gun is "AAMG".
16.42 Each vehicle that is armed with machine gun weapons has its MG weapons listed on the counter in the following format: CMG | BMG | AAMG. There is no machine-gun range listed on the counter. CMG and AAMG have a normal range of '10' hexes. BMG have a range of '6' hexes UNLESS mounted on an APC, in which this range is also TEN. CMG and AAMG (and BMG on an APC) may fire beyond their normal range at HALF firepower. BMG may not fire beyond their range of '6' hexes.
16.43 AFV Machine Gun Restrictions
16.431 In some AFVs, if the turret machine gun fires, the main turret armament may not fire in the same Combat Segment, and vice-versa. This 'One Man Turret' restriction is noted on the AFV card for some AFVs.
16.432 Vehicles using Assault Movement may fire one or all of its machine-guns from the starting hex or any ONE hex entered during their move (in the Movement Segment) at HALF firepower. If a turreted main armament fires, any CMG fired must fire at the same hex. Note this form of vehicle machine-gun fire may only be conducted from ONE hex during the Movement Segment and must be conducted while the AFV is in the act of moving. The fire may not be 'saved' for use later in the Movement Segment.
Example: It is the start of the Direct Fire Phase during the Combat Segment. British squads '21', '13' and '3' are faced by a large number of Axis troops supported by a half-track and a Pzkw IIf tank. The German player has a number of options. German squad '15' and Italian squad '1' may form a same-hex firegroup because German leader '7' is in their hex (otherwise, German and Italian units may not firegroup).
The Axis player may instead opt to add to this stack and form a large firegroup, adding squad '10' + ATR 'C' + squad '9' + L|MG 'B' + Sd 250 'B' for a total of '32' Gunfire factors that can be fired at any ONE of the British squads. Squad '10' is reduced by ONE factor for the ATR it is carrying, but the ATR may use its '1' factor directly on the Casualty Table. Squad '9' is also reduced by ONE Gunfire factor for using the MG 34, but the machine-gun adds its '5' factors to the attack. The Sdkfz 250/1 half-track is allowed to firegroup with personnel. The Pzkw IIf is NOT. The German Granatenwerfer 36 light mortar is also dis-allowed from firegrouping as it is an indirect firing weapon. If instead a PaK 36 was in its hex, it also would be dis-allowed from joining the firegroup since it must use the HPT to secure a hit.
The Axis player may instead opt to make a series of separate shots. Squad '10' and ATR 'C' can fire at British squads '21' or '3' using '6' Gunfire factors ('5' + '1'). If it chose to fire at British squad '13', it would fire using '3' factors due to the range of SIX hexes reducing the printed Gunfire by HALF ('6' MINUS '1' HALVED = 2.5 [FRD]; the ATR is still within its range of 16 and provides '1' factor). If any unit fires on British squad '13' it my 'drop' into FULL cover under the hedgehog. The firing unit(s) is still marked as fired.
16.433 The BMG, AAMG and the CMG may ALL be fired in the same Combat Segment. They may be combined in a form of 'firegroup' to fire at the same target. A vehicle machine-gun may not be 'saved' to fire later, after a vehicle is marked with an 'F' marker.
16.444 Any AFV suffering a turret (TUR) 'F-KILL' also loses the use of the CMG (and any AAMG). Any AFV suffering a FRONT upper hull (UH) M-KILL also loses the use of its hull machine gun. Use the appropriate F-KILL markers for AFVs so-affected (i.e., F-KILL 'T' for turreted weapons; 'H' for hull weapons).
16.445 Any vehicle machine gun that is fired after a vehicle or turret pivots pays the a penalty for covered arc changes. Each '+1' modifier applied for pivoting during the Combat Segment is applied as a one column shift LEFT on the Casualty Table if pivoting is conducted during the Combat Segment (i.e., or a weapon that pivots to fire).
16.5 Long Range Machine Gun Fire
16.51 Vehicle and non-vehicle machine guns may fire beyond their normal range at HALF firepower, to a maximum of DOUBLE their normal range.
16.6 Anti-Vehicle Machine Gun Fire
16.61 Instead of attacking vehicles on the Direct Hit Results For APC and Non-AFV Vehicles table using Gunfire factors, a crew-served or vehicle mounted machine-gun may instead use the MG Hit Probability Number Table (a special HPT for anti-vehicle machine-gun fire) to attempt to secure a direct hit against any vehicle within the NORMAL range of the machine gun. For each direct hit obtained, a roll may be made on the Direct Hit Results for APC and Non-AFV Vehicles table OR using the penetration number (on the K-KILL Table) for machine-guns ('1' up to the normal range of the machine-gun), depending on the target type (i.e., use the '1' for attacks against AFVs).
16.62 Machine-guns using anti-vehicle fire do not acquire a target and thus never have their ROF increased. They do not benefit from BOT for previous hits obtained.
16.7 AFV Flamethrowers
16.71 The Italian L3lf is armed with a Bow-mounted flamethrower that operates within the normal restrictions of any BOW weapon (e.g., front two hexes unless vehicle pivoted; etc.) except as follows.
16.711 The flamethrower attacks on the Casualty Table with the equivalent of '30' Gunfire factors. A flamethrower attacks non-AFV vehicles on the Flamethrower Vs. Vehicles table using the row for APC, Truck and AFVs.
16.712 On any attack roll of '0' the flamethrower is considered to be 'out of fuel' and no attack is made. The L3lf is marked with an F-KILL marker and must exit the map. A flamethrower attack against a unit in a building or bunker (not blockhouse) creates a flame (place a flame marker) on any 'C6' or greater result (also eliminating all target units). Also, a 'C6' or greater result eliminates any heavy weapon and its crew in a non-building hex. Do NOT place an F-KILL marker on a heavy weapon, it is removed instead.
16.713 An Assault Moving L3lf may fire its flamethrower at any target in its hex or an adjacent hex with no penalty for moving. If moving using cross-country movement, it may not fire. The range of a flamethrower is '1' hex (adjacent).
17. Details on Anti-Personnel Direct Fire
17.01 As can be seen from the rules, certain relationships exist between various weapons systems: Both HE and AP ('AP' also includes APCR and HEAT ammunition) DIRECT fire use the same acquisition system (the HPT). HE, machine gun, and infantry gunfire are applied to the target in the same manner (the Casualty Table). Armor-piercing rounds are all delivered to AFV targets by the same method, the HPT, regardless of their source (AFVs, guns, or ATRs).
17.02 When firing at personnel targets, fire resolution requires the use of the Casualty Table. The HPT is not used when personnel are fired at by personnel and machine guns. It is used when HE is fired direct (i.e., not using indirect fire or semi-automatic fire) at personnel by weapon units.
17.03 When firing at vehicles, fire resolution requires the use of the Hit Probability Table followed by use of the Direct Hit Results For APC and Non-AFV Vehicles table for vehicles with yellow and white movement icons OR the K-KILL Table for AFVs, i.e., those with gray movement icons.
17.04 Anti-personnel fire from non-APC vehicles and personnel may not be combined. Anti-personnel fire from personnel units and other personnel using L|MG and M|MG may be combined against the same target hex as part of a firegroup. Personnel may also form firegroups with APC machine-guns. All firegroups are formed from adjacent units and an unlimited string of adjacent eligible units may combine their fire using a firegroup. No fire using the HPT may ever form a firegroup.
17.1 Semi-Automatic Guns
17.11 Some guns (e.g., Pzkw IIf turreted main armament) that have a high rate-of-fire may attack on the Casualty Table OR use the Gunfire/Fragmentation portion of the Direct Hit Results for APC and Non-AFV Vehicles without rolling for a direct hit using the HPT. These Gunfire factors are used in the same fashion as a personnel unit (exception: apply any column shifts for pivoting normally). However, their use consumes ALL the rate-of-fire of the weapon for that Combat Segment.
17.12 Procedure—For any AA gun of 40mm or less AND any gun of 20mm or less multiply the normal FRAG factors for that gun by its ROF. This total may be used as Gunfire on the Casualty Table or the Direct Hit Results for APC and Non-AFV Vehicles (on the without securing a hit.
17.2 APCR and HEAT Ammunition
17.21 APCR Ammunition—During the campaign represented in the game, the Germans had available a limited supply of Armor-Piercing Composite Rigid (APCR) ammunition which had markedly superior penetration capabilities. Limited availability, however, necessitated strict tactical doctrines governing its use in combat. The Germans also introduced hollow charge (or HEAT) rounds for use with the 75 mm short weapon on the Pzkw IVe and with the 75mm le IG. HEAT may not be used for any scenario set before June 1942. Italian 75mm and 65mm guns had HEAT available beginning in September 1942.
17.22 Some AFVs and weapon units may fire APCR or HEAT as noted by an 'APCR' or 'HEAT' notation on their AFV card or the Gun & Mortar Ammo Table for heavy crew-served weapons. When firing APCR/HEAT ammunition, use the APCR and HEAT entries on the Gun Penetration Table for those ammunition types.
17.23 APCR/HEAT ammunition is limited. In any scenario including a unit equipped with APCR or HEAT, a secret roll must be made prior to play on the Alternate Ammunition Availability Table to determine the number of HPT shots that may be taken during a scenario using this ammunition. Note the modifier on the table for APCR and HEAT if the Allied order of battle includes certain tanks (e.g., Grant; Matilda).
17.24 To determine the number of APCR and HEAT (for each ammunition type) rounds available during a scenario, add the number of 'APCR' and 'HEAT' ('A' and 'H') capable units in the order of battle and use HALF of this total as the base number for that ammunition type. The base number, plus the total from the Alternate Ammunition Availability Table roll equals the number of APCR and HEAT shots (a separate number for each) available for the scenario.
17.25 The owning player must specify the identity of the AFVs or guns 'carrying' or 'assigned' the APCR and HEAT rounds resulting from the calculation above. Make a side note of the ID letter of the units allotted APCR or HEAT ammunition and quantity available for each. Only the noted units may use this ammunition. The German player may freely distribute his ammunition among eligible AFVs and weapon units. Each 'round' is equal to ONE 'shot' (hit attempt die roll) on the HPT.
17.3 Gun Duels
17.31 Gun Duel—An AFV or heavy crew-served weapon unit under fire may respond when fired on during the DIRECT FIRE PHASE. A unit that must pivot to fire (including the pivoting of a turret) on the instigating unit may not engage in a gun duel.
17.32 When one AFV or heavy crew-served weapon unit fires at another AFV or heavy crew-served weapon unit, the target unit has the option (if it has not already fired and otherwise eligible, i.e., not F-KILLed) of returning fire against the firing unit until one of the two units is destroyed or all rounds available are fired. Suppressed AFVs may gun-duel.
17.33 If the friendly unit being fired on currently has a BOT marker on the instigating enemy unit, the friendly player may declare a 'gun duel'. The enemy firing unit still makes it shot, but one shot may be returned by the target unit. Both sides roll for their shot. The side rolling LOWEST is considered to have fired FIRST. If these rolls are TIED, both shots are considered SIMULTANEOUS. An exchange of shots is then exchanged in this manner until one or both firing units is K-KILLed, exhausts its ROF or is unable to fire for any other reason (e.g., F-KILL).
17.34 If the target unit has NOT previously acquired (i.e., placed a BOT marker) the firing unit, it cannot return fire until ONE HALF of the instigating unit's available ROF rounds have been fired FIRST. Otherwise, it may return fire shot-for-shot AFTER one shot has been made at the target unit in the same manner as above, i.e., lowest roll hit first. Each hit inflicted during a gun duel is evaluated for damage IMMEDIATELY. Units K-KILLed, F-KILLed or weapon units otherwise unable to fire may not continue firing in the duel.
17.35 A player who responds to enemy fire nevertheless has the next fire choice after the duel is terminated. His response to the duel is not considered as his next portion of the Direct Fire Phase. The unit that returned fire, of course, may not fire again during the turn. Mark firing units with an 'F' marker normally.
17.36 For duels involving AFVs with sponson-mounted armament, both weapons may duel independently with two different targets. If the owning player chooses to fire both guns at the same target, both may fire as if one weapon was being fired in terms of enemy opportunity to respond during a gun duel but the lowest roll still hits 'first'.
17.4 Smoke Candles
17.41 The AFVs in the game, including armed APCs and armored cars (gray and yellow movement icon vehicles ONLY) carry smoke candles for self-defense. They were used in the battle for providing a short smoke screen to allow vehicles to retreat and this is how they may be used in the game.
17.42 Whenever a vehicle is forced to leave the board due to an F-KILL result on its main armament it may lay one smoke counter in any hex through which it moves to retreat from the board. The smoke may only be laid once, and lasts one turn. Place a smoke counter with its '2' side up in the hex.
17.5 Weapon Hits Using HE and AP ≤ 20mm
17.51 Employ the following rules when evaluating DIRECT fire AP or HE hits from weapons of 20mm or less (including ATR) against heavy crew-served weapons. Note that AP may NOT be fired at personnel unless they are in bunkers. It does create collateral attacks when hitting vehicles transporting infantry.
17.52 When a hit is obtained, crew casualties and damage to the weapon are evaluated separately.
17.53 For weapon damage, roll one die for EACH hit and refer to the Direct Hits On Crew-Served Weapons ≤ 20mm table. An 'F' result means that the weapon has been F-KILLed. A non-'F' result means the weapon is undamaged. In addition, any weapon hit but not F-KILLed may NOT fire in that turn (unless it has already done so). Mark it with a 'Cease Fire' marker.
17.54 Crew casualties are incurred for each hit regardless of whether the weapon is F-KILLed. Evaluate casualties on the Casualty Table as per the FRAG factors produced by the impacting HE rounds. AP creates collateral attacks at the rate of FOUR fragmentation factors for each AP hit.
17.55 Hits on weapon units by weapons of greater than 20mm automatically F-KILL the target and eliminate the crew. Machine guns may not obtain direct hits against crew-served weapons.
17.6 Direct Hits vs. APC and Non-AFV Vehicles
17.61 Direct Hit Results For Non-AFV Vehicles—Direct fire HE or AP hits will K-KILL 'soft-skinned' (lightly armored or un-armored) vehicles. These vehicles may also be damaged by lighter weapons. When firing at non-AFV vehicles with weapons of 20mm gun size or smaller, use the Direct Hit Results For Non-AFV Vehicles table to ascertain damage from gunfire/fragmentation factors and direct hits from lighter weapons.
17.62 An 'M' result M-KILLs the vehicle. A 'K' result K-KILLs the vehicle. On an 'xM' result, if the die roll is less than or equal to the 'x' value, the vehicle is M-KILLed. On an 'xK' result, if the die roll is less than or equal to the 'x' value, the vehicle is K-KILLed instead of M-KILLed. Otherwise, there is no effect on the vehicle if an 'xM' and 'xK' result is listed the die roll exceeds BOTH 'x' values.
17.63 Use the 'APC' row for any yellow movement icon vehicles and the 'Truck' row for all white icon vehicles.
17.7 High Explosive and Armor Piercing Limitations
17.71 No AP—Some weapons, including some tank main armaments (e.g., German 75mm le IG; Crusader CS) may only fire High Explosive (and smoke)—i.e., no armor piercing [AP] ammunition may be fired by these weapons. Such units are noted with a gray circle (for turreted) or gray box (for non-turreted) behind the gun size value on the counter.
17.72 No HE—Units that may only fire Armor Piercing (AP) ammunition are represented with a white circle or box behind the gun size value (with gun value in black text) on the counter (e.g., Crusader II; Grant 37mm turreted gun).
17.73 In all cases refer to the AFV Card or Gun & Mortar Ammo Table for available ammunition.
17.8 Airbursts
17.81 Certain terrain represented additional danger due to rock fragments being thrown about by exploding HE rounds. Any personnel unit in a hex of rock-strewn terrain have their cover-state reduced one column shift RIGHT for all indirect HE fire (including all mortar fire), off-board artillery and aircraft bomb attacks.
17.82 The 88mm Flak weapon was the only gun in the game to possess large time-fuzed HE ammunition for the engagement of aircraft. Often, these rounds were used against ground targets set to explode in the air—an extremely lethal tactic. An 88mm FLAK may fire airburst HE against a non-yellow/gray icon vehicle target in ANY terrain. The airburst rounds produce as much fragmentation as the normal 88mm HE round but they will provide a one column shift RIGHT for all units which are not in APCs, bunkers or blockhouses. If the German player chooses to fire time-fuzed HE (which he may at his option whenever firing INDIRECT HE) it will not produce direct hits (i.e., do not roll for direct hits). This shift is in addition to that for rock-strewn terrain (i.e., TWO column shifts RIGHT are applied for HE time-fuzed ammunition vs. non-white/gray icon vehicle targets in rock-strewn terrain).
17.9 Dust Reduction of ROF
17.91 All heavy crew-served weapons were assumed to adopt anti-dust measures to prevent obscuration upon firing. When moved into the open, however, considerable dust would be raised by any large caliber weapon discharge and this may be reflected through a reduced ROF. In play, assume that any heavy crew-served weapon of 65mm or greater, firing outside of a weapon pit or sangar, has its ROF reduced by one-half, rounded down to a minimum of one. This does not apply to light or medium weapons. The BOT modifier is still applied for direct hit attempts against units previously hit but will NOT increase the weapon's HALVED ROF.
17.92 Wet Weather Conditions—In some scenarios an SSR may state the weather conditions are 'wet' or 'raining', negating the effects of Dust Reduction of ROF. Unless specifically negated by SSR, the rule is used.
18. Off-Board Indirect Artillery Fire
18.01 Many factors influencing a tactical battle occur beyond the physical limits of the map-board. Off-board artillery rules represent INDIRECT firepower available to the tactical commanders from artillery batteries located off map. There are, of course, no unit counters for these batteries. Rather, their fire effectiveness is simply evaluated on the OFF-BOARD ARTILLERY CHART and applied using FRAG factors on the Casualty Table in the normal manner for HE. Off-board artillery fire is one type of indirect artillery fire.
18.02 Indirect artillery fire is executed during the Indirect Fire Phase of the Combat Segment. Opposing players alternately fire their off-board batteries. Damage is evaluated and recorded immediately.
18.03 Off-board indirect artillery fire may be directed against any type of target.
18.1 Artillery Order of Battle
18.11 Artillery is provided via Scenario Special Rule. Support is listed via SSR in the form of the size and type of the battery, quantity of 'concentration' or 'barrage' FFEs that may be placed, and number of registration hexes if any.
18.12 Quantity of FFEs Available—Prior to the start of play, the player receiving artillery makes a secret die roll for each battery received via SSR to determine the number of FFEs he may place during play for that battery. This resulting die roll is HALVED (round fractions down to a minimum of one). This is the maximum number of FFEs that may be used during the scenario for that battery. If High Ammunition Supply is specified for the battery, add a +1 DRM to this roll AFTER halving. For Low Ammunition Supply, a -1 DRM is applied.
18.2 Artillery Acquisition Process
18.21 Artillery is a ONE PHASE procedure. Once Battery Contact is made by rolling less than or equal to the 'Battery Contact' number, a 'Call For Fire' (CFF) is placed in the intended target hex. An immediate accuracy dice roll is made using the Indirect Fire Accuracy Diagram. Move the CFF to the final hex and immediately flip to an FFE, attacking all hexes normally (for a concentration or barrage as per the Indirect Fire Direct Hit Table). Flip the FFE back to its CFF side during the End of Turn Segment.
18.22 Battery Contact
18.221 A battery contact number is provided on the Indirect Fire Accuracy Diagram for each nationality. Before placing an artillery CONCENTRATION CFF, a die roll less than or equal to the BATTERY CONTACT number must be made. If the roll is greater than this number, no call for fire (CFF) marker may be placed. This failure is considered 'No Fire' for the battery involved. Note a 'No Fire' result still uses a turn of indirect fire, allowing the opposing player to attempt off-board indirect fire.
18.222 In each subsequent turn that the battery is called and is unavailable, add '1' to the BATTERY CONTACT die roll (making it harder to get through to the battery). The Battery Contact die roll increases by '+1' for each turn of NO FIRE. Even if a CFF is subsequently placed, any NO FIRE modifiers to the Battery Contact die roll are retained for later attempts to place a new CFF.
18.223 EACH turn a player wishes to use a new FFE or move an existing CFF more than THREE hexes, another Battery Contact roll must be made. Remove the CFF or FFE marker if the new roll is not successful.
18.224 Artillery Ammunition Supply—An increased or decreased level of support for off-board artillery may be provided by SSR. If "High Ammunition Supply" is indicated for a battery, SUBTRACT '1' from all Battery Contact die rolls for that battery. If "Low Ammunition Supply" is indicated, ADD '1' to all Battery Contact die rolls for that battery.
18.3 Artillery Accuracy
18.31 The player firing the off-board artillery places a 'Call For Fire' (CFF) marker in the target hex he wishes to attack. This 'acquisition fire' has absolutely no effect on the target, but represents the reference point before a dice roll is made to 'zero in' and correct the artillery fire. After placing the call for fire marker, immediately make a die roll using the Artillery Accuracy Chart, to determine the final hex of the call for fire counter. Align the chart so it lies correctly 'on' the map. Roll two ten-sided dice and place an FFE in the hex that corresponds with the resulting number.
18.32 No accuracy roll needs to be made if a player wishes to continue artillery in its current hex or an adjacent hex the following turn. The CFF simply remains in its hex or is moved to the adjacent hex of the owning player's choice and attacks normally during the indirect artillery phase of the new Combat Segment by being flipped to its FFE side (assuming another FFE is available from the existing quantity for that scenario).
18.33 CFF Conversion Range Modifiers
18.331 If the player wishes to move a CFF (already placed on map from a previous FFE flipped during the End of Turn Segment) greater than SIX hexes, he may do so, rolling for accuracy again normally in the new hex. However, if the CFF is moved more than SIX hexes, a -20 DRM (making accuracy more difficult) must be applied to the accuracy dice roll.
18.332 A +20 DRM is applied for any EXISTING CFF that is moved TWO hexes or less (making accuracy easier) OR if placed in a Registration hex (i.e., not cumulative).
18.4 Direct Hit Determination
18.41 Resolve FFE attacks using the Indirect Fire Direct Hit Table to determine the number of direct hits to roll for and the number needed to obtain each direct hit.
18.42 Each battery type has a different number that must be rolled less than or equal to in order to obtain a direct hit.
18.43 Artillery Direct Hits
18.431 A direct hit is obtained against one or more units per hex by rolling less than or equal to the number needed for that type of battery. For direct hits obtained, treat the target as if it is STATIONARY. If there are multiple units in the hex, a die is rolled for each unit (including each heavy crew-served weapon, i.e., in addition to its crew). The unit that rolls the highest receives the direct hits. In the case of any ties, ALL highest rolling units receive the effects of a direct hit.
18.432 All units in the hex that do NOT receive a direct hit are ALSO attacked by the indirect fire. For all other units in the hex, use the target's ACTUAL cover state. The Casualty Table is used normally for the effects of artillery on personnel.
18.433 FULL Cover Units—Unless a direct hit is obtained, units in FULL cover are immune to indirect fire.
18.434 IMPORTANT: If a VEHICLE target is moving when attacked, direct hits are NOT rolled: evaluate for fragmentation only (an AFV may not be K/M/F-KILL affected by fragmentation only) in the hex.
18.5 Registrations
18.51 In some scenarios, one or more 'registrations' are provided for an artillery battery (or on-board mortar). Before play begins, but after all set up, players secretly record the locations of their registrations by writing the hex coordinates of the target hexes on a side note, also noting the off-board battery (or on-board mortar) to which they belong.
18.52 Distribution—Each off-board battery or on-board mortar may be assigned any number of available registration locations by SSR.
18.53 NOTE: Once the registration locations have been assigned, they may not be changed. They may not be transferred between batteries or mortars.
18.54 In some scenarios other on-board weapons are provided the ability to register one or more hexes via SSR. Such hexes (and the ID of the registered weapon) must be secretly recorded BEFORE the opponent sets up. Treat the hex as if a BOT marker has been placed in it, that may not be removed, for the designated weapon.
18.55 Registration Effects and Usage
18.551 Whenever artillery (or on-board indirect fire) is brought down in a registration hex, add a +20 DRM to the artillery accuracy roll.
18.6 Artillery Concentration
18.61 Concentration Artillery Limits—All units in and adjacent to the FFE hex are attacked at full HE firepower on the Casualty Table AND one Direct Hit roll is made in each hex (i.e., seven Direct Hit rolls are made).
18.7 Artillery Barrage
18.71 Barrage Artillery Limits—All units in the FFE hex and the adjacent two hexes are attacked at full firepower. Two Direct Hit rolls are made in the FFE hex and one Direct Hit roll is made in each remaining hex (a total of twenty Direct Hit rolls are made). If a Barrage is provided via SSR, the owning player may instead specify six hexes adjacent to the CFF (three on each side) that will be affected when the FFE is placed. Place the barrage FFE AND two 'Barrage Limit' markers—one in EACH of the end hexes of the seven-hex string of the barrage—and attack units in these seven hexes instead.
18.72 Barrage Contact Procedure
18.721 A 'Battery Contact' roll is NOT made to initiate BARRAGE artillery provided in a scenario. Additionally, a CFF is not placed. When using a barrage, simply place the FFE in the target hex (and end-hex markers if using the seven-hex option) on any turn that the barrage is stated to be available by SSR. Roll for accuracy in the normal fashion for a registration hex (i.e., noting the reduction in error distance for registration hexes) and place the FFE in the final hex (adjusting any barrage end-hex markers).
18.722 A registration hex MUST be used to place a barrage FFE.
18.73 Rolling Barrage
18.731 A barrage may be provided as a 'Rolling Barrage' via SSR. When a rolling barrage is used, the barrage MUST use the six adjacent hex form of barrage FFE (i.e., seven hexes in total). A rolling barrage enters play in the same fashion as a barrage (i.e., immediate FFE; registration hex only; place barrage end-hex markers).
18.732 Rolling Barrage Movement—The seven hex long barrage must be set up in keeping with a map orientation listed in the SSR providing the rolling barrage capability. The SSR will also state how many turns the barrage moves forward, how many hexes per turn AND in what direction IF ACCURATE. All hexes a rolling barrage moves through are attacked. A rolling barrage moves and attacks FIRST during the Off Board Indirect Fire Phase of the Combat Segment.
18.733 Accuracy and Duration—A rolling barrage never flips to its CFF side. As long as the rolling barrage is in play its FFE and end-hex markers remain on the map. Add a +20 DRM to the accuracy dice roll for a rolling barrage. During the End of Turn Segment of the turn a rolling barrage is scheduled to 'lift' (be removed), a 'Battery Contact' roll must be made successfully. Otherwise, the rolling barrage continues into the next turn, whereupon another attempt to 'lift' it must be made, and so on. Until 'lifted' (removed), the rolling barrage continues to move and attack, rolling for accuracy normally each turn.
18.8 Artillery Forward Observers
18.81 Forward observers are artillery officers attached directly to fighting units for the purpose of directing and adjusting off-board artillery fire onto targets.
18.82 One Forward Observer (FO) counter must be provided for each off-board battery provided in a scenario. One FO is permanently assigned to each battery by writing the FO's ID number in a side note.
18.83 Forward observer units consist of only a single individual and thus consist of ONE stacking point. They do not affect the morale of other units in any way. Forward observer counters are 1|1|8 leaders with an FO triangle icon on their counter.
18.84 Set Up—Unless otherwise restricted by SSR, an FO may set up with ANY part of a side's order of battle.
18.85 Off-board artillery batteries may only fire if their assigned FOs are physically on the map-board (exception if an off-map FO is provided by SSR or in the case alternate FO for barrages). Off-board artillery batteries may only fire at targets that can be 'seen' by their forward observers.
18.86 FO Spotting
18.861 Forward observers have a maximum 'sighting range' equal to DOUBLE the current SPOTTING RANGE for that scenario. An FO may adjust its artillery battery's fire onto any target within this range provided no smoke or wreck counters (only) intersect (or terrain block LOS) the line-of-sight from the FO to the target unit that would provide greater than a +8 HPN modifier if direct fire was being used. As long as the FO's LOS does not exceed the equivalent of a +8 HPN modifier, wrecks, smoke and other line-of-sight modifiers do not hinder the FO's ability to 'see' its target hex.
18.862 If the line-of-sight becomes obstructed after a target hex has had an FFE placed in it, the artillery battery may still fire into that hex, but it may not shift its fire out of that hex until the line-of-sight becomes unobstructed (e.g., by the FO moving to a new hex). Otherwise, the FO would necessarily have to initiate fire (i.e., place a CFF) against another target hex, in its LOS.
18.863 If the FO for a battery is eliminated in combat, its off-board battery may not fire for the remainder of the game (exception: Alternate Forward Observers may be used for barrages).
18.864 Forward observers must be stationary to observe their targets. They may not move and observe targets in the same turn. Mark an FO with an 'F' marker (exception: if in FULL cover or hidden, make a side-note; do not mark).
18.87 Spotting Delay
18.871 If an FO moves during the Movement Segment, a CFF may remain in its current hex. An FO that infiltrates one hex during the Infiltration Phase has no effect on any CFF (or FFE for a barrage) already on the map-board.
18.9 Artillery OP Tanks
18.91 FOs may be assigned to observe fire from inside vehicles. They may observe from inside a vehicle, without unloading, providing the vehicle remains stationary. When observing from AFVs (a common practice of both sides), the FO counter is removed from the map-board and a notation of which AFV is carrying it is recorded on a side note.
18.92 If the vehicle is K-KILLed the FO is eliminated. If a Bail Out results, the FO is placed in the hex of the AFV. If the AFV is forced to exit due to F-KILL, the FO must stop any observation immediately and exits with the tank (i.e., is removed from play). Otherwise, an FO may exit a vehicle as if unloading from transport.
18.93 When an FO is adjusting fire from inside an AFV, it may not move. Nor may it fire its turret weapons. An FO may NOT adjust fire from a SUPPRESSED AFV.
18.10 Alternate Forward Observers
18.101 Leaders as Forward Observers—Leaders may conduct limited FO functions. Leaders may call in BARRAGE locations for artillery fire even if the battery has no forward observer on the map-board. This barrage fire may not shift, but is limited to the registration hex location initially recorded for that battery. Mark any leader that calls in a barrage with an 'F' marker to indicate it has 'fired' (exception: if in FULL cover or hidden, make a side-note; do not mark).
18.102 A leader may be designated as calling in a barrage for more than one off-board artillery battery, but any one leader is limited to one battery per turn.
18.103 Off-board FO
18.1031 In some scenarios an SSR will provide an 'off-board' FO (considered to be in off-map terrain or an artillery spotting tower off-map) at a specific hex and height advantage. All LOS for this FO is traced normally from the hex and level specified. Note off-board FOs may not be attacked in any way (and thus are never eliminated) and never enter the map-board in counter form.
18.11 Counter-Battery Fire
18.111 Off-Board Counter-Battery Fire—An important task of artillery is counter-battery fire in which friendly batteries fire at enemy batteries in an attempt to inhibit or interrupt their fire.
18.112 Counter-battery fire is initiated by off-board artillery batteries against enemy off-board batteries during the Indirect Fire Phase. A forward observer need not be present on the map-board for its battery to engage in counter-battery fire.
18.113 IMPORTANT: Only certain types of batteries may engage in counter-battery fire against certain types of enemy batteries (which is based upon their maximum ranges). Consult the Off-Board Counter-Battery Matrix to determine which types may conduct counter-battery fire against specific types of enemy batteries.
18.114 Counter-battery fire does not destroy enemy off-board batteries, but rather neutralizes them so that they cannot fire. The procedure for neutralization is as follows.
18.115 Locating Enemy Batteries
18.1151 Enemy batteries must be located before they may be affected by counter-battery fire. Only enemy batteries that fire (i.e., place an FFE) during a turn may be located in that turn. Locating attempts are conducted at the end of the Indirect Fire Phase in which the enemy battery fires. To attempt to locate an enemy battery, roll one die for each enemy battery that fired. A die roll of '1-2' means that the enemy battery has been located. Once located, an enemy battery remains located for the remainder of the game. Make a side note or use the provided markers to serve as a reminder. A friendly battery need not be used to LOCATE an enemy battery. It is only used to NEUTRALIZE it.
18.1152 Once located, counter-battery fire may be initiated against that battery by a friendly battery any time thereafter. Counter-battery fire requires a two-turn acquisition procedure. At the beginning of the second turn after declaring counter-battery fire, the enemy battery is neutralized and may not fire. Make a side note or use the provided markers to denote this status.
18.1153 Enemy batteries remain neutralized for as long as the counter-battery fire is maintained and for TWO turns after it is ended. That is, if a battery ceases counter-battery fire, the target battery may not place a CFF or FFE on the map until THREE turns later. If the friendly battery resumes fire on the enemy battery, it must re-acquire that target battery again. Once a friendly battery is no longer maintaining counter-battery fire, it may be used normally again (i.e., to place CFF and FFE).
18.11531 Players should make appropriate side notes or use the markers provided in regards to locating and neutralization of enemy batteries to avoid confusion.
18.11532 Occasionally Scenario Special Rules may specify an off-board battery consists of tanks or SP-Guns, and a modifier to locating or the length of time the battery is neutralized will be provided (making it more difficult to provide effective counter-battery fire against mobile and armored batteries).
19. Mortars
19.01 Light and Medium Mortars—Mortars are on-board, INDIRECT FIRE weapons that fire using in the same manner as artillery. However, they do not place CFF or FFE markers. Simply apply the effects of their fire in the resulting target hex and place a 'Continued Fire' marker normally. They use the Indirect Fire Accuracy Table to fire and the Indirect Fire Direct Hit Table to obtain direct hits. All mortars are denoted by the 'MTR' status listed on the counter, provided in the following format: Type | mortar status, i.e., an "L | MTR" is a light infantry weapon mortar; an "M | MTR" is a medium crew-served weapon mortar.
19.02 Mortars function within the previously cited rules for on-board weapon units for carrying, possession, etc. Mortars only attack one hex and have a 360-degree field-of-fire. They need not pivot.
19.03 Mortar fire is used as INDIRECT fire from on-board units. Mortar units fire in the Indirect Fire Phase of the Combat Segment AFTER all off-board artillery fire has been resolved.
19.04 For their fire, mortars use the Indirect Fire Direct Hit Table like other artillery. The direct hit numbers listed for mortars on the table refer to their direct hit capabilities and do not affect their ability to deliver fragmentation factors at targets within their range.
19.05 Unlike off-board artillery, mortars have a limited range as indicated on their counter in the format maximum-minimum. They may not fire at targets beyond their maximum range or at less than their minimum range.
19.1 Mortar Fire Effects
19.11 A direct hit is obtained against one or more unit per hex by rolling less than or equal to the number needed for that type of battery. If there are multiple units in the hex, a die is rolled for each unit. The unit that rolls the highest receives the direct hit. In the case of any ties, ALL highest rolling units receive the effects of a direct hit. The Casualty Table is used normally for the effects of mortar fire on personnel using the appropriate FRAG row.
19.12 Mortars may shift their fire any number of hexes between turns.
19.13 On-board mortars may not fire at a hex (i.e., a MISS is not applied) if LOS modifiers are +8 or greater along the mortar's LOS. Although they do not use the HPT to obtain direct hits, any HPN DRM along the LOS of an on-board mortar are SUBTRACTED from its ACCURACY dice roll (making accuracy more difficult).
19.14 Personnel—HIT: Treat the target as if it is STATIONARY and attack at FULL FRAG factors. MISS: Target is attacked in its ACTUAL cover state at HALF fragmentation factors.
19.15 AFV—HIT: Determine the target facing and aspect hit normally (i.e., as if using direct fire) but ignore all TRACK hits. Use the HE Penetration Table (noting penetration numbers are HALVED for indirect fire) and the 'HE DIFF' row of the K-KILL Table. Any direct hit that fails to K-KILL an AFV is rolled on the Suppression Table. MISS: A roll is ONLY made on the Suppression Table.
19.16 FULL Cover Units—Unless a direct hit is obtained, units in FULL cover are immune to mortar fire.
19.17 Note the addition of a +2 DRM for Direct Hits for targets in FULL cover (making it harder to obtain a Direct Hit).
19.2 Mortars vs. Open Topped AFV and Non-AFV Vehicles
19.21 Against open-topped AFVs a direct hit results in a K-KILL.
19.22 As per the Direct Hit Results for APC and Non-AFV Vehicles table, any direct hit on these classes of vehicle results in a K-KILL. Make a separate roll using the 'BURN' number to determine if any resulting wreck is burning or non-burning. For each MISS, apply HALF the FRAG factors. Reference the Casualty Table to determine the FRAG factors for each size of mortar, e.g., a 76mm mortar results in 14 FRAG factors—half of this is 7; use the '4' column on the Direct Hit Results For APC And Non-AFV Vehicles table.
19.3 Mortars vs. Crew-Served Weapons
19.31 Crew Served Weapons—HIT: F-KILL. Apply fragmentation factors to crew at HALF if the weapon is being targeted for a hit. MISS: Apply HALF FRAGMENTATION against the crew. No effect on the weapon.
19.4 Mortar Fire from Full Cover
19.41 Mortars may be positioned in and fired from FULL cover when located in a hedgehog or equivalent emplacement. They are the ONLY weapons that may fire from FULL cover from these types of field emplacements.
19.5 Mortar OP
19.51 Situations may arise where mortar weapons would not be able to directly see a target. In these cases, allow any adjacent leader or FO to act as a mortar forward observer for any friendly mortar (or mortars in one hex) in the same manner as spotting for artillery. A leader may only act as an FO for one mortar or multiple mortars in the same hex during a Combat Segment. Mark the leader with an 'F' marker. Any mortar that fires using a spotter's LOS otherwise fires normally.
19.6 Mortar Registrations
19.61 As in the case of artillery batteries, mortar crews, especially German, would often shoot-in registration points for fire. To simulate this, one or more registrations may be provided for an on-board mortar via SSR. Treat registrations for on-board mortars in the same manner as for artillery, i.e., an accuracy DRM of +20 (making accuracy easier).
19.7 Mortar ROF
19.71 On board mortars all have a ROF of '1'. This ROF is DOUBLED to TWO following the placement of a BOT marker in a target hex in the normal manner. However, the probability of a Direct Hit is NOT increased by the BOT marker placed by a mortar. The placement of a BOT marker by a mortar simply provides a second Direct Hit die roll in the target hex.
20. AFV and On-Board Gun Indirect Fire
20.01 Any AFV or on-board heavy weapon unit with a gun of 75mm+ and capable of firing HE or smoke ammunition may fire INDIRECTLY in the same manner as mortar fire.
20.02 AFV and on-board gun indirect fire is executed in the Indirect Fire Phase of the Combat Segment AFTER all off-board artillery and mortars have fired. Weapons that fire indirectly may not fire directly in the same turn. They are marked as fired. For vehicles, placing the 'F' marker BEHIND the vehicle.
20.03 Weapons and vehicles may not fire indirectly at targets if the line-of-fire between the firing unit and the target unit has greater than +8 HPN modifiers along it. Each +1 HPN modifier adds '1' to the Direct Hit die roll, making them impossible in some cases.
20.04 SPECIAL: vehicles with indirect fire capabilities may use HALF of their ASSAULT MOVEMENT allotment of movement points in the Movement Segment AFTER firing INDIRECTLY in the Combat Segment of the same turn. The 'F' marker BEHIND the vehicle serves as a reminder of those units that used indirect fire.
20.1 Indirect Firing AFV Limitations
20.11 An AFV that uses indirect fire may NOT conduct an overrun in the Movement Segment of that turn.
20.2 Minimum Range
20.21 Minimum Range—The minimum range for a non-mortar heavy weapon or AFV to fire indirect is TEN hexes. For game purposes, the maximum range for indirect fire is unlimited (exception mortars have minimum and maximum ranges printed on the counter and are not covered in this rules section).
20.3 Smoke and Smoke Ammunition
20.31 Smoke Obscuration—Burning wreck counters and smoke markers partially obscure the line-of-fire for direct fire weapons and on-board indirect fire. Burning wrecks and smoke shells provide a +4 HPN modifier for any fire into or through that hex or a FOUR column LEFT shift on the Casualty Table for fire that does not use the HPT.
20.32 Smoke shell ammunition may be fired by all off-board artillery batteries provided that capability via SSR and those on-board units with smoke ammunition capabilities listed on their AFV card (e.g., Crusader II CS; Pzkw IVe; etc.) or on the Gun & Mortar Ammo Table.
20.33 Smoke shells are fired indirectly during the Indirect Fire Phase in exactly the same manner as HE rounds except they are fired at hexes instead of individual target units. ALL smoke shells must be fired before any other indirect fire.
20.34 Smoke shells, unlike HE indirect fire, may be fired into hexes occupied by friendly units. They may also be fired into empty hexes.
20.35 The On-Board Smoke row of the Off-Board Indirect Fire Accuracy Table is used to place smoke shells in a hex. A direct hit must be obtained by the unit firing. Add any HPN DRM along the LOS as a die roll modifier to the direct hit roll. If a direct hit is NOT obtained, no smoke counter is placed. The unit is still marked as fired. A unit may not fire smoke in more than one hex per turn, its full ROF is used up placing smoke in one hex.
20.36 Smoke Duration
20.361 Duration—Each off-board battery may place smoke into as many hexes as its FFE would affect (e.g., a Concentration may place smoke in its FFE hex and six adjacent hexes). On-board units may fire smoke into one hex per turn ONLY. The DURATION of this smoke depends upon the type of weapon firing it.
20.362 Smoke fired from OFF-BOARD batteries lasts for TWO turns. When fired, a smoke counter is placed face-up in the target hex displaying its '1' side.
20.363 Smoke fired from ON-BOARD units lasts for ONE turn. When fired, an inverted smoke counter, displaying the '2', is placed in the target hex.
20.364 During the End of Turn Segment, all smoke counters displaying a '2' are removed from the map-board. All smoke counters on the map-board displaying their '1' side are inverted to display the '2' on the reverse side.
20.365 Weapons with ROF greater than ONE may attempt a smoke direct hit on ONE target hex per Combat Segment. This attempt uses the FULL ROF of such units. No more than one smoke shell counter may be placed in a hex. Any HPN DRM along the LOS of the smoke-firing unit are added as a modifier to its Direct Hit die roll (making a Direct Hit more difficult to obtain).
21. Overrun
21.01 Any non M-KILLed AFV (gray movement icon ONLY) armed with at least a machine-gun available to fire (i.e., not F-KILLed) when entering a hex occupied by enemy personnel or weapon units, has the option of overrunning those units.
21.02 Overrun is an optional form of combat. AFVs that conduct overruns may only use Assault Movement during the Movement Segment.
21.03 Each AFV may overrun only ONE personnel unit (AND the weapon units it is operating or carrying) OR ONE un-possessed weapon unit per hex but may overrun as many hexes as can be entered using assault movement in a Movement Segment.
21.04 A vehicle may also choose to remain in a hex to overrun additional units, but must expend one movement point per unit it wishes to overrun in this manner after the first unit is attacked via overrun after its entry. The vehicle counter is not actually moved when spending additional movement points to conduct additional overruns in one hex. An Opportunity Fire shot may be made at the AFV for EACH overrun MP it utilizes in a hex BEFORE the overrun morale check is taken by the target unit.
21.05 A vehicle may continue to overrun a unit in a hex for more than one turn by simply remaining in the hex and announcing continued movement during the End of Turn Segment. Overrun markers from prior overruns are removed during the End of Turn Segment.
33.06 Direct fire may be used in hexes containing friendly units if the hex ALSO contains an overrunning vehicle. The direct fire may ONLY be used against the vehicle, but any COLLATERAL attacks affect friendly units in the hex (e.g., artillery directed at the overrunning vehicle; etc.)
21.1 Overrun Procedure
21.11 To execute an overrun attack, the simply move the vehicle into the target's hex and announce 'overrun' and state the unit being attacked if more than one enemy unit is in the hex. All personnel and weapon units in the overrun hex are 'frozen' and may not move out of the hex if the AFV ends the Movement Segment in their hex.
21.12 Overrunning a personnel unit does not directly damage it. It does, however, reduce the morale value of the unit being overrun by '4' for EACH AFV overrunning it THAT TURN. This reduction is in CUMULATIVE with any other normal morale value alterations (e.g., due to proximity to enemy units NOT counting the overrunning vehicle) and remains in force for that turn even after the overrunning AFV has moved off. This morale reduction replaces the normal reduction of '1' for an enemy AFV within morale support range.
21.13 If another AFV overruns the unit in the same turn, the morale reduction of '4' still applies from the previous overrun (i.e., a reduction of '8' is applied for the second overrun morale check). Overrun morale effects may never exceed '8' (i.e., '4' for a prior overrun and '4' for a current overrun). Mark units that are overrun with an 'Overrun' marker.
21.14 Units that are overrun in the Movement Segment must have their morale checked immediately due to the overrun.
21.15 Overrunning a weapon unit results in that unit's immediate destruction (F-KILL). EXCEPTION: Light infantry weapons are not destroyed if they are being carried or operated by personnel units or if they are on OR under an emplacement counter. Medium mortar units are not destroyed if they are being operated from FULL cover. Otherwise, all of these weapon types are automatically destroyed when overrun.
21.16 An AFV may not fire its weapons and overrun in the same hex (see AFV Machine Gun Final Fire).
21.2 Final Defensive Fire vs. Overruns
21.21 Weapon units which are BEING OVERRUN may fire at the overrunning AFVs in the Movement Segment before being marked as F-KILLed providing the AFV enters the hex from a hex within the weapon unit's field of fire. A weapon may not pivot to conduct final defensive fire against an overrun and must be otherwise eligible to fire (e.g., manned by a crew; not already marked with an F-KILLed marker).
21.22 Each weapon unit may fire at any ONE (i.e., the first) overrunning AFV. Once a weapon unit has fired using final fire, it is F-KILLed normally.
21.23 Final defensive fire is executed like any normal direct fire, except that it is assumed to occur at a one hex range. If the fire destroys or immobilizes the overrunning AFV, it is placed in the target unit's hex with an M-KILL marker (or place the appropriate wreck) and the AFV may not execute the overrun (the weapon remains in play).
21.24 ONE Final Defensive Fire shot may be executed regardless of whether the firing weapon is marked with an 'F' marker.
21.3 AFV Machine Gun and Flamethrower Final Fire
21.31 Machine Gun fire may be used as a form of 'final fire' by AFVs conducting overruns. They may attack the intended target of their overrun with any available machine gun fire at HALF Gunfire factors BEFORE entering the target hex. This attack is made from an adjacent hex.
21.32 AFVs armed with flamethrowers may attack using their flamethrower firepower as a form of 'final fire' before conducting an overrun. The flamethrower attack affects ONLY the specific unit being overrun but their is no penalty to this fire. This attack is made from an adjacent hex.
21.4 Overrun Damage to AFV
21.41 Whenever an AFV destroys a HEAVY crew-served weapon unit in an overrun attack, there is a small chance of track breakage. For each weapon overrun, roll a die. A die roll of '1' means the AFV has broken a track and is M-KILLed in the target hex. The overrun is still conducted normally. Place the AFV in the overrun hex marked with an M-KILL marker.
22. Personnel Close Assault
22.01 The Close Assault Segment allows all personnel units otherwise capable of moving (i.e., not broken or surrendered) to move ONE hex (called INFILTRATION) and engage in melee. A roll is made to determine the side moving first (or making a grenade attack) in the Infiltration Phase. The Close Assault Segment consists of two phases:
- INFILTRATION PHASE
- MELEE PHASE
22.1 Infiltration Phase
22.11 During the Infiltration Phase of the Close Assault Segment, all units otherwise eligible to move (i.e., not broken or surrendered) may move one hex. Units in FULL cover may also move 'up and out' to enter an adjacent hex, and vice-versa unless otherwise restricted (e.g., enemy unit occupying a bunker disallows entry by friendly units). Units not marked with 'F' markers may also conduct one 'grenade' attack as a form of final fire before infiltrating.
22.12 Grenade Attack Final Fire
22.121 All personnel carry hand grenades. Grenades may only be used during the Infiltration Phase against ADJACENT enemy units if the friendly personnel unit did not FIRE yet during the turn and is otherwise eligible to infiltrate. It may have already moved. A player may infiltrate OR make a grenade attack in his 'turn' during the Infiltration Phase.
22.122 Grenade Attack Resolution—Any personnel unit eligible to infiltrate may declare a grenade attack against an adjacent hex. The personnel making a grenade attack need not do so against a hex it plans to infiltrate into. Nor need it infiltrate during the phase. To determine the grenade FRAG factors, simply multiply the Stacking Points of the unit by FIVE (e.g., a squad produces a 15 FRAG factor grenade attack). These factors are used on the Casualty Table normally with the added benefit that any target in GOOD or FULL cover is reduced to STATIONARY for the attack, including against units in bunkers (but not blockhouses). The bunker itself is not destroyed. Crews of Open Topped AFVs are also reduced to STATIONARY cover. For each Stacking Point used up carrying a possessed weapon, reduce the grenade attack multiplier accordingly. Personnel units in the same hex may combine their grenade attack for one total OR attack different adjacent hexes. All units in the same hex attacking a particular adjacent hex MUST combine their grenade attack into one total against that hex.
22.2 Melee Phase
22.21 When opposing personnel units occupy the same hex, they must 'melee' (engage in hand-to-hand combat). A 'melee situation' occurs whenever a personnel unit enters a hex occupied by an enemy personnel unit (exception: if the enemy unit is in a bunker). The melee situation is RESOLVED during the Melee Phase of the Close Assault Segment.
22.22 To engage in melee, a player simply moves personnel units into a hex during the Infiltration Phase of the Close Assault Segment, announces 'melee' and places a melee marker in the hex.
22.23 Once the melee marker has been placed, ALL enemy units in that hex are 'frozen' and may not use infiltration to move out of that hex (exception: a unit in a bunker may use infiltration to exit the bunker and move into the hex to take part in the melee), even if they have not infiltrated yet. Other units, friendly or enemy, may still enter the hex. All units in the melee hex are involved in the melee resolution (exception: moving AFVs and those not attacked due to the presence of friendly personnel in the hex).
22.3 Attacker and Defender Designation
22.31 Even if additional units subsequently enter the hex, the player that instigates the melee (by entering an enemy hex) is considered the ATTACKER. The other player is considered the DEFENDER. Place all ATTACKER personnel units on top of DEFENDER personnel units in the hex.
22.4 Stacking in Melee
22.41 Within the melee hex itself, stacking limitations are relaxed. Both sides may stack the hex to normal limits without being considered overstacked. There is no penalty for overstacking in melee, noting the penalties to overstacked hexes during other segments.
22.5 Morale Check in Melee Hex
22.51 At the start of the melee segment, morale is checked for all units involved in melee. The morale of all attacking units is checked before the morale of any defending units. ONLY apply morale modifiers for friendly and enemy units IN THE HEX during melee morale checks, ignoring any units that subsequently break during a melee morale check (i.e., only the 'at start' morale modifiers in the hex apply to melee morale checks).
22.52 An attacking unit whose morale is broken while in a melee situation is NOT removed from play, but it may not participate in the melee and does not affect melee resolution in any manner. Mark broken attacking units with a broken marker.
22.53 A defending unit whose morale is broken is removed from play immediately, i.e., they do not surrender.
22.54 NOTE: If ALL attacking units have their morale broken, NO defending units have their morale checked. No melee takes place in that hex and all of the attacking player's units in that hex are eliminated and are removed from play.
22.55 If the attacker is defeated in the melee, attacking units that suffered broken morale are also eliminated from play. If the attacker wins the melee, they may resume normal function in the following turn (i.e., they do not remain broken). Remove their broken markers immediately.
22.6 Resolving Melees
22.61 Total the number of firepower factors in the hex meleeing for each side. Ignore attacking units whose morale has broken. State these numbers as a ratio, attacker-to-defender, and 'round down' in the defender's favor to conform to the simplified 'melee odds' printed on the Melee Table.
22.7 Determine Casualties
22.71 Roll one die. Cross-index the die roll number with the melee odds on the Melee Table. The result will be the casualties sustained by each side.
Example: 'AC1 | DC2' means the attacker sustains ONE casualty step loss and the defender sustains TWO. One 'round' of melee has been completed.
22.72 Recalculate the melee odds at the new strength levels of the participants. Continue with additional rounds of melee, rolling the die and extracting casualties until one side is totally eliminated or until the melee odds become worse than 1 to 2 or greater than 4 to 1, at which point the weaker side is automatically eliminated and removed from play.
22.73 All melees initiated in the Close Assault Segment are completely resolved in the Melee Phase of the same turn.
22.74 Casualties may be distributed within the participating units in any manner desired by the owning player provided all casualties are absorbed.
22.75 If there is more than one melee hex in play, they are resolved in the order they were initiated or by mutual player consent.
22.8 Melee by Personnel in Vehicles or Riding on AFVs
22.81 Personnel units that are in vehicles (or riding on AFVs) cannot melee or be meleed. If their vehicle survives the first 'round' of melee, they are placed in the melee hex but attack and defend at HALF their normal melee value in the second round. If they survive any 'second round', they may conduct melee at their normal strength in any subsequent rounds of melee in that hex.
22.82 Personnel units may unload and infiltrate one hex during the Infiltration Phase unless frozen in melee by attacking units that enter the hex first.
22.9 Gurkhas
22.91 In some scenarios SSR will designate all or some portion of the British force to be Gurkhas. Any personnel unit denoted as a Gurkha DOUBLES its melee value for ATTACK only.
23. Personnel vs. Vehicle Close Assault
23.01 Attacking vehicles by close assault—At close range, infantry have a chance of destroying AFVs in a procedure similar to melee. Truck-type transport is automatically captured (unless it is carrying personnel units).
23.02 Only personnel may close assault enemy vehicles. Each personnel unit may only close assault one vehicle per turn. A vehicle may undergo more than ONE close assault in a melee phase. If two or more personnel units are in a hex they each may attack.
23.03 Close assaults may not be conducted if there are non-transported enemy personnel units in the hex with the vehicle (exception: enemy personnel in a bunker do not affect the melee). If enemy units move into a hex in which personnel units are attempting a close assault against a vehicle, the close assault may not occur. The personnel units must melee with the enemy personnel units. Even if the enemy personnel are subsequently eliminated, no close assault may take place against the vehicle during that melee phase.
23.04 Close assaults against AFVs marked with movement markers (i.e., continued movement) are attacked by personnel at HALF their normal melee value.
23.1 AFV Final Fire vs. Close Assault
23.11 Non-moving AFVs being close assaulted are allowed a final fire as in overrun situations (exception: Close Assault Final Fire is conducted from the SAME hex as the enemy personnel). Final fires are assumed to be at a range of one hex against infantry in the STATIONARY cover state (regardless of the same-hex range and any emplacements that may be in the hex). Final fire may ONLY consist of coaxial, bow and anti-aircraft machine guns. ALL machine guns must observe field-of-fire restrictions (exception: AAMG have a 360-degree field-of-fire) depending upon the direction the enemy infantry units entered the hex. If the infantry did not enter the vehicle hex through the turret or vehicle covered arc(s), no Final Fire attack may be made (unless the AFV has an AAMG). Only eligible machine guns may use Final Fire (e.g., if only the turret covered arc is facing the entry hex, bow (hull) machine guns may not be used).
23.12 NOTE: AFV Final Fire may NOT be initiated against infantry units that did not enter the hex to initiate the close assault (or announce a close assault against a same-hex vehicle), i.e., if the AFV ended in the hex of the infantry and the infantry is NOT making a close assault attack (i.e., close assault against vehicles that end movement in the personnel hex is OPTIONAL).
23.13 Infantry units being overrun may NOT engage in close assaults or any form of attack against the overrunning vehicle.
23.2 Vehicle Close Assault Morale Check
23.21 Infantry units close assaulting must undergo a morale check in the same manner as meleeing units. If the close assault is unsuccessful, all close assaulting units whose morale has broken are eliminated. If it is successful, they may resume normal function in the following turn. Remove broken markers from surviving close-assaulting personnel immediately.
23.3 Infantry vs. AFV Close Assault Procedure
23.31 Procedure—Close assault resolution requires only a simple tally of the stacking factors of the assaulting personnel unit(s) and a die roll.
23.32 Tally the stacking factors of the personnel unit ('4' for a squad accompanied by a leader; '3' for a squad; '2' for a half-squad or crew; '1' for a leader or FO alone) involved in the close assault. If the assaulted vehicle is an Open Topped AFV, DOUBLE the total. If it is any other type of AFV, use the base AFV Close Assault Value.
23.33 Roll one die. If the die roll is LESS than the AFV Close Assault number, the vehicle is K-KILLed. If the die roll is EQUAL to the number, the vehicle is M-killed. If the die roll is greater than the number, the vehicle is unaffected. If the roll is HALF of the AFV Close Assault number, replace it with a burning wreck. Otherwise, place a non-burning wreck.
23.34 Only one melee attack may be made per personnel unit in the hex during the Close Assault Segment. Not all personnel in a hex must take part. However, any personnel that checks morale (and passes) to attack an AFV must attack. Non-leader personnel units in the hex may NOT 'combine' in one attack against a vehicle. ONE leader (not FO) per attack may assist a squad, half-squad or crew personnel unit in a close assault against a vehicle.
23.35 Crack Troops vs. Vehicles
23.351 If the personnel unit in a melee against an AFV have morale of SEVEN or greater, increase their AFV Close Assault number by '1'.
23.36 Un-Armed Vehicle Capture
23.361 Un-armed, non-AFV vehicles (with WHITE movement icons) are AUTOMATICALLY captured in close assault unless carrying enemy personnel at the time. The capturing player simply takes control of the vehicle. If carrying personnel, treat un-armed, non-AFV vehicles in the same manner as Open Topped AFVs. If the vehicle survives the first round of melee, place the enemy personnel in the hex and treat them in the same manner as any transported units in melee. The winning side in the hex will take control (or retain control) of any un-armed, non-AFV vehicles.
23.37 Combat Engineers
23.371 Scenario Special Rules will occasionally identify one or more squads (and leaders) as Combat Engineers, providing an additional bonus to their AFV Close Assault number (i.e., to make it easier for them to attack enemy AFVs).
24. Armor Command Control
24.01 Command Control—To simulate some of the C3 (Command, Control, and Communications) problems associated with handling small armored units in action, secretly designate one AFV as being the commander's vehicle. Armor Command Control is only used if specified via SSR.
24.02 For each company-level, (or smaller) 'group' of AFVs provided in a scenario for each side (German, Italian and British), one AFV is the command tank which must 'lay back' and may not participate directly in an engagement. (For reference purposes, company-level units contain the following number of AFVs: German—17 AFVs; British—16 AFVs; and Italian—17 AFVs). The parameters of each Armor Command Control 'group' will be specified by SSR only if it differs from these numbers.
24.03 The command vehicle may not initiate fire against targets. If fired upon, it may only respond by gun dueling with the initiating unit. It may not overrun.
24.04 If a forward observer is assigned to armored units, it must be located in the commander's vehicle.
24.05 If the commander's AFV is K-KILLed or M-KILLed, '1' is ADDED TO the die roll for all Bail-Out checks for the remaining AFVs in that group for the rest of the game (making bailing out more likely).
24.06 If the command tank begins and spends an entire Movement Segment with another AFV in the same hex, without either moving, the commander may be placed in the new AFV. Make a secret side note to this effect.
24.07 Elite Tank Commanders—In some scenarios SSR will specify that one or more AFVs may be recorded as carrying 'elite tank commanders'. Simply make a side note of the ID of the AFV and apply a -1 HPN DRM for that tank. Elite tank commanders may move from one tank to another in the same manner as command tank. An elite tank commander need not be a command vehicle and Armor Command Control need not be in force.
25. Carriers and Armored Personnel Carriers
25.01 All APC are open-topped, lightly armored vehicles that are attacked using the Direct Hit Results for APC and Non-AFV Vehicles table. They are denoted by YELLOW movement icons on their counters.
25.1 Carriers
25.11 The Carrier is a small lightly armored APC on the British side.
25.12 Carriers move and pivot in the same manner as any other type of fully tracked vehicle.
25.13 Each Carrier mounts a variety of weaponry, which functions in the same manner as the main armament and machine-guns of AFVs. Carrier weapons may only fire to the front covered arc of the vehicle. All other direct fire rules apply to the ATR and vehicle machine-guns.
25.14 Each Carrier also contains an inherent 2|3|8 crew that may drop into FULL cover if fired on (and it has not already fired and is otherwise eligible, i.e., not broken). Mark as 'suppressed' any Carrier that has a crew in FULL cover to signify that it may not fire. The crew is otherwise in GOOD cover. Carriers are destroyed (and their crews eliminated) by direct hits from any type of HE or AP greater than 20mm. Use the Direct Hit Results for APC and Non-AFV Vehicles table for all fire at a Carrier, noting they are 'very small' vehicle targets (i.e., a +2 HPN DRM).
25.15 A weapon may be removed from a Carrier and used by any personnel unit, including its inherent crew. Removal of any weapon (and unloading of the crew) is conducted in the same fashion as normal loading and unloading procedures. If the Carrier is K-KILLed, all weapons are assumed to be destroyed. A side note must be maintained as to which weapons are removed from Carriers (or mark with F-KILL and Bail Out markers).
25.16 When a 'C1' or greater result is sustained by a Carrier it must cease firing for the turn and attempt to exit the map-board in the next movement opportunity. It must exit along a friendly map edge, in the most direct route available. It may not fire its weapons or overrun. If it cannot move due to immobilization, the crew automatically bails out (mark as Bailed Out). Note AFVs exiting the map may use smoke candles in any ONE hex along their movement path while exiting (in the case of Carriers and other APCs these are actually smoke grenades deployed by the crews).
25.2 German APC
25.21 The medium 251/1 and the light 250/1 were the basic armored personnel carriers (APC) of the German forces in the desert. Both are half-tracked vehicles.
25.22 Transportation capacities of these vehicles are indicated on the counter for each and on the Tow/Personnel Table.
25.23 251/1 APC—The 251/1 is equipped with one 'bow' machine-gun (that is actually installed at the front of the vehicle above the driving compartment). This Bow machine-gun has a front field-of-fire and fires in the same fashion as an AFV BMG (exception: The BMG may be fired during turns in which passengers are loaded or unloaded). The front machine-gun is assumed to be operated by an inherent crew member that is assumed to be in GOOD cover. Personnel units AND the vehicles's inherent crew that are being transported in half-tracks are assumed to be in GOOD cover. They may drop into FULL cover when fired on if they have not fired. Mark a half-track as Suppressed if the transported personnel OR crew drops into FULL cover to signify it may not fire. If broken, personnel units in a half-track automatically drop into FULL cover; they need not be marked as 'suppressed'.
25.24 Half-track Passenger Fire—Personnel units transported in a half-track may fire their printed Gunfire factors and any ONE L|MG or M|MG possessed while in GOOD cover in a half-track. These machine-guns are fired through the rear and side facings of the half-track ONLY. If the half-track uses Assault Movement, this fire is HALVED. If non-moving, there is no penalty. No fire may be made by passengers in a half-track if the vehicle uses cross-country movement.
25.25 250/1 APC—The 250/1 is similar to the 251/1, except that it can carry a smaller number of passengers. Rules for its operation are the same as for the 251/1.
26. Open Topped and Partially Armored AFVs
26.01 The Marder III is an example of an open-topped, turret-less, AFV, also known as a self-propelled gun (SPG) or tank-destroyer (TD). The Marder III may only fire at targets that are within its field-of-fire, which consists of its two front-facing hex sides, unless it pivots the vehicle. The Marder III crew is susceptible to fragmentation casualties due to the nature of the exposed gun position. The crew is considered to be in GOOD cover for fire against its crew on the Casualty Table. The crew may 'drop' into FULL cover when fired upon unless it has already fired. Mark a Marder as suppressed if the crew drops into FULL cover to signify it may not fire.
26.02 Open Topped AFV—All vehicles that are Open Topped (OT) are so noted by having a white outline behind the vehicle art on the counter. All open-topped AFVs are treated in the same manner as the Marder III for crew exposure and cover state.
26.03 When a 'C1' or greater result is sustained by an Open Topped AFV AND the crew remains with the AFV (i.e., it does not Bail Out), it must cease firing for the turn and attempt to exit the map-board in the next movement opportunity. It must exit along a friendly map edge, in the most direct route available. It may not fire its weapons or overrun. If it cannot move due to immobilization, the crew automatically bails out (mark as Bailed Out). Note AFVs exiting the map may use smoke candles in any ONE hex along their movement path while exiting.
26.1 Partially Armored AFVs
26.11 Some AFVs have no armor at a particular facing (usually rear). Any AP or HE that hits an un-armored aspect and facing is considered to hit an un-armored vehicle. Use the Direct Hit Results for APC and Non-AFV Vehicles table to resolve such hits using the 'Truck' row. Un-armored facings are denoted by the 'l' entry for the armor factor for that facing of the AFV. All other direct hits for armor number on other aspects and facings are treated normally.
27. Sponson and Hull Mounted Gun Limitations
27.01 Special Rules for Tanks with Sponson Mounted Guns—Several peculiarities exist in using the Grant AFV as noted below. Any gun that is mounted in a 'sponson' has an 's' superscript on the gun value for that gun (on the AFV counter).
27.02 The Grant tank has two 'main armament' weapons instead of one; the 37mm gun (may only fire AP) in the turret, and the 75mm gun in the hull. A Grant tank may fire both of these weapons independently during its portion of the Combat Segment, rather than alternating each separate weapon with an enemy weapon. Further, they may be fired at completely different targets if desired. Each gun must acquire its target separately for BOT purposes.
27.03 The Grant's 75mm weapon in the hull is severely limited in its ability to engage targets due to its location. Consequently, the 75mm may only fire at targets that are within its 'field-of-fire' which consists of all hexes within the angle formed by its front-right hex spine and its right front-flank hex spine, inclusive. Targets that lie outside of this arc may not be fired on by the 75mm hull-mounted gun unless the vehicle is pivoted.
27.04 F-KILLs on a Grant can occur to either or both of its weapons systems. An F-KILL can only occur against the turreted gun on a turret hit. An F-KILL can only occur on an upper hull (UH) hit emanating from the field-of-fire of the 75mm gun OR the starboard (right) side.
27.05 All rules for the Grant apply to the Italian M11/39 (exception: the M11/39 gun is NOT restricted to the right-front, i.e., it may fire in the same manner as any HULL mounted weapon—through the front two hexsides) and any other AFV with a sponson mounted weapon. The M11/39 has a machine-gun armed turret in addition to a sponson-mounted 37mm gun in its hull. Treat the two weapons separately in the same manner as the Grant.
28. Portees
28.01 Portees—Positioning a weapon 'in portee' means mounting the gun on the bed of a truck in such a manner that the truck bed acts as a firing platform. Portees are non-AFV vehicles that are treated in the same manner as AFVs for firing purposes (but remain trucks for target purposes).
28.02 In some scenarios, portees are provided. These counters function like any other vehicle unit and represent trucks with AT guns mounted to fire from their rear. AT guns mounted in portee have a restricted field-of-fire consisting of the rear two hex sides of its hex as indicated by the truck's facing and an 'R' superscript on the gun value (on the counter).
28.03 Trucks mounting AT guns in portee may not tow other weapons. They carry an 'inherent' crew to fire the gun. This crew is not represented in counter form in the same manner as an AFV (i.e., mark as Bail Out).
28.04 When firing an AT gun in portee, the crew is considered to be in a STATIONARY cover state.
28.05 AT guns and crews in portee aboard trucks that are K-KILLed are considered destroyed.
28.06 If allowed by SSR, an AT gun may be dismounted from a portee in a SIX turn loading/unloading procedure within which neither the gun, truck or crew may move or fire. A minimum personnel unit consisting of a crew or larger is required to perform this function. If the portee receives an attack by Gunfire or FRAG factors, the unloading process must halt. Make a side note of the number of dismounting turns transpired. Replace the portee counter with the appropriate gun, a crew and a light truck counter once unloaded. Note the '37' portee is armed with a captured German PaK 36.
29. AFV Crews
29.01 AFVs, and other vehicles presented in the game, have crews that operate them. Unlike weapon crews, however, these crews are not represented by crew counters.
29.02 Crews for non-tank/self-propelled vehicles have no visible function and thus are always assumed to operate the vehicle until it is damaged or destroyed. They are not represented by a counter. If a crew bails out, mark the AFV with a 'Bail Out' marker. It may not move or fire for the remainder of the scenario.
30. AFV Visibility Restrictions
30.01 AFV Visibility Restrictions from Fire—AFVs undergoing HE fire are usually forced to close their hatches to avoid fragmentation casualties and thus severely limit their visibility.
30.02 Whenever an AFV is fired upon by AP or HE ammunition (either direct or indirect HE), or a minimum of EIGHT Gunfire or FRAG factors, it must make a roll on the Suppression Table. Failure results in suppression.
30.03 NEWLY suppressed AFVs lose any BOT markers previously placed and suffer a '+2' HPN modifier for any fire while so-marked. Mark them with a suppressed marker, orienting the marker with the turret facing (or ignoring facing for non-turreted vehicles). Note that already suppressed AFVs may place new BOT markers for any Direct Hits they obtain.
31. Field Emplacements
31.01 Field emplacements, a general term for minefields, hedgehog entrenchments, sangars, anti-tank trenches, bunkers, wire, and weapon pits, play a very important role in the game.
31.02 Entry of field emplacements—With the exception of minefields, and units that are eligible to 'drop' into FULL cover in an emplacement hex, for a personnel unit to move UNDER the emplacement (into FULL cover or inside a bunker) in a hex during the Movement Segment costs one additional movement point (i.e., one movement point to enter the hex and another, second movement point, to move under the emplacement).
31.03 A unit derives protection by being UNDER an emplacement counter in the form of FULL cover or GOOD cover for being on TOP of a hedgehog or equivalent emplacement. Each LEFT column shift for GOOD or FULL cover provides a +1 DRM to direct hits for indirect fire AND on the HPT (e.g., a unit in GOOD cover receives a +1 DRM; a unit in FULL cover receives a +2 DRM).
31.1 Minefields
31.11 Minefield counters represent anti-personnel and anti-tank mines.
31.12 Only one minefield counter may be placed in a hex.
31.13 Minefield counters may not be placed in hexes containing any other type of field emplacements or in building hexes.
31.14 Minefield Density—In some scenarios the defender is provided a quantity of mines in his order of battle. This quantity corresponds to the total number (using the values on the back of each mine counter) of mine counters the player may use for that scenario. On the back of each minefield counter the field density is indicated in the form of number corresponding to the die roll which must be rolled GREATER THAN for successful passage of the hex. Once a total quantity of counters is selected, up to the quantity provided for that scenario, the counters are then placed on the map by the defender with this number face down until a forcing is attempted.
31.15 Hidden Minefields—When an SSR specifies all or some minefield factors may be hidden, a secret side note is made listing the hex ID and the value of the mine counter in the hex. Whenever an enemy unit enters a hidden minefield hex using any movement type except Crawling (for personnel) or Assault Movement (for vehicles) make an immediate forcing die roll AND apply a -1 DRM (making it more difficult to succeed).
31.16 Friendly Lanes through Minefields
31.161 Most minefields contained secret lanes through which the laying side could safely pass. Any friendly unit may enter and pass through a friendly mine hex normally as if a minefield lane marker was placed without 'forcing' (i.e., no roll is made upon entry). A forcing roll IS made normally if personnel uses running or a vehicle uses cross-country movement types. No minefield lane marker is placed for such entry.
31.17 Forcing Minefields
31.171 Any minefield hex may be 'forced' (pushed through) by any vehicle during the Movement Segment or personnel unit during the Movement Segment or Infiltration Phase.
31.172 Movement restrictions apply to any unit attempting to force a minefield. Personnel may only CRAWL onto the minefield counter in the Movement Segment. A vehicle must use Assault Movement to enter. A vehicle may not change its covered arc (pivoting a turret is permitted) while in a minefield hex. If a unit chooses to enter a minefield hex without following these rules it is automatically attacked by the mines.
31.173 As a unit moves into the minefield hex, one die is rolled immediately to determine if the forcing attempt is successful. A die roll greater than the minefield density (found on the back of that counter) means that the unit has successfully forced the minefield.
31.174 If the minefield is successfully forced by any type of VEHICULAR unit, the hex is assumed to be safe for any subsequent units to pass through for the remainder of the game, but ONLY vehicular units using Assault Movement avoid a forcing roll. Personnel may now use Assault Movement to enter and pass through a minefield hex without forcing. Running personnel and cross-country movement vehicles still risk a forcing die roll in a minefield hex with a lane marker. Place a minefield lane marker in the hex. Only vehicles create minefield lanes.
31.175 If successfully forced by a personnel unit, subsequent units must still roll one die for their own forcing attempts (exception: no roll is made when moving through friendly minefields unless entering using a movement mode prohibited for forcing units).
31.18 Minefield Attacks
Units unsuccessful in forcing a minefield hex undergo the following damage:
a) AFVs are rendered M-KILLed (immobilized) and must undergo a check on the AFV Bail Out Chart.
b) Non-AFV vehicles are rendered K-KILLed and replaced by burning wrecks. Any units being carried are placed in the hex and undergo an attack. Units being towed are unaffected unless a towed gun, which is marked with an F-KILL marker.
c) Personnel units must undergo the effects of the FRAGMENTATION of the detonated mines by multiplying the minefield density number (found on the back of the minefield counter) by FOUR, which represents the number of fragmentation factors the unit is attacked by on the Casualty Table. The personnel are considered STATIONARY when attacked by mines.
31.19 Dummy Minefields
31.191 Dummy Minefield—Quite often during the war, dummy minefields (marked fields containing NO mines) would be laid between real ones to increase coverage of available mines. To simulate this, some scenarios provide 'dummy' minefield counters via SSR. If enemy units attempt to force a dummy minefield, the true nature of the minefield counter must be revealed. The minefield counter remains on map and all subsequent units moving through a dummy field still treat it as a normal minefield for movement restrictions (only). Minefield lanes are placed normally in dummy mine hexes.
31.20 Hidden Minefields
31.201 Some Scenario Special Rules will specify some or all of the provided minefields are HIDDEN. The location of hidden minefields is recorded, including the minefield density in the hex. A hidden minefield is treated normally in every respect with the following exceptions. A hidden minefield counter is placed on board if an enemy unit enters the hex and an immediate forcing roll is made unless the hex was entered using cross-country or running movement, both cases where the unit is automatically attacked. Dummy minefields may not be set up hidden.
31.21 Poking For Mines and Clearing Minefields
31.211 Any personnel unit may spend a full Movement Segment in its current hex to 'search' for hidden minefields. The unit is considered to use crawling movement although it does not exit its hex. Any hidden minefield counter(s) ADJACENT to the searching unit is placed on board. No attack is made against the searching unit (it does not enter the mine hex). The minefield density is NOT revealed.
31.212 Artillery Clearance—A minefield is 'cleared' (remove the minefield counter) by any direct hit in the hex from Indirect Fire HE of 149mm or greater.
31.2 Hedgehogs
31.21 Hedgehog counters represent the erection of a network of trenches and foxholes in a hex that provide all-round protection for personnel units.
31.22 Only one hedgehog counter may be placed in a hex.
31.23 Hedgehog counters may not be placed in a hex containing any other type of field emplacement or in a building hex.
31.24 Hedgehog counters do not affect movement or stacking in any way for personnel and tracked vehicles (exception: wheeled vehicles must make a roll on the Terrain Immobilization Table to enter a hedgehog hex).
31.25 Hedgehog Effects
31.251 Units UNDER a hedgehog counter are assumed to be in a FULL cover state. With the exception of mortars, such units may not fire during the Combat Segment. FOs (and leaders serving as alternate FOs) may spot for artillery from FULL cover.
31.252 Units ON TOP OF a hedgehog counter are assumed to be in a GOOD cover state. Note that not all units in a hex with a hedgehog counter will not be considered on top of or under it (e.g., heavy crew-served weapons treat hedgehog counters as open ground, i.e., they derive no benefit unless the crew leaves the gun un-possessed, whereupon they are treated as personnel normally).
31.253 Once dropped into FULL cover, the unit must remain in FULL cover until the next movement opportunity. A unit may drop into FULL cover EVEN as it is being fired upon (but BEFORE the die is rolled to resolve the fire). Enemy units attempting to fire on units that drop into FULL cover must still 'fire' at those units, i.e., mark them with 'F' markers even if the fire will have no effect.
31.254 Units may move from FULL cover to GOOD cover state (and vice-versa) during the Movement Segment or the Infiltration Phase of the Close Assault Segment. Units may 'drop' into FULL cover when fired upon if they are otherwise eligible. A personnel unit in an adjacent hex may use crawling to move 'in' and 'under' a hedgehog counter, noting that Opportunity Fire may be used against the unit IN the hedgehog hex BEFORE it is physically placed UNDER the hedgehog.
31.255 Hedgehog counters add '1' to the morale value in the same hex to personnel units that derive cover advantages from the hedgehog. They have no effect on melee resolution. To possess a weapon left un-attended in FULL cover would require a personnel unit to move under the hedgehog counter to pick it up.
31.256 Personnel units may move from one adjacent hedgehog counter to another without exiting from under the counter. These units are considered to be in FULL cover during such movement and ignore column shifts RIGHT for ASSAULT (moving) cover state. They may not use RUNNING movement when deriving this protection while moving from one hedgehog to another. A bunker, blockhouse, and weapon pit may also be entered from an ADJACENT hedgehog in this manner by personnel.
31.257 Personnel units in FULL cover under a hedgehog counter DO NOT suffer the +4 DRM to their morale during an overrun.
31.26 Hedgehog Limitations
31.261 Only personnel units, medium mortars and light infantry weapons derive any benefit from hedgehogs. Non-wheeled vehicles and heavy weapons treat them as clear terrain for all purposes. Wheeled vehicles risk a roll on the Immobilization Table to enter a hedgehog hex.
31.3 Weapon Pits
31.31 Weapon pit counters represent dug-in gun positions providing partial protection for weapons, personnel units, and vehicles. Heavy crew-served weapons in weapon pits may set up hidden in any terrain as long as they set up outside of the spotting range of all enemy units at the start of a scenario. Make a side note of their location and the facing of the gun. The weapon pit AND its gun and crew are placed on the map as soon as the gun is spotted.
31.32 Only one weapon pit counter may be placed in each hex. A weapon pit may not set up in a building hex. Weapon pit counters may not be placed in hexes containing other types of field emplacements.
31.33 Weapon pits do not affect movement in any way, noting the cost to move under a weapon pit counter and the ability to enter from an adjacent hedgehog while remaining in FULL cover.
31.34 Personnel units occupying weapon pits are considered to be in either GOOD or FULL cover in the same manner and with the same limitations and advantages as hedgehog counters (i.e., personnel may 'drop' into FULL cover in the same manner as a hedgehog; safer from overruns; etc.).
31.35 Stacking—Each weapon pit may hold ONE heavy crew-served weapon unit AND its crew OR one vehicle OR up to three Stacking Points of personnel and their light and medium weapons. (NOTE: other units may occupy the same hex, but they cannot enjoy the defensive advantages of the weapon pit if it is 'full'). Personnel ON TOP of a weapon pit counter are considered to be IN it, using GOOD cover. Units occupying weapon pits have the following defensive advantages:
a) Weapon units, Personnel and non-small Non-AFV Vehicles—The Hit Probability Number required to hit a heavy crew-served weapon or personnel unit in weapon pit is automatically increased by '2' for all direct fire AP and HE weapons. Also add '2' to the die roll needed to secure a direct hit when using Indirect Fire (except smoke).
b) Non-AFV Vehicular unit—'Small' and 'very small' target-size non-AFV vehicles are assumed to be in FULL cover when in weapon pits. They may only be hit by direct fire at range of one hex or less. Mortars and indirect fire must secure a direct hit to destroy these vehicles. There is no dice roll modification for indirect fire direct hits. Gunfire factors have NO effect unless fired from units at one hex range or less.
c) AFVs—Turreted AFVs in weapon pits are assumed to have their hulls completely protected (hull defilade). Any hits scored by direct fire weapons against AFVs that impact on the lower hull (LH), upper hull (UH), or track areas have no effect. Non-turreted AFVs (e.g., Marder; Semovente) are hit on TUR and UH hits, ignore Track and LH hits only.
31.36 IMPORTANT: At ranges of one hex or less, DO NOT add '2' to the Hit Probability Number for direct fire against units in weapon pits (i.e., UNDER the weapon pit counter). Additionally, ignore 'hull defilade' when firing at AFVs at a range of one hex or less.
31.37 SPECIAL: The Grant (and in later modules the Lee tank) may not use its sponson-mounted 75mm armament in weapon pits.
31.38 Indicate the cover-state of personnel units in weapon pits by placing them under the counters for FULL cover and on top of the counters for GOOD cover. If more than one vehicle or heavy weapon unit occupies a hex containing a weapon pit, only ONE may be placed under the weapon pit counter.
31.39 K-KILL and F-KILL Units IN Weapon Pits
31.391 A unit continues to occupy a weapon pit regardless of its damage status. A vehicle that is K-KILLed while in a weapon pit remains there (replaced by the appropriate wreck counter, i.e., burning or non-burning) and prevents other units from occupying that weapon pit. Likewise, a heavy crew-served weapon unit that is F-KILLed while in a weapon pit remains there, preventing other units from occupying the weapon pit counter until it is pushed or towed away. Heavy weapons and vehicles UNDER a weapon pit may be towed normally by vehicles in the hex (i.e., on top of the weapon pit counter) without having to move under the weapon pit counter. Personnel must move under the counter to push a heavy crew-served weapon out.
31.4 Sangars
31.41 A sangar is a form of weapons pit that is constructed above the earth by piling stones in a circular emplacement. They function like weapons pits with the following differences.
31.42 Units in a sangar may only accrue GOOD cover benefits while inside (i.e., under the counter). A sangar may NOT be entered from FULL cover from any adjacent emplacement. There is no benefit to being on top of a sangar counter.
31.43 Stacking for a sangar is exactly the same as for a weapon pit.
31.44 A sangar is removed from play (and the units inside reduced from FULL cover to STATIONARY cover) by any direct hit with HE ammunition from any weapon of 75mm or larger; either by direct or indirect fire. Overrun of a unit in a sangar by any fully-tracked AFV removes the sangar and any heavy crew-served weapon in it. Any personnel (including the gun crew) receives no additional penalty from the overrun, i.e., the normal +4 morale check is applied.
31.45 Floorpan Armor Hits
31.451 An AFV EXITING a sangar is subject to an Floorpan Armor Hit for any direct fire that crosses the hexside being crossed by the exiting vehicle. On a Lower Hull (LH) hit, roll a subsequent die. If this roll is 1-2, the thinly armored 'floorpan' of the AFV is considered to be hit. Treat the Armor Factor for all Floorpan Armor Hits as '1' and use the K-KILL table normally. Floorpan Armor Hits may also occur for units crossing wall hexsides.
31.5 Bunkers
31.51 Bunkers are small weapon pits covered with reinforced roofs. They function like weapon pits with the following differences.
31.52 Each bunker may only hold ONE heavy crew-served weapon and its crew OR one medium crew-served weapon and crew OR personnel units (and their light weapons) totaling no more than THREE stacking points.
31.53 Units inside a bunker are assumed to be in a FULL cover state. They may fire out of a bunker while under this FULL cover state. Only machine-guns and ATRs may fire from bunkers. Mortars may not fire from inside (i.e., under the counter) bunkers.
31.54 A bunker is destroyed (and the units inside reduced from FULL cover to STATIONARY cover) by any direct hit with HE ammunition from any weapon of 88mm or larger; either by direct or indirect fire.
31.55 When destroyed, a bunker counter is removed from the map-board permanently. Any weapon units inside the bunker are also destroyed. All personnel units undergo fragmentation attack on the Casualty Table from the round fired that destroyed the bunker in a STATIONARY cover state.
31.56 AP Fire vs. Bunker Occupants—Any weapon capable of firing AP ammunition may use it as direct fire against the occupants of a bunker. A +4 HPN DRM is added to the direct hit attempt. For each direct hit obtained, DOUBLE the normal '4' FRAGMENTATION (for a total of EIGHT) usually applied for AP collateral attacks against personnel. AP fire has no effect on the bunker (i.e., it may not be destroyed by AP fire).
31.57 Same Hex and HPN Effects
31.571 SPECIAL: Enemy units may enter the same hex as a friendly unit in a bunker during the Close Assault Segment without such entry resulting in melee (this is the one exception to the melee rules). Melee ONLY takes place if the unit under the bunker counter chooses to INFILTRATE out (i.e., to be placed on top of the bunker counter during the Infiltration Phase). Otherwise, the friendly and enemy units remain in the same hex. A melee marker is not placed in such hexes.
31.572 Enemy units occupying the same hex as a friendly bunker reduce the cover state of any units inside the bunker to GOOD cover to their fire ONLY and both friendly and enemy units in the same hex are considered to have an LOS to each other. Friendly units may not enter a bunker (i.e., be placed UNDER the bunker counter) that is already occupied by enemy units (or friendly units if the stacking limit of the bunker has been reached, i.e., a bunker may NOT be overstacked).
31.58 Like weapon pits, '2' is added to the HPN for all direct fire weapons when firing at units in bunkers, except at ranges of one hex or less. See above for AP direct fire vs. bunker occupants.
31.6 Blockhouses
31.61 Blockhouses were concrete defensive structures built by the Italians. They are in use only by SSR and use bunker counters.
31.62 Only one blockhouse may be placed in each hex. Blockhouses may not be placed in hexes with other types of field emplacements.
31.63 Each blockhouse may hold up to SIX stacking points of personnel and any medium and light weapons they carry.
31.64 Units in blockhouses are considered to be in FULL cover. Units outside of blockhouses, in the same hex, accrue no defensive advantages.
31.65 Unlike bunkers, no units of any type may fire from blockhouses.
31.66 A blockhouse is destroyed (and the units occupying it have their FULL cover state reduced to STATIONARY cover) by any direct hit by HE ammunition weapons of AT LEAST 149mm (and ANY 500 lb. aircraft bomb). When destroyed, the blockhouse counter is permanently removed from the board and the personnel units inside undergo an attack on the Casualty Table from the FRAG factors from the fire in the STATIONARY cover state.
31.67 Units in blockhouses cannot melee or be meleed unless the units inside infiltrate out during the Infiltration Phase. Friendly and enemy units may remain in the same hex. There is no reduction in cover state created by same-hex enemy units for units in a blockhouse.
31.68 Units may move from inside a blockhouse to the outside only during the Movement Segment and the Infiltration Phase. Units in the same hex as a blockhouse may NOT 'drop' into FULL cover (i.e., move inside the blockhouse) at any other time except during the Movement Segment and the Infiltration Phase. It costs one movement point to enter a blockhouse hex, and another to move UNDER during the Movement Segment. Units moving entering a blockhouse hex during the Infiltration Phase may move one hex 'in' and then 'under' the blockhouse counter.
31.7 Anti-Tank Trenches
31.71 Anti-tank (AT) trenches are steep-sided ditches used to block vehicular movement.
31.72 Only one AT trench may be placed in each hex. AT trenches may not be placed in hexes with any other types of field emplacements.
31.73 No vehicular units of any type may enter hexes containing AT-trenches.
31.74 AT-trenches also act as hedgehog counters for personnel units, light weapons and mortars. They function exactly like regular hedgehog counters in this respect.
31.8 Barbed Wire
31.81 Barbed Wire represents rolled or staked concertina wire used to hinder enemy movement on the battlefield.
31.82 Only one wire counter may be placed in each hex. Wire counters may not be placed in hexes with any other types of field emplacements.
31.83 No WHEELED vehicular units of any type may enter hexes containing wire. Tracked (including half-tracked) vehicles may enter, but risk a roll on the Immobilization Table upon entry.
31.84 Personnel units may ONLY enter wire hexes by CRAWLING or INFILTRATION. They may exit freely.
31.85 Clearing Wire—A wire counter is removed by a direct hit by Indirect Fire HE of 149mm or greater.
32. Limited Intelligence
32.01 The camouflaging of weapons was critical to desert survival. The following rules serve to create 'fog of war' in a playable format usable for both face to face and solitaire play. To reflect the lack of accurate detailed information a field commander would have concerning enemy units and defensive positions, employ the following rules.
32.1 Fog of War
32.11 Vehicles and weapons have a yellow 'blank' or generic tank or gun icon Fog of War (FOW) side that conceals their identity. Players may set up all units with their FOW side up. All units that enter from off map also enter with their FOW side up.
32.12 Any unit with its FOW side up that is within spotting range is flipped to its non-FOW side UNLESS it is has NOT fired AND is in any terrain that allows a unit to set up hidden within it (e.g., Scrub; weapon pit).
32.13 The following rules pertain in addition to the above rules for Fog of War.
32.131 Personnel units occupying field emplacements in a FULL cover state may never be examined by the opposing player unless they move out of their hex or out of FULL cover and into GOOD cover in the same hex. They may be meleed normally.
32.132 The opposing player may not look at any units under the top unit in a stack unless those units are within spotting range AND move or fire.
32.133 Heavy crew-served weapons may set up hidden in certain terrain.
32.2 Hidden Set Up
32.21 Heavy crew-served weapon units may be set up hidden in certain terrain (and in weapon pits outside of spotting range of all enemy units at the time of set up) as listed below:
- Scrub
- Rock-Strewn
- Palm Grove
- Building (including tomb and mosque)
Other units may be allowed to be set up hidden by SSR.
32.211 Revealing Hidden Units—Place hidden units on map with their FOW side 'up' for the following reasons:
- Upon being spotted (including for pivoting within hex or moving);
- Hex is entered by an enemy unit;
- If 14+ Gunfire factors are fired into the hex;
- Upon any direct hit being achieved in the hex.
32.2111 Place hidden units on map with their unit side 'up' for the following reasons:
- Spotted due to unit firing.
32.22 Make a side note of hidden units, including covered arc for any crew-served weapons and vehicles (include turret covered arc if it differs from the vehicle covered arc). In some cases Scenario Special Rules will allow units to set up hidden in wadi or deir terrain also. If, after all set up, it is determined a hidden unit in a weapon pit not otherwise in eligible terrain to remain hidden is within spotting range of any enemy unit, place the weapon pit, heavy weapon and crew on the map. The Fog of War side remains 'up' for the heavy weapon.
32.23 Emplacements containing hidden units are not placed on map until the units under or on them are spotted by an enemy unit or their contents are revealed.
32.24 Dummy Weapons and Vehicles
32.241 Some scenarios provide dummy heavy weapon and vehicle counters via SSR. These are set up or enter from off-map with their FOW side up. Use any extra 5/8" counter to represent a dummy crew for heavy weapons if they are placed on map with their FOW side 'up'. If a dummy counter is forced to 'flip' to its non-FOW side for ANY reason (e.g., dummy vehicle moving into spotting range), it is removed from play.
32.25 Spotting Ranges
32.251 No unit may be fired on unless it is spotted. Use the Spotting Ranges Table to determine the spotting range for each unit type as follows:
| Unit Type | Description |
|---|---|
| V | All vehicles |
| P | All personnel, including those with light and medium crew-served weapons |
| H | All heavy crew-served weapons |
32.252 Once a heavy weapon or vehicle unit is 'flipped' from its FOW side, it is considered spotted for the remainder of the scenario. Other units are only eligible to be fired on if they can be spotted at the time the friendly unit wishes to fire, noting conditions that increase the spotting range for certain targets and conditions (as listed on the Spotting Ranges Table).
32.253 Match the conditions with those provided for the scenario via SSR (any scenario that does not list conditions is considered to take place during OPTIMAL conditions). There is a row for each condition: use the 'SUP | FOW' row for any firing units that are Suppressed OR for target units that are showing their Fog of War side UP.
32.254 Solitaire Play—For solitaire play, place all units on map but do not allow units that would be hidden to be fired at by an enemy unit until they would be spotted. Players may also wish to randomly place different unit types of the 'enemy' with their FOW side up.
32.26 Height Advantage
32.261 Any unit at a higher level than Level '0' ADDS its height to its Spotting Range (e.g., a unit at Level +5 on a hillock adds '5' hexes to its Spotting Range). Note spotting is reciprocal, i.e., a unit that adds to its Spotting Range may also be spotted at the increased range provided by height advantage.
33. Terrain
33.01 The desert area in which most of the battles were fought was extremely flat. Any cover that could occasionally be found was magnified in its importance. Undulations of the terrain forms in the form of slight rises (hillocks), depressions (deirs) or dry riverbeds (wadis) were found in the region. These types of terrain features could be used to good effect by AFVs, personnel and weapon units when assuming hull-defilade positions behind them or using them to hide from view.
33.02 All terrain except scrub (found on the map as well as on some overlays) is provided in the form of overlays that depict landforms that slope upward—hillocks, and depressions—deirs and wadis, as well as rock-strewn terrain, villages, desert tracks, an oasis, etc.
33.1 Game Topography
33.11 The game terrain uses topography in the form of 'levels' to create a 3D space on the 2D map surface. When no terrain overlays are placed on the map, the terrain is considered flat desert with the occasional patch of scrub the only terrain. A numerical value of level '0' (or 'sea level') is assigned for all non-overlay hexes.
33.12 Terrain features depicted on overlays slope gradually up and down using contour lines in increments of 5, 10, 20, 30, 40 and 50 yards in height UP and DOWN. Each 'point' of numerical topographical value is equal to about three feet in height.
33.13 Each level above and below '0' is denoted by contour art facing out (for UP) on all hillock (a slight rise) and in (for DOWN) on all deir (depression) overlays. Wadis (dry streambeds) are Level -10 DOWN terrain that do not use contours. Buildings are +10 terrain obstacles (unless a height of +20 is denoted by a large hex center-dot) that also does not use contours. Hillocks use a unique contour system: the first level UP on any hillock overlay is Level +5 (the height of a tank); additional slope artwork on a hillock overlay creates level +10, +20, and higher terrain per ring of contour lines.
33.14 Non-small/very small vehicles and all wrecks are level +5 in height and affect any same-level LOS traced through their hex. Smoke and Dust rises to Level +30 above the 'ground level' of their hex. No other non-terrain (e.g., personnel counters; weapons) affect LOS.
33.15 Topography and Line-of-Sight
33.151 A Line-of-Sight (LOS) in game terms is represented by a straight line drawn between the center-dot of two hexes—that of the firing unit and the target hex. An LOS is blocked if a higher obstacle is located BETWEEN the hexes—not including the two hexes themselves. If an LOS to a hex is blocked no direct or indirect fire may be conducted against it, even if it is within spotting range. Use a thread or a straightedge touching the center-dot of both hexes to draw an LOS. Unless the firing OR target unit is at the BOTTOM of a wadi, terrain in the firing and target hexes does NOT block LOS—only intervening terrain.
33.152 A hex containing blocking terrain in the form of a higher contour or terrain obstacle only blocks LOS if the thread or straight edge touches ANY part of the TERRAIN depiction or contour artwork. Wrecks and smoke affect any LOS drawn through their hex, including an LOS that runs EXACTLY along one of its hexsides.
33.153 All units are considered to be at the same height as the ground level of the hexes they occupy (exception: units UP in buildings).
33.154 Some hexes will have a combination of heights, such as building hexes that have a 'ground level' at '0', and an UP level at +10 (and another UP level at +20 in some buildings, i.e., those with large white hex center-dots). Others will create blocking terrain at higher levels due to a combination of terrain in a hex (e.g., open ground on a +10 contour with a Palm Grove [adding another +10], creating an overall block to LOS of +20 to fire from a higher level to a lower level target).
33.16 LOS Over Lower Level Blocking Terrain
33.161 A unit on a higher level may see over intervening blocking terrain to a target hex at a lower level. If the firing unit has at least a +10 height advantage over the blocking terrain (+5 if sighting over a vehicle, wreck or wall) it may have an LOS to the lower hex. Use the LOS Blind Hex Creation Table, cross-referencing the Height Difference (HEIGHT DIFF between firing unit and the intervening TERRAIN). The number of BLIND HEXES created is traced from the hex directly BEHIND the terrain and continue back along the LOS. If the target hex is in a blind hex, no LOS exists. Otherwise, the firing unit has an LOS to the target hex. Note that an LOS does not supersede spotting ranges (i.e., a hex may be in LOS of a firing unit otherwise unable to fire at it due to spotting range restrictions).
33.162 A +5 blocking terrain (e.g., wall) or wreck only blocks (in the case of a wall) or affects (in the case of a non-burning wreck) same-level LOS (unless a burning wreck or smoke hex, which rises +30 above the ground level of the hex). NO BLIND HEXES are created by +5 terrain (or by vehicles or wrecks) to higher-level firing units. Note two smoke hexes along a Line-of-Sight will block LOS.
33.2 Walls
33.21 Some overlay hexsides contain WALL artwork. Walls block same level LOS beyond the hex directly connected to the wall hexside. Units behind wall hexsides are considered to be in GOOD cover. Walls create hull defilade for AFVs directly behind a wall hexside and add a +2 HPN DRM for all other vehicles and heavy weapon units.
33.22 Wheeled vehicles may not cross wall hexsides. Half-tracked vehicles may but risk a roll on the Immobilization Table. Place M-KILLed half-tracks in the hex they started in. Fully-tracked vehicles may cross wall hexsides at no risk of immobilization but may be subjected to Floorpan Armor Hits when crossing the wall hexside.
33.23 Personnel units pay an additional ONE movement point to cross a wall hexsides. Heavy crew-served weapons may never be pushed or towed across a wall hexside unless an opening in the wall hexside art is depicted, representing a gate. A 'gate' is treated for all other purposes as a wall hexside.
33.3 Hillocks
33.31 Hillocks depict slight rises of +5 and higher (as denoted by the contour lines on the overlay) and are found on any overlay with an 'H' identification letter-number combination.
33.32 A hillock slopes upward along the topographical contours on the overlay. Any unit moving UP must pay ONE additional movement point to cross a contour hexside (and the cost of any other terrain in the hex). Such units are considered to be ON a hillock at Level +5 (as compared to non-overlay terrain that is all considered to be at level '0'). If a unit crosses another contour hexside UP, it will be at level +10. The next contour line crossed puts the unit at Level +20.
32.33 Hillock LOS—A unit ANYWHERE on a +5 hillock may see OVER non-burning wrecks (ignore them for HPN and Casualty Table purposes) and walls in a level '0' hexes (i.e., all non-overlay hexes). Dust and smoke are considered to rise +30 ABOVE the terrain level of their hex and affect all LOS through such hexes. A unit in a Level +5 (ONLY) hillock hex may also see past other Level +5 hillocks to see units beyond them in Level '0'. This special LOS is limited to a number of hexes past the FIRST same-level hillock (not hex, but all hexes of the hillock) UP TO the height the viewing unit is on (e.g., a unit on a Level +5 hillock may see FIVE hexes past the first Level +5 hillock its LOS crosses). A unit in a level '0' hex may never see BEYOND the first hex on the far side of a +5 hillock (as long as it is not blocked by +10 or higher intervening blocking terrain, i.e., an additional level 'up' of contours on the hillock overlay). However, a unit may always see past its own hillock if adjacent to a 'down' contour hexside. Intervening terrain of Level +10 ALWAYS blocks LOS beyond to units in a lower level if the viewing unit is in a Level '0' or +5 hex. Units on Level +5 can ALWAYS see other units on Level +5 as long as intervening HIGHER (e.g., Level +1 or +20) terrain does not intervene between firing unit and target. Units in Level +20 hexes may see over Level +5 and +10 terrain, subject to blind hexes created and noting +5 terrain NEVER creates blind hexes.
33.34 Each successive additional LEVEL of height (+10 and up) created by a hillock BLOCKS line-of-sight from lower levels normally, including LOS from units on the same or other hillocks.
33.35 Hillock contours AUTOMATICALLY create hull-defilade for AFVs on the lower side of a contour for all LOS traced to the lower level across a contour hexside of the AFV's hex. An AFV may roll for hull-defilade across a HIGHER contour after all set up OR if entering the hex using Assault Movement during the Movement Segment. In both cases a die roll of '1' creates a hull-defilade across the lower (facing out) contour ONLY. Place a Hull Defilade marker to denote this status.
33.36 Personnel units in FULL cover in a hedgehog or equivalent emplacement behind the lower side of a contour hexside are considered out of LOS to all direct fire across the contour hexside from a non-adjacent hex. All other units are considered in GOOD cover to non-adjacent firing units.
33.4 Deirs
33.41 Deirs depict slight depressions and are represented by any overlay with a 'D' identification letter-number combination. All Deir topographic contours depict a gentle slope in level down to Level -5. There is no additional movement point cost to move DOWN onto a deir overlay. Moving UP (crossing a hex side with a contour) costs ONE movement point plus the cost of the hex entered.
33.42 Running and Assault Moving personnel units in a deir hex in which the target OR firing unit's LOS does not cross a topographic contour DOWN in its hex are out of line-of-sight UNLESS the sighting unit is on any terrain of Level +10 or greater. Units in Level +5 hexes on a hillock may also see into a deir hex if the range in hexes from the firing unit to the first hex of the deir does not exceed the height advantage of the firing unit (i.e., FIVE hexes).
33.43 Deirs contours AUTOMATICALLY create hull-defilade for AFVs on the lower side of a contour for all non-adjacent LOS traced to the lower level across a contour hexside of the AFV's hex and GOOD cover for personnel. Any LOS traced through a hex with a non-burning wreck in a deir hex is ignored if both firing and target unit are at Level '0' or higher.
33.5 Rock-Strewn Terrain
33.51 Rock-strewn terrain is found on any overlay with an 'R' identification letter-number combination and gray terrain artwork. Rock-strewn terrain is also found on some other overlays.
33.52 Rock-strewn terrain costs TWO movement points to enter. Vehicles must make a roll on the immobilization table when entering rock strewn terrain.
33.53 AFVs set up in or entering via Assault Movement may attempt hull-defilade on a roll of '2' or less in rock-strewn terrain. If otherwise allowed, hidden set up may be used in rock-strewn terrain.
33.6 Scrub Terrain
33.61 Scrub terrain is found on map (e.g., hex QQ20) and on some overlays.
33.62 Scrub terrain costs TWO movement points to enter. All vehicles may enter scrub terrain without risk.
33.63 AFVs set up in or entering via Assault Movement may attempt to become hull-defilade in scrub terrain on a roll of '1'. Units may be allowed to set up hidden in scrub terrain via SSR. If otherwise allowed, hidden set up may be used in scrub terrain. Scrub does not affect LOS in any way.
33.7 Wadi Terrain
33.71 Wadi terrain is represented by any overlay with a 'W' identification letter-number combination. Wadis are a form of depression terrain at Level -10. However, the END of a wadi is considered to slope gradually up to level '0', creating an entrance into the wadi that does not increase movement cost to enter or exit.
33.72 Wadi terrain costs TWO movement points to enter AND exit. Any unit that enters a wadi is considered IN the wadi (i.e., at the bottom). Wheeled vehicles must make a roll on the immobilization table when entering wadi terrain unless entering through an END hex of the wadi (where the wadi art meets non-wadi terrain) and all others pay one MP to enter an end hex.
33.73 Personnel may be in GOOD or FULL cover in a wadi in the same manner as a hedgehog for LOS and non Indirect Fire purposes ONLY. Treat units in FULL cover in a wadi as if they are in STATIONARY cover for all indirect fire and aircraft attacks. Units may move to adjacent wadi hexes in the same manner as adjacent hedgehog counters (i.e., remain in FULL cover). Units in FULL cover in a wadi hex are out of LOS for all fire from non-adjacent units.
33.74 Personnel, ALL weapon units (unlike hedgehogs) and AFVs may enter or set up in or enter a GOOD cover position in a wadi. It cost FOUR movement points (or personnel may CRAWL or a heavy weapon may be pushed) to enter a GOOD cover position in a wadi but ONLY from within a wadi hex (i.e., the unit must have already set up or entered the wadi). The only effect of a GOOD cover position on an AFV is to create hull-defilade across some of the hexsides in its hex. Non-turreted AFVs may not enter GOOD cover in a wadi. Place an LOS +10 marker on all units in GOOD cover in a wadi hex, with the arrow on the marker pointing toward ONE hexside NOT crossed by wadi artwork. Any fire across this and any connecting (up to three hexsides) hexsides NOT crossed by wadi art creates a hull defilade position for the AFV. Treat personnel and heavy weapons in such positions as if in GOOD cover. Personnel UP in GOOD cover positions have their LOS restricted in the same manner as AFVs. Only the hull defilade eligible positions may be fired across—and they are the only hexsides across which the personnel unit receives the cover benefits.
33.741 A unit in LOS level +10 wadi positions must 're-enter' the wadi in its hex before it may move to another wadi hex. Point the LOS +10 marker arrow to a specific side of the wadi hex when a unit is UP. The unit may ONLY exit to the non-wadi hexsides on that side of the wadi, across non-wadi hexes across any hex the unit would be eligible to receive hull defilade (or GOOD cover) fire across (i.e., a non-wadi hexside). To enter the 'other side' of the wadi, the unit would have to re-enter (go down into) the wadi first.
33.75 Wadi LOS
33.751 A unit in a wadi (i.e., NOT in a GOOD cover position at LOS +10) may ONLY fire at a unit in an ADJACENT hex (including adjacent wadi hex).
33.8 Terrain Created Hull-Defilade
33.81 Once an AFV leaves a hex in which it had hull-down cover, it may not regain that cover without again rolling a die.
33.82 No 'transfer' of Hull Defilade is allowed from one AFV to another.
33.83 Only one AFV at a time may take advantage of hull-defilade provided by a die roll when one is required. More than one AFV may not be in a hull-defilade position in a single hex.
Example: Pzkw IIf 'C' is in a hull defilade position across the down contour hexsides in its hex (the front two hexes corresponding with its VCA). If squad '15' was an enemy AFV, Pzkw IIf 'C' would NOT be in hull defilade to its fire.
Squad '15' can see all units in the deir. If it was one hex back (away from the deir), it could NOT see '13' unless the latter was Running or using Assault Movement. Also, if '15' was back away from the deir, squad '21' would get the benefit of being in GOOD cover. Being adjacent to '21' denies this benefit (making it in STATIONARY cover).
If squad '15' was backed away from the deir BUT was up on Level +10 or greater (or on +5 and within FIVE hexes to the target hex in a deir) it could see into all hexes of the deir.
33.9 Buildings
33.91 Buildings are a terrain feature found on overlays with a 'V' letter-number combination. Buildings are a terrain LOS obstacle that rise above the 'ground level' (at Level '0') of their hex.
33.92 All buildings are considered a level +10 LOS obstacle unless the building art in a hex is marked with a large white center-dot, denoting it is a Level +20 building.
33.921 Personnel may be at the ground level or UP in Level +10 or +20 in a building hex. A unit pays TWO movement points to enter or to move UP (or down if already up) to each higher level of a building hex. Mark such personnel units with an LOS +10 (or +20) marker to signify their height in the hex.
33.922 Roofed Buildings—Any hex LACKING a black center-dot depicts a flat-roofed building (all buildings in Advanced Tobruk are flat-roofed and Level +10; future modules will introduce higher buildings) and allows personnel to move to the roof level in the hex. The roof level is located at the same height as the highest building level in the hex. The only game-value of rooftops is to allow mortars to be fired from roof level. They provide less protection than the rest of the building in the form of GOOD cover for units on a rooftop fired on by units at a lower level.
33.923 Only personnel units may move to higher levels in a building. Non open-topped tracked AFVs and non-mortar heavy crew-served weapons may set up in and fire from the ground level of a building. Note that all mortars may set up in or enter any level of a building hex. However, they may only fire from a roof level in a building hex. Personnel may carry and fire all other light and medium crew-served weapons to higher levels.
33.93 Buildings provide an IMPROVED cover state to any unit in a non-roof level. Any non-open topped AFV (gray only) that enters a building must roll on the Immobilization Table upon entering. Vehicles that set up in buildings do not risk M-KILL to set up within.
33.931 Use the IMPROVED column on the Spotting Range Table for units in buildings unless on a rooftop, which is considered GOOD cover from lower level units and STATIONARY to same level or higher firing units (unless a unit on a rooftop is moving).
33.94 Height Advantage—Units in a building upper level or roof trace their LOS from their actual height.
33.95 Building Destruction—Any direct hit obtained by direct or indirect HE fire from guns > 75mm may destroy a building and cause it to burst into flame. Any 'C6' or greater result on the Casualty Table that results from a direct hit causes a building to be destroyed. All units in the building are eliminated (i.e., not just those targeted; replace a vehicle with a non-burning wreck) AND a flame counter in placed in the building hex. So-marked buildings are considered Level +5 obstacles for the remainder of the scenario.
33.951 Flame Effects—No unit may enter a hex with a flame marker and flame produces smoke (rising to Level +30) in the hex for the remainder of the scenario.
33.952 Building Targets
33.9521 An indirectly firing weapon may opt to fire at a BUILDING when units within are beyond spotting range. When firing at the building (including forts) 'target' only, spotting range is doubled. Any resulting FRAG factors are HALVED for such fire.
33.96 Alternate Building Types
33.961 Occasionally an SSR will specify that a particular building is a 'tomb' or a 'mosque'. Rules for such building types will be provided by SSR. Other building types provided on overlays include 'camps', 'ammo dumps' and others. These will be contained in future modules and rules for any scenarios that use them are provided via SSR.
33.9611 Forts—Several Beau Geste style Turkish forts were found in the region, depicted by overlays with an 'F' letter-number ID. A Fort is a form of walled-in building with a courtyard in its center.
33.9612 The hex the 'X' coordinate on a fort overlay is printed in is also its 'gate' hex. Units may only enter the fort's courtyard from the 'X' hex, and only if the 'door' is OPEN. An open fort door is signified by placing a movement arrow in hex 'X' facing IN to the fort. Only the side 'controlling' the fort may open or close the door. A fort is considered controlled if ONLY units of one side are 'inside'. The door may be opened or closed by the controlling side during the End of Turn Segment by any personnel unit in the 'door' hex worth TWO or more stacking points.
33.9613 Personnel units may be UP or DOWN in the fort hexes surrounding the fort. Units in the center courtyard hex may only be down. A personnel unit may crawl or infiltrate to an UP position in any eligible hexes of a fort and may carry any light or medium weapon UP with them. These weapons may also be fired from an UP position. Units in an UP position are considered in IMPROVED cover. They may not 'drop' into FULL cover from UP positions. Units in any courtyard hex of a fort (including DOWN hexes along its sides) are in FULL cover and may not fire out. Indirect firing weapons MAY fire in normally, including 'lobbing' shells into fort courtyard hexes that would otherwise be out of LOS.
33.10 Soft Sand Terrain
33.101 Soft sand terrain is represented by any overlay with an 'S' identification letter-number combination and a pale yellow hex terrain depiction.
33.102 Soft sand costs TWO movement points to enter. All vehicles must make a roll on the immobilization table when entering soft sand. A vehicle may not tow another vehicle INTO a soft sand hex. It may tow one OUT.
33.103 HE Effects—Any HE fired direct or indirectly at personnel results in a one column shift LEFT due to the cushioning effect of soft sand.
33.11 Sand Dunes
33.111 Sand dunes are represented by any overlay with an 'Sd' identification letter-number combination and a terrain art depiction across hexsides. All pale yellow terrain on a sand dune overlay is soft sand unless otherwise negated by SSR.
33.112 Sand dunes rise to +5 and +10 levels as specified by SSR. They affect LOS along any hexsides touched by the sand dune artwork in the same manner as 'contours' noting that they are considered to slope 'down' in both directions from the hexside they touch. Sand dunes serve to affect LOS but otherwise do not create any cover benefits or hull defilade.
33.113 Crossing a sand dune hexside costs double the normal entry cost for the hex (e.g., a soft sand hex costs TWO movement points; crossing a sand dune doubles this cost to FOUR). An Floorpan Armor Hit may occur when an AFV crosses a sand dune hexside.
33.12 Palm Groves
33.121 Palm groves are found on any overlay with a 'P' letter-number ID and green 'palm tree' artwork. A palm grove hex has no effect on entering or exiting the hex. A palm grove hex affects LOS in the same manner as a non-burning wreck for same level fire and as if a Level +10 obstacle for higher level fire, creating blind hexes normally. Units otherwise allowed to set up hidden may do so in a palm grove hex.
33.13 Roads and Tracks
33.131 Overlays with a letter-number combination beginning with 'Tr' are tracks. They also represent roads via SSR. Roads cost all vehicles HALF a MP each and are treated as open ground by all other units (i.e., they enter at the cost of one MP). Tracks cost TRACKED (including half-tracked) vehicles HALF a MP each and all other units treat them as open ground. To obtain the MP bonus a unit must be moving from one track (or road) hex to another.
33.1311 Railroad—Overlays that begin with the letter-number ID 'RR' are railroad right of way terrain. Treat railroad hexes as open ground unless specified otherwise by SSR.
34. Weather and Aerosols
34.01 'Aerosols' are airborne factors such as haze, dust and heat shimmer that affect the ability of men to observe on the battlefield. In the desert environment, weather entails intense dust storms, or 'Khamsin', that occasionally take place, curtailing the ability of the combatants to wage war.
34.1 Dust
34.11 Dust—The Western Desert was very dry and dusty. Vehicles moving across the battlefield raised plumes of dust behind them that caused severe visibility problems. Vehicle dust is only used in a scenario via SSR.
34.12 Dust is raised in the previous TWO hexes entered by a vehicle units using cross-country movement (i.e., not in its own hex and it must have moved at least two hexes to raise dust). For vehicles using Assault Movement, dust is NOT RAISED. Place a movement arrow marker TWO HEXES BEHIND the vehicle to signify dust and 'follow' the vehicle with the marker to signify dust.
34.121 Vehicles using Assault Movement do not raise dust. For vehicles using this form of movement, place a movement arrow marker on TOP of the vehicle to signify no dust is raised. No dust is raised by vehicles moving along a road. Dust IS raised on a track.
34.13 Movement arrows for vehicular units represent the dust raised by those units when moving. They are removed during the End of Turn Segment unless a vehicle continues moving between turns.
34.14 Dust (movement arrow) counters partially obscure the line-of-fire in the same manner as wreck counters. Add '1' to the HPN for EACH dust counter (i.e., movement arrow marker) along the LOS or a one column shift LEFT for Casualty Table fire.
34.15 When in use, dust is created in every hex affected by an FFE or aircraft bomb attack. Dust created in this manner is treated in the same way as artillery smoke. Place a smoke counter in such hexes with its '1' side facing up.
34.2 Sun Glare
34.21 The difficulty of looking east, i.e., into the rising sun during the morning, or west, into the setting sun, is represented by an HPN modifier to re-create this effect. Sun Glare is only used in a scenario via SSR.
34.22 When sun glare is in effect, any line-of-sight that leaves the firing unit's hex along the two (of three, depending on the map orientation for that scenario) hexside facing directly east or west receives a +2 HPT DRM for direct hit attempts. Whether sun glare is created by LOS facing east or west will be stated by SSR.
34.23 Sun glare creates no effect on off-board indirect or aircraft fire. Sun glare is not effect by range (i.e., a +2 HPN DRM applies for all affected fire no matter the range).
34.3 Heat Shimmer
34.31 Heat shimmer is a form of aerosol that hinders line-of-sight in an increasing manner, dependent on range. Heat shimmer is only used in a scenario via SSR.
34.32 When Heat Shimmer is in effect, a '+1' is added to all HPT direct hit attempts for each TEN hexes in range between firing unit and target. Heat shimmer also affects Casualty Table fire by providing a one column shift LEFT for each TEN hexes in range.
Example: Crusader 'C' is in a Hull Defilade position to Pzkw IIf 'C' (and vice versa). It can ONLY be hit in the turret, which is showing the Crusader a FRONT facing. The Crusader is not in defilade from ATR 'C'—it can be hit in the hull REAR or turret SIDE.
Squad '9' has no LOS to squad '21'. Squad '15' has an LOS to all the units shown and is at Level +5.
Squad '10' can see squad '21' and is in GOOD cover to '21', Pzkw IIf 'C', Stuart 'K', and Crusader 'C'. If squad '15' was an enemy unit, it would deny the GOOD cover when firing at '10' due to being ADJACENT.
Stuart 'K' is not automatically in Hull Defilade—it may roll when in an hex up on a hillock—after setting up in or entering the hex. Squad '15' may see past the NEXT hillock along its LOS for FIVE hexes.
If '10' was in FULL cover in a hedgehog, it would be out of LOS of all units in the example except '9', and 2|3|8 '8'.
34.4 Khamsins
34.41 Khamsins—Khamsins (desert dust storms) could, and did, sweep across battlefields with blinding suddenness. Khamsins are ONLY used in a scenario via SSR. When in use, the SSR will specify when and what die roll is needed for their implementation.
34.42 A Khamsin has the effect of reducing Spotting Conditions to 'Khamsin' for the remainder of the scenario.
35. Aircraft
35.1 Stuka Dive-Bombers
35.11 The Junkers JU 87 'Stuka' dive-bombers were the 'flying artillery' of the Luftwaffe. The quantity and turn of arrival parameters for Stukas will be specified by SSR. For scenarios in which Stukas appear, apply the following rules.
35.12 Placement—Aircraft attack target hexes of the owning player's choice in a manner similar to artillery FFE. When not in use (i.e., attacking a hex), they are held out of play.
35.13 Any number of aircraft may attack one hex during the same Combat Segment. Each attack is resolved separately using the Indirect Fire Accuracy Diagram and the Indirect Fire Direct Hit Table.
35.14 Entry—Once available, an aircraft may not remain in play for more than three turns without making an attack. After expending all of its bomb-load, an aircraft is removed from play.
35.15 Bomb-load—Each aircraft carries a specific bomb-load as marked on its counter. In a given bombing attack, either a single 'large' bomb, or all 'smaller' bombs, or all five bombs, may be dropped. Therefore, each aircraft may make, at most, two bombing attacks per game. Each aircraft may only attack one hex per Combat Segment.
35.2 Resolving Bombing Attacks
35.21 Bombing Attacks—Aircraft execute bombing missions by being placed in the intended target unit's hex in the same manner as an FFE (during the Aircraft Attacks portion of the Indirect Fire Phase) and then announcing the type of bomb-load dropped. After making its attack, an aircraft is removed from the map AFTER all enemy anti-aircraft fire has been conducted against it in the final attack hex.
35.22 The results of an aircraft's bombing attack are evaluated during the Indirect Fire Phase BEFORE any other type of indirect fire is evaluated (but after all smoke shells). Aircraft bomb attacks are resolved in the same manner as off-board artillery fire. Accuracy is determined using the Indirect Fire Accuracy Table; direct hits use the Aircraft Bomb row of the Indirect Fire Direct Hit Table; and fragmentation attacks for each bomb are made using the Casualty Table. Each aircraft has the HE fragmentation factors listed on its counter as '500' for the large bomb and '5' for the four smaller bombs.
35.23 Roll direct hits for each bomb separately, regardless of whether they are dropped together. Thus, there may be a maximum of FIVE direct hit rolls in a single attack if all five bombs are dropped.
35.24 Regardless of the damage inflicted on the target unit, an aircraft bombing attack forces ALL medium and heavy crew-served weapon units in the target hex to cease fire for that turn. Mark such target units with a cease fire marker. Acquisition on targets being engaged by 'cease fire' weapons is lost and must be re-acquired (i.e., remove all BOT markers for the units attacked).
35.25 Aircraft may not initiate bombing attacks in hexes containing friendly units. They may, however, bomb targets ADJACENT to friendly units. Aircraft have an LOS to all hexes on the map.
35.26 Aircraft bombs use the '6' FRAG column for the four smaller bombs (each a '50') and the '50+' column for the one large bomb (a '500').
35.3 Accidental Bombing
35.31 Target identification was sometimes a tricky proposition for aircraft pilots when engaged in bombing attacks. Occasionally they bombed the wrong target. Even worse, occasionally they bombed the wrong side. In addition to the risks entailed in use of the Accuracy Table to units within three hexes of an aircraft attack, use the following rules.
35.311 Prior to the resolution of dive-bombing attacks (during the Indirect Fire Phase), the friendly player must roll one die for each aircraft engaged in a dive-bombing attack. If a '1' is rolled, the pilot of the aircraft has mistaken the target and either of the following occurs:
a) If there are no other units within a three hex radius of the target, the die roll is ignored and the aircraft bombs its target normally.
Example: Squad '13' only has an LOS to '21' and '15' and vice versa. Squad '9' UP in the wadi (along with its MG 34 L|MG) can SEE but has no LOS to FIRE at squad '10' (ignore ramifications for same nationality for this example) or '15'. Squad '10' CAN see and fire at (i.e., has an LOS) squad '9' with no restriction as can '15'.
Pzkw IIf 'C' is also UP in its wadi hex. It has an LOS to squad '10' but no ability to fire at any other unit in the example. Its line-of-fire to '15' crosses a wadi hexside; squads '13' and '21' are down in the wadi; and an LOS to squad '9' would NOT cross the three allowable hexsides the Panzer's LOS has to cross from a hull defilade position in a wadi. If squad '10' was an enemy tank instead, Pzkw IIf 'C' would be in hull defilade to its direct fire.
Squad '10' cannot see squads '13' and '21' down in the wadi.
b) If there are other units within a three hex radius of the target, the enemy player may, at his option, select any one of them as the aircraft's new target—including units friendly to the aircraft. Accuracy is still rolled for normally, using this new hex as its starting hex.
35.4 Anti-Aircraft Fire
35.41 Certain guns are capable of providing anti-aircraft fire at low flying aircraft. Such guns will have an "AA" notation on their counter AND an anti-aircraft range. Note that not all "AA" guns (e.g., 88mm Flak 36) may fire at low-flying aircraft. Such guns are used for high-level anti-aircraft fire, not depicted in game terms. Anti-aircraft fire is a form of Opportunity Fire that is conducted during the Aircraft Attack portion of the Indirect Fire Phase.
35.42 All AA guns have a 360-degree field-of-fire (as marked on the counter with a circle around the gun value).
35.43 AA guns function normally as heavy crew-served weapons (firing AP or HE ammunition) when not using anti-aircraft fire.
35.44 An AA gun may attempt to shoot down any aircraft that makes an attack within its AA-RANGE, which is listed on each AA-capable counter under the 'AA' identifier. AA range is usually FOUR hexes for AA guns ≤ 20mm and EIGHT hexes for AA guns ≤ 40mm. One weapon may fire at as many aircraft during one Movement Segment, whenever they 'fly' within its AA Range (i.e., are placed in a final attack hex within the AA gun's range), as its ROF will allow (e.g., a Bofors may fire at THREE attacking aircraft). Each gun may fire at a particular aircraft only once per turn, however.
35.45 In a similar way to the heavy crew-served weapon unit type AA guns, the AA machine-guns on AFVs and any medium crew-served machine-guns may be employed against aircraft in the identical fashion. These vehicular weapons are employed identically to AA guns for use against aircraft with an AA range of FOUR hexes.
35.46 AA dice rolls are executed immediately whenever an aircraft attacks within a weapon's AA Range. A die roll of '1' will eliminate an aircraft. A die roll of '2-3' will 'drive off' the aircraft. Destroyed aircraft do not execute bombing missions in that turn and are simply removed from the map-board, as are those that are driven off. ONLY destroyed aircraft count for victory point purposes.
35.47 Weapons that use AA fire are marked with an 'F' counter normally when their ROF is expended.
35.5 Aircraft Counter-Battery Fire
35.51 Aircraft Counter-Battery—Aircraft may be used in a counter-battery role against off-board batteries.
35.52 Aircraft assigned to counter-battery work never appear on the map-board (i.e., they make no on-board attacks). They are simply announced as engaging in counter-battery during the Air Attack portion of the Indirect Fire Phase of the Combat Segment of the desired turn and then put aside.
35.53 Batteries that have not fired may also be located for counter-battery purposes by aircraft.
35.54 A minimum of THREE aircraft are required to neutralize an enemy battery. Each three-aircraft group may neutralize one battery for TWO turns, after which the battery may resume normal function.
35.55 Counter-battery neutralization is effective in the same turn that it is announced.
35.6 Interceptors and Spotter Aircraft
35.61 Interceptors—In any scenario that has 'interceptors' provided by SSR, roll one die for EACH THREE-AIRCRAFT GROUP of enemy aircraft entering the game. A die roll of '1' means that the group of aircraft has been intercepted en route to the target and may not enter the game. They are counted as destroyed for victory point purposes.
35.62 Spotter Aircraft—In any scenario which has 'spotter aircraft' provided for an off-board battery an FO is created that may create an LOS to any enemy unit on the map for the purposes of placing CFF/FFE markers.
36. Designer's Notes
In a depression among the sand dunes before El Agheila, on the western frontier of Cyrenaica, lay a British reconnaissance patrol:
Lieutenant Fred Miller dozed in the silent night near El Agheila. All he could hear was the snoring of his comrades. And at that moment the war began to "breathe" again.
The clank of tank tracks... Then silence and an oath. Fred Miller was on the alert, but there was no need for him to wake the others. Clark, too, was peering out from under the scout car. They lay on their bellies and stared ahead at the mighty shadows, which rattled as they moved. They heard shouts. "Tanks," whispered Miller, "German tanks." The monsters drove past 30 yards away in a southerly direction. "One, two, three, four, five..." Clark stopped counting. The sixth veered and made directly for them. The commander was standing in the turret. He had spotted them. "Move off," yelled Clark. The driver and wireless operator were already in the car. The self-starter hesitated. "Get cracking, man!" At last. The rattling shadow was almost on them as they drove off. The desert suddenly sprang to life, the shadows coming from all directions.
FOXES OF THE DESERT; Paul Carell
Those allergic to nostalgia are urged to move down about ten paragraphs. To our remaining readers, it is hard to believe over a quarter-century has passed since the young boy this writer once was read the stirring account of a British patrol sitting in the dark night, on the edge of Cyrenaica. A life-long interest in the war in North Africa during World War II was literally ignited by Paul Carell's seminal book, Foxes of the Desert.
Carell's book was not the first military history tome to tickle my fancy. That place will forever be held by Tregaskis' Guadalcanal Diary, borrowed from the school library in a bright-green, reinforced-binding with penciled-in title elementary school edition. My interest in reading was a flame fanned by my beloved fifth-grade teacher Mrs. Melamed. It was a year for Babe Ruth and Abe Lincoln biographies, the Hardy Boys, and books about bugs. Then came the war. Or more accurately, the wars.
The 'dots' would later be connected between Tregaskis, Ernie Pyle, Paul Carell, and Hal Hock. All unseen, lying in wait in the future not unlike Clark and Miller waiting in the night on patrol...then watching something important thundering by. Not quite sure what the import of it would be. Incredibly fascinated by military history, something apparently lost on this generation's young if recent reports of national testing are to be believed.
Long before discovering TOBRUK this writer was a ten-year old boy that was just sure there had to be something like wargames out there. The first hint came from the Woods Edge Game. Purchased from an advertisement in the back of a Metal Men comic book. Then that cardboard 'footlocker' with "over 100 men, tanks and ships", that happened to also include a map printed on polypropylene (think plastic sacks at your local supermarket) and rudimentary rules. These were duly set up, after surviving the four month wait that followed posting off the requisite two bucks or so. Me, my cousin Vinny and my best pal across the street Brian bought every comic book 'wargame' there was, including the one with the rubber-banded two-piece plastic tanks that 'exploded' when you pressed in their middle with your finger.
We played these things. And played them. Our little group was so out of the loop that we knew Helen of Toy, yet never heard of Milton Bradley's TANK BATTLE. I picked up the latter at an, er, 'antique' (read: junk) shop in rural Pennsylvania last summer while traveling with the wife and kids. For five bucks. And I had to finally hide it in the closet or my six-year old son would still be having me play it with him nightly. Suffice it to say we use house rules.
"Tobruk is the first, to the best of my knowledge, only board wargame—that shows what a 'close battle is really like." — Mark Saha, Fire & Movement, Number One
Fast-forward a couple of three years and we find this writer a thirteen-year old kid experiencing serendipity in the dusty corridors of the former Westchester Hobby Center of East Post Road in White Plains, New York. A small stock of wargames was tucked in among the myriad trains, Airfix soldiers and radio-control airplanes of the one-channel 'pulse' variety. My father was instantly made a prisoner as I pored over the best way to spend my office-vacuuming and cleaning 'business' money, suddenly burning a white-hot hole in my pocket.
TOBRUK was my first wargame. The back of the box sold me. I wanted to "recreate all of the furious action of tank-to-tank battles on the Western Desert during World War II". I was a late-bloomer and hadn't discovered girls yet. About twelve bucks in singles was peeled out of my wallet and plunked down for my very own tank battle in a cardboard box. This was going to be good.
The good times didn't last long. When I got this puppy home it became pretty evident there was no way this thing was going to be played by me or my best comic book gaming buddies. 'Programmed' instruction notwithstanding. I carefully packed it all back in the box and begged a ride back to Westchester Hobby to return the thing. Actually, I swapped it for AH's Stalingrad. Now that we managed to play.
Our readers are so devilishly smart I know you've already guessed the story doesn't end here. Sure, Stalingrad was fun. And easy. But the unrequited love with actually riding in my very own tank courtesy of TOBRUK just would not go away. Quite the contrary. It grew. Until finally, newly-earned greenbacks in hand I found myself back on East Post Road, in a brisk gait passing the amazingly sun-faded plastic models languishing in the display window since before the first Walther was born. I had a date with TOBRUK. There would be another bite at the apple for this young man.
My very own TOBRUK. Well, not exactly. It wasn't the same copy I had returned. But it would be mine. As I type these words my 'Copyright 1975' copy of the game is sitting on my desk, next to my dog-eared copy of Fire & Movement, issue Number One. Picked the latter up new at the hobby shop too. This time around I had set my teeth to getting this game. As in learning it and playing it. And my pals had been sold on the idea, albeit as long as my cash was put on the barrelhead. It wasn't long before the second 'bite at the apple' paid off and we all became Tobruk fans. Plenty of face-to-face and play-by-mail followed. It was a keeper.
Moving forward twenty years found this writer at the National Archives buried in the still photo department when an acquaintance on hand asked if I'd like to meet Tom Jentz and Hal Hock. A brief introduction to Mister Jentz followed an interesting and cordial session with Hal that led to more conversation at dinner at Hal's choice (he was buying), a Ruth Chris Steakhouse in Georgetown. On the way there Hal was putting his new Ford Taurus SHO (mutual car-guy thing going) through its paces when as an aside, he said, "you know I have the rights to Tobruk back." Later a letter from Thomas Shaw legally returning all rights was duly produced and the rest is history. This Tobruk kid would have the chance to bring back his first boardgame love for one more 'dance'.
Before the project could be completed, sadly, Hal suddenly passed away on December 7, 1999. The decision was made to go on but the deadline was blown right out the door when we lost Hal. His lifelong and intimate knowledge of the war in North Africa was a resource that could not be replaced. Nor could his kind and gentlemanly nature, interest in the Titanic and love of his dogs. As for our success in bringing back Hal's labor of love in a new edition, we'll let the reader decide.
The New Edition
My intent in the new Tobruk was to build an entirely new game system around some key precepts set down by Hal Hock and found in the previous edition. I feel a fairly successful job was done along these lines.
Infantry in the original Tobruk was all about casualties. You shot at someone and something happened. The original Casualty Table simply listed the number of men that went down with each shot—and there were few '0' results on the table. And whenever casualties were absorbed, the personnel unit would have to 'check morale'. This system is retained in the new game, albeit in a modified form. Instead of looking up the number of gunfire factors on the Gunfire Factor Table, these are provided right on the counters. We lose a little 'grainy' detail with our simple system of Gunfire on the counter—halved for 'long range fire' out to double the printed range. We pick up a LOT more convenience, and that results in faster play and far less tedium.
The original Tobruk used a system wherein casualties were marked off on a separate 'roster pad', man by man. The major downside to this was that all personnel counters on the map looked exactly as they started the game when they were 'fresh'. The only way to discern the status in terms of casualties was to check your roster pad. This was a major hassle as one needed to know the exact number of men in each personnel unit whenever tallying up gunfire factors to make a shot. This was no minor disadvantage and is done away with entirely in the new system with little loss in detail. A squad now has five 'steps' instead of the original ten or so, each represented by a 'man' in the former edition. A squad can be in its 'fresh' state, marked with a casualty marker, flipped to its reduced side, flipped and marked with casualties, and eliminated. This comes down to accounting for every two men worth of casualties. Considering that over half the categories on the original Casualty Table resulted in 2-9 casualties, one can argue that we lose nothing in the new translation.
More written records were required when firing tanks at one another, the very heart of the game. Same for guns engaging tanks. Each target had to be listed on a target roster pad in order that the proper rate-of-fire, initial or acquired, could be used for subsequent shots. This slowed the game down quite a bit, as even a court reporter needs to commit something to the page to assist one's memory. Even broken and surrendered units had to be memorialized to identify their status.
The entire load of note-taking has been lifted from the players shoulders by the new Advanced Tobruk System. Burst-On-Target markers are used to mark acquired targets. There are markers for casualties, broken, and surrendered status. And infantry can't 'run' for two turns in a row, as in the original game. Now there is just a 'winded' counter to mark these tired men with. A plentiful supply of marker counters is provided, practically eliminating the need for record keeping, such that it is not an integral part of game play any longer. This serves to speed things up dramatically.
Another benefit is accrued from the extensive use of marker counters in Advanced Tobruk. Players can simply scan the 'battlefield' and instantly see just who is broken, winded, surrendered, and more importantly, gunfire can be tallied up easily without taking one's eyes, or attention, off the map. This is no minor point. The ability to review the status of your units on the game map allows for an enhanced ability to play the game well. The combat potential of each unit, and more importantly the corporate potential of your on-map forces in keeping with their myriad capabilities simply cannot be understated. And my designer's intent is for players to seek the rewards of playing the game as experts. That's one reason for the inclusion of two dozen carefully picked and documented scenarios. That's part of the 'throwback' approach. Instead of a mountain of unremarkable scenarios that may never get played, and certainly never get played more than once, the plan is to move the conversation to picking apart every nuance of a smaller, more compelling, batch of actions.
The shell vs. armor plate system is new and intuitive. Our collective hats are tipped to Lorrin Bird, co-author of World War II Ballistics: Armor and Gunnery (Overmatch Press; 2001). His tome combines original research with an extensive compilation of government ordnance and ballistics data. Our new system literally jumped from the pages of the book. The armor for each tank is rated using nine armor factors, cross-referencing front, side and rear with turret, upper hull (superstructure) and lower hull aspects. A track hit can also be obtained. Armor factors are the thickness at that aspect (adjusted to zero degrees using Hal Hocks's favorite slope effects data) in millimeters divided by ten. Gun penetration is also in millimeters at specific ranges, also divided by ten. The K-KILL table brings it all together, and is based on the penetration probability data from U.S. tests presented in Bird's book—modified for 'real world' effects at the advice of the author himself.
Bringing it all together results in a very different approach from the original edition. Appearances may be deceiving on that score, though. Upon closer review one will note the exact same results are available in terms of tank warfare outcomes. AFVs may be K-KILL, F-KILL or M-KILL victims. Tank crews may also bail out in certain situations. When combined with the feel of hitting tanks on specific facings and aspects, this all starts feeling a lot like Tobruk. Albeit without a thousand dice rolls.
The issue of game length has also been re-worked with the 90-second game turn. Simply put, scenarios are much shorter than before and game play takes a fraction of the time it used to. In the new game, a short platoon-level action can actually be played during lunch hour.
Advanced Tobruk is not just a tank game any longer. It is designed with the express intent to use the system to portray infantry warfare across the length and breadth of World War II and other eras. To that end while we've been working on Tobruk our eye has always been on the need for the system to have the flexibility to 'move' to other fronts. We'll be putting that intent into action shortly with France 1940, 'Finland at War', Buna, and other interesting modules. Don't worry, the desert war has lots of attention coming as our first three Advanced Tobruk modules are in hand. WAVELL'S 30,000 brings alive Alan Moorehead's The March to Tunis with the 1940 British campaign against Italian forces in Egypt and Libya, culminating at Beda Fomm. Carell's The Foxes of the Desert comes alive in the ROMMEL RE-TAKES CYRENAICA module. And El Alamein literally jumps from the pages of C.E. Lucas Phillips, Alamein in our new DEVIL'S GARDEN module for Advanced Tobruk.
It is my hope that you pull on your suede boots or Rommel goggles and get down in the sandbox with us. If you haven't noticed by now, Advanced Tobruk is a turn-key miniatures system. Simply convert the 50 yard hexes to your measurement of choice and use the marker counters alongside your favorite miniatures.
Become a Dyed-in-the-Wool Desert Rat
Advanced Tobruk is a new tactical-level game system and has its own learning curve that needs to be travelled before you can start calling yourself a true Tobruk 'desert rat'. To that end we've created the Advanced Tobruk GAMERS GUIDE.
Stuffed with all the history and game play you can handle, the guide gets you up to speed quickly with a move-by-move scenario replay, complete with extensive notes communicating the players rationale for each move. And they're out for victory in this heated match. We don't want to spill the beans, BUT the game action spilled over into some insane gaming that takes the word 'competition' to a new level. Suffice it to say 'fog of war' will be putting it mildly when you get the scoop in your very own copy of the Gamers Guide.
Advanced Tobruk EXPANSION MODULES are now available, each featuring 12 scenarios that literally place you in the middle of some of the most intense actions in the annals of war. Each module has a theme and includes new overlays, scenario cards, and new overlays, maps and counters as needed. The first three modules are WAVELL'S 30,000 (1940 Campaign), ROMMEL RE-TAKES CYRENAICA (April 1941) and DEVIL'S GARDEN (El Alamein).
The best place to keep up with the latest TOBRUK action is at our website, www.Criticalhit.com. Be sure to sign up for our free electronic newsletter.