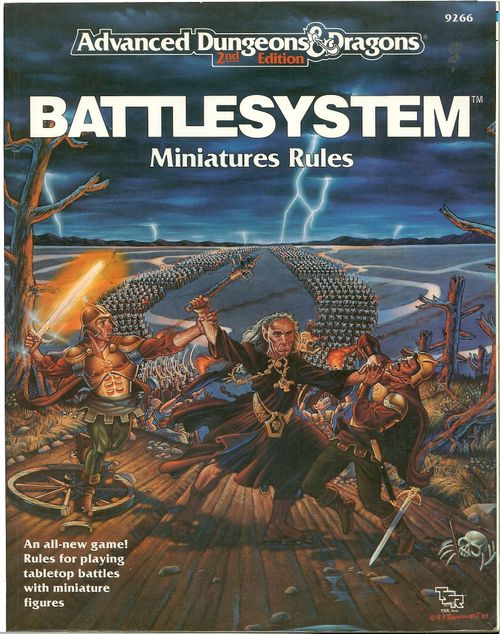
Advanced Dungeons & Dragons Battlesystem (Second Edition)
Advanced Dungeons & Dragons Battlesystem (Second Edition) Rulebook
Table of Contents
Table of Contents
- Introduction
- Basic Rules Summary
- Chapter 1: Reviewing the Troops
- Chapter 2: Sequence of Play
- Chapter 3: Morale
- Chapter 4: Movement
- Charging
- Rout Movement
- Terrain Effects on Movement
- Chapter 5: Combat
- Melee Combat
- Missile Combat
- Basic Scenarios
- Chapter 6: Intermediate Rules
- Heroes
- Firearms
- Dismounted Cavalry
- Optional Combat Rules
- Intermediate Scenarios
- Chapter 7: Advanced Rules
- War Machines
- Chapter 8: Magic
- Advanced Scenarios
- Appendices
- Rules Reference Card
- Closing Notes on This Transcription
Introduction
The Rules Summary
A summary of the major BATTLESYSTEM rules is included at the end of the Introduction (page 6). Players with some experience in miniatures gaming will be able to absorb the basics of this game with a quick look at the rules summary.
Changes in the System
This set of rules bears some resemblance to the original BATTLESYSTEM Fantasy Combat Supplement, published in 1985—but a lot of details have been improved. Some of the differences between the old system and the new one are these:
The new combat system requires less record-keeping and uses more dice and less mathematics. A time-consuming part of the original game, the Combat Results Table, has been completely revamped.
Instead of a quarter-page unit roster, each unit can be represented by as little as one line of information. Page 127 is a sheet of blank forms, used to display information for units in any easily readable fashion.
The base size for BATTLESYSTEM units has been converted to a more universal standard. Individually mounted figures that have been used with the original game can be easily remounted, since the new standard base sizes are slightly larger than the older ones.
The number of magic spells described in these rules, although still substantial, is much smaller than the number of spell choices in the original game, and each spell is specifically described in BATTLESYSTEM game terms.
These rules are fully compatible with the AD&D game (original or 2nd Edition), but do not depend on that game in order to be playable. You don't need any of the AD&D game reference materials, or even any knowledge of that game, to stage miniatures battles with the new BATTLESYSTEM rules.
One result of these changes, and the many others that players of the original BATTLESYSTEM game will find in this book, is that any miniatures battles you want to set up using these rules can be played without the participation of a referee. The Dungeon Master of your AD&D game campaign is welcome to oversee the battle, of course, and he may be useful in resolving issues that arise if your game play goes beyond the scope of these rules. But this version of the BATTLESYSTEM game has been designed so that two players can contest against one another without the need for a third party to moderate.
Other Materials Needed for Play
DICE. An assortment of dice are used in playing the BATTLESYSTEM game, primarily for resolving attacks and checking the morale status of your units, but also for other purposes.
For best results you should have at least six dice of each of the following types: 4-sided, 6-sided, 8-sided, 10-sided, and 12-sided. Dice are referred to in the rules by abbreviations: d6 for a six-sided die, d10 for a 10-sided die, and so on.
If you don't have all of these types of dice, the absolute minimum requirement is two 6-sided dice and two 10-sided dice. To simulate the rolling of a d4 or a d8, roll the next largest die and disregard (reroll) any results higher than the desired range. To simulate a d12 roll, roll 1d6 and 1d10. If the d10 comes up 1-5, read the d6 normally. If the d10 comes up 6-10, add +6 to the d6 roll to get a number from 7 through 12. (As you can see, getting along without all the proper types of dice is possible but troublesome.)
FIGURES. Miniature figures, cast from metal or plastic, make the best troops for your army. The game is designed to be played with 25mm (1 inch = 6 feet) scale figures. Chapter 1 contains information on preparing figures for play, and Appendix IV includes a short course on painting miniatures and attaching them to bases.
PLAYING SURFACE. A miniatures game requires a large, flat surface. You can use a section of floor, but for several reasons (especially in a household with animals or small children) a tabletop is much better. The table should be large enough to allow room for maneuvering, but small enough so that any part of the table can be reached from at least one edge. The scenarios given in this book are designed to be played on a battlefield that is twice as long as it is wide. A 4' x 8' surface is ideal; 3' x 6' is large enough for small scenarios.
The playing surface usually represents something other than flat, featureless terrain; the battlefield (whether for a predesigned scenario or one of your own creation) is likely to have hills, rivers, buildings, forests, and other kinds of physical features that will have an effect on how the battle plays out.
These terrain pieces can be simple or elaborate. Cut-out strips of construction paper can mark a river. A few large books can be scattered around to represent low hills, while a book on a flat game box represents a high hill.
Of course, a whole host of products is available to make your battlefield look like a grand diorama. Many players enjoy placing styrofoam cut-outs, detailed miniature trees, and models of buildings and other features on the battlefield. Appendix IV contains some basic information on how to construct and use realistic-looking three-dimensional terrain features.
MEASURING STICK. Several rulers and measuring tapes are handy at the gaming table, since every player will probably need to make a few measurements during a turn. The best tools for this purpose are those metal tape measures that remain rigid when extended. You can get along with rulers or yard sticks most of the time, but a flexible tape will come in handy at times for measuring along arcs. If not every player has access to a ruler, you can make temporary measuring sticks by marking off half-inches and inches on a strip of cardboard.
Playing a Scenario
Once you have learned the basic rules of the BATTLESYSTEM™ game, you will be able to set up and fight an enormous number of battles, skirmishes, and engagements on your tabletop playing area. Each scenario—actually a "game" in itself—consists of at least three sections of information: the situation map and background; a list of the forces involved in the scenario; and special conditions (including how to achieve victory) that apply only to that scenario.
Each of the nine scenarios in this book contains all of the information described above, enabling you and your friends to recreate the situations and play out the battles as commanders of the opposing forces. If you're new to miniatures gaming or have just started to become familiar with the BATTLESYSTEM rules, you should start by setting up and playing the basic scenarios on pages 47-52. When you've gone through each of those at least once, you can try your hand at designing some more scenarios using only the basic rules, or you can progress to the intermediate and advanced rules and try out the scenarios provided on the pages following those sections. By the time you've absorbed all the rules in this book, you'll be able to play large battles involving heroic leaders, hordes of monsters, powerful siege artillery—even flying dragons and towering castles!
The complexity and playing time of a scenario relate directly to the size of the playing area and the number of miniatures involved. While miniatures gaming lends itself readily to team play, getting more players involved will not necessarily decrease the playing time of a game. Experience will soon show you the right type of scenario for a given group of players and time limit.
Self-designed scenarios are easy to do and lots of fun. A particular advantage of the home-grown scenario is that you can tailor the forces in the battle to the kinds of miniatures you have on hand. Appendix III provides a point system and other tips for creating balanced armies in home-grown scenarios.
Starting to Play
Once your scenario is chosen or planned, you simply need to set up the necessary terrain features, make a roster of all of your units (for an original scenario), put the miniatures in place on the battlefield, and start to play.
For the scenarios given in this book, general setup locations are specified. However, you will often get to select the exact placement of each unit, the direction faced by your miniatures, and so on. Sometimes a scenario will specify that one side or another is set up first.
Rosters for the scenarios in this book are included with each scenario. You may want to copy the information onto a separate sheet of paper (especially if you want to refer to other parts of the rule book during play), but this is not necessary. If you are using a self-designed scenario, you will have to draw up your own rosters.
Once your rosters are in hand, the terrain and miniatures are arrayed across the table, and dice, rulers, and the rule book are close at hand, you're ready to start the game!
Follow the BATTLESYSTEM sequence of play (see page 14) for each turn of the game. Play through a succession of turns until one side or another achieves victory. Though the victor is always defined by certain scenario conditions, such definitions are often unnecessary. If your victory was a solid one, you (and your opponent) will know it!
Questions?
If you're unsure how to interpret a rule or how to deal with a special situation that comes up during the play of a scenario, we may be able to help. Send a note containing your question or comment, along with a self-addressed, stamped envelope, to BATTLESYSTEM™ Game Question, TSR, Inc., P.O. Box 756, Lake Geneva WI 53147. Be sure to give us as much information as we'll need to give you an accurate and complete answer, and if possible, phrase your question so that it can be answered in just a few words.
Basic Rules Summary
When reading this summary, you will need to refer to a BATTLESYSTEM™ unit roster (see the example on page 12), and the Reference Card attached to the back cover.
The ground scale is 1 inch = 10 yards. Figures are at a 10:1 ratio, so that each figure in a unit represents 10 individual combatants of that figure type. The game is designed for use with 25mm figures.
Units are described by the words and statistics on the unit roster: Type, Weapon(s) Used, Attack Dice, Armor Rating, Hits, Morale, and Movement.
Attack Dice (AD) specifies a size of die (d4, d6, d8, d10, or d12). On rare occasions, an AD notation will be given as the total of two dice, such as 10 + 8 or 2d10; otherwise, only a single numeral appears, indicating a single die that has that many sides. Generally, a player rolls one attack die for each figure in an attacking unit. The result of each roll is compared to the table on the top of the Reference Card to find out how many hits were scored on the defending unit by that roll. The attacker adds up the hits scored by all of his AD rolls to determine how many hits were scored by the entire attack.
Occasionally (such as during a charge or when missile weapons are fired; see the Reference Card), the number of attack dice allowed for a unit is increased or decreased. In all such cases, round fractions up. For example, a unit with 5 figures that is allowed a bonus of x 1 1/2 AD gets to roll 3 extra attack dice; the same unit attacking at x 1/2 AD must roll only 3 attack dice instead of 5.
Armor Rating (AR) represents a unit's ability to withstand hits—the lower a unit's AR number, the harder it is to defeat. When the attacker has finished rolling his attack dice and has totaled all of the hits scored, the defender rolls 1d10 for each hit. Each result higher than the defending unit's AR means one of the hits is cancelled by armor.
Circumstances often affect a unit's armor rating, modifying it for the purpose of determining hits scored by a specific attack. A negative modifier to AR is an improvement, increasing the target's chance of avoiding hits, while a positive modifier makes the defender more vulnerable. In some cases, more than one of the modifiers to a target's AR (see the Reference Card) will apply at the same time.
Hits represents the number of hits required to remove one figure from the unit. Figures can be removed from anywhere in the unit. Partial damage to a figure can be recorded by placing a d6 next to the unit. For example, if it takes 4 hits to remove a figure from a unit and that unit suffers 3 hits, then a d6 with the "3" facing up is placed next to the unit to keep track of the hits it has suffered. As soon as the unit takes 1 more hit, then a figure must be removed.
Example of combat procedure: Unit A (8 figures, AD 8) engages in melee (hand-to-hand) combat with Unit B (6 figures, AR 7, Hits 2). For the attack, Player A rolls 8d8, getting results of 2, 2, 3, 4, 5, 5, 6, and 8. The three lowest rolls score no hits; the next three highest rolls score 1 hit each; and the two highest rolls score 2 hits each, for a total of 7 hits.
Player B rolls 7d10 to see how many of the hits are cancelled out by armor, getting results of 1, 3, 3, 4, 5, 8, and 9. The two highest rolls are greater than Unit B's armor rating of 7, meaning that only 5 of the hits actually did damage. Since each figure in Unit B can take 2 hits before having to be removed, this means that Player B must take 2 figures off the tabletop and then note (with a d6, as described above, or some other marker) that the unit has suffered 1 additional hit of damage.
Morale (ML) refers to the morale rating of the unit. When a unit makes a morale check, the player must roll 2d10. A result equal to or less than the unit's ML means that the check is passed, and the unit does not suffer any penalties. A result greater than the unit's ML means that the check is failed, which has varying effects, depending on the status of the unit when the check is made.
All units begin the game in good order. When a unit in good order reaches a situation that calls for a morale check (see the Reference Card), the unit must either make a morale check or retreat 4" (player's choice). If the check is made and failed, the unit goes to shaken order and must retreat 4".
When a shaken unit reaches a situation that calls for a morale check, the check is mandatory. If the check is failed, the unit must retreat 4" and make another check. A failure on this second check causes the unit to rout.
A unit that has been routed will attempt to retreat from the battlefield as quickly as possible.
A unit that is shaken or routed and is not in contact with enemy forces can be rallied (improved to good or shaken order) if it makes a successful morale check.
Any unit that fails a morale check by 7 or more is routed immediately. For a unit with ML 12, for instance, this occurs if the 2d10 roll is 19 or 20.
It is important to remember that a high ML is good, but a high roll on a morale check is bad, since a check is failed whenever the roll exceeds the unit's ML.
In certain circumstances, a unit's ML is modified before a check is made; see the Reference Card.
For scenarios that use the intermediate rules concerning individual units (heroes and commanders), the heading on this column of the unit roster is given as ML/CD, and the number for an individual, expressed in inches, represents that figure's command diameter (see the intermediate rules). Heroes and commanders do not have morale ratings (in effect, their ML is considered to be so high that it need never be checked).
Movement (MV) is the number of inches a unit can move across clear, flat terrain. A unit conducting a charge can move farther than its normal MV. Special terrain—anything other than clear, flat ground—has an effect on movement (see the Reference Card); sometimes a unit is slowed, and certain types of units are not allowed to move into some types of terrain.
Chapter 1: Reviewing the Troops
Many different types of miniature figures are available for use with the BATTLESYSTEM™ game, ranging from the historically realistic (for example, foot soldiers wielding spears) to the "merely" fantastic (elven archers, dwarves with battle axes) to the truly incredible (enormous flying dragons). Each figure represents a certain number of troops of that type. When you group a band of the same troops—outfitted with identical weapons, armor, and equipment—together, you form a unit.
In general, troops can be classified into one of several categories, by the type of creature making up the unit, by its weapons and armor, and by its means of transport.
A unit is also defined in terms of its formation, which in the basic game is either regular or irregular. Trained soldiers can operate in regular formation—a compact mass of troops that can move efficiently and concentrate their firepower. A unit in irregular formation is more dispersed and less well organized, which reduces its maneuverability and its combat effectiveness to some extent. (For a more detailed description of these formation types, see pages 20 and 21.)
Common Troop Types
The two fundamental troop types are infantry and cavalry. Practically any scenario will include some units of each of these types (although an all-infantry or all-cavalry scenario is certainly possible). Among the wide variety of fantasy miniatures on the market, several kinds of special troop types are also available, such as elephants mounted with howdahs (battle platforms), chariots, artillery pieces such as catapults and ballistae, fantastic monsters, and other unique combatants.
Infantry are warriors who march about the battlefield on their own two (or, occasionally in a fantasy milieu, three or four) feet. Most infantry will be humans, or humanoid creatures such as ogres, trolls, and goblins.
Infantry mounted on bases. Note how the figures were mounted diagonally so that each one occupies a square area of the proper size.
Light Infantry includes foot soldiers with little armor protection, often armed with missile weapons and/or swords.
Medium Infantry is made up of foot soldiers that are moderately well armored, usually wielding spears and shields or carrying pikes or other pole arms.
Militia or Levy troops are armed and armored much the same as medium infantry, but are different in game terms because they are not professional soldiers and thus are not capable of assuming a regular formation.
Heavy Infantry is composed of foot soldiers wearing chain mail or plate armor and generally utilizing large swords, halberds, or other powerful weapons in combat.
In the BATTLESYSTEM game scale, each infantry figure represents 10 soldiers of that type. Generally, you will need infantry mounted on various-sized bases, or stands, containing one, two, or three figures. (Putting more than one figure on a stand makes it easier to move large units across the battlefield, but you will still need some single figures in the unit to make it possible to remove casualties one figure at a time.)
You can mount larger numbers of figures per stand if you favor large units in battle (and if you have lots of miniatures). Guidelines for base sizes are given on page 11.
Cavalry troops represent, in general, soldiers that ride into battle on the backs of mounts. Those mounts might, incidentally, also be combatants. Lancers on horseback, orcs riding giant boars, and goblins atop wolves are all examples of cavalry troops.
Light Cavalry moves quickly, because mounts and riders wear little or no armor. The soldiers are armed most commonly with bows, javelins or light lances, and swords.
Medium Cavalry riders typically wear chain mail, but the mounts might not be as well protected. Medium cavalry can operate in regular formation, using lances and swords in combat.
Heavy Cavalry is primarily composed of knights armored in plate mail and riding steeds protected by heavy barding (armor for mounts). Though such a group is slower than other types of cavalry, very few units can stand against the crushing charge of these knights and their lances.
As with infantry, each cavalry figure represents 10 soldiers of that type. For most units, cavalry figures should be mounted on individual bases, or two per base. However, if you have (and want to use) large numbers of cavalry figures in your battles, stands of three or more figures are quite workable.
Special is a catch-all troop classification for anything that can't qualify as infantry or cavalry, including vehicles (chariots or wagons), siege machinery (catapults, ballistae, etc.), unusually large or fantastic creatures (elephants, giants, dragons), and unique individuals (army leaders or heroic characters). Special troop types are mounted on bases that conform to the overall shape of the figure (which will most often be square or rectangular, half as wide as it is long). Information on the use of special troops is introduced in the intermediate and advanced rules, and in the scenarios and appendices.
Units: An Army's Building Blocks
In the BATTLESYSTEM™ game (just as in most real-life military conflict situations), the forces making up an army are organized into companies of warriors that operate together, called units.
The figures in a unit, generally, are armed with the same weapons, or weapons that inflict the same type of damage and function in similar ways. (Some of the illustrations in this book show figures with different weapons in the same unit.) For example, you might have a unit made of a mixture of axemen and swordsmen, since the weapons are similar, but you could not have a unit that included pikemen and swordsmen, because the two types of weapons have almost nothing in common.
The figures in a unit must move and fight together on the battlefield. A unit that becomes split or scattered must recombine as soon as possible.
Unit Sizes
At the start of a battle, each unit in an army must contain a minimum number of figures (which varies according to the troop type), and for most scenarios the number of figures in a unit should fall within a recommended range, as given in the table below.
| Unit Type | Minimum | Recommended |
|---|---|---|
| Infantry, human-sized or smaller creatures | 6 | 12-36 |
| Infantry, larger than human-sized creatures | 4 | 6-24 |
| Cavalry | 4 | 4-24 |
| Special | 2* | 2-8 |
* Unless the entire force contains only one figure of this type.
Despite the recommendations given in the preceding table, there is no rule limiting a unit to a certain number of figures. Units composed of many figures have the advantage of being sturdy, capable of sustaining many casualties before their morale begins to suffer or their position begins to give way. However, large units are hard to maneuver (not everyone can get through a mountain pass at the same time), and if the morale of the unit does collapse, a large part of your army is lost.
Units composed of relatively few figures are much more maneuverable than units representing a great number of soldiers, and if the unit's morale is shattered, you don't risk losing so many figures at once. However, small units are obviously more vulnerable in combat because it takes fewer casualties to eliminate them.
Getting Down to Bases
Your miniatures should be mounted on firm bases before you begin to play. Bases ensure that figures take up the proper amount of space ("frontage") on the playing surface. They can be made of cardboard, masonite, thin strips of plastic, or any other durable, hard, flat material that you can easily cut into the requisite sizes. More information on how to attach miniature figures to bases can be found in Appendix IV.
Infantry made up of human-sized or smaller figures are mounted, most commonly, three figures to a base. However, you will need enough single- and double-mounted figures to give you flexibility in making different formations, and to "make change" as you suffer losses in battle. For a group of 12 human infantry, for example, you might mount two stands of three figures each, two stands of two, and two stands of individual figures. This allows you to arrange the 12 figures in virtually any grouping you might desire, and enables you to remove the exact number of figures from the unit every time it suffers casualties.
As a general guideline, larger than human-sized infantry and all cavalry figures are mounted with no more than two figures per base. Special troop types are best mounted on individual bases.
If you like to fight battles with huge units (40, 50 or more figures), you will be able to move these units more quickly and easily if you mount many of the figures three or four (or more) to a stand.
Base Sizes
The dimensions of bases for various types of figures are variable, depending on the size of the figure and the type of unit that figure represents. The illustration of recommended sizes on the facing page is compatible with the standard ground scale (1 inch = 10 yards) used throughout the BATTLESYSTEM™ rules. If you own some miniature figures on bases larger than the minimum sizes, and cutting the bases down is not possible or desirable, then you can use your figures the way they are.
When a choice of base sizes is given for a certain type of figure, you should use the smaller size for regular troops—units composed of trained professional soldiers that work together on a regular basis. The smaller bases reflect the fact that soldiers can function well in close quarters and assemble into tighter formations. The larger size should be used for figures representing militia or peasants—units composed of troops that don't have as much training or discipline, and thus can't form into a really densely packed group.
For extra-large or oddly shaped figures (elephants used as mounts, dragons, giants, other fantastic monsters), the size of the base is generally dictated by the shape and massiveness of the figure. Special troop types of all sorts should be mounted singly (or at the most, two per stand) on bases that are square or rectangular and large enough in area to support the figure.
Standard Base Sizes (diagram, printed page 11), as printed:
- Small-sized infantry (halflings, goblins, etc.): single figure base 15 mm or 20 mm; stand of 3 on 15 mm bases; stand of 3 on 20 mm bases.
- Man-sized infantry (humans, orcs, etc.): single figure base 20 mm or 25 mm; stand of 3 on 20 mm bases; stand of 3 on 25 mm bases.
- Giant-sized infantry (giants, dragons, etc.): single figure base 35 mm or 40 mm; stand of 2 on 35 mm bases; stand of 2 on 40 mm bases.
- Large-sized infantry (ogres, trolls, etc.): single figure base 30 mm; stand of 2 on 30 mm bases.
- Standard-size cavalry base: 25 mm by 50 mm.
Unit Rosters
Each figure type in the BATTLESYSTEM rules is assigned certain values to reflect its abilities in combat, movement, and so forth. These values are all consistent with the creature type descriptions in the ADVANCED DUNGEONS & DRAGONS® game. Other creatures from the AD&D® game can be converted to the BATTLESYSTEM rules by using the process described in Appendix I.
The summary of a unit's capabilities is known as a unit roster. You can play a BATTLESYSTEM game without creating unit rosters—just use one of the pregenerated scenarios in this book, until you start to draw up your own forces. Appendix II contains a long list of unit rosters for dozens of unit types you may want to use in the scenarios you create.
The information in each unit roster is presented in this format:
| Unit Type | AD | AR | Hits | ML/CD | MV |
|---|---|---|---|---|---|
| 24 Light Infantry (Short swords) | 6 | 7 | 1 | 11 | 12" |
Unit Type: Here is given the number of figures in the unit, the type of figures that make up the unit, and (sometimes on the following line, as shown here) the type of weapon the troops in the unit are equipped with.
Attack Dice (AD): The AD of a unit is the size of the die that is rolled for each figure in the unit when it is attacking an enemy figure. The "6" in the example means that each figure rolls a 6-sided die when attacking. (For more information on combat, see Chapter 5.)
Armor Rating (AR): The AR of a unit represents how heavily armored the troops are. The lower the number, the better the unit's armor.
Hits: A number representing the durability of a unit—the higher the number, the more damage the unit can take before a figure must be removed from the table.
Morale (ML): The morale rating of a unit is a number indicating the relative courage and commitment of the troops. A morale rating of 11 is average; 13 or better is elite; 15 or higher is rare. When you check morale for a unit, it passes the check if you roll its morale rating or less on 2d10. (See Chapter 3 for more information on morale.)
Command Diameter (CD): This statistic takes the place of a morale rating for an individual figure that represents a hero or a commander. (Since heroes always have good morale, they don't need a morale rating.) The CD number, in inches, indicates the diameter of the circular area over which the special individual can exert influence, enabling a unit within that area to perform at its best. (For more information on individual figures and their command diameter, see the intermediate rules, Chapter 6.)
Movement Allowance (MV): The number of inches (in the standard scale of 1 inch = 10 yards) that the unit can move in a single turn. This is a basic value that can be changed by terrain or other circumstances. (See Chapter 4 for more information on movement.)
Chapter 2: Sequence of Play
Each turn in a BATTLESYSTEM™ game consists of several steps, taken in the order they are described here. If you aren't yet familiar with these rules or with miniatures gaming in general, you may encounter words and terms on this page that you don't understand right away—but all of them are described in the rules that follow.
Step 1: Charge Declaration
(Skip this step on the first turn of any scenario.)
Players declare which of their units will attempt to charge on this turn. Unless the participants agree to use some other method of declaring charges (see page 31), the player who did not win initiative (see Step 2, below) on the previous turn must make all of his charge declarations first.
Step 2: Initiative Determination
Each player rolls a d10 to determine which side has the initiative. A player subtracts 2 from his die roll for each of his units that will attempt to charge when it moves (in Step 3 or 4). The player with the lower modified roll wins initiative for the turn. If the results are identical, roll again.
Example: Player A declares that two of his units will charge on this turn, and Player B designates one unit to charge. They roll dice for initiative: Player A rolls a 6 and subtracts 4 (for his two charging units) to give him a modified roll of 2. Player B rolls a 5 and subtracts 2 (for his one charging unit), for a modified result of 3. Player A, with the lower result, wins initiative for the turn.
Note that the result of a modified die roll for determining initiative can be zero or a negative number; this may happen if a player rolls a low number and has declared several charges to take place during his movement step.
The player who won initiative then chooses which side will perform First Movement (Step 3), with the other side then following with Second Movement (Step 4).
Step 3: First Movement
Several actions are performed during this step. First, the active player makes charge initiation checks for any units that he has declared to be charging. If its check is successful, a unit is eligible to charge—and must do so, as long as it fulfills the necessary conditions (see pages 32-33). Charge initiation checks and movement for charging units can be performed in any order, so long as the player moves each of his charging units before handling any other unit.
Next, the player deals with all of his noncharging units. Any unit in good order can be moved normally, up to the limit of its movement rate. A shaken unit can be moved normally, or the player can make a rally check for the unit. A shaken unit that undergoes a rally check cannot be moved during this step, whether the check succeeds or fails; conversely, a shaken unit that has been moved during this step cannot rally until the following turn.
Within the framework described above, the active player can move or attempt to rally his units in any order he desires. However, his opponent may require him to stop charging or moving now and then, so that an enemy unit can deliver pass-through fire or make an opportunity charge.
After all of his charging units have been moved, a player may find that some of his units armed with missile weapons are within range of targets. If all of the necessary conditions are met (see "Movement and Missile Fire," page 31), a unit with missile weapons can attack at this time. (However, by doing so, many units forfeit the opportunity to attack later in the turn.) If an opportunity for a missile attack occurs and the player wants to make the attack, the combat must be resolved immediately, before continuing with movement of other units.
During this step, the active player must attempt to rally any unit that has routed and is not in contact with an enemy unit. A routed unit that is in contact with the enemy or that fails its rally check must immediately perform rout movement.
Step 4: Second Movement
The player or side designated to perform Second Movement now does so, repeating all of the procedures under Step 3.
Step 5: Magic
Magical spells are introduced in Chapter 8. Skip this step when using the basic rules.
Step 6: Melee Combat
To begin this step, the player who won initiative for the turn designates a unit of his that is in contact with an enemy unit. All attacks made by and against those two units are resolved. The opponent then selects one of his units that has not fought yet, and that battle is resolved. The choice of where to fight next alternates until all melees have been resolved.
Step 7: Missile Combat
In this step, players resolve missile fire for all artillery figures (catapults and other siege equipment), as well as any missile troops that are eligible to fire during this step. (If a unit with missile weapons fired during the movement step, it cannot fire again during this turn unless it is armed with bows and arrows.) All missile fire is resolved one unit at a time. Players take turns firing eligible units until all attacks have been made, beginning with the player who has initiative.
Step 8: End of Turn
Some scenarios may require you to keep a record of turns played (for example, if reinforcements for one player enter on a certain turn, or if the scenario has a time limit). If this is necessary, players mark the passage of a turn at this time.
To continue the battle, proceed to Step 1 of the next turn, unless one side or another admits defeat or has no forces left with which to fight.
Chapter 3: Morale
When a group of soldiers fights as a unit, one important measure of the unit's effectiveness is its morale. The strongest and toughest warriors on the battlefield are not necessarily the best fighters, if their morale is so low that they are liable to become disorganized or panicky as soon as something unfortunate happens to them.
To reflect the all-important role of morale in a mass combat situation, each unit in a BATTLESYSTEM™ game has a morale rating—a number from 2 to 20 (but usually in the range of 5 to 15) that represents the unit's will to fight in the face of casualties and other dismaying circumstances. At numerous times during the game, each player will be required to make a morale check for one or more of his units. The player notes the morale rating of the unit, applies any modifiers that may raise or lower the rating because of present circumstances, and then rolls 2d10. If the roll is equal to or lower than the modified morale rating, the check has succeeded; if the roll is higher than the modified rating, the check has failed. The effects of a failed check are described below.
Order: A Unit's Status
Any unit in a BATTLESYSTEM game is always in one of three states of morale: good, shaken, or routed. If a unit fails a morale check, it drops one notch on this scale and/or is forced backward 4". A shaken or routed unit can try to rally; a successful rally check moves it a notch back up the scale, from routed to shaken or shaken to good.
GOOD: A unit in good order performs movement and combat functions with no penalties because of morale.
SHAKEN: A shaken unit has been disorganized by events of the battle. It is one step closer to running away than is a unit in good order. (When one of your units becomes shaken, mark it by placing a suitable token beside it.) There are several limitations on the use of a shaken unit:
- It cannot charge.
- It suffers a −1 penalty to its morale rating for all morale checks (including rally attempts) made for the unit while it is shaken.
- It cannot move into contact with the front of an enemy figure or unit. (It is still courageous enough to contact the enemy on the flank or in the rear; see pages 41-42.)
- A shaken unit that suffers even a single hit from enemy pass-through fire (a missile attack that occurs during the shaken unit's movement step) must cease moving for the rest of the turn, regardless of whether a morale check is required because of the hit(s).
ROUTED: A routed unit has lost all will to fight, and is concerned only with placing as much distance as possible between itself and the enemy. (When a unit becomes routed, mark it by placing a token—different from the one used for shaken units—beside it.)
The restrictions for a routed unit are similar to the limitations given above for a shaken unit, except that its morale rating penalty is −2, and it cannot stop moving if it is hit by pass-through fire. After the consequences of such an attack are resolved, the unit must continue fleeing just as if the attack had not occurred.
A routed unit cannot attack and cannot move voluntarily. If its flight away from the battle causes it to move close to other friendly units, those units might be required to make a morale check to see if the routed unit affects their own morale.
Making Morale Checks
Morale checks are required at many times during a game. Several factors can modify a unit's morale rating, increasing or decreasing it from the rating listed on the unit's roster. These factors should be determined before the check is made, and may vary from check to check.
A unit must make a morale check at any time during the game when at least one of the conditions listed below is in effect. If more than one condition occurs at the same time, only one morale check is required. Regardless of what happens to it, a unit is not required to make more than one morale check during any step of a turn (but may make more than one if the owning player desires to do so).
A unit must make a morale check:
- When the unit loses its first figure as a casualty of combat. (Elite units, representing highly disciplined troops with exceptionally strong morale, are exempt from this check.)
- Whenever the unit takes 4 or more hits in one step.
- Whenever the unit finds itself within 3" of a routed unit with an equal or better morale rating.
- When the unit is reduced to 50% of its original size, and during every step thereafter when it loses at least one additional figure.
- When the unit finds itself 1" away from an enemy unit that is charging and about to strike.
- When the unit attempts to begin a charge, unless the target of the charge is a shaken or routed enemy unit.
- When the unit, in the course of making a charge, attempts to cross an obstacle in its path.
- When the unit is routed and not in contact with an enemy unit at the end of its movement step. (This morale check, also known as a rally check, is optional for a shaken unit but mandatory for a routed one.)
The intermediate and advanced rules (Chapters 6 and 7) introduce other conditions requiring morale checks. All of the conditions, collectively known as morale triggers, are listed on the Reference Card printed on the last page of this book and on the perforated foldout inside the back cover.
How to Check Morale
The basic morale check procedure requires a player to roll two 10-sided dice and add the results together. If the sum is equal to or less than the unit's morale rating, the check is successful. If the sum is greater than the unit's morale rating, the check is failed.
Morale Scale
Morale Scale (printed page 17), as a summary of the three columns of the printed chart:
GOOD
- Causes: (1) A unit is always in good order at the start of a scenario. (2) A shaken unit that makes a successful rally check regains good order.
- Consequences: A unit in good order (1) has no restrictions; can function with no penalties because of its morale status. (2) If not a flying unit, can elect not to make a morale check and retreat 4" instead (page 75). (3) Is the only unit that can perform a charge. (4) Is the only unit that can make a forced march (page 57).
- Results of Failed General Morale Check: (1) The unit becomes shaken and must retreat 4". (2) If a unit of herd animals, it becomes routed instead of shaken and must perform rout movement or a stampede rout (page 77).
SHAKEN
- Causes: (1) A unit in good order that fails a general morale check becomes shaken. (2) A routed unit that makes a successful rally check becomes shaken. (3) A unit that uses its full charge movement bonus and fails to contact an enemy unit becomes shaken (page 32). (4) A unit in good order that retreats to avoid being contacted by a friendly routed unit becomes shaken (page 33).
- Consequences: A shaken unit (1) has a -1 morale modifier for as long as it remains shaken. (2) Cannot charge. (3) Cannot move into contact with the front of an enemy unit. (4) Must stop moving when hit by pass-through fire. (5) If not in contact with an enemy unit, can make a rally check or perform movement, but not both in the same turn. (6) If airborne (page 75), cannot gain altitude and cannot make a rally check. (7) If not in command (page 58), cannot make a rally check.
- Results of Failed General Morale Check: (1) Unit must retreat 4" and check again immediately; if this second check fails, the unit becomes routed. (2) If inside a building (page 80), the unit remains shaken.
ROUTED
- Causes: (1) A unit in good order that fails a general morale check by 7 or more becomes routed. (2) A shaken unit that fails two consecutive general morale checks becomes routed. (3) A unit that cannot retreat far enough to avoid being contacted by a friendly routed unit becomes routed itself (page 33). (4) A skirmish unit that is too tightly or too loosely formed at the end of its movement becomes routed (page 54). (5) A flying unit that lands upon an enemy unit as the result of a dogfight becomes routed (page 74).
- Consequences: A routed unit (1) if airborne when it routs, must be removed from play immediately (page 75). (2) Has a -2 morale modifier for as long as it remains routed. (3) Cannot attack. (4) If not in contact with an enemy unit, must make a rally check during its movement step; if the check fails, the unit performs rout movement (page 33). (5) May affect morale of friendly units it nears while performing rout movement. (6) Must continue with rout movement after being hit by pass-through fire.
- Results of Failed General Morale Check: (1) Unit performs rout movement immediately.
Note printed on the Morale Scale: See the Reference Card (page 128) for information on when morale checks are required, and modifiers that can affect a unit's morale rating.
Morale Rating Modifiers
However, often the morale rating of a unit is improved or worsened by conditions around it. Thus, before dice are rolled for a morale check, the player should check the following list to see if he needs to modify his unit's morale rating—for the current check only—before he rolls.
The conditions that affect a unit's morale rating, and the amount of the benefit or penalty, are listed below.
- −2 if at least 50% of the unit's figures have been removed
- −2 if the unit is routed
- −2 if the unit attempts an opportunity charge, and no charge had been previously declared for the unit on this turn
- −1 if the unit is shaken
- +1 for each rank in the unit beyond the first, to a maximum modifier of +4
Other modifiers are introduced in the intermediate and advanced rules (Chapters 6 and 7). All of the morale rating modifiers are listed on the Reference Card at the back of this book.
Effects of a Morale Check
Morale checks are made for a variety of reasons. A unit attempting to begin a charge, or a charging unit that comes upon an obstacle in its path, must make a charge initiation check. A player can (and usually should) attempt to rally a shaken or routed unit by making a rally check. A morale check made for any other reason is known simply as a general morale check. The effects of success or failure differ according to the reason why the check was made.
General Morale Checks
If a unit in good order is required to make a general morale check, the player can choose to retreat the unit 4" directly backward instead of making the check (and risking failure).
Exception: A unit checking morale because it is about to be hit by a charge cannot choose to retreat; it must make the check.
A unit that retreats to avoid making a general morale check remains in good order. If a player decides to make the check, he must abide by the results.
A unit in any order (good, shaken, or routed) that succeeds on a general morale check suffers no positive or negative effect—it continues about its business or remains in place, as appropriate. If the unit fails the check, however, the exact effect depends on whether the unit is in good order, shaken, or routed.
If the unit that failed was in good order, the player must reduce the unit to shaken order and retreat 4".
If the unit that failed was shaken, it must retreat 4" from its current position and make another general morale check. If it fails this second check, it routs, assumes irregular formation (see page 20) if it was not already in that state, and immediately performs rout movement (see page 33).
If the unit that failed was already routed, it performs rout movement.
Catastrophic Failure: If a unit fails a general morale check with a dice-roll result at least 7 greater than the unit's modified morale rating, the unit automatically routs.
Retreating: The retreat performed by a unit after failing a morale check is a simple rearward move. The unit pulls back, directly away from the attack or threat that caused the check to be made, and every figure in the unit ends the retreat facing in the same direction as when it began the move.
If a unit is unable to retreat the full 4" because its path is blocked by impassable terrain (including the edge of the tabletop) or another unit (enemy or friendly), then the unit moves as far as possible—up to the edge of the obstruction—and halts there. However, if a unit in good order wants to avoid making a morale check but does not have a clear line of retreat at least 4" long, then it must remain in place and make the check.
Charge Initiation Checks
Units that have been ordered to charge, but then fail the required charge initiation check, cannot charge during this current turn.
A charging unit that attempts to cross an obstacle in its path (wall, fence, trench, ditch, etc.) must make a charge initiation check when it reaches the obstacle. If the check is successful, the unit continues on with its charge. If the check is failed, however, the unit ceases movement where it stands, and it cannot change frontage or facing for the rest of the turn.
Rally Checks
Each player has an opportunity to make rally checks during his movement step, in an effort to improve the morale of units that are shaken or routed. The only units that cannot be rallied are ones that are in base-to-base contact with enemy units.
For a shaken unit, a rally check is optional. During his movement step, each player can make a rally check for a shaken unit instead of moving it. If the rally check is successful, the unit returns to good order; if it fails, the unit remains shaken. In neither case can the unit move (including a change in facing or frontage) later in the same turn. Likewise, a unit that has already moved, or changed facing or frontage, cannot be rallied in the same turn.
For any routed unit not in contact with an enemy unit, a rally check is mandatory. If the rally check is successful, the unit becomes shaken, and the figures in the rallied unit can be turned to face any direction the player wants.
A rally check is made the same way as a general morale check, using any morale rating modifiers that apply. A unit suffers no actual penalty for failing a rally check, other than being forced to remain shaken or routed. However, that can have its drawbacks: A shaken unit that fails to rally has lost a turn of movement. A routed unit that fails to rally is forced to begin (or continue) fleeing from the battlefield, and if it moves off the field it is lost forever.
Chapter 4: Movement
Units can be moved during the movement step of each turn. As part of movement, units can change formation, change facing, change frontage, and perform special movement such as charges or rout movement.
While the basic movement allowance, in inches, is given on the roster for each unit, this allowance can be modified by battlefield terrain, special movement, changes of direction by the moving unit, and the presence of enemy units.
Formation
The figures that make up a unit must remain grouped together, with the base of each figure or group of figures touching (or very close to touching) at least one other base. The exact arrangement of the figures depends primarily on whether the unit is in regular or irregular formation. Regardless of the type of formation a unit is in, the figures in the unit must be placed in rows, called "ranks," of figures.
In regular formation, each part of the unit is in base-to-base contact with the parts around it, and all of the figures are arranged as neatly as battlefield terrain and conditions will allow.
In irregular formation, the base of each figure (or stand of figures) in the unit must be separated from the bases around it by some small amount of space (no greater than 1/2"). The ranks of the unit must still be easily identifiable, and each rank must be parallel to the ones adjacent to it.
Some units are capable of assuming regular formation (and will most often prefer to remain that way, to take full advantage of the benefits of being in regular formation). Other units can only be in irregular formation; when a unit has this limitation, it will be noted as part of the unit roster.
The most important differences between regular units and irregular units are the amount of area the units can cover, the types of terrain they can move through (see "Terrain Effects on Movement," page 34), and the ease with which they can change their configurations (perform turns or alter the shape of the formation). Regular units are more closely packed than irregular units, which means that they can bring more attack strength to bear on an enemy unit of a certain size. However, a unit in regular formation cannot travel over any terrain other than clear, open ground. Irregular units are not as efficient as regulars when making changes in facing and frontage (discussed later in this chapter).
A unit capable of assuming regular formation can switch back and forth between regular and irregular formation. A change to irregular formation can be done automatically any time the player desires; he simply declares the intent to change, and then separates the stands of figures within the unit by some small amount, so that the unit is visually identifiable as being in irregular formation.
In contrast, a change from irregular to regular formation costs 3" of a unit's movement allowance (representing the time required to pull the ranks back together). Thus, a unit with less than 3" of its movement allowance remaining in the current turn cannot reassume regular formation until the following turn.
As noted above, every unit—whether regular or irregular—must be arrayed in rows. When a row of figures meets certain conditions (described below), it is considered a rank. Depth of rank provides a valuable morale boost to units—a +1 morale rating modifier for every rank beyond the first. However, the maximum modifier for multiple ranks is +4, so a unit with more than five ranks does not receive any additional benefit.
In order to be considered a rank, a row of figures must meet these conditions:
- When the row is in a single straight line, that line must be continuous.
- When the row is not in a single straight line—which is the case after part of a unit has moved and turned—the only gaps in the row must be those that occurred as a natural result of the movement. (Note: Any row, whether or not it otherwise qualifies as a rank, must abide by these first two requirements—unless it is the back row of a unit. If the back row does not contain as many figures as the row in front of it, then one or more breaks in the line are permitted.)
- It must contain at least as many figures as the front row of the unit.
- It must have a figure behind every figure that is part of the row in front of it.
- Every row in front of it must be a rank.
Frontage
In order to tell how many ranks a unit has, a player must first determine the frontage of the unit—how many figures are in the front row, and exactly which figures those are. In general, a figure is considered part of the frontage of a unit when it meets both of the following conditions:
- Its front side is not adjacent to another figure in the same unit.
- It is part of an unbroken—but not necessarily straight—line of figures (bases adjacent side to side or corner to corner) that all meet condition 1.
If a unit contains more than one line of figures that meets condition 2, then the player can choose which line constitutes the unit's frontage—if the unit is not in contact with an enemy unit. However, if the front side of any figure is in contact with an enemy figure, then that figure is automatically considered in the front row of the unit (as are all the other figures in the same unbroken line, whether or not each of those figures is also in contact with an enemy figure).
In cases where it is not easy to determine the frontage of a unit, or which figures are part of the frontage, by using these guidelines, then common sense and reasonability should prevail.
Diagram caption (printed page 21): Examples of regular formation (above) and irregular formation (below). The figures in a regular unit are always in base-to-base contact; in an irregular unit, each stand of figures is separated from the others by as much as 1/2".
Diagram caption (printed page 22): Determining frontage and number of ranks. The units on green bases have frontages of 6 and 3. They are both two ranks deep, which qualifies them for a morale bonus. The brown-based unit has a frontage of 12 (counting the six figures in the center plus the three on each end that are facing sideways), but only has one rank.
Column Formation
A unit that is capable of assuming regular formation can be arrayed in a column, which is a specialized type of regular formation. (See the illustration on the facing page.) A column is made up of many ranks of troops, with no more than three figures of width. A column cannot be wider than 3 inches (75 mm); if this restriction is impossible to meet with three figures, the column can only be two figures wide (or one figure, in rare cases involving very large figures that are mounted on bases 40 mm square).
Exception: If a unit of man-sized or smaller troops contains some figures that are mounted in stands of four or more, and players on both sides agree to grant the exception, then it is permissible to have a column formation that is more than three figures wide and which might also be wider than 3 inches.
A unit in column formation can take advantage of a special column movement bonus: The unit does not pay any movement costs for wheeling (changing direction) as it moves—it can snake its way freely along a winding road, or make turns while moving across open terrain, and still travel a number of inches equal to its full movement allowance.
The drawback is that a unit that employs this column movement bonus at any point during its move cannot move closer than 3" to an enemy figure during that same movement step. A unit in column formation that does not make use of the column movement bonus during a given movement step is not so restricted—it can move close to, or even into contact with, an enemy unit.
Diagram caption (printed page 23): Column formation. This unit, 3 figures wide and 14 figures deep, can snake its way through the valley without paying for all the turns that each stand of figures has to make in order to stay on the path between the trees and the fence.
How to Move
Each player moves his units during either Step 3 (First Movement) or Step 4 (Second Movement) of each turn. Units can be moved in any order the player desires (charging units first); however, all movement for a single unit must be completed before any other figure can be moved. It is not legal to move some of the figures in a unit, then move a different unit, and then move the remaining figures of the first unit. The figures in a unit must be in formation (regular or irregular) when movement for that unit is completed, but the shape of a unit's formation can be altered during movement.
Each unit has a movement allowance (in inches) listed on its roster. This is the maximum distance that the figures in that unit can move during a turn. A ruler or tape measure is used to determine actual distances on the tabletop.
The distance of a move is measured from the front of a figure's base. For a simple move (for instance, traveling in a straight line with no change of facing or frontage), it is generally sufficient to measure the move for one or two stands of figures in a unit. Move those figures and then bring the rest of the unit up to join it, placing them in the same position relative to the moved figures as they occupied before the move.
A player must declare what a unit will try to achieve with its move before he actually measures out the move. For instance, if he states that one of his units will move toward an enemy unit, intending to attack, but when he measures the move the target turns out to be an inch or two beyond the unit's movement allowance, he must still move his unit forward as far as possible. Conversely, if he declares that a unit will move as far as it can in a certain direction but upon measuring the move he discovers that it brings the unit into contact with an enemy unit that he did not intend to attack, he must go through with the move as announced.
A player is not required to move any figures. He can move some, but not all, of the figures in a unit—as long as the unit continues to abide by the formation rules when the move is completed.
A unit cannot move through a space occupied by another unit, even if both units are on the same side. It's important to keep this in mind when deciding the order in which units are moved.
A unit that tries to move through a narrow gap between other units or between areas of impassable terrain may have to change frontage (see below) in order to be able to fit through the opening. If it does not have enough movement allowance remaining to make the frontage change, then it must stop and wait until the following turn to continue its movement.
IMPORTANT: As stated above—and emphasized here—it is strictly illegal to pre-measure movement distances (or any other measurement) without first declaring what action a unit will attempt to perform. Once the action is declared, the unit is committed to following through on it.
Diagram caption (printed page 24): A unit in the process of being moved. The move has been measured and made for the corner figures of the front rank. The rest of the unit can now be moved up between and behind the two figures, without further measuring.
Changing Direction
A unit can move straight ahead, or at an angle of up to 45 degrees to either side of the direction it is facing, without paying any special movement costs. However, when a unit makes this sort of angling movement, none of the figures are allowed to change their direction, or facing, as a result of the move.
Diagram caption (printed page 24, lower): Forward movement. The unit at the bottom can move straight ahead (to the top) or anywhere within a 45-degree arc to either side of the center of the front rank.
Often a player will want to maneuver a unit through a sharper turn, or to adjust the unit so that its front rank is pointed in a different direction, in which case it is necessary for the figures to pivot in addition to moving from one location to another. A unit has several ways to change the direction faced by its figures. Each change of direction costs part of a unit's movement allowance.
A figure in base-to-base contact with an enemy figure cannot change direction, except as specified under "Movement and Enemy Units" (page 28). For a unit that is not in contact with an enemy unit, the two types of direction changes used most commonly are the change of facing and the wheel.
A unit that changes its facing can perform a right face turn, a left face turn, or an about face turn. In a right or left face turn, some or all of the figures in the unit are rotated 90 degrees to the right or left. A right or left face turn costs 2" of a unit's movement allowance (4" for irregulars), regardless of how many figures are changed to the new facing.
Note: If some of the figures in a unit are mounted three or more to a stand, it is sometimes impossible to perform a true right or left face turn. If a unit is only two ranks deep, for example, three figures technically could not stand side by side after such a turn. In such a case, the player can adjust the unit to the closest practical arrangement of figures—as long as the unit is able to pay the movement cost for a change of frontage (see page 26) as well as the facing change.
For example, for a unit configured as described above, a two-rank line turning right could be changed to a column of figures marching three abreast so long as the unit could afford the cost of a change in frontage (1" to increase frontage by 1 figure) in addition to the change in facing (either 2" or 4", depending on whether the unit is regular or irregular). See the illustrations on page 26 for an example of an adjusted right face turn.
Diagram caption (printed page 25): A simple right face turn. These pikemen have ended up facing the trees (top), and must make a right face turn (bottom) to avoid having to move through the forest.
Diagram caption (printed page 26): An adjusted right face turn, before (top) and after. Because the unit is made up of stands of three figures, it has a frontage of 3 (instead of 2) after the turn.
When a unit performs an about face turn, some or all of its figures are rotated 180 degrees, so that they face in the opposite direction (to the rear of their original position). An about face turn costs 4" of a unit's movement allowance (8" for irregulars), regardless of how many figures are involved.
A wheel is a combination of a move and a turn. Instead of simply changing the direction of facing while remaining in the same location (as is the case with a right face, left face, or about face turn), a unit that performs a wheel changes direction and location at the same time by pivoting along an arc. The movement cost of wheeling is the distance moved by the figure farthest from the pivot point. (This is one case where a flexible measuring device comes in handy, since the distance to be measured is along a curved line.)
Diagram caption (printed page 27): A wheeling maneuver. After coming up to face the gap at an angle (left), this cavalry unit performs a wheel (right), pivoting on the right front corner, before continuing to move between the hedge and the fence.
Facing a Unit in Several Directions
Sometimes a player may want to change the facing of only some of the figures in a unit—to defend against an anticipated attack, for example, by forming a square with all four sides facing outward so that none of the figures can be attacked from the rear.
Figures that are not in contact with enemy units can change facing—even if other figures in the unit begin the movement step in contact with enemy figures. To determine how much of a unit's movement allowance is required to make multiple facing changes, simply add up the movement costs of the different maneuvers that need to be performed.
For example, forming a regular unit into a square requires some figures to make a right face turn (2" cost), some to make a left face (2"), and some to make an about face (4"). Thus, the unit spends 8" of its movement allowance to perform the maneuver.
Diagram caption (printed page 28): Three types of square formations. The unit can have a gap in the middle (left), can be a solid mass with figures facing in all four directions (right), or can simply have its front and rear ranks facing away from each other (center).
A unit with figures facing in more than one direction cannot move, except to change frontage (see below), to perform facing changes, or to wheel one or more portions of itself around to make all of its figures face the same direction. A unit can only move across the battlefield, changing its physical location, when all of its figures are facing the same direction.
A unit with multiple facing can also re-form into a single facing by changing frontage (see below). Each figure that is moved during a change of frontage can be faced in whatever direction the player desires.
March to the Rear
In performing this maneuver, a unit moves up to 4" backward, retaining its facing, during its movement step. A unit that executes a march to the rear cannot change frontage, facing, or formation during the same movement step, nor can it combine a march to the rear with any forward movement.
As an alternative to a full rearward march, a unit can wheel one or another of its flanks backward a distance up to 4". Again, this is the only movement of any kind allowed for that unit during the current movement step.
A march to the rear is identical with the maneuver that a unit in good order or a shaken unit performs when it falls back after failing a morale check, and with the maneuver performed by a unit in good order to avoid having to make a morale check. In those cases, however, the fall-back movement takes place independent of the unit's chosen move for the current turn. A unit that falls back for a morale-related reason can still move normally during the current turn if it has not already done so.
Changing Frontage
This movement maneuver is in effect a reorganization or realignment of the figures in a unit. The unit's frontage can be expanded or contracted by moving figures into or out of the existing front row, at a movement cost of 1" for each figure that is realigned.
A unit can expand its frontage by moving figures from the rear ranks to the front, placing them on one or both sides of the figures in the existing front rank. The cost of such an expansion is 1" per figure added to the unit's frontage. There is no additional cost to expand one or more of the back ranks to make them equal in size to the new front rank.
A unit can contract its frontage by moving one or more figures from the front rank and placing them in the row(s) behind the front rank. Again, the movement cost is 1" for each figure that is moved from the front row to some other location within the unit, with no additional cost for rearranging figures that were positioned behind the front-rank figures that were moved.
A unit can only change its frontage if there is enough space on the battlefield to accommodate the new configuration. A unit that is hemmed in by impassable terrain or the presence of nearby units (enemy or friendly) may be restricted in the number of figures that it can add to or subtract from its frontage. See the illustrations on page 29 for examples of changing frontage.
Facing and Frontage for Irregular Units
As noted early in this chapter (in the section titled "Formation"), irregular units are not as efficient or as versatile as regular units in certain aspects of facing and frontage. The differences are these:
Irregular units pay double the regular cost for changes in facing—4" to perform a left face or right face turn, and 8" for an about face turn. Thus, a slow-moving irregular unit (MV 6", for instance) cannot perform an about face in one movement step, but must accomplish the maneuver by making one 90-degree facing change and then a second one during a later movement step.
Also, an irregular unit must maintain at least half as many ranks as it has figures in its frontage. Its facing or frontage cannot be changed in such a way that the unit would violate this restriction. If the unit violates this restriction because of the way in which casualties were removed from it, then it must be reconfigured immediately the next time the unit is able to move—whenever it begins a movement step not in contact with an enemy unit. The irregular unit must pay for the necessary change in frontage before it can undertake any other kind of movement.
If an irregular unit remains adjacent to an enemy unit (locked in melee combat) from one turn to another, then the figures that are in contact with the enemy are not allowed to move—and thus, the irregular unit can continue to violate the frontage-vs.-ranks rule. But as soon as the contact is broken (by the elimination of the enemy, or the retreat of either unit), the irregular unit must change frontage as its first act during the player's next movement step, so that the unit is no longer in violation of the rule. If conditions on the battlefield make it impossible for the unit to make the necessary change in frontage, then one or more figures must be removed from the unit (and counted as casualties) to bring the unit into compliance with the rule.
The only times that an irregular unit in violation of this rule is allowed to move across the battlefield are when it is performing a retreat after failing a morale check and when it is performing rout movement (see page 33).
This restriction on the configuration of irregular units may not seem like much of a limitation, but it can have a significant effect on how the unit performs in a scenario.
Movement and Enemy Units
A figure or stand of figures must immediately stop its movement when it comes into base-to-base contact with an enemy stand. Other stands in the moving unit can continue forward if they are not in contact with the enemy, so long as the moving unit remains in formation. However, no figures in the moving unit can change facing after any one figure in the unit contacts an enemy figure.
NOTE: If a unit moves into contact with an enemy unit during the First Movement Step, the figures in that enemy unit cannot move normally, nor can they change facing or frontage, during the Second Movement Step.
Exceptions: A unit that begins its movement in contact with one or more enemy figures can perform only one of these three types of movement: fighting withdrawal, flight, or wraparound.
Fighting Withdrawal
The unit moves 4" directly backward, just as if it were performing a march to the rear (see page 26). It retains the same facing it had before the move took place. The unit cannot come into contact with an enemy unit as it moves; if it is not possible to move the full 4" without contacting an enemy unit, then the fighting withdrawal cannot be performed. The move is also prohibited if the necessary 4" path is blocked by impassable terrain (see "Terrain Effects on Movement," page 34).
If a unit makes a fighting withdrawal during the First Movement Step, there is no further effect; the unit has simply used the benefit of initiative to break off contact and pull back a short distance from the enemy unit.
If, however, the withdrawal occurs in the Second Movement Step, a special combat is fought at the moment the withdrawal begins. All enemy figures in contact with the withdrawing unit are allowed to make a normal attack against the withdrawing unit—but the withdrawing figures cannot attack the figures they are pulling away from. Casualties and any required morale checks are resolved for the withdrawing unit before it can perform the withdrawal movement. If a morale check results in the unit being forced to fall back 4", then it does so (this move is physically identical with a fighting withdrawal). If the unit routs, then it performs rout movement (see page 33) instead of the withdrawal that had been planned for it.
Diagram caption (printed page 29): Changing frontage. This infantry unit (top) expanded its frontage from 6 to 9 in order to fill the space between the tree and the fence. The cavalry unit (bottom) was riding nine abreast, but narrowed its frontage to 3 to pass between the buildings.
Flight
This type of movement is generally performed when a player wants to put a lot of distance between one of his units and an enemy unit. When a player announces that his unit will attempt to flee, the enemy unit immediately gets a free attack on the fleeing unit (regardless of which movement step is taking place).
After this attack is made, casualties are removed, and any morale checks resulting from the combat are resolved, the fleeing unit makes an immediate about face turn (at no movement cost) and moves in a straight line away from the enemy unit, up to the limit of its movement allowance. Note that if the result of a morale check calls for the unit to fall back 4", it does not fall back, but proceeds with its flight instead.
If the unit routs as the result of a morale check following the combat, it performs rout movement (see page 33).
Flight is physically identical with rout movement; however, a unit that is fleeing (but not routed) does not require other nearby friendly units to make morale checks. Also, a unit that is fleeing is not required to keep fleeing turn after turn (as is the case with rout movement, unless the routed unit rallies).
Wraparound
Unlike the other two types of movement described above, wraparound movement is an offensive maneuver. The unit expands its frontage (if necessary) and then wheels one or both ends of the unit inward in an attempt to outflank or envelop the enemy unit.
The movement cost of wraparound movement is the total cost of expanding frontage (at 1" per figure) and the wheeling movement. However, unlike other types of movement resulting in multiple facings within a unit, the cost for wraparound movement is not the total of all the individual turns and movements made by various figures in the unit. If both wings of a unit wheel inward, apply only the cost for the wing that traveled the longer distance (or the cost for a single wheel, if both wings traveled the same distance).
Diagram caption (printed page 30): Wraparound movement. The elves could fight the giants along one front (top), but can bring more attackers to bear by expanding their frontage from 7 to 13 and then wheeling the flanks until they also make contact with the enemy.
Movement and Missile Fire
A unit that is armed with missile weapons can often fire those weapons during one of the movement steps instead of waiting for an opportunity to use the weapons later in the turn.
NOTE: Troops using bows and arrows have the advantage of being able to fire twice in a turn (but not twice in the same step). All other missile weapons can only be used once per turn.
When Firing Unit Moves
The figures in a player's missile units can fire during his movement step (whether it is First or Second Movement) if they meet the following conditions:
- The figure in the missile unit is not in contact with an enemy figure at any point during this step, before or after the missile fire. (Exception: A figure can fire missiles and later in the same step be struck by an enemy unit making an opportunity charge.) If an enemy unit comes into contact with part of a missile unit, the figures that have been contacted cannot fire, but other figures in the missile unit are still free to do so.
- The unit cannot use more than half of its movement allowance during this step. (Exception: Archers astride horses or other mounts can use their bows during the movement step and still move their full movement allowance.)
- Unless armed with bows, the unit cannot have fired missiles previously during the same turn.
A unit that meets these conditions can fire either before it moves or after it completes its move (or, if the unit remains stationary, at any time during the movement step that the player desires). As in condition 2 above, mounted archers are an exception to this rule: They are not limited to firing either before or after movement. If the player so chooses, such a unit can use part of its movement allowance, fire its weapons, and then continue moving.
When Opposing Units Move
A player's missile units can fire during the opponent's movement step, if they meet the following conditions:
- No figure in the unit can be in contact with an enemy figure when the missile fire takes place or prior to the missile fire during the current movement step. Contact during other steps of the turn, or during the current movement step after the attack is made, does not affect the unit's ability to shoot.
- The unit cannot have used more than half of its movement allowance prior to firing its missiles. If the opponent moves during the First Movement Step, any units that fire missiles at enemy units during his movement can use no more than half of their movement allowance during the Second Movement Step. (Again, mounted archers are an exception to this restriction; see the preceding column.)
- Unless armed with bows, the unit cannot have fired missiles previously during the same turn.
If a unit meets these conditions, the owning player can fire its missiles while the opponent is moving his figures. To do so, the player simply announces his intention to fire when an enemy unit moves within range of his missile unit. The opponent must stop moving until the attack is resolved. He suffers any required casualties immediately, and makes any required morale checks, before continuing to move.
If a player announces his intention to fire missiles, but upon measuring finds that the target is out of range, that shot has been wasted—the missiles went off, but they failed to hit anything.
Charging
Charging is a special type of movement. The objective of a charge is to carry a unit into melee combat with enemy figures. Of course, a unit does not have to charge in order to move into contact with enemy figures. A charging unit, however, gains considerable bonuses in the melee combat that results from the charge.
Declaring Charges
During Step 1 of each turn (except for the first turn of any scenario), players can announce which of their units will charge during that turn. When declaring a charge, a player also indicates the enemy unit that will be the target of the charge. It is possible to declare charges by more than one unit against the same target in the same turn. For every charge declaration, the owning player receives a -2 modifier to his die roll for determining initiative (in Step 2).
If the situation on the battlefield makes it important to determine the order in which players determine charges, or the number of charges each side declares, then the players can agree to settle the issue in any way they desire. Some possible methods:
- The player who did not win initiative on the previous turn must make all of his charge declarations first. (This is the "default" method; see page 14.)
- The players roll dice, with the high roller getting the option of making all of his charge declarations last or allowing his opponent to do so; or
- One of the two above methods is used for the first declaration, but thereafter players alternate declaring charges until one of them chooses to stop. The other player can then continue for as long as he desires.
(Remember that at this point in the turn, no one knows who will be moving first or second—and also, declaring a charge does not guarantee that the charge will actually take place, since the unit must still succeed on a charge initiation check later in the turn.)
A unit must be in good order to charge. A unit can only complete a charge successfully if there is at least one enemy unit in its charge range (see below), and the declared target unit must be visible to the front rank of the charging unit. (See the section on "Line of Sight," page 43.)
Once a unit has declared a charge, it is committed to following through on that charge, unless it fails a charge initiation check (which causes the charge to be negated or discontinued at that point). A charging unit can change facing, change frontage, or wheel into a different position before beginning its forward movement, so long as this preliminary movement does not cost more than 3" (see below under "Performing a Charge").
Charge Range
A unit's charge must be directed toward a target (enemy unit) that is located entirely or partially within the area in front of the charging unit, extending 45 degrees to either side of the direction the charging unit is facing (see the illustration below). In order for an enemy unit to be considered within range, the base of at least one figure of the target unit must be entirely within the charge range of one figure in the charging unit.
A charging unit receives a 50% bonus to its movement allowance; thus, a unit with a normal move of 12" could charge a target as far as 18" away, at the outer limit of the unit's charge range. At the other extreme, a unit's charge range does not include the space immediately in front of the unit up to half of its movement allowance away, or out to a distance of 6", whichever is less. Thus, a unit with a movement allowance of 6" cannot charge a target that is 3" or less away from it; a unit with a move of 12" or more cannot charge a target that is 6" or less distant. If a charging unit contacts an enemy unit before moving this minimum distance, combat still takes place—but the attacking unit receives none of the combat benefits for charging. (In terms of realism, this rule simulates the fact that across a relatively short distance, the charging unit does not have enough room to build up the momentum needed for a thunderous impact against the target unit.)
Diagram caption (printed page 33): Charge range. This unit has a movement allowance of 6". If it charges straight ahead, it can contact a target unit that is at least 3" and no more than 9" away, as long as one figure of the target unit is inside the 90-degree arc.
Performing a Charge
Most of the charges that a player performs with his units will occur during his movement step. Occasionally a player will have a chance to make an opportunity charge (see the following section) during his opponent's movement step. The basic procedure for all charges is the same, regardless of when they take place.
First, the player makes a charge initiation check for the unit attempting to charge. If the unit fails this check, it cannot charge at any time during the current turn. If the check is successful, the charge proceeds.
The charging unit is allowed to change frontage, change facing, or wheel before charging—at no movement cost. However, this preliminary maneuvering can involve no more than 3" of movement. (For example, a regular unit could make a right face turn for 2" and then change its frontage by 1 figure, or it could perform a 3" wheeling maneuver.) Then the charging unit must move in as straight a line as possible to the target. As stated above in the section on "Charge Range," it can move up to 1 1/2 times its movement allowance.
After the unit has succeeded on its charge initiation check and performed a preliminary maneuver (if desired), the player measures the distance to the target unit. If, after measuring, the player discovers that the target is not in charge range, his unit must still move forward 1 1/2 times its movement allowance—and the would-be charging unit automatically becomes shaken. (Unless you are very good at judging distances, it's best not to take chances on trying to charge an enemy unit that you think is on the very outer edge of your unit's charge range.)
When an enemy unit is struck by a charging unit (just as when struck by any unit moving normally), the enemy cannot change frontage or facing, nor can it move, for the remainder of the turn.
Any unit that is declared to be charging must do so, either in a normal charge or an opportunity charge (see the next section); the player cannot change his mind later in the turn. If more than one enemy unit lies within a unit's charge range, and the enemy unit that had been designated as the target of a charge is allowed to move out of charge range, then another enemy unit within range must be charged instead. If all enemy units move out of charge range, the charging unit must still move forward (toward the designated target) and become shaken, just as if the owning player had underestimated the distance between the opposing units.
Opportunity Charges
An opportunity charge is a charge performed by a player during his opponent's movement step in reaction to an enemy unit's movement. A unit can make an opportunity charge if all of the following conditions are met:
- The charging unit has not yet moved during the current turn.
- The target unit is about to move, has been moved, or has changed facing or frontage.
- The opportunity charge is declared during or immediately after the target unit's move, before any other enemy unit is moved or reoriented.
Even if the above conditions are met, an infantry unit is not allowed to make an opportunity charge against a cavalry unit. (This reflects the reality that foot soldiers are not physically capable of intercepting and interrupting the movement of mounted troops.)
If an enemy unit has its move interrupted by an opportunity charge and the charge succeeds in contacting the target unit, then that unit cannot move any farther during the current turn.
A unit that has been designated to make an opportunity charge must make a charge initiation check. If no charge was declared for the unit during Step 1 of the turn, the unit's morale rating is modified by -2 for the purpose of this check. If the check is failed, the unit does not charge and cannot charge during the rest of the current turn. If the check succeeds, the charge takes place.
If the enemy unit that triggers an opportunity charge was itself charging the unit making the opportunity charge, the two units meet halfway between the locations they occupied when the opportunity charge was declared. (If a player waits too long to declare an opportunity charge, he may discover that the target unit is too close to be within the charging unit's charge range. In this case, the two units still come together for combat, but only the enemy unit receives attack bonuses for charging.)
Rout Movement
A unit that becomes routed has only one real objective: to get to a place of safety as soon as possible. Rout movement simulates the action of a unit whose morale has been shattered, and which is running away from the battlefield in panic.
The figures in a routed unit are turned, if necessary (no movement cost), to face toward the end of the battlefield where they began the scenario and away from the attack or threat that caused the rout. If these two directions are not the same, the unit's first priority is to head for "home." A routed unit will normally try to avoid coming into contact with other units (enemy or friendly), but will not stray too far from the most direct path possible between its present location and the place it wants to get to (the edge of the tabletop).
A routed unit always moves as far as possible (up to the limit of its movement allowance) in a straight line. It is allowed to move 45 degrees to either side (changing the direction of movement, but not changing facing) to avoid contacting a unit in its path, or to avoid being hemmed in by impassable terrain (see the following section, "Terrain Effects on Movement"). This oblique movement must be performed at the beginning of the unit's move if it is performed at all; a routed unit cannot, for instance, move 2" directly forward and then veer off to one side or the other.
A routed unit that cannot avoid touching an enemy figure is considered destroyed, and should be removed from the field and placed with the other casualties. A routed unit that cannot complete its movement because of battlefield terrain is also considered destroyed.
A routed unit cannot change frontage, unless that is the only way it can perform its rout movement. For instance, it can change frontage to squeeze through an opening on the battlefield if the unit would otherwise be blocked by terrain, friendly or enemy units, or other obstacles. A routing unit cannot rout through a gap too narrow to accommodate the widest stand of figures in the unit.
A routed unit cannot change facing, except if it needs to make a turn to get itself pointed in the right direction (toward the edge of the battlefield) just after becoming routed. The unit can veer up to 45 degrees as often as necessary to avoid contacting a friendly unit that lies in its path. However, any friendly units thus avoided might be forced to make a morale check; as explained in Chapter 3, a friendly unit must make a general morale check if a routed unit with an equal or higher morale rating comes within 3" of it.
If a unit cannot complete its rout movement because a friendly unit lies in its path (and all the routing figures cannot veer around it), then the friendly unit blocking the path must retreat 4" and (if it was in good order) become shaken. If this retreat still does not allow the routed unit to pass (or to complete its movement without making contact), then the blocking unit automatically becomes routed and performs its own rout movement before the original routed unit completes its move. This phenomenon can have a chain-reaction effect; any friendly unit that lies in the path of any routed unit is subject to being routed itself. (This is one good reason why players should be careful not to pack their units too closely together front to back—in the worst case, a single unit that routs has the potential to cause disruption throughout an entire army.)
A routed unit performs rout movement each turn until it rallies or it leaves the battlefield. If the unit does not rally and is not destroyed by running into an enemy unit or impassable terrain, then the figures in it are removed from play (and counted as casualties) as they leave the field. If not all of the figures in a routed unit leave the field in the same turn, the figures remaining on the battlefield can still rally and come back into play on the following turn.
Diagram caption (printed page 34, phase 1): Rout movement, phase 1. A unit of orcs has forced its way behind enemy lines, taking heavy losses along the way, and is now being engaged by elf pikemen.
Diagram caption (printed page 34, phase 2): Rout movement, phase 2. The orcs have been routed; they turn their backs to the elves and flee. By moving away from the elves at an angle, they can pass between the other two enemy units.
Diagram caption (printed page 35, phase 3): Rout movement, phase 3. If the routed orcs don't rally immediately, they'll be destroyed—because a unit of archers has moved up to block the orcs' only path of retreat.
Terrain Effects on Movement
Very seldom is the battlefield for a scenario composed of nothing but clear, flat ground. The presence of other physical features, known collectively as "special terrain," can have a significant impact on the outcome of a battle. Special terrain affects the movement of units as specified here; it can also affect combat, as explained in Chapter 5.
A unit must be in irregular formation before it can move in or through special terrain—unless it is moving along a road or trail that cuts through the special terrain. After emerging from special terrain onto clear, open ground, a unit can reassume regular formation (if it is otherwise able to do so) for the standard movement cost of 3".
Movement costs for various types of special terrain are applied to changes in facing and frontage as well as to normal travel. For example, in accordance with what is given below, the cost for an infantry unit to change frontage in light woods is 3" per 2 figures instead of 2"; a special unit making a left face turn on rough/rocky ground must use 8" of movement instead of 4".
LIGHT WOODS: Infantry units moving through light woods pay 3" of movement for every 2" (or fraction of 2") traveled through that terrain. Cavalry units in light woods pay 2" per 1" moved. Special units of cavalry size or larger cannot enter light woods; special units smaller than cavalry size are treated as infantry (3" per 2" or fraction thereof).
DENSE WOODS: Movement in dense woods is prohibited to all units except infantry. An infantry unit moving through dense woods pays 2" for every 1" moved.
ELEVATION: Elevation increases on the battlefield are shown in 1" increments (10' in scale). Generally, a unit pays 2" of movement to climb 1" of elevation. A scenario may specify that a change of elevation in a certain area is a steep slope, requiring 3" (or more) for a unit to ascend instead of 2". Some changes in elevation may be too steep to negotiate, either ascending or descending, such as the face of a cliff. Descending from a higher elevation to a lower one is done at no additional cost in movement (unless the particular rules for a scenario dictate otherwise). Note that the cost of movement while ascending a slope is cumulative with any other terrain costs that may apply; the cost for an infantry unit moving to a higher elevation within an area of light woods is 6" per 2" traveled.
SWAMP: Only infantry units can enter a swamp. Each 1" of actual movement through swamp costs 3" of a unit's movement allowance.
DEEP WATER: This terrain feature represents a stream, pond, lake, ocean, or other body of water having considerable depth and/or a soft, mucky bottom. It is a body of water that cannot be waded through by troops, and movement into it is prohibited.
SHALLOW WATER: This represents a body of water with a relatively solid bed (gravel or packed clay, not mud or quicksand), with water not more than shoulder-deep to creatures that might enter it. Any type of unit (infantry, cavalry, or special) can move through shallow water at a cost of 3" per 1" moved.
The depth of any body of water should be indicated in the setup information for a scenario. It is quite possible that a pool would be deep water to human (and similar-sized) troops, but shallow water to ogres and giants (large troops).
OBSTACLES: Obstacles include barriers such as walls, fences, hedges, gullies, and ditches. It usually costs 4" of movement to cross an obstacle, though some scenarios might specify different amounts (6" for a deep, muddy ditch, for example). Any type of unit (infantry, cavalry, or special) can cross an obstacle, but the unit must assume irregular formation in order to do so.
ROUGH/ROCKY: This terrain represents jagged rock outcroppings, boulder-strewn fields, steep-sided gullies, and other irregular features. Cavalry units cannot enter rough terrain, and other units pay 2" per 1" of movement through such an area.
BRUSH/SCRUB: This terrain is composed of shrubbery, moderately thick underbrush, and/or small trees. Any type of unit can move through brush at a rate of 3" per 1" traveled.
ROADS: A unit moving on a road that runs through an area of light woods, dense woods, swamp, rough/rocky ground, or brush/scrub does not suffer any movement penalties or restrictions because of the special physical features of the area; it is treated as clear, open terrain. The unit still pays the normal cost for moving uphill or for clearing an obstacle that lies in or across the road. A road may or may not include a bridge that allows the path to continue over a body of water; if there is no bridge, a unit moving along the road must pay the normal cost for crossing the water (or may be prevented from traveling farther, if it is prohibited from moving through the water).
TRAILS: A trail is similar to a road. But, because the path is narrower, a cavalry unit cannot move along a trail. (Large-sized or giant-sized figures may also be unable to benefit from a trail; the width of a trail and the largest figures that can use it should be specified in the setup information for a scenario.)
Terrain Effects on Charges
A unit can charge through an area of special terrain, if it is able to move through the type of terrain in question and if all of the following conditions are met:
- The target unit is not located in special terrain.
- The charging unit can pay the movement cost of getting through the special terrain and still have enough movement left (including its charge bonus) to contact the target.
- The charging unit, when it emerges from the special terrain, is at least as far away from the target as its minimum charge range.
Penalties (to the player) for miscalculation or mismeasurement are assessed just as if the charging unit had been moving across clear, flat terrain.
As noted earlier in the rules about performing a charge, a unit can cross an obstacle (fence, hedge, etc.) and still complete a charge, as long as the conditions given above are met. Note also that a unit attempting to cross an obstacle during a charge must make a successful charge initiation check in order to be able to proceed.
A unit cannot move uphill and charge in the same turn, even if it would have enough movement left after making the ascent to complete the charge. However, a unit can descend from a higher elevation to a lower one in the course of making a charge (unless the specific rules for a scenario dictate otherwise).
Favored Terrain
Some types of units in a fantasy milieu have a special affinity for certain types of terrain. When the roster for a unit in a scenario includes a mention of "favored terrain," the unit can move through the indicated terrain as if it were clear ground. Lizard men, being creatures native to the swamp, often have that terrain type listed as favored terrain. Likewise, dwarven infantry may be able to travel across rough or rocky ground with no movement penalty; elves on foot can move freely through light woods, and through dense woods as though the area was light woods.
Favored terrain is not always listed for a certain type of unit; the specification may appear in some scenarios but not in others. Special cases are possible, such as a unit of human "amphibious" troops that can negotiate swampy terrain as easily as lizard men can.
Terrain and Rout Movement
A unit performing rout movement does not incur any penalties for traveling through special terrain; however, impassable terrain is still impassable. For instance, a cavalry unit that routs can move through light woods, climb elevations, and clear obstacles as though they weren't there—but the unit is destroyed if its path takes it into dense woods, swamp, water, or rough ground. The "benefit" of not being slowed by terrain can often be a curse instead of a blessing, though; a routed unit that runs pell-mell through a forest could end up being wiped out because its movement takes it into contact with an enemy unit lurking at the opposite edge of the woods.
Caption (printed page 36): This elven army stands firm at the border of its forested homeland. Horse archers, lancers, and infantry will all face death before allowing the desecration of their pastoral realm by attackers from the wasteland in the distance.
Chapter 5: Combat
Combat is divided into two types: melee combat, which occurs between opposing figures in contact with each other; and missile combat, which occurs when one unit launches missiles (arrows, spears, catapult boulders, etc.) at another.
Melee and missile combat employ the same procedure to determine the effects of attacks. In melee combat, two units attack each other simultaneously, with losses removed from both sides after the fight. In missile combat, one unit attacks at a time—and there is often no return attack.
Much of the information in the combat rules is condensed and presented at the top of the Reference Card, which is printed on the foldout back cover and on the last page of this book.
Attack Procedure
In the system's most basic form, a player rolls a die for each attacking figure, scoring anywhere from 0 to 4 hits per roll. The player whose figures are being attacked then rolls one die per hit, to see if his unit's armor cancels any of those hits. All remaining hits are registered as casualties, often requiring figures to be removed from the table.
Rolling Attack Dice
When making an attack, a player totals up the number of figures eligible to participate in the attack, and notes the type of attack dice used by that unit.
Generally, the number of attack dice (AD) rolled for an attack is one per each attacking figure, though sometimes—most notably when it is charging—a unit will get extra attack dice. Roll all of the dice for one unit's attack at the same time, if enough dice of that type are available. Otherwise, roll all the dice available, add up the hits, and reroll enough dice to arrive at the total number of rolls needed.
For example, 11 trolls (AD 12) are attacking, but only four d12's are available. Roll the four dice, note the number of hits scored, roll them again and do the same thing, and then roll three of the four dice and add those hits to the final sum.
Scoring Hits
The higher an AD roll is, the more hits are scored by that roll. The Combat Results Table (given below, and also printed on the Reference Card) shows the number of hits scored by a certain die roll.
Combat Results Table
| Result of AD Roll | Hits Scored |
|---|---|
| 1-3 | 0 |
| 4-5 | 1 |
| 6-9 | 2 |
| 10-11 | 3 |
| 12 | 4 |
It's easy to see how a unit with larger attack dice has a greater ability to cause damage to the enemy. A figure in a unit with AD 4 has a 3 in 4 chance of not scoring a hit, and can never score more than one hit; a figure in a unit with AD 6 has a 50% chance of missing on its attack, and only a 1 in 6 chance of scoring two hits. At the other extreme, a figure in a unit with AD 12 will score at least one hit 75% of the time, and on the highest possible roll that single figure can inflict four hits on the enemy.
Continuing with the example of the trolls, let's say that the 11 figures make the following AD rolls: 1, 3, 3 (no hits); 4, 5 (1 hit each); 6, 8, 8, 9 (2 hits each); 11 (3 hits); and 12 (4 hits). The unit inflicts 17 hits on the defender.
Armor Checks
A hit scored on an AD roll does not necessarily result in a casualty for the defending unit, since the defender's armor rating (AR) must also be considered. When the total number of hits in an attack is determined, the player of the defending unit then rolls that number of 10-sided dice. Any die result equal to or greater than the defender's AR negates one hit (in effect, the attack did strike a figure, but that figure's armor prevented it from being damaged).
Suppose that the trolls attacked a unit of dwarven heavy infantry with an AR of 6. The player of the dwarves rolls 17d10, and nine of the results are 6 or greater. This means that of the 17 hits scored by the trolls, 9 are negated and only 8 actually hit home.
Many combat situations, explained in this section and listed on the Reference Card, will modify the AR of a unit under attack. A modifier may change the AR of only some of the figures in a unit. In such a case, attacks and armor checks are rolled separately for each group of figures.
Effect of Hits
The number of hits required to "kill" one figure is listed on a unit's roster. If the "Hits" number is 1, each hit against a unit kills one figure. If it is greater than 1, that number of hits are required to force the removal of a figure. For example, a unit rated at 4 Hits only loses a figure for every 4 hits that are inflicted on it.
If hits that don't require the removal of a figure are scored on a such a unit, those hits are noted by placing a d6 or similar marker adjacent to the unit, showing the number of hits it has suffered. If additional hits are scored against the unit later, the hits shown on the die are added to those new hits to see if a figure is removed.
For example, let's say the dwarves that took 8 hits from the trolls are listed as having 3 hits per figure. Thus, as a result of the attack just completed, two dwarf figures must be removed and two additional hits are recorded. A d6, with two pips showing, is placed with the dwarves to indicate the two additional hits. If the unit later suffers 2 more hits, the total of hits against it is now 4—so one more figure is removed and the die is turned to show 1 excess hit.
Note (printed in the book): Players may wish to use d6's of a different color from that of the playing dice for marking hits. This reduces the chances of a player accidentally scooping up his hit markers when he gathers dice for a shake.
Removing Casualties
The casualties removed from a unit can be taken from anywhere in the unit the owning player desires. Losses can be taken both from figures that are, and are not, in contact with enemy figures. If all the figures in contact with an enemy unit are removed, the two units are no longer considered to be in contact.
For example, a unit three ranks deep and six figures wide is engaged in melee combat all along its frontage and suffers 5 casualties. Among other possibilities, the player can remove five figures from the back rank (leaving one), or he can remove two from each of the back ranks and one from the front rank (narrowing the unit's frontage to 5), or the casualties can all be pulled from the front rank. Even in the latter case, however, the units would remain in contact, because one figure (all that remains of the front rank) is still engaged by an enemy figure.
If attacks and armor checks are rolled separately for certain groups of figures in a unit (because of differences in their modified AR), this does not affect the removal of casualties; lost figures can still be taken from anywhere in the unit.
If the proper number of figures cannot be removed from a unit because it contains multiple figures per stand, then a toothpick or pipe cleaner or some other similar marker can be used to separate casualties from figures that are still active. Any figure separated from the rest of its unit by a casualty marker is considered not to be on the battlefield. As the unit suffers additional casualties, the marker is shifted so that it separates all the lost figures from the rest of the unit. A stand of figures must be removed from the battlefield as soon as it becomes possible to account for casualties by doing so.
The morale rules (Chapter 3) explain when morale checks are required as a result of hits and casualties. Such checks are made after all casualties have been removed.
Special Attack Dice
In most cases, the entry under the Attack Dice (AD) heading on a unit roster is a single number, representing the type of dice (4-sided, 6-sided, etc.) that are rolled when this unit makes any attack. But for some units, this entry is more than a single number.
When one of a unit's two AD numbers is followed by an asterisk, dice of that type are used for a missile attack. For example, an entry of "6*4" means that the unit uses 6-sided attack dice when firing missiles, but 4-sided dice when it is in melee combat.
A number enclosed in brackets indicates the unit's AD for an attack that can only be used on the first turn of a melee. (Lances wielded by cavalry are the primary example of this attack form.) For example, an entry of "[12]8" would describe a unit equipped with lances and long swords. The unit has 12-sided attack dice on the initial turn of a melee (when using the lances), but if it remains engaged with the same enemy unit for two or more consecutive turns, it must use 8-sided dice (for the swords) thereafter until contact with the enemy is broken. Then, the next time it contacts an enemy unit (either the same one or a different one), it is again eligible to use 12-sided attack dice at the start of that melee.
When two numbers are separated by a plus sign, each number refers to a die of a certain type. Both dice are rolled at the same time and hits are tallied for each die individually; the die rolls are not added together into one final attack dice roll result. The number of hits scored by each die is added together to determine the total number of hits inflicted. For example, "12 + 8" means that each attack involves rolling a d12 and a d8. If the results were 11 and 5, respectively, the attack would cause 4 hits total—3 from the first attack and 1 from the second. Note that while no individual die roll can ever cause more than 4 hits, a combination of die rolls can. If this attacking figure had rolled 12 and 7, the attack would have caused 6 hits—4 from the d12 attack and 2 more from the d8 attack.
Unless special rules for that figure state otherwise, all of a figure's attack dice constitute a single attack.
Modifiers to Attack Dice
Certain circumstances during melee or missile combat will increase or decrease the number of attack dice a unit is entitled to. Such modifiers are given as additional dice (x 1 1/2 AD, for example) or fractions (1/2 AD) of the number of figures you have attacking. (When making this or any other calculation in the BATTLESYSTEM™ game, always round fractions up.)
The example of "x 1 1/2 AD" indicates that the attacking unit gets 1 1/2 times its normal number of attack dice. Thus, a unit containing six figures and benefiting from a x 1 1/2 AD bonus gets 9 (6 x 1 1/2) dice for this attack. A unit containing seven figures would have 11 attack dice (7 x 1 1/2, rounded up). Additional attack dice are always the same type of die as normally used for the unit.
Modifiers to Armor Rating
Other conditions, in melee or missile combat, will modify the armor rating of a unit hit by an attack. Such modifiers are always cumulative, except that no AR can be modified above AR 10 (the equivalent of no armor) or lower than AR 2.
A modifier to armor rating always represents some aspect of the target unit. Perhaps it is under attack in the flank (+2 to AR) or from the rear (+4), or protected by a wall (-4). Most of these modifiers are listed on the Reference Card.
Melee Combat
Whenever figures from opposing units come together on the battlefield, melee combat can take place. In most cases, each side is considered to be attacking the other one simultaneously; each player rolls the appropriate number of attack dice and checks to see how many hits are negated by the opposing figures' armor. Then casualties are recorded and figures are removed from each side at the same time. If opposing figures remain in contact after the combat results are applied, the combat can continue on the following turn.
Attack Eligibility
In general, figures that are in base-to-base contact with one or more enemy figures during Step 6 (Melee Combat Step) can make attacks and be attacked, with two restrictions:
- ROUTED figures cannot make melee attacks.
- MISSILE-FIRING figures that shot their weapons during either movement step of the turn cannot make melee attacks.
Note that "base-to-base contact" applies only to individual figures, not to an entire stand of figures mounted two or three (or more) to a base. When a figure is part of a multiple-figure stand, the base of that single figure (for purposes of determining attack eligibility) is only the part of the stand occupied by that figure.
Contact need not be front-to-front; a figure can attack an enemy that is contacting it along the side or the rear of its base. However, a figure that is being attacked from the side or the rear suffers a penalty to its armor rating when defending against that attack (see below).
Diagram caption (printed page 40): Eligibility to attack. The orc at the bottom of the photo can't attack, since the unit is irregular and the base of that figure is not contacting an elf figure. In contrast, every one of the elves can attack, since they are in regular formation and armed with pikes.
Effects of Formation on Attacks
If a unit is in irregular formation, only those figures in actual physical contact with enemy figures can attack.
If a unit is in regular formation, an additional one figure to the right and one figure to the left of the figures actually contacting the enemy's figures can also fight. In addition, figures in the second row of a regular formation can fight if the unit is armed with spears, pikes, or pole arms (simulating their ability to strike between and over the friendly troops in front of them, because of the length of their weapons). The attacking player rolls 1/2 AD for every figure in the second row (rounding up). Any figure in the second row that is adjacent to an attacking figure in the front row of the unit is eligible to attack in this manner.
In addition, figures in the third row of a unit armed with pikes can also take advantage of this special attack opportunity. (Pikes are extremely long handheld weapons, enabling the wielder to strike between and over two rows of friendly figures.) Remember, though, that the unit must be in regular formation for figures to attack from the second or third row.
Melee Advantage
Certain melee combat situations give one unit an advantage over its target. In a BATTLESYSTEM™ scenario, this allows the unit with the advantage to resolve its attacks first, inflicting casualties and forcing morale checks before the target unit makes its attack. If the target unit withdraws or routs as a result of the melee, it does not get to make its attacks.
A unit receives the melee advantage bonus if it is in good order; if at least some of the attacking figures are contacting the enemy with the fronts of their bases; and when at least one of these conditions is met:
- It is armed with pikes and attacking a unit that is not armed with pikes.
- It is armed with halberds, spears or lances and attacking a unit that is not armed with pikes, halberds, spears, or lances.
- It is attacking the rear of an opponent (but only if every attacking figure is attacking from the rear).
- It is composed of figures that are similarly armed but larger than the defenders; for instance, men with short swords get a melee advantage against goblins that are also carrying short swords. (However, being of smaller size than the defender does not negate an advantage gained for some other reason; for example, humans with spears still have an advantage against ogres with clubs.)
Armor Rating Modifiers
The following situations all change the armor rating of the target of an attack. (Remember, negative numbers improve AR, while positive numbers reduce armor protection.) The modifiers described below are cumulative; the player owning the target unit adds together all of the adjustments that apply in a certain situation and modifies the AR of his unit (or some of the figures in the unit) before rolling armor checks for the current turn of combat.
- −2 if target is on higher elevation than opponent
This modifier is used whenever the bases of more than half the target figures rest on a higher piece of terrain than the bases of all the attacking figures. The benefit applies to figures defending the top of a building or ravine and similar positions but not the uphill side of a normal slope.
- −2 if target is in favored terrain
When all the figures under attack occupy terrain favorable to their creature type (see page 36), the AR of the target is improved by 2.
- −2 if target figures are protected by a wall, breastwork, doorway, window, or similar cover
This benefit always applies to both units in a melee if it applies at all, since the barrier protects each combatant from the other. Note, however, that it pertains only to figures that are protected; if only part of a unit is behind a wall, then the AR of unprotected figures does not receive this modifier.
- +2 if target is at lower elevation than opponent
This is the converse of the first modifier given above, and applies to a unit at lower elevation whenever the previous modifier applies to a unit on higher ground.
- +2 for target unit being attacked from flank
If any figure in the target unit has the side of its base in contact with an enemy, the unit suffers this penalty. If the corner of a figure's base is in contact with the front side of an attacking figure, the defender suffers this penalty if the angle between the attacker's front side and the defender's flank is smaller than the angle between the attacker's front side and the defender's front or rear side. (See the illustration on the following page.)
- +4 for target unit being attacked from rear
If any figure in the target unit has the rear of its base in contact with an enemy, the unit suffers this penalty. If one of the rear corners of a figure's base is in contact with the front side of an attacking figure, the defender suffers this penalty if the angle between the attacker's front side and the defender's rear side is smaller than the angle between the attacker's front side and the defender's flank.
Diagram caption (printed page 42): Flank attack. The combat at left is not a flank attack, since the horseman is facing more to the front of the giant than to the side. The combat at right is a flank attack.
Attack Dice Modifiers
In certain situations, attacking figures receive additional attack dice (over and above the normal one per figure), to reflect their increased ability to inflict hits on the enemy because of the circumstances. These AD modifiers are as follows:
- x 2 AD for figures in a charging cavalry unit. This adjustment applies only to figures that are eligible to attack the unit that was declared as the target of the charge. In other words, the attacker does not get the x 2 bonus against a second enemy unit that is incidentally contacted by the attacking unit at the end of its charge. (This could occur, for instance, if two enemy units were adjacent to each other side-to-side.) This modifier only applies during the first turn of combat after a charge is completed.
- x 2 AD for figures set to meet a charge. This modifier applies to figures armed with spears, pikes, or other pole arms, when those figures are the target of a charge and when the owning player has declared that the troops have set their weapons in anticipation of being hit by the charge. A figure set to meet a charge only receives this AD bonus against an attacker that makes contact along the defender's front side; if the figure is hit in the flank or in the rear, the bonus is not granted.
- x 1 1/2 AD for figures in a charging infantry unit. For the restrictions that apply to the awarding of this bonus, see the description above of the AD bonus for charging cavalry figures. Remember that calculations are always rounded up, so that (for instance) a charging infantry unit with five figures eligible to attack receives 8 attack dice for the first turn of combat following the completion of the charge.
Missile Combat
A unit equipped with missile weapons has an obvious and important advantage in combat: It can attack from a distance, inflicting damage on the enemy without necessarily exposing itself to attack—unless, of course, the enemy also has missile-firing capability. Unlike melee combat, missile combat can take place during more than one step in a turn.
Attack Eligibility
The movement rules (Chapter 4) detail when and how often missile troops can use their missiles during a turn. Within those rules, these conditions also apply:
Missile-firing figures can only attack enemy figures located in front of them, within an arc 90 degrees wide (45 degrees to the right and left of the center of the figure's base). This target area is determined on a figure-by-figure basis, which means that in some cases not every figure in an attacking unit will be able to fire, and not every figure in the defending unit will be within an attacking figure's target area. (See the illustration on the top of page 43.) In addition, the target figures must be within range of the missile troops.
Ranges for missile weapons (recorded on the unit roster) are expressed as three distances, indicating short-, medium-, and long-range shots. For example, longbow range is 7"/14"/21". A target more than 7" distant, but 14" or less away from the firing unit, would be attacked at medium range. A target more than 21" away could not be fired upon.
Unlike the determination of target area (which is done on a figure-by-figure basis), the determination of range is performed once. The distance from the center front of the firing unit to the nearest figure of the target unit determines the range at which all attacks are made. (See the illustration on the bottom of page 43.)
A missile unit on higher ground than its target receives a bonus to its range limits; see the section on Elevated Attack, page 44.
Up to two rows of missile troops can fire at a target. Figures in the third row or deeper cannot fire. Thus, a missile-firing unit with a frontage of 6 and a depth of 3 ranks could fire with as many as 12 figures (the number of figures in the front and second ranks combined). If the same unit made a right face turn so that it had a frontage of 3 and a depth of 6, then only 6 figures would be eligible to fire.
No missile fire is allowed into melee; that is, a unit with missile weapons that is engaged in melee cannot use its missiles, either against the unit it is in contact with or against a different enemy unit that happens to be within its target area. Also, a missile unit cannot fire against an enemy that is being engaged in melee by another friendly unit.
Ammunition
Missile units equipped with normal (nonmagical) projectiles are assumed to have an unlimited supply of ammunition, unless the unit roster for a certain scenario specifies otherwise. Units that are carrying magical projectiles generally do not have an unlimited supply of those weapons. Unless the scenario rules specify a different amount, assume that any unit so equipped has enough magical projectiles for two volleys. The magical weapons can be used whenever the owning player desires; before and after the special weapons are fired, the unit uses nonmagical weapons for its attacks.
Diagram caption (printed page 43): Missile target area. Any enemy unit within the arc described by the solid lines can be fired upon by at least some of the figures in this missile unit. Some determinations may have to be made on a figure-by-figure basis; for example, the dotted lines show the target area of the figure on the left side of the front rank.
Diagram caption (printed page 43, lower): Measuring missile range. The distance from a missile-firing unit to its target is measured from the center front of the firing unit to the center of the side of the target unit that is facing the attackers.
Line of Sight
Before a missile attack can take place, a line of sight must be confirmed: Can the missile troops see the target unit? Line of sight applies to each attacking figure—it is quite possible that half of a unit will be prevented from shooting by a blocking feature of the battlefield. A line of sight is good if any figure in the target unit can be seen by the attacking figure.
However, casualties must be removed from among figures that are in the attacker's line of sight, and if the attacker scores more hits than the number of figures that are eligible targets, then the excess hits are lost.
Note: If part of a unit shoots missiles, that attack counts as an attack for the entire unit.
Line of sight is blocked if there is a hill or high ground between the attacker and his target, but not if either the attacker or target unit occupies the high ground. Line of sight is also blocked by other units—generally, missile troops cannot shoot over a unit to hit a target beyond. (Exceptions: see the sections below on Elevated Attack and Indirect Fire.)
Dense woods also blocks line of sight, if at least 2" of woods separates the target and attacker. Light woods will block missile fire if a 6" or greater barrier exists.
Diagram caption (printed page 44): Line of sight. Because a clump of trees stands between this line of archers and their potential targets, not all of the enemy figures can be fired upon by all of the archers. Some of the archers on the extreme left don't have shots against the unit on the right, and many of the archers on the right side can't see the two units on the left. In cases such as this, eligible attackers and eligible targets often have to be determined on a figure-by-figure basis.
Buildings and walls block line of sight, except if the target is behind windows, doors, arrow slits, or other apertures (see "Modifiers to Missile Combat" on the next page).
Elevated Attack
A missile-firing unit on high ground (or on some kind of a platform) can sometimes shoot over an intervening unit, at a target unit beyond. If the intervening unit is closer to the attacker than to the target, it has no effect on the line of sight of the elevated missile troops. This opportunity is also available to large-sized troops at the same elevation as the target, as long as the unit they shoot over is composed of man-sized or smaller creatures, and to man-sized troops firing over smaller than man-sized creatures.
A missile-firing unit at a higher elevation than its target enjoys a benefit to the range at which it attacks, equal to 1" of extra distance for each 1" difference in elevation. For example, the normal range for a longbow is 7"/14"/21". For a unit firing down upon a target from a 2" elevation, the range figures for its longbows are increased to 9"/16"/23".
Indirect Fire
A missile unit can sometimes shoot over a unit that would otherwise block its line of sight, by using indirect fire. The intervening unit must be friendly to the missile troops; indirect fire is never allowed over enemy troops. In addition, the intervening troops can be no closer to the target than they are to the attacker. Figures attacking by indirect fire suffer a 1/2 AD penalty to their attack dice; that is, they only roll half as many attack dice as they would for a normal shot.
Modifiers to Missile Combat
Several factors (some of which are described above) can affect the success of a missile attack, either by reducing the number of dice the attacker rolls; by altering the range of the attacker's weapons; or by changing the armor rating of the defender. These factors, and the modifiers that apply to them, are listed below.
Elevation and Range
A missile-firing unit on higher ground than its opponent can shoot farther than usual. For every 1" of elevation of the attacker over the target, the upper limit of each range category is increased by 1", up to a maximum benefit of 3".
Range
Against a target at short range, the attacking unit receives its normal number of attack dice. For an attack at medium range, the attacker suffers a penalty of 1/2 AD, or one attack die for every two figures (rounded up). For an attack at long range, the penalty is 1/3 AD, or one die for every three attacking figures.
Indirect Fire
As stated in the preceding section, an attacker using indirect fire suffers a penalty of 1/2 AD.
Target AR Modifiers
For any of the following conditions that apply, the armor rating of the target unit is altered. (Remember that an addition to AR is a penalty, a subtraction is a benefit.)
- +1 for a target at a lower elevation than the firing unit
- +1 for a target consisting of larger than man-sized creatures
- −3 if the target is screened
A target is screened if it is enveloped by darkness, fog, or smoke; if it is behind a hedge or some other low obstacle; or if it is separated from the attacking unit by less than 2" of dense woods or less than 6" of light woods.
- −4 for target figures protected behind arrow slits, loopholes, or some other kind of small opening
- −2 for target figures protected by a wall, parapet, doorway, or window
Rules on buildings, walls, and other constructions are covered in detail in the advanced rules, Chapter 7.
Penalties to a target unit's armor rating are cumulative, so that (for instance) a unit of large creatures at a lower elevation than the attacker has its AR modified by +2. If that same unit is in a valley that is cloaked in fog, then it also receives a -3 benefit for being screened; taking all of these factors into consideration, its AR for purposes of this attack is adjusted by -1.
However, the listed benefits to AR are not cumulative; if more than one of the conditions applies, only the modifier giving the greatest benefit is used. For instance, a target behind a wall (−2) and also protected by arrow slits (−4) receives a modifier of −4, not −6.
Basic Scenarios
Printed page 46. The scenarios on the following pages are examples of miniatures battles that can be set up and played using only the basic BATTLESYSTEM™ rules.
Each scenario description is two pages long. To simulate a real battle situation in which not all the facts are known by both sides, each page contains only the information that one side would have—its perspective on why the battle is occurring, its unit roster, what it needs to do to achieve victory, and possibly other facts depending on the scenario in question. To include this "fog of war" aspect in the playing of the scenarios, the player(s) for each side should only look at the page that pertains to that side.
The battlefield map for each scenario shows where various types of special terrain and other features are located. The scale of these maps is very close to 1:12 (1 inch on the map equals 1 foot on the table, assuming a table of 4' X 8' dimensions). With the page held in the normal position for reading, north on the map is always to the right.
In most cases, it's not necessary to place terrain and special features exactly where they appear on the maps, but players should take a certain amount of care to be sure that the table is at least a close approximation of what the map portrays.
It's also not necessary to have the exact types of miniature figures described in the unit rosters in order to play a scenario. For instance, if a scenario calls for goblins and you don't have any goblin figures, simply substitute another sort of figure of the same size, identify the unit as goblins (so that players on both sides know what's going on) and give those figures the appropriate statistics from the unit roster. In all cases, remember that although the players' enjoyment of a scenario may be enhanced by having all the "right" figures and terrain pieces, the battle can still be fun to play with some makeshift or substitute elements.
Basic Scenario 1: The King Will Come
Map: the printed battlefield map is not reproduced here; the setup areas it marks are described in the Setup paragraphs below.
King Filanor's Army
Background. The situation is not an uncommon one throughout history: A weak ruler, who ascended to the throne only through an accident of birth, has been displaced by his more powerful uncle. While the former king's son was out of the country, Filanor declared himself the new and rightful monarch.
Now the young man who would be king has stolen his way back into the homeland and has mustered a troop of soldiers and militia to reassert his claim to the title. Filanor, long expecting that a show of force would be necessary, has entrenched his own army in the southern end of a river valley. Guarding both banks of the river, he has arrayed his force so that his men can ride out to confront the bulk of the prince's troops, no matter which side of the valley the upstarts choose to move along.
As the mists of dawn rise slowly from the meadows surrounding the river, the prince's force is still too far away to be easily seen. But there is no mistaking the blare of battle trumpets in the distance: The battle is about to be joined!
Setup. Filanor's brigade must be set up before the prince's army takes the field. All of the king's units are placed within the area indicated on the map, with at least one unit on each side of the river.
Terrain. The river is deep water, and can only be crossed at the bridge or at one of the two fords. Movement through a ford costs 3" for each 1" traveled. If a routed unit cannot avoid running into the river, the unit is considered disbanded and destroyed.
Victory. Filanor's main objective is to cause all of the prince's troops to rout. The king wins if, at any time, his force contains the only unrouted unit(s) on the battlefield. The scenario ends as soon as the last enemy unit routs; it need not move off the table, and it does not get a chance to rally. Filanor can also win by eliminating all of the prince's troops, but this is not a desirable outcome since all of the soldiers on both sides are countrymen. If the last unrouted units on both sides become routed as a result of the same combat, the scenario is a draw.
Unit Rosters (AD / AR / Hits / ML / MV)
| Unit | AD | AR | Hits | ML | MV |
|---|---|---|---|---|---|
| 6 of Filanor's Knights (Medium cavalry) | [10]8 | 5 | 3 | 13 | 15" |
| 12 Swordsmen | 8 | 8 | 1 | 11 | 9" |
| 24 Reluctant Militia (Irregular formation only) | 6 | 9 | 1 | 10 | 12" |
| 24 Equally Reluctant Militia (Irregular formation only) | 6 | 9 | 1 | 10 | 12" |
Prince Dirkly's Force
Background. The situation is not an uncommon one throughout history: A ruler who is entitled to his throne as a birthright has been selfishly ousted from power by a close relative who considers himself a more capable leader. Good Prince Dirkly would be the first one to admit that he has a lot to learn about being a monarch—but that does not justify the actions of his devious uncle Filanor, who usurped the kingship while Dirkly was away on a diplomatic mission.
Now the young man who should be king has returned to his homeland and has pulled together a troop of soldiers. Realizing that the only way to oust the usurper is by a show of force, he has sent his men southward to drive Filanor's men out of the river valley.
Most of the farmers and villagers in the area have remained loyal to Dirkly, and have provided his force with information on where Filanor's troops are located. Dirkly hopes that this strategic advantage will be the first step along the road to regaining his throne.
As the mists of dawn rise slowly from the meadows surrounding the river, trumpets sound and the horses of the knights paw the ground in anticipation: The battle is about to be joined!
Setup. The prince's army takes the field after Filanor's forces have been set up. The units can be all on one side of the river or the other, or split between the two banks.
Terrain. The river is deep water, and can only be crossed at the bridge or at one of the two fords. Movement through a ford costs 3" for each 1" traveled. If a routed unit cannot avoid running into the river, the unit is considered disbanded and destroyed.
Victory. Dirkly's main objective is to cause all of the usurper's troops to rout. The prince wins if, at any time, his force contains the only unrouted unit(s) on the battlefield. The scenario ends as soon as the last enemy unit routs; it need not move off the table, and it does not get a chance to rally. Dirkly can also win by eliminating all of his uncle's troops, but this is not a desirable outcome since all of the soldiers on both sides are countrymen. If the last unrouted units on both sides become routed as a result of the same combat, the scenario is a draw.
Unit Rosters (AD / AR / Hits / ML / MV)
| Unit | AD | AR | Hits | ML | MV |
|---|---|---|---|---|---|
| 6 of Dirkly's Knights (Medium cavalry) | [10]8 | 4 | 3 | 14 | 15" |
| 20 Swordsmen | 8 | 7 | 1 | 12 | 9" |
| 18 Longbowmen (Range 7"/14"/21") | 6*6 | 8 | 1 | 12 | 12" |
| 12 Axemen | 8 | 8 | 1 | 12 | 12" |
| 24 Loyal Peasants (Irregular formation only) |
Basic Scenario 2: The Marching Horde
Monstrous Invaders
Background. The goblins of Blackfang Peak have waited long enough. They don't want to be the goblins of Blackfang Peak any more; instead, they are coming down from the mountains to lay claim to the fertile lowlands. Aided by a contingent of orc allies that are faster than and just as nasty as the goblins themselves, they hope to break through a narrow strip of flat ground between the forest and a ridge of hills bordering the lake.
They expect to encounter opposition in the form of a fragmented band of demihumans, most of which (the goblins assume) are lying in wait like cowards inside the edge of the forest. The goblins know from past experience that it's not a good idea to meet this enemy in head-to-head combat on a small battlefield; they will fight if they must, but they know that they have a better chance of achieving ultimate victory if they are able to pass the bottleneck and spread out into the wide-open terrain farther to the south.
The sky is gloomy—a great day for a battle, from the monsters' point of view. They inch forward to the edge of the battlefield and form into an organized mass. The lead unit is just about ready to start the advance. . . .
Setup. The forces of the Monstrous Invaders must be set up first, all units within the area defined on the map. Note that the overcast sky allows the goblins and orcs to fight with no penalty to their morale.
Terrain. The lake is deep water, impassable to all troops. (It exists only as a means of narrowing the gap through which the invaders will try to pass; to make the defenders' task more challenging, players may agree to remove the lake, widening the battlefield accordingly.)
Victory. The Monstrous Invaders score a major victory if at least two units with more than 50% of their original number of figures succeed in moving off the south end of the table. They achieve a minor victory if, at any time, the number of demihuman casualties plus the number of monster figures that have marched off the south end of the table is greater than the number of monster casualties.
Unit Rosters (AD / AR / Hits / ML / MV)
| Unit | AD | AR | Hits | ML | MV |
|---|---|---|---|---|---|
| 24 Goblins with Spears (Range 1"/2"/3") | 6*6 | 8 | 1 | 11 | 6" |
| 24 Goblins with Swords | 6 | 8 | 1 | 11 | 6" |
| 12 Goblin Cavalry (Riding wolves) | 10 | 8 | 2 | 12 | 18" |
| 12 Orcs with Axes | 6 | 8 | 1 | 11 | 9" |
Demihuman Defenders
Background. The goblins of Blackfang Peak are on the march. Scouts have alerted the peace-loving folk of the forest and grassland south of the mountains that an attack by a force of monsters is imminent. The elves, dwarves, halflings, and centaurs who share the land and normally stay out of one another's way now find it necessary to join forces to meet the common foe.
Each race of the defenders has sent a contingent of its best warriors to meet the threat. Although they realize that they are outnumbered, this is not a matter of great concern, because they plan to choose the place where the confrontation will take place and thus make the battlefield work to their advantage. By bottling up the invaders between the forest and the hills, they hope to make it impossible for the goblins and orcs to bring all their numbers to bear at the same time. Although they would settle for driving the monsters back where they came from, the defenders would prefer to eliminate every goblin and orc to prevent the survivors from gathering another invasion force.
The defenders are poised on the edge of the forest. They know where the monsters are located, and are just waiting for them to make a move southward. Or, if the spirit moves them, they might just move out first, occupy the hilltops and the valley, and dare the invaders to breach their lines.
Setup. After the forces of the invaders are set up, the defenders deploy within the southern part of the forest.
Terrain. The lake is deep water, impassable to all troops. (It exists only as a means of narrowing the gap that the defenders must guard; to make the invaders' task less challenging, players may agree to remove the lake, widening the battlefield accordingly.)
Victory. The Demihuman Defenders score a major victory if all of the invading units are eliminated or forced to rout back into the mountains (off the north end of the table). If any monsters are able to break through and move off the south end of the field, the defenders can still score a minor victory if, at the end of the scenario (no monsters left on the field), the number of monster casualties is greater than the number of demihuman casualties plus the number of monster figures that have marched off the south end of the table.
Unit Rosters (AD / AR / Hits / ML / MV)
| Unit | AD | AR | Hits | ML | MV |
|---|---|---|---|---|---|
| 15 Elf Longbowmen (Range 7"/14"/21") | 6*8 | 7 | 1 | 12 | 12" |
| 18 Dwarf Axemen | 8 | 6 | 1 | 12 | 6" |
| 24 Halfling Spearmen (Range 1"/2"/3") | 6 | 8 | 1 | 11 | 9" |
| 8 Centaur Lancers | [12]8 | 7 | 3 | 13 | 18" |
Basic Scenario 3: Attack from the Swamp
Defenders of Freedom
Background. The swamp is a place where most sensible men do not dare to tread. Moving through the muck and mire is difficult and dangerous, because of the terrain itself and even more so because of the inhuman and evil creatures that dwell within it.
But all of that does not mean that men and their allies can afford to ignore the swamp; in fact, quite the opposite is true. For as long as the natives of this area can remember, garrisons have been set up and manned around the edge of the bog, to make sure that the fiends of the swamp do not emerge and take over the surrounding countryside. This outpost is one of the most important and most heavily staffed; the Defenders of Freedom know, as do the swamp creatures, that if this position is overrun, no one anywhere else in the land will be safe.
Things have been quiet for a long time . . . too long. The defenders have no way of knowing for sure, but warriors' intuition tells them that the uneasy peace is about to be shattered. The humans and demihumans deploy as though they expect an attack at any minute—and they are about to be proven right.
Setup. Units of the Defenders of Freedom are set up first, in and around the area enclosed by a low stone wall. The wall used to serve as a fence around a farmhouse and outbuildings, all of which were burned to the ground during the swamp fiends' last assault on this area.
Terrain. The wall is in the shape of a square with one corner and part of one side missing. Each full side is 12" long, and the gap along the southern edge is 6" wide. The wall is 4 feet high; dwarves and halflings can cross the obstacle at a movement cost of 6", humans and elves at a cost of 4", and the knights (on their horses) at a cost of 2".
Victory. The Defenders of Freedom give no quarter and expect none. The battle is a fight for survival; the defenders win if they eliminate all of the swamp creatures from the battlefield. The defenders can also claim victory if all of the remaining monsters rout back into the swamp. When a routed monster unit ends its move in the swamp, it is considered eliminated; it need not move all the way off the table.
Unit Rosters (AD / AR / Hits / ML / MV)
| Unit | AD | AR | Hits | ML | MV |
|---|---|---|---|---|---|
| 8 Knights of the Red Badge | [12]8 | 5 | 3 | 14 | 15" |
| 12 Elf Longbowmen (Range 7"/14"/21") | 6*6 | 8 | 1 | 12 | 12" |
| 16 Human Swordsmen | 6 | 7 | 1 | 11 | 9" |
| 12 Halfling Shortbowmen (Range 5"/10"/15") | 6*6 | 8 | 1 | 11 | 6" |
Lean, Mean, and Green
Background. The swamp is a place where cowardly humanoids do not dare to tread. If humans and their allies had the courage to meet the denizens of the bog on their own terrain, the battle for control of the countryside would have ended long ago in favor of the lizard men and their compatriots.
As it is, however, the men insist on staying just out of easy reach, hidden in forests or behind barriers, requiring the lizard men to carry the fight to their enemies. If the swamp creatures are forced to come out of their element and fight the defenders on dry ground, then that is what they will do. The humans can try to hold their defensive positions, and they may succeed in bringing down some of the marauders from the swamp, but considering the power of the forces that have allied with the lizard men, eventual triumph is a certainty.
Things have been quiet for a long time . . . too long. The lizard men have recouped from earlier defeats, and now are ready to begin their most vicious assault ever on one of the humanoids' most fortified positions. Imagine the look of terror on the cowards' faces when they discover that the swamp is not the only ground they have to worry about guarding. . . .
Setup. After the defending units are set up, the forces of the Lean, Mean and Green alliance are placed along the northern edge of the battlefield. One unit of lizard men must be set up in the swamp; the ogres and the trolls can be either in the swamp or on the clear terrain adjacent to it. The other unit of lizard men can be placed anywhere within the swamp (inside or outside the setup area).
Terrain. The wall is in the shape of a square with one corner and part of one side missing. Each full side is 12" long, and the gap along the southern edge is 6" wide. The wall is 4 feet high; lizard men can cross the obstacle at a movement cost of 4", ogres and trolls at a cost of 2".
Victory. The Lean, Mean and Green alliance gives no quarter and expects none. The battle is a fight for survival; the swamp creatures can only win if all of the defenders' units are eliminated from the battlefield. If a routed swamp-creature unit ends its move in the swamp, it is eliminated; the unit need not move all the way off the table.
Unit Rosters (AD / AR / Hits / ML / MV)
| Unit | AD | AR | Hits | ML | MV |
|---|---|---|---|---|---|
| 6 Trolls | 12 | 6 | 4 | 13 | 12" |
| 12 Ogres | 10 | 7 | 2 | 12 | 9" |
| 20 Lizard Men (Irregular formation only; Favored terrain: Swamp) | 10 | 7 | 2 | 12 | 12" |
| 20 Lizard Men (Irregular formation only; Favored terrain: Swamp) | 10 | 7 | 2 | 12 | 12" |
Chapter 6: Intermediate Rules
These rules expand the basic version of the BATTLESYSTEM™ game. They include information on skirmish units, primitive firearms, special formations, chariots and other battle platforms, unit discipline, and the roles of individual figures as commanders and heroes.
It's not necessary to use all of these rules; in fact, some of them may not even apply in a given scenario. However, it's a good idea to become familiar with these rules and put at least some of them into play before proceeding to the advanced rules, given in the following chapter.
Skirmishers
Skirmishers, or skirmish units, are fast-moving, lightly armored troops, often armed with missile weapons such as bows and arrows. They are more mobile than other kinds of troops, and for this reason skirmishers are often used as an advance force that can move out ahead of the main body of an army and make contact with or shoot missiles at the enemy (often preventing the enemy from moving any farther) in preparation for a full-scale assault by the units that are following them into battle.
Skirmishers must be mounted one figure per stand, on bases that are larger than those used for other kinds of troops: 25 mm square for smaller than man-sized infantry; 30 mm for man-sized infantry; 30 or 35 mm for large creatures; and 40 mm square (or larger) for giant-sized creatures. Cavalry skirmishers are mounted on rectangular bases: 25 or 30 mm wide for small-sized figures, 30 or 35 mm wide for man-sized, and at least 35 mm wide for larger types of creatures.
Skirmisher Formation
Skirmishers cannot enter regular or irregular formation. Each figure in a skirmish unit must be at least 1/2", and not more than 1", away from another skirmisher in the unit. All the figures in the unit must be linked together through a loose chain of bases; it is illegal to split up a skirmish unit into groups separated by more than 1".
The figures in a skirmish formation must obey this restriction at the end of their movement step. If the figures are spread too far apart (or packed too tightly) at that time, the unit routs. If combat losses or some other factor drive the unit apart during a later part of the turn, the unit still has until the end of its next movement step to regain its formation.
Skirmisher Movement
Unlike figures in other units, skirmisher figures are moved individually. However, one figure must complete its move before the next is moved—and, as with all types of troops, the entire unit must be moved before the figures of another unit can begin to move.
Each figure in a skirmish unit can change its facing (by turning or wheeling) at no movement cost, paying only for the distance actually moved from one location to another on the battlefield. Also, each figure pays for movement separately; for example, if part of a skirmish unit moves on a path that takes it across an obstacle, only those figures that move through the obstacle are required to pay the cost of doing so.
A skirmish unit can move through another friendly skirmish unit at no movement penalty. When the skirmishers are finished moving, however, the two units must be separate from each other—you can't intermingle figures from two units of skirmishers into a single formation. Skirmishers cannot move through a friendly unit that is not also a skirmish unit.
Skirmishers can move through light woods without incurring a movement penalty, and they treat dense woods as light woods. Skirmishers can cross obstacles by paying only half the movement penalty assessed to other troops (usually 2" instead of 4", but may vary per obstacle).
All other special terrain affects the movement of skirmishers as it does all other troops.
Caption (printed page 54): An ogre stands ready, arrayed for battle.
Skirmisher Combat
Skirmishers perform in combat the same as all other troops, except for these differences:
Charging/Contacting Enemy Troops: Skirmishers cannot declare charges. They cannot advance into contact with the front sides of enemy figures in regular formation. They can advance to contact the flanks and rear of a regular formation unit, or against any side of an irregular unit. They can stand and defend normally if an enemy unit moves into contact with them. (Also, see Skirmisher Withdrawal and Charging Skirmishers, pages 55-56.)
Melee Casualties: When melee combat inflicts casualties on a skirmish unit, those casualties must be accounted for by removing skirmishers that are in contact with enemy figures. If all skirmishers in contact are eliminated, additional losses are taken from the skirmishers nearest the casualties.
Missile Casualties: When missile combat inflicts casualties on a skirmish unit, the attacker chooses which of the defender's skirmisher figures are removed. Losses must come from skirmishers within the proper range category (or closer) of the middle of the firing troops. For example, it is illegal to take a medium-range shot at a skirmish unit and then take casualties from skirmishers at long-range distance—unless all the medium- and short-range targets are first removed, and those removals do not account for all the hits inflicted.
Caption (printed page 55): Skirmisher movement. Before moving, this skirmish unit was in a roughly straight line (left side of photo), with the figures 1/2" apart. After the unit moves (right side), the three figures that had to clear the hedge are lagging behind the other figures, which are now separated from each other by 1". (One figure has moved out of the photo.)
Skirmisher Withdrawal
Skirmishers can perform a special kind of movement, called skirmisher withdrawal. Like an opportunity charge, skirmisher withdrawal always occurs during the opponent's movement step. Skirmisher withdrawal can be declared while the opponent is charging with or moving a non-skirmish unit, unless one of these conditions is true:
- The opposing unit that is moving or charging has a greater movement allowance than the skirmish unit.
- The opposing unit is charging, and it has a movement allowance equal to that of the skirmishers.
- Any figure of the skirmish unit is in contact with an enemy unit.
When a player declares skirmisher withdrawal, the opponent immediately ceases his movement. The skirmishers can then withdraw a distance of up to half their movement allowance.
If the withdrawing skirmishers have missile weapons, and would normally be entitled to fire them during this movement step, they can fire before they withdraw. Whether or not they shoot, withdrawing skirmishers can always be moved backward a distance of up to half of the unit's movement allowance.
Each figure in the withdrawing skirmish unit must move to the rear (angling no more than 45 degrees to either side), and at the end of its withdrawal, its facing can be changed to whatever direction the owning player desires. A withdrawing skirmisher cannot move into contact with an enemy figure. A withdrawing skirmisher that moves as close as 3" away from an enemy figure must cease moving at once. If it begins withdrawing when it is 3" or less away from an enemy figure, it can only move in a direction that takes it farther away from that enemy.
If a figure in a skirmish unit is confronted by enemy figures from more than one direction, it must withdraw along a path that takes it away from all of the enemy figures. If any figure of a skirmish unit cannot withdraw because it is surrounded by nearby enemy figures (or impassable terrain, or friendly units that are not skirmishers, or a combination of all three), then that entire skirmish unit cannot withdraw.
Skirmisher withdrawal can only be performed once per turn by any given skirmish unit. If, after the unit withdraws, an advancing enemy unit still makes contact with it, the skirmishers must fight a normal melee. Skirmisher withdrawal does not affect a skirmish unit's ability to move during its own movement step.
Skirmisher withdrawal is never required; a unit of skirmishers can stand and meet the advance of the enemy.
Once a figure in a moving unit (in any formation) comes into contact with a skirmisher, that figure must cease moving. As with any unit, other figures can keep moving until they, too, come into contact with skirmishers or reach the limit of their movement allowance.
Charging Skirmishers
When declaring charges for his units, a player can designate an enemy unit as the target of the charge even if the path to that unit goes through one or more units of enemy skirmishers, because it is possible for a charging unit to blast through a line of skirmishers and continue its charge against units beyond.
If a charging unit contacts enemy skirmishers before it has gone its full normal movement (not including the charge movement bonus), a special melee combat is resolved immediately. If all skirmisher figures in the path of the charging unit are eliminated as a result of this combat, the charging unit can continue its charge. However, the charging unit also has the option of calling off the charge after the combat (in case the skirmishers scored enough hits to severely weaken the unit).
A charging unit with sufficient movement can attack and pass through several groups of enemy skirmishers during a single charge.
Battle Platforms: Chariots, Elephants, and Battle Beasts
A battle platform is any vehicle or structure, usually designed to carry troops, that can be moved quickly around the battlefield while being pulled or carried by a large animal. In BATTLESYSTEM™ scenarios, the most often seen types include chariots pulled by horses or other animals, elephants with howdahs (platforms) mounted on their backs, and battle beasts—dragons or other huge monsters equipped with platforms or enclosures that can hold troops.
At least one riding figure is required to control the platform; all other figures carried aboard can participate in missile or melee combat. An animal pulling or carrying an empty battle platform cannot move unless it is performing rout movement (see below).
A battle platform has its own AD figure, and adds its attack die roll to the attack of each of the figures it is transporting when they enter melee combat. Missile troops aboard a battle platform can fire as if they had remained stationary during a turn, even if the platform moves. Archers in chariots, for example, could fire twice during a turn (during the movement steps or the Missile Combat Step) even if the chariots move their full allowance. The troops on a battle platform can engage in melee combat even if some or all of them have fired missiles during the same turn.
Charging platforms are treated as cavalry, inflicting double AD against the target of the charge.
Routing of Battle Beasts
If an elephant or other large animal figure routs, it will not necessarily flee toward its own side of the board. Instead, roll a d12 for each unit of such beasts that routs to randomly determine its direction.
Orient the "12" result to north (think of the face of a clock) and rout the unit in the direction indicated by the roll. A result of "3" sends the unit east, for example, while "6" sends it south. The unit will veer within the allowances of the rules on rout movement (see page 33) to avoid units in its path.
If, however, the unit contacts any unit, friendly or enemy, during the course of its rout, melee combat is resolved immediately. If the unit struck by the routing unit fails to displace enough to allow the routing unit to pass, a new direction of flight is determined for the routing beasts.
Caption (printed page 56): A catapult backs up a sturdy unit of irregular infantry, with the artillery crew prepared to aim the weapon where it will do the most damage.
Special Formations
Special formations detailed here include shield walls, pike blocks, and mixed units of archers and melee troops. A unit is only eligible to use one of these formations if this fact is noted on the unit roster.
If an eligible unit is in regular formation, the owning player can declare that it is entering a special formation. This must be declared during the player's movement step, before the unit moves. A unit can be declared to abandon its formation at the start of a movement step in a subsequent turn. A unit automatically abandons a special formation if it goes to irregular formation, or if it routs.
Shield Wall
Regular units equipped with large shields can form a shield wall.
A shield wall gives the unit a bonus of -3 to its armor rating against missile attacks, and -1 against melee attacks. It only provides the bonus against attacks that hit the front of the unit; flank and rear attacks against a shield wall are resolved normally. A shield wall is of no benefit against artillery attacks (see the advanced rules, Chapter 7).
A unit employing a shield wall formation can only move half of its normal movement allowance.
Pike Block
A well-trained unit equipped with pikes can form a pike block.
A pike block can be used to defend a unit upon three of its flanks; only the rear of the unit is treated normally. This formation allows the unit to move up to half of its normal movement allowance while benefiting from the advantage of a unit with pikes set to meet a charge (x 2 AD versus a charging unit). If a pike block is engaged in melee combat, pikemen in the second and third rows of a formation, as well as those in the front row, can attack the enemy.
Mixed Lines
A unit armed with both missile weapons and melee weapons can employ this formation, in which all the missile-firing figures are grouped together with the melee troops arrayed around them or in front of them.
In a typical arrangement, troops using melee weapons are set up toward the front of the unit, with the missile troops in the rear. While the front rank is engaged in melee combat, the missile troops (assuming they are not in contact with enemy figures) can fire their weapons during the same turn.
The missile troops are not allowed to fire at enemy figures that are in base-to-base contact with friendly figures, but they can take pass-through fire against a foe before it contacts the unit the missile troops are in, without hampering the front rank's ability to meet the enemy in melee.
Forced March
Troops in good order can sometimes increase their movement allowance by 6" per turn by using a forced march.
The forced march must be declared before the unit begins moving, and before any measurement is made for the unit's move. The unit increases its movement allowance by 6". It cannot move into contact with or close proximity to enemy figures at any point during that move or when the move is completed. Whenever its path of movement would bring it less than 3" away from an enemy figure, the unit must either veer to avoid the enemy figure or cease its movement for the turn at that point.
After the unit completes its move it must perform a morale check, even if it did not use any of the extra movement granted by the forced march. A failed check reduces the unit to shaken status, but there is no additional effect; a unit is not forced to retreat as a result of failing this check (although it can retreat if desired).
A unit can continue to perform forced marches (one per turn) as long as it is in good order. A forced march cannot be performed in conjunction with a charge.
Caption (printed page 57): Heroes. A goblin scowls warily at anyone who dares to approach.
Heroes
Heroes are figures that represent individuals—those who command units and armies, and those who might stalk the field, seeking opponents to meet in single combat. The miniature figure representing a hero indicates a single person or creature, not 10 individuals (at the 10:1 ratio used for other figures). Also unlike other figures used with the BATTLESYSTEM™ rules, heroes do not need to be mounted on special bases of a certain dimension, though they can be so mounted if desired.
The word "hero," in this context, includes—in addition to the "good guys"—villainous humans and humanoids, and even nasty monsters such as dragons and giants. Wizards and priests, described in the advanced rules on magic (Chapter 8), are also treated as heroes. A set of rules, explained in this section, allows some heroes to be designated as commanders. A commander is placed with a unit of troops and serves to control that unit. If the rules on commanders are employed, a unit must have a commander in order to move and fight at full effectiveness. In the following text, "hero" is used to describe an individual figure that is not a commander, and thus not compelled to remain attached to the same unit for the duration of the battle.
Number of Heroes per Battle
When heroes are present on the battlefield (as per the scenario roster), in general there will be no more than one hero for each two units.
A hero can become a commander, taking over control of a unit, if the unit's original commander is killed. Also, it is possible for a hero to be designated as the army commander. This special individual is not assigned to a specific unit, but can move to take control of any unit. However, a commander who is replaced does not become a hero; the figure must continue to move and fight with the unit to which it is attached.
The Unit Roster
For the most part, the roster of an individual looks like that of a unit. Attack Dice, Armor Rating, Hits, and Movement all indicate the same functions. The only different category is Command Diameter (CD), which is substituted for Morale. This statistic is only used if the rules on commanders (see next column) are employed.
Commanders
A commander is any hero designated as the individual in charge of a unit or an army. If these optional rules are employed, players are allowed to add one hero (as a commander) to their army for each unit, and one hero to serve as the army commander.
The unit roster of a commander gives the individual's command diameter (CD), which describes the size of the circular area in which the commander exerts influence. The circle must include the commander, but need not be centered on the commander. All of the figures (troops) in a unit must be within the command diameter of their unit commander in order to be able to move or attack at full effectiveness.
Units that are not entirely within a single commander's CD are considered to be out of command. They remain out of command until they enter the diameter of the commander, or the diameter is shifted to include them (which can happen when the commander moves, or when the owning player states that the circle is being moved).
Caption (printed page 58): Command diameter. The individual figure has a CD of 12", large enough to put either one of these units—but not both—in command. If the CD circle is drawn with the commander in its center, then neither unit is in command.
Effects of Command
Figures must be in command to undertake several different functions. A shaken unit can only rally if all of its figures are in command. Units that are not in command cannot change frontage. A unit not in command cannot declare or perform a charge.
During the owning player's movement step, a unit's commander can move either before, during, or after the unit's move.
If a unit is not in command when it begins to move, its movement allowance is reduced to half of the normal amount, even if the unit becomes in command while moving.
Figures that are not within the command diameter of their leader at the time they make an attack receive only half the normal number of attack dice for that attack (1 AD per two figures, rounded up).
Charisma Bonus
Some commanders have a charisma bonus, listed as a note on the roster when it applies. These individuals, by force of personality and leadership, can increase the courage and ferocity of the troops under their command. This bonus applies to the morale of a unit under the character's command whenever the entire unit (or as much of it as remains in the battle) is within the commander's CD.
For example, a unit with a morale of 12 that is commanded by an individual with a charisma bonus of +2 functions as if it had a morale of 14 as long as it remains in command.
Discipline
Sometimes a unit can be overeager to see combat, charging against a hated foe when its commander might wish it to remain in place. In some cases, a discipline check is necessary to determine whether or not a commander retains control of his unit.
A unit's discipline is the same as its morale, and a discipline check is made the same way as a morale check. However, the modifiers that can affect a unit's morale do not apply to a unit making a discipline check.
Usually, only units of chaotic creatures are subject to discipline checks. (The troop type list, Appendix II, identifies which creatures are chaotic.) Non-chaotic creatures might be required to make a discipline check if they have a hated foe in the battle. (Hated foes are also listed in the troop type list, and should be noted on a unit roster before the start of the scenario.)
A chaotic unit must make a discipline check when:
- It is in good order and has an enemy unit in its charge range at the start of a turn.
A failed discipline check means that the unit will charge; no charge declaration or charge initiation check is necessary. (In this case, the owning player still receives the modifier to his initiative die roll for this charge, even though a charge was not technically declared for the unit.) If the discipline check is successful, the owning player can choose whether or not the unit will charge (and, as usual, a charge initiation check is necessary if a charge is declared).
- A unit in melee with the chaotic unit routs, or performs a fighting withdrawal.
A successful discipline check means that the chaotic unit can perform whatever task the owning player desires. Failure, however, means that the chaotic unit is required to make every effort to close with the retreating unit during its next movement step.
In addition, any unit must make a discipline check when it is in good order and has a hated foe in its charge range at the start of a turn. A chaotic unit has a -2 penalty to its morale rating when this check is required.
Caption (printed page 59): This elven axeman is a fine example of detail painting.
Moving and Fighting with Heroes
The movement allowance and combat abilities of a hero allow it the same movement and attack options as they would to figures in a unit. These combat rules apply to all heroes, including those used as commanders.
When a hero is in base-to-base contact with one or more figures of a friendly unit, the hero is considered to be attached to that unit, and can move and fight as part of that unit. This applies to commanders and also to heroes not used as commanders.
A hero moves like a figure in a skirmish unit; that is, it pays no extra cost for facing changes, and special terrain features don't slow it down as much as they do non-skirmish units.
The movement of a hero does not trigger an enemy unit's pass-through fire, opportunity charges, or skirmisher withdrawal. An enemy hero, however, can take pass-through missile attacks at other heroes and units. A hero cannot charge unless attached to a unit that charges.
In addition to its skirmisher-type movement, a hero can change facing at any time during a turn (just before being attacked, for instance, so that it can avoid being struck from the flank or the rear). During its movement step, a hero can freely move away from an opponent in contact with it; it need not flee or withdraw the way a unit does.
A hero can perform skirmisher withdrawal, with the same restrictions and procedures as for skirmishers.
A hero can attack any figure it touches, and be attacked likewise. When a unit in regular formation attacks a hero, the attacker does not get the benefit of additional attacks (one figure to the right and one to the left of the target) that it would receive against normal troops. In fact, no more than two figures of the same or smaller size, or one figure of larger size than the hero, can attack a figure representing an individual.
Also, the only way two figures can attack a hero is from two different sides—from the front and rear, or from the front and one side, or from both sides at the same time.
Heroes Fighting With a Unit
A commander or hero can be attached to a unit as explained above. The hero can be placed between two figures, or it can occupy a small space on the tabletop (only as large as the actual base of the figure). In either case, the addition of a hero to one of the ranks in a unit does not increase the width of that rank and does not require the unit to expand frontage in order to accommodate the hero.
The individual figure attacks along with the unit to which it is attached, and any hits that it scores are added to the damage done by the troops. One enemy figure (possibly two, if the hero is under attack from the flank or rear as well as the front) can be designated to attack the individual; hits inflicted by that figure apply against the hero, not the unit. A player does not have to designate a specific attack against an enemy individual.
Challenge to Heroic Combat
A hero can sometimes challenge an enemy hero to single combat, with the intention of eliminating the enemy hero or causing that individual to flee. A hero can challenge an enemy individual during the owning player's movement step, so long as the challenging hero has not moved during the current turn. Morale of nearby friendly units is temporarily raised when a challenge is issued or accepted.
A challenge can be issued to any enemy individual within 10" of the challenging hero. A hero can challenge another hero, or possibly a commander; however, a hero can only challenge a commander if the hero is attached to a unit that is in melee combat with the enemy commander's unit.
A commander can issue a challenge to another commander, or to a hero attached to a unit the commander's unit is attacking. For a commander to issue a challenge, neither he nor his unit can move during his movement step (though they can be engaged in melee).
Exception: If a commander's unit is engaged in melee with an enemy unit, he can challenge the commander of the enemy unit (or a hero operating with that unit), and then his unit can still perform wraparound movement before another turn of combat takes place.
The opponent must immediately respond to an individual's challenge, accepting or refusing it. If the challenge is refused, nothing occurs as a result—except that the morale of one or more of the challenging side's units will improve for the rest of the turn.
If the opponent accepts the challenge, the two figures are immediately moved to a point halfway between their previous locations and placed in base-to-base contact facing each other. If this location happens to be in the midst of a melee, the two individual figures will face each other, the flanks and rear of each one protected by friendly figures. No other figure can attack figures engaged in heroic combat.
The challenge combat must be fought with melee weapons. Each figure makes one attack during the Melee Combat Step of each turn. The combatants inflict hits upon each other until one figure is slain, or a player decides (during his movement step) to withdraw his figure from the duel.
Morale Effects of Heroic Combat
A unit commander can modify the morale of his own unit by taking part in heroic combat. A hero will modify the morale of the unit he is fighting with, if he is currently operating as part of a unit. Otherwise he can modify the morale of any single friendly unit that has at least one figure within 5" of the hero.
An army commander engaged in heroic combat can modify the morale of any of his units that have a line of sight to the heroic battle.
The morale effects are as follows:
- When a challenge is issued: +1 to the morale of any eligible friendly unit(s) during that turn.
- When a challenge is accepted: +1 to the morale of any eligible friendly unit(s) during that turn.
- When a challenge is refused: no morale effect to the refuser's unit(s), but the challenger still gets the +1 modifier for any eligible unit(s).
- When an individual breaks off a heroic combat, or is slain: The unit(s) on the same side as the defeated hero that received a morale benefit when the challenge was issued or accepted must make an immediate morale check without the +1 modifier, which is negated as soon as the defeated hero is killed or flees. In addition, the following morale modifiers immediately take effect: -2 to the defeated individual's unit(s) for this and the following turn, and +2 to the victorious individual's unit(s) during the same time.
Individuals as Missile Targets
An individual not attached to a unit is not eligible to be the target of a unit's missile attack. However, if a missile unit is firing at a target unit that contains one or more individuals, one firing figure can be allocated to shoot at each enemy individual figure in the firing unit's range. A moving hero, whether attached to a unit or operating by itself, cannot trigger pass-through fire from a missile unit—but other heroes can make pass-through attacks against the moving hero.
Showing Hits Against Individuals
Hits against individuals are marked with a d6 (or d12, if necessary). It is often easiest to stand the figure right on top of its damage marker, covering up the number on the die that indicates how many hits the hero has suffered. Alternatively, hits on an individual can be recorded on the unit roster or some other piece of paper, which enables the owning player to keep the total number of hits secret (unless the opposing player has been careful to also keep track).
Caption (printed page 60): Elven riders—two heroes, four heavy horsemen, and a line of light lancers—advance to contact the foe.
Firearms
One of the intermediate scenarios in this book (presented following the end of this chapter) introduces a unit armed with the primitive arquebusses that heralded the dawn of the Age of Gunpowder. These troops, called arquebusiers, are easily used in BATTLESYSTEM™ scenarios by incorporating the following optional rules.
When They Fire
Units equipped with firearms can fire them during the Missile Combat Step, or can use a volley as pass-through fire during the opponent's movement step. If a unit of arquebusiers is being transported aboard battle platforms, however, the weapons can be fired before, during, or after the battle platform moves in the owning player's movement step. In any case, arquebusiers cannot fire more than once per turn.
Arquebusiers that are not aboard a battle platform cannot fire if the unit has moved at all during the current turn, including changes of frontage or facing. Neither can the firearms be used if enemy figures are in base-to-base contact with the firearms-bearing figures.
Effects of Fire
Arquebus units typically are allowed 8-sided attack dice (AD 8) and range limitations of 5"/10"/20". Those numbers might be varied by specific scenario rules.
Arquebusiers are treated as normal missile-firing units in all respects, except that they cannot perform indirect fire.
An arquebus attack scores hits normally, with one exception: Since these weapons had a tendency to explode, each AD result of 1 causes an automatic hit (no armor check allowed) on the arquebus unit itself!
Arquebus attacks can punch through even the heaviest armor at short range. Consequently, figures or units struck by arquebus attacks often suffer penalties to their armor rating, depending on the range of the arquebus attack:
- A target at long range makes armor checks with the full benefit of its armor rating (although other modifiers to AR might apply).
- A target at medium range suffers a +5 penalty to its AR.
- A target at short range suffers a +10 penalty to its AR; in other words, every hit counts unless the target is screened or protected, so that it receives an AR benefit that partially offsets the +10 penalty.
Dismounted Cavalry
Certain types of cavalry units are capable of dismounting, so that the troops can fight as infantry. This tactic can be useful in dense woods or swamp—terrain prohibited to cavalry, but not infantry—and also when troops enter and fight in buildings (described in the advanced rules, Chapter 7). If a cavalry unit is capable of moving and fighting while dismounted, this fact must be noted on the unit roster for the scenario being played; if no such notation exists, then the unit cannot dismount.
Some of the characteristics of dismounted troops are different from the unit's normal (mounted) statistics. The following modifications apply to a dismounted unit:
- AD is the same as the unit's mounted melee weapon—not its charge weapon, if the unit is equipped with one. For instance, the AD figure for a unit of mounted lancers is [12]8, indicating that it uses AD 12 (the lances) when charging, but changes to AD 8 (swords) for normal melee combat after the charge is completed. If the unit dismounts, it has AD 8.
- AR and Hits are unchanged.
- ML is reduced by 1.
- MV for nonhuman troops is the same as for infantry of that creature type; for example, dismounted goblins move 6". MV for human troops is assigned according to the unit's armor rating; humans of AR 3 or lower can move 6", those of AR 4-6 can move 9", and those of AR 7 or higher can move 12".
A mounted unit cannot move and then dismount in the same turn; dismounting must be done before the unit moves. A unit that begins its movement step by dismounting can move up to two-thirds of its dismounted movement allowance during that turn.
Dismounted troops should be represented by spare figures or counters, while the cavalry figures are kept on the table to represent the steeds. One of every four dismounted figures must remain with the steeds if the mounts are to be reused. If the mounts are to be abandoned, then the cavalry figures should be removed from the table as soon as the dismounted troops move away from them.
Steeds without riders cannot attack, and they suffer a -1 penalty to their ML for as long as they remain riderless. Troops can remount (if their steeds are still available) whenever they begin their movement step in contact with the mounts. It requires one-third of a unit's mounted movement allowance to remount.
Optional Combat Rules
These rules add detail to several aspects of the combat system.
Specific AR Penalties
This rule applies in melee combat when a unit is attacking more than one side of an opposing unit. Instead of the entire defending unit suffering an AR penalty (+2 if attacked from the flank, +4 if attacked from the rear), the penalty is applied only to the figures that are actually being flanked or hit from the rear. In effect, the defending unit is treated as two separate groups (or three, if that many sides are being attacked), with separate attacks rolled for each group.
When the defending player makes armor checks for the unit that has just been attacked, he also does so in two (or three) separate rolls. Figures that are attacked only along their front sides make armor checks using their normal AR; those that are attacked from the flank (or from the front and the flank simultaneously) make armor checks with a +2 penalty to their AR; and those that are attacked from the rear make armor checks with a +4 penalty.
Hits are still totaled for the unit normally, and lost figures may be removed from anywhere in the unit.
Splitting Missile Fire Between Targets
This rule allows missile-firing units to occasionally fire at two target units at the same time. A unit can split missile fire only when more than one target unit is in range, and when some of the attacking figures are prevented (by blocked line of sight) from shooting at the target designated for the rest of the missile unit.
Only those figures that cannot shoot at the first designated target can fire at a different enemy unit. Roll for the first attack, and then immediately for the alternate attack, before resolving any other movement or combat.
If the rules on commanders are used, figures must be in command to take the alternate shot. Only one alternate target can be fired on; splitting fire between three or more targets is not allowed.
Caption (printed page 62): These dwarven troops exhibit their standard proudly, and also show off a unique weapon: the dwarven steam cannon. (See Advanced Scenario 2, pages 99-100, for an example of the steam cannon in action.)
Intermediate Scenarios
Printed page 63. The scenarios on the following pages are examples of battles that can be set up using the basic and intermediate BATTLESYSTEM™ rules.
All three scenarios use the rules for skirmish units. The second scenario introduces individuals (heroes and commanders), and the third battle gives one side a unit of arquebusiers.
Refer to the introductory text for the basic scenarios (page 46) for general information and advice that is true for these scenarios as well.
Intermediate Scenario 1: Border Skirmish
The King's Army
Background. The area in the vicinity of Greyrock Bridge marks the unofficial border between the lands claimed by human settlers and the untamed expanse to the north, occupied by great tribes of restless monsters. The river is deep enough to be an effective barrier against an invading horde; the bridge is the only place for leagues in either direction where the river can be crossed by most creatures, and the King's Army has long maintained a garrison on a nearby hilltop from where the troops can keep the bridge under constant surveillance.
All that is changed now. Recently a mass of monsters mounted a successful surprise attack against the garrison, destroying it and occupying the hilltop. Before the last of the defenders were slaughtered, they managed to send out a courier to relay news of the invasion to the main body of the King's Army, which was based far to the south.
As the king's soldiers rush northward, they get their first close look at the invading force: a group holding the hilltop, which they expected—and an even larger mass of evil creatures across the river, all set to take the bridge and use that as a springboard for a big push south. The task of the King's Army is twofold: hold onto the ground they still control, and retake the bridge and the hilltop garrison before the monsters' foothold turns into a stranglehold.
Setup. After the monster army has been set up, the King's Army is brought onto the field along the southern edge.
Terrain. The river is shallow water to the king's medium cavalry, but deep water to all of the other human forces. The bridge is 3" wide, sufficient to accommodate a unit of man-sized figures moving in column formation.
Victory. The King's Army can win by eliminating all of the monsters from the battlefield, or by occupying the three key terrain objectives: the bridge, the hilltop, and the steeper hill in the southeast corner of the battlefield. If human forces are on the bridge and on the tops of both hills at the end of any turn, and if none of those occupying forces are in contact with enemy figures, then the scenario is over.
Unit Rosters (AD / AR / Hits / ML / MV)
| Unit | AD | AR | Hits | ML | MV |
|---|---|---|---|---|---|
| 12 Medium Cavalry | [10]8 | 7 | 3 | 12 | 18" |
| 12 Halberdiers (Second rank can attack in melee) | 8 | 5 | 2 | 12 | 9" |
| 16 Spearmen (Range 1"/2"/3") | 6 | 8 | 1 | 12 | 12" |
| 24 Pikemen (Second and third ranks can attack in melee) | 6 | 8 | 1 | 12 | 12" |
The Monster Army
Background. For generations, the creatures who make their settlements to the north and west of the river have been enduring small but repeated invasions of their territory. These invaders, who call themselves "adventurers," seek out the strongest tribal leaders they can find—for the sole purpose of killing them. The creatures of the northland do not understand or appreciate this kind of behavior (unless, of course, they are the ones doing the killing).
Enough is enough. The creatures have banded together and devised a plan to strike back at the land where the adventurers come from. The first step is complete: the outpost to the east of the river, which many adventurers have used as a jumping-off point for their invasions, was hit by a surprise attack. The hilltop is now under the creatures' control.
Phase two is under way. Creatures of various types have gathered in the area across the river from the hilltop, and are just about to rush over the bridge and begin moving south. They can see a tall hill in the distance, and they know that if they can take that high ground before the enemy has time to react, they will be well on their way to dominating the entire countryside. Now this is an adventure. . . .
Setup. The Monster Army sets up first. One of the goblin units and the orc archers are placed in setup area #1, and the remainder of the troops in setup area #2.
Terrain. The river is shallow water to the ogres and trolls, but deep water to all of the other monster forces. The bridge is 3" wide, sufficient to accommodate a unit of man-sized figures moving in column formation.
Victory. The Monster Army can win by eliminating all of the enemy units from the battlefield, or by occupying the three key terrain objectives: the bridge, the hilltop garrison (which they already hold), and the tall hill in the southeast corner of the battlefield. If monster forces are on the bridge and on the tops of both hills at the end of any turn, and if none of those occupying forces are in contact with enemy figures, then the scenario is over.
Unit Rosters (AD / AR / Hits / ML / MV)
| Unit | AD | AR | Hits | ML | MV |
|---|---|---|---|---|---|
| 24 Goblins with Spears (Range 1"/2"/3") | 6 | 8 | 1 | 11 | 6" |
| 24 Goblins with Swords | 6 | 8 | 1 | 11 | 6" |
| 12 Orcs | 6 | 8 | 1 | 11 | 9" |
| 18 Orc Archers (Range 5"/10"/15") | 6*8 | 8 | 2 | 12 | 9" |
Intermediate Scenario 2: Clash in the Clearing
Fallwick's Legion
Background. If the monsters of the Darkwood had been content to stay in their forest hideouts, Lord Fallwick and his people would have been happy to leave them alone and go about their own business. But the forest dwellers don't seem interested in peaceful coexistence; bands of gruesome creatures have been sallying forth from the forest and assaulting people in the nearby grasslands.
Lord Fallwick has two options: He can send out small groups of soldiers on search-and-destroy missions, hoping to discourage the marauders, or he can put an end to these depredations once and for all by leading his entire legion into battle against the horde. He chooses the latter course, feeling confident that his small but well-trained force can outmaneuver and outfight even a full army of smaller and slower goblins, orcs, and the like.
The legion commander is prepared to battle the monsters wherever he encounters them; his force includes some troops that can function well in wooded areas, powerful infantry that can slug it out on any kind of terrain, and a squad of speedy cavalry that can chase down any vermin that try to flee across open ground. While guarding against an ambush from the forest to the west, Lord Fallwick moves his legion methodically northward. Sooner or later he'll find what he's looking for.
Setup. Fallwick's legion is set up first, with no more than one unit in the woods.
Terrain. There are no special terrain considerations in this scenario.
Victory. Fallwick's legion wins a major victory if all of the enemy units are eliminated in combat and none of the legion's units are eliminated or routed off the field. The legion scores a minor victory if all of the enemy units are destroyed or routed off the table.
Unit Rosters (AD / AR / Hits / ML/CD / MV). Commander rows are the unit commander's own statistics; a unit commander's CD is given in the ML/CD column.
| Unit | AD | AR | Hits | ML/CD | MV |
|---|---|---|---|---|---|
| Lord Fallwick (Army commander, mounted; +2 Charisma Bonus) | 8 | 3 | 5 | 16" | 15" |
| Sir Tenly, Fighter hero | 10 | 4 | 5 | 8" | 9" |
| 24 Medium Infantry | 8 | 7 | 1 | 12 | 9" |
| — Unit commander | 6 | 5 | 3 | 9" | 12" |
Note on the table: the printed roster gives the unit commander's row beneath each unit's row; the unit commander's values are shown here as printed.
Thorack's Army
Background. If Lord Fallwick had been content to mind his own business and not worry about protecting every isolated farmer and wayfarer in the territory he claims as his domain, the dwellers in the forest would have been satisfied with making occasional small raids into the open terrain, and both factions would have been able to peacefully coexist. But the power-hungry human commander has insisted on escalating the conflict; scouts for the forest creatures have reported that a force of soldiers is making its way northward.
Thorack, an exceptionally strong and intelligent orc, has taken it upon himself to assume command of the forest folk. He has two options: He can send out small parties to harass the advancing legion and deplete its ranks, or he can put an end to Fallwick's intrusions once and for all by leading his entire army into battle against the legion. He chooses the latter course, confident that his large and well-organized force can overwhelm Fallwick's men, especially if the fight takes place on open ground where he can use his advantage in numbers to the fullest.
Thorack has just received a report that the human legion is almost within striking distance. He gives the order to deploy for battle, and the orcs and goblins under his command snarl and slaver in anticipation.
Setup. After Fallwick's legion is set up, Thorack's army is put into position along the north edge of the battlefield. No more than one unit can begin the scenario in the woods.
Terrain. There are no special terrain considerations in this scenario.
Victory. Thorack's army is victorious if all of the enemy units are eliminated in combat or routed off the field.
Unit Rosters (AD / AR / Hits / ML/CD / MV). Commander rows are the unit commander's own statistics.
| Unit | AD | AR | Hits | ML/CD | MV |
|---|---|---|---|---|---|
| Thorack (Army commander, mounted; +1 Charisma Bonus) | 10 | 4 | 5 | 15" | 15" |
| Blackthumb, Fighter hero | 8 | 3 | 6 | 7" | 9" |
| 12 Orc Heavy Infantry | 8 | 7 | 2 | 12 | 9" |
| — Unit commander | 8 | 5 | 3 | 9" | 9" |
Intermediate Scenario 3: Powdersmoke
Red Prince's Army
Background. The time is the late medieval era, and the way that men wage war is on the verge of being changed forever. The Army of the Red Prince, one of two contenders for the throne, is riding forth to meet the Army of the Black Prince in a conflict that will be a test of courage as much as a test of arms. To the victor will go the kingship—and if the Red Prince's force prevails, he will also go down in history as the first monarch to rule by means of bullets rather than blades.
Among the Red Prince's soldiers is a contingent of arquebusiers—brave (some would say foolhardy) men who wield primitive firearms. If the weapons don't kill the men holding them, they have the potential to wreak havoc throughout any enemy unit that is the target of their fire. And if the Red Army does win the day, it may not be long before powder horns and pellets become part of every soldier's equipment.
The Red Prince knows that his opponent does not have firearms; instead, the Black Prince is expected to rely on the durability of his heavily armored knights and the maneuverability of his renowned horse archers. The battle shapes up as a classic confrontation of power versus speed—and now that the Red Prince's force has crested a hill and can see the Black Army in the distance, the festivities are about to get under way.
Setup. The Army of the Red Prince is set up first. At least one unit must be placed on top of the hill; others can be deployed anywhere in the setup area.
Terrain. There are no special terrain considerations in this scenario.
Victory. Total elimination of the enemy is not necessary. The Army of the Red Prince wins if the Black Prince's heavy cavalry and horse archers are destroyed or routed off the field.
Unit Rosters (AD / AR / Hits / ML / MV)
| Unit | AD | AR | Hits | ML | MV |
|---|---|---|---|---|---|
| 6 Heavy Cavalry | [10]8 | 4 | 3 | 14 | 18" |
| 16 Arquebusiers (Range 5"/10"/20") | 8*6 | 9 | 1 | 12 | 12" |
| 20 Pikemen (Second and third ranks can attack in melee) | 6 | 7 | 1 | 12 | 12" |
| 20 Halberdiers (Second rank can attack in melee) | 8 | 7 | 1 | 13 | 9" |
Black Prince's Army
Background. The time is the late medieval era, and the way that men wage war may be on the verge of being changed forever. The Army of the Black Prince, one of two contenders for the throne, is about to enter battle with the Army of the Red Prince in a conflict that will be a test of tradition versus innovation. To the victor will go the kingship—and if the Black Prince's force prevails, that victory will demonstrate that the world is not yet ready (if indeed it ever will be) for weapons that operate on gunpowder instead of musclepower.
The Black Prince knows that the Red Army has a squad of arquebusiers—foolhardy men who use primitive firearms. The Black Prince has disdained their use, since he has witnessed (on his own training grounds) their unsettling tendency to blow up in the faces of the men holding them. Yet he fears that if the weapons do work properly, they have the ability to wreak havoc.
To counter the Red Army's strength, the Black Prince will rely on the speed of his renowned horse archers. Even though these troops are extremely vulnerable to missile fire, they can move quickly enough to stay out of the way of the guns. And as always, the nucleus of the Black Army is a squad of heavily armored knights. The Black Prince is out to demonstrate that the age of knighthood and chivalry is far from over—and the way to fight a real battle is to meet your enemy face to face in a test of strength and courage, not to cower behind the lines and pepper your foe with hot pellets of lead.
Which side will prevail? More importantly, from a larger perspective, which type of warfare will prove to be the more effective? The answers will come soon, because the Army of the Red Prince is now visible in the distance to the south. The festivities are about to get under way.
Setup. After the Army of the Red Prince is set up, the Black Prince's soldiers are placed in the northwest corner of the battlefield. At least one unit must be on the crest of the hill.
Terrain. There are no special terrain considerations in this scenario.
Victory. Total elimination of the enemy is not necessary. The Black Prince wins if the Red Prince's heavy cavalry and arquebusiers are destroyed or routed off the field.
Unit Rosters (AD / AR / Hits / ML / MV)
| Unit | AD | AR | Hits | ML | MV |
|---|---|---|---|---|---|
| 8 Heavy Cavalry | [10]8 | 4 | 3 | 13 | 15" |
| 12 Horse Archers (Range 5"/10"/15") | 6*6 | 8 | 2 | 12 | 21" |
| 24 Pikemen (Second and third ranks can attack in melee) | 6 | 7 | 1 | 12 | 9" |
| 20 Swordsmen | 8 | 7 | 1 | 12 | 12" |
Chapter 7: Advanced Rules
Like the intermediate rules, the advanced rules can be added one at a time, or can be incorporated into the game as a group. Because of the variety and complexity of the advanced rules, it's unlikely (although certainly possible) that all of them would be in use during a single scenario. To avoid misunderstandings after play has begun, it's important that every player know which rules are to be used and which ones are not used in the scenario they're about to start.
Flying Creatures
Certain types of creatures usable in BATTLESYSTEM™ scenarios can fly. Units capable of flight provide great advantages in movement and positioning for the owning player, but their morale is sometimes fragile, and some kinds of flying creatures are difficult to maneuver.
Flying creatures on the ground perform as a normal land-based unit; the movement and combat rules given below apply only when the creatures are in flight.
Aerial Movement
Creatures in the air generally abide by the normal movement rules, with several additions and exceptions.
The standard ground scale (1" = 10 yards) does not apply for elevations and vertical movement; in such measurements, 1" = 10 feet.
A unit is always in irregular formation when it is airborne; each figure or stand of figures must be at least 1" and not more than 2" away from the figure or stand closest to it.
A flying unit in the air cannot declare or perform a charge against a unit at the same or a higher elevation. A flying unit can charge a unit at a lower elevation, including a unit on the ground—but see the section below on Melee Combat Options for flying units.
A flying unit must spend a portion of its movement allowance in order to leave the ground or (if already airborne) to climb to a higher altitude. A given figure can never spend more than half of its MV to gain altitude; the other half must be spent in forward flight.
The altitude of a flying unit is recorded by placing a d20 with the figures in the unit. Each increment on the die represents 10' of altitude—the same as one level of hill. If a unit flies higher than 200', use a second die to show the added altitude.
A unit cannot take to the air during a movement step when it begins that step on the ground and in contact with an enemy unit.
Unlike a unit on the ground, an airborne unit must use at least half of its movement allowance every turn.
Exceptions: A flying unit in base-to-base contact with an enemy flying unit does not have to move, and flying creatures with maneuverability class A or B (see next column, and also Appendix II) need not move.
Changing Altitude
When a figure climbs, it spends 1" of its movement allowance to ascend through one 10-foot (1" in scale) increment of altitude. It must combine each 1" of ascent with a forward move of at least 1". For example, a figure cannot move vertically upward 100 feet (10" in scale) and then start flying forward; it must move forward 1" for each 1" climbed, so that in order to climb 10" it has to use 20" of movement.
Exceptions: Figures with hovering ability can climb straight up. This includes creatures with a maneuverability class of A or B, as well as figures using fly spells (see the rules for magic, Chapter 8), rings of flying, and potions of flying. However, magical devices that provide a platform for the flyer (a flying carpet or broom of flying, for example) must make the forward movement in addition to the climbing.
Descending costs none of a flyer's movement allowance. In fact, for every 3" of altitude descended, a flyer adds 1" to its forward movement allowance.
Turning in the Air
Every flying creature is assigned a maneuverability class, ranging from A (best) to E (worst). This letter rating describes how well the creature is able to change direction during one turn of movement.
- Class A: Figure can turn as much as desired. It can hover, and it can move vertically upward without having to move forward.
- Class B: Figure can turn a total of 360 degrees in one movement step, and it can hover as a figure of class A.
- Class C: Figure can turn a total of 180 degrees in one movement step.
- Class D: Figure can turn a total of 90 degrees during a move.
- Class E: Figure can turn a total of 60 degrees during a move.
A figure can combine turns of different directions as long as it does not exceed its overall turn allowance during a given movement step. For example, a figure of maneuverability class C does not have to use its 180-degree turn allowance all at once; it could (among other combinations) make a 90-degree turn to the left and later during its move make a 90-degree turn back to the right.
Combat and Flying Creatures
Special combat rules apply to both melee and missile combat when one or more flying creatures are involved.
Melee Combat Options
A flying unit can enter melee combat in one of four different ways:
- Ground Attack: It can land next to an enemy unit on the ground, moving into contact with the unit as it lands. Normal melee combat rules apply, and the flying unit receives no combat modifiers for being airborne. It can charge into battle (and thus get the normal AD bonus for charging) with this option.
- Pass-By Attack: It can pass by an enemy unit on the ground or in the air, making a special melee attack and then continuing on with its movement. If the attacker does not have enough movement left to break off contact after the battle, it cannot choose this combat option. Combat occurs when the two units are at altitudes one increment apart (1", or 10 feet in scale). If units come together at the same altitude, combat option 1 (if both units are grounded) or 4 (if both units are airborne) is used.
Pass-by combat allows figures in a flying unit and in an enemy unit (either flying or on the ground) to attack up or down. Armor rating modifiers for units at higher and lower elevation apply, as do the rules for advantage in melee (see page 41). Since the frontage of the unit is above or below it, all figures that pass over (or under) enemy figures can make attacks. If the unit on the ground is in regular formation, one figure to each side of the contacted figures can attack. The number of attack dice for both units is modified to half of the normal amount, after all other modifications have been made. After pass-by combat, the attacking unit must move out of base-to-base contact with the defending unit.
A flying unit cannot combine a charge and a pass-by attack.
- Vertical Envelopment: This is a form of combat in which a flying unit attempts to land on top of a land unit, attacking as it does so. The flying figures end their move directly above and adjacent to the land unit. (For purposes of the battle, they occupy the same space as the defending unit, but since the figures cannot be actually stacked on top of one another, the flying unit is simply placed on the battlefield next to the land unit.)
A vertical envelopment attack is resolved as a normal melee combat. Armor rating modifiers for higher and lower elevation apply, as do the rules on advantage in melee. All figures that would be in contact with the enemy unit (and those to either side, if the unit is in regular formation) can attack. This form of attack differs from normal melee combat in one way: After all casualties are removed and morale checks made, one unit or the other must be dislodged from its place on the battlefield, since opposing units can't occupy the same space.
If the defending unit withdraws or routs from its position, the flying unit can claim that place on the table. If both units stand firm, however, the flying unit must retreat 4" toward its own edge of the table, moving on the ground, and be reduced to shaken status. If this 4" move is not sufficient to remove it from contact with the original defending unit, it routs.
A unit cannot charge into a vertical envelopment attack.
- Dogfight: A flying unit can end its move in melee combat with another flying unit at the same elevation, or one increment higher or lower. If the units are not at the same elevation, then all the figures of a unit may be able to contact the enemy, even if both units are several ranks deep.
A unit can charge into battle with this option. Resolve the melee using the normal rules, with the following addition: Each unit involved in a dogfight loses altitude as a result of the combat. The players roll a d6 for each unit, subtracting that many increments of elevation from the unit's altitude. (On a roll of 6, for instance, the unit descends 6", or 60 feet in scale, from its original altitude.) If a unit lands on the ground, it stops its descent there, but suffers no damage from the landing. If it lands on a friendly unit, that friendly unit automatically routs.
If a descending unit lands on an enemy unit that was not involved in the dogfight, the enemy unit gets a free attack against all figures of the flying unit that make contact. The flying unit, once on the ground, then automatically routs from that engagement.
If both combatants in a dogfight descend to the same location on the ground, both of them become routed.
Setting Spears or Pikes Against Flying Creatures
If a unit in regular formation on the ground has set spears or other pole arms to meet the attack of a flying unit, and the airborne attack is against the front sides of the defending figures, the unit with set weapons can roll x 2 AD against the flyers—even if the flying unit makes a vertical envelopment or a pass-by attack. If the flyers drop to the ground to make a normal land attack, the AD bonus for the defending unit does not apply unless the attacking unit is charging.
Although the ground unit is not the target of a charge when it is being hit by a vertical envelopment or a pass-by attack, it still must make a successful morale check in order to set its weapons. Failure of this check has no effect other than to prevent the setting of weapons.
Falling Damage
If a figure or unit falls freely, the victim suffers damage from a 6-sided attack die for each 10 feet of distance fallen. The number of attack dice is halved (to a minimum of 1) if the landing takes place in water or swamp, and doubled if the landing is on rough or rocky ground. The victim is not allowed to make armor checks to reduce the number of hits scored. If the fall is into deep water, the figure or unit is destroyed. If the fall is into any other type of terrain that the unit cannot move through, it is destroyed unless it is a flying unit.
Caption (printed page 73): Aerial missile fire. A flying unit could only fire on the figures near the wall if the attacker was above the line from the figures' heads through the top of the wall.
Flying Units and Missile Combat
Units that launch missiles from the air suffer a penalty of x 1/2 AD in addition to all other applicable penalties. However, defenders that depend upon vertical obstacles such as walls or breastworks for an armor rating bonus against missile fire might lose that bonus when they are attacked from the air. If the airborne attackers are farther above the obstacle than they are in front of it (away from the defenders), then the defensive benefit of the obstacle is negated.
Range Effects of Altitude
When a missile attack is directed against, or launched by, flying creatures, the vertical distance between the attacker and the target affects the calculation of the range at which the attack is made.
Every 1" (10-foot increment, in scale) of altitude of the target above the attacker counts as 1" of distance for range determination. However, if the target is at a lower altitude than the attacker, every 2" of vertical distance counts as 1" for range determination. The horizontal distance between the units is measured (just as if they were both on the ground directly beneath their present locations), and then the vertical distance and horizontal distance are added together to determine the range at which the attack takes place. Also, a flying unit at a higher altitude than its target receives the range bonus for elevation—each range category is increased by 1" for each 1" difference in altitude, up to a maximum bonus of 3".
For example, Advanced Scenario 3 in this book (see pages 101-102) contains a unit of manticores (missile range 6"/12"/18") on one side and a unit of hippogriffs carrying elven longbowmen (range 7"/14"/21") on the other. Both units are capable of flight. If the manticores are about to fire missiles while flying 8" above the hippogriffs and 5" away in horizontal distance, they are considered to be 9" away for purposes of range determination—5" for horizontal distance, plus 1" for every 2" of vertical distance. The manticores qualify for the maximum range bonus of 3" because of their elevation, which means that the attack from 9" away is a short-range attack. If the elves fire at the manticores in the same situation, they do so from a distance of 13" (8" vertical plus 5" horizontal), which is a medium-range attack.
A target that is far below a unit of missile troops, and is out of range because of vertical distance, can still be fired upon (treated as a long-range target) if the horizontal distance between attacker and target would put the target in short range. If the manticores from the above example were more than 21" above the hippogriffs, the target would be out of range in terms of vertical distance (even including the manticores' 3" elevation range bonus). However, if the hippogriffs were 9" or less away from the manticores in horizontal distance, the manticores could make a long-range attack.
Morale and Flying Units
A unit in flight suffers a -1 penalty to its morale rating whenever called upon to make a morale check. (Some airborne creatures may be specifically exempted from this penalty.) A unit in flight, even if it is in good order, cannot withdraw instead of making a morale check.
Other situations requiring morale checks are handled the same way for flying units as for ground units. However, there are some major differences in the way flying units are affected when they become shaken or routed.
If a unit in the air becomes shaken, it is marked to indicate its new status, but it is not required to withdraw 4" as must a ground unit. However, if it is moving when it fails the check, it adds 4" to its forward move for that turn, and must use all of its movement allowance before stopping.
A shaken flying unit cannot gain altitude, nor can it be rallied while airborne. Normal restrictions on shaken units all apply to a shaken flying unit. It rallies from shaken to good order normally when on the ground.
If a unit routs while it is in the air, the creatures are assumed to dive away from the battle with all possible speed. If a flying unit routs, it is removed from play immediately without going through rout movement. If a unit of flyers routs while on the ground, or at an altitude of 1" (10 feet in scale) above the ground, it can perform normal rout movement on the ground, and can be rallied the same way that a ground unit is rallied.
Undead Units
Magical beings and powers can sometimes animate the corpses of the dead. These creatures can gather into military units of horrible aspect and considerable effectiveness. These forces include skeletons, zombies, ghouls, and wights, and occasionally even more fearsome monsters. They offer terrors far beyond those of mortal combatants. On the other hand, limitations in initiative and intelligence of these troops can cause complications for their controllers.
Undead cannot charge. They are not required to make morale checks or discipline checks.
Command of Undead
The rules in this section should only be used if the rules on commanders (see pages 58-59) are employed.
Undead figures must be commanded by priests. (Necromancers converted from AD&D® game characters, and supernatural monsters commanding undead hordes, are possible exceptions.) A figure in command of an undead troop cannot perform any other functions (including heroic combat or spellcasting) during a turn without causing the undead to be out of command.
A priest can command a number of zombies or skeletons limited only by his command diameter. Ghouls are harder to control; a priest can command two of these creatures for each one of the commander's hits. And wights are harder still—a priest can only command as many of them as the priest's number of hits. Ghouls and wights must still be within the priest's command diameter to be controlled; if the number of such creatures in the priest's command diameter is greater than the maximum number the individual can command, then the player in charge of the priest figure must specify which ghouls or wights are in command and which ones are out of command.
If undead figures are out of command, they move and fight at half effectiveness. In addition, they will continue to perform the last order given them until they are destroyed, they march off the table, or the scenario ends.
Exceptions: If the last command given to the undead was to fight a melee, and the enemy is no longer before the unit, the undead will march straight forward until they contact another foe. If the undead unit had been given an order to move in a certain direction and subsequently contacts another unit—enemy or friendly—the undead unit will attack.
Effects on Enemy Morale
Mortal troops universally shudder at the prospect of an assault by an undead unit. This fact is reflected in special morale check requirements.
The first time an undead unit advances to within 4" of a non-undead unit, the mortal troops must check morale. If the mortal unit is in good order, it can withdraw instead of making the check. If a mortal unit advances toward an undead unit, it must make a morale check when it reaches a point 1" away from the undead. (If the unit is charging, it has already passed its one morale check for the step.)
Some undead have special horrific abilities. Wights, for example, drain life energy (an ability reflected in the creature's large AD size), and ghouls cause paralysis. (See Appendix II.)
When facing an undead unit with a special ability such as the ones mentioned above, a unit must check morale at the end of the turn if the two units are in contact at that time. This is in addition to the check that is made before the units come into contact.
For either type of check against ghouls, a unit suffers a -1 penalty to its morale rating. (Elves are an exception; see Appendix II.)
When a unit is checking because it faces wights, it suffers a -2 penalty to its morale rating. Both morale effects fall under the special ability "cause horror" (see the magic rules, Chapter 8).
Priests Affecting Enemy Undead
A priest fighting against undead units has a special way of scoring hits on undead figures that are nearby. This procedure is a conversion of the AD&D® game mechanic for turning undead.
Note: If the scenario being played is drawn directly from an AD&D game campaign, the Turning Undead Table (Player's Handbook, page 103, and Dungeon Master's Guide, page 67) can be used in place of the table given in these rules. Undead that are turned are considered slain for BATTLESYSTEM™ scenario purposes.
A priest can make an attack of this sort during the Melee Combat Step, instead of making a normal melee attack. A priest can attempt to slay an undead figure even if the priest is hit by an attack from that figure or any other enemy figure in that same step.
Caption (printed page 76): This lion-headed figure would make a fearsome-looking gnoll commander.
How to Use the Table
A priest can attempt to eliminate an undead figure if the enemy is located in front of the priest (within a 45-degree angle to either side) and is 3" away or closer. No figures can be between the priest and the undead, but the undead does not need to be facing the priest.
The priest's chance of eliminating an undead figure depends on the number of hits the priest has, and the result of a die roll on the Slaying Undead Table (see below).
Cross-reference the priest's Hits rating with the type of undead being fought against. If the entry is a number, roll a d20. If the result is equal to or greater than the given number, one enemy undead figure is destroyed. If the entry on the table is an "S" followed by a number, then that many undead figures are automatically slain (assuming there were at least that many undead figures within range).
A priest can make one attempt to slay undead in this fashion during any Melee Combat Step. However, as soon as a priest is unsuccessful in an attempt, he can make no further attempts against the undead of that same unit for the rest of the scenario.
Slaying Undead Table
| Type of Undead* | Priest's Hits: 1 | 2 | 3 | 4 | 5 | 6 | 7+ |
|---|---|---|---|---|---|---|---|
| Skeleton | 7 | S1 | S1 | S2 | S2 | S3 | S4 |
| Zombie | 10 | 4 | S1 | S1 | S2 | S2 | S3 |
| Ghoul | 13 | 7 | 4 | S1 | S1 | S2 | S3 |
*Additional types of undead (vampires, spectres, wraiths, etc.) from the AD&D® game can be employed in massed battles. The table in the AD&D rule books is used for determining a priest's effects against those creatures. Except in very fantastic battle settings, the additional types are far more likely to function as heroes (individual figures) than as units.
Animal Packs or Herds
It is not uncommon for the beasts of the forest to rise in defense of their domain, particularly when it is threatened by an evil force. These rules do not apply to animals that have been magically controlled and/or summoned (see the Mass Charm spell, page 92, and the Insect Plague and Creeping Doom spells, page 94).
Command of Animals
The rules in this section should be used only if the rules on commanders are employed (see pages 58-59).
Animals do not necessarily need a commander, if some universal urge propels them into the battle. (This is a determination to be made in the setup of a scenario.) However, animals can attack and maneuver much more effectively when they are under the control of an intelligent creature. Druids, clerics, and possibly rangers can command units of animals. A scenario might define another character who can command a specific body of animals—a man raised with a pack of wolves, for example, could command the pack in battle.
Animals receive their full movement allowance regardless of whether or not they have a commander. However, animals only attack at 1/2 AD when not motivated by a commander.
With a commander, animals receive the normal 1 AD per figure in melee combat. Animals can also charge (if they succeed on a morale check). Animals never become shaken; any time a unit of animals fails a morale check that would normally cause a unit to become shaken, the animal unit routs. An animal unit can only rally if it has a commander.
Animals in Combat
When animals charge, they receive the AD bonus for a charging cavalry unit (x 2 AD) if the animals are larger than man-sized. Human-sized and smaller animals charge as infantry (x 1 1/2 AD bonus).
Stampedes
Herd animals can perform a stampede, which is essentially a charge with extra impetus. In order to start a stampede, a herd must consist of at least 8 medium-sized herd animal figures or 6 large or huge herd animals (see animal descriptions, Appendix II), and must be at least 2 ranks deep. A herd can stampede if it passes a normal charge initiation morale check, and is of sufficient size.
A stampeding herd has its morale rating improved by +3 for the duration of the stampede—i.e., until it routs, reaches the end of its move, or is annihilated.
When a herd of animals stampedes, any melee combat triggered by its charge is resolved immediately. If the animals do not rout and are not destroyed, they continue their stampede after the combat is resolved.
If the enemy unit withdraws or routs as a result of the combat, the animals continue moving straight ahead—possibly contacting and fighting that unit again. If the enemy unit stands its ground after the combat is resolved, the stampeding animals will veer around the unit on the shortest path to continuing the charge. If two approximately equal paths are available, roll a d6. On a 1-3 the herd goes to the right; on a 4-6 it veers left.
The herd stampedes to the limits of its movement, attacking every enemy unit in its path, unless it routs or is annihilated before then.
Stampede Rout
When a unit of animals routs, it follows the normal requirements for routing units, except that if it is large enough to perform a stampede it will not attempt to veer around friendly units—instead, it performs a stampede rout. Animals that do not fulfill the minimum size requirement of a stampeding unit will veer normally around friendly units.
An animal unit performing a stampede rout is treated as a unit performing a stampede, except that its direction is determined by the rules on rout movement, and it will attack friendly and enemy units in its path with equal vigor.
Fortifications and Fortresses
Troops can take shelter in buildings. The walls and doors of a stone farmhouse can offer protection against a clamoring horde of attackers. Greater still is the security provided by high walls, fortified ramparts, and reinforced gates.
These protections, like so much armor, can increase the security of a defender but they cannot guarantee that security. Battering rams, siege towers, catapults, trebuchets, and other tools of the military engineer can smash at the walls and gates of a fortress until the battle, once again, becomes a test of arms.
This test of arms is fought amid the mazelike corridors, narrow ramparts, and long wall-top platforms of a fortress, not the wide open meadows of the typical battlefield. Heroes and gallant warriors battle in doorways or breached walls, standing fast against a swarm of attackers.
In all these respects, combat in buildings offers different tactical problems than does combat in the field. The following rules address changes in movement, morale, and combat for such units, as well as machines to aid in the attacking or defense of a fortress.
Effects of Walls
The rules in this section apply to all walls and buildings that might appear on the battlefield. However, fences or other barriers (even if solid stone) that can be crossed by the creatures in a unit are considered obstacles (special terrain), not walls or buildings. Likewise, a very high wall that is not solid—a plank panel with many gaps, for example—does not fully qualify as a wall. Troops cannot move over or through it, but nevertheless it is treated simply as an obstacle for melee combat, or as a screen for protection against missile fire. A missile unit adjacent to such a barrier can fire missiles through it with no penalty.
It is possible for a fence to be an obstacle to a unit on one side and a wall to a unit on the other (a seven-foot-high wall dividing giants and humans, for example).
Representing Buildings in the Game
Actual models of castles, towers, and fortifications add a wonderful visual effect to any gaming table. Many of these miniature structures have removable roofs so that the placement of troops inside can be observed and adjusted.
Lacking such an elaborate display, however, the matter is easily handled by using floor plans sketched on a large piece of paper or cardboard. Such templates are even easier to use than models, since there are no physical walls to obstruct the placement of a stand of figures inside the structure. If a detailed depiction of a building is needed, players might find it useful to place the building display on another nearby surface instead of on the battlefield tabletop itself; simply mark the location of the building on the gaming table and resolve engagements within the building on the off-board display.
Effect of Buildings on Command
If the rules on commanders (see pages 58-59) are employed, the presence of buildings on the battlefield affects those rules in the following ways: Figures within a building or an enclosed wall space are not out of command, even if they are outside the command diameter of their leader, as long as the commander is located somewhere within the same structure. However, the charisma bonus of a commander can only benefit those figures that are within the leader's command diameter, and that are not separated from the commander by walls or other building features.
Moving Troops in Buildings
Troops are not required to use the special movement rules in this section simply because they're surrounded by walls. In a large courtyard or cavern, it is quite possible that a unit will be able to maneuver using the normal movement rules. However, when walls constrict the normal deployment of a unit, or when a doorway or gate stands in its path, some modifications of the normal movement rules are required. Figures mounted on bases by themselves are ideal for use inside buildings and fortifications, but normal stands of two and three figures can also be used with little difficulty.
Squeezing In
Figures are not allowed to enter buildings or enclosed areas unless the entire base of the figure can fit inside. However, the number of figures mounted on a stand should not work to penalize a player. If there would be room for all the figures if they were mounted on individual bases, the multiple stand can be placed even where it actually doesn't quite fit. (Obviously, it's a lot easier to squeeze a stand of figures into a room when using a floor plan than it is when using a three-dimensional model.)
Caption (printed page 78): Occupying a building. This stand of three ogres is assumed to be entirely within the building, even though the stand itself hangs over the edge of the building's outside wall. (See "Squeezing In" on the top right of this page.)
Facing and Formation in Buildings
A unit is considered to be in irregular formation when inside a building, unless there is room for the unit to deploy in a regular formation at least two ranks deep. A player must declare when his enclosed unit is in regular formation.
Figures pay none of their movement allowance to make facing changes when within a building or enclosed walls in irregular formation; they can change direction freely, just like skirmishers can. Stands may be placed farther apart indoors than out; up to 1" per figure can separate the stands of a unit. A stand of three figures, for example, could be up to 3" away from another stand (of any number of figures) in that unit. A stand of one figure must be within 1" of another single figure or within 2" of a double stand, and so on.
A gap between figures in regular formation is never necessary, however; figures can be in base-to-base contact, just as they are required to be when they are not inside a building.
Skirmishers are not required to maintain a distance between bases when indoors; they can be crowded as close together as any other figures.
Note on facing: When a unit is inside a building or enclosure, sometimes it will not be possible to face all of the figures in the desired directions. As a general rule, assume that the first side of a figure to contact an enemy (in an indoor environment) is the front of that figure; no flank or rear attack penalties apply if the figure is attacked from only one direction. However, subsequent attacks against that figure from additional directions will trigger the penalties.
If a stand of three figures, for example, must defend two openings in the corner of a building, one of the figures will have his flank to one of the openings. Regardless of the actual direction this figure is facing, it should be assumed that the figure is guarding the direction of obvious attack, and an attack through the nearest opening is considered to hit the front, not the flank, of the figure. An enemy breach into the building and subsequent attack, as described below, would result in the flank penalty being applied to the defenders of the building.
Caption (printed page 79): Facing inside a building. Even though this stand of figures is facing the windows, the one at left is assumed to be guarding the doorway, so that it can't be attacked from the flank by an enemy coming through the door.
Passing Through Doors, Gates, and Windows
If a door or gateway is wide enough to accommodate a stand of two figures (or more) at a time, the figures in a unit can pass through the opening using the normal movement rules. Otherwise, the following special procedures apply.
Only one figure at a time can pass through the door, gateway, or other aperture, and the unit pays 1" of movement per figure passing through (or 2" per figure moving through a window). This cost even applies to skirmish units.
If more than one opening is available, figures can move through all the openings simultaneously and only pay the movement cost once for each group of figures that move. For example, if a unit is facing a wall that contains a door and two windows, it could move 4 figures to the other side of the wall by spending 2" of its movement allowance: One figure moves through each window, and two figures pass through the doorway at the same time. Each additional 2" spent can move 4 more figures inside.
A figure cannot end its move directly in an opening, unless the opening is wider than the figure's base. However, a figure can pass through an opening that is narrower than its base, by simply ending its move on the other side of the wall from where it began.
Stairways and Permanent Ladders
Most fortifications have different levels of elevation, connected by prepared routes such as stairways and ladders. For the purpose of the movement rules in this section, these features do not include portable ladders (scaling ladders) or grapples that might be carried by assaulting troops; see the following section for rules concerning those items.
A figure can climb or descend a stairway at a cost of 1" per 1" (10 feet in scale) of elevation change. Moving up or down a permanent ladder costs 2" per 1" of ascent or descent. As with moving through doorways and other openings (see above), more than one figure can move simultaneously at no increase in movement cost if more than one route (or, for instance, an extra-wide stairway) is available.
Scaling Ladders and Grapples
A unit can be designated in a scenario as carrying ladders or grapples. A unit carrying ladders pays one-third of its movement allowance every turn because of its load; there is no movement cost for carrying grapples.
Ladders and grapples can be represented by miniatures, toothpicks, thread, or other props, though this is not necessary.
A unit can use ladders if it begins its move in contact with (and facing) the wall to be scaled, or if it uses less than one-third of its move to contact and face the wall. To use grapples, a unit must be contacting and facing the wall at the start of its move.
When using ladders, a unit spends 2" of its movement allowance to move one figure 1" (10 feet in scale) up each available ladder. A ladder can support one figure for each 1" of its length; however, no more than one rank of a unit may climb aboard the unit's ladders until entry is gained to the walltop position.
Grapples are more difficult to use. Not only is the cost 3" per figure moving up 10 feet, but such figures might not be able to fight when they reach the top of the wall. If a unit is using grapples to reach the top of a wall, and the top of the wall is being defended by enemy units, then the attacking unit must make a special morale check—with no modifiers, regardless of other circumstances—before melee combat is resolved. The only purpose of this check is to determine if the unit using grapples gets to make an attack (success) or must simply hang on its ropes and endure the attacks of the defenders (failure). A unit never changes the status of its morale (to shaken or routed) or withdraws as a result of this special check.
Effects of Buildings on Morale
The effects described here apply to the defenders of a building or fortification—and also to the attackers, if every surviving figure of the attacking unit is within the walls of the enclosure.
A player can always choose to apply the standard effects of morale to one of his units instead of the special procedures listed here. In fact, such a decision need not be made until after the morale check dice are rolled.
The primary effect on morale is that units are not required to rout when they are within walls. An important additional consideration is the determination of troops to stand firm at a wall, gate, or breached wall, defined as "holding the breach."
Effects on Rout
The routs seen on a battlefield, where troops panic and flee toward imagined safety, are less relevant in a fortress—particularly when such a flight would send the fleeing force pouring over the back wall into the teeth of the encircling foe. Even attacking troops, however, will not be so likely to fly from the shelter of their hard-fought gains, once they have worked their way into a castle or fortress.
When a unit makes a morale check that would ordinarily result in its routing, the following effects occur instead:
- The unit becomes shaken (if it did not already have that status).
- One figure is removed, in addition to any casualties that might already have been lost; no additional morale check is required for this lost figure.
- All of the remaining figures in the unit are moved 4". They must move away from enemy figures as much as possible, and are allowed to change elevation within the building by using stairs or permanent ladders. Any figures that cannot complete a 4" move, or that come into contact with enemy figures during the move, are eliminated. Figures can be faced in any direction after the move is completed.
Units in Separate Rooms
If figures suffer a rout result when a unit is split between several different rooms or enclosed areas, only those figures within the affected room are required to perform the 4" move explained above. The entire unit is still reduced to shaken status, however.
Holding the Breach
This game rule allows a unit to stand more solidly at an important defensive position such as a rampart on a wall, a gateway or doorway that has been smashed open, or even a breach in a castle wall. A breach must be a bottleneck or barrier of some sort, however; units holding a line across a wide corridor, bridge, or other long, straight passage are subject to the normal combat and morale rules.
If the breach is the top of a wall, a rampart, parapet, or other type of breastwork, all of the figures in the unit that are in contact with enemy figures must be protected by the barrier.
A player can declare that one of his units is attempting to hold the breach before it begins melee combat with a given enemy unit. If this declaration is made, the unit cannot choose to withdraw instead of making a required morale check. However, if the unit fails a morale check, it is not required to withdraw 4". Instead, it follows this special procedure:
If a unit in good or shaken order fails a morale check while holding a breach, some of the enemy figures force their way past the obstacle. The exact number is determined by the difference between the morale roll needed to pass the check and the dice roll actually made. For example, if the unit needed a 12 and rolled a 15, then 3 enemy figures pass through the breach (or doors or window, or climb over the wall, etc.).
The defending figures must withdraw enough to allow the enemy figures through, but no more. The defender does not become shaken if it was in good order. If the defending unit regains its position at the breach, it can hold the breach again; until it does so, normal withdrawal rules apply.
If the defender inflicts casualties on an enemy unit that has passed partially, but not entirely, through any breach (whether or not a holding action was declared there), the figures killed must be taken from those through the breach. Defending figures can immediately move forward to fill gaps left by those removed figures.
A hero can hold a breach (and obviously, such an individual will never fail a morale check). This is a legitimate tactic, and indeed the bones of many heroes have come to rest in all the different types of breaches.
Caption (printed page 81): Shelter from missile fire. The front rank of the unit at left can't be hit by indirect fire, and the unit under the roof is obviously protected. The unit at right can be hit by indirect fire, as can the second rank of the unit at left.
Combat Rules for Buildings and Fortifications
Combat rules apply to figures fighting from, within, against, or upon fortifications, and to figures and war machines attacking the fortifications themselves.
Shelter from Missile Fire
If the figures in a unit are in a building or behind a wall, they can take shelter from enemy missiles. All figures within a building can claim such shelter. Up to one rank of figures may shield itself completely behind a wall; additional ranks may be subject to indirect fire.
Enemy missile troops can take indirect fire shots over a wall in the hope of hitting a target beyond. After all other modifiers are made, such attacks suffer an additional 1/2 AD penalty. After the fire is resolved, hits are divided evenly among all target units within the range of the attacker. The defender decides which units take the extra hits when the division results in a remainder. The defender then rolls armor checks and removes any casualties.
Troops that are under a roof, or the first rank of troops against a wall that separates them from the missile troops, cannot be struck by indirect fire.
Fighting at Narrow Passages
Only as many figures as could pass through a narrow opening at one time can fight to defend that opening. This usually means a single figure at a door, window, or other bottleneck. If the figure fighting at a passage is slain, it can be replaced by another figure in its unit if that other figure is not in contact with an enemy unit. (To simplify this procedure, simply remove the casualty from a rear rank of the unit.)
Scaling Walls
Units equipped with grapples or scaling ladders can attempt to gain entry into a fortress over the top of its walls. However, defenders holding the wall have a considerable combat advantage over the attackers.
Melee combat can occur between figures that have climbed ladders and grapples (see the rules on movement in the previous section) and reached the top of a wall. Both sides are considered to be at the same elevation.
However, the defender gets the AR benefit (-2) of being protected by a wall and the attacker does not. In addition, the attacker suffers a +4 penalty to his AR when on a ladder. An attacker on grappling lines is not allowed to make any armor checks; every hit on the unit counts as a casualty.
When casualties are inflicted on a scaling unit, losses must first be removed from figures that have made the climb. When all figures on ladders or grapples are eliminated, excess losses are applied to figures on the ground below.
Bashing Doors and Gates
Doors and gates in a building have a certain number of hits, much like a figure in a unit. When a door or other physical feature loses all of its hits, it ceases to be an obstacle.
Typical Hits ratings for structures and parts of structures are given below, though these numbers will often be modified by the details of a certain scenario.
Hits of Building Features
| Hits | Feature |
|---|---|
| 2 | shutters on a typical door or window |
| 3 | heavy door |
| 5 | fortified door |
| 10 | typical cottage |
| 15 | iron door |
| 20 | wooden house |
| 24 | small gate |
| 30 | stone house, section of wooden palisade |
| 40 | section of earthen wall |
| 50 | large gate |
| 60 | section of stone wall up to 20' thick |
| 80 | section of stone wall greater than 20' thick |
Small-sized troops can inflict damage on physical features having 20 hits or less. Humans and other man-sized troops can damage objects having 30 hits or less. Troops of larger than man-sized creatures can damage objects having 50 hits or less. Objects having more than 50 hits can only be damaged by giants or other creatures of similar size (dragons, large dinosaurs, titans, etc.).
Only one figure can attack a building feature, unless the feature is wider than the figure's base. (But see the following section on the use of battering rams.) As many figures as could fully touch an aperture or wall can attack it during a turn.
To bash a physical feature, simply roll an attack for the figure(s) that are trying to break it down and total the number of hits. Hits scored on physical features, just like excess hits scored on a unit, are cumulative from turn to turn. Physical features do not make armor checks; every hit does damage. Often it is easy to keep track of hits scored by placing a die next to the physical feature, but for objects with more than 20 hits it is more convenient to keep a tally on paper.
Battering Rams
An obstacle can be broken down or broken through more quickly by the use of a battering ram. (The rules for a scenario will dictate when one or more battering rams are available.) In its simplest form, this implement is a log carried by several figures in a unit, which then rush forward and smash the ram into the obstacle being attacked.
Generally, as many as 6 figures can use a battering ram (although a scenario might specify a smaller maximum number). The ram is assumed to be as long as the line of figures that are holding it. In order for a ram to be usable, there must be space in a straight line in front of the target equal to half the length of the ram (so that the troops can get a running start before the ram impacts with the target).
For example, a unit with a battering ram wants to break down a fortified door at the end of a narrow corridor. Assuming that each figure in the unit is on a base roughly 1" square, then the corridor must be 9" long in order for 6 figures to use a battering ram. If the corridor is only 6" long, then only 4 figures could ram; if it is 3" long, then just 2 figures could ram—but that would still be a more effective attack than if a single figure stood in front of the door and hacked away at it with his weapon.
The AD of a battering ram (which may be given in the scenario description) varies with the size of the figures wielding it. Small-sized creatures such as goblins might use a battering ram with AD 6; humans, AD 8; and large creatures such as ogres or giants might ram with AD 10 or AD 12. If an AD number for a ram is not specified in a scenario, use the AD one size higher than that of the unit's normal melee attack. To determine the number of hits scored by a battering ram, roll an appropriate-sized attack die for every two figures participating in the assault.
Caption (printed page 83): Battering rams. The four orcs at left can use their battering ram, since they have 2" of free space and need only 1 1/2". The two orcs at right can't ram, since there is no open space behind them. The six in the center can ram, because the path behind them is clear. (Foreground buildings are not shown for clarity.)
Dropping Missiles from Walls
A unit can be listed in a scenario description as being armed with weapons that can be dropped on an attacker. Alternately, certain walltop positions within a defense can be protected with such weapons, usable by any unit garrisoning that location.
The roster notation for an attack with dropped missiles—rocks, cauldrons of oil, and so forth—is an AD number in parentheses.
Missiles can be dropped during the Melee Combat Step by any defending figures that are not in contact with enemy figures (because of the defender's higher elevation) but have those figures adjacent to them at the bottom of a wall or other precipice. This attack must be made instead of a figure's normal melee attack.
Also, dropped missiles can be used as pass-through fire during the enemy's movement step when enemy figures are scaling a wall or other barrier that a friendly unit is attempting to hold. Figures that make this pass-through attack are still eligible to fight in the Melee Combat Step of the same turn.
Dropped missiles can sometimes negate the armor protection of the target unit. If the missiles are small rocks (less than 1 foot in diameter) or regular weapons (such as spears), the defender is allowed normal armor checks. But if the missiles are large rocks, or hot (boiling oil) or corrosive (acid, green slime) substances, the defender is allowed no armor checks.
War Machines
The most elaborate assaults against fortifications involve great engines of war such as catapults, trebuchets, and siege towers, as well as powerful, grinding constructions such as covered rams and bores. These are easily represented on the tabletop battlefield. Each type of war machine falls into one of three classifications: bombardment engines, crushing engines, or siege towers.
Bombardment Engines
Bombardment engines are medieval artillery. They hurl missiles at a slow rate of fire and without a great deal of accuracy—but the missiles are very large and do a lot of damage to anything they hit.
Explanation of terms used in the table below:
- AD is the size (and number) of attack dice rolled when the artillery is fired. Attacks can be rolled against specific target units or building features. Eligible building features include wall sections 3" or more in length, or a reasonably large feature such as a tower, gatehouse, or stable. Objects such as gates are generally too small to be artillery targets; a gate or other type of feature not listed here would need to be at least 3" wide to qualify as an artillery target.
- A ballista with full crew can fire at a single large-sized individual figure (a dragon or the leader or a troop of giants, for instance); under no other circumstances can an artillery piece fire at a single figure, whether that figure is a hero or part of a unit.
- Targets of artillery attacks are not allowed to make armor checks; every hit does damage.
- Special Modifier: An artillery weapon only inflicts half the actual hits it rolls (rounded up) when firing at a unit in skirmish formation. If 5 hits are indicated, for example, a skirmish unit only suffers 3.
- Hits is the number of hits required to disable the machine (see the section below on Damage to Occupants of Buildings and War Machines).
- Range is given in minimum and maximum distances. There are no short, medium, and long range categories for artillery, and artillery pieces do not receive a range bonus for elevation.
- Crew is the number of figures required to operate the weapon at full effectiveness. The weapon can operate with less than a full crew, but its rate of fire is slowed to half speed. A weapon cannot fire or be loaded if its crew has been reduced to less than half the number given here.
Crew members can defend themselves against a melee attack, but they cannot fire missile weapons or make a melee attack; if they do either of these things, they are considered not to be crewing the artillery weapon during the turn in which the attack is made.
- Rate of fire is the number of turns required for the weapon to be reloaded. A heavy catapult, for example, can fire once every three turns (or only once every six turns, if it is missing a crew member or two).
- Move is the distance an artillery weapon can travel in one turn over clear, flat terrain. An artillery weapon is treated as cavalry for purposes of determining what types of special terrain it can negotiate, and how quickly it can move through special terrain—half speed through light woods or when ascending a slope, and one-third speed through shallow water or brush/scrub.
An artillery weapon can only be moved when it has a full crew. An artillery weapon cannot move and fire in the same turn, though it can be moved fully loaded, ready to fire the turn after it moves. A turn when an artillery weapon moves does not count for reloading, for purposes of determining rate of fire. An artillery weapon can change facing during a turn when it is being reloaded.
Bombardment Engines Table
| Bombardment Engine | AD | Hits | Range | Crew | Rate | Move |
|---|---|---|---|---|---|---|
| Ballista | 12 | 8 | 1"/27" | 3 | 1 | 6" |
| Light Catapult | 2d10 | 10 | 15"/30" | 4 | 2 | 4" |
| Heavy Catapult | 2d12 | 15 | 18"/36" | 6 | 3 | 3" |
| Trebuchet | 3d12 | 20 |
Crushing Engines
Rams and bores are the two typical examples of this type of war machine. The ram (a more massive version of the battering ram discussed in a previous section) is most useful against wooden barriers and portals. The bore, a large implement resembling a drill or a screw, is most useful against stone walls.
At least eight figures are needed to move a crushing engine at its full speed of 3" per turn. Four to seven figures can move it 2", and two or three can move it 1". Crushing engines can only be moved over clear, flat terrain (including roads, but not trails). Twice as many figures are required to move a crushing engine up even a gentle slope (1" rise for every 12" of horizontal distance), and movement up a steeper incline is impossible.
A crushing engine gets two attack dice of the appropriate size for each figure helping to operate the device. At least two figures must be available to operate it, and no more than four can contribute to the crushing engine's attack strength. The engine must be touching the surface to be attacked before it can cause damage.
Explanation of terms used in the table below:
- Hits is a two-number entry because in most cases, a crushing engine is enclosed within a structure (generally a heavy wooden roof supported by a framework of timbers) that provides protection for the device as well as for the figures (maximum of four) that are operating it. The first number represents the number of hits of the engine itself; the second number is the number of hits of the protective framework and roof (which must be destroyed before the device inside can suffer damage).
- AD columns show the size of attack die (4-sided, 6-sided, or 8-sided) used when the engine is attacking a certain type of material. The number of attack dice rolled is determined by the number of figures operating the device, as described above.
Specific alterations in the ratings of these engines can occur between scenarios.
Crushing Engines Table
| Crushing Engine | Hits | AD vs. Stone | AD vs. Metal | AD vs. Wood |
|---|---|---|---|---|
| Ram | 6/18 | 4 | 6 | 8 |
| Bore | 12/18 | 8 | 6 | 6 |
Siege Towers
The purpose of these huge, movable towers is to move attackers up to the wall of a fortress, castle, or other structure and enable them to take on the defenders of the wall from the same height, or perhaps even a higher elevation. A siege tower is as difficult to move as a crushing engine, requiring the same number of figures and subject to the same restrictions.
A siege tower has 10 hits for every 1" (10 feet in scale) of the tower's height. The dimensions of a siege tower, the number of levels within it, and its capacity (in number of figures) must be specified in the rules for a scenario. If the tower has multiple levels, figures can be placed at various elevations within it. (For example, some troops might battle defenders at windows 10 feet off the ground while other attackers are meeting a force guarding the top of the wall 20 feet higher up.)
Damage to Occupants of Buildings and War Machines
War machines can score hits against other war machines, and against both stone and wooden building features of any type (as long as the feature is large enough to be an eligible target). War machines can also be damaged by individual figures and units.
A structure is destroyed when it has suffered all of its hits in damage. Figures inside the structure are in danger of being killed in the collapse. The attacker rolls a d6 for each figure and totals the number of hits scored; then the defender removes the appropriate number of figures from the battlefield. No armor checks are allowed to cancel any of these hits.
The crew of an artillery weapon does not suffer damage when the weapon is destroyed, since those figures are not in an enclosed area. Figures that are operating a crushing engine may be killed when the protective structure around the device is destroyed. (The ram or bore itself is still usable, as long as a sufficient number of figures survive or more figures can be moved up to take the places of the victims.)
A siege tower is a special case because of its height and massiveness. Instead of a d6, the attacker rolls a d8 for each figure inside a siege tower when the structure is brought down.
Caption (printed page 85): A horde of charging goblins, mounted on bloodthirsty wolves, rush the courageous defenders of a key bridge.
Fire Attacks
Fire can be wielded in the form of torches, flaming oil, chemically based Greek fire, and possibly magic. Fire, or a fiery object, can be delivered to its target by dropping it from a height, launching it from a catapult, or lashing it to an arrow.
Fire inflicts damage against living creatures and wooden structures, but not against stone. Also, certain creatures (such as fire giants) may be designated as immune to fire attacks. Fire attacks are generally only usable if a scenario specifies that they are available; a player cannot arbitrarily decide that his troops have access to Greek fire, for instance. However, players might come to a mutual agreement that certain types of fire attacks (particularly torches and flaming arrows) are available whenever a player elects to use them.
Forms of Fire
Caption (printed page 86): Bright colors enliven this detailed figure of an elven cavalryman and his horse. See Appendix IV for more information on painting.
Greek fire is a caustic, flame-producing liquid chemical that has AD of 2d12 per attack in the turn when it hits a target—and 1d12 for each of the next two turns, when the target is a figure or a unit (unless the liquid is somehow washed off or neutralized). The damage suffered on later turns is determined at the start of the Melee Combat Step (after the affected target has had an opportunity to move). Canisters of the substance—which are assumed to break on contact, whether or not they hit their target—can be launched from a catapult or dropped off the top of a wall or the roof of a building.
Torches have AD 4 per attack. They must be carried (and thus used as a melee combat weapon) or dropped.
Flaming oil has AD 12 per attack, and also AD 12 on the turn following the attack when the target is a figure or a unit (resolved as for Greek fire; see above). Containers of flaming oil can be launched from a catapult or dropped.
Burning arrows act essentially as torches used as missile weapons. Because they don't fly as fast as normal arrows, they have AD 4 per attack (instead of the usual AD 6 for normal arrows). And they can't be propelled as far as normal arrows can; the upper limit of each range category is halved (after the elevation range bonus, if any, is taken into account).
Magical fire has various effects, depending on how the fire is produced and how potentially damaging it is. See the rules on magic (Chapter 8) for details.
Igniting Targets
Figures hit by fire attacks are not allowed to make armor checks; every hit scored does damage. Most of the time, the same is true of a structure or substance that is hit by fire. However, there are two types of exceptions to that rule:
- Green or freshly wet wood that is hit by nonmagical fire makes armor checks as though the substance or structure has an AR of 6.
- Soaked hides or a steadily watered surface hit by nonmagical fire makes armor checks as though the substance has an AR of 2.
A wooden structure hit by a fire attack continues to suffer damage on subsequent turns and may eventually be consumed by flames. At the start of the Melee Combat Step of the turn following the original attack, the attacking player rolls AD 6 for each hit that was scored by the original attack, and damage is added to what the wooden structure had already suffered. During the next turn, AD 6 rolls are made for each hit scored on the previous turn, and that damage is added to the total. The process is repeated until the wooden structure has suffered all of its hits in damage, or until the AD 6 rolls made during a turn result in no additional damage, which means that the fire has gone out.
Each figure spending a turn within 1" of a fire can fight the blaze. Each firefighter changes an AD 6 fire damage roll for that turn to a roll of AD 4, which increases the chance that the fire will be extinguished (score no hits during a Melee Combat Step) before it has consumed the structure. Firefighting figures cannot move, attack, or be in contact with enemy figures during a turn when they fight the fire.
Chapter 8: Magic
Magic on the battlefield is broken into two categories: special abilities inherent to certain types of creatures (such as dragons and hell hounds) and magical spells usable by certain types of heroes (wizards and priests).
Magic not only unleashes forces of horrible destructive power, but it can be used to shape and alter the features of the battlefield, or to disguise—even to the point of invisibility!—individuals and units. The use of strong magic also can have a detrimental effect on the morale of a foe.
Fortunately for the masses of creatures, those who can wield magic are few in number, restricted to powerful wizards and priests or those awesome creatures such as dragons with inherent magical powers. When one of these powerful individuals works to serve the cause of evil, another powerful spellcaster will often be found to champion the cause of good.
The rules that follow are not an attempt to directly convert a magic-using character from the AD&D® game into a figure in a BATTLESYSTEM™ scenario. Instead, they are designed as a set of magic rules, drawn from the AD&D game rules, that will enable players to use magic spells and abilities on the tabletop battlefield without needing a referee.
The rules for converting AD&D game characters to BATTLESYSTEM scenario participants (Appendix I) explain how you can involve PCs in a battle scenario with no conversion of abilities or spell lists. Such usage, however, does require a referee or DM, and is best suited for battles occurring as part of a role-playing campaign.
Special Magical Abilities
Invulnerability (Immunity to Certain Weapons)
Some creatures are described (in the statistical listings, Appendix II) as being immune to nonmagical weapons. An enemy figure or unit cannot inflict harm upon such a creature unless the enemy is equipped with magical weapons. Attacks with nonmagical missile and melee weapons against invulnerable units or figures are impossible. If an invulnerable hero is attached to a unit that is not invulnerable, the other figures in the unit can still be attacked normally.
Certain exceptions do exist, however:
- An invulnerable figure can be hit by a nonmagical weapon that allows no armor checks (artillery and fire attacks being the prime examples).
- An invulnerable figure can be hit by a figure (whether a hero or part of a unit) having at least 3 Hits.
A unit in contact with an enemy unit that it cannot attack because of invulnerability (or any other special magical ability) must make a morale check at the end of each turn in which the two units remain in contact.
Breath Weapons
Certain creatures (most notably dragons) can breathe fiery, or icy, or poisonous blasts from their jaws, capable of causing fearful havoc on a battlefield. A breath weapon can be used once per turn, during either side's movement step or in the Missile Combat Step.
A breath weapon affects an area of a specific shape directly in front of the breathing creature. In addition, it may affect a specified maximum number of target figures. (Add 1 to this number for smaller than man-sized targets; subtract 1 for larger than man-sized.) Each figure within the area of effect suffers an attack by the listed AD for the figure's breath weapon attack. No armor checks are allowed.
Cause Awe, Cause Horror
Some creatures have the ability to cause awe or horror in enemy units. The effects of the two powers are only slightly different. Creatures having either ability should be noted as such on the unit roster.
A creature or unit that causes awe forces an enemy unit to make a morale check the first time during a scenario when the awesome creature comes within 12" of the unit. Vertical distance (if greater than 12") doesn't count; if a dragon flies 20" above a unit on the ground but is 12" or less distant from the unit in horizontal distance, the unit suffers the effects of awe.
If figures attempt to charge an awesome figure, or if they are making a morale check because they are the target of the charge of an awesome creature, a -2 penalty applies to the unit's morale rating.
Once a unit has succeeded on a morale check caused by an awesome figure or unit, it need not check again for being awed by that figure or unit for the rest of the scenario.
A creature or unit that causes horror forces an enemy unit to make a morale check when the opposing units first find themselves separated by 3" or less. In addition, a unit must make a morale check at the end of each turn when it is in contact with a figure or unit that causes horror. Certain figures are described on the unit roster as "Cause horror, -1" or "Cause horror, -2"; the number is the penalty that applies to the opponent's morale rating for these checks.
Creatures that cause horror or awe are immune to the horror and awe effects of other figures or units. Other types of creatures may be immune to these effects as well.
Magic Resistance
Creatures having magic resistance can often avoid the effects of a magic spell or magical special ability. Magic resistance is expressed as a number from 1 (weak) through 9 (very strong).
The procedure for checking magic resistance is similar to an armor check; the player controlling the figure or unit having magic resistance rolls 1d10 for each figure struck by a magical attack. For each die-roll result equal to or less than the unit's or figure's magic resistance rating, one figure avoids the effect of the magical attack.
Level Draining, Poison, Paralysis
These magical attacks serve to create additional casualties among the ranks of their victims. Consequently, creatures with these abilities have been granted a larger-sized AD than they would normally merit. (In addition, the paralysis ability has another special effect; see the description of ghouls in Appendix II.)
Creatures with any of these attack forms always cause horror, and units facing creatures with these special abilities must make morale checks as explained under the "Cause Horror" section above.
Caption (printed page 89): Spell areas of effect. A spellcasting figure at "X" casting a wall of fire spell (see page 91) has several choices. The spell can be directed at the giant; at two of the orcs in the unit behind the giant; or at the skirmishers (right), hitting three of them. The ogres at left cannot be targeted, since they lie outside the 45-degree arc to the left of the spellcaster's center.
Spell Abilities
Two types of heroes, wizards and priests, can employ spells on the battlefield. Certain monsters might be specified as capable of using spells also.
Choosing Spells
The spells usable by a figure are specifically assigned or chosen at the start of a scenario, and cannot be changed once the battle is under way. The greatest number of spells a figure can have is equal to 1 1/2 times the spellcaster's number of hits (rounded up). Usually, a figure will have the maximum number of spells available, but sometimes a scenario may specify a lower number.
As explained below, each spell has a specified level; the higher the level, the more powerful the magic. A spellcaster cannot have any spell of a higher level than the figure's number of hits, and a figure cannot have more spells of a certain level than he has of each level lower than that. The same spell can be taken twice, but not more than twice.
Exception: A spell of a lower level can be taken to fill a slot at a higher level, as long as the selection of this spell does not violate the rule about having the same spell no more than twice. For instance, the player of a wizard entitled to have a sixth level spell may not see any use in being able to cast Lower Water, which is the only sixth level wizard spell available. In that case, he can fill the sixth level slot with a spell of fifth level (or lower), as long as the wizard does not end up with the ability to cast the same spell three times.
Putting all these rules together: A wizard with 3 hits can have as many as 5 spells (3 x 1 1/2, rounded up). One of those spells can be a third level spell (matching the figure's number of hits). The other four spells could be allocated in two ways—either three first level spells and one second level, or two of each lower level. It would be illegal to give the figure a single first level spell and three from second level, or to allow the figure more than one third level spell.
In addition, spell-using individuals have these innate abilities: A wizard causes horror in enemy figures within a range of inches equal to the wizard's number of hits. A priest causes awe in enemy troops within a range equal to the priest's number of hits.
Casting Spells
A spellcasting figure can use as many as two spells in a single turn, and can cast spells (one per step) at any of these times—as long as the caster is not in contact with an enemy figure or unit:
- During the caster's movement step, in place of movement, as long as the casting figure has not yet moved in the current turn.
- During the opponent's movement step.
- During the Missile Combat Step.
The target of a spell must be within the area of a 90-degree arc in front of the caster (the same area that is used to regulate movement and missile fire). Remember that an individual figure can change facing freely during a turn; this includes pivoting to face a target just before casting a spell.
Each spell listed for a spellcaster is usable once per battle. When the spell is used, it is crossed off the figure's list.
Effects of Spells
The specific effects of each spell are given in that spell's description (see the spell lists at the end of this chapter). The general characteristics that describe each spell are defined below.
- Spell Level is an indication of the relative power of the magic of the spell; second level spells are more powerful than first level spells, for instance (although not necessarily twice as powerful). This number is also the minimum number of hits a figure must have in order to use the spell in question (as explained above).
- Range is the maximum distance away from the caster that the spell's effects will reach or commence.
- Duration is the number of turns during which the spell will remain in effect. Players may wish to note the turn when a spell is cast on the unit roster (or another slip of paper), and they should be sure to record the passage of turns throughout the scenario in order to ensure accuracy. A spell's duration lasts until the end of its final turn. A duration of "Concentration" means the effect lasts as long as the wizard does not move, does not cast another spell, and is not hit by an attack. When concentration is broken, the spell effect ceases immediately.
- Area of Effect describes the size (and perhaps also the shape) of the area in which the spell's effects occur. It is expressed either as a measurement of space or as a maximum number of figures. If the area of effect is a measurement of space, a figure is only affected by the spell if any "living" part of the figure itself (but not its weapons, its equipment, or its base) is within the area.
When an area of effect is given as a number of figures, this number refers to man-sized targets. It should be increased by 1 for smaller than man-sized figures and decreased by 1 (to a minimum of 1) for larger than man-sized targets. When several figures are affected, they must all be adjacent to each other in the unit's formation. If the target is in skirmish formation, only 1 figure is affected.
Following this information in each spell description is a section of text detailing how the spell works and what sort of effect it has on the target figure(s). If the spell does damage, an AD number will usually be given. This type of die is rolled for each figure affected by the spell, and any hit(s) resulting from that roll are applied to the specific figure for which the roll was made. (Note that this differs from the procedure for weapon combat, in which hits are rolled collectively and not applied on a figure-by-figure basis.) Unless otherwise specified in a spell description, no armor checks are allowed for the purpose of canceling hits inflicted by magic.
Wizard Spell List
Magic Missile
- Spell Level: 1
- Range: 6" + 2" per hit of caster
- Duration: Instantaneous
- Area of Effect: 1 figure or unit
A magic missile inflicts one hit upon the target for each hit of the caster (no AD rolls necessary), up to a maximum of 5. Armor checks are allowed against each hit.
Stinking Cloud
- Spell Level: 2
- Range: 3"
- Duration: 1 turn
- Area of Effect: 1 figure
The stinking cloud surrounds the target with a mass of noxious vapors. A unit must check morale if one of its figures is struck by this cloud. Larger than man-sized figures, and figures with 3 or more hits, are immune to the stinking cloud.
Dispel Magic
- Spell Level: 3
- Range: 12"
- Duration: Instantaneous
- Area of Effect: 1 spell
The dispel magic spell can be cast against any opponent's magic spell with an ongoing effect occurring within range of the caster. (Spells with a duration of "Instantaneous" cannot be dispelled before they take effect.) To succeed, the caster must roll 6 or higher on 1d10 (counting "0" as a roll of 10). The roll is modified by the difference between the caster's hits and the hits of the spellcaster whose enchantment is to be dispelled.
For example, a caster with 7 hits attempting to negate a spell cast by a figure with 4 hits adds 3 (7 - 4) to his die roll, so that the dispelling succeeds on a roll of 3 or higher. In the reverse situation, a caster with 4 hits attempting to negate a spell cast by a figure with 7 hits must add -3 to his roll, so that he needs to roll a 9 or higher to dispel the more powerful caster's enchantment.
Haste
- Spell Level: 3
- Range: Contact
- Duration: 2 turns
- Area of Effect: 1 figure
The haste spell doubles a figure's movement allowance and number of AD. A hasted figure always receives the melee advantage bonus (see page 41), regardless of weapon type, unless he is fighting a foe who is also hasted.
Wall of Fire
- Spell Level: 4
- Range: 6"
- Duration: Concentration
- Area of Effect: Rectangle 1" long per hit of caster, 3" high
One part of the wall must be within range of the caster, but the far end of the wall can extend outside of the 6" range. The wall cannot be moved once it is raised. It lasts until the caster moves, casts another spell, or is hit by an attack. Each enemy figure in the wall when it is raised, or that marches into it while it is up, suffers damage of AD 1d10.
Fireball
- Spell Level: 3
- Range: 2" per hit of caster
- Duration: Instantaneous
- Area of Effect: 2 figures 1" or less apart
The fireball explodes around the affected figures, inflicting AD of 3d8 per figure.
Fly
- Spell Level: 3
- Range: Contact
- Duration: 6 turns
- Area of Effect: 1 figure
The fly spell allows one figure (representing an individual, not 10 creatures) to fly at a movement rate of 18", Maneuverability Class B. This figure can be the spellcaster, or any individual figure that is in base-to-base contact with the caster when the spell is cast.
Lightning Bolt
- Spell Level: 3
- Range: 4" + 1" per hit of caster
- Duration: Instantaneous
- Area of Effect: 3" line
The lightning bolt begins at a point within range of the spellcaster, and then shoots 3" from that point directly outward from the front side of the caster. A figure whose body (but not just weapon, equipment, or base) lies in the area of effect suffers AD of 3d8.
Protection from Normal Missiles
- Spell Level: 3
- Range: Contact
- Duration: Remainder of scenario
- Area of Effect: 1 figure
The caster can protect himself or one other individual figure (hero) from all nonmagical arrows, spears, hurled boulders, etc., for the rest of the scenario (or until the magic is dispelled). The spell conveys no protection against artillery weapons or magical attacks.
Fear
- Spell Level: 4
- Range: 2"
- Duration: Instantaneous
- Area of Effect: 1 unit
When the fear spell is cast upon an opposing unit, that unit must make an immediate morale check with a -3 penalty to its morale rating.
Cone of Cold
- Spell Level: 5
- Range: 1" per 2 hits of caster
- Duration: Instantaneous
- Area of Effect: 90-degree arc in front of caster, to outer limit of range
The cone of cold is a frigid blast against creatures in the fan-shaped area of effect. Each victim suffers an AD 8 attack for each 2 hits of the caster (rounded up). For example, a caster with 5 hits rolls 3d8 against each figure in the area of effect.
Cloudkill
- Spell Level: 5
- Range: 1"
- Duration: 1 step
- Area of Effect: 1" x 2" rectangle
The cloudkill must be placed so that at least an edge or a corner of the area of effect is within 1" of the spellcaster. Any figures within the area of effect suffer AD of 2d12.
After the spell is cast, the cloud can be moved in a straight line up to 1" for every 2 hits of the spellcaster, possibly damaging or killing other figures as it moves. A unit that is forced to check morale because it suffers a casualty from this magical attack is not required to make repeated checks if the cloud kills other figures in the same unit as it moves. No single figure in the unit can be the object of more than one AD roll.
If the target unit is in good order, it can choose to withdraw instead of making the morale check after suffering a casualty. (Obviously, this can be a wise tactic to get away from a moving cloud.) If the spell is cast during the target unit's movement step and that unit has not yet moved, it can move immediately after the casting (and the initial AD roll) in an attempt to avoid further damage. The effect of this spell can be negated by a successful casting of dispel magic; the defending player must be given an opportunity to declare that he is casting dispel magic before the attacking player makes an AD roll to determine damage caused by the cloud (whether the roll comes just after casting or while it is moving).
The cloud will sink to the lowest elevation in its path, perhaps moving contrary to the desired direction of the caster in doing so. The cloud cannot move up a slope and cannot move over any obstacle 1" (10 feet in scale) high or higher. It is dispersed if it comes into contact with dense woods, and only causes 1d12 of damage to figures in light woods.
Hold Monster
- Spell Level: 5
- Range: 1" per hit of caster
- Duration: 1 turn per 2 hits of caster
- Area of Effect: 1 figure
The caster paralyzes any one figure if this spell is successfully cast. To determine success, roll 1d10 for the caster. Subtract 3 from the die roll if the figure represents creatures at a 10:1 ratio. If the result is greater than the number of hits of the victim, the spell works and the victim must remain in place, unable to move or attack, for the duration.
Teleport
- Spell Level: 5
- Range: Spellcaster
- Duration: Instantaneous
- Area of Effect: Spellcaster
The teleport spell allows the spellcaster to move instantly to any other place on the table—or even leave the battle, in an emergency. A figure with two teleport spells can leave the battle with one spell and then return during a later step or turn with the other spell. The caster's destination can be any location on the battlefield not occupied by another unit.
Lower Water
- Spell Level: 6
- Range: 8"
- Duration: 1 turn per 2 hits of caster
- Area of Effect: 1" square per hit of caster
With this spell, a wizard can turn an area of deep water into shallow water, or an area of shallow water into clear, open terrain. Figures (friendly or enemy) can move through the altered terrain, treating it as shallow water or dry ground, for the duration of the spell (or until the magic is dispelled). If a figure is caught in shallow water when it turns back to deep water, the figure is destroyed. If a figure is caught in an area of dry ground when it turns back to shallow water, the figure is destroyed if it is unable to move through shallow water. Note that the area of effect is always a square, regardless of the shape of the body of water being affected.
Thus, a wizard with 6 hits casting the spell on a 2" wide shallow stream causes a 6" length of the stream to dry up; the rest of the terrain in the spell's area of effect is already dry ground, and is not changed by the magic.
Mass Invisibility
- Spell Level: 7
- Range: 2" per hit of caster
- Duration: Special
- Area of Effect: 1 unit within 6" x 6" square or equivalent area
This spell can be used to conceal the location of any one unit, including not more than 40 man-sized or smaller figures, up to 12 larger than man-sized or cavalry figures, or up to 4 giant-sized or larger figures. In addition, the unit to be affected must be enclosed entirely within an area of 36 square inches (6" x 6", 4" x 9", 3" x 12", or any other shape that meets this requirement). The spell cannot be cast on a unit having any figures within 6" of an enemy figure or unit. The magic lasts until the invisible unit is contacted by a moving enemy unit or makes an attack.
Any player who uses this spell must have a sheet of graph paper with an accurate representation of battlefield terrain. Figures are removed from the tabletop when they become invisible, and their location and subsequent movement are recorded on the graph paper.
The invisible unit's figures must be put back on the table as soon as the unit attacks, or as soon as an enemy figure's movement would cause it to bump into the invisible unit. (Close calls go to the player moving the non-invisible unit; if his moving figure would perhaps graze the side of an invisible unit, that is enough to discover it.)
If the invisible unit reappears because another unit bumps into it, or if the invisible unit attacks (either with missiles or melee weapons), the appearing unit gets to make a free attack against the enemy unit; the enemy is not allowed to return fire or make an attack with its own weapons. This "free" combat takes place during the movement step; the units fight normally during subsequent combat steps.
Mass Charm
- Spell Level: 8
- Range: 1" per hit of caster
- Duration: Special
- Area of Effect: 2 man-sized figures
The mass charm spell is used against specific enemy figures (2 man-sized, 3 small, or 1 large figure). To determine whether the spell succeeds, the defending player makes a morale check for each figure targeted by the magic. This check is made with a -4 modifier to the figure's morale rating, or -2 if the target figure is part of a unit and that unit's commander is also targeted. If an individual figure (hero) is targeted, that figure uses its CD rating for this check—unless the individual figure is a unit commander, in which case the check is made using the unit's morale rating. Successful charming of a unit commander will cause that unit to be out of command.
This special check has no effect other than to determine whether or not the spellcasting is successful. If the check is passed, the spell has no effect on that figure. If one or more of the checks are failed, however, the affected figure(s) are immediately treated as casualties from the unit they belonged to, and the remainder of the unit must immediately make a morale check as though a figure had been eliminated by a magical attack. Thereafter, the charmed figure(s) become a separate unit under the command of the spellcaster. If a hero is charmed, the figure switches sides and is now controlled by the player whose figure cast the spell. Charmed figures are allowed an immediate change of facing as their control passes to the other player; after this, they can only move and attack when their controlling player has chances to move and attack.
If the charmed figure was part of a unit (a figure representing 10 soldiers), it can join a unit owned by the controlling player if its attack dice and armor rating are the same as those of other figures in the unit. A charmed individual can take command of one of the controlling player's units if the player so desires; otherwise, that figure operates as a hero.
The effect of the spell lasts for the duration of the scenario—unless the magic is dispelled, the charmed figures are eliminated, or a wizard controlled by the opposing player casts another mass charm spell to return the figures to their original allegiance.
Meteor Swarm
- Spell Level: 9
- Range: 4" + 2" per hit of caster
- Duration: Instantaneous
- Area of Effect: Special
This powerful spell causes damage in a two-step process. First, the magical meteors will strike any figures in line between the caster and the target figure. When the effect reaches the target (which can be any figure within range), the magic erupts in a spectacular and fiery display. This pyrotechnic explosion affects the target and all other figures within 2".
The attacking player rolls AD of 2d10 for each figure struck by the spell. (A figure that lies between the caster and the target and also within 2" of the target is only struck once, not twice.)
Priest Spell List
Bless
- Spell Level: 1
- Range: 6"
- Duration: 1 turn
- Area of Effect: 1 unit
The bless spell, when cast upon a unit that is not in contact with enemy figures, raises the morale rating of that unit by 1 until the end of the following turn. It can be used to affect a unit of up to 12 small or man-sized figures (or 4 large-sized figures). More than one priest (or one priest with two bless spells) can make multiple castings of the spell to protect a unit containing a greater number of figures. A priest casting more than one bless spell at the same time is treated as if he is casting only a single spell, for the purpose of counting the number of spells cast per turn.
All figures to be affected must be in range of the spellcaster, though they do not have to be within his 90-degree forward arc; for this spell, the caster's range extends 6" in all directions around the figure.
Spiritual Hammer
- Spell Level: 2
- Range: 1" per hit of caster
- Duration: Instantaneous
- Area of Effect: 1 individual figure (hero)
The spiritual hammer allows the priest to roll an AD 6 attack against any individual figure within range. The attack is treated as an attack by a magical weapon, so that it can affect a figure that is invulnerable to nonmagical weapons.
Dispel Magic
- Spell Level: 3
- Range: 12"
- Duration: Instantaneous
- Area of Effect: 1 spell
The dispel magic spell can be cast against any opponent's magic spell with an ongoing effect occurring within range of the caster. (Spells with a duration of "Instantaneous" cannot be dispelled before they take effect.) To succeed, the caster must roll 6 or higher on 1d10 (counting "0" as a roll of 10). The roll is modified by the difference between the caster's hits and the hits of the spellcaster whose enchantment is to be dispelled. This spell is identical with the wizard spell of the same name.
Chant
- Spell Level: 2
- Range: Special
- Duration: Concentration
- Area of Effect: 1 unit
A priest must be within 1" of the unit commander to benefit a unit with this spell, and all figures in the unit must be in command. When it is cast, the unit's morale rating receives a +1 bonus and the AD of the unit is temporarily increased one size—from 8 to 10, for example. (If the AD is already 12 or greater, add a d6 for each AD). The effect only lasts while the priest is concentrating.
Prayer
- Spell Level: 3
- Range: Contact
- Duration: 1 turn
- Area of Effect: 1 unit
The prayer spell affects the same number of figures, for the same duration, as the bless spell. It provides the unit with an improved morale and AD (exactly as the chant spell), plus it improves the unit's AR by 1 (from 5 to 4, for example).
Cure Hits
- Spell Level: 4
- Range: Contact
- Duration: Permanent
- Area of Effect: 1 individual figure (hero)
When a priest casts this spell on an eligible target, the recipient immediately has some of his wounds healed; roll 1d6 and remove that many hits from the character. This spell cannot be used on a figure that has been slain.
Divination
- Spell Level: 4
- Range: 2"
- Duration: Next initiative roll
- Area of Effect: Commander
If the divination spell is cast by a priest who is within 2" of the army commander of his forces (not merely a unit commander), or if the priest himself is the army commander, the divination spell grants the controlling player a -3 bonus to his next initiative roll.
Flame Strike
- Spell Level: 5
- Range: 6"
- Duration: Instantaneous
- Area of Effect: 1 figure (any size, any type)
This spell calls down a towering pillar of flame onto any single target figure within range of the caster. The flame inflicts AD of 3d10 on the victim.
Insect Plague
- Spell Level: 5
- Range: 12"
- Duration: 1 turn
- Area of Effect: 6" diameter circle
This spell creates a dome-shaped cloud of insects around any point within range of the caster. The cloud blocks line of sight, and is 60 feet (6 elevation levels) high. It cannot be moved once it is cast.
Any units with figures in the cloud when it is cast will rout automatically, unless the figures have at least 4 hits apiece—in which case they must check morale at the end of any turn when figures of the unit occupy the spell's area of effect.
Wall of Fire
- Spell Level: 5
- Range: 8"
- Duration: 1 turn
- Area of Effect: Rectangle 1" long per hit of caster, 3" high
One part of the wall must be within range of the caster, but the far end of the wall can be farther than 8" away. The wall cannot be moved once it is raised. It lasts for the duration of the current turn plus the next turn, unless the caster moves, or an enemy figure moves into contact with the caster.
Each enemy figure in the path of the wall when it is raised, or that marches into it while it is up, suffers an attack with AD 10.
Find the Path
- Spell Level: 6
- Range: Caster
- Duration: 1 turn per hit of caster
- Area of Effect: Special
A priest using this spell can lead a unit of figures in column formation through any type of terrain except completely impassable barriers. The unit pays no movement penalty for the terrain as long as the priest remains at the head of the column.
The spell also allows the caster to locate any fords in streams that might lie hidden below the surface.
Wall of Thorns
- Spell Level: 6
- Range: 8"
- Duration: Length of scenario
- Area of Effect: Rectangle 1" long per hit of caster, 3" high
The wall of thorns creates a hedge of nasty, spiked vegetation. It can be slashed through, but only if a figure spends 4 turns hacking at a single place (instead of moving). After 4 turns, the effort opens a passage as wide as the figure's base.
A unit can attack the wall, trying to hack through more quickly. However, if this tactic is used the hedge is treated as an AD 8 foe, and a melee must be fought between the unit and the hedge. The unit must score a number of hits greater than 1 per attacking figure in order for an opening to be made. For this special combat, the unit is allowed to make armor checks but the wall of thorns is not. It could take more than one turn for a unit to make an opening by combat.
A fireball, wall of fire, or flame strike spell that touches a wall of thorns will ignite it. The thorns burn until the end of the following turn, acting in all respects like a wall of fire spell. When the fire dies, the wall of thorns is gone.
Creeping Doom
- Spell Level: 7
- Range: 1" per hit of caster
- Duration: Instantaneous
- Area of Effect: 1" square
The creeping doom spell creates a mass of poisonous stinging spiders and insects. The horror inflicts AD of 4d12 on any figure caught within it. Once created, the creeping doom can move in a straight line 1" for every 2 hits of the caster. (Its movement can be interrupted while the opponent resolves morale checks for casualties.)
Fire Storm
- Spell Level: 7
- Range: 16"
- Duration: 1 turn
- Area of Effect: 1" cube per hit of caster
The fire storm sends explosive blasts of flame through the entire area of effect. Each figure within that area suffers an attack of AD 2d10. Creatures within the fire storm at the end of a turn suffer damage again.
A priest with this spell can cast it in reverse, as a fire quench spell. If cast against a nonmagical fire, it completely smothers all flame in twice the area of effect listed above. If cast against magical flame (including fire storm spells, walls of fire, etc.), it smothers an area equal to the listed area of effect.
Advanced Scenarios
The scenarios on the following pages are examples of miniatures battles that can be set up and played using the basic, intermediate, and some of the advanced BATTLESYSTEM™ rules.
The first scenario is a battle that centers around a building—one side occupying the structure, the other side trying to take it away. Each side has an army commander. The second battle uses undead troops, commanders and heroes, an artillery weapon, and magic spells. In the third scenario, the rules for heroes, skirmish units, flying units, and magic spells are employed.
Refer to the introductory text for the basic scenarios (page 46) for general information and advice that is true for these scenarios as well.
Caption (printed page 95): This fearsome giant skeleton is not afraid to die . . . again.
Caption (printed page 95, lower): From Scenario 2: This massive battle is reaching a climax, as an army of dwarves tries to stem the advance of the horrific undead units that are moving out of the swamp.
Advanced Scenario 1: The King's Last Stand
Men of King Weaver
Background. Old King Weaver is a good and kind man. And, as so often happens to such people, someone who is not good and kind has taken advantage of that benevolence. Assassins in the employ of Prince Boris, the king's younger half-brother, invaded Weaver's lightly guarded castle and, though they did not do him in, forced him to flee. King Weaver, along with a small contingent of loyal soldiers, has taken refuge in a manor on the fringe of his kingdom.
Being in the manor is a bit of a mixed blessing. Troops within the structure will be secure behind its stone walls—but if the entrances are breached, the haven could turn into a tomb for anyone caught inside. Should the king keep his men sheltered and try to hold the gate against Boris's assault, or should he send at least some of his forces outside to intercept Boris's men on the open field?
Now that he can see the enemy corps lining the ridge to the south, King Weaver knows that the time for decision is at hand . . . and the time for being good and kind is over.
Setup. The men of King Weaver are placed after the forces of Prince Boris have been set up. The king himself must begin the scenario inside the manor, either in the courtyard or in the house. The units he commands can be located in the manor or anywhere within a 6" move from the courtyard gate. Any unit inside the house does not have to be placed on the battlefield until the enemy enters the house or the unit fires missiles at a target outside the house.
Terrain. Any suitable building model can be used for the manor, or a cardboard floor plan would suffice. The structure consists of two main parts: a large courtyard surrounded by a 10-foot-high stone wall, and a two-story stone house that is 30 feet tall. The courtyard is 18" wide and 12" deep, with a 3" wide gate separating the courtyard from the road leading up to it. The gate has 24 hits; the door leading into the house has 15 hits. Both the courtyard walls and the exterior walls of the house have arrow slits.
Victory. The men of King Weaver can win if the king himself survives and all of Prince Boris's army is eliminated or routed from the field. If King Weaver is killed, his men must make a morale check at the end of every turn; they can still prevent the other side from winning if they are able to eliminate Prince Boris. If both commanders are killed, the outcome is a draw.
Unit Rosters (AD / AR / Hits / ML/CD / MV)
| Unit | AD | AR | Hits | ML/CD | MV |
|---|---|---|---|---|---|
| King Weaver (Army commander; +2 Charisma Bonus) | 10 | 2 | 7 | 18" | 18" |
| 6 King's Knights | [12]10 | 3 | 5 | 15 | 18" |
| 8 Loyal Archers (Range 7"/14"/21") | 8*6 | 7 | 2 | 12 | 12" |
| 10 Loyal Footmen | 8 | 5 | 2 | 12 | 9" |
Corps of Prince Boris
Background. Prince Boris has known for many years that he will succeed to the throne upon the death of his older half-brother, King Weaver. But Boris himself isn't getting any younger, and he has grown tired of waiting. The assassins he hired to infiltrate the king's castle somehow botched the job; now Weaver and the remains of his army are holed up in a manor near the northern border of the kingdom.
Boris has reached the crest of the last hill lying between him and the manor, and he instantly sees a problem: Because of the water running along its back side, he cannot surround the manor as he had planned. However, another idea springs to mind. The wooded area to the east is more than a source of cover—it could provide Boris with the material he needs to turn a possible stalemate into a decisive victory.
Setup. The Corps of Prince Boris is placed on the field first. The prince himself must begin the scenario at the highest point of the hill.
Terrain. The manor consists of a large courtyard surrounded by a 10-foot-high stone wall, and a two-story stone house that is 30 feet tall. The courtyard is 18" wide and 12" deep, with a 3" wide gate separating the courtyard from the road leading to it. The gate has 24 hits; the door to the house has 15 hits.
The area of light woods is central to Boris's new plan. He can send squads of men into the forest to cut down small trees for use as battering rams. To make a ram, a unit must spend one turn in the forest without moving or engaging in combat (although such a unit could be attacked by missile fire and still be able to finish its job). Boris's men can make up to three battering rams in this fashion; the rams can then be carried to the courtyard gate and used in an attempt to break the gate down. Up to six figures can handle a single battering ram. Any figures carrying or using a ram cannot attack and cannot defend themselves in melee combat; if they do take up weapons, they must drop the ram to do so, and then the ram is lost.
Victory. The Corps of Prince Boris can win if the prince himself survives and all of King Weaver's army is eliminated or routed from the field. Boris can also win if he occupies the manor and none of King Weaver's men are left inside it. If Prince Boris is killed, his men must make a morale check at the end of every turn; they can still prevent the other side from winning if they eliminate King Weaver. If both commanders are killed, the outcome is a draw.
Unit Rosters (AD / AR / Hits / ML/CD / MV)
| Unit | AD | AR | Hits | ML/CD | MV |
|---|---|---|---|---|---|
| Prince Boris (Army commander) | 10 | 3 | 5 | 13" | 18" |
| 7 Knights | [10]8 | 3 | 3 | 13 | 15" |
| 36 Regular Men-at-Arms (May be split into two units at player's option) | 6 | 7 | 1 | 11 | 12" |
| 21 Militiamen Irregulars | 6 | 8 | 1 | 9 | 12" |
Advanced Scenario 2: Army from Beyond the Grave
Graybrow's Legion
Background. In the words of one dwarven warrior with a penchant for wry comedy, undead are simply a fact of life. For a long time, skeletons and zombies have been sallying forth from the Black Swamp to bring terror and death to any mortals they may encounter. Until now, it has been a relatively simple matter to either destroy them or avoid them.
However, recent developments have turned the joke into a statement that is no longer humorous. The undead now seem to be marching with a purpose, as though they are commanded by someone who is not only evil but intelligent. The dwarves can no longer afford to take this threat lightly. The renowned commander Graybrow has gathered a horde of his own, and has added to his army an instrument with great destructive potential. The dwarven steam cannon can fling enormous missiles across a great distance, and is just the thing that Graybrow's Legion needs to bring down the tower, looming from the center of the swamp, which the commander assumes is the base of whoever is controlling the undead troops.
Graybrow's Legion is almost within striking distance now; while the foot soldiers deploy to protect the cannon and engage undead attackers, the crew of the cannon will move into position for the assault on the tower.
Setup. Graybrow's Legion is placed first, with at least one unit atop the hill.
Terrain. The tower (or whatever structure is used) is visible from any place on the battlefield, except for the locations where the light woods block line of sight. The tower has 30 hits; it can only be attacked by the steam cannon until it has 20 hits or less, at which point it can also be attacked from ground level.
Victory. Graybrow's Legion can win by destroying the tower, regardless of how many undead remain on the battlefield. If neither side achieves an automatic victory, the last side to have troops remaining on the table wins the scenario.
Unit Rosters (AD / AR / Hits / ML/CD / MV)
| Unit | AD | AR | Hits | ML/CD | MV |
|---|---|---|---|---|---|
| Graybrow (Army commander; +3 Charisma Bonus) | 10 | 3 | 7 | 18" | 12" |
| Silverhelm (hero) (Has reusable throwing hammer, range 6") | 10*10 | 3 | 6 | — | 6" |
| 24 Elite Dwarves | 8 | 5 | 2 | 14 | 6" |
| 24 Dwarven Regulars | 6 | 6 | 1 | 12 | 6" |
Dark Mahon's Horde
Background. Troops are only as good (or in this case, as evil) as the individual who commands them. Before the evil priest known as Dark Mahon came to the Black Swamp and took up residence in an abandoned tower in the center of the morass, the undead of the swamp were disorganized and, as a result, generally ineffective. Now, thanks to some new creatures that Dark Mahon has created and thanks to his skill as a commander, the horde is ready to surge forth from the swamp and make a killing strike against the haughty dwarves who live in the area to the south.
The nucleus of Dark Mahon's strike force is a squad of skeleton warriors mounted on skeletal steeds. And in case that isn't enough of an advantage, the priest has also animated the skeleton of a giant—a behemoth easily capable of slaying two or three, perhaps even four, dwarves in a single stroke.
Looking out from the window of his tower, Dark Mahon cackles in glee. He can see an army of dwarves on the horizon—the little creatures are actually going to make his task easier by advancing to meet his troops! He sees that the dwarves have an unusual-looking piece of artillery, and immediately realizes that they are staking their success on being able to use this weapon to destroy his tower. Thus, his first tactical decision is made for him: Take out this artillery weapon, and the plodding dwarves won't stand a chance. The priest sends out orders to his minions, then settles back to prepare his spells.
Setup. Dark Mahon's Horde is placed after the dwarven army has been set up. The commander begins in his tower; the undead forces are set up in the swamp.
Terrain. The tower (or whatever structure is used) has 30 hits. As long as Dark Mahon occupies the structure, he can use any spell with a range of "Contact" to affect any figure or unit anywhere in the swamp; if he leaves the tower, this benefit is lost.
Victory. Dark Mahon's Horde can win by destroying the dwarves' artillery weapon, regardless of how many dwarf figures remain on the field. If neither side achieves an automatic victory, the last side to have troops remaining on the table wins the scenario.
Unit Rosters (AD / AR / Hits / ML/CD / MV)
| Unit | AD | AR | Hits | ML/CD | MV |
|---|---|---|---|---|---|
| Dark Mahon (Army commander; Priest spells: Bless (x 2), Chant (x 2), Prayer (x 2), Divination, Flame Strike) | 8 | 3 | 5 | 9" | 12" |
| Giant Skeleton (hero) (Causes awe) | 12 | 2 | 8 | — | 9" |
| 18 Skeleton Skirmishers | 6 | 7 | 1 | n/a | 12" |
| 20 Skeletons | 6 | 7 | 1 | n/a | 12" |
Note printed beneath the roster: All skeletons suffer only half of hits inflicted by crossbows (divide before making armor checks); all other attacks inflict usual damage.
Advanced Scenario 3: Assault on Dragon Peak
Army of the Dragons
Background. The audacity of humans is exceeded only by their foolishness. That is an adage, coined by a dragon long ago, that has been proven correct time and time again. Men and their demihuman minions just never seem to learn the folly of trying to conquer a dragon or make it do something it doesn't want to do. It's impossible to sneak up on a creature that can fly so high that it can see for miles around. And as for actually trying to engage a dragon in combat . . . well, every dragon is glad that humans keep making the attempt—because even a dragon needs some amusement once in a while.
Two dragons, a red and a white, make their lairs atop a pinnacle known as Dragon Peak. They allow other evil creatures and humanoids to live on the lower slopes, creating an impregnable outpost that the dragons can use as a base of operations for their attacks on the surrounding lands.
Now, scouts for the dragons have relayed the news that a force led by humans is advancing toward the peak. It's been months since anyone has tried to take on "Big Red" and his only slightly less formidable white partner, so this little battle will be a good change of pace. And it would be nice, just for the sake of the sport, if this bunch is able to actually put up a bit of a fight. . . .
Setup. The Army of the Dragons is set up first. All of the units must be placed somewhere on Dragon Peak, with at least one dragon on the top of the hill. The other dragon can be on the hilltop, or it can begin the scenario airborne, at up to 20" (200 feet in scale) directly above the top of the peak.
Terrain. Dragon Peak is a hill at least 4 elevation levels high. The edges of the battlefield are taken up by terrain that is difficult for ground troops to negotiate—swamp on the west, rough ground and a wooded area on the east.
Victory. The Army of the Dragons wins the scenario by destroying all of the enemy figures. To that end, it is important for the dragons to maintain control of the hilltop—or regain it, in the unlikely event that the enemy occupies the area.
Unit Rosters (AD / AR / Hits / ML/CD / MV)
| Unit | AD | AR | Hits | ML/CD | MV |
|---|---|---|---|---|---|
| Red Dragon (hero) (Breath weapon 3" x 1", 5d12, 3 uses; no spellcasting ability) | 12 | 2 | 8 | 12" | 9"/30" |
| White Dragon (hero) (Breath weapon 3" x 1", 3d10, 3 uses; no spellcasting ability) | 12 | 4 | 7 | 15" | 12"/40" |
| 4 Manticores (Missile range 6"/12"/18", 4 uses) | 12 | 7 | 3 | 13 | 12"/18" |
| 10 Hobgoblin Archers (Range 7"/14"/21") | 6*6 | 7 | 1 | 11 |
White Wizard's Army
Background. A dragon's arrogance is exceeded only by its reasons for being that way. That is an adage that has been proven correct time and time again. Most men of honor can't stand the fact that dragons are insufferably egotistical—but only the strongest and shrewdest are able to stand up to these terrible creatures, let alone defeat one of them.
Still, wizards and warriors continue to challenge these enormous evil flying creatures. The man who calls himself the White Wizard has spent years honing his skills in preparation for an assault on Dragon Peak. Now he and his force are ready.
The humans and their allies are small in number but very strong in combat ability. They have advanced slowly and deliberately, keeping all of their units on the ground to hide the true nature of their forces. Now they are close enough that they must show themselves. With one eye on the ground and the other one cocked toward the sky, the troops receive their final orders. They will take the peak or—like so many others before them—die trying.
Setup. After the dragons and their allies are set up, the White Wizard's Army is deployed. If one of the dragons is airborne, the elf/hippogriff cavalry unit can also be in the air as high as 24" (240 feet in scale) above the setup area.
Terrain. Dragon Peak is a hill at least 4 elevation levels high. The edges of the field are taken up by terrain that is hard for ground troops to negotiate. (Note, however, that the halflings can move easily through the light woods.)
Victory. If the dragons' pride can be shattered, they can be defeated without being killed. If at least one unit or figure in the White Wizard's Army occupies the top of Dragon Peak and holds it for four consecutive turns, the dragons will give up. If the dragon army drives the invaders from the hilltop, they can try to take the high ground again.
Unit Rosters (AD / AR / Hits / ML/CD / MV)
| Unit | AD | AR | Hits | ML/CD | MV |
|---|---|---|---|---|---|
| White Wizard (hero) (Wizard spells: Magic Missile (x 2), Stinking Cloud (x 2), Lightning Bolt, Protection from Normal Missiles, Fear, Wall of Fire, Hold Monster, Teleport, Mass Invisibility) | 8 | 4 | 7 | 7" | 24" |
| Patriarch (hero) (Priest spells: Bless (x 2), Chant (x 2), Prayer (x 2), Cure Hits (x 2), Insect Plague, Wall of Fire, Wall of Thorns (x 2), Creeping Doom, Fire Storm) | 10 | 3 | 9 | 14" | 18" |
| 20 Light Halberdiers (Second and third ranks can attack in melee) | 8 | 7 | 2 | 11 | 12" |
| 10 Halfling Archers (Skirmish unit; Range 5"/10"/15"; Favored terrain: Light woods) | 6*6 |
Appendices
Printed page 103. The appendices follow.
Appendix I: Converting AD&D® Game Statistics
These rules allow players to quickly convert characters and creatures from the AD&D® game into units and individuals that can be used in the play of a BATTLESYSTEM™ scenario. They can be useful for creatures not mentioned in Appendix II, and also for making modifications specific to a role-playing campaign. How will it improve the ratings of an orc unit, for example, if the DM in your campaign has a band of the monsters with an extra Hit Die, and a +2 to all damage rolls? What does your 10th level fighter, with his longsword +4 and shield +2, look like on the battlefield?
Of course, some of the AD&D game rule books are necessary to perform this conversion—or at least you need the pertinent statistics of the creatures or characters to be converted.
The conversion is easily accomplished, since all of the basic characteristics that describe a figure or a unit in a BATTLESYSTEM scenario have their roots in the mechanics of the AD&D game.
Attack Dice
To arrive at an AD number for a character or creature type (unit), you need the AD&D game ratings for a figure's THACO (the number on a d20 roll needed to hit Armor Class 0 with an attack), and the maximum damage the creature or character could inflict in one round, if all of its normal attacks hit. (Don't consider spells, special abilities, or magical abilities.)
Find the THACO on the Conversion Table below, and cross-reference to the center column to see how many Conversion Points that THACO is worth. Then find the line relating to the character's maximum damage per round, and see how many Conversion Points that is worth. Add both Conversion Point totals together.
Note: For characters and creatures that can make two or more missile attacks per round, only one of those attacks (the one causing the most damage, if they differ) should be used when determining maximum damage per round.
Conversion Table
| THACO | Conversion Points | Max. Dmg. per Round | Conversion Points |
|---|---|---|---|
| 20 | 0 | 0-2 | 0 |
| 19 | 1 | 3 | 1 |
| 18 | 2 | 4 | 2 |
| 17 | 3 | 5 | 3 |
| 16 | 4 | 6 | 4 |
| 15 | 5 | 7-8 | 5 |
| 14 | 6 |
Now check to see what size Attack Die the total of Conversion Points allows, as follows:
| Conversion Points | Attack Die |
|---|---|
| 0-3 | d4 |
| 4-6 | d6 |
| 7-9 | d8 |
| 10-14 | d10 |
| 15-24 | d12 |
| 25-35 | d12 + d8 |
| 36+ | 2d12 |
Special Notes on Attack Dice
- If the creature type is a normal animal (not a fantastic creature, and not a humanoid), reduce the AD by one size.
- If the creature causes paralysis or level draining, or is using a deadly poison, increase the AD by one size.
Also see special notes on converting cavalry and battle platform types at the end of this section.
Varying Attack Dice (Optional Rule). Often, a character or creature from the AD&D game will inflict different amounts of damage on different attacks, reflecting the use of a specific weapon or the result of combat against a foe of a certain size. To reflect this capability in a figure or unit for BATTLESYSTEM scenario play, simply calculate each AD separately and note the specific conditions on the roster.
For example, a unit made up of fighters carrying longswords could have AD 8 against small and man-sized opponents, and AD 10 versus large-sized foes. On the unit roster, this is noted by a usage such as "AD 8 (10 vs. lg)."
Armor Rating
Note the Armor Class of the character or creature (taken from the AD&D game rules) and consult the following table to determine the figure's corresponding armor rating (AR) in a BATTLESYSTEM scenario.
| Armor Class | Armor Rating |
|---|---|
| 10 | 10 |
| 8-9 | 9 |
| 6-7 | 8 |
| 4-5 | 7 |
| 2-3 | 6 |
| 0-1 | 5 |
| -1, -2 | 4 |
| -3, -4 | 3 |
| -5 or less | 2 |
Note on the table: the printed table's negative-AC row reads "-2, -2"; the sequence of the rows indicates it is the -1 to -2 band, and it is shown here as "-1, -2".
Hits
The Hits Rating in BATTLESYSTEM play is a fraction of a creature's Hit Dice or a character type's experience level in AD&D game terms. Assign the figure or unit a number of hits according to the following table, using the "Hit Dice" column for creature types or the "Experience Level" column for individual characters.
Hits Conversion Table
| Hit Dice | Experience Level | Hits per Figure |
|---|---|---|
| Less than 1-1 | 1-1 | 1/2 |
| 1-1 to 1+1 | 0-1 | 1 |
| 1+2 to 3+1 | 2-3 | 2 |
| 3+2 to 6+ | 4-6 | 3 |
| 7 to 10+ | 7-10 | 4 |
| 11 to 18+ | 11-18 | 5 |
| 19 or more | 19 or more | 6 |
Morale Rating
The exact determination of a unit's morale rating requires a little bit of a judgment call, within some very firm guidelines. Of course, if you have the AD&D® 2nd Edition Monstrous Compendium, you can use the morale listings for creatures described therein. For bodies of humans, or whenever morale information isn't available, the following procedure can be used.
Begin with a base morale rating of 11. This is the typical ML for 1st level fighters with average training, armor protection, and motivation—or for the typical 1 Hit Die monster. Then modify the 11 up or down for any of the following factors that apply:
Morale Rating Modifiers
- -2 for creatures of 1/2 HD or less
- -1 for creatures of more than 1/2 HD, but less than 1 HD
- +1 for creatures with 3-6 HD
- +2 for creatures with more than 6 HD
- +1 if unit is entirely elves or dwarves
- +1 if unit has AC of 4 or less
- -1 if unit has AC of 9 or 10
- +1 if unit is cavalry
- +1 if unit is capable of assuming regular formation
- -2 if unit is 0-level humans
- +1 if unit is entirely creatures with Special Abilities*
- +1 if unit is entirely creatures with Exceptional Abilities*
- +1 if unit has magical equipment
- +2 if unit is elite**
- +1 if unit is passionately committed**
- -1 if troops are antagonistic to their own cause**
* These factors are defined in the AD&D game. If using the original rules, see page 85 of the Dungeon Masters Guide. In the 2nd Edition rules, consult page 47 of the DMG. Each Hit Die Modifier listed there (on Table 32) becomes a morale rating modifier when the character or creature is converted to BATTLESYSTEM™ rules. However, no figure or unit can benefit from more than two of the abilities and characteristics given on the table.
** These categories must be determined in the specifics of a scenario, or through the use of a referee in your campaign situation:
An elite unit is defined by training, the longevity and traditions of the unit, and the commitment of its members; an elite unit, therefore, cannot also receive the modifier for being passionately committed. Generally, no more than 1 in every 4 units should be elite, except as allowed by special game conditions.
Troops that are passionately committed to their cause are motivated by something like fanaticism, whether it is a belief in a religious cause or a specific leader, or is something more desperate like the final defense of a homeland, with the lives of family at stake or the ultimate survival or destruction of a nation.
Troops that are antagonistic to their own cause are most typically reluctant peasants ordered to serve an unpopular lord, though they can be slaves ordered to combat, or soldiers whose morale has been undermined by some campaign factor or another. Mercenaries who have begun to fear that they will not be paid suffer from this malaise.
Movement
No actual conversion is necessary to derive a movement allowance for a character or creature; simply use the movement statistic that the character or creature has in the AD&D rules, expressing it as a number of inches in the tabletop game scale (where 1" = 10 yards).
Converting Cavalry
The conversion procedure for cavalry is a modification of the procedure for infantry. Make the following adjustments:
- AD: Raise the AD by 1 size larger than either the rider's or the steed's AD, whichever is larger. If the horse alone would have AD 4 and the rider AD 6, for example, the cavalry figure has AD 8.
- AR: Use the Armor Class of the rider or the mount, whichever is worse. However, if the worse AC is at least 3 higher than the other AC, improve the AC by 1. For example, a rider of AC 3 on a horse of AC 7 is considered AC 6 for purposes of conversion. Then convert the Armor Class to an armor rating using the normal conversion table given above.
- Hits: Determine Hits ratings for the rider and the mount separately; then take the average of the two numbers, rounding fractions up.
- ML: Use the rider's morale rating, raised by +1.
- MV: Use the mount's AD&D game movement statistic.
Converting Battle Platforms
This procedure is very similar to the cavalry conversion procedure (above). It applies to chariots, elephants with howdahs, and other mobile battle platforms.
- AD: Calculate the figure's attack dice the same as for a cavalry figure, and then double the number—not the size—of the AD.
- Hits: Calculate the same way as for cavalry, but then add 1 for every steed, mount, or rider beyond the first of each type. For example, a chariot with 4 horses and 2 riders would receive a +4 to the normal Hits rating.
- AR: Converted from AD&D game rules for Armor Class, the same way as for infantry units.
- ML: Use the rider's normal morale rating, raised by +1.
- MV: Use 2/3 of the steeds' normal movement allowance if only one creature pulls the vehicle; use the full movement allowance of the steeds if more than one are pulling the vehicle.
Converting Individuals
Individual characters and monsters follow a slightly different conversion procedure, to reflect the fact that they represent but one creature instead of ten.
These rules treat heroes heroically. From a mathematical perspective, the attributes of heroes in a BATTLESYSTEM scenario are inflated beyond those of the creatures in the units surrounding them. However, the conversion is based on the assumption that there is an intangible quality to heroism that exceeds in importance the hero's worth as a fighting machine.
In scenario design, the ratio of heroes (non-commanders) to units should not exceed 1:2, and the ratio of all individual figures (including commanders) to units should not exceed 3:2, in order to maintain the integrity of this interpretation. Of course, obvious exceptions can arise when a role-playing situation is converted for resolution in a BATTLESYSTEM scenario. Players should always have the option of treating their PCs as individual figures.
Here's how to convert an individual character's attributes to ratings usable with these BATTLESYSTEM rules:
- AD: Determined as for an infantry unit, and then reduced by one size (but never smaller than 4). For example, if the THACO and damage capabilities of a hero would normally convert to AD 12, then the individual gets AD 10.
- Hits: Determined depending on what type of creature or character is represented by the individual figure. All monster types, and characters of the fighter class, receive 1 hit for each 2 Hit Dice or experience levels. All priest, wizard, and thief characters receive 1 hit for every 3 levels. As always, round fractions up.
- CD: This value is calculated by adding the character's experience level (or half that number, if he is not a fighter) to his Loyalty Base figure (from the Charisma Table in the Player's Handbook). A character can only command troops of the same class as himself. Only fighters can command 0-level (unclassed) characters and monstrous troops.
Exceptions: Wizards and priests might be able to command monstrous troops under special circumstances—the wizard's own ogre bodyguards, for example; and of course priests and necromancers are the only characters who can command undead units.
Monsters, as a rule, can only command monsters of their own kind, or those of related kind and lesser stature. Ogres, for example, can command ogres, orcs, and goblins. Orcs can command goblins but not ogres, and goblins cannot command any of these types. Nor could ogres command giants. Giants, on the other hand, can command virtually all of the humanoid mammalian monster types.
The command diameter of a monster is equal to the monster's ground movement rate, with a minimum of 9" and a maximum of 15".
Using a Referee
The BATTLESYSTEM game is designed to be fully playable without a referee. This makes necessary occasional streamlining of the AD&D game rules in order to circumvent the role of the referee. Mass battles can easily be adjudicated with a referee, however. Indeed, this is encouraged when player characters are involved in battles. The use of a referee allows the character to use the full range of his abilities, possessions, and ideas, often in ways that would be impossible without the referee.
If the referee is the DM of the campaign, a common scenario arrangement will pit him, in command of the enemy legions, as an adversary of the player characters (who are presumably occupying influential positions in the friendly forces). It is important that the referee retain some semblance of objectivity, but this does not mean he can't pull out all the stops with his army in an attempt to win a victory.
Using Characters in Units
Characters of lower level can of course fight as infantry or cavalry troops among the units on the battlefield. Such combat is best handled as a role-playing melee.
Should the unit suffer disaster, the anonymous fate of such a soldier is a less than satisfying conclusion to a role-playing character's career. If a character is represented as part of a unit of troops (i.e., is one-tenth of a figure), the character can be assumed to survive as long as one figure of the unit remains. Should that last figure be eliminated, however, the referee can randomly determine the character's status by rolling 1d10 on the following table.
Fate of PC/NPC in Eliminated Unit
| d10 Roll | Character's Fate |
|---|---|
| 1 | Killed; body is lost |
| 2-3 | Killed; body lies on field |
| 4-7 | Badly wounded (1d6 hp left) |
| 8-10 | Unwounded, but unconscious for 10 rounds or (in the scenario) game turns |
Using Unconverted Characters
This procedure is most commonly used when a BATTLESYSTEM scenario is a backdrop for an adventure in a role-playing campaign. It is certainly possible to generate AD&D game characters strictly for purposes of a miniatures scenario, but this entails a lot more work than the use of the BATTLESYSTEM rules for heroes. The use of role-playing rules for timekeeping and combat procedure also can slow the play of the battle considerably.
However, if you have PCs or NPCs who are involved in a large battle, you may not want to sacrifice all of the details you have worked out for those characters—details that cannot be determined for every creature in a large battle. If the DM of your campaign is refereeing a BATTLESYSTEM scenario, he may rule that PCs (and possibly NPCs) in the scenario will still be played using AD&D rules for combat, magic, and so forth. The units and any individual figures not designated as "special" in the battle still use BATTLESYSTEM game ratings. In fact, the DM may want to determine both BATTLESYSTEM and AD&D game ratings for all individual figures in his force. Those that are in the vicinity of a player character will employ the AD&D rules, while those creatures far removed from a PC function as heroes. Then, if the PCs move, the first monsters can revert to the simpler BATTLESYSTEM rules for heroes, and the second group would be played as AD&D game creatures when any PCs come nearby.
Melee Rounds
Each figure using role-playing attributes and rules plays out four melee rounds per turn in a BATTLESYSTEM scenario, one round apiece during four different steps of the turn: First Movement, Second Movement, Melee Combat, and Missile Combat.
A figure can perform its melee round action at any point during the step in progress. If opposing figures choose to perform their actions at the same time, a normal AD&D game initiative roll determines the order of their actions—and only their actions. Figures can attempt any function they could normally perform in a melee round: melee attacks, movement, special actions, spellcasting, and so on. It doesn't matter what step of the BATTLESYSTEM game turn is in progress—PCs can fight during the movement steps and move during the combat steps as they wish.
All characters and creatures using AD&D game attributes employ this melee round structure. All units using BATTLESYSTEM game ratings are bound by the normal turn sequence. (This is why a character/creature facing a PC should always be treated as an NPC, not an individual in terms of the BATTLESYSTEM rules. If the characters were treated differently, the PC could get as many as four attacks for every one attack of the foe.)
Consistency of Ratio
The procedure explained above works most smoothly if PCs confine their attacks to enemy figures representing individuals. If the hero just has to go up and beat on the left flank of the ogre unit, however, he can.
The DM must be sure to remember that the ogre figure represents 10 ogres. The melee rounds should be resolved accordingly—and the ogre unit doesn't lose a figure unless Our Hero bags at least 10 ogres.
Converting Unusual Creatures
Any AD&D game creature can conceivably be converted to use on a battlefield, though many of them cannot perform as troops. A beholder, for example, can be given effects for its relevant abilities in BATTLESYSTEM game terms with little difficulty. Many AD&D game creatures have been omitted of necessity from the rosters in this book (see the scenarios, and Appendix II), but players who desire to use them should not have any trouble making the conversion.
When making a conversion of an unusual creature, first decide if it should be displayed at 1:1 or 10:1 in the game. Generally, creatures with offensive magic abilities, lots of Hit Dice (14+), or that are very rare or unique, should be presented as 1:1. Those figures not meeting one of these criteria should be displayed at the 10:1 ratio.
If the creature uses special or magical abilities, convert these to BATTLESYSTEM scenario ratings. Offensive and defensive effects are easily converted by calculating their effect on THACO and maximum damage (for AD determination) or Armor Class, for a defensive benefit. It might be necessary to give a figure several different AD, if it has a variety of attack forms.
When an area of effect is given in the original AD&D game rules as a number of inches (6", for example), the scale is 10 feet per 1", not 10 yards. To convert these scales to miniatures, divide ranges and areas of effect by three; a 6" radius becomes a 2" range, for example.
Magical abilities that affect only a single individual (ESP or hypnotism, for example) are often best ignored. Battlefield conditions can be assumed to overwhelm all attempts to employ such magic.
When in doubt, look for a comparable ability or effect among the creatures and troop types listed in Appendix II. Convert your own creature based on these comparisons.
Appendix II: Troop Type List
The numerical values given in this section are typical for the creature types listed. All of them are accurate conversions of the creature's abilities in the AD&D® game. Of course, a specific unit of creatures from a certain campaign (dwarves, for example) could easily have different ratings than those provided here for various dwarven units. Players will have to do their own conversions for such specific troops.
The basic listing for each troop type provides the five principal ratings—attack dice, armor rating, hits, morale rating, and movement allowance. Below that line are given any additional facts that apply, such as range of missile weapons, whether the unit is irregular, whether it is chaotic, and so forth. When more than one listing is given for a creature type, the listings after the first one are for specialized troops—units that use specific weapons or have certain special attributes. If the identification of a specialized troop type is followed by a phrase such as "up to 25%," this is a recommendation of the maximum number of figures of that type that should be used in a scenario. For instance, if you design a scenario using 20 dwarf figures, as many as 7 of those figures ("up to 35%") could be light crossbowmen. These percentages are guidelines based on the AD&D game description of the creature type; the recommended maximums can be exceeded to meet a specific need. For example, it's okay to create a unit of 20 dwarves wielding light crossbows, even if there are only 30 dwarf figures on the battlefield all told, as long as you have a good reason for doing so.
A general fact (Irregular only, Chaotic, etc.) that appears following the basic listing for a creature type applies also to specialized troops of the same type unless otherwise indicated. For example, all centaurs are chaotic in nature, and all dwarves treat rough/rocky ground as favored terrain.
Editorial note on this transcription: the printed Appendix II entries are preceded by descriptive flavour prose about each creature. That prose is omitted here; every rule-bearing sentence is kept. The stat lines are given in the order AD / AR / Hits / ML / MV, followed by the printed notes.
Creatures Used with the Basic/Intermediate Rules
Monsters (including demihumans)
Dwarves — AD 6 / AR 7 / Hits 1 / ML 12 / MV 6". Favored terrain: Rough/rocky ground. Hated foes: goblins, orcs, hobgoblins.
- Dwarven Axemen: AD 5 / AR 7 / Hits 1 / ML 13 / MV 6".
- Dwarven Light Crossbowmen (up to 35%): AD 6 / AR 8 / Hits 1 / ML 12 / MV 6". Range 6"/12"/18".
- Dwarven Heavy Crossbowmen (up to 15%): AD 5 / AR 6 / Hits 1 / ML 13 / MV 6". Range 8"/16"/24".
- Elite Dwarves (up to 20%): AD 5 / AR 6 / Hits 2 / ML 14 / MV 6". Dwarves fight with courage and skill, adapting well to tightly packed regular formations. When dwarves are engaged in melee combat with one of their hated foes, the enemy monsters suffer a +1 penalty to AR; an orc with AR of 6 becomes 7, for example. However, dwarves are still subject to discipline checks in battles involving these types of foes. Because of their small size, dwarves gain a bonus to their AR when they face giants, ogres, or trolls in melee combat. On the battlefield, this becomes a -2 bonus to the dwarves' AR; an AR of 4 becomes 2, for example.
Bugbears — AD 8 / AR 7 / Hits 2 / ML 12 / MV 9". Irregular only; Chaotic. Bugbears are sometimes armed with small missile weapons such as maces, hammers, or spears (AD 6, Range 1"/2"/3", point cost +3; see Appendix III for an explanation of point costs). This is in addition to their normal melee weaponry. Bugbears thus armed can throw these weapons at an enemy closing to their fronts when that enemy is at medium or long range, and still participate in normal melee combat if they are contacted in the same turn.
Centaurs — AD 10 / AR 7 / Hits 3 / ML 13 / MV 18". Irregular only; Chaotic. Favored terrain: Woods.
- Centaur Lancers (up to 50%): AD [12]8 / AR 7 / Hits 3 / ML 14 / MV 18".
- Centaur Archers (up to 50%): AD 8*8 / AR 7 / Hits 3 / ML 13 / MV 18". Range 5"/10"/15". Centaurs move through light woods at no penalty, and through dense woods as if the area was light woods.
Elves — AD 5 / AR 7 / Hits 1 / ML 13. Chaotic. Favored terrain: Woods.
- Elven Longbowmen (up to 100%): AD 6*8 / AR 7 / Hits 1 / ML 13 / MV 12". Range 7"/14"/21".
- Elven Cavalry (up to 25%): AD [10]8 / AR 7 / Hits 3 / ML 15 / MV 18".
- Elven Elite Troops (up to 25%): AD 6*8 / AR 7 / Hits 2 / ML 14 / MV 12". Range 7"/14"/21". Elves can function as skirmishers in any of the above configurations. Favored terrain for elves includes all types of forest. They treat light woods, heavy woods, and brush/scrub as clear terrain when they move and attack in melee. Elves are unique among the creature types described in this appendix, because they are immune to the special magical abilities of ghouls (see page 112). Elves do not check morale when confronted by ghouls (the monsters' cause horror ability does not apply), and elves are not affected by the paralysis attack of ghouls.
Gnolls with Great Bows (up to 25%) — AD 6*8 / AR 8 / Hits 2 / ML 11 / MV 9". Range 6"/12"/21". Gnolls must check morale during every step in which the unit loses even a single figure, as well as at any other time when a morale check would be required. However, gnollish savagery is reflected in the creatures' ability to function as berserkers—gaining double attack dice in melee combat when they are in good order.
Gnomes — AD 6 / AR 7 / Hits 1 / ML 11 / MV 6". Favored terrain: Woods. Hated foes: goblins, kobolds.
- Gnomish Light Crossbowmen (up to 25%): AD 6 / AR 8 / Hits 1 / ML 11 / MV 6". Range 5"/10"/15". These diminutive demihumans can move through light woods at no penalty, and through heavy woods as though the area was light woods. Gnomes with missile weapons can be skirmishers. Gnomes gain a -2 bonus to their AR when in melee combat with giants, ogres, bugbears, gnolls, or trolls.
Giants, fire — AD 1212 / AR 4 / Hits 5 / ML 15 / MV 12". Irregular only. Range 5"/15"/20" with thrown boulders. Favored terrain: See below. Giants, frost — AD 2d102d10 / AR 5 / Hits 5 / ML 13 / MV 12". Irregular only; Chaotic. Range 5"/15"/20" with thrown boulders. Favored terrain: See below. Giants, hill — AD 1212 / AR 6 / Hits 4 / ML 13 / MV 12". Irregular only; Chaotic. Range 5"/15"/20" with thrown boulders. Favored terrain: Rough/rocky ground. Giants, stone — AD 2d1012 / AR 5 / Hits 5 / ML 16 / MV 12". Irregular only. Range 10"/20"/30" with thrown boulders. Favored terrain: Rough/rocky ground. Giants throw boulders in combat, inflicting their normal AD except for stone giants (AD 2d10 for missile attacks). Unless boulders are available on the field, giants can throw boulders only three times per battle. Fire and frost giants are invulnerable to fire/flame attacks and cold/frost attacks, respectively. In a scenario that includes scorching desert, lava pools, and hot springs, fire giants treat such areas as favored terrain. Similarly, frost giants enjoy the benefit of favored terrain on ice or snow.
Goblins — AD 6 / AR 8 / Hits 1 / ML 11 / MV 6". Hated foes: dwarves, gnomes. Vulnerable in daylight (see below).
- Goblin Cavalry (riding wolves): AD 10 / AR 8 / Hits 2 / ML 12 / MV 18". Goblins are hampered in daylight, which causes them a -1 modifier to morale and gives any opponent a -1 benefit to AR when being attacked by goblins.
Gnolls — AD 8 / AR 7 / Hits 2 / ML 11. Irregular only; Chaotic. Hated foe: minotaurs (see below).
Halflings — AD 6*6 / AR 8 / Hits 1 / ML 11 / MV 9". Range 5"/10"/15". Favored terrain: Woods, brush/scrub. Halflings can function as skirmishers, in which case their ML is 12. Halflings move through all of their favored terrain as though it was clear ground—and they are considered invisible when they occupy such terrain (unless they are in base-to-base contact with an enemy unit). Halflings are exceptionally good with their bows; figures attacked by halfling missile fire suffer a +3 AR penalty.
Hobgoblins — AD 5 / AR 7 / Hits 1 / ML 11 / MV 9". Hated foe: elves.
- Hobgoblins with Bows: AD 6 / AR 7 / Hits 1 / ML 11 / MV 9". Range 7"/14"/21". When a hobgoblin unit is considered to be especially well trained, or when it is led by a commander with high charisma, the unit can have a morale rating of 12.
Ogres — AD 10 / AR 7 / Hits 2 / ML 12 / MV 9". Irregular only. Hated foes: elves, dwarves, halflings. Ogres can function as skirmishers or as an irregular unit, moving from one type of formation to the other as desired. However, the entire unit must be in the same type of formation at the end of its movement step; it cannot be partially in skirmisher formation and partly in irregular formation.
Humans — Many varieties of human troops are described in a separate section below.
Orcs — AD 6 / AR 8 / Hits 1 / ML 11 / MV 9". Hated foes: dwarves, elves. Vulnerable in daylight (see below).
- Orc Crossbowmen (up to 25%): AD 6*6 / AR 8 / Hits 1 / ML 11 / MV 9". Range 6"/12"/18".
- Orc Shortbowmen (up to 25%): AD 6*6 / AR 8 / Hits 1 / ML 11 / MV 9". Range 5"/10"/15". Orcs can function well in large regular units, and orcs with missile weapons are sometimes employed as skirmishers. Orc units can gain a morale modifier of +1 if they are well trained. Like goblins, orcs suffer in direct sunlight, receiving a -1 morale rating modifier and giving opponents a -1 benefit to AR under such conditions.
Kobolds — AD 4 / AR 8 / Hits 1/2 / ML 9 / MV 6". Hated foes: gnomes, pixies, sprites (see below). Vulnerable in daylight (see below). Their hatred of gnomes is so great that when a kobold unit is in good order and attacking gnomes, the monsters act as berserkers—getting double attack dice (1 per figure instead of 1/2) on melee attacks. Their hatred of pixies and sprites only applies in scenarios using the advanced rules (where flying units come into play). When fighting in daylight, a kobold unit gives up a -1 bonus to the enemy unit's AR (but kobolds do not suffer a morale penalty as goblins do).
Lizardmen — AD 10 / AR 7 / Hits 2 / ML 12 / MV 6". Irregular only. Favored terrain: Swamp. Lizardmen have a distressing tendency (distressing to their commanders, in any event) to occasionally ignore living opponents in favor of feasting upon the enemy slain. If a unit of lizardmen is engaged in melee, and the enemy is destroyed or the surviving enemy troops move away from the melee (including by rout), the lizardmen are assumed to be gorging themselves. They cannot move, or change facing or frontage, until the unit routs or passes a special morale check made at the start of the unit's movement step. (Passing a morale check for any other reason, at any other time during a turn, does not count as success for this purpose.)
Minotaurs — AD 10 / AR 8 / Hits 2 / ML 13. Irregular only; Chaotic. Hated foe: gnolls. A unit of minotaurs receives a +3 modifier to its morale rating as long as it is in good order. When charging, minotaurs inflict double AD (as for a cavalry charge).
Trolls — AD 12 / AR 7 / Hits 3 / ML 13 / MV 12". Irregular only; Chaotic. Trolls can function as skirmishers or as irregular units (but cannot switch between the two formations as ogres can). Their primary feature is the ability to recover hits of damage that have been inflicted upon them. Troll figures removed from the battlefield because of casualties do not return to the fight, but at the end of each turn, any excess hits (shown with a die) that have been inflicted upon a troll figure are removed.
Chariots, Light (2-horse) — AD 2d6*2d10 / AR 8 / Hits 4 / ML 13 / MV 18". Range 5"/10"/15" (short bow). Chariots, Heavy (4-horse, 2-monster, etc.) — AD 1d12 / AR 6 / Hits 5 / ML 14 / MV 12".
Human Troops
The following human units are assumed to include primarily first level fighters, unless otherwise noted. See Appendix III for information on modifying troops from the basic types listed here.
Troops not defined as "Irregular only" can form regular or irregular units. The following types can be designated as skirmishers if desired: light infantry shortbowmen, longbowmen, and light cavalry.
- Peasant Rabble (0 level, Irregular only): AD 4 / AR 9 / Hits 1 / ML 7 / MV 12".
- Militia (Irregular only): AD 6 / AR 9 / Hits 1 / ML 10 / MV 12".
- Light Infantry: AD 6 / AR 8 / Hits 1 / ML 11 / MV 12".
- Medium Infantry: AD 6 / AR 7 / Hits 1 / ML 11 / MV 9".
- Halberdiers: AD 5 / AR 7 / Hits 2 / ML 11 / MV 9". Second rank can attack in melee.
- Veteran Pikemen: AD 6 / AR 7 / Hits 2 / ML 12 / MV 9". Second and third ranks can attack in melee.
- Heavy Infantry: AD 5 / AR 6 / Hits 1 / ML 12 / MV 6".
- Berserkers: AD 6 / AR 8 / Hits 1 / ML 12 / MV 12". A berserker unit in good order earns double AD when engaged in melee combat, from the fanatical intensity of its attack. (This is not cumulative with a charge benefit; x 2 AD is the greatest bonus the unit can receive.) Berserkers are exempt from any morale checks due to casualties until the unit is reduced to 50% or less of its original size; thereafter it checks normally.
- Shortbowmen: AD 6*4 / AR 8 / Hits 1 / ML 11 / MV 12". Range 5"/10"/15".
- Longbowmen: AD 6*6 / AR 9 / Hits 1 / ML 12 / MV 12". Range 7"/14"/21".
- Light Cavalry: AD 5 / AR 8 / Hits 2 / ML 12 / MV 24".
- : AD 5 / AR 7 / Hits 2 / ML 12 / MV 18".
Tribesmen (Irregular only, all types)
- Spearmen: AD 6*6 / AR 9 / Hits 1 / ML 11 / MV 12". Range 1"/2"/3". Second rank can attack in melee.
- Archers: AD 6*6 / AR 9 / Hits 1 / ML 11 / MV 12". Range 5"/10"/15".
- Axemen/Swordsmen: AD 4 / AR 9 / Hits 1 / ML 11 / MV 12".
Desert Nomads (Irregular only, all types)
- Lancers (light cavalry): AD [8]6 / AR 8 / Hits 2 / ML 12 / MV 24".
- Horse Archers (up to 25%): AD 6*6 / AR 9 / Hits 2 / ML 12 / MV 24". Range 5"/10"/15".
- Medium Cavalry: AD 5 / AR 7 / Hits 2 / ML 13 / MV 18".
Animal Packs and Herds
All of these creature types can use irregular formation only. See the advanced rules (pages 76-77) for information on the use of animal packs on the battlefield.
- Ants, Giant: AD 6 / AR 6 / Hits 2 / ML 20 / MV 12". Favored terrain: See below. Giant ants always move in column formation, 3 figures wide. They can move into contact with enemy figures while in column formation. If the column is prevented from advancing because of enemy figures, the ants can expand frontage and perform wraparound movement. If the enemy unit breaks contact or is eliminated, the ants will contract into a column as they move again. Giant ants treat all terrain types except water, snow/ice, and exotic settings (such as lava pools) as favored terrain.
- Apes (Gorillas): AD 6 / AR 8 / Hits 3 / ML 10 / MV 12". Favored terrain: Woods, brush/scrub. Gorillas receive double their normal number of AD when cornered by terrain features (such that the gorillas could not perform a 4" withdrawal if so required). Gorillas also gain double AD in any battle where the gorillas' lair is on the field, though these two benefits are not cumulative. Gorillas treat all wooded areas and brush/scrub as favored terrain, able to move through all such areas at no penalty.
- Baboons: AD 4 / AR 8 / Hits 1 / ML 11 / MV 12". Favored terrain: Woods (see below). In addition to the normal benefits of favored terrain (no movement penalty through light or dense woods), baboons enjoy an extra advantage—an additional AD for every 2 figures whenever baboons attack while in a forest.
- Bears (brown or grizzly): AD 8 / AR 8 / Hits 3 / ML 12 / MV 12". Bears can do extra damage with their crushing hug. For every normal attack that scores a hit (after armor checks are made), a pack of bears gets an immediate additional attack with AD 6—and no armor checks are allowed to negate damage from the bear hug.
- Canines: Dogs, coyotes, jackals: AD 4 / AR 8 / Hits 1 / ML 9 / MV 18". Wolves, war hounds, etc.: AD 6 / AR 8 / Hits 2 / ML 11 / MV 18".
- Felines: Leopards, pumas, cheetahs, other medium felines: AD 5 / AR 8 / Hits 2 / ML 11 / MV 12". Lions, tigers, other large felines: AD 10 / AR 8 / Hits 3 / ML 12 / MV 12".
- Herd Animals: Cattle, deer, antelope, medium herd animal: AD 6 / AR 9 / Hits 1 / ML 9 / MV 18". Buffalo, rhinoceros, other large herd animal: AD 5 / AR 8 / Hits 2 / ML 10 / MV 15". Elephant, mammoth, other huge herd animal: AD 10 / AR 7 / Hits 3 / ML 11 / MV 12".
Advanced Game Monster Types
Familiarity with the advanced rules (Chapters 7 and 8) is necessary before players can use these creature types in a scenario. All of these types except unicorns must use irregular or skirmish formation. Unicorns can employ regular formation as well as irregular and skirmish.
- Ghouls: AD 8 / AR 8 / Hits 2 / ML n/a. Irregular only; Chaotic. Cause horror, -1. These loathsome undead creatures cause horror in all non-undead opponents—except for elves (see above)—forcing a morale check with a -1 modifier. However, their most fearsome ability is a paralysis attack. Any opposing unit that suffers a hit from ghouls and is not eliminated as a result of that combat is paralyzed for the rest of the current turn and the entire following turn. A paralyzed figure is helpless; it cannot move or attack. In any kind of attack against a paralyzed figure, the attacker receives double the normal number of AD. If a paralyzed figure suffers just one hit of damage, the figure is removed even if it ordinarily would have one or more hits remaining. An example of the procedure: A group of ghouls attacks a unit of centaurs (figures with 3 hits). The ghouls score 4 hits, so one centaur figure is removed and another one is designated as having one hit of damage. The damaged figure is also paralyzed. If the ghouls (or any other enemy) cause more damage to the centaurs while the figure is still immobile, then the first hit is applied to the paralyzed figure and it is removed from the table even though it technically has one hit remaining. A paralyzed figure is automatically eliminated if it is ever more than 3" distant from all other figures in its unit. This gap can occur if other nearby figures are eliminated in combat, or if the remainder of the paralyzed figure's unit routs and is forced to leave the immobile figure behind.
- Griffons: AD 12 / AR 6 / Hits 4 / ML 11 / MV 12"/30". Maneuverability Class C. Griffons must be treated as animals if they are not being ridden (one size smaller AD, down to AD 10). Griffons carrying riders can be treated as flying cavalry; they can charge (and receive the appropriate bonuses for doing so), although they are still not capable of regular formation.
- Hippogriffs: AD 12 / AR 7 / Hits 2 / ML 13 / MV 18"/36". Maneuverability Class C. Like griffons, hippogriffs must be treated as animals (AD 10 instead of AD 12) unless they are mounted as cavalry steeds.
- Manticores: AD 12 / AR 7 / Hits 3 / ML 13 / MV 12"/18". Maneuverability Class C. Manticores can fire up to 4 volleys of missiles (spikes from their tails) per scenario, range 6"/12"/18", AD 12 per manticore per attack.
- Unicorns: AD 12 / AR 6 / Hits 3 / ML 14 / MV 24". Chaotic. These extraordinary and very rare steeds never appear in units of more than 6 figures. They are occasionally ridden by elven maidens, in which case they can assume regular formation. A unit of unicorns can teleport up to 36" once per day (usually this means once per scenario). Teleportation can occur at any time when spellcasting is allowed (see the rules on magic, Chapter 8). Unicorns can teleport both out of and into base-to-base contact with enemy figures.
Individual Characters, Heroes, and Monsters
The following types of creatures are best represented as individuals (i.e., 1 figure represents 1 creature, not 10 creatures). They are powerful enough in their own rights to show up in small numbers and deserve such exclusive recognition.
- Sprites: AD 8*4 / AR 8 / Hits 1 / ML 11 / MV 9"/18". Range 3"/6"/9". Maneuverability Class B. Sprites, like pixies, can become visible or invisible at will. (See the description of the Mass Invisibility spell, page 92, for information on how to handle invisibility in a scenario.)
- Troglodytes: AD 8 / AR 7 / Hits 2 / ML 11 / MV 12". Chaotic. Troglodytes excrete a horrid odor in melee combat. Any unit in contact with troglodytes at the start of a turn must make a morale check immediately.
- Chimera: AD 10 / AR 7 / Hits 5 / CD none / MV 9"/18". Chaotic. Maneuverability Class E. The body of this fire-breathing monstrosity is a hybrid of goat and lion with dragon's wings. It has three heads, one of them a dragon's head that can breathe fire (range 1", AD 8) as an additional attack against any figure within range.
Dragons
A dragon can attack with its breath weapon, or it can make a normal melee attack, but the creature cannot do both in a turn. A dragon cannot use its breath weapon on two consecutive turns—however, it can breathe on every other turn for the duration of a scenario. A dragon's breath weapon can be directed anywhere within a 180-degree arc to the front of the dragon.
All dragons cause awe, and this reaction is of greater intensity than the awe or horror caused by most other creatures. Whenever a unit checks morale because of a dragon's presence, the unit does so with a -2 modifier to its ML.
The listing for each dragon gives attributes for two ages of life: adult (listed first) and venerable. Dragons also have inherent spellcasting ability, and the maximum number of wizard spells usable by the dragon at each age level is given. Some scenarios may specify dragons without spellcasting ability.
All dragons fly at Maneuverability Class C. A dragon that has suffered at least half of its hits in damage cannot fly for the remainder of the scenario.
The following special notations are used in the dragon roster descriptions: The number following "BW" is the attack dice for the dragon's breath weapon. The expression following "SP" is the number of spells known of the highest possible level, with an equal number of spells available at lower levels (if any). Thus, a listing of "1 x 3rd" indicates that the dragon can know one 3rd level spell, as well as one spell from each of the lower two levels.
Each entry below gives the adult listing first, then the venerable listing.
- Black Dragon — Adult: AD 12 / AR 4 / Hits 7 / CD 12" / MV 12"/30" / BW 2d10 / SP 2 x 1st. Venerable: AD 12 / AR 2 / Hits 9 / CD 12" / MV 12"/30" / BW 3d10 / SP 3 x 1st. Chaotic. The black dragon's breath weapon is a stream of acid, a thin line extending 2" from the dragon's front.
- Blue Dragon — Adult: AD 12 / AR 4 / Hits 8 / CD 9" / MV 9"/30" / BW 2d12 / SP 1 x 1st. Venerable: AD 12 / AR 2 / Hits 10 / CD 9" / MV 9"/30" / BW 4d12 / SP 1 x 3rd. The blue dragon breathes a lightning bolt of electric damage. The bolt extends 4" from the dragon in a straight line.
- Brass Dragon — Adult: AD 12 / AR 4 / Hits 7 / CD 12" / MV 12"/30" / BW special / SP 1 x 2nd. Venerable: AD 12 / AR 2 / Hits 9 / CD 12" / MV 12"/30" / BW special / SP 2 x 2nd. Chaotic. The brass dragon's breath weapon is a cloud of fear-causing gas 2" long by 1" wide. If a figure is affected, that figure's unit must immediately make a morale check with a -3 penalty to its morale rating.
- Bronze Dragon — Adult: AD 12 / AR 3 / Hits 8 / CD 9" / MV 9"/30" / BW 2d12 / SP 1 x 2nd. Venerable: AD 12 / AR 2 / Hits 10 / CD 9" / MV 9"/30" / BW 4d12 / SP 1 x 4th. The bronze dragon's breath weapon is a lightning bolt like the blue dragon's. Alternately, the dragon can breathe a cloud of repulsion gas in a 1" square area. Treat this gas as the brass dragon's fear gas.
- Copper Dragon — Adult: AD 12 / AR 3 / Hits 8 / CD 9" / MV 9"/30" / BW 3d10 / SP 1 x 1st. Venerable: AD 12 / AR 2 / Hits 10 / CD 9" / MV 9"/30" / BW 5d10 / SP 1 x 3rd. Chaotic. The copper dragon's breath weapon is a stream of acid like the black dragon's, also 2" long.
- Gold Dragon — Adult: AD 12 / AR 2 / Hits 9 / CD 12" / MV 12"/40" / BW 6d12 / SP 2 x 2nd. Venerable: AD 12+8 / AR 2 / Hits 11 / CD 12" / MV 12"/40" / BW 10d12 / SP 2 x 6th. The gold dragon breathes a gout of fire 3" long by 1" wide. In addition to the wizard spells, a venerable gold dragon (the second listing) also knows 2 x 2nd priest spells.
- Green Dragon — Adult: AD 12 / AR 4 / Hits 8 / CD 9" / MV 9"/30" / BW 3d10 / SP 2 x 1st. Venerable: AD 12 / AR 2 / Hits 10 / CD 9" / MV 9"/30" / BW 5d10 / SP 2 x 2nd. The green dragon can breathe a cloud of poisonous gas 2" long by 1" wide.
Human Character Types
Printed page 115.
These are samples of the many varieties of human and demihuman character types—by no means a complete list of every possible hero or commander. Certainly, players who convert AD&D® game characters for use in BATTLESYSTEM™ scenarios will come up with ratings for PCs and NPCs that differ from any of the figures described here.
- Knight Hero (Level 8 fighter): AD 10 / AR 4 / Hits 4 / CD 5" / MV 9". This warrior can increase his MV to 15" when mounted on his armored warhorse.
- Captain (Level 10 ranger): AD 8*8 / AR 5 / Hits 5 / CD 16" / MV 12". Range 10"/20"/30" (magical long bow). +1 charisma bonus when used as commander. The captain can also use a light lance when mounted on a light or medium warhorse (AD [10], MV 18").
- Lord Hero (Level 14 fighter): AD 10 / AR 3 / Hits 7 / CD 16" / MV 9". When astride his heavy warhorse (MV 12"), this grand old warrior can also wield a lance (AD [12]).
- Minor Wizard (Level 8 wizard): AD 4 / AR 7 / Hits 3 / CD 5" / MV 12". Cause horror, -1, range 3". This character can cast 2 1st, 2 2nd, and 1 3rd level spell.
- Great Wizard (Level 13 wizard): AD 5 / AR 5 / Hits 5 / CD 7" / MV 24". Cause horror, -1, range 5". This mighty spellcaster can use 2 1st, 2 2nd, 2 3rd, 1 4th, and 1 5th level spell.
- Major Wizard (Level 19 wizard): AD 5 / AR 3 / Hits 7 / CD 8" / MV 24". Cause horror, -1, range 7". This awe-inspiring mage knows 2 1st, 2 2nd, 2 3rd, 2 4th, 1 5th, 1 6th, and 1 7th level spell.
- Priest (Level 8 priest): AD 6 / AR 6 / Hits 3 / CD 9" / MV 9". Cause awe, -1, range 3". This cleric has 2 1st, 2 2nd, and 1 3rd level spell.
- High Priest (Level 13 priest): AD 5 / AR 4 / Hits 5 / CD 12" / MV 12". Cause awe, -1, range 5". This worthy man (or woman) of faith can use 2 1st, 2 2nd, 2 3rd, 1 4th, and 1 5th level spell.
- Patriarch (Level 20 priest): AD 10 / AR 3 / Hits 7 / CD 14" / MV 18". Cause awe, -1, range 7". This potent spellcaster can use 2 1st, 2 2nd, 3 3rd, 2 4th, 1 5th, 1 6th, and 1 7th level spell.
Giants
- Cloud Giant: AD 12*12 / AR 5 / Hits 9 / CD 15" / MV 15". Range 8"/16"/24" with thrown boulders. +2 charisma bonus when used as commander.
- Storm Giant: AD 10*12 / AR 5 / Hits 10 / CD 15" / MV 15". Range 10"/20"/30" with composite bow. Chaotic. Once per scenario, a storm giant can hurl a lightning bolt of the same size and shape as in the Lightning Bolt spell (see page 91). This bolt inflicts AD 3d12 on all targets in its area of effect.
Treants
- Treant: AD 12 / AR 6 / Hits 6 / CD 6" / MV 12". Chaotic. Each treant can command one tree within its CD to move (3" MV) and fight. The tree attacks and defends just like a treant.
Appendix III: Scenario Construction and Point Costs
This appendix is designed to allow two players or teams to create reasonably well-balanced scenarios while still allowing the players a great deal of freedom in selecting their troops. Basically, each player is given a certain number of scenario points, and uses those points to purchase troops from the lists below.
Types of Scenarios
As a basic framework, the following three sizes of scenarios are suggested. (By prior agreement, players can design armies of any size they wish, but it's probably a good idea to start small.)
- Small Scenario: 500 points per player, 3-6 units per side
- Medium Scenario: 800 points per player, 5-8 units per side
- Large Scenario: 1200 points per player, 6-12 units per side
As an additional control, players can declare a maximum number of points that can be spent on any one creature. This limitation prevents one player from introducing dragons, for example, while the other player prepares for a lower level of magic in the fight.
- Low Magic: No figure costing more than 60 points can be used.
- Medium Magic: No figure costing more than 100 points can be used.
- High Magic: No restriction on point cost for any figure.
Players should select a size of scenario and level of magic desired before beginning to design their armies. Additional conditions should be agreed upon before actual scenario construction begins. A common general condition is for the battle to be a contest between good creatures and evil creatures; thus, both sides cannot employ units of orcs, or elves, or any creature type that is typically (for game purposes) evil or good in alignment. In the lists of point values below, (G) indicates good creatures, (E) evil ones, and (N) those that can be of either alignment (and thus could be used on either or both sides of a good-vs.-evil battle).
Terrain and Situation
Players should agree upon the types of terrain to be represented on the field, and take turns placing the various pieces. Some modifications to point expenditures can be reflected in the terrain.
- If a player defends a fortified structure, his opponent can spend 2 1/2 times as many points as he can.
- If a player is allowed to place all of the terrain pieces (giving his army the advantage of a readily defensible position), his opponent receives 1 1/2 times as many points as he does.
Rules of Thumb
Unless both players agree to alter one or more of these, the following restrictions apply to armies created by the point system.
- No more than 1 hero (noncommander) is allowed per 2 units, and if commanders are used, the ratio of all individual figures to units should not be more than 3:2.
- The number of figures per unit (not counting heroes or commanders) must fall within the ranges recommended in the basic rules (see the right-hand column of the table on page 9).
- No more than 1/4 of the units in an army can have morale ratings of 13 or higher.
- No more than 1/3 of the figures in an army can be cavalry.
- No more than 1/2 of the figures in an army can possess missile weapons.
Point Values
The following lists provide point costs, per figure, for all of the troop types described in Appendix II. By using these numbers as guidelines, players can devise point values for other types of creatures or variations on the troop types in these lists. To prevent later misunderstandings, all players involved should agree on the point value to be given to a newly created troop type before the actual design of a scenario begins.
Basic & Intermediate Game Monsters (including demihumans)
| Troop type | Points |
|---|---|
| Bugbears (E) | 13 |
| Centaurs (G) | 30 |
| Centaur Lancers | 34 |
| Centaur Archers | 35 |
| Dwarves (G) | 5 |
| Dwarven Axemen | 6 |
| Dwarven Light Crossbowmen | 10 |
| Dwarven Heavy Crossbowmen | 12 |
| Dwarven Elite Troops | 13 |
| Elves (G) | 7 |
| Elven Longbowmen | 13 |
| Elven Cavalry | 20 |
Any of the above monster figures can be modified in these ways: Add spears, 1 point (AD 66, Range 1"/2"/3"); Add short bows, 4 points (AD 6, Range 5"/10"/15").
Human Troops (all N)
| Troop type | Points |
|---|---|
| Peasant Rabble | 1 |
| Militia Irregulars | 3 |
| Light Infantry | 4 |
| Medium Infantry | 5 |
| Halberdiers | 10 |
| Veteran Pikemen | 12 |
| Heavy Infantry | 7 |
| Berserkers | 6 |
| Tribesmen: Spearmen | 3 |
| Tribesmen: Archers | 6 |
| Tribesmen: Axemen/Swordsmen | 2 |
| Desert Nomads: Lancers (light cavalry) | 14 |
The above types of human infantry can be equipped with the following additions, for the listed point costs:
- Add spears (AD 6*6, Range 1"/2"/3"): 1
- Add halberds (AD 8; second rank can attack): 2
- Add large shields (needed for shield wall): 1
- Add pikes (AD 6; second and third ranks can attack): 2
- Add short bows (AD 6*, Range 5"/10"/15"): 5
- Add long bows, light infantry only (AD 6*, Range 7"/14"/21"): 7
- Add heavy crossbows (AD 8*, Range 8"/16"/24"): 6
- Add light crossbow (AD 6*, Range 6"/12"/18"): 4
- Add arquebuses, light infantry only (AD 8*, Range 5"/10"/20"): 7
- Improve ML by 1: 1
- Improve ML by 2 (maximum improvement of 2): 3
- Add extra Hit (maximum of 1 Hit): 6
- Improve AR by 1 (maximum improvement of 2): 1
The above cavalry and special types can be modified as follows:
- Improve ML by 1 (maximum improvement of 2): 4
- Add extra Hit (maximum of 2 Hits): 8
- Improve AR by 1: 3
Animal Packs and Herds
| Troop type | Points |
|---|---|
| Ants, Giant (N) | 12 |
| Apes (Gorillas) (N) | 9 |
| Baboons (N) | 3 |
| Bears (brown or grizzly) (N) | 12 |
| Canines (all N): Dogs, coyotes, jackals | 1 |
| Canines (all N): Wolves, war hounds, etc. | 3 |
| Felines (all N): Leopards, pumas, cheetahs, other medium felines | 4 |
| Felines (all N): Lions, tigers, other large felines | 6 |
| Herd Animals (all N): Cattle, deer, antelope, medium herd animal | 4 |
| Herd Animals (all N): Buffalo, rhinoceros, other large herd animal | 8 |
| Herd Animals (all N): Elephant, mammoth, other huge herd animal | 15 |
Advanced Game Monster Types
| Troop type | Points |
|---|---|
| Ghouls (E) | 22 |
| Griffons (N) | 45 |
| Hell Hounds (E) | 22 |
| Hippogriffs (N) | 30 |
| Manticores (E) | 55 |
| Pegasi (G) | 35 |
| Pixies (G) (if invisibility is not used: 8) | 12 |
| Skeletons (E) | 14 |
| Skeletal Cavalry | 25 |
| Sprites (G) (if invisibility is not used: 15) | 25 |
| Troglodytes (E) | 12 |
| Unicorns (G) | 40 |
Individual Characters, Heroes, and Monsters
| Troop type | Points |
|---|---|
| Chimera (E) | 75 |
| Dragons: Black (E) | 125 |
| Dragons: Blue (E) | 150 |
| Dragons: Brass (G) | 110 |
| Dragons: Bronze (G) | 160 |
| Dragons: Copper (G) | 140 |
| Dragons: Gold (G) | 250 |
| Dragons: Green (E) | 150 |
| Dragons: Red (E) | 200 |
| Dragons: Silver (G) | 220 |
| Dragons: White (E) | 150 |
| Giant, cloud (N) | 200 |
Typical Army Lists
Armies are more than collections of armed creatures. Certain combinations of types and formations have proven themselves effective, and armies are generally organized along the lines of these proven arrangements.
The armies presented below represent typical arrangements of forces for these creature and culture types. Most of these armies are built with approximately 500 points, for use in a small scenario at a low level of magic. Some medium-sized armies are provided. In addition, one or more of the brigade groups listed at the end of this section can be tacked onto an army to bring the force up to medium or large size.
- Dwarven Field Army (62 figures): 10 Light Crossbowmen (100 points); 8 Heavy Crossbowmen (96); 20 Regular Infantry (100); 16 Dwarven Axemen (96); 8 Elite Troops (104). Total 496.
- Elven Field Army (38 figures): 6 Elven Cavalry (120); 14 Longbowmen, regular or skirmish (182); 6 Elite Troops (108); 12 Regular Infantry (84). Total 484.
- Elven Light Army (41 figures): 8 Elven Cavalry, 1 or 2 units, regular or skirmish (160); 18 Longbowmen, 1 or 2 units, regular or skirmish (234); 15 Regular Infantry, 1 or 2 units (105). Total 499.
- Goblin Field Army (95 figures): 8 Goblin Cavalry (144); 45 Regular Infantry, split into 2 units (135); 24 Goblins with Spears (96); 18 Goblins with Short Bows (126). Total 501.
- Orc Field Army (76 figures): 40 Regular Infantry, split into 2 units (200); 12 Crossbowmen (120); 12 Shortbowmen, regular or skirmish (108); 12 Spearmen (72). Total 500.
- Reptilian Field Army (89 figures): 51 Kobold Infantry, split into 2 units (102); 12 Kobolds with Short Bows (72); 12 Lizardman Infantry, irregular or skirmish (144); 14 Lizardmen with Spears (182). Total 500.
- Undead Army (38 figures): 18 Skeletons, 1 or 2 units (252); 8 Zombies (128); 6 Skeletal Cavalry (150); 6 Ghouls (132). Total 662.
- Human Army, Medieval Period (68 figures): 6 Heavy Cavalry (180); 24 Militia Irregulars (72); 8 Longbowmen (88); 12 Heavy Infantry (84); 18 Light Infantry (72). Total 496.
- Human Army, Renaissance Period (66 figures): 6 Heavy Cavalry (180); 6 Light Cavalry (96); 16 Veteran Pikemen (192); 8 Heavy Crossbowmen, improved Heavy Infantry (104); 12 Medium Infantry (60); 12 Shortbowmen, improved Light Infantry, can be skirmishers (108); 6 Heavy Infantry (42). Total 782.
Brigade Groups. These troops can be used as small independent forces or as reinforcements for the army groups described above.
- Monstrous Heavy Brigade (30 figures): 4 Trolls (100); 8 Ogres with Spears (112); 18 Hobgoblins (90). Total 302.
- Giant Brigade (26 figures): 8 Bugbears (104); 16 Orcs with Spears (96); then either 2 Stone Giants, skirmishers (300), for a total of 500; or 3 Hill Giants (270).
- Woodland Brigade (26 figures): 5 Centaur Lancers (170); 6 Centaurs (180); 15 Halflings, skirmishers (150). Total 500.
- Human Elite Brigade (18 figures): 4 Ultra-heavy Cavalry (160); 8 Halberdiers (80); 6 Longbowmen (66). Total 306.
- Human Heavy Brigade (45 figures): 6 Heavy Cavalry (180); 24 Heavy Infantry, 1 or 2 units (168); 15 Halberdiers (150). Total 498.
- Human Light Brigade (36 figures): 8 Light Cavalry (128); 8 Longbowmen, skirmishers (88); 20 Light Infantry, 1 or 2 units (80). Total 296.
Note on the army lists: the printed Undead Army entry gives the subtotals 128, 150, and 132 and a total of 662; the Skeletons subtotal (252 = 18 x 14) is not printed on the same line, and is shown here because it is the value that makes the printed total of 662 add up.
Rules Reference Card
Printed page 128 (the foldout Reference Card). Its sections are reproduced in the order printed.
Combat
Hits per Attack Die Roll
| Result | 1-3 | 4-5 | 6-9 | 10-11 | 12+ |
|---|---|---|---|---|---|
| Hits | 0 | 1 | 2 | 3 | 4 |
Melee Combat — modifiers to attacker's AD
- x 1 1/2 AD: for each figure in a charging infantry unit
- x 2 AD: for each figure in a charging cavalry unit
- x 2 AD: for each figure in a unit meeting a charge with set spears, pikes, or other pole arms
- x 1/2 AD: for each figure out of command
- x 1/2 AD: for a flying unit making a pass-by attack
- x 1/2 AD: for a unit defending against a pass-by attack
- x 2 AD: for each figure in a unit meeting an aerial attack with set spears, pikes, or other pole arms
Melee Combat — modifiers to target's AR
- +2 if being attacked from flank
- +2 if at lower elevation than opponent
- +4 if being attacked from rear
- -2 if at higher elevation than opponent
- -2 if in favored terrain
- +4 if fighting from a ladder or grapple vs. a foe atop a wall
- -2 if protected by parapet, doorway or window
Missile Combat — modifiers to attacker's AD
- x 1/2 AD if using indirect fire
- x 1/2 AD if attacking at medium range
- x 1/3 AD if attacking at long range
- x 1/2 AD for each figure out of command
- x 1/2 AD if attacking from the air
Missile Combat — elevation range bonus: +1" to each range category for each 1" of elevation of firing unit above target, to a maximum bonus of 3".
Missile Combat — modifiers to target's AR
- +1 if at lower elevation than opponent
- +1 if larger than man-sized creatures
- -3 if screened (by smoke, fog, hedge, woods, etc.)
- +10 if attacked by arquebus at short range
- +5 if attacked by arquebus at medium range
- -2 if protected by wall, parapet, doorway, or window
- -3 if protected by shield wall
- -4 if protected by arrow slits
Note printed on the card: Some magic spells have specific effects on AD and AR of units or figures; see the spell descriptions, Chapter 8, for details.
Morale
Morale Triggers. Any unit must make a general morale check when:
- The first casualty figure is removed from the unit (except elite units)
- It suffers 4 or more hits in a single step of a turn
- A routed unit with an equal or higher ML moves within 3" of it
- It is reduced to 50% of its original number of figures, and for each lost figure thereafter
- It is about to be struck by a charging unit (when the charge is 1" away)
- A figure/unit that causes awe first moves within 12" of the unit
- It is about to be struck by (or is about to strike) an undead unit or a unit that causes horror or awe
- It ends a turn in contact with a unit having a special magical ability
- A figure in the unit is eliminated by a magical or special ability attack
- It finishes a move during which a forced march was declared
- It attempts melee combat while using grapples to scale a wall
- It attempts to set spears or other pole arms against an aerial attack
- A friendly hero withdraws from or is slain during heroic combat
Charge Initiation Check. Any unit must make a charge initiation check when:
- It attempts to begin a charge
- It attempts to cross an obstacle during its charge
Discipline Check. Any unit must make a discipline check when:
- It is in good order and has a hated foe within its charge range at the start of a turn
A chaotic unit must make a discipline check when:
- It is in good order and has an enemy unit within its charge range at the start of a turn
- It is in melee with an enemy unit that routs or performs a fighting withdrawal
Note printed on the card: Some magic spells have specific effects on the morale of units or figures; see the spell descriptions, Chapter 8, for details.
Morale rating modifiers
- +1 for each rank in the unit beyond the first, to a maximum of +4
- -1 if the unit is shaken
- -2 if at least 50% of the unit's figures have been removed
- -2 if the unit is routed
- -2 if the unit attempts an opportunity charge, and no charge had been declared for the unit this turn
- +3 if the unit is a herd of stampeding animals
- +2 if the unit's hero or commander wins a challenge
- +1 if the unit's hero or commander issues a challenge
- +1 if the unit's hero or commander accepts a challenge
- -1 if the unit is airborne at the time of the check
- -1 if the unit is dismounted cavalry
- -1 if the unit is riderless steeds
- -1 or -2 if horror or awe effects apply (see unit roster)
- -2 if the unit's hero or commander loses a challenge
-
- or - the commander's charisma bonus
Terrain Effects on Movement
| Terrain Type | Regular | Cavalry | Special | Infantry |
|---|---|---|---|---|
| Light Woods | cannot enter | 2" | * | 1 1/2" |
| Dense Woods | cannot enter | cannot enter | cannot enter | 2" |
| Elevation | All units: 2" per 1" of ascent | |||
| Swamp | cannot enter | cannot enter | cannot enter | 3" |
| Shallow Water | cannot enter | 3" | cannot enter | 3" |
Legend printed on the card: "cannot enter" (the printed black square) = this unit type cannot move into or through this terrain; * = special units of cavalry size or larger cannot move through light woods, brush/scrub, or trails; others treated as infantry; x" = unit pays this amount of its movement allowance for each 1" (or part thereof) moved through this terrain.
Note on the card: the printed card shows special units as unable to enter shallow water, whereas the body text (page 35, Shallow Water) states that any type of unit (infantry, cavalry, or special) can move through shallow water at 3" per 1" moved. Both are reproduced as printed.
Note printed on the card: Rules and modifiers that are used only with the intermediate and advanced rules are printed over a light gray background on the original card.
Closing Notes on This Transcription
- Omitted pages. Appendix IV, "The Art of Miniatures Gaming" (printed pages 119-126, a hobby essay on painting, basing, and terrain construction, with photo captions), and the blank Unit Roster Forms (printed page 127) are not reproduced; they contain no rules.
- Credits and colophon. The credits, playtester list, copyright and trademark boilerplate, and the printed colophon are not reproduced.
- Flavour prose. Descriptive flavour paragraphs and photo captions were left out, following the convention; rules-bearing sentences were kept.