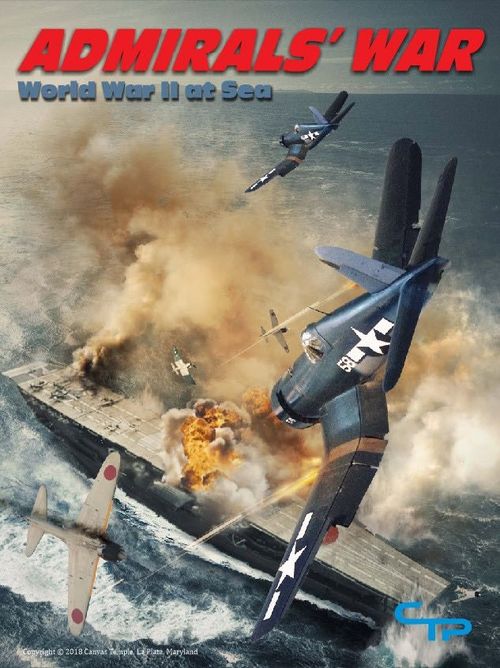
Admirals' War: World War II at Sea
Admirals' War: World War II at Sea Rulebook
Table of Contents
Table of Contents
- 1.0 Playing Admirals' War
- 2.0 The Mapboard
- 3.0 The Playing Pieces
- 4.0 Prepare for Play
- 5.0 Sequence of Play
- 6.0 Movement
- 7.0 Combat
- 8.0 Retreats
- 9.0 Carrier Air Raids
- 10.0 Returning to Base (RTB)
- 11.0 Repairs
- 12.0 Land-Based Air (LBA)
- 13.0 Amphibious Units
- 14.0 Submarines
- 15.0 Hilfskreuzers
- 16.0 Capturing Ports and Bases
- 17.0 Controlling Sea Areas
- 18.0 Minor Navies
- 19.0 Japan & The US Entering The War
- Optional Rules
- 20.0 Turn 0
- 21.0 Turn 11
- 22.0 French Fleet Dilemma
- 23.0 Pearl Harbor Tension
- 24.0 Tora, Tora… Uh-Oh
- 25.0 Gunnery Radar
- 26.0 Hidden Submarine Deployment
- 27.0 Submarine Targeting
- 28.0 Damage Control
- 29.0 Task Forces
- 30.0 Greek Navy
- 31.0 HMS Argus
- 32.0 Pocket Pride
- 33.0 German Carriers
- 34.0 Alternate Ship Names
- 35.0 Japanese BB-CV's
- 36.0 Aging British Fleet
- 37.0 Italian Ineffectiveness
- 38.0 Italian Naval Buildup
- 39.0 Examples of Play
- 40.0 Pacific Theater Beginner Scenario: Midway!
1.0 Playing Admirals' War
1.1 Player Count
Admirals' War: WWII at Sea can be played as either:
- a two-player game with one player controlling the Allies (Britain, France, the United States, plus several minor fleets) and the other player controlling those of the Axis (Germany, Italy, and Japan), or as
- a four-player game with each player controlling one of the following: Britain + the minor allies, US + France, Germany + Italy, or Japan.
1.2 Objective: Gain Victory Points
The objective of the game is to gain Victory Points (hereafter, VP) by controlling the various sea areas of the mapboard. These VP are recorded on a track printed on the mapboard. There is one pair of markers for the Atlantic Theatre of Operations (ATO) and one pair for the Pacific Theatre of Operations (PTO).
The number of VPs that a player gets for controlling a sea area is printed beneath the name of each sea area on the mapboard. These VP numbers reflects how valuable each sea area was to that side's war effort.
Examples: As seen in the picture above, the North Sea is worth 1VP to the British player and 3VP to the German player. The Indonesian oilfields were crucial to the Japanese war effort, so the Japanese player gets 3VP for controlling Indonesia, while the US player gains only 1VP there. In the Atlantic, virtually all England-bound convoy traffic passed through the Western Approaches; hence it is the single most valuable sea area on the board: 4VP for Germany/Italy, and 2VP for the British.
1.3 Basic Mechanism of Play
To control a sea area, a player must have a patrolling surface ship or a land-based air unit still at sea in the area after combat has concluded for the turn. Only one player at a time can control a sea area, so if both sides have units in the same sea area, the units must fight until all of one or both sides' units have retreated or been destroyed. The players use their ships, subs, land-based air, and ground units to control areas for themselves and to prevent the enemy from doing the same.
1.4 Winning The Game
In the two-player game, the side with the most accumulated VP in each theatre wins that theatre. To win the game, a player must win one theatre and win or draw the other. On any other result, the game is a draw.
In the four-player game, players may either play as teams, using the two player victory conditions, or individually. The individual winner of a four-player game is the player with the most VPs on his track. For either the British or American player to claim victory, however, his partner must also win or draw his side of the board. If neither Allied player can claim victory, the Axis player with the most VP is the winner — regardless whether an Allied player has more VP.
Example: At game end, the US has +3VP (Japan, -3), but Germany has +1VP (Britain, -1). Since both Allies did not win or tie their respective halves of the board, the German player wins the four-player game, despite having fewer VP than the US player. Had the British player eked out one final VP and gained a draw in the Atlantic, the US player would have won the game with 3VP.
Make sure all four players agree on whether team or individual victory conditions are in effect.
2.0 The Mapboard
2.1 How The Map Works
The mapboard portrays the regions of ocean, bases, and ports that were the centers of naval fighting during World War II. Ships and other units move onto sea areas during turns and return to friendly bases or ports between turns. Each sea area, port or base can be controlled by either side, and control of each of these can change from turn to turn. Control markers are placed on each sea area, base, or port with either the Axis or Allied side face up to indicate possession/control.
The land-mass areas decorated with historical photos are not used during play and are shown on the board solely to fill in the geography.
2.2 Sea Areas
Sea areas are the large blue regions separated from each other by thick black lines. Moving from port or base to a sea area, or one sea area to another counts as a single move, regardless of the size of the sea area(s). (Exceptions: the Strait of Gibraltar 2.51 and the English Channel 2.52).
2.21 The map of each sea area contains two circular symbols resembling flags. The flag on the left will either belong to the US or Britain, and the flag on the right will belong to either Germany or Japan. These flags indicate which player/nation will gain VP should his side successfully control the sea area after a turn is over, and the adjacent number indicates how many VP will be gained by that player.
2.22 Victory Points listed next to Japanese or US flags are recorded using the PTO markers, and points next to British or German flags are recorded using the ATO markers. Note that some sea areas that belong to one theatre may actually award VP in the other theatre. For instance, the Arabian Sea, Bay of Bengal, and the Indian Ocean are part of the Pacific Theatre, but award VP to the British (and Atlantic victory) should the Allies patrol these areas (regardless of which player's units actually did the patrolling), but to the Japanese player (and Pacific victory) should the Axis control them.
2.23 Some sea areas in the PTO have one flag circle or the other outlined with a yellow band. This indicates which side, if any, controls the sea area at the beginning of the game. No ATO area is controlled at game start.
2.3 Ports and Bases
2.31 Ports and bases are represented by circles, either red or green. Each has a circular flag on the bottom of its perimeter to indicate which player/nation controls that base at the start of the game.
2.311 There are two bases that are not controlled by either side when the game begins: Lae and Guadalcanal. They function normally as bases, with the sole exception that they must be captured (16.0) before either side may use them. The white circle in the base symbol's perimeter indicates their initial un-controlled state. The Neutral Port in South America also has this white circle.
2.312 Another base, Addu Atoll, also begins the game un-controlled, and automatically becomes British controlled at the start of turn three.
2.32 Ports are the red circles with the anchor symbol at the top. These are the main fleet facilities, often with repair capabilities. If a port has a gear symbol with a number in it on its perimeter, that port can make repairs (11.0). If a port has a banner symbol with a line through it, that indicates the port may not be captured during the game. Units may return to them from any sea area within the Theatre of Operation (2.6). Land-based air units (12.0) may operate from them.
2.321 Germany may not be captured within the confines of the game, but functions in all other respects as a port.
2.322 Russian Ports: Murmansk and Leningrad are Russian ports that are active for the Allied player beginning on turn three. During turns one and two (and optional turn zero), they are ignored. Like Germany, they cannot be captured within the confines of the game. Allied land-based air units may not operate from any Russian port. In all other respects, they function as ports while active.
These circles correspond to the national flag of the owner. Initial control of ports and bases is also listed in Table 1 for the Allies and Table 2 for the Axis, both below.
Table 1: Initial Port/Base Control — Allies
| England | France | US |
|---|---|---|
| England | Brest | USA |
| Gibraltar | Toulon | Panama Canal |
| Malta | Diego Suarez | Philippines |
| Suez | Saigon | Attu/Kiska |
| Simon's Town DY | Nouméa | Dutch Harbor |
| Trincomalee | Midway | |
| Andaman Islands | Pearl Harbor | |
| Singapore | Johnston Island | |
| Australia |
Table 2: Initial Port/Base Control — Axis
| Germany | Italy | Japan |
|---|---|---|
| Norway | Taranto | Yokosuka Navy Yard |
| Germany | Tripoli | Okinawa |
| Saipan | ||
| Truk | ||
| Kwajalein | ||
| Maloelap |
2.323 USA is a port, as is England. The flag wash-out overlays in the shape of the national borders/islands are there to help clarify which sea areas are adjacent.
2.33 Bases are represented by green circles. They are smaller facilities than ports and have no repair capacity other than serving to remove disabled (5.48) counters. Units may return to them only from an adjacent sea area. Land Based Air (12.0) may operate from them.
2.34 The South American Neutral Port is also represented by a red circle. It may be used by both sides, even on the same turn.
2.341 Only ships may use the neutral port. Land based air units may not operate from or return to the neutral port. The neutral port may never be invaded, attacked, or captured.
2.342 Ships in the neutral port may not repair damage, but upon entering the neutral port, any disabled marker is removed, just as with any other port or base.
2.343 Every ship that begins the turn in the neutral port must successfully leave or the owning player — not an ally — suffers an immediate loss of 1VP per such unit. Such ships that attempt a speed roll, fail it, and as a result end up back in the neutral port have not successfully left the port and are subject to the 1VP penalty.
2.35 Ports and bases are located within sea areas or along the border between two or more sea areas; a port or base is treated as part of every sea area that it touches.
Examples: Taranto is part of both the Western and Eastern Mediterranean Sea. Truk is part of the Marianas, the Marshalls, and the Bismarck Sea.
2.36 Each port or base may be used only by the player who controls it at that time. Unless otherwise noted in the rules or on the board, every port and base is in operation throughout the game.
2.4 Special Geographic Cases
2.41 The island of New Guinea is divided into two bases: the northern half, Lae, and the southern half, Port Moresby. Lae touches only the Bismarck Sea and Indonesia, while Port Moresby touches only the Indian Ocean and Coral Sea. The two bases do not touch each other; they are separated by the Owen Stanley Ridge (the mountain range represented by the line between them), which effectively prevented large-scale military operations. Amphibious units (13.0) cannot move directly between Lae & Port Moresby; they must go to sea and invade to get around the Owen Stanley Ridge.
2.42 Germany and Norway are considered a single port in the standard game. German units may move back and forth between them at no cost. An Allied air attack on either is considered an attack on both. The green base coloring of Norway is for use in the optional "Turn Zero" (20.0).
2.43 The entire Philippines island chain comprises a single base that touches both Indonesia and the Marianas.
2.44 As noted on the mapboard, Addu Atoll may not be used as a base by the British until turn 3, and may not be attacked by the Axis until Trincomalee is captured by the Axis.
Addu Atoll was established as a base by the British beginning in August 1941. With the threat posed to the British position in India by the Japanese army, it subsequently became a fallback position for the Royal Navy. The Japanese were completely unaware of the base's existence for a very long time.
2.5 Geographic Choke Points
2.51 Gibraltar: All ships attempting to move past Gibraltar in either direction while Gibraltar is enemy-controlled must treat this move as an extra sea area of movement. Any ship failing its speed roll must return to its original port/base. Note that this supersedes 6.21 and 6.22. Units may not Return to Base (10.0) past an enemy-controlled Gibraltar.
2.52 English Channel: Any ships attempting to move through the English Channel into another sea area while either England or Brest is enemy controlled must treat that as an extra area of movement.
Note the double black line on the mapboard as a reminder.
2.53 Panama Canal: Ships that begin the turn at the Panama Canal may move into either French Polynesia or the Hawaiian Islands, but such a move is considered the second sea area entered. Speed rolls (6.2) are made accordingly. The reverse is not true, however; ships in those sea areas may only cross back to the ATO during the return to base portion of the turn. The Panama Canal is considered adjacent to those sea areas for this purpose only. Japanese amphibious units may not invade the Panama Canal.
2.54 No non-Russian Allied units may enter the Baltic Sea. No Russian units may exit the Baltic into other ports or sea areas.
2.55 No unit may move through the Suez Canal while Suez is enemy-controlled, likewise the Panama Canal. During the war, Axis ships and submarines did make it through both the English Channel and the Straits of Gibraltar. The maneuver was extremely dangerous and often costly, but it was done. No significant Allied units passed either into or out of the Baltic; had they attempted to do so, the Luftwaffe could and would have put up a far greater resistance than is represented in this game.
2.6 Theatres of Operation
For purposes of several rules, and also for ease of reference, the board is divided into two halves, called Theatres of Operation. There is a heavy red dashed line separating these two halves.
2.61 The Pacific Theatre of Operations (PTO) consists of every sea area, port, and base from the right (Hawaiian) edge of the board up to and including Diego Suarez and the Arabian Sea.
2.62 The Atlantic Theatre of Operations (ATO) consists of every sea area, port, and base from the left (USA) edge of the board up to and including Suez and the Cape of Good Hope.
2.63 A few sea areas (e.g. Eastern Seaboard and Bay of Bengal), despite being part of one theatre, actually yield VP in the other theatre. These are noted on the mapboard.
2.7 Turn Record / Reinforcement Chart
2.71 The Turn Record / Reinforcement Chart in the top portion of the Atlantic board indicates what units each side has at the start of the game, and what units enter or leave the game later during play.
2.72 Each player takes the ships and other units listed for turn 1 (not turn 0) from the chart and places them on the board according to the set-up restrictions for his side.
2.721 German, Italian, and Japanese units are placed and/or appear in Germany, Taranto, and Yokosuka Navy Yard, respectively.
2.722 French ships may be placed in any/all of Brest, Toulon, Diego Suarez, Saigon, or Nouméa.
2.723 US units with a letter in the upper left corner of the counter are placed in the appropriate ports, sea areas or holding boxes according to said letter. See 3.15 for details.
2.724 British units may begin the game in any/all of: England, Gibraltar, Suez, Trincomalee, or Singapore. Unless otherwise noted, British reinforcements arrive in England.
2.73 At the start of each turn during the game, both players consult the Reinforcement Chart and place all their units listed as arriving that turn on the board. Then the player must remove from play any units that are listed under removals for that turn; these are out of play for the rest of the game.
2.74 If ships or units are listed as arriving at a port that is controlled by the enemy, the ships or units are lost instead. (Exception: All US reinforcements may appear at either USA or Pearl Harbor. If Pearl Harbor has been lost, they may enter at Panama Canal instead).
2.75 On some turns, the Reinforcement Chart requires the withdrawal of certain units. On these turns, the player must remove that specific unit if possible, even if that unit is damaged. If that unit has been lost, he must remove a different unit of the exact same type. If no units of that type are currently on the board, but one that has been lost and is due to re-enter as a later reinforcement, he must remove the next available returning unit. If no units of that type exist either on the board or as a returning unit, the player need not remove any unit. It is never necessary to substitute the Italian or a Japanese LBA for a removed German one.
2.76 AW is normally a ten-turn game. Optional turns 0 and 11 are included in the rules and on the Turn Record / Reinforcement Chart.
2.8 VP Track
The VP track on the board (in Asia) is used to record the players' relative VP accumulations. Each theatre is tracked separately. There is one pair of markers to track the ATO (between Britain and Germany) and one pair to track the PTO (between the US and Japan). At the end of each turn (5.72), each player totals the VP listed for his side in all the sea areas he controlled that turn, the totals are subtracted from each other, and the player who gained the most VP in each theatre that turn gains the difference and moves the VP counters along the track to reflect the VP gained. Gains by each player are shown by moving the markers towards the end of the track next to his flag; the VP10 counters are used on the 10's tracks to record multiples of 10 VP. If any player gets 29 VP ahead, he can gain no more; he remains at +29 until his opponent starts regaining VP.
Example 1: The German player wins 3VP and the British player wins 6. The British player moves the ATO VP counters the net 3VP gain in his favor. Example 2: The US player wins 5 VP and the Japanese player wins 12, but the Japanese player already has 27 VP accumulated. The Japanese player moves the PTO VP counters to show the maximum of 29 VP.
3.0 The Playing Pieces
3.1 Ships
The game contains several different sets of 5/8" x 1¼" two-sided playing pieces, or counters, that represent the capital ships of the various navies that fought during WWII. The fronts of these counters are sky blue on the upper portion, with a thick colored stripe on the lower portion. These thick stripes are a distinct color for each major navy as follows: United States = blue, Japan = red, Great Britain = green, Germany = black, Italy = grey, France = lighter blue. Also represented are the minor navies of Russia, Australia, Greece, and the Netherlands; all which = lighter green. In the center is a side view of the ship. The front side is also called the patrolling or patroller side.
The reverse side is mostly sky blue, with a thinner border around all four sides in the same national color as the front side. The center of the back side contains an aerial view of the ship. The reverse side is also called the raiding or raider side.
Both sides contain the various numbers (factors) used in the game, and the national flag of the owner in the lower right corner.
Most units are two sided, but some ship counters have only a patrolling side; this is deliberate. Such units must move with and function only as patrollers.
3.11 Gunnery Factor: The number of dice the ship rolls when attacking during a surface action.
3.12 Armor Factor: The number of damage points a ship can have without sinking.
3.13 Speed Factor: The number a ship must roll less than in order to move an extra sea area; also used to determine whether one ship can evade or pursue another.
3.14 Bonuses: Ships with a red gunnery factor add 1 to each gunnery attack (not damage) die roll during a surface action. Ships with a red armor factor subtract one from each damage (not attack) roll made against them. Ships with red plane symbols to indicate their airstrike factor add 1 to each airstrike attack (not damage) die roll during an air action.
3.15 Turn/place of appearance: A letter indicates a unit that must be set up in a specific location, a number indicates the turn on which the unit appears, and an asterisk (*) indicates a counter that is associated with an optional rule.
A – Australia C – Coral Sea E – USA F – French Polynesia H – Hawaiian Islands M – Philippines L – Leningrad P – Pearl Harbor S – Singapore W,X,Y,Z – "Location Uncertain" groups
3.16 Airstrike factor: If a ship has aircraft symbols along the top right of the counter, that ship is an aircraft carrier, and the number of aircraft symbols is the airstrike factor. This is the number of dice the ship rolls when attacking during an air action. If there are no aircraft symbols, the ship may not make any attacks during an air action.
3.2 Submarines
The 5/8" square counters that appear as smaller versions of ship counters represent submarines. Gunnery and armor factors of submarine counters are analogous to those of ships, except that submarines do not have speed factors.
3.3 Land-Based Air units (LBA)
The 5/8" square counters with pictures of planes on them represent land-based air forces of the various nations.
3.31 Attack/Air Factor: The number of dice the unit rolls when attacking during an air action.
3.32 Defense Factor: The maximum number of damage points the unit can have without being destroyed.
3.33 Air units have no movement/speed factor.
3.34 Some air units have initial placement restrictions (ATO or PTO) listed on the back of the counter.
3.35 Air units have no raiding side.
3.4 Amphibious Units
The 5/8" square counters with infantry symbols on them are amphibious units, used to hold or capture bases. All nationality's amphibs function essentially the same. Attack, defense, and speed factors are all analogous to those of a surface ship. See 13.0 for details.
The US and Japanese units represent amphibious troops; the British unit nominally represents men, equipment, and supplies intended to reinforce the Malta garrison; and the German unit represents varying combinations of German paratroopers with German and Italian sea-borne troops.
3.5 Markers
There are also several types of markers used in the game that belong to neither side, but are used to indicate control, damage, and game status.
3.51 The 5/8" two-sided square markers with pairs of naval jacks on either side are control flags, which are placed in sea areas at the end of a turn to denote control by one side or the other. Flip the appropriate side face up to indicate control by the Axis or Allies. Any flag is removed if nobody controls a given sea area.
3.52 The 5/8" square two-sided markers that contain either a British, German, US, or Japanese roundel are garrison counters that are placed on the ports and bases, with the appropriate side face up to indicate Axis or Allied control. Use the British/German counters in the ATO and the US/Japanese counters in the PTO. Ports and bases that are initially controlled by one side or the other do not need to have a garrison marker placed on them unless that port or base is captured.
3.53 The 5/8" two-sided square markers with numbers or X's used to mark damaged, disabled, or sunk ships.
3.54 The 5/8" single-sided square markers with the letters "VP" on them are to keep track of the score (Victory Points) on the scoring tracks. There are two pairs of markers (ATO and PTO).
4.0 Prepare for Play
4.1 Arrange The Mapboard
Unfold and place the maps on the table between the players. The Atlantic map should go on the left and the Pacific map adjacent to it on the right, with their bottom edges aligned with one another. It is recommended that the Axis player(s) sit nearest the north edge of the board and the Allied player(s) sit nearest the south edge.
4.2 Place The Counters
Place all the unit counters onto the Turn Record / Reinforcement Chart, matching each counter up with its turn of appearance. Counters with an asterisk as all or part of its turn of entry are optional units (its name will be in italics on the board). Make sure all players agree upon which, if any, optional rules are in effect.
4.21 The German paratrooper unit (0-2-* Fsjr) appears on turn 3 in the standard game and on turn 0 if optional rule 20.0 is in play.
4.22 Several American ships arriving later in the game have two counters for the same unit, one of which is an optional unit. These are paired by "hull numbers", e.g.: CV10, CA71. Place both counters onto the same space of the Turn Record Chart, but only bring one on as a reinforcement on the appropriate turn. See optional rule 34.0 for details. If you are not using 34.0, use either counter of each pair (not both!) they are functionally identical.
4.3 Place Control Flags (& Garrison Markers)
Place control flags in each sea area controlled by one player or another as indicated on the map. Since each port and base is already labeled with its original owner, it is not necessary (but certainly acceptable) to place garrison markers onto each port/base.
4.4 Place The Markers for Easy Access
Place the damaged, disabled/sunk, and unused control counters in a neutral area in easy reach of all players.
4.5 Deploy Units
Each nationality in turn (5.1) takes all of its unit counters from the Turn Chart that are available on turn one and deploys them on the board according to the restrictions listed.
4.6 Pearl Harbor Raid Force
Finally, the Japanese player moves any desired units from Yokosuka Navy Yard to the holding box marked "Pearl Harbor Raid Force". Only ships with speed five or greater may be placed into this box.
4.7 Begin The Game
The game is now ready to begin.
5.0 Sequence of Play
5.1 Nationality Order
In each activity, unless otherwise noted and regardless the number of players, the British player acts first, then the Japanese, then the American, then finally the German/Italian player. French units are controlled by the US player and are moved accordingly. Any French ships captured by the Germans as a result of 18.33 or 22.0 are treated as German ships thereafter and are moved accordingly. Other Allied minor units (e.g. Russian, Australian, Dutch) are controlled by and move at the same time as the British. During combat, all Allied or Axis units act together, in the nationality order of the British or Germans in the ATO, and in the nationality order of the US or Japan in the PTO.
5.2 Reinforcements
Players consult the turn chart and place their reinforcements on the board. Any units listed as removals are removed from play.
5.3 Movement
5.31 In nationality order, each player moves all patrolling ships and all submarines to sea (patrolling side up). Flip over all ships in port that are to become raiders (top view side up). Units that are to be repaired are also left in port, but remain patrolling side face up. After each player has completed all his patrolling moves, resolve speed rolls for each of his ships that moved an extra sea area. Ships that fail their speed roll are inverted to their raiding side.
5.32 In nationality order, ships that remained in port but were not inverted to their raiding side conduct repairs.
5.33 Land-based air units are placed one at a time in nationality order. Skip a nation once it runs out of air units.
5.34 Each player in order moves any/all of his amphibious units to sea. Amphibs are not placed one at a time like LBA.
5.35 Each player in turn moves his raiding ships from ports and bases to sea. After each player has completed all his raiding moves, resolve speed rolls for his raiding ships that tried to move an extra sea area. Ships that fail this roll must return to base from the sea area they now (temporarily) occupy.
5.36 In nationality order, each player may (not must), in every sea area where he has a patrolling submarine(s), invert one sub to its raider side. Each player inverts all raiding subs that he wishes, then the next player inverts all that he wishes, etc. (not one at a time, like LBA).
5.4 Combat
5.41 In nationality order, take turns selecting the next sea area or base where combat will be fought (7.1). Once combat begins in any location, it is fought to a finish before combat proceeds to the next sea area or base.
5.42 Resolve ASW (14.2). Total the ASW strength in that sea area and resolve the attacks. Surviving patrolling submarines roll their attack(s) against merchant shipping. Adjust the VP track. Move surviving patrolling submarines aside; do not return them to base until the Return to Base phase (5.74).
5.43 Each side moves desired LBA units onto enemy base(s) to attack those bases. Resolve these attacks. LBA's that attacked return to base.
5.44 Combat within a sea area is fought in rounds. Each round consists of one air action or one surface action; or occasionally, one air action followed by one surface action taking place in the same round.
5.45 Determine whether the upcoming round will be an air, surface, or combined air-surface action (7.22). This determination is in effect only for that round of combat in that sea area. If it is a surface action, the player shooting second must announce which of his aircraft carriers (if any) will be firing their gunnery factors.
5.46 The first player to shoot allocates all his attacking forces for this action to their targets, then resolves their attacks and places the appropriate damaged, disabled, and sunk markers on targets that were affected. These markers do not go into effect until the end of that action; the second player's ships and units get to return fire before the first player's attacks take effect.
5.47 Then the second player allocates his attacks and resolves them, placing the appropriate markers as he goes.
5.48 At the end of the action all damaged, disabled, and sunk markers go into effect.
5.49 If the players are fighting an air action followed by a surface action in the same round, they follow steps 5.46 through 5.48 once for the air action, then repeat them once for the surface action. Note that all damage and disabled markers placed during the air action take effect before the surface action begins. Units destroyed during the air action are not available for the surface action.
5.5 End of Combat Round
After each combat round in a sea area, the following actions may be taken:
5.51 First, any raiding submarine in that sea area may attack, returning to base immediately after executing the attack.
5.52 Second, either player may retreat (8.1) from the sea area and the other player may pursue (8.2) or (if already pursuing) break off pursuit.
5.53 Finally, non-retreating amphibious units in the sea area may land.
5.6 Additional Combat Rounds
5.61 Repeat combat rounds (steps 5.45 to 5.53) until only one side has forces in the area.
5.62 The victor may then conduct air raid(s) with eligible carriers, and any amphibious units still at sea in the area may land. Combat then moves to the next sea area.
5.7 End of The Turn
After combat has been concluded in all sea areas, the following actions occur:
5.71 Each player in turn may invade adjacent island bases with any amphibious units still at sea.
5.72 The players place control flags on the sea areas they control and add up the VP they gain for the turn. The VP tracks are adjusted to show the new VP totals.
5.73 Any port or base that is surrounded by enemy-controlled sea areas both before and after control flags are placed is converted to enemy control. Turn its garrison counter over to show the new owner.
5.74 Each player in turn returns all his ships and units still at sea to friendly ports and bases.
5.75 The players proceed to the next turn and repeat steps 5.2 through 5.74. At the end of the tenth (or optional 11th) turn, the game is over. Apply the victory conditions from 1.4 to determine the victor.
6.0 Movement
6.1 Moving Ships
6.11 All ships start their move by moving from a base or port into an adjacent sea area. They may then move into a second (or third, if raiding) sea area that is adjacent to the first (second) sea area.
6.12 Ships that move to sea during step 5.31 (before air units are placed) are patrolling ships and are placed front side up. Patrolling ships may move one sea area automatically, and a second area if they successfully make a speed roll (6.2). Place a die on each ship (or use any other convenient method) that moves a second area to indicate the need for a speed roll.
6.13 Ships that move to sea during step 5.35 (after air units are placed) are raiding ships and are placed raiding side up. Only ships in port with the raiding side face up may move during step 5.35. When raiding, ships may move two sea areas automatically and a third area if they successfully make a speed roll. Place a die on each ship (or use any other convenient method) that moves a third area to indicate the need for a speed roll.
6.2 Speed rolls
Each unit's speed factor is used only for making speed rolls and during combat. It does not indicate how many sea areas a unit can move. When a speed roll is made for a ship, roll one die and compare the result to that ship's current speed. If the ship's speed exceeds the die roll, the ship passes the speed roll and the ship successfully enters the sea area. If the die roll is equal or higher than the ship's current speed, the ship fails the speed roll.
6.21 Patrolling ships that fail the speed roll still enter the second sea area, but are turned raiding side face up; they are treated like raiding ships for the remainder of the turn. If the ship does not have a raiding side (the back of the counter is blank), the ship must immediately return (10.0) to a friendly or neutral port/base from the second area entered.
6.22 Raiding ships that fail their speed roll must immediately return (10.0) to a friendly or neutral port or base from the third sea area entered.
6.23 All speed rolls are done at the end of each step. All of a player's patrolling ships must move before any of them attempt speed rolls; all of a player's raiding ships must move before any of them attempt speed rolls. A player may not wait to see the result of any speed roll(s) before moving additional ships.
6.24 Ships with a speed of 1 due to damage may still attempt a speed roll, even though it will automatically fail. If a ship has a speed of 7 or 8, it is not necessary to roll the die, as the ship will automatically pass.
6.3 Enemy Control Hinders Movement
Any ship or amphibious unit must always stop when it enters an enemy-controlled sea area, even if that is the first sea area it moved into. It may move no further that turn.
6.4 Moving Other Units
6.41 Amphibious units always start their move from a base or port by first moving onto a sea area that touches that base or port. They may then move from that first sea area into an adjacent sea area, where it must stop. Amphibious units may never move three areas. Amphibs never make speed rolls. Amphibious units may not land at another port or base during movement, even a friendly one.
6.42 Air units do not move, per se. They are simply placed in any sea area that touches any friendly port or base, as per 12.1. Air units are placed one at a time, in turn.
6.43 Submarines may be placed in any legal sea area regardless of enemy control, as per 14.1. All submarines are placed at the same time as each nation's patrolling ships.
6.44 Hunter-Killer escorts are placed in any U-boat-legal sea area at the same time as British patrolling ships.
6.5 Special German Movement on 1st Turn
On the first turn of the game, German oilers (10.3) and merchant raiders (15.0) may be freely placed as patrollers into any sea area in the ATO or with a British VP flag symbol. German pocket battleships (the 2-2-5 ships) may be placed as either patrollers or raiders into any ATO sea area except the Caribbean or the Eastern Seaboard. None of these moves require a speed roll. After the first turn, all German units move normally.
7.0 Combat
Rule section 9.0 explains carrier air raids, rule section 12.0 explains land-based air attacks on ports/bases, rule section 13.0 explains the use of amphibious units and rule section 14.0 explains sub and anti-sub warfare. The rest of section 7.0 explains normal combat between opposing forces in the same sea area.
7.1 Select A Sea Area to Resolve Combat
Each turn, combat is resolved in every sea area, one sea area at a time. Once combat is started in an area it continues until finished and then starts in a new area. In nationality order, select the next sea area for combat. When it is the British or German selection, they must select an area in the ATO, and when it is the Japanese or US selection, they must select an area in the PTO.
7.11 In a four-player game, during turns when the interaction between the ATO and PTO is minimal (for instance when there are few/no units in the Indian Ocean region), play often may be greatly speeded up by having the British and German players resolve combat in the ATO while the US & Japanese players simultaneously resolve the PTO. Rule 7.1 still applies to each theater separately. If any player objects to this, follow nationality order.
7.12 Players may not select a sea area containing no units for either side. All sea areas containing no units are considered resolved first, before any sea areas containing units. Players may select an area where only he or his opponent has units.
7.13 If the selecting player chooses an area where only one side has units, air raids, submarine attacks against VPs, and amphibious landings by that side may still occur normally. If that side has no carriers, LBA, subs, or amphibious units in the sea area, no combat takes place there.
7.14 If the player selects an area containing opposing units, they fight until only one side is left in the area. Then surviving carriers (not LBA) may air raid and/or surviving amphibs may land or invade.
7.2 The Combat Round: Air vs. Surface Actions
Both sides' ships and units fire at each other once, then damage takes effect and losses are removed. Each exchange of fire is called a combat round or a battle. This is repeated until at least one side is eliminated or retreats from the sea area.
7.21 There are two types of battles; air actions and surface actions. Air actions are long range battles fought with airstrikes; surface actions are close range gunnery battles. The type of action determines which ships and units may attack and which may be attacked during that round.
7.22 At the start of each combat round, each player in turn chooses whether he wants an air action or a surface action that round. If either player wishes it, the choice can be made secretly and revealed simultaneously. If the two sides agree, they fight that type of action. If they disagree, each rolls a die and the player with the higher result gets the type of action he chose.
7.221 In a four-player game, it is possible that both teammates will have units in the same sea area. If teammates disagree as to the type of action they wish to fight, the British or German/Italian player decides in the ATO, and the US or Japanese player decides in the PTO.
7.222 In the PTO, the player who wants an air action adds one to his roll. In the ATO, the player who wants a surface action adds one to his roll.
7.223 The player who controlled that sea area the previous turn adds one to his roll.
7.224 A player who has at least one LBA in the area adds one to his die roll.
7.225 These three modifiers are cumulative.
7.226 If, after modification, the result is a tie, the players fight an air action followed by a surface action in the same round. There can be no retreats, invasions, or submarine attacks between the air and surface portions of a combined air/surface action. Damage from the air action takes effect and losses are removed before the surface action begins.
7.23 The determination of air or surface action applies only to that round of combat in that sea area. The process is repeated for every round in every sea area.
7.231 If a player is attempting to retreat (8.0) from an area with multiple groups of ships, a separate air/surface determination is made for each group.
7.232 A player may elect to fight either type of action, even if he has no units able to attack during that type of action.
7.24 Prior to either side retreating, if any combat round is determined, either by agreement or by die roll, to be solely a surface — not a combined — action, all LBA units in the sea area immediately return to base for the remainder of the turn. Even if subsequent rounds are air actions, they do not return to combat. Once a retreat occurs, the non-retreating player's LBA's do not immediately RTB in the event of a surface action; they remain at sea and count for control of that area.
7.3 Naming Targets
In an action, each side in turn names targets and resolves attacks. In both theatres, all units on the same side are combined into a single force for purposes of combat. In the ATO, the Allied side declares and resolves its attacks first; in the PTO, the Axis side declares and resolves its attacks first.
7.31 In air actions, only units with airstrike factors (carriers and land-based air units) may attack. Any ships, LBA, or amphibious units in the sea area may be attacked.
7.32 In surface actions, all non-carrier ships with gunnery factors must attack. Aircraft carriers may fire their gunnery factors or not, at their option. All ships without gunnery factors cannot attack. Each player is limited as to what he may attack during a surface action as follows:
7.321 He may attack any ship that is firing its gunnery factor. At the start of a surface action, the second side to fire must name which, if any, carriers will fire. The first player is then permitted to shoot at those carriers. A carrier not named as firing cannot fire even if fired upon.
7.322 He may attack an enemy aircraft carrier that is not firing its gunnery factor only if he also attacks every enemy ship that is attacking during that surface action.
7.323 He may attack an enemy amphibious unit only if he also attacks all enemy ships, including all carriers, in the sea area during that surface action.
7.324 Air units may not be attacked. Note that this will only be an issue during a combined air/surface action, since during a purely surface action, all LBA will have already returned to base.
7.33 In any action, only ships and units at sea in that sea area may attack or be attacked. Ships and units in adjacent ports or bases may not be attacked during normal combat (see 9.0 and 12.4 for how to attack such units). Hilfskreuzers, oilers, and submarines may not be attacked during normal combat or air raids; they are only attacked during ASW (14.2).
7.331 Each attacking ship or unit is assigned to one target and uses its whole attack against that target; it cannot split its attack between different targets. Multiple attackers may attack different targets or combine against a single target.
7.332 A player rolls his attacks only after all his attacking units have been assigned to targets. Once he starts to roll dice, he cannot change targets, even if he ends up firing at a target he has already sunk.
7.4 Combat Procedure
The attacking player rolls one die for each shot fired by each attacker.
7.41 In an air action, each aircraft carrier and LBA unit fires a number of shots equal to its airstrike factor. Gunnery factors do not attack.
7.42 In a surface action, each ship fires a number of shots equal to its gunnery factor. LBA units do not attack and are ignored.
7.43 A highlighted gunnery or airstrike factor gets the attack bonus only when it attacks a ship or amphibious unit. The attack bonus adds one to each "to hit" die roll when the highlighted factor attacks, but not to any subsequent damage roll(s).
7.44 If the target is a ship or amphibious unit, a result of 5 disables it. A disabled marker is put on the target. Land based air units are never disabled and ignore any roll of 5 against them.
7.45 A result of 6 (or more) is a hit. For each hit, the attacker rolls one die to see how many damage points are scored. A damage marker with the appropriate number is placed on the target.
7.46 When the total number of damage points on any unit exceeds its armor factor, put a sunk marker on it.
7.5 Resolving Fire
All exchanges of fire are considered simultaneous. The results of both sides' attacks take effect only after the second side has attacked. The second side returns fire at the same strength he began the round before the first side's attacks take effect.
Example: Patrolling ships Hood and Prince of Wales are facing raiding ships Bismarck and Prinz Eugen in a surface action. All ships begin the combat undamaged, so Bismarck is eligible for the gunnery bonus. Hood fires at Bismarck and gets one hit for 4 points of damage. Prince of Wales fires at the Prinz Eugen and disables her. Bismarck returns fire, and even though she is now damaged, still gets the gunnery bonus for this round since the British attacks do not take effect until both sides have fired. Likewise, Prinz Eugen can return fire before the disabled result takes effect (and she must return to base). On subsequent rounds, Bismarck will not get a gunnery bonus since she began the round already damaged.
7.51 Sunk ships and units are removed from the board.
7.52 Each disabled ship or unit must return to a friendly (or neutral) port or base and remain there for the rest of the turn. At the end of the turn, the disabled marker is removed. On the following turn, the ship or unit is free to move normally.
7.53 A ship or unit that is both disabled and damaged takes its damage before returning to port. If both sunk and disabled, the unit is sunk.
7.54 In an air action followed by a surface action in the same round, do steps 7.3 to 7.5 once for the air action, then repeat them for the surface action. Ships/units destroyed during the air action are not available for the surface action.
7.6 Effects of Damage on Combat Effectiveness
7.61 A ship that has accumulated damage equal to its armor factor is referred to as "crippled".
7.62 Speed: Each point of damage on a ship (not amphibious unit) reduces its speed by 1. Damage can never reduce any ship below a speed of 1. Damage does not directly affect the number of sea areas a ship may move, but it will affect its chances of successfully passing a speed roll.
Example: HMS Rodney is normally a 5-5-3. Four points of damage make her effectively a 5-1-1.
7.63 Gunnery: Any ship with at least one current damage point loses any attack bonus for its gunnery factor. If a ship is crippled, its gunnery factor is reduced to one if it was originally greater than one, or to zero if the gunnery factor was originally one. A zero gunnery factor remains a zero.
Examples: Rodney (from the previous example) receives one additional point of damage (5 total). She is now a 1-0-1. IJN Myoko is a 1-2-8 with the attack bonus. With her first damage point, she becomes a 1-1-7 with no bonus. If she receives exactly one more point of damage (2 total), she is a 0-0-6.
7.64 Airstrike: When an aircraft carrier is crippled, its airstrike factor is reduced to zero. The airstrike factor is not affected by lesser damage. A carrier or LBA unit does not lose its attack bonus due to damage, as a gunnery factor does.
7.7 End of The Combat Round
At the end of each round of combat, follow the steps in 7.71 to 7.73 below, in the order listed. If a round contains both an air and a surface action, do these steps only after both actions are complete.
7.71 Raiding submarines may attack, if any are in the sea area. See 14.3.
7.72 Each player declares whether he will retreat (8.0) from the area. If exactly one player decides to retreat, the other player may pursue.
7.73 Each player in turn may land any amphibious units (13.0) that have not retreated.
7.74 Repeat rounds until there is a victor in the sea area. The victor's aircraft carriers may then air raid (9.0) ports and bases touching that area.
8.0 Retreats
8.1 Declaring A Retreat
8.11 After each round of battle in a sea area either player may retreat. Players must state their intention in nationality order.
8.12 In a four-player game, when both teammates have units in the same sea area, if either player decides to retreat his forces, both teammates must retreat.
8.13 When a player retreats, all of his land-based air units must instantly return to base and his patrolling ships become raiders (turn the raider side face up). Only ships and units in that area are affected.
8.2 Pursuit of Retreating Units
The other player may pursue and continue the combat with any or all of his ships in that sea area. LBA units and amphibs cannot pursue.
8.21 Each retreating ship or amphibious unit remains in the sea area until it escapes, is sunk, or is disabled. When it escapes or is disabled, it must immediately return to an eligible port or base. It does not move to another area.
8.22 The retreating player forms his ships and amphibious units into groups of one or more ships and/or units. Each group retreats together at the speed of the slowest member of the retreating group. Each adjacent base or port controlled by the retreating side is also considered a separate group with speed zero, but no other units may be added to these groups.
8.23 Then the pursuing player assigns pursuers to the retreating groups. He is not required to pursue every or even any group. A ship may pursue a group only if its speed equals or exceeds the speed of the slowest member of the group. If a ship is slower than all members of the group, it may not pursue that group. Ships too slow to pursue any group may not pursue.
8.24 Carriers may be assigned to pursue enemy ports or bases. If they do so, a carrier air raid is conducted. See 9.0 for details.
8.25 Ships that do not pursue immediately may not begin pursuing later in the turn.
8.26 A raiding sub that has not yet attacked may attack any unit in any retreating or pursuing group, regardless of speed.
8.27 Patrolling subs, Hilfskreuzers, and oilers are not retreated with other ships, neither may they pursue; they remain in the area and negate any enemy control at the end of the turn.
8.3 Continuing and/or Ending Pursuit
Each group fights additional combat round(s) against its pursuers until one side is gone or the pursuers stop pursuing.
8.31 When multiple groups are being pursued, each fights a separate battle against only the ships pursuing it. The type of action (air/surface) is determined separately for each group each round.
Example: One retreating group could fight an air action against its pursuers while another group in the same area fights a surface action against its pursuers.
8.32 At the end of each combat round, each retreating group may split into smaller groups and the pursuing group may also split to follow the new, smaller groups.
8.33 Each pursuing ship may stop pursuing at the end of any combat round. It must stop pursuing if its speed has dropped below that of the group it is pursuing. Once a ship stops pursuing, it cannot pursue again that turn; neither that group nor any other.
8.34 Ships that break off pursuit may not themselves be pursued in turn. One or more ships may break off while the rest of the group continues the pursuit.
8.35 Whenever a group is no longer being pursued, it escapes and every ship and unit in it immediately returns to a friendly port or base (10.0).
8.36 When all ships and units in a group are sunk or disabled, its pursuers stop pursuing for the rest of the turn.
8.37 Neither retreating nor pursuing groups may re-join or combine. A ship or unit from one group may never join a different group.
9.0 Carrier Air Raids
9.1 Air Raids Occur Post-Combat
In a sea area, when combat is completed for the turn, or if there was no combat, aircraft carriers may air raid adjacent enemy ports/bases.
9.2 Restrictions on Carrier Air Raids
9.21 Only aircraft carriers at sea in the area may air raid at this time. Land-based air units only attack ports/bases per 12.4.
9.22 A carrier may not air raid if it pursued another retreating group this turn.
9.23 Each attacking (air raiding) carrier is assigned to a single port or base adjacent to the sea area and may attack only that port or base.
9.24 Only the ships and units that are in the port or base at the time the raid occurs may be attacked.
9.25 A port or base may be air raided once from each sea area it touches. Survivors of an air raid may be air raided again from a different sea area later in the turn.
9.26 In the PTO, all carriers may participate in air raids, regardless whether they are raiding or patrolling. In the ATO, only raiding (not patrolling) carriers may do so.
9.3 Air Raid Procedure
An air raid consists of a single air action in which carrier airstrike factors may attack the ships and units in a port or base. As with normal combat, all carriers attacking the same port or base must allocate their attacks before any are rolled. The carriers attack normally except:
9.31 Carrier air raids take place after all other retreat/pursuit combat in that sea area is concluded.
9.32 The ships and units in the port or base cannot return fire.
9.33 Disabled results have no effect.
9.34 Do not roll for damage when an amphibious unit is hit during an air raid; a hit on an amphibious unit on a port or base always inflicts a single point of damage.
9.35 A ship (but not other units) in port can absorb twice its normal damage without being sunk. When its damage exceeds its armor factor, it is resting on the bottom of the harbor and cannot move, but it can still be repaired. It is sunk when its damage is more than twice its armor factor.
9.351 Any ship resting on the bottom in a port or base with no repair capacity is considered sunk and removed from the board.
9.352 When a port is captured by the enemy, any ships resting on the bottom are sunk.
10.0 Returning to Base (RTB)
10.1 Legal Basing Locations
Except where specifically stated otherwise in the rules or on the mapboard, whenever a ship or unit returns to base, it may return to any friendly base adjacent to its sea area or to any friendly port anywhere within its theatre of operations — provided the path to that port does not pass through a choke point (2.5) held by the opponent.
10.11 Allied ships in the Hawaiian Islands or French Polynesia may return to the Panama Canal.
10.12 Prior to Japan's attack, only US or Free French units may base in the USA or any US possessions.
10.13 After Japan attacks, US & British units may base at each other's possessions without restriction.
10.14 Italian units that have entered the Atlantic may base in Brest (if friendly), Germany, or the neutral port and move normally once there.
10.15 Disabled Axis ships in the Caribbean Sea or South Atlantic must go to the neutral port.
10.16 Disabled ships in the Cape of Good Hope may return to Diego Suarez or Simon's Town Dockyard, if friendly. Otherwise, they must return to the neutral port.
10.17 British-controlled ships in the Caribbean Sea must return to the neutral port if the US is not at war.
10.2 RTB Under Special Conditions
10.21 When a raiding ship or a patrolling ship with no raiding side fails its speed roll, it returns to port from the last sea area entered. (Exception: 2.51).
10.22 When a ship or unit retreats from a port or base being captured by the enemy, rule 16.2 applies (another adjacent base or the nearest port).
10.23 If a ship or unit has no legal place to return to (a very rare situation), it is sunk and removed from play.
10.3 Oilers (German Supply Ships)
The German fleet includes several supply ships called oilers. The oiler function is indicated on the counter by a jerry-can symbol on the upper right corner of the patrolling side. Oilers have no raiding side; they may only move as patrollers. At the beginning of the game, the German player may place these oilers in any ATO sea area or any area with a British VP symbol. Multiple oilers may be placed in the same sea area. These ships do not return to base at the end of a turn, but rather function essentially as mobile bases for German ships (only).
10.31 On turn two and after, oilers move as German patrolling ships. Oilers move as if their entire current sea area were a hypothetical base. In other words, any adjacent sea area is always a one-area move. Oilers may attempt to move two areas like other ships, but on an unsuccessful speed roll, they must RTB from the second area entered. They are never inverted to raiders.
10.32 Oilers are combatted using ASW procedures (14.241).
10.33 If, after combat, any German (but no other Axis) ships, including Hilfskreuzers, remain at sea in the same sea area as an oiler, those ships may remain at sea and treat the entire sea area itself as their hypothetical base for movement purposes on the following turn.
Example: The oiler Nordmark survives turn 3 ASW in the Mid-Atlantic, and at the end of all combat, the Scharnhorst and two Italian cruisers occupy the sea area as well. Scharnhorst is refueled. The two cruisers may not refuel, since they are Italian rather than German, and must RTB. On turn 4, the Nordmark and Scharnhorst treat the entire Mid Atlantic sea area as their base for movement purposes. Air Gap, Western Approaches, Eastern Seaboard, Bay of Biscay, Caribbean Sea, and South Atlantic are all one-area moves.
10.34 Oilers may never be used as a base for LBA units, nor may German ships that fail their speed rolls "return" to them.
10.35 Even though they move with patrolling ships, oilers do not count for control of a sea area. Unlike subs and/or merchant raiders, if only an oiler(s) remains in the same sea area as an Allied patrolling unit after combat has concluded, Allied control is not broken.
11.0 Repairs
11.1 Port Repair Capacity
Some ports have a repair capacity that gives them the ability to remove damage points from ships. These are noted on the mapboard with a number inside of a gear icon on the perimeter of the port's red circle (Exc. Pearl Harbor, see 11.12). Each point of repair capacity allows the port to remove one point of damage every turn.
11.11 The US player may repair 10 points of damage per turn in the USA, and a varying number per turn at Pearl Harbor, as detailed in 11.12 below. The US player may only repair US or Free French ships until Japan attacks.
11.12 On the turn Pacific hostilities begin, the repair capacity of Pearl Harbor is zero. The following turn, the repair capacity is 3, and this increases by 3 per turn until a max of 15 is reached. If the Allied player loses Pearl Harbor, he can use these repair points at Panama Canal, which represents the shipyards of the US west coast.
11.13 Beginning on turn 3, the Allied player may remove 2 points of damage per turn at Leningrad and 1 point per turn at Murmansk.
11.14 Other than the French ports of Brest and Toulon, only the original owner (i.e. Axis or Allies) of a port can make repairs there. The repair capability of these French ports is usable only while the ports are under Axis control.
11.15 A port's repair points can be divided among multiple ships in the port. The points indicated are the total number of points that can be removed at the port each turn, not the number of points that may be removed from each ship.
11.16 Within the limits of any other listed restrictions, ships may be repaired at a port belonging to an ally. If there is a disagreement among teammates as to how to split up repair points, the owner of the port makes the decision.
11.17 Repair points cannot be transferred from port to port, nor may they be accumulated from turn to turn. They must be used on the turn and at the port they are received or they are lost.
11.2 How to Repair
11.21 Damage points may be removed from a ship, provided the ship remains in port and does not move that turn. Ships that intend to repair must remain in port with their patrolling side face up. Ships that invert to their raiding side may not repair that turn. Russian ships may roll to see if they can move before declaring their intention to repair.
11.22 Repairs take place after all movement is completed, and before any combat takes place.
11.23 Only ships may be repaired using a port's repair points. Repair points may not be used to repair LBA or amphibious units. Damaged LBA and amphibious units remain damaged until they are eliminated, then return in two turns per 12.6 and 13.5 respectively.
12.0 Land-Based Air (LBA)
12.1 Placing Land Based Air Units
Land-based air units are placed on sea areas after patrolling ships have moved but before amphibious units and raiding ships have moved.
12.11 In nationality order (5.1), the players take turns placing one air unit at a time into a sea area. Once a nation runs out of units to place, skip that nation and continue until all nations run out of units.
Example: On a given turn there are 2 (G)erman, 2 (B)ritish, 8 (A)merican, and 4 (J)apanese LBA on the board. Regardless the number of players, the order of placement is: BJAG, BJAG, JA, JA, AAAA.
Players of VITP should note that the RAAF and RNZAF are British units in AW and are placed accordingly.
12.12 Air units ignore distance as well as enemy-controlled sea areas and may be placed in any sea area on the board as follows (12.121–12.124):
12.121 A player may only place an air unit in a sea area if he or a teammate controls a base or port touching that sea area. The LBA need not operate from the same base where it began the turn.
12.122 LBA may never operate from Russian, neutral, or uncontrolled bases or ports.
12.123 Allied LBA units initially placed in one theatre of operations may only redeploy to the other theatre by sitting out a full turn off-board. During LBA placement, place transferring units onto the Order of Appearance chart for the following turn, when they may be placed in either theatre.
12.124 Axis LBA units may never redeploy from theatre to theatre. Japanese LBA must remain in the PTO; German & Italian LBA must remain in the ATO.
12.13 Each player may place his air units in any order he wishes (e.g., if one of them is damaged). This includes the German player having the choice of placing one of his German or his Italian LBA.
12.2 Combat Involving LBA
LBA units in sea areas may attack and be attacked each combat round, but only during air actions. LBA units may attack once per air or combined action, but must return to base as soon as the first surface action is rolled.
12.21 There is only one LBA unit that receives an attack bonus: the German Stuka counter. No other LBA receives such a bonus, even while attacking an enemy unit in port. (Exceptions: the Japanese surprise attacks and 14.3 (Exception: kamikazes 21.1).
12.22 Shots fired at land-based air units do not get the attack bonus even if the attacking carrier or LBA normally gets the bonus. (Exceptions: optional rules 21.1 and 23.3).
12.23 Like ships, air units are destroyed when their damage exceeds their defense factor. They are removed at the end of the combat round.
12.24 Unlike other types of units, land-based air units are not affected by disabled results against them.
12.3 LBA Units Against Submarines
In addition to making normal attack(s), LBA units add their attack factor to the ASW strength for the sea area in which they are deployed.
12.4 LBA Attacks Against Ports/Bases
After ASW is resolved in a sea area, each player in turn order may move one or more LBA's from that sea area onto any adjacent enemy port or base to attack any ships, LBA, or amphibious units there.
12.41 Any/all LBA attacks on ports are resolved prior to any combat between ships and units at sea in the original sea area.
12.42 A single round of air attacks takes place, the mechanics of which are the same as carrier air raids (9.2–9.25).
12.43 All airstrike factors of a given LBA unit must attack the same target, as with normal air actions.
12.44 After the attack, the LBA must immediately return to a friendly base that borders the sea area where it was initially placed.
Example: The US controls Kwajalein, Guadalcanal, and Lae, and has placed two LBA's in the Bismarck Sea. He decides to use one of these to launch an attack on a Japanese ship in Truk. The unit makes one attack on one ship with two airstrike factors, then must return to base. The LBA may return to Guadalcanal or Lae, but not to Kwajalein, which does not border the Bismarck Sea. The returned LBA would then be subject to possible air raids later in the turn.
12.5 LBA Units Count for Control
LBA units that survive combat without being returned to base count as patrollers for determining placement of control flags. Note: Control flags are only placed after all combat is resolved for the turn. This means that an unopposed or victorious LBA in a sea area can achieve control of that area, provided that either there was no combat round fought, or if all combat rounds were either air or combined actions. If any round (prior to a retreat) was solely a surface action, then the LBA's would RTB before any control flag is placed.
12.6 Reappearance of Destroyed LBA's
Destroyed land-based air units are placed on the Order of Appearance card in the boxes labeled for that purpose and reenter the game, undamaged, two turns later. Units so returned are initially placed on any friendly port, then moved as per 12.1.
12.61 Destroyed Axis LBA may only reappear as reinforcements in their "native" theatre.
12.62 Destroyed Allied LBA units may reappear as reinforcements in either theatre, but then must remain there unless transferred as per 12.123.
12.7 Loss of An Airbase
If an air unit finds itself in a sea area without a friendly port or base, it must immediately return to base.
12.71 If an enemy captures the only friendly port/base available to an air unit, that air unit must immediately RTB at the nearest friendly port and stay there for the rest of that turn.
12.72 This is true even if combat has already concluded in that sea area, and even if the first base is later recaptured.
12.73 Units returned to base under this rule are subject to air raids (9.0, 12.4) later in the turn.
Example: In the Bismarck Sea, the US controls only Guadalcanal, which is unoccupied by any amphibious units. All other adjacent bases are controlled by Japan. Each side has a single amphibious unit that survives the first round of combat. The Japanese player lands his amphib unit on Guadalcanal, capturing it. Any Allied LBA in the Bismarck Sea must immediately RTB to the closest friendly port. The US marine unit then invades and retakes Guadalcanal. Allied LBA(s) from the Bismarck Sea do not get to return to the sea area that turn.
13.0 Amphibious Units
13.1 Moving Amphibious Units
Amphibious units are used to capture enemy (or uncontrolled) bases, or to secure one's own bases against the enemy. They move after LBA units but before raiding ships. Amphibious units may move one or two sea areas automatically, but never three, even with a speed roll. Otherwise, they move as ships. (Exception: German Fsjr, unit 13.6).
13.2 Amphibs In Combat
Amphibious units do not attack during combat, but they may be attacked. In surface actions, they may be attacked only if all friendly ships are also being attacked during that action.
13.3 Landing Amphibs
Amphibious units may land on ports or bases at the times indicated below (13.31–13.33). A unit may land on any enemy or uncontrolled base, or friendly base/port that touches its sea area. It may not land on an enemy port. Amphibious landings take place in nationality order.
13.31 At the end of each combat round, each amphibious unit at sea in that area may either land or stay at sea.
13.32 At the end of all combat in a sea area (including air raids), each amphibious unit in that area may either land or stay at sea.
13.33 At the end of the turn, all amphibious units still at sea must either land or return to port in nationality order.
13.4 Amphibious Invasions
When an amphibious unit lands on an enemy base, it invades. A unit cannot invade if it retreated or was disabled this turn (it must return to a friendly port/base instead).
13.41 When a unit invades an enemy base, the invading unit is eliminated, and the base is converted to friendly control.
13.42 Damage does not affect an amphibious unit's ability to invade or defend.
13.43 If the enemy base holds one or more landed enemy amphibious units, the invading unit is eliminated along with one of the enemy amphibious units (owner's choice of which). The base remains under enemy control.
13.44 If multiple units on the same side invade a base at the same time, they invade one by one and each invasion is resolved in turn.
Example: Three units invade an enemy base containing one enemy amphibious unit. One invader is lost eliminating the defending unit, one is lost to convert the base and the third lands safely on the now-friendly base.
13.45 When a base is captured, place (or invert) its garrison marker to reflect the new owner.
13.46 Since amphibious units land in nationality order, it is possible for one side to capture a base and the other side to capture it right back. If this happens, and it was the only friendly available base in the area for one or more air units, apply 12.7.
13.5 Reappearance of Lost Amphibious Units
13.51 Amphibious units lost in invasions or combat return, undamaged, two turns later. When lost, place these units on the Turn Chart in the boxes labeled for that purpose. Returning amphibious units may be placed in any friendly port.
13.52 Some US amphibious units have two sides. The reverse side is only used when the unit reappears on or after turn 8. Amphibs never invert or move as raiders.
13.6 German Paratrooper (Fsjr) Unit
This special "amphibious" unit functions as does any other amphibious unit for capturing or defending bases. It does not, however, move as a normal amphibious unit. Rather, it is placed as if it were an LBA. The paratrooper unit may attack any enemy-held base at the same time and with the same range restrictions as a German LBA unit attacking an enemy base at the start of combat. If one or more Axis LBA units are also placed to attack the same Allied base, these air units may attack first, then the paratrooper lands.
Examples: The paratrooper unit begins the turn in Germany. During the placement of land-based air units, the German player places the unit in the Western Mediterranean. When LBA's are moved to attack enemy bases, he moves the unit from the sea area onto Malta. When the attack is resolved, the paratrooper unit is eliminated and placed on the turn record track to return two turns later. The garrison counter for Malta is inverted to show Axis control. Any Allied units based at Malta must evacuate as per 16.2. Had the Tiger amphib counter also been on Malta at the time, both the paratrooper and the Tiger amphib would have been eliminated, and Malta would have remained in Allied hands. If additional Axis LBA were also moved onto Malta, they would have attacked first, in the hope of destroying the Tiger unit before the paras landed.
14.0 Submarines
14.1 Submarine Movement
Submarines may either patrol or raid, just like surface ships. However, all submarines initially move as patrolling ships. Then, when raiders are moved, each nationality may invert any desired submarine counters to their raiding side, but no more than one in any sea area.
14.11 Distance or control flags never inhibit the movement of submarines.
14.12 German subs may be placed only in ATO sea areas.
14.13 The Italian sub (10MAS) may be placed only in either Mediterranean sea area.
14.14 Japanese or US subs may be placed only in PTO sea areas.
14.2 Patrolling Submarines & ASW
Patrolling submarines attack enemy merchant shipping, i.e. Victory Points, and are countered by means of Anti-Submarine Warfare (ASW).
14.21 Before combat begins in a sea area, total up the ASW strength in that sea area. Each patrolling, non-carrier surface ship counts as one ASW factor. Each amphibious unit and patrolling carrier counts as three ASW factors. LBA units add their attack factor to the ASW strength of the area. Raiding ships, regardless of type, and units not currently at sea do not count toward ASW.
14.22 British Hunter-Killer (HK) escort groups may be placed in any ATO sea area at the same time as patrollers. Each hunter-killer group in a sea area gives a +1 attack bonus to the ASW roll for that sea area; these bonuses are cumulative. After ASW combat, all HK groups RTB; they take no further part in combat or control determination. They may not be attacked.
14.23 ASW attacks that take place in either Mediterranean sea area receive a +1 bonus. This reflects not only the relatively shallow depth and clarity of the water, which made U-boats easier to spot, especially from the air, but also the dangers inherent in trying to get past a hostile Gibraltar. During WW2, only one U-boat deployed from the Atlantic into the Mediterranean, operated there, and made a successful return to Germany.
14.24 Roll one d6 for each ASW factor. These attacks are made against submarines as a group, not individually. Just as with surface combat, each hit (6+) destroys one submarine; each disabled (5) forces one sub to return to base. Hits take precedence over disabled results. All ASW results take effect immediately, before patrolling subs attack.
14.241 German oilers and Hilfskreuzers are counted as submarines for taking ASW losses. Against a force containing more than one of these types of units, any oilers are destroyed first, Hilfskreuzers second, then finally U-boats are lost.
14.242 If there are both normal and Type XXI U-Boats present in the same sea area, normal U-Boats are sunk first, then Type XXI U-Boats are sunk, then normal U-Boats are disabled.
14.243 The Type XXI German U-Boats have a defensive bonus, but not the same one other units do. Instead of damage reduction, Type XXI U-Boats may ignore any disabled results against them.
Examples: In a sea area, the German player has the merchant raider Atlantis, the oiler Nordmark, and two U-boats, one of which is Type XXI. If the British roll one 6 and one 5, the oiler is sunk, and the raider is disabled. If the British roll two 6's and one 5, both the oiler and the merchant raider are sunk, and the normal U-boat is disabled. If the British roll two 6's and two 5's, the same thing happens because the Type XXI ignores the disabled result.
14.25 Submarines may only be combatted through ASW; they may not be attacked in port or at any other time.
14.26 Patrolling subs that survive ASW each roll an attack using their gunnery factor against (off board) enemy merchant shipping. Each hit — not disabled — immediately gains 1 VP for the sub's owner. Subs in any sea area may gain no more total VP's than the higher of the two VP values of that area. VP gain due to submarine attack is separate from VP awarded at the end of the turn for area control.
Example: Patrolling US submarines that survive ASW in the Marianas Islands may gain no more than 2 VP in any one turn — the value to the Japanese. Patrolling U-boats may gain no more than 4 VP in the Western Approaches — the value to the Germans.
Example: The Axis makes a strong push in the South Atlantic. Three U-Boats survive ASW. They roll 6-5-4, which becomes 7-6-5 after applying their attack bonus, and score two VPs. Two patrolling Axis ships also survive combat and force the Allies to retreat from the area. The Axis gains another 2VP for control of the area.
14.28 Any patrolling submarines still at sea after the conclusion of ASW in that area remain there for the rest of the turn and take no further part in any combat. At the end of that turn, the presence of patrolling subs prevents enemy control (17.0) of the area if it would otherwise occur. Patrolling submarine(s), even if unopposed, are not sufficient to place a control flag for their own side in a sea area.
14.3 Raiding Submarines
Raiding submarines may attack enemy ships or amphibious units, but no other units.
14.31 Each raiding submarine attacks only once per turn at the end of any combat round — not after ASW — and then immediately returns to base.
14.32 Raiding submarines are immune to ASW results.
14.33 Raiding submarines never break control of a sea area like patrolling submarines do.
14.34 Attacks by a raiding submarine take effect immediately.
14.35 If a side that retreats contains a raiding sub that has not yet attacked, that sub forfeits its attack for that turn.
14.4 Reappearance of Lost Submarines
Submarines (but not oilers or Hilfskreuzers) that are sunk are returned to play after two turns in the same manner as LBA and amphibious units. Place sunk submarines on the appropriate space on the Turn Chart. They reappear as normal reinforcements for their respective countries, and are placed as per 2.7.
15.0 Hilfskreuzers
During WW2, Germany converted nine merchant vessels into auxiliary cruisers, "Hilfskreuzers (HILFS-kroy-zers)" in German. These were never intended to go up against enemy capital ships, but rather to use their harmless and oft-changing appearance to approach and destroy unwary allied merchantmen. This was accomplished with varying degrees of success. Slow, but typically carrying a half dozen six-inch guns, they were capable of (and did on at least one occasion) surprising an incautious light cruiser or destroyer. Some of the more successful ones are represented here.
15.1 Hilfskreuzer Movement
On the first turn, Hilfskreuzers — denoted by the small "HK" next to the German flag — may be placed per 6.5 in any sea area in the ATO or with a British VP flag symbol. After the first turn, they move normally, but only within the previously noted sea areas. These ships have no raider side; they always move as patrollers.
14.27 Subs in the PTO may only gain VP by means of attacking merchant shipping if they are patrolling in a sea area that is adjacent to an enemy port or base at the time ASW is resolved. If placed in any other area, they can still prevent enemy control (with VP swings accordingly) by surviving ASW. They may invert to and attack using their raider side as per 14.1 in any PTO area.
15.2 Hilfskreuzers & Victory Points
15.21 Hilfskreuzers are combatted alongside U-boats by ASW as per 14.241. Each Hilfskreuzer that survives ASW attacks British merchant shipping with a nominal gunnery factor of "1" (no bonus), scoring VP as per 14.25.
15.22 A Hilfskreuzer, by itself, is insufficient to place an Axis control flag in a sea area, but will prevent placement of an Allied control flag (like submarines in 14.28). However, at the end of combat, if one or more Hilfskreuzers are in a sea area unopposed by any Allied patrolling unit, the German player automatically gains one VP. The presence of Allied raiding ships does not prevent the VP, but the presence of LBAs (which count as patrollers) does.
15.3 Hilfskreuzers & Returning to Base
15.31 At the end of each turn, Hilfskreuzers that have gained at least one German VP are automatically refueled as if there were an oiler in the sea area. If the HK is refueled, treat the entire sea area as the HK's base for the following turn. HK's may also refuel with oilers. If an HK cannot refuel, it must RTB like any other ship.
Example: The HK Atlantis ends turn 3 in the South Atlantic without any Allied patrolling units to oppose her. Although she did not score a hit with her gunnery factor during ASW resolution, she automatically gains one VP for the Germans and is therefore refueled. During turn 4 movement, the entire South Atlantic is considered her starting point; thus, she may move (one area) into the Caribbean, the Mid-Atlantic, the Bay of Biscay, the Cape of Good Hope, or even attempt passage of Gibraltar into the Western Med.
Note that a move into the Western Med would be considered a two-area move and would require a speed roll.
15.32 If a Hilfskreuzers is forced to RTB from a PTO area, and no legal PTO base or port is available, they are placed in the Neutral Port.
16.0 Capturing Ports and Bases
16.1 How to Capture a Port/Base
16.11 A port can only be captured at the end of a turn. It is captured only if all sea areas that touch it were enemy controlled both at the start of the current turn and at the end, after control flags are placed. (Exceptions: 16.3, 16.4).
16.12 Bases can be captured at turn end like ports, or they can be invaded by amphibious units (13.4).
16.13 If side A invades a base but side B controls all adjacent sea areas at both the start and end of the turn, side B recaptures the base at the end of the turn.
16.14 When a port/base is captured, place an appropriate garrison marker on it to indicate the new owner.
16.2 Effects of Port/Base Capture
16.21 Ships and units in a port or base when it is captured must instantly return to either a different base adjacent to the same sea area as the captured base, or to the nearest friendly port.
16.22 To determine the nearest port, count the number of sea areas between the two bases via the shortest route. In the case of a tie, the owning player may choose.
16.23 If the captured base was the only friendly port or base touching a sea area, even if combat has already concluded there, all friendly air units in that sea area instantly return to base. Even if an island base is recaptured later in the turn, expelled LBA units may not return to combat in that sea area.
16.24 Returning ships and units may land at or operate from a base or port as soon as it has been captured.
16.3 Port Capture — Special Cases
16.31 Murmansk, Leningrad, and Germany cannot be captured within the scope of the game.
16.32 After turn 2, the French ports Brest and Toulon may be recaptured by the Allies normally. However, these two ports do not become vulnerable to recapture by the Allies until after Taranto has been captured.
Example: On turn 7, Taranto is captured. Also during turn 7, the Bay of Biscay is uncontrolled. On turn 8, the Axis must break control of the Western Med to prevent Allied capture of Toulon. The soonest Brest could be captured is turn 9.
16.4 Capturing Taranto — Italian Surrender
Taranto is captured normally, as a result of Allied control of both halves of the Mediterranean for two consecutive turns. However, Taranto does not become vulnerable to capture until the turn after both Tripoli and Malta are controlled by the Allies.
Example: On turns 4 and 5, the Allies successfully control both halves of the Mediterranean, and both Malta and Tripoli convert to Allied control. On turn 6, the Axis must break control of either the Eastern or Western Med to prevent Allied capture of Taranto. If Allied control is broken on turn 6, the soonest Taranto could fall would be turn 8.
The capture of Tripoli represents Allied success of the North African campaign, considered a necessary precursor for any invasion of Italy. Similarly, the loss of Malta would have severely hampered any Allied attempt to invade.
16.41 When Taranto is captured, all Italian units must return to Spezia, which now activates as a base. When reinforcements are taken the following turn, roll d6 on Table 3 for each surviving Italian unit to determine its allegiance.
Table 3: Italian Ship Surrender
| Roll d6 | Result |
|---|---|
| 1–2 | German control |
| 3–5 | Scuttled |
| 6 | Allied control |
In reality, more Italian ships sided with the Allies than with the Axis after the surrender, but for several reasons, including doubts about crew loyalty, no ships represented in AW saw significant action against Axis forces — unless you want to count the Littorio (renamed Italia) being struck by a glider bomb.
16.42 Italian units still under German control may operate from Spezia, or attempt to reach another German controlled port. If they are at sea in either half of the Mediterranean when they RTB, they must return to Spezia.
16.43 When reinforcements are taken on each subsequent turn, any Italian units which began the turn in Spezia must again roll on Table 3. This continues until they are either scuttled or surrender to the Allies. Italian ships that reach another German port make no further rolls for surrender.
16.44 Italian units that surrender to the Allies are placed in Suez, and move as British thereafter. They must roll a 5–6 to move each turn, just as the Russian ships do.
16.45 It requires two turns of Western Mediterranean control by the Allies after the capture of Taranto to capture Spezia.
17.0 Controlling Sea Areas
17.1 Control Flags
The control flag in a sea area indicates who presently controls the area.
17.11 If a player has a control flag in a sea area from the previous turn, he still controls that area until flags are placed at the end of the current turn, even if he has no ships or units there.
17.12 If neither side has a control flag in a sea area, neither side controls it.
17.13 At the end of each turn (step 5.72 in the sequence of play) all control flags are removed from the board. Then each player places a control flag in each sea area where he has a patrolling ship or a land-based air unit. He now controls that sea area until the end of the next turn.
17.14 Starting at the end of turn 1, each time a player has a control flag in a sea area he earns the VP listed in that area for his nation. This is true in the PTO even if the Japanese have not yet attacked.
17.2 Establishing Control of A Sea Area
17.21 Only patrolling ships currently capable of launching an attack and land-based air units count for control of a sea area. Submarines, oilers, Hilfskreuzers, raiding ships and amphibious units do not count for control, neither do ships and units in a port or base.
17.22 If neither side has a patrolling ship or LBA unit that is capable of launching an attack in a sea area, no one controls it.
Example: Combat has left both sides with only crippled carriers with no gunnery factors, but neither side is willing to withdraw. Both sides remain in the sea area until the RTB phase. Nobody controls the area.
17.23 At the start of play, each side controls areas in the PTO as indicated on the map by the yellow outline around the circular flag symbol; neither side controls the Arabian Sea, the Aleutians, or the Gulf of Alaska. Neither side controls any area in the ATO.
18.0 Minor Navies
18.1 Australian & Dutch Ships
18.11 Once the Japanese attack, Australian and Dutch ships may return to any US or British-controlled port or adjacent base.
18.12 Prior to the Japanese attack, the DeRuyter must return to base in Singapore.
18.13 The Australian cruisers may move to the ATO at any time.
18.2 Russian Ships
Russian ships are controlled by and move with the British player.
18.21 Russian ships may only enter the Baltic Sea, and may only return to Leningrad.
18.22 Each Russian ship must individually roll a 5–6 on a d6 in order to move each turn.
18.23 Russian ships that are permitted to move by the die roll may patrol, remain in port for repairs, or invert to their raider side.
18.24 Russian ships that are not permitted to move by the die roll may still make repairs.
18.25 The British player may await the results of all the Russian "to move" rolls before deciding whether to move any of the Russian ships.
18.3 French Ships
French ships may begin the game at any French controlled port or base (Table 1). The Richelieu and Jean Bart arrive on turn 2 in Brest.
18.31 On the first turn, French ships are controlled by the US player.
18.32 During the RTB portion of turn 1, all French ships must return to either Brest or Toulon, whichever is closest. In case of a tie, return to Toulon.
18.33 Before turn 2 movement begins, roll 2d6 for each French ship and check Table 4 for that ship's disposition. Apply the modifiers as indicated.
Table 4: French ship disposition
| Roll 2d6 | Result |
|---|---|
| ≤3 | German control |
| 4–9 | Scuttled |
| ≥10 | Free French (US control) |
Modifiers: +1 = British VP lead; -1 = Each VP of German lead; -2 = Jean Bart (due to her unfinished condition)
18.34 After all rolls have been made, all Free French ships are moved to the USA. German controlled ships stay in their current location. Scuttled ships are removed from play permanently.
18.35 All French ships must remain in port (they may make repairs) on turn two and may move normally on turn three and after.
18.36 Starting on turn 2, Diego Suarez and Nouméa are considered uncontrolled and are therefore unusable by either side. Both are subject to normal base capture rules, except that while uncontrolled, each may also be "invaded" by any French ship. During any amphibious landing opportunity (5.53, 5.62, or 5.71), either a Vichy or Free French patrolling ship may "invade" and convert control to that side. The French ship is not lost in the process, but it must RTB there assuming control of the base remains in that player's hands. Once control has been established by any method, Vichy or Free French "invasion" is no longer possible.
18.37 Before reinforcements are taken on turn 3, Saigon automatically converts to the control of the Japanese player, who may use it to operate LBA that turn. If the Japanese do not break Allied control of Indonesia by the end of turn 3, Saigon reverts to Allied control as per 16.1.
After the fall of France, Japan seized control of French possessions in Indochina, hence the automatic port conversion, even if hostilities in the Pacific are not yet underway.
18.38 When both Brest and Toulon are captured by the Allies, any remaining French ships under German control are permanently withdrawn.
18.39 If all players desire more French fleet participation, expand the German Control result to "4 or less" and the Free French to "≥9", adjusting Scuttled accordingly.
19.0 Japan & The US Entering The War
The game begins before the outbreak of hostilities in the Pacific. The Japanese attack would historically occur during turn three, but it is up to the Japanese player whether he attacks at that time, earlier, or later.
19.1 Before Japan Attacks
19.11 Except as altered below, the turn sequence in a "peaceful" PTO is executed normally. Units move and RTB in the usual way. Once the Japanese player has completed the surprise attacks at Pearl Harbor and in Indonesia, Section 19.0 is ignored for the remainder of the game; play proceeds normally from that point.
19.12 VPs are awarded normally at the end of each turn.
19.13 The Japanese start the game with a lead of eight VP in the PTO.
This reflects the deteriorating Japanese position after the asset freeze and oil embargo by the US.
19.2 Control Flags
At the beginning of the game, place control flags in the PTO for each side as per the indicators on the map — the yellow outlines around one side or the other's circular flag by the VP values. The side outlined in yellow gets the initial control flag. The Aleutians, Gulf of Alaska, Bismarck Sea, and North Pacific have no yellow outline around either flag, and are uncontrolled at game start.
19.21 For purposes of placing control flags, one of the location uncertain groups is assumed to be patrolling the Central Pacific until the Pearl Harbor Raid Force moves.
19.22 PTO control flags have all normal effects.
19.3 Basing Restrictions
19.31 US units indicated as starting in Pearl Harbor ("P" for their at-start coordinate) must remain there until the surprise attack occurs.
19.32 All other US units in the PTO must RTB at either Pearl Harbor, Samoa, or the Philippines.
19.33 US units listed as starting on the East Coast (starting coordinate "E") may only base in USA.
19.34 The US Location Uncertain groups remain in their holding boxes until 19.72 is resolved.
19.35 US LBA are not placed in sea areas, but must remain on a friendly base.
19.36 If the 5th AF LBA plus at least one US ship are not based in the Philippines when the Pearl Harbor Raid Force moves, any Japanese amphibious attack on the Philippines that turn does not result in the loss of the amphibious unit. Instead, the unit occupies the Philippines as if it were an excess invading unit.
This represents an overall commitment of US forces. Historically, the USS Houston was in the area when war broke out.
19.37 Any Australian ships in the PTO must base in Australia, and the DeRuyter must base in Singapore.
19.38 If the Japanese have any ships or amphibious units based outside of Yokosuka Navy Yard at the beginning of a turn, they may not make any surprise attacks that turn. This restriction is lifted if the US does not have a control flag in both French Polynesia and Hawaiian Islands at the start of the turn.
19.4 Movement Restrictions
19.41 Allied units may not move into sea areas controlled by Japan. If the Japanese player places ships, amphibs, or LBA in an area with an Allied control flag, that is considered his "declaration of war" and he must move the Pearl Harbor Raid Force to the Hawaiian Islands on that turn.
19.42 Each turn, US ships and other units in the ATO (except Free French) must each roll less than the turn number in order to move. Make all rolls at the beginning of US patroller movement. Ships allowed to move may move as raiders if desired. All US ships may make repairs. No US units (except Free French) may move to any ATO sea area other than Eastern Seaboard &/or Caribbean Sea.
19.43 Any US units in the ATO that move to the PTO (by first returning to Panama Canal) must move to Pearl Harbor and remain there and are thus subject to the surprise attacks. Any US reinforcements initially deployed to the PTO must also follow this restriction. (Exception: USS Hornet (arriving turn 3) is placed with Location Uncertain Group Z).
19.44 If there are not two British battleships (gunnery factor 3+) patrolling Indonesia when Japan moves his patrollers, the Allied control flag there is immediately removed, along with all effects of controlling the area.
19.45 German U-Boats, Hilfskreuzers, and Oilers may enter Eastern Seaboard and Caribbean Sea. No other German ships may do so.
19.46 Either US or British ships, but not both, in Eastern Seaboard or Caribbean Sea may conduct ASW in each area.
19.47 For each German VP gained in either area, and also for each US ship sunk by a raiding U-boat, subtract 1 from the US rolls to move on the following turn.
19.5 Pearl Harbor Raid Force (PHRF)
Prior to the execution of the surprise attacks, the Japanese player may add any desired ships (but no other units) to his Pearl Harbor Raid Force holding box, provided they have a speed factor of 5 or greater. Ships may enter or leave the PHRF box at will during patroller movement.
Note that if the Japanese player wishes to explore the possibility of not attacking Pearl Harbor, all he has to do is remove all ships from the PHRF box when he begins his patroller movement, then move into an Allied controlled sea area.
19.51 Units entering the PHRF box must begin the turn in Yokosuka Navy Yard or be an arriving reinforcement.
19.52 Units leaving the PHRF box reappear at YNY at no movement cost, and may move normally from there.
19.6 The Surprise Attacks
On the turn Japan attacks, play is altered to reflect the effects of the surprise attacks on Pearl Harbor and Indonesia. Movement is executed in the standard sequence.
19.61 The Japanese ships in the Pearl Harbor Raid Force are raiders and must move to the Hawaiian Islands when other raiders move. No speed rolls are necessary for this special move. Other Japanese ships and units move normally.
19.62 The first sea area where combat is resolved is automatically the Hawaiian Islands. The second sea area where combat is resolved is automatically Indonesia. After combat in those two areas is complete, sea areas are selected for combat per 7.1.
19.7 Pearl Harbor
Combat starts with two rounds of carrier air raids against the ships and air unit in Pearl Harbor. Any US ships at sea in the Hawaiian Islands are temporarily ignored.
19.71 After the two rounds of air raid, the Japanese player may elect to retreat or stay for more combat. If he retreats now he may not be pursued.
19.72 Then the Allied player rolls one die for each of his Location Uncertain groups, and places them as patrollers according to Table 5. They may not move further. (Optional rule: see 23.2)
Table 5: US Location Uncertain Groups
| Roll d6 | Place Group in: |
|---|---|
| 1 | Central Pacific |
| 2–3 | Hawaiian Islands |
| 4–6 | Caribbean Sea |
19.73 All surviving Allied ships and air units in Pearl Harbor move out into the Hawaiian Islands as patrollers (ships with damage exceeding their armor factors may not go to sea). These forces cannot move.
19.74 If a patrolling submarine is in the Hawaiian Islands, conduct ASW. If a raiding submarine is in the Hawaiian Islands, it may attack now.
19.75 The Allies may retreat from the Hawaiian Islands sea area with all at sea forces. If they retreat now, the Japanese may not pursue.
19.76 If the Japanese stay in the Hawaiian Islands they may stay for up to two more rounds before they must retreat due to fuel shortages.
19.761 If Allied ships &/or LBA units are present, the round is a normal combat round. If no Allied fleet is present, it is an air raid round.
19.762 If the Allies retreat after the first normal round, the Japanese may pursue for one round. Carriers that do not pursue may air raid that round.
19.763 In any case, after two additional combat rounds, the Japanese must stop pursuing and retreat. The Allies may pursue the Japanese if they have not already retreated themselves.
19.8 Indonesia
The Japanese player then executes two rounds of air attacks against any Allied ships and units at sea in Indonesia or at adjacent bases.
19.81 Japanese carriers and land-based air units in Indonesia may both attack during these two rounds of air attacks.
19.82 All disabled results, including those against units at sea, are ignored during these air attacks.
19.83 After the surprise air attacks, surviving Allied forces fight normal combat against Japanese forces in Indonesia.
Optional Rules
Most of the following rules give an advantage to one side or the other. Players can agree to use these rules to adjust the play balance of the game, or they can increase the complexity of the game by using rules with offsetting advantages. Note that several can seriously affect play balance based on a die roll, and only players more interested in recreating what might have been than a balanced contest — those more interested in the journey than the destination — should use those rules.
20.0 Turn 0
(Advantage — undetermined) The standard game begins with the German player already in possession of Norway, which means the game starts in 1940, and several units (e.g. the Blücher) were already on the bottom of the sea by this time. This fact is not reflected in the original WAS order of battle, but is here. For those of you who can't get enough dice rolling, or just miss the Blücher, this rule recreates the opening salvoes of the naval war.
20.1 Order of Battle Adjustments
20.11 All units normally available on turn 1 are available on turn 0 except for the units listed on the turn chart as withdrawals (WD). These units become reinforcements appearing on turn 1.
20.12 Add to these all units with a turn indicator of 0: Courageous and Royal Oak for the British; Altmark, Blücher, and the Fsjr unit for the Germans. All are subject to the same placement restrictions as other units of their respective nationalities.
20.2 Separate Norway
Norway is a separate base on turn zero and is not usable by either side at the beginning of the game. Assuming Germany captures Norway, it immediately becomes part of the same port as Germany. Should England capture Norway, it remains a separate base.
20.3 The French
Everything that happens in the standard game to the French units or ports happens one turn earlier: roll for French fleet disposition after turn zero, the French ports become German on turn one, etc.
20.4 The Italians
Italy begins the game neutral on turn zero, but may declare war and move/attack normally if the Allies do not have sufficient patrolling units in the Mediterranean. After LBA placement is complete, roll 2d6. If the result is equal to or greater than the total number of Allied patrolling ships and LBA units in both halves of the Med, Italy may declare war. If Italy remains neutral on turn zero, no Italian units may move or attack, Allied units may not attack Italian units, and nobody receives any VP for controlling either half of the Med.
20.5 The Pacific
The Pacific is set up and played normally, but the Japanese may not attack on Turn 0. Initially place the PTO VP track at +12 for the Japanese.
21.0 Turn 11
(Japanese advantage — small) Historically, Japanese naval resistance effectively ended at the Battle of the Philippine Sea (turn 10). However, by adding an 11th turn to the game, a number of interesting situations enter play. But since the Atlantic war is considered over, this rule is probably not the best choice for a four-player game.
21.1 Kamikaze attacks
On turn 11, Japanese land-based air units may make kamikaze attacks. When an LBA unit makes a kamikaze attack, it gets the attack bonus, but is automatically eliminated afterward. Japanese carriers may also make kamikaze attacks. Such attacks also get an additional attack bonus (possibility of +2), but the carrier is immediately disabled following the attack. The Japanese player must announce at the start of each air action which carriers and LBA's will make kamikaze attacks during that action.
21.2 No Further Combat in The ATO
The war, as well as all combat, in the ATO is considered over. The ATO VP track is frozen. All ATO sea areas no longer count for VP on either track. PTO sea areas that award allied VP in the ATO no longer do so.
21.21 If the German player is ahead or tied in VP, all units of both sides currently in the ATO must remain there during turn 11.
21.22 If the British are ahead in VP, the Allies may immediately transfer any one British or American ship (not any other unit) from anywhere in the ATO to Trincomalee or Pearl Harbor, respectively, for each ATO VP he is ahead. This transfer does not count as movement and does not affect the unit's ability to move on turn 11. All other units in the ATO must RTB normally after turn 10 and move normally on turn 11.
21.221 If Trincomalee is captured, transferring British ATO units may be placed in Adu Atoll or Diego Suarez, if friendly; in Suez otherwise.
21.222 If Pearl Harbor is captured, transferring US ATO units may be placed in Panama Canal.
21.223 Free French units are still treated as US units.
21.3 VP Adjustments
Throughout the game, Indonesia and the Home Islands are each worth four VP to the Japanese player instead of the normal three.
22.0 French Fleet Dilemma
(Axis advantage — medium) Historically, no major French naval units fought on the side of the Axis during WWII. However, the possibility of the French fleet falling into Axis hands — either as a condition of the armistice or as a result of a successful seizure on the part of the Germans — was a nightmare for Winston Churchill. However unfounded they may have been, these fears led directly to Operation Catapult, the Royal Navy's attack on the French Fleet. The purpose of this rule is to give the British player that nightmare, force him to make that agonizing decision, and live with the consequences either way.
22.1 Operation Catapult
At the beginning of the turn 1 RTB phase, before any units have returned to base, the British player may launch Operation Catapult and attack the French Fleet. If the British player does launch Operation Catapult:
22.11 Any British units still at sea may conduct a single round of attacks against any French ships either at sea in that same sea area or in a port/base adjacent to that area.
22.12 Both gunnery and airstrike factors may attack, and all British attacks receive a +1 bonus. All damage from these attacks takes effect immediately.
22.13 Surviving French ships, directed by the German player, may then return fire once. If no British unit fires on any French ship in a given area or base, no French ship in that area/base may fire. Subtract one from all damage rolls resulting from the French counterattacks.
22.2 French Return to Base
Regardless whether or not Catapult was launched, all French units then RTB as per 18.32. The rest of turn 1 proceeds as usual. Richelieu and Jean Bart arrive normally in Brest when turn 2 reinforcements appear.
22.3 Will The French Surrender The Fleet?
Do not roll on Table 4 (French Ship Disposition) per 18.33. Instead, before turn 2 movement begins, roll d6 one time for the entire French fleet. If the Germans have a VP lead, subtract 1 for each VP. If the ATO is tied or the British have a lead, there is no modification.
22.31 On a roll of 1 or less, all French ships are surrendered to the Germans as part of the armistice agreement. These ships are henceforth treated as German for all purposes. 18.38 no longer applies.
Place damage markers on each ship equal to its armor factor. No French ship may move on turn 2.
This damage represents the fact that the Kriegsmarine does not have enough trained sailors to suddenly crew the entire French fleet. Plus, there would certainly have been significant "mischief" by debarking French sailors.
22.32 On any other roll, all French ships are placed in the Vichy holding boxes to await Operation Lila (22.4) or the Torch landings (22.5). All damaged French ships are placed in the Toulon box. Roll a d6 for each undamaged French ship with 1–3 results going to the Toulon box and 4–6 to the French North Africa (FNA) box. There are no modifiers to this roll.
22.33 While in these holding boxes, French ships may not be attacked. Germany may use Toulon's repair capacity on damaged Vichy ships.
22.4 Operation Lila
Once per game, but not before turn 3, the German player may attempt Operation Lila, the seizure of the French Fleet. He declares this after control flags are placed and any bases are converted due to enemy control.
22.41 The longer the German waits, the better the operation is planned. When the German layer declares Lila, roll 2d6 on Table 6 for each Vichy ship.
Table 6: Operation Lila (2d6)
| At FNA | Result | At Toulon |
|---|---|---|
| ≤1 | German | ≤4 |
| 2–8 | Scuttle | 5–9 |
| 9≥ | Free French | 10≥ |
Modifiers: +1 = Each turn before turn 5 (+1 on T4, +2 on T3); -1 = Each turn after turn 5 (-1 on T6, -2 on T7, etc.); -1 = Catapult was launched; +1 = Catapult was not launched; -1 = Axis control Malta & Tripoli (applies to FNA only)
Historically, the German attempt to seize French vessels at Toulon was, to say the least, poorly planned and executed.
22.42 All French ships are marked with damage counters as per 22.31.
22.43 German controlled ships may be placed (or remain) in Toulon or Taranto, at the German player's option. Scuttled ships are removed from play. Free French ships are moved to the USA.
22.5 Operation Torch
The moment the Allies simultaneously control both Malta and Tripoli is treated as the equivalent of the Torch landings in North Africa. If the German has not attempted Lila by this time, roll d6 to see if the ships in FNA will oppose the landings. On a roll of two or less, the French oppose the landing. If Catapult was launched and there are any British units at sea in either half of the Med, subtract 2 from this roll. If the Germans have already executed Lila, there will be no French opposition to Torch.
22.51 If the French fleet does oppose Torch:
22.511 All French ships in FNA (under temporary German control) join the combat in the sea area containing the invading amphibious unit. The landing may not occur until after at least one more round of combat. Or…
22.512 If there is no invading amphibious unit and control of Tripoli will change due to the sea area control at the end of the turn, another combat immediately starts between the FNA ships and Allied ships in the Western Mediterranean. If the French ships manage to break Allied control, Tripoli is not captured. Move all surviving French ships to the FNA box. Any future landings will automatically be opposed.
22.52 If the French do not oppose the landings:
22.521 All French ships in FNA become Free French.
22.522 Roll 2d6 on Table 7 for each French ship in Toulon, no modifiers.
Table 7: Operation Torch (2d6)
| At Toulon | |
|---|---|
| German | 2 |
| Scuttle | 3–9 |
| Free French | 10≥ |
This represents a hastily planned and executed Lila.
22.6 Final French Disposition
Once rolls are made on either Table 6 or Table 7, the French question is settled. All French ships belong to the current owner for the rest of the game.
22.7 Plus de Français, S'il Vous Plaît
If all players agree, and desire more French participation, expand the German and Free French die roll ranges on both Table 6 and Table 7 by 1, taking the rolls away from the Scuttle result.
23.0 Pearl Harbor Tension
(US advantage — medium) This rule modifies the surprise attack on Pearl Harbor that is described in 19.0. Use 19.0 except when contradicted below.
23.1 Japanese Fuel Limitations
The Japanese player may assign no more than 10 ships to the Pearl Harbor Raid Force due to fuel limitations.
23.2 Location Truly Uncertain
Before play starts, the US player is allowed to secretly change the probability of the location uncertain groups' arrival. Markers are provided to indicate these chances, along with decoys.
23.21 The US player must allot at least a 1/6 chance to each of the three areas (Central Pacific, Hawaiian Islands, and the Caribbean). This selection is not revealed after the Japanese player announces whether he will stay for additional combat, i.e. when the location uncertain groups are rolled for.
23.22 Roll for the location uncertain groups before the Japanese begin their Pearl Harbor attacks. Keep the results secret.
23.23 For each group that shows up in the Hawaiian Islands, roll again using the same probabilities. If the result again shows the group in the H.I., the entire group is in Pearl Harbor for the attacks. Roll all four groups twice to keep the Japanese player from deducing the presence or absence of carriers.
23.24 There is no penalty if a group shows up on both rolls in the Central Pacific or the Caribbean.
Example: The normal distribution is: 1=Central Pacific, 2–3 = Hawaiian Islands, 4–6 = Caribbean. If the US player expects a strong first turn Japanese push toward Midway, he might change the allocation to read: 1–3 = Central Pacific, 4–5 = Hawaiian Islands, 6 = Caribbean. If he wishes to make a stand at Pearl Harbor right off the bat, he could select: 1 = Central Pacific, 2–5 = Hawaiian Islands, 6 = Caribbean.
The Enterprise and her group were due back in Pearl Harbor on the 6th. If it weren't for a storm, and having to stop to refuel her destroyers, she would have been in port during the attack, and almost certainly would have been destroyed. Think about that: had "Big E" not survived to become the legend she did, Jim Kirk may have become captain of the Yorktown (Roddenberry's original starship name of choice) after all.
23.3 Changed Mechanics for The Air Raid
23.31 On the first round (only) of the surprise air raid, the Japanese adds one to each shot's die roll (so if the shot already had the attack bonus it gets a total of plus two). This includes any attacks on the 7th Air Force and is an exception to 12.22.
23.32 If the 7th AF survives the first round of the air raid, it may attack on the second round. The Japanese forces may still air raid the ships in Pearl Harbor normally, as well as attack the 7th AF normally (no bonus).
23.4 If The PHRF Stays For A Third Round
If the Japanese stay after the air raid, the first extra round of combat (3rd overall) is automatically an air action with the following special rules:
23.41 The Japanese player names his targets before the location uncertain groups are rolled for. He may allocate any carrier air attacks he wishes to "location uncertain". If any of the location uncertain group(s) show up in the Hawaiian Islands and stay for combat, that Japanese carrier may attack any ship in such group(s). If the US player retreats before combat (19.75) or no location uncertain groups appear in the Hawaiian Islands, that Japanese carrier forfeits its attack that round.
23.42 On the second extra round of combat (4th overall) and thereafter, play proceeds as explained in rule 19.0.
23.5 Interaction with Task Force Rules
23.51 If optional rule 29.0 (Task Forces) is also in use, the Japanese fleet must form a single TF for the first round.
23.52 The US player may wait until he sees the results of the location uncertain rolls before declaring his TFs for the first round.
23.53 The Japanese player must declare his TF option each round per 29.2, but with the additional available choice of attacking Pearl Harbor, even if the US has units at sea in the Hawaiian Islands. Carrier air raid procedure (9.0) is replaced by this rule during this attack (only). Japanese TFs that do not select this option may not attack ships in Pearl Harbor, even if no other TF is located.
23.6 US Navy Not Prepared
23.61 On the turn Japan attacks, the US is unprepared, and no US carriers get the airstrike bonus. On all subsequent turns, normal bonuses apply.
23.62 If 23.0 is used alongside rule 24.0, and the third roll is successful (1 or 2 is rolled), the US is prepared, and the US carriers do get the airstrike bonus.
24.0 Tora, Tora… Uh-Oh
(US advantage — likely none at all, slim chance of huge) It is common knowledge that US code breakers were nearly able to warn Pearl Harbor of the attack before it happened. An intercepted Japanese dispatch was partially decoded and a few people in Washington knew the Japanese were on the move. Unfortunately for the servicemen in Hawaii, a message warning them arrived too late. Had General Marshall's message been received perhaps two hours earlier, the Japanese pilots would have found the P40's from Hickam flying CAP over an empty Pearl Harbor. The chances of any in-game effect of this rule are very low (1/27 to lose one surprise round, 1/81 to lose both).
24.1 Does The Codebreaker Find Marshall?
Just before executing the first round of attacks for the Pearl Harbor raid, but after the Japanese player has allocated his airstrikes, the US player rolls a die. If he rolls a 1 or 2, the codebreaker finds General Marshall in Washington right away, instead of having to hunt for him. Marshall is intelligent, so he sends out a warning right away (as per history). There is no in-game effect as yet, but the US player rolls the die again.
24.2 Is The Telegram Marked Urgent?
If he rolls a second 1 or 2, the telegram is correctly marked as "urgent", so the messenger in Hawaii picks up the telegram and delivers it to Pearl Harbor HQ before the first Japanese planes arrive, instead of arriving just after the attack started. Still no effect, but roll again.
24.3 Is General Short in His Office?
On a third 1 or 2, despite it being Sunday morning, General Short is in his office, so he immediately gets the message and routinely orders an alert. The Japanese lose their first (23.3) round of surprise attack. But also, roll again.
24.4 Does Kimmel Sortie The Fleet?
On a fourth 1 or 2, Admiral Kimmel immediately sees the significance of the alert and orders a general fleet sortie. The Japanese get no surprise attacks, and cannot run before combat. Also, with their aircraft committed to the Pearl Harbor strike, the Japanese carriers cannot attack at all on the first round of normal combat, which is automatically an air action.
24.5 Restrictions And Conditions
24.51 A roll of 3 or higher at any point breaks the chain at that point.
24.52 These rolls affect only the surprise attacks at Pearl Harbor, not those in Indonesia.
24.53 Regardless of the dice rolls, the U.S. player rolls normally for his location uncertain groups before the first round of combat.
24.6 Additional Effects
24.61 If Optional Rule 23.0 is also in play, and if all four rolls are 1–2, any Location Uncertain Groups that end up in the Hawaiian Islands do not roll again to see if they are in Pearl Harbor; they sortie with the rest of the fleet.
24.62 For each round of surprise attack the Japanese player loses at the beginning of the action, he may elect to stay one additional normal round. In other words, the Japanese player is permitted four total rounds of combat before he is forced to retreat due to lack of fuel.
25.0 Gunnery Radar
(US advantage — small) On turn 9 and thereafter, every undamaged United States ship with a gunnery factor of 3 or more gets the gunnery bonus in a surface action.
26.0 Hidden Submarine Deployment
(Axis advantage — small) All movement by submarines, both patrolling and raiding, is done in secret. The owning player records each move on scrap paper, and only reveals the presence and patrol/raid status of a submarine when it is either affected by ASW (which must be rolled for in every sea area) or attempts to attack.
27.0 Submarine Targeting
(Allied advantage — medium) Due to differences in speeds, submarine attacks on fast warships were actually relatively uncommon. More often, submarines went after the slowest (or damaged) warships. To reflect this, and to keep submarine warfare from devolving into an automatic pot shot at the most valuable enemy unit, raiding submarines are limited in their choice of targets.
27.1 Targeting Rolls
When a raiding submarine wishes to attack, the owner must first make a targeting roll. Roll one die and add two to the result. It may select any target that either: 1) has a current speed equal to or less than this number, or 2) has been disabled in the immediately preceding exchange of fire. If the sub attacks a just-disabled unit, it receives +1 attack bonus for that shot in addition to any it might already have.
27.2 Waiting to Attack
If there is no unit slow enough to be a legal target, and no units have been disabled in the current round, the submarine may not attack that round. The submarine may attempt to attack again in a later round, using a new targeting roll. If there is no target the player wishes to attack, he may withhold firing in hopes of getting a better targeting result in a later round.
27.3 Attacking Ship in A Group or Task Force
For purposes of submarine targeting, if a unit is withdrawing, or if players are using the optional task force rule (29.0), all units in a group are considered to be moving at the speed of the slowest unit in the group, regardless of actual speed.
28.0 Damage Control
(US advantage — small) Starting on turn 6, award the defensive bonus to any surviving at-start U.S. carriers. This reflects improved damage control procedures after that time. Subtract one from each damage die roll made against any of these ships.
29.0 Task Forces
(Advantage — undetermined) It is difficult to recreate battles such as Midway and the Philippine Sea without some sort of hidden movement. While AW makes no claim to in-depth tactical realism, this rule gives players the opportunity to sweat out whether or not their forces will spot the opponent first, last, or never. Note that use of this rule can add significantly to the playing time.
29.1 Grouping task forces
At the start of each round of combat in a sea area, each player in turn groups his ships and units (except raiding submarines) into task forces (TFs) however he wishes. Raiders and patrollers may be grouped together in the same TF.
29.2 Declaring TF Intentions
During the round of combat, each TF must be declared as either: 1) landing; 2) searching; or 3) hiding. After both players have formed their TFs, each player in turn states what each of his TFs will do on this round of combat.
29.3 Determining Action Type
Determine whether this round is an air or surface action. As long as neither side has retreated, only one air/surface determination is rolled; the results apply to all actions that round.
29.4 Sighting Enemy task forces
Then each player rolls one die for each enemy TF to see if he sights it.
29.41 Landing TFs are automatically sighted, no roll is made.
29.42 Searching TFs are sighted on a die roll of 4 or less.
29.43 Hiding TFs are sighted on a die roll of 2 or less.
29.44 The player who currently controls the sea area subtracts one from each die roll. Any player with one or more LBA units in the sea area subtracts one from each die roll. These modifiers are cumulative.
29.5 Altered Combat
Fight one round of combat normally, except as noted below.
29.51 During air actions: hiding TFs may not attack, and only sighted TFs may be attacked. A hiding TF that is sighted may be attacked, but may not attack. A searching TF that is not sighted may attack without being attacked.
29.52 During surface actions, conduct one large action. All TF's that are either sighted or landing must join the action. Any TF that is both hiding and un-sighted may not join the action. TF's that are searching but un-sighted may be included in the action at the owner's option.
29.53 During both air and surface actions, an amphibious unit may land (including at friendly ports/bases) only if it is part of a landing TF.
29.54 A raiding sub may attack after any action, as per the normal submarine attack rules.
29.6 Retreat And Pursuit of task forces
29.61 During retreat/pursuit, each retreating group is considered a single TF and must hide; each pursuing group is considered a single TF and must search. Once retreat/pursuit begins, each pair of retreating/pursuing TF's rolls for air/surface action separately.
29.62 If a retreating TF is not sighted, it has successfully disengaged and returns to base.
30.0 Greek Navy
(British advantage — small) The two Greek ships represented in the counter mix, the Lemnos and the Kilkis, are included in the game for fans of the many Avalon Hill WAS variant rules published over the years, of which this was one. In reality, however, these two units had long since ceased to function as warships when Greece entered the war. The Lemnos had been stripped of her guns, which were removed for use as coastal artillery, and the Kilkis was a training vessel. Use of these two units should be considered a play balance measure, not an attempt at additional historical accuracy.
The Lemnos and Kilkis appear at Suez/Alexandria as reinforcements on Turn 2. They may base at any British base bordering the Eastern or Western Mediterranean, and may only move into those two sea areas. Otherwise, they function normally as British ships.
31.0 HMS Argus
(British advantage — small) The British carrier Argus (0-0-3-1) is included as an optional counter as a nod to its presence in an old WAS expansion. By any reasonable definition, however, this ship was an escort carrier, and as such, is outside the scope of AW. If we have Argus, why not Gambier Bay, Guadalcanal, or any of dozens of other escort carriers that played vital roles themselves? Where does it end? As with the Greek navy, inclusion of the Argus should be considered a play-balance measure.
The Argus arrives in England as a reinforcement on turn 2 (after completing a refit) and is withdrawn on turn 7 (when she was relegated to training duties).
32.0 Pocket Pride
(German advantage — small) As many naval history buffs know, the pocket battleship Lutzow was originally christened the Deutschland, but was ordered renamed by Adolf Hitler due to concerns over national morale should such a patriotically named ship be sunk. They may also know that a Hipper-class cruiser called the Lutzow began construction, and was even launched, but was sold to the Soviet Union before completion. The Soviets never completed her either. This rule places that naming decision into the hands of the German player, rewards him for maintaining the Deutschland's original name, and punishes him for allowing the country's namesake ship to sink, all completely ahistorical, of course.
32.1 The German player starts the game with the alternate Deutschland (2-2-5) counter instead of the Lutzow (2-2-5). He may on any turn, prior to moving that ship, swap that counter for the Lutzow (2-2-5). There is no penalty of any kind for doing so.
32.2 Should this ship be sunk while named Deutschland prior to turn 3, the Petropavlovsk (ex-Lutzow) arrives as a Soviet reinforcement in Leningrad on turn 7. It does not receive any gunnery bonus.
32.3 If the Deutschland is sunk on either turn 3 or turn 4, the German player immediately loses 1VP, but the Soviet receives no extra reinforcement.
32.4 If the Deutschland survives until turn 5 (the original estimated completion date for the cruiser Lutzow), the German player receives the Lutzow 1-2-7 as a reinforcement. No swap for a U-boat is necessary.
32.5 Once the Lutzow/Petropavlovsk (1-2-7) enters play, the Deutschland may no longer be renamed. There is no penalty for the loss of Deutschland for the remainder of the game.
33.0 German Carriers
(German advantage — small/medium) The first German aircraft carrier, the Graf Zeppelin, was never completed, but was included in the original WAS "as a touch of what might have been." If it works for the Graf Zeppelin, why not the cruiser Seydlitz, which was 90% complete in 1942, as well? Or the planned light carrier conversion of the Seydlitz, the Weser? Historically, both of these ships were constantly delayed due to the material requirements of the U-boat fleet. What if the Germans had made different construction choices?
33.1 Scrap Graf Zeppelin and Seydlitz?
During the movement phase of turn 1, the German player may declare he is scrapping the in-progress Graf Zeppelin &/or Seydlitz. If he does so, for each of the ships he scraps, the arrival of the Type-XXI U-boats moves up by 2 turns (normally turn 10). All U-boat reinforcements and all returning lost U-Boats appearing on or after the modified turn are considered Type-XXI U-boats; use the alternate counters.
33.2 Or Prioritize Them?
If he scrapped neither the Graf Zeppelin nor the Seydlitz on turn 1, the German player, may on turn 4 take the Graf Zeppelin &/or the Seydlitz instead of one of his U-boat reinforcements due that turn (one U-boat for each).
33.3 Converting the Seydlitz to the Weser
Alternately, if the German player elects to receive the Seydlitz instead of a U-Boat on turn 4, he may also elect to delay its entry until turn 5 and convert it to the light carrier Weser (0-2-7-1). No further cost is incurred.
33.4 Or Keep The Status Quo
If the German player elects, he may do nothing on turns 4/5, and the game plays out normally, i.e. no Graf Zeppelin, no Seydlitz/Weser, and a single Type-XXI U-boat arrives on turn ten.
34.0 Alternate Ship Names
(No effect on play, of historical interest only) The original VITP game included four Essex-class carriers identified solely by their hull numbers: CV's #10, 12, 16, and 18. If you've read this far, the odds are good that you know these were the Yorktown, Hornet, Lexington, and Wasp, respectively. These ships were monikered as they were in order to perpetuate the names of carriers lost in combat. But… what would CV10 have been named had the original carrier Yorktown not been sunk? Or any of the others? I found the answers to these and other trivia questions quite by accident while browsing an old copy of Jane's.
34.1 Numbered Essex-class CV's
34.11 Each of these has two counters: one with the historical name, and one with the name that ship would have christened had the original CV not been lost. Select the appropriate counter when that ship is received as a reinforcement. Under no circumstances should both of any given pair be on the board at the same time.
Example: on turn 9, the US player is due to receive the Essex-class Hornet (CV12), but the original Hornet (CV8) is still afloat. Use the CV12 Kearsarge instead.
34.12 It is highly likely that had either or both the Enterprise and Saratoga gone down, those ships' names would have been perpetuated as well. If they are sunk, substitute the CVxx Enterprise or CVyy Saratoga for any Essex-class carrier arriving at least two turns later.
34.2 CVL28 — Cabot/Wilmington
If CV16 appears on turn 8 as the Cabot, use the CVL28 Wilmington counter, otherwise use CVL28 Cabot.
CVL28 Cabot was originally laid down as the light cruiser USS Wilmington (CL79). Like the rest of the Independence class, she was converted to a light carrier while still under construction. When CV16 was renamed from Cabot to Lexington, this ship was renamed Cabot. Had the Lexington not gone down, this ship would possibly (likely) still have been renamed, but I can find no documentation as to what the alternate name would have been. If anyone can answer that question, I would greatly appreciate it.
34.3 CVL30 — San Jacinto/Reprisal
If the Houston survives until turn 8 (when the Independence-class begins to arrive), use the CVL30 Reprisal, otherwise use the CVL30 San Jacinto.
CVL30 San Jacinto was originally laid down as the light cruiser USS Newark (CL100) and renamed Reprisal during her conversion to a light carrier. She was renamed again to San Jacinto in honor of the battle for Texan independence and to commemorate the loss of the USS Houston. If the Houston had not been lost in the early months of the war, this ship would have served under the name USS Reprisal.
34.4 CA70 Canberra/Pittsburgh
If the Australian ship Canberra survives through turn 6, use the CA70 Pittsburgh counter, otherwise use the CA70 Canberra.
CA70 was laid down as the USS Pittsburgh but was renamed in honor of the Australian cruiser that fought (and was sunk) alongside US naval units during the Battle of Savo Island. Had the original Canberra not been lost, this ship would have remained the Pittsburgh. CA70 is the only US Navy ship specifically named in honor of a foreign ship and with the name of a foreign city. Historically, CA72 later became the Pittsburgh.
34.5 CA71 — Quincy/St. Paul
If the "at start" Quincy survives through turn 6, use the CA71 St. Paul counter, otherwise use the CA71 Quincy.
CA71 was laid down as the USS St. Paul, but her name was changed to perpetuate the name Quincy when that ship (which was actually the second to bear that name) went down during the Battle of Savo Island. Had that Quincy not been sunk, this ship would have retained her original name. Historically, CA73 later became the St. Paul.
35.0 Japanese BB-CV's
(Japan advantage — very small) When the Japanese lost a number of their front-line carriers, they hurriedly began converting existing older battleships to hybrid battleship-carriers. The only two completed were the Hyuga and Ise, which were converted by removing the aft-most two (of six) main turrets and fitting a shortened flight deck and catapults.
35.1 Triggering & Executing The Conversions
Beginning the turn after the Japanese player loses carriers totaling 14 or more airstrike factors, and as repair capacity permits, he may convert the Hyuga's and/or Ise's 4-4-4 counter into its corresponding 3-4-4-1 counter. Each conversion is considered a separate three-point repair for all purposes, and each counter is swapped as the repair is completed. A damaged ship may be converted, but not a bottomed one. If battle damage is being repaired at the same time, the Japanese player may choose to make the conversion "repair" before the damage repair.
Example: The 4-4-4 Hyuga has been crippled with four points of damage, and is in Yokosuka (6 repair points) to be repaired. During the repair segment of his turn, the Japanese player may convert the Hyuga to the 3-4-4-1 counter for three points, and then repair 3 points of damage, leaving him with a 3-4-4-1 with a single damage point. Had the Hyuga been bottomed with 5–8 points of damage, no conversion would have been allowed until she was repaired to the point of floating again.
35.2 Additional Conversions
Had time and resources permitted, or if these ships had been lost prior to their conversion, it is likely the Fuso and Yamashiro would have been converted instead (or perhaps as well). If either/both the Hyuga and Ise are sunk prior to conversion, the Fuso and/or Yamashiro may be "converted" to the BB-CV counters instead of the Hyuga and/or Ise. No counters are provided (since no appropriate drawings could be found); just substitute the BB-CV version of the Hyuga/Ise.
36.0 Aging British Fleet
(Axis advantage — small) The Royal Navy, for all its skill, valor, and tradition, had a serious problem at the outset of the war: budgetary restrictions had saddled a number of capital ships with significant maintenance lapses. Several of the County-class cruisers, plus several battleships were no longer capable of achieving their original speeds. The most notable of these was (gasp!) the Mighty 'ood 'erself. Originally capable of a bit over 32 knots and a speed factor of seven, by the time war broke out, she was barely capable of 28 knots and couldn't sustain even that. During her famous battle with the Bismarck, while she was closing at top speed, her squadron mate Prince of Wales actually had to reduce speed to keep from pulling ahead. Her actual speed factor: 5.
36.1 Overhaul Markers
Several counters with the word "Overhaul" and a number are included with the game. These function like damage counters in that they decrease the speed of the ship by the number indicated. They do not, however, affect the defense (armor factor) of the ship in any way.
Example: The Hood with her "Overhaul 2" counter is effectively a 4-4-5, not a 4-2-5. The Hood with Overhaul-2 and Damage-1 would effectively be a 4-3-4.
36.2 Placement
At start, the British player places overhaul markers on the following ships for one or two points of speed as follows:
Table 8: Overhaul Markers
| Ships | Points | |
|---|---|---|
| BB's | Barham, Malaya, Royal Oak, Ramillies | 1 each |
| BB's | Hood | 2 |
| CA's | Berwick, Cornwall, Cumberland, Kent, Suffolk | 1 each |
36.3 Removing Overhaul Markers
36.31 Overhaul counters may be removed during the repair phase in the same manner as damage counters, with the same costs and restrictions, as per 11.0.
36.32 Once the overhaul marker is removed from a ship, future damage or disabled effects do not reinstate it; the overhaul is permanent.
37.0 Italian Ineffectiveness
(British advantage — large) Italian Commando Supremo was notorious during the war for preferring to avoid a fight. This rule places that handicap onto the Axis player.
37.1 Roll for Retreat
Before each combat round involving any Italian ships other than Decima Flotiglia MAS (a.k.a. "The Frogmen"), roll one die. If the result is equal to or less than the number of the round about to be fought, all Italian units other than 10 MAS must immediately withdraw or break off pursuit.
37.2 Cooperation with The Kriegsmarine
If Italian and German units are in a combat together and the Italians retreat because of 37.1, the Germans may elect to stay or retreat at their option.
37.3 Special Retreat Conditions
37.31 If the Italians retreat per 37.1 before the first round of combat, they may not be pursued, nor may German ships that retreat at the same time.
37.32 If the Italians retreat per 37.1 on any combat round after the first, they may be pursued normally.
38.0 Italian Naval Buildup
(German advantage — small/medium) The Italian carrier Aquila and the battleship Impero were never completed. Had they been, they may have altered the course of the war in the Med, provided of course, that their careers began early enough; say, in 1941 or early '42. This rule offers two options to examine the effect that such a powerful addition to the Italian fleet could have had. Players must agree which of the two options is in play when using this rule.
38.1 Option one (semi-historical)
The Aquila and Impero are added to the Italian fleet as reinforcements on their planned completion dates, turns 7 and 10, respectively, provided the Italians are still in the game at that point. They function normally as Italian units in all regards except that Aquila's air group is strictly defensive in nature. The Aquila may not attack other units. Instead, during each air action, the Aquila's airstrike factor rolls its attack against any one attacking enemy carrier or LBA — prior to that unit's attack. If any disabled result is rolled, the attack is aborted. If any hits are rolled, roll the damage and apply the results as follows:
38.11 If the attacking unit is a carrier, and the damage is equal to or greater than the carrier's airstrike factor, the carrier is disabled and must RTB at the end of the action. The carrier's air attack is aborted.
38.12 If the attacking unit is LBA, apply the damage normally. If the LBA unit is destroyed, that takes effect prior to the LBA making its attack. This was the original concept for the Aquila: to defend the fleet. To achieve this objective, it was originally planned to arm her solely with fighter-interceptors.
38.2 Option two (purely conjectural)
Beginning on turn 2, roll one die each for the Aquila and Impero. On a roll of 1, each ship is added individually to the reinforcements for that turn. On each subsequent turn, 1 is subtracted from this die roll, so that on turn 3, a roll of 1–2 results in the ship being completed, on turn 4, a roll of 1–3 is needed, etc. If using this option, Aquila's air group functions normally (i.e. as does any other carrier's).
39.0 Examples of Play
In another universe, Hood and Prince of Wales have failed to make contact with Bismarck and Prinz Eugen in the Denmark Straits, and the German task force is headed into the convoy lanes of the Western Approaches, intent on operating in concert with a wolf pack, and if all goes according to plan, refueling from a supply ship. The Royal Navy, naturally, turns in pursuit…
The Situation—Western Approaches, Turn 2
The British carrier Ark Royal, along with cruisers Norfolk and Suffolk are patrolling (front side face up). They are reinforced by a raiding Hood and Prince of Wales (reverse side face up). The RAF is also contributing land-based air support. The Allies controlled the sea area on the prior turn.
For the Germans, Hilfskreuzer (armed merchantman) Pinguin provides a distraction, the oiler Nordmark awaits her larger cousins Bismarck and Prinz Eugen, who are both raiding (reverse side face up). Two U-Boats are ready to assist. Although both U-Boats moved to the Western Approaches during patroller movement, during raider movement one has been inverted to its raider side. Her most likely target: Ark Royal, hopefully before she can launch any fateful Swordfish at Bismarck.
Anti-Submarine Warfare
Land-based air is worth its attack factor (two in this case) in ASW rolls, the patrolling carrier is worth three (regardless of its airstrike factor), and every other patrolling ship is worth one, for a total of 7 rolls against Hilfskreuzers, oilers, and submarines as a group. Hood and Prince of Wales are raiding, and therefore do not contribute to ASW defense.
British ASW Attack rolls = (3, 4, 2, 2, 6, 1, and 5). The British score one hit (6) and one disabled result (5). These results take effect immediately. Successful ASW attacks must be applied first to oilers, and Nordmark is sunk and removed from play. Additional results are applied second to Hilfskreuzers, and the Pinguin is disabled; she returns to base. Only two British rolls were successful, therefore no U-Boats are affected.
The surviving patrolling U-Boat now hits back. It rolls a 5 (a 6 after applying the attack bonus), which is a hit against merchant shipping and immediately costs the British player one victory point. Just as important, it remains in the sea area until the end of the turn. The ASW portion of the turn is complete. The raiding U-Boat must wait until after at least one round of combat to attack.
1st combat Round
At the start of each round, determine the type of action to be fought. The British have complete air supremacy and prefer an air action in order to hopefully soften up Bismarck before closing with the fleet. Obviously, the Germans do not want Bismarck as a helpless target, and prefer a surface action. Each side rolls one die. The British roll a 3, which is modified by +1 for having the control flag and +1 for having an LBA unit present, for a net result of 5. The Germans also roll a 3, modified by +1 for selecting a surface action in the Atlantic Theatre of Operations, for a net result of 4. The British get their air action.
Only units with an airstrike factor may attack during an air action, so the British will be the only on rolling any attacks. The RAF rolls its two attacks against the Bismarck, but rolls a 2 and a 4 for no effect. Ark Royal fares no better, rolling a trio of 4's, also for no effect.
With the round complete, the raiding U-Boat is now permitted to attack, and does, rolling a 5 against Ark Royal and disabling her. Both Ark Royal and the raiding U-Boat return to base.
2nd combat Round
The British are bound and determined to sink the Bismarck, and since they still have the air advantage, see no reason to withdraw and announce they are staying for another round. The German, perhaps unwisely since there are no more VP to be gained, also decide to stay. This time, however, the dice go the German's way. Using the same modifiers, the British roll a 1, which becomes a 3, and the Germans roll a 3, which becomes a 4 resulting in a surface action. Since a completely surface action has been rolled, all air units in the sea area immediately return to base for the remainder of the turn — another blow for the British.
The British are first in the turn order, and therefore designate targets and roll first. Norfolk, Suffolk, and Prince of Wales fire a total of six shots at Bismarck; and Hood fires four at Prinz Eugen.
British surface attack rolls: (2, 4, 3, 4, 6, and 4). The 6 against Bismarck is a hit, and the die is re-rolled to determine damage. A roll of 2 is adjusted by the Bismarck's defensive bonus to a 1, so a damage -1 marker is placed on Bismarck.
British attack rolls: (1, 4, 3, and 3). Hood rolls no fives or sixes, so her fire has no effect.
The Germans now return fire. The Bismarck takes four shots at the Hood, and the Prinz Eugen one shot at the Prince of Wales. Bismarck was undamaged at the start of the round, and so still receives the gunnery attack bonus.
Bismarck's attack roll = (3, 4, 6, and 1) with the gunnery bonus: (4, 5, 6, and 2). The 6 is a hit even without the bonus, and is re-rolled to a second 6 for damage, scoring six damage points. This exceeds the Hood's armor factor, and she is sunk. Place a sunk marker on her. The 5 disabled result is ignored. Prinz Eugen then fires her lone shot at Prince of Wales.
Prinz Eugen's roll = (3). A roll of 3 has no effect. The round is over, and Hood is removed from play.
3rd combat Round
The British, anxious to sink the now-damaged Bismarck, elect to stay for another round. Since Bismarck's speed is now 5 (6 minus 1 damage), she could not escape from any of the British ships. The Germans therefore also elect to stay. As only surface units are present (no units with an airstrike factor), both sides agree to a surface action.
The British train all six shots from their three remaining ships on the Bismarck.
British attack rolls: (3, 1, 6, 3, 2, and 4). The 6 is a hit, but the reroll gets only a 1, which is adjusted downward to 0 due to the Bismarck's armor bonus. The hit does no additional damage.
Both Germans ignore the cruisers and return fire against the biggest threat, the battleship Prince of Wales, combining for five shots, and get 1, 1, 5, 4, and 6. Now that the Bismarck is beginning the round damaged, she no longer receives the gunnery bonus.
The 6 is a hit, and is re-rolled a 2 for two points of damage. The 5 is a disabled result, and Prince of Wales is forced to return to base at the end of the round. Place a two-damage and a disabled marker on Prince of Wales. All fire on both sides is complete; the round is over. Prince of Wales returns to base with her two points of damage, selecting England and the possibility of repairs next turn. Upon her arrival, the disabled marker is automatically removed.
3rd combat Round and Retreat
The British, now outgunned, elect to retreat Norfolk and Suffolk, keeping them in a single group for mutual support. Bismarck is too slow to pursue. Prinz Eugen could pursue by herself, but she would be outgunned 2:1, so the German player elects not to do so. The retreating British cruisers must now return to base. The Norfolk chooses to return to England and the Suffolk, anticipating a possible move toward the Pacific next turn, chooses to return to Suez.
End of the Turn
Bismarck, Prinz Eugen, and the patrolling U-Boat are the only remaining occupants of the Western Approaches sea area. Neither ship is patrolling, however, and U-Boats by themselves are not sufficient to claim control of a sea area. The Allied control flag from the previous is still removed, but no Axis flag is placed. The German player is awarded no victory points for controlling the Western Approaches, but he does keep the VP his U-Boat earned earlier in the turn. Having no oiler to refuel them, Bismarck and Prinz Eugen will have to return to a friendly red port (there are no adjacent green bases) at the end of the turn.
40.0 Pacific Theater Beginner Scenario: Midway!
Playable Sea Areas: Home Islands, Central Pacific, Aleutians, Gulf of Alaska, Hawaiian Islands, Marshalls. VP are awarded normally for these areas (except Home Islands, see below); no other areas may be entered.
Game Length: 1 turn
Available Forces:
Allies (USA) — at Pearl Harbor: Yorktown, Enterprise, Hornet, Saratoga; Maryland, Pennsylvania, Tennessee; Astoria, Louisville, Minneapolis, Northampton, New Orleans, Pensacola, Portland, Salt Lake City, Vincennes; 7AF, 11AF
Axis (Japan) — at Yokosuka Navy Yard: Kaga, Akagi, Hiryu, Soryu, Hosho, Ryujo, Junyo, Zuiho; Yamato, Nagato, Mutsu, Fuso, Hyuga, Ise, Yamashiro, Kongo, Hiei, Haruna, Kirishima; Tone, Chikuma, Atago, Chokai, Myoko, Haguro, Kumano, Suzuya, Mikuma, Mogami, Nachi, Takao, Maya, Oi, Kitakami; 24AF, 25AF; Yokosuka, Kure
At Start Control Flags: Home Islands, Marshalls (Japan), Hawaiian Islands (US).
HOW TO WIN: Just as in the standard game, win this 2-player (only) scenario by scoring more VP than your opponent.
Special Scenario Rules (These are NOT part of the standard game):
- No Japanese VP for control of the Home Islands.
- 1VP to either player for control of Attu/Kiska, 2VP to either player for control of Midway, 1 US VP for each Japanese port subjected to US carrier air raid, even if no units are present when the raid occurs.
- All Japanese speed rolls are assumed to be a "6".
- The three US battleships and the Saratoga are actually arriving from the West Coast. The battleships may be placed as patrollers or raiders in Gulf of Alaska or Hawaiian Islands only (no speed rolls needed). Saratoga may be placed as a raider (only) in either area.