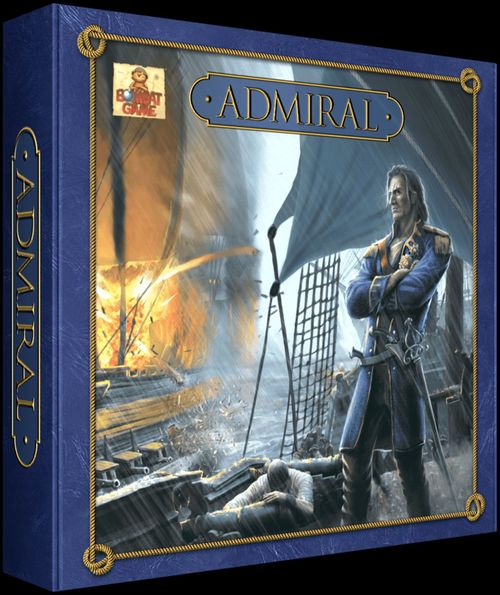
Admiral
Admiral Rulebook
Table of Contents
Table of Contents
I. Introduction
1.1. General Information
"Admiral" is a naval strategy boardgame representing sea battles between ships. The Players' main task is to plan and accomplish, with the warships and other assets available, naval operations. Depending on the Scenario chosen, objectives might include defeating an enemy naval force, gathering treasure, or capturing a fortress or other valued shore asset. The game is designed for 2-6 players with a game length of 30-120 minutes, depending on the scenario.
"Admiral" features several levels of complexity:
- "Lieutenant" (standard rules)
- "Captain" (adding more complexity to play)
- "Admiral" (significantly greater complexity)
We recommend that Players begin at the "Lieutenant" level and, after mastering this, explore the game system to find the level of complexity which is most appealing to them.
Symbols in the rules: Historical information - provides information about historical events, interesting facts, and outstanding personalities who have left a trace in naval history.
II. Admiral Rules Game Components List and Ship Construction Manual
The game box contains the following elements and quantities:
- These rules
- Sprues (14) with:
- 6 sets of 4 ships (24 ships total; brown sprues for hulls/flags, white for sails, blue for stand/flags):
- Brig (historical prototype Russian brig "Mercury")
- Galleon (prototype English galleon "White Bear")
- 28-gun Frigate (prototype English "Enterprise" series ships)
- 100-gun First Rate (prototype Spanish ship "Santisima Trinidad")
- Fortifications (4, blue)
- 6 sets of 4 ships (24 ships total; brown sprues for hulls/flags, white for sails, blue for stand/flags):
- Map overlays:
- Royal Ports (2)
- Islands (5):
- 1 Snake Islands, 5x3 spaces (pattern: Ilha de Queimada Grande, Brazil)
- 2 Monu Islands, 4x2 spaces (pattern: Fiji)
- 2 volcanic island, 3x3 spaces (pattern: Aogashima, Japan)
- Reefs (6)
- Naval Mines (6)
- Weathercock (assembled from four parts)
- Ship cards (24) which contain information about ship characteristics and an identifying number
- Small round magnetic tokens: green (24), yellow (50), and red (104)
- Sticky paper sheet featuring very small number stickers (numbered from 1 to 6)
- Game playing area (mapboard): two pieces in full game, each 24 x 14 spaces.
Manual on Ship Assembly: Your Own Shipyard!
Tools needed: a sharp pointed hobby knife, a plastic ruler, tweezers and a moderate-size combination pliers. In the event that a child assembles the ships, we strongly recommend adult supervision.
We also recommend (a) assembling according to instructions and (b) especially not separating all the parts from the sprues at one time, but only those needed for one ship at a time.
Each ship consists of four types of component: a hull, several sails, a stand, and flags. All of the parts are on the sprues.
Sprues with hulls and sails all contain inscriptions specifying the type of corresponding ship.
Each stand (blue) has an inscription with the ship type, and at each end a square depression, which is to be filled with labels from the label sheet to number each ship. Each ship has its own number, which is used in connection with the matching "ship card". This is particularly important in scenarios requiring one player to use several ships of the same type.
Please follow this order of assembly:
-
Separate the stand (blue) and hull (brown) from their sprues with a sharp knife. Attach two number stickers (use the same number) at each end of the stand.
Note: there will never be two ships of the same type with the same number.
1a. Alternative method of a sticker attachment: attach a sticker at a fore-and-aft sail. A sticker is attached after a ship is completely assembled.
-
After attaching the numbers, connect the hull to the stand. Please do not push the hull using the masts; use tweezers to press the hull into the stand.
-
One by one (but starting with the square sails which attach across the hull) separate and carefully attach the sails to the masts of the hull using the pins and holes. Small black figures near the sails on the sprues picture show the order of sail location (from bow to stern).
Note: If you wish, ships can be assembled using glue, but take into consideration that if you later decide to paint your ships, it will be much easier if you can separate the sails from the hull and masts, paint details and then re-assemble.
-
Place a square sail next to the mast and visually verify that the pins and holes align; if not, that sail is mounted on a different mast.
-
Use a ruler as backing support to the mast in order to mount a sail. In most cases attachment only requires slight pressure. If the sail is tight, enlarge the hole slightly by means of the point of a sharp hobby knife turned carefully in a circle. Be careful, otherwise it will be necessary to glue the sail to the pin on the mast.
Note: Some sails (e.g. the last fore-and-aft sail of a frigate - No.4 on the sprue picture) are very tiny; we recommend that you use tweezers to place them accurately.
-
After attaching square sails, attach fore-and-aft sails, again using pins and holes. If attachment is difficult, combination pliers can be (gently!) used.
-
Flags are the final step. There are 58 flags in two colors. During the game, the number of maximum required flags is less than this (usually 6-10 per player, depending on scenario and boarding/capture of other ships), so some flags are spares.
III. Admiral Rules
Now the components are ready, the ships are built. Let's play!
In each game, there are two stages: preparation, and playing.
3.1. Stage 1: Preparation
Preparation includes:
3.1.1. Selecting a Scenario. Each Scenario describes a situation from the Sail Epoch, Objectives, victory conditions, the number and role of players, the number and initial placement of playing elements, and in some cases, special rules for the Scenario.
3.1.2. Establishing agreement on alliances between players in multi-player games: whether allowed or not allowed, and if allowed, between whom.
There are two available types of alliances:
- Constant Alliances may not be broken during the game. Allies cannot attack each other. Allies may repair ships in one another's forts' water area and repair each other's forts.
- Temporary Alliances are created and broken periodically. A Temporary Alliance can be understood as a temporary armistice, a period of cooperative action, etc. Such an Alliance is determined by mutual consent between two or more parties, for a certain number of turns, for a specific goal-based period, and so on as agreed.
In a Temporary Alliance the possibility of suddenly breaking such an alliance depends on players' established agreement. Players may choose to agree to play with the possibility of sudden breach of Alliance, or they may agree to play with the requirement of a one-full-turn notification in advance of breaking a Temporary Alliance.
Temporary Alliances are especially useful in games with a large number of players, in providing variety for a scenario, or in cases in which bad weather and failures in combat can be salvaged through good diplomacy.
Whatever alliances you make, please remember: only one player (or one team in a team-based game) finally wins!
3.1.3. Establish agreement on the preferred Complexity Level from the three available:
- Lieutenant (basic rules, good for the whole family: these rules are found in this chapter)
- Captain (more complicated rules; use them if you have already mastered the "Lieutenant" rules and wish a more sophisticated game. Rules found in the 5th chapter)
- Admiral (the most complex rules, available on the company's website)
3.1.4. Establish agreement on whether Mine Fields are to be used.
3.1.5. Complete initial placement of the playing components and ships, in accord with the rules of initial component placement and, additionally, as specified by the chosen Scenario (some scenarios can modify the rules of initial component placement listed below).
Main Rule: Map overlay components and ships are placed on the mapboard inside the map spaces (the picture shows correct and incorrect placement).
Common Rules of Initial Placement of Playing Components
3.1.5.1. Royal Ports (if present in a Scenario) are usually located relatively close to the edges of the map at a considerable distance from one another. A Player can have only one Royal Port. A Royal Port has no Strength or Firepower and is only a symbol of the Player's command center. Capture of an opponent's Royal Port is used in some Scenarios as one of the possible Victory Conditions (leading to opponent's immediate capitulation).
Capture of an enemy's Royal Port is achieved if one of your ships remains for four consecutive Turns (or two of your ships remain for two consecutive Turns) in the Harbor Area of the enemy's Royal Port. These counted Turns do not include the Turn in which your ship/s enter the Royal Port's Harbor Area.
Note: All sea spaces around the Royal Port are considered its "Harbor Area". The ships of the Royal Port owner (or his allies) cannot enter the Harbor Area of the Royal Port (and they stop next to it in the event that they are blown by the wind).
3.1.5.2. A Fort is a coastal fortification built to protect ships and an "ordinary port" territory. Normal placement of Forts is on the coast of an island, or in the space directly adjacent to the coast of an island (the diagrams show correct and incorrect placement).
Forts cannot be placed near the Royal Port. The distance from the Harbor Area of the Royal Port must be greater than the Fire Range of the fort (which is 5 for horizontal/vertical [orthogonal] directions and 4 for diagonal).
All Sea spaces and Coastal spaces (spaces with both Sea and Land in which more than half of the space is Sea) around the Fort are considered its "Harbor Area".
3.1.5.3. An Island grid must match the grid of the main mapboard. Island and Reef positions must allow the possibility of ship movement between two Royal Ports. In most scenarios, Players usually decide how many islands to place on the map.
Note: No part of any island can be located in the Harbor Area of a Royal Port.
3.1.5.4. A Reef is a low (or underwater) stone or coral ridge, which is dangerous for the ships that can run aground there during a storm. Reefs are placed on the map by Players, either by mutual agreement, or equally divided between Players and placed by them individually in their sector of the map.
Note: A Reef cannot be placed in the Harbor Area of a Royal Port.
3.1.5.5. A Naval Mine is an explosive device that is hidden in the water with the goal of damaging opponents' ships. If both Players agree that Mines are to be used, they are divided equally between Players. Each Player notes, on a separate piece of paper, the mapboard space coordinates of each mine location he chooses. For instance, if the Player has three Mines, he writes coordinates on three pieces of paper (e.g. "A2", "B3", and "D4") and puts these sheets under the edge of the map.
Mines can be placed not further than three spaces from the Harbor Area of the Royal Port or a Fort belonging to the Player.
Mines cannot be placed in the Harbor Area of the Royal Port (but are allowed in the Harbor Area of Forts). Once placed, Mine locations cannot be changed during the game.
3.1.5.6. Ships must be placed by the Players in the Harbor Area of their Forts. Flags of one color must be mounted on the player's ships and forts.
3.1.5.7. Ship Cards are placed off the mapboard, in front of the owning Player.
3.1.5.8. A green token (current turn movement indicator) is placed at the upper left corner of each Ship Card.
3.1.5.9. A yellow token (current turn gunfire indicator) is placed at the left lower corner of each Ship Card.
3.1.5.10. Red tokens (damage indicators) are not used at the beginning of the game.
3.1.5.11. The Weathercock is located off the mapboard.
Note: We recommend a "mirror" or "symmetrical" placement of the components for beginning Players in the case of a two-Player game (e.g. if the Royal Port of the first Player is in the upper left portion of the map, put the Royal Port of the second Player in the lower right portion in order to balance each Player's chances fairly).
3.1.6. Determining Order of Players. Playing Actions Performing is accomplished with a die roll. The Player who rolls the highest number moves first, the lowest, last, and so on. In the event of a tie, both Players re-roll.
For each following Turn, the next Player in order starts performing his playing actions first during the Turn. For example, in case of a 3-players game, Turn 2 (and Turn 5 and so on) will be started by the Player 2, followed by the Player 3 and the Player 1. Turn 3 is started by the Player 3, followed by the Player 1 and the Player 2. This transfer leads to game balance improvement and is called Initiative transfer.
Note: some scenarios specify exact Order of the Players.
3.1.7. Determine Flag Color by mutual consent, or by Turn Order (highest roll chooses first).
3.2. Stage 2: Playing
This Stage is based on Turns.
Sequence of a Turn
3.2.1. Determination of Wind Direction and Strength. Wind Direction (one of eight directions) and Strength (3 variants) is made once per Turn (by means of the Weathercock) by the player who starts the Turn, so the Wind will be the same for all Players during the Turn.
Eight Directions are possible in the game:
- Four horizontal/vertical (East, South, West, and North)
- Four diagonal (Southeast, Southwest, Northwest, Northeast)
The Compass printed on the mapboard is used to translate Weathercock directions into map directions (e.g., if the direction is "NE" (Northeast) on the Weathercock, find "NE" on the mapboard compass in order to accurately fix the Wind Direction).
Three Strengths of Wind are possible in the game:
- "Fresh Breeze" (blue sector)
- "Dead Calm" (white sector)
- "Storm" (red sector)
In the event that the Weathercock stops on a boundary between sectors, the outcome will be the next Sector clockwise.
3.2.2. Performing Playing Actions. During a Turn, Players, one by one (according to their order) perform Playing Actions (described on the following pages). The Turn is started by the First Player, who may perform Playing Actions with all, or part, of his Ships, or even choose to do nothing.
In some cases (listed in the rules), performance of some Actions is obligatory (e.g., movement of Ships in a Storm). After the First Player finishes all Actions, the next Player takes his Actions, and so on. A Player who has already taken his Actions can take other Actions during other Players' Actions only in certain cases as described in the rules (e.g., Mine detonation).
3.2.3. Preparation for the Next Turn. Each Player has his Ship Cards in front of him off the map. On these Ship Cards the Player marks executed Playing Actions during their execution by means of shifting the magnetic Tokens. At the end of each Turn, all Players shift their Tokens back to the initial position.
Turns are continued until a Scenario Victory Condition is achieved.
3.3. Description of Playing Actions
The following Playing Actions are permitted:
- Movement of Ships over the mapboard "Sea Field".
- Gunfire (Ships and Forts) and use of "Fireships".
- Boarding Attacks on enemy Ships.
- Repair of Ships.
- Attacks on Enemy or Neutral Forts and Repair of Forts.
- Use of Naval Mines.
Detailed Description of Playing Actions
3.3.1. Movement of Ships over the Sea Field:
3.3.1.1. A Ship only moves in one direction per Turn, either orthogonally (vertically or horizontally) or diagonally.
3.3.1.2. Maximum number of Ships in a single Sea space:
- A space in the Harbor Area of any Port (Royal or ordinary): Limit of TWO Ships maximum.
- A Coastal space (space with both Sea and Land) in which more than half of the space is Sea: Limit of ONE Ship (even if any Port is located near it).
- A space in Open Sea (the space is not located within the boundaries of the "Royal Port" and contains Sea only): Limit of ONE Ship.
3.3.1.3. Ships MAY NOT occupy spaces, or move through spaces, in these cases:
- Land occupies more than half of the space.
- Spaces are occupied with a Reef, a Fort or another Ship in Open Sea.
- Sea spaces in a Port Harbor Area occupied by TWO Ships (Note: a second Ship may enter a Harbor Area space containing only ONE Ship).
- A Coastal space which is already occupied by another Ship.
3.3.1.4. A Sea space can be passed through from any side. A Coastal space can be passed through only so long as the line of movement does not cross Land.
3.3.1.5. Order of Movement and Firing: A Ship may Fire before Moving, and also after Moving. The total number of "shots" fired by a given Ship during a Turn is limited according to the Ship's characteristics on its Data Card. For example, if a Ship's characteristics permit three "shots", it is permitted to Fire three times in its Turn. It could Fire once, then Move, then Fire twice, or Fire twice, Move, then Fire once. Or it could Fire three times, Move, and not Fire again, or Move, then Fire three times.
Important: A Ship may not begin Moving, Fire, then finish Moving in its Turn.
3.3.1.6. Movement of Ships is dependent on Wind Strength.
3.3.1.6.1. Movement in a "Fresh Breeze" (Blue sector in any direction of the Weathercock):
- Ships may move in any direction as the owning Player chooses.
- A Ship may only move in one direction in a Turn.
- The distance (number of spaces) moved depends on the direction chosen.
- Maximum distance in a Fresh Breeze is shown on the Ship Data Card. The maximum distance is different for orthogonal (vertical or horizontal) movement than for diagonal movement (which is always lower!).
This maximum distance move may only be made when a Ship is moving in the same direction as the Wind on the Weathercock is blowing (i.e., with the wind).
If the Player chooses a direction of travel other than with the wind, maximum distance is decreased according to the difference between the wind direction and the desired direction of the Ship; the larger the difference, the less the permitted movement distance.
Example: The Weathercock shows "Fresh Breeze" on N (North). A "1st Rate ship" may move five spaces in that direction. If the Player wants to move the Battleship NE or NW, then the maximum diagonal distance (four spaces) is decreased by ONE and is thus equal to THREE spaces.
If the chosen direction is West or East, then the Battleship's maximum orthogonal distance (five spaces) is decreased by TWO and thus becomes THREE spaces.
If the maximum speed of a Ship after adjustment for Wind direction is ZERO or a NEGATIVE number, the Ship is not permitted to travel in that direction.
These calculations are used to determine MAXIMUM speed allowed for a Ship's move. A Player may always choose to move a Ship a lesser distance than the allowed maximum (after the maximum is calculated).
3.3.1.6.2. Movement in a "Dead Calm" (no Wind; White sector on Weathercock):
- When the Wind is Calm, Ships move very slowly; most of them cannot make any way at all. Maximum distance of a Ship's move during Calm is shown on its corresponding Data Card and is also different for orthogonal (vertical/horizontal) and diagonal directions.
- This low Calm Winds maximum speed is NOT decreased for ANY Movement direction; if the Data Card allows such a move for its Ship type, no calculation for direction is made.
3.3.1.6.3. Movement (Carried Away) in a "Storm" (Red sector on Weathercock):
-
A Storm carries Ships in the direction the Wind is blowing without regard for the wishes of the Players; the number of Sea spaces is shown on each Ship Data Card.
-
In the event that any obstacle is in the path of a Ship being Carried Away, the Ship always stops in front of that obstacle.
-
A Ship is damaged only when a Ship is Carried Away into a Reef. In this case, the Ship receives a number of Damage tokens equal to the number of Sea spaces it cannot enter due to the presence of the Reef (including the Reef space).
This damage, and all other damage inflicted on a Ship, is recorded using Red tokens which are placed on its Ship Data Card in its "Strength Area". Damage does not impact any characteristics of a Ship, but when the number of Red tokens (damage level) equals the Strength Number of a Ship (shown in the Strength Area), the Ship "sinks" and is immediately removed from the mapboard.
Red tokens can be removed from a Ship Data Card only if that Ship is repaired (Repair process is described below; see Rules, Section 3.3.4).
-
A Ship being Carried Away is not damaged if it meets Land or either friendly or foreign Ships or any other obstacle (except Reefs). In the case of a Ship being Carried Away into a Sea space occupied by another Ship, the Ship already in that Space prevents the Ship being Carried Away from entering the space. The Ship which is moving instead stops in the last Sea space entered before the space containing the non-moving Ship.
-
A Ship is not Carried Away, even if no obstacle exists to impede it, if:
- (a) At the beginning of the Turn, or after a Ship begins to be Carried Away, the Ship is located in the Harbor Area of any port;
- (b) the Ship is located near any Land and the Land is situated in the direction from which the Storm is blowing. (Note: When considering a Storm blowing in orthogonal directions, the spaces must share a common boundary line; when considering Storm blowing from a diagonal direction, a shared corner suffices to provide protection.)
3.3.1.7. Ship Movement Marker Placement: Before the Turn begins, all Ship Data Cards must have a Green token placed on the Ship picture. After the corresponding Ship moves (in any weather), the Green token is moved to the right. This signifies that the Ship has already moved and is no longer eligible to move in the current Turn. At the end of the Turn, all Players move their Green tokens back to the initial position.
3.3.2. Ships and Forts: Gunfire and use of "Fireships"
3.3.2.1. Only Ships and Forts may Fire in "Admiral".
3.3.2.2. The Player whose Ship or Fort is Firing must name the specific Target being fired upon before resolving the Fire. Should a Player fail to designate the Target beforehand, the Ship or Fort is considered to have Fired, but with no effect on any Target.
3.3.2.3. A Ship may Fire either before Moving or afterward. During his Turn, a Player may Fire as many of his Ships as have suitable Targets to Fire upon. Several Ships may "combine" Fire before or after Moving; see "Salvoes" below, 3.3.2.12.
3.3.2.4. The result of each Shot (representing multiple guns firing from the Ship's broadside or from the Fort's armaments) is determined by the owning Player with a die:
- When the Target Ship is located on an adjacent orthogonal (horizontal or vertical) or diagonal space, the Range is "Close" and only a "2" is a "Miss".
- When the Target Ship is located more than one space away, any odd die result (1,3,5) is a "Hit"; even result (2,4,6) is a "Miss".
3.3.2.5. Any successful "Hit" results in one Damage token applied to the Target's Ship Data Card.
3.3.2.6. The maximum Firing Range of each Ship is shown on its Ship Data Card (example: 1,2,3). The maximum Firing Range for a Fort is FIVE for orthogonal (horizontal or vertical) directions and FOUR for diagonal.
3.3.2.7. Firing at less than maximum Firing Range is allowed; the restrictions of 3.3.2.8. are always in force.
3.3.2.8. It is only possible to Fire in strictly orthogonal (horizontal or vertical) or diagonal directions. The maximum Ranges for a 1st Rate Battleship and permitted Firing Directions (Bearings) are shown with lines on the printed diagram.
3.3.2.9. A Target must be within maximum Range and a permitted Firing Direction, in a straight line from the Ship or Fort which is Firing. The concept is the same as for Moving, with these exceptions:
- Reefs, being low (or underwater), do not protect a Target in any way.
- Ships may never Fire through a space containing even one Ship.
- Forts can Fire over Ships located in the Harbor Area of a Port (Fort guns are mounted higher than Ships' guns) but Forts cannot Fire over Ships in the open sea.
3.3.2.10. A Ship Data Card shows the maximum permitted number of "Shots" (representing gun decks) permitted in a single Turn. This depends on the number of gun decks in each specific Ship's design. If a Ship Data Card includes a second number after a Slash, this indicates the maximum number of "Shots" allowed for this Ship type during a Storm. A Ship with no number to the right of a Slash may not Fire during a Storm.
3.3.2.11. Forts are permitted to Fire twice per Turn in any weather. A neutral fort attacks (immediately) only ships of the players who attacked (now or previously during the game) this neutral fort. Rules used in order to determine result of attack are the same as for a ship.
3.3.2.12. Salvoes. Ships and Forts may fire in salvoes. If your Ships' guns (and Fort guns, if applicable) can all legitimately Fire at a Target, their Shots can be combined in a salvo.
If the Player wishes to execute a Salvo, he declares a "Salvo Attack", designates the Target, and identifies each Ship/Fort participating in the Salvo Attack. Ships capable of Firing more than once in a Turn may fire up to their maximum permitted number of Shots for the Turn, or may choose to Fire only part of their total Firing potential for the Turn.
The Player rolls one die for the entire attack: either all Shots "Hit" the Target (on a 1,3, or 5) or "Miss" (2,4, or 6).
Note: In the event that at least one Ship participating in a Salvo Attack is at Range 1 (Close), but others are Firing at longer Range, their "salvo grouping" will require a 1,3, or 5 to "Hit" - therefore it is generally better not to combine Ships or Forts firing at longer Range with others Firing at Range 1 (Close).
3.3.2.13. A Salvo Attack may also be executed by a single Ship Firing all, or more than one part, of his total Firing potential for the turn (gun decks).
3.3.2.14. Keeping track of Shots available on Ships: At the beginning of the Turn, yellow tokens are located at the lower left portion of the Ship Data Card. The number of yellow tokens is equal to the maximum number of Shots available to that Ship type in the Turn. After a Shot, the Player moves a yellow token immediately to the Firing zone of the Ship Data Card. At the end of the Turn all yellow tokens are moved back to the initial position.
3.3.2.15. Keeping track of Shots available for Forts: Since Forts do not have Data Cards, place a yellow token on the mapboard near the Fort (preferably on a "land" portion of the map) each time the Fort fires (Reminder: maximum of two Shots per Turn).
3.3.2.16. Use of "Fireships": Any Ship may be used by the owning Player as a large "sailing bomb". Such a vessel is called a "Fireship". Using a Fireship requires a two-Turn process:
- The owning Player, before the end of his current Turn, designates one or more of his Ships as a "Fireship" (this occurs before the next Player's Turn begins). This decision cannot be changed after it is declared (the fire is set!). All yellow tokens are removed from the designated Ship's Data Card (the Ship will not be able to Fire any guns next Turn; it is ablaze!).
- During the owning Player's next Turn, the Fireship may Move according to normal Movement rules. After moving, the Fireship explodes. All Ships in the Sea spaces adjacent to the Fireship (including "friendly" Ships!) receive Damage equal to the maximum Strength of the Fireship (Note: maximum original Strength, not remaining Strength after subtracting Damage). After Damage is imposed on all Ships, the Fireship is removed from the mapboard.
3.3.3. Boarding Attacks on Enemy Ships
3.3.3.1. A Boarding Attack is a chance not only to decrease an Opponent's fleet, but to increase your own! However, a Boarding Attack is risky: no retreat is allowed, and only one side can succeed, so evaluate your chances well!
3.3.3.2. A Boarding Attack may be made upon an Enemy Ship which is at Close Range only in orthogonal directions (horizontally or vertically in the adjacent Sea space). Boarding from a diagonal direction is not allowed.
3.3.3.3. One, or several, of a Player's Ships may simultaneously conduct a Boarding Attack on an Enemy Ship (but only one Enemy Ship) if all friendly participating Ships are orthogonally adjacent.
3.3.3.4. After declaring the Enemy Ship to be attacked, and all Friendly Ships participating in the Boarding Attack, "Boarding Points" are calculated; the side with the greatest number of Boarding Points "wins" the Boarding Attack.
To calculate Boarding Points, add:
- Total current Strength of the Ships involved on each Side (Total original Strength minus total Damage)
- Chance factor, calculated using a die. A die is rolled separately for each Attacking Ship, and for the Defending Ship. Results: 1,2: 0 points; 3,4: 1 point; 5,6: 2 points.
Add the Total current Strength of the Attacking Side and the Chance factor for that Side. Add the current Strength of the Defender to the Defender's Chance factor. Compare.
3.3.3.5. If both Sides tie, all involved Ships SINK.
3.3.3.6. Otherwise, the Player with the higher Boarding Points total is the winner. Even so, during Boarding Attacks, Ships are damaged and sailors lost! The difference between the Winner's and the Loser's Boarding Points total is assumed to represent "Remaining Strength" which is assigned to Ships engaged in the Boarding Action as the Winner chooses between the Ships participating (including the "captured" Ship) or even given to one Ship (in this case, the other Ship/s "sink").
Example: Two undamaged Brigs (each with a Strength of "3") are trying to Board a 1st Rate Ship, which already has four Damage tokens and therefore has a current Strength of "3" remaining Strength Steps.
The first segment of the Boarding Points calculation is "3" plus "3" (Attacker) and "3" (Defender).
In the second segment of the Boarding Points calculation, two die rolls (one for each Brig) give "plus 1" point for the Attacker (he was rather unlucky with his two rolls) and "plus 2" for the Defender (he was quite fortunate with his single die roll).
The Attacker now has "6" plus "1" for a total of "7" total Boarding Points; the Defender has "3" plus "2" for "5" total Points. The Attacker has won.
The Difference is "2" and this must be assigned by the Winner among his three Ships. In this case, at least one of the three Ships must sink; the Winner must choose the Ship to be lost, and the other two Ships will be reduced in Strength almost completely (to "one" Strength each, that is, only one Damage marker away from sinking). The Winner also has the option to sacrifice two of his Ships, leaving the third with two Strength Steps remaining.
3.3.3.7. After Strength Remaining is allocated, the Winner takes the Opponent's Ship(s) card(s) for his own (assuming such Ship(s) are still afloat) and places his Flag(s) on his new Ship(s). All sunken Ships are removed from the mapboard.
3.3.3.8. Boarding Attacks can be made either before or after Movement of the Ship. Ships that Moved before conducting a Boarding Attack may not Move any further in the current Turn.
3.3.4. Repair of Damaged Ships
3.3.4.1. Any ship that is still afloat (not "sunk") can be Repaired.
3.3.4.2. Repair is conducted in the Harbor Area of any Fort belonging to the Ship's owner.
3.3.4.3. In order to Repair a Ship, the owning Player removes his Flag from that Ship while entering the Harbor Area of the Fort.
3.3.4.4. During his next Turn, the Player decreases the amount of Damage by removing a Red Damage token from the Ship's Data Card. Repair may continue on the following Turn, with Damage removed at the rate of one Damage token per Turn.
3.3.4.5. A Ship which is being repaired cannot Move or Attack in any way. An Enemy cannot Fire at a Ship being Repaired, but can conduct a Boarding Attack against it.
3.3.4.6. If a Player wishes to stop Repairs, during his Turn he again places his Flag on the Ship. During this Turn, the Ship cannot Move, but may Fire its guns up to its maximum number of Shots.
3.3.4.7. No Repair is made (no red token is removed) on the Turn when the Flag is placed on the Ship.
3.3.5. Attacking an Enemy or Neutral Fort, and Fort Repair
3.3.5.1. Attacking an Enemy or Neutral Fort:
- (a) Attacking an Enemy Fort allows you to deprive your Opponent of the possibility of Repairing Ships, and can increase the number of your Naval Bases.
- (b) Forts may only be Attacked in the "Lieutenant" level Rules by Fire from Ships.
- (c) Both Enemy and Neutral Forts may be Attacked.
- (d) Neutral Forts will also attack Players' forces if the Player Attacked the Fort during this Turn or in a previous Turn. In the event that two Players' forces can be attacked, the Neutral Fort will attack the closest Target. Neutral Fort Firing is determined with a die according to the general rules regarding Hit probabilities.
- (e) Initial Strength of a Fort is "3". Place a Red Damage token near a Fort for each successful Hit on that Fort. The Fort is destroyed at the moment when remaining Strength reaches zero (on the third Hit).
- (f) If a Fort is destroyed:
- The Flag of the Owner is removed.
- All Ships under that Fort's protection for Repair sink.
- The Port still performs a Storm protection function, but it cannot Repair Ships or Fire.
3.3.5.2. Repair of a Fort:
- (a) A Fort which is Damaged but not yet Destroyed can be Repaired.
- (b) The owning Player must place two Ships in the Harbor Area of this Port, declare in the same Turn that the Fort is being Repaired, and remove Green (Movement) tokens from those Ships' Data Cards.
- (c) The Ships cannot Move during Fort Repair, but may Fire.
- (d) Fort Repair begins in the next Turn; one Red Damage token is removed during each Turn of Repair.
- (e) Fort Repair is not made if Enemy Ships are present in the Harbor Area of the Port during the Turn (even if such Enemy Ships are sunk during the Turn).
- (f) Fort Repair can be stopped if the owning Player so chooses. In this case, he returns the Green Movement tokens to his Ship Data Cards. Fort Damage is not removed during this Turn. Ships which had participated in Fort Repair cannot Move in this Turn, but may Fire.
- (g) If a Fort is Destroyed by Enemy Ships, each Ship participating in Fort Repair receives one Damage token (as part of his crew working on Repairs have become casualties).
3.3.5.3. Reconstruction of a Destroyed Fort:
- (a) A Destroyed Fort can be reconstructed. This can be accomplished by any Player, not just by the previous Owner.
- (b) Fort Reconstruction is made in a similar manner to Fort Repair at the rate of one Strength Point per Turn, with two Ships participating.
- (c) When a Player has Reconstructed at least two Strength Points, he has the right to place his Flag on the Fort (and indicates the Strength Level with one Red Damage token). A Fort with a Flag has full Fire capability.
3.3.6. Use of Naval Mines
3.3.6.1. If an Enemy Ship moves through, or stops on, a space where a Naval Mine is located, the Player owning the Mine may Detonate the Mine. Declaring Mine Detonation is made after the Enemy Ship is moved to its destination and the Green Movement token is shifted to the right on the Ship Data Card. When the Declaration is made, the paper recording the written Naval Mine location is shown to the other Players.
3.3.6.2. A Detonated Naval Mine causes three Damage tokens to be placed on the involved Enemy Ship.
3.3.6.3. The Detonated Mine is identified on the mapboard by means of a "Naval Mine" marker. This space is considered as "ordinary" (without an active Mine) until the end of the game.
3.3.6.4. Detonating a Naval Mine is the Player's option, not his obligation. If a Naval Mine is not Detonated (e.g., the Player forgot to Detonate it in time, or chose not to Detonate it at the time), the Naval Mine can be Detonated the next time either the same, or a different, Ship passes the Mine.
IV. Admiral Game Rules Scenarios
The "Admiral" game includes the following scenarios:
- "Treasures of the Old Pirate" (Introductory; 2-4 Players; 20-35 minutes; single mapboard).
- "Pearl Banks" (2-6 Players; 30-90 minutes).
- "Good luck with Jolly Roger" (2-4 Players; 30-90 minutes).
- "Oceans On Fire" (2-4 Players; 60-120 minutes).
Note: Players are free to devise any mutually agreeable scenarios they wish on their own, limited only by imagination and available game components!
Detailed description of the Scenarios
4.1. Scenario: "Treasures of the Old Pirate"
(Introductory scenario, 2-4 Players, 20-35 minutes average playing time, using one of the two provided mapboards)
4.1.1. Scenario is used for learning the game system, or for regular play with younger children (6-7 years).
4.1.2. Half of the total map area, one mapboard, is used.
4.1.3. Initial placement of playing components on the map is shown in the printed diagram.
Note: Ship Data Cards are shown on the map for illustration purposes only; in reality, they are placed off-map.
4.1.4. Scenario description: an old pirate-shellback buried seven troves of gold on an island. Young treasure-hunting adventurers sail to bring treasure back to their forts:
- 3 Gold Troves (in 2- or 3-Player games)
- 2 Gold Troves (in a 4-Player game)
The winner will become the old pirate's successor and the leader of a squadron!
Each Player has two Ships. You may use either two Brigs, or a Brig and a Galleon (all Players must agree upon and use the same set of Ships). Half of the map set, one board, is used. Forts are placed in the corners of the Mapboard.
4.1.5. Rules of Movement: Standard Lieutenant-level rules.
Note: If played with a child of 6-7 years, we recommend using the same Maximum Movement Distance for diagonal movement as for orthogonal (vertical/horizontal).
4.1.6. Loading Gold: Gold can be loaded aboard a Ship only by entering a Space containing Gold (this can be done immediately, during the same Turn, after Movement). The owning Player can begin moving his Ship toward his Fort in the next Turn. Unloading Gold at the Fort is also accomplished on the Turn the Ship arrives in the Harbor Area of the Fort.
4.1.7. One Ship may only carry up to two Gold treasures, no more.
4.1.8. There is not enough Gold for everyone! So Players can (and, to win, must) engage enemy Ships with their Ships and/or Forts. If the opponent's Ship sinks, and the victorious Ship is located in the adjacent Sea space (orthogonal OR diagonal), that Ship's owner is permitted to capture the Gold aboard and transfer it to his Ship (assuming it has the capacity to hold another Gold treasure). If the victorious Ship is further away than one Sea space, or is already full of Gold, the Gold sinks along with the losing Ship.
4.1.9. In the event that it is impossible for any Player to capture 3 Gold treasures (because of the amount of Gold sunk with Ships), the Player who collects 2 Gold treasures, and returns them to his Fort first, is the winner.
4.1.10. In a game with young children, an additional rule may be introduced:
- If a Player loses all of his Ships, a new Ship (e.g., Brig) is considered to have been constructed and available on the 5th Turn after the Turn in which that Player's last Ship was lost.
4.2. Scenario: "Pearl Banks"
(2-6 Players, 30-90 minute average playing time).
4.2.1. Scenario description: With a light rustle, warm South Sea waves caress and rebound from sand banks and tenderly roll across sea creatures nurturing beautiful pearls. The sun's rays are softly mirrored in the clear waters and play upon the merrily speckled shells of living treasure chests.
But in a short time, the silence of paradise is to be shattered by the pitiless thunder of naval gunfire. Warships will come to the banks in order to collect the rich harvest of pearls and transport it to secure Forts. There are always more hunters than treasure!
Only one rule governs the situation: "No rules!". Someone will sail home garnering riches and fame; others will rest in silence on the seabed.
Only a commander skilled both as a fighter and a diplomat, one who knows when to make an alliance and when it is time for "Ultima ratio Regum"1 can win the victory!
4.2.2. Number of Players: 2-6 (Note: a Scenario with five Players is difficult to balance).
4.2.3. Scenario variants:
- Individual (all Players on their own, 1 vs. 1 vs. 1, etc.)
- Team-based (2 vs. 2, 3 vs. 3)
4.2.4. Victory Conditions (Individual variant):
- First Player to bring to his Fort 4 Pearl batches (2 Players), 3 pearl batches (3-4 Players) or 2 Pearl batches (5-6 Players).
- Last Player with surviving Ships on the mapboard.
- Player with the largest number of Pearl batches in his Fort in the event that there are no more Pearls available in the Sea or aboard Ships. If two Players are holding the same number of Batches, the first Player to have reached this level is the winner.
4.2.5. Victory Conditions (Team variant):
- First Team to bring to their Forts 5 pearl batches (2 vs. 2), 4 Pearl batches (1-1-1 or 2-2-2 Teams).
- Only Team with Ships surviving on the mapboard.
4.2.6. If a Player loses all of his Ships, he is out of the game. His Forts and any Pearl batches in them remain as the property of his Team (for Team games).
4.2.7. If all of a Player's Forts are destroyed or captured, over the next three Turns the Player must attempt to gain possession of a Fort in one of three ways:
- Repair (by himself or with Allies) or recapture one Fort.
- Capture another Fort (alone or with Allies).
- Receive a Fort from an Ally. If this is the Ally's last Fort, the Ally's Ships are immediately removed from the game and the Ally drops out of the game.
If none of these three possibilities is achieved over the three Turns after the Turn in which his last Fort was lost, the Player is out of the game and all of his Ships are removed from the mapboard.
4.2.8. Initial Placement of Components:
4.2.8.1. Game with 2 or 4 Players:
- Islands: Two (2), size 2 x 4 spaces, in the center, with seven (7) Pearl batches between them.
- Forts: located in opposite diagonal corners (2 Players) or in all corners (4 Players).
- Reefs: Two-Player game: divided between Players, placed as they desire in accord with general rules concerning Reefs; Four-Player game: 2 Reefs placed in spaces L5, M10, others divided between Players for placement.
- Ships: Four (4), different models, for each Player.
4.2.8.2. Game with 3 Players:
- Islands: Two (2), size 2 x 4 spaces, in the center, with seven (7) Pearl batches between them (same as above, but Islands are shifted toward Players' Fort locations).
- Forts: Located in mapboard corners.
- Reefs: Divided among Players, placed as Players desire in accord with Reef rules.
- Ships: Four (4), different models, for each Player.
4.2.8.3. Game with 6 Players:
- Islands: Two (2), size 2 x 4 spaces, in the center, with seven (7) Pearl batches between them.
- Forts: Located in Spaces A1; A13; L1; M14; X2; X14.
- Note: As a game set includes only four Forts, two additional Forts are represented using "Royal Port" symbols.
- Reefs: Divided among Players, placed as Players desire in accord with Reef rules.
- Ships: Three (Brig, Frigate, Galleon) for each Player.
4.2.8.4. Players may agree to choose other locations for Forts. If so, please maintain equal distance between all Forts and the Pearls. Other Islands may be placed if Players agree, or they can be left out of the game altogether.
4.2.8.5. In Team play, the Players of one Team occupy positions as far from each other as possible (e.g. in a 2 vs. 2 Team game, Forts of one Team's Players are located in A14 and X1).
4.2.9. Pearl loading/unloading and consequences of destruction of Ships/Forts.
4.2.9.1. A Ship must enter a Sea space with a Pearl batch marker in order to load it. The Pearl batch is loaded immediately, or during any other Turn while the Ship is on the space. The Pearl batch marker is transferred to that Ship's Data Card. A Pearl batch can only be unloaded in the Harbor Area of the Player's Fort (or a Fort of one of his Allies). The Pearl batch marker is placed beside the Fort.
4.2.9.2. Pearl transfer from one Ship to another Ship in the open Sea is prohibited (except in the case of transfer to or from a Ship that has been "Boarded").
4.2.9.3. Maximum cargo capacity:
- A Brig or Frigate may be loaded with one (1) Pearl batch. Their speed is reduced by one Sea space while loaded.
- A Galleon or 1st Rate Battleship may be loaded with one (1) Pearl batch with no loss in speed, or with two (2) Pearl batches with a loss of one Sea space while loaded.
4.2.9.4. Consequences of Loss of Ship carrying Pearls: If a Ship sinks in a Coastal space (adjacent to Land or edges of the mapboard, e.g., A6), the Pearl batch is left in that space and can later be loaded by another Ship. Ships lost in "deep" water (other Sea spaces) are sunk with their cargoes; the Pearls may not be recovered and are removed from the game.
4.2.9.5. Consequences of Fort destruction: If a Fort storing Pearls is destroyed, the Pearls are considered permanently lost and are removed from the game.
4.2.9.6. Consequence of Fort capture: If a Fort storing Pearls is captured, both the Fort and the Pearls change ownership to the Capturing Player.
4.2.9.7. Transfer of Pearls between Forts: Ships may transfer Pearl batches between Forts. A Ship may load Pearl batch/es from a Fort in the same Turn the Ship enters the Harbor Area of the Fort. Unloading may also be accomplished in the same Turn the Ship enters the Harbor Area of a Fort.
4.3. Scenario: "Good Luck with Jolly Roger!"
(2-4 Players, 30-90 minutes)
The historical note at the start of this scenario is omitted in this transcription.
4.3.2. Scenario Description: Her South American territories bring Spain fabulous revenues. Gold and silver, precious exotic woods, spices unknown in the Old World are transported to Europe by Spanish Royal Fleet galleons. However, privateers also consider that they have a right to these treasures.
4.3.3. Number of Players: 2-4.
4.3.4. The Spanish Task: Transport as much treasure as possible to the Old World.
4.3.5. The Pirates' Task: Come into possession of as much treasure as possible.
4.3.6. Victory Conditions: The richest Player is the winner; thus the Winner must:
- Collect three (3) treasures (any side).
- Or, for the Pirate, possess more Treasures at the moment when Spain has lost all of its Ships.
- Or, for Spain, to sink all Pirates' Ships.
4.3.7. Order of Turn: Spain moves first.
4.3.8. Alliances: Before the game begins, Players decide whether Pirates are permitted to fight one another.
4.3.9. Initial Placement:
4.3.9.1. Spain (1 Player): Two (2) Galleons and two (2) Frigates.
4.3.9.2. Pirates (1-3 Players): Six (6) Brigs, divided between them.
4.3.9.3. Spain owns three (3) Forts (B2; B13; X14); Pirates own one (1) Fort (Tortuga, M2).
4.3.9.4. Islands and reefs are placed according to agreement among Players (if all agree). If not, Pirates choose the island and place it beside their Fort, Spain places islands beside its Forts. In any case, Forts must be either Coastal spaces, or in Spaces adjacent to an Island coast.
Reefs are placed by Players one by one until all Reefs are placed. The general rules regarding Reef placement must be followed.
4.3.10. Further Information: Spain obtains Treasures from "inland" on the Continent (these appear in the Forts located in B2 and B13). One Treasure is placed beside these Forts on every third Turn: beside B2 before the first Turn, beside B13 before the fourth Turn, beside B2 before the seventh Turn, and so on until all Treasures have been placed.
These Treasures are placed even if the Fort is captured or destroyed.
Spain must transport all the Treasures to Spain ("Fort Cadiz", X14). The Pirates must capture these Treasures and transport them to Tortuga (M2).
4.3.11. All Ships except Galleons can transport one (1) Treasure, and their movement is reduced by one Sea area. A Galleon can transport one Treasure with no decrease in speed, or two (2) Treasures with a movement reduction of one Sea area.
4.3.12. Pirate Treasure Maps: If several Players are acting as Pirates, each of them creates a secret "treasure map", a piece of paper on which he notes secretly the coordinates of a coastal Space where his treasures may be hidden. This Space does not have to be in the Harbor Area of a Fort.
4.3.13. Treasure Loading: A Treasure may be loaded on a Ship in the same Turn in which the Ship enters the Harbor Area of a Fort. At that moment, the Treasure is transferred from the Fort to the Ship's Data Card. Only Spanish ships can load Treasures in Spanish forts. After a Fort is destroyed, any Ship in the Harbor Area of that wrecked Fort can load the Treasure.
4.3.14. Treasure Unloading: Unloading can also be accomplished in the same Turn in which a Ship enters the Harbor Area of a Fort. Unloading is done by Spaniards in Cadiz (X14), or by Pirates in Tortuga (M2). Once this is done, the Player removes the Treasure from the playing board and retains it for himself toward fulfilling Victory Conditions.
In the event that unloading is made in another Fort's Harbor Area, the Treasure is transferred from the Ship Data Card to beside the Fort. Spain may not unload Treasure in Tortuga, and Pirates may not unload Treasure in Cadiz.
4.3.15. Treasure Transfer: Treasure cannot be transferred from Ship to Ship on the open seas (except in the event of transfer to or from "boarded Ships").
4.3.16. Treasure Capturing: Treasure can be captured through victorious Boarding Actions (in this the winning Player may decide either to leave a Treasure on a boarded Ship or transfer it to another surviving friendly Ship). Both Spain and Pirates can capture Ships. Treasure can also be captured by capturing a Fort in which the Treasure is being held.
4.3.17. Treasure loss: Treasure aboard a Ship which is sunk is considered lost. Such Treasures are removed from the gameboard and kept separate in a "Lost treasure stack".
4.3.18. Spanish Fleet Regeneration: In the event that the number of Spanish Galleons is less than two (2), or the number of Frigates is less than two, Spain can take corresponding Ships from "Reserve" to bring the number up to two.
"Reserve" consists of Ships not previously used in the Game (Sunken Ships do not increase the "Reserve"). The initial "Reserve" consists of two (2) Galleons and two (2) Frigates (thus there are a total of four Galleons and four Frigates available for use in the Scenario). Ships from the "Reserve" start in Cadiz on the next Turn after the Turn in which the number of Spanish Ships of the type fell below two. If the required type of Ship is not available in Reserve, no Ship is placed on the board.
4.3.19. There is no Regeneration of Pirate ships; the starting Fleet is the total available.
4.3.20. Forts, Additional Rules: This Scenario allows Forts to be destroyed, but does not allow ownership of Forts belonging to opponents. Thus Fort capture automatically leads to Fort destruction, not change of ownership. A destroyed Fort can be Repaired using Ships of the Player's side.
4.3.21. Boarding, Additional Rules: In the event that a Pirate's Ship or Ships engage in a Boarding Action with a Spanish Ship (as Attacker or Defender), the Pirate side receives one (1) additional Boarding Point for each Pirate Ship.
Thus, Total Pirate Boarding Points equal "Remaining Strength" + "Die roll for Boarding Points" + "One (1) additional Point for each Pirate Ship".
4.3.22. Loss of All Pirates' Ships: In the event that a Pirate Player has lost all of his Ships, he is out of the game and cannot become the Winner, regardless of the amount of his previously accumulated Treasures.
4.3.23. In the event that a Player's last Ship:
- is Sunk (e.g., from gunfire or Reefs, but not from Boarding Attack), all his accumulated Treasures are considered lost and removed from the gameboard to the "Lost treasures stack".
- was Boarded by other Pirate or Spain: the "secret map" (or "secret maps" if he possessed maps from other Players) is given to the Player victorious in the Boarding Action. The new Owner afterward may move any of his Ships to the secret coastal Space and load Treasure (up to the maximum of his Ship type). The Secret Map must be shown to the other Players in order to load Treasure, in order to verify the correct location. The Player may continue to repeat this procedure until no more Treasures are available. No other Player may load these secret Treasures.
4.3.24. End of Game: The Game ends in one of three ways:
- One Player, at the end of the Turn, possesses at least three (3 or more) Treasures in hand (Treasures aboard his ships or on the gameboard are not included; they must have been delivered to Cadiz or Tortuga). In this case, this Player wins the game.
- All Pirate Ships are sunk. The Spain Player wins the game.
- Spain has no more Ships or Reserves. The Pirate Player possessing the most Treasures in hand and aboard his Ships wins the game. The Winner is determined after all Players finish their playing actions for the Turn.
4.4. Scenario: "The Seas are In the Fire"
(2-4 Players, 60-120 minutes)
Editor's note: the scenario list above prints this scenario as "Oceans On Fire"; the heading in the source (and its contents table) reads "The Seas are In the Fire". Both names refer to this scenario.
4.4.1. Description: Total war on the entire game board. All types of ships are used. It is an uncompromising battle, where you, as Commander, must bring victory to your country, as only one nation can become "The Mistress of the Seas".
4.4.2. Objective: Defeat your opponents and control the entire gameboard.
4.4.3. Victory Conditions (Optional):
- Capture the Opponent's Royal Port (in a 2-Player game). Capture is achieved if one (1) of your Ships remains for four (4) consecutive Turns, or two (2) of your Ships remain for two (2) consecutive Turns in the Harbor Area of the Royal Port. The Turn in which your Ship/s entered the Harbor Area is not counted.
- Opponent/s have no remaining Ships.
- The last Opponent's Fort is destroyed or captured, and over the next three (3) additional Turns, no enemy Player can recapture or repair any of the Forts.
4.4.4. The Winner is the Player who first achieves any of the listed Victory Conditions.
4.4.5. Initial Placement: General rules are used. Additional Rules are listed below:
- The gameboard is divided into equal Initial Sectors, the number of which corresponds to the number of sides (e.g., two (2) Sectors in a 2-Player game, shown by the Purple line on the illustration with example of initial placement). Sectors can occupy the entire board, or, if both Players agree, Neutral areas can be designated. Sectors are used only during initial placement; after set-up, they are no longer relevant.
- Board overlay components (exception: Forts and Minefields) can be placed as Players agree, but must allow the following placement of Forts (e.g., Players receive equal numbers of Islands for placement in the Initial Sectors of these Players).
- Four (4) Forts are equally divided between Players (there will be only three (3) Forts in a 3-Player game) and placed in its Initial Sector. In a 2-Player game Royal Ports are placed after Forts placement. Royal Ports are not used in games with more than 2 Players.
- The number of Ships and their characteristics must be equal for all Sides.
4.4.6. Alliances: In games with more than two Players, the Players must determine whether they will play individually, or with constant Alliances (e.g., 2 vs. 2, 2 vs. 1, 3 vs. 1).
4.4.7. In the event that any Player loses all his Forts, he must either capture or reconstruct any Fort during the next three Turns following the Turn in which he loses his last Fort.
V. Admiral Game Rules Captain Level
While playing the "Captain" level rules, the "Lieutenant" level rules are followed with the exception of the cases listed below.
Note: You may choose to use some of the advanced "Captain" rules, but not others. In this case, please agree with your opponent/s on which "Captain" level rules to use before starting the game.
5.1. Ship Movement: Maneuvers
5.1.1. Ships are permitted to maneuver when the Wind Condition is "Fresh".
5.1.2. The initial maximum movement distance is determined based on general rules (dependent on initial direction and diagonal movement).
5.1.3. After a Ship has moved through one or more Sea spaces, and the owning Player wishes to alter its course (direction of movement), the number of spaces remaining in the move is calculated (starting maximum movement distance minus spaces already moved this Turn). This remainder may be used as the new maximum movement distance in a new direction, and it is adjusted according to the influence of Wind direction on the new course.
5.1.4. A Ship's Course direction may be changed more than one time as necessary until remaining movement distance is greater than zero (in consideration of Wind direction).
Example: Wind is Fresh, Wind direction is E (East). A 1st Rate Ship moves on a NE course (line 1). Maximum movement distance is therefore equal to three (diagonal maximum 4 minus deviation of Ship's Course direction from wind 1). After moving one space, the Player directs his Ship to SE (line 2). The remainder is two spaces (3 minus 1 moved) but this must now be reduced by one due to deviation of new Course direction from Wind direction, so the Ship cannot pass more than one space. The yellow line in the diagram shows the final path taken by the Ship.
5.2. Damage to Ships in a Storm
5.2.1. Collisions of a ship with other Ship/s (own or belonging to another Player) that finished being driven leads to damage during a Storm. Number of red damages is calculated according to the same rule as for reefs, and both ships receive this number of damages.
5.3. Movement of Damaged Ships
5.3.1. Each Damage point on a Ship Data Card reduces maximum movement allowed that Ship by one Sea space.
5.3.2. Maximum movement distance is reduced to not less than two spaces in orthogonal (vertical/horizontal) movement and one space in diagonal movement. Therefore, even severely damaged Ships may move up to two spaces orthogonally when moving in the direction of the Wind.
5.4. Effects of Firing Range on Hit Probability
5.4.1. "Captain" level rules distinguish three categories of Firing range (as opposed to two categories in "Lieutenant" level rules):
- Long Range: Firing more than one-half of the maximum allowed Firing Range for the Ship type (e.g., a Brig's maximum Firing Range is 3 spaces (so one-half Range is 1.5), so spaces at Range 2 and 3 are considered at "Long Range" (more than 1.5). A Ship "hits" on a die roll of 1, 3, or 5.
- Normal Range: Firing from Range 2 (spaces) to the start of "Long Range". A Brig has no Normal Range, since "Long Range" begins at 1.5 spaces. A Ship eligible for Normal Range fire "hits" on a 1, 3, 5, or 6.
- Close Range: Firing into the adjacent space (only a die roll of "2" means a Miss).
The illustration shows Long Range (1), Normal Range (2), and Close Range (3), based on the firing capabilities of a 1st Rate Ship.
5.4.2. In the case of "Salvo Firing" (combined firing from multiple Ships (or Ship/s and Fort), all Ships firing are considered to be firing at the longest Range of any Ships involved in the Salvo Fire. Therefore, it is better to combine only Ships firing at the same Range into Salvo Firing.
The table below shows Range categories according to Ship type:
| Battle unit type | Range category | Distance (vertical/horizontal) | Distance (diagonal) |
|---|---|---|---|
| 1st Rate Ship | Long Range | 4-6 | 3-5 |
| 1st Rate Ship | Normal Range | 2-3 | 2 |
| 1st Rate Ship | Close Range | 1 | 1 |
| Galleon | Long Range | 3-4 | 2-3 |
| Galleon | Normal Range | 2 | - |
| Galleon | Close Range | 1 | 1 |
| Frigate |
5.5. Simultaneous Fire from Both Broadsides
5.5.1. Ships' guns are mounted along both sides of a Ship; each "side" can fire (this is called a "Broadside"). A Ship may Fire out from both sides simultaneously in the event that two enemy Ships are in Range and line of Fire (the same line, orthogonally or diagonally, with the Firing Ship between both enemy Ships).
5.5.2. Both Broadsides together only require one point of available Shots, as the guns on each side can be reloaded simultaneously by their gun crews.
5.5.3. Firing may be done in a Salvo (one die rolled and maximum Firing Range rule) for each Broadside separately.
5.6. Fort Assault (Capture)
5.6.1. Ships located in the Harbor Area of the opponent's Fort can attempt to Capture it.
5.6.2. The attacking Player declares his decision to Assault and designates attacking Ships.
5.6.3. The Fort owner (Defender) has the right (not the requirement) to use some or all of his Ships located in the Fort's Harbor Area to help defend the Fort. The Defender designates what Ships are being used to defend the Fort. Ships that are being Repaired cannot be designated to defend the Fort and Repairs may not be stopped.
5.6.4. The Assault result is determined using the Boarding rules: each participating Ship, and the Fort, add their Strength points and additional Points determined by die roll.
5.6.5. As compared to Ships, a Fort has a defensive advantage due to its high walls and towers. A Fort's additional Points are determined by die roll as +1 on a roll of 1 or 2; +3 on a 3 or 4; +5 on a 5 or 6.
5.6.6. If the Attacking Player wins, he must divide remaining Strength points (total Assault points difference between Attacker and Defender) between his Ships and the Fort. If he decides to share some Points with the Fort, he receives ownership of the Fort and therefore mounts his Flag on it. Otherwise, the Fort is considered to be destroyed.
Ships of the Defender under Repair during Assault change their owner, and their Data Cards are transferred to the new owner. Other Ships do not change their owner, but if the Ship defended the Fort, her crew is considered as almost fully lost. Therefore, her remaining Strength is reduced to one. If the Ship's Strength was one before the Assault began, the Ship sinks.
5.6.7. If the Defending Player wins, he can also divide remaining Strength points (total Assault points difference between Defender and Attacker) between his Ships and Fort. Ships of the attacking Player do not change ownership, but their Strength is reduced to one per Ship. If the Ship had a Strength of one before the Assault, it sinks.
5.6.8. Regardless of the Assault result, Strength of any Ships being Repaired does not change (it neither increases nor decreases) during the Assault turn.
Footnotes
-
Latin for "The Last Resort of Kings", inscribed on French cannon by order of Richelieu. ↩